

Trigger
-
Posts
213 -
Joined
-
Last visited
Posts posted by Trigger
-
-
Starion calipers dont have a massive piston vs Sigma ones do they?
Na, dont think theres much diff (I'll check it out)
and yea bleeder nipples are pointing "up" maybe skim the rotors and put some new pads in?
-
Cheers man,
yea I've replaced the brake hoses (new) but I'll double check IF xpanding
orginal pads and un-machined rotors (as I brought them) but might machine them?
I re-built the calipers so slides should be lubed up
got orginal drums / shoes from when I got the car (standard) with no problems
have adjusted at the shoes, not the cable,
and yea thats my next thing to try (clamping off the lines)
-
I'm hoping someone can shed some light on this for me...
(I've done a search on here, ask a few people and bleed the brakes HEAPS of times but still got a spongy brake pedal?)
Note: brakes were working fine (well not noticably spongy) when car was standard, also havent machined the discs or replaced the front pads, just running them as I got them (lots of pad left)
If I had to say the brakes "seem" to work a bit better with no vacumm (eg when being towed and engine not running)
still not great by any means, but takes at least x3 pumps to try to stop when under vacumm
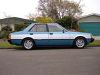
Car:
Mitzy Ex Lancer ('82 1200cc)
Orginal brake setup:
Disc (front) Drum (rear) twin/split resorvour master cylinder
Brakes changed to:
Starion disc/calipers (front) factory standard drums (rear) Sigma master cylinder and booster
Ex m.c:

Sigma m.c:
(Sigma m.c / booster "bolts in" and all brake lines match up no worries)
Have tried bleeding the system (manually and vacumm) and also bled the m.c with no change to the pedal? Even swapped around the x1 way valve with a brand new 1, with no luck?
So I swapped the Sigma m.c and booster back with the "orginal" Ex m.c / booster and bleed it all up and still no difference? So the only thing that is different from "orginal" (standard) setup is the Starion front disc / calipers
Be keen to hear from anyone else who has done this swap before, but I think most guys are running disc rear end (not drum) and maybe using another model m.c / booster?
cheers for any help
-
Haven't had a chance to work on the "Starmax" lately...
(Having a pregnat wife doesn't leave much spare time)
But did work out the alt. wasn't charging the battery,
and had replaced everything on it when I had it apart, except... the regulator
so I'm guessing that its the problem?
Have removed it now and getting it tested ASAP
replaced the regulator,
but ended up being a bad earth (good reason not to power coat everything!)
so have addedd a couple of xtra earth wires and all good now
Then theres the brakes...
Still havent been able to work out why the pedal is "spongy"
- Have bleed the whole system countless times (vac and manual)
- Bleed the master cylinder
- Tested different x1 way valves
- Even removed the "new" Sigma master cylinder/booster and re-fitted the old (orginal) 1200 Ex m.c and booster
with no change?
New Sigma M.C / Booster:
Old Ex M.C / Booster:
Going to put a question on "tech questions" and see what everyone else thoughts are
(any HELP would be great)
see link... viewtopic.php?f=2&t=19426
gotta get the brakes sorted for the swap meat (esp that I'm in Palmy!) bit dodgy to leave it as it is tho...
-
mmm...
werid how both our cars run pretty much the same setup but are different
After I get the 1st oil change out of the way on mine, I'm taking back to
the guy who built/sorted my suspension and see what he says
thought about getting some "adjustable" top hats to even up the front neg. camber
(but maybe not enough difference to worry about?)
Think I'll try get the caster re-done tho, and re-align rear wheels
-
WOF's dont count when you get them mailed out you know
Mailed out?
Na, hand delivered...
Can get a "gauge" type sender from Mitzy (xpensive) or any appco/repco etc (aftermarket)
Be keen to see some pics of your one man...
-
.2 camber is stuff all differance really, most alignment people wouldnt worry at all... as a rough guide you'll have to move it 2mm to adjust it, so you might be able to undo bolts and push things with crow-bar and re-tighten, or maybe even file the holes
Sweet, good to know (yea there might be a bit of that done)
your caster is abit wack... most alignment places will tell you its not adjusable but it is! its those bars going forward to the rad support from the lower arms, i would want this even (although some do run it slighlty off to make up for curve of road)
yours was at .4 and 1, i would be running as much as i could while still keeping it even, will give you good turning grip, i'd be going for about 2-to-2.5degrees if it was my car, evening this out might bring your camber closer aswell
i think they run this quite low to make up for the crap tyres they had back in the 80's
cheers for that too man,
I'll see what its like (when its drive-able)
I know what you mean about those caster arms, so might get it checked out again
(was just a "quick Sat morning" W/A) dont think they spent ages on it
just got to get these brakes 100% and put some kms on the motor...
-
engine bay looks mint man
keen to see a twin cam '63 in there
its a good feeling when you start puting parts "in" and back together
-
Well, I wish I could say...
"I've been driving it around heaps, and running the new motor in" but no not yet...
But I have been "slowly" getting the last little things sorted out,
found the "aftermarket" thermostat was no good (didnt open?)
so got a genuine Mitzy one, (which I've tested 1st) and is mint!
just need to fit it now...
One of the last things I've still gotta do is, sort out the brakes (pedal real spongy?) have bled the system over x10s!
(manual/and vaccum) with no luck...
so might start up a "tech question" on it and see what everyone thinks I could/should do?
I have changed master cylinders and boosters (from Ex to Sigma)
But did get the electric fan "wired up" properly and going sweet as (BIG THANKS to ROJ)
And finally "Towed" it down to get a wheel alignment, to find that the Starion front struts had 1.5 negative camber
Well, using the parts that I'm using anyway, which is a mixture of; Starion, Sigma (GS) and Ex (1200)
(so much to all the internet "rumours" of 3-5 degress negative Starion struts give?)
Heres the copy of the W/A specs...
Note: camber is different from the Left and Right (1.2 - 1.5 negative)
nothing is adjustable, so may need to get adjustable "top hats" or lower arms maybe?
Also the rear toe is out, so I might try "slotting" some lower arm holes?
Oh yea, I got one of these too
-
I'm running Starion struts in my Ex (was a 1200)
(so many "rumours" about Starion struts and HUGE NEGITIVE camber?)
wanted to be sure, and do it myself
ended up using a "mixture" of parts for the steering...
Sigma; drag link (main/centre rod)
Starion; strut knuckles
Ex; idler, pitman and ALL tie rods
and "finally" getting a wheel alignment this Sat
-
yeah was pretty fun, um plans are just to make it bulletproof, im not caging it cos its gonna be a fun street car not a race car.
sounds good man, hanging out for some pics tho...
(of car, or more black lines!)
-
so keen, for party but my shed way to small and to much crap., trigger or markuu should have party at there place, OH YEA!!
mmm... maybe not MY shed (way too small)
but keen as, to see how crazy this can get from all your
stories Ogre
-
fukn more ppl!! and on time, i was half pissed by the time anyone turned up.......
Ha Ha, but who complains about drinking?
(sorry, better late then NEVER tho)
see you next month, hopefully earlier...
-
Got the head gasket and exhaust manifold gasket here (both brand new)
and I'll check at work on Monday for anything else and let you know
-
SO KEEN to take it for a drive!
I've been working on it late last night and this morning
(had to have the heater cranked up in the shed!)
After changing the dash clusters over (1200-1600) found the oil pressure
gauge on the 1600 dash would either be completly ON or OFF when the engine was running?
Worked out I needed to change the oil pressure sender from the standard "light only" type
to a gauge type sender
(ordered a new sender yesterday and fitted) now works mint!
Original oil pressure sender:
New gauge type sender:
Now just need to test the electric fan to make sure its going, and work out how to
"wire up" the rev counter on the 1600 dash
(note: next time SO much easier starting with a 1600 Ex!)
-
Hey man, I might have some gaskets and shit left over from my SOHC '63 build up
if your keen?
Head gasket, inlet and exhaust manifold, rocker cover gaskets etc
(be pretty much a top set)
-
cheers everyone
yea its been awhile...
(not quite 100% yet tho)
probably the "easiest" convertion to do
but at least I've tried to make it look good
Still got to:
- get rev counter going (using 1600 dash cluster) need to wire to coil?
- get electric fan going (relay?)
- change oil pressure sendor to "gauge type" (1600 dash has gauge, 1200 just has light)
- wheel alignment
- Rego off "hold" middle of next month
- then write a WOF out for it
hope to take it for a short drive at somestage this weekend (all going well)
-
Long COLD night, tonight...
But got a bit more done, including re-assembling the dizzy
Got the extractors fitted
Also scored an owners manual, and 80's advertisting poster
Oh and... Got IT GOING too!!! (FINALLY)
Note: HUGE thanks to Craig! for ALL the help tonight and along the way
(got a few things to sort out still before I take it for a "drive" but stoked with it so far)
-
^ Really?
I've had quite a few parts coated by them over the years for different cars
(including turbo'd cars that get A LOT hotter) and the HPCing has held up well, without any problems?
Lots of people say they've had parts "coated" but not always with the genuine HPC coating
I've tried a few different types of coating, but spending the money and using HPC has always
had good results and I would recommend it to anyone
do it once and forget about it
(I'll keep you posted on how it holds up on the Ex tho)
Another one in Hamilton? Common as mud aye!
CUL8R, I've PM'd you with costs
-
Sent the carb back, and got them to change around the fuel feed into the carb
(to the other side from in pic) so it wouldnt hit the thermostat housing anymore
Now fuel feed on the otherside (way from engine)
And today I finally got my parts back from being coated at HPC!!!
(mite add a bit of "bling" to the engine bay)
Inlet manifold, dizzy and thermostat housing:
Extractors:
Now just have to re-assemble dizzy with the new parts
(even managed to get a brand new screw set!)
-
NO WAY!
Gutted man...
hope its fix-able and you can find some panels etc and get it going again
-
All good to catch up with some of the "locals"
hope to see a few more next month...
-
Another big part done this week, the exhaust...
Decided on: 2 1/4inch pipe, flanged in x2 places, mandral bends, x2 mufflers
Wow, its OUTSIDE!
(On the way to the exhaust shop)
Got it all made up and fitted etc and did some painting...
Getting a small mod done to the fuel feed (of the carb)
then remove all parts to be coated
-
Love it, so clean. Definately an improvement over the Lancer courtesy car you were rolling around in
lol... yea still got the courtesy car (for the weekends)


Spongy brakes, STILL... (help)
in Tech Talk
Posted
True, but was thinking IF I did the pads/rotors that would rule them out?
Have vacumm bleed from each point (note: only x1 bleeder for the rear, on the R/R)
and have also got someone to pump the pedal manually as I bled from each bleeder under pressure
(both for quite a number of times)
Been using DOT4 B/F
I think its just air in the system still...
Havent heard of a "compressor powered bleeder" ? sounds good