


Esprit
-
Posts
1,136 -
Joined
-
Last visited
Content Type
Forums
Downloads
Events
Gallery
Posts posted by Esprit
-
-
Well yesterday afternoon I had the clam all ready to come off, but no extra pair of hands to lift it off. I organised got JC and Nixx to come up and meet Toni and I for dinner and put them to work helping me lift the clam off.
Before then, I had most of the day free, so I turned my attention to the long-delayed job of finishing off the dash.
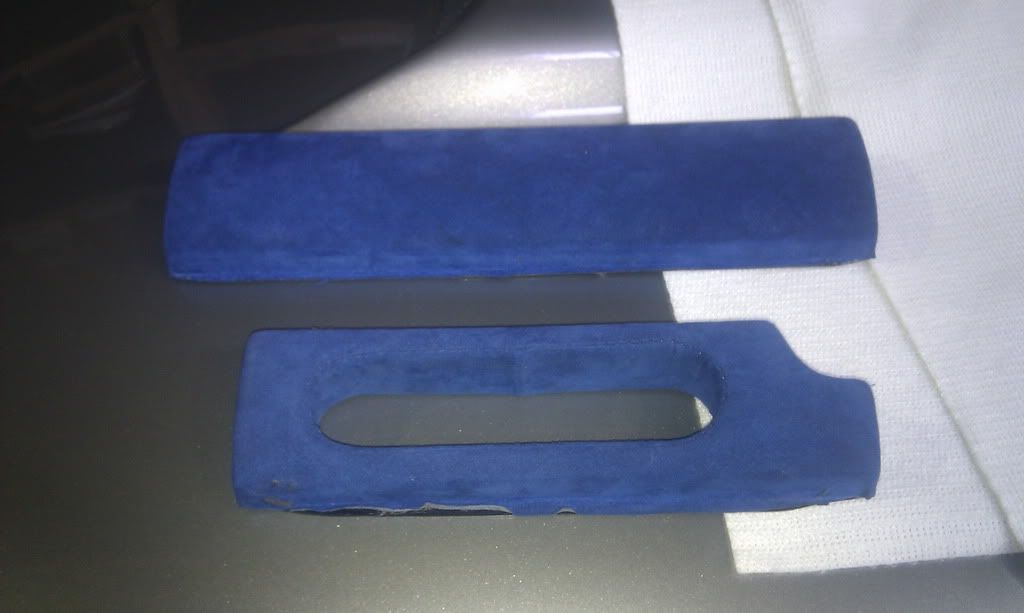
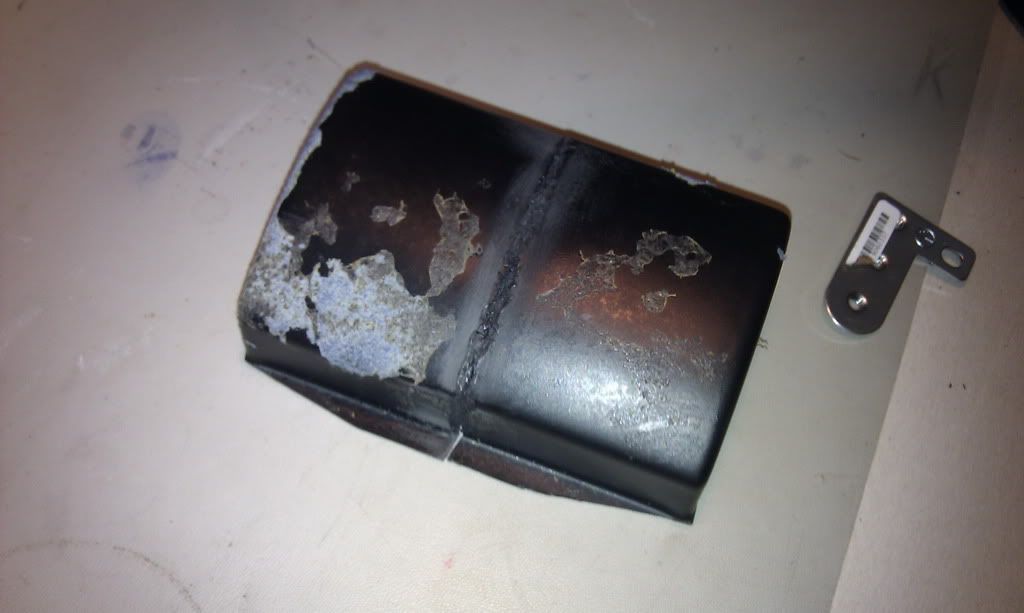
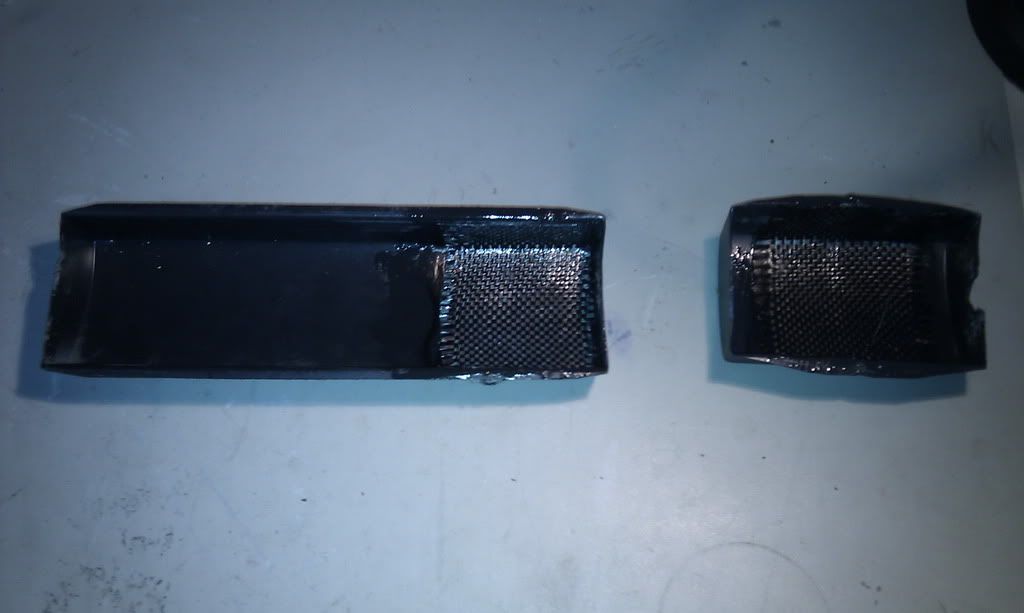
Before Christmas, I bought some spare Exige Alcantara-trimmed dash pieces off SELOC's Paul Myhill (PMyhill). These would allow me to remove my original pieces and stow them should I ever want to revert to the factory-look dash with no extras. The new pieces could then be modified to take the various buttons, sockets and modules I wanted mounted in the dash.
Here's two of the three trim pieces I bought... the missing one is the radio slot cover, which is a shorter version of the top piece.

The final tally of items I need to mount are:
- MoTeC MDD Screen
- Lifeline fire extinguisher control module
- Press-button to change pages on the MoTeC MDD
- Lifeline fire extinguisher trigger button
- CAN-Bus communications port
- RJ11 12v power socket for powering ancillary equipment such as a Valentine One radar or a PerformanceBox on-track (after one too many frustrations using the cigarette lighter and bumping it out with my leg)
I figured I could fit this all in fairly easily. The page-change button would mount in the heater control surround trim piece, just behind the indicator stalk. This would be easy to reach while driving on track to view different engine info.
The MDD mounts to the right hand side of the radio slot, I've been using it in this position mocked up and it's very visible and fits like a glove.
To the immediate left of this will be a modified trim piece that I'd make as a shortened version of the radio blanking piece. This would then be used to house (from right to left) the extinguisher trigger button, the RJ11 power socket and the comms port. This enables the extinguisher trigger to be in a position where either the driver or passenger should be able to just reach it when strapped in firmly.
To the left of this will be the control unit for the extinguisher, and to the left of this will be a shortened version of the passenger's side trim piece since all the bits I'm mounting in the radio slot are wider than the single-DIN radio slot.
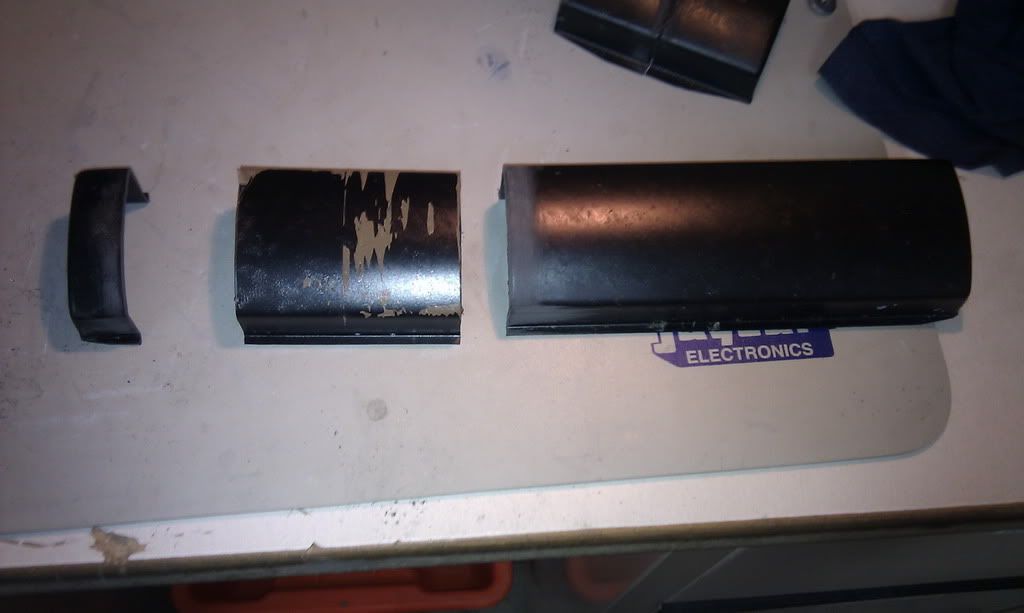
The customising work I needed to then do was simply to shorten the radio blanking trim and the passengers' dash trim. To do this, I've begun by carefully peeling the alcantara material off the vac-formed plastic backing. This material will be cleaned up and used to reupholster the modified pieces for that OEM look.
I started by modifying the radio blanking trim. The plastic pieces was carefully marked up and cut like so:
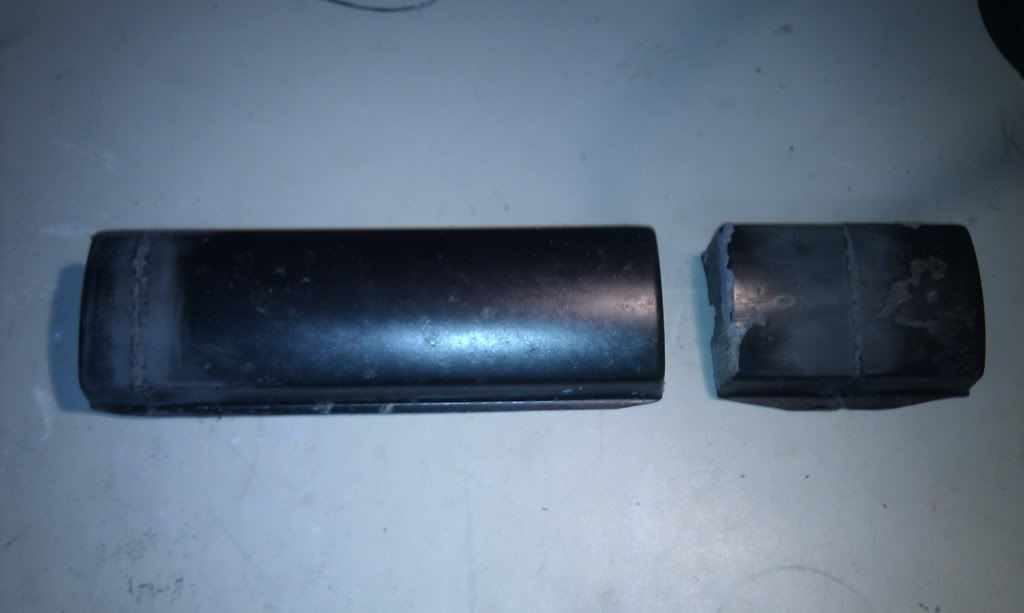
The pieces would then be joined like this:
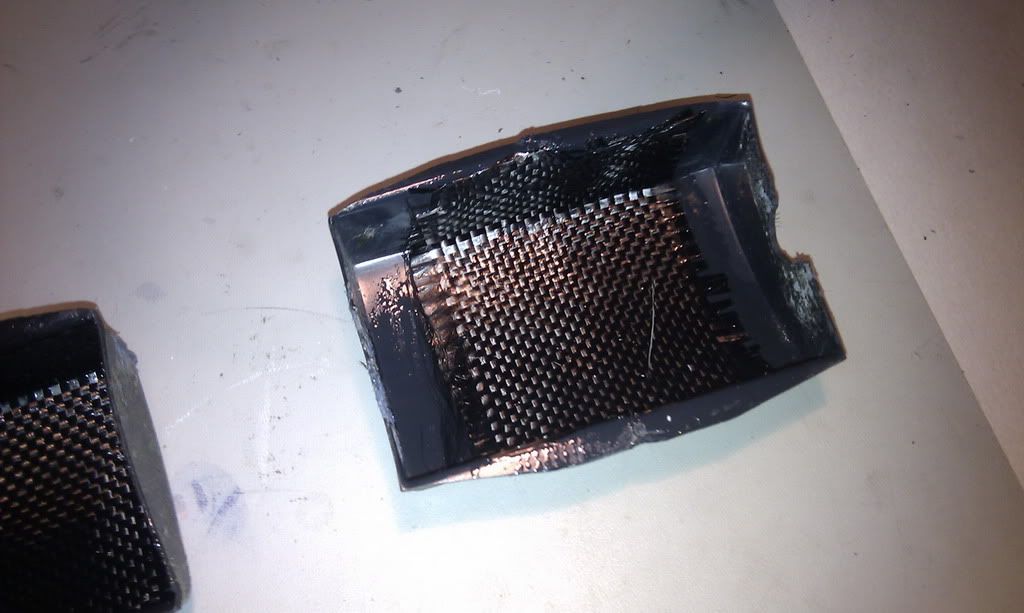
Thankfully, because the plastic was vacuum-formed, these types of plastic lend themselves pretty well to plastic-welding. I'm certainly no expert but a couple of trial runs with the soldering iron, I was able to get a pretty strong weld that didn't look too ugly. I then joined the two bits together:
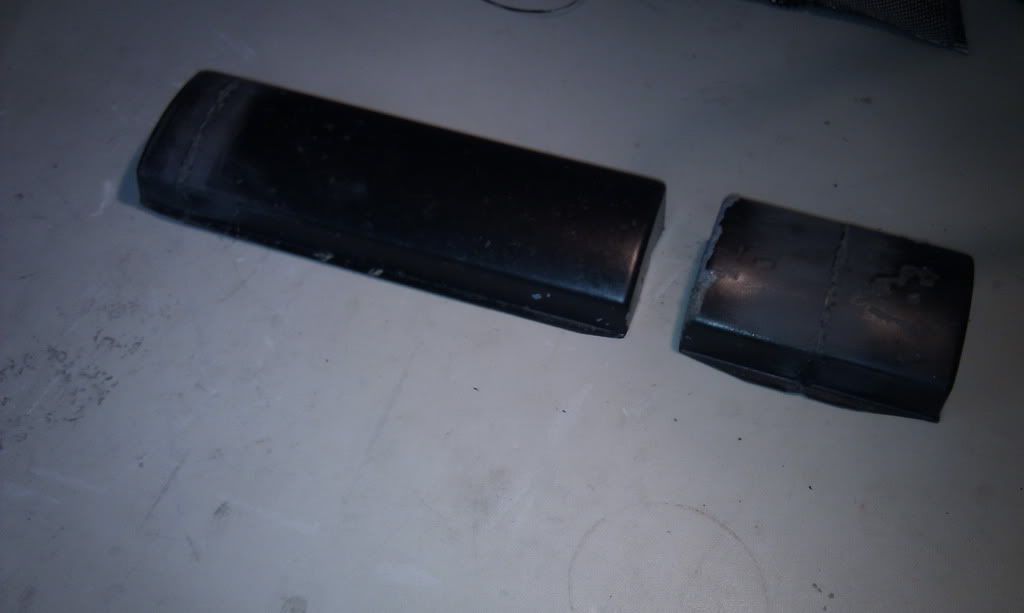
Pleased with the result, I then repeated this process with the passengers' side trim and then sanded the welds a little smoother:
The result is pretty smooth, and I will skim-bog the joins and sand them to be perfectly smooth before reupholstering them.
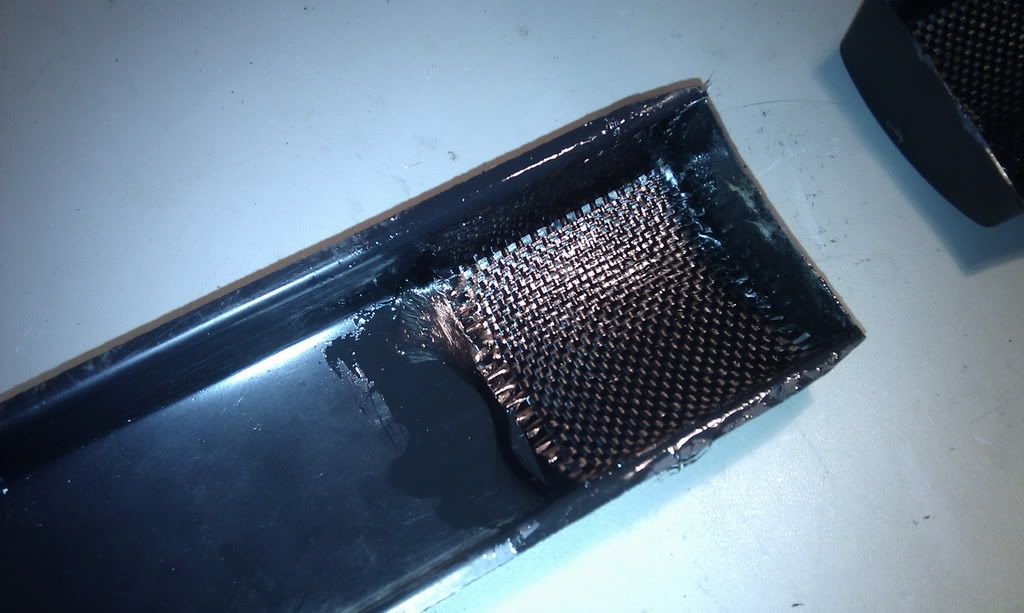
Now the welds should be fairly strong, and have stood up well to me flexing them about a bit but they're always going to be a bit of a weak-point, expecially on the smaller piece which will have buttons etc mounted in it and will have to put up with a bit of force. It'd be a disaster if the trims split again once they were upholstered so I decided to reinforce the join a little.
I cleaned up the areas on the back by sanding, then wiped them down with acetone to clean them up before cutting up some scraps of carbonfibre cloth I had laying around and trimming them to size.
A quick bit of ham-fisted wet lay-up later and voila, some nicely reinforced dash trim pieces, destined to never come apart again!
Given that the clamshell is now off the car, my attention turns again to the engine bay so I'll park the dashboard work for now. All that remains to be done is to skim bog and sand the fronts smooth, clean up the edges of the carbon reinforcement and make sure it's all smooth before marking them out and drilling the holes for the switches etc to mount through. Then I'll lovingly re-cover them in their original material and I'll be able to do a final assembly on the dash and have it looking all finished at last instead of having wires and plugs etc hanging out of it! Well overdue.
Right now, where's my can of degreaser!?!
-
Well a few hours working on the car today. I got the workshop set up and started to get the rear clam ready for removal:
I snapped a couple of shots of the damage to the firewall heat shielding to show where the fire began to take hold. As you can see it's kinda screwed the heat shielding but we got it out before it could get any heat into anything meaningful.
The car's now up on the stands and tomorrow the clam will come off. As you can see there's oil EVERYWHERE so it'll take a lot of cleaning up, and I'm hoping I can rpelace the firewall shielding with the engine in situ. My new shield is going to be made in a few pieces with overlaps, so it should be possible. Fingers crossed.
-
Toni is the girlfriend, she's in and outta hospital a lot.
The strip down is to replace threat shield. It also makes the clean up a bit easier, so two birds and one stone
-
Well, I hope that everyone has had a great Christmas and is now full of Christmas cheer and the holiday spirit.
I've decided to stick around Auckland these holidays to look after Toni, who has had to go into hospital for a couple of weeks, and also get back to work on the Lotus.
I've already gotten in some new sound deadening foam and heat reflective material from the USA, and the only thing missing, until yesterday had been the car.
I'd left the car out at Toni's parents place under a sheet since the fire, unable to look at it but yesterday I ventured out there with my friend Richy to take a look.
We got the car out of the garage and mopped up the various puddles of oil that had accumulated and set about examining the damage.
Most of the oil that got out (about 0.7litres judging by the dipstick) seems to have burned off directly from the exhaust manifold or on the firewall. The good news is that other than a couple of patches of the firewall heatshield that obviously got scorched, there seems to be no damage at all to anything else. The engine bay seems to just be very soaked with oil.
We then got the car topped back up with oil (from about 2/3 of the way down the dipstick) then we started it and left it idling for 15 minutes. There was a lot of smoke as the oil gradually burned off the manifold and exhaust, but even though we were standing by with hoses and extinguishers, there was little drama. The engine seemed to sound fine, no knock or concerning noises whatsoever.
After that, I drove the car back to my workshop where I can pull it to bits and fix it up again. Thankfully the drive back was uneventful, the car runs as it should, feels just like it did before the fire and makes no concerning noises... The datalogging seems to have been right in telling us the engine's just fine. MASSIVE relief.
So that's where we are now. Today I'll start stripping the car down and getting it up in the air so that I can work on it again, then the clean-up begins. They have a special on cans of degreaser at SuperCheap Auto today.... maybe that's an omen.
Welcome back everybody and here's to a better 2012 than 2011... a year I'd sooner forget.
-
Sweet deal
-
Calmed down a bit now thankfully. I'll strip it down again in a few weeks once I've somewhere to work on it more, then I shall get to the bottom of it
-
Thanks for the kind words guys. I'll get back to it at some point. I'm hoping to navigate myself through a first home purchase and hope that I end up with a garage I can use to work on it in.
Initially the damage looks minimal to nil, thankfully oil fires burn cool, so it's mainly a mess to clean up, which will take a good few weekends in the garage. At least that's what I hope.
-
At the moment I'd say it's likely to be a bit of wiring (the loom is in multiple parts, most of which was well away from the fire). The bay is unpainted, and I think most of it is damage to the heat shielding, which should be able to be replaced with the chassis stripped back and engine out. Don't think there's likely to be too much damage to anything else, just needs a good clean up and thorough inspection.
Possible insurance, but it's more man-hours than money.
-
CO2 extinguisher in this case so non corrosive. As for storage, we'll see what happens with the househunt in the next little while.
-
Meh, I've spent all the money on all the right parts, done everything to the highest standard I can manage but this car is suicidal. I guess sometimes you buy a lemon, and I bought the biggest of them all.
-
And this is where my project comes to a rather ignoble end.
Friday saw the car head up to the dyno, for her final tune and power runs. For the back-to-back comparisons we were just doing power runs to 8000RPM when disaster struck. As near as we can tell, the oil filter either worked loose, extruded a seal or stripped a thread. Hot oil was sprayed all over the exhaust manifold, which instantly ignited into a huge fireball, which consumed the rear half of the car.
Glenn managed to immediately shut the engine down and extricate himself from the inferno, while I made a mad dash for the extinguisher. Between my efforts with the extinguisher and Glenn on the hose, we managed to extinguish it after what seemed like a very long time (but was probably only about 10-15 seconds). I've not inspected it in detail yet, but the damage seems pretty minor with the body and chassis looking like it's escaped without permanent damage.
The firewall bore the brunt of the fire and the heat shielding looks to have done its job here. This will all need replacing (for a fourth time).
Datalogging shows that the car still had semi decent oil pressure of 30PSI when Glenn got off the throttle, 0.2 seconds after the initial blow off, and still had above 16psi when unloaded on decel. Oil pressure was still at 12psi when shut down so we think that the engine should have survived unscathed, hopefully at least.
The rest of the car needs to come to bits to fix the fire damage, but I can't really be bothered. I'm currently out of room at my old place and don't have a garage I can work on the car any more. I'm looking to buy a house, which will take some time, so I'm unable to undertake another rebuild right now anyway. I'm thinking of throwing in the towel with it, part of me wishes it had just burned to the ground.
Will probably tow it down to Hawke's Bay in a few weeks over Christmas, stick it out in the back paddock with a tarp over it and forget about it for a year or three. If I ever get my motivation back, I will see then. Until then I'm giving up on playing with cars and taking up a hobby that doesn't piss on me at every opportunity.
I wish I could say it's been fun, but in reality it's not been anything other than expense and heartache.
-
Well, progress has been muted the last month or so. Changeable weather and a busy non-car schedule have largely kept me out of the garage and out from behind the wheel.
The run-in is now complete, having done about 720 miles (1150km) of good running. I've got the Motul 300V Competition oil into her, a new filter and I've upped the rev limit to 8000 in prep for tomorrow's final tune dyno session.
I've done a bit more reprogramming too, I've set the car up with a variable rev limit so that when the oil is below 45 degrees, the rev limit will kick in at 3500RPM, then up to 65 degrees the rev limit will cut in at 6500RPM. Above 65 degrees the full 8000 (eventually 8500RPM) will be available.
I'm still chasing a couple of very small oil leaks, although these are just fittings that need a bit of nipping up, all the seals seem to be holding good this time around.
I've only had the one chance to take it to above the old 6500RPM limit thus far, a quick squirt up to 7500RPM through 2nd and third gear and MY GOD it's quick! The speed at which it piles on revs is insane and I'm gonna have to spend some time programming the shift-lights to my liking once it's all finished to prevent me from head-butting the rev-limiter... above 6500RPM it just gains revs so fast it's like a motorbike... then when you change gear you don't drop out of the torque band like you do when changing at 6000/6500 and the acceleration is just vicious.
I've also fabricated and fitted the breather tube for the gearbox, which means I can run it with more oil in it without it throwing it everywhere. It's just a stand-tube with a K&N breather filter on it, an interim measure until I get around to fabricating a dedicated twin-chamber catch tank next winter.
I've just bought some spare blue Alcantara dash trim pieces off Paul Myhill (PMyhill to all you SELOCers) which will be here in a couple of weeks. I'll hack these about to finish up the dash along with a bit of custom carbon work, without having to hack about my original bits. This will then allow me to finish off fitting the Lifeline extinguisher system sometime after Christmas.
So, with that, tomorrow I'm off to visit the dyno, to check that everything's still happy, and we'll also take it for a ~80km road tune to just check that we're happy with all the part-throttle mapping and hopefully if all goes well (unlike last time) it should make some semi-decent power and be a hell of a lot of fun to drive.... from there on out I'm well and truly onto the finishing bits and pieces.
Also, on Sunday I'm hoping to take it out Hampton Downs and get it on the skid pad for a bit of gymkhana fun
TALLY HO! -
I pulled out in front of a truck on my restricted as I misjudged his speed (hadn't slowed from 100km/h zone into the 50 zone) in my folks' Mitsubishi Mirage Spacewagon. He managed to swerve around me but put a small kink in the corner of the bonnet with the frame around his rear lights. Bog sorted it out.
A couple of years later in my girlfriend's Mitsubishi Mirage (sensing a theme here?) I did a U-turn in front of a motorcyclist who was riding through Christchurch city at night on a black bike, with black leathers and a headlight that was about as powerful as most cars park lights. Clean didn't see him, he went over the bonnet, wrote off the bike (he was ok), broke the rod end, bent the FR strut, fuxed the bonnet and RF guard. Fixed it up and all was good.
Thankfully haven't even come close to another accident in the last 11 years... touch wood.
-
Just a quick update for early November.
I've not been able to spend much time using the car or in the garage the past few weeks with one thing or another, but I've been plodding on. About 650 miles on the engine now, and I'm booked in to hit the dyno on Nov 25th to get the final tune done and on the car.
Weekend after next I'll change the oil over to the Motul 300V Competition 20W-50 and slot a new filter in, ready for taking advantage of the RPM up above the 6500RPM limit I've currently got on it.
I also have to get a breather pipe made up for the gearbox to help to stop the oil splash out when hot. That'll probably happen this weekend.
One job I have been working on it a bit of a tweak to the way the gearbox cooler pump operates.
Obviously, I've uncovered a weakness with the splash lubrication of the 5th/6th gearset. Thankfully the oil cooler return line returns oil back to the box over the top of this assembly, meaning that when the cooler is running, this weakness is negated.
Because the MoTeC is controlling the cooler pump temperature switching, I've now got this triggering off an auxiliary table that polls both gearbox temperature and throttle percentage. When the gearbox oil is below 55 degrees, the pump is permanently off. 55 degrees is deemed to be the lowest sensible normal running temperature.
Above 55 degrees, the pump will switch on when the throttle position is over 95%, meaning that when the gearbox is warm, the cooler will be circulating oil when the gearbox is at maximum load so long as the oil temp remains above 55 degrees (hence preventing overcooling). On track this will mean that the cooler will be running a significant amount of the time, keeping the 5th/6th gearset lubricated.
The normal running temperature of the gearbox on the road is about 70 degrees when fully up to temperature. As such, when the temperature exceeds 80 degrees the pump will activate regardless of throttle position, hence cooling the oil at maximum capacity.
This is a really cool benefit of having the MoTeC controlling this kinda thing. I'd never intended it to work in this way, but after 10 minutes at the laptop I've been able to reconfigure it to work sensibly the way I want it without hacking into wiring or cutting metal to mount more sensors. It's times like these when spending money during the build pays dividends!
-
Need to sort out that crooked R/H headlight Heath!
-
A successful day in the garage today. First off I got the coolant system re-bled as I don't think I got all the air out the first time around. There was a cool spot in one corner of the radiator when the car was hot indicating that some air was still trapped in there. I managed to get a few bubbles out the radiator bleed point and now the radiator feels hot all over. I might try to re-bleed it in another week or two just to make sure all the air is out.
The next job was to get all the extinguisher lines run in the engine bay and the nozzles mounted. I managed to get all this done and I'm really happy with how it's come out. All the lines are completely hidden from sight and securely mounted. The nozzles themselves are quite discreet too despite being purple! Here you can see the four of them in the corners of the engine bay:
I've still got to figure out where to mount the remote charge cannister for the extinguisher tidily, which will be a bit of a task, but I have some ideas. For now though I'm stoked with how the engine bay looks.... tidy and professional-looking.
Once I've mounted the rest of the extinguisher in, I'll get Glenn to wire in the control box and mount the bits and pieces in the dash. I've got a bit of work left to do there as well, but that'll pretty much be the last of the things I need to cross off my immediate to-to list. Things are looking good!
Oh, and she still continues to drive and run really well. Sump is still full of nice clean oil, no leaks I can see and it's performing how I feel it should. So yeah, onwards!
-
Just a quick update. I've nto done much on the car this last week or so except clean it up after the trackday. I hope to do a touch more on the extinguisher install this weekend and get the nozzles mounted in the engine bay.
This weekend I also want to bleed through the brakes and clutch and also re-bleed the coolant circuit since it's had long enough now to work most of the air through to the trap points.
And as soon as this crappy Spring Auckland weather stops raining every day, I might even get out and chuck another 150 miles or so on her
Hopefully I can get her back to the dyno towards the end of the month to get the fun tune on her
-
Peugeots are renowned for having dodgy driving ergonomics. The same problem you have in your 405, I have in my 306 GTi6. And yeah, these cars don't really come alive til you push them. My Pug gets boring from time to time and I often think about swapping it for something more interesting, but then I find myself on a twisty road and all of a sudden it wins me over again. And I'm reminded of how cheap it is to run and how reliable it is and there's never any reason to get rid.
-
Haha no, seriously I was taking it fairly easy on her..... I was having some fun for sure, but I wasn't driving anywhere near 10/10ths in it.... it'd break my heart if I bent it or blew it up.
-
Right, well a red-letter day in the rebuild really as on Saturday I took the Exige down to Taupo for the CJC Jerkfest trackday at the Taupo short track. Up at 4am to meet up with James & Nikki Colverson in their S2 Exige S and my friends Richy and Ryan who also convoyed down in Richy's awesome MkII Triumph PI.
What followed was a day of fun and (thud far) faultless Exige running. I've got 500 miles on the car now, some of which was around the track and it's feeling really good. Still not as fast as it will be by a country mile with a 6500RPM limiter, and with me generally short-shifting somewhere around 5500-6000RPM, but it feels perkier than it did in March and then some.
It got through the trackday without burning any oil (last time it burned a lot) and the oil is still clear and smelling sweet... last time it blackened very quickly and smelled like petrol.
I was very cautious on track and took care to keep the oil temp to under 100 degrees as I wanted to be VERY conservative with the car, but I was able to use the track to get some useful load on the engine without stressing it too much.
The handling is FANTASTIC, and while it's only a base setup to improve on, it's going to be one very quick car when I can unleash it... and that's even WITH old 048s that feel like they're made of stone.
I did see a few drips of oil on the undertray when I put it away Saturday night but I also see the gearbox has blown a little oil out of the breather vent, which was something I'd expected to happen running it so full of oil. It's on my list of things to make up a new catch-tank for the car at some point with a dual-chamber... one for the engine (as it currently uses) and one for the gearbox. That way I can keep the box nice and full.
So now I'll post up a few photos courtesy of the Jerks that were out in force with the cameras on Saturday:
The Exige sitting in the pits (photo courtesy of Caleb Wong):
Nice fisheye shot of the engine bay, looking shiny! (photo courtesy of Brian Cox):
And another fisheye shot, this time of one very happy muppet behind the wheel! (photo courtesy of Brian Cox):
Then, of course, a few photos of the Exige doing its thing on track (photos courtesy of Royce Mihaere):
OVERSTEER!
And of course, I've promised some video, so here's some video I snapped on my GoPro of a session on track... you can see I'm driving it pretty gently, so expect it to be an animal once I let it off its leash!
Also present on the day was my father, who brought his E-type along. He's not yet strong enough in the neck to risk a day blatting around the track in his helmet, but it was the first time he's been back at a trackday since his horrific accident and he loved the atmosphere.
He was also kind enough to let me take the old girl out for a spin around the track. He offered me a drive at a trackday back in '06 and I declined for fear of bending it. This weekend though (after regretting not accepting the offer before!) I made sure I took him up on it.
I was still being pretty gentle with the old girl, after all she is 47 years old! It didn't stop me having a little bit of fun with her though and the 3.8L XK engine on track just sounds so wonderful! Even though I loved having the Exige there and it was very special for me.... being able to give the Jaguar its head of steam was the day's highlight for me
Here's a video of that session
So yeah, that was the Saturday... no dramas and a car that behaved and performed fairly well.... RESULT!
Next weekend I'll be giving it a clean, fashioning up a temporary breather tube for the gearbox and hopefully finishing painting up the extinguisher nozzle mounts in the engine bay.... if it's fine I'll even take it for a drive!
I'll finish with this shot, which I love. My car with the Colversons' Exige in the background (photo courtesy of Mr Richard Opie Esq.):
-
Spotted a pretty sweet metallic blue Avenger that looked a little lowered on what looked like hotwires (or similar) on the Northwestern motorway about 4pm yesterday afternoon. Some young looking fullahs in it. It wasn't massively clean or overdone, just looked cool. Makes me want an Avenger back, I really love their shape.
-
Well not a LOT to report this weekend. It's been pi$$ing down all day today today and I'm knackered so been spending some time with the better half instead, but yesterday I got the car washed and cleaned up a bit as well as a couple more peripheral bits bolted on.
I masked up the engine bay finishers and test-painted the extinguisher nozzle mounts matt-black. I've got the other two still to do as they're in the engine bay and harder to mask... so I'll probably brush-paint them instead since they're so small. The two I've done turned out really well so I hope to get a chance to do the other ones in the next week or so. No huge hurry at this stage anyway.
With the car cleaned, Brad came around and got a couple of shots of the car for the next issue of G-FORCE magazine, which is due out the week after next. I've yet to see the shots, but here's a couple of quickies I snapped with my phone.
I'm hoping for finer weather next weekend so I can take the car for a run down to Taupo and back and maybe even do a bit of run-in work around the circuit where I'll be taking my father's E-Type on a trackday... all going well.
The engine still sounds and goes sweetly. Nothing leaking or weeping yet, and it doesn't seem to be using any oil or coolant, which is a bonus. There's about 50 miles on the engine now (plus the 3-4 hours of dyno work) so the most critical part of the run in is past, but we'll still do it by the book with the run-in oil until we're at about 800 miles or so.
On the still-to-do list is the following:
- Paint the remaining extinguisher nozzle mounts in the engine bay
- Mount the engine bay extinguisher nozzles and run the lines from the rear bulkhead to the nozzles.
- Mount the remote charge cannister on the extinguisher, hopefully inside the footwell divider out of sight.
- Get Glenn to wire up the extinguisher circuit all tidy to match the rest of the vehicle wiring.
- Cut up my spare dash piece and lay up a carbon fibre console to sit in the radio slot to hold the MoTeC MDD, the extinguisher controller and a couple of buttons as well as the vehicle CANBus connector.
- Get some more correctly-coloured blue Alcantara material to upholster the modified dash piece in.
- Get the car remapped after run-in.
- Do some trackdays.
On the horizon is a bit of a refurb on the wheels along with some new tyres since the 048s on it are now as hard as bullets from sitting in the garage for 4 years.... shame since they're almost new in terms of wear! Then maybe I'll get shopping for a set of TMR alloys... all in good time.
-
Well, I'm officially road legal again!
The six-monthly faffing around that is a WOF is always entertaining. It got through relatively easy this time until it came to the brake testing on the rollers.... it came up with a pretty bad front brake imbalance and failed.
I took the car away and got it out onto the motorway for a few hard stops thinking the discs just needed a clean-up from all the oily fingerprints etc they probably had on them.
I got the car back and it passed.... JUST. This was a little concerning but after reading about it, Elises/Exiges are notorious for reading well under on the left-front wheel on a brake test roller as there's not enough weight on the wheel to grip the roller properly. Certainly you can stop on the road lightly or heavily without the steering wheel pulling anywhere, so I'm picking it's more of a problem with the testing method than the brakes themselves.
I've got to re-bleed the brakes and clutch in the next week or two anyway as it's only got crap fluid in it at the moment (what we put in when my clutch line failed on the dyno in March). So if there's any air left in the brakes (although it doesn't feel like it) it'll get worked out then.
But the main thing is I'm all legal to go again, which makes me happy. Now I just need a sunny weekend so I can get to work with the mile-munching!
-
Nice! I'll have to watch that later, up loud!


Esprit's '01 Exige Over-winter refresh
in Other Projects
Posted
.... and here's what the sorry sight of the car in bits again looks like. At least at the moment I've plenty of workshop space to work in!
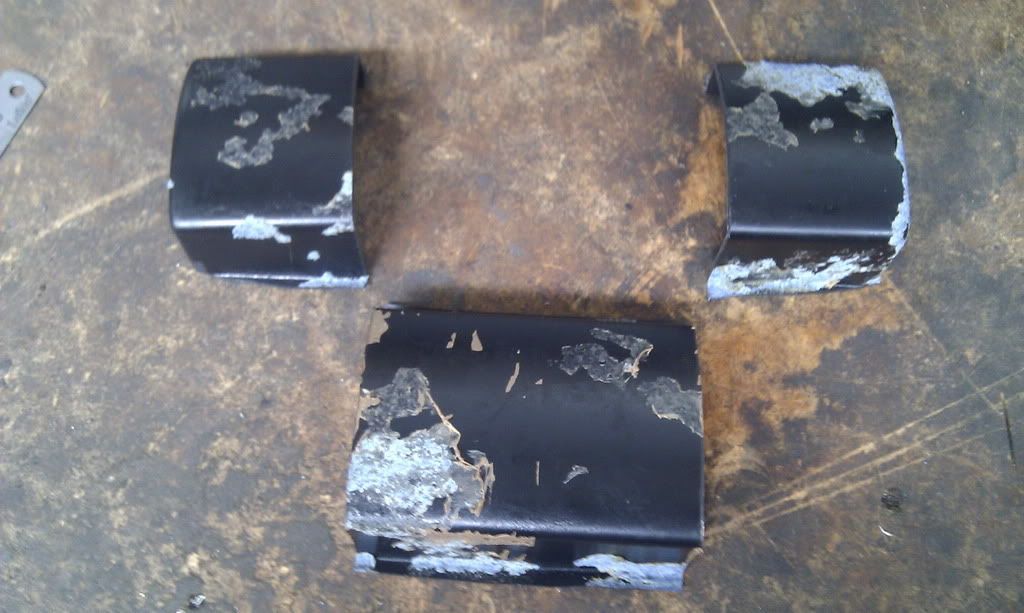
I've now got the car about as stripped as it needs to be. Rear clam, roof, rear window and surround is out. I've removed the exhaust manifold and alternator heat shields as well as the alternator itself (this is dripping in oil and will need a clean along with a new belt). I've drained the coolant off and removed a couple of the pipes as well as the header tank and catch can for access to the firewall.
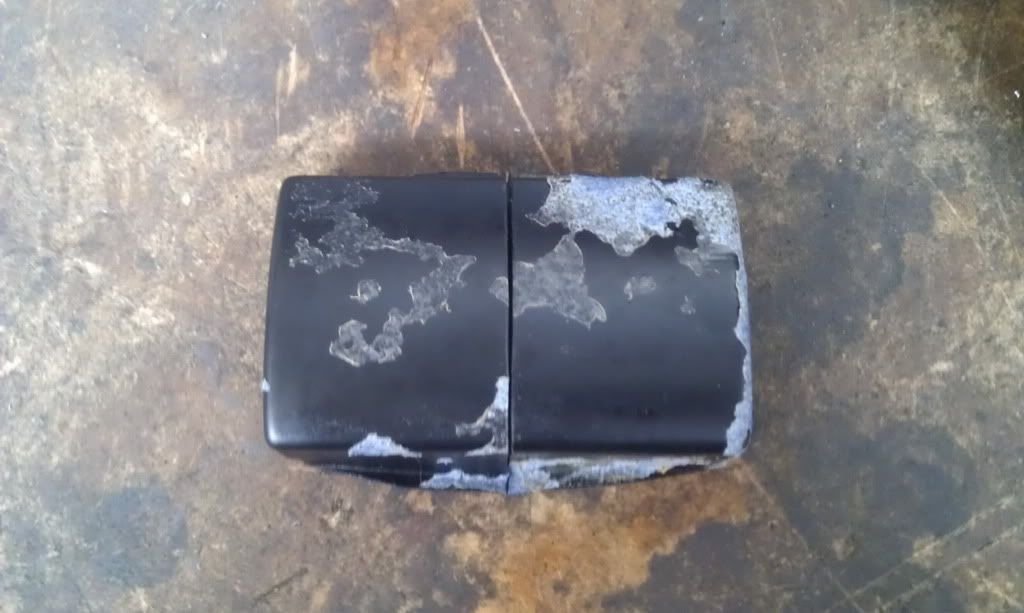
I've also pulled off the charred remains of the old heat shield. Here's what it looked like after I spent a full day painstakingly making the bastard:
And here's what it looks like now:
All that work down the drain!
It's good that I made the decision to pull it off and replace it. This heat shielding wasn't the best material choice (went with what I could get locally rather than importing) and it shows. The foam is open-celled, so in the patches where the aluminium outer has burned away, the oil has soaked right through and into the foam behind. Large chunks of the foam are now thoroughly soaked with oil right through. If I had just pressed on with it, it was a bit of a fire risk. The new foam is closed cell and will not absorb oil or moisture and is much more fire resistant as a result.
The engine bay now looks like this:
Tomorrow begins the task of cleaning up and removing the sticky remnants of the foam on the firewall. There's a good day or two's work in that so progress will be slow.
The good news is that despite having Christmas away from my family, my father's going to come up next weekend and spend the whole weekend with me and we'll work away on getting it all back together. By then I should have much of it back in one piece, but it'll be nice to have his helping hand here for the bigger stuff and to double-check my work. It'll also be bloody nice to see him and spend some good garage-time with him, something I've not had much of a chance to do in recent years.... in light of last year's accident, it's something I want to do much more of in 2012, although hopefully not on my car beyond this week!