

SR ROLLA
-
Posts
178 -
Joined
-
Last visited
Posts posted by SR ROLLA
-
-
Yeah, no worries. I think the fit and quality on the rubbers seems pretty good, I've no complaints so far. No rattles, I spent quite a bit of time aligning the windows and getting the height right, so the fit is nice and snug.
I'm pretty sure the bearings were packed well—I was super paranoid about not packing them enough after a couple of horror stories from friends who replaced bearings and then had to do them again a couple of weeks later due to not enough grease—so I think that side was just a little too tight.
-
 1
1
-
-
So first of all, I drove from Auckland to Rotorua and back without any major issues. Was getting some noise from the front left wheel by the time I got home though.
 Fuck.No doubt something I cocked up when I put them in. The leading theory at the moment is that I just did it all back up too tight and the long drive at higher than norm speeds cooked it. Anyway, replaced and sorted now, seems to be okay.Next thing in trying to continue this project on a bit with effectively zero budget is getting the original wheels back in a better state. I'm going with a darker grey and decided to try the Lyndar paint system from Supercheap. I got a can of VW Pepper Grey mixed up, seems to be pretty good.This is the first coat, over a dark grey primer.Couple more coats, goes on easy without tooo much stippling/orange peel. I think it should come up good with a clearcoatShiney bits just sitting in place
-
6
-
-
Finally got a couple of pics of these seals
-
The end at the rear is just cut off square and goes as far back into the pillar as you want—they are longer than needed so I trimmed them off to finish just past the end of the trim they clip into. The front end tapers down to a point, but doesn't flatten out completely and widen like the OEM ones. I positioned them so that they go forward a little past the front edge of the metal trim and tacked the end to the door frame with a small amount of adhesive to keep it held in place. This seems to seat against the closed door well. I think you could probably place them to end pretty much at the end of the metal trim track without the need to glue them down and they'd still fit without a gap when the door is closed.
I'll get some pictures when I have a chance so you can see what I mean.
-
I got to see this in the flesh and meet the man himself on Saturday. I must say it's looking absolutely superb, the huge amounts of effort and hours are very evident in the quality of the result. The red looks amazing in the sunlight, pictures don't do it justice. It's going to be a real stunner. Very well done.
-
-
-
-
Boring progress ahead:So the rubbers above the windows have always been pretty ropey, they had had an extra foam strip glued on at some stage and they were getting hard and brittle. I managed to buy the last NOS item in the country from Mitsubishi (one side only) a while ago, for a retardedly high amount of money. Sadly, after sitting around all those years it turned out to be pretty average too.Already splitting after being on the car a few weeks:Not too chuffed about that. I also got some generic ones from Rare Spares but the cross section was so different that I thought they weren't likely to fit the same channel. Turns out that the indicated dimension is close enough that it can be squished into the rail and actually makes for a really good fit and a pretty easy install. The only difference being that the new seals do not wrap around on the inside but that is no big deal.Both sides are all fitted up now. I spent ages adjusting the window positioning on both sides to get the fit right and they are sitting pretty mint now. It looks much better, the rubber is firm but not too hard, seems nice.
-
2
-
-
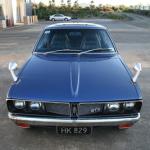
Ha ha, is that your one? It seems to be a tricky model to find decent images of online to play with in Photoshop. I guess they are pretty rare and not as mainstream cool as Celicas, RXs and the like. I read an article on JNC which estimated only about 500 left.
I got pads and rotors (and shoes to do the rears too) from BNT New Lynn. Once I got the part number for the rotors from you they were able to find a set easy enough. Turns out they are the same ones as used in early 80s Sigmas, which helps. I did the bearings and oil seals at the same time which partly came from Mitsubishi and partly from Saeco in Avondale.
-
Plans:
-
6
-
-
I finally managed to source all the parts to replace the pads, rotors and wheel bearings. Ended up having to go through three different places.
Crusty old bits out:
Shiney new bits in:All assembled, greased up and ready to go.Quite proud of myself, although not major by any stretch this is one of the biggest tasks I've taken on completely by myself and so far the car stops right and nothing has fallen off. Yay me.-
4
-
-
Awesome, Thanks.
-
The next thing to have a look at is the brakes. It all seems pretty straight forward but I'm having a lot of trouble getting new parts. I've managed to track down some pads, which seem quite pricey for regular road-going brakes, they are not performance parts or anything. No one seems to be able to find a compatible rotor though. Everyone I've talked to doesn't really seem interested in doing more than looking it up on their computer and it appears that they are just too old turn turn up on anyone's systems. Mitsubishi has some of the bearings and seals, but that is all, everything else is listed as 'obsolete'.
I'm don't think there is enough meat to get the rotors machined. They are 12mm atm and the minimum thickness in the manual says 11.4mm
Anyone have an idea where I could source something that will fit? Discuss
Crappy pics:
-
So, headlights are all sorted now thanks to some pro advice from GTO expert dwlee — on closer inspection the cups, which look pretty much identical, have a 'type' number, a 1 and a 2 for each side.
So it looks like these have been installed exactly wrong for the whole time I've owned it. Much better now:At some stage I'll get around to converting to semi-sealed. It's not driven at night much so it's not a big priority right now.-
1
-
-
Interesting, that could easily be it. The way they are on now is the way they've been on since I've had it, but who knows what previous owners may have done. I'll try swapping them around and see if it looks any better.
Cheers.
-
The height adjust screw for one of the headlights was bung so while I had the grille and everything off I took the opportunity to make it all nice and clean and black.Before:After:Much better.the headlights have always been a tiny bit on the piss — the lines are not quite vertical/horizontal. They can't be rotated though because there are little tabs on the back of the bulbs which correspond to slots in the headlight cups.Am I missing something? Discuss here if you have any ideas.Cheers
-
2
-
-
So this is what that is:Got it from Yahoo Japan for cheep. Seems to be in really good condition, one small crack on the back which I'll fix up, then give it a good clean and a repaint. It feels a lot more solid than the earlier grille, like I have on the car now.
-
1
-
-
Another cool thing (and reason for lack of progress, until now) is that I sold up and moved to a new house — with a nice big double garage with a workbench. yay.
Also, time for an early christmas treat from the land of the rising sun.
what's this?
-
2
-
-
oops, been a while.
So I got the head off the spare engine, got it checked over and smartened up. Everything mated up sweet except the exhaust ports on this are the round version — the original head had the square ports. The ports all line up but the mounting bolts are in a slightly different place so the flange for the headers required some slight modification.
Here's the new head in place:
And everything back together and running:Been going again and used for daily driving for a while now, with no signs of issues so far, fingers crossed that's it (until the next thing).-
3
-
-
I have a 74 GTO.
Would be good to know the compatibility of parts between the models. I think the doors and a lot of the interior are supposedly interchangeable. Dash and centre console are different though.Does anyone know if the door rubbers are the same? and if so anyone know where you can get them from?-
2
-
-
The NZ distributor is a place called Loft HQ. Pricing and minimum amounts available depend on what kind (there are loads of different textures, finishes, colours etc) and whether they have it in stock.
The kind I got was about $70 per metre I think and it's around 1.2m wide.
-
So now that I've given the old girl a nice treat and the insides are pretty much all mint it's about time for something to break as a way of saying thanks, of course.
Started to present symptoms which suggested a blown head gasket. Took the cylinder head off with the help of a friend who knows what he's doing (I mostly don't) and took it away to an engine reconditioners to get it planed and the various bits tarted up, replaced etc as needed.
Naturally it was not that simple and today it turns out the head is cracked between the valve seats. Bugger. So I'll be needing to do something about sorting a replacement sharpish. I have a 4G51 from a Colt 1850 sitting in the shed, so I need to see if that will fit, fingers crossed they are the same.
Some pointless pics:
Also decided to give the rocker cover a bit of a polish while it was off (and I was still feeling some love for the car, before I found out I was rooted). Not perfect by any stretch but looking better than it did before.-
5
-
-
So what I thought was a blown head gasket is in fact a cracked cylinder head. Damn.
I can get my hands on a 4G51 head from a Colt 1850. Do any experienced Mitsi guys out there know off the top of their heads if these are compatible? or do I need to wait until I can get at it, pull it off and have a look for myself?
Cheers


sheepers 1977 (i think, could be 76) Toyota Celica TA23
in Project Discussion
Posted
So freaking hot, looks amazing. Must convince Richard to let me have a drive asap.