
- Popular Post


Avenga
-
Posts
935 -
Joined
-
Last visited
Posts posted by Avenga
-
-
13 minutes ago, noel said:
I'd paint those bonnet pins to match the car.
It's on my to do list. I want to make it as sleeper as possible. I might have to wait until I get the rest of the outside repainted though.
3 minutes ago, chasinthemirage said:Well done man, absolutely flying through it so far!
Thanks. I am rushing to get it ready for a mopar show that I am driving to in the South Island in October. I still have about a month to finish it, so I'm looking pretty good. The wheel are the only thing that I am waiting on now.
-
 2
2
-
-
- Popular Post
- Popular Post
Configured the turn signals and headlights on the dash
Made a small sub loom that connects up to the old instrument cluster wiring.

The old dash only had one turn signal indicator so that made the wiring for that easy, the high beams were also easy. I had to do a little logic in the dash to get the low beam working the way I wanted it to, for the low beam I had to use the panel illumination which meant the little low beam light would stay on when I went to high beams. The dash lets you use If.. Then.. Else statments so I set it to use "If Low Beam = 12V and High Beam = 0V then turn on the light If else turn off the light" and for the high beam I just said "If High Beam = 12V then on Else off" so that way when there is 12V to the low beams then the low beam indicator will come on, but if there is 12V to both high and low beam then it will turn off the low beam light and turn on the high beam light. The dash really powerful like that. You can use conditional statements for any of the alarms or warning lights.
Got some temporary wheels so I can get it on the trailer to get it dyno'd etc. I am still waiting on the proper wheels to arrive from Aussie. Hopefully they arrive soon. These are on the front with a 30mm spacer
And the back, again with a 30mm spacer
And it sitting down on the ground. I am still waiting on another set of spacers for the front wheels so I still have the front sitting on the dollies we made.
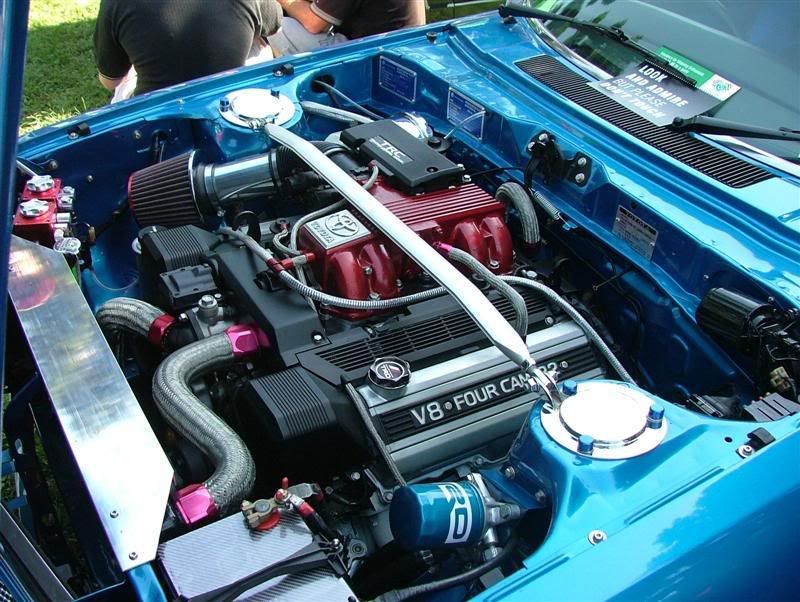
Finished off the radiator, popped the trumpets back on, and added the sealing strip around the top of the air cleaner. It's starting to look real cool now.
Just enough room for the radiator hoses.
Installed the bonnet pins.
They are a little higher up than I would have liked but I didn't want to cut in to the supports anymore than I already have in the middle of the bonnet. My other Avenger had a fibreglass bonnet so it's a bit easier to place the pins where you want them. I have to mould for the bonnet so I might make a fibreglass one further down the track, or maybe paint the bonnet pins body colour.
-
19
-
- Popular Post
- Popular Post
Big milestone. Fired the engine up for the first time.
A few issues. The biggest problem is that the TPS doesn't work, The shaft on the throttle bodies spins the opposite way to the standard 1UZ TPS. Need to do some research to figure out what TPS I can run.
In other news.
Got the gearbox boot and gear knob. Tried this one but it was a little high for my liking.
Swapped it out for a smaller knob which feels much better (Ladies!! See, a bigger knob doesn't always feel better)
It also has the correct H pattern on the top which is cool because it is different to the 5 speed sierra gearbox in my 75 Avenger and the old standard Hillman 4 speeds, they both have reverse next to first instead of below 5th, so I'm sure I will forget where reverse is on this one if I didn't have the H pattern there.
Also got the dash up and going. It still has the protective screen protector on it so it looks a bit fuzzy. I will take that off once it is all mounted in the car.
-
17
-
 1
1
-
- Popular Post
- Popular Post
Brought my bonnet pins.
They are the same AeroCatch pins that I use in my 75 Avenger. This will pretty much be the only external mod that you will see when the bonnet is closed.
Finished the front of the engine loom. Cam sensor, Crank sensor, oil temperature, oil pressure coil and suppressor.
Alternator wiring.
Vehicle speed sensor and reverse switch.
Updated my documentation with a few of the extra plugs that I needed to figure out.
Mounted the fuse box
Throttle linkage and valley.
Front of the engine loom. You won't even see this because the radiator hose is right above it.
Then it runs down the side of the engine
Started mounting the battery. I decided to run it in the guard, behind one of the trim panels. That keeps everything out of the way and still gives me full usage of the boot, because wagon.
The engine is all fully wired up now and the engine bay is looking freaking tidy. Almost no visible wiring.
And from the other side
-
28
-
I think the were either Wurth or Tridon, they are the ones they make specially for the fuel system
The ones for the vacuum hoses are pinch-on double ear clamps. Again, either from Wurth or Tridon, I forget which.
-
1
-
-
- Popular Post
- Popular Post
Re-positioned the handbrake further back. Because we move the engine back a few inches, and the longer gearbox, the handbrake wouldn't fit in it's original position.
Fitted the seat to test the position of the handbrake, feel good.
Continued with the loom. Passenger side plugs. TPS, injectors and ICS
What it will look like with the injectors in and connected.
Routing through the tunnel
Finished the drivers side plugs. Intake temp, water temp, injectors and one of the coils with a suppressor.
Final shot of the valley before putting the manifolds back on
Also found that my brake light switch wasn't working so I took it apart and found it was covered in muck.
Took the little plunger out so I could give it a good clean
Clean as a whistle now.
-
12
-
Thanks Richie. I'm rushing to get it ready for my South Island trip in October. Fingers crossed!!
The idle control valve is from NZEFI. Here is a link http://www.nzefi.com/product/2-wire-idle-speed-control-solenoid-kit-weld-flange/
They also do a remote mount version http://www.nzefi.com/product/2-wire-remote-mount-idle-speed-control-solenoid-kit/
-
3
-
-
- Popular Post
- Popular Post
Finished the vacuum tank and idle control solenoid. This will run the MAP sensor and remote brake booster
Created a bracket for the throttle cable
Milled the manifold a bit to get the vacuum hoses on.
Some more wiring. Ignitors and MAP sensor
Continued building the loom
-
14
-
- Popular Post
- Popular Post
Been working on the wiring.
Finished the body loom.
Went from this
To this
Started on the fuse box and relays
Did new connectors for the digital dash. I used nylon braided sleeving for everything
Also finished the backbone of the engine loom. The rest I will do in the car so I can work out the exact cable length I need.
Link ECU all mounted
Also got some new brighter bulbs now that I have some relays and better wiring. I went for 60/55W Halogen H4 with a P45T base. Should be quite a bit brighter than the old 45/40W incandescent bulbs
-
13
-
- Popular Post
- Popular Post
Took some measurements for the wheels
I found that the fronts need to be ET+19 which rules out steel wheels so I went for Performance Wheels Challengers. 15X7 ET+19 on the front. Big thanks to Chris (CUL8R on the oldscool forum) from Mag & Turbo Christchurch for organising and ordering the wheels.
And for the back I needed ET-25. The best they had in the cast wheel is ET-9 so I will have to run a 16mm spacer. They do a forged wheel which I could get in ET-25 but they are super expensive so I will probably wait a year or so and then get a set of forged ones made. This is the 15x8 ET-9 that I will be running on the back
I found a photo of a wagon the same wheels as I am getting but mine will look 1000 times cooler because V8 Avenger wagon
Got the bonnet back from painting
Started on the rest of the exhaust
Over the diff
The front muffler and flex joint
Started on a little shield for the brake lines and fuel lines.
-
18
-
- Popular Post
- Popular Post
Got the calipers mounted
Wilwood Rotors
Installed all the fuel pumps
Mounted the Wide Band Lambda sensors
Inside the car and the grommets
Got all the bits for the exhaust
Finished off the front brakes.
And I guess I will be racing everywhere
Put the air cleaner back on and modified the front cover a little bit
I also had a little test fit of some wheels using the wheels of my other Avenger. It looks like I will be able to run 15x8 on the rear. The front is going to be harder. I am hoping for some 15x7 but might need to go down to a 15x6.
-
23
-
Thanks.
Yeah. I am local to Birkdale.
-
- Popular Post
- Popular Post
Started work on the loom. Just laying it out at the moment then once I have everything finalised I will wrap it.
Made a little bracket for the cable grommet.
Mounted the ECU mounting plate
Put the old body loom back in to see how it all fits. Again, when I have everything finalised then I will wrap everything up.
Finished off the fuel tank
Added in a new fuel pickup
Ran the fuel lines. For certification you need to run the lines 150mm away from the drive shaft.
Made some quick spacers for the rotors so we could figure out what hat to buy.
Brought all of the brake gear. Wilwood 4 pot calipers and the hat for the hub. Also brought the rotor but I haven't unboxed it yet
-
23
-
- Popular Post
- Popular Post
The car is all done at the panel beaters.
Finished painting the last bit, behind the headlights and radiator.
Engine is back in
Started work on the front hubs
And started work on the Dynamat
-
21
-
- Popular Post
- Popular Post
The underside is all sealed and painted.
Drivers side front wheel
Back end
Underside and new chassis rails
Passengers side front wheel
-
10
-
Thanks for your feedback.
I do like the silver and black because it has a good contrast
My problem with black is that in makes the engine look very bland, because the plastic trim is also black. I like the contrast of silver and black better.
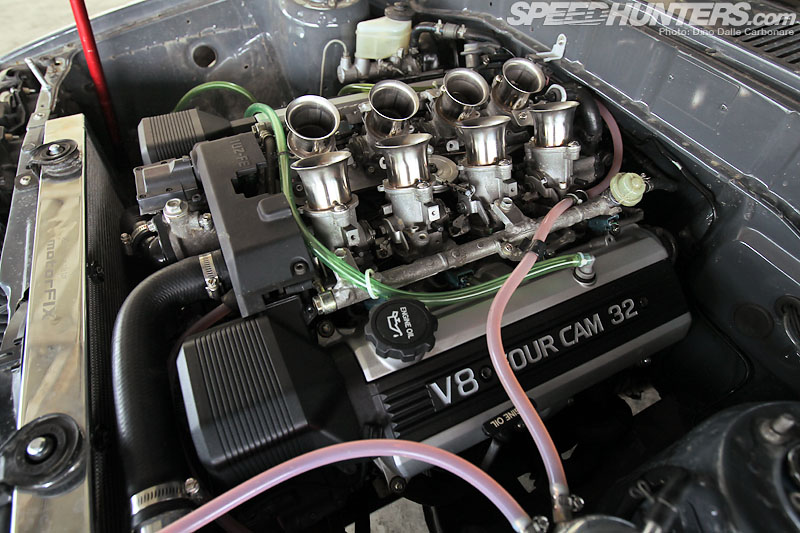
There a car with a black 1UZ and ITB's in the next workshop over so I went and took a photo of it's engine. It just looks like too much black and nothing to break it up.
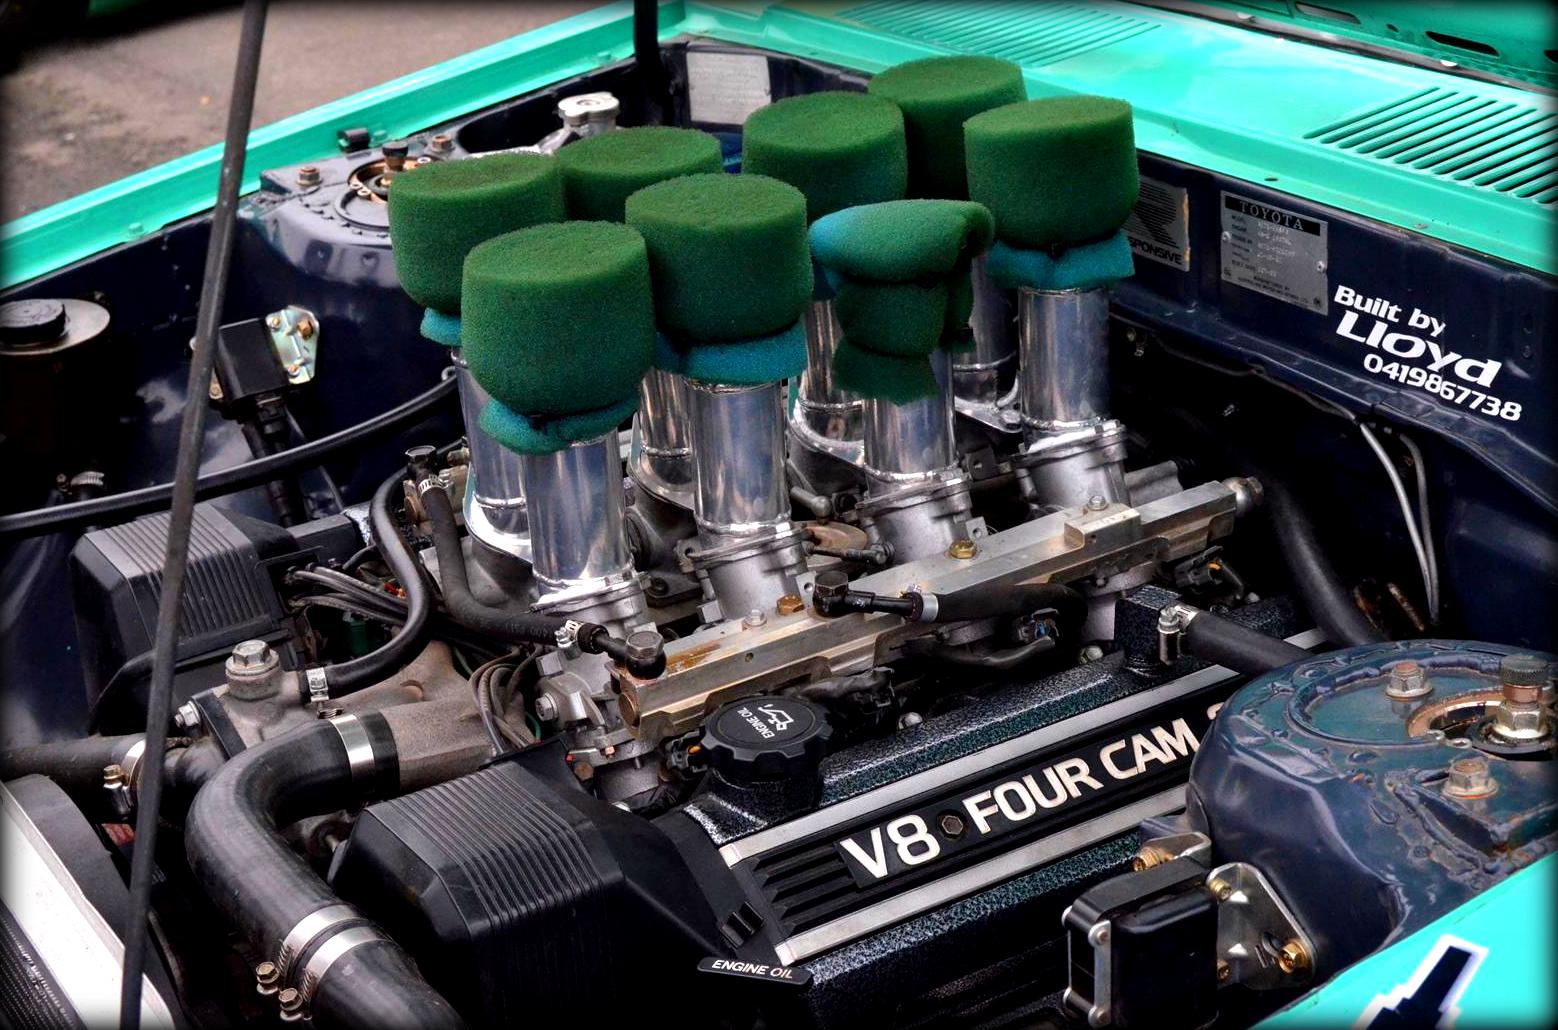
Here is a pic online that I found with crinkle paint which looks better because it has some silver accents
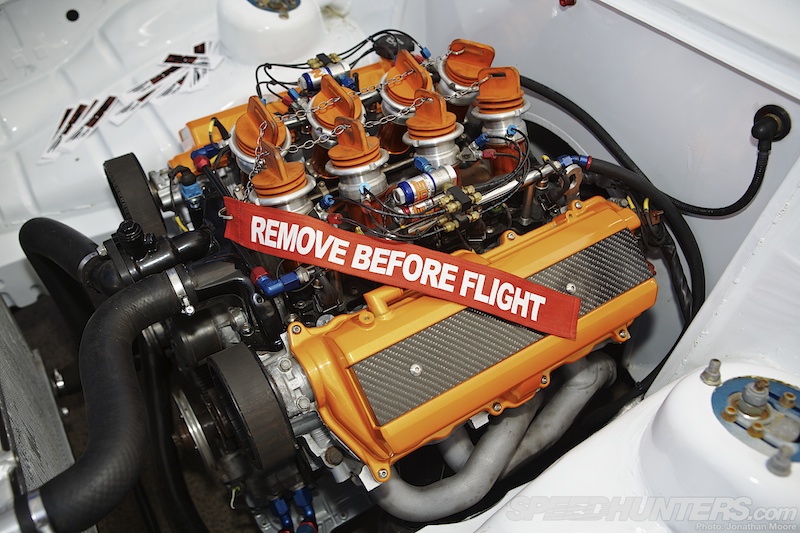
Or I could go something crazy and custom like this
But I don't really want to add a third colour in to the engine bay.
-
- Popular Post
- Popular Post
Some pics from the painting.
Bogging and sanding the engine bay
The engine bay in primer. Looking really smooth
In the booth to add the colour
And the finished product. The camera had problems with the white balance so it looks a bit more gold than IRL but it is a perfect match for the rest of the car
The bonnet primed and ready for paint
Now the next question, rocker covers??? Which colour should I do them. I am tossing up between body colour, bare alloy or painted silver like the front of the engine. What do you guys think? ATM I am leaning towards body colour.
-
11
-
- Popular Post
- Popular Post
I had the surgery yesterday and am recovering in hospital. Everything went really well. I hope to get out of hospital on Sunday if all things go well.
Still a long road of recovery ahead of me.
-
28
-
Yes. It is sealed into the cabin by that box around it and draws air in the vent under the window. The same way the heater used to.
-
1
-
-
- Popular Post
- Popular Post
So, small car update, big life update!
I am going in to have Gastric Bypass Surgery tomorrow. It was going to be in August but they last minute moved the date forward. I only had 6 days notice so I have been rushing around getting ready for that. I was planning to get the car finished by the surgery date in August but since they moved the date forward then I will have to finish the car after I have recovered.
So, expect less progress photos for a while. I will post a little update when I am out of surgery and back online.
Here is a few little progress shots of the interior all painted.
And I also got some track rods from a friend on the Avenger forum
-
16
-
1 hour ago, tortron said:
M8 I'm fizzing to see this back from paint
You and me both!! Can't wait!
-
- Popular Post
- Popular Post
Another update.
Went down to the panel beaters and we matched the paint colour. It turns out that it is still it's factory colour. I always assumed that it was repainted a different colour at some stage. The body tags have the paint code PM which is a Mitsubishi colour named Phantom Mist. Love the name.
Installed the new alternator only tensioner. Also cleaned up and painted the engine block.
Took the rocker covers off to check the condition of the cams. Looks immaculate, lovely golden colour.
Got all the bushes I need.
Got the vehicle speed sensor from Recon Electronics in Christchurch. Got a really good deal on this. My local Toyota dealership wanted $470 but I got an aftermarket one from Recon for around $180
I got another great deal on Trademe. A set of 8 remanufactured injectors for $110. Brought them from a cool guy who has a superchanged 1UZ in a Ford Courier Ute. They are unused, he brought them and then decided to go bigger because of the supercharger, but they are perfect for my NA motor. Drove my other Avenger to pick them up on Saturday. Had a good chat about 1UZ etc.
While I was up there I also picked up a Lexus front engine cover which will hid the spark plug leads at the front of the engine. My 1UZ is a Toyota so it had that big ugly cover that covers the whole engine. The Lexus ones only cover the front and side so I have been looking for this part for a while.
-
13
-
- Popular Post
- Popular Post
Big milestone today!!! Off to the panelbeaters.
Loaded the car on the trailer. We just lifted the body on to the trailer. The body shop is only 350 meter down the road so I was tempted to just carry it the whole way
Body is safely down at the panel beaters now. They say it will be about 2 weeks.
While waiting on the body we stripped the engine down to replace the water pump and cam belt etc. We also found that who ever did the cam belt last set the cams wrong, they were both out by a tooth, one was advanced and the other was retarded so it is a good thing we redid the cam belt.
Also found that the track rods had a big bend in them so I will replace them.
Started work on the new fuse box. Here is the diagram.
I'm installing a couple of relays for the headlights so I brought the relays, main fuse box, and a bigger inline for the feed to the headlights.
Labelled the fuse box.
-
20
-
Yeah, I don't know. I just brought it off trademe and chucked up the link in case anyone else doing a similar engine swap wanted to do the same thing and run only the alternator.
He did say that he lived and worked on a family farm. He wasn't promoting the website, other than his email address was at that website and he sent a business card with that URL in the package.
It's the only bit that I have brought from them and I saw it, and it fits my needs so I brought it. I'll let you know how it goes when I get the engine running but it looks nicely made and the service was quick and the communications was good.
-
1
-


Avenga's 1UZ V8 powered 1980 Avenger Wagon
in Projects and Build Ups
Posted
She drives!! First drive around the yard.
Got the engine running really nice for the basic tune. Found I had to reverse the polarity of the wires for the cam trigger and crank trigger. With both of them wired the "Correct" way according to the documentation put me about 40 degrees retarded, I checked the trigger scope and they were clearly around the wrong way, flipping the cam got me to about 15 degrees advanced, then flipping both of them got the timing bang on. Did some other stuff like set up the idle control solenoid.
Here is a little rev")
I have it booked in at the dyno on Thursday!!!
Got the checklist back from the certifier. Not a very long list. Most of it is just little things like lock nuts, and things we haven't got like the wheels and we can't test the brakes yet.
Got the reverse lights going. Which is pretty awesome because it is my first Avenger with working reverse lights. Here in NZ the reverse lights were only hooked up on the top of the line models. As all of my Avengers have been base models then they haven't had reverse lights, they have all the wiring in the loom for them but they just don't put in the switch or bulb holders.
Got it down on it's temporary wheels, we had to put some smaller rubber on the front so it is even lower at the front and jacked up at the rear so it has that drag car rake, it will look more normal with the final wheels on when they get here.
Also finished the battery brackets.