

deankdx
-
Posts
799 -
Joined
-
Last visited
-
Days Won
3
Everything posted by deankdx
-
 4 August 2017 squeezed in another arvo session today.. fitted the stock radiator and fan, gives me some homework to make a thermo fan fit the alloy radiator. fitted the rear bumper and gave it the kick and twist to make it sit right. plugged in the number plate light and it worked first go. unclipped the left door lock rod from the central locking motor and hooked it to the door lock.. works like new. also let the magic smoke out of some wire under the dash.. pretty sure its due to the dodgy twist n tape stereo install.. haven't got that far yet. looks like a car again.. and getting close to being able to get a permit and go for a drive. .can't wait.
 -
2 August 2017 had another arvo session today, got the parkers working.. just a fuse luckily. fitted the tail lights, loom was just tucked under the floor so it was an easy process to feed it through the access panels and wire to the lights. checked the demister even and even half of it still works..amazing. also removed the shithouse window winders, got the door trim off and removed the door lock to be repaired/re keyed spare one etc.. had been bypassed with a central locking motor due to a broken lever part but the wires were cut off in the door hinge area due to a poor path chosen to run them through. next visit i'll sand some bog on the rear quarter, fit the rear bumper and swap the radiator so i can fit a normal fan. still have to swap the front brakes over, and find out why the handbrake light doesn't work. and swap in the rear shocks also. running out of urgent things to fix
-
1st August 2017 today i had the opportunity to head over and have another go at the gemini. about 90mins before it got dark, just enough time to fit a bumper, straighten it .. fit a stone tray, straighten it also, fit headlights(left one sits a bit cockeyed.. might redrill mounting holes or try another bucket) and fit the grille(zipties) how do you straighten a gemini bumper? brute force.. wrapped a rag on the bottom edge and braced My foot against the front wheel and pulled with the might of 2 tractors idling.. bent back easy.. i had to remove the bumperette pad before it fell off due to rust.. will probably bolt it on with coach bolts, and the other for ocd people(and added security) parkers not working, i did test the lights work at home.. that's no doubt why the instrument lights didn't work in the cluster.. pays not to go ripping stuff apart before checking further. i had to swap one indicator housing over on the bumper due to the globe holder being full of rust. .. all went to plan otherwise.(used another ford mud guard bolt for the stone tray because longer.. ) next visit i'll be fitting the rear bumper, same process.. bend it into shape etc i want the tail lights fitted also, but i suspect i may need to remove the petrol tank to access the wiring.
-
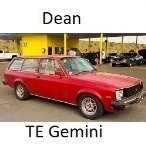
31 July 2017 i came across a similar wagon to how mine should look on google at some point, its what made me think of changing the grille to the TF type for a different look. it even has a bent up bumper etc.. wheels are filthy though. i could live with that ride height also
-
31 July 2017 continuing on with the "homework" (car is at Dave's) My daily diesel gemini has a volt gauge and oil pressure gauge mounted in a fascia in the console by someone. home made alloy plate and i do get some peace of mind knowing what the voltage is doing, it's been a good diagnosis of battery issues or alt issues in the past(reading higher can mean battery lead off or regulator issue, lower can be belt off or alt wire broken etc..) so, what gauges do you choose? tacho, because a big clock in the main cluster is useful for timing how long you've been stuck in traffic.. so the tacho is less important. Volt gauge, reasons above.. and oil pressure, just to see how rattly the engine from the rusty panel van is on a measurable device i still have to put the chinese gear boot on, its a tight fit, but should look standard when done and in. i tried silver or black fascia, and silver seemed to work better surprisingly. the black console i am trying to sell, its growing on me though ..
-
30 July 2017 another day of progress today.. nothing tangible though i bled the brakes without jacking the car up just to get it moving again.. tested the cluster, clock working, all globes worked.. plugged it in, all gauges and lights come on.. went to see how it looked all lit up NO ILLUMINATION LIGHTS WTF! .. need to investigate further. took some more stuff back for homework. next episode i will be looking to put the lights, grille, bumper etc back on. getting sick of seeing it looking like a POS. Devil is in the Detailing.. worth the effort, stone tray was purple, i bought for $20 already pretty straight., light rub with 400 paper, grey undercoat.. no sanding because lazy.. general red paint base coat because colour match is expensive. one coat of colour match marenello red.. done. grille was shithouse black and silver.. scrubbed it with a scotch brite sponge, sanded a few edges, masked it up and painted black.. the grille badge i bodged on as its from the earlier TE grille and this is a TF grille. needed painting, so sprayed the paint in the cap, and brushed with a cotton bud and wiped off the top with thinners rag.. grille done.. reminder pic below of the grille from the rusty pano donor car..(had to change that shit grille badge)
-
you are correct, Thanks for the mention. at the time he didn't have them, I've bought some parts from "Darren Gypsy" before he's also got a gemini page called JUST GEMINIS on facebook. i did see a welded hinge for this fuel flap, but i still haven't bothered making one(not a fan of the plastic, needs a safety strap if so just in case) there's a guy making full fibreglass door with inbuilt metal hinge also (i think Lachlan Hope, not 100% sure but those facebook groups are awesome for help, parts and sharing knowledge.
-
29 July 2017 had an arvo/evening session on the gemini today(Friday) what size are the wheel nuts.. next few pics will tell the story email i just sent Stanley tools below Hi Stanley tools, do you sell the breaker bar and socket separate from the set. (got no reply) as i accidentally sent it to scrap metal.(scrapper said he didn't see it on the wreck so some kid could have picked it up walking to school even?) pic of the wreck with the breaker bar resting on the gaurd lip what i did do is finish off fitting the new brake hoses to the front. and then set about swapping the steering rack (supposed reco) and the sway bar links from the wreck(black nolathane stuff, better than perished rubber) set up for the next session, bleed brakes after fitting reco calipers and new pads hopefully.. here's a pic of My home made hinge out of strong wire.. too strong to bend neatly.. one of those, expectation Vs reality moments..
-
21 July 2017 had an arvo session on the gemini wagon today, fitting the brake line under the car in the dark isn't fun, but probably helped because it would have been a prick of an idea at the best of the time. got the diff hose and lines sorted finally, even if the replacement nut is longer than the other one(looks a bit odd) started on the front hose, but was over it by the time i got one out, couldn't see well enough once it got darker outside. thats another day job. took some stuff back for homework.. should be some more updates if i can get anything done over the next few days awesome petrol cap now fitted.. i'll take a pic of the bodgy hinge i made soon brake lines at rear done.. darkness, not ideal for good photos
-
21 July 2021 some of the quality wiring from this project.. this is from the CD player it came with. all joins were twist n tape.. but why you need 3 joins in the one wire i don't know.. funnily enough, this deck didn't work in the car.. wonder why? tested it out today works well, but why the hell do they need to be such a pain in the ass to set up someone probably suggested, hey pioneer, too many buttons n shit, i cant work it out.. make less buttons. result, no radio preset buttons googled for a while, need to tune a radio station, press the list button then select a pre-set number you want and click the volume dial.. this will probably help me remember when i fit it to the daily. no idea how to adjust anything but Bass either i mustn't be asian, could just be the over 40s dementia kicking in? (can hear the comments, just buy a new one.. pfft.. no. I'm sure this unit will still run the CD stacker in the boot of the diesel sedan oooohhhh fancy)
-
13 July 2017 got a quick welding session in today before calling it a day.. weather not ideal and need to make sure i don't over do the upside down shit with My back . rear quarter was a pain in the ass to weld, wind didn't help, even with the gasless wire.. nothing bog cant fix anyway.. no pics of that too ugly lol.. brake lines next session, and front brakes maybe . apparently masking tape burns... who knew.. special shaped patch fitted like a glove..(A Bunnings gardening glove maybe?) in hindsight, i should have cut this off and made a new one, but then.. i might be still cutting looking for good metal.. its not too bad.. guards are back on permanently 2 falcon bolts on the drivers side.. removed the cluster to access this side.. cluster removal from a cracked dash is quite challenging. mounting tabs snagging on loose vinyl etc, needed to use two screw drivers and a bog applicator to pry it out
-
12 July 2017 no welding today... i did bent up my roll of brake line i had flared up yesterday.. what a prick of an idea(has about 20bends in it), it turned out about 7cm short.. hoping i can dodge one of the clips and still have it work.. otherwise back again to the brake mob for a join somewhere and longer section fitted. what i did get done is fitted the pedders shocks to the front, removed the front bumper(took 5mins, was in the way of refitting the front guards) fitted the left guard. bit more description with the pics below.. should be welding tomorrow if weather permits. otherwise, brake line if it fits(doesn't rain under the car) the patch below is for the A pillar rust box area at the front. shaped it in cardboard perfectly.. then lost the cardboard.. made another that was quite inaccurate, had to refold the edge twice.. won't matter much, cant be seen for starters. paint stripper consisted of 1mm cutting disc, because lazy.. (could also be seen as "keyed for paint/bog) left side didn't have rust holes, so just got a rust converter, wire brush over the the seams, re applied seam sealer and painted in killrust black and the guard refitted.. the top bolt was a prick to get restarted*(under the dash through the A pillar) due to the gemini bolts being short... solution.. XF FALCON mudguard bolt, same thread but longer
-
8 July 2017 today's update was ruined by poor planning and rain.. did get something done.. cut all the areas of rust out ready to weld using Daves grinder(cordless) then Dave used it and flattened the battery by the time i had made My cardboard patterns for rust patches.. i brought My grinder with Me but only with a flap disc... next time i'll bring my cutting discs. i rust converted the affected areas, then it rained, washing my good work away.. it doesn't rain under the car, so i got under the back edge and wire brushed and sanded with the flap disc all the bodgy bog etc off.. silastic, seam sealer and bog.. there was some rust hidden, but it doesn't look bad considering the mess trying to hide it.. i'll take the petrol tank out soon for a better look/access to weld. what i need to do next visit is remove the main rear brake line, goes all the way to the master cyl from diff hose. the front lines look fine, i may get them done when the motor comes out still. rear quarter rust isn't too bad, i'll trim the back edge some more also. no rust on the left side lower A pillar section cut out. very solid inside. i decided not to cut this whole box off. i think a few patches will be plenty good. the rusted to fuck bonnet is making good with rust repair patches.. i figured if it didn't rust in the center, must be impervious to rust? the rusty pedders shocks worked fine, so they got a de flakey rust via the round file, then wire brush and rust converter. then painted red again.. good for another 4yrs parked in the sea
-
5 July 2017 parts car... engine out.. torque tube removed(heard they can be broken) panhard rod removed, might have better bushes than my wagon one steering rack removed, mainly because it was simple, but has a nolathane coupling fitted. going going gone.. leaving the locked diff in, not legal, no idea if done any good or twisted axles.. cbf shitbox gone.. had to pay $100 for someone to come get it.. gone are the days of free car removal when metal prices were reasonable.. if i had known i was going to have to pay $100.. i'd have left more on it and listed it on feebay for $20 or so.
-
1st July 2017 photobucket will have a lot of haters from this day forward.. (imgur.com used instead now) anyway.. side cutters and 10 and 12mm spanner got a workout this arvo.. bloody cold outside, think around 6 degrees outside when we packed up.. i expect it will be just as cold when its time to lift the hoist for all the underside stuff in the morning.(down to 1deg at the moment..) Well, today was supposed to be rusty parts donor ready for scrap.. usual distractions and priorities meant it's close but not quite ready.( i took the tailgate off due to the hinges being perfect .. pretty sure the the wagon ones have movement. might stash the tailgate dash is stuck in eleventy million times stronger than a falcon one.. decided that i don't need to remove it not even for practice.. pedal box was simple..3 bolts..unclip brake and clutch cable and pin and brake switch.. done. 5min job. heater core was the easiest i have ever heard of.. undo hoses.. 2 screws holding the cover on, and slide out the core.. (and move out of the way of the white tail spider that was in there) external door handles are way advanced compared to XD.. have adjustment in the rod(might take a pic later.) still fail in similar ways. pulled the fuel tank out mainly so it wouldn't be a fire risk if i start chopping with the grinder.. surprised it wasn't rusted through.. only took 2 pics, was on a mission to get as much done before dark next time you see surface rust.. and think its just surface rust.... give it a kick... just to be sure..(i was going to remove this door.. .not anymore) pulling a car apart has to be the best way to figure out how stuff works or to be repaired.
-
28 June 2017 well.. rocked up this arvo for a quick garage session.. glad i paid part's donor value.. even still i don't think i'd want to use anything under the car. exhaust maybe... but not seeing value elsewhere. pics speak for themselves under the car is fucked.. ..rust is severe.
-
25 June 2017 well, weekend has passed and there'd normally be an update on this but a few distractions interrupted progress.. well, at some point i mentioned i wanted a better bumper.. and other parts no doubt.. came across a gemini panel van that needed to be bought. has the style of bumper i wanted bit bent, but i'll roll with it. bonnet is so rusted, i tied over it so the skin wouldn't peel off on the highway.. even latched down lol.. i got it going.. it was sold as not running, so a bit of a gamble.. been parked 4yrs roughly. bush mechanic for the win.. sanded the points, rotor button, and cranked it over for a while before resorting to the start ya bastard(has no choke assy in the carby) fired up and idled pretty soon after this turned out to be super rusty, surprised it didn't fall in half on the hoist video of the hope its still good "after a 4yr wake up call" engine has a 2507 crow cam same as i got with the other parts engine, it idles with a slight lope that i initially thought was just running rough(no choke/4yrs of parked in the beach) seems good. Dave claimed the steering wheel as payment for picking up this parts car from a couple of hours away. motor seemed healthy.. good chance i'll be doing a compression test next visit.. if good, its going in the red wagon as its a rodeo 2litre with a cortina 32/36 weber on it. interior is mouldy. not much usable on it at first glance.. seat frame maybe for My daily if not twisted also.
-
16 June 2017 todays plan of brakes got postponed again due to stubborn mudguard bolts. the gemini must use the guards as a structural part of the car.. there'd be double the bolts than an X series holding them on. 2 of accessed behind the kick panel and under the dash.. (naturally the under dash ones were pricks, one had a rounded head Just barely good enough to undo with perfect alignment of the socket, and the other had the nut part come off the captive clip thing.. great.. painted most of the quarter panel .still rust on the very lowest part. had a look at the tag after seeing the shifter area with pop riveted fill panel fitted. suspected it was an auto.. code says yes.. / M40 three speed 'Tri-Matic' (option) rubbed the tailgate down for the last time, and primed over the metal and bog.. let it dry and then got one coat of red on before the can ran out of paint.... one more can will get the rest done.. good enough for now.
-
11 June 2017 bodge level.. expert? the grille i got with this car was broken in the top sections..(hidden clips and impatient anger management people don't play well apparently) they clip in with shitty little clips, but most people use Zip ties. i suspect the guy couldn't figure out how to either unclip it, or couldn't find the zip ties? and yanked it out breaking it. i have a spare good condition TF grille, they look less awesome..(commodore fans might compare the TF grille to a VC commodore, and the TE grill is more like a VH commo(better).. i glued it with araldyte, but it cracked still.. needed reinforcing.. so... here is the result.. concrete has wire reinforcing.. so.... bog with wire must be awesome? if this holds up well and still fits everything(headlights etc) i'll leave it in.. otherwise i will have to fit the TF grille till i come across another TE one. grille differences.. thought about painting the TF Grille black, as it might help improve the look. grille update.. DONE! .. till it cracks.. then maybe fit the other after painting it black or finding a good one. even fitted a NOS grille badge that came with the diesel gemini when i bought it.. headlights are clear lens/shaped reflector.. not sure i like the look yet, but i have been told they work well(not as good as stock looking H4 Hella/Narva i switched to later) the sealed beams they come with are better described as candles
-
10 June 2017 managed to cross a few more things off the list today with the gemini project.. i modified a commodore boot trim to fit the lower rear window trim that was missing, its beat up and rough but its on and fits well.. i removed the ripped drivers seat and stuck in the pick a part one (slightly different style and colour) its got to come out again when the floor rust happens but wanted to check it was usable.. didn't get much else done but its set up for brakes next episode. i pulled the brake drums off to be machined and the brake lines off to be re made. and took the stockies off the front for use on my daily.. fitted the front Bathurst globe for a look.. i should start looking for tyres for these also.. no idea why its so high in the front.. needs low.. i ran out of red colour match paint in the one can i bought, got all the boot seal done at least. one can should do for the rest i hope. the bonnet got a full wipe down with thinners.. pretty sure its getting clear coated as is just to seal it.
-
3rd June 2017 continued on with some more paint work today.. remembering the ad.. "all rust removed" the reason all the undercoat is all over the rear quarter and tailgate is due to crows feet in the paint, that chips off with the orbital sander..(i used one today on it and it hadn't been taken back to metal or solid paint... i didn't either.. ) a simple hand sand with a block and paper to feather it out would have been all the bodger needed to do to make it respectable.. i decided i am not taking it back to metal now.. goal is to get it on the road as quick as possible. there is rust i need to fix in the lower quarter corners. bugger all really.. will do it next time i lift it on the hoist(and make sure nothing will catch fire inside like tail light wiring...) painted over the stripped back areas on the sill and under doors, also made more work for myself by filling and painting where the side mould had taken paint off the front guard(should have just left it, painted over the chips in correct colour) i want to refit the alloy window trim asap(to prevent it getting damaged) so painted around that edge and some of the quarter, but the temperature at 4pm wasn't warm enough for the paint.. it went a bit chalky.. so packed it up for the day. sanded and painted the boot seal channel also.. very time consuming, particularly trying to prevent overspray from going on everything. rattle can colour match paint. should be able to see the difference quite easily.
-
28 May 2017 well.. i had a brief look through the box of engine parts. to see how complete "complete in pieces" means...(of the G200z 2 litre) looked at the carby it had on it, usual full throttle check, was going to see if vacuum secondary had been rigged to open mechanically.. nope, but it doesn't open at all... there is a stop/lever possibly bent on purpose thinking that will make it mechanical.. but its actually stopping them from opening via vacuum or anything.. hmmm no wonder it ran "rich" ?? (also a 1600 carb, not a 2 littre one...not sure just how much that matters yet..) see below crap photo.. i think this carby will now be a restriction... the XE XF webber can be fitted, but the 2 litre cortina one is usually the one fitted(maybe in the past they were more common? maybe its the smaller primary preferred? not sure.. more researching to do.. standard head appears in good shape, was looking to see if someone had fitted bigger valves.. looks stock here. crow cam?.. i looked up the number.. it exists, which is good.. (mild cam, smallest crow makes) price on it would have put me off.. but since its already there.. winning!!!
-
27 May 2017 well, today i did some more gemini work at Dave's(Dave had the welder and engine crane etc i needed initially.) had a "clean" day.. didn't feel like playing with spanners.. goal changed, from doing brakes.. to making it water proof.. i'd like to think i have succeeded (LOTS of rain on the forecast between next visit) it came with 2 packs of door seals.. bonus was, it has 2 seals in each pack.. so i have spares for the sedan. feathered out the edge of the undercoat mask line the previous owner did.. sprayed my colour match Marenello red over 600 dry rub and looks a good match around the petrol cap have to work out if the petrol lid can be saved.. not sure if the stupid plastic hinge is still available.. its different to the sedan one which i think is still available.. i did some UN PAINTING of the window, seal and edge surrounding the seal.. thinners on a rag came in handy today. ( @kws I was too late to suggest this as a possibility for the marina) also DE STICKERED the rear window. and also thinners cleaned the rubber and glass of overspray and also did same on some areas of the paint.. took a pic of the "better side" will look much better soon.. the paint on the bonnet is Shithouse.. the car was stored under a TARP (to stop water getting in, but tarps sweat, and it blistered the paint..) i wiped it over with the thinners rag for a look.. (I found a better bonnet later)
-
i had the chance to get a few more things done on the wagon today. forgot to take any pics.. nothing that interesting though. repaired the too short tail gate seal with a section chopped out of a wreck boot seal.. silastic the gaps in the rear window seals(shrunken seals) more of an urgent temporary fix. fitted the boot latch and it shuts and seals out water(fingers crossed) i need to fit the new front door seals it came with, as that appears to be the where the front water leak is.. i had a bit of a dig around in the plenum area and seems like its not rusted through(surface rust needs addressing very soon) also agreed to buy the 2 litre motor and 5 speed and a standard copper radiator. due to The 2 litre needing a rebuild with assembly.. that concludes the buying stuff phase.. (No.. it doesn't .. as we'll see later) actual progress will now begin.. i am keen to sand back the "repaired rust" and paint that.. i did measure the length in the back.. 1.5 meters to the underside of the seat base(folded forward) so if to sleep in it, would need the seat base removed and the front seats flipped forward..
-
14 May 2017 continued with the parts gathering the other day. found some SL/E TD wheels(same as the Gypsy had) these are the 2 cleanest ones. they had bald and flat tyres so i bought another 2 used dunlops for $35 each fitted.. couldn't be ballanced due to the center cap hole not being big enough for their machine.. (found a different tyre mob later for balancing) i need at least one more centre cap, they are smaller than the commodore ones and would need to find a wheel cleaner that works with them and some similar colour for the faded centre caps later. no gemini work this weekend.. I will probably be doing brakes on it next week in the attempt to make it safely on a permit, and mounting the thermo fan, tail lights and tailgate latch. i have been buying more parts, found the elusive left mirror and GC seller had new service parts like dissy cap, brake pads, etc and has a spare 5 speed i'll buy just in case(at a price i could get my money back on easy) he has a 2litre (not twin cam) engine also in bits.. issue with in bits is whether its 100% still all there?.. apparently the 2 litre allows then to go up hills due to more torque.. (confirmed this later, it's what they should have come with)
