


Kilroynz
-
Posts
18 -
Joined
-
Last visited
Posts posted by Kilroynz
-
-
- Popular Post
- Popular Post
Drove to Islington to help Zeb rebuild the front suspension on his Marina van. It all went well, so we aced a couple of other bits then had a couple of beers to celebrate.As you do.Heading home as it got dark I was enjoying the drive, and the lights were all in my favour through town until I reached Brougham/Ensors and had to stop. As the lights changed I did the expected thing. Floored it.At this precise instant the accelerator cable pulled itself neatly out of the carb linkage and I was suddenly going nowhere, which the other traffic found perplexing. Much as I did.Aah. Manual choke. Fast idle. crawled out of their way into the emergency lane which almost had enough width to accommodate us. Came to a stop and threw the shifter into park with just a hint of annoyance, whereupon the rod that links the shifter to the auto under the car fell off.What are the odds..??!!Peering under the car I could see the rod dangling. A small spring clip had let go of its hold on the universe allowing one end of the rod to come unstuck. Lying on the road with one leg in the traffic I clipped it back together using the light from my cell phone.Woot.!I can fast idle home then.Like hell.The Opawa end of Brougham street has no room for fast idlers.I made it to the bridge still in the emergency lane, then snuck into the road works.Fortunately - and only because I had gone to do some work on another car - I had plenty tools onboard, so the airfilter came off and the cable got refitted.Status - normal. Had to make one more stop on the way home to put someone's rubbish bin away. Bin was already away. Made U turn in narrow street. Shifter rod fell off. I am wedged across narrow street. In the dark.MY. This is an interesting evening.Put it back together as easily as it will soon fall off again if I don't find out tomorrow what the hell is going on.Or off.This is an ad for lights on cell phones.Brilliant.!
-
 14
14
-
 1
1
-
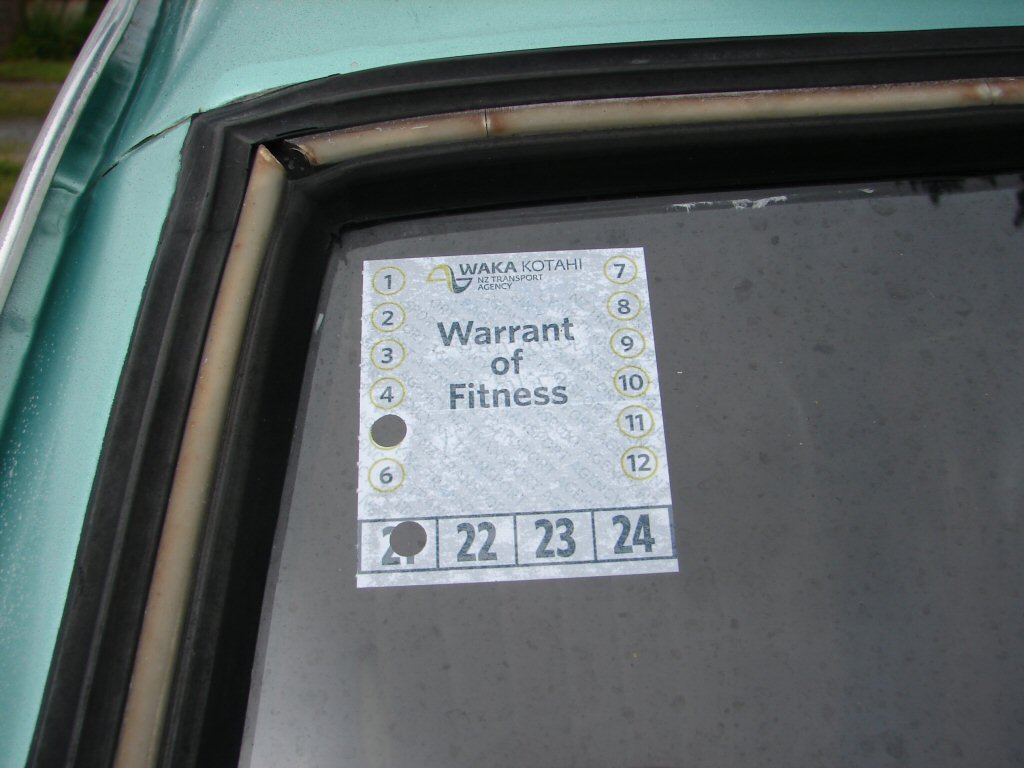
Finally everything was in place for the wof check.
My wof guy has met many of my previous Marinas, and he knows that I know far more than he does about them, so he sticks to the necessaries.
Absolutely everything worked, and the only negative comment he could make was that the seat belts were a bit faded.
Indeed they are, but it has taken them 38 years to get to where they now are, so I am not expecting any trouble with this over the next few 6 monthly wof's..!
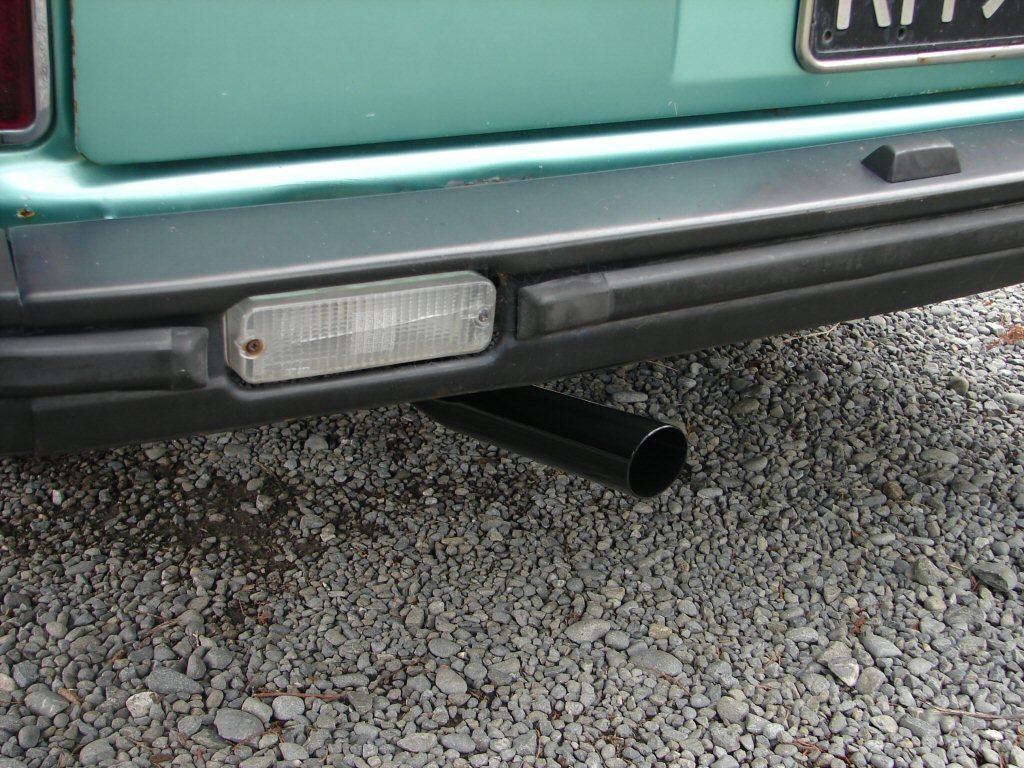
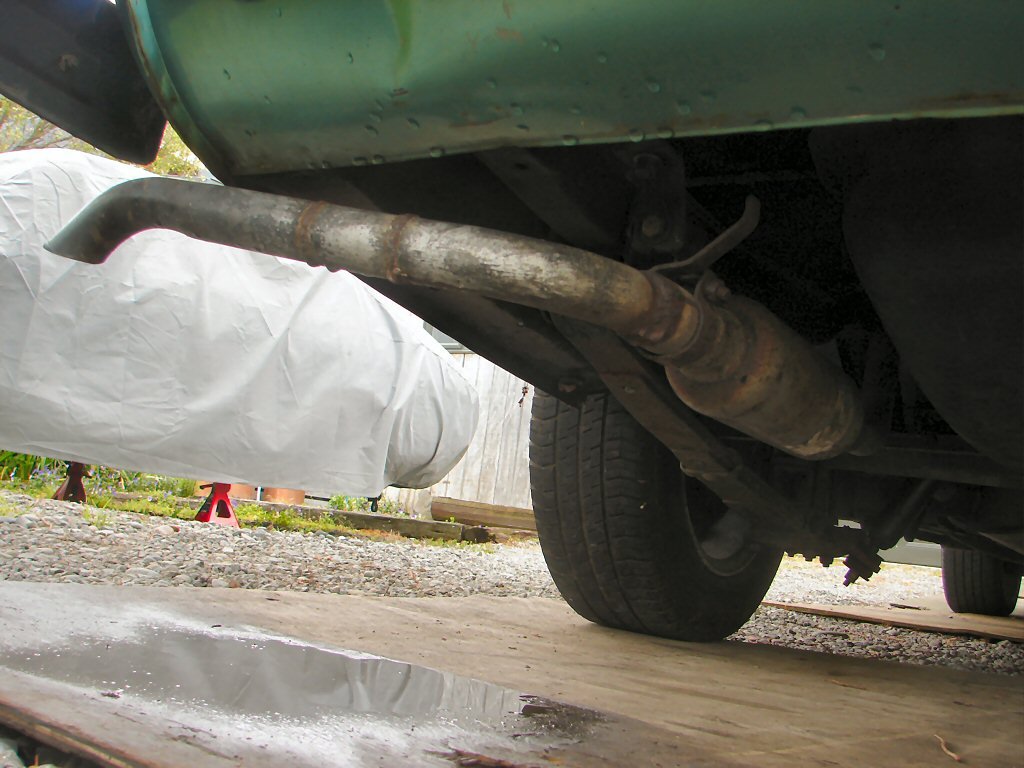
With that in the bag I headed directly - did not pass 'go' - to my exhaust guy. Turned out they were no longer 'my' exhaust guy, but as I was on a mission I engaged their services.
I wanted the godawful tailpipe removed and a basic 2 feet of 2" pipe instead. With a slight bend.
Got that for a princely $120..!
Well - that might have paid for a cheap welding device.
Never mind. It is now what I wanted, and the reason the fog lights had to go.
This was the most driving I had done in the car, and it was obvious that there was a nasty drone from amidships suggesting something was in trouble.
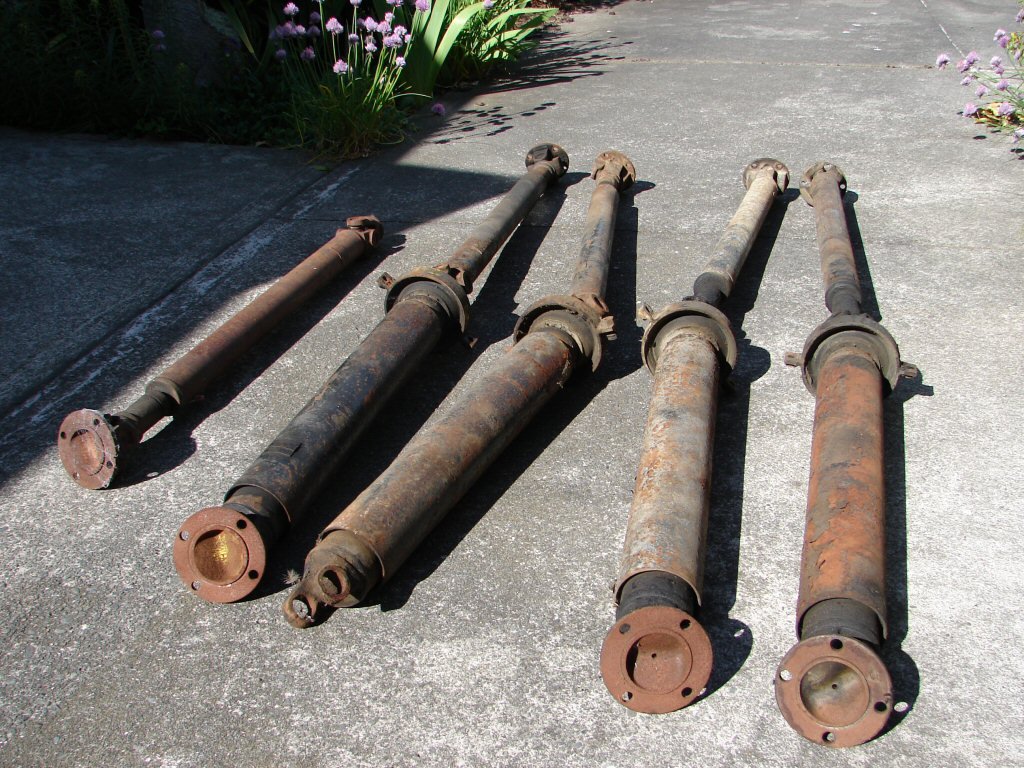
Because it sounded like it was right next to me below the floor I figured it would be the prop shaft centre bearing. And it was.
I dug out a few possible candidates for a straight swap.
Second from left got the nod, so I wire brushed it all up and got the car airborne to make life easier. That means axle stands at my place.
Seemed happy, so I now looked at the other issue I had detected. The left front shock absorber felt soggy. I sorted another, cleaned it up and gave it a coat of paint.
An hour later it was in place and I was out there doing some more miles. In short time the new propshaft was squeaking when reversing. Over the rest of the afternoon it got more persistant until it was also squeaking going forwards.
It seemed I had swapped a dud centre bearing for a dud universal. I had.
Sigh.
I found an even better unit lurking in the shed behind a heap of other stuff.
Next day I completed the third propshaft change in 3 days. Fortunately its a ripper, and we are sorted in that dept at least.
In other news, my 10 week delivery Chinese mirrors arrived in a week and a half. I decided I had to fit one up to see if it was going to be the thing.
Hmmm.
Jury is still out. I had intended to paint it body colour, but I am just not sure it looks the part. Works well though. Left the original one on meantime.
To console myself I took it for a few blocks while holding the ancient Gopro. I wanted to compare the amount of body snake the standard tyres allow versus the 7" superlite wheels and 205 radials.
The car feels way under-tyred on the standard setup.
That got us this...
Coming along...
-
9
-
-
- Popular Post
- Popular Post
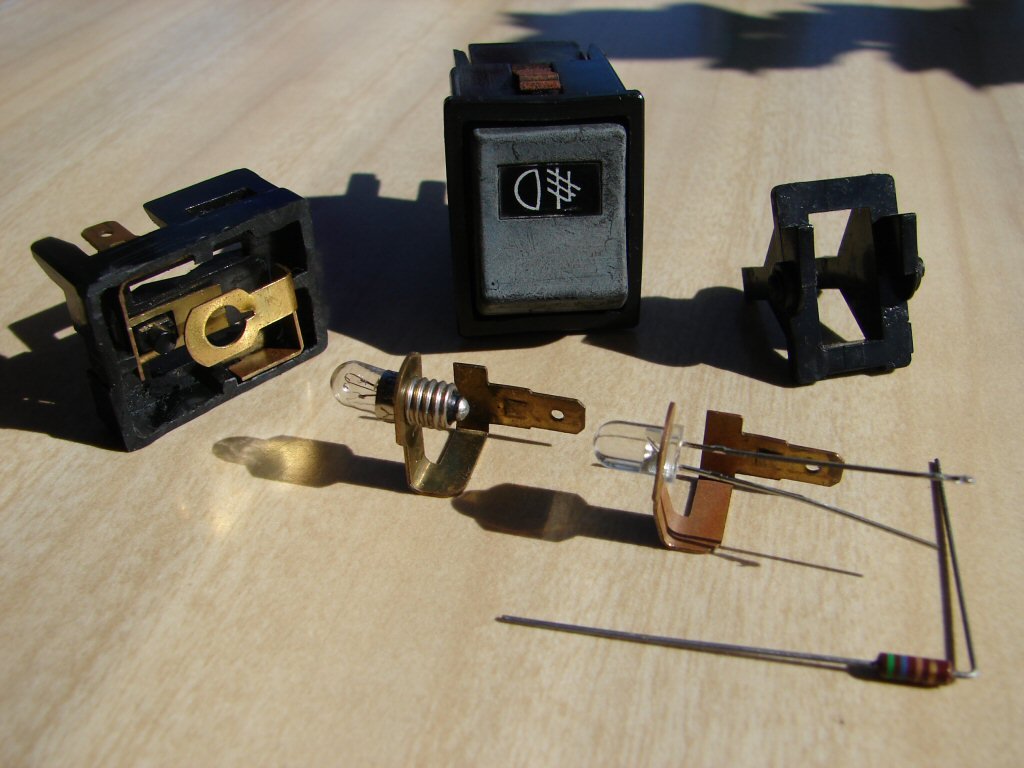
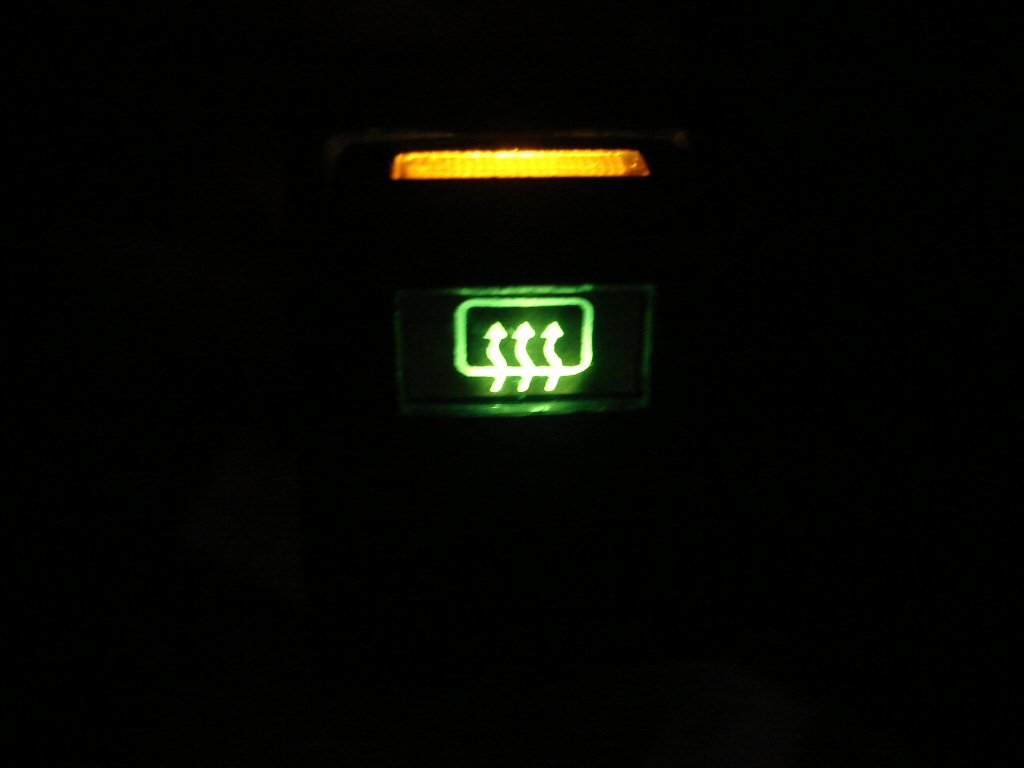
I was waiting for something else to happen before I could attempt a wof, so I decided to do something about the dashboard switch lighting.
The rocker switches have tiny screw in lamps in them, but they often manage to either fail or quietly unscrew themselves resulting in partial blackouts. That can actually be a bonus, because when they do work they get so hot that operating the switches can be a health risk. On top of that, they melt.
Hey. We got LED's these days...
The bits look like this..
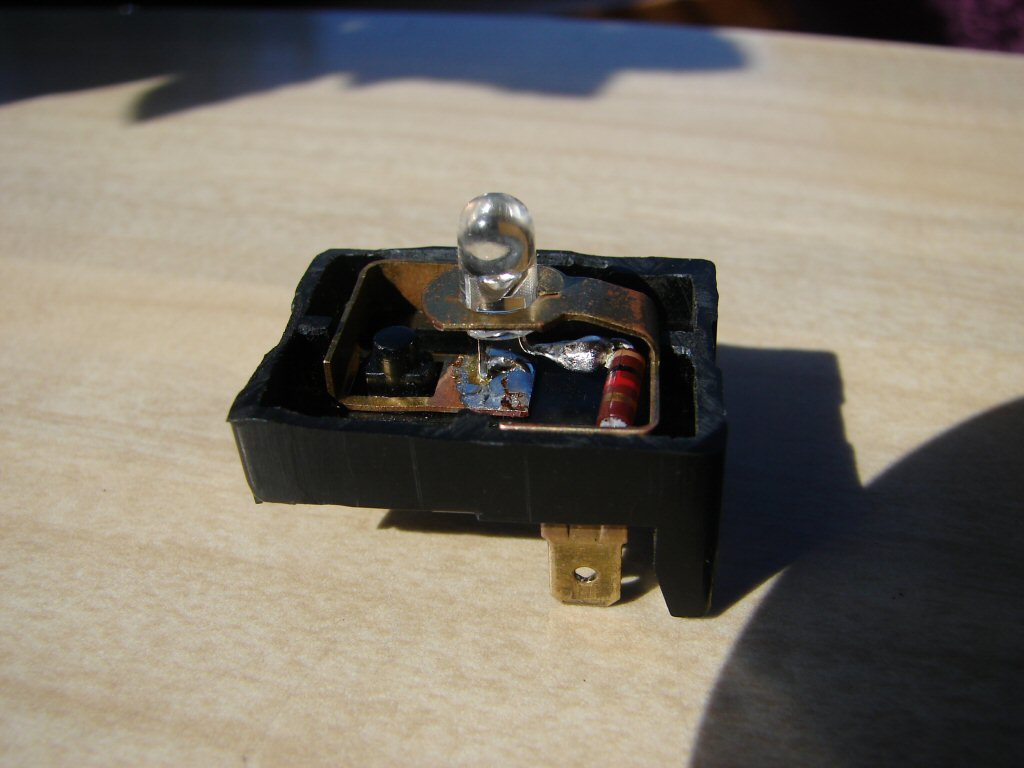
I sacrificed a switch body to use as a jig and soldered up the LED plus a resistor whose value (820 ohms) I had chosen to give me the amount of bright I was after.
Bingo..
That comes out quite easily as one assembly and gets transplanted into a working switch, by pulling the rocker out of the switch body, swapping this with the original lampholder, then bunging it all back in again.
Happy with the level of bright..
And in the dark it is not over-bright which would be more annoying than it not being lit at all..
So that took ages, being 7 switches and all, but it is done forever hopefully.
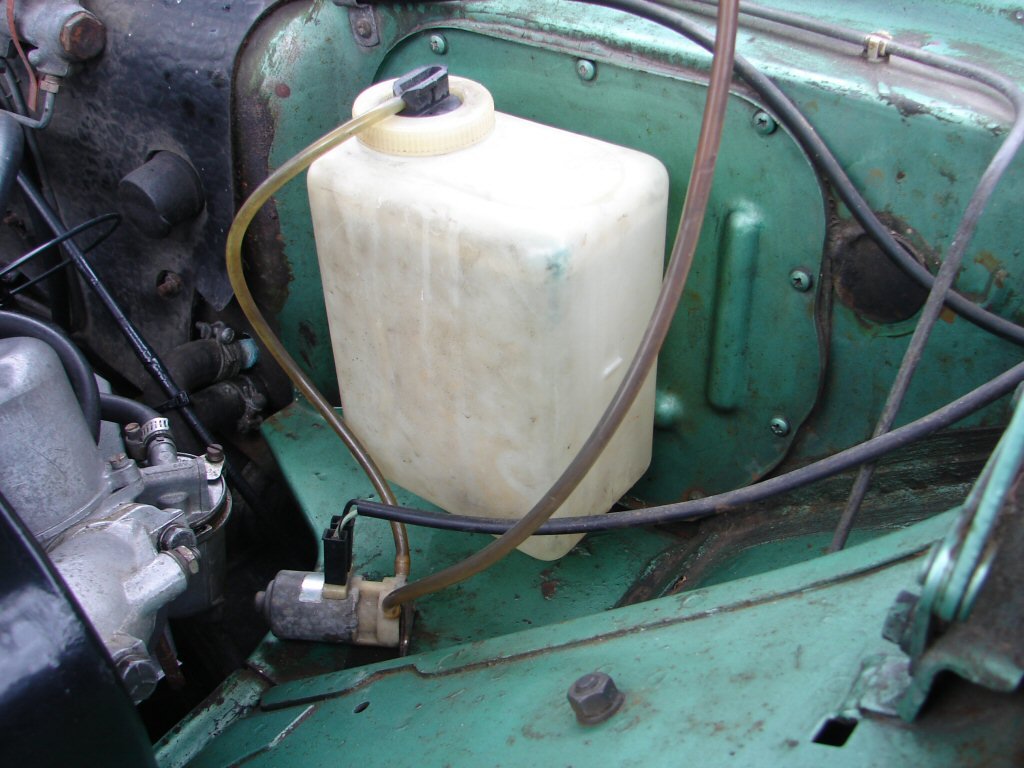
Another thing that had to be done for a wof was to get the screen washers going. The front one did nothing at all despite having power. A rat around in the old manky bits dept elicited one that worked, so I mounted that up front.
All good there.
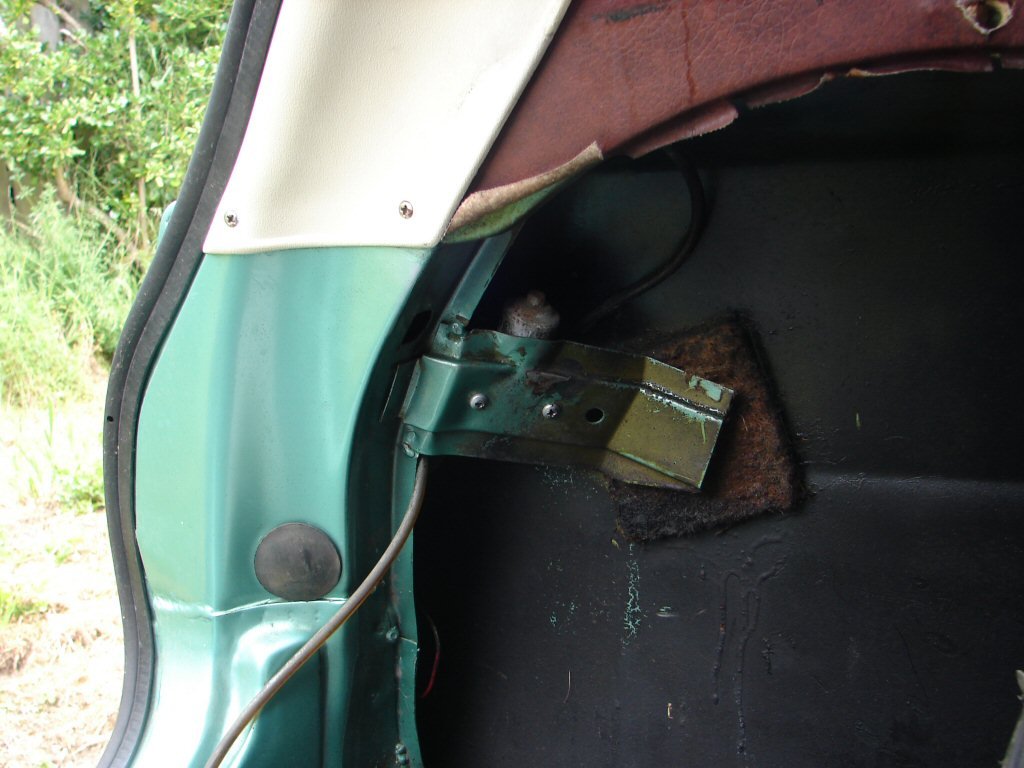
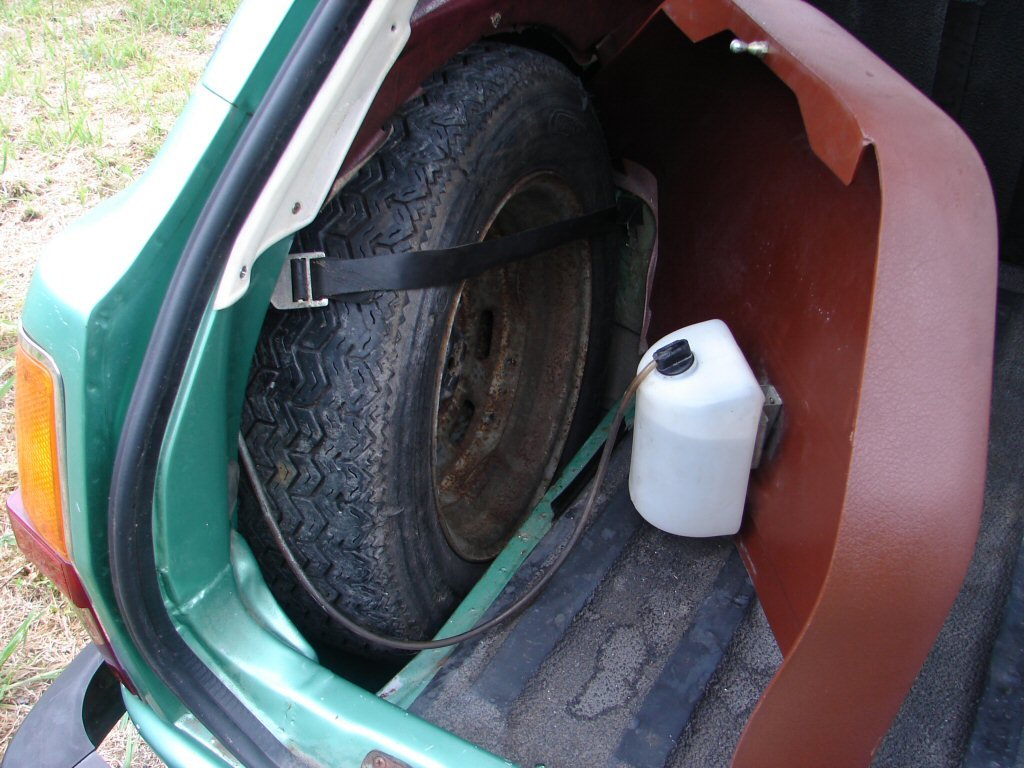
The rear one made noises but would not pump anything. It is hidden away near the spare wheel, but is still fortunately fairly easy to get at. I found it was wired backwards, so of course it was running backwards too. East fix then.? Nope. Won't run at all when wired correctly.
Ratted around for another, and after rejecting 4 or 5, found a goodie.
Pleasingly it primed up and was doing its thing in a trice. I admire the fact that they hid all the gubbings for this setup, while leaving them very easy to get to.
Does not happen very often.
Ok.
Next step warrantsville.
-
12
-
- Popular Post
- Popular Post
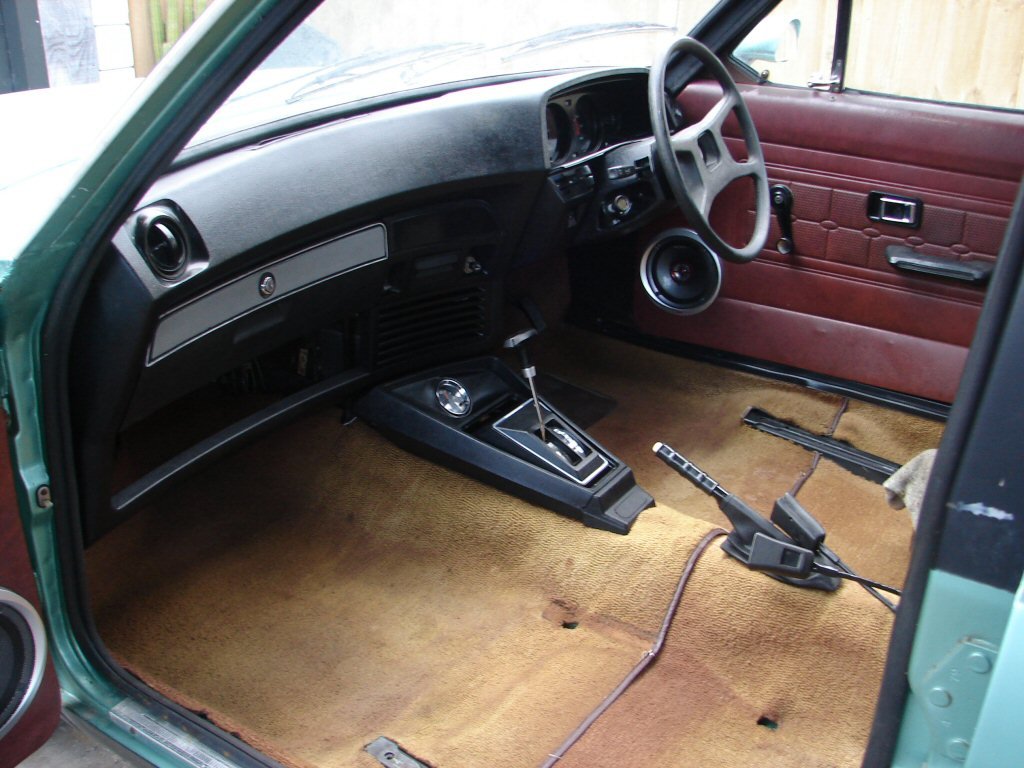
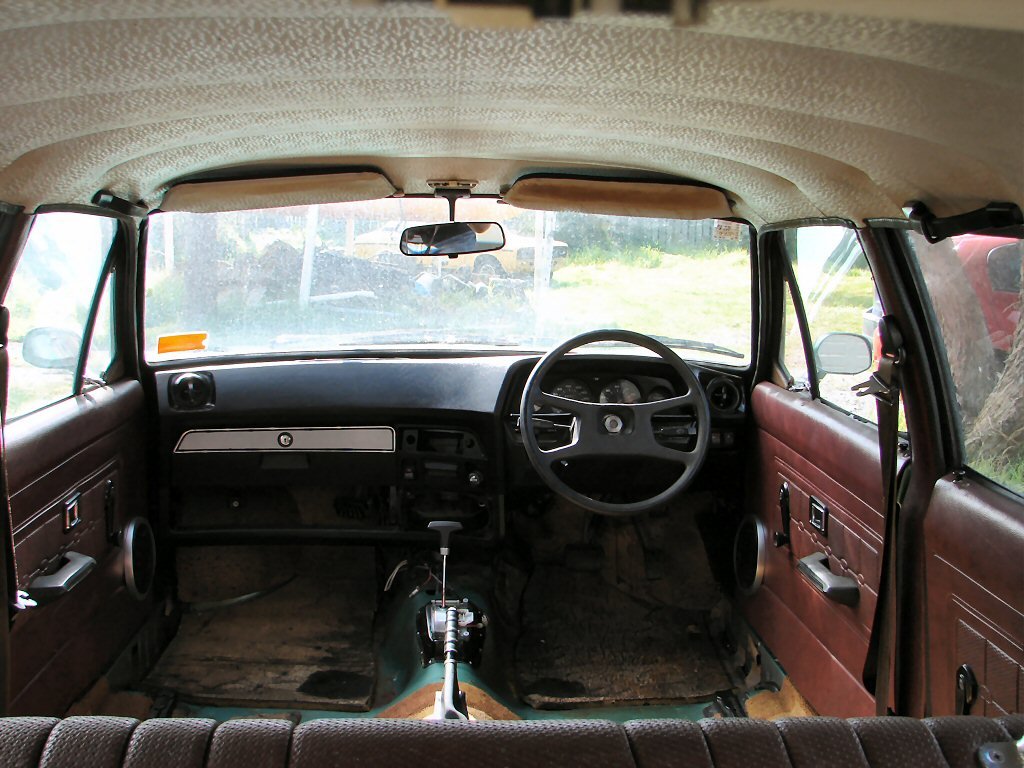
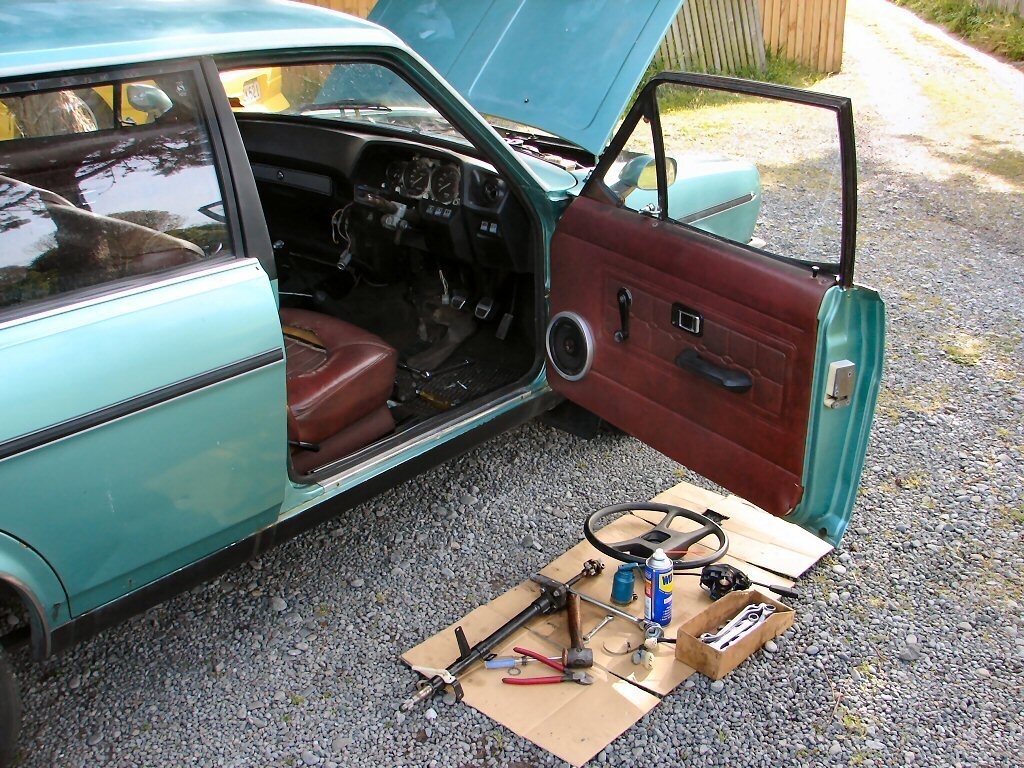
The front carpet finally got fitted - it was originally from a manual so had to be cut around the shifter which has a bigger footprint. Fortunately the console hides any bad judgement..
Yay.
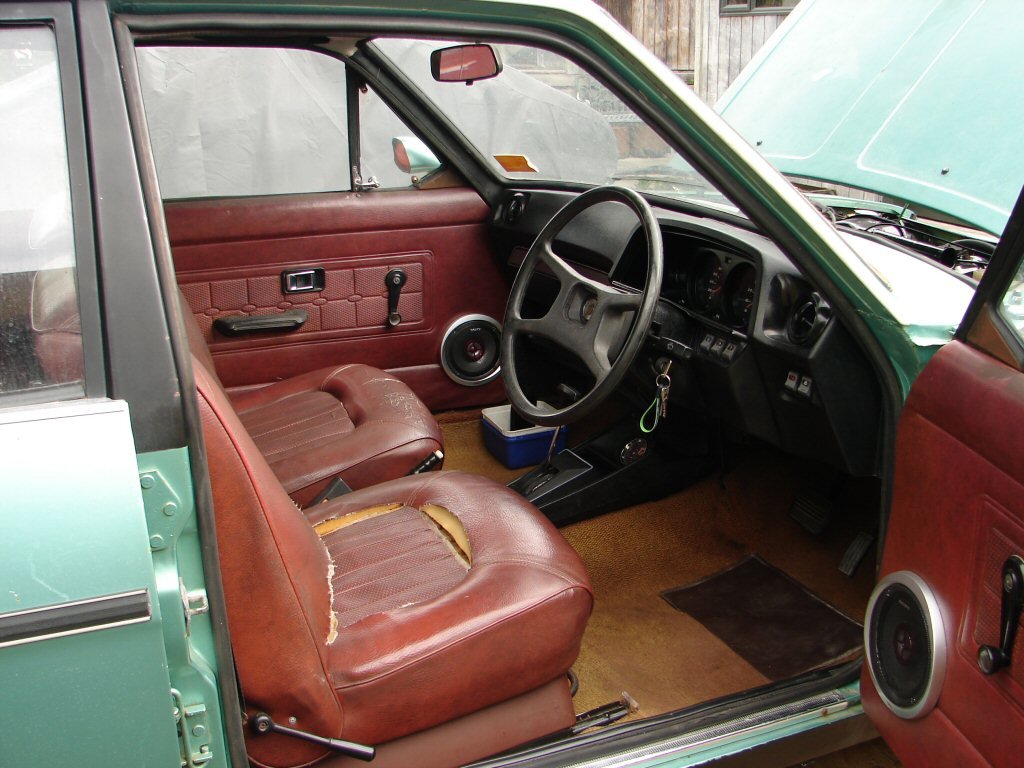
Got seats. Brilliant. Well, the seats themselves aint, but having some at all is.
Tempted to get the vinyl repaired, being as they are the right colour and all. Really comfortable to sit on, so that's a win.
Some covers would also do the job. Considering options.
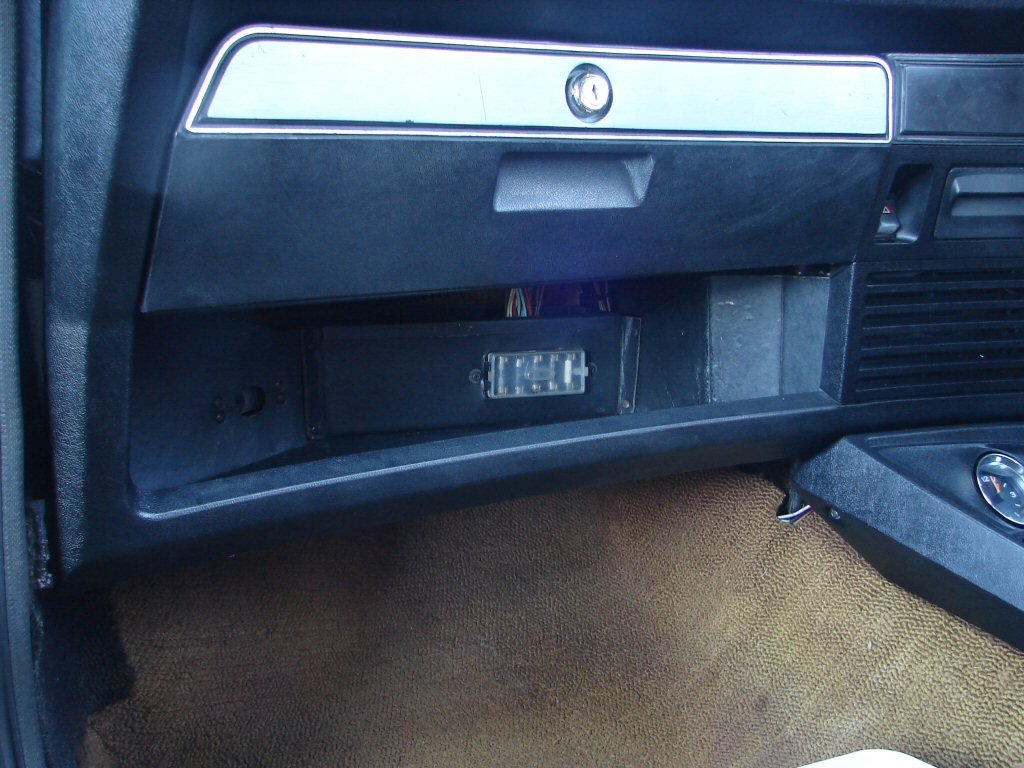
Next was the parcel tray. Bloody handy things they are too. Also contains the fusebox, in case you get bored at the drive-thru...
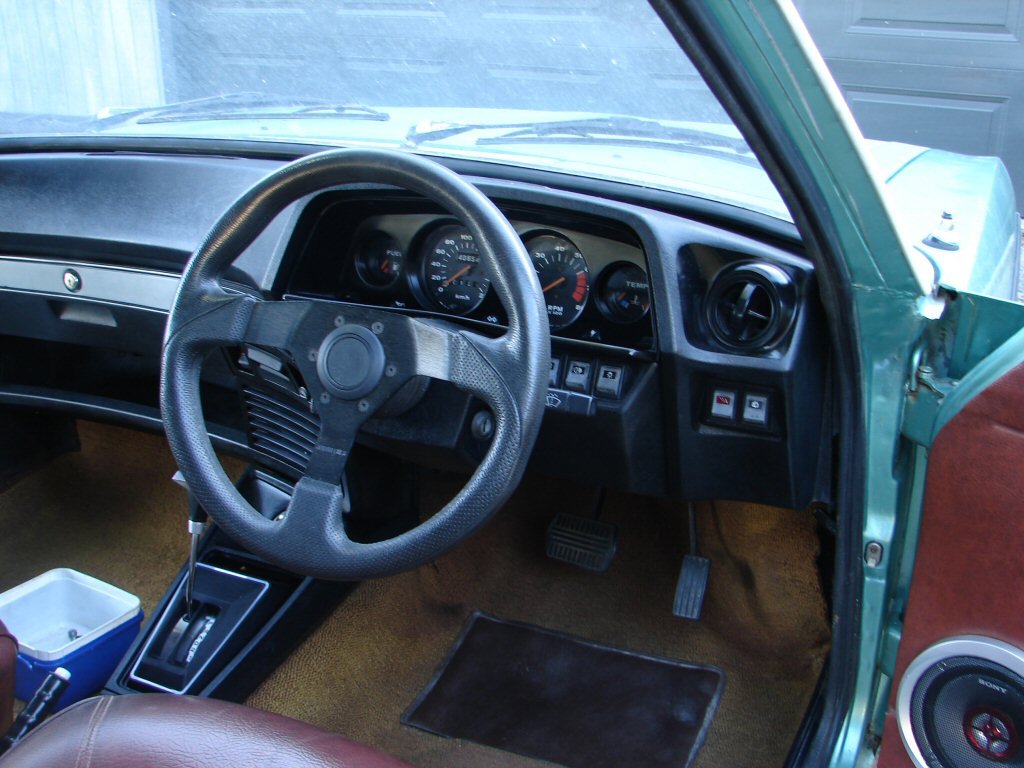
And just because I could, I fitted a well - traveled sports wheel. Its cheaper than fitting a higher geared steering rack, but magically feels like it has the same effect.
Manages to let you still see the necessary clocks as well. Life doesn't get better than this..
Next bit was to get all the various lighting doing its thing, as we are gearing up for a wof after all.
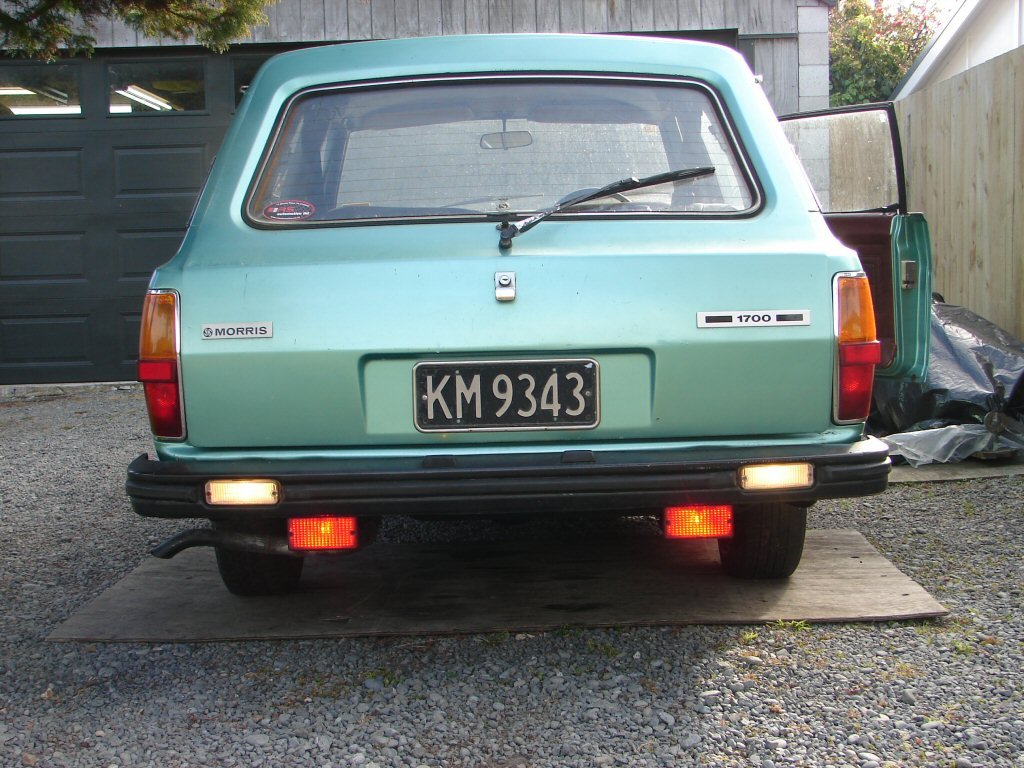
Managed to finally get both numberplate lights working at the same time. Not sure for how long though.
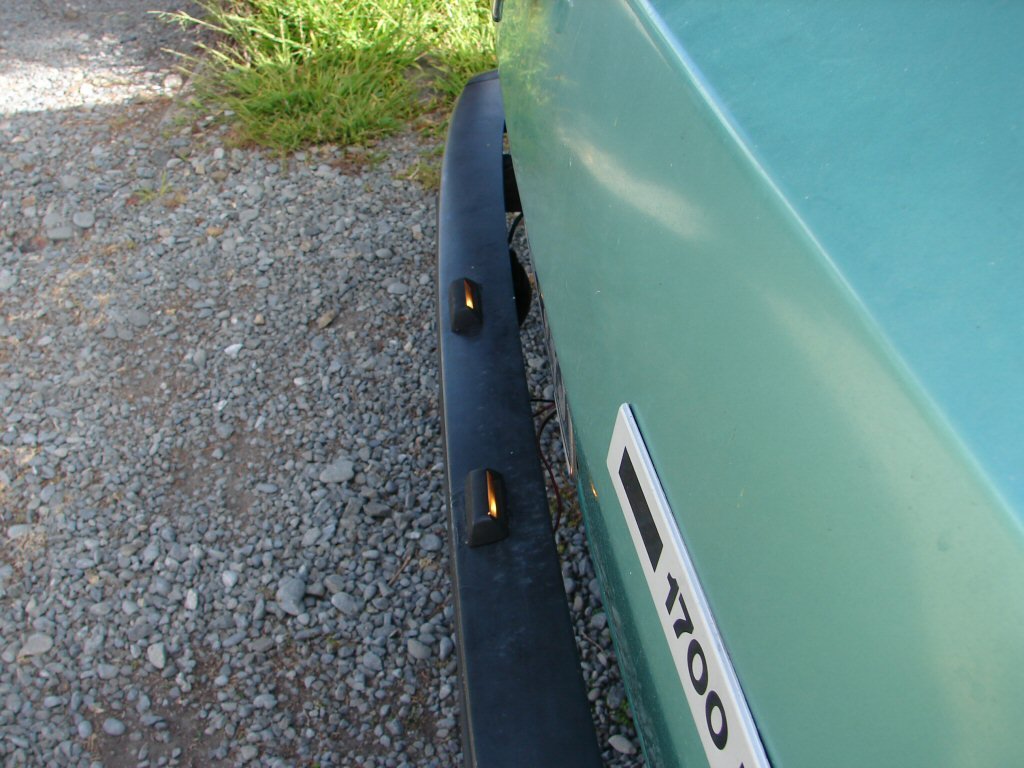
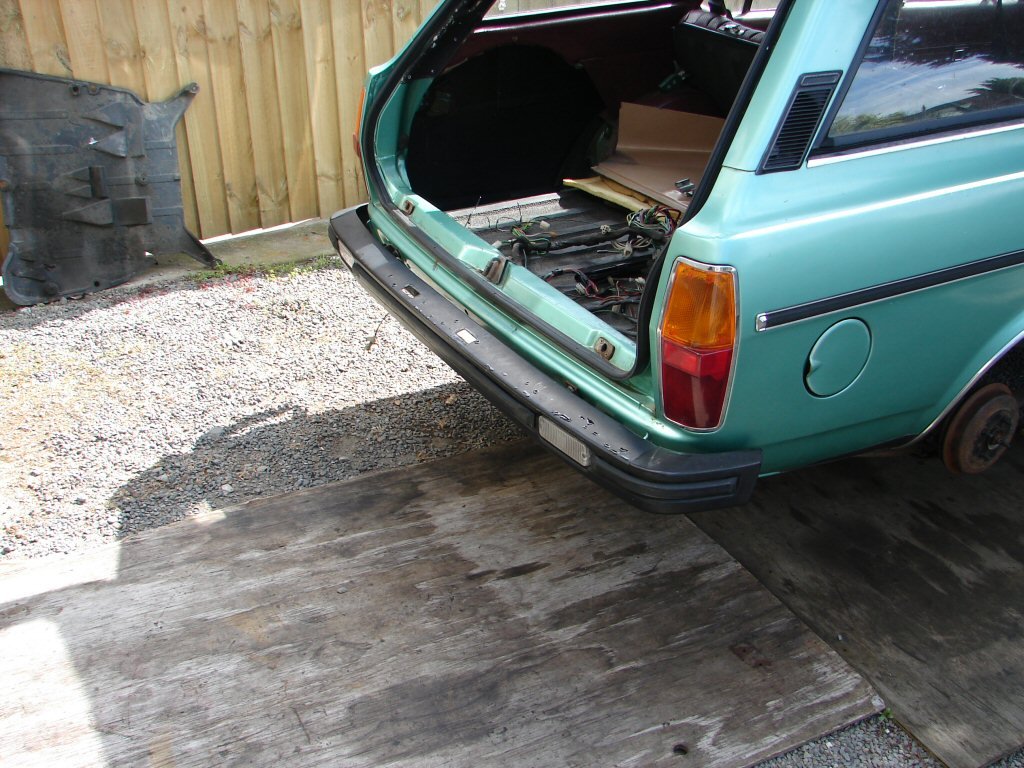
The rear bumper on these also holds the reversing lights, and a number of estates I have owned had fog lights fitted, although I never fired one in anger.
Bit over the top really, but at least they all work now.
Starting to look like a complete car now, and because I wanted to see them on it, I fitted an old set of hotwires that were factory fitment on the first Marina I ever owned.
Be nice to get them cleaned up and some fresh tyres on, but a lot of stuff would be nice I guess.
I thought better of having the fog lights. I have something else in mind...
This thing will have to go. Besides making it inaudible, it reduces in diameter about 5 times in as many inches, so all the gases have to squabble just to get out.
Hard to know what they were thinking.
Back to the lighting.
If its there it has to work, and as the plates have been on hold for 10 years I figure it will get a fair going over. One of the road lights had its plug chopped off, so that involved finding another and breaking out a soldering iron.
Been putting that off for a while. Such a lot of dicking about for small gain.
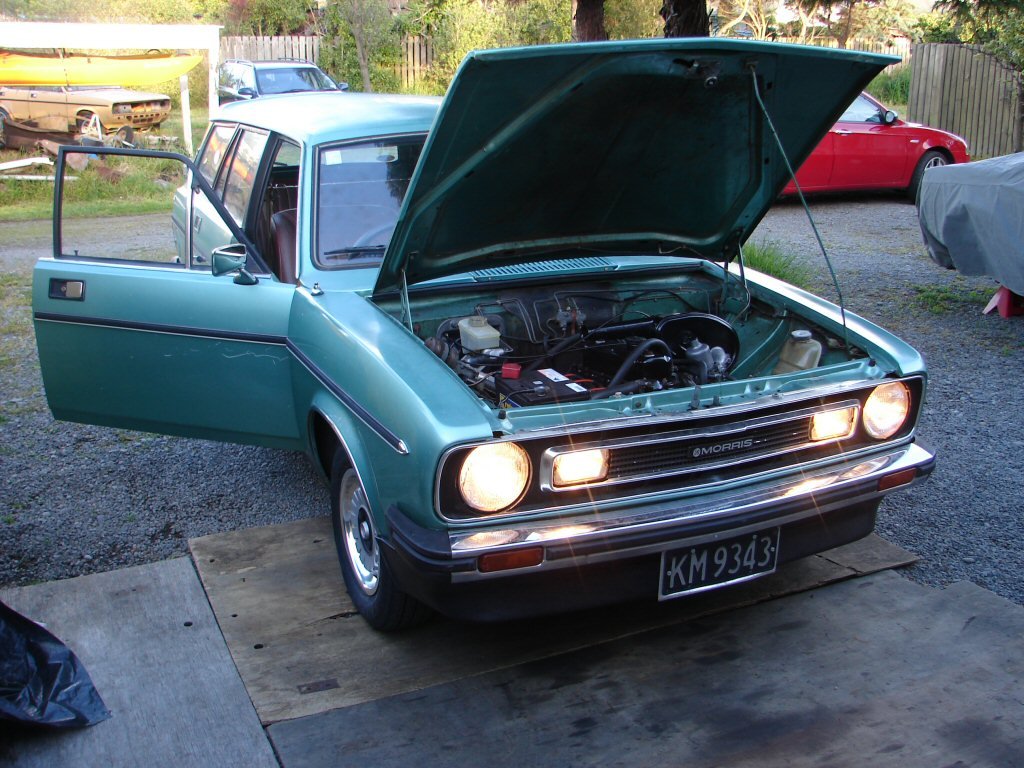
At least it got the front lit up properly for the first time.
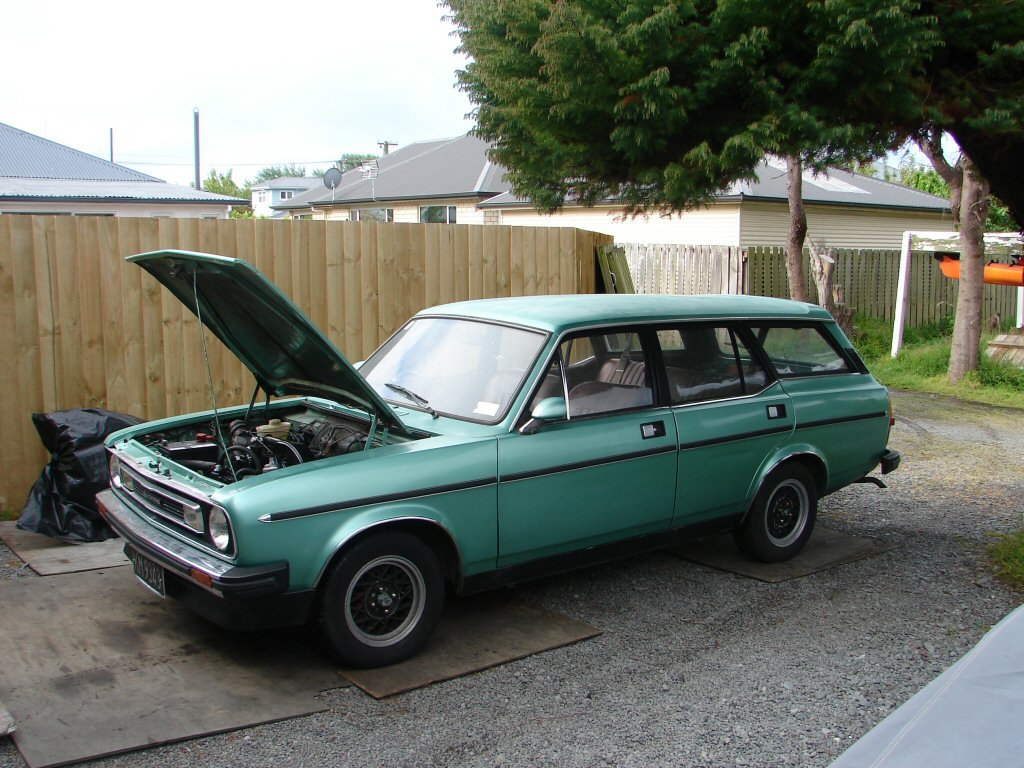
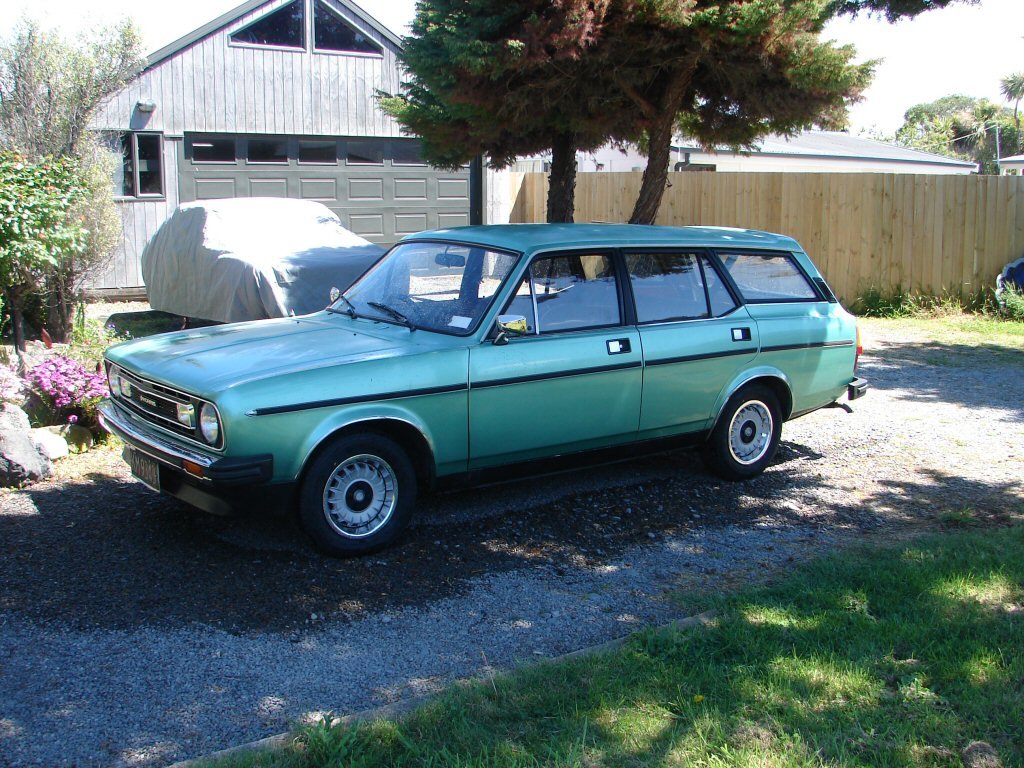
And as you have noticed, the stock wheels have finally made the cut. The new tyres mean these are the best wof candidates, so can stay on here until that happens.
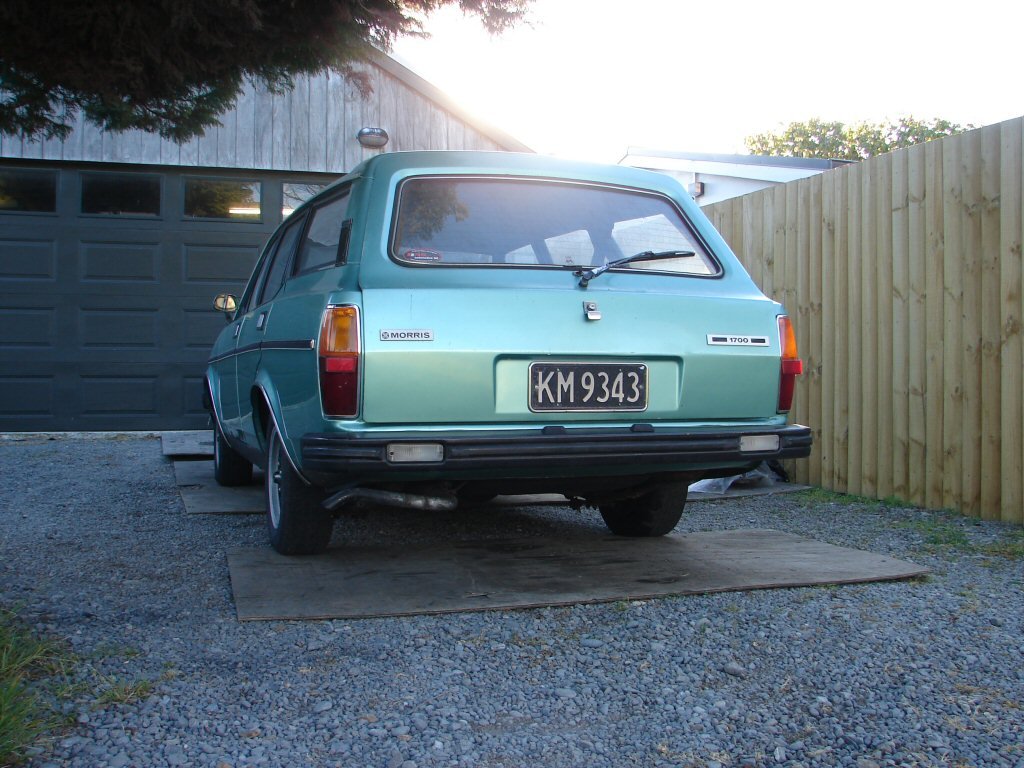
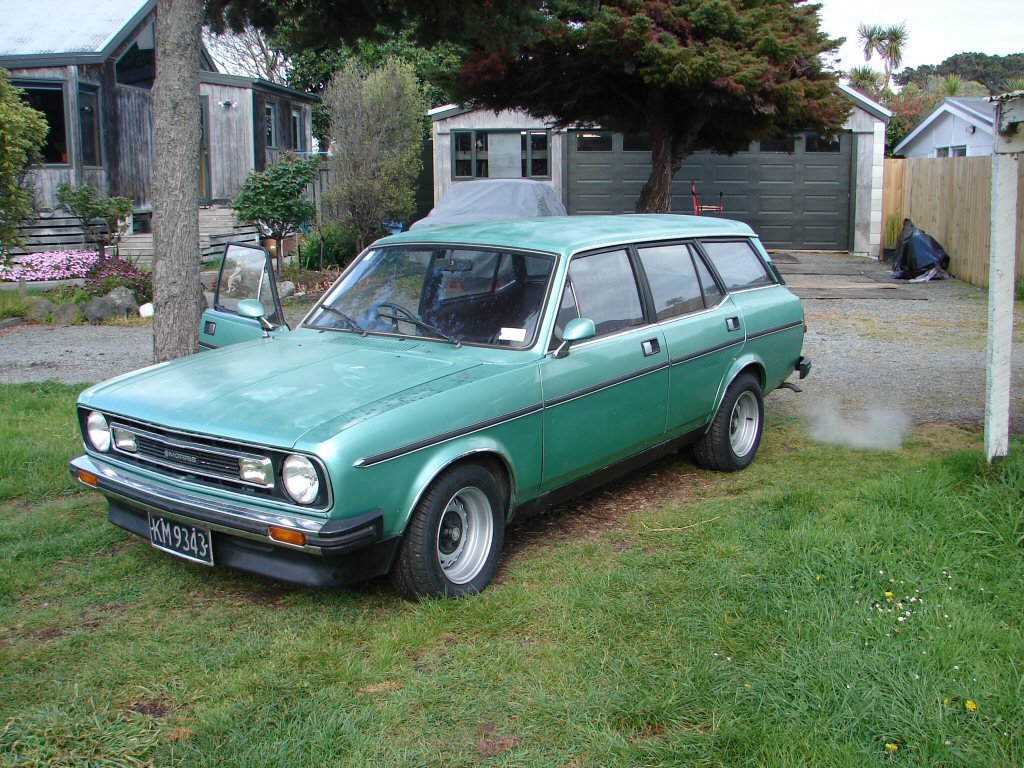
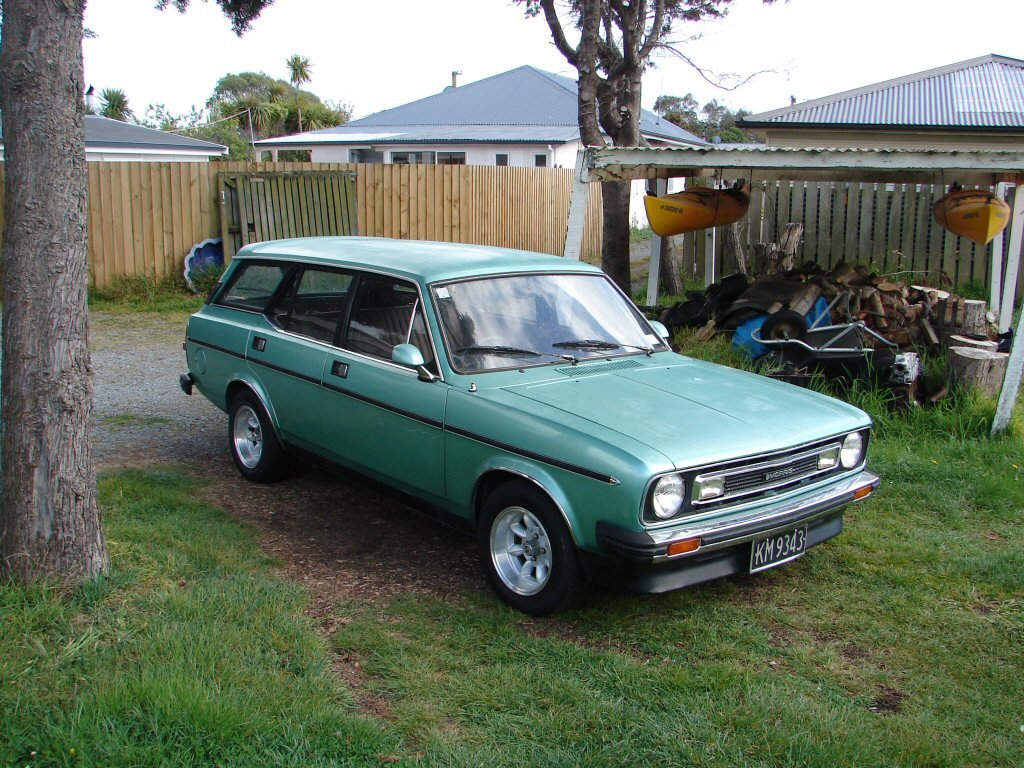
Sort of warranted another photo, so I actually washed the car for the first time.
Lawdy - it actually looks rather tidy.
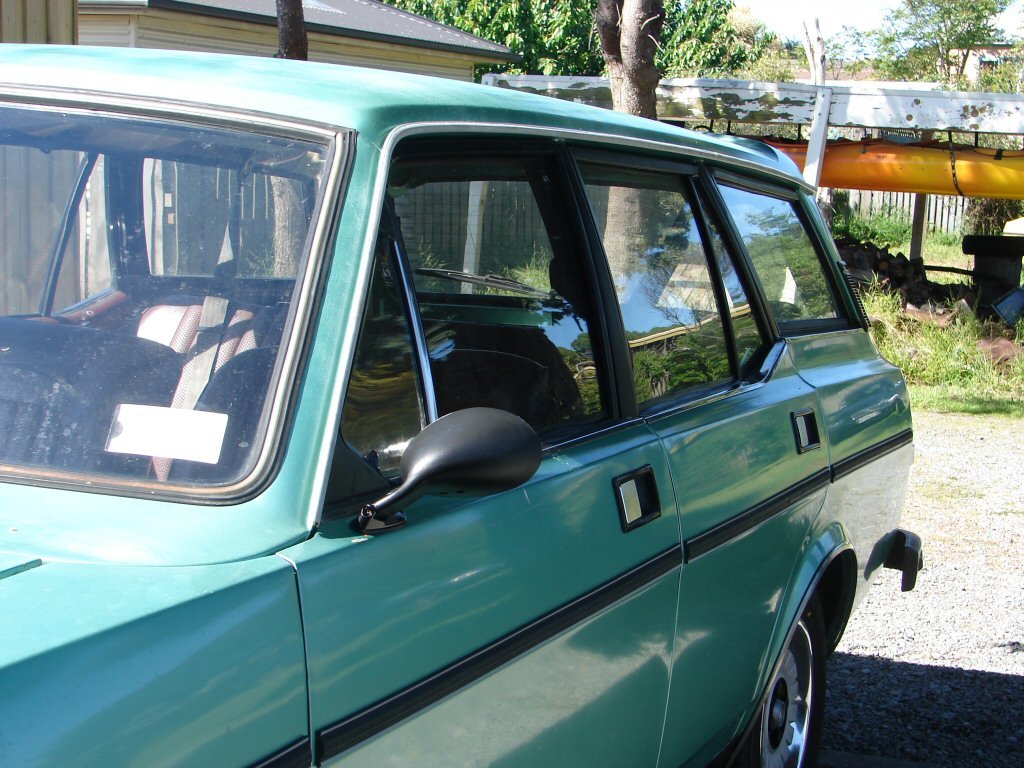
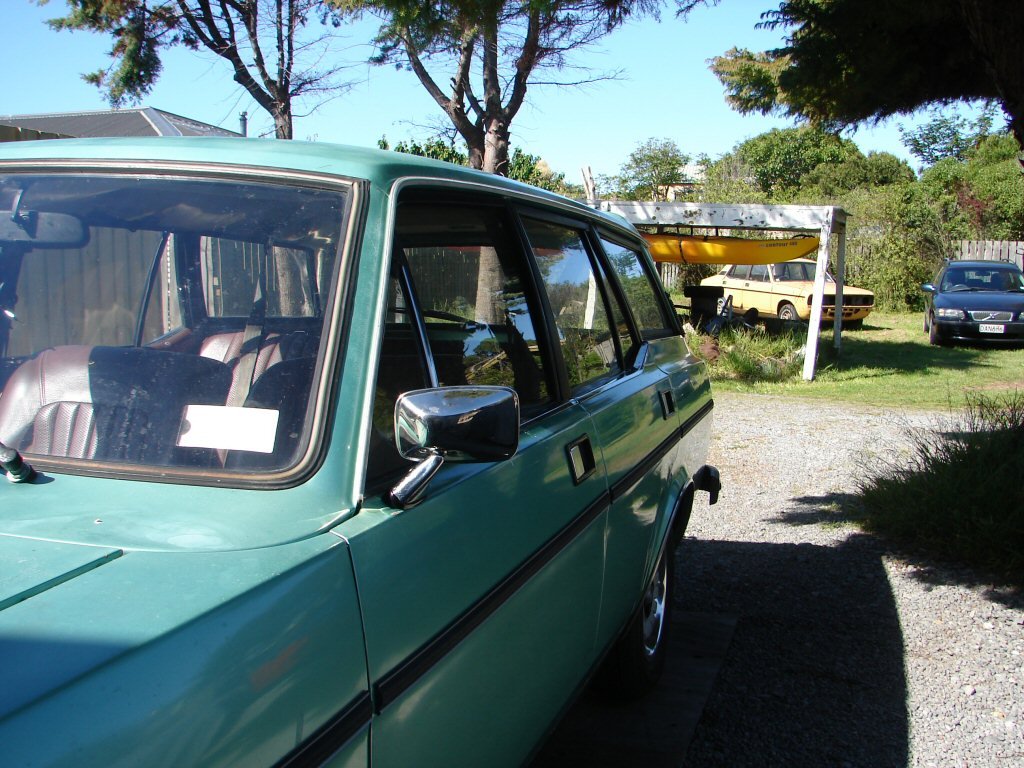
The body coloured mirrors are gone too now. They looked pretty good on the car, and the style did not look out of place, but you simply could not see anything in them, which made it all a pointless exercise.
These are the factory mirror style and still come up on Trademe from time to time. I have bought a pair that will hopefully look more like the coloured ones, but they say they could take 10 weeks from China. At least we are covered for being legal meantime.
Cheers.
-
13
-
- Popular Post
- Popular Post
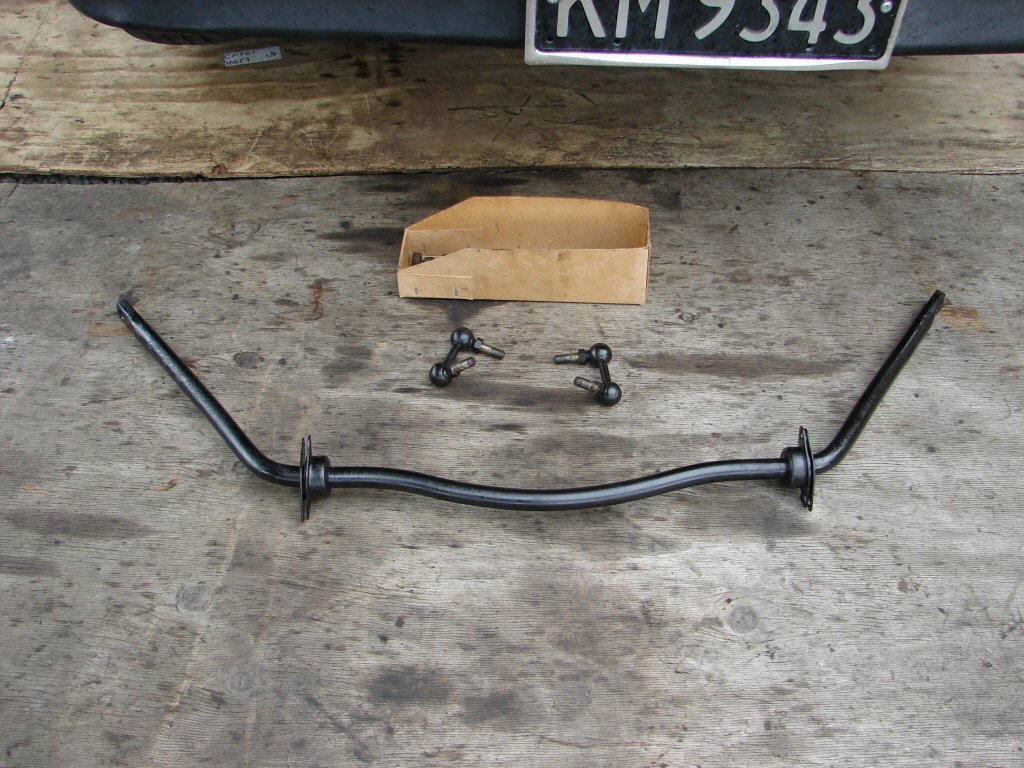
Final touches to the suspension and underside were now taken care of.
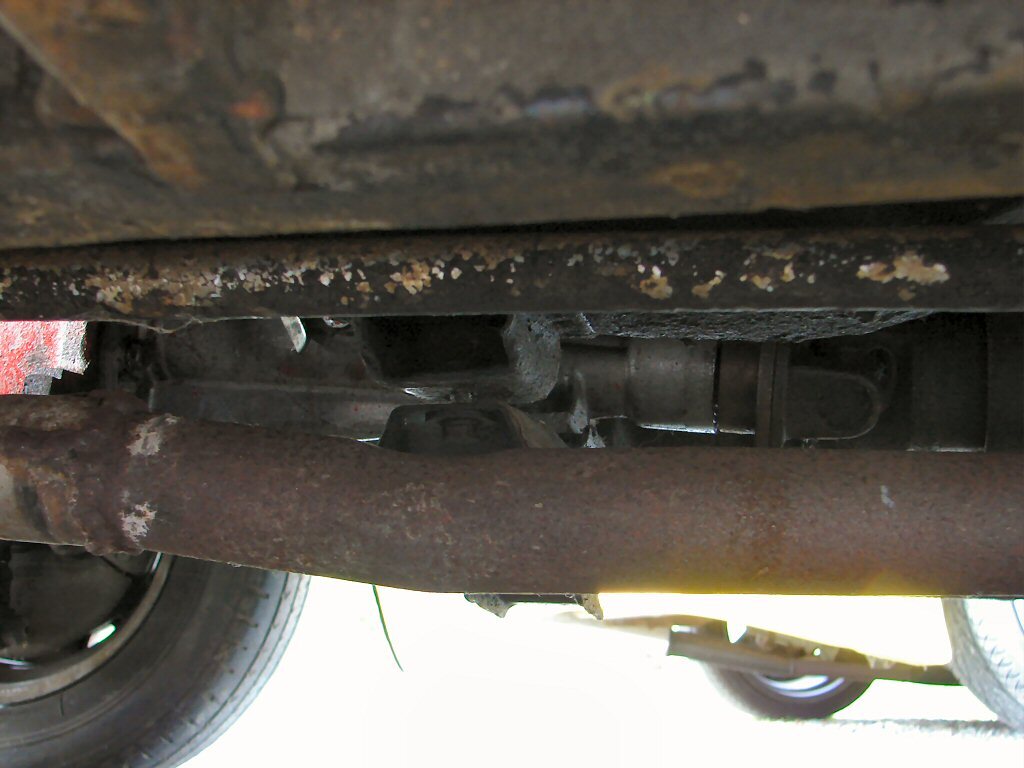
While it was an 'option' most NZ Mk3 Marinas had a huge swaybar fitted from new. This thing is 1.125" (28.5mm) so it makes all the difference in the world to cornering performance. Sedans also got a smaller one at the rear which doubled as a trailing arm arrangement, but the estate had stronger rear springs so there are no mounting points provided.
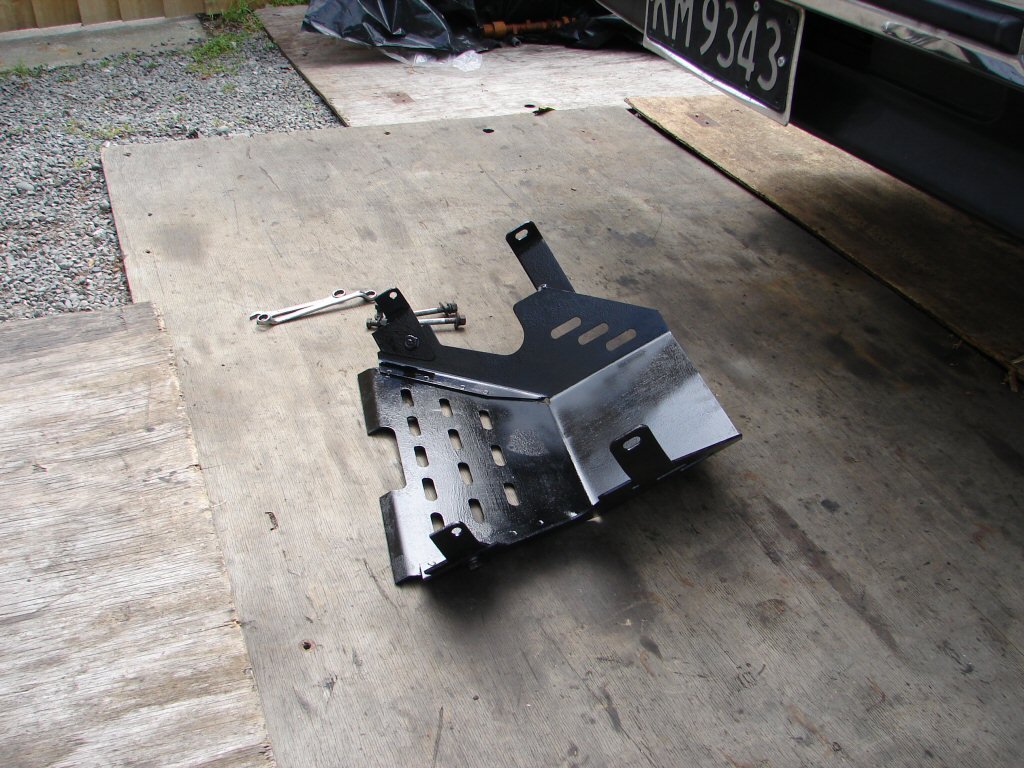
Also in the category of 'useful stuff' there was a factory sump guard.
It is made of quite sturdy plate, and in the absence of any crossmember it also helps to stiffen up the front suspension mounts a bit.
I had to modify the front mounts on this slightly, as the B series engine has its mounts in a different place to the O series this car came with, and there is a clash of locations.
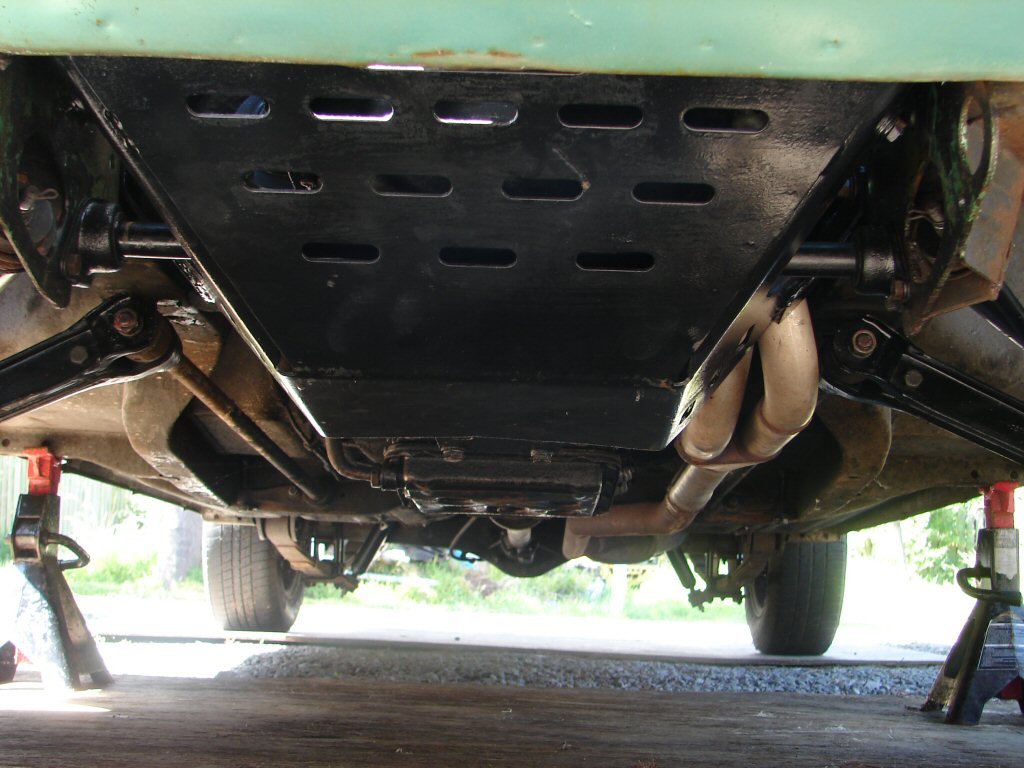
I figure this thing is worth having so I made it fit. I have in the past holed the auto sump pan on rocks, so this guard helps to deflect lumps before they make it to the auto.
All complete.
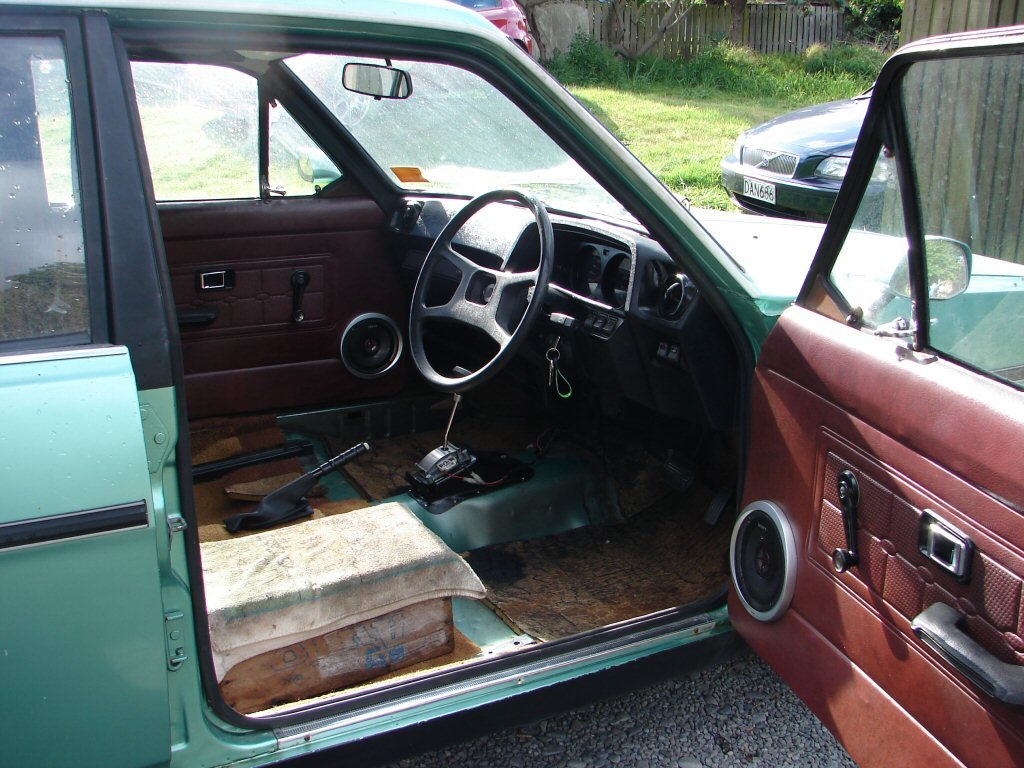
Time to do some more on the inside...
-
12
-
- Popular Post
- Popular Post
Well that was a happy thing.
After a bit of carb tuning it was much happier at idle, but I also had to retard the timing slightly. It was spot-on by strobe, but as the engine is running 11/1 the fuel is not up to it and needs to be slightly less advanced.
Despite the driving position being a bit plush I was keen to make sure everything worked as intended.
This is the steel side...
.. and this is the alloy side..
Beginning to look like something now.
-
15
-
- Popular Post
- Popular Post
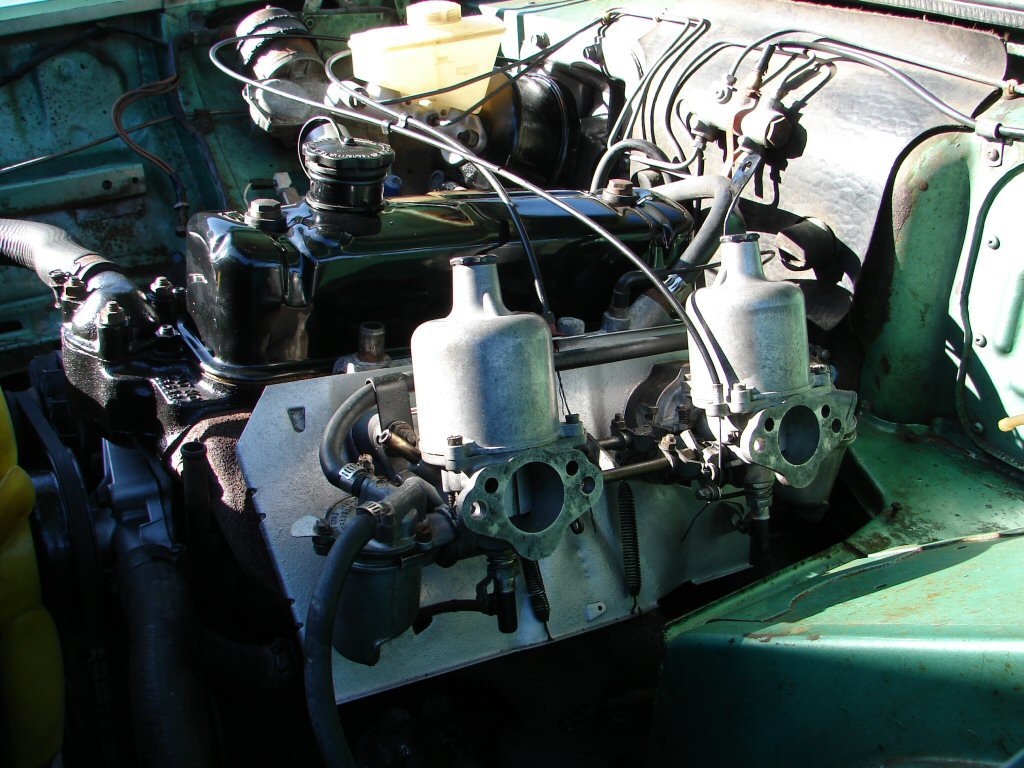
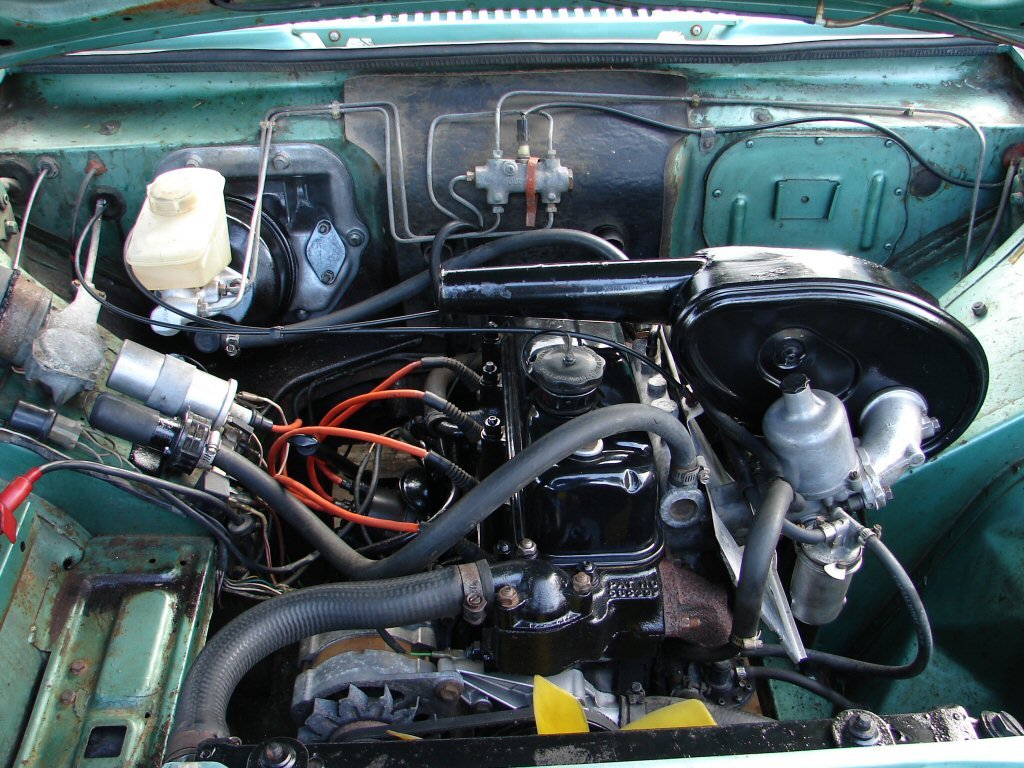
I had cleaned up the carbs and manifold bits that came with this engine, so they all got fitted looking a tad fresher...
Don't be ridiculous....
I also found a powder coated rocker cover that I knew I had stashed somewhere. Somebody went to great trouble to have it powder coated with the existing dent still in it...?
Next obvious step was to refit the aircleaner, indigenous to Marina models that got all the otherwise MGB stuff, but which rather wisely drew their air from the cold side of the engine...
The next step involved adding some functionality which this car was never equipped for.
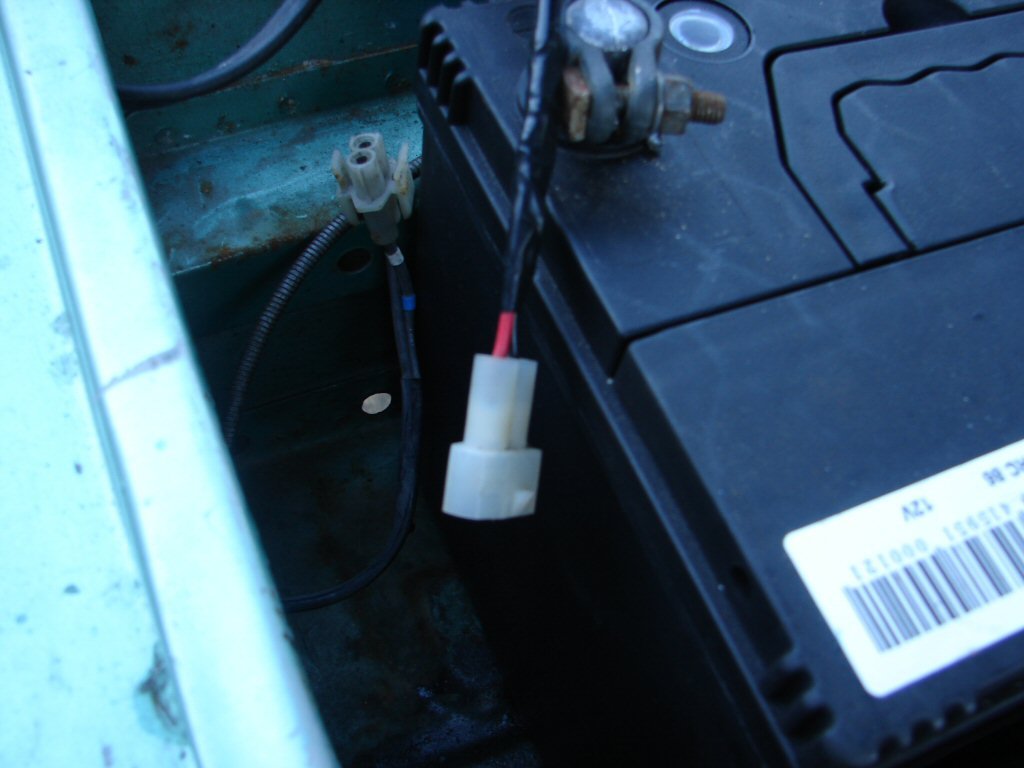
The twin carb 1800 engines had a propensity for 'running-on', due to various things, but because of this and the forthcoming US emission limits, a modification was done to ensure that fresh air was drawn into the inlet manifold at the instant the engine was turned off, to thus purge unburnt fuel, and also make the engine stop at a time it was supposed to do so.
This was achieved in a way that was both elegant and clumsy. A relay was fitted which received power when the ignition was turned off. However, the relay was not earthed unless oil pressure was still present, achieved by extra contacts on the oil pressure light switch. The relay operated a solenoid valve which allowed air to be delivered to the inlet manifold, thus delivering the cure for life, the universe, and everything.
To demonstrate I shall insert here the final video of this engine running in its previous body prior to the transplant. The water pump was entirely karked and made a hideous noise, but the engine was otherwise responsive and healthy as I knew it to be. Pay attention to how it stops.
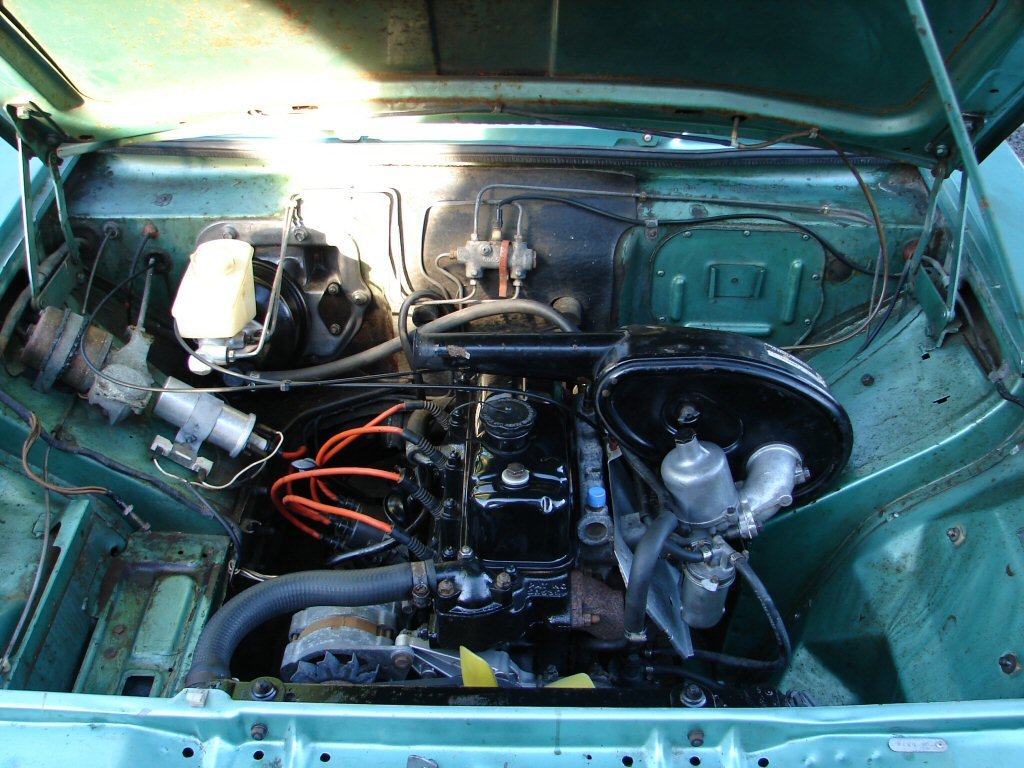
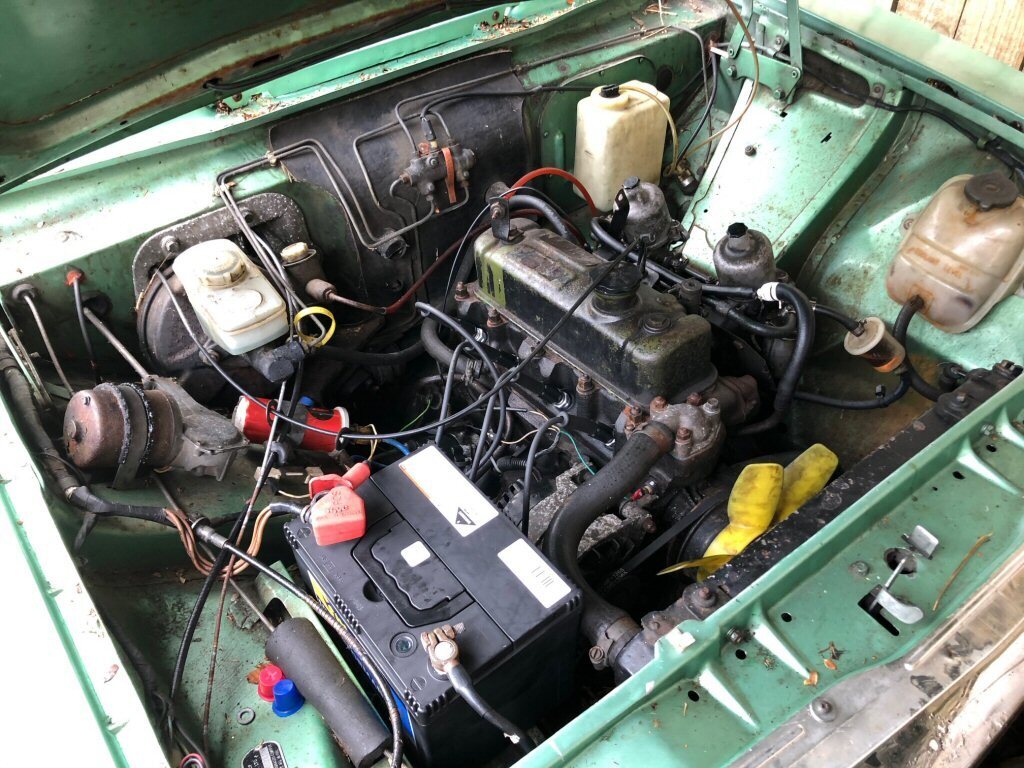
With a manual transmission you can drop the clutch and force a stall when the engine runs on, but with an auto that is not an option. The cure worked very well indeed. This same technology would need to be installed in this car. Besides some plumbing this would require a different ignition switch, extra wires in the wiring loom to the engine bay, and the relay and solenoid themselves, plus the weirdy oil pressure light switch. All of which it got. As can be seen here if you know what you are looking at. Both items are on the left inner guard above a starter relay that I install as a matter of course, but the large diameter hose through which air is delivered to the inlet manifold is obvious.
So that should take care of the niceties.
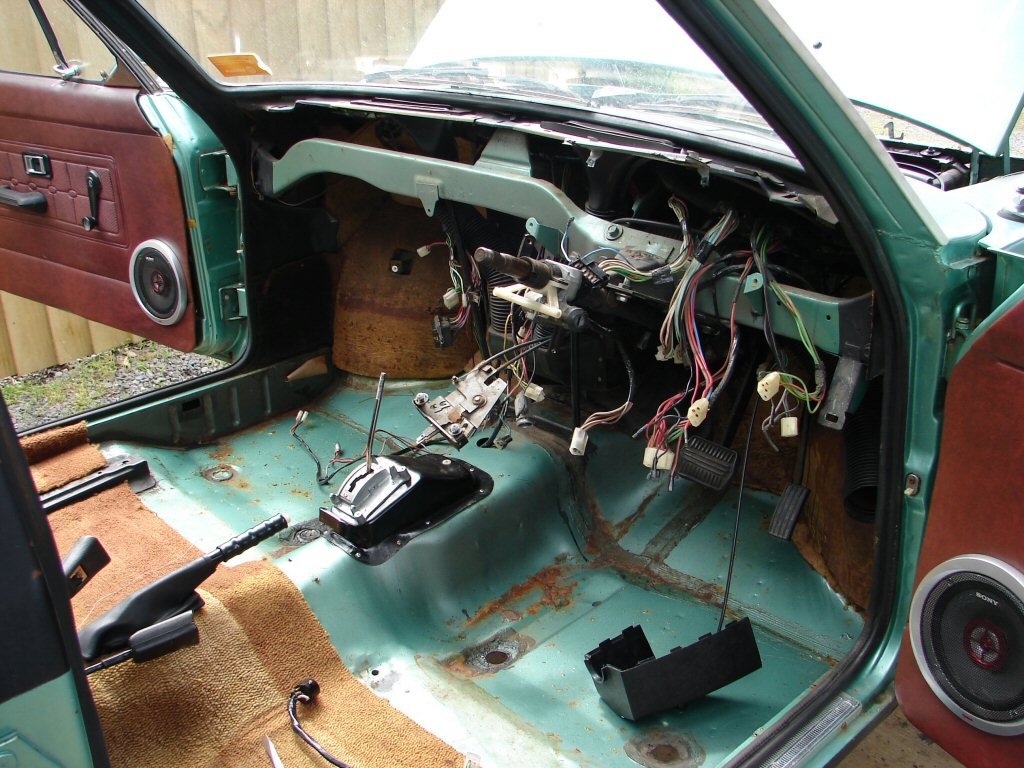
I had now to add wiring behind the dashboard, which is a mega-bitch from an access point of view, and I had already discovered that the dashboard was broken, missing a mounting on the left side which allowed the parcel tray to collapse, so as I had several (5) complete dashboards on hand, I decided to rip this one out and replace it.
This would make access to the wiring a cinch, but would also involve a great deal of work.
Sigh...
Well, it certainly did. But there are always advantages in providing a clean palette as a base working platform.
I was able to swap the necessary ignition switch wiring for the solenoid by using another already equipped connector, plus I was able to address all the shortcomings of the old dashboard before fitting the new one. This then began to happen...
As I was in an electrical mode, I decided it was time to fit a rear bumper, which contains various necessary lights. The car did not have one fitted when I got it, but the previous owner had obtained one and included it. The correct bumper would have been chrome, whereas this one was black chrome. I thought I had a chrome example I could fit, but found an interesting thing - the Estate bumper was wider than those from a sedan.
Bother.
I figured I would fit the black one for the time being, as there was some urgency to make this car road legal.
Having made progress here, there was only one logical next step.
Would it go..?
-
14
-
Inspecting the front suspension revealed some early stuff fitted here as well. Seems this car was built with parts from several. Perhaps the donor car also supplied the twin-carb 1800 engine as this would have originally had the 1700 O series.
The early suspension had rubber bushes in the shock absorber arms, which form the top arms of the suspension, so that allows a bit of vagueness in the steering. There was also a camber change at some point, but as I could not detect any difference in the dimensions of this setup otherwise, I decided to reuse the uprights but convert them to later spec by fitting the later top swivel joints which have a tapered pin that fits to the shock absorber arm, so I would also need to fit a different pair of shocks.
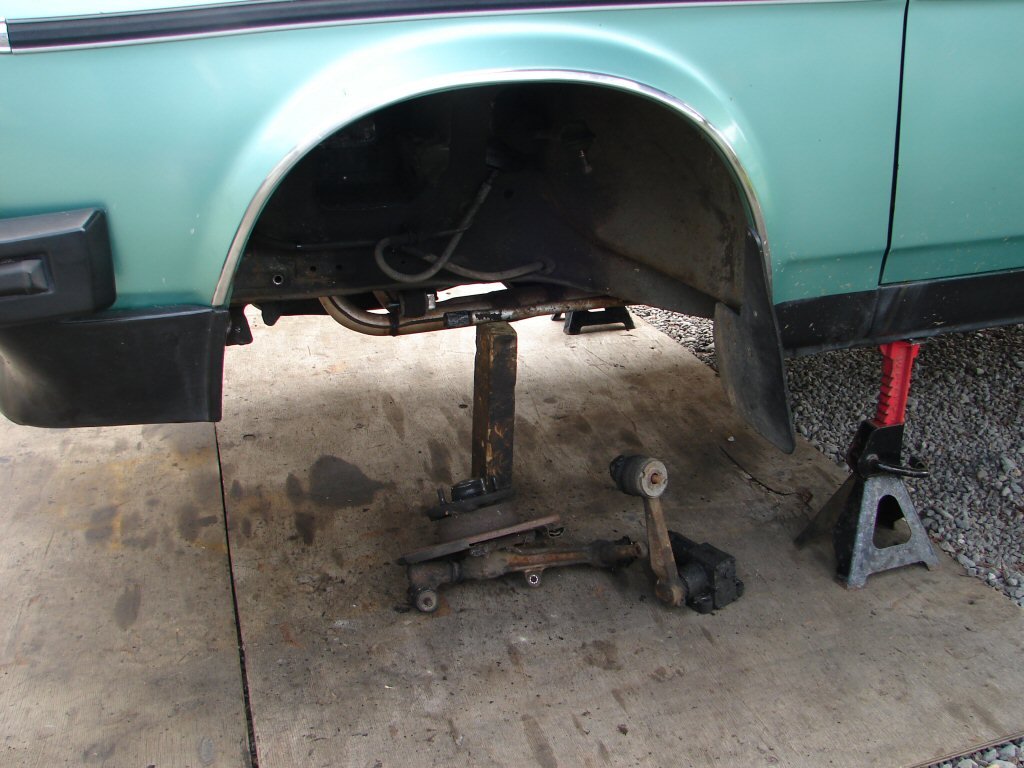
First step to rip it all out then..
Doesn't take long, although some parts were rusted together so I just left them that way.
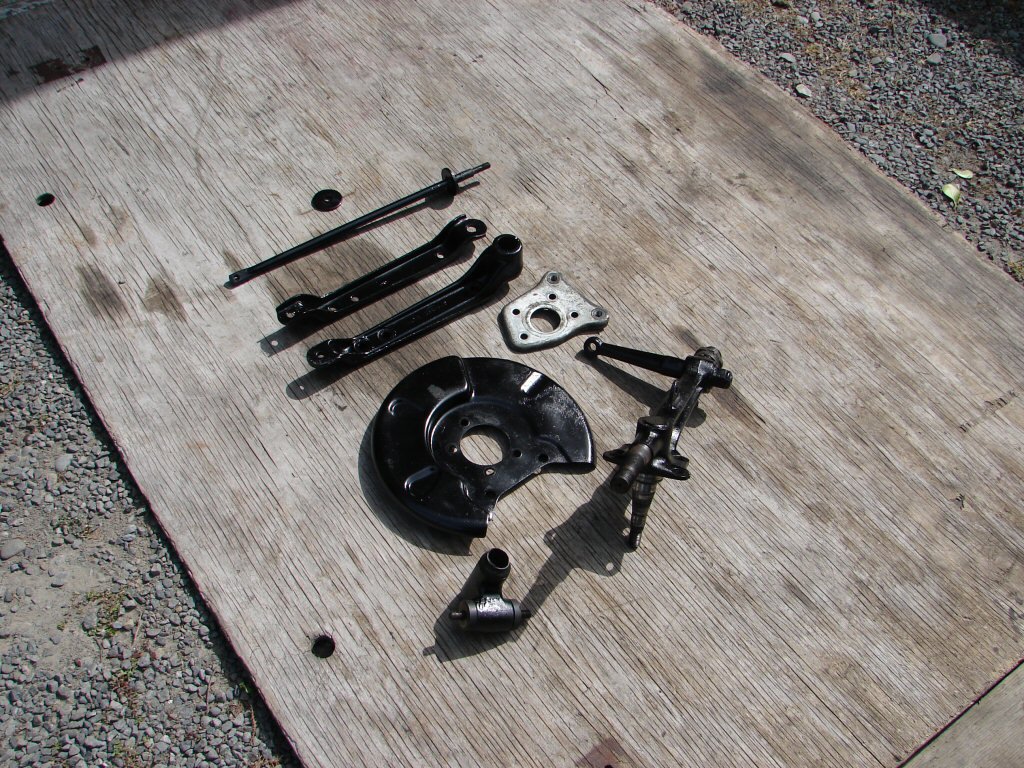
What does take the time is cleaning all the crappy bits and painting them. There is a trunnion at the lower end of the upright which need regular greasing, but they are prone to letting all the grease go to the loosest bit and starving the other, so when you are assembling them is the ideal time to get grease everywhere.
The trunnions screw onto a huge thread on the upright, so the steering turns the two parts up and down the thread, albeit only about 1/4 turn. This is why the grease is important.
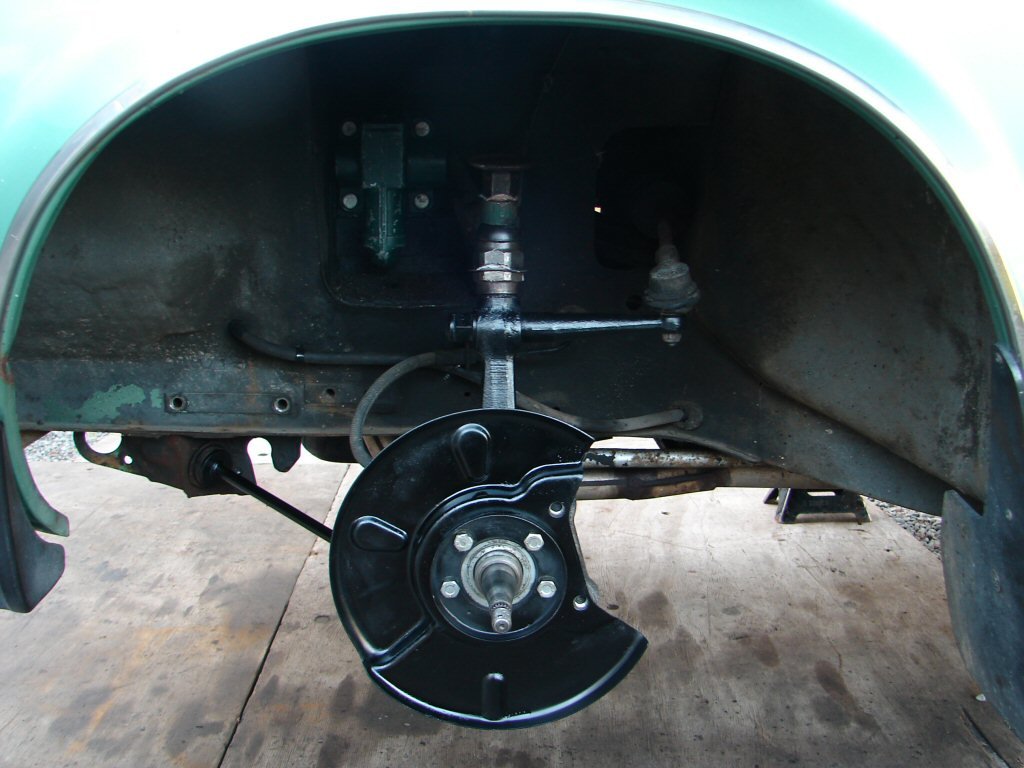
The swivels were removed from some spare uprights and bunged onto these, and a pair of shocks found that were nice and clean, which makes me suspicious, but they would do for now.
The brake calipers were problematic, but I got one working properly and found another to replace the one that wouldn't. That allowed me to bleed them all up and get the car back on its wheels so I could turn it around when needed.
I had fitted some 2" lowering blocks when the replacement rear end went in, so I dropped the front a similar amount. This is as simple as fitting the lower arms onto the torsion bar in a different position on the spline. The torsion bar is the silver thing just above the exhaust. Crude but effective.
Another couple of things completed then. If you don't go through absolutely everything you miss the bit that is going to give you trouble...
-
9
-
-
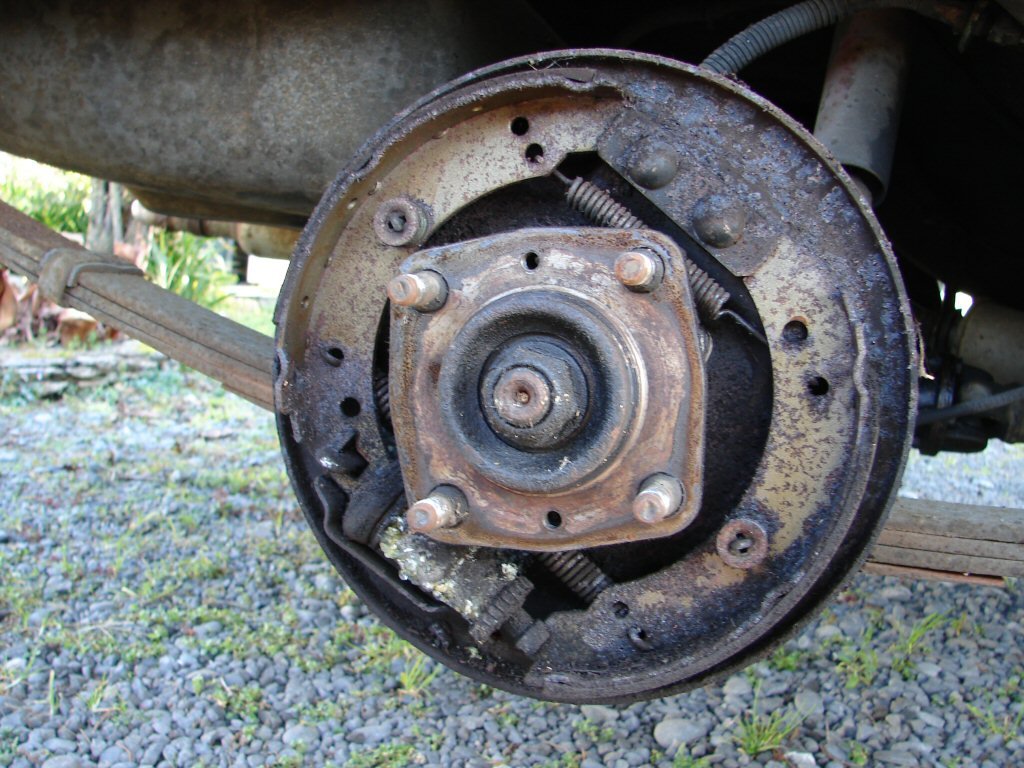
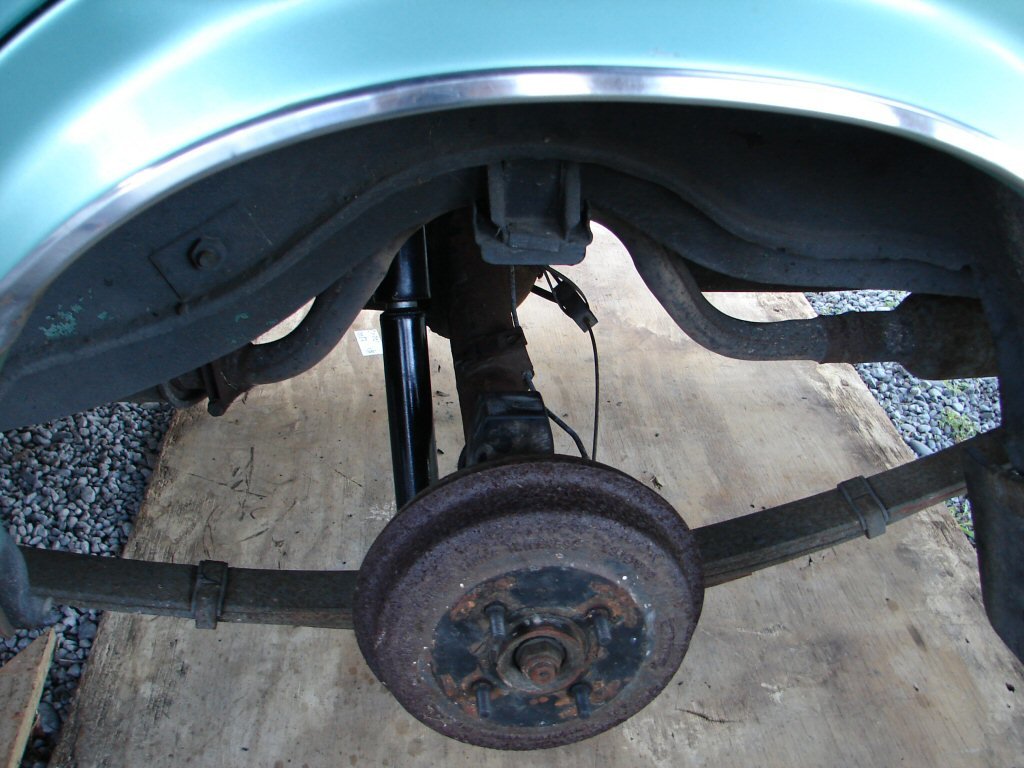
I had noticed the rear brakes were dragging a bit when pushing the car around the yard, and the handbrake lever was a bit naff, so I replaced that while the carpet was out, but it made no difference.
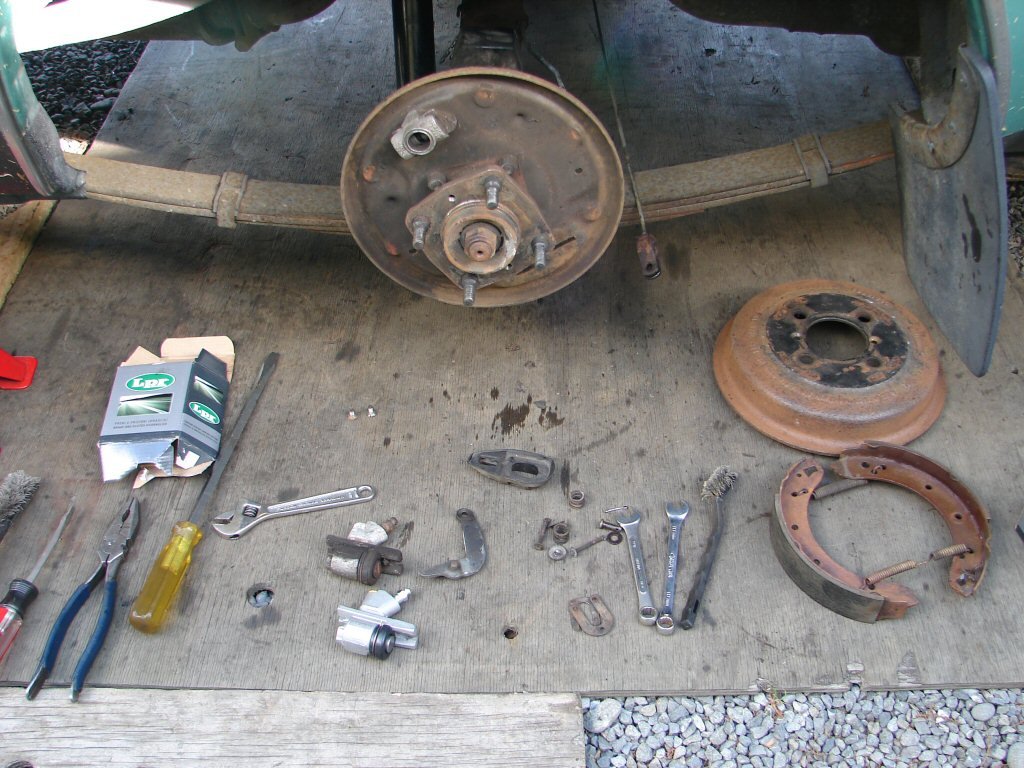
I attempted to back off the adjusters but there were none, so I plucked a drum off to find there had been an earlier rear end fitted which had the 'auto-adjusting' (hohoho..) setup, which doesn't.
As there was a good rear end of the proper type hanging around I fitted it along with a new pair of shocks.
As this one had been out of service for a while the wheel cylinders were bound to be seized up, so I stripped it all out, cleaned it and fitted new cylinders.
Some I had prepared earlier...
That all went as planned and the handbrake now worked as it should.
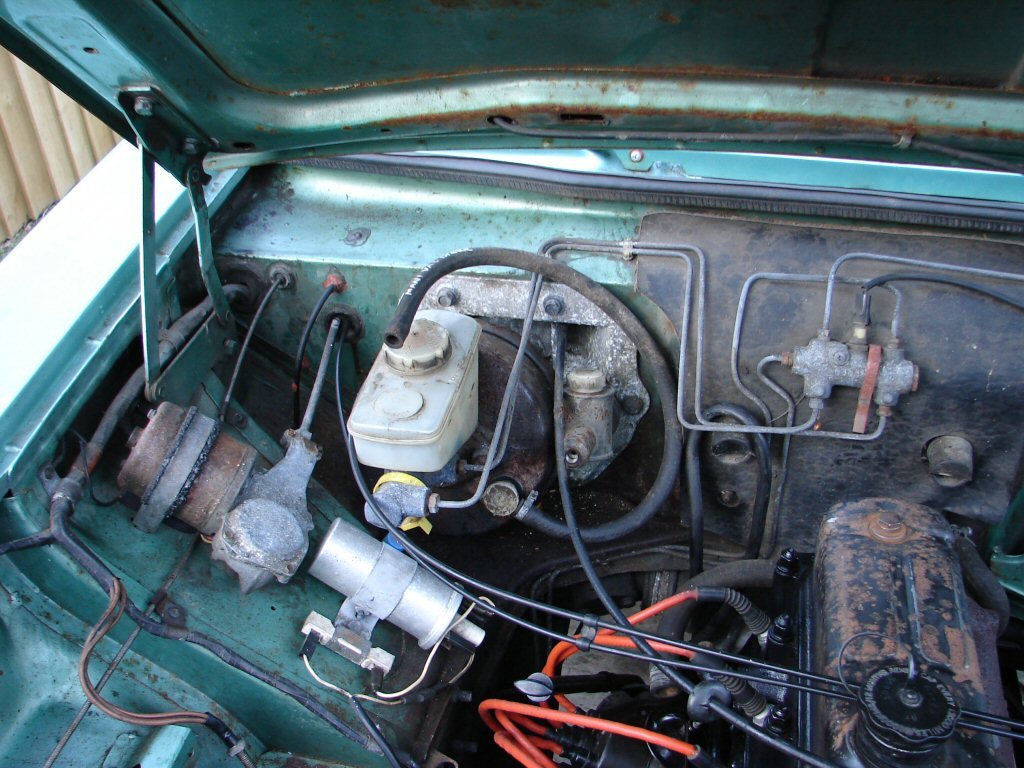
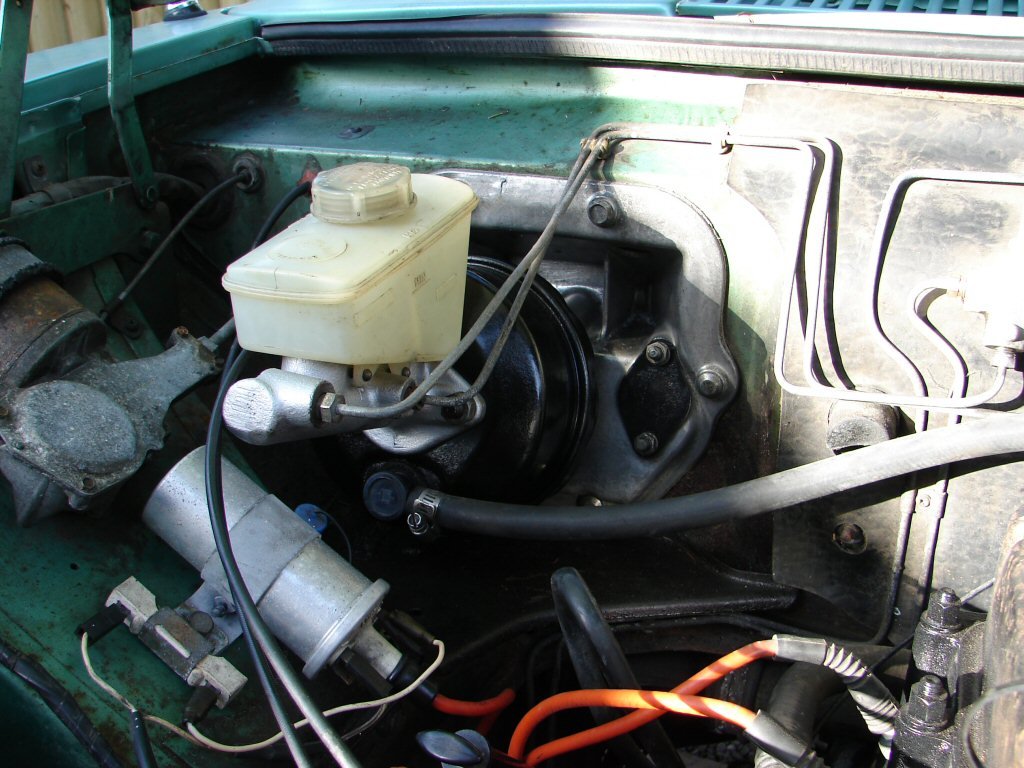
The pedal box was a 2 pedal type as befit a manual gearbox, so it would need to come out and be replaced by the setup that came with the auto.
Being alloy the housings always corrode and look manky, especially as I live near the beach. I stripped the new lot, wire brushed the housing and gave it a coat of clear to keep the air off it. The master cylinder got wire brushed as well and some silver wheel paint while the booster got engine paint. Great stuff you get in cans these days.
Should do the job.
Not much point in attempting to bleed up the hydraulics as the front suspension and brakes are also going to need checking out first.
-
6
-
-
- Popular Post
- Popular Post
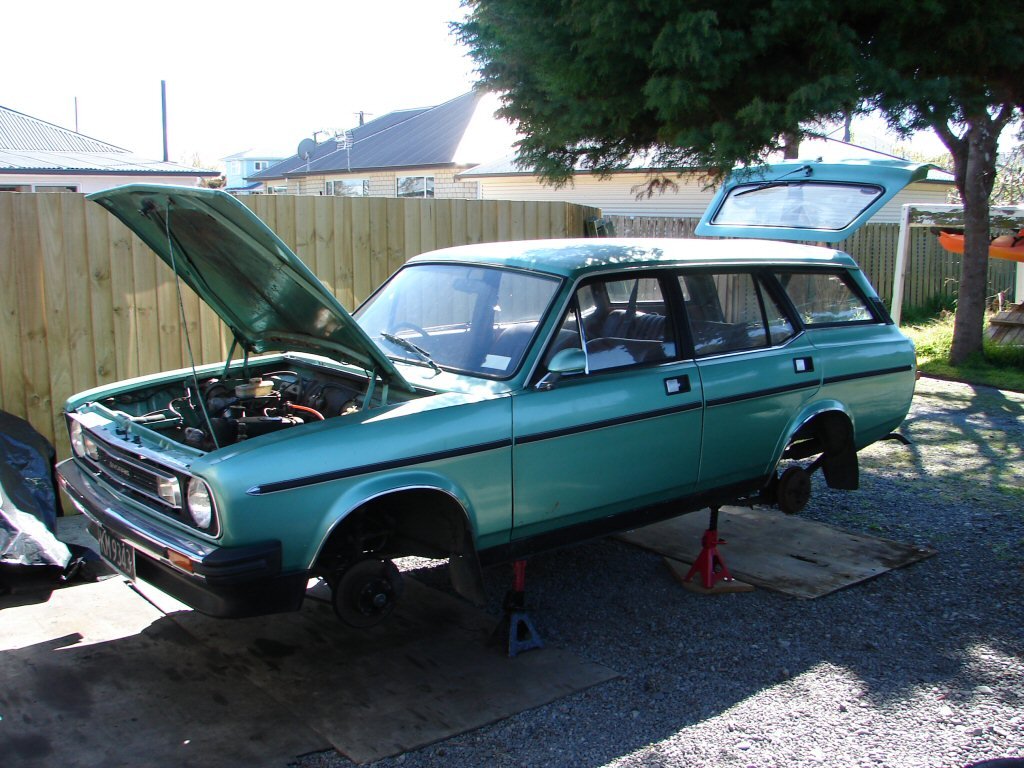
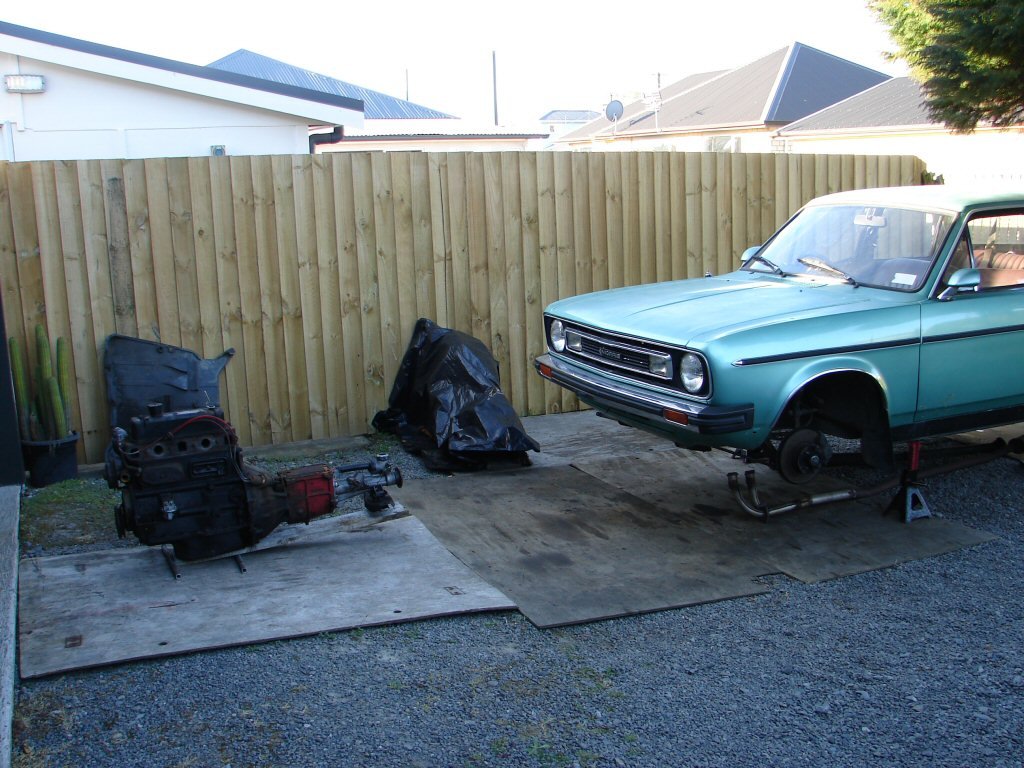
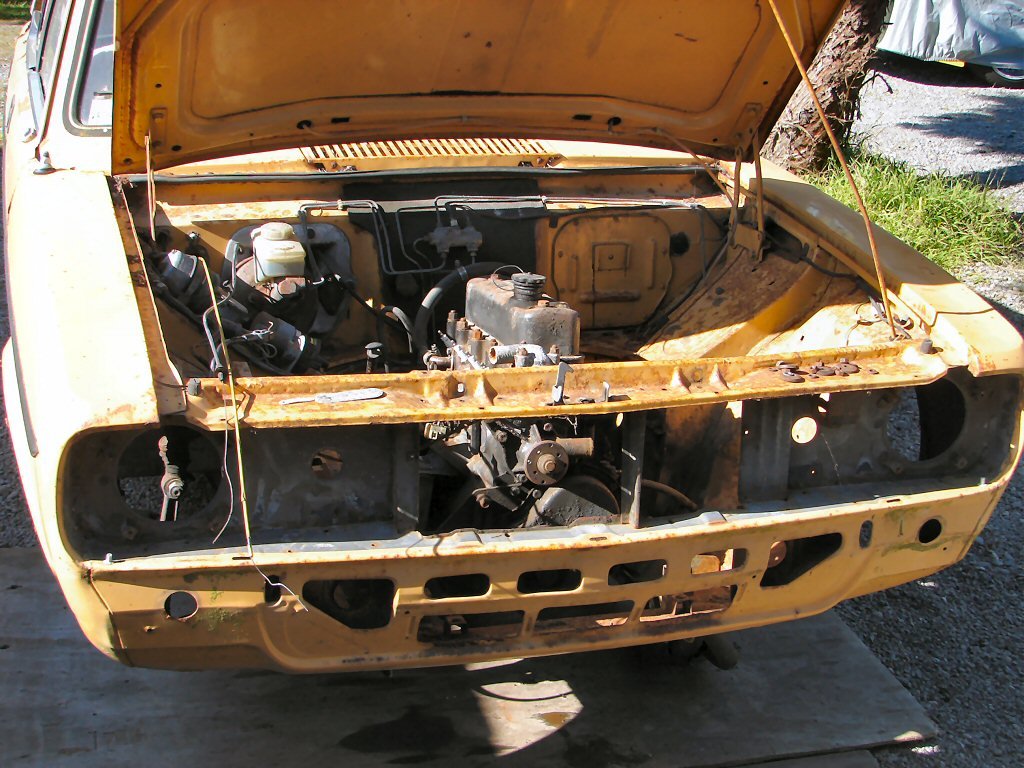
The engine got its dulux overhaul, and the failed water pump was removed.
The estate was moved to the working space and its engine/gearbox dropped out.
So now we have two engine/gearboxes to deal with. Whoopee.
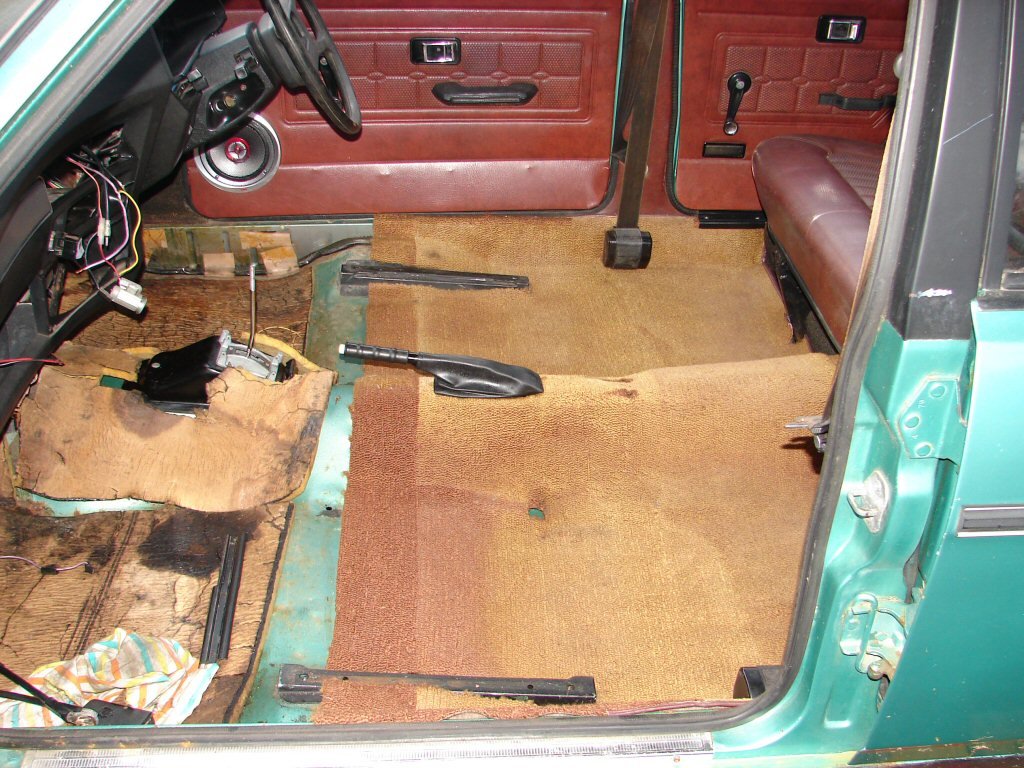
Before the swap can take place the car needs to be changed from manual to auto, so all the carpets come out. As the carpets have in some way been treated to look matte black they were destined for the tip anyway.
I had some carpets from a similar car stored so the rear set got fitted while the auto shifter was installed.
A few wiring mods and the swap could now go ahead. I cleaned the engine bay and stripped other bits that would require dealing to.
The engine and gearbox were now lifted into place and bolted up, and the propshaft refitted.
Major part of plan completed.
Minor part of necessary work completed...
-
13
-
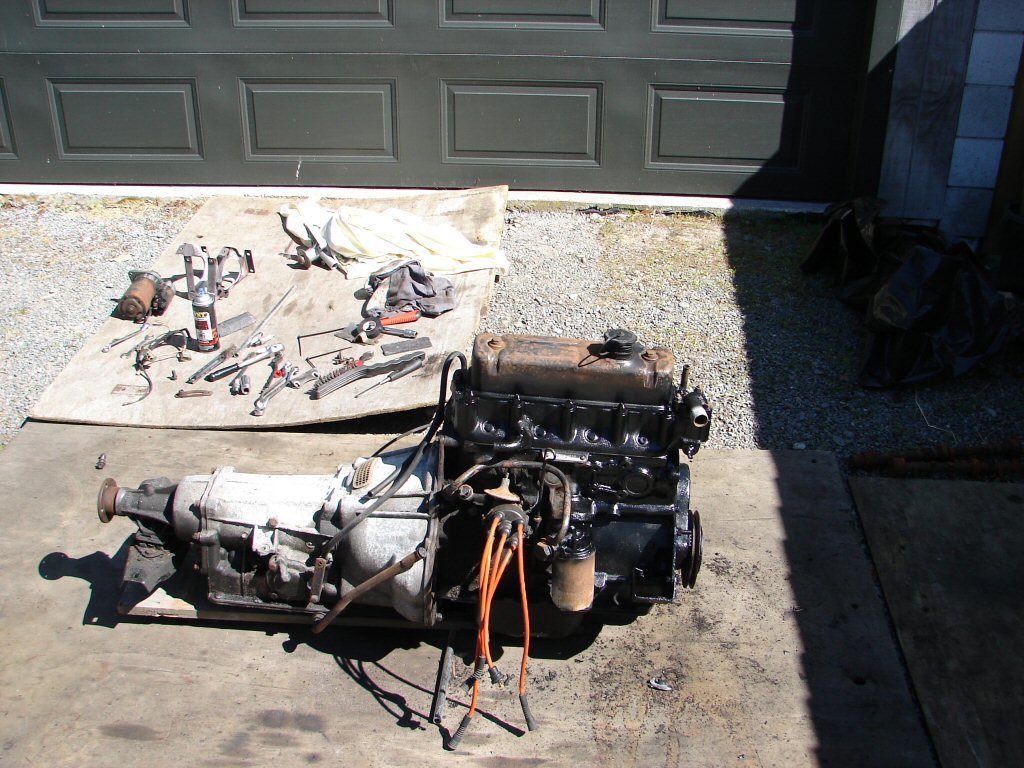
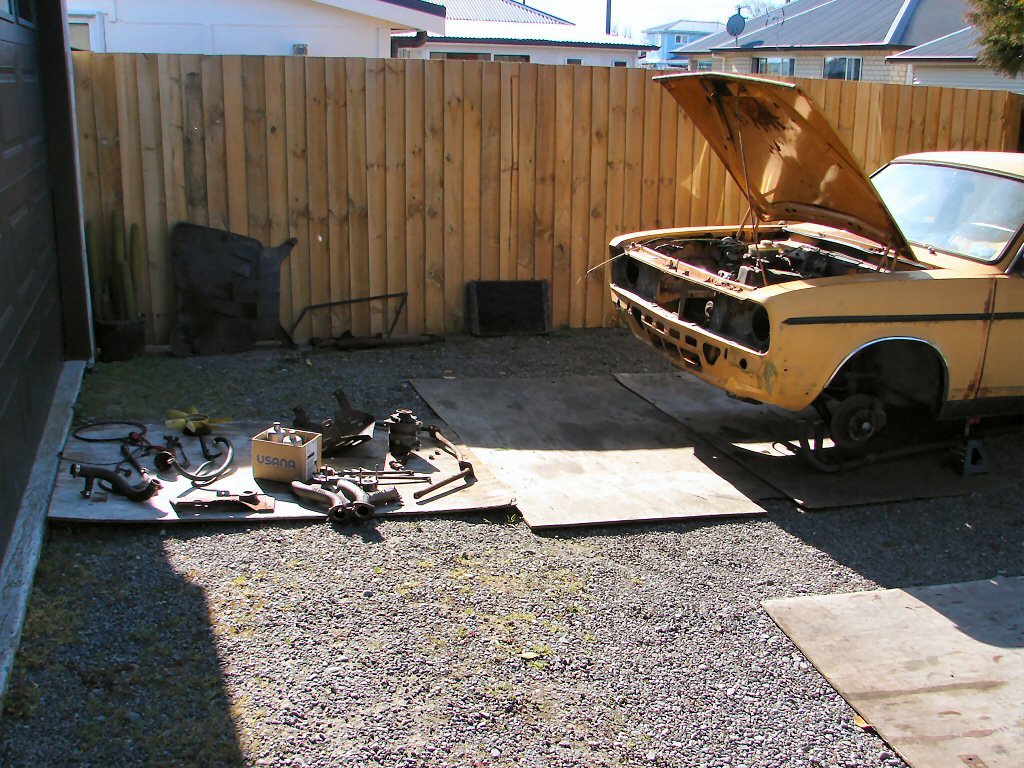
It takes a whole lot longer to remove all the ancillary bits of an engine than it does to remove the dang engine.
I try to keep things in groups, so I will be able to find all the manifold nuts/bolts when I next need this manifold again, for example. Sometimes it works.
Got this thing looking good.
Took a few years on the lawn...
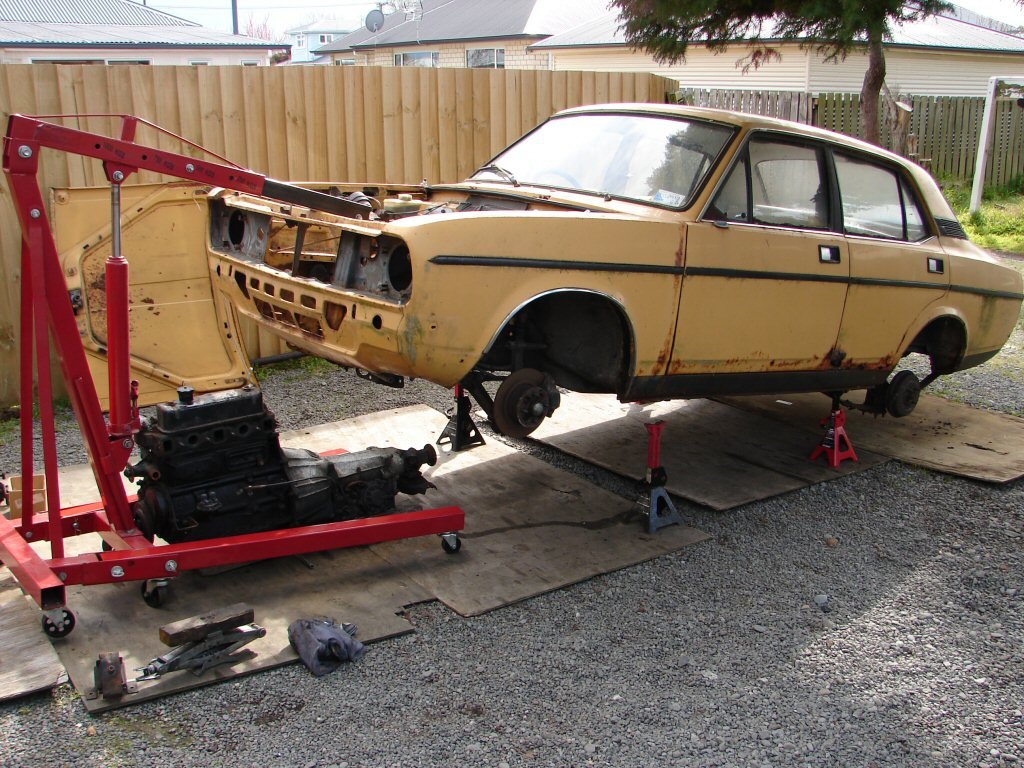
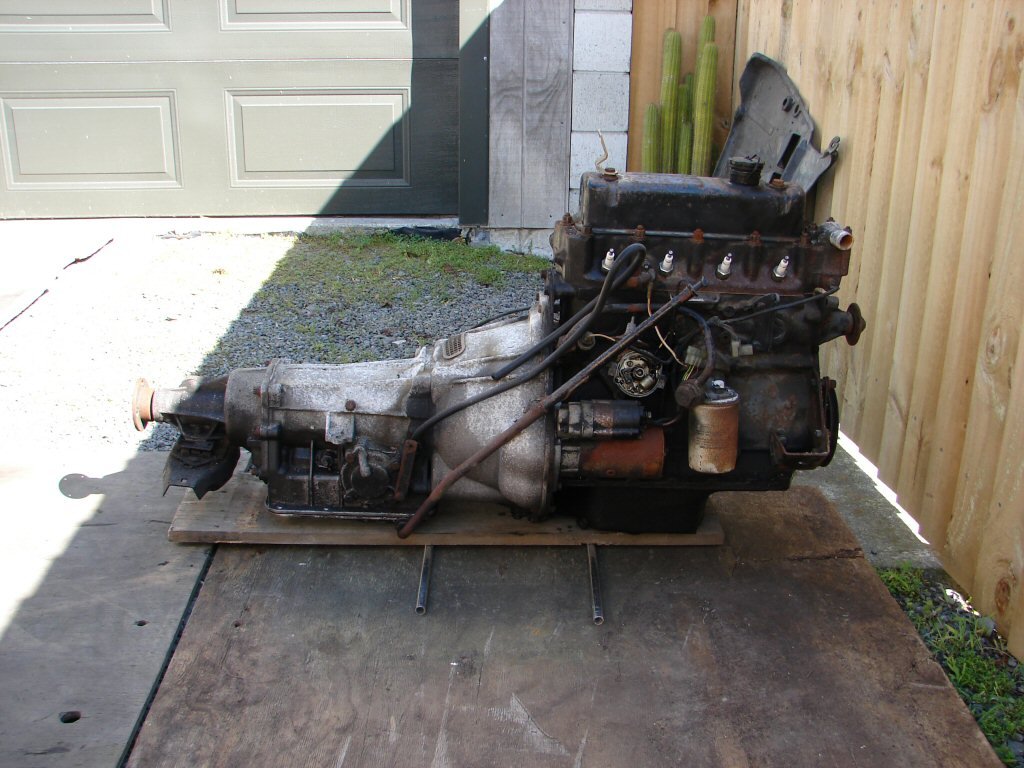
The Marina has no crossmembers other than the rear gearbox mount - which can be removed with the gearbox. So the easiest approach is to drop the entire engine/gearbox as a unit on the deck, then lift the body and drag it out the front. My engine hoist has just enough room between the leg extensions to allow dropping the body back down to remove the hoist and mess with the rest. I drop the engine assy on a piece of wood with a couple of small rollers under it, so moving it is quite easy.
That gets us to the point where this engine can be spruced up for another life in yet another body. Has outlived 3 so far...
Once this lot is ready to move into the estate I will drop its engine out in the same way.
-
2
-
-
- Popular Post
- Popular Post
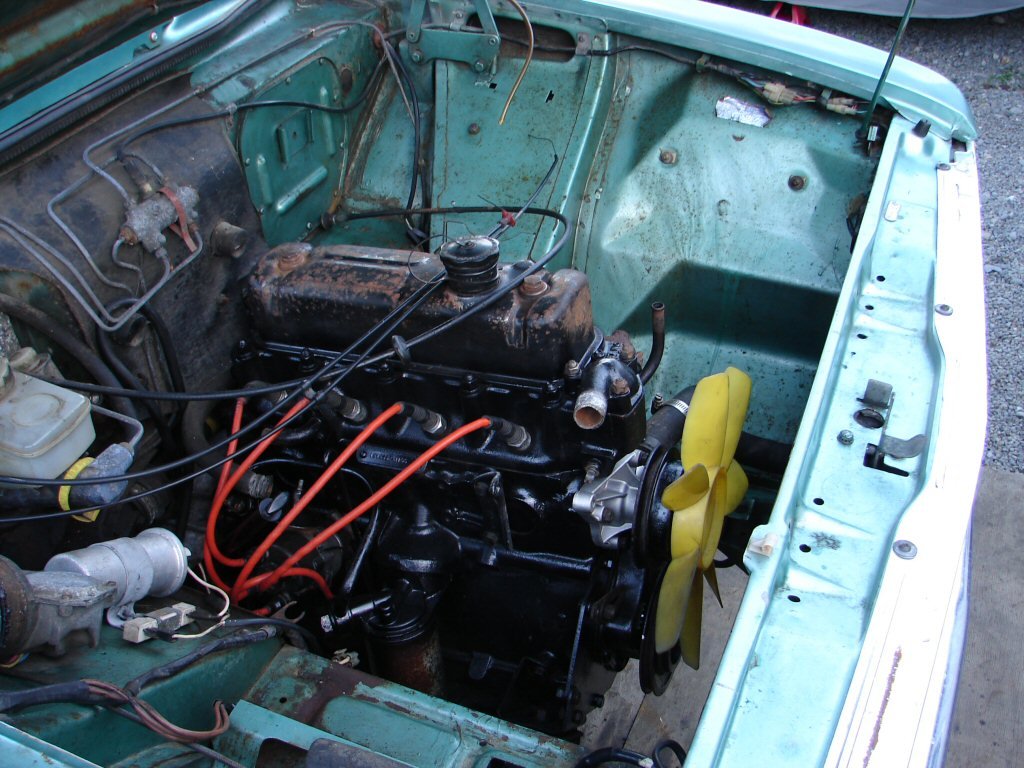
The engine could apparently be started, but there were wiring issues to sort and the ignition key/steering lock was partially porked and would not return from starting position, so I decided to replace it and deal to a few electrics before attempting to see if it could make noises.
Easiest way to replace the ignition is to swap the steering column rather than drill out or nuke the anti-theft bolts with their snapped off heads.
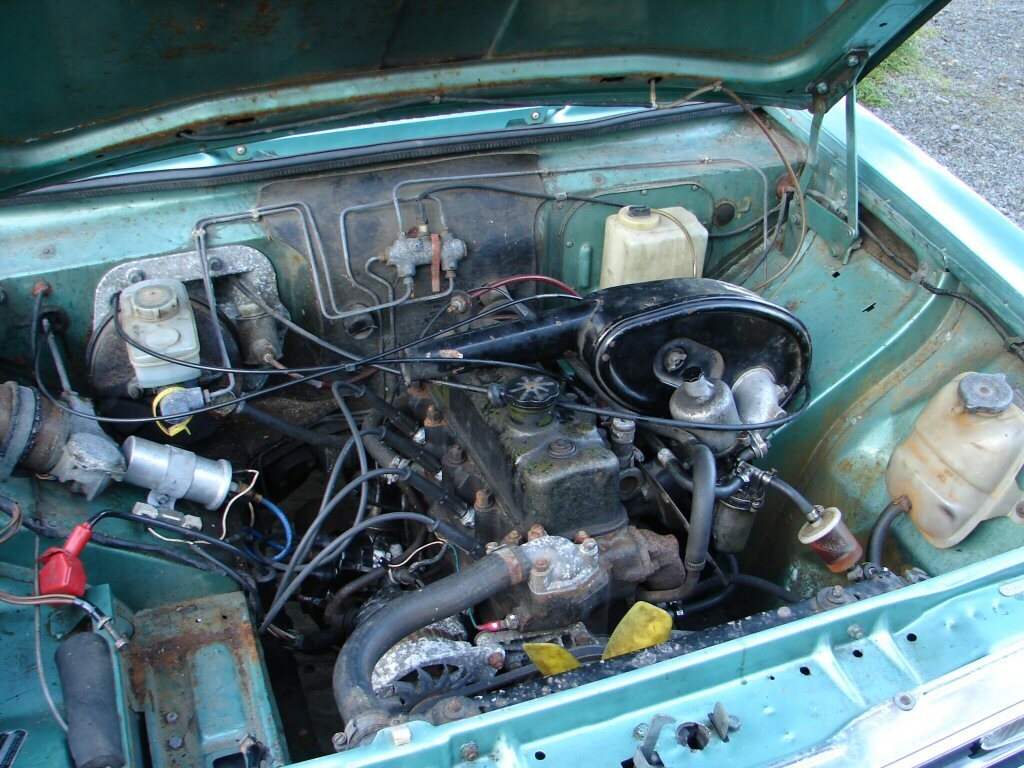
The engine bay was a bit squiffy. Cables had been routed in interesting ways, the airfilter was removed, and the coil had been wrapped in a soft drink can - presumably to give it some fizz. Being a total unknown quantity I was not sure how far I should persevere with the engine as I had other options, but I figured it was worth trying it to see what might happen, so I would just do what was needed to get to that point.
Carbs seemed to be in working order but I refitted the airbox anyway, as much to make sure I had all the bits than because I might be driving it far in the near future. Replaced choke and accelerator cables and coil. Tried to check the distributor timing but it was totally seized in the side of the block and could not be moved. The retaining clamp was well bent so somebody had already had a go at this. I dumped the petrol/oil mix from the sump and put some fresh 20/50 in it in case we got lucky. Ready for the off.!
Well, I gave it all the battery had, but it did not even fire. The starter motor was struggling and I found the terminal on the solenoid was heating up because the nut would not tighten. I dropped the starter motor out then thought better of it. How far should I go before deciding this was wasted effort.?
Hmmm.
Sitting on what I laughingly call 'lawn' is a terminally rusted Marina sedan with a very good engine of similar origin to this one. It is however connected to an auto, the usual Borg Warner 65 which were also fitted to large ships as ballast. At least they are mounted midships and low in the Marina, so act as a form of added stability. Mind you - this one is quite low mileage since a full rebuild by a very skilled chap who set it up to work very well with the engine it is joined to.
Despite having now outlived no less than 3 Marina bodies, this engine still runs great and develops respectable grunt thanks to being bored out to take modified Mk3 Zephyr pistons. It now displaces 1903cc and has 11/1 compression ratio, so having an anti run-on device is mandatory, because being an auto you simply can't stop the damn thing.
As the gearbox in the estate is also looking like a pile of problems waiting for a pension I could swap the whole lot over and turn it into an auto.
So that is now the plan.
I will drop the engine and transmission out of this, give it a spruce up, then drop the engine/gearbox out of the estate and swap them over.
What could possibly go wrong...-
12
-
I pretty quickly discovered that this car had been assembled in order to sell it - not to drive it.
While the previous owner said he managed to get it running, and it smoked profusely, he also found that there was no gearbox oil and the gearbox had not been assembled completely, as-in the tailshaft housing had not been tightened up and that was where all the oil had leaked out.
I had a quick look and found that the gearbox support had not been tightened up either..
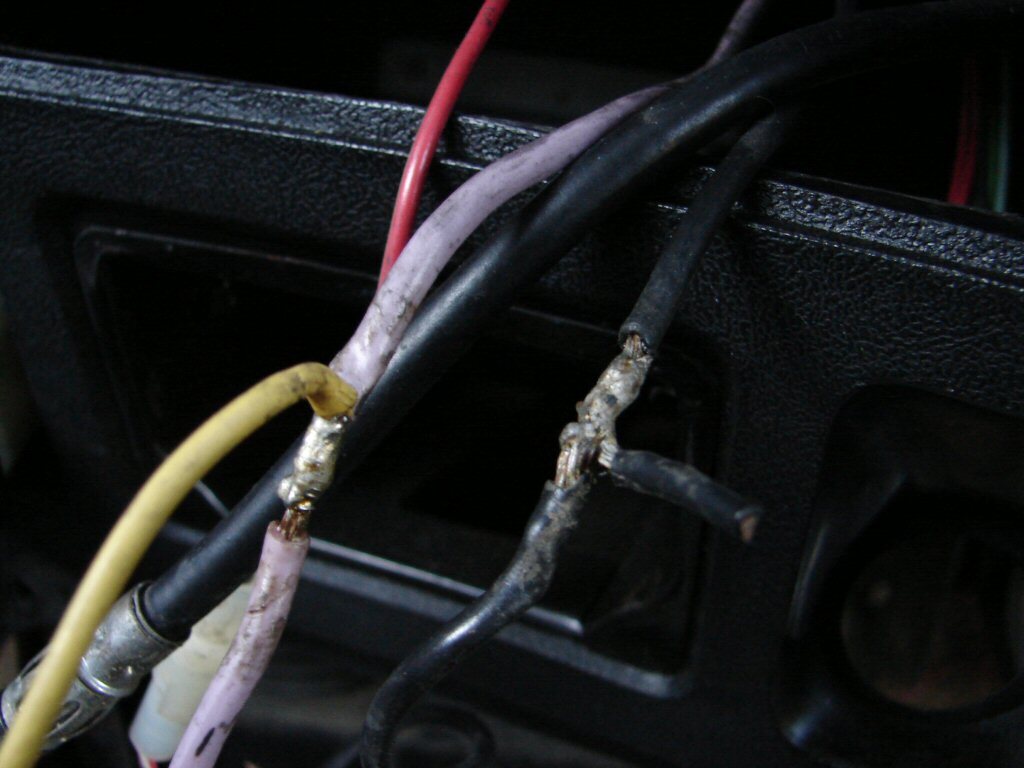
There were also the occasional wiring alterations which had been left to do their own thing..
It was beginning to look like the previous owner had made a wise choice to pass it on.
The gearlever did not seem to be commanding any gears to change, the suspension was all from a much earlier model and in dubious repair, two compressions were absent from the engine dept, the starter motor was in trouble, there was as much fuel in the sump as there was oil, none of the lights worked, the oil light did not work, and I discovered that a wire from the starter motor had been connected to the oil pressure light switch. This would have vaporised the first time anyone tried to start the thing except for the fact that it had a diode halfway along it, and that vaporised instead.
We seemed to be getting a picture.
-
4
-
-
-
Hey Dudes.
I have spent the last 24 years messing with Morris Marinas - mostly because people gave them to me for nothing.
Hard to resist.
I knew how to make them go well and be reliable, so I just did that.
Talk to me about any of that if you want.
Cheers.
-
3
-
-
- Popular Post
- Popular Post
Hey all.
I have owned more than 20 of the most hated cars on the planet. That has a great deal to do with why I did so. I am not a follower, so I go my own way. I don't care what you drive, and I don't feel the need to leave things standard - as many of you don't - but I figure that if I turn the lowliest cars into something that other people now see value in, then I have done a good thing.
In todays world I think that the most ecologically friendly thing you can do is to keep using something old. And I make a living by repairing old things for other people. So that is my mode.
I swapped my first Morris Marina for a used washing machine. It turned out to be a great car, although it was rusty as hell and would never come back from that. So I bought another body and transferred the good stuff into that. That's where it began.
I guess this might be Marina #23 for me, but I am no longer concerned about numbers.
I got contacted via a UK Marina website that a New Zealand Marina owner was looking for help with his project.
I was unable to supply him with a correct O series engine for his estate, and the B series engine his car came with was in trouble.
Over a period of time we communicated until he decided the project was beyond him and decided to part with it.
He offered it to me for free as he really wanted it to be saved.
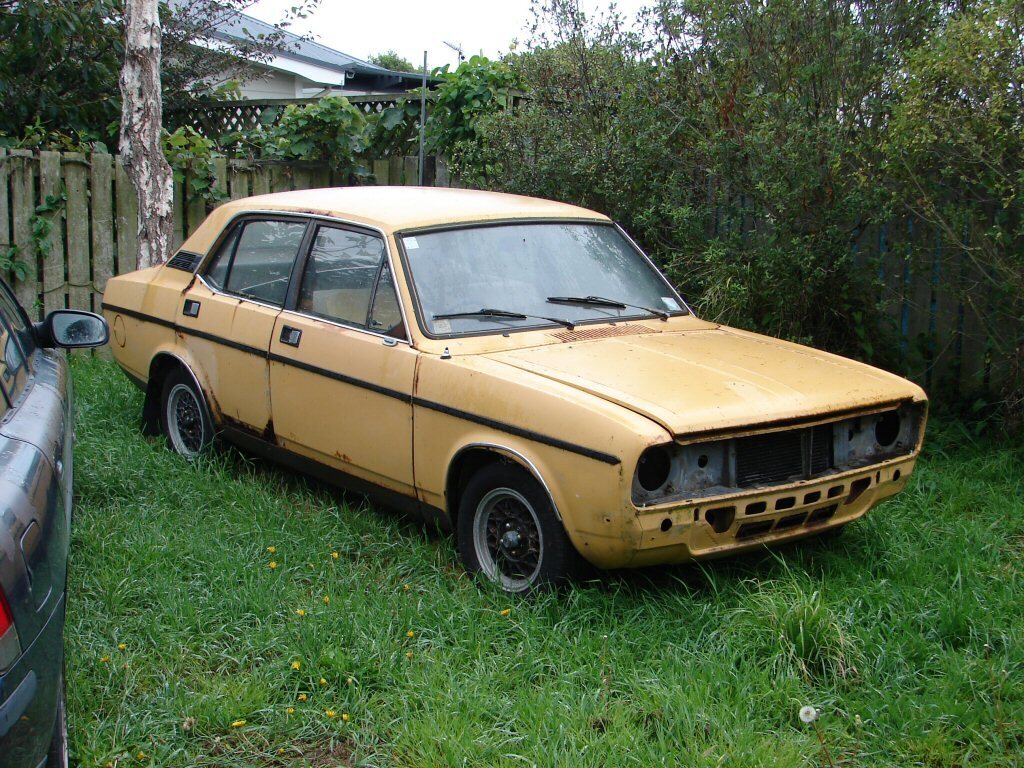
Having seen photos of the body I agreed - it really needed to be saved.
To retrieve it from where he lived was going to cost me at least NZ$1000, so I did not see that I could justify it, even though I did have an engine and transmission that would revive it.
Sheesh.!
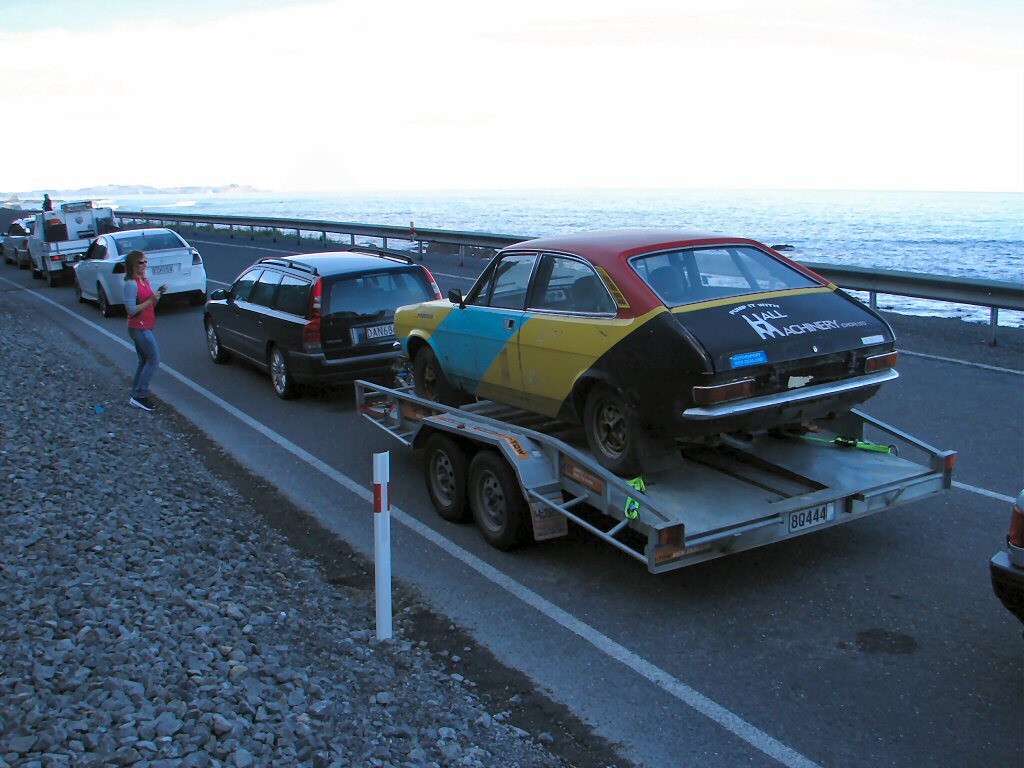
As it happened, I was in charge of a local ex-competition rally coupe that belonged to a friend, and which a buyer had been found for, and as he also lived in the NZ North Island as did this estate, I asked if he would be willing to pay for a one way ferry trip if I trailered his car north in order to drag mine south.
He agreed, so the game was on.
Despite the continuing road issues which cause traffic stoppages, we made the pilgrimage north with the rally coupe.
That actually worked, albeit a day later than intended as the ferry company cancelled my sailings on the Saturday, but I was able to get the same sailings on the Sunday and extend the trailer rental by a day.
I met a really cool Dude at the place I dropped the Coupe off, and such events make you realise that it is all a part of some greater plan.
Love it when that happens.
From there I found my way to the place where the estate lived, and was chuffed to finally meet the owner who I had spoken to at great length by email.
I had decided that I would have to give him a few hundred dollars for the car even though he had offered it for free, as it had cost him money and was a viable project.
When he showed me all the stuff he had bought for its repair, and which he was now giving me, I felt like a total tightarse, but he seemed to be pretty happy that I was giving him anything at all.
One of the reasons I love working with these old cars. The people are just the best.
I have made a promise that he gets first dibs if I decide to sell it after I have completed it.
We loaded the estate up and I dragged it back to the ferry. 7 hours of ferry crossings in one day can seriously damage your humour.
Never mind.
We have a challenge here.
Stayed with friends at the southern end of the voyage, as I arrived close to midnight.
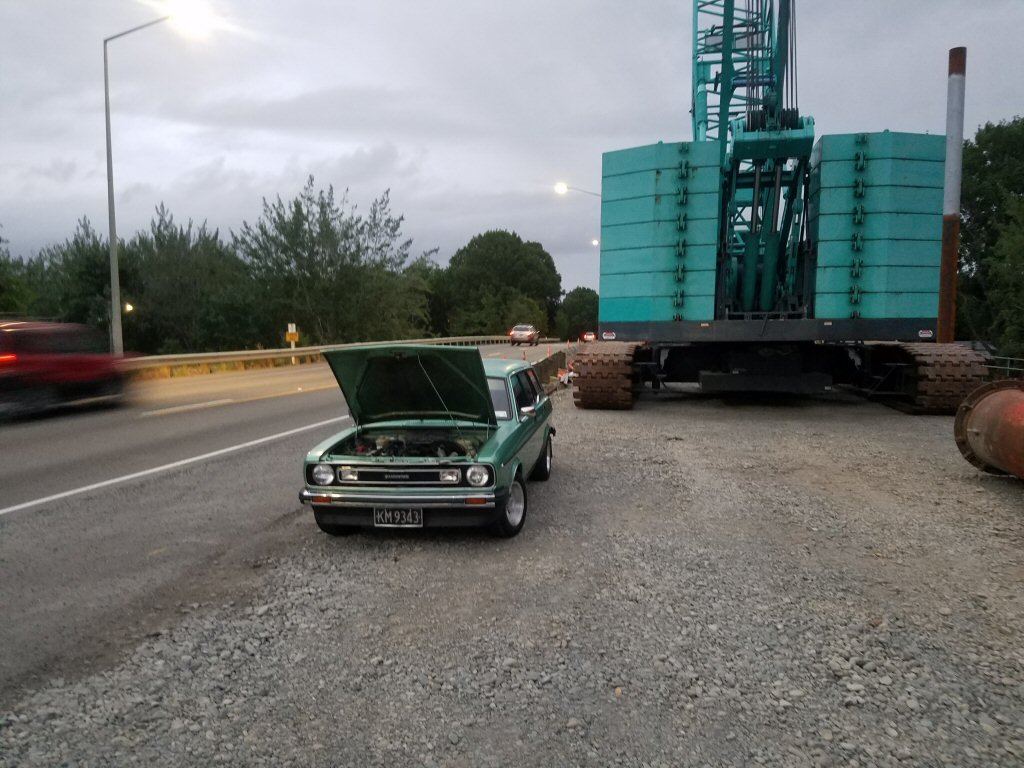
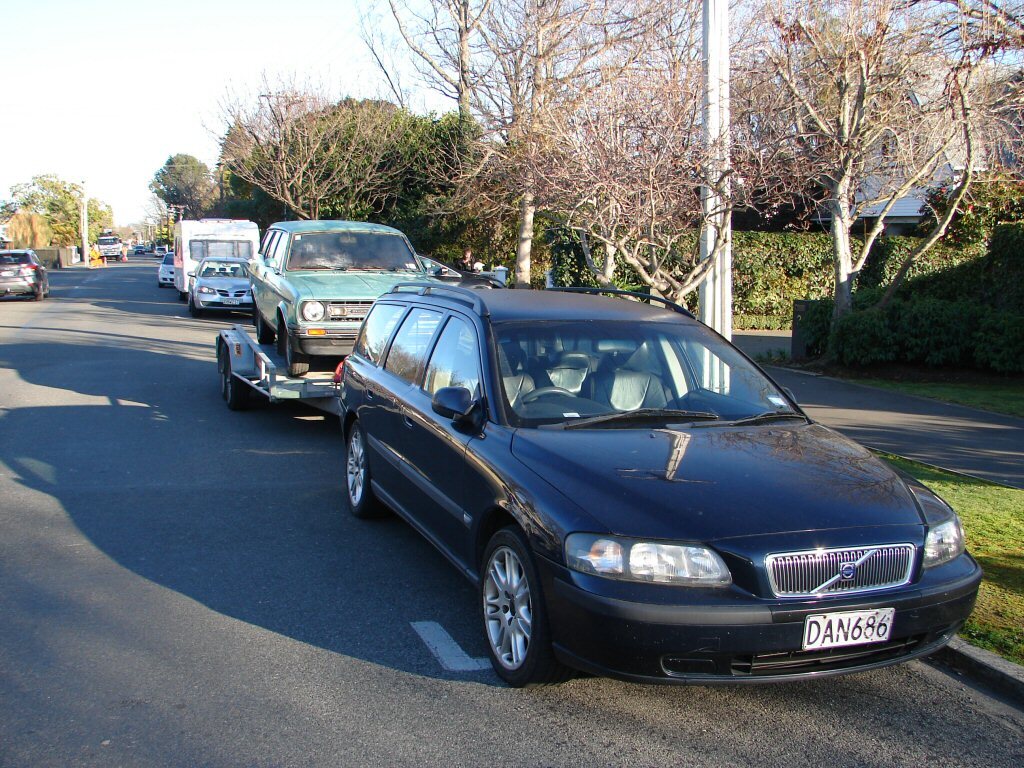
Here's how things looked in the morning..
Next day we dragged this back to Christchurch which was about 300 miles by the route we took.
I was concerned about the auto in the Volvo being under stress so was trying to adopt an easier route, but it turned out to be more difficult than the northbound coastal one.
But we survived.
Work on the estate began the next day.-
16


Kilroys 1982 Morris 1700
in Projects and Build Ups
Posted
Cheers all.
The shifter rod problem was just the small spring clip that retains the end of the rod in the auto lever. It was bent way out of shape so not even trying to hold things together. No idea what caused this. I was able to straighten it out, but fitted a different one anyway.
In other more mundane matters.
I fitted some rear mudflaps. Had not previously noted they were made in NZ..
The petrol tank cap I had found, which belonged to no particular vehicle I can think of, was behaving amazingly.
So I got suspicious.
It began making a lot of vacuum noises each time I removed it.
I once had a tank suck itself to half volume, all because of a blocked cap and a very diligent mechanical pump.
Decided not to risk that outcome again.
Sure enough, no vent hole at all, but no leaks either.
Found the smallest drill bit that my drill chuck would grip.
0.9mm.
So whatever fuel can get out of this, is welcome to do so. The problem only happens on left turns.
And because of my driving...
Finally, I did some fine tuning of the wheel alignment, because it is much easier with the Superlites on, as they come to the edge of the body.
While that all made sense, I discovered that the right front shock was leaking fluid quite badly.
This makes both of the first set I chose for the car a fail.
Mostly I chose them because they did not require painting. Luckily I found that the mate of the one I painted for the left side was in equally good working condition, so I cleaned it up and painted it.
Now we do the swap..
A friend called in as I finished this job, so I was cleaning up as we talked. I wiped the place where I put the nuts and bolts while working - not sure what its technical name is, but the panel the bonnet catch lives under - and there was a slight noise like I had bumped something over the edge.
Could not see it so chose to ignore.
Friend left and I went for a test drive. Huge improvement in the ride, so very pleasing.
Then I noticed that the bonnet was floating up against the safety catch. Stopped to check but it would not close. Turned out my rag had grabbed the end of the catch spring and neatly dropped it out of its hole.
Sheesh.
This car is finding some interesting things to test me with.
At least they are small....