Chain
-
Posts
5 -
Joined
-
Last visited
Everything posted by Chain
-
Chain'ss Fiat 850 Sports Coupe Simca/Abarth-ishness..
Chain replied to Chain's topic in Projects and Build Ups
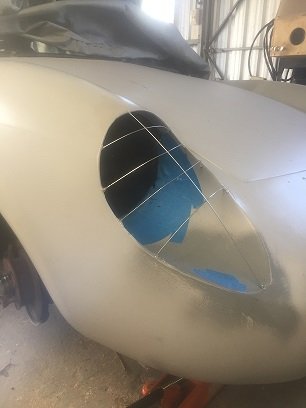
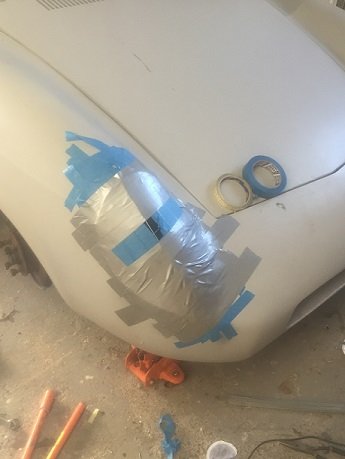
Life. She's a busy one. Anyway onto smoothing the mold. Once the initial foam shape has been rough sanded with a 180 grit sand paper it then gets hit with body filler to create a smooth surface. This take a wee while to get it perfectly smooth and find the right shape that suits the curves of the body. The Mold must be 5mm smaller than the hole to accommodate for the polycarbonate. Next stage will be the molding process. The wooden template will be used to press over the polycarbonate.
- 2 replies
-
- 13
-

-
CHAIN'SS FIAT 850 SPORTS COUPE SIMCA/ABARTH-ISHNESS..
Chain replied to Chain's topic in Project Discussion
That is super interesting. I wonder what osh would say about that now. I really hope they went with a thicker plastic than mine haha -
Chain'ss Fiat 850 Sports Coupe Simca/Abarth-ishness..
Chain replied to Chain's topic in Projects and Build Ups
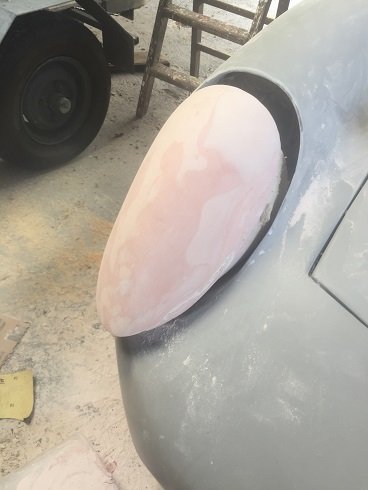
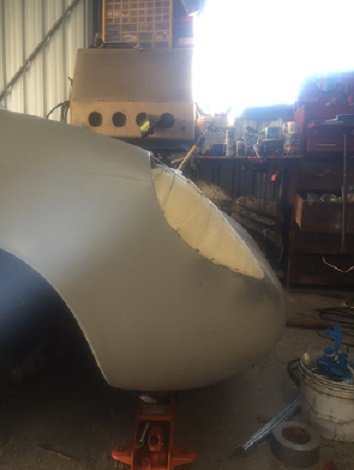
Lately I have been pondering the headlight covers. With no off the shelf parts available I'll be building them from scratch. After a bit of research it came down to material use and forming method. Materials: Plexiglass (Acrylic) vs Polycarbonate. There are others but these are the most readily available and commonly used. Plexiglass: Much cheaper and easier to obtain at different thicknesses however weaker and is less resistant to heat. Workability is easier however drilling becomes harder and more likely to split (especially at the edges) Polycarbonate: Much tougher than plexi-glass, more resistant to heat, can be drilled easily near the edges however it is harder to obtain and quite expensive. Both have excellent thermoforming properties however Polycarbonate has been my choice. Not due to heat as I would imagine the old fiat bulbs don't produce much heat (causing them to yellow) but due to being able to drill near the edges (Essential for mounting) and being much much tougher. I could write a post alone on vacuum-forming vs cold-forming vs heat forming but the google God has many an answer. I will be heat forming due to it's awkward shape and my lack of vacuum forming experience. Here are the basics to building a plug. 1. Shape: (More support wires were added) 2. Seal & Wax : Wax and tape inside walls. Stronger the tape the better - Leave a small hole for pouring. (Hole got moved to the top after a recommendation) 3. Fill: (Alumilite Super Foam 320) 2-part mixture https://www.alumilite.com/store/p/973-Super-Foam-320.aspx 4. Result: Pretty close. Needed more foam Buggar ahh well, get it with the next stage Next Post: Smoothing & Finishing If you have tips or tricks I'm all ears...
-
Gidday team, New here, say what's up pretty keen to meet some new dudes especially in Wellington as my friends enjoy wrenching bottle tops not batteries. If you have any ideas or questions about my project give me a buzz. Cheers.
-
Chain'ss Fiat 850 Sports Coupe Simca/Abarth-ishness..
Chain posted a topic in Projects and Build Ups
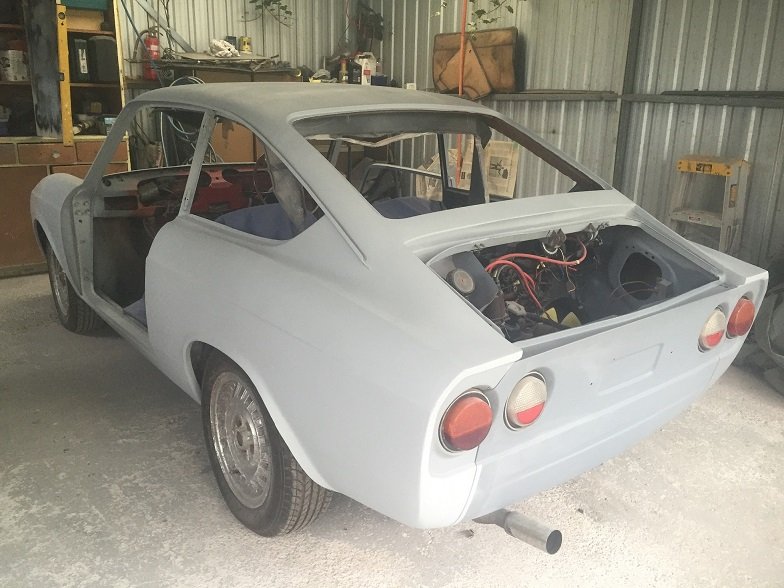
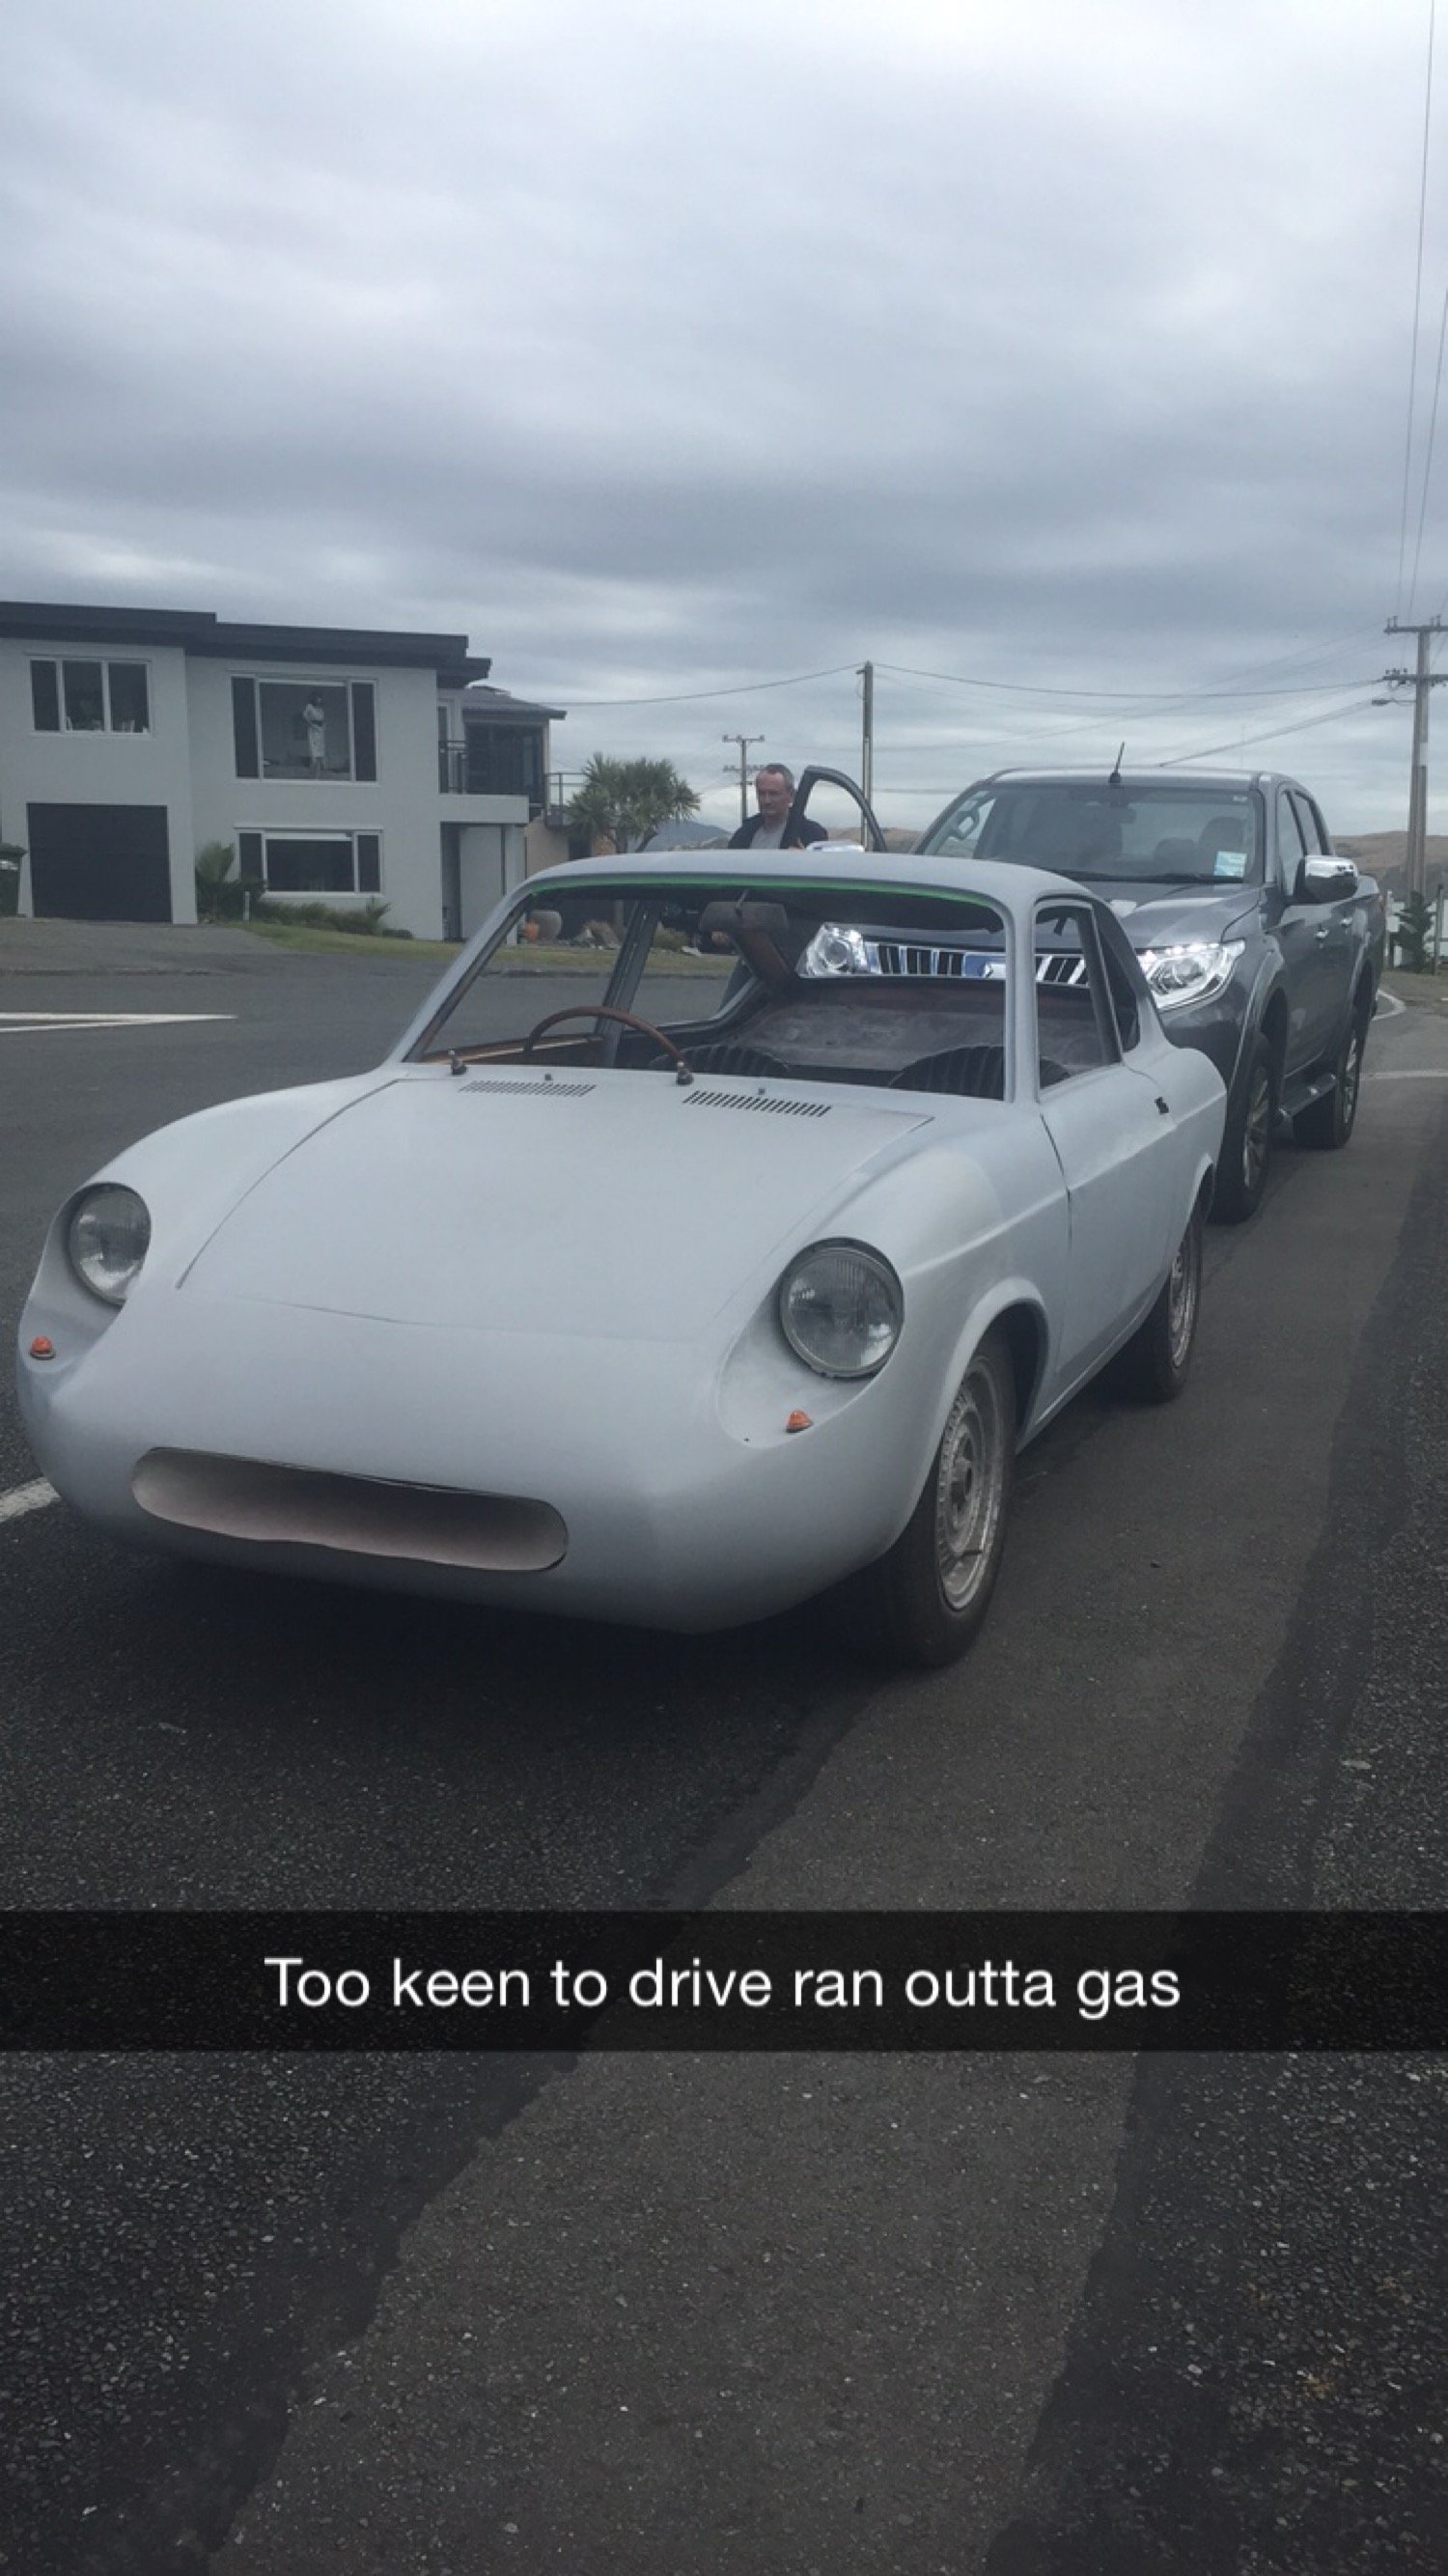
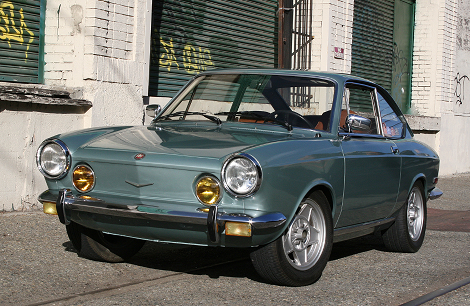
So time has finally come to find a place for my barely interesting, mildly entertaining diy thread. It is definitely old and I'm sure you have seen one dropping the kids off at school. Oldschool.co.nz it is. This car has slowly brought me back down to earth from my 'Big Plans' (What motorcycle engine?). Learning the basics outta my parents (now mine) garage and basically getting it back on the road. Born in 1968 she managed to escape the city grind and found her way to NZ shores, finally residing in Wellington and for many moons sitting in Continental Cars as a parts shelf, then up to find a comfy tarp to rest under plus get a healthy dose of fresh salt air in Waikanae. After convincing the elderly lady to relinquish it I began about slowly restoring it. (Learning as I went of course). Before I owned it anything further forward of the windscreen was chopped and shaped, suspension included. I'll post more about this further down the track. I'll post an original front so you get the idea. Annnd away we go.... Original front: Any Q's get at me
- 2 replies
-
- 19
-