
- Popular Post


J4m13
-
Posts
157 -
Joined
-
Last visited
Posts posted by J4m13
-
-
Once I got the control arms back, I pulled the diff to paint it and the rest of the suspension, then replace all bushes

-
 4
4
-
-
While this was all going on I was also trying to work through the last pieces of the diff conversion and suspension upgrade.
i had some lower control arms from a s3 rx7 sent to me, cut the eyes off the factory 323 ones that incorporate the spring seats, cut the eyes of the rx7 ones and went to shortening them to have em the right length. Got em tacked and trial fitted.
perfecto!!! So had a local welder glue them up for me
-
4
-
-
-
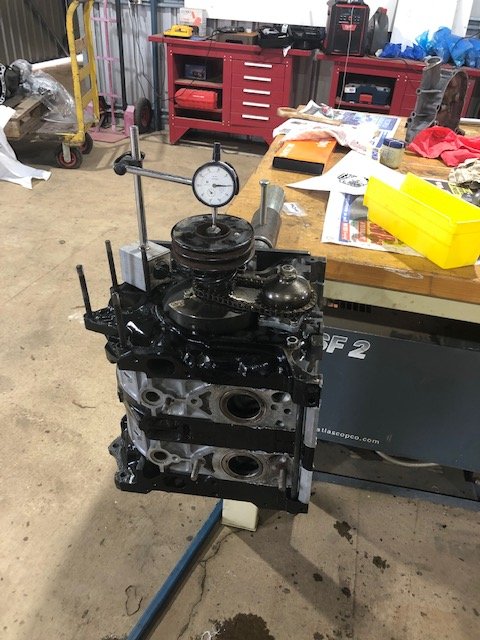
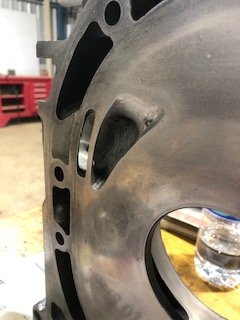
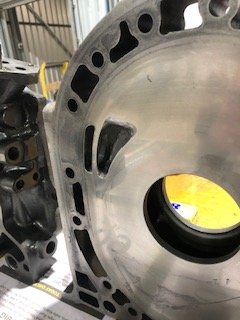
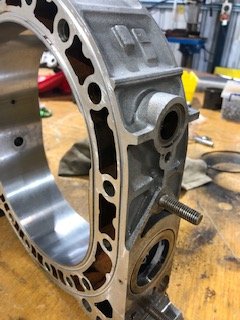
So completed the task of assembling this thing.
went smooth, all together nicely. Had to muck around with the spacer for end float but all n all was good to get back in the groove.
pulled the pp out to give it a once over, ensure oil pressure and all that good stuff. I must admit, when I had it in the engine stand and rotated it to ensure all was good it was easier to rotate than I remembered.....
swung it in the there no worries, got it all hooked up, threw my ida on from my 13b and went for a spin over.
didn’t even sound like it wanted to start. Got mum to turn it over while I checked etc and it looked like someone was putting fuel down there. Far too big.
so boxed up the other ida that came with this block and whipped it to a carb specialist in Brisbane. 10 days later it was back at my door.
beaut!!
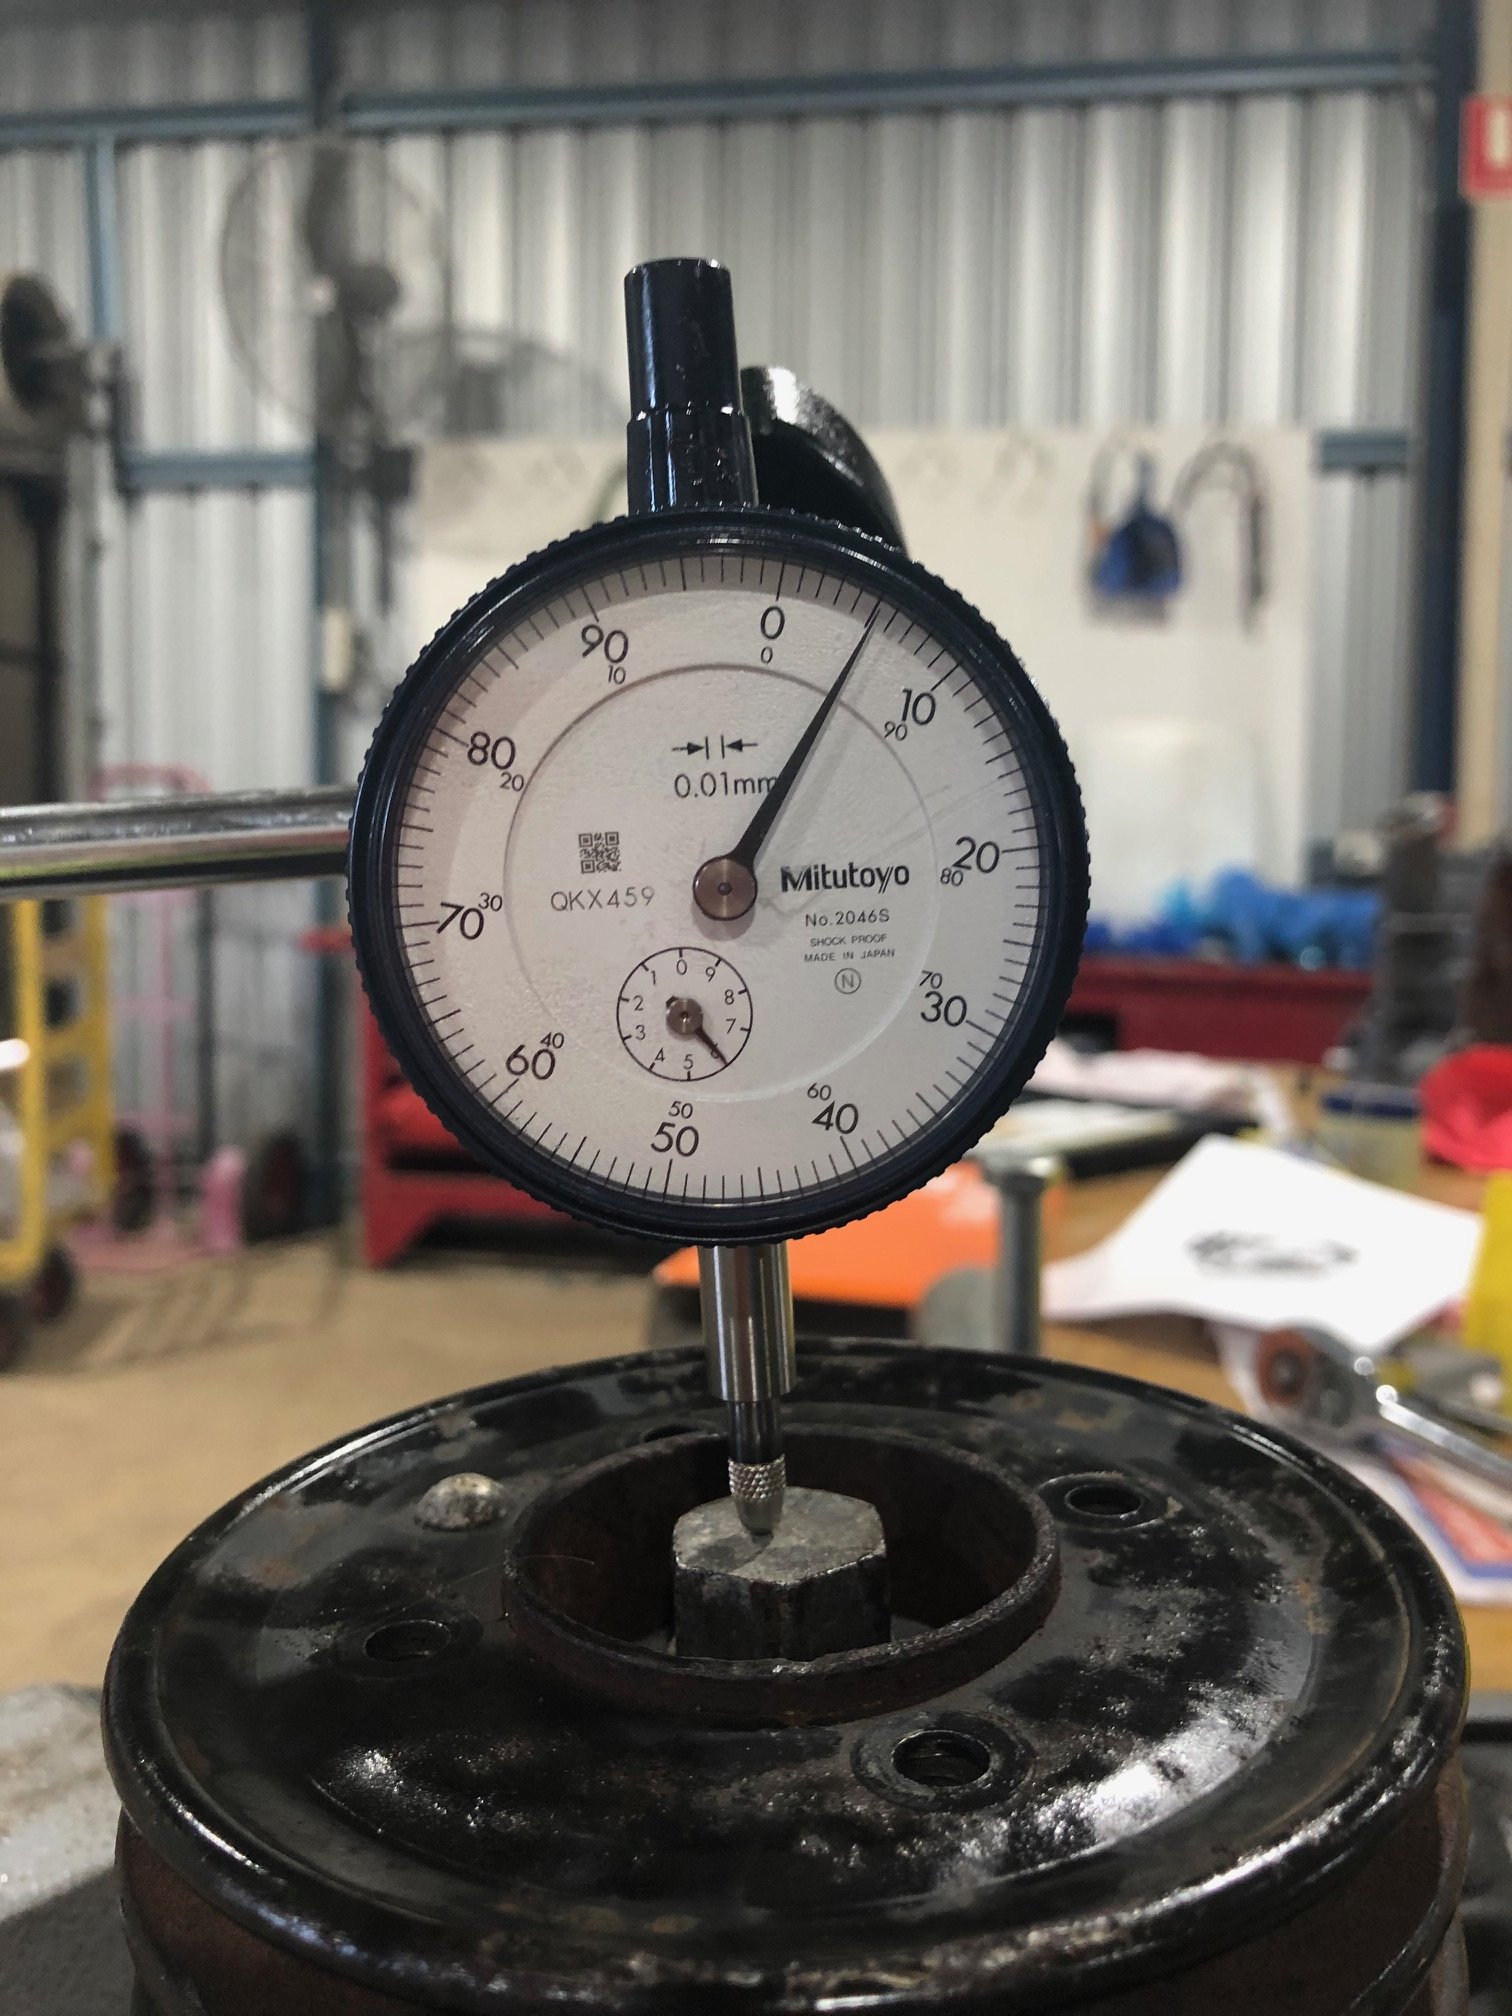
Set it up, bolted it on and tried again. Nothing.....chucked my compression tester in and you got it. Not even enough to pull me off.
absolute fail and waste of my time.
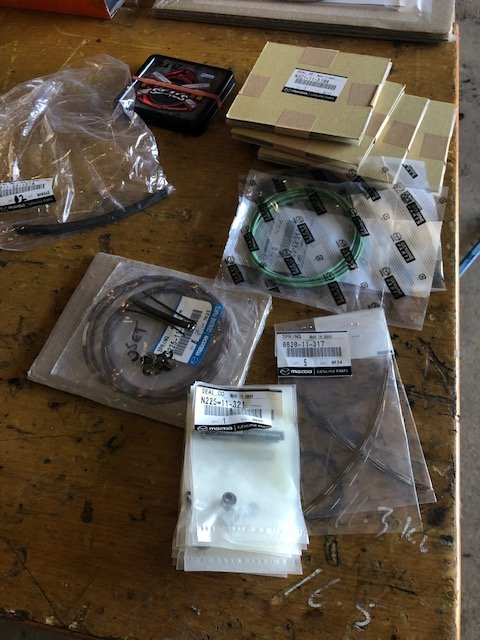
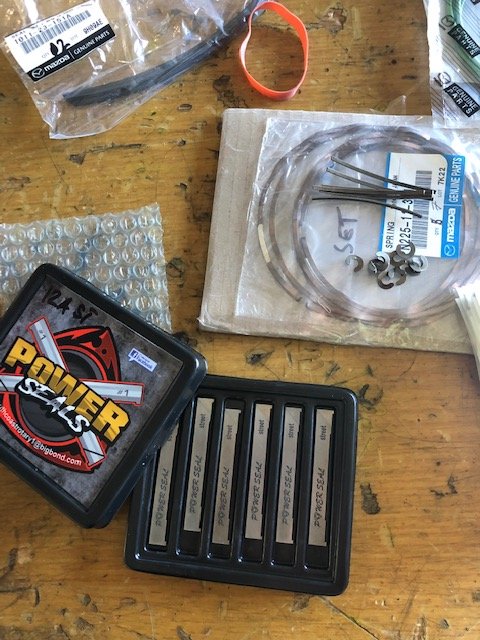
so with that, it was decided a complete reseal and birthday.so with that, whip it back out, I jumped on a Japanese parts website and ordered all new seal and springs except apex seals.
while I was waiting for them to arrive, pulled the motor apart and got to lapping the plates.

-
3
-
-
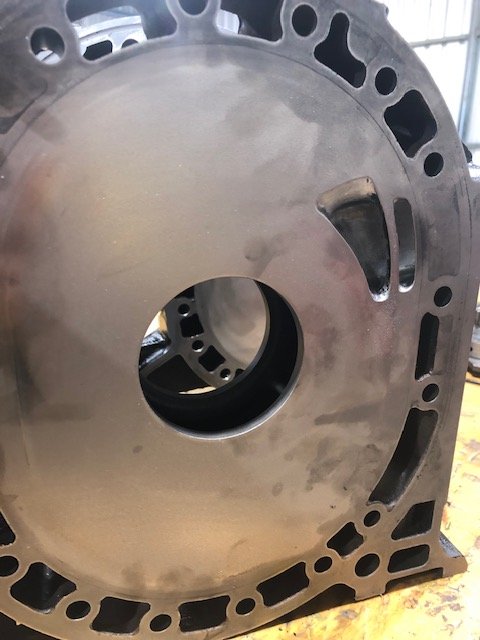
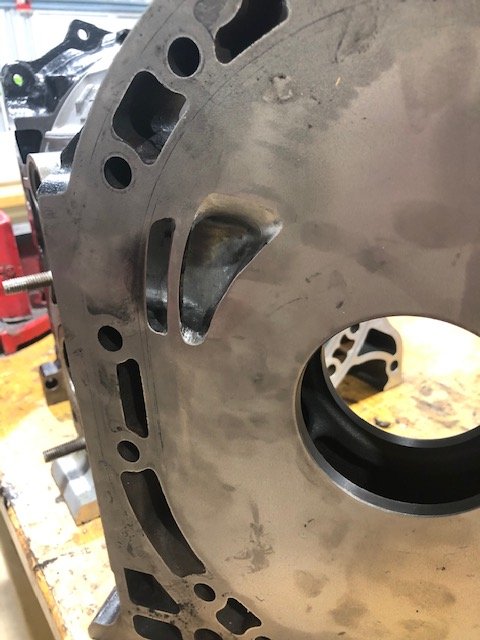
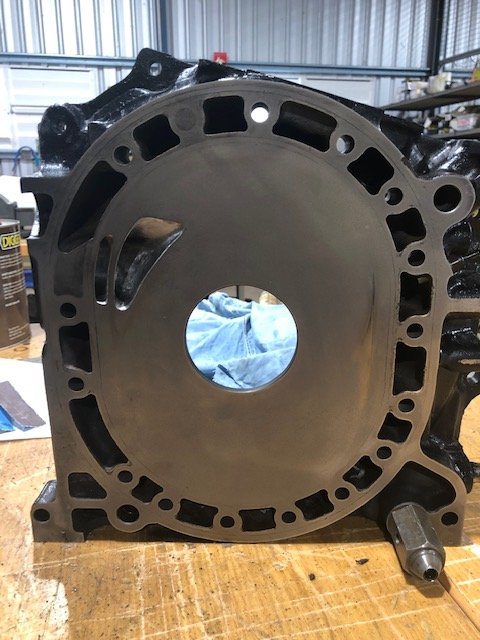
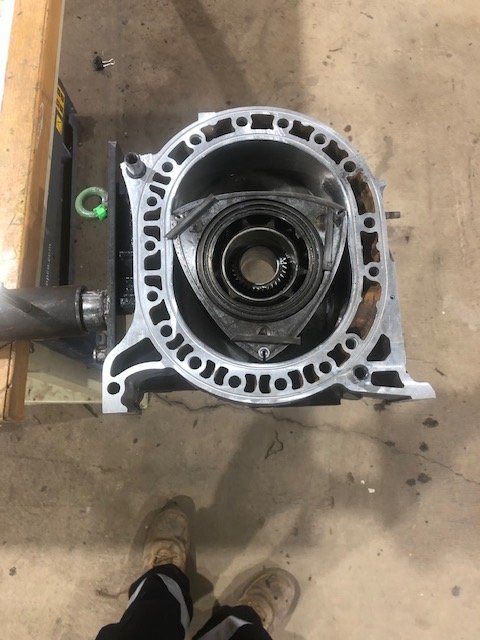
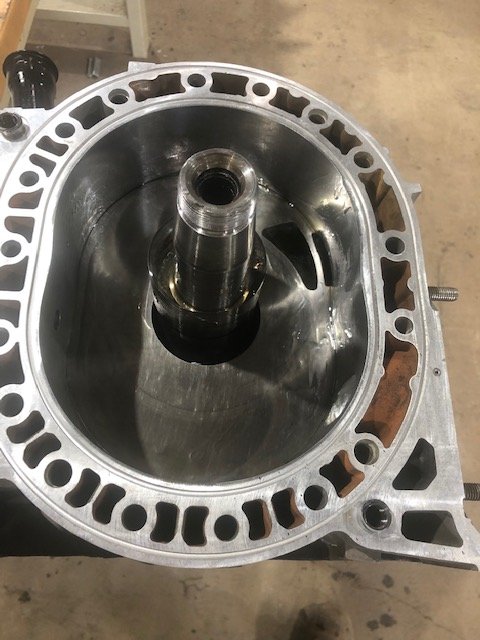
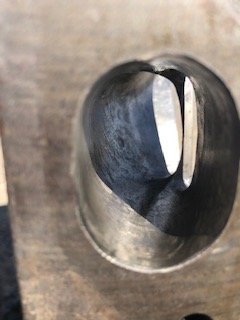
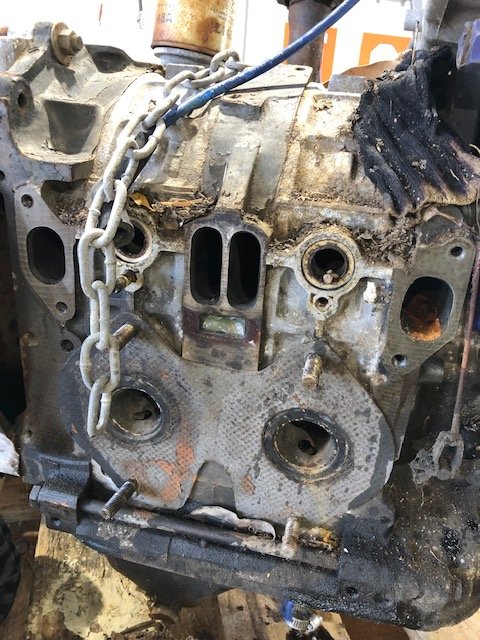
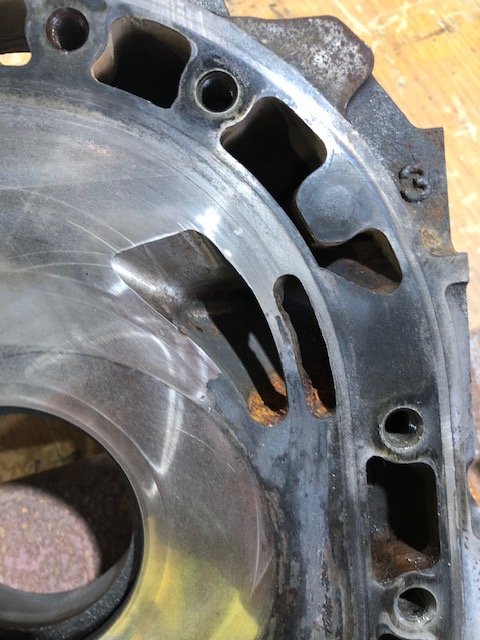
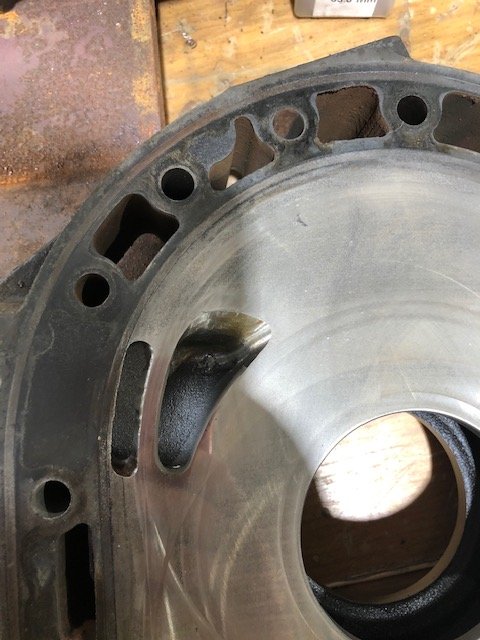
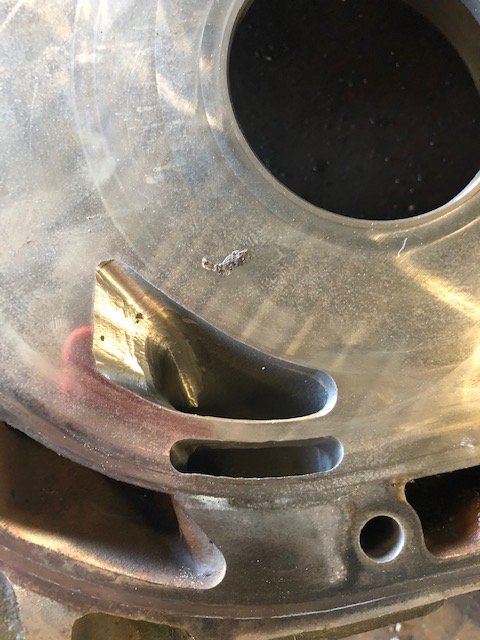
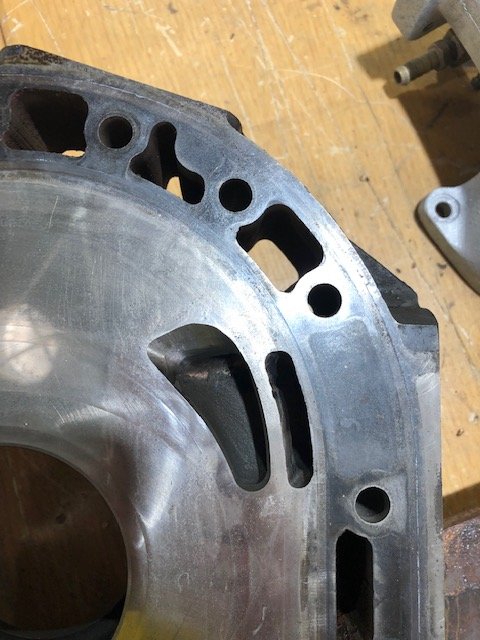
So it’s been some time since I actually did some work on the internals on a motor and it took a bit longer than I hoped. And being I live in rural Queensland, parts deliver is painfully slow.
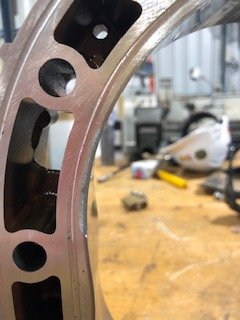
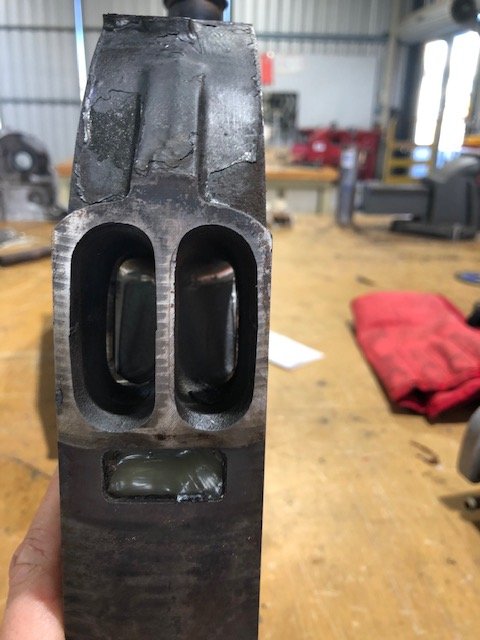
I tidied up the ports as well as I could, had some 13b housings machined down and some water seals cut into them.
I did a measure of everything and it all seemed pretty usable, although the front rotor was rooted, dunno if this thing actually ever run after the last assemble as the rotor looked like it had been dropped. Apex seal Slot dented to buggery, corner seal hole had been made into an ellipse and side seal gap had been closed up beyond repair. Alas.... replacement.the bearings looked pretty shagged so as a matter of course, replaced those and both front n rear seal. Had some Atkins corner seals I had from a while back and put new springs in it.
-
5
-
-
It’s been a while.
my wife gave birth 2 days after the hole saw ate my hand.
been a few purchases and other things completed.things obviously slowed down on the car with the birth. But I bought a little 12a I saw someone comment on. Unknown condition, came with a 48mm ida and 4 speed gbox for $1200. Thought it was a pretty good deal so snapped it up.
got it sent to work, to find out she’s seized solid. Removed the carb and manifold, Sprayed/tipped some penetrene in the intake ports am slowly started to turn the front pulley. Kept at it and freed it up.
no compression, no worries. I bought it knowing it wasn’t ideal.
spent the rest of the day at work ripping it apart.
coronavirus has been great for me and working on my stuff at work!!!
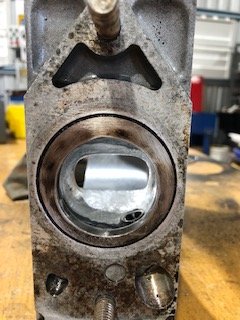
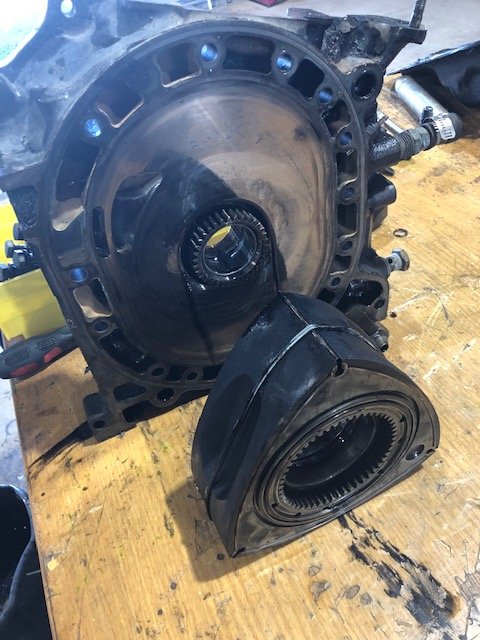
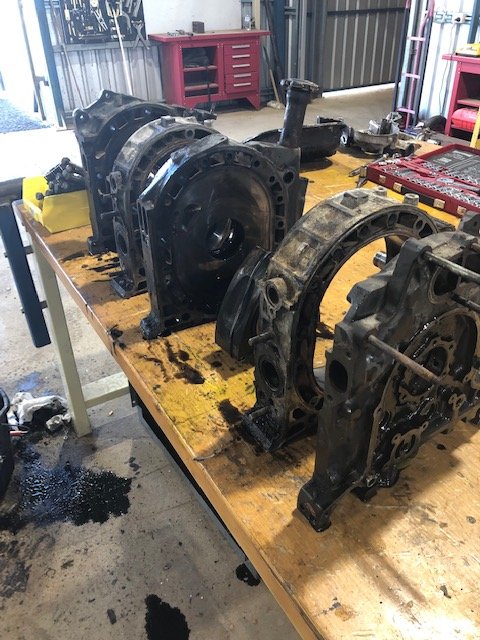
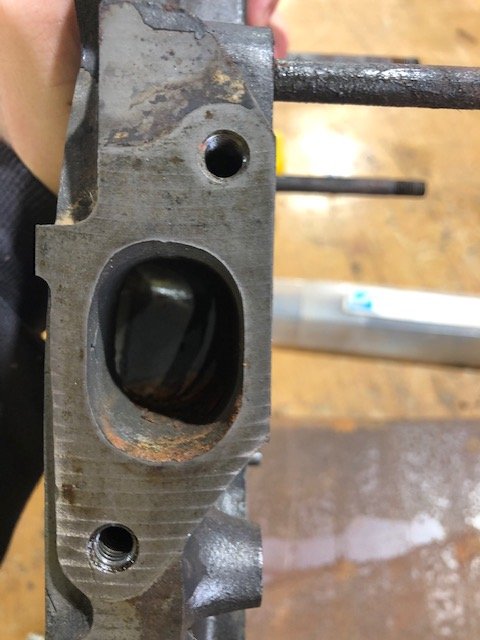
So once I opened it, it was apparent someone had “bridgeported” it. No work done on the runners, literally just cut a bridge and open up the port on the face of the plate. Was pretty rough and the bridge was wide, almost into the water seal.Housings well rooted, good for a game of horse shoe maybe
a few pics for those with interest.....
-
3
-
-
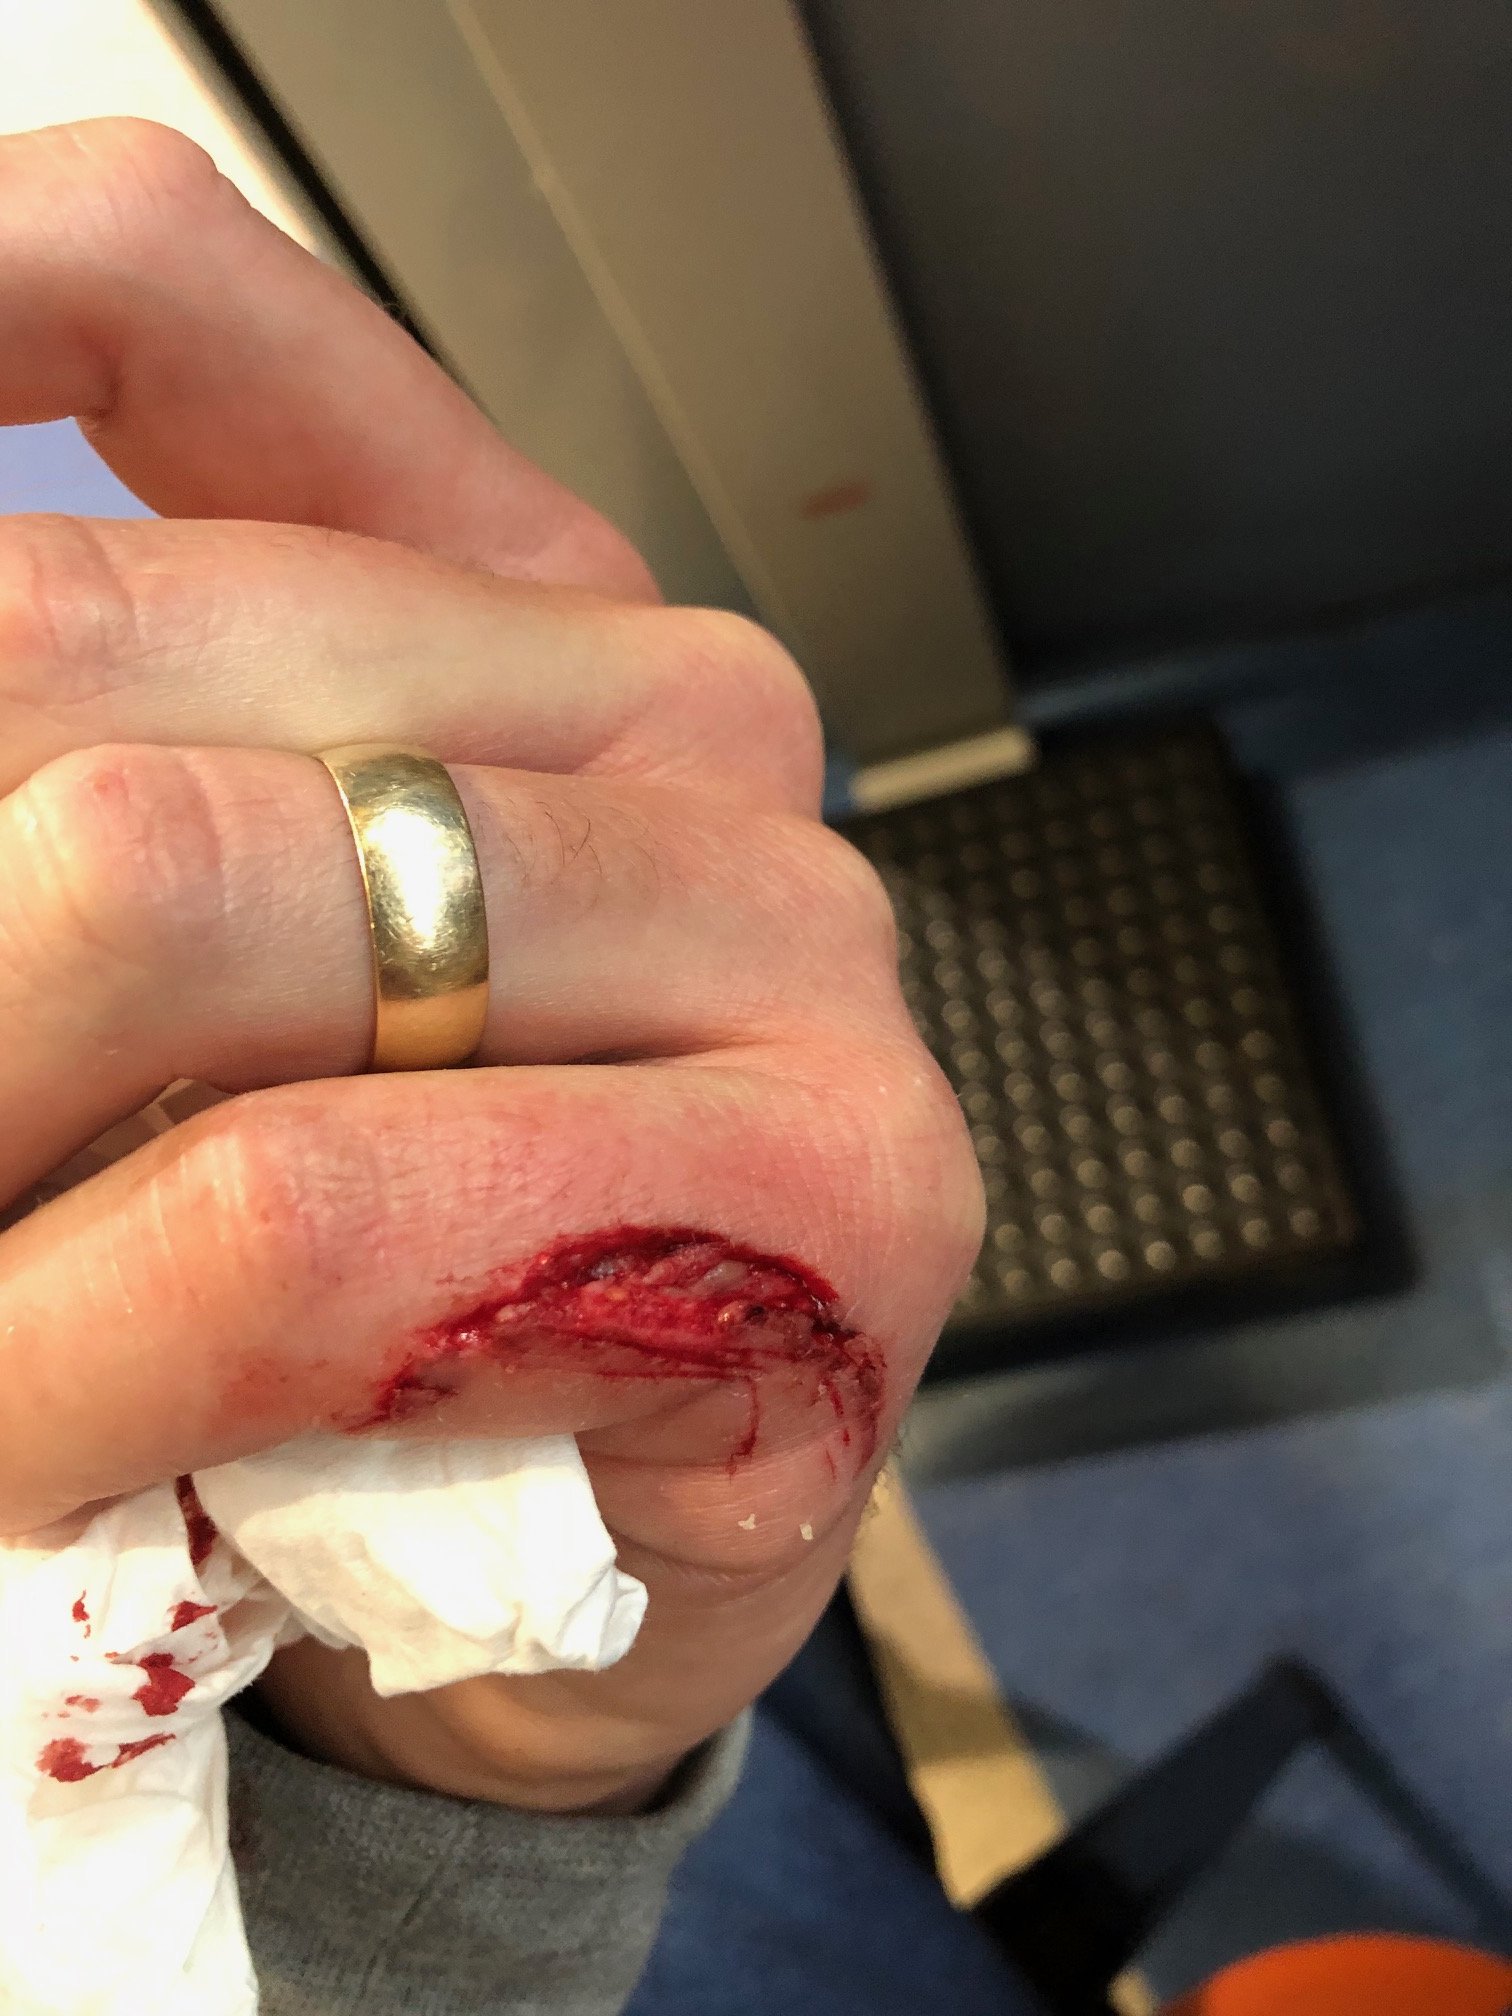
I been chipping away on bits n bobs.
mounted fans, oil cooler properly
but did myself a mischief....holesaw won
-
 8
8
-
-
Thanks for replying guys!!
i appreciate it.
-
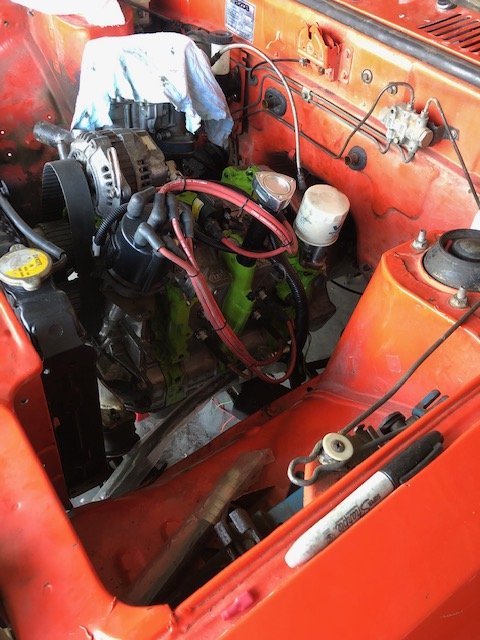
Today after hooking everything up and firing my car up it wouldn’t shut down.
I traced the problem to the alternator.with the alternator unplugged, the car turns off fine. I suspect a diode or the likes has shit itself.
where is the best place to buy alternator parts. It seems my regulator and brushes etc are a complete unit.
it is a s4 rx7 alternator supplied by Mitsubishi.
any help would be appreciated
-
- Popular Post
- Popular Post
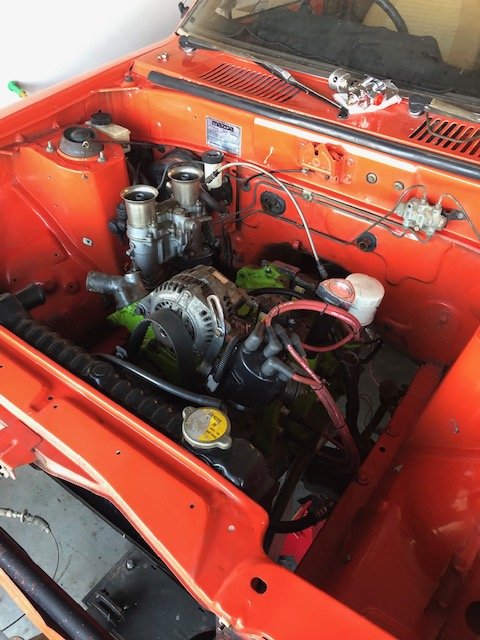
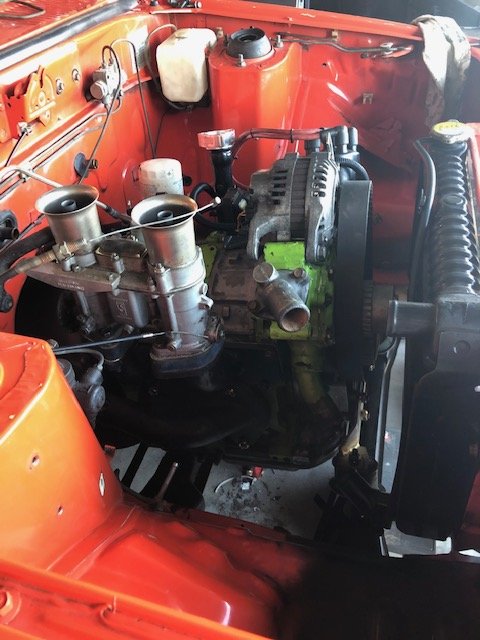
So today I received the bolts I was waiting for, so promptly got to installing them. Connected positive, negative cable and starter solenoid feed.
got 20L of gas and some Penrite race castor. And threw it in the tank.
primed the fuel system, while totally forgetting how noisey Holley pumps are, I got a quick reminder. I guess that’s what you get for a budget build!!
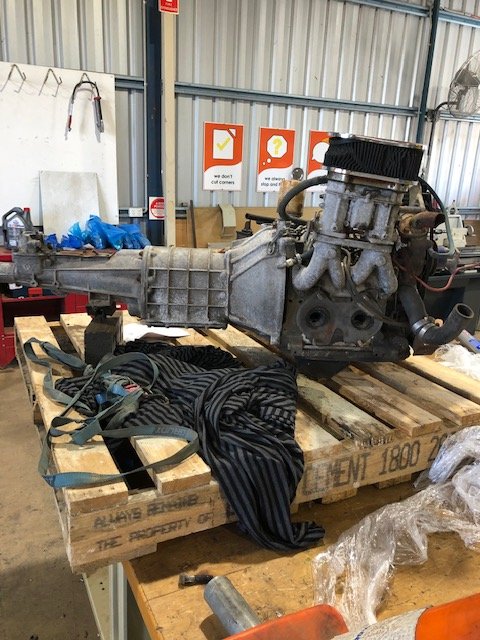
its at this point I must remind everyone I got the pp as a bare block. So the distributor, IDA, gilmer gears, coils, you name it, was robbed from the fucked bridgeport I picked up, so after seeing the condition the gearbox and block was in and shit house extractors I wasn’t holding my breath.
the gilmer gears had a shit tdc mark that took me about a half hour to work out when I was transferring everything over but no other timing marks.
after consulting some old school knowledge today, I was told 20deg btdc was the timing I need.
So at some stage I’ll need to remove the pulley and mark it. But was too keen today to at least check out of my wiring was as successful as I hoped.
Took the coil leads off and spun the motor for about 30sec to prime the oil system.
at least I knew the startermotor worked!!!Reconnected coil leads, turned the key to acc, held my breath and crossed my fingers. Gave the carb a couple of pumps... accelerator pump worked!!!
cranked the starter and no sooner had the starter engaged..... the bitch roared Into life!!!
pretty fucking chuffed to say the least.
I got a vid but it’s too big to upload, so not sure how I’ll go about that.
either way, there’s a few more things I need to tidy up. Connect a few more instruments.
and get the diff sorted.
my wife is due to give birth to number 2 nek week so fucked if I know when I’ll have more time to progress.
but I’ll do my best. Luckily work is fairly quiet in this time so I’ll use that time wisely I think.
-
12
-
 1
1
-
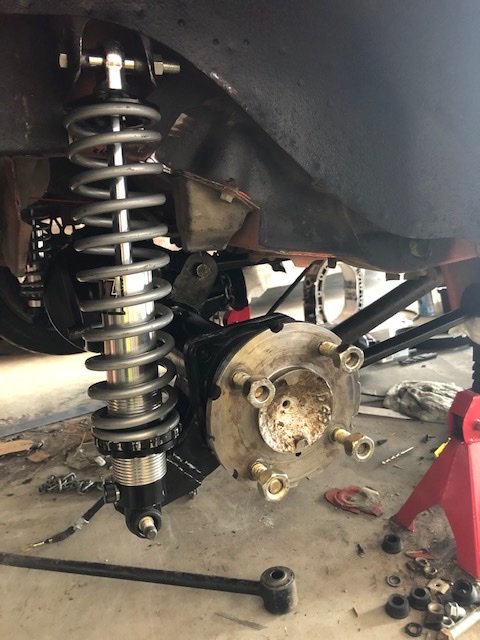
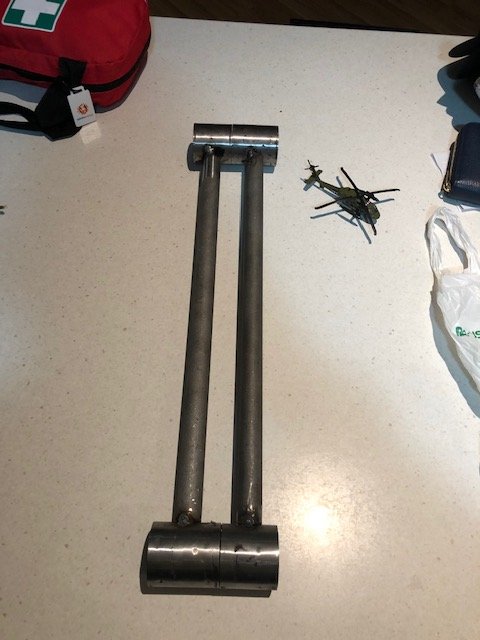
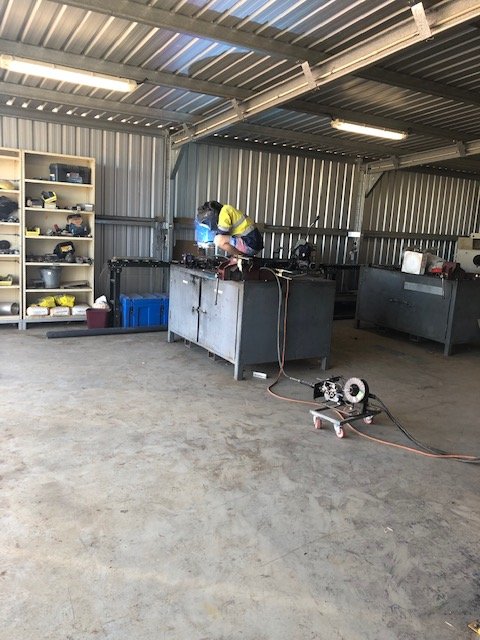
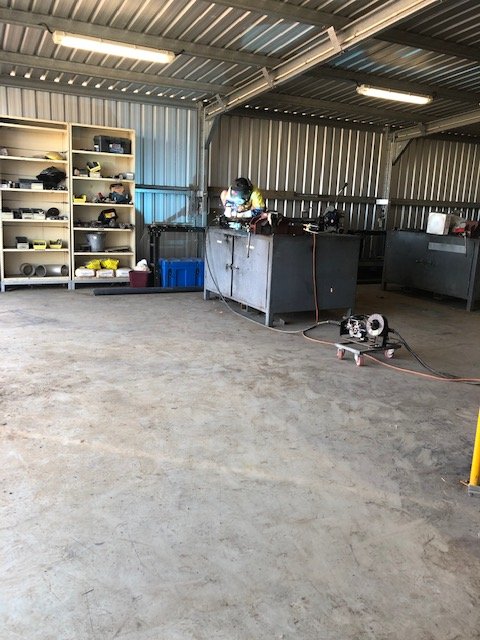
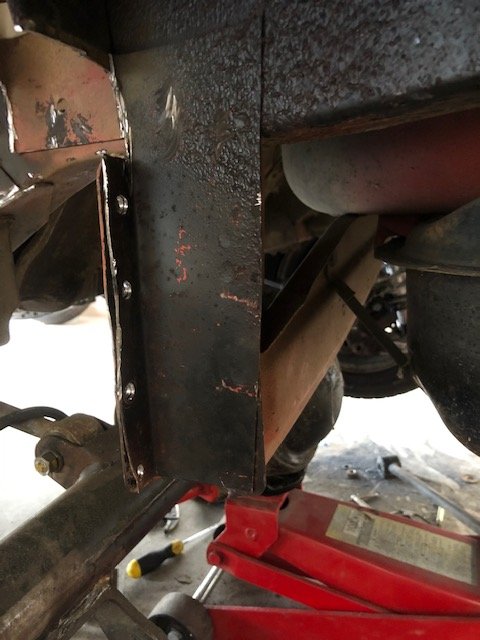
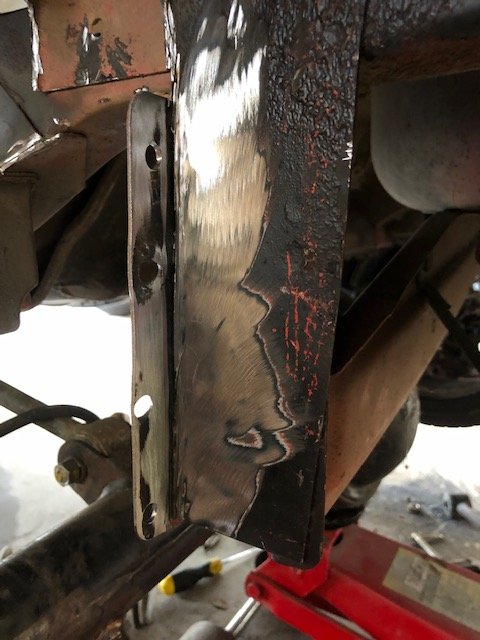
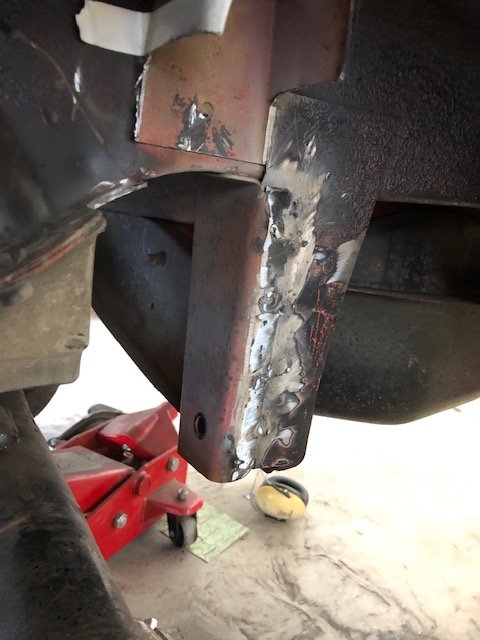
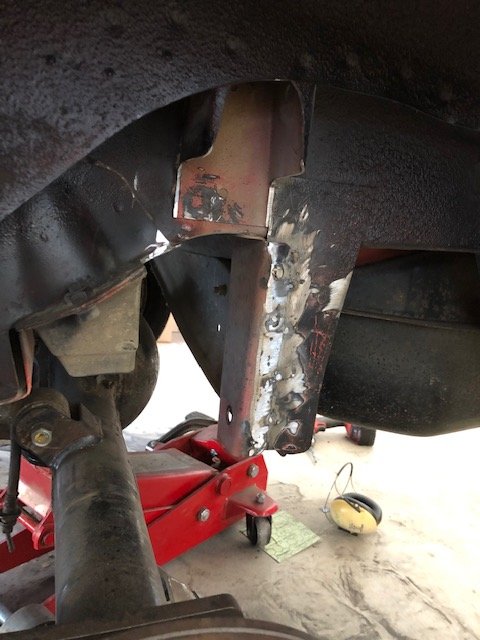
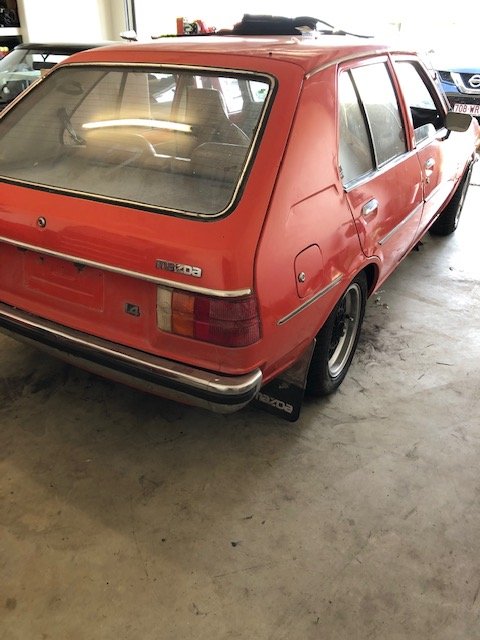
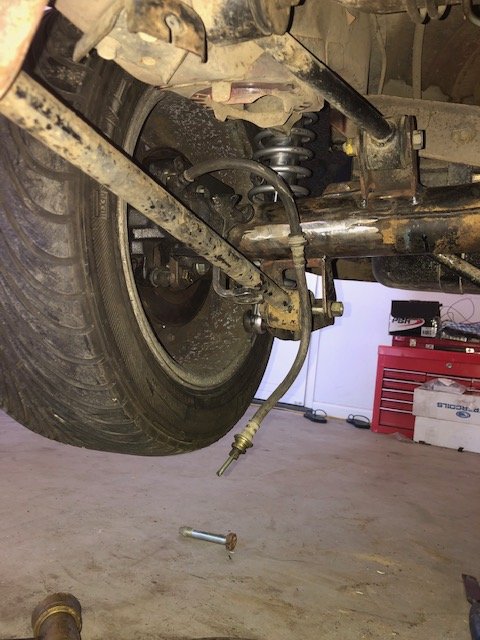
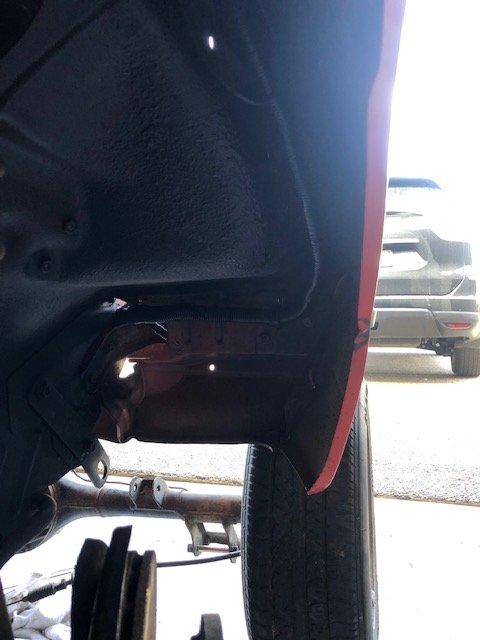
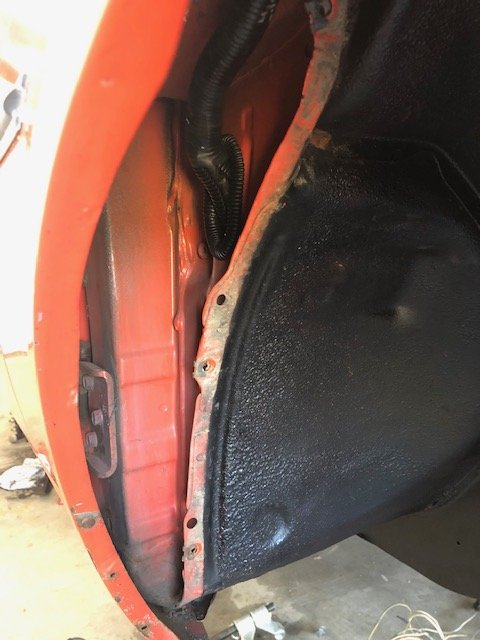
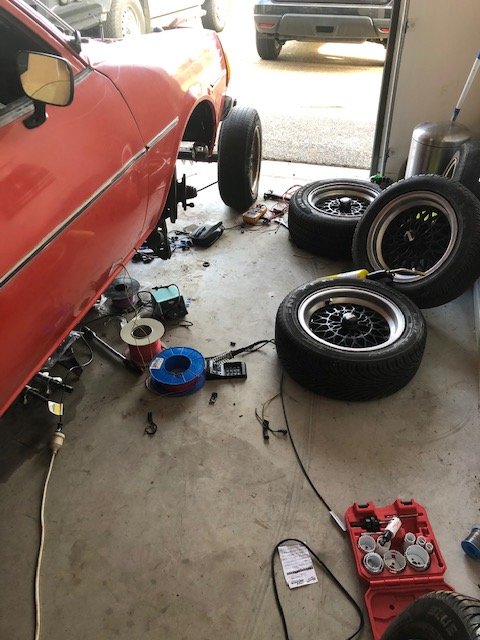
So over the last few days I had the new suspension mounts/tabs welded on.
the spherical bearings arrived for the top mounts so installed them also.
was a Sunday cash job for the welding, 9am ended up being almost 1pm but at least it’s now done
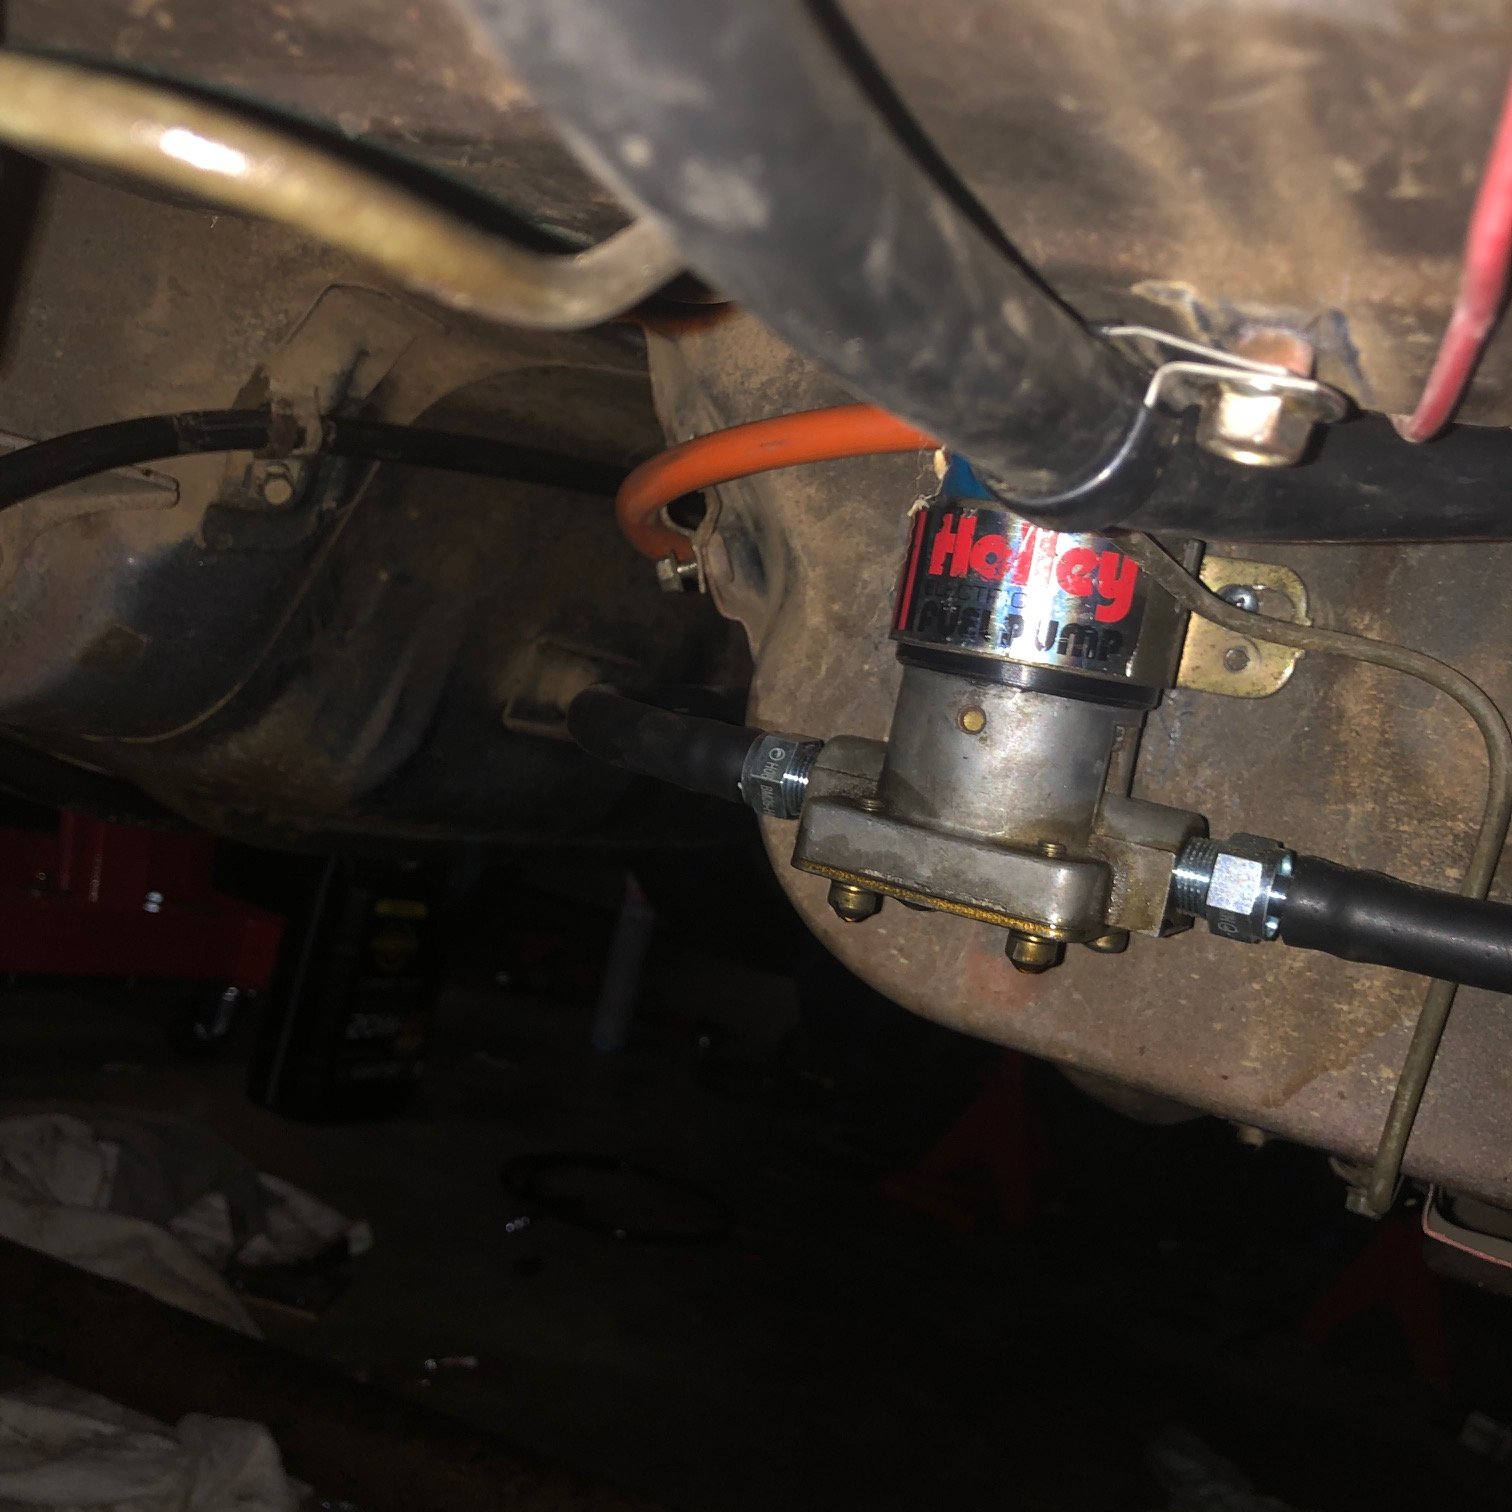
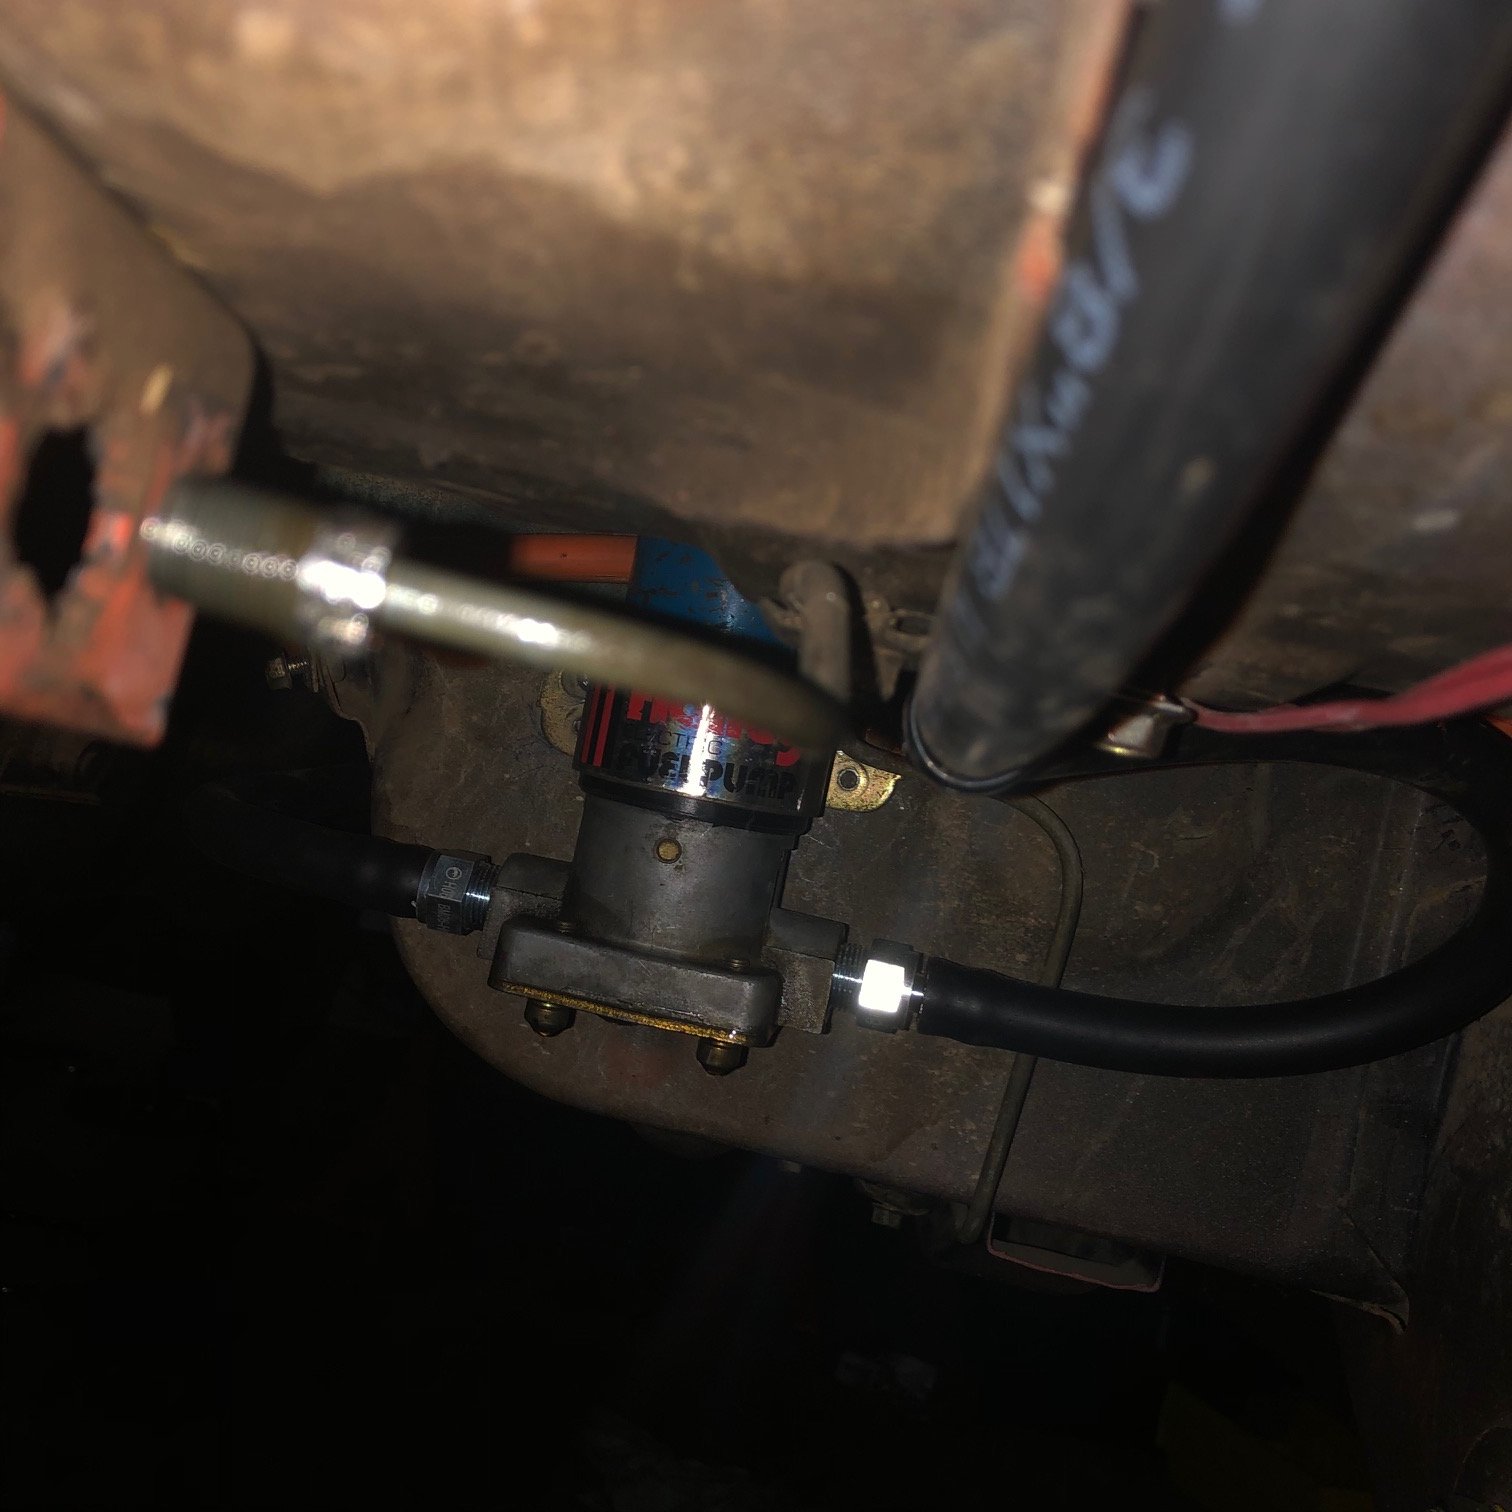
Ran fuel hoses, plumbed in fuel pressure reg and Holley fuel pump. Ran the battery cable from the boot, and connected all that jazz up.
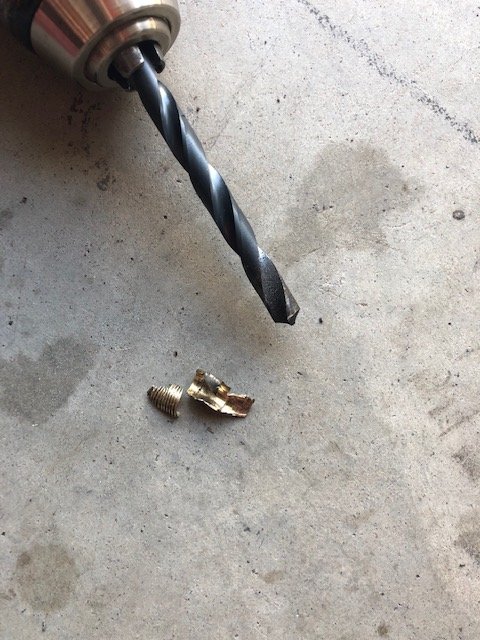
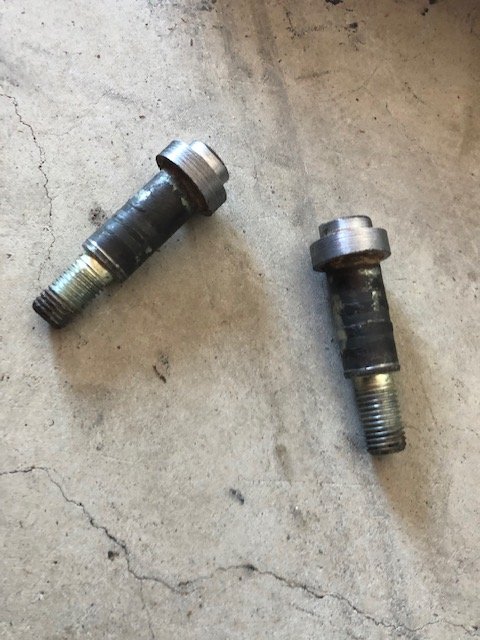
had to wait a few days extra from the Mazda bellhousing and startermotor bolts but that didn’t worry me too much as I was still cursing over the broken temp sender the previous owner broke off at the block.
i tried to easy out it but that at failed. So bought an m8x0.75 tap. Drilled the centre out and no sooner had I started to drive the tap in, the thread broke in two and I could pull it out.
had a drama with the pressure regulator, no matter how much I tightened the fittings they leaked. I guess being built in Korea now Holley arnt the quality they should be.
ended up having to use a bit of ptfe tape to ensure a good seal. Anyways, some photos and we’ll get to the good stuff soon....
-
5
-
-
Just now, oldrx7 said:
please keep the 1.4 badge on the back
Sure!!
was gonna take it off but since you requested. It’s gonna stay .
im missing the mazda323 badge off the other side. You got one??
-
On 06/04/2020 at 09:06, Truenotch said:
They look harder than ~100lb to me. I’d say somewhere around 200-250lb would be a good rate for a road car depending on what you’ll be running up front.
To run a keeper spring you’ll either need to run a shorter spring or “lower” the spring perches to account for the extra stack height of the keeper.
Hey, im looking into the suspension a bit harder now. Im contemplating getting the spherical bearings for the top shock mount.
Do you know by any chance where to source them and what info i'd need??
Also, where can i find some more info on this keeper spring youre suggesting??
Thanks mate.
-
- Popular Post
- Popular Post
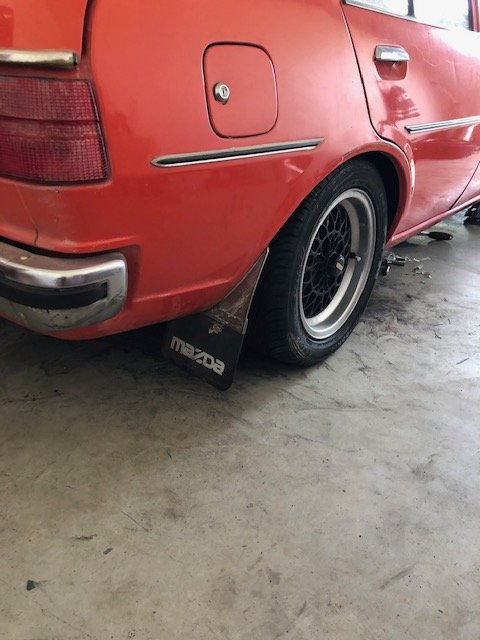
I got bored today so started on the passenger side suspension mounts etc.
scratched my head when I got to the panhard rod mount.... but endeavoured to have a win
Ended up unstitching some of it, wrapping what was left around and welding it back together.
the pictures do a better explanation.
most of the fabrication is complete, just need to get my brackets fully welded that I’ve tacked on and top shock mount bushes. I’m thinking of getting the spherical bearings for the top.at least it’s back as a roller-ish and on my week off will try have all the engine stuff done and go for a start.
enough jibber jabber....
-
10
-
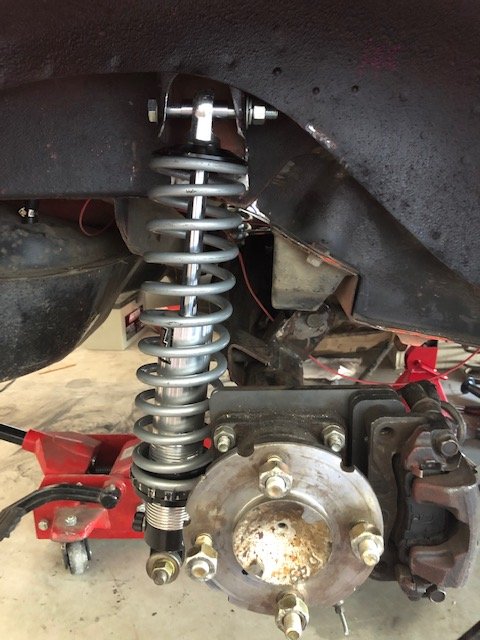
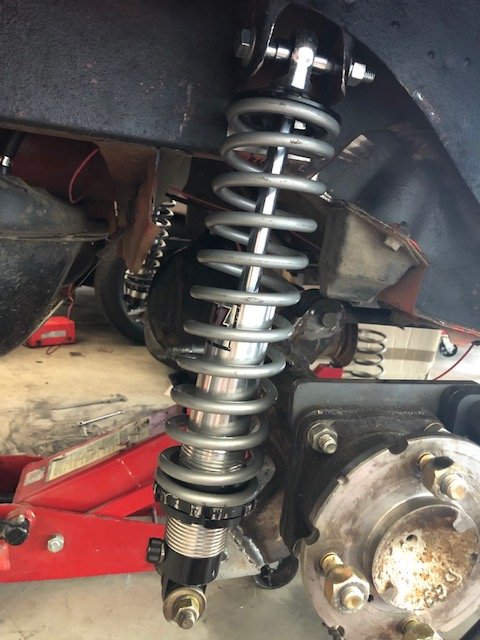
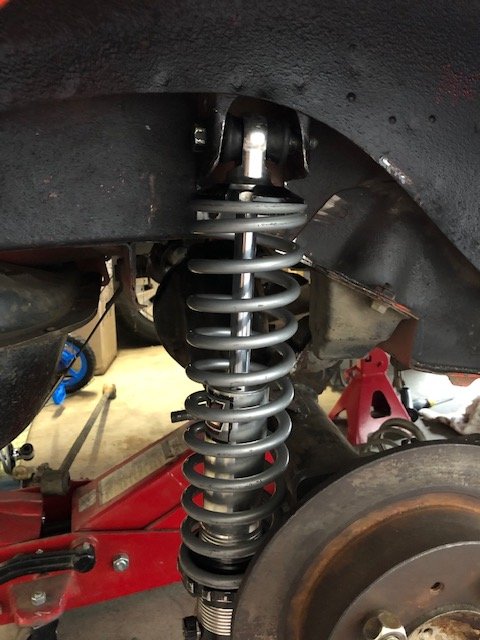
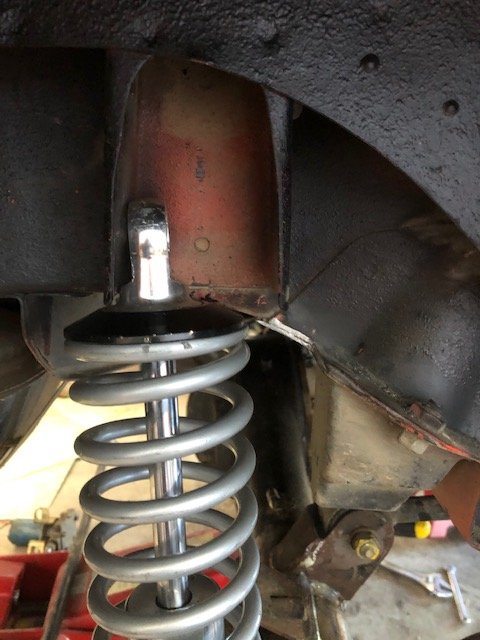
Well.... I tacked it on, and used the old bushing to try it out.
clearanced the old shock housings to fit the new coil over diameter.and it worked in all aspects. Clearance in all areas.
its taken a lot of trial n error, but I finally have it where I think it can work as designed.
From all accounts it’s not just an easy trim n fit. But totally achievable with a grinder, some scrap steel, welder and patience.
-
7
-
-
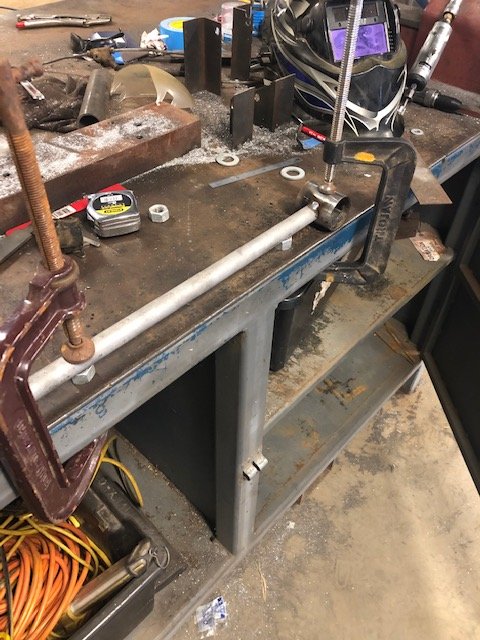
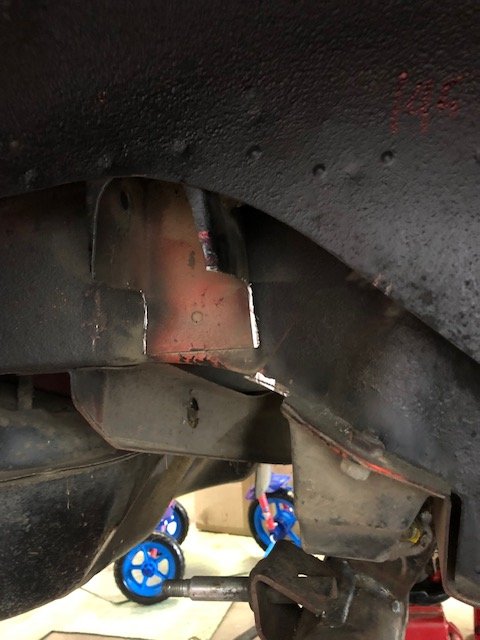
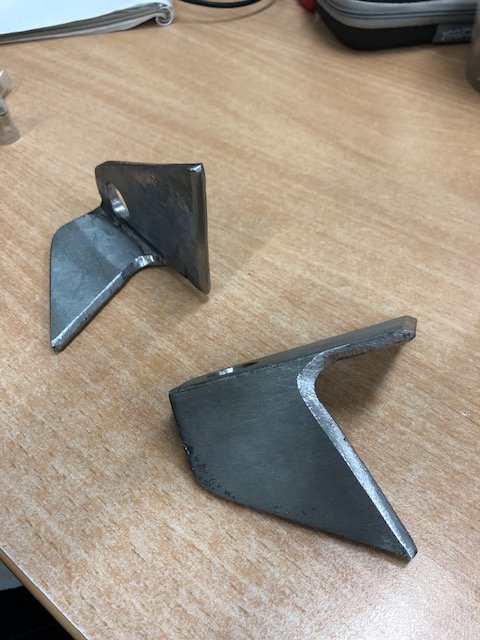
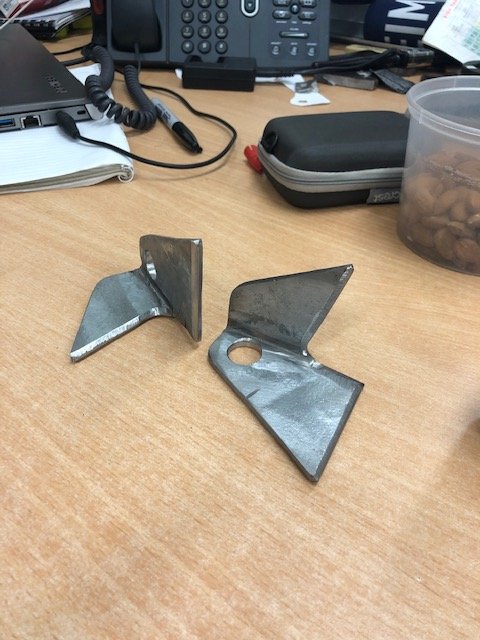
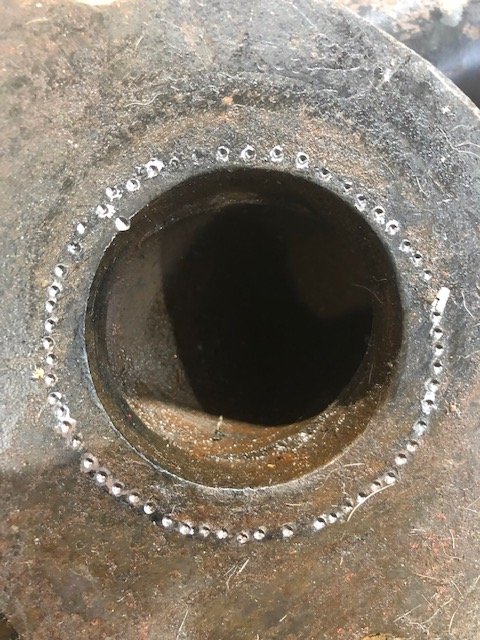
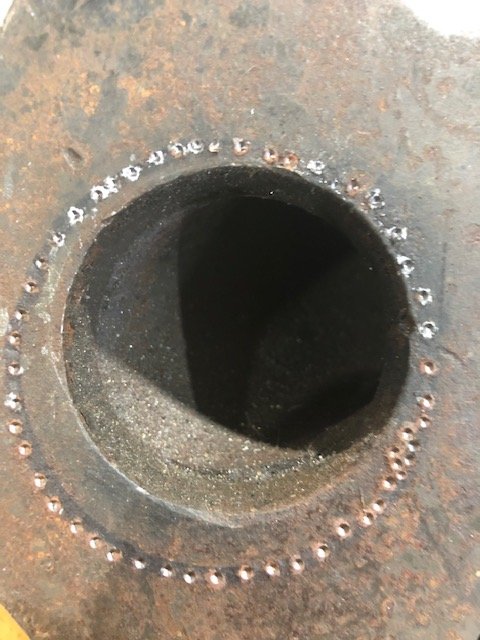
So I took my gasket paper designs into work and looked in the steel rack for some stock to scrounge.
ended up fining some angle iron off cut that wax extra from a platform and ladder install.
5mm thick so good n solid!!!traced the outline of the one I cut out, reversed it for the opposite side and with grinder in hand. Cut em out
cleaned em up and brought em home to test fit.....
-
4
-
-
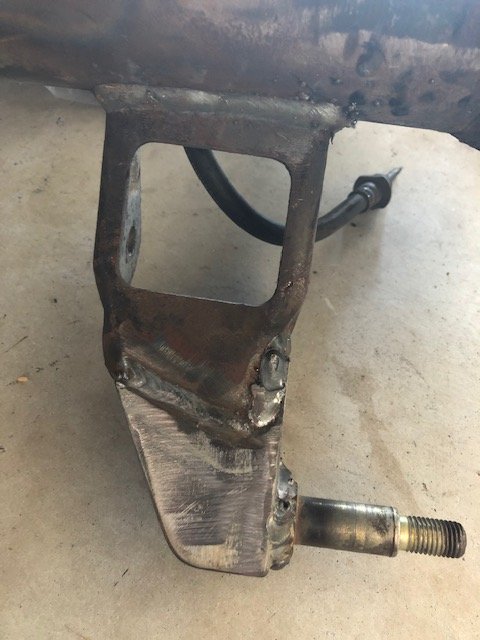
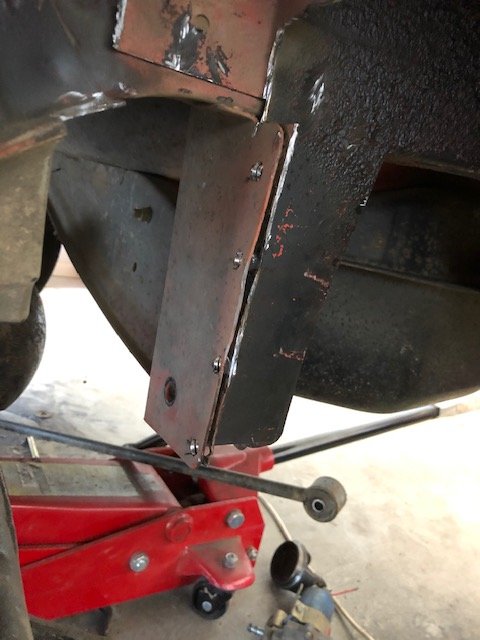
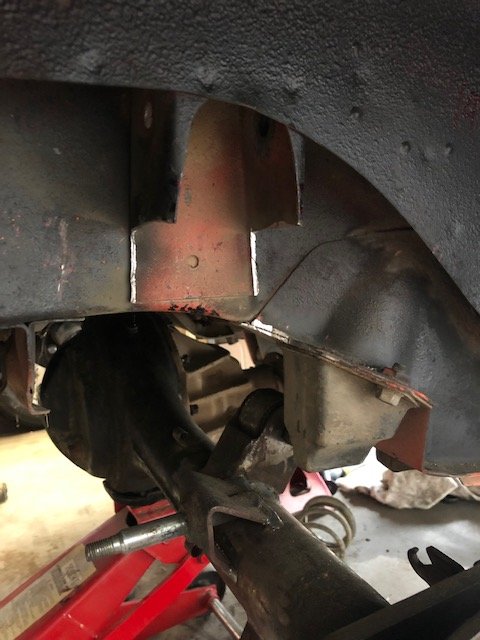
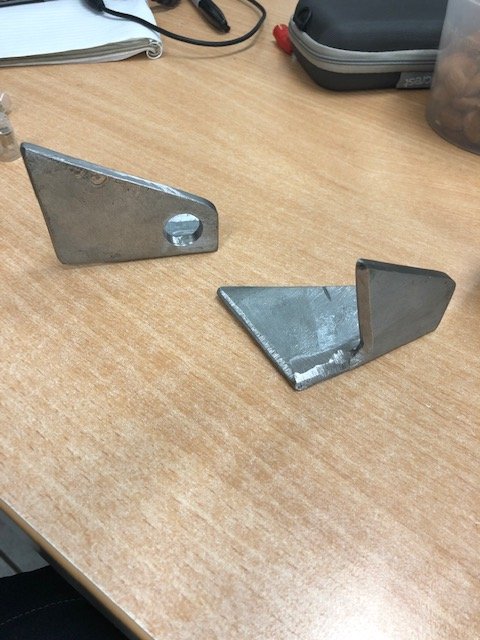
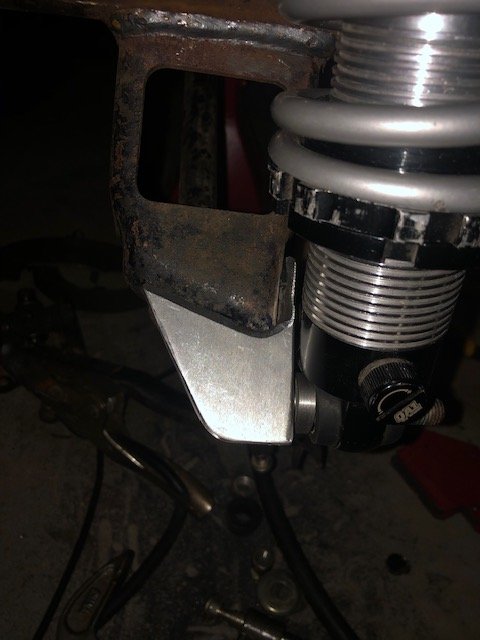
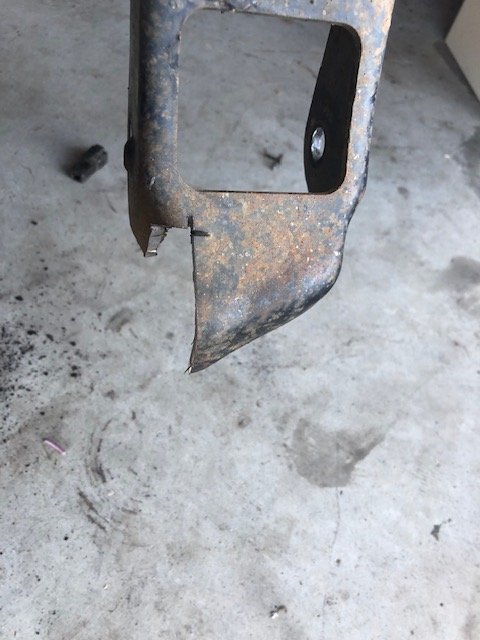
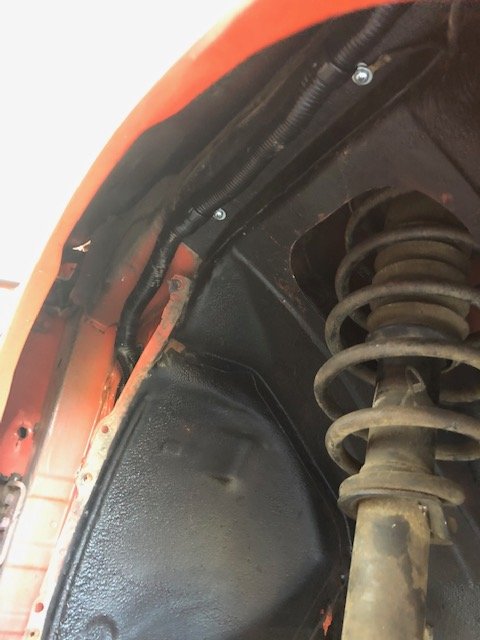
Thats a big fat no.
it gave me clearance, but just not enough for my liking, if the diff angle was changed, that would’ve given me more but I’m not keen on chewing out universal joints.
So my going to have to cut out some plates to weld on and extend my shock mount as shown in the photo below.
if anyone else has a better/easier idea, let me know!!!
-
3
-
-
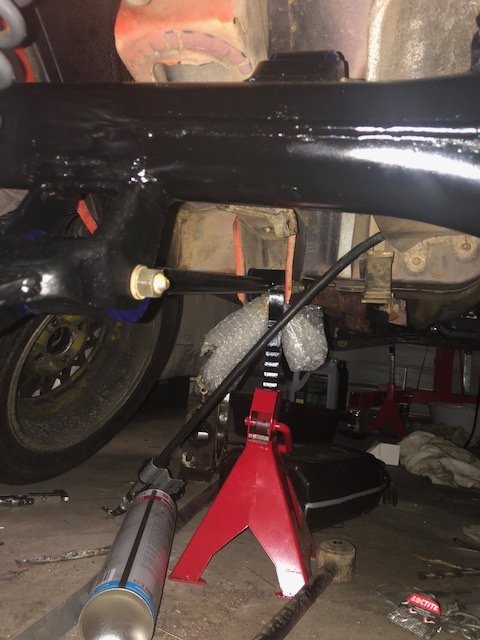
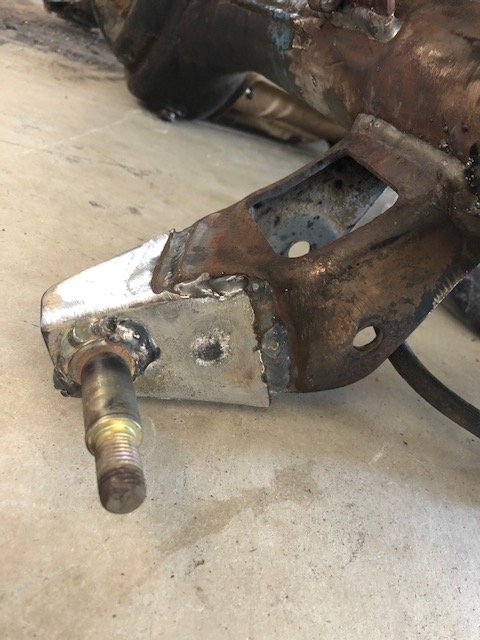
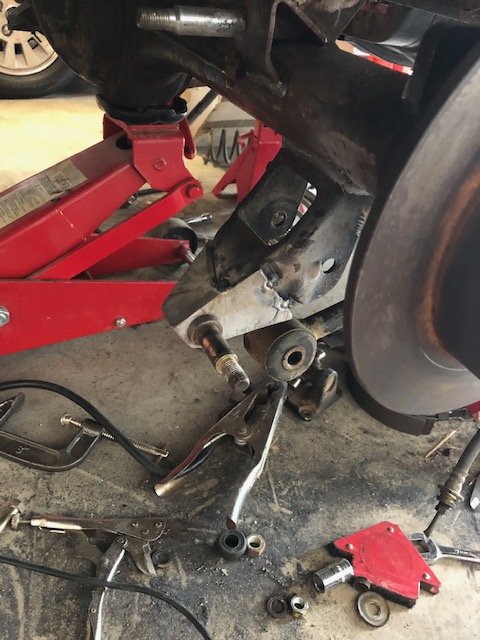
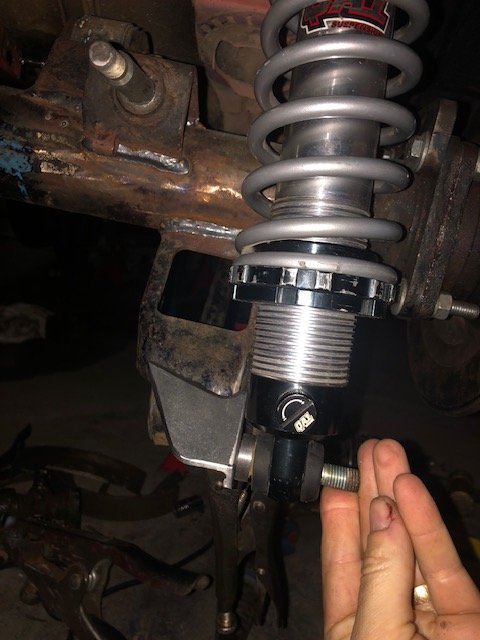
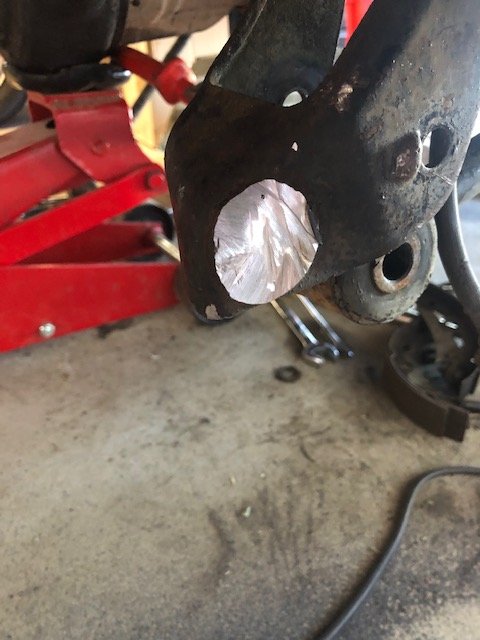
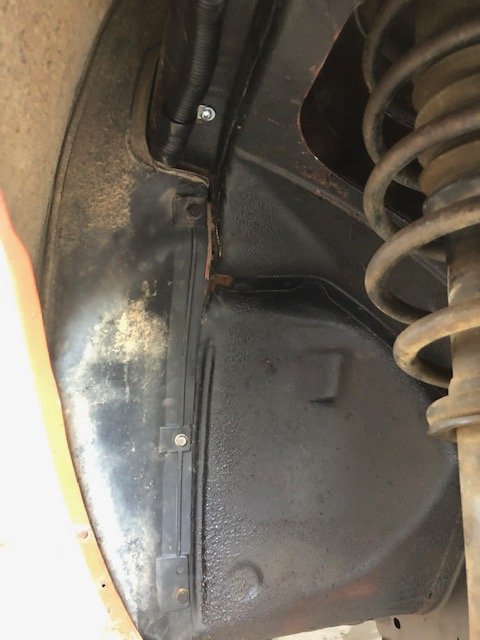
But I think I now have it sorted....
i am going to try move the bottom mounting pin down and away from the diff in the hopes of gaining enough clearance. I think if I can manage about 20-30mm movement I’ll be good to go.... stay tuned for an update tomorrow, with hopefully some better news
-
1
-
-
- Popular Post
- Popular Post
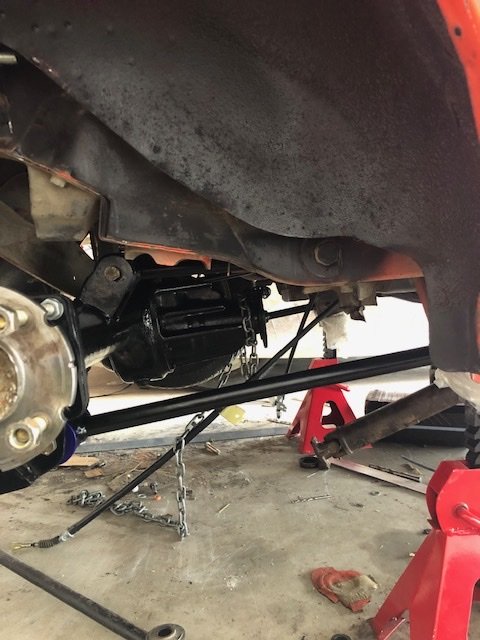
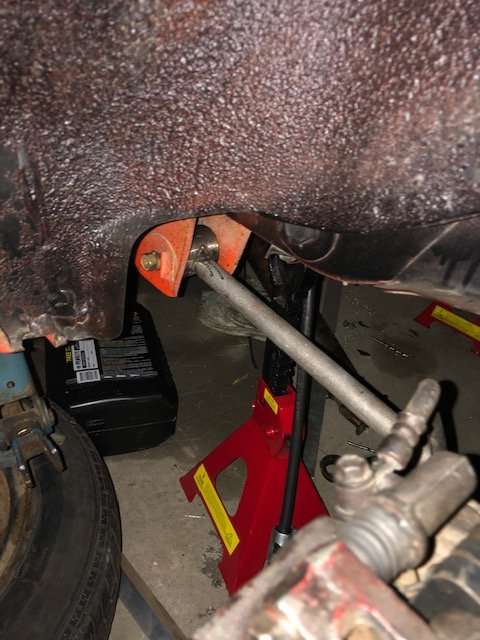
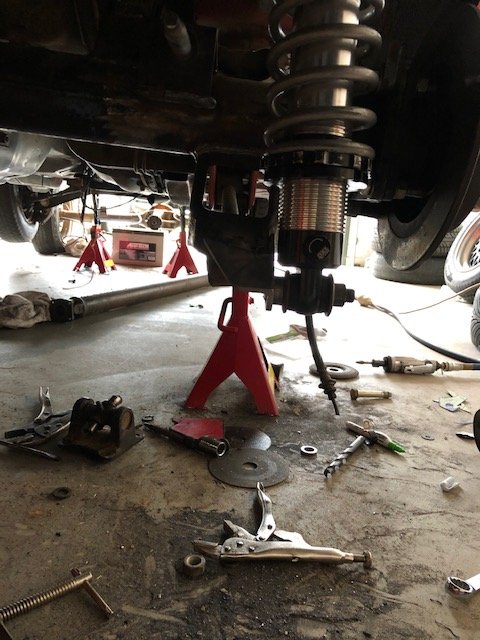
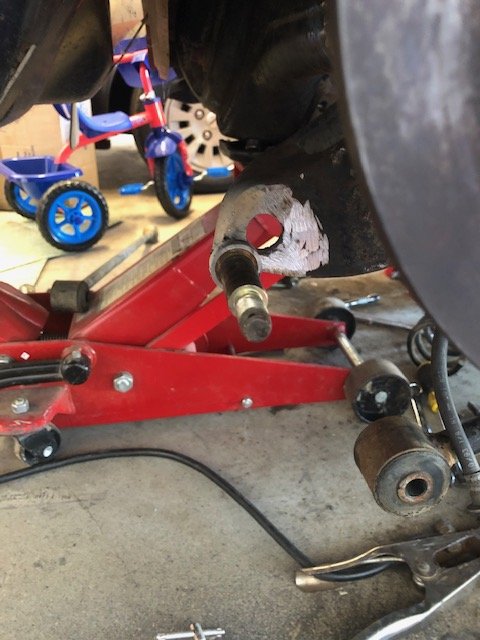
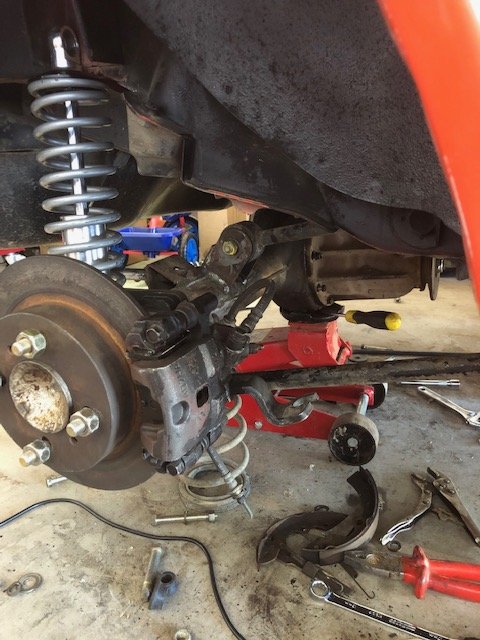
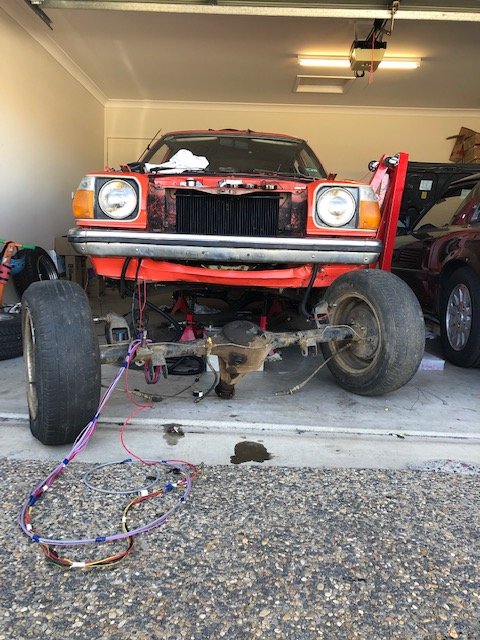
After finishing the wiring, I decided I’d tackle the diff install after the quick mock up the other day.
I did my best to wrangle it in but it just won’t go. I have this weird need to run rear coil overs instead of the standard setup, why... I don’t know. I think it’s because it’s a challenge and I don’t like to let things beat me.
anyway, I came to the realisation that it’s a bigger mission than I anticipated, The springs hit the diff preventing the top from mounting, the mounting points need massaging, and a whole lot of other shit. It was at this point I got carried away on the rums, and was a bit too wobbly to swing spanners.so cleaned up the engine bay Instead.
im not sure how these others people get their qa1 mounted but they must be smarter than me
-
11
-
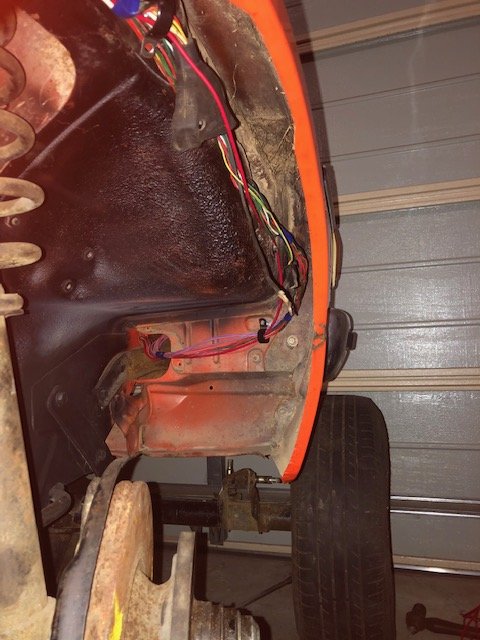
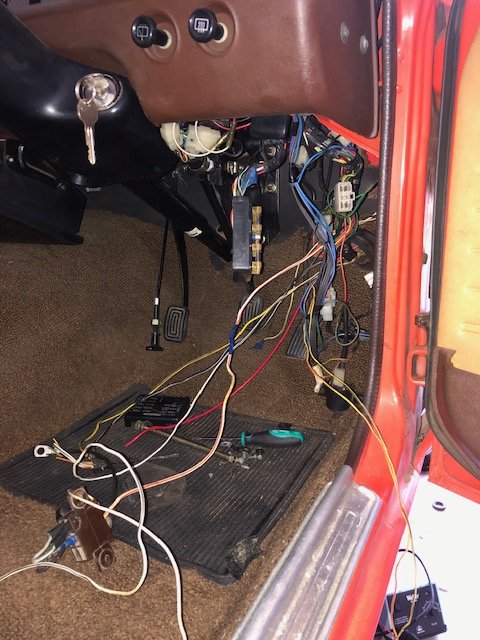
To make it easy for me, I ran 3 “circuits”
headlights and indicators. Instruments, and ignition.
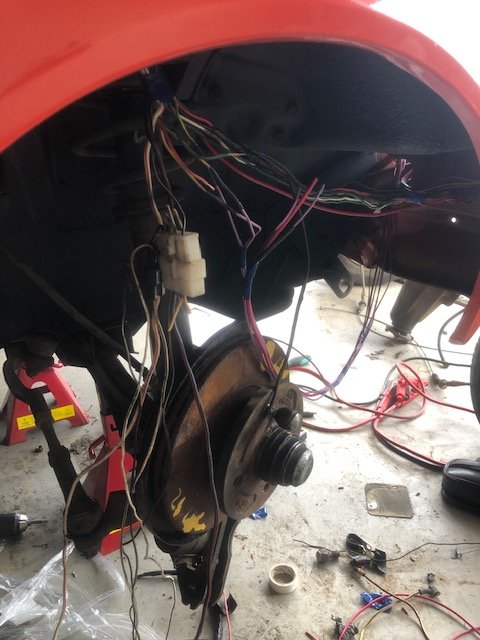
so the lights were a basic cut, solder and lengthen.the ignition was a bit trickier, as I wanted there to be minimal wiring in the engine bay, and to look somewhat professional. So that’s all new, from the fuse box forward. I had a ball ache of a time looking at wiring diagrams, tracing wires etc to utilises the correct ignition circuits from the original ballast system, so I gave that up n reached out to an old auto sparky i knew from way back when and he told how he does it.
so same deal with alternator wiring. Fucked if I knew what to utilise from the old ext reg system but nutted as much as I could before again reaching out.
so all that was done and dusted, clipped up and ready for action yesterday morning.
enough dribble, more photos
-
7
-
-
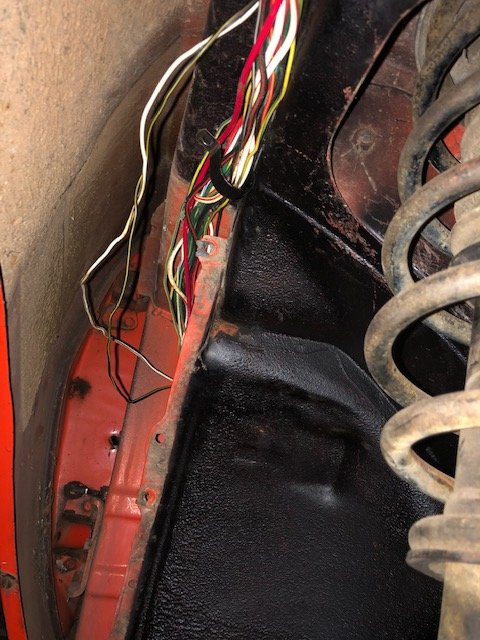
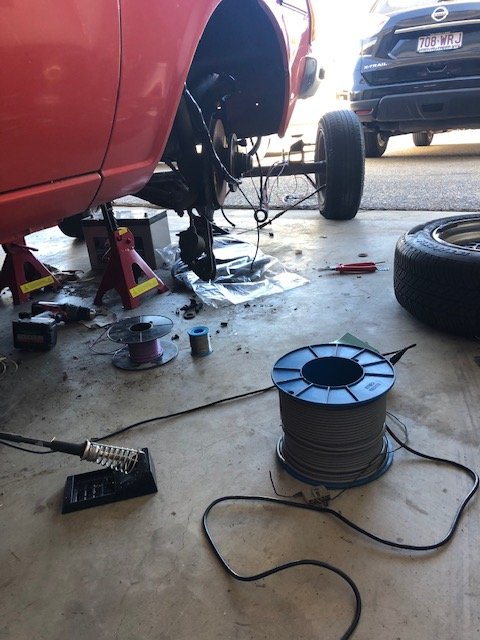
I started my week off, last week on Thursday, and set to sorting the wiring.
im not a sparkey, and have never really wired anything up before so to tackle this was a big of a head fuck to say the least.... but I got there.
i chose to extend my harnesses, so to keep the factory colours at the end of the runs. Not sure if this was the right thing to do but made sense to me at the time.
anyways, here’s a pic or two
-
4
-
-
Also, ive got a week away from work so i'm going to tackle the wiring. Those who are proficient and this magical wiring stuff... ive got 1.5mm and 2.5mm.
Would this cover most of the stuff I need to do to both extend my loom, and wire new relays and positive feeds etc??
Any help would be appreciated, write up on the discussions.....
-
2
-
-
- Popular Post
- Popular Post
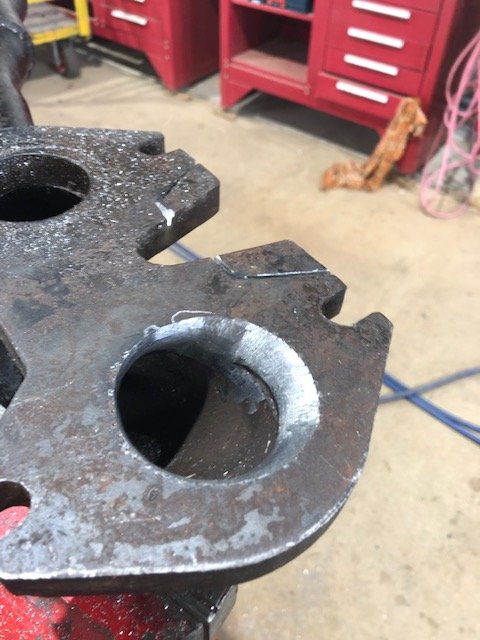
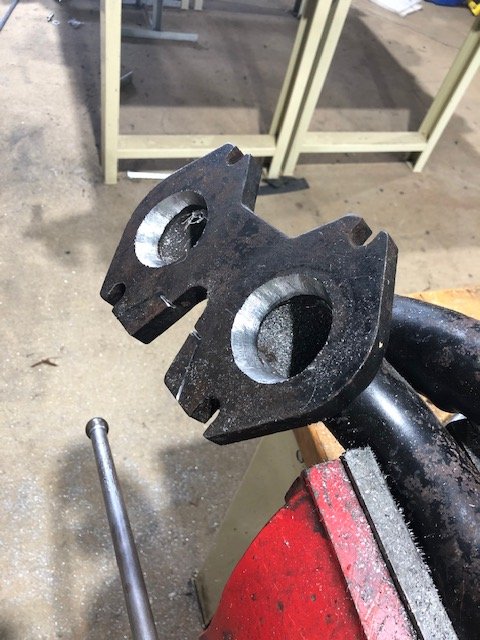
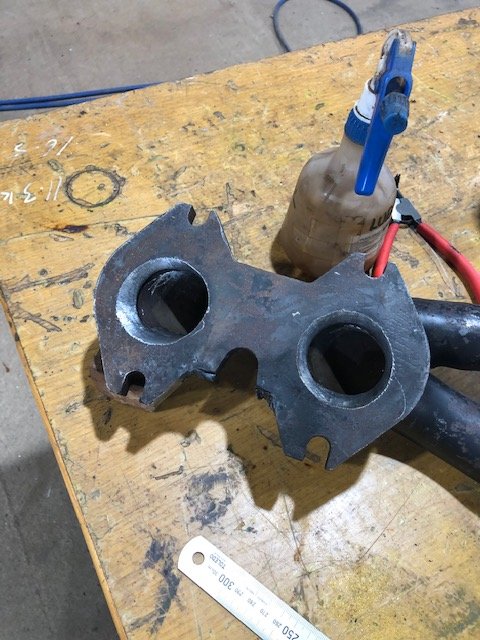
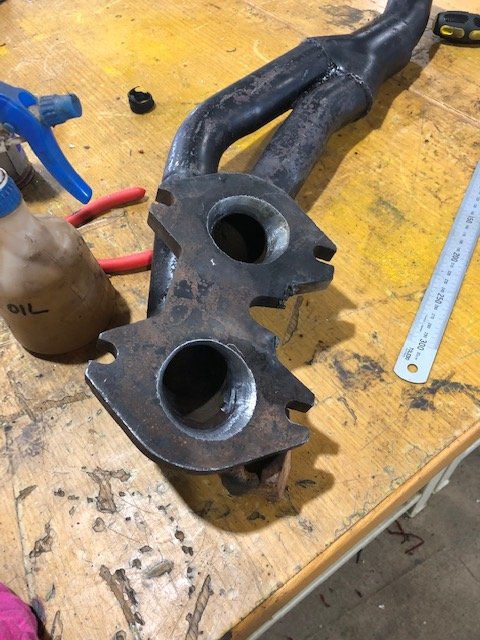
I’m going to run the extractors I got with my bridgeport as I’m doing this on a pretty tight budget. That and I wanna see how cheap but solid I can build it.
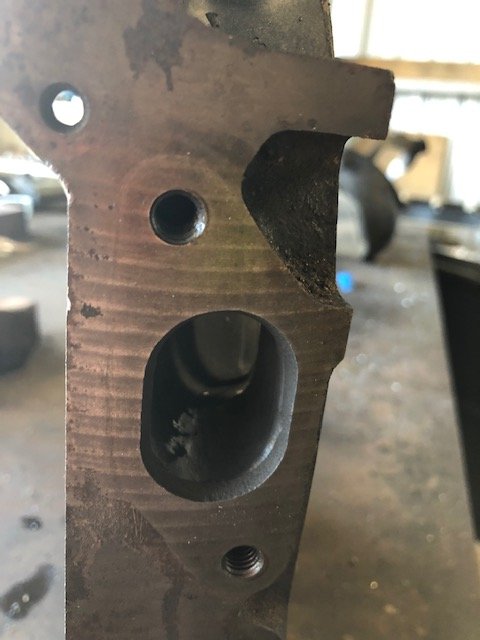
anyways, when I put the exhaust manifold gasket up to the manifold flange, it was quite clear whoever built the manifold wasn’t worried about flow.
so traced the outline of the exhaust gasket on the extractors and centre punched it so I don’t lose the outline.got my die grinder in hand and went to work.
its not going to be perfect by any means, the tubes didnt join to the flange at 90deg so there’s no real way of having perfect outlet flow. But I did my best and I guess a picture tells a thousand words.
-
18
-
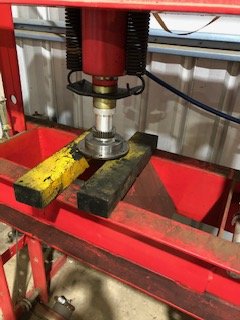
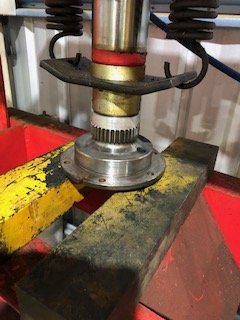
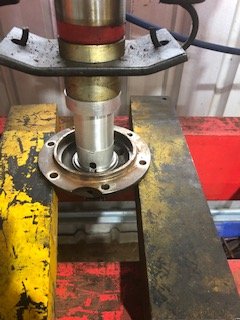
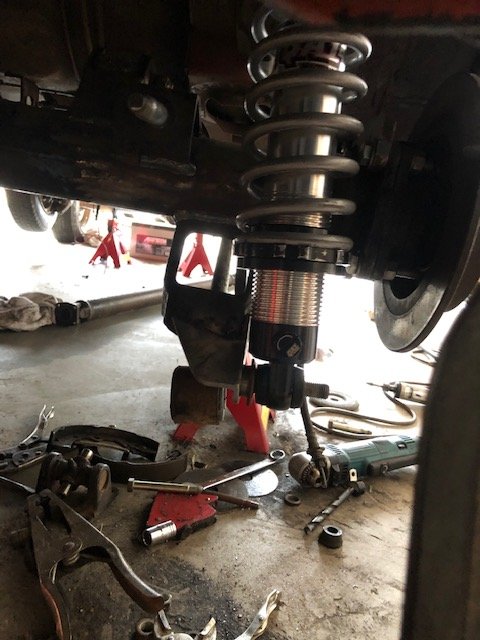
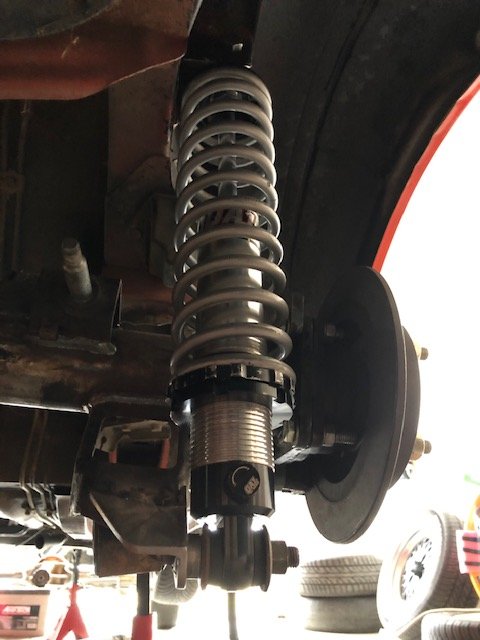
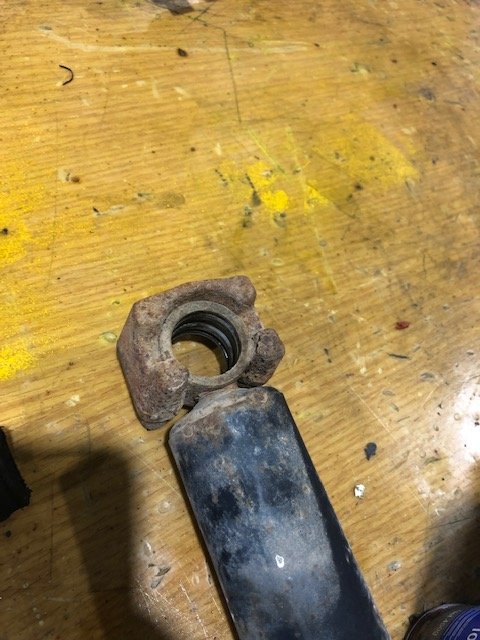
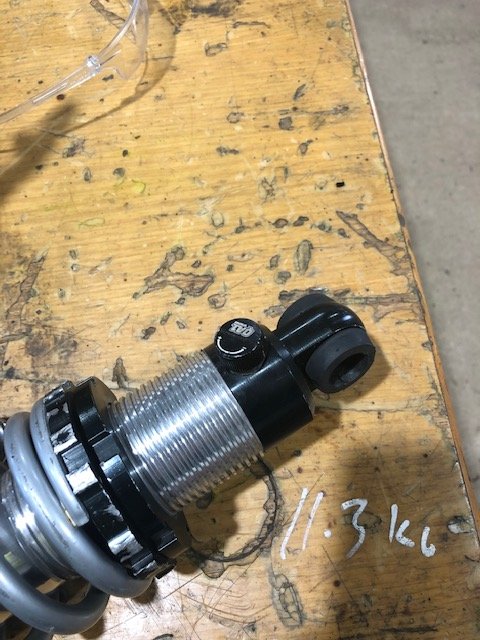
I had a bit more progress with my qa1 shock. The steel inserts/crush tubes for the upper shock mounts weren’t the right size so I had to figure out what I was going to do. So I took the easy way out. I pressed out the rubber bush from the original shock. Remove all the rubber from the original shock crush tube and pressed that it. Right length, o.d and I.d
bloody winner!!!
Im going to try run the other bushes from the other end of the shock and see how things go. They slip in, fit what seems appropriate enough so will have to report back after a few k’s are put on it when I finally get it on the rd
-
3
-


Jamie’s rx 323
in Projects and Build Ups
Posted
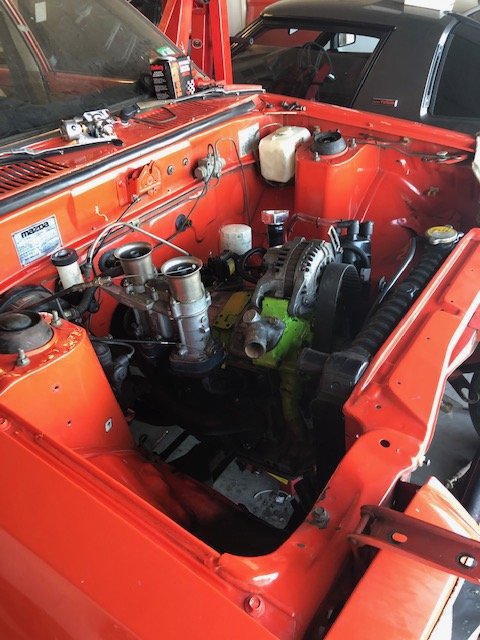
With that all done, and a bit of time up my sleeves it was time for rebuild #2 on the little 12a!!
this time with everything being new I was sure it’ll be ok.
Everything went together without a hitch.
and this time rotating it was the compression I remembered
got it thrown back in the engine bay, hooked up and spin up for oil pressure.
even got me young fulla off the couch from watching paw patrol to help dad throw it in!!!
no dramas. Checked timing, ensured there were no leaks.... then went for a start.
started first turn of the key.... smoked the house out and gave the dog a heart attack. Headers only meant it was loud.. just right.
I'd upload a video... but I’m shit with technology and don’t know how to.