


LOWMK11
-
Posts
119 -
Joined
-
Last visited
Posts posted by LOWMK11
-
-
^the car or the blonde? I know what I saw first!
-
 1
1
-
-
Lol. To do a car properly work out what you think it would cost then double it and in some cases triple it. Money pit full stop.
-
2
-
-
- Popular Post
- Popular Post
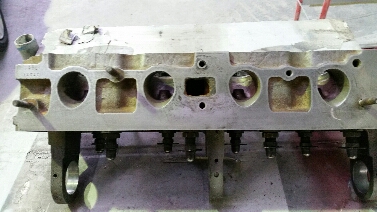
So a wee bit more has happened. Firstly I modded the head for the injectors to fit and then sent it back to be reassembled

Bonnet all repaired and inside painted ready for the outside to be coated
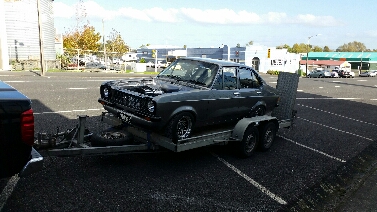
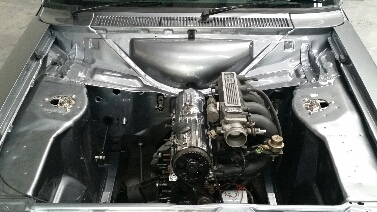
And finally put the car on the trailer and went for a ride to drop the engine in. Fitted the new heavy duty exedy sports clutch, bolted up the gearbox and boom in she goes..
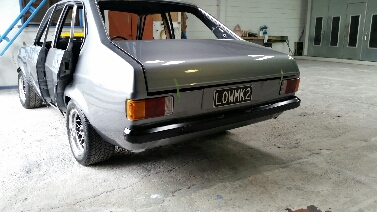
And a look at the ride height...not bad, will leave like this for now and see where it settles
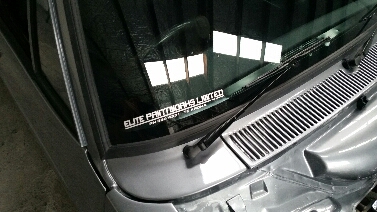
Got the all important sign writing on too
-
14
-
Providing it's factory/2k paint use paint thinner to take the glue off
-
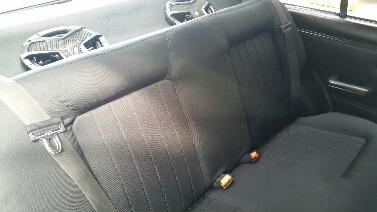
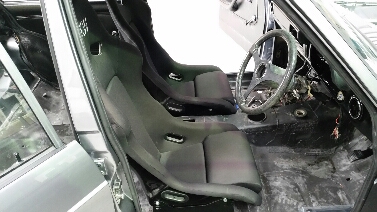
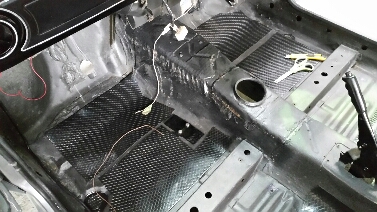
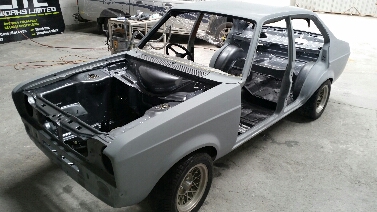
Got most of the interior in now carpets,seats,belts, etc
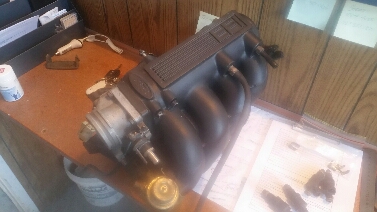
And multi point efi manifold arrived from auzzie this morning, brought from rhubarb77 ( thanks heaps)
Next is to get the die grinder out and modify the inlet ports on the head to fit the injectors, assemble head, fit head, collect clutch kit and fit gearbox and finally drop her in! Hopefully within a couple more weeks
-
3
-
-
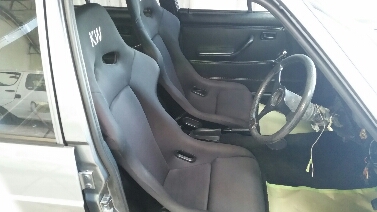
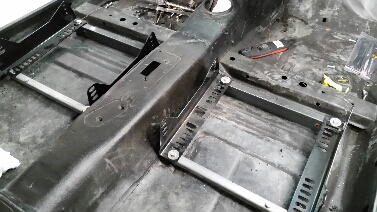
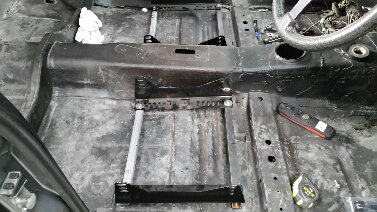
Cut up some 75 and 25mm box section today for the seat mounts and bolted the brackets in position. Worked out quite well
And bolted up the seats. Super solid and comfortable too
Took it all back out for paint then cleaned up the floor and put a bit of sound proofing down (might help, not holding my breath tho)
-
5
-
-
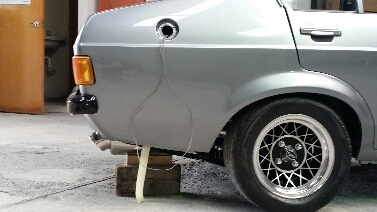
Pushed the car outside for the first time for a look...
And also sat the rear muffler in position to weld up a rear mount to it so I can go ahead and paint it without burning it later
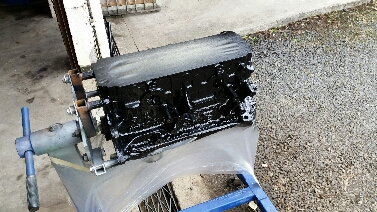
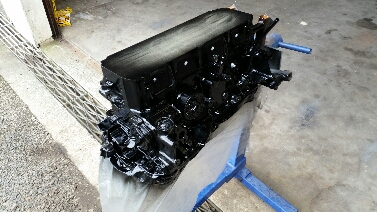
Short block is assembled so sprayed it up at the old mans
Got a sierra efi manifold sorted, so until I'm able to get it the head has to wait as it will need the inlet ports modified to suit the injectors.
Seat mounts today....
-
2
-
-
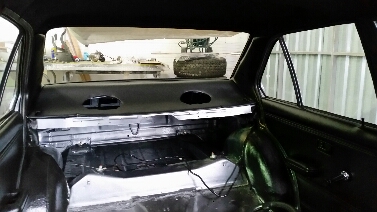
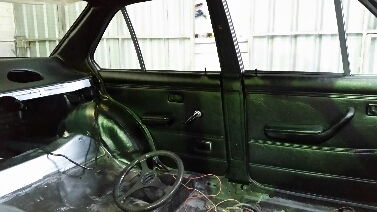
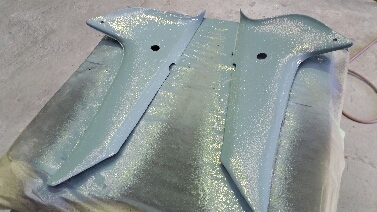
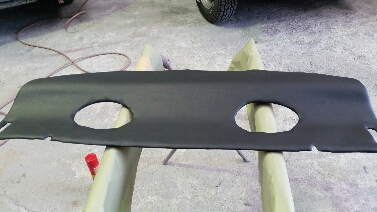
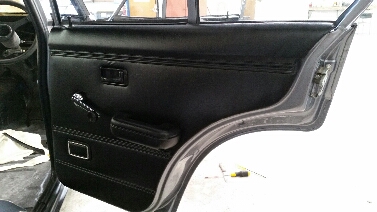
Got the "b"and"c" pillar trims in along with the rear parcel tray
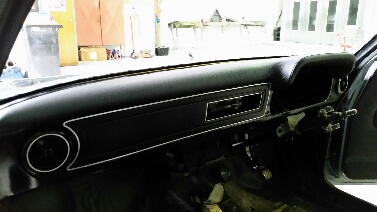
Also in went the pedal box, heater box and piping and dashpad.
In the middle of tidying up the wiring atm and putting back up under the dash(going to rewire the engine bay new and hide a bit of it too).
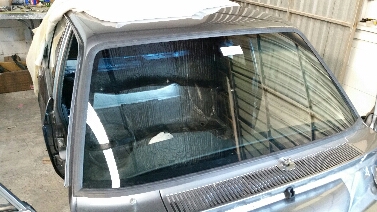
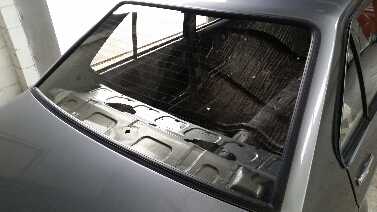
New windscreen turned up this morning so in it went
Bro inlaw dropped off the sump he modded for me too, with the bottom squared off to clear the cross member and a return pipe for the turbo.
The old man called today to let me know the pistons and crank were about to go in too!
The engine is basically going to be a fresh standard rebuild(with race spec rings and bearings ) for now just to get it running and to tune in the link(will run low boost)and will be building a forged engine later with the 205 sierra block I have waiting...
-
7
-
-
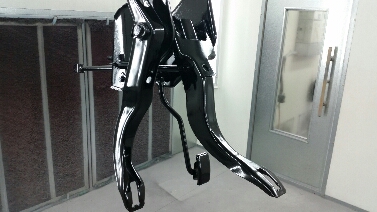
Firstly drop it by at least 3 inches
-
1
-
-
-
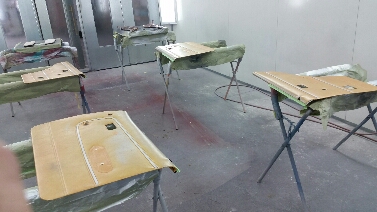
Pedal box got a tidy up today
And c pillar trims were far from good so a rub down and a coat of texture spray ready to be satin blacked tomorrow.
Sent the rear parcel tray to the upholsterer this morning and he came in this arvo holding my flash new parcel tray...super fast!
-
3
-
-
Hey man how common are those efi manifolds over in Oz? Trying to find one here but its proving difficult.
-
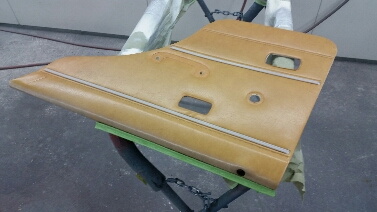
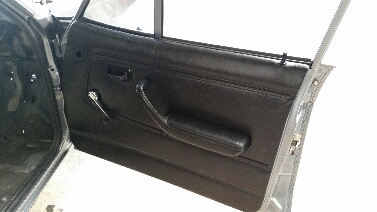
Got a real good set of door trims but wrong color and filthy so before I sent them to be upholstered I thought I'd try spraying them and if that turned into a f up retrimming would be the go.
All cleaned up with iso, vinyl prep and then adhesion promoter.
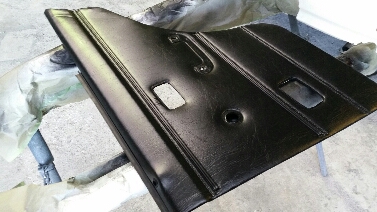
Then dusted multiple light coats of the black color coat, and wow stoked as! Look factory as
Managed to get a couple on too
Will try to get over to work tomorrow arvo to finish up the other two then thats the doors done
-
9
-
-
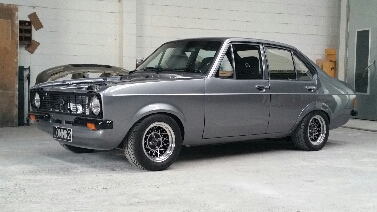
Thanks heaps guys . My phone won't let me put bigger pics up for some reason? Maybe cause I'm computer illiterate! I own and operate my own auto painters so the panel and paint hasn't really cost me that much,but really my own time but to give you some idea of the value of the job it's worked out to around the 20-25k mark(panel and paint alone) originally set a budget of 10k finished but blew that outta the water quite a while back lol. Wasn't meant to get this carried away but it just snowballed and now have to carry on
-
2
-
-
- Popular Post
- Popular Post
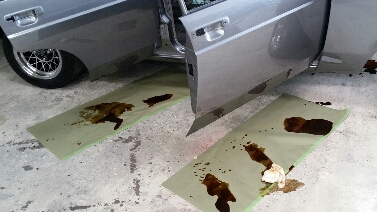
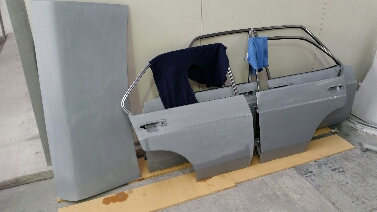
Got the door rubbers on along with the latches, strikers and handles. Then a couple more hours lining it all up properly( new rubbers make this a mission)
The problem with a build like this that's gotten out of hand is everything that goes back on has to be new or made look new, so is taking a lot longer than expected. Rear window in
Side windows,regulators and new belt moulds and clips
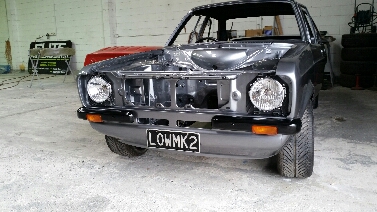
Starting to look the business with the new grill in
Scored a mint bonnet so that's that sorted and also sent the exhaust manifold,turbo housing, bonnet hinges and latches off to be hpc coated. Engine rebuild bits should be here tomorrow...
-
11
-
Yeah man send them to me. I'll sort it
-
Just do what I did and strip it and paint it black. Illegal I know but....
-
1
-
-
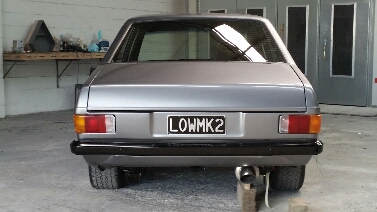
Just a couple pics of the front and rear lights and bumpers going on. Ordered a new grille last week so that should arrive tomorrow. Also blacked the plates as one was a bit bent and barked up.
Might try to get a couple doors together today.
-
9
-
-
Cheers Dan. Yeah much happier with the wheels now after todays effort. Still a little unsure but I'm sure some more low will fix that!
-
1
-
-
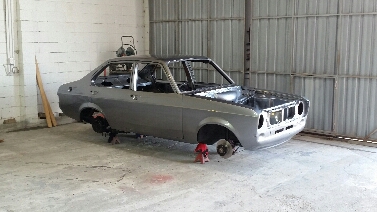
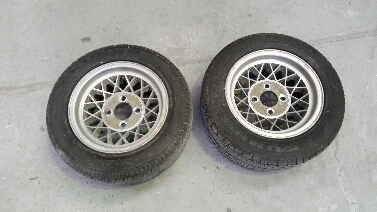
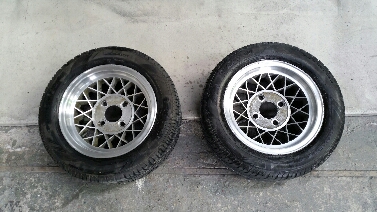
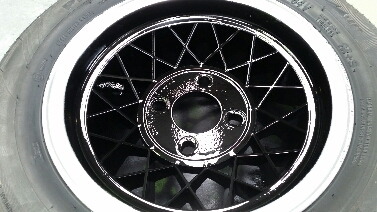
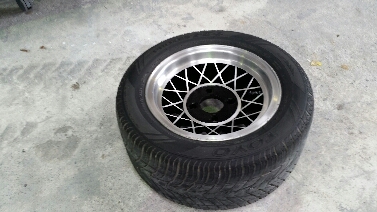
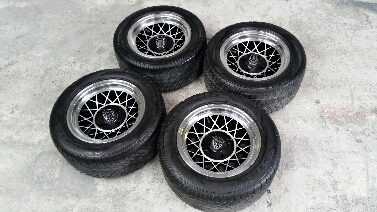
Pulled the wheels off today to give them a spruce up.
They were looking a bit ratty and wasn't sure if they were the right choice
Gave them a good sand up with 320 then 800,1000 and 1500
A few coats of satin black and a rag with some thinner on to wipe off the excess.
And finally a heap of rags,metal polish and elbow grease...
Came up good,much happier now. Still needs about 2" of drop but will have to wait till the rest of the weights in.
still thinking modgies but might leave that for now as I've realistically got other things to blow money on for a while.Also filled it up with cavity wax
-
9
-
-
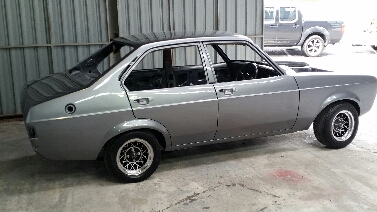
Thanks for that, yeah I'm pretty happy with it, I played around with colours for quite a while. It had to be gunmetal but not too dark otherwise looks dirty and too light would be just silver.
I'm not totally convinced about the hotwires and am thinking of 14 inch modgies? Opinions? I think the hotties would be ok but they really need eagers. Might go with both?
-
- Popular Post
- Popular Post
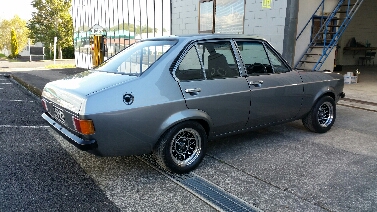
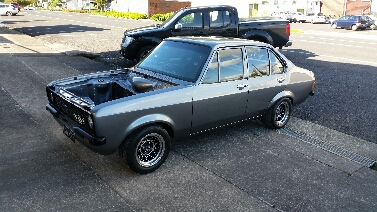
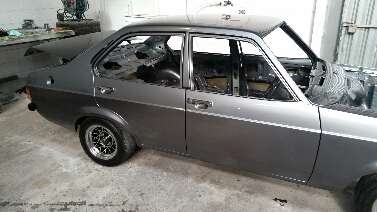
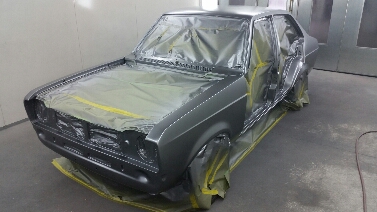
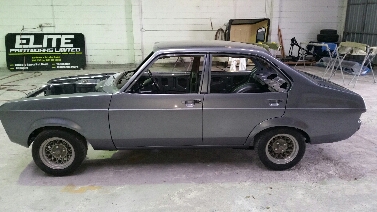
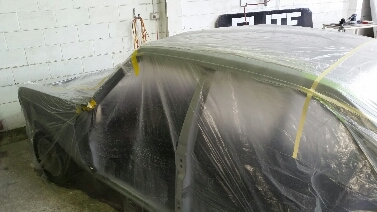
And today after all customers had their cars back for the Easter break and after nearly 18 months since I started,the body was in the booth and masked up
After degreasing,checking everything was right,degreasing again and checking again color was on Letting the basecoat flash for 20 mins I hit it with 3 coats of clear
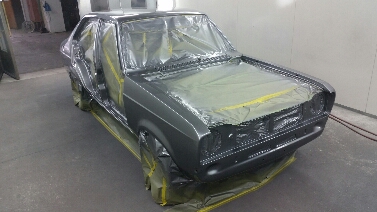
And a 40min bake later out it comes
Bootlid on
And finally doors
Real happy with the result and how straight it's come out...not bad for a painter lol
Well I've had a guts full of cars for the moment so going to hook up the boat for a couple days fishing and diving. Thats all for now. Chur
-
14
-
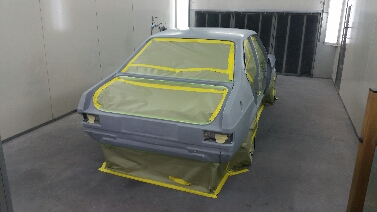
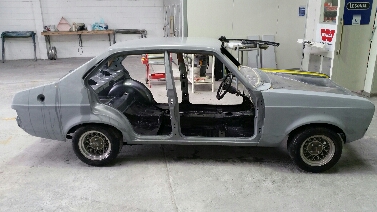
The last week I've been chipping away at getting the final rub down done...
firstly blocking with 240 wet to ensure everything's straight then moving on to 400 and finally 800(all wet sanding by the way)Once this was done I fixed a couple areas I wasn't happy with and we were ready
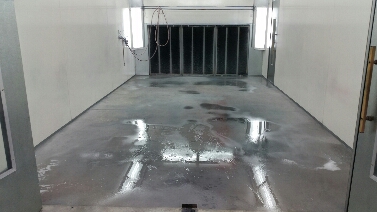
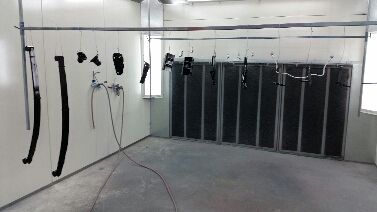
Time to give the booth a good hose out and make sure that everything is clean.
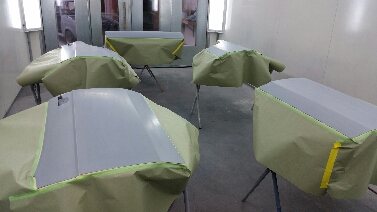
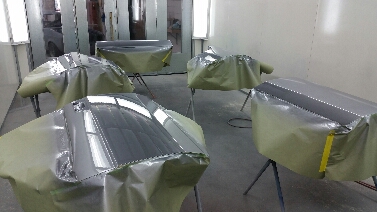
Doors and bootlid in,masked and degreased.
And paint time!
-
4
-
-
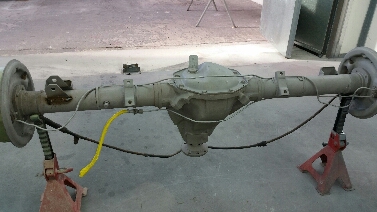
And whattaya know the phone rings and it's Logan telling me my sandblastings done. So keen as a keen thing I'm off to pick it up. With it all back to the shop firstly hit it with the air to blow out all the sand and setup in the booth
And hey presto with a coat of epoxy and a couple coats of satin 2k black and silver we're done and looking good
Sunday rolls around and off to brads engineering shop to borrow his press,out come the old bushes from the springs and swaybar mounts and in go the new ones, all ready for refitting....
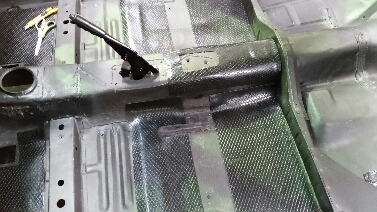
Real happy with the underneath now, all clean tidy and tight. Next will be the big block down and topcoats... stay tuned lol
-
3
-


Mk5 cortina suspension and wheels
in General Car Chat
Posted
If you got a set custom made with the appropriate offset or shortened the diff or more then likely both then maybe... definitely not on the front tho