jsnapsnz
-
Posts
107 -
Joined
-
Last visited
Everything posted by jsnapsnz
-
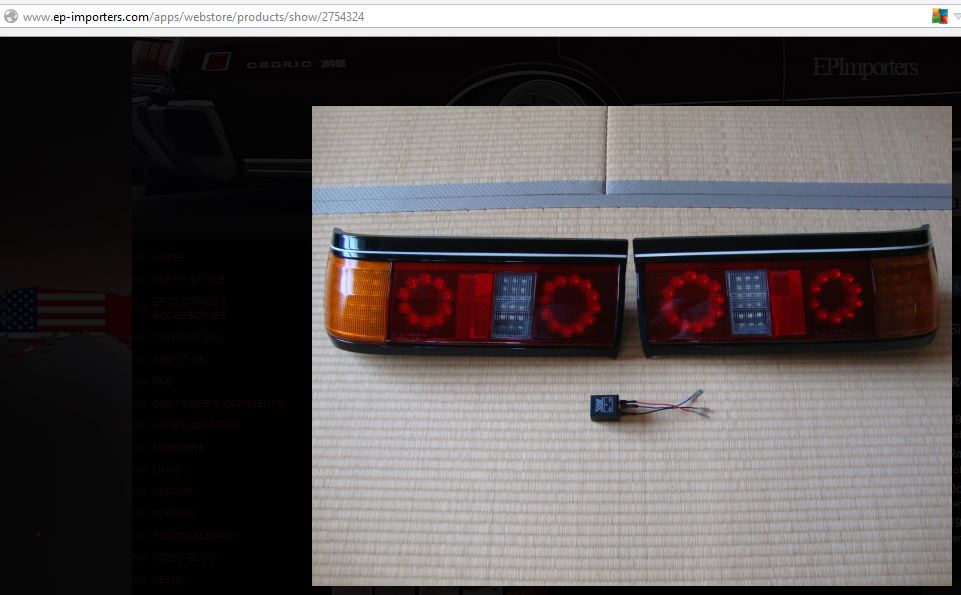
Ideally I would like to mod some facelift tail lights in this fashion

-
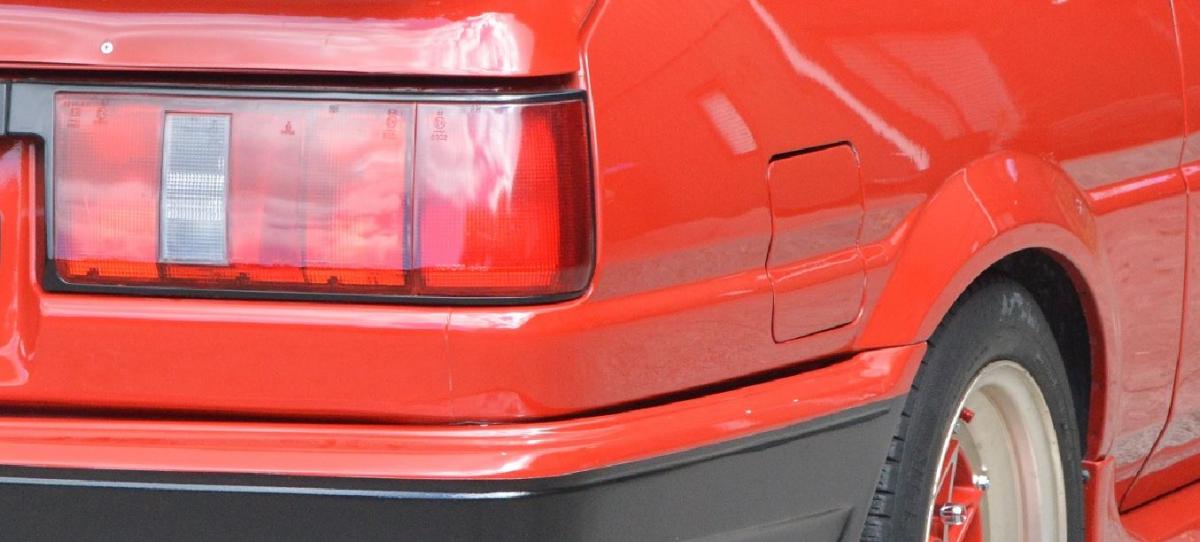
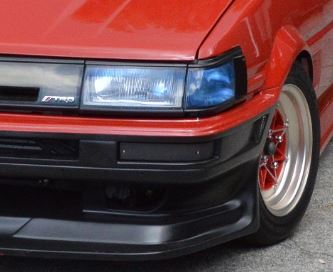
While I hunt for Whiteline Tail lights I decided to go "US spec" with my full face lights The spray looks so damn close to the factory red plastic I also slapped some LED bulbs in my corner lights and tinted them black & blue You can also see my bumper indicator lenses looking matt - Plastidip Smoke spray blends them into the Plastidipped bumper nicely.. Note the cheeky blue "eyelid" on the headlight - I did go full blue but too obviously illegit
-
Got one of it running, just need to figure out how to get it off my phone and post it!!
-
Hah! What a noob, fully thought it was C10 sedan there was a beautiful restored C210 at Classic Car Nagoya - need to bloody figure out posting pics out of the build blog.... Man what a place!!
-
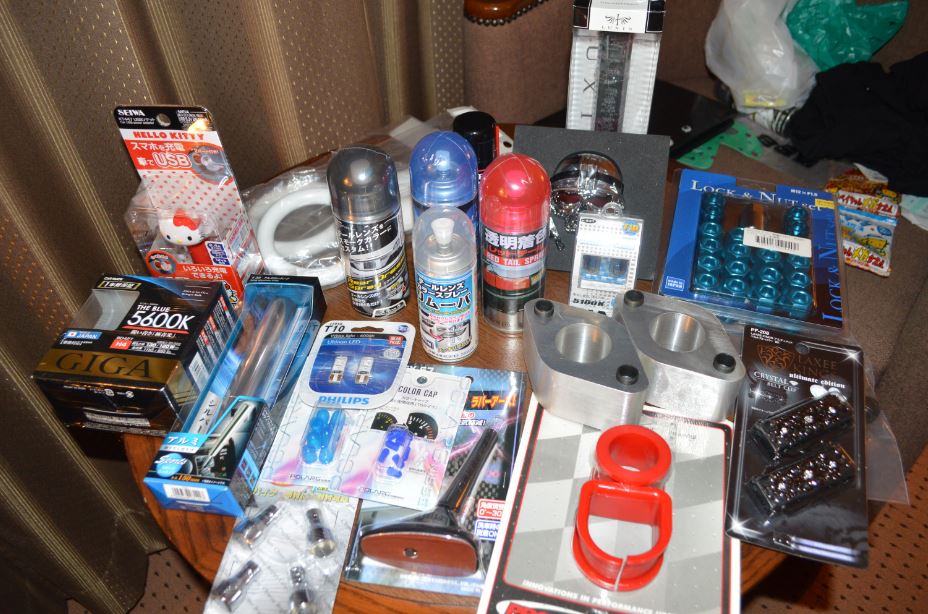
Well here's some more loot I brought back from Japan for my car. Specifically the 45mm RCAs from MotorFIX. Supposedly the biggest that will fit inside 14" rims - I can attest to that even though I had to remove the grease nipple that had replaced the bolt under by LCA balljoints. I decided to use buttonhead capscrews for ultra clearance but probably not necessary I heard NCRCAs can't be certed (? discussion://oldschool.co.nz/index.php?/topic/51964-jsnapsnzs-1985-ae86-levin/ ) so I've put my Techno Pro Spirits goodness on my shelf to look pretty... my LCAs do look pretty flat now but I do want as much low as possible (poor exhaust) I also plan to have some fun with the Tinting sprays - note also the tint removal spray! (spray can with clear cap) pics to follow....
-
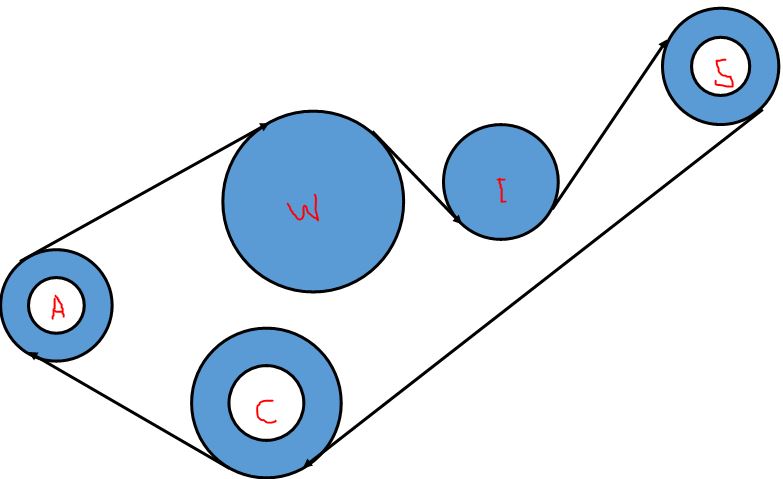
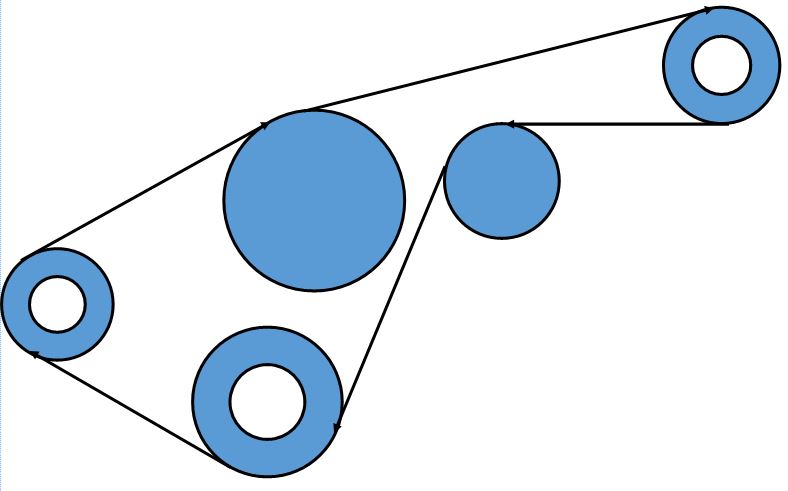
Bugger! I had intended to run the belt in this fashion: Once I test fitted the belt however I decided I was unhappy with the lack of crank pulley contact - ~60deg. As it's a straight pull from the crank to the blower I got dubious. Totally not to scale by the way! I'm sure you get the gist however. Excuse the childish letters w-waterpump etc etc. Here's my revised belt path: In this configuration I probably doubled the belt contact on the crank pulley so much happier about this! Also I've ended up with shorter straight bits of belt between each pulley - win! Bugger all contact with the waterpump pulley but who cares, there's sfa load there... Here's the bugger bit: Belt "pull" was mostly down in V1 but not the pull is mostly sideways in V2. My flaming blower cradle was made with V1 belt path in mind and I've found it's flexible as a gymnast now. SHIT!! I have also found one of my header bolts to be stripped - crap idea making the cradle bolt up there! I have got the rear lifting point, the P/S mount and A/C mount to work with mounting-wise as I run neither. Maybe need to consider an over the head brace to the front lifting point... Oh well time to start fresh, flat bar Ali probably wasn't the best material selection for rigidity anyways...
-
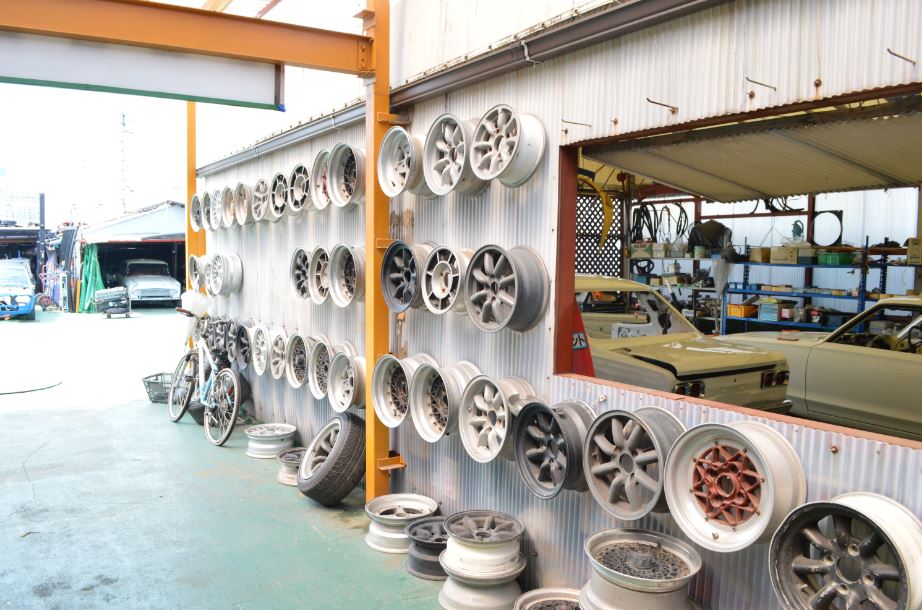
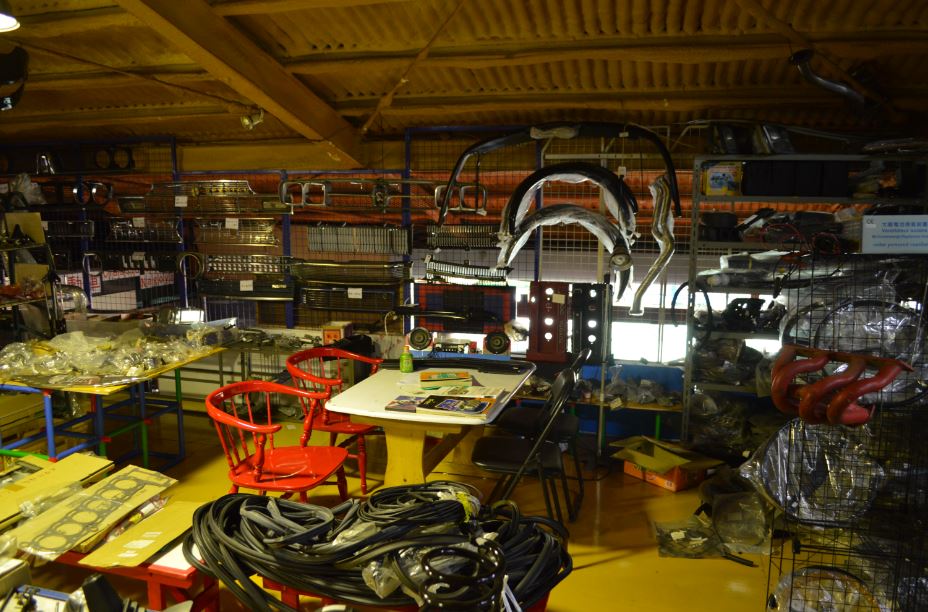
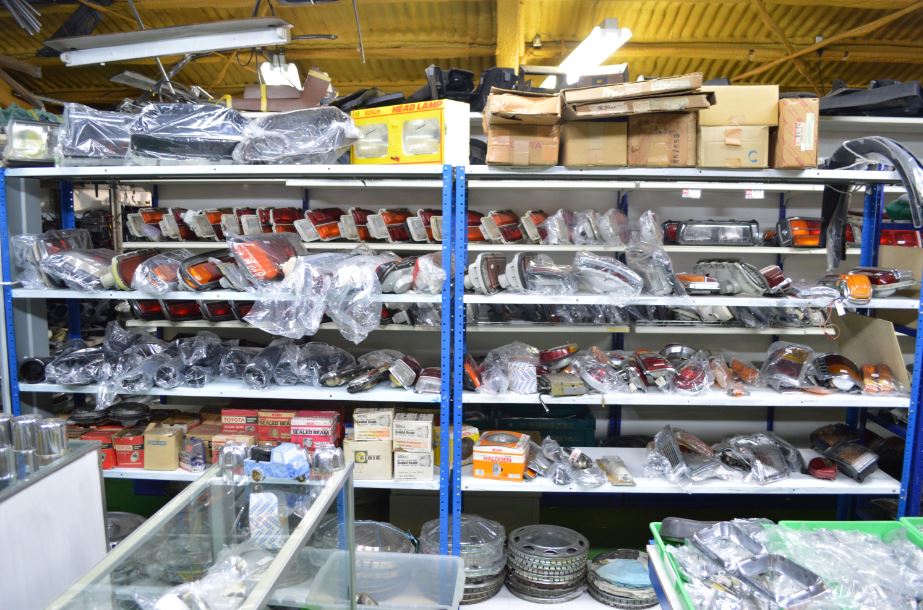
Here's some more pics from the parts department of Classic Car Nagoya. Not a lot really for my AE86 but plenty for early Datsun, Isuzu, Toyota and so on. This one's for you Alex Oooo yeah I'll have me ALL of those wheels thanks! AND the Hakos getting painted... Discuss? //oldschool.co.nz/index.php?/topic/51964-jsnapsnzs-1985-ae86-levin/
-
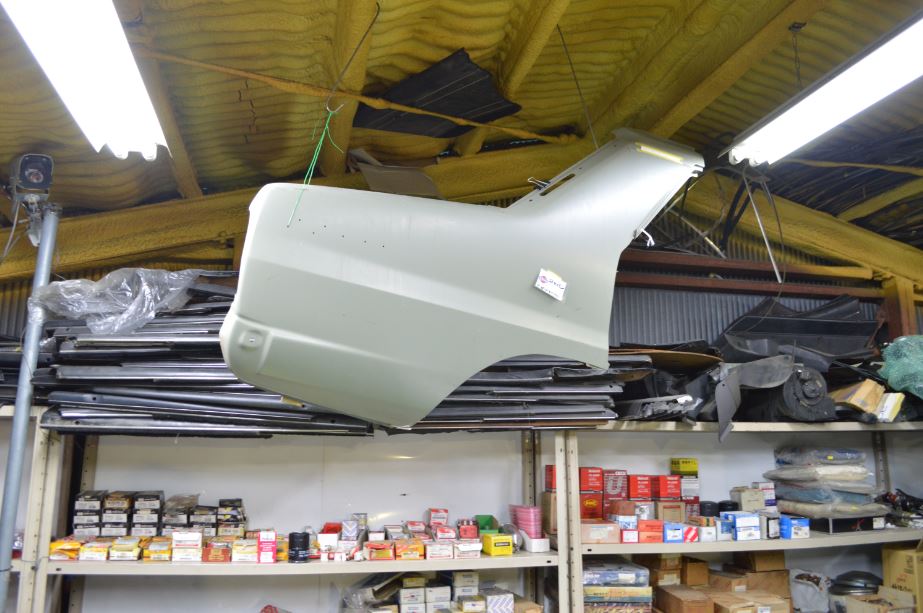
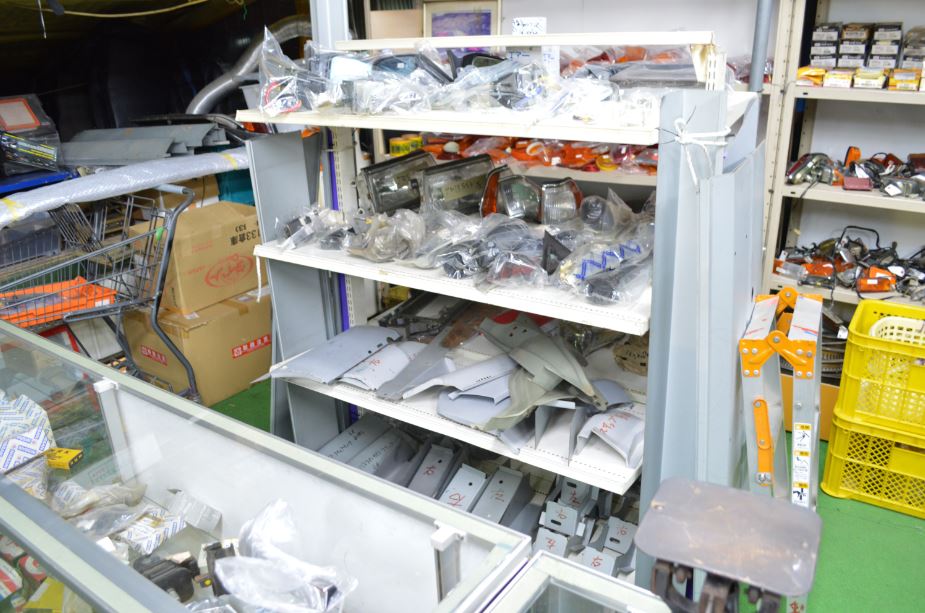
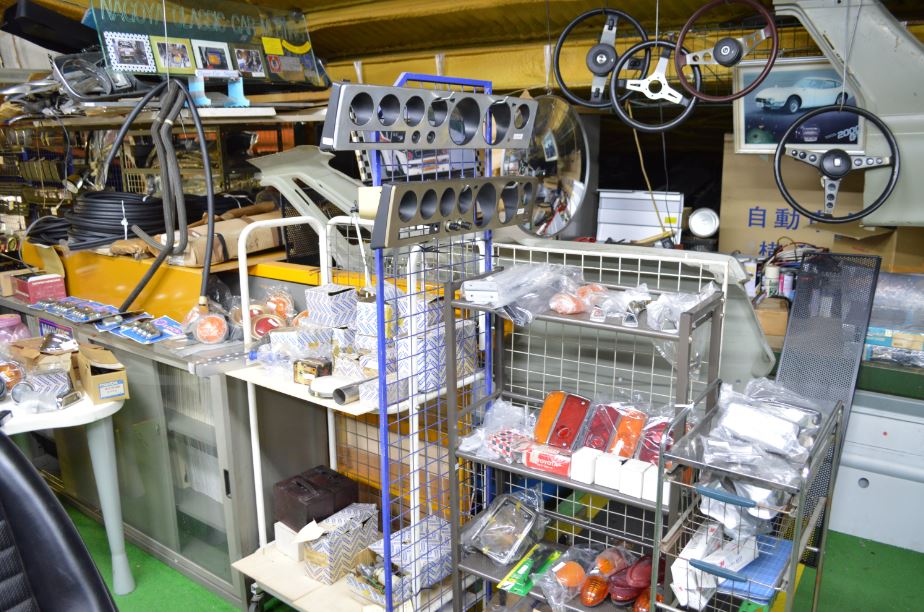
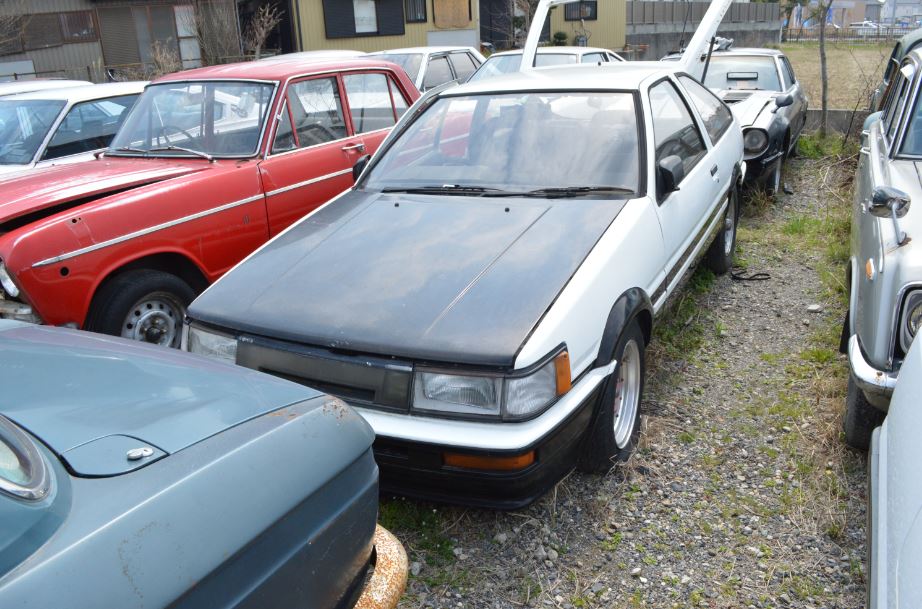
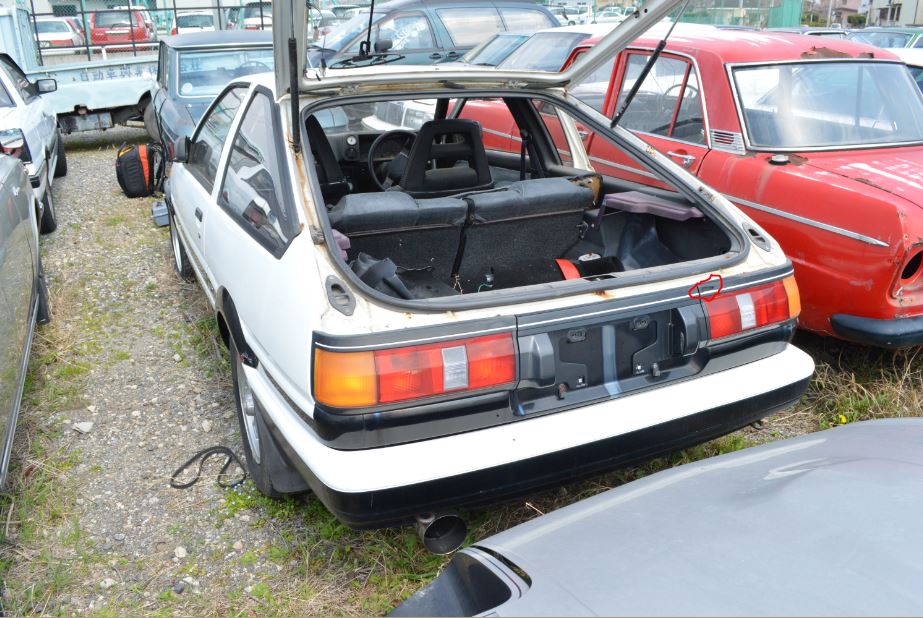
While in Japan I visited Classic Car Nagoya - I'm sure many of you must know of them, I can't recommend a visit enough! They were nice enough to give me a toolbox and let me loose out back Anyway here's some pics of the AE86 in their yard I raided: I grabbed the center Garnish but the tail lights were expensive and not that great - see dodgy tape/paint pen repair I circled. Runfree rear strut brace too, same as mine but difficult to take home... Turbo but Automatic(!!!) I grabbed headlight eyelids, corner lights, garnish and center console lid - they bubble wrapped and boxed for me then off I went on my longboard, skating back to the train station with my box under my arm... Awesome! Here's some pics of their parts dept upstairs J Parts HEAVEN!
-
The car under cover was under video surveillance whereas the door was not. I actually stood in front of it like a mug waving and holding up pictures of my car. I hope they realised it was me! In my defence I also left my business card with an apology note about the sticker as well as some un-stuck stickers for them Respect for cars but not for property...! I am looking forward to removing the rear quarter sticker but I thought it would take the Plasti Dip with it! I bought another can recently so it's on the job list... Thanks, this Corolla deserves a bit of love! I reckon it must be an investment (if I conveniently forget what it is costing to modify/build )
-
Wow roof racks for A-dub! My Kouki AE86 brochure advertises racks too, damn I'd like some!! Also the factory shoes carrier and baby seat! Congrats on the super crazy find
-
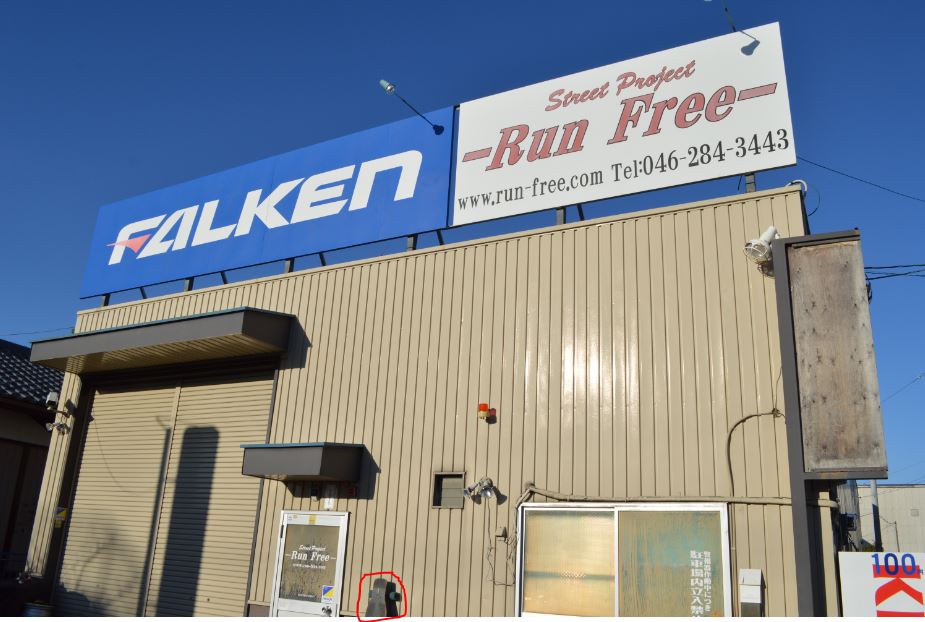
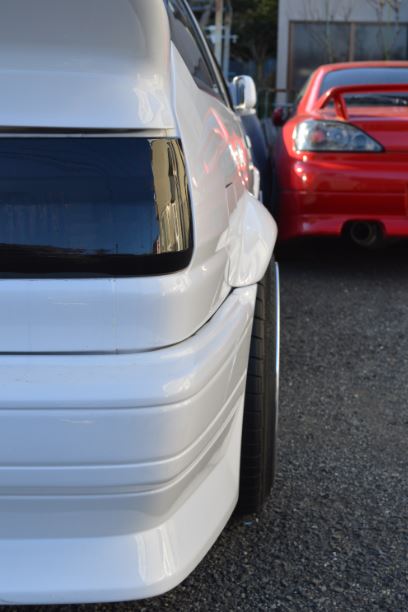
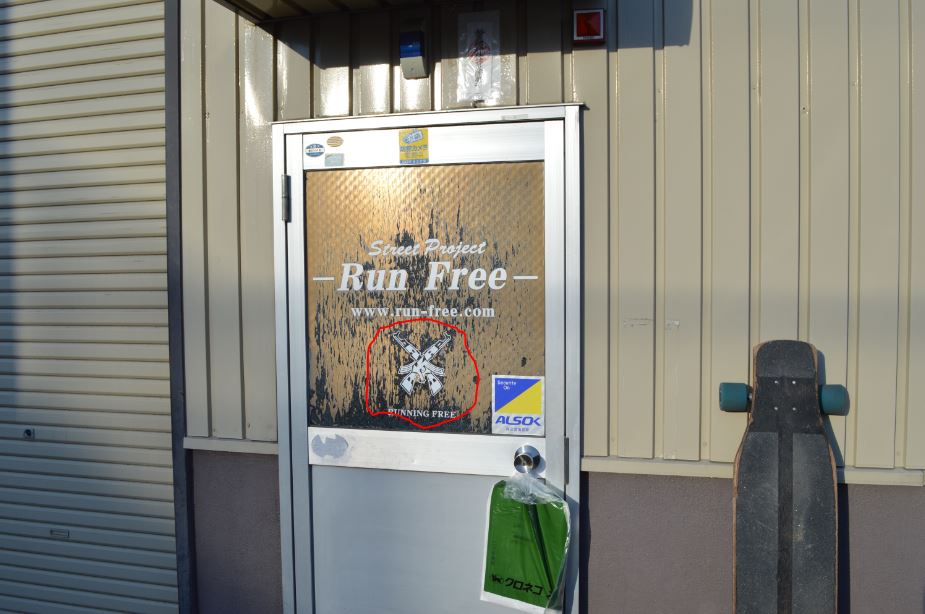
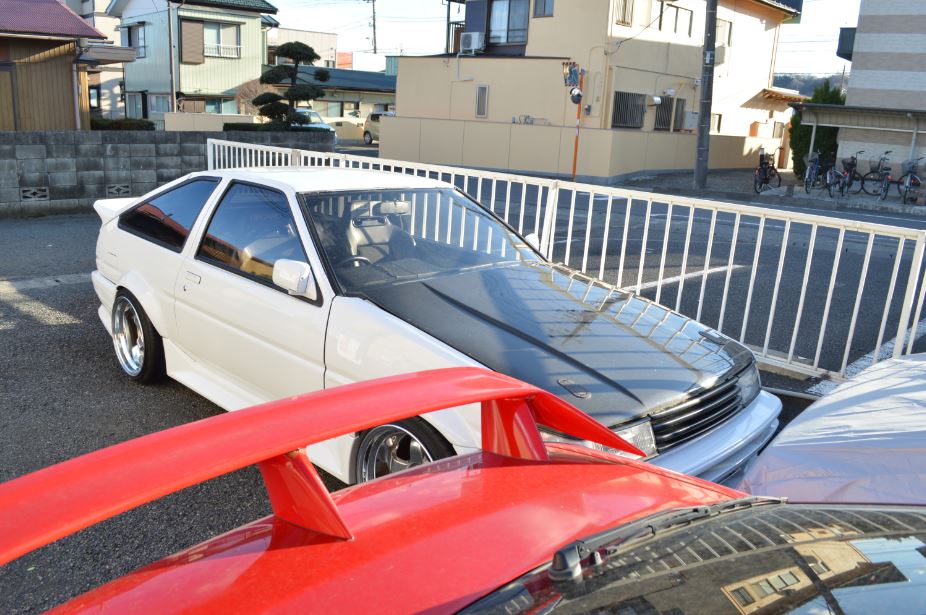
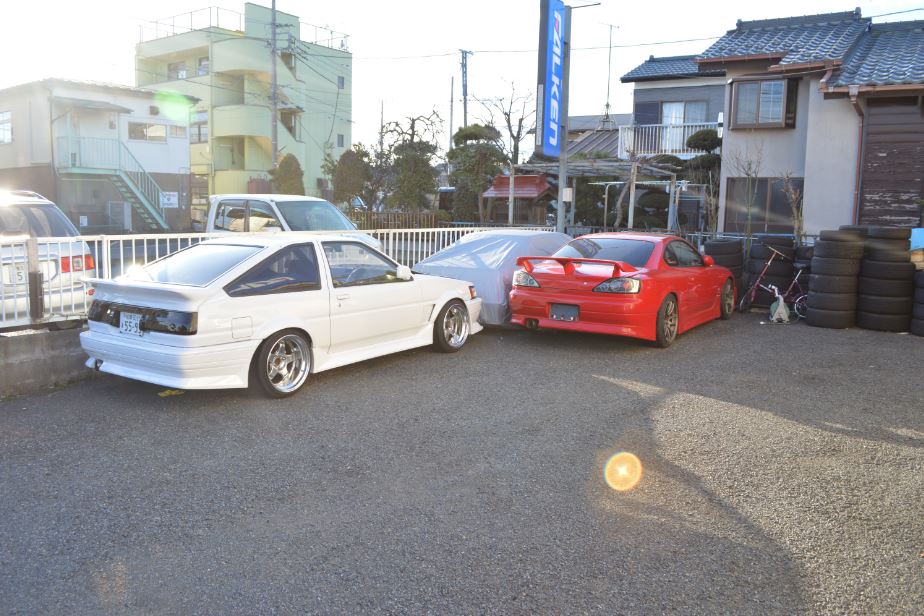
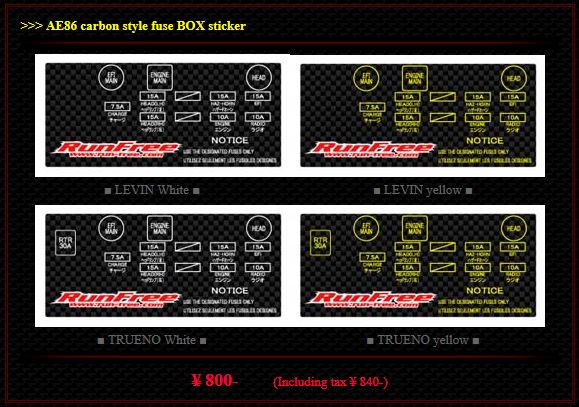
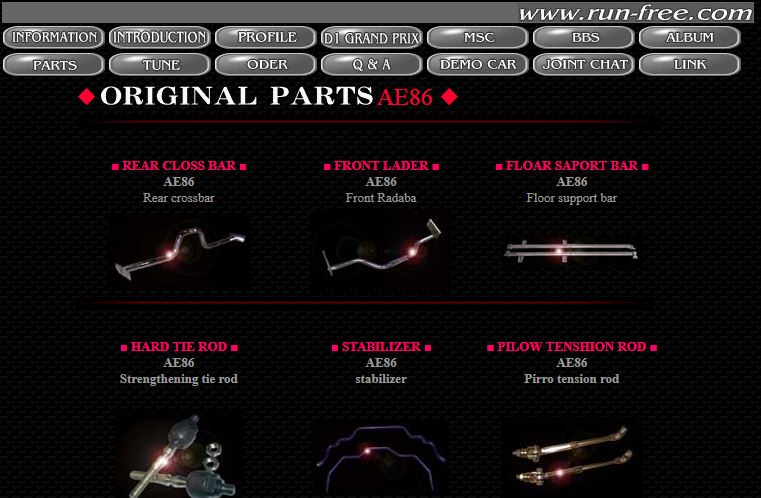
The other Workshop in Japan I tried to visit was Runfree as I suspect my Levin was built by them! Anyway I missioned it to Aikawa and after checking out Autobacs I skated over to their workshop only to find it was a public holiday and they were closed. GRRRRRRRRRRR how dare they!!! Spot my longboard leaning against the shed In a fit of pique I slapped an AKA sticker on their door and moved along. Not before I snapped pics of the sweet white Levin out front (imagine what was inside if this was stuck outside!!! I left an apology note in the bag hanging on the door plus some stickers I was dying to check under that cover but I am too polite I want to combine a Runfree bonnet with a Goodline one for the ultimate AE86 bonnet! Super poke on those 17" Meisters I really wanted to meet Yamashita-san and buy some goodies! Oh well perhaps it just means I need to visit Japan again one day
-
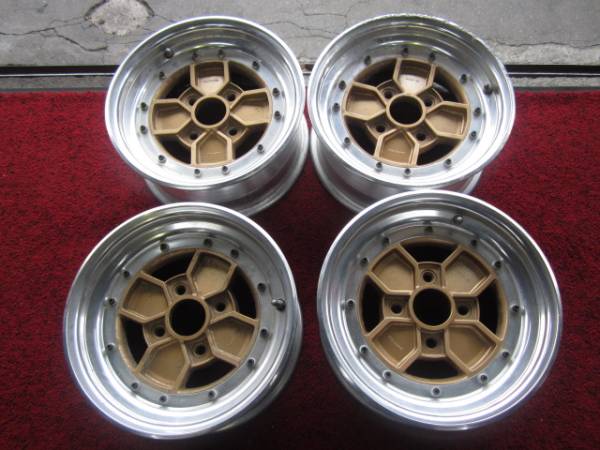
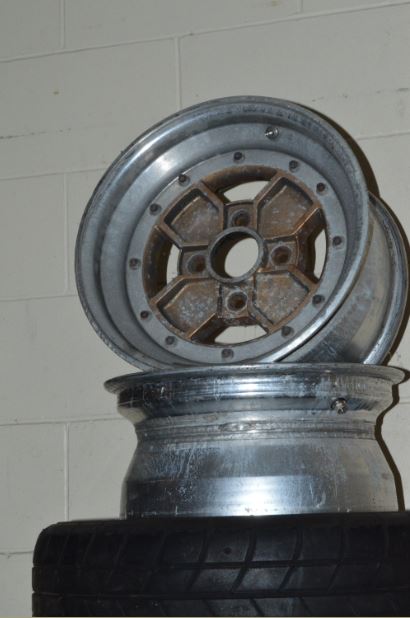
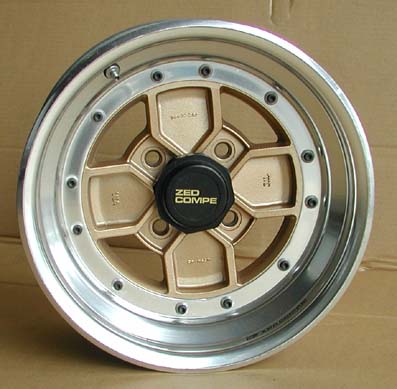
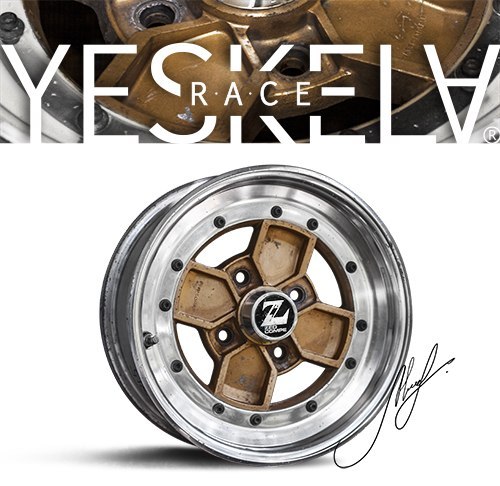
Obscure wheels alert! Many years back I tried to buy a dope set of 14"s for my KE70. I even encouraged my mate Simon to buy them for his (our) AE85 Trueno! So this guy at Ace Towing called Jarod bought himself a Liteace with a cool set of rims already on it, ex-repo or some shit. I tried to buy for a while but to no avail only to find my mate Cam rocking them later on his AE70 coupe! Stretching some crazy 155/55R14's from memory on them with inner tubes. Bugger it he swapped some chrome 17"s for them!!! Anyway I was browsing TradeMe (surprise surprise ) and I saw a pair of the same wheels for sale!! Turns out they are called Crimson Zed Compe and they happened to be 14x7J -0 ET! From memory the Liteace had 14x6.5J and 7J so SCORE! Note the funky bolt pattern! Anyone out there prepared to part with another 7J pair? These have very strange front lips that curve back in on themselves like nothing I've seen before... Here's what they ACTUALLY look like: Spot the Semi Slicks underneath. I think I will leave them unrestored, "rat" style (read- too lazy to clean/paint them) Later I found out from Jarod he bought the Liteace for $70 ( ) Discussion? //oldschool.co.nz/index.php?/topic/51964-jsnapsnzs-1985-ae86-levin/ By the way if anyone knows of any center caps let me know!!
-
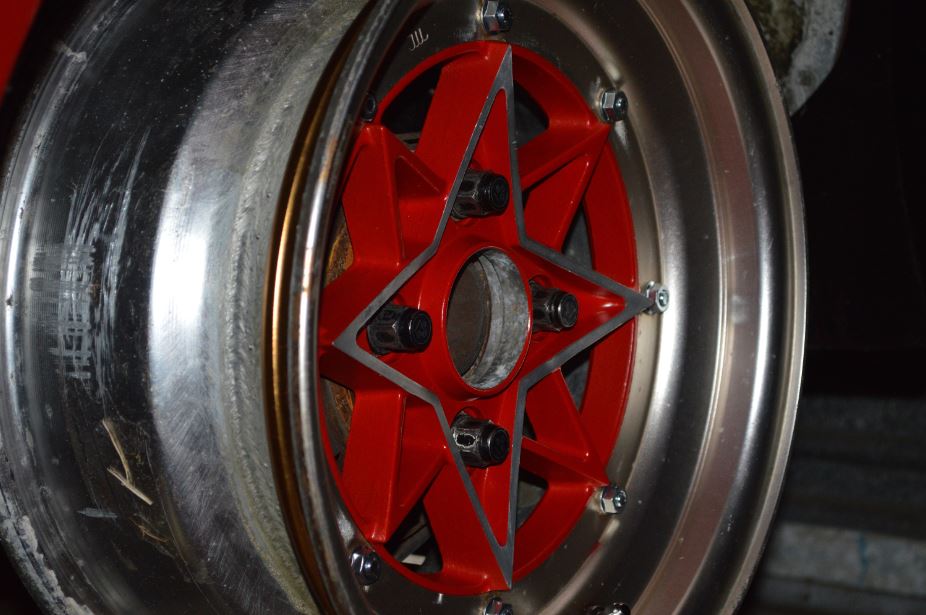
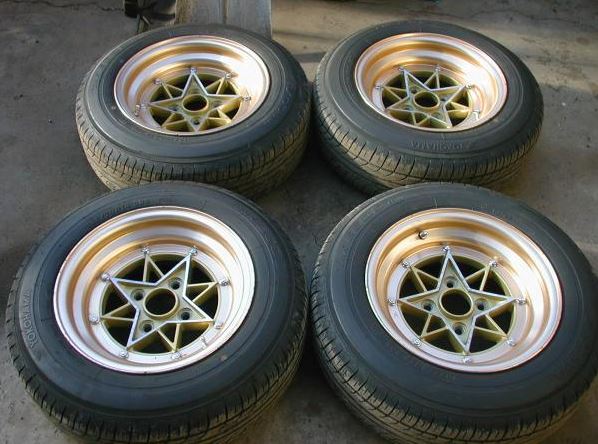
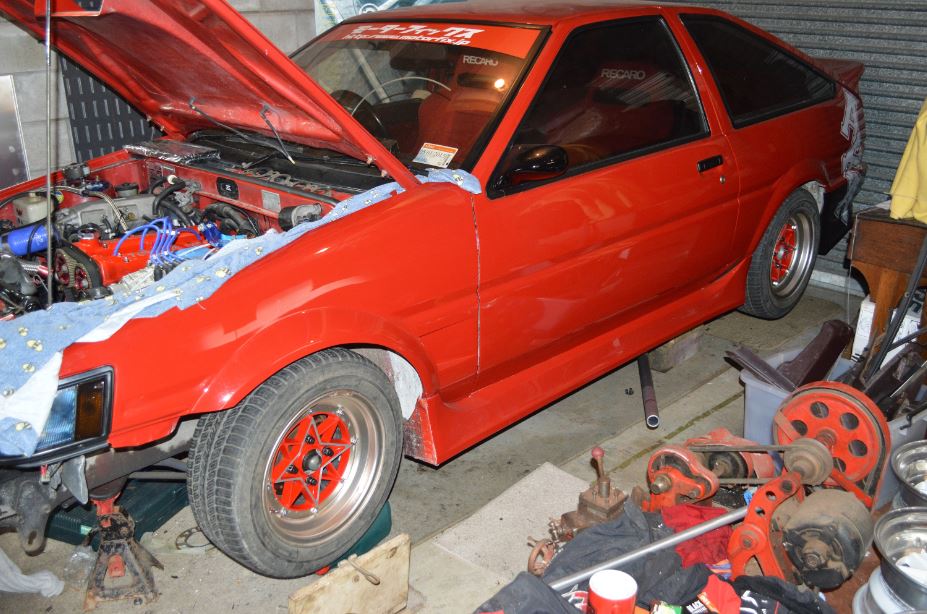
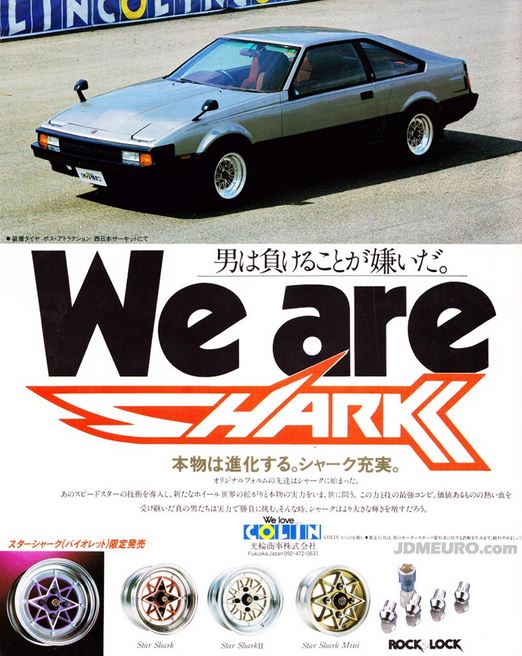
I'm sure many can relate when I claim I have a thing for Japanese 14" rims... Anyway having a set of 14x8J tipped me over the edge so time to sell the 15" Watanabes (thanks Mint_86) to fund more 14"s. Sad tyre selection be damned! I found a set of 14x6.5J +6 ET Starsharks (guess where??? - TradeMe ) 8 hours of masking and several coats later they looked like this: You can see some faint Gold Anodising on the lips and under where the bolts were. I reckon they must have looked like this new: We are Shark and we sure do love Colin It's all about the Red finish I reckon! I note they have the same width rear barrel as the Work Equip Excel so I will widen these to 8J later and expect they will be -13 ET as well... In the mean time they are my thrash wheels! 185/60R14's will do nicely for skids etc (and ground clearance) I also scored some used Toyo RA1 Semi Slicks in 205/55R14 and 225/50R14 so I'll probably mount them on these when I drag my beast to the track.
-
They won't! SS welding to SS or SS to MS is the worry. This shit's golden
-
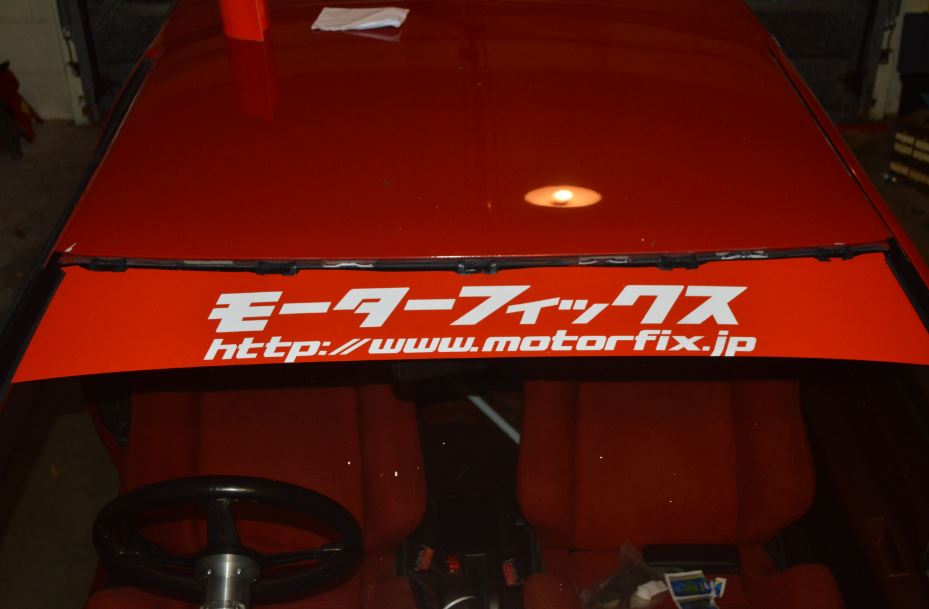
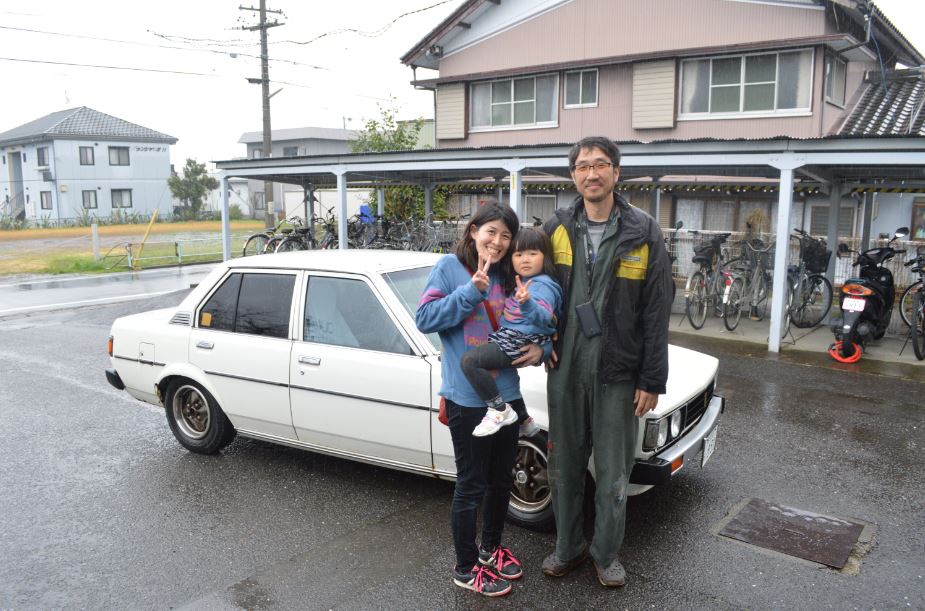
While in Japan I did all sorts of badass shit but two (ok really just one) garage visit really stuck with me - Nozomu Sakai @ MotorFix is just the sweetest guy ever! We traded heaps of stickers and he even went as far as to chase me back to the train station in his missus 4A-GZE AE70 because I left my windscreen banner stickers behind! Grinning like a fiend, I'm sure you can understand why Brad has a KE70 so I scored him a Windscreen Banner and this photo... 8 Throttle 1UZ-FE Windscreen Banner fitted once I got home Sakai-san and Family His cute daughter kept grabbing the stickers from her Dad to give to me. I exclaimed it was like Christmas - "Hahahaha you're like Santa!" he reckoned cue grins all round... Language barrier is nothing. Hajime mashite Sakai-san! - arigato gozaimasu!!! Watashi wa Nihon-go wo sukoshi hanase masu. Watashi wa Nihon-go daisuke desu! That's about all I've got... Just one of many cool cars at Motorfix - Carina wagon with 6 throttle 2JZ-GE I like the lo-rise strut brace, just because
-
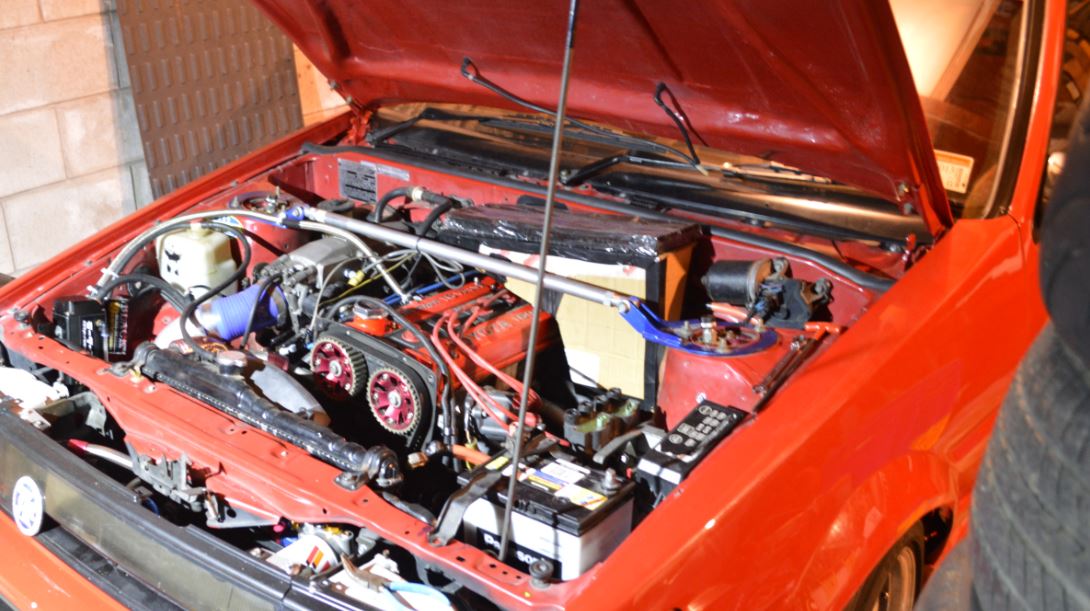
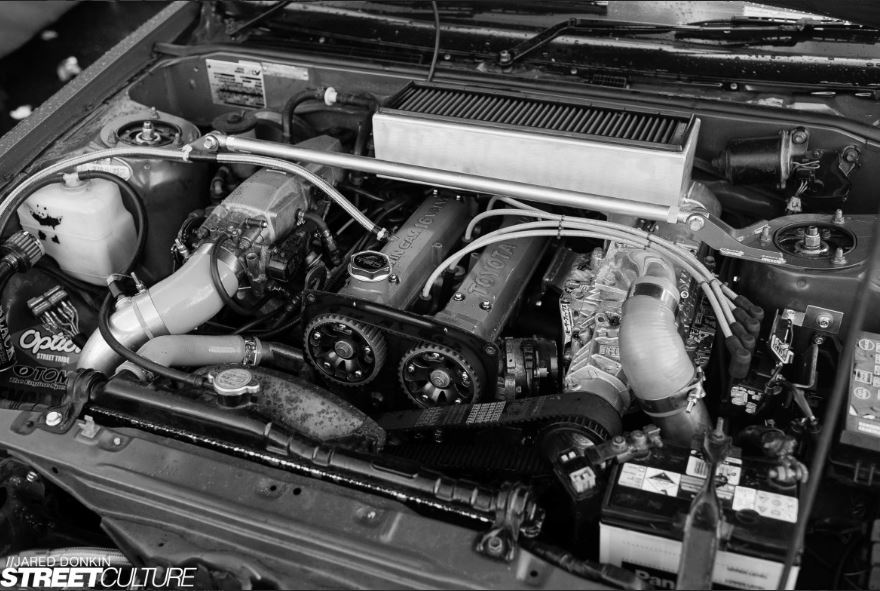
Making my airbox for my blower was a flaming mish! I started with a Cardboard Mockup then got Mark @ Absolute Stainless to make it for me out of 2mm Aluminium Sheet I have already been to Japan by this stage - Motorfix Windscreen banner already fitted! Can't see much of the Airbox Mockup You can see my old crappy quick release in this shot... Better view of my mockup Aaand here's the finished product with Peugot V6 K&N Panel Filter in place It's a crying shame you can't see my awesome headers Finally here's a classy shot of my engine bay from D1NZ round 6 @ Puke on Fanga's Stand - helping Brad again promoting AKA and selling merch Thanks Jared Donkin! This makes it look epic and almost finished!
-
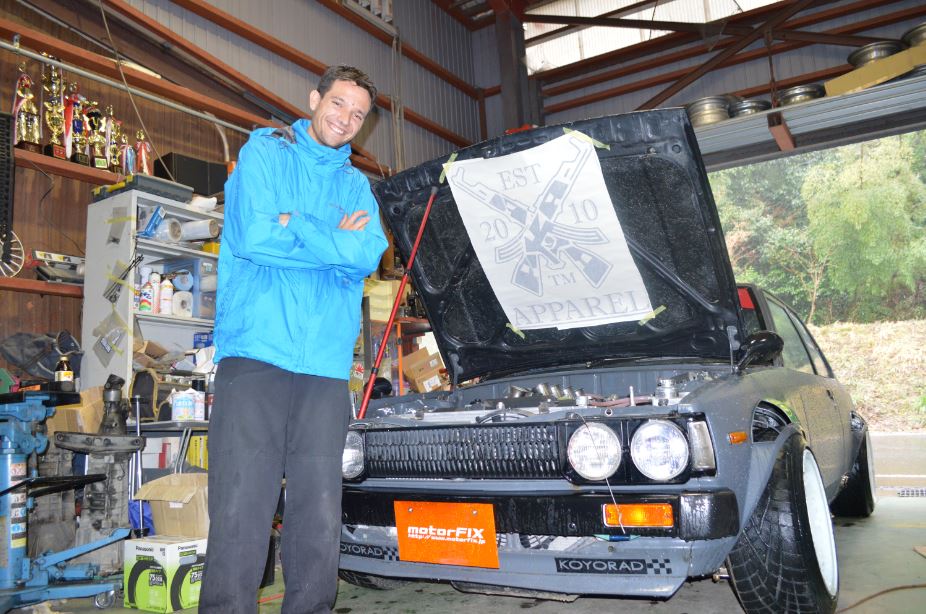
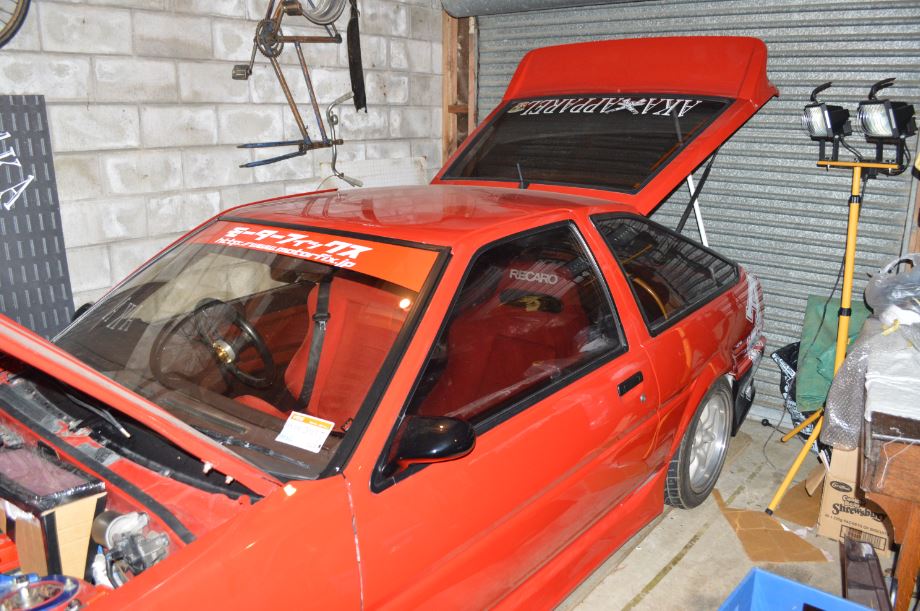
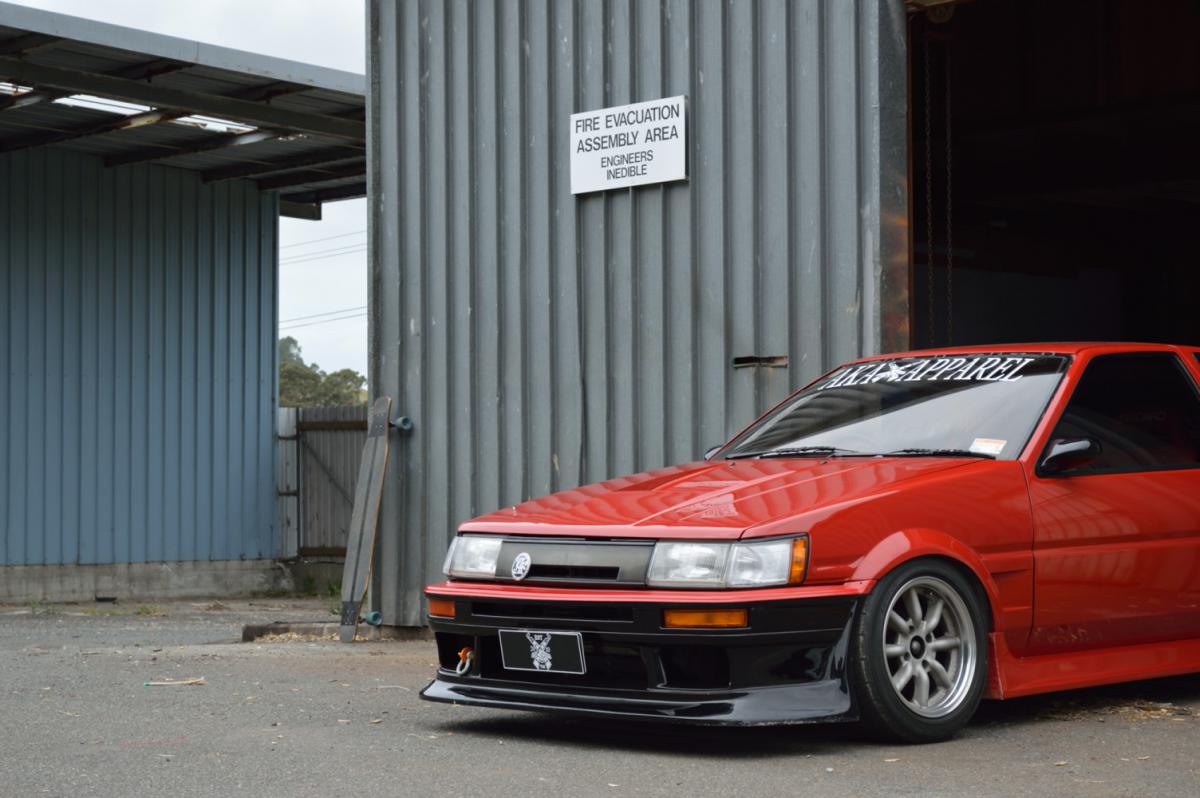
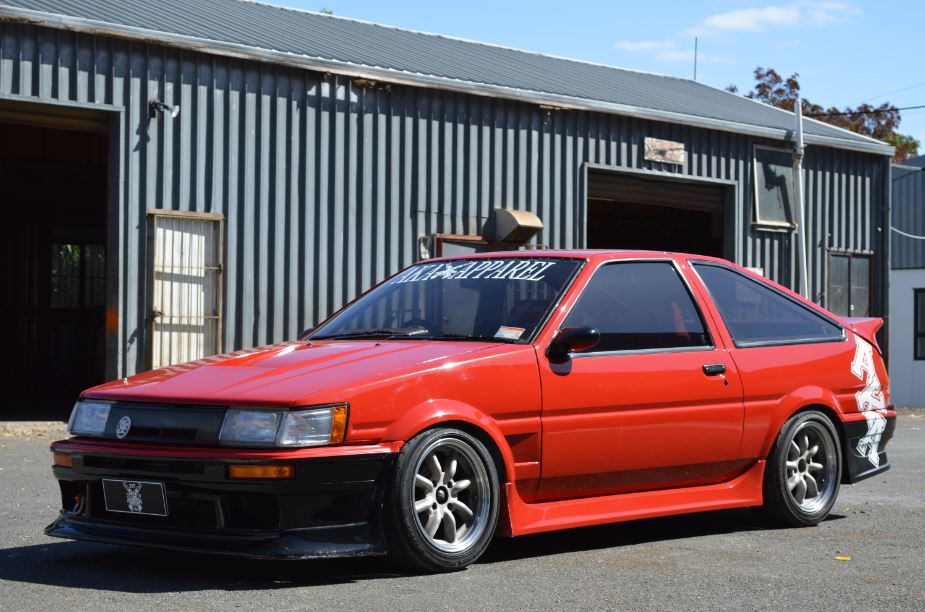
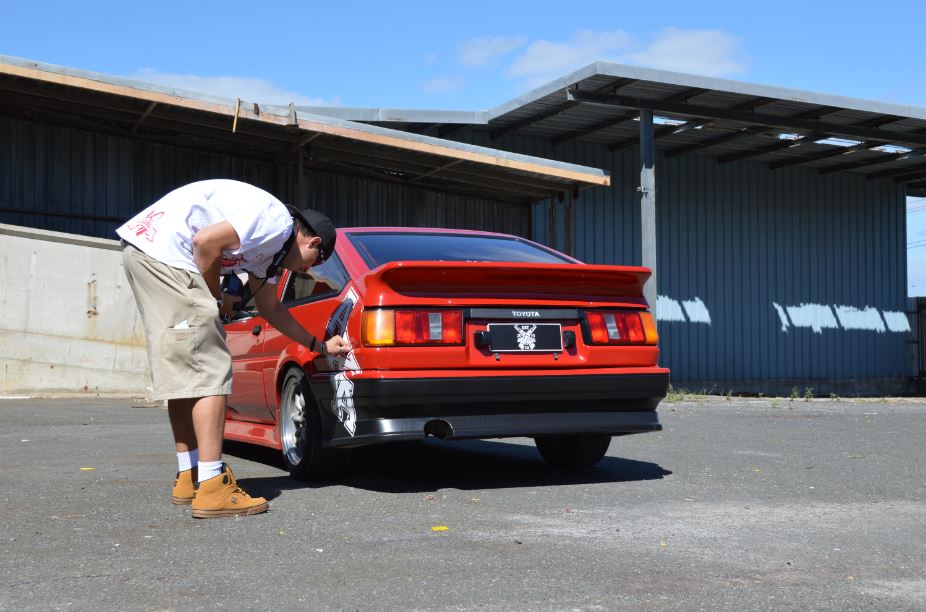
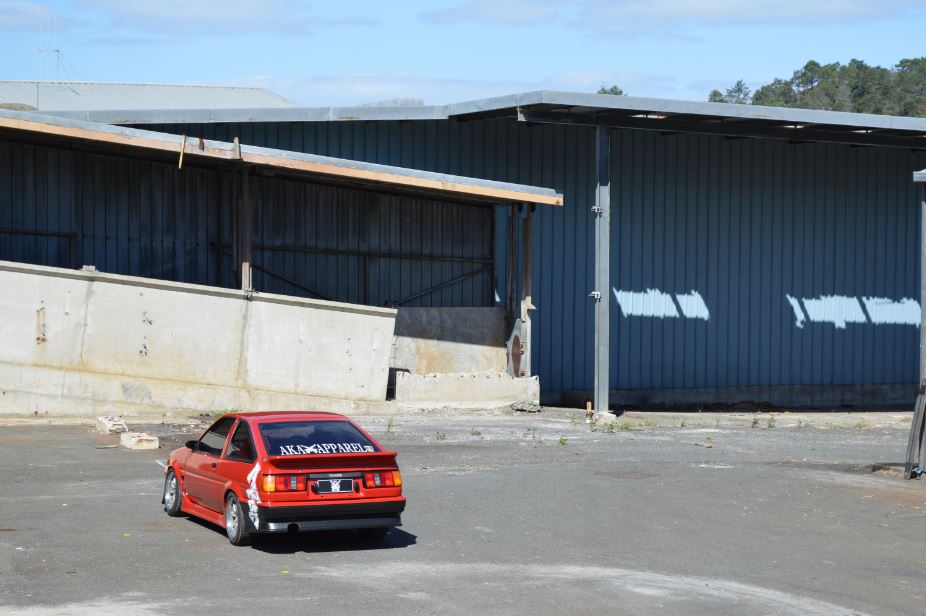
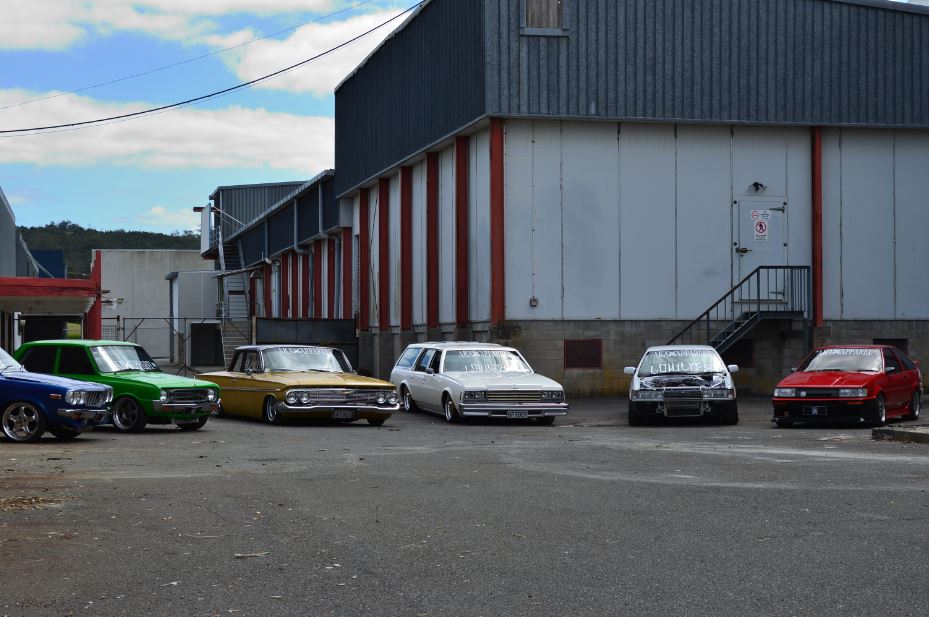
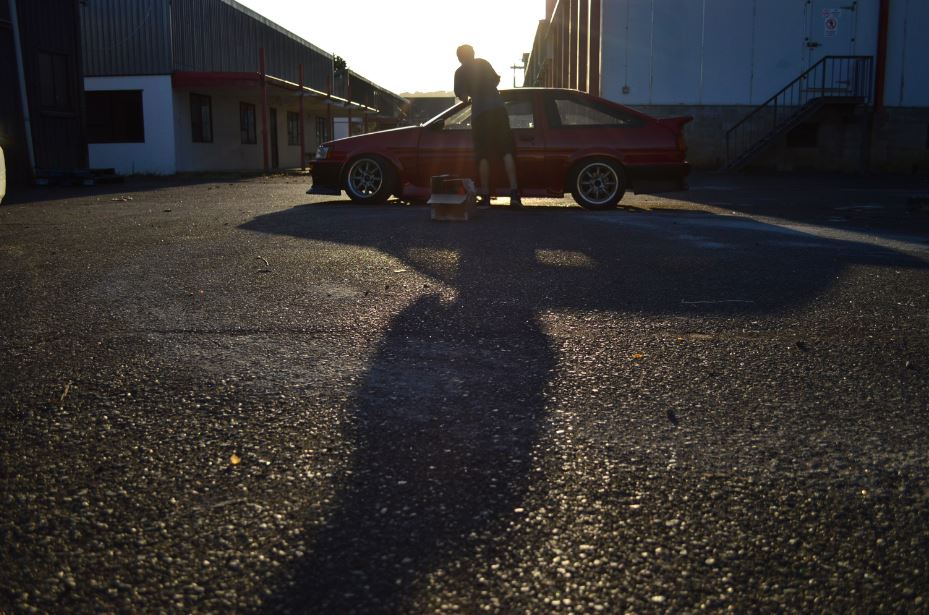
Just before I visited Japan in March 2014 I helped my mate Brad supplying my car for a photo shoot promoting his clothing brand AKA Apparel Note the longboard leaning against the shed Oooo JAF badge, scored this at a V8 swap meet for $2 (whaaaat!!) Nice camber up front thanks to my Techno Pro Spirits NCRCA's! (Thanks Mint_86 for identifying those :grin: ) Strategic photo composition just got my longboard in the shot far right There was also Beam's 20B turbo Luce (ex-SKDKNG), Adam's 12A Mazda 1300, ___'s (? sorry bro) turbo 13B RX3, KTM's Caprice Wagon and Mark's Belair. Properly Old School I'm happy to report my car perhaps sounded the baddest of all due to my sweet new headers and nothing more - unfair advantage. My cams make my 4A-GE pulse at idle like a bridgey Creative shadows shot by Axel Cawthorn on my new Nikon D3200 Waxing the Levin the night before... Cool old freezing works Shoot Location, thanks Gus I scored a $50 voucher from Brad for my troubles! Nice!
-
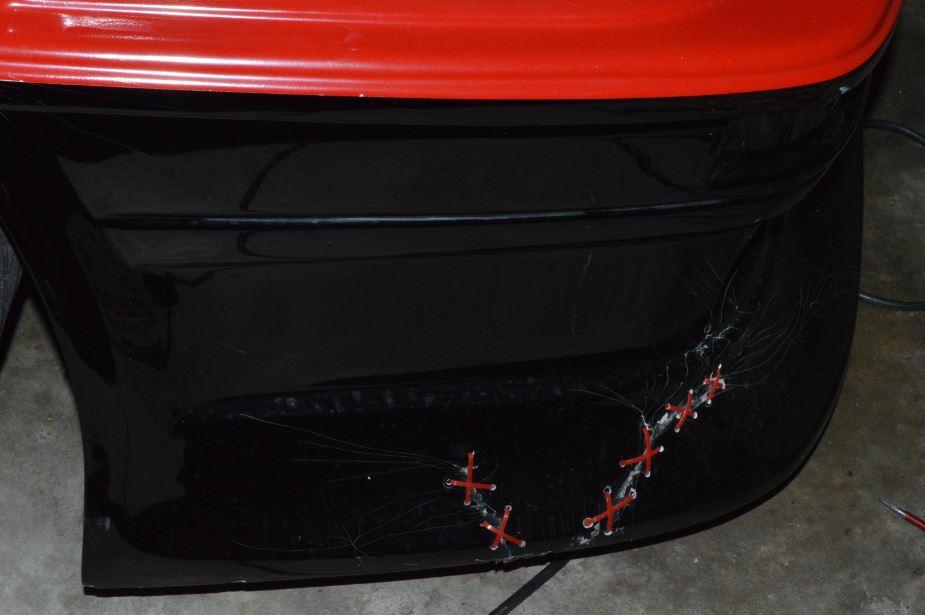
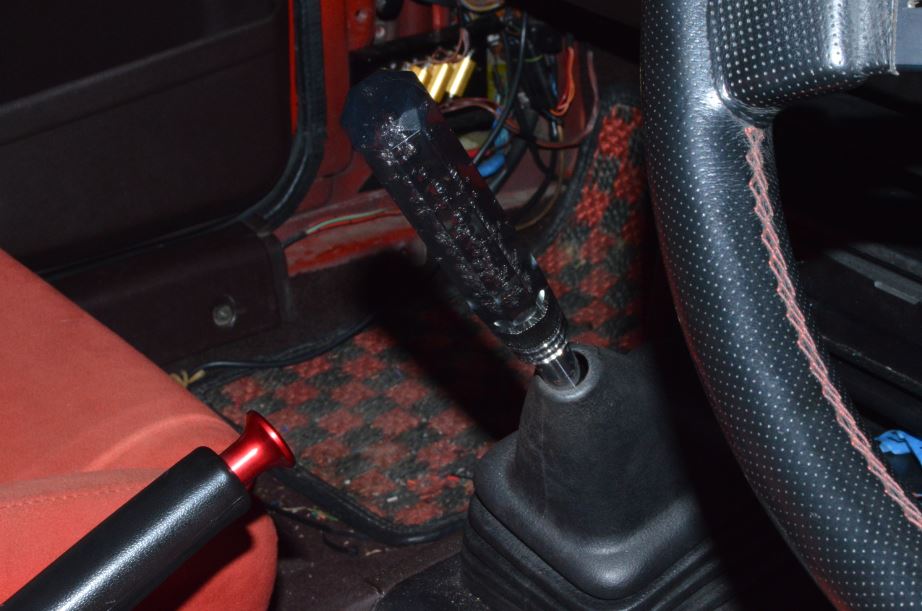
Some more random pics: "Repairing" Nick Teeboon's old bumper Eminently thrash ready New shifter position (after cutting and welding) with W Short Shift from Torana Race Supplies (TRS) fitted Just the casual 6" crystal bubble knob brought home from Japan, didn't want to go "Over the Top" Sweet Cusco Spin Turn Knob from Nick @ NST - there's no spinning involved! Now I know how it works... Strange 15x7J Work Equip Excel with 14" Center Good to have a spare center in case one of my rims eats it at the track later I guess...
-
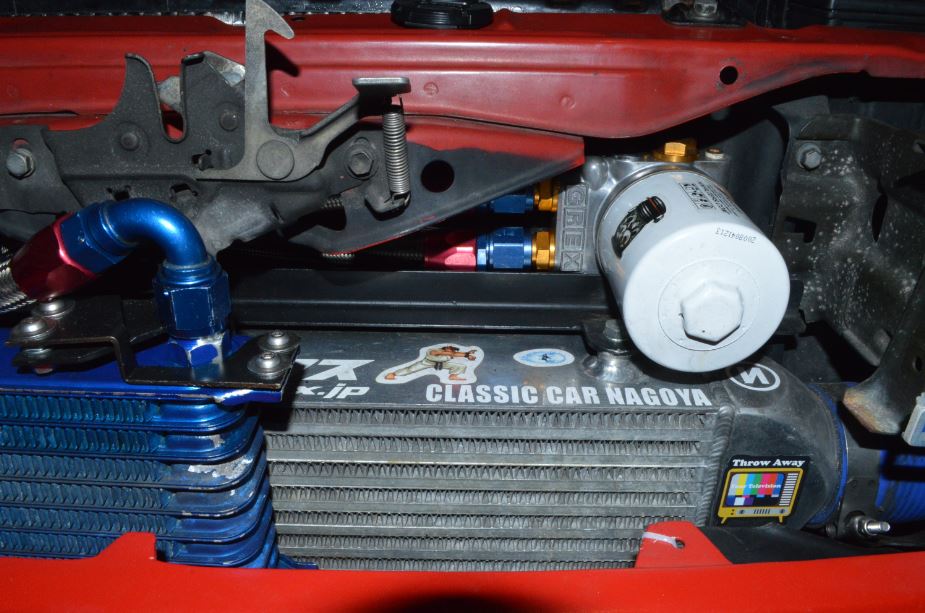
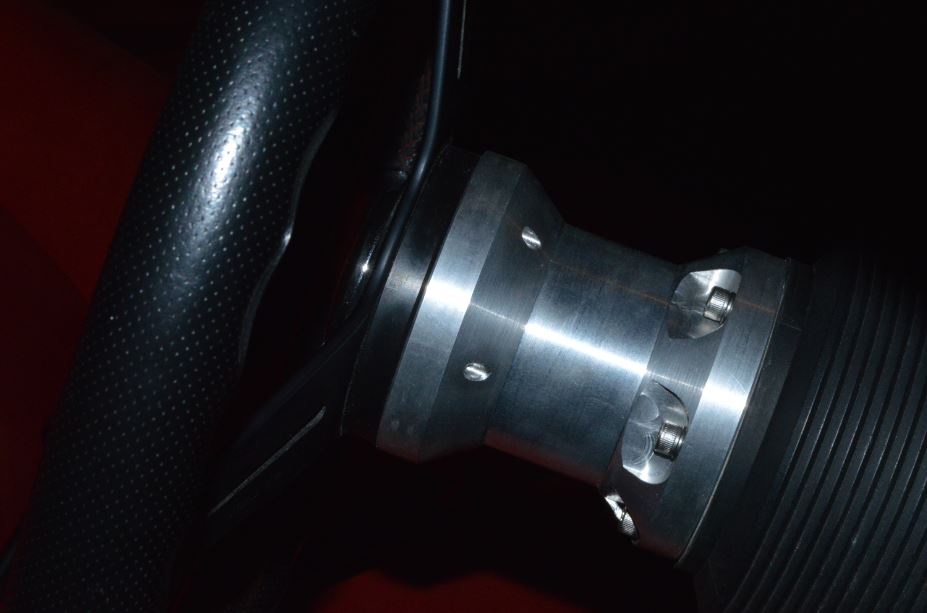
Here's a better close up of the new Remote Mount position. Major pain in the ass due to ports position and hoses coming out of the housing as well as proximity to the intercooler and radiator I cut up the intricate pieces of 2mm steel to weld to the intercooler mounting support but clear the hoses - and yet be strong enough to resist bending when removing a tight filter!! Bloody mission but works great, welded by Mike @ Kinsmen Engineering. I am a huge fan of the K&N Oil Filters with 1" Hex on the end! My stupid GZE CAS didn't clear my dope headers so I had a custom cap machined from billet by Bene You can see my horrific new loom in the background but I left everything separate in case I had to trouble shoot later... And the blower hides this shit! This was actually after he criticised my cheapie quick release steering hub (I only wanted it for spacing my Nardi, my legs are long but not so my arms...) Sooo Bene reckoned he'd make me a spacer from billet and Hot DAMN. It turned out fantastic What a gun machinist! Naturally he got the job making the Dizzy Cap
-
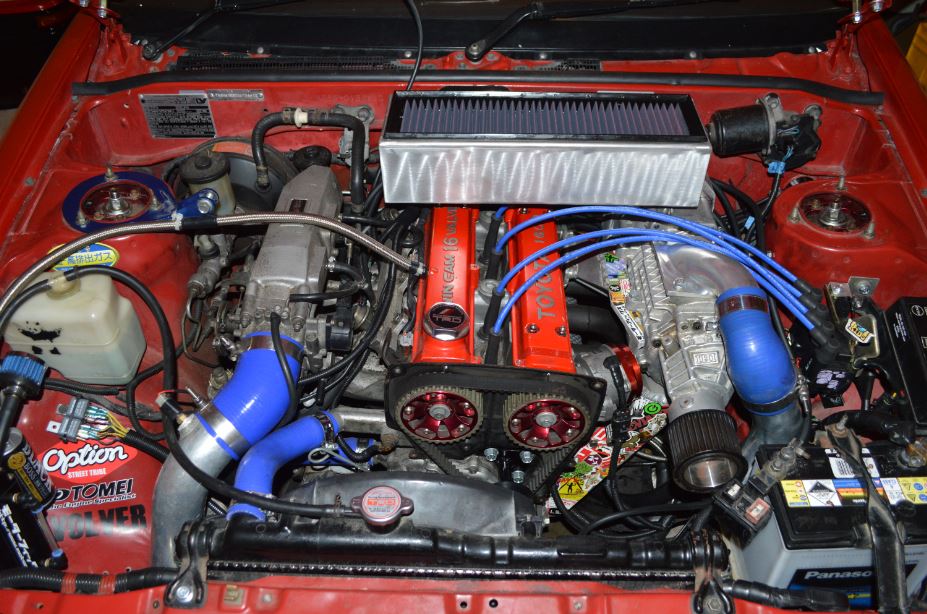
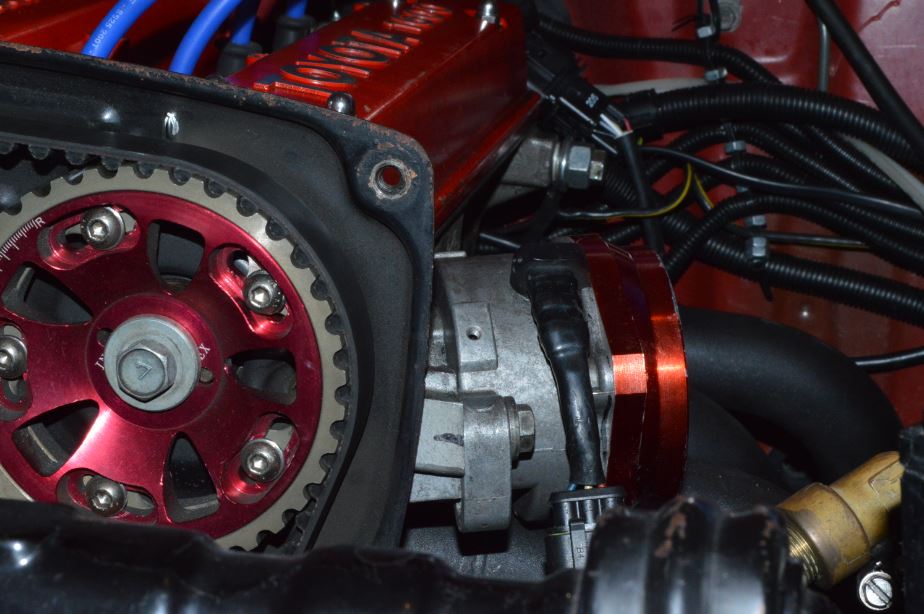
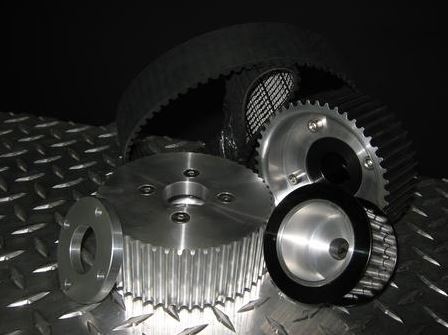
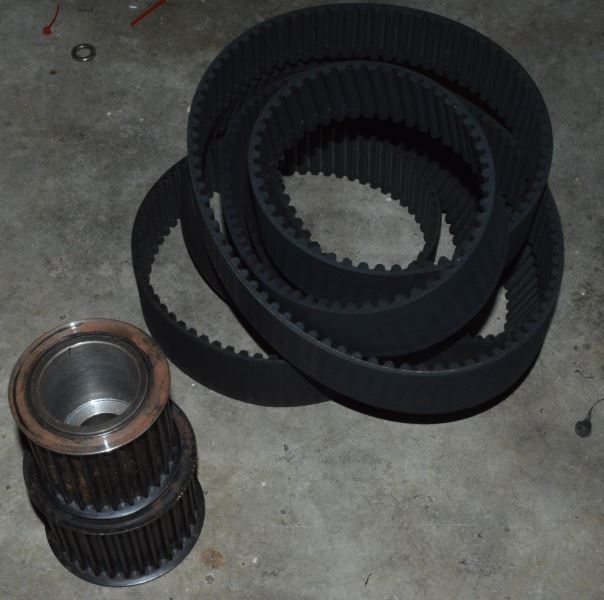
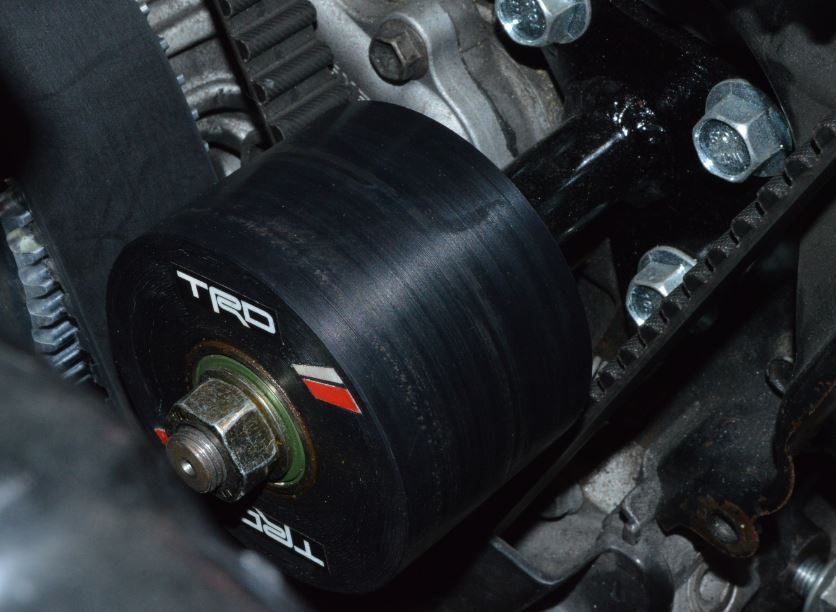
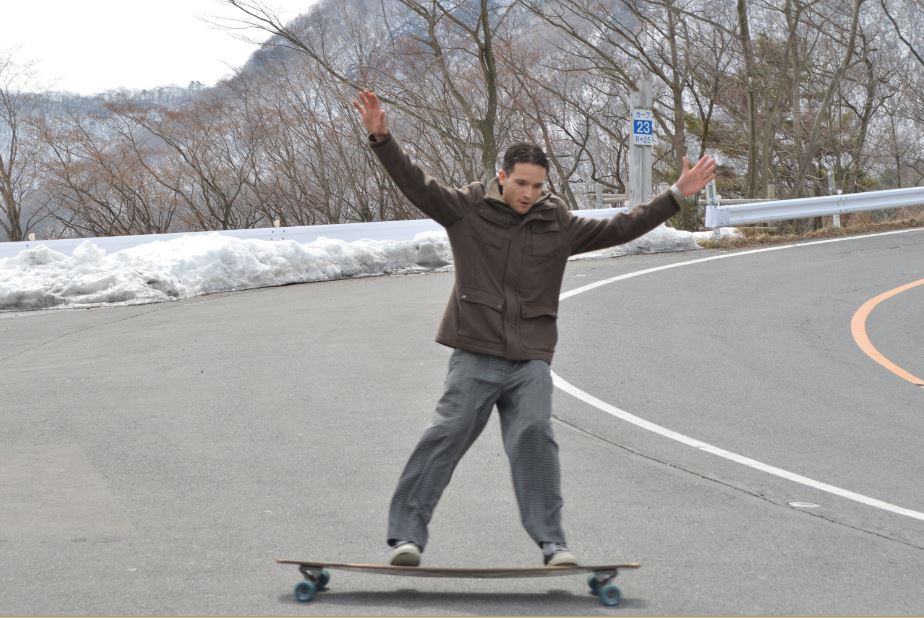
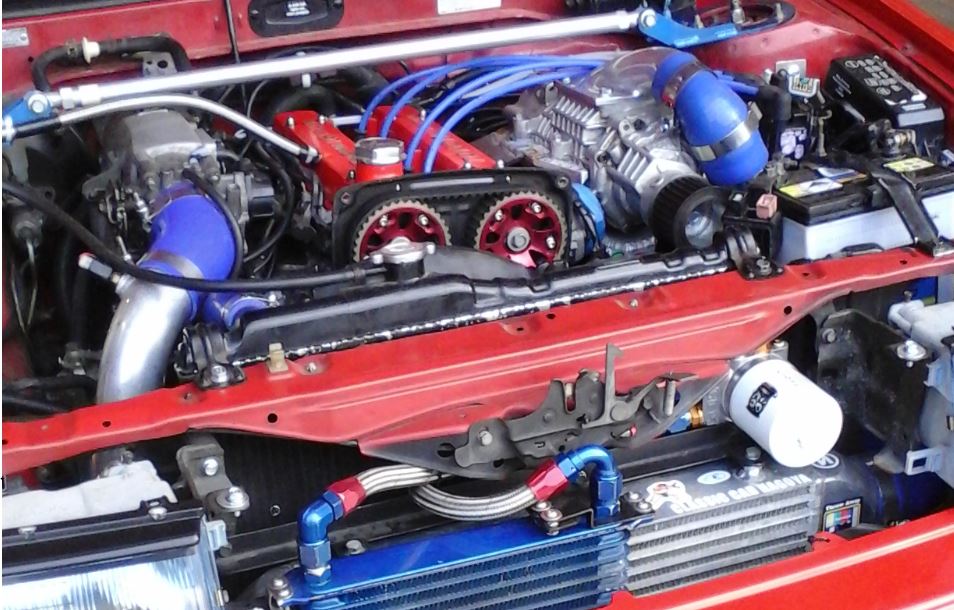
Right! Time to sort the belt drive. Oh hells yes I wanted that gilly whine Endeavour engineering Tauranga supplied their 4AGE kit and changed the belt length for me. I sussed some steel 8M pulleys thru work resulting in ratios of ~1.56:1, 1.6:1, 1.75:1. Once I settle on ratio I will probably get it remade in Ali instead... I already had an Optibelt low noise type so I requested a full tooth profile belt for max whine!! They only had one belt so I hit up Maud Kirk for another spare. Alternator pulley fit issues aside (promptly sorted by Endeavour with quickly supplied replacement pulley FOC, w/full boss instead of a spacer) this was dead easy to bolt on. I do love being able to do most things on my car myself I am just lucky to know many talented machinists/fabricators. Thanks everyone!! 2x spare belts - sorted! Pulleys bored and keyed by Mike @ Kinsmen Engineering. Now it's idler time. I had a custom back idler spun up out of black UHMWPE by my master machinist workmate Jim. He then fitted 2x 6001DDW triple lip sealed NSK bearings and a crush tube. Finally I got Logan @ Brian Craig Engineering to machine a shaft and mount plate to bolt to the block's engine mount position it being a GZE block Stickers by Jsnapsnz of course proper TRD racing part, you just won't find it in any catalogue... I'm a keen Longboarder so this is a wee nod to my other wheeled past time. My mate Bene suggested using an old skate wheel instead but running 608 bearings means 8mm shaft so nahhh - and Urethane's too soft I reckon. Cheeky pic of me Drifting on Mt Akina (Mt Haruna in real life) on my dream holiday to Japan (my rental car at the time was FF )
-
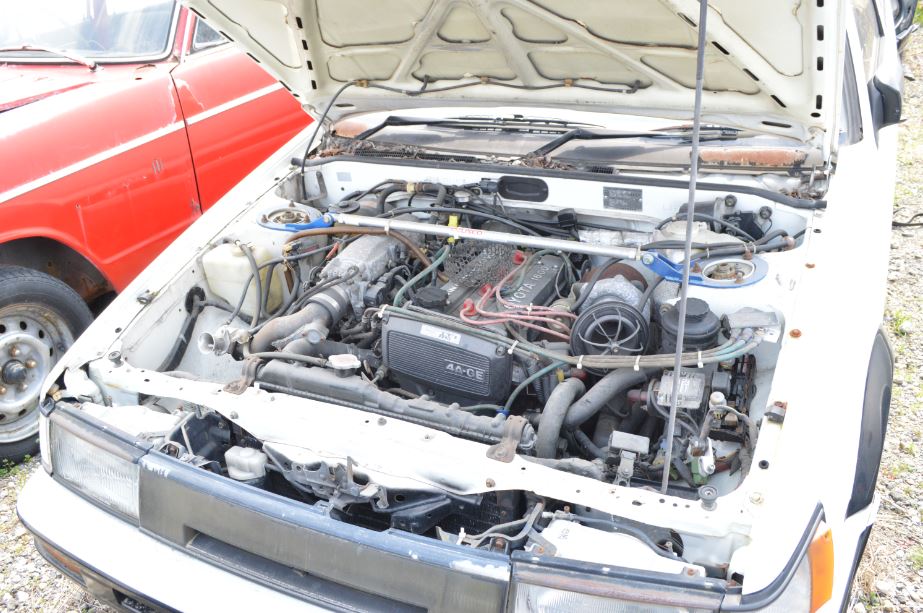
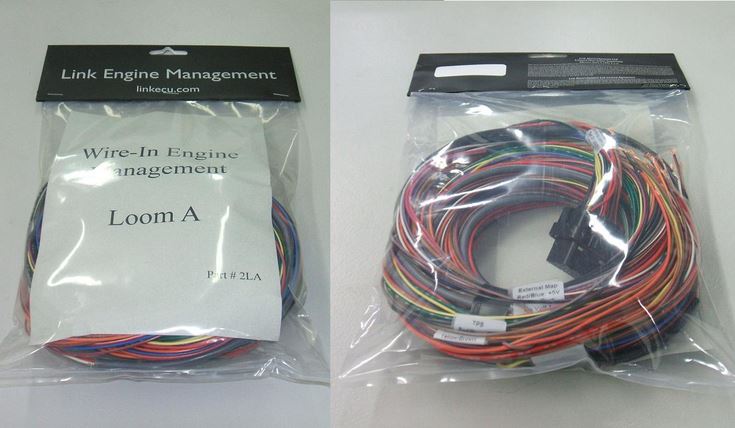
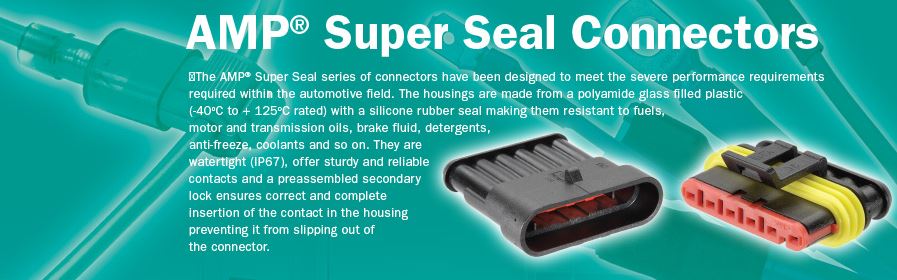
Oh yeah by now I have decided to do a full re-loom. True to form the old loom was a dogs breakfast. Melted insulation from the stupid turbo mani aside - what had me gobsmacked was the cavalier approach to wiring in the ECU. Link loom was cut down to ~100mm. Original ECU plug sockets desoldered from the PC Board. Link loom soldered to PC Board pins of said sockets then painted in some insulation - sweet bro now we just plug into the original wiring loom! Better yet let's use crimp terminals on the injector loom and slide em right onto the pins in the injectors! I shudder to think what would have happened if one popped off during spirited driving RB Injector plugs fit mine after cutting them down, no idea what my injectors are. 1x new Link loom later: and around $500(!!!) worth of Narva Amp Super Seal connectors and misc switches and relays (I clowned it up and booked half a doz to my work account, then after fitting them I checked the price and nearly fell over. Commited now so suck it up and finish the job.... AND PAY!) Oh well at least I know I can trust this now. I am certainly not an auto sparky but I know what a diode is. I just took my time running 1x wire at a time to replace the dodgy shit and kept the number of joins to a minimum. Satisfying job but I can't recommend it. Not sure what I would have done if it didn't work - bloody electrickery!! Aftermarket Mitsi wasted spark coils and a $20 Suby Ignitor (and expensive new Bosch Plug for said ignitor) and engine bay wiring is complete. Why bother with wasted spark? Damn dizzy is in the way of my blower...
-
Legend!! Strange I never made the connection thanks heaps! Crazy Logo...
-
Thanks bro, I'm posting like crazy to catch it up to current I'm aware that SS somewhat deteriorates when melted during welding so it is common to select a higher grade rod compared to what you're welding ie: using RM318LC Weldwell electrodes to Arc Weld SS316 - this way you don't get the weld rusting quicker than the parent metal. I'm not sure if the copper coated mild steel filler rod (exactly the same as copper coated steel mig wire) is similarly affected but using low grade SS rods to weld Mild Steel is an old school trick my young welder picked up and he reckons it results in a cleaner weld too. The welds sure looked pretty! He mentioned grinding them back and I said DON'T YOU DARE!
-
It goes great! Mine's not fully running yet but I had a ride in an AE92 Trueno with a Lysholm 1200AX. The map and specs for this blower seem to be substituted for the IHI as there is sweet f a info available for them! Boost was a bit wild with 1.6:1 overdriven but ~15psi ish at WOT. Partial throttle spiked the boost way up so a BOV was used with a boost control solenoid to let the Link ECU bleed of boost and maintain stable boost curve. This was run on a mostly stock 4AGE with quad throttles fitted, 2.1/2" plumbing and exhaust. My tuner Glenn Suckling reckons this is hard on your engine though as it's running "turbo style" pushing air at the throttle body and loading it up as soon as you touch the gas. Perhaps a better idea to put the blower post throttle with a recirc valve per factory application. Response seemed pretty good though! Crazy loud so forget about it as a daily or love to piss off your neighbours
-
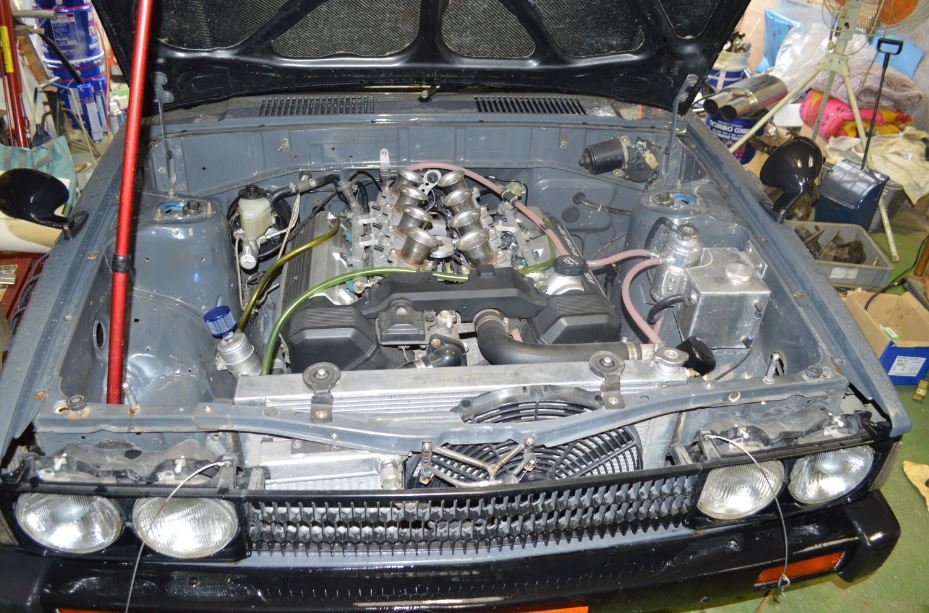
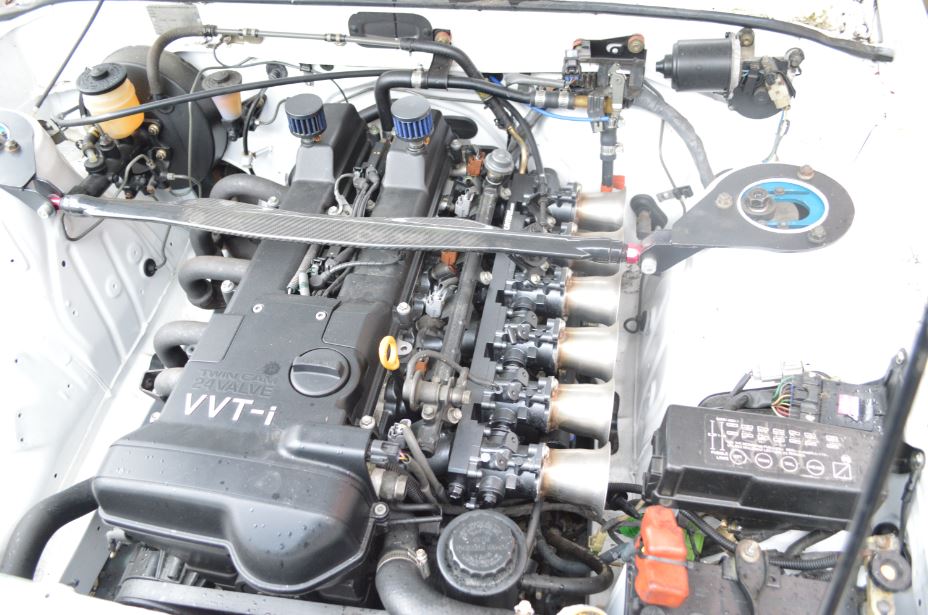
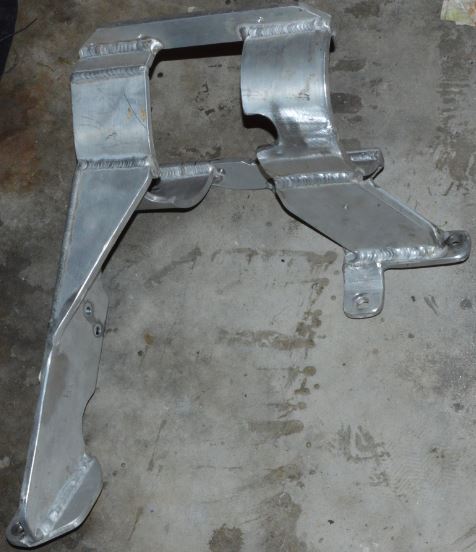
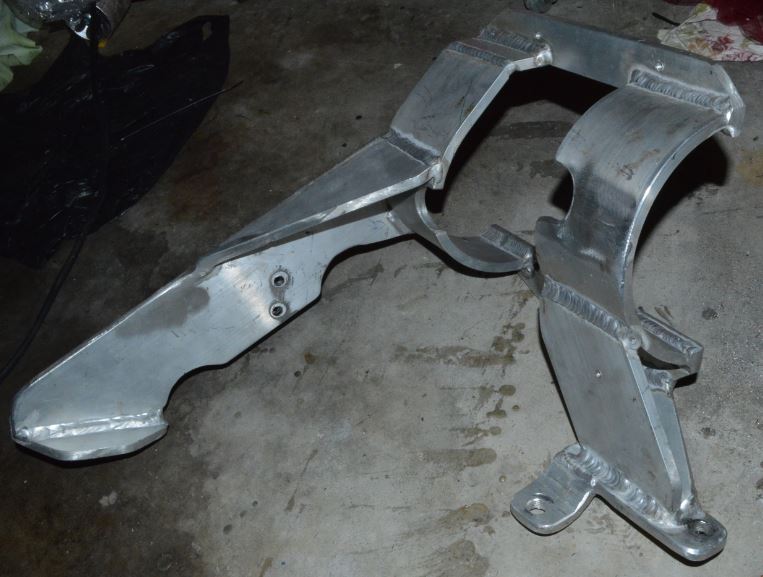
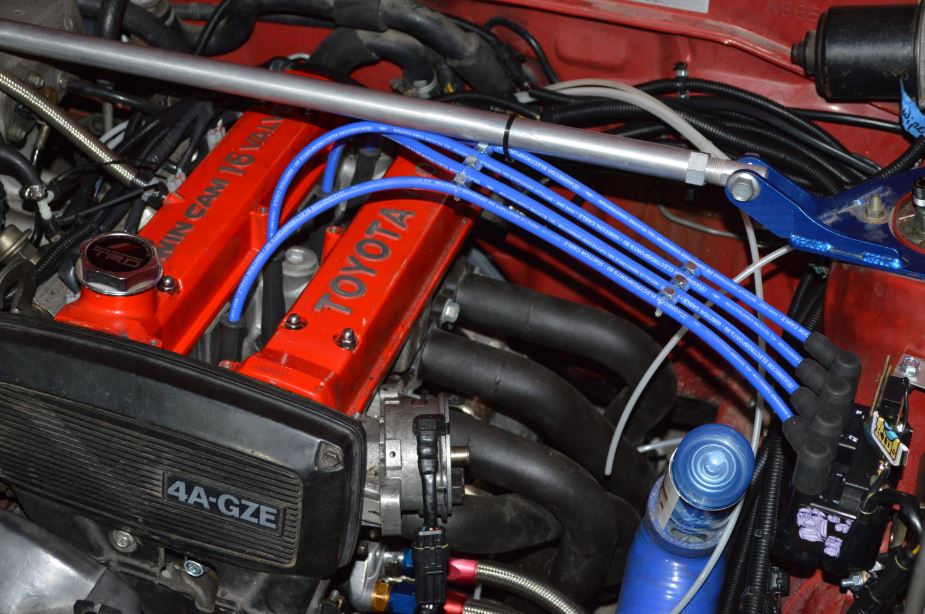
The IHI blower is oil fed so lucky my beast used to be turbo! I bunged some brass fittings underneath to join the two drains to the hose down to my sump and connect to the turbo oil feed line. I needed a cradle to mount the blower so time to get Jack on the case again! Using 50x5mm and 80x5mm Aluminium Flat Bar, angle grinder, hydraulic bender and ACDC Tig he created this bad boy I then proceeded to sticker it up... Here's what the headers look like fitted. Note the Mitsi wasted spark coils and the Magnecor Leads from Mr Manon Here's what the blower fitted looks like! I had to front mount my Remote Oil Filter Housing due to hose length restrictions and blower belt path.