


Lord Gruntfuttock
-
Posts
13114 -
Joined
-
Last visited
-
Days Won
27
Posts posted by Lord Gruntfuttock
-
-
From the XL forum (my go-to)
"When you pull in the clutch lever:
The lever moves.
The cable moves in the housing.
The release ramp rotates.
The 2 large coil springs compress. (This releases pressure on the plates and now they are free to slide around disengaged.)That is all that happens.
Clutch plates are not involved at all.
The ramp is not going to bind
This leaves the cable as the cause of your problems with the lever being hard to pull in."-
 1
1
-
-
Nah it's pretty sweet for one of these. Will see how the new springs go in a week or so...
Does the 77 have the 3 ball rotating release ramp?
There's really not much to go wrong if the balls and ramp are right. I think most times it's the cable. I did shorten mine a lot so that prob helps...
-
1
-
-
Went through my stash and found some thin spacer washers and had a measure up. The kit washer came in at 0.008" on my damaged vernier (was raining so couldn't be bothered getting he micrometer out of the other shed)...

Found a washer slightly thicker, at 0.025"...
And buttoned things up, can see the shim now, and with everything snug but not tight I bent the tab on the lockwasher...
And had a delivery in the mail, got the spacer that was holding things up...
I'd cut down some allen head countersunk screws, so cleaned them up and fitted the ratchet with Loctite 263. Debated adding a small weld to them but supposedly 263 is a permanent threadlocker, so should be ok...
And slid on the sprockets and new chain...
At this point I couldn't find the large nut for the clutch, so spent an hr or so searching my parts and even the rubbish bins in case I'd discarded it. Eventually found it behind the engine on the bench, which was a relief, but I stopped here so I could read up on the correct way to tighten things up...
-
7
-
-
Decided to check kickshaft end play so I pulled shim out and measured on the dial. There was noticeable movement, and from the zero position it moved to around 0.78mm, roughly 30/1000 of an inch. Way outside the 0.001 - 0.007 inch recommended in the service manual...
With the shim back in, it felt much better, and measured nearer 0.28mm, around 11/1000"...
I know these don't add up, with the shim being 0.007 thick, but it was a very quick check without putting the sprocket cover on, so there was a little up and down movement at the far end making the numbers look worse, and the dial gauge wasn't aligned properly. If I re-did the measurement with the dial gauge perpendicular in the middle of the shaft and the other end of the shaft in the bush, I'm sure it would be more accurate.
Looks like I definitely need the shim though anyway...
-
2
-
-
Yeah no prob.
-
 1
1
-
-
So much attention to detail and getting things looking nice, then you've got to run external oil lines everywhere...
Been there

-
- Popular Post
- Popular Post
Carrying on this arvo, I replaced the bearing in the clutch basket, was a lot of metal underneath it, and the bearing was pretty noisy when I spun it, so not before time...
When I put the basket in place and spun it there was obvious metal on metal contact somewhere, a regular 'tick' as it spun, suspected the welds or weld splatter as they were the highest spot...
So hit them with a flap disc, covered the new bearing while doing this to avoid bits getting in...
But didn't work. Tried screwing the retaining nut right in but made no difference, but removing it fixed it, so I put plasticine on it to see where things were hitting...
Was obviously only just hitting on the high centre section of the nut, so I skimmed it in the lathe, didn't alter the amount of threads so should make no difference...
And spins freely now...
No noise and the kicker ratchet engages well, getting there...
-
11
-
That's my regular route into town. Will keep an eye out. No idea what I'll do if I see it tho...
-
1
-
-
Oh that's cool.
Yeah hopefully when I sort the shift out I can rig something. Pushed for time atm as want to use it for Munro rally, but since that's in like 3 days and I'm still waiting for parts can't see it happening. If I get rid of that shifter arm in the future I can always get another sprocket cover...
Will def look at something like what you've posted though, great pic...
-
1
-
-
Looks like no issues with protruding screws, will clean the edges of the holes and loctite the screws in later...
Started installing kicker hardware, there was a blanking plug in the case blocking the shaft hole...
And the bush and oil seal were already in there. The round pin lower left is the thrust plate retainer...
Slid the shaft in with shim and thrust plate...
Other side, square one is the kickstart shaft, the round stop pin was already in the case...
First piece in, the gear on the shaft...
And the ratchet engaging gear, spacer and spring on...
Was all going too well, the new sprocket cover with kickstart shaft bushing fouls the shift operating arm (RHS of pic). These arms are only on the 75 models that have a horrible crossover shaft system as they changed from right foot shift...
Difference in old and new covers is obvious...
So I notched the strengthening web casting of the cover and trimmed the edges slightly for clearance. Hope this doesn't weaken things too much as they are prone to cracking anyway...
Should have enough clearance for the chain now, can adjust further when back in the bike if required...
-
5
-
-
Waiting on parts but been doing a bit. Gave engine a rattle can rebuild...
And looked at my kicker install, I'd bought a used clutch basket ages ago with the kicker ratchet attached, as I'd heard they were better quality than the pressed steel ones in the kit. I thought it'd be an easy clean and install job, till I looked at them both and realised the 'new' one didn't have the starter gear...
So was either remove the starter gear and weld it to the replacement clutch basket, or fit the starter ratchet to my one, I'm more confident in my drilling and tapping than my welding so took that route. Started by machining up a spacer out of aluminium, using an old bearing for sizing up on the lathe. Got to use my awesome little power hacksaw too...
")
Successfully centred...
There were a few weld splatters on the flat surface so took them off with a sanding disc...
And fitted the first screw. Used M5 countersunks as easily available. Quite hard to tap as drilled 4mm instead of recommended 4.2mm and it's hard steel, but got there, with lots of backing off to clear the threads...
Drilled the others out after marking the centres...
And all done, loosely buttoned up...
I might replace these stainless screws with black allen head ones yet, also unsure if the screws going though will cause any issues?
I'll look at the clutch parts/reassemble to see if I need to cut these down flush, but some progress anyway...
-
5
-
-
Regards manuals, I've had success in the past searching online if I include 'forum' in the search terms. Have found a few links to pdf copies that way...
-
1
-
-
Sweet...
-
1
-
-
Beaut car.

It's probably too clean to try this but have you wound it over to see oil coming out of filter hole?
And I'm assuming oil pickup is not too high or anything?
Sorry just read you have good pressure. I'm stumped. Be interesting to have filter checked, but no oil in it is strange...
-
1
-
-
On 07/06/2022 at 19:22, fletch said:
Mum had a supercharged jaaaag, it drove like shit at anything under 115kmh. Had to concentrate to keep it on the road.
Once it was sitting on 120+ it was a dream
I drove a bloke at work's V12 XJS yonks ago, I was thinking, shit it's smooth at 120kph.
He pointed out the speedo was in miles...-
2
-
 4
4
-
-
Got'eem...
Knew I was on the right track. Bit of a soak, bit more heat and they rattled out with the black part of the shaft clamped in a vise. 2 to go, but at least I know what I'm dealing with now...
-
6
-
-
Been wrenchin...
Tried to pull apart the rocker covers, what a drama. Bit of heat got them apart enough to get out, but struggling to get the o-ring end screw out of the shaft...
Tried heat and a rattle gun/allen key but no joy, then tried drilling and tapping a thin piece of scrap and screwing the acorn nut up tight, still nothing. Scared of stripping the thread so stopped...
Centre drilled then drilled out the screw to see if it helped, makes it easier to get penetrating oil in there anyway...
Not sure of screw size so only drilled a small hole through, currently soaking in penetrant while I look at other things...
Filed the show side of the first cover flat as it was pretty rough...
Followed up with a block and different grades of paper and some elbow grease...
Then a few minutes on the wheel and looks much better...
Also looked at fitting some rearsets, as I'm a bit cramped with standard pegs. Want to do away with the awkward '75 cross-shaft gear linkage too, maybe use that for the brake. Will be a right-foot change backwards pattern potentially...
Want them to be about here ideally...
Would be so easy without the pipes and kick-start being in the way, just fabricate a bracket bolted to the two holes on bottom rear of frame. Guess I'll wait till things are back in to see what is possible...
-
4
-
-
- Popular Post
- Popular Post
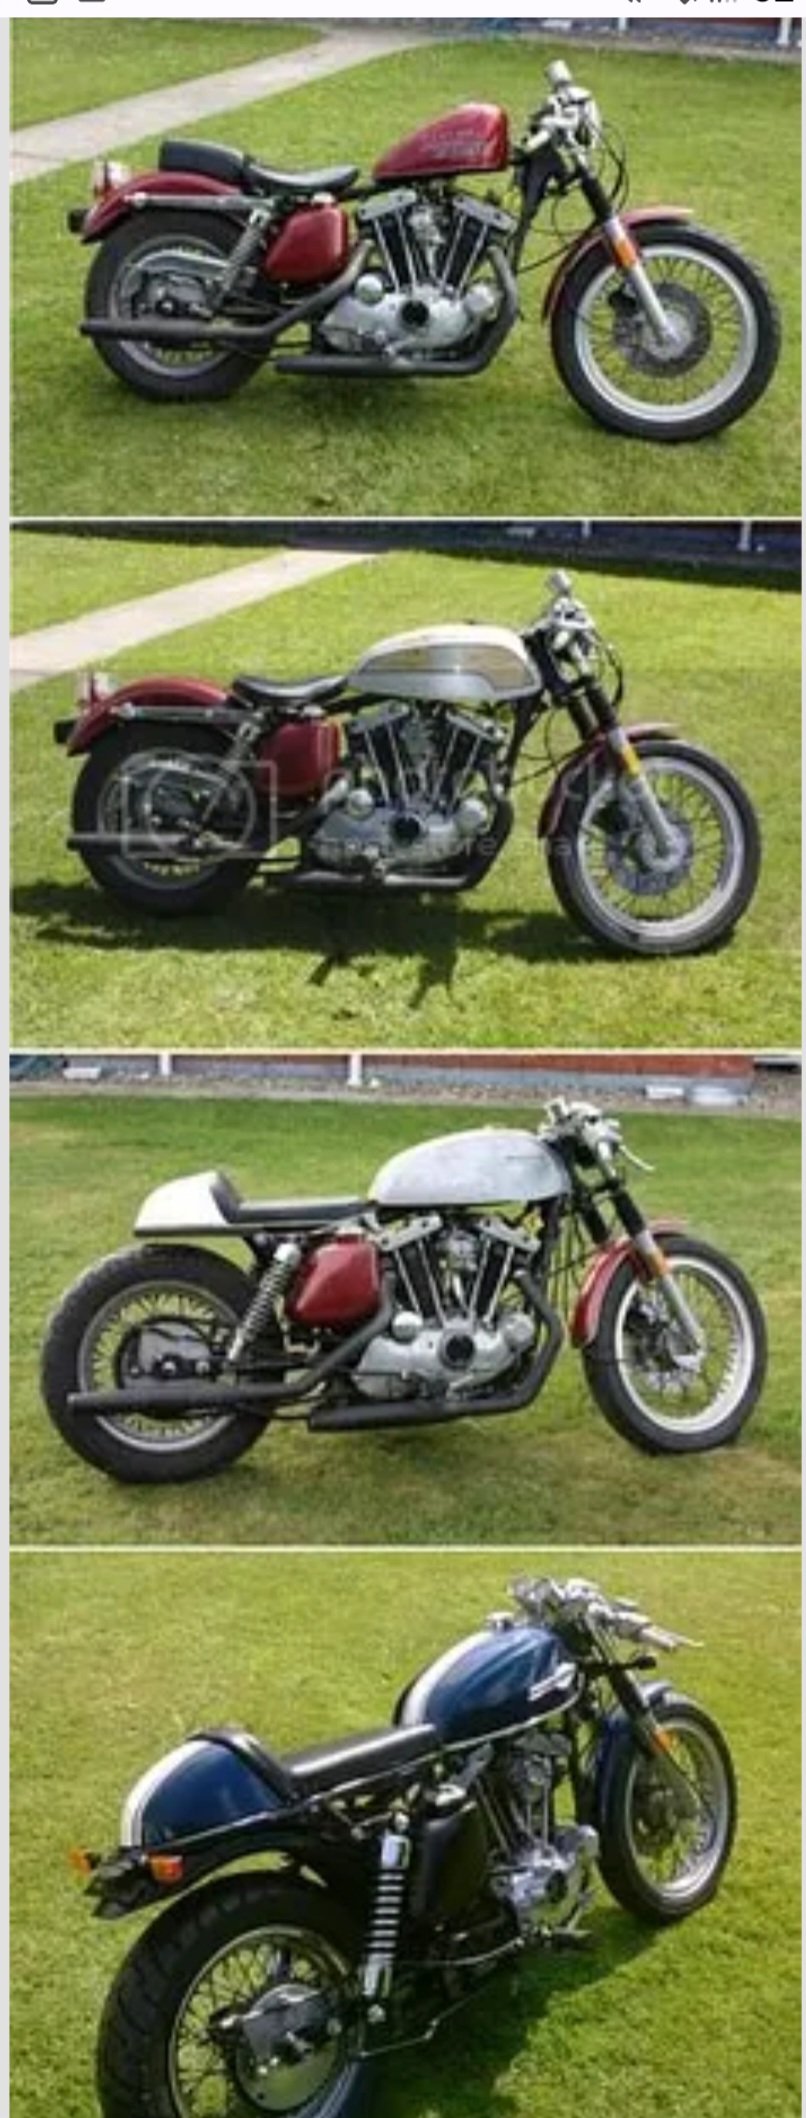
Then sorta...

-
16
-
1
-
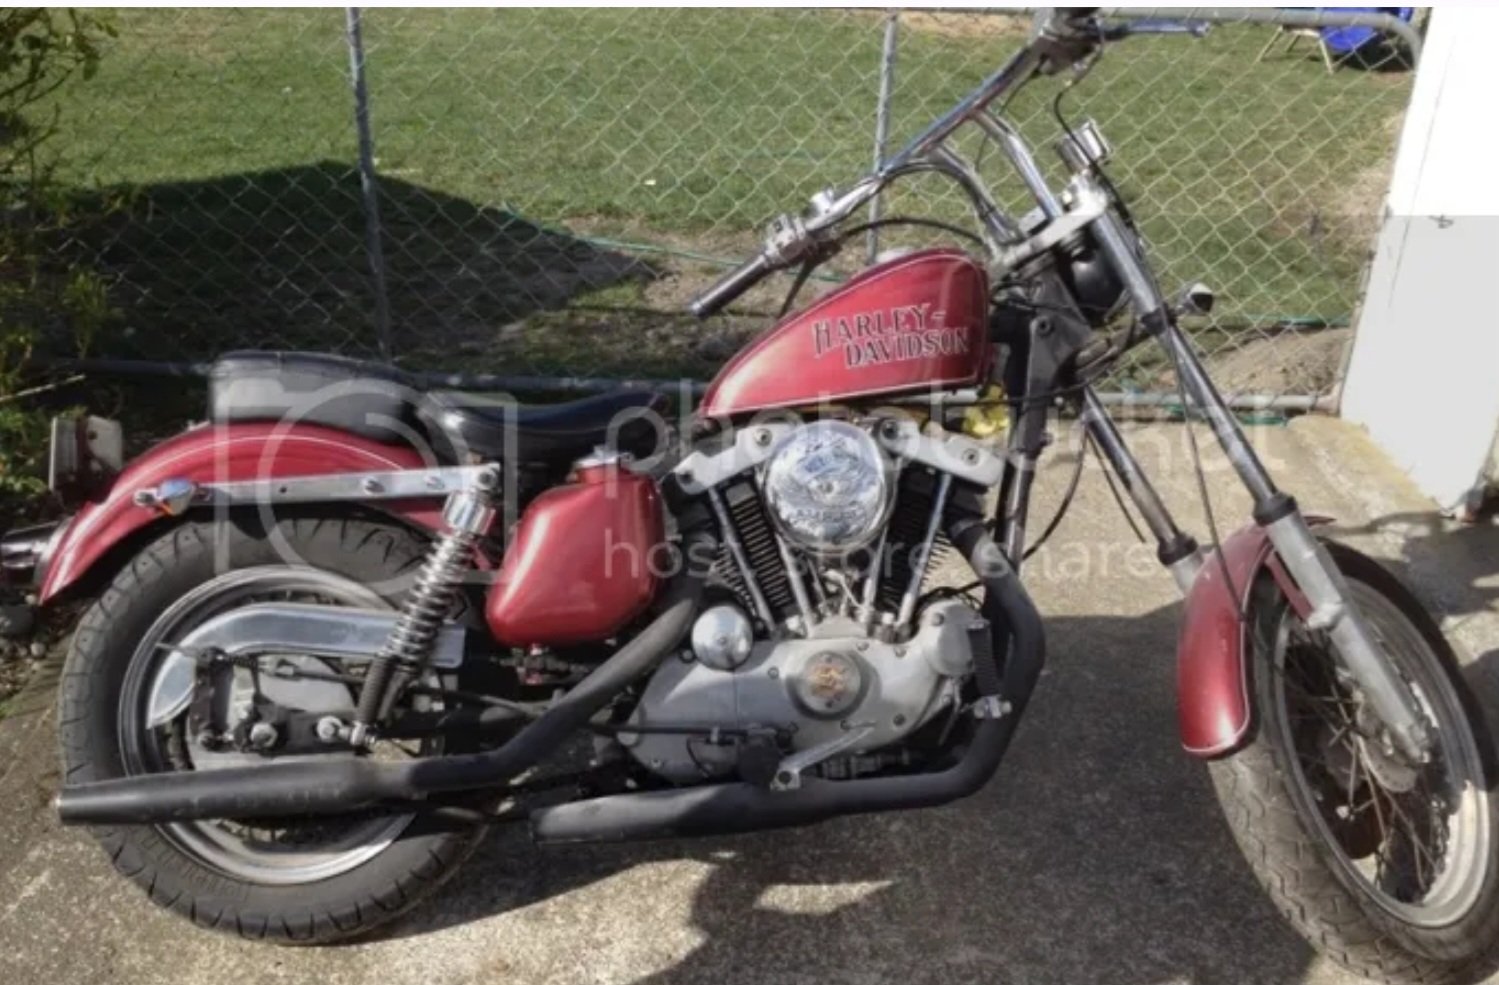
Had a whole build thread but photobucket turned into a dick.
Started thus...
-
4
-
-
Had a thought last night about wiring the new ignition, yep no way could I get the wires through the teeny hole, so pulled cover again and drilled out. Took it in stages to avoid breaching the casting, and 7mm does the trick...
Cleaned up the swarf and put cover back on loosely. Should prob check the lifters next...
-
7
-
-
- Popular Post
- Popular Post
Pulled the cams to check condition and clean things up, all looked in pretty good condition...
They're labelled P cams, which I think are stock for a '75, and are a decent all-round cam...?
Checked the timing breather valve as per manual, just because I could see everything, then had a go at lining up the cam gears, starting with the pinion gear mark at around the 11 o'clock position...
And had a bit of trouble getting things to line up perfectly, cams 1,2,3 were no problem, but number 4 didn't appear to line up correctly. Tried shifting it one tooth over from here, but that looked worse...
But turning the engine slightly showed the marks lining up better...
Can see why people get frustrated...
I used a bit of loctite on the intermediate gear bushing that had popped out of the cover, fitted new shaft seal and gasket and loosely buttoned up the cover...
I re-installed the shims as I was confident where they came from, they all looked in great shape, and I had no issues previously. The manual said to install a fibre washer in front of the intermediate (idler) gear, but I tried that and the cover would not sit flush, so removed it (there was none in there before).
Hopefully this side is done now...-
11
-
Put nut back on main shaft and can rotate engine no worries, will sort timing next. And turns out that weld is a factory Harley thing, added after drilling out an oil passage during construction. Apparently HD put out a service note stating you can discard the shims as they can fail and send bits of metal through the engine. Will look into that.
Also hit the case on the buffer wheel for about 5 mins...
-
9
-
-
Discovered I had a cam tensioner pad in one of my gasket kits so fitted it. Of course I discovered this the day after I ordered one...
Pulled the gearcase (cam) cover. Was aware of losing bits so took it very carefully, easing off the cover.
Careful...
Careful...
Arse...
And that was even trying to keep the gears in place with a long screwdriver as I removed cover. Not the biggest deal as I'd probably remove them to clean/inspect things anyway, and at least all the shims stayed in place so I knew where they all go...
There's a blob of weld from what I assume is an old repair on the underside of the cover, it's in an unobtrusive place so debated leaving it, but decided to give it a tickle up with a file...
And gasket surfaces cleaned up...
I'll leave it here while I look into cam timing methods, not sure how I'll rotate engine yet, but will sort that out...
-
8
-
-
Yeah ta, that pic is deceptive, actually a fine mesh, just been pushed in...
And already got a vented bolt on top of the case...
I've re-seated the check ball in the pump so that should minimise leaking (sumping), and I expect some to drain in there, that gets pumped back when running - but if I leave it sitting there's several litres that has to be drained out. I'll replace the seal and check that transfer valve and see how we go.
Cheers for the advice though, appreciate it...
-
2
-


Bike spam thread
in General Bike Chat
Posted
Honda are pretty good. Bung the part number in a web search and you might be surprised how available/reasonable NOS parts are.
Prob even worth asking the dealer.