


sr2
-
Posts
763 -
Joined
-
Last visited
-
Days Won
1
Posts posted by sr2
-
-
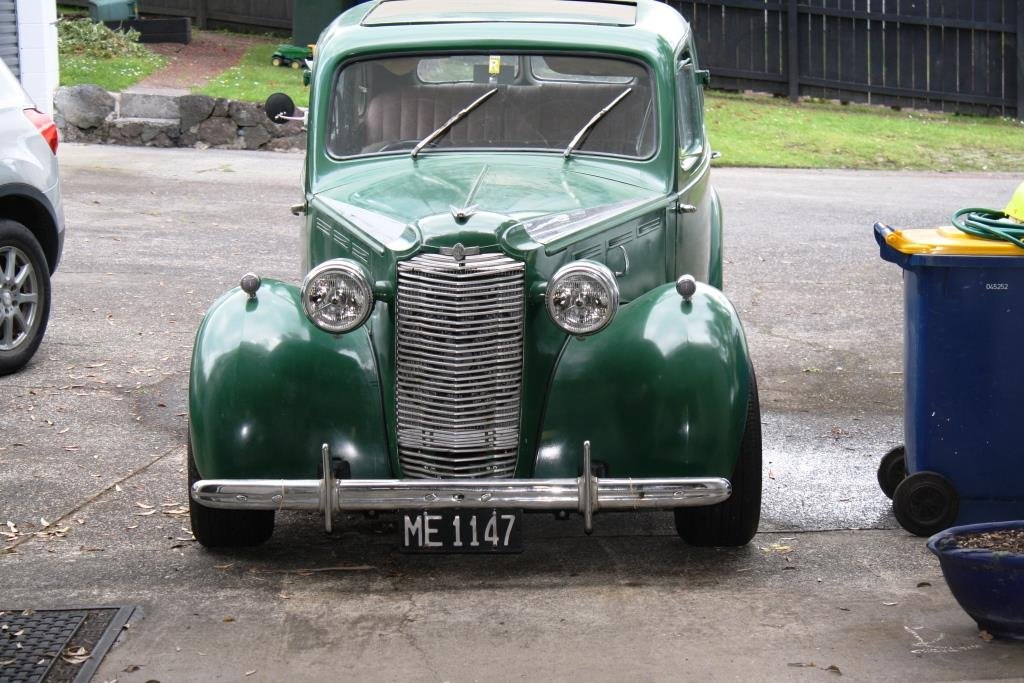
Jeeze I just spotted this on Trademe - speak of the bloody devil!

-
 3
3
-
-
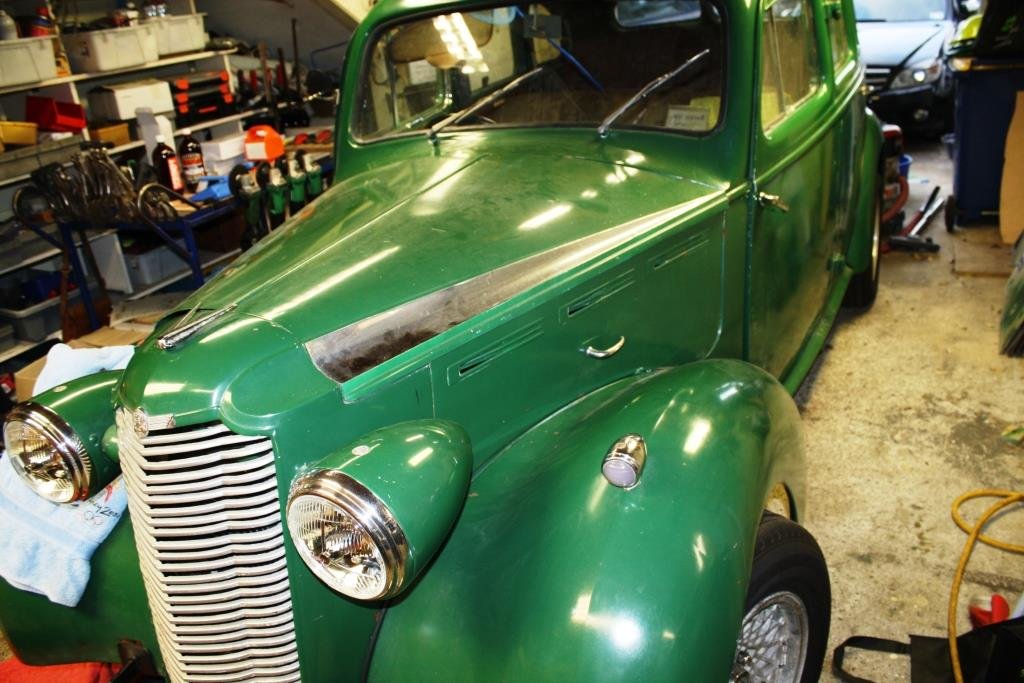
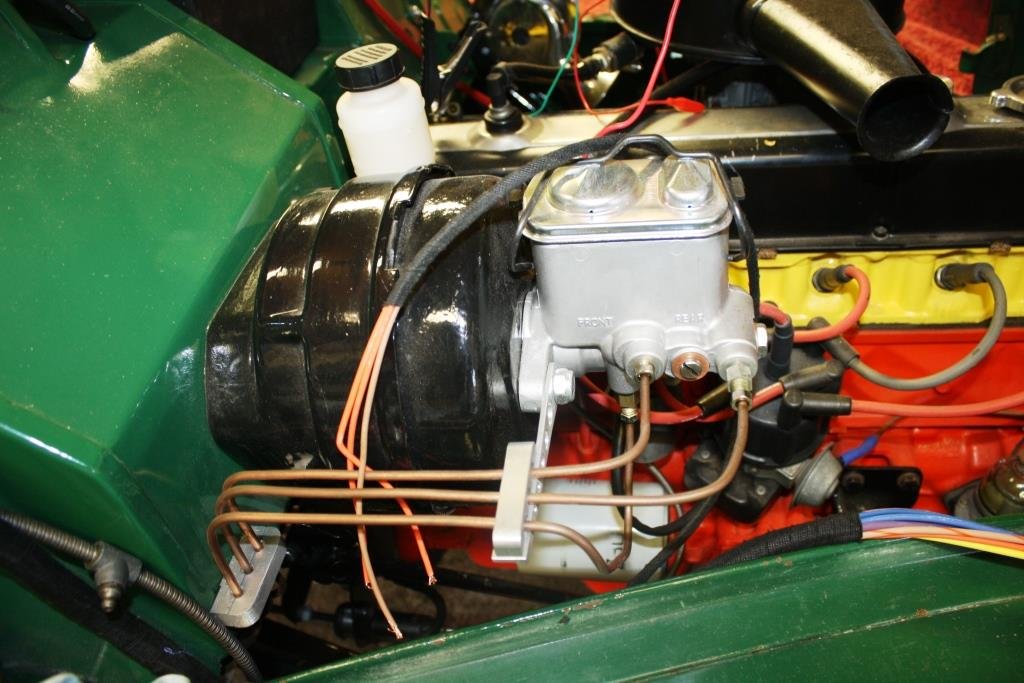
Being a Holden 6 cyl. junkie from way back I’m loving your build, nothing better than a pink HQ with a 6 in it! The HQ master cylinders were never the world’s most reliable and when combined with the big single diaphragm Mastervac booster they were best described as being only adequate. I could never figure why they didn’t fit a tandem booster as BPR were supplying them for other Aussie cars at the time.
The bad news is that brake fluid in your booster is usually fatal, there’s a small indentation in the booster body where the m/cyl is mounted that is supposed to act as a drain in the event of a m/cyl failure. If the fluid has been leaking out from there you may get away with replacing the input seal; if fluid has made its way through to the booster it’s a matter of when rather than if the booster diaphragm fails. Easiest way to check for fluid in the booster is to remove the vacuum check valve and grommet and poke your finger in there - (I could make a rude innuendo but I won’t!).
You can still get HQ booster kits (diaphragm, input & pushrod seal and reaction disk) in Aussie, I haven’t bought a kit for a while so can’t guess the price but the m/cyl’s are bloody expensive. My preferred fix is to fit a Commodore VT to Vx M/cyl and Booster. You need to make up a firewall spacer/adaptor but it’s a simple modification, the pedal feel is improved with the tandem diaphragm Mastervac and the parts are cheap as chips 2nd hand.
-
4
-
 1
1
-
-
- Popular Post
- Popular Post
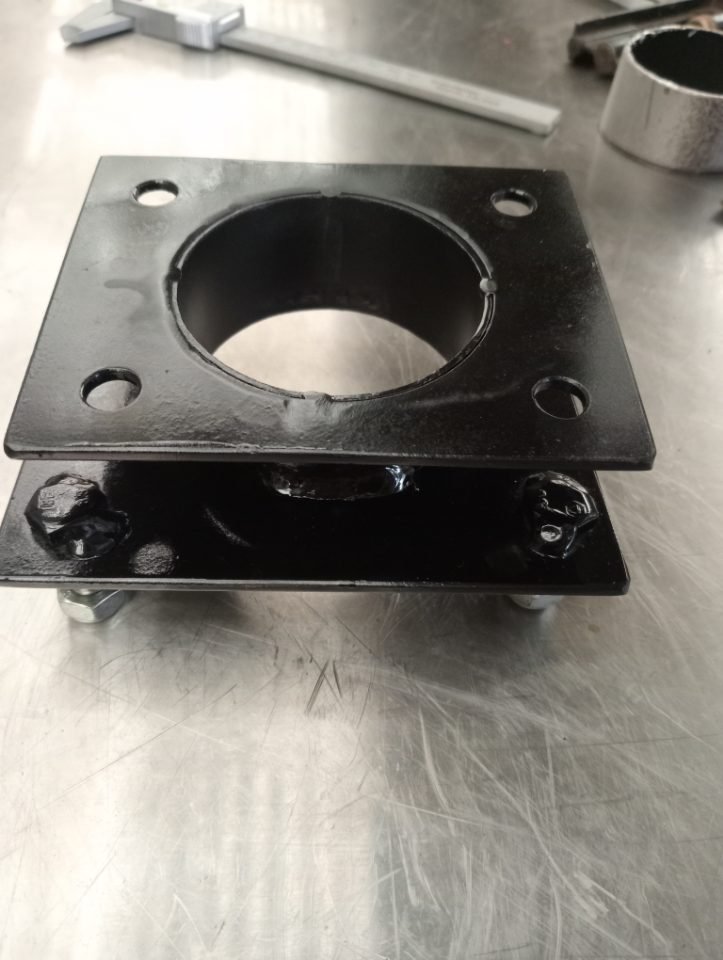
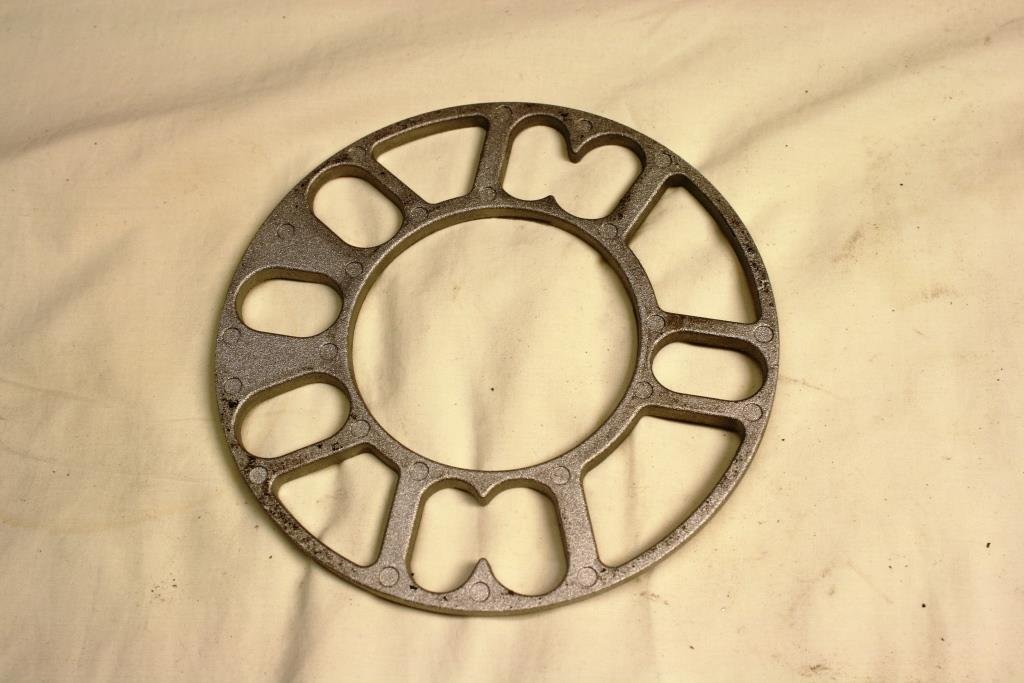
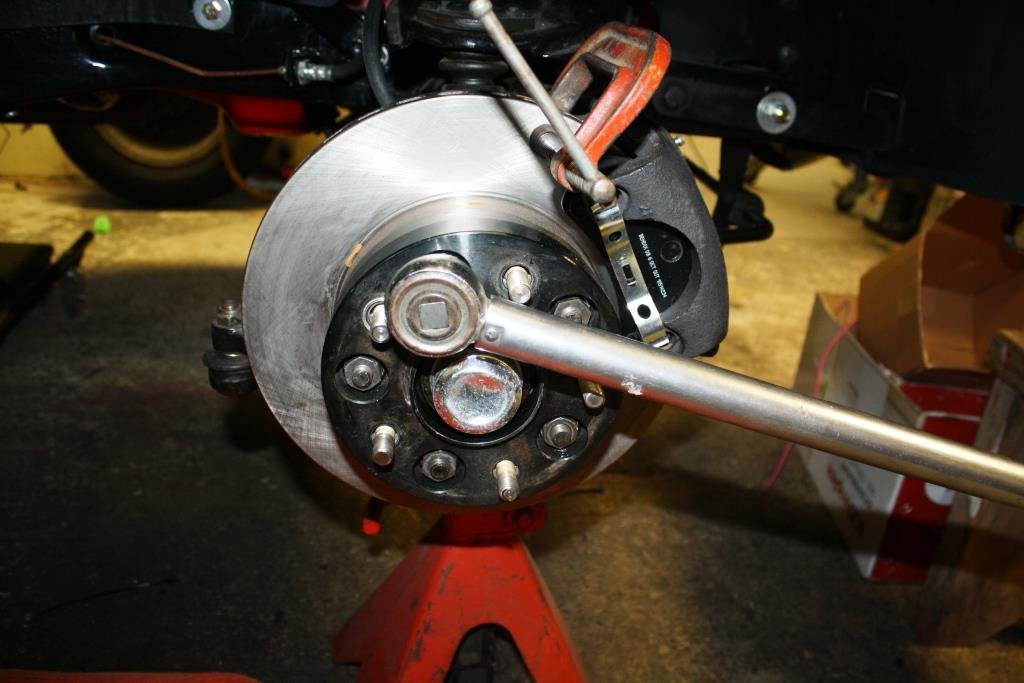
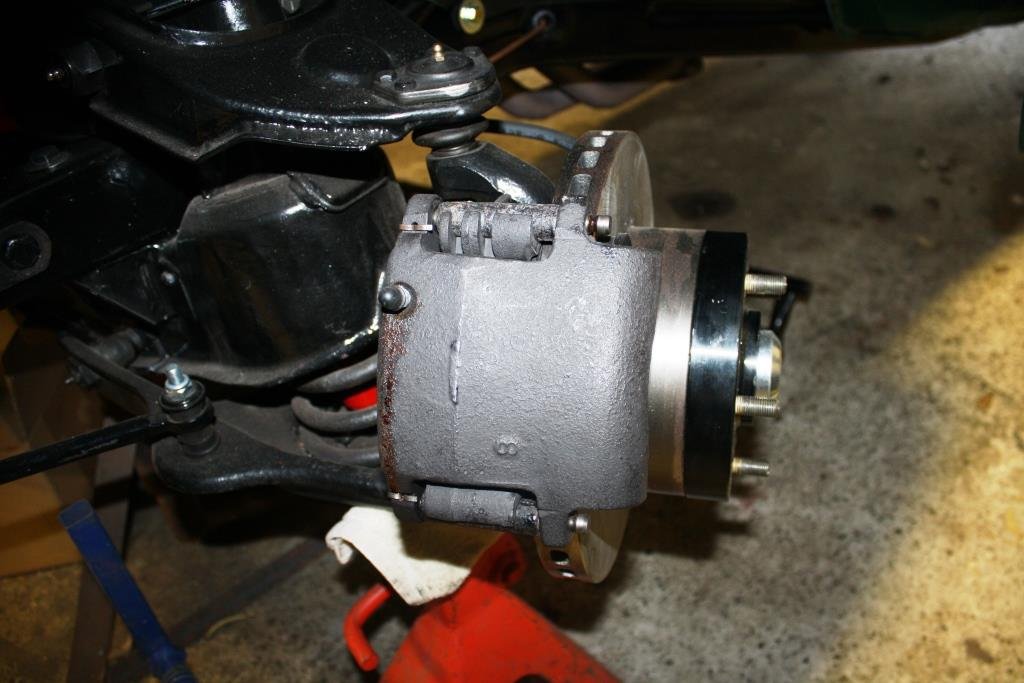
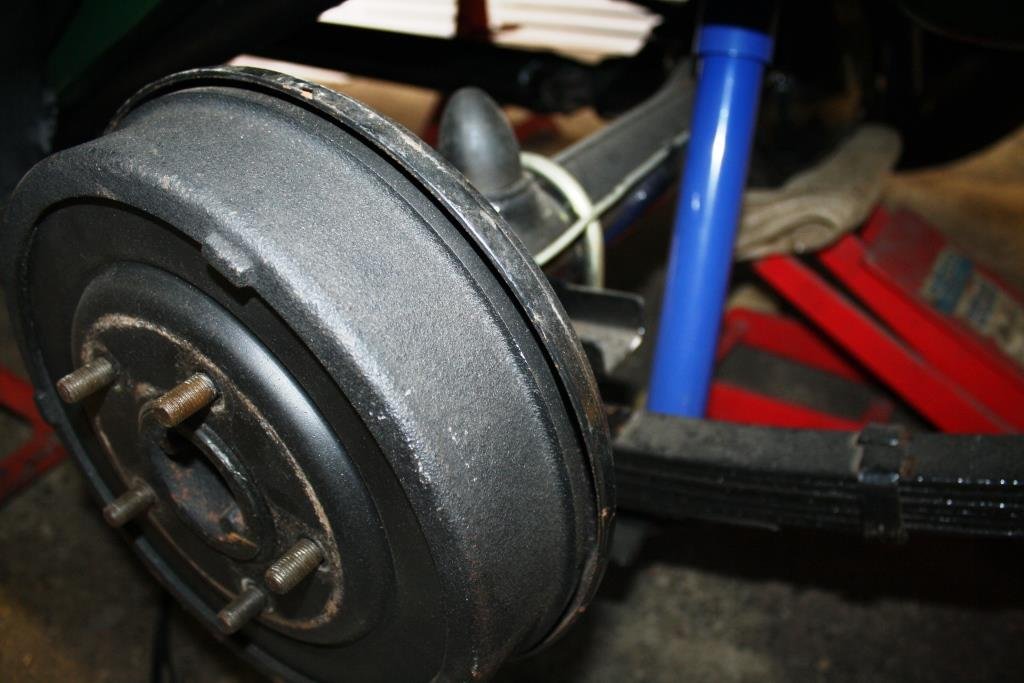
One of Rigamortice’s dirty little secrets was a set of these little shockers hidden behind the front wheels!
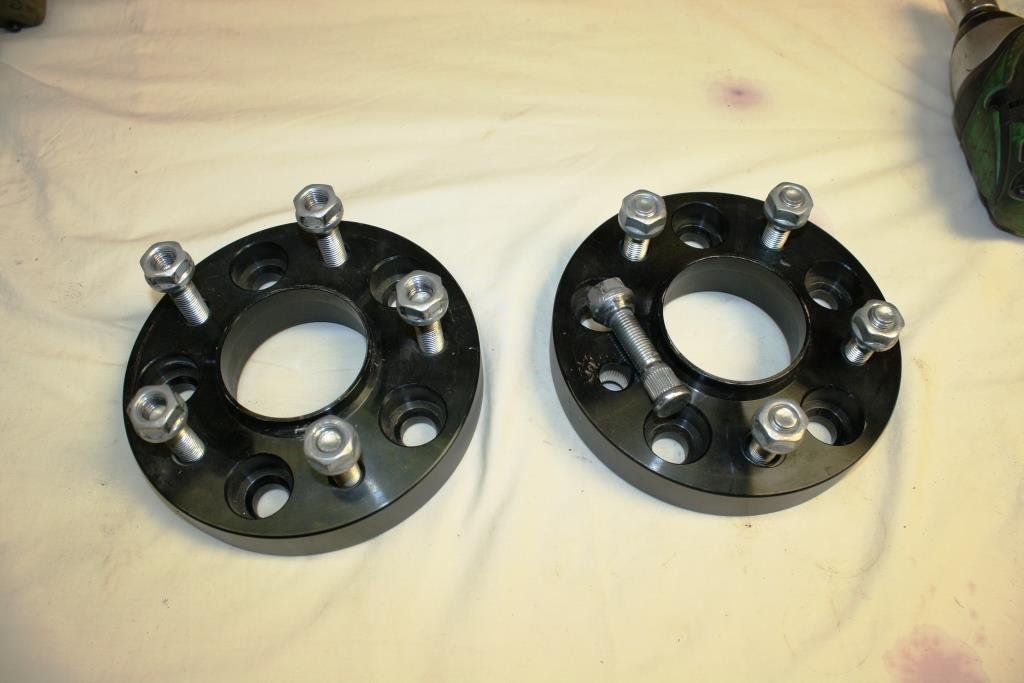
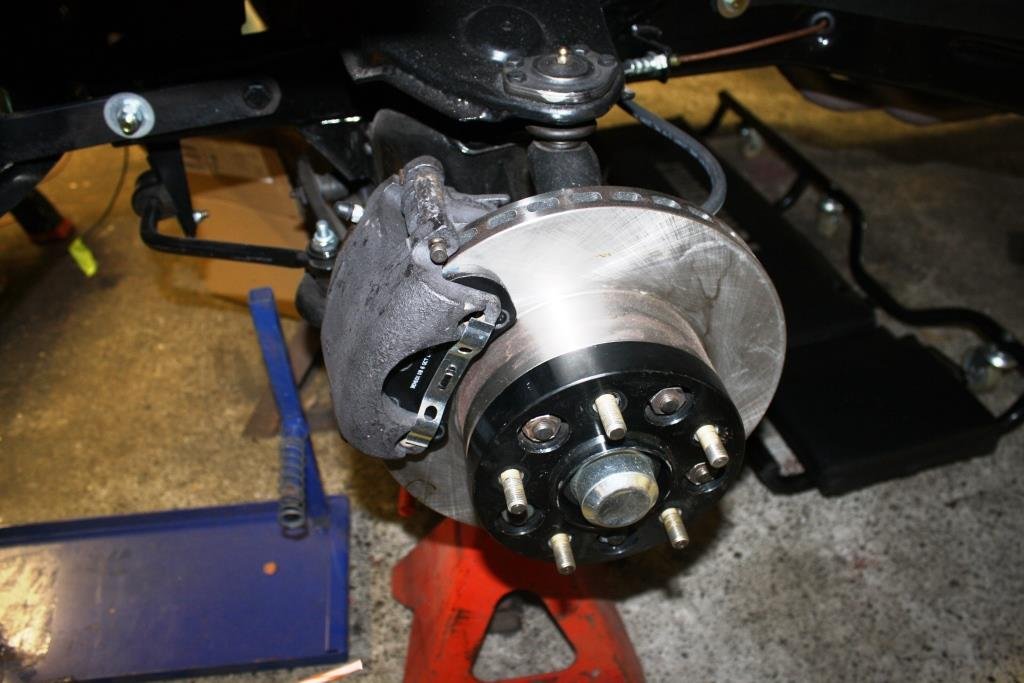
I found a pair of proper hub-centric spacers on Trademe for a very reasonable price.
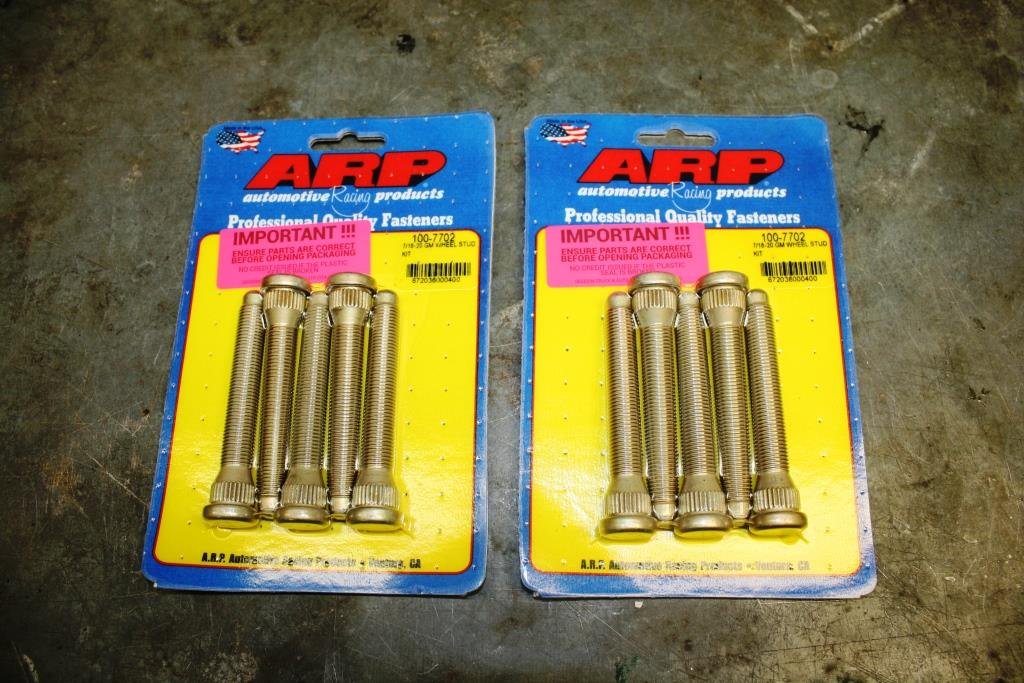
I then upgraded to some ARP studs at a very unreasonable price. (Talk about charging like a friggin wounded bull!).
All torqued up with a snug fit on the hub and wheel.
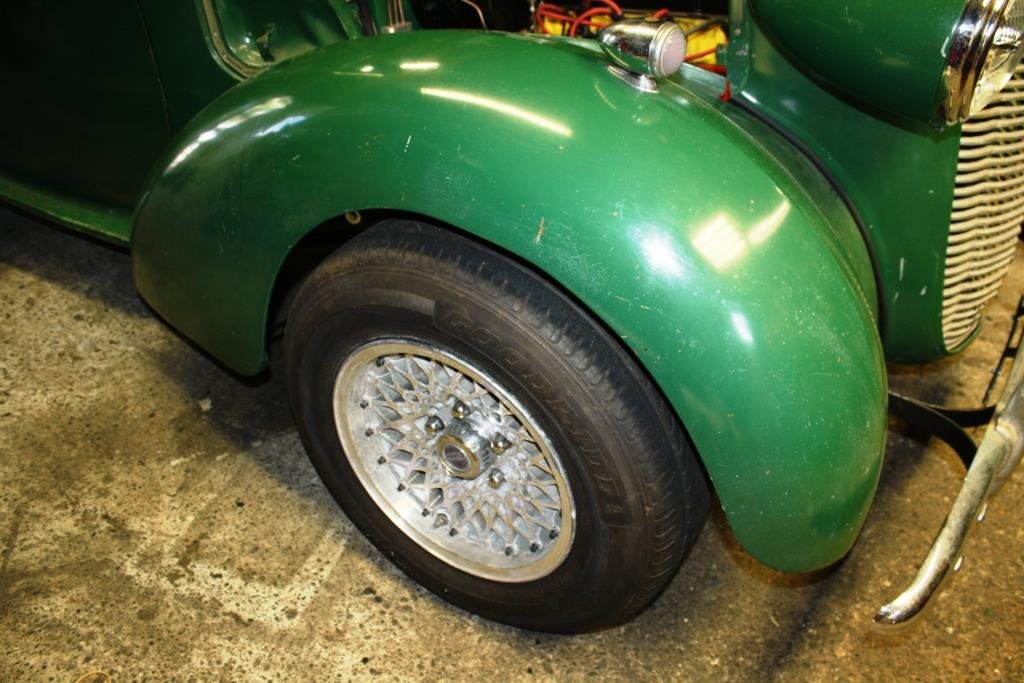
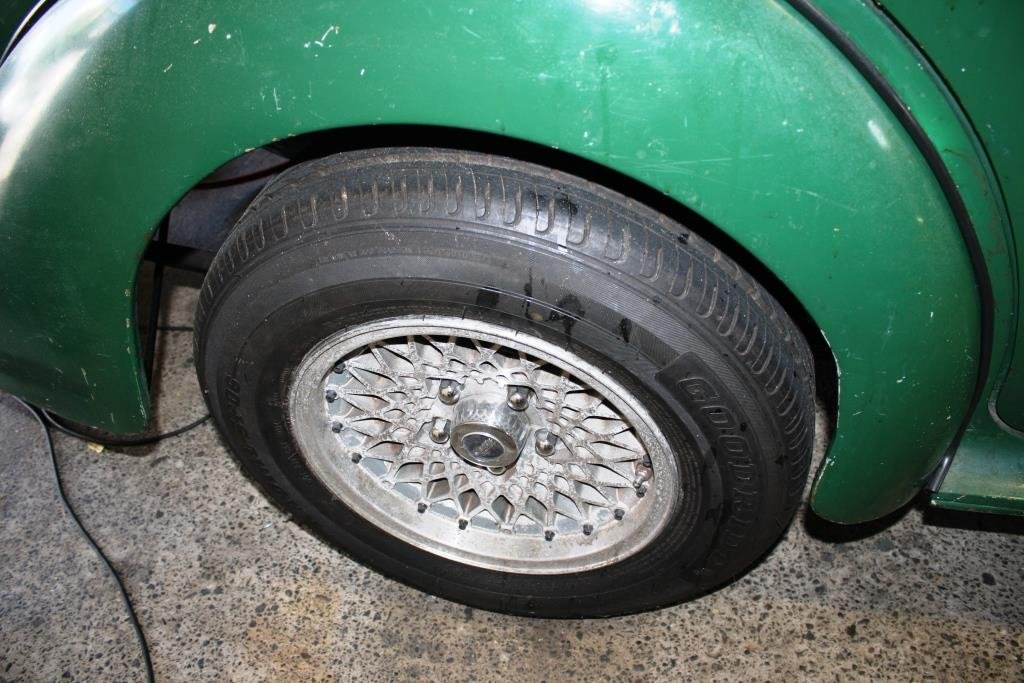
Finally got the front ride height and wheel track just where I want it.
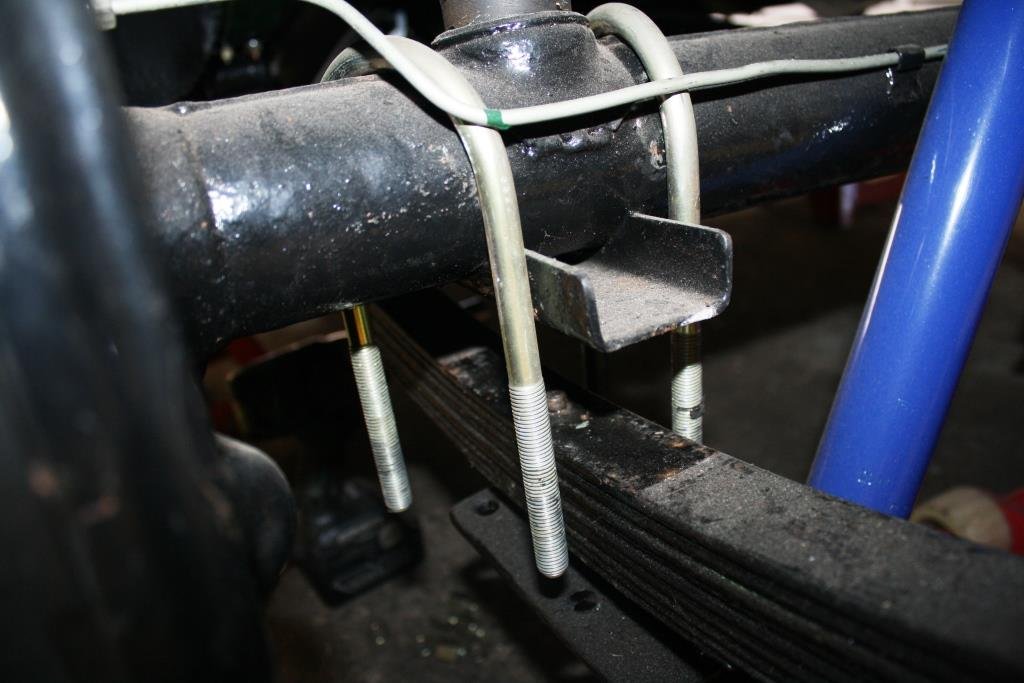
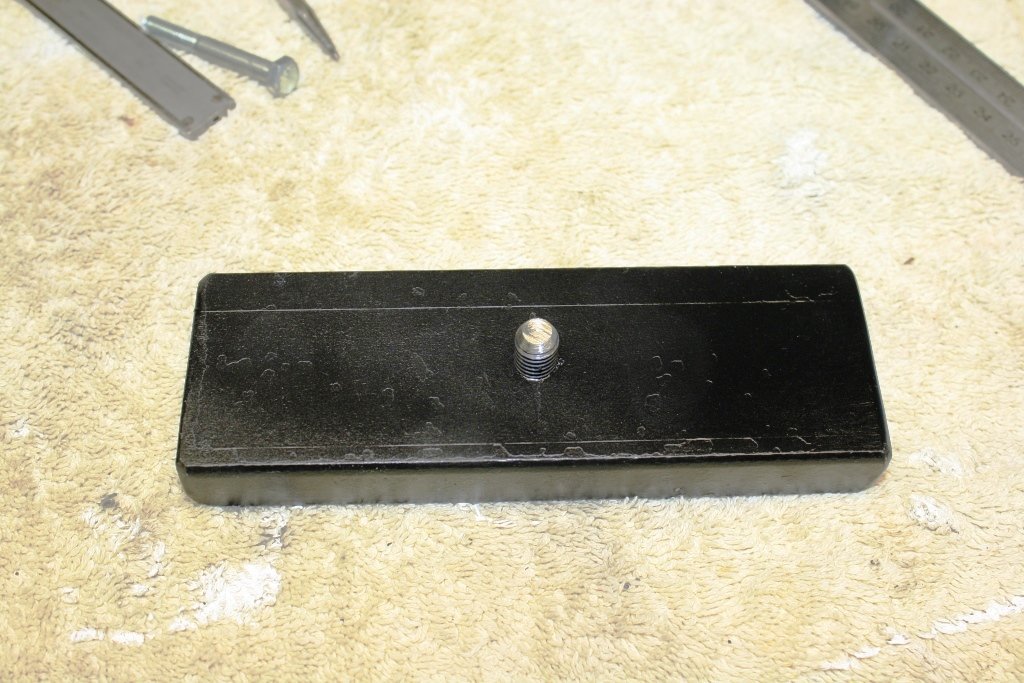
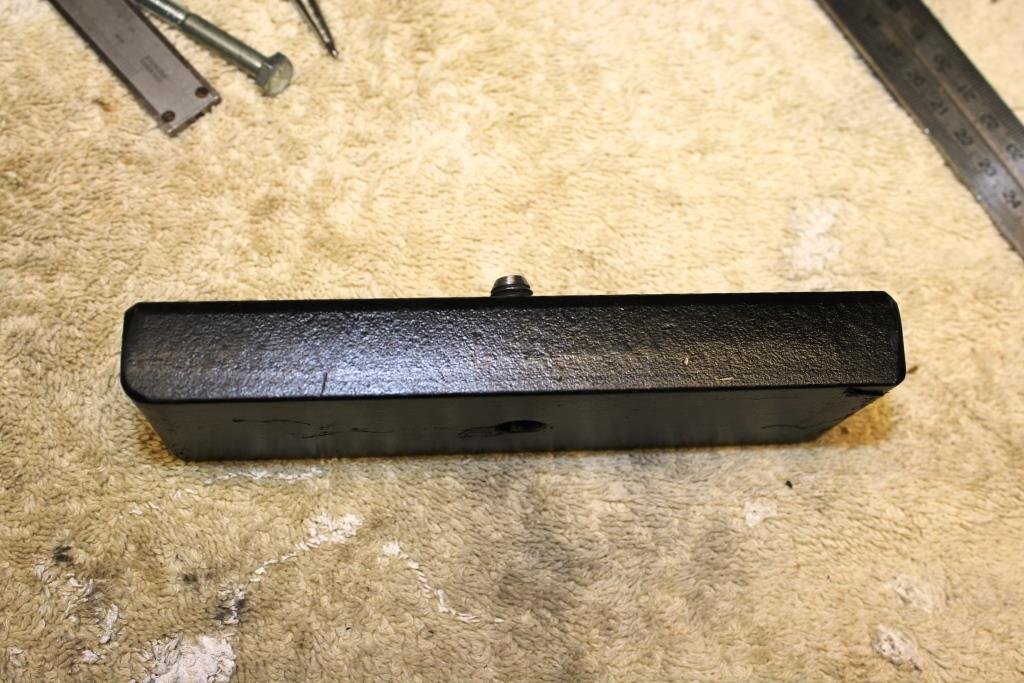
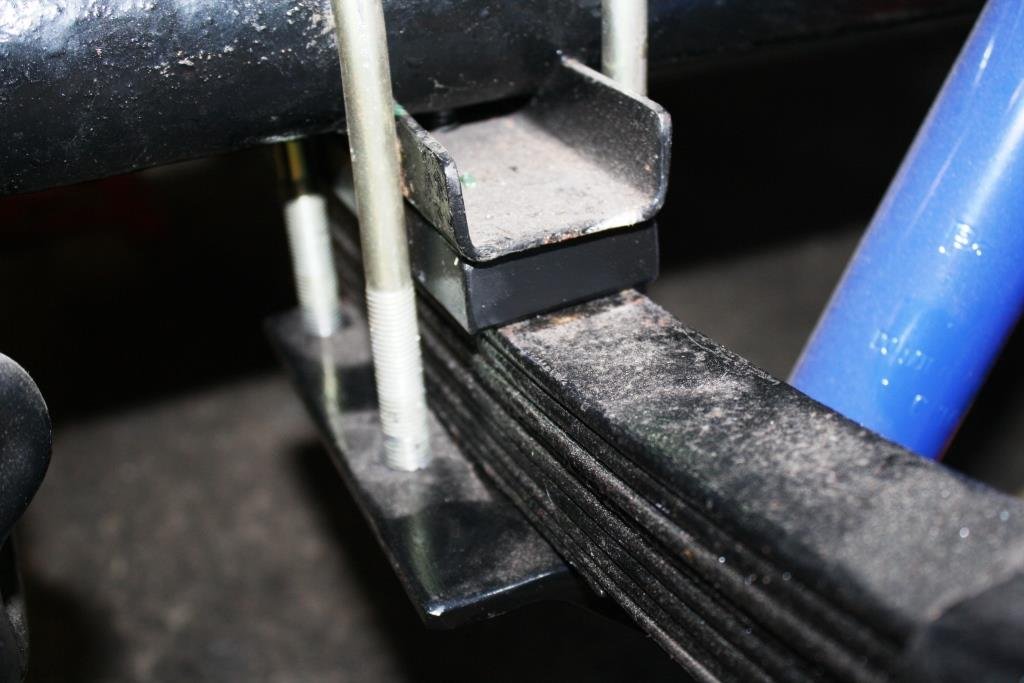
Decided the rear needed a tweak, so I backed off the rear U bolts….
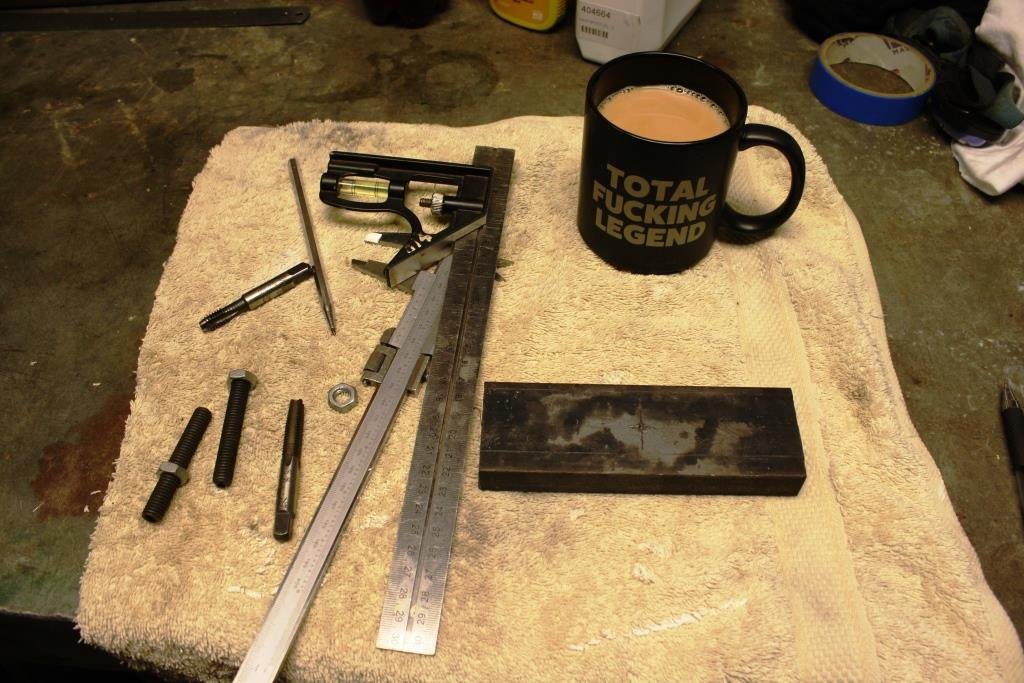
…and figured out how much I could safely lower the rear.
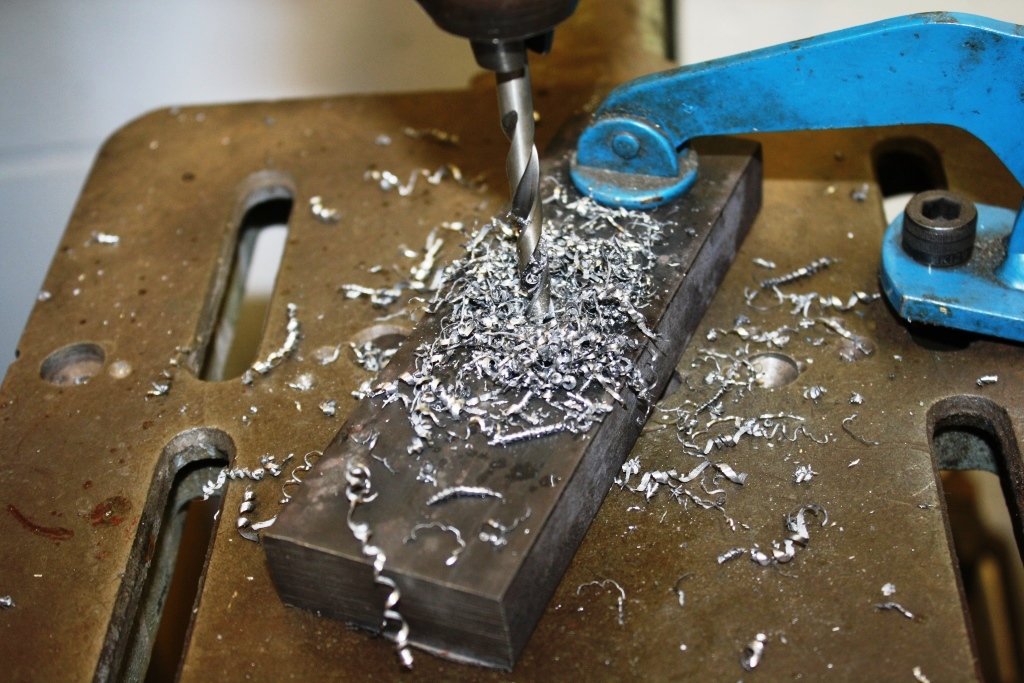
I ended up using solid bar for the spacers
I’m expecting the rear springs to settle with a little use…..
Have to say I’m finally happy with the old girls stance.
-
27
-
- Popular Post
- Popular Post
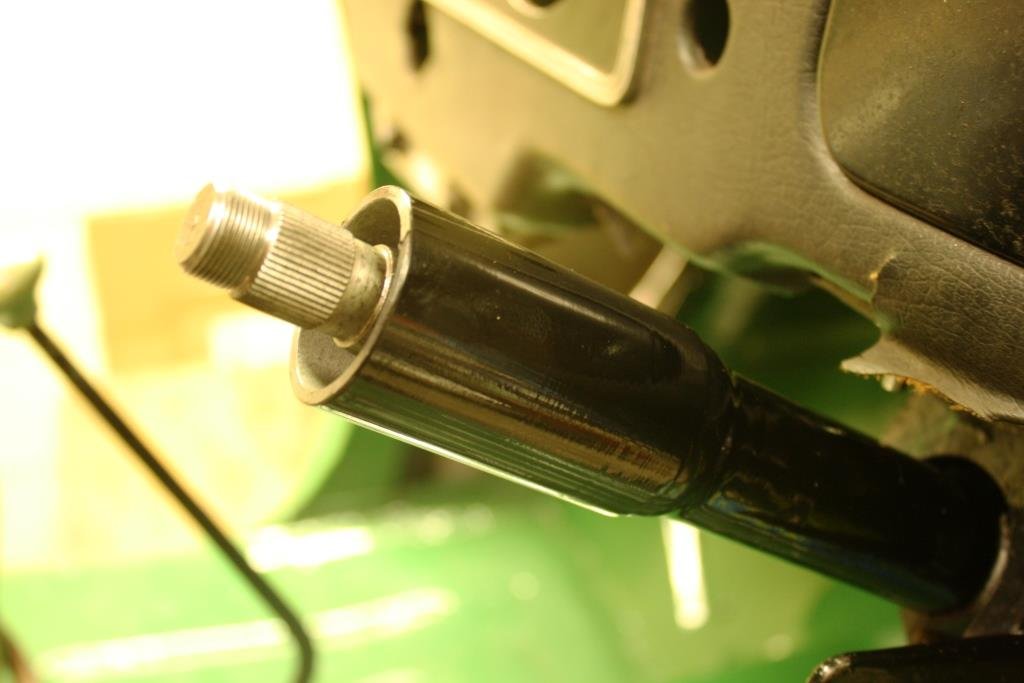
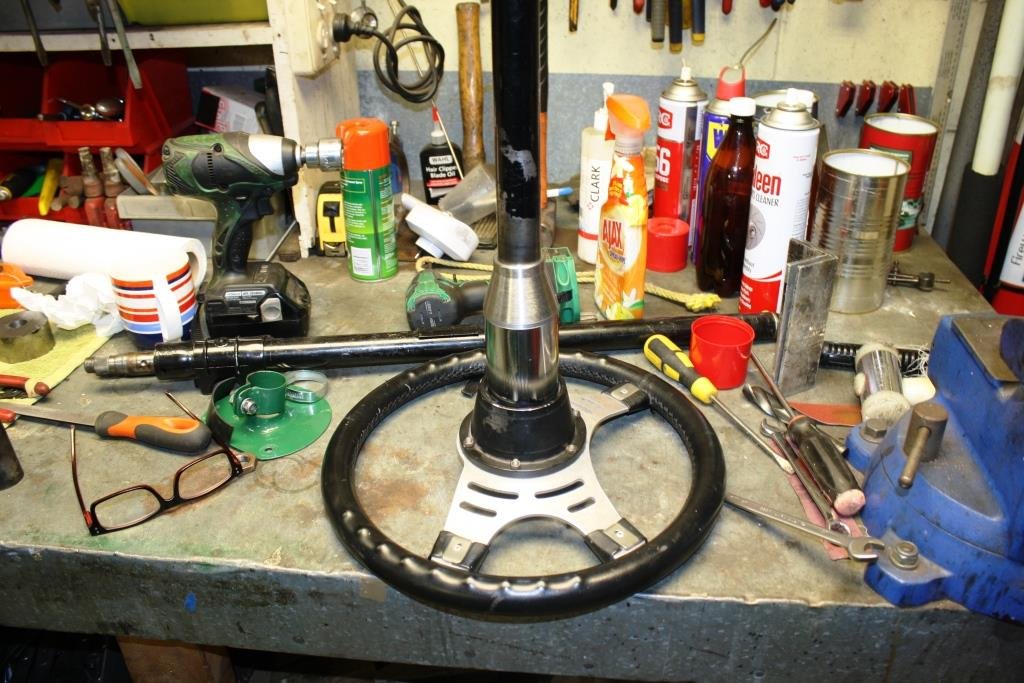
A while back I spent quite some time making a sleeve to tidy up the gap between the steering column and the steering wheel.
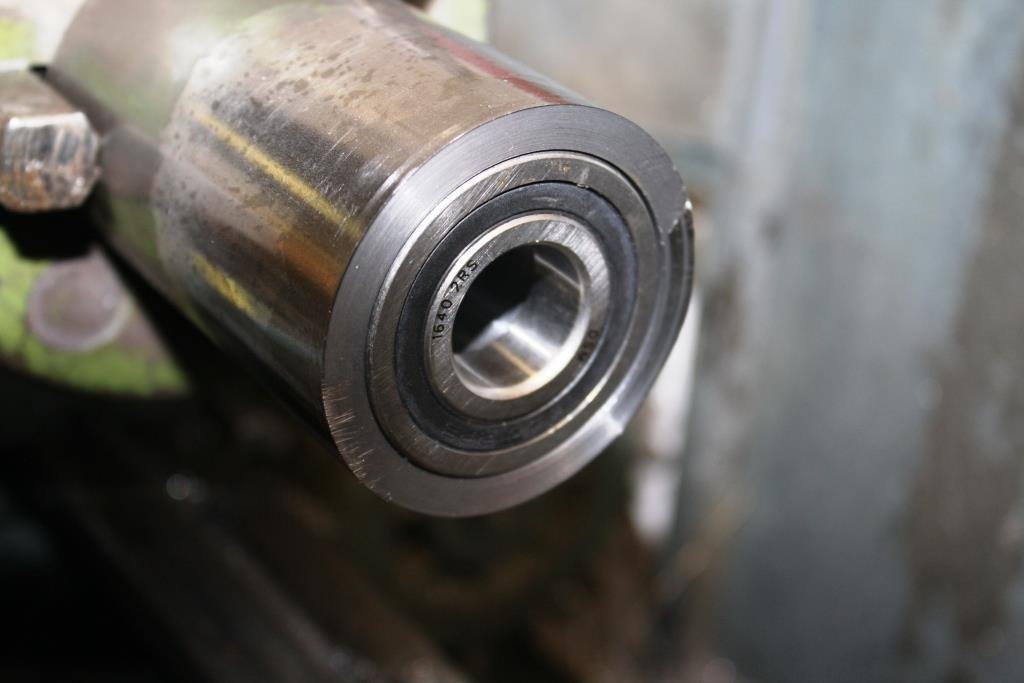
Problem was the top bearing just had too much play in it for my liking.
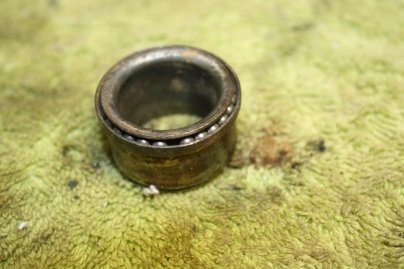
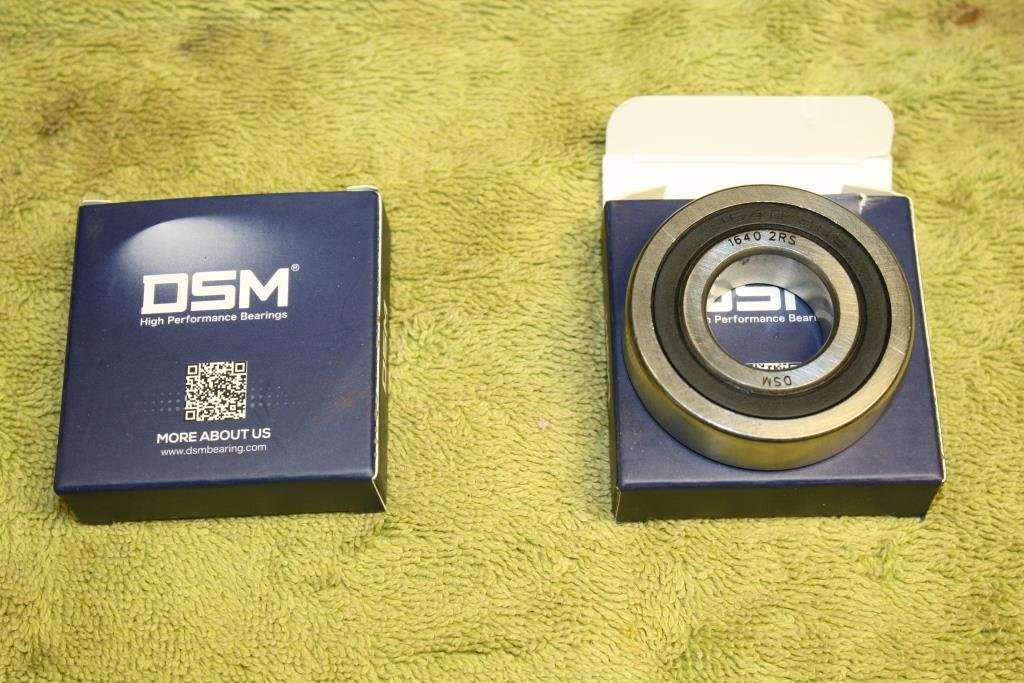
When I pulled out the bearing I found it was a piece of pressed sheet metal rubbish that was close to impossible to replace.
The solution was a trip to the local bearing supplier and the massive investment of $13.50 (and to think the “ever lovely Mrs. sr2” accuses me of being cheap!).
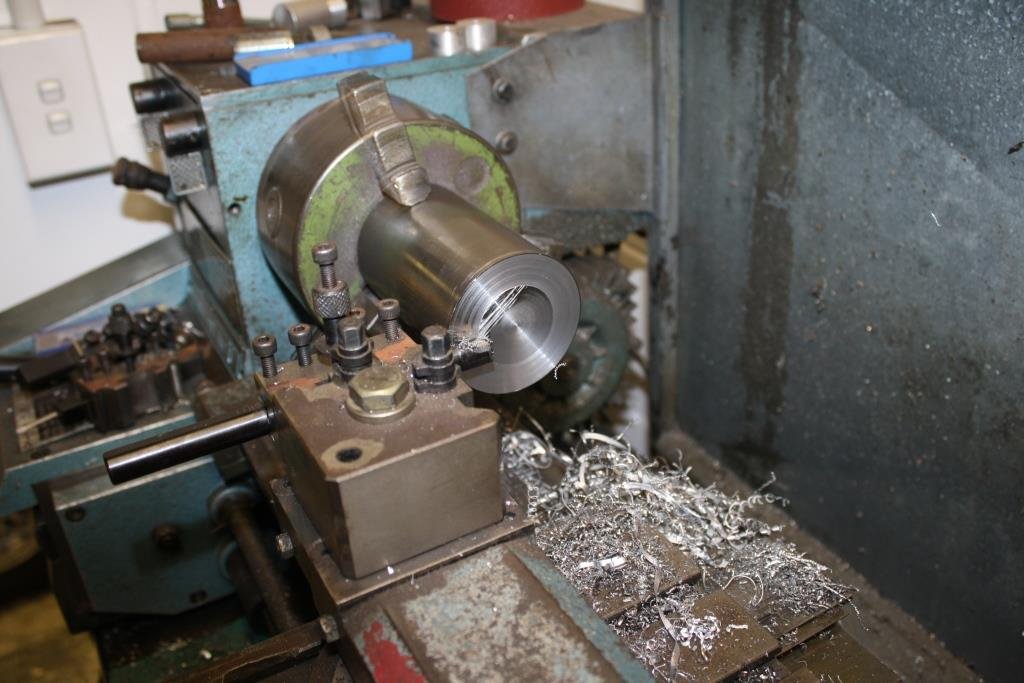
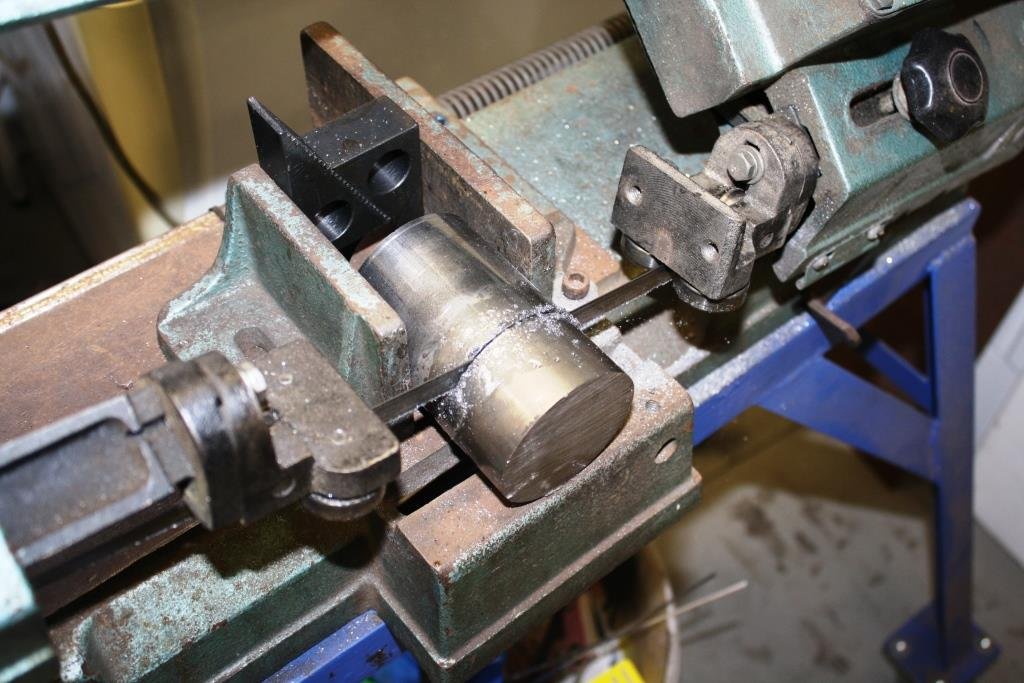
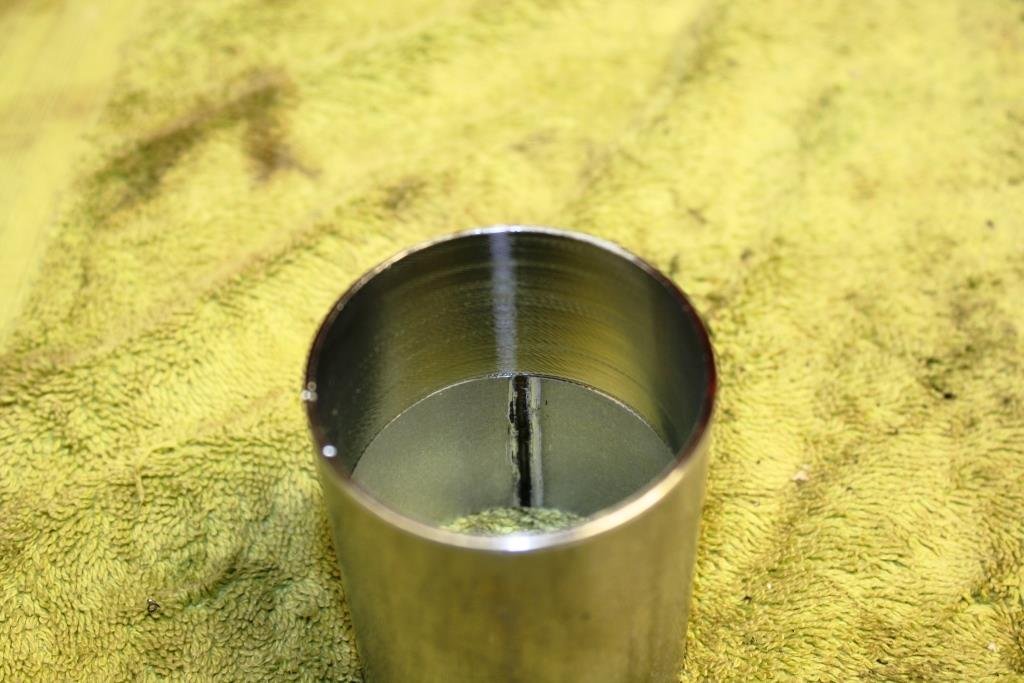
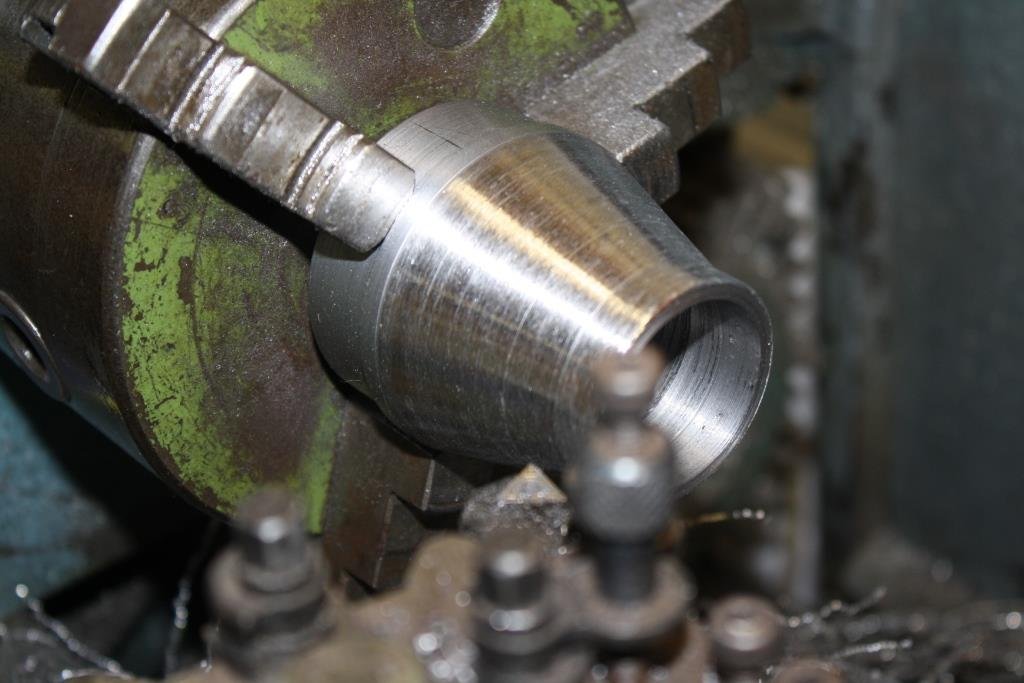
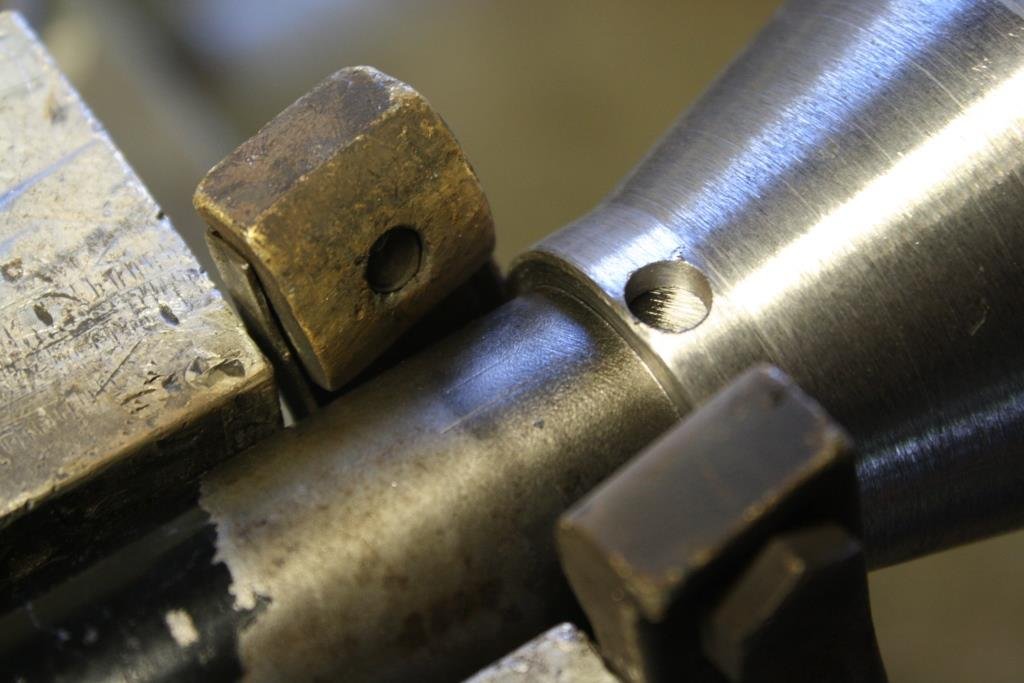
I bought a large piece of mild steel round and chucked it in the Emco.
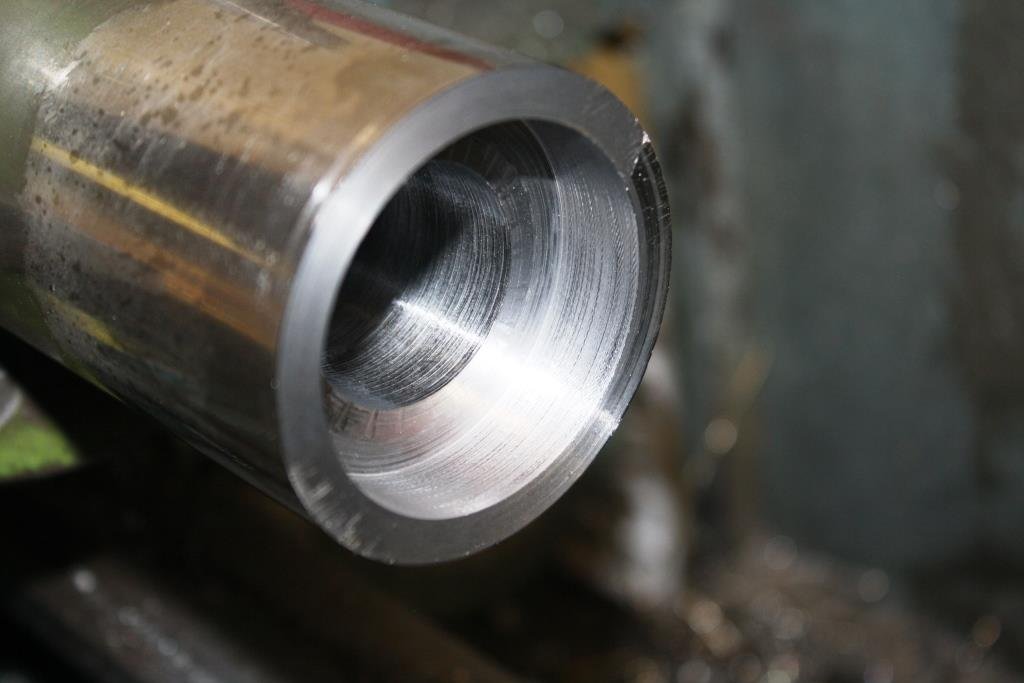
I bored it for a firm fit to the OD of the new bearing.
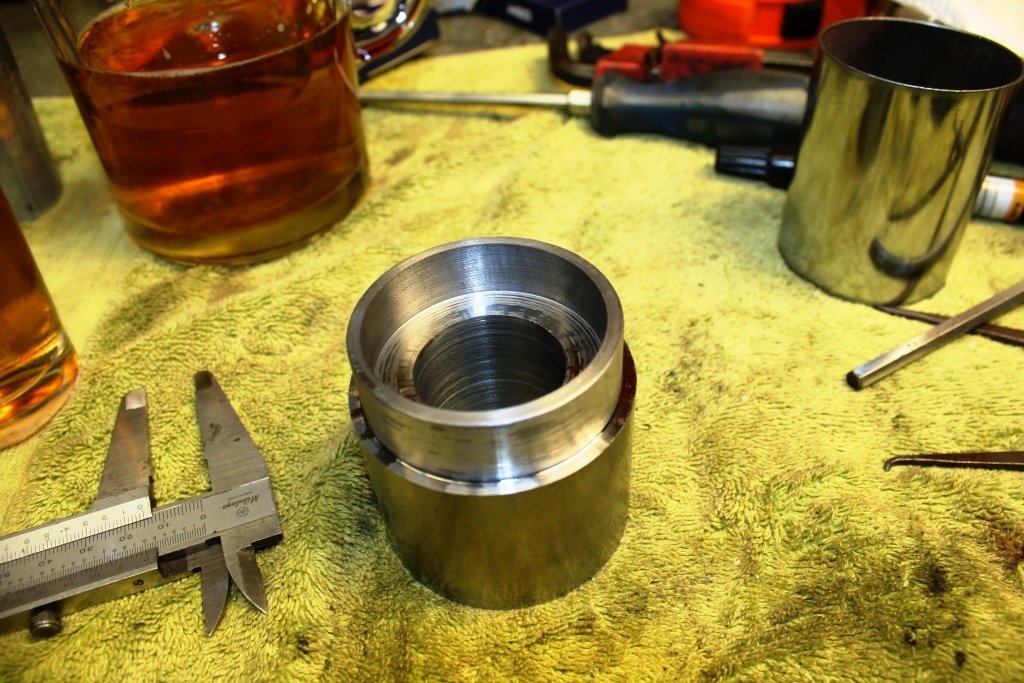
I flipped it over and cut it to size in the bandsaw…
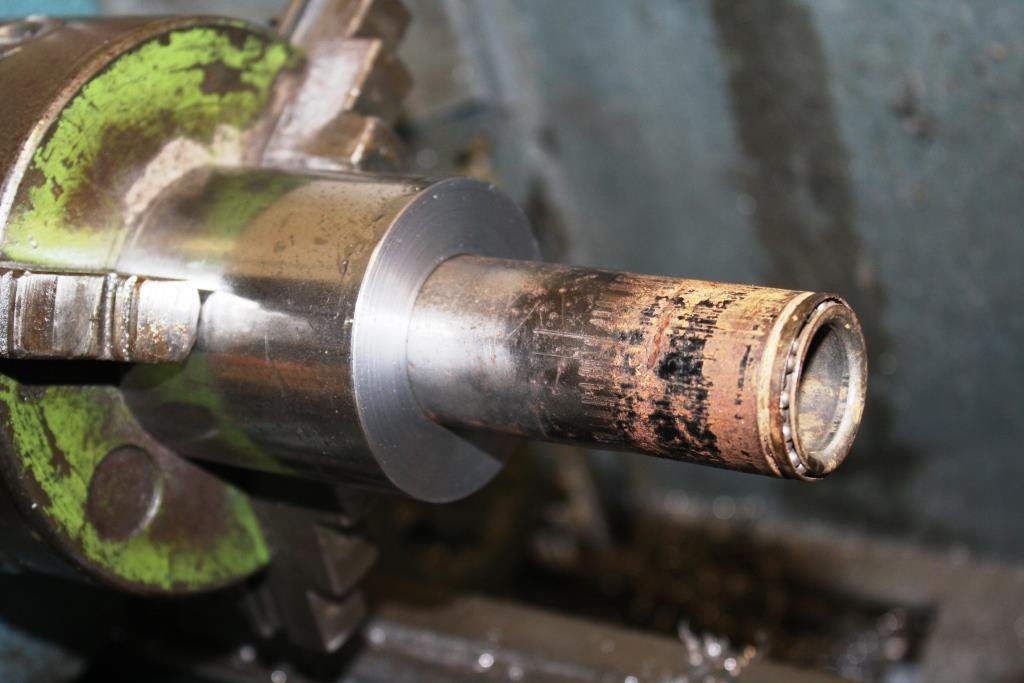
I then line bored it to fit the steering Column tube.
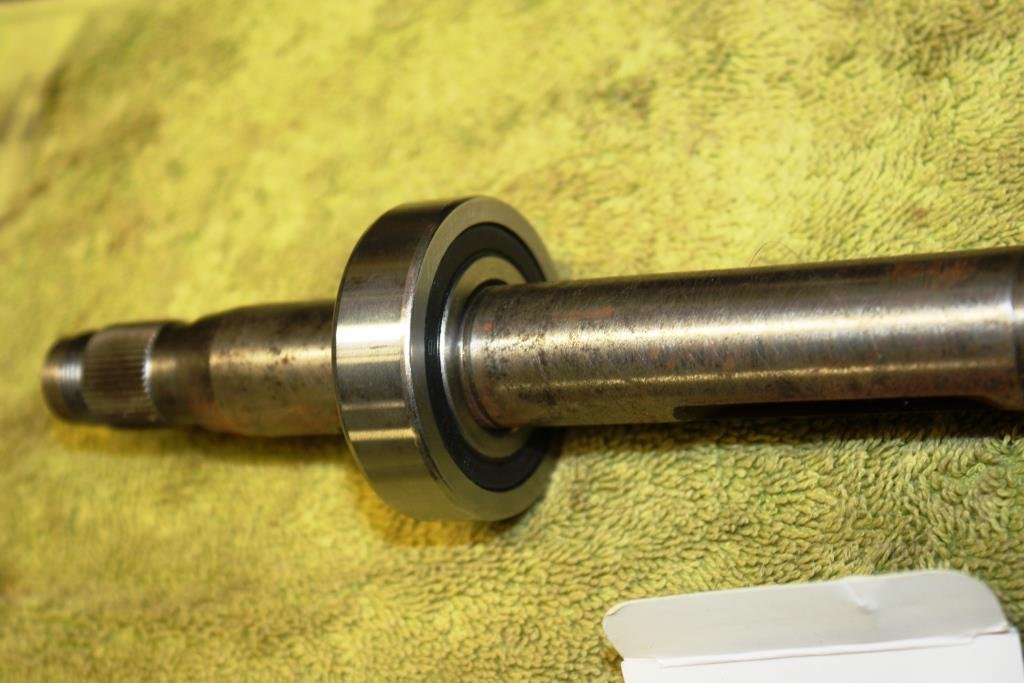
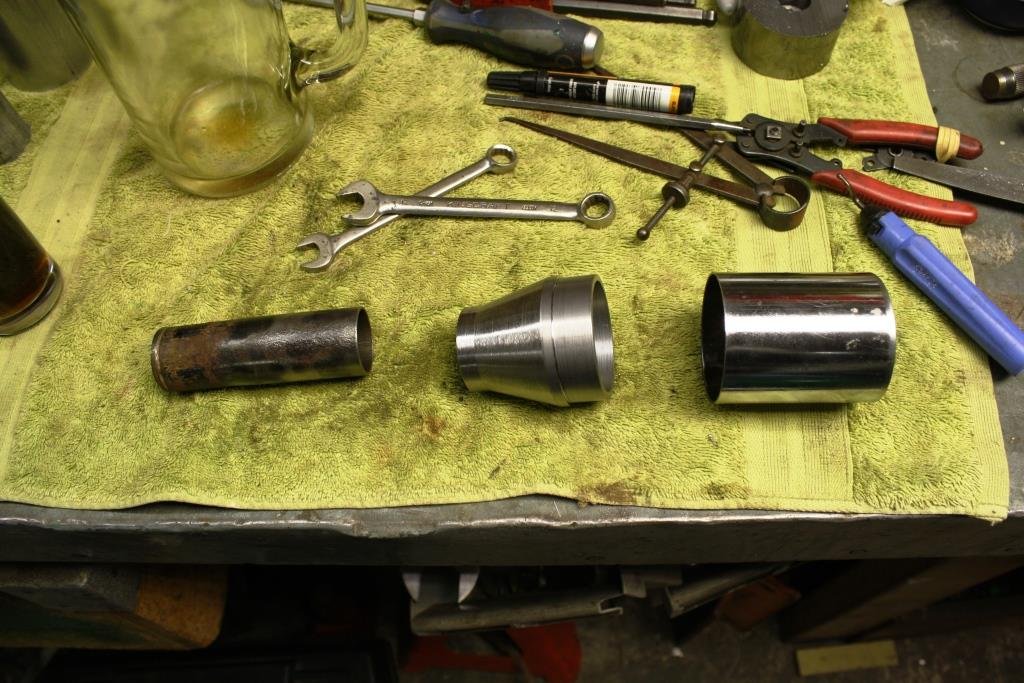
That’s an end I cut off from an old column; you can see how light the original bearing was.
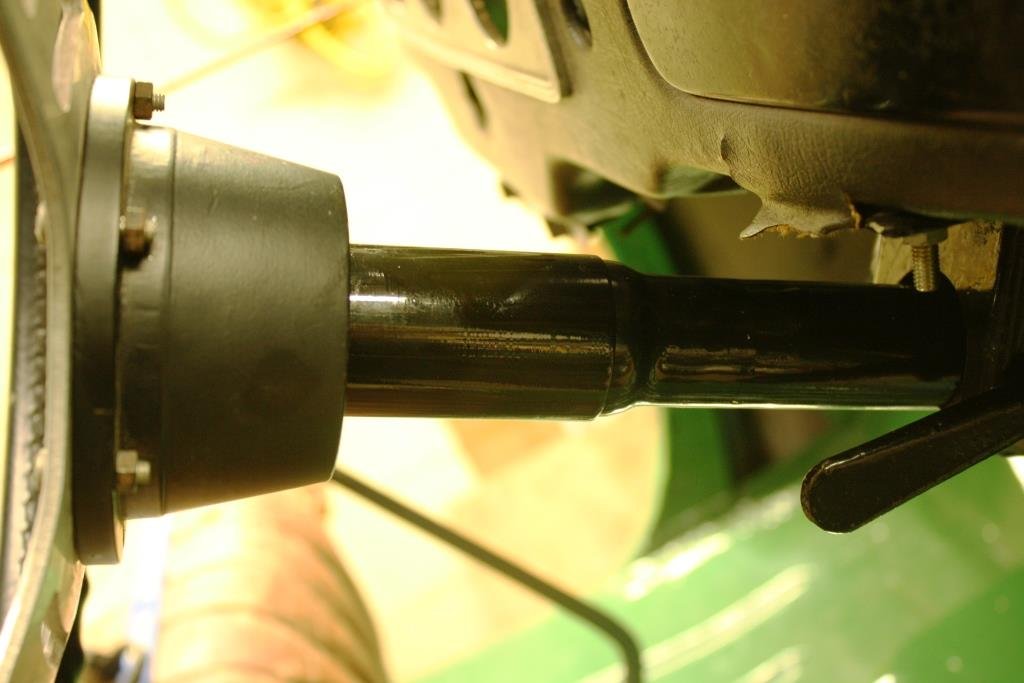
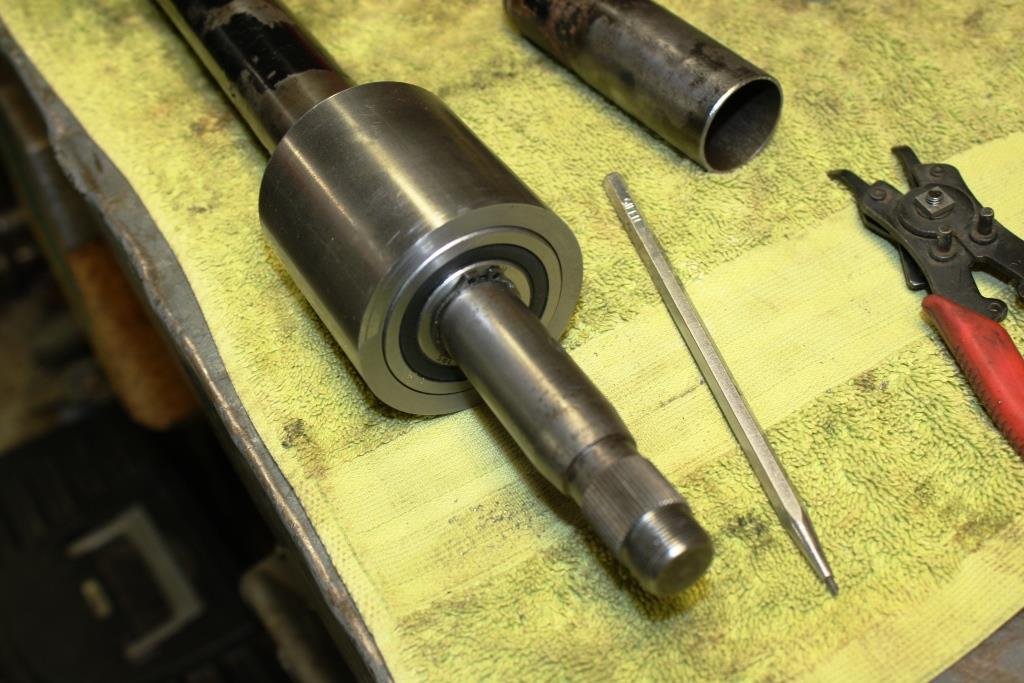
I double checked everything still fitted……
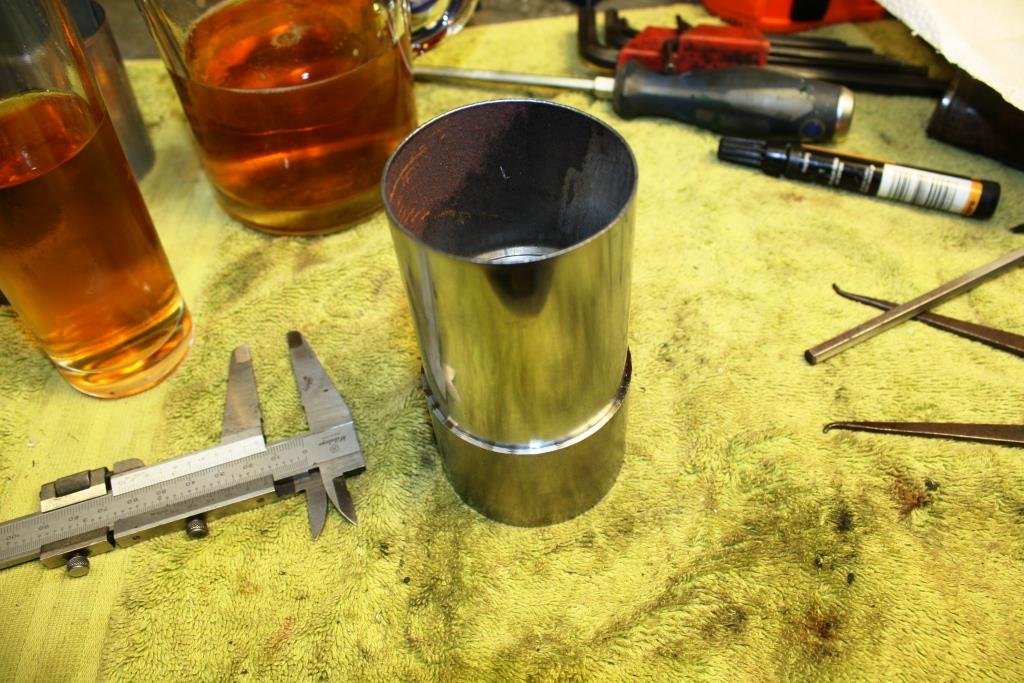
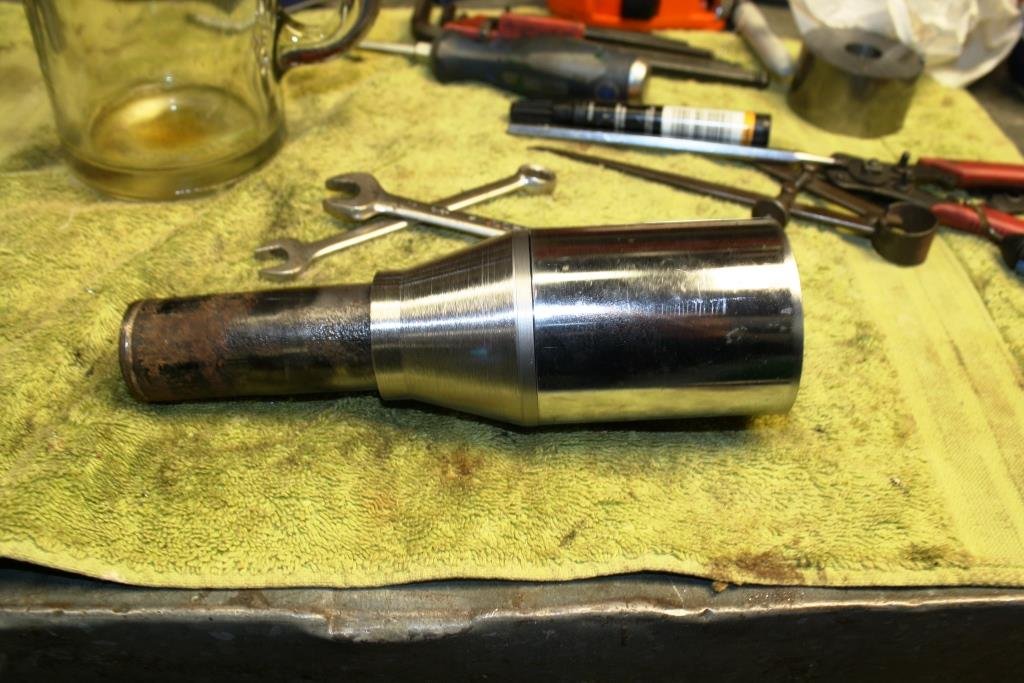
…… and then turned down a piece of scrap water pipe to act as a cover between the bearing and the steering wheel.
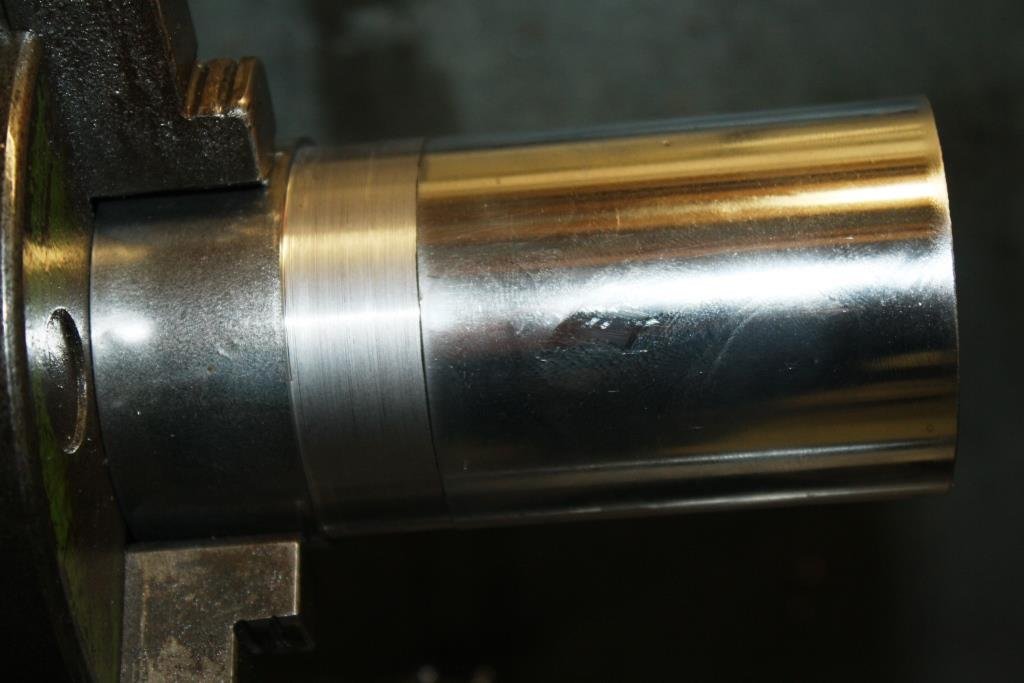
I then turned it down to the same OD…….
…. Took the cover off and turned a taper at the other end……
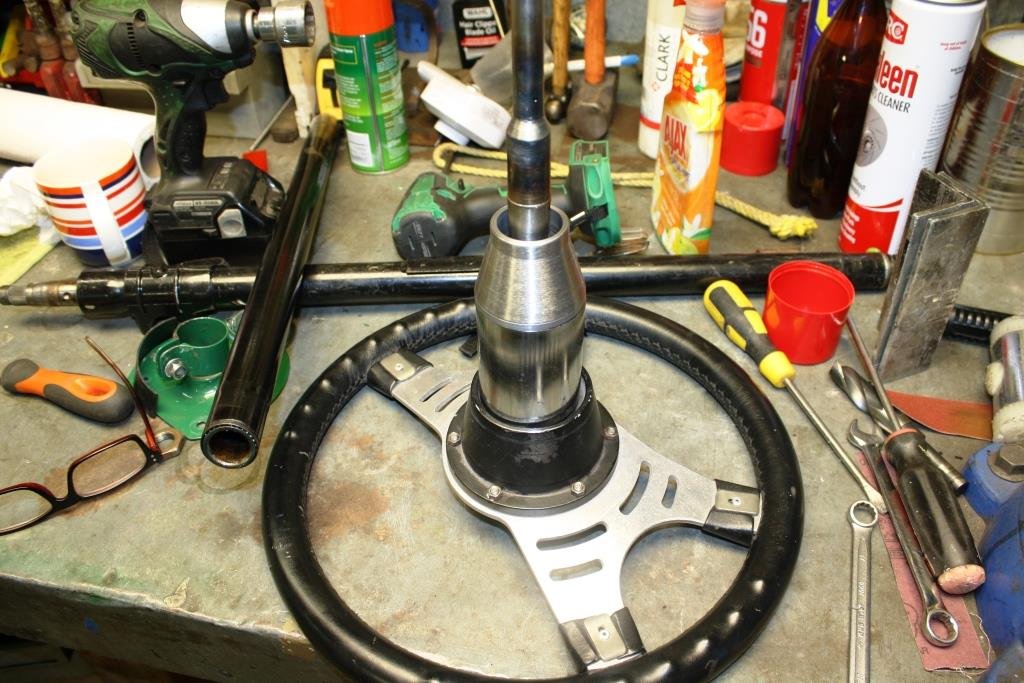
All set to assemble…….
(The tube on the left is just for setting it up).
Checked it with the Triumph steering assembly….
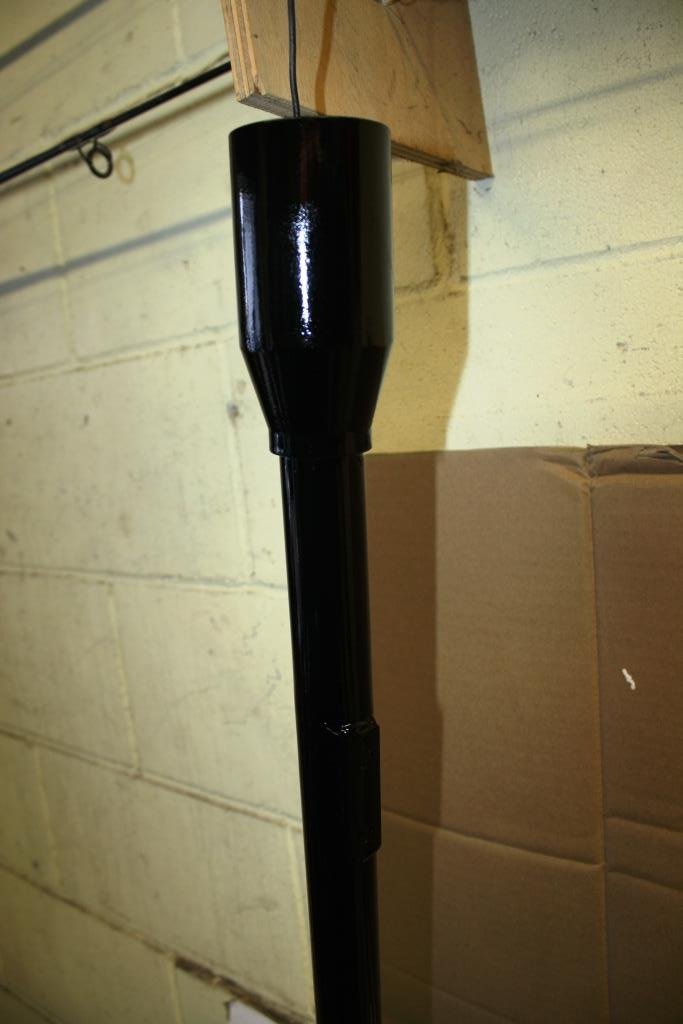
…….some plug welding……
A bit of paint…………
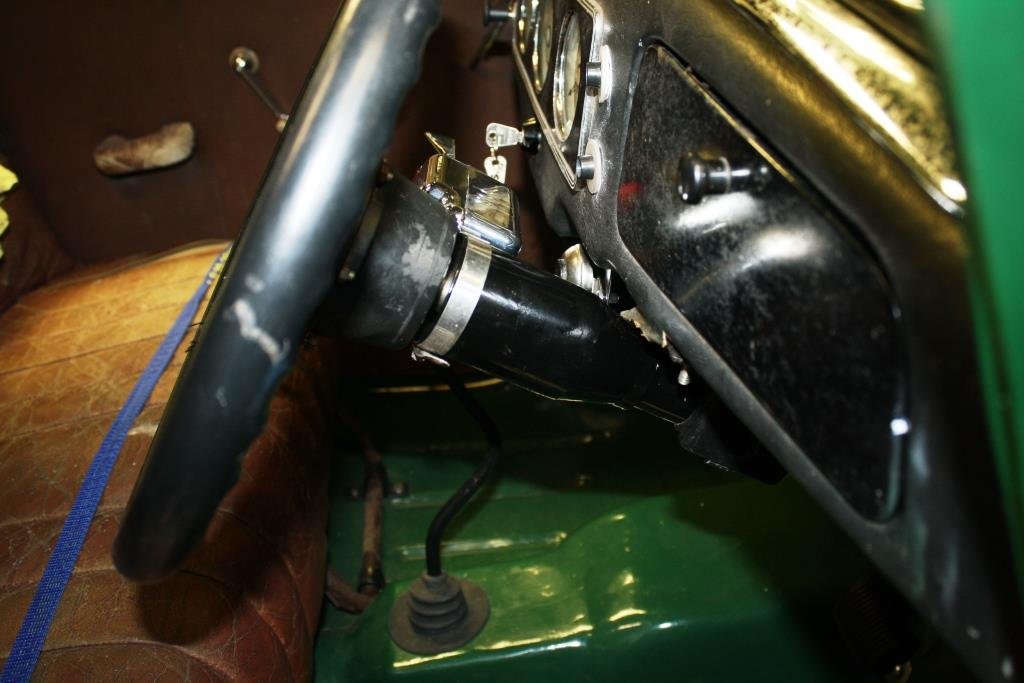
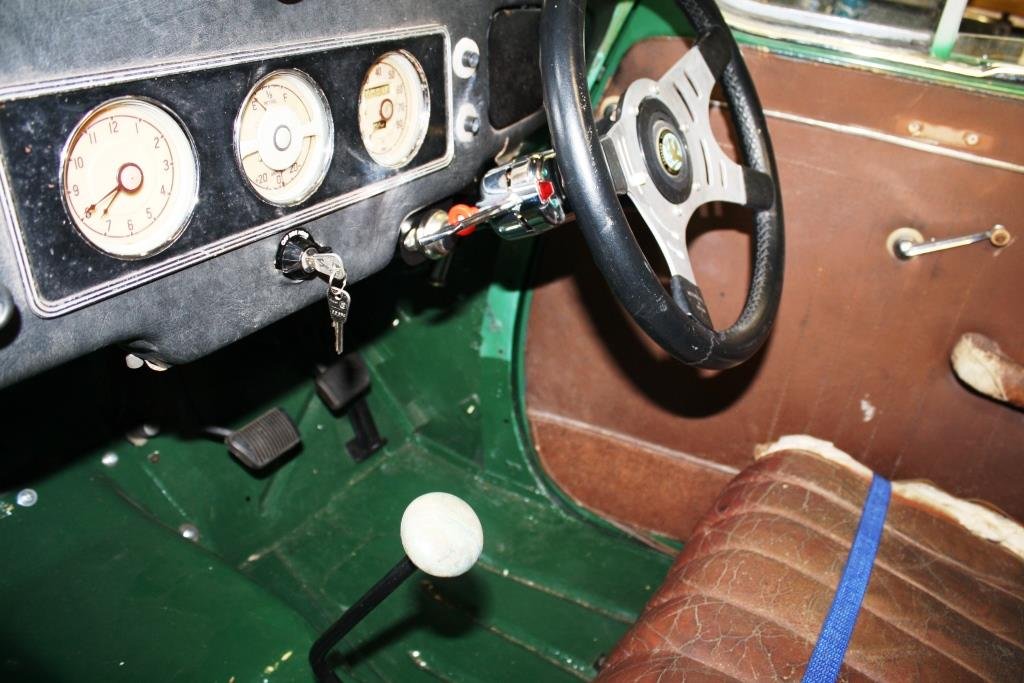
And I’m back to where I started, (story of my life!) but with no play in the steering wheel.
The only thing I don’t like is the cheap, shiny, aftermarket “hotrod” indicator switch. To its credit it works well but looks very out of place - far too new and shiny for Rigamortice’s discerning taste.
I’ll keep looking for something old and quirky to replace it with. Any suggestions gratefully accepted…
-
18
-
1
-
- Popular Post
- Popular Post
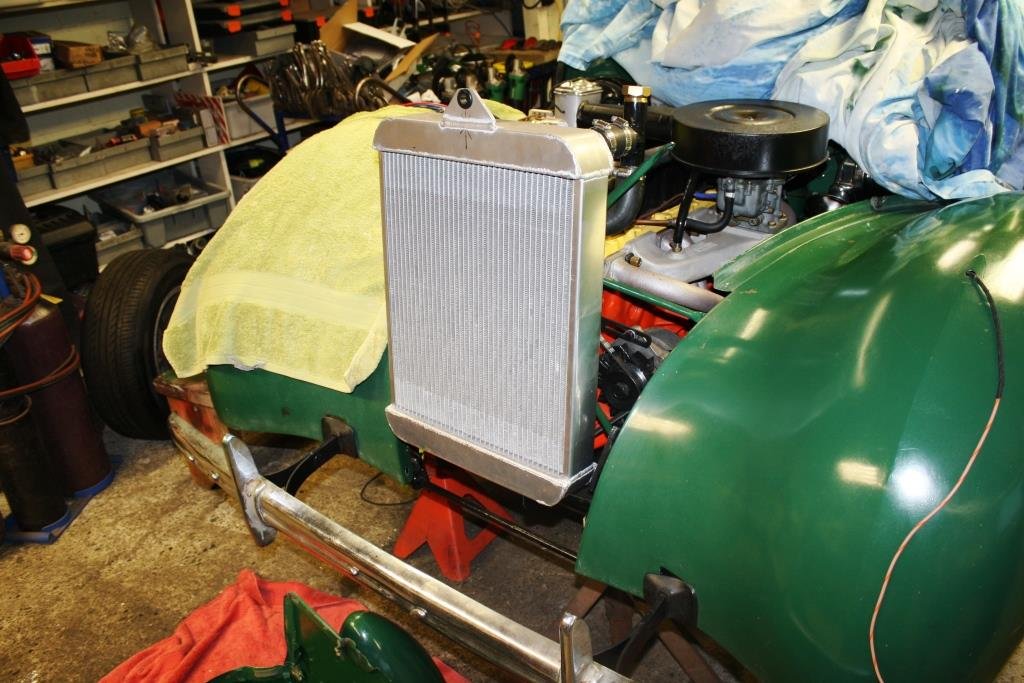
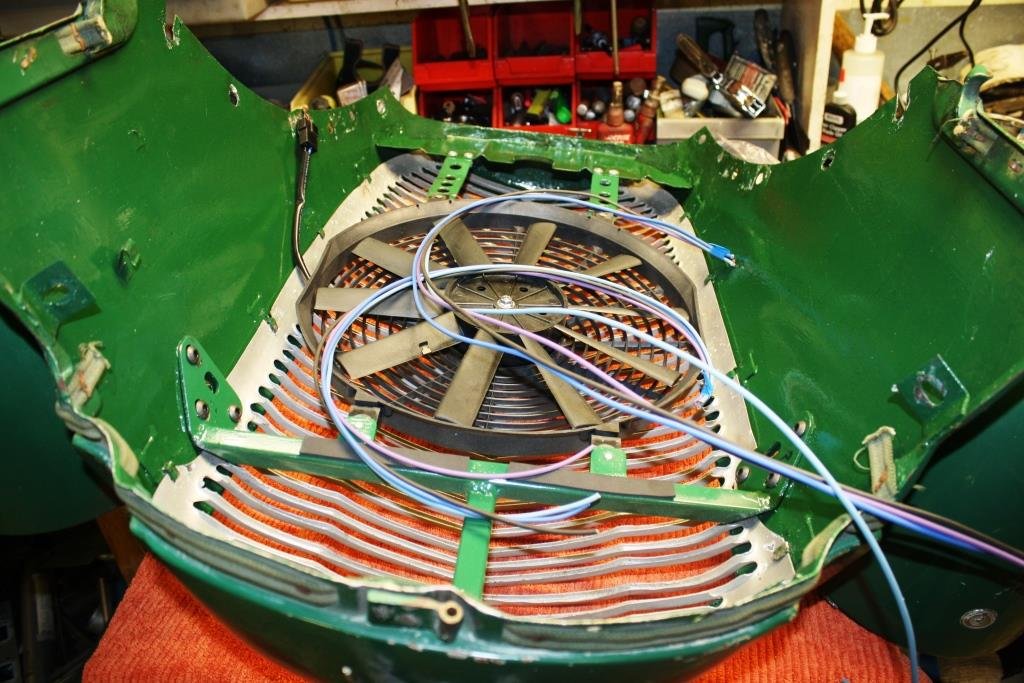
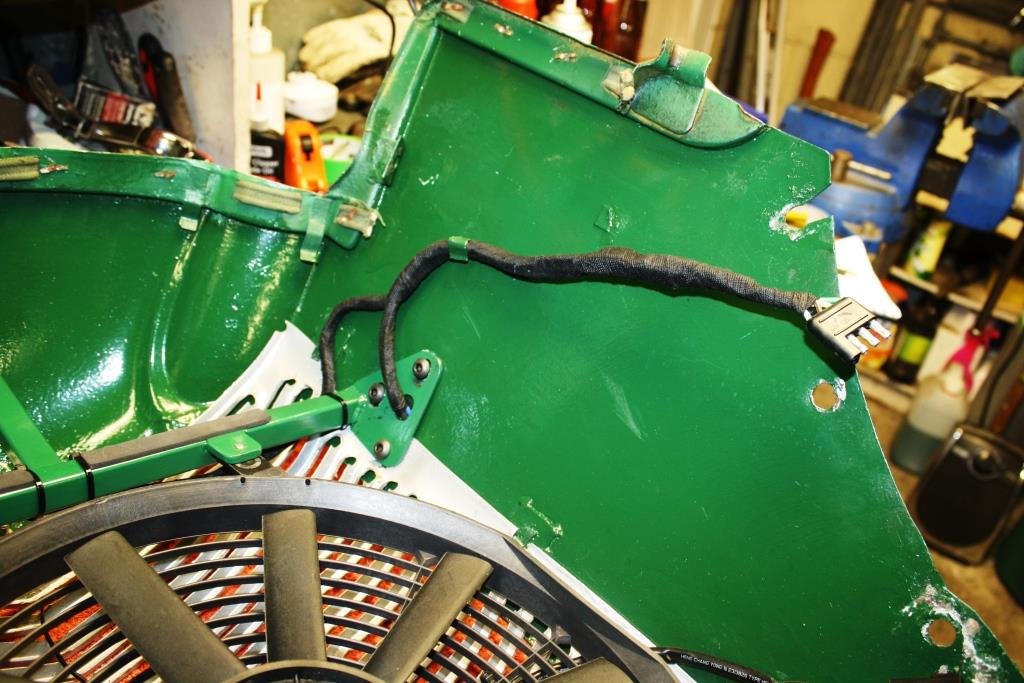
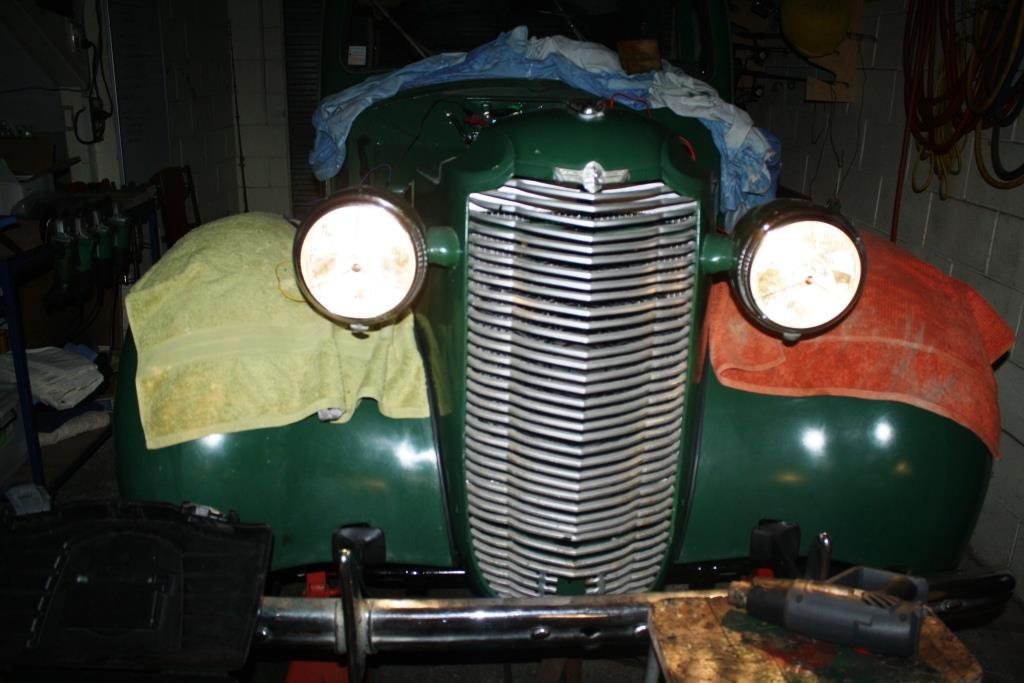
With space in the nose cone so tight the only way to wire the headlights and fan was to take the front off for the umpteenth bloody time….grrr….!
So much easier to wire on the bench.
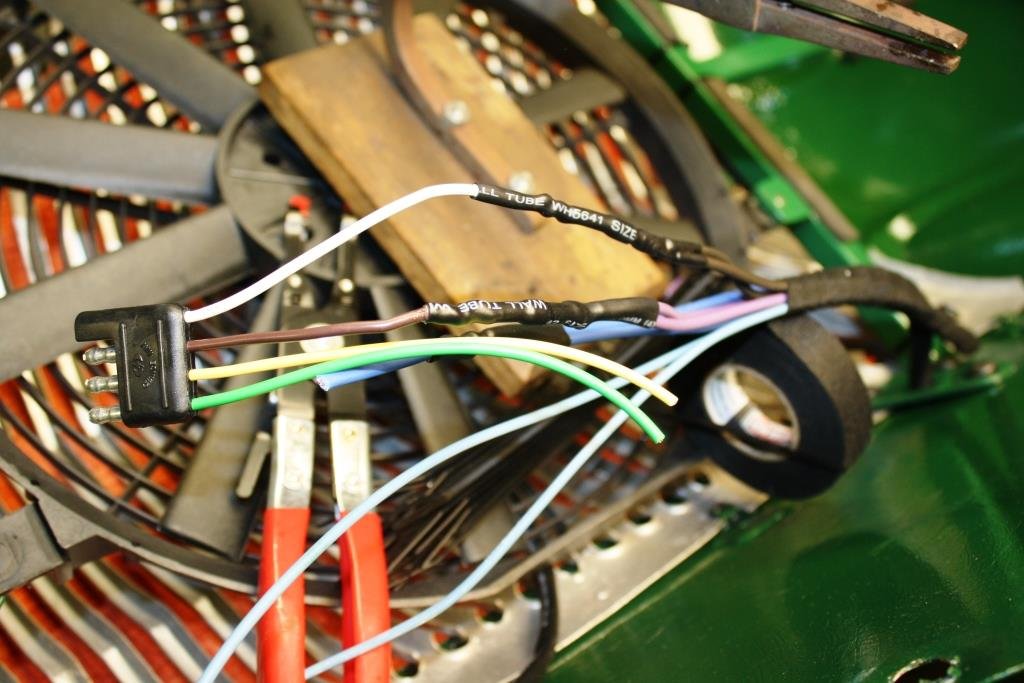
Found some heavy connectors to make disassembly easier in the future.
Love using the old school fabric wrap.
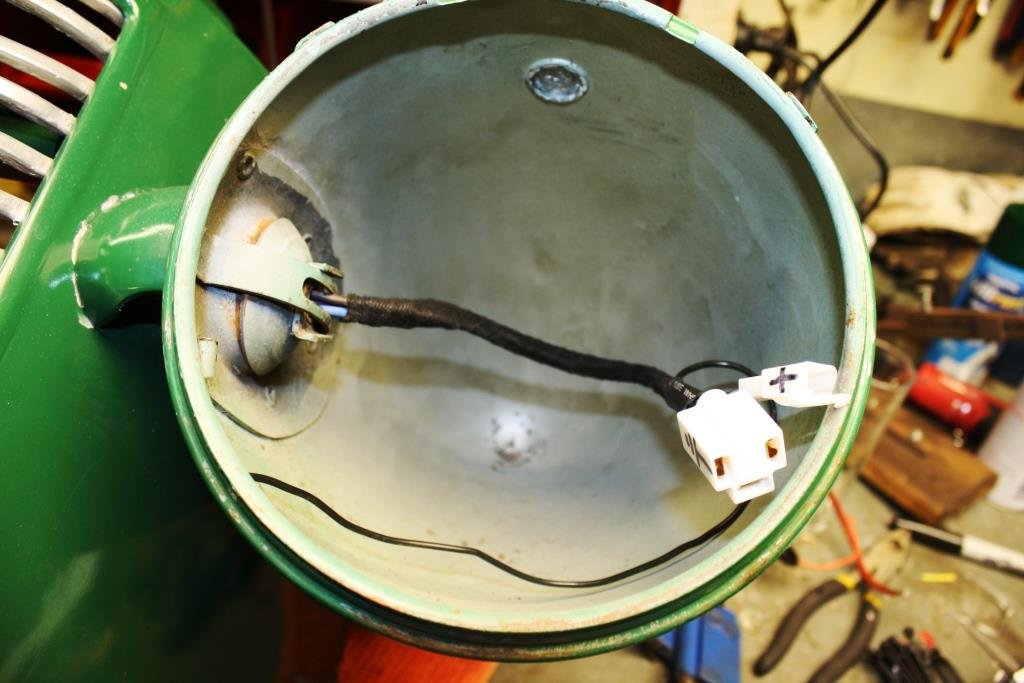
I’d bought a big box of connectors off Banggood for a price that was too good to be true……..
… so I wired up the headlights.
I refitted the front……….
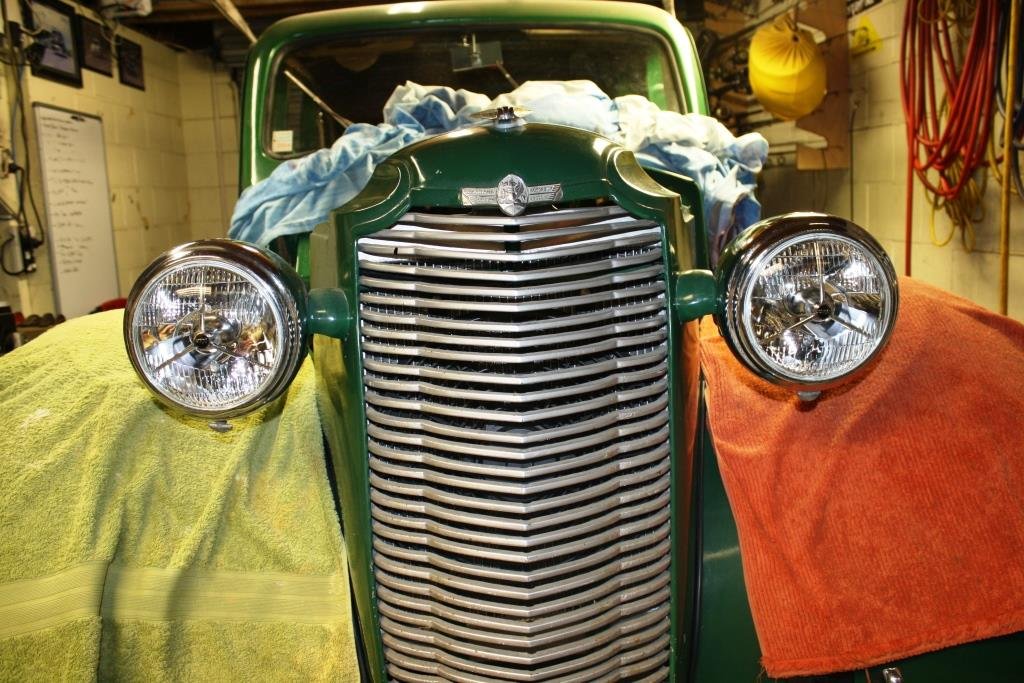
I installed the gorgeous over-priced P700 headlights….
……..and started blowing fuses whenever I powered them up!
After an evening of uttering nasty horrible words and throwing thinly veiled insults at Rigamortice re the marital status of her parents at her time of inception, while going round and round in circles with a variety of test lights, test probes and multi meters - I discovered the f****** “too good to be true” Bangood connectors were………. You guessed it ‘too good to be F****** true’!
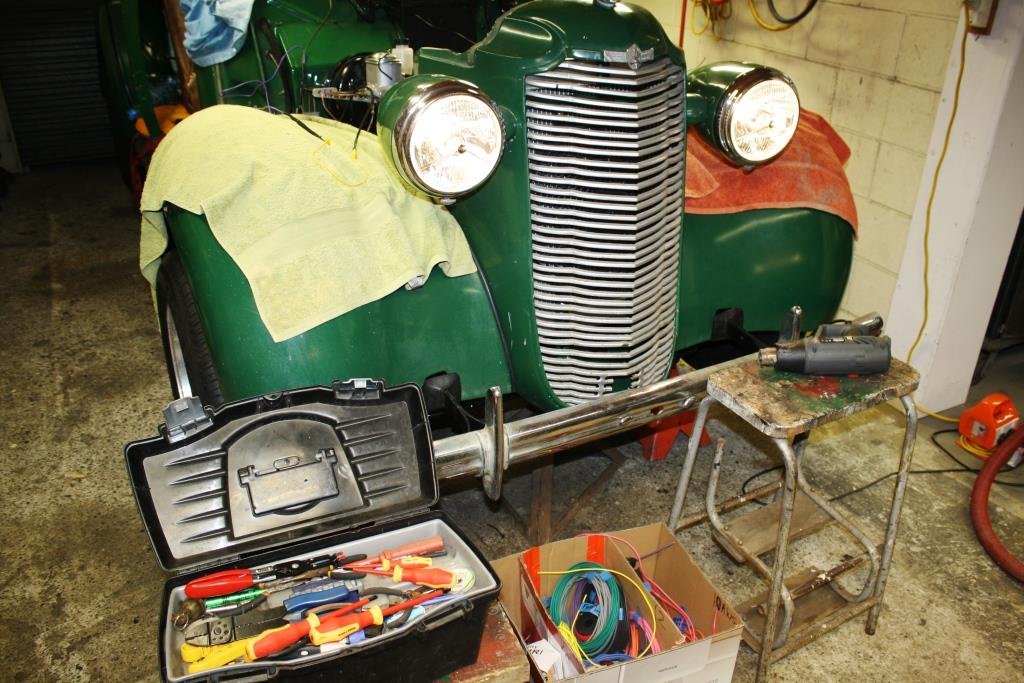
After a quick trip to Jaycar the following day, I paid through the nose for the right connectors…and we now have head lights.
And as an added bonus they even worked in the dark!
So I stuck the bonnet on and discovered it didn’t fit….
I loosened it off and started pulling things into line before re-tightening.
Finally, it all fits, (sort of).
-
21
-
- Popular Post
- Popular Post
…………Yes I know I’ve been a slack prick, re: this thread.
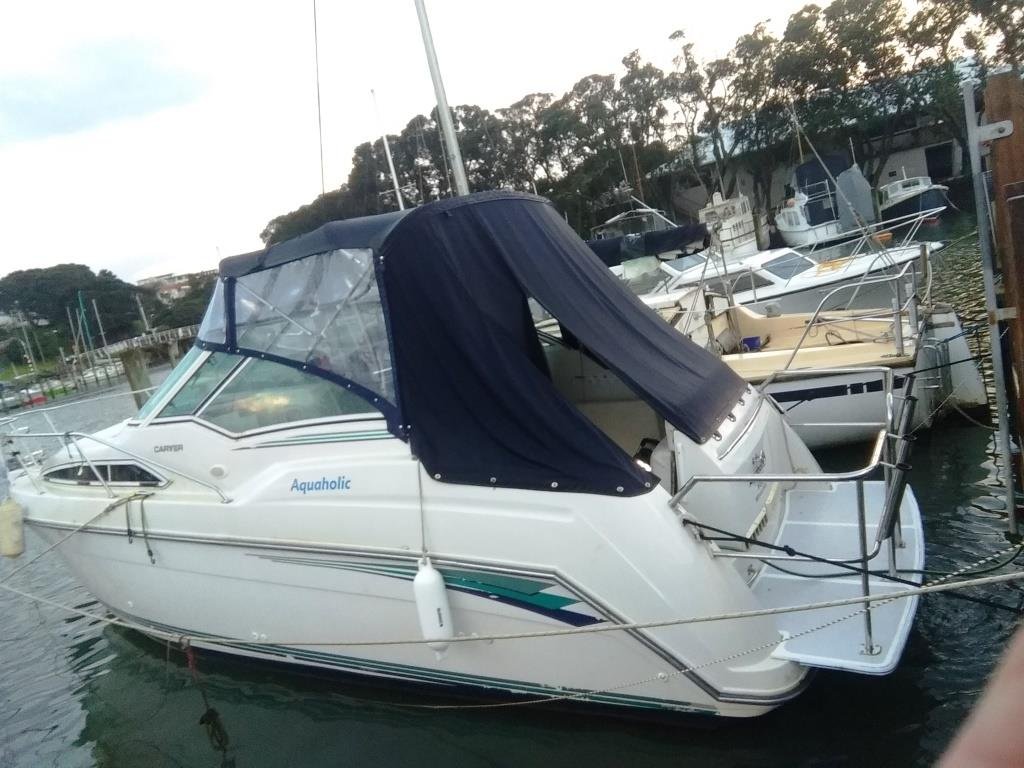
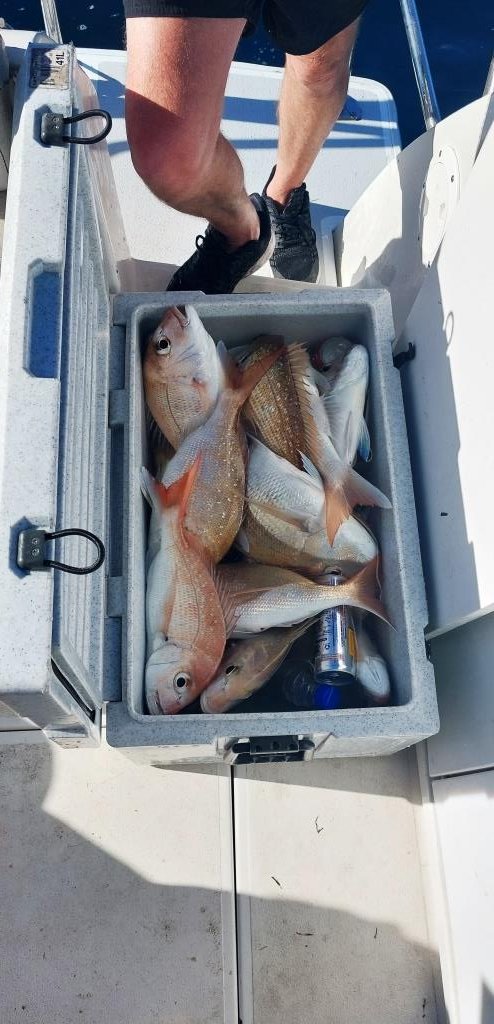
With final arrival of summer the good ship Aquaholic insisted that I take her and some of my disreputable mates out fishing… (What could possibly go wrong?).
It was a hot day, we got thirsty, we drank heavily and we “got fush”…….(as you do).
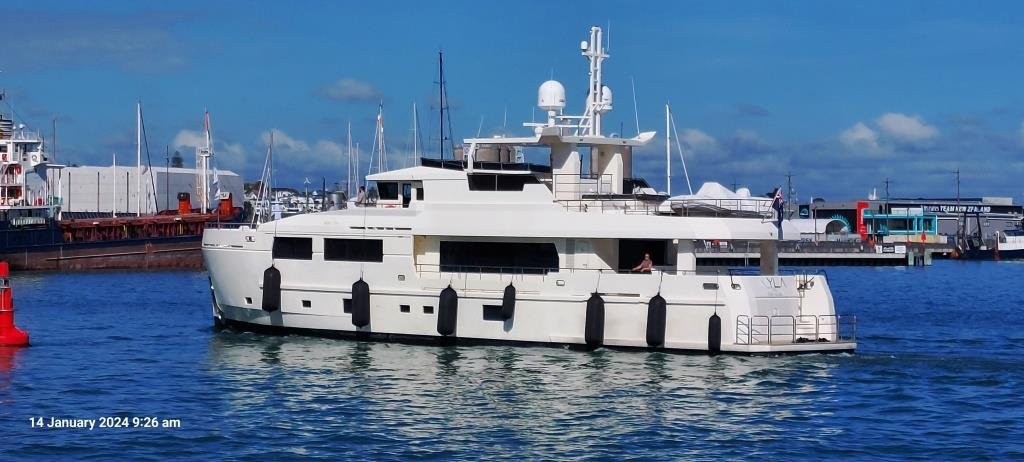
A few days later my brother turned up at the Viaduct in this bloody monstrosity, and the good ship Aquaholic (and a certain part of my anatomy) felt very, very, …. small…….(Sibling rivalry can get complicated!).
….so we headed north.
The view from the bridge was cool……
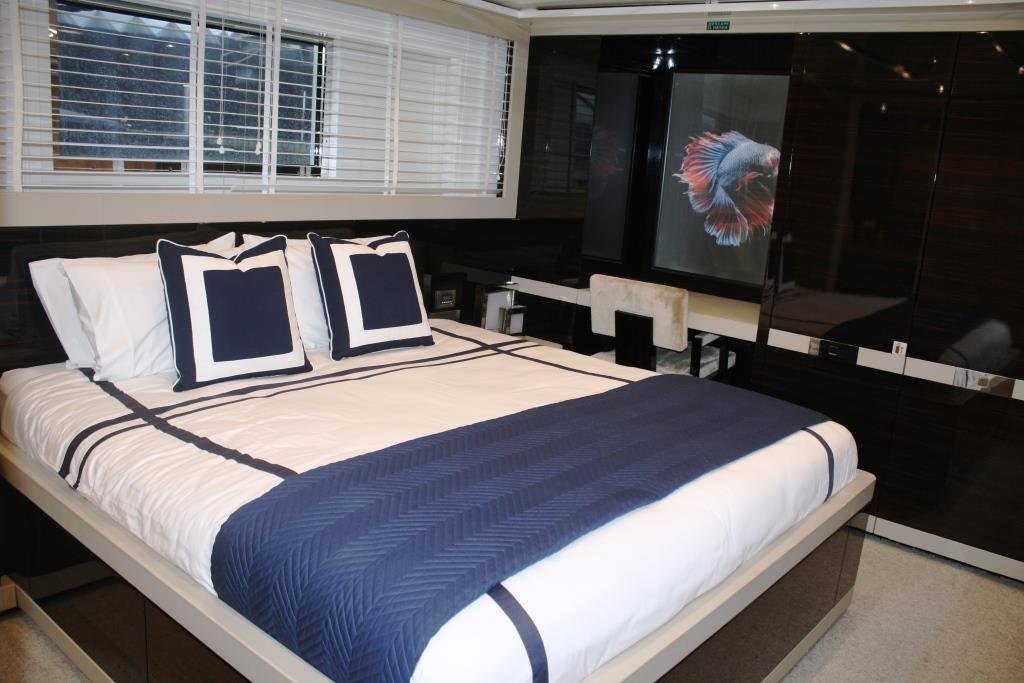
Accommodation wasn’t too shabby….
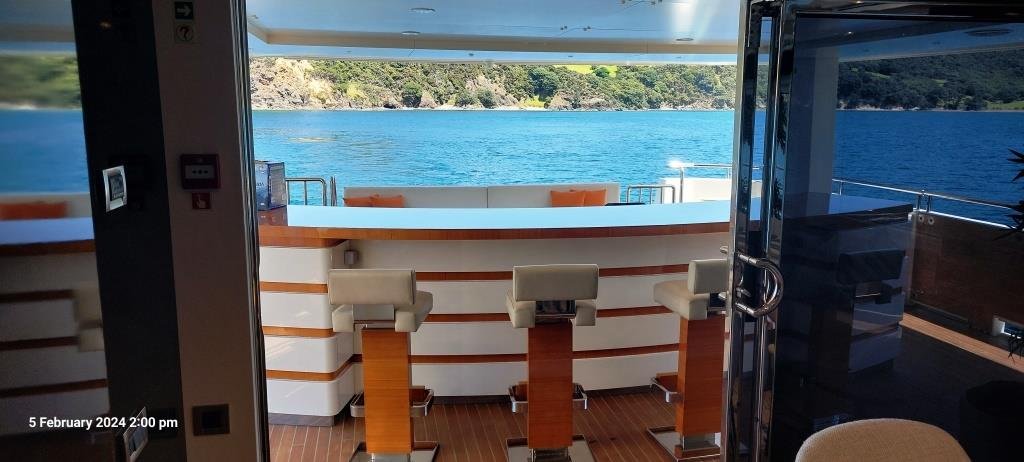
…. And the lounge was bigger than the one at home…
Thankfully there was a bar on board for self medication!
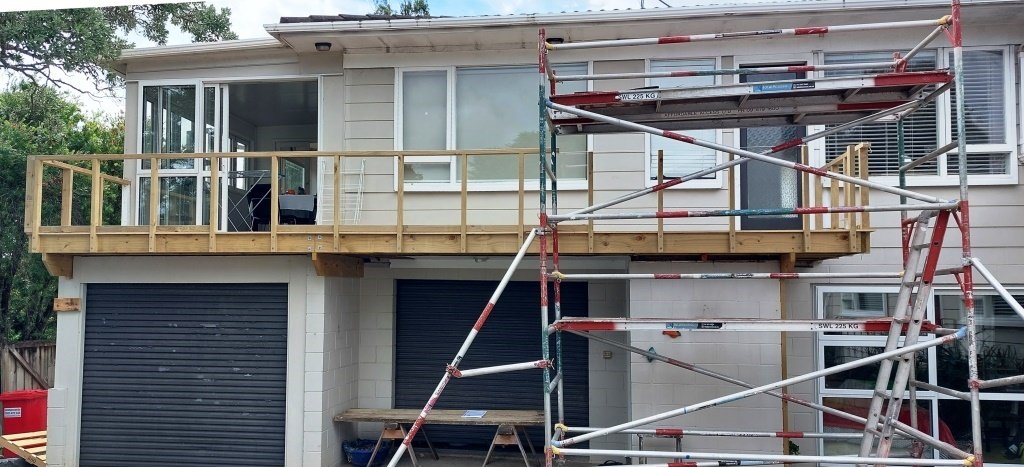
Back home I was stricken with a bout of the much feared “home handyman-itis” and I accidentally started rebuilding the front of the house… (Note the cunning accumulation of Brownie points with the “ever lovely Mrs. sr2”).
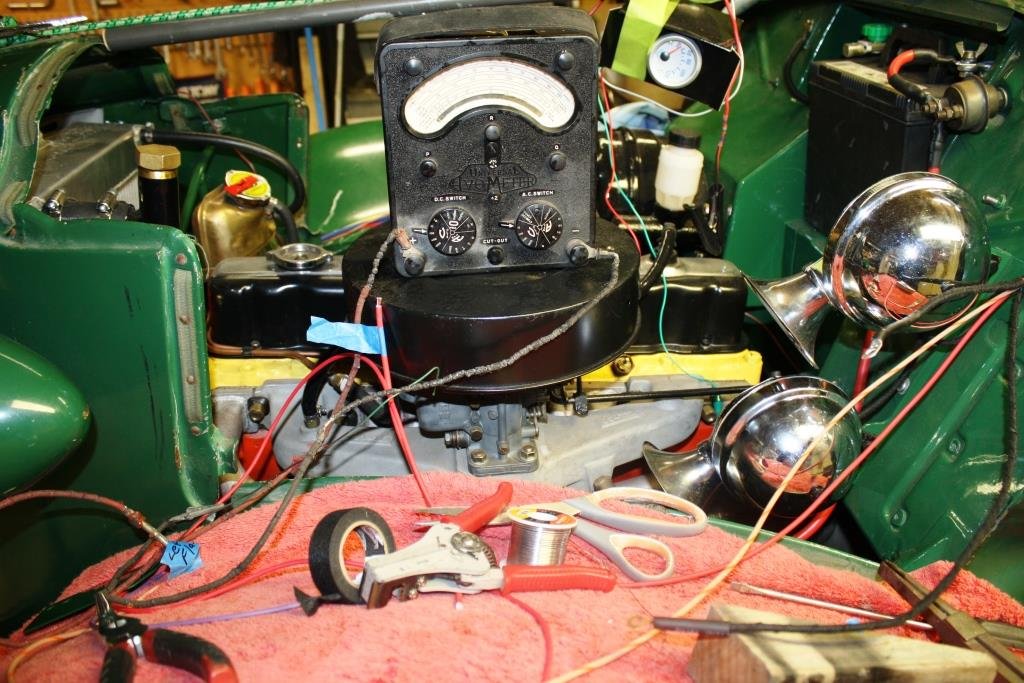
After the above brief hiatus I’m finally back to Rigamortice’s wiring.
I’m trying to document as much as I can because my memory is like a sieve.
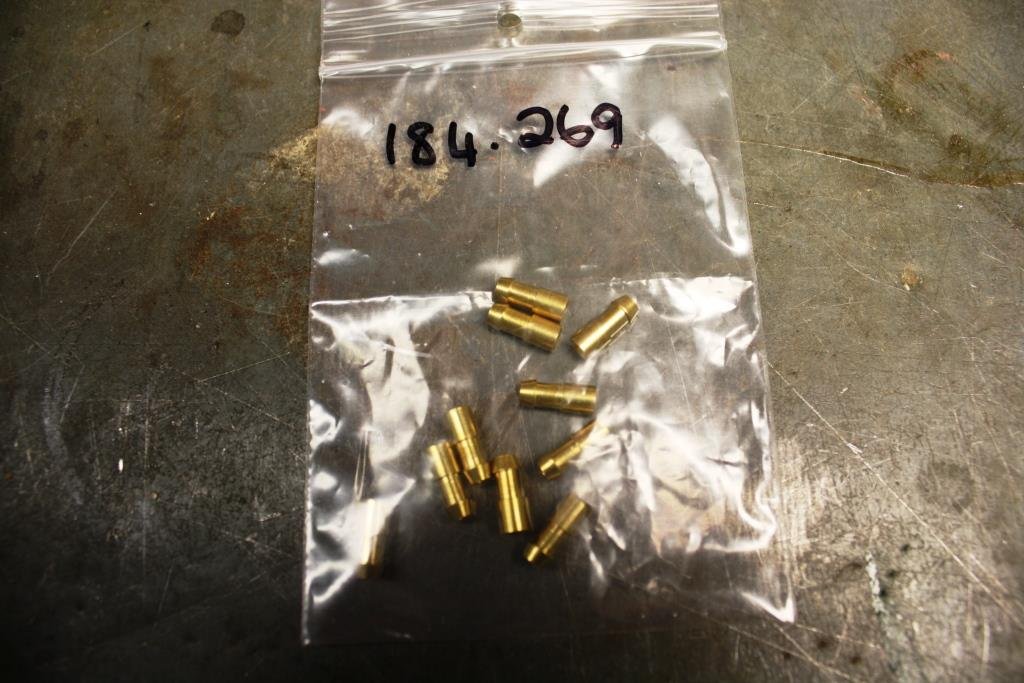
I managed to source some cool old fashioned bullet connectors….
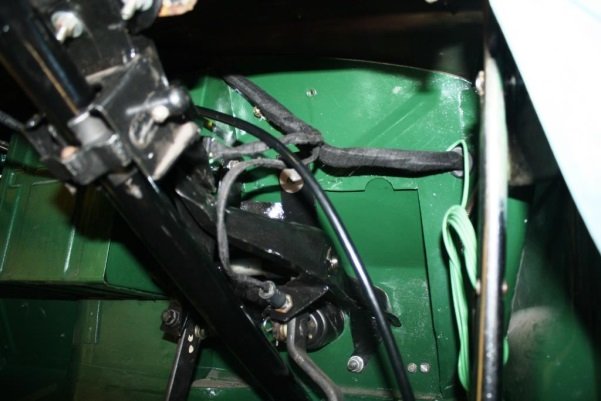
I’m almost finished under the dashboard, getting sick of working upside down.
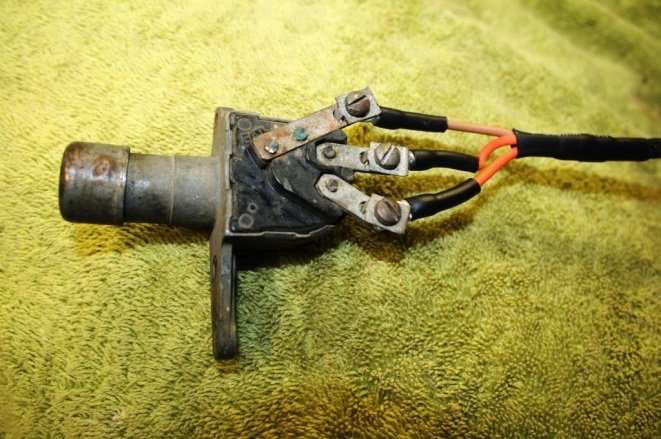
The dip switch still works so I hit it with some contact cleaner and we’ll see how it lasts. I’m running relays on the lights so it won’t be carrying the amps that it used to.
I’m using my 70 year old meter just because I can.
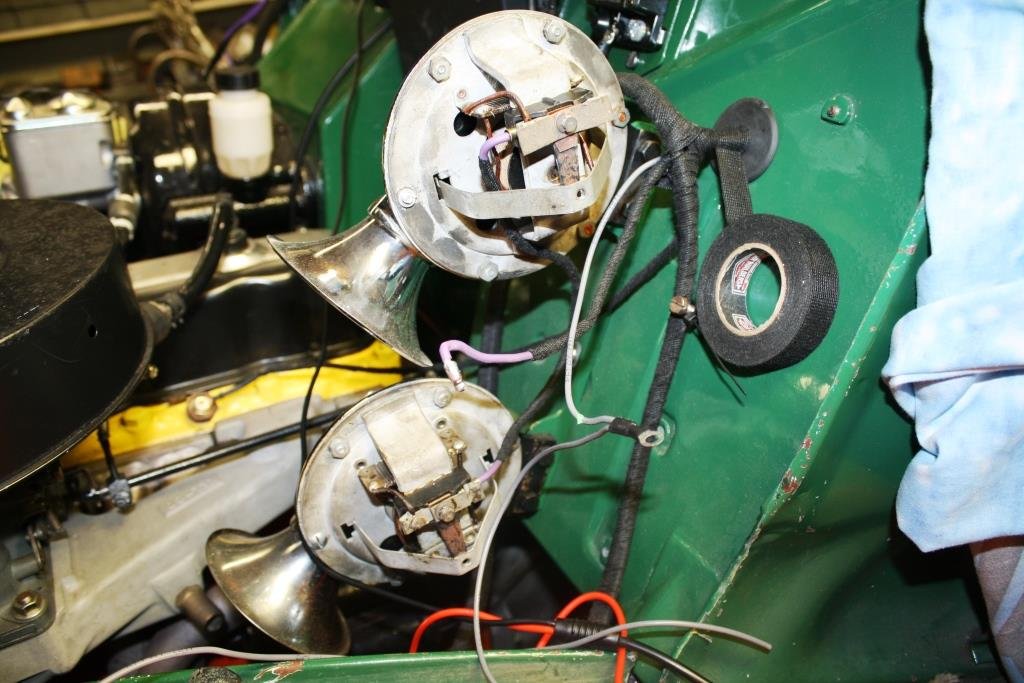
The horns are all wired up but they sound like two strangled cats, I’ll have to do some research on how to tune them.
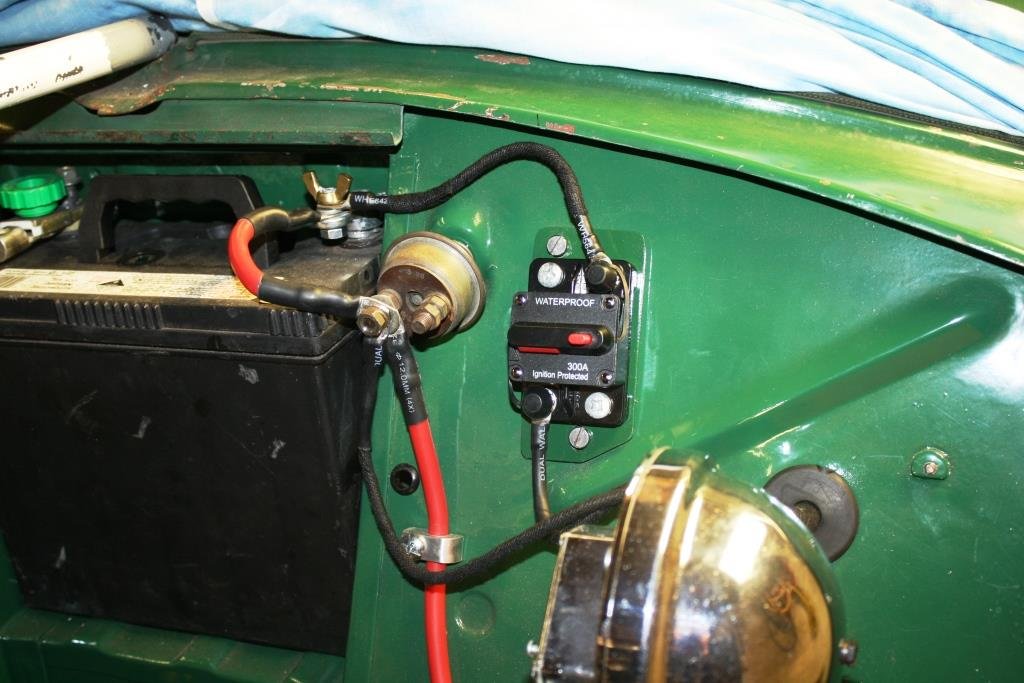
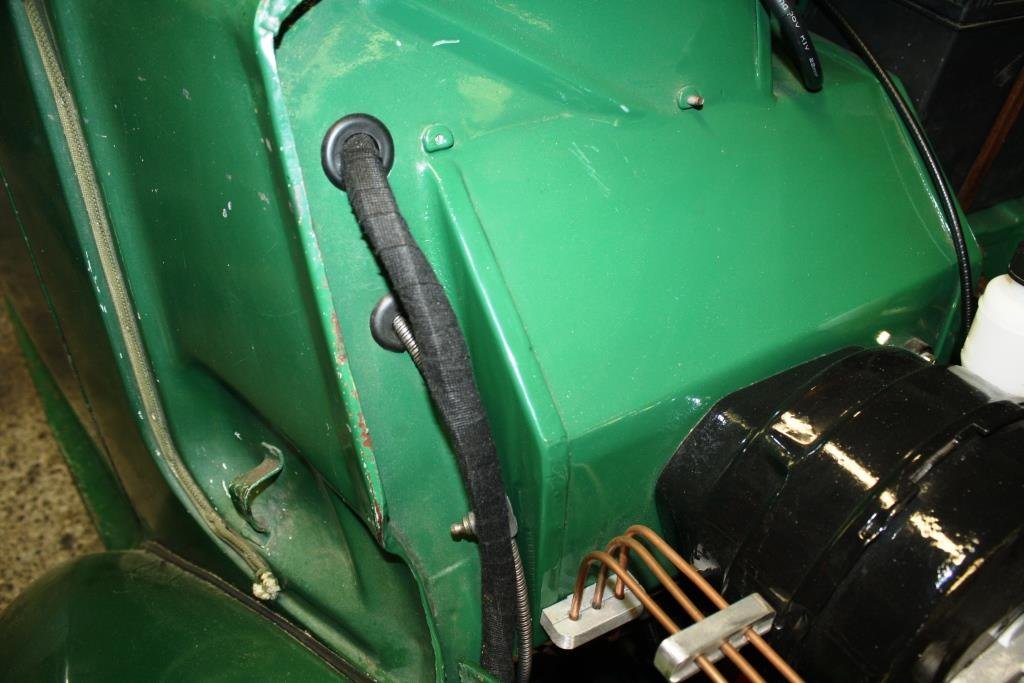
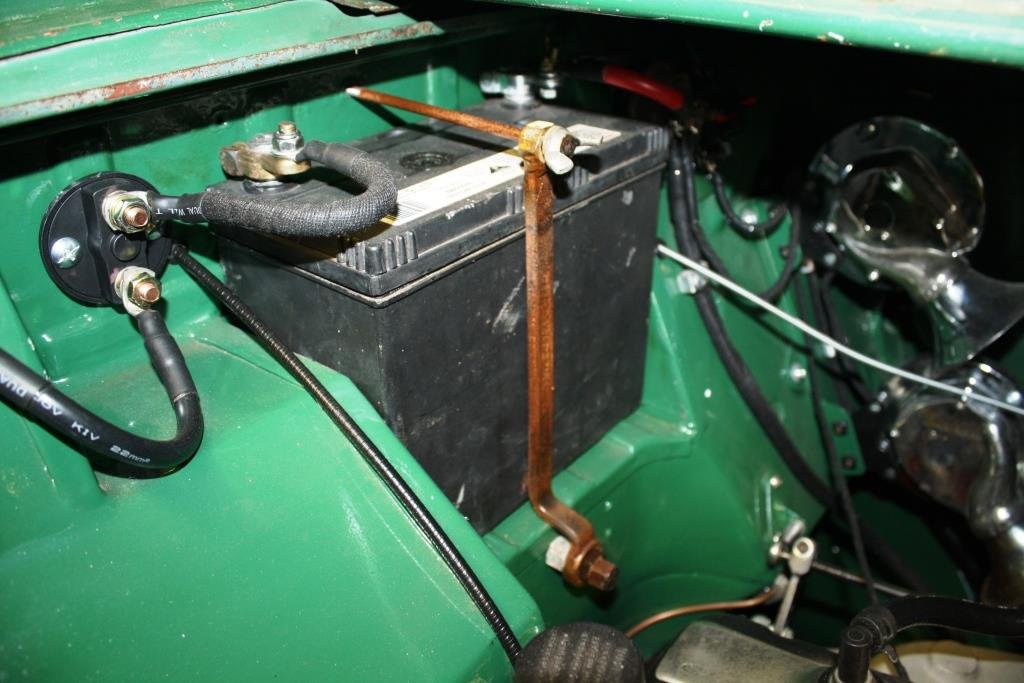
Circuit breaker in place instead of a fusible link.
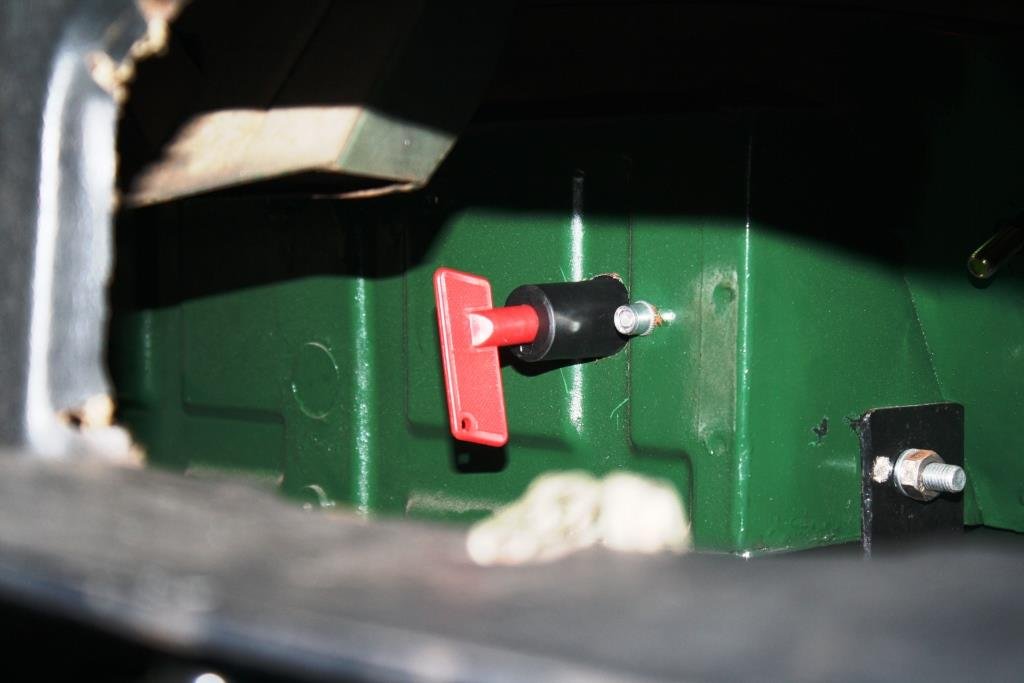
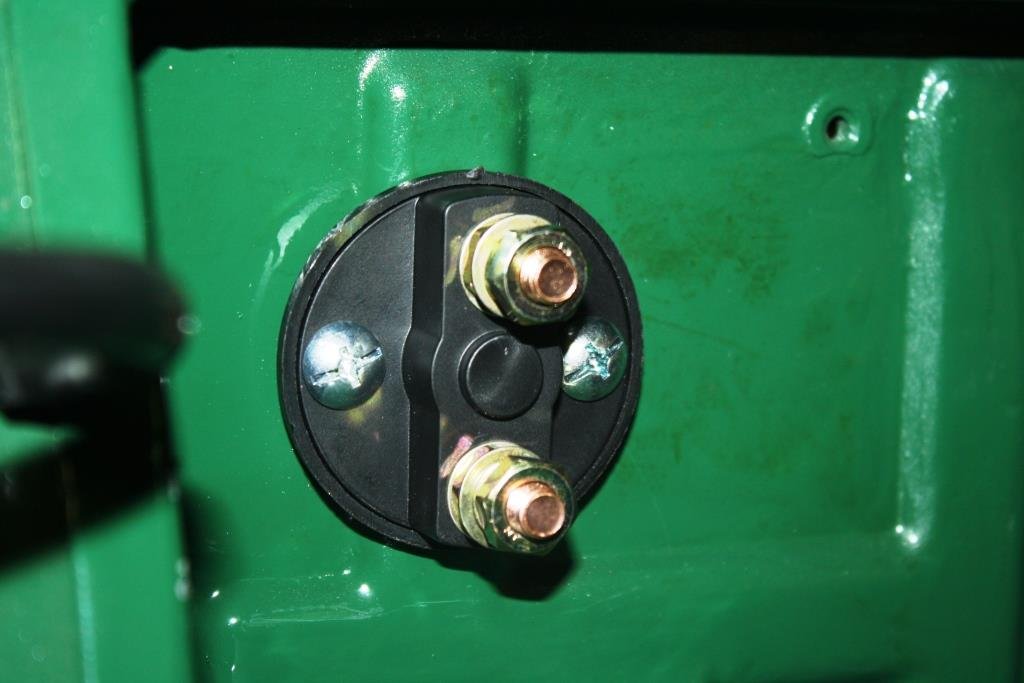
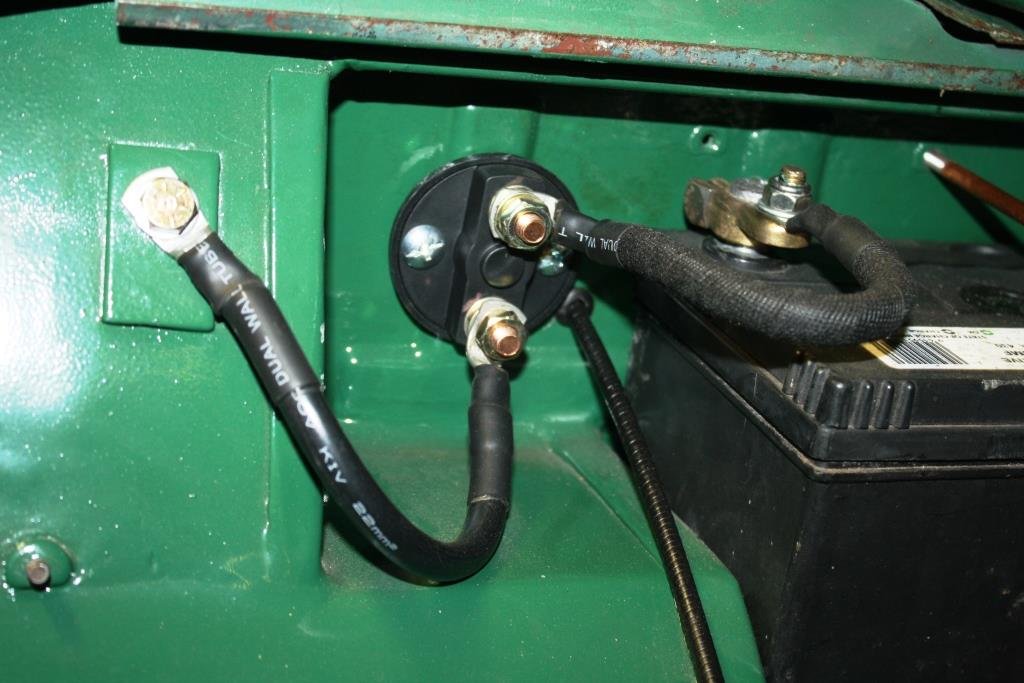
Mounted the battery earth cut out through the fire wall
Repurposed an old offset ring spanner for a battery clamp.
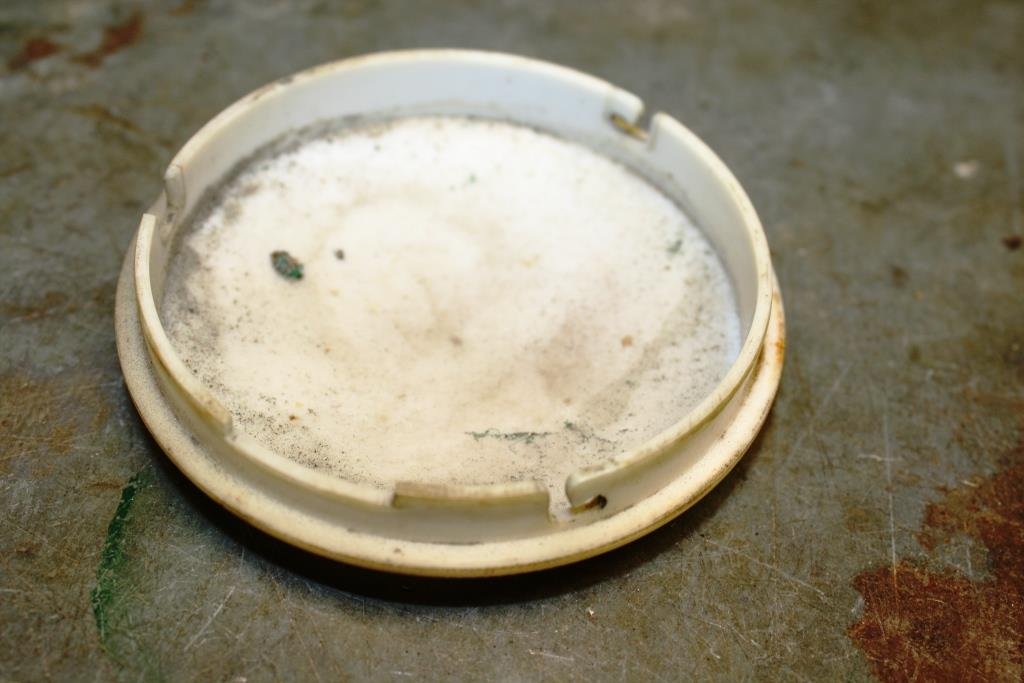
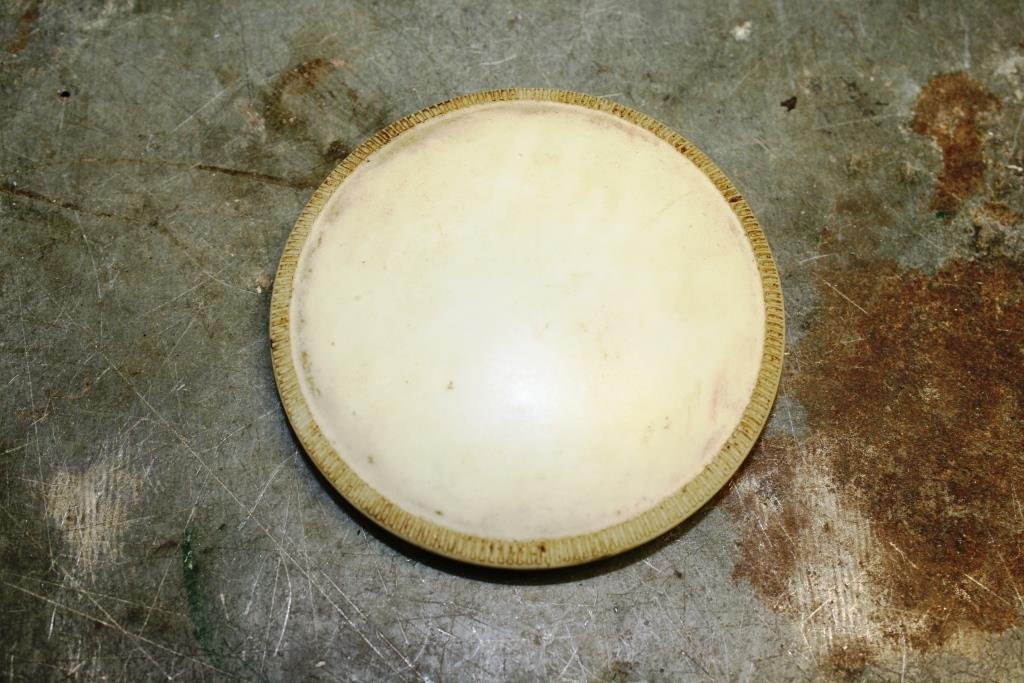
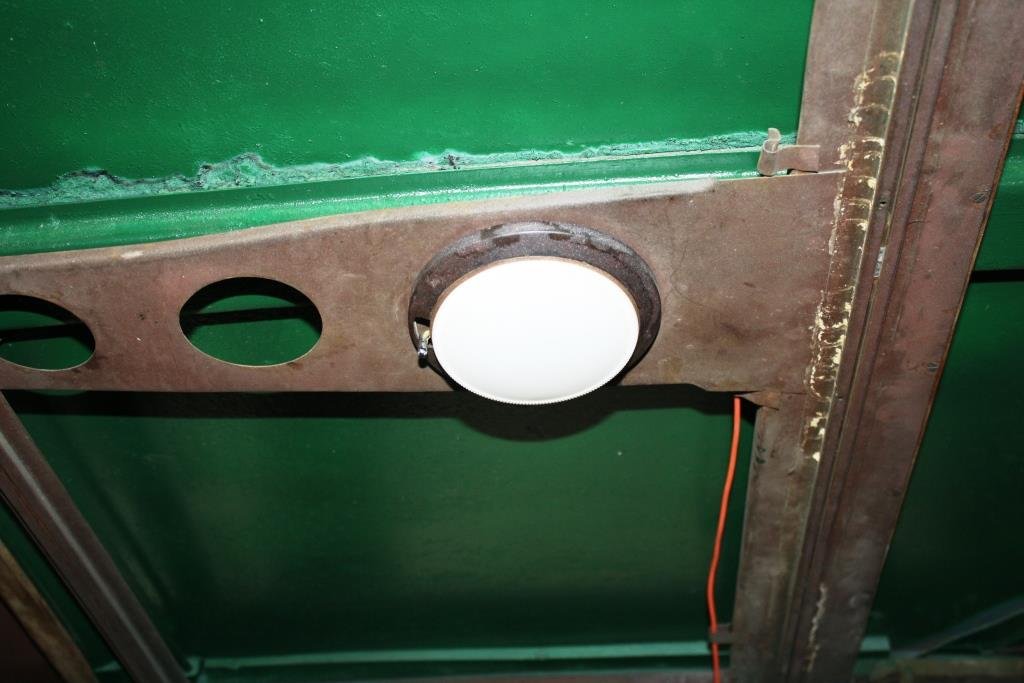
Managed to get some life out of the interior light with a new bulb and fresh wiring.
Cleaned a ton of crud of the diffuser….
And it works.
-
23
-
1
-
On 21/01/2024 at 12:08, Kayzee said:David
Cairns, Australia
Toyota Sprinter
KE55 Corolla coupe
Daihatsu Compagno Spider
1948 Bedford PC utility
Lotus 7 replica
googling Compagno
Bloody Hell, not another friggin Ozzy! (Luv the ute - I'm a Vauxhall nut from way back).
-
18 hours ago, tortron said:
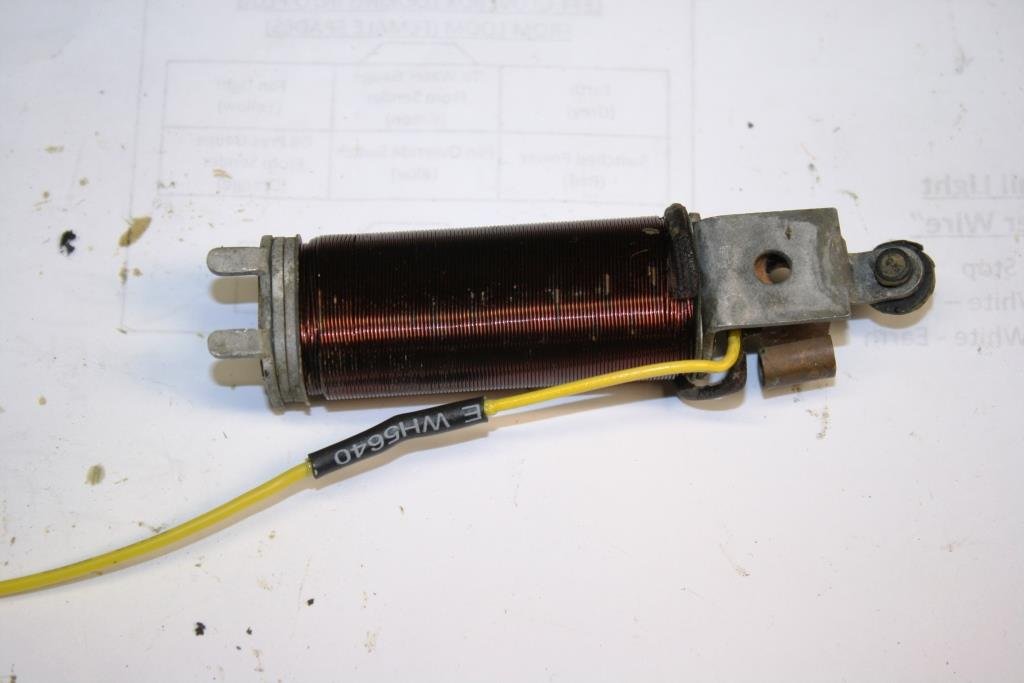
You can get all those trafficators going again. It's usually the shellac on the windings is failed and shorting. Fairly straightforward to rewind by hand, not too many wild turkeys cos there's 700 odd coils
Could be a good winter project, any idea on what resistance the windings should be?
I've been thinking of buying some flashing LED's for them https://classiccarparts.co.nz/classic-car-led-12v-self-flashing-36mm-semaphore-trafficator-amber-led-slimline-256-12v36flash
-
- Popular Post
- Popular Post
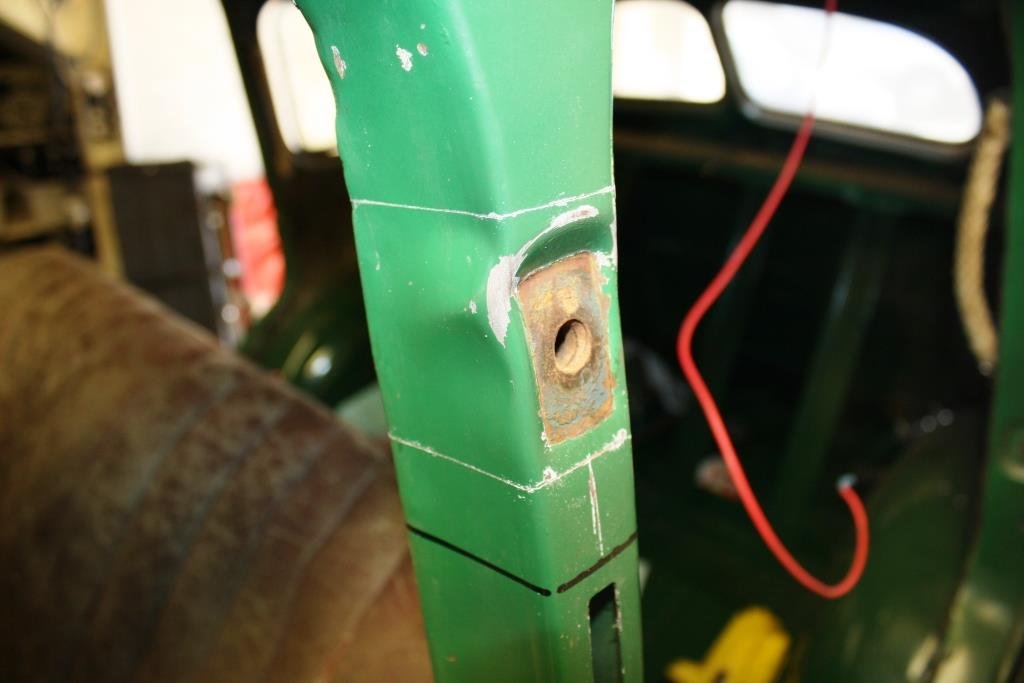
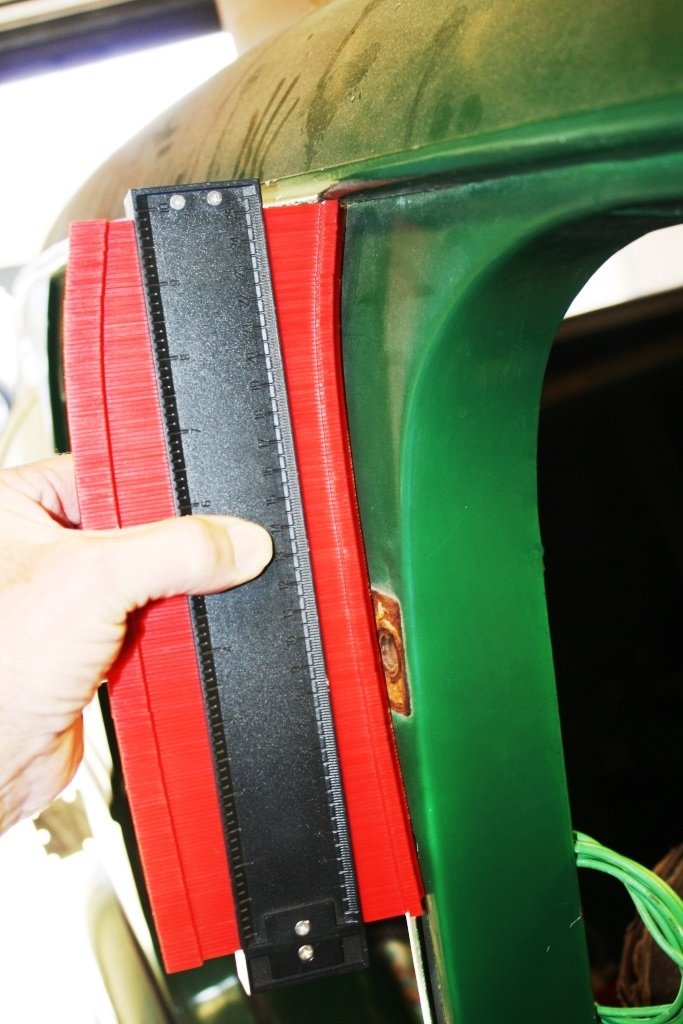
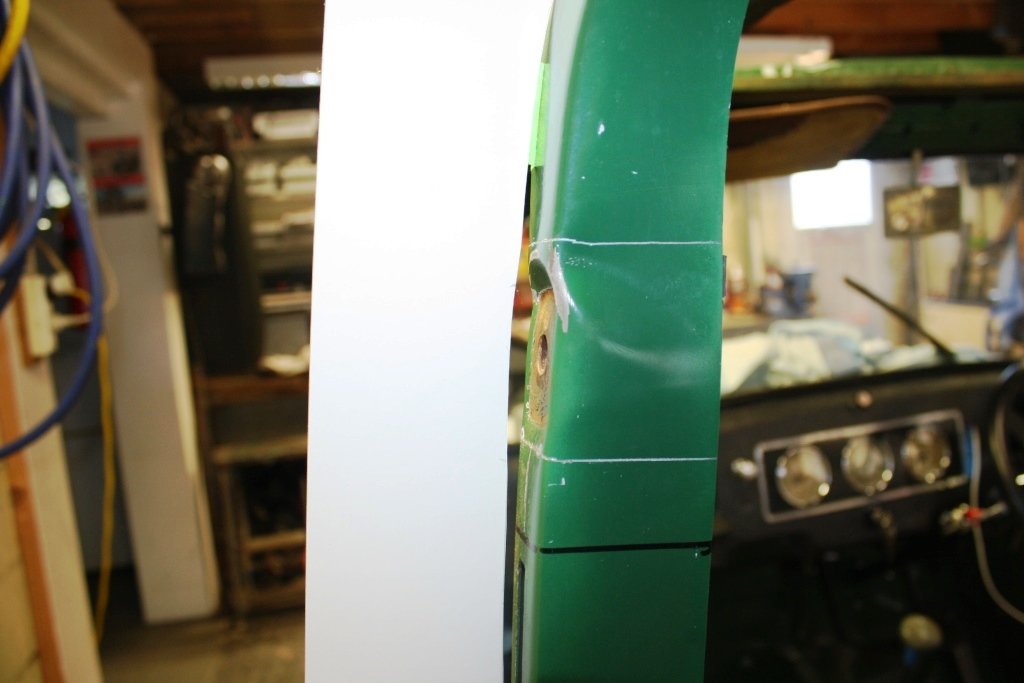
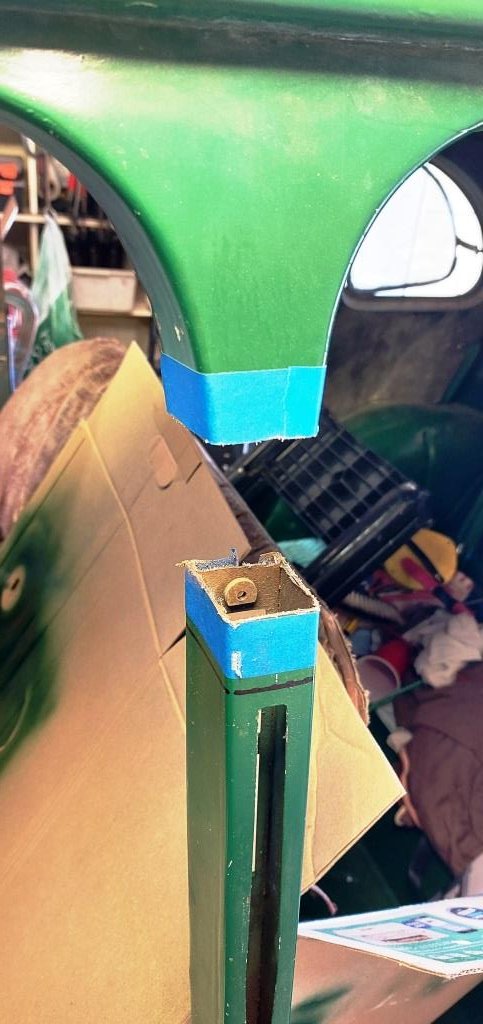
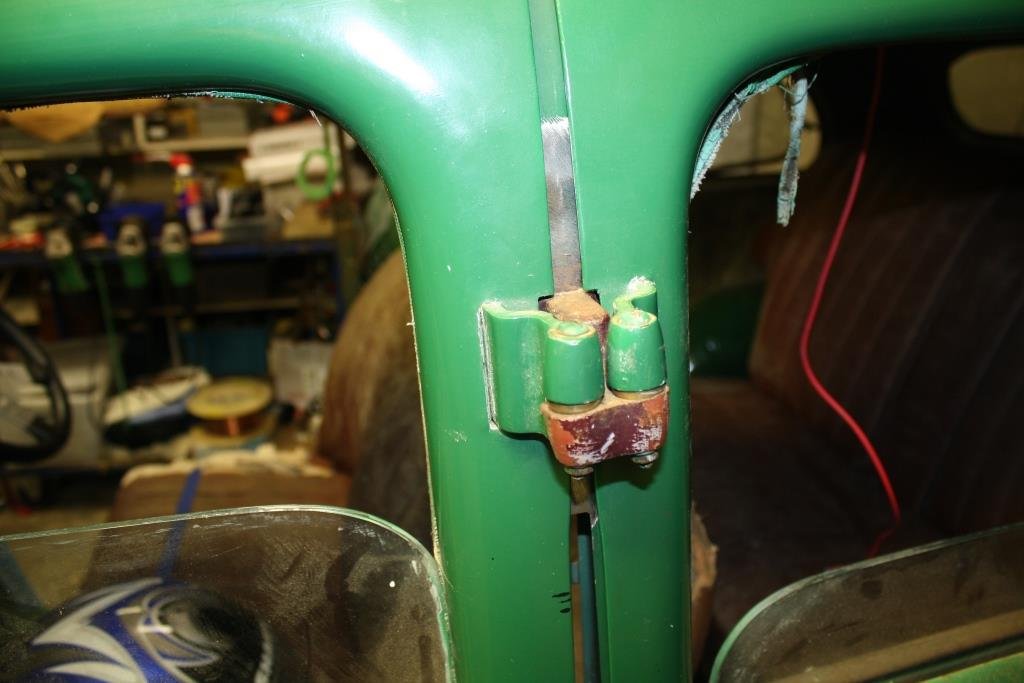
Time to take on a job I’ve been dreading somewhat; repairing the damage to Rigamortice’s port side B pillar that was the result of the body falling off my homemade body rotisserie.
I used a profile gauge on the good side……..
Converted it to CAD…….
Swapped sides……..
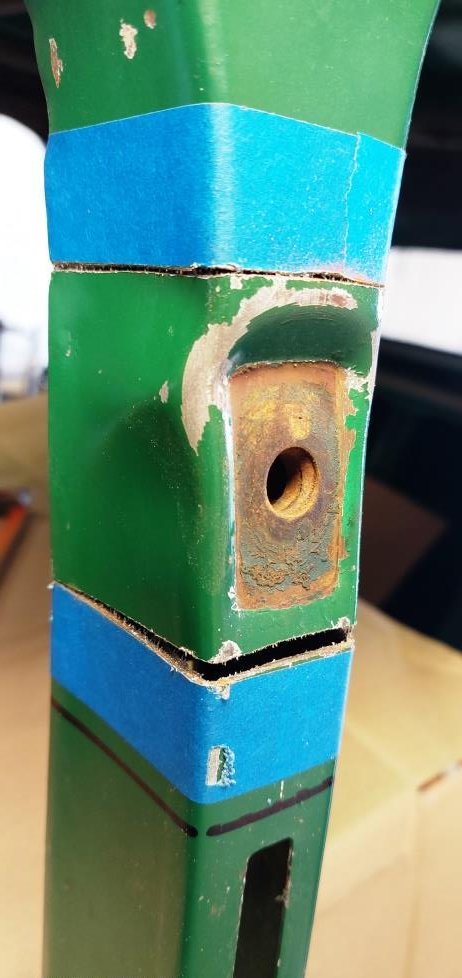
…. And it was easy to see how out of shape things were….
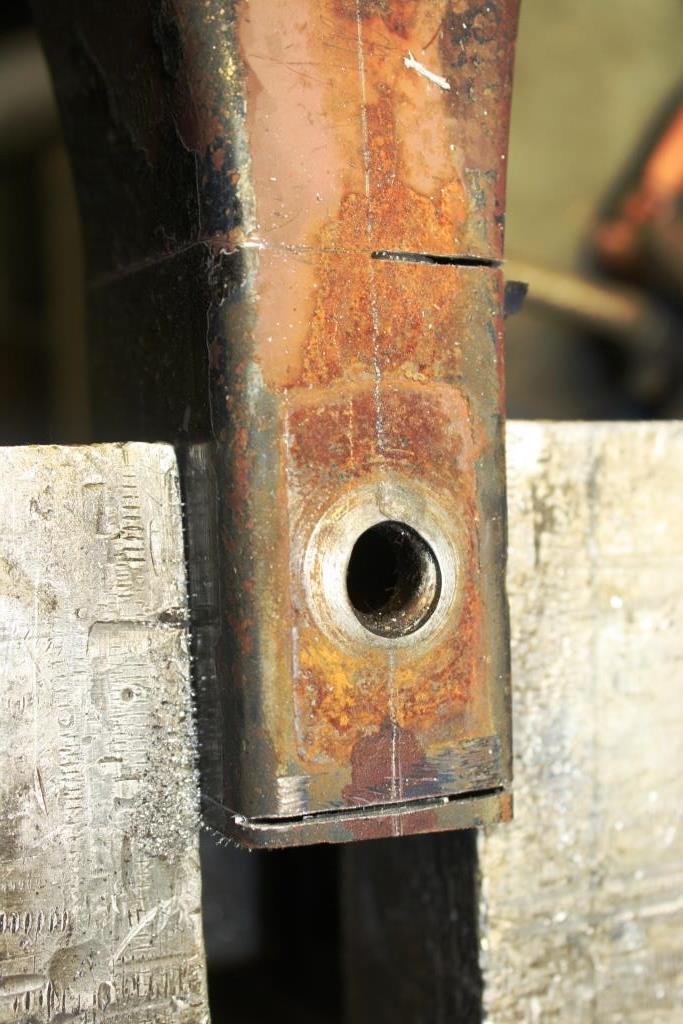
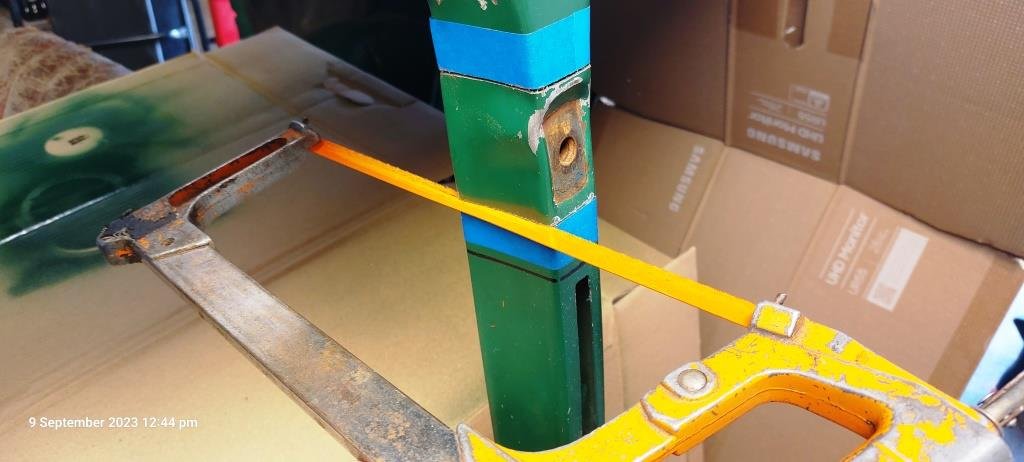
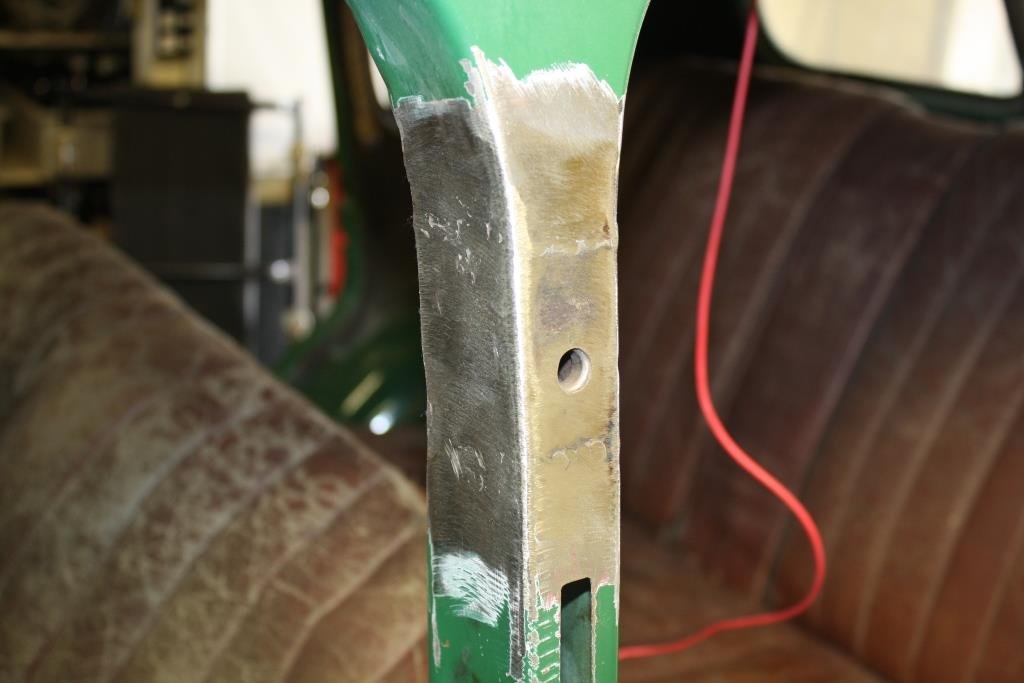
After a lot of measuring I cut a section out of the replacement B pillar….
And did the same on the car. I went back to using an old school hacksaw - far more accurate than an angle grinder for me.
It popped out with a bit of a bang, obviously under some tension.
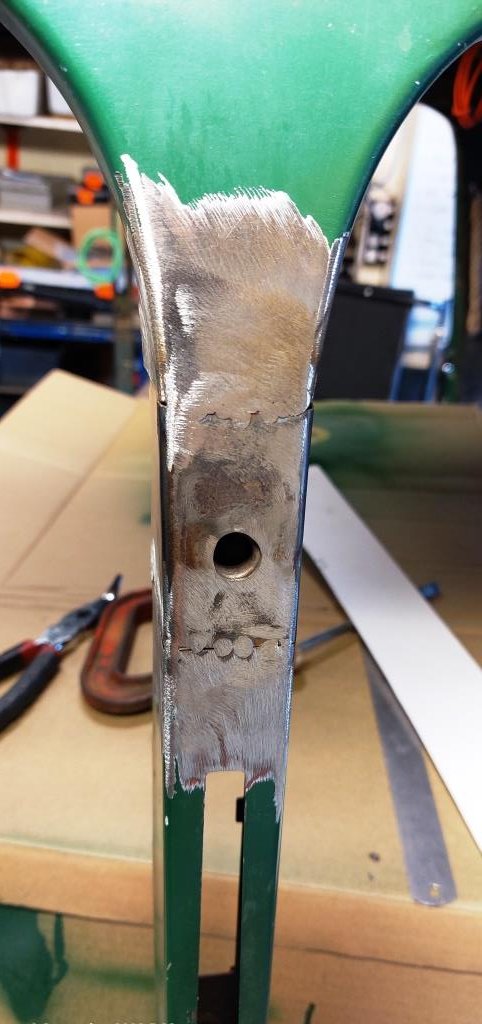
Started tacking the repair piece in…
Checking it with the CAD template….
Still just little tacks, a bit messy but I’m cognisant of avoiding putting too much heat in and distorting things.
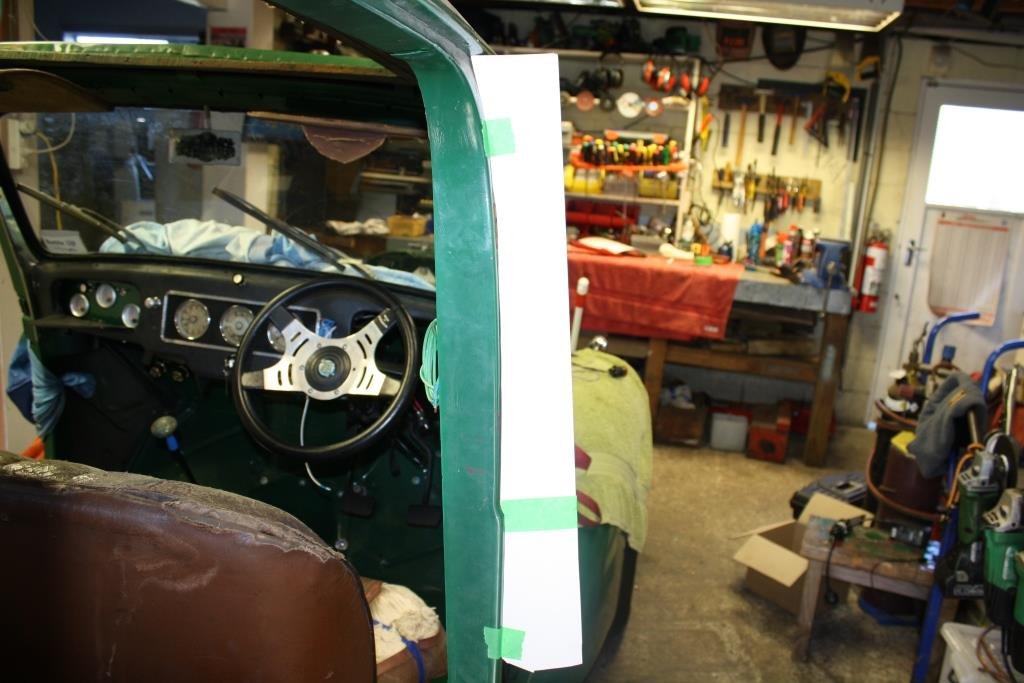
A quick test fit of the doors and it looks OK.
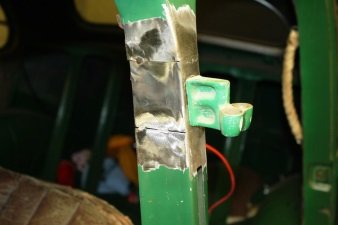
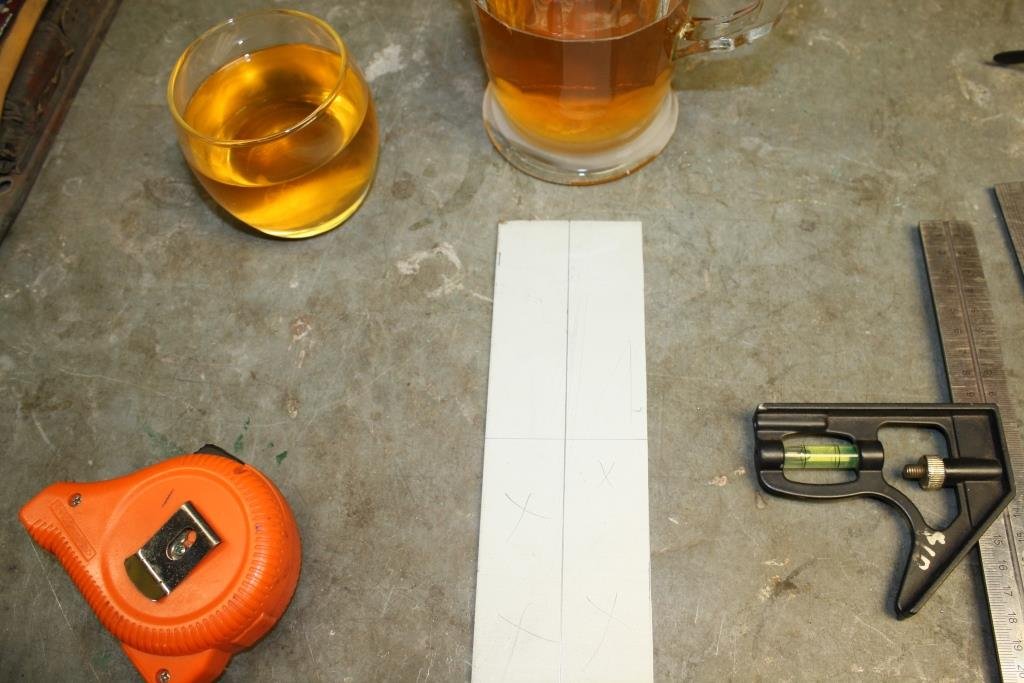
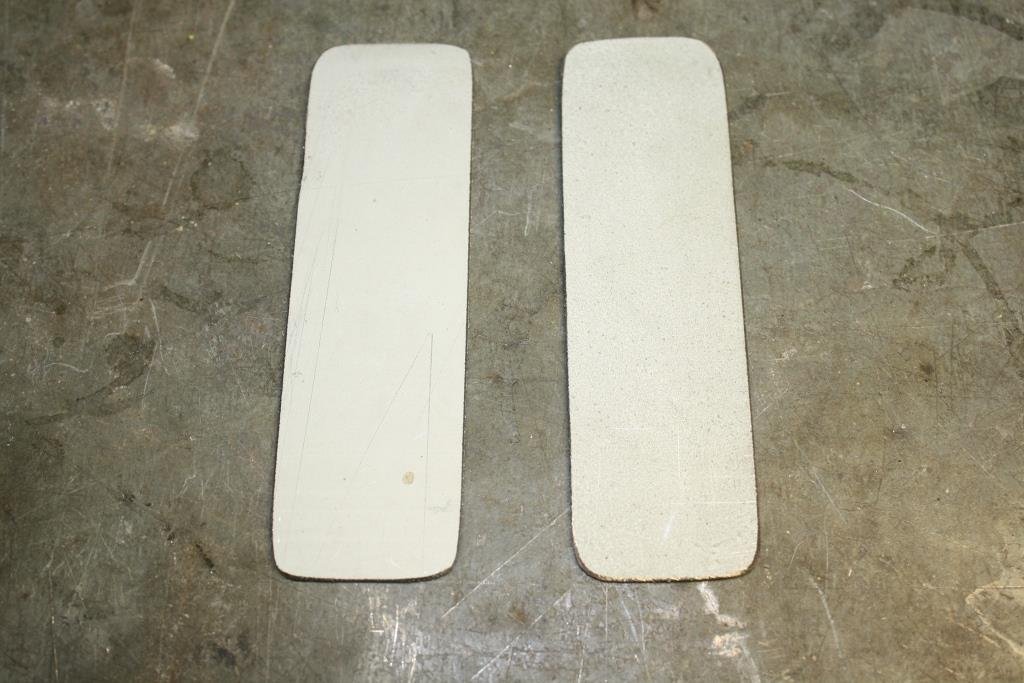
Cut out some 16 gauge zintex strips…
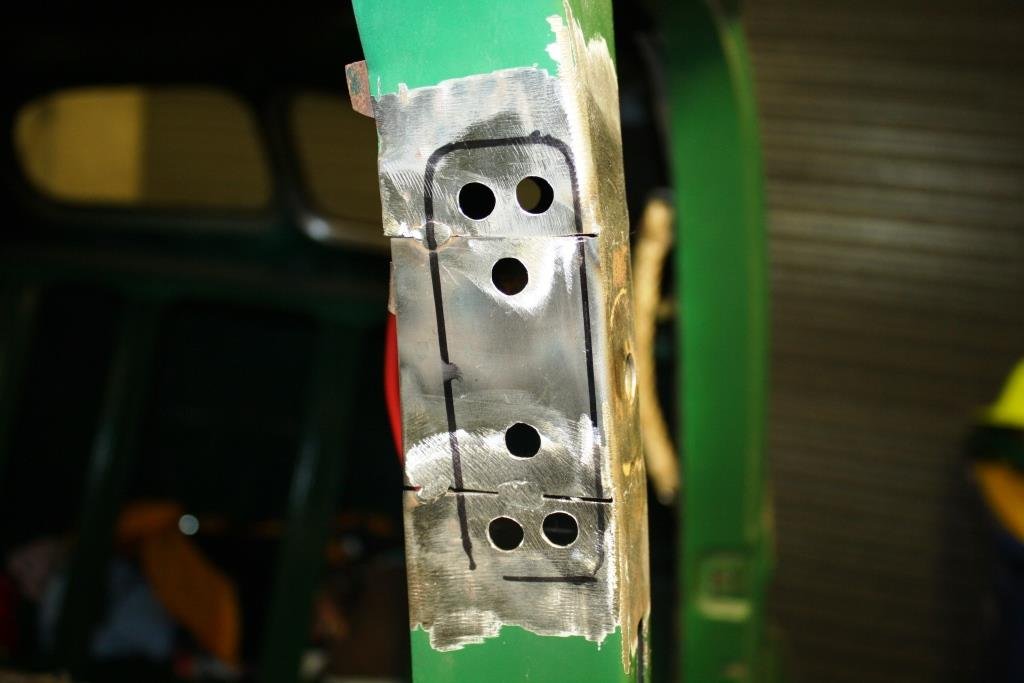
Marked out and drilled for plug welds..
Put the reinforcing strips inside the pillar and started welding…….
A quick test fit of the doors and nothing has moved….(phew!).
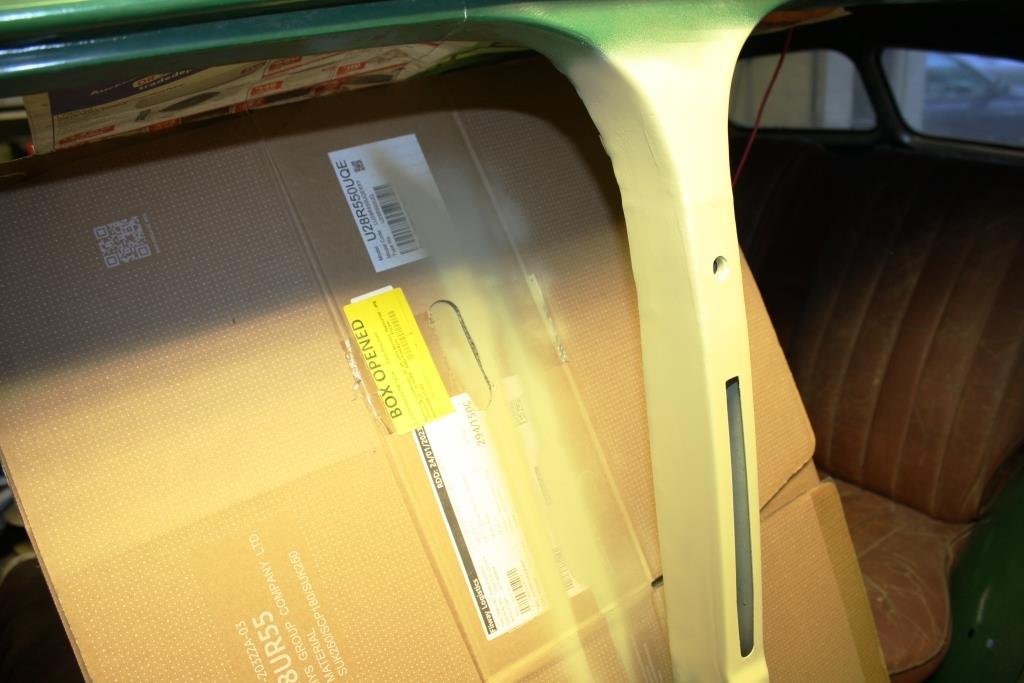
A few coats of sandable primer…
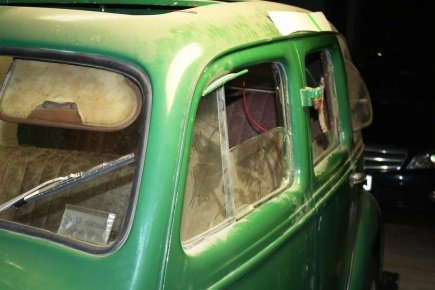
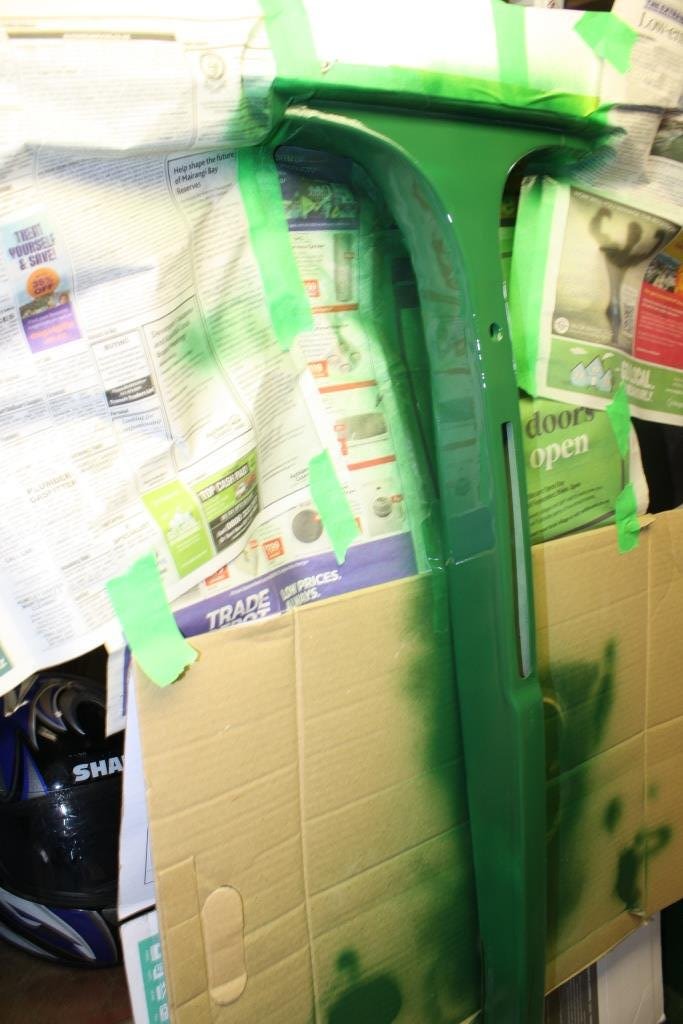
The obligatory insipid green…
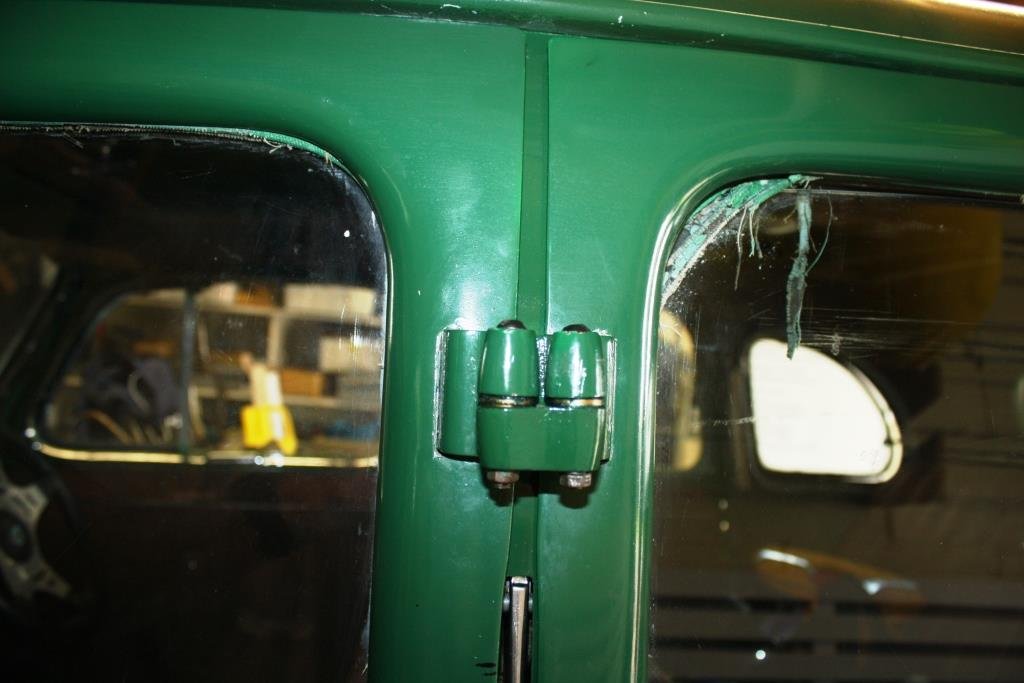
Doors finally back on and everything fits.
-
25
-
1
-
4 hours ago, igor said:
Now you need an exemption.
Yes please!
-
 1
1
-
-
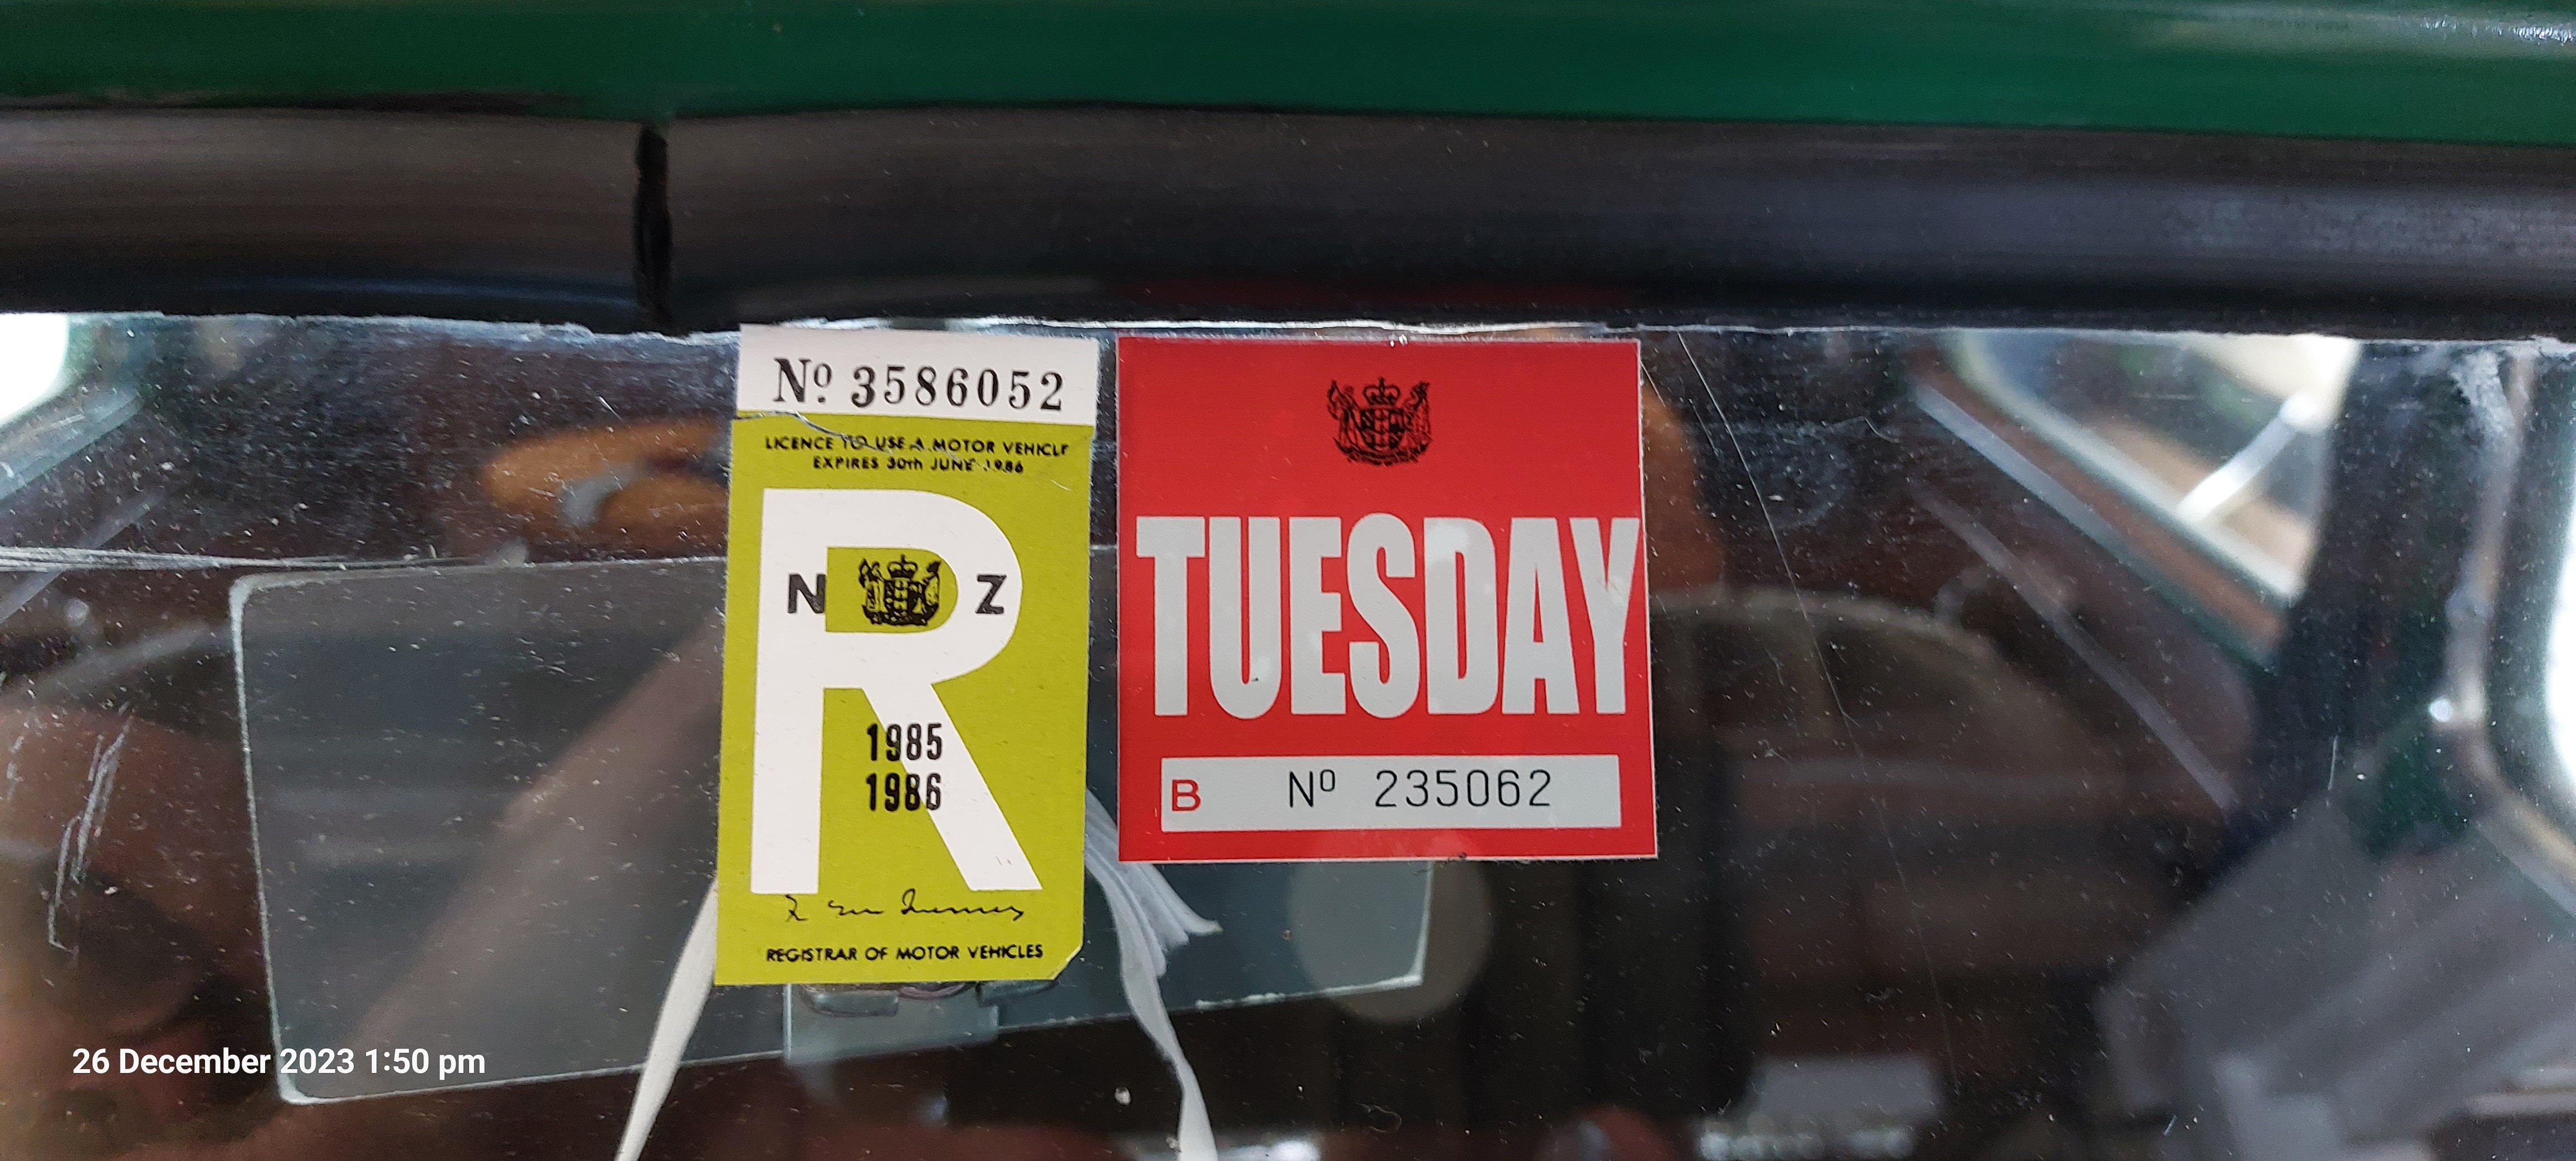
Big thanks to V8Pete for the carless day sticker. 'You da boss"
")
Legals all sorted!
-
3
-
-
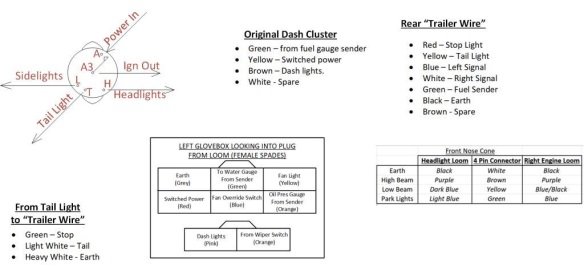
To start the ball rolling I'm picking this would work without a relay? It would be easy to test on the bench that it self parks.
-
2
-
-
If you're using a toggle switch you'll need a single pole double throw. I'd use a double pole/double throw ( https://www.jaycar.com.au/dpdt-6a-240vac-heavy-duty-centre-off-standard-toggle-switch/p/ST0576 ) so you can double up the contacts and not need to run a relay, i.e. keep it simple.
If you can confirm the terminals were correct in my previous post I'll draw you up a circuit diagram and a simple wiring schematic.
-
1
-
-
No offence but yes it is mumbo-jumbo. I'm by no means an expert but I have drawn up the circuit diagrams and rewired a reasonable number of cars over the years.
To solve Flash's problem all we need to do is figure out the wiring configuration of the 4 wire L300 wiper motor. At that stage I can draw up a circuit diagram using the odd relay, diode, timer, etc. to interface with any cool, oldschool switch he can find.
-
2
-
-
16 minutes ago, Doug Hill said:
Can you stop it mid turn and then earth A? That could be the self park track
Edit: it should all be earth switched because they are non-relay and the colum switch is teeny-tiny
Reversing polarity will not change the amps running through the switch?
-
1
-
-
1 hour ago, Flash said:
@sr2 thanks for the reply Simon. Looks like Mitsubishi do something different as earthing the body and then cycling +12 volts through the other wires yields no results on three of the wires and sparks on the 4th wire.
OK. So my guess at this stage is that......
C should be your permanent earth (i.e. negative).
+ve power to B should give you low,
positive power to D should give you High,
and a permanent (i.e. from the ignition switch) +ve supply to A will power the self park.
Give it a test and tell us the results.
-
2
-
-
OK. So
3 hours ago, Doug Hill said:C should be +12v
The other 3 should be a lucky dip of earthing via the switch to get park/low/high
LOL, it's a wiper motor not parking/headlights.
-
Most 4 wire wiper motors I've come across have the earth through the body, and terminals for a continual 12V supply, high and low speeds and an on/off. Not too hard to work out which terminal is which with a 12V supply.
-
3
-
-
- Popular Post
- Popular Post
Now for the fun part, I’ve been looking forward to this……..
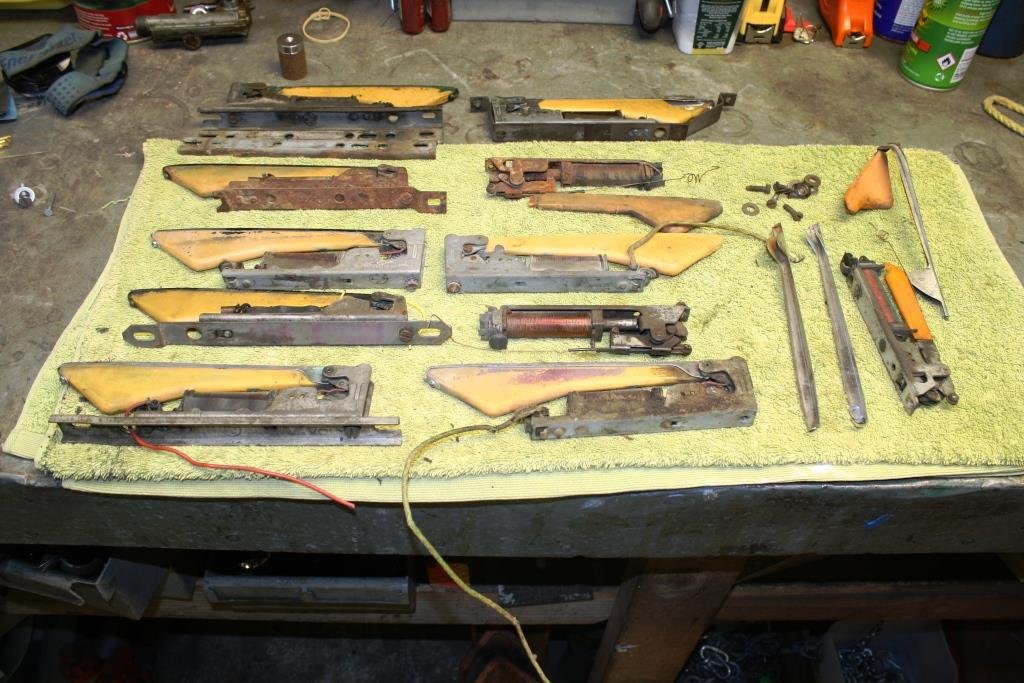
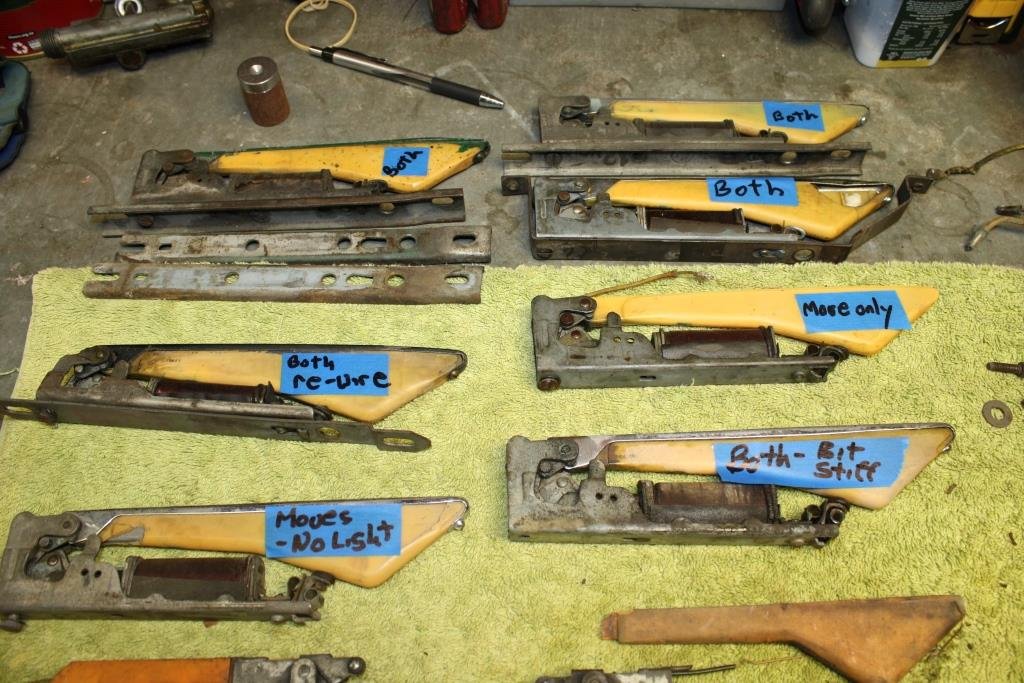
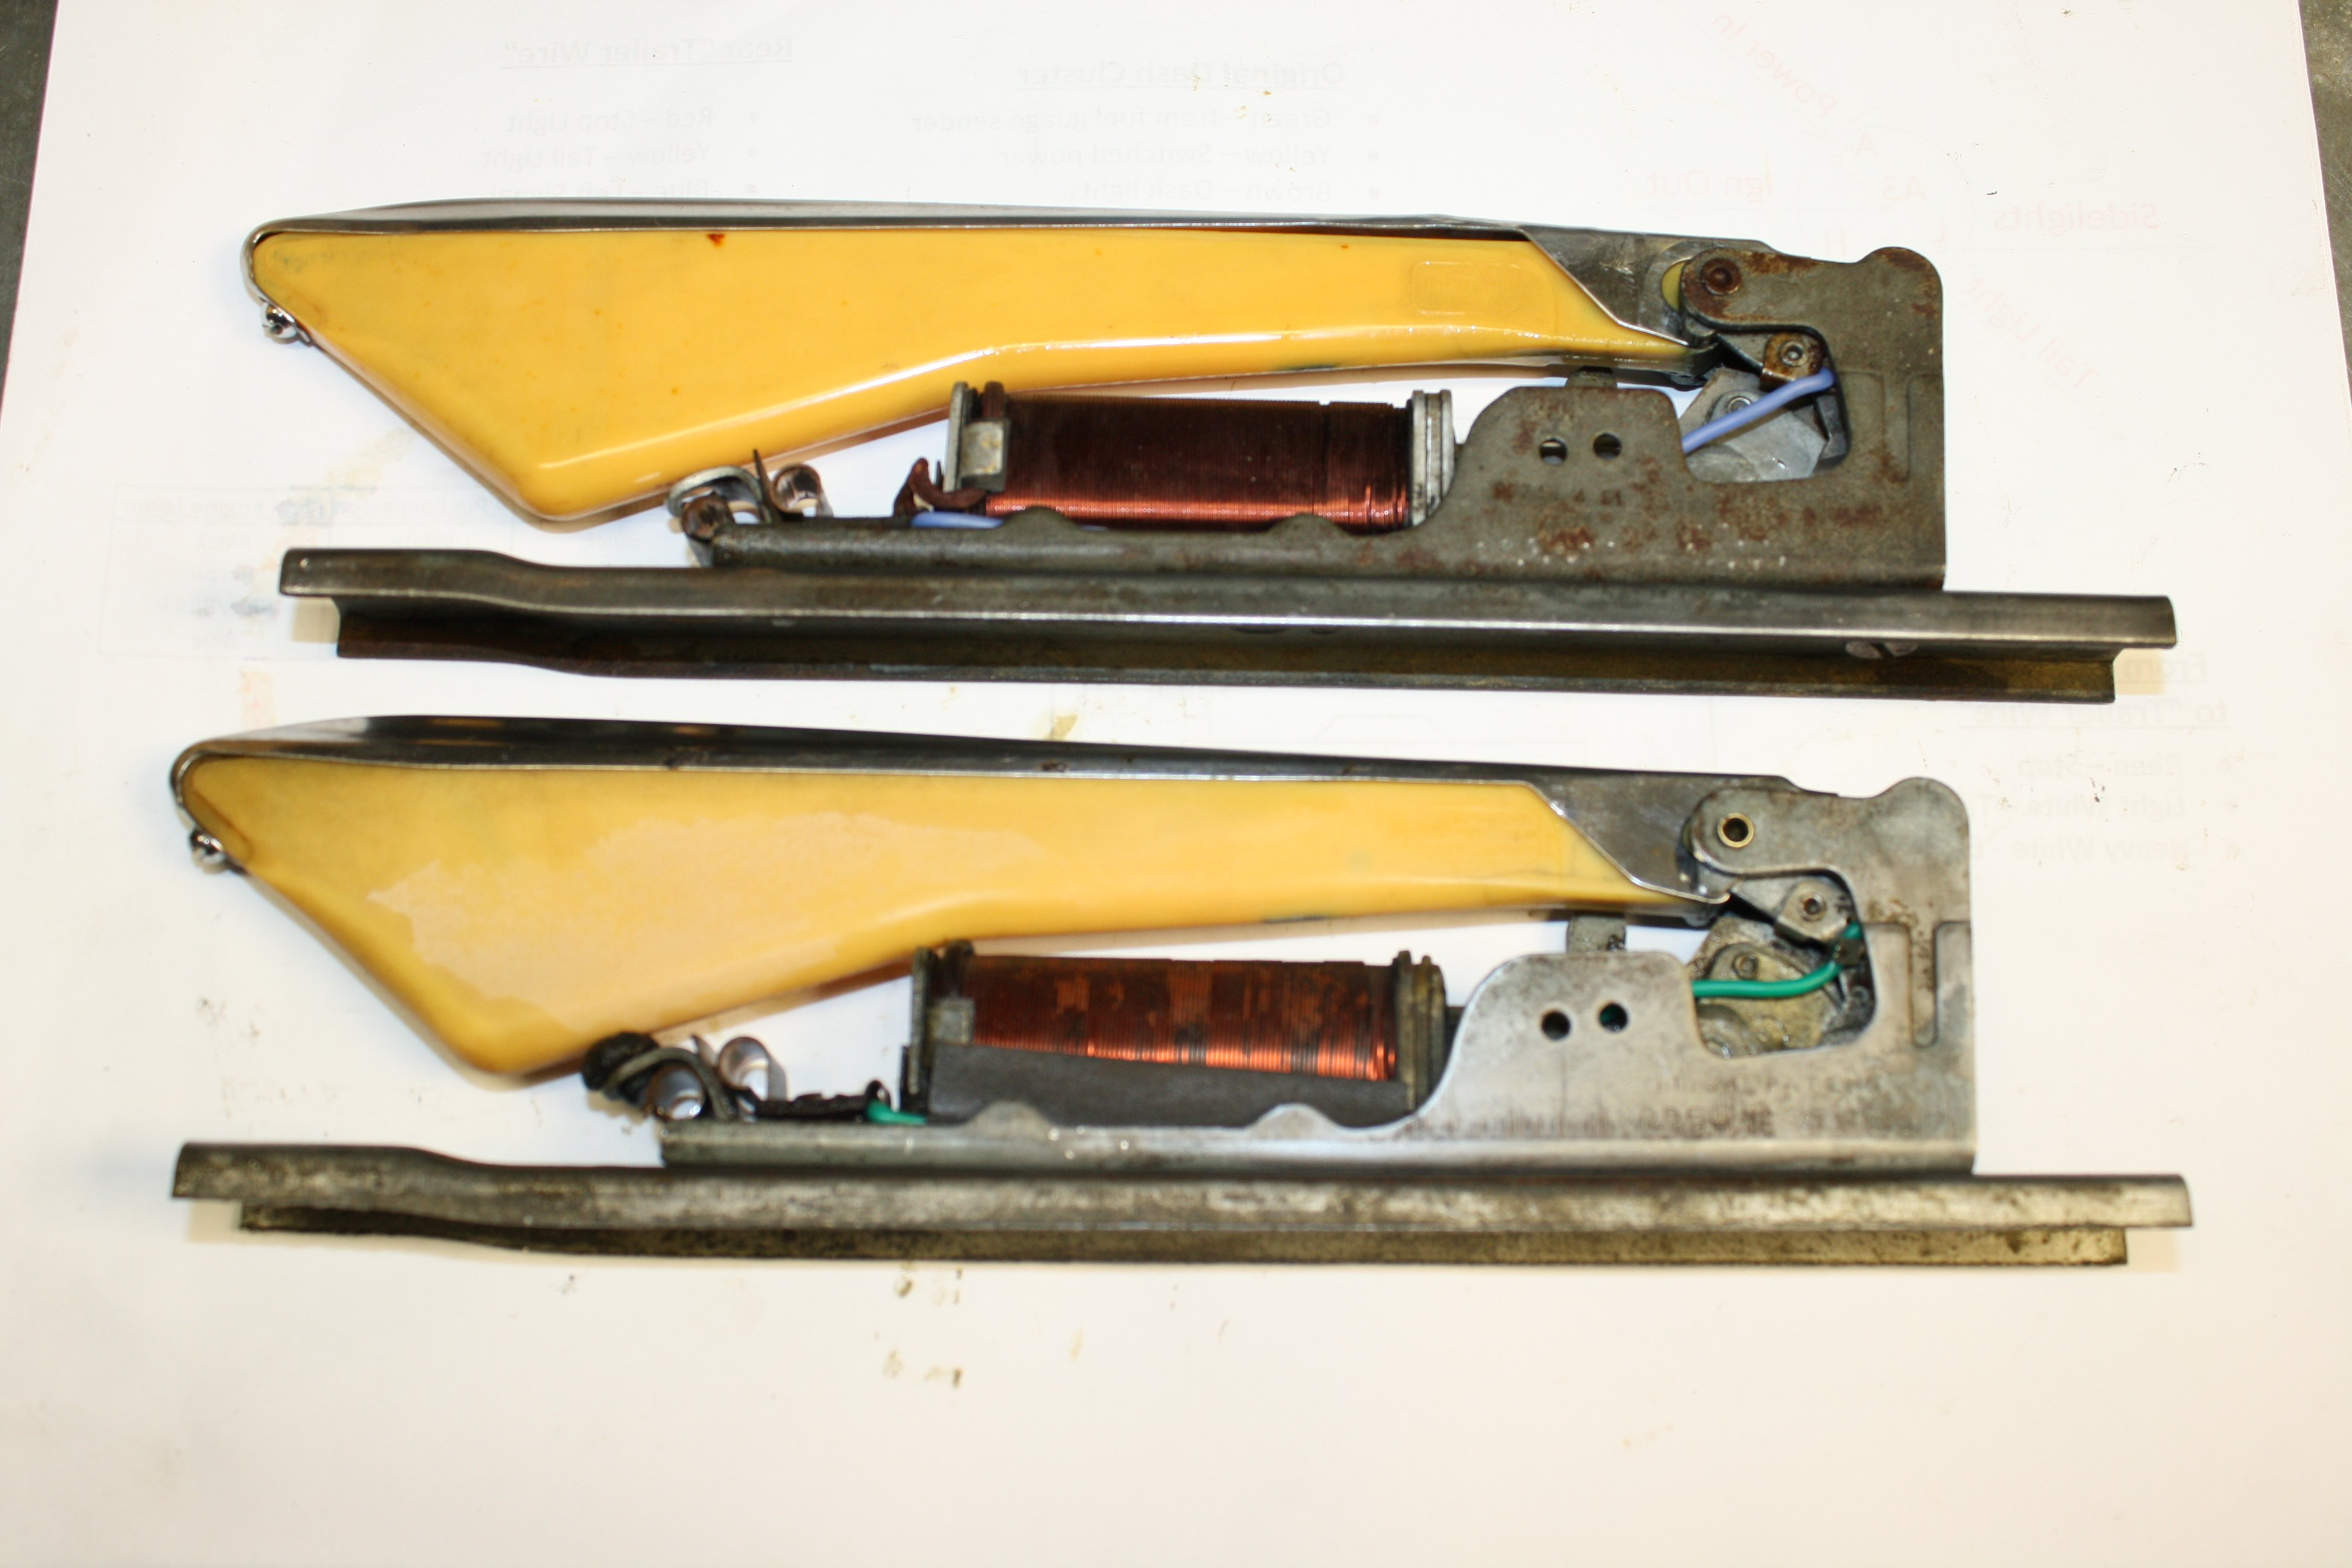
I’ve been collecting old (and mostly broken) Lucas Trafficators for a few years now.
I gave them all a quick test, the results weren’t promising.
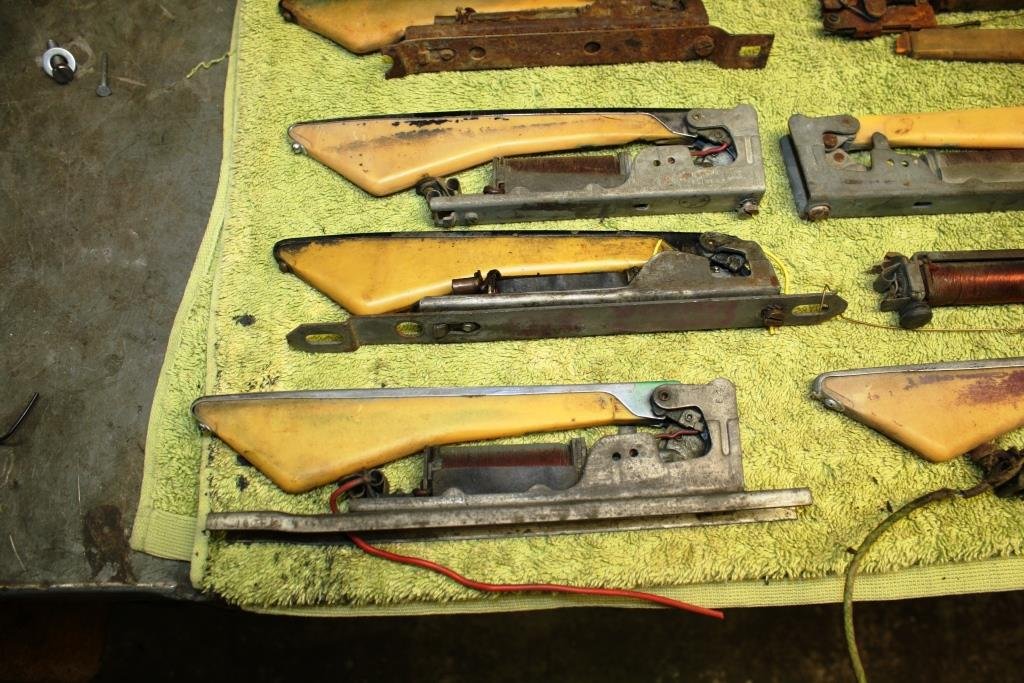
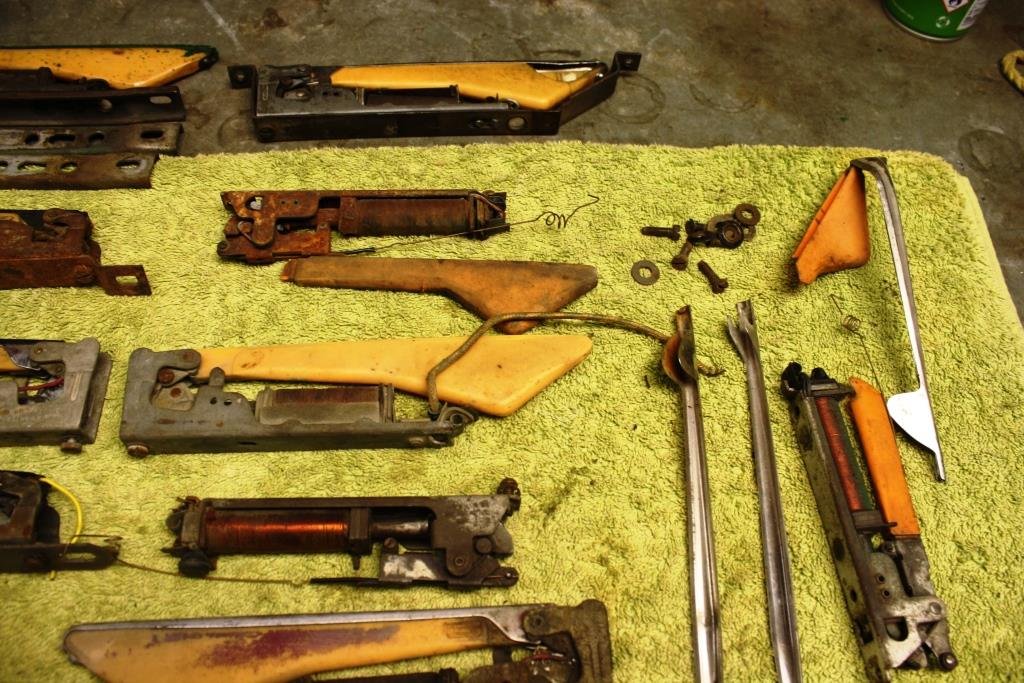
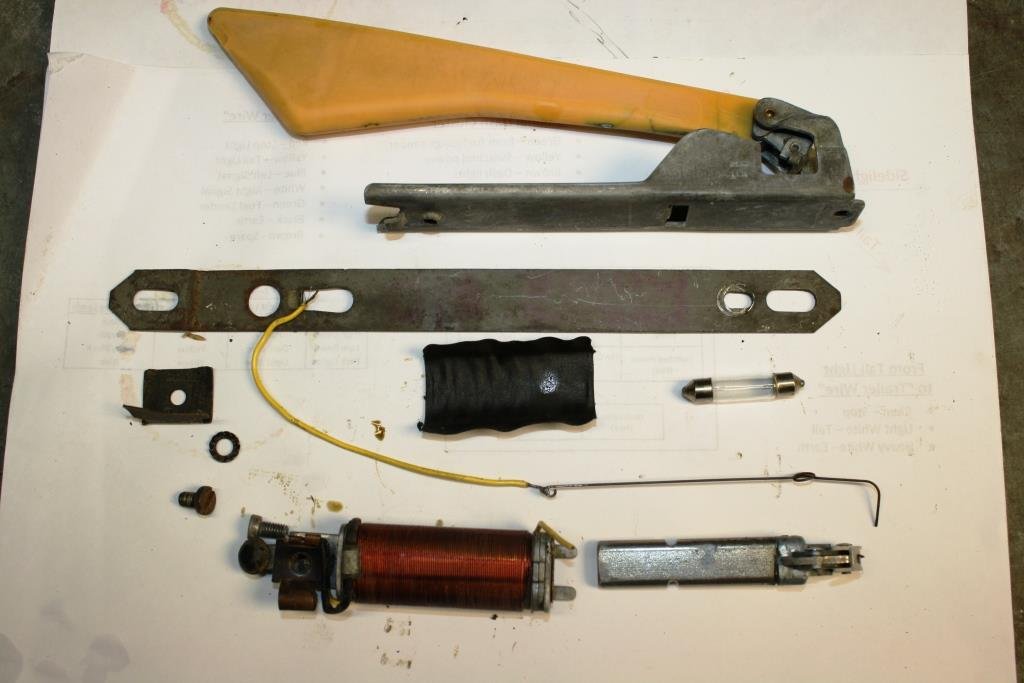
I cannibalised a number to get enough parts to build a working pair.
Started rewiring and assembling the good bits, learning as I go. Have to say they were a lot fiddlier than I first thought.
I just love diving into this old shit; it feels like you’re bridging the knowledge gap - if we guys don’t keep it alive who the hell will?
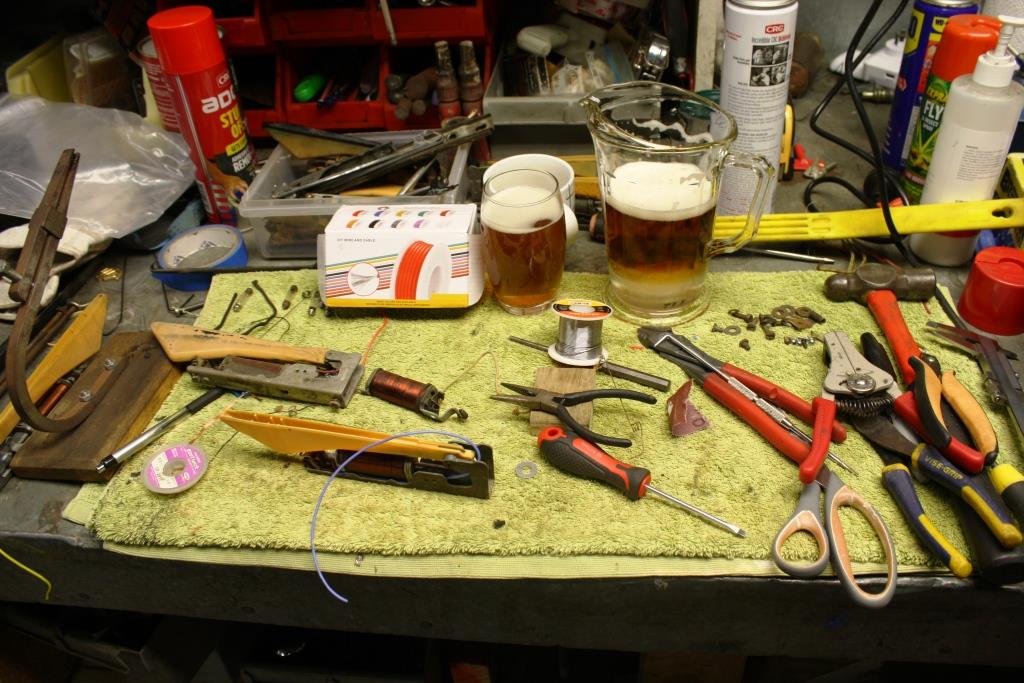
It was also very thirsty work!
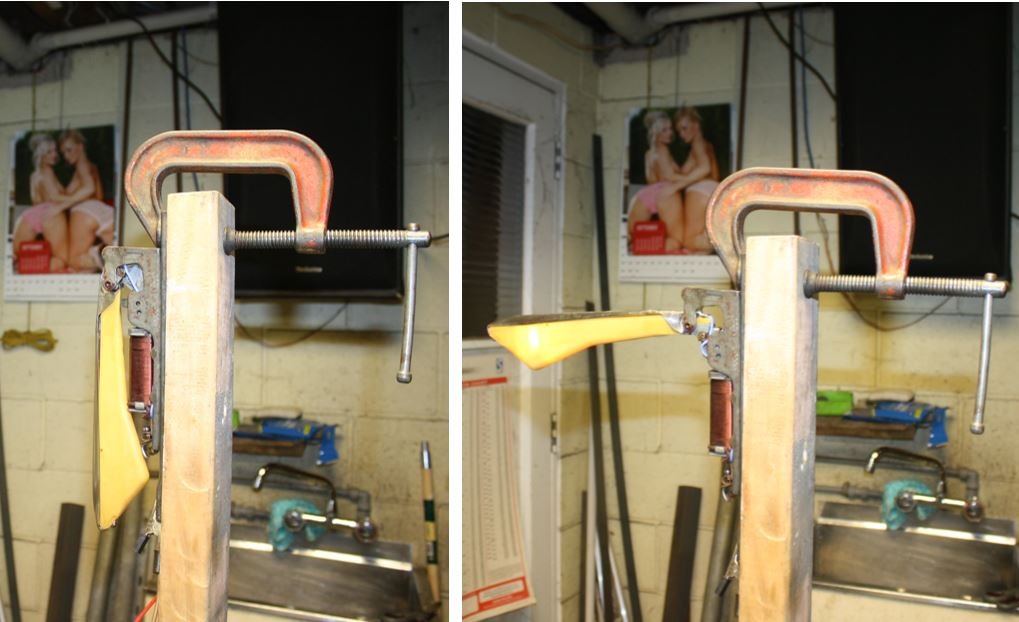
After more failures than I’ll admit to I eventually ended up being a self-appointed Trafficator expert and more importantly - I ended up with a working pair.
So much fun to play with………yes it’s a blokes thing.
I left one set up on the home made test bench for a few days in the ‘universally esteemed & revered sr2 man-cave’ for visitors to play with…..and to think the “ever lovely” Mrs sr2 had the audacity to describe Rigamortice, me and my mates as being shallow?
https://www.youtube.com/watch?v=xQ67aWH4v4U
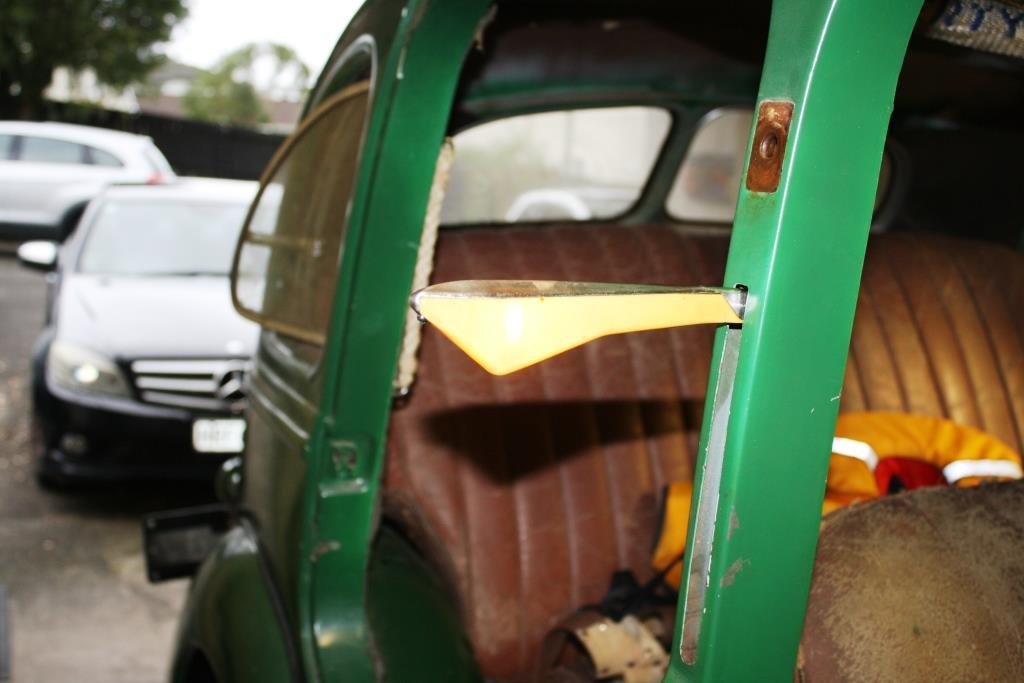
Fitted up and wired up - if that’s not old school I don’t know what is!
-
23
-
3
-
- Popular Post
- Popular Post
After countless, sleepless nights of painstakingly thorough soul searching and self-analysis, (fuelled by the considerable imbibement of 101 Wild Turkey) I came to the conclusion that for Rigamortice and myself to have any chance of surviving typical Auckland traffic we would need indicators! In 1947 indicators were yet to be invented and trafficators were considered to be state of the art high-tech.
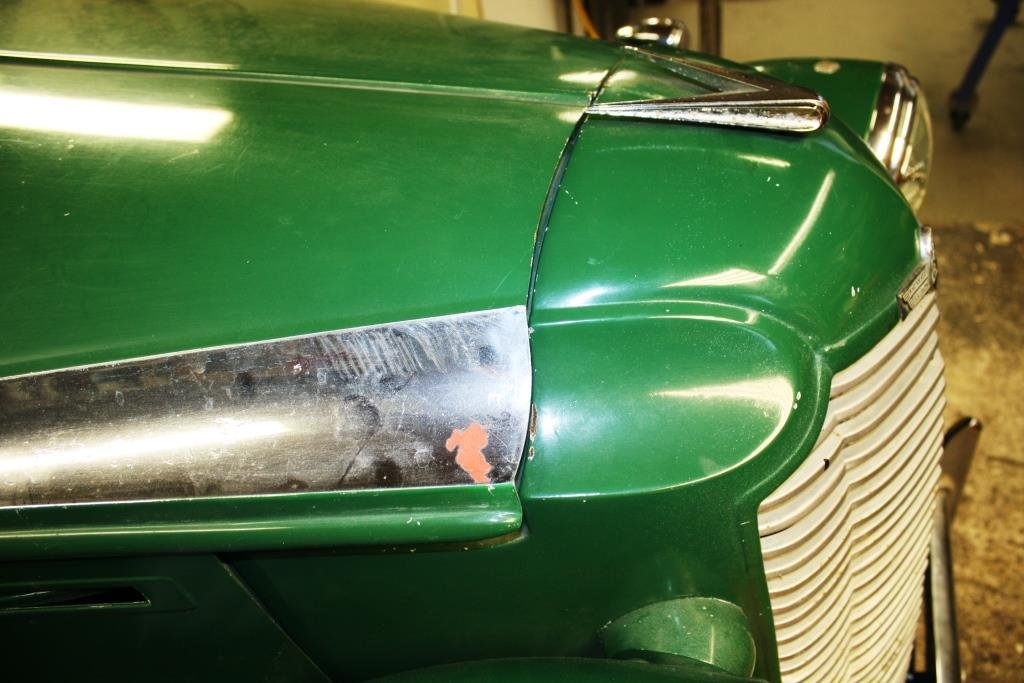
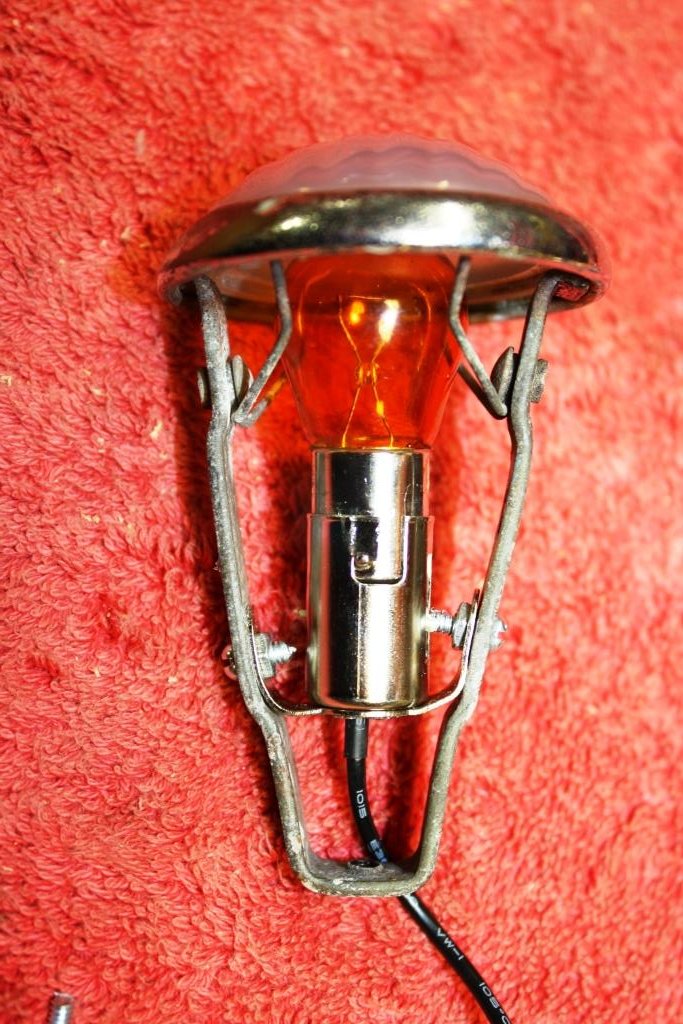
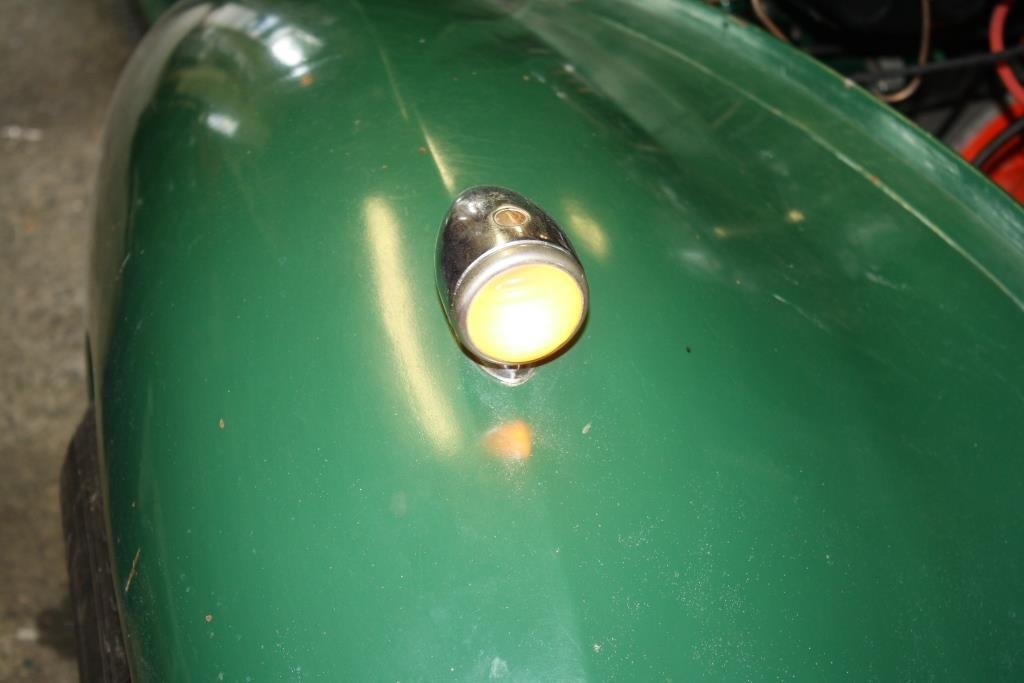
Maybe the side lights on the front guards could be converted to indicators with an orange lens or bulb…….?
This became my fiendishly cunning justification for Rigamortice and me spending far too much money on a beautiful pair of P700 replica headlamps that had the parking lights built in.
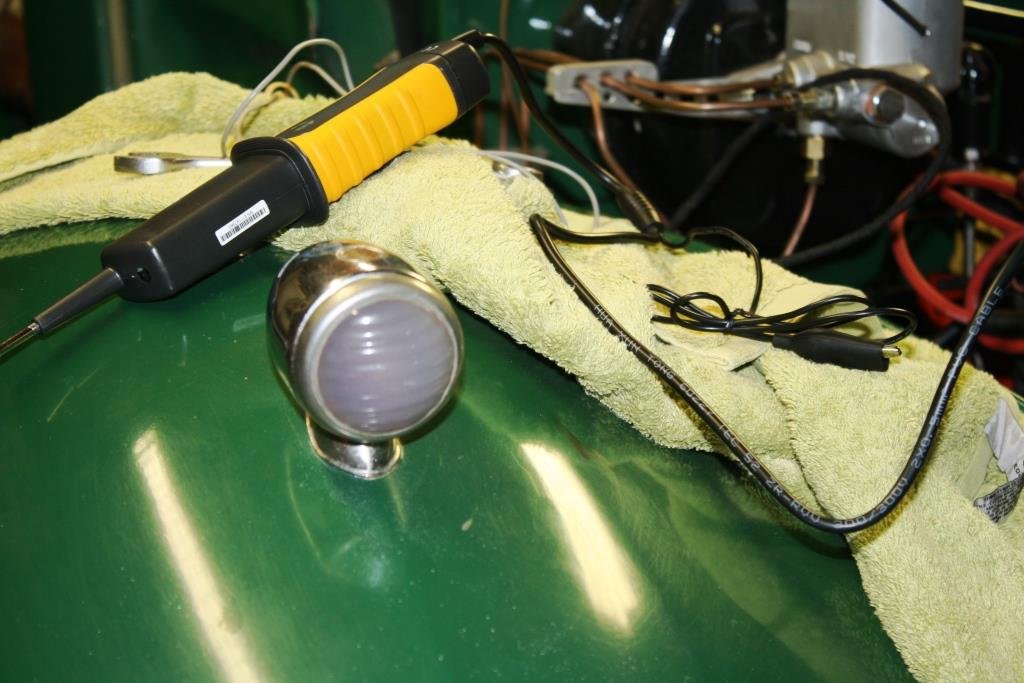
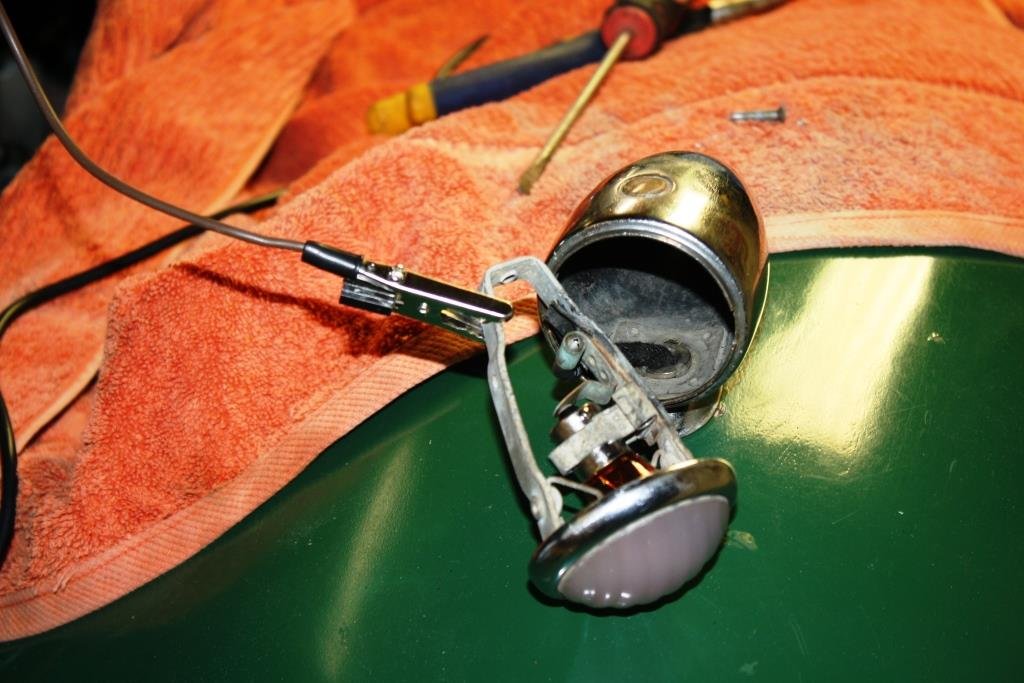
I struggled to get anything that resembled either light or life out of the existing sidelights.
Same old problems as with the tail light, corroded terminals, dodgy insulation, and almost impossible to strip down while keeping it intact. Yes; sadly 70 years ago when they were new they were junk - Lucas, “the prince of darkness” strikes again!
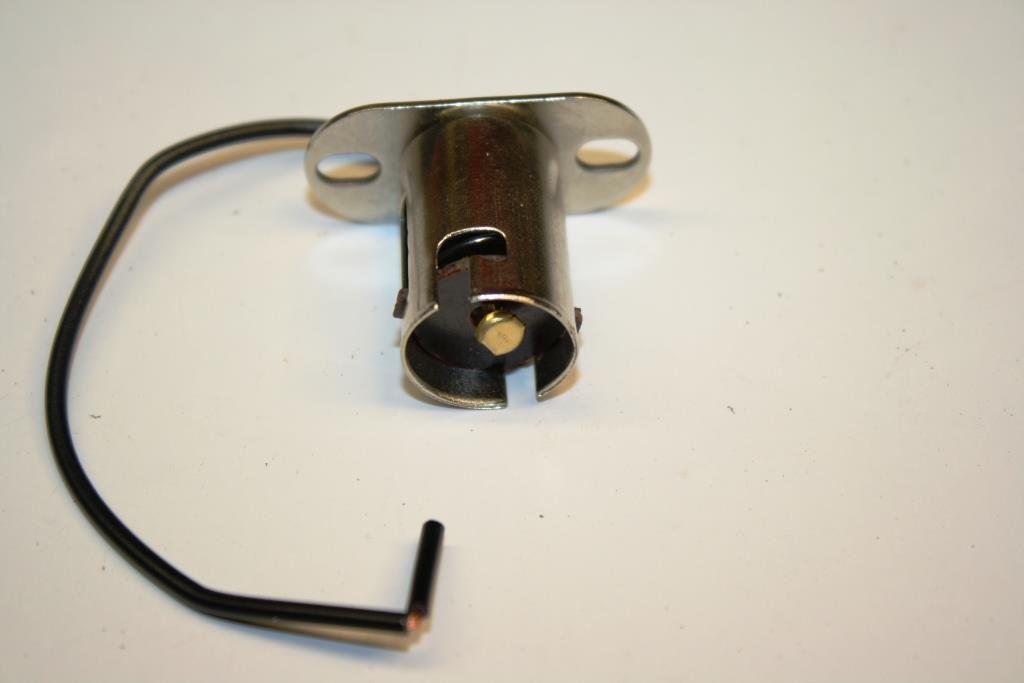
So I found these bulb holders on line……
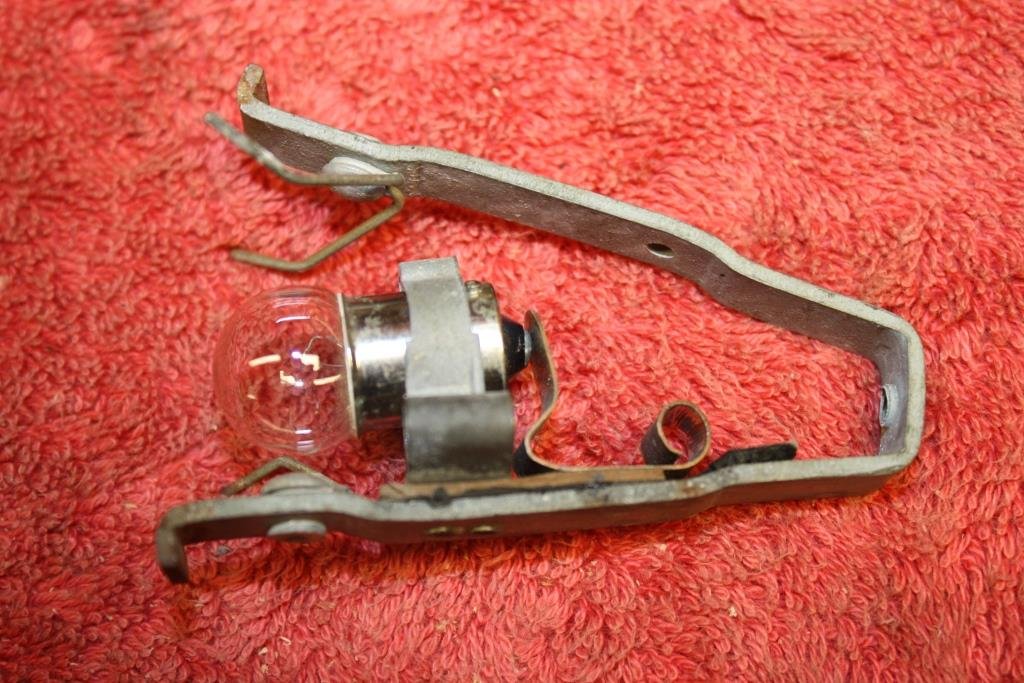
…and fitted them with orange bulbs.
Old vs new…..
Luckily the original lenses gave it that elderly, faded, glow!
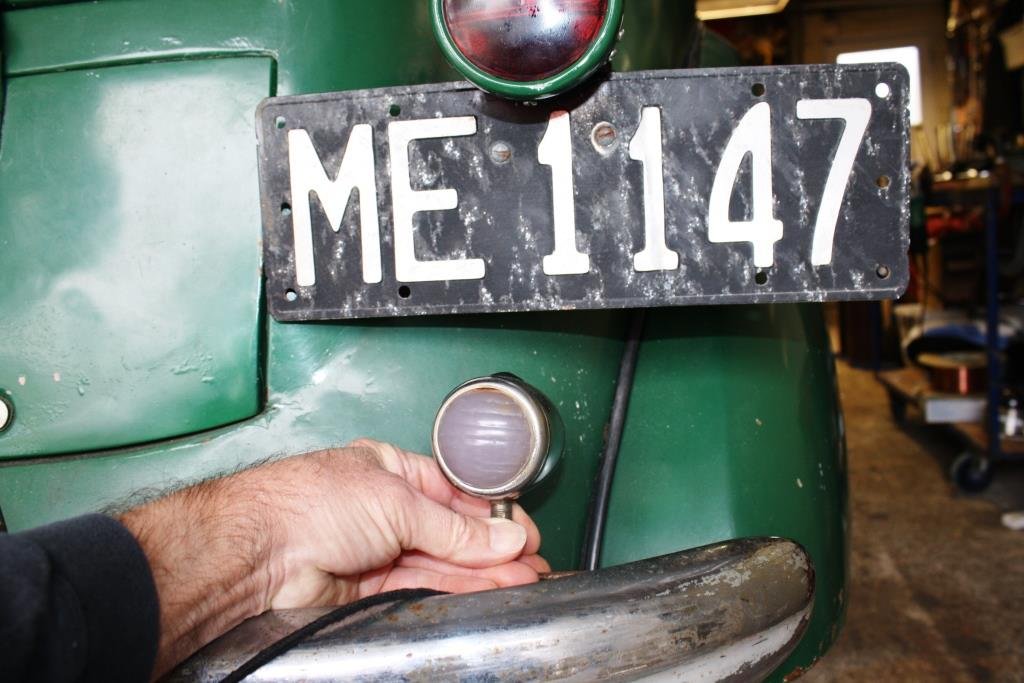
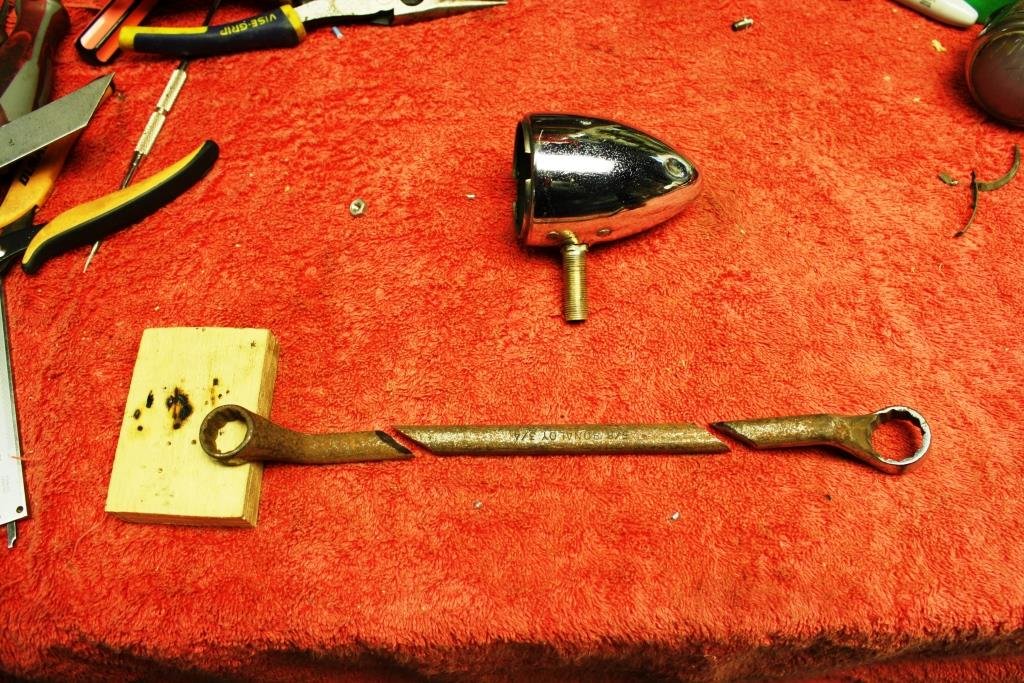
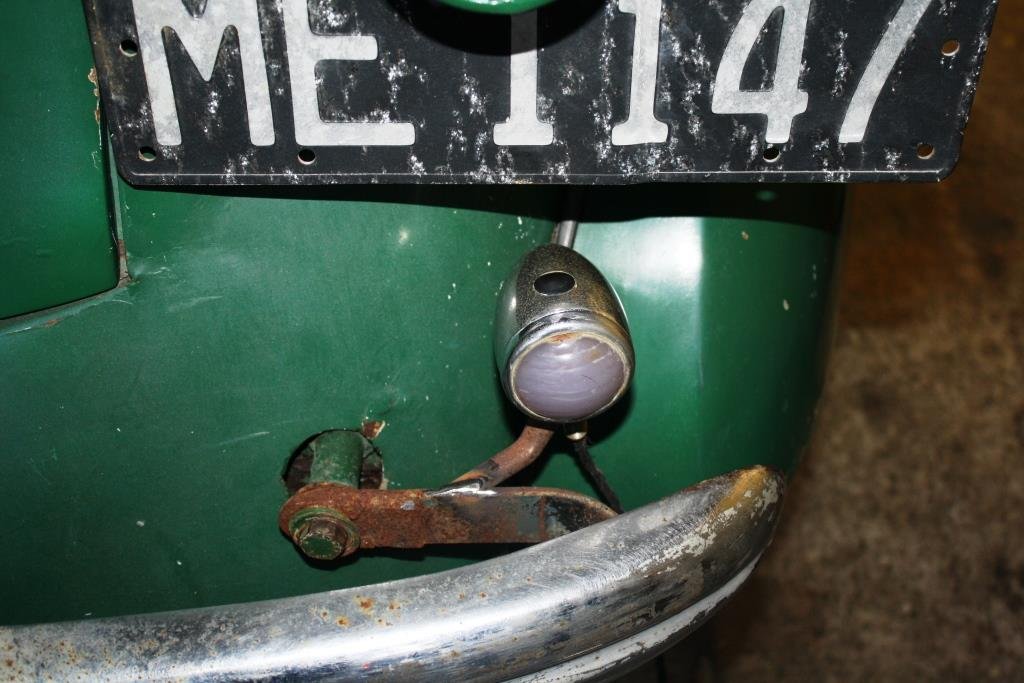
I had a spare pair to use in the rear.
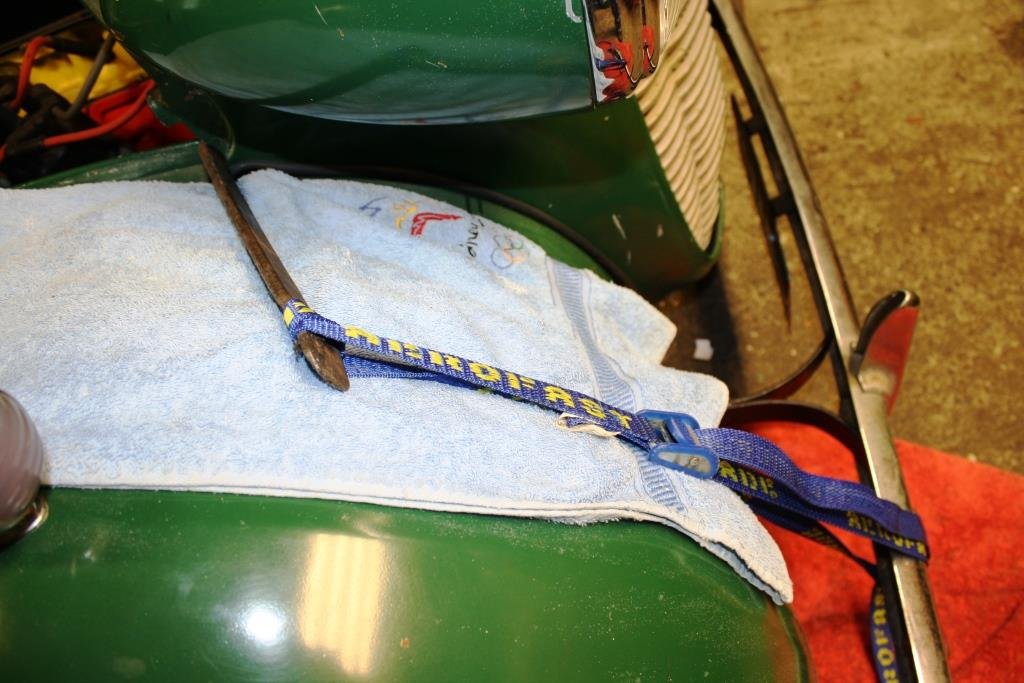
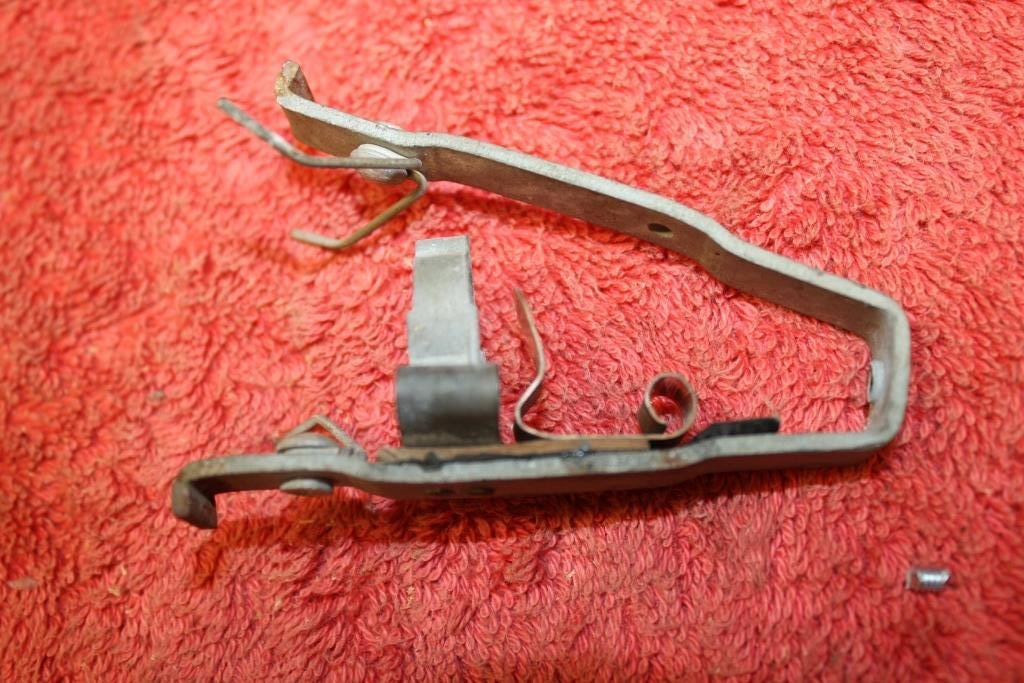
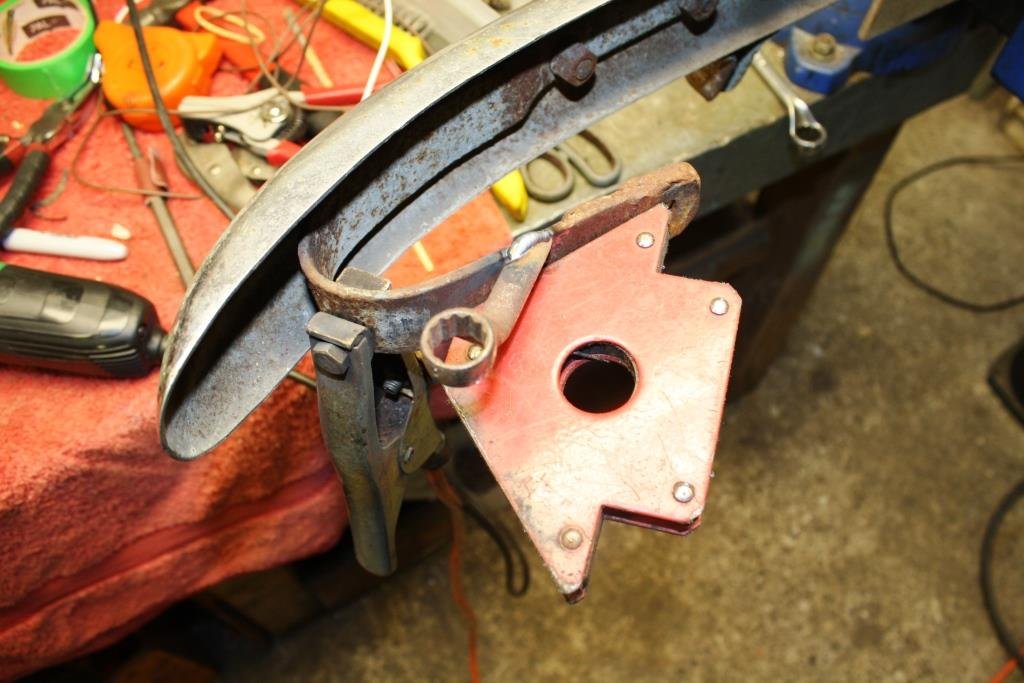
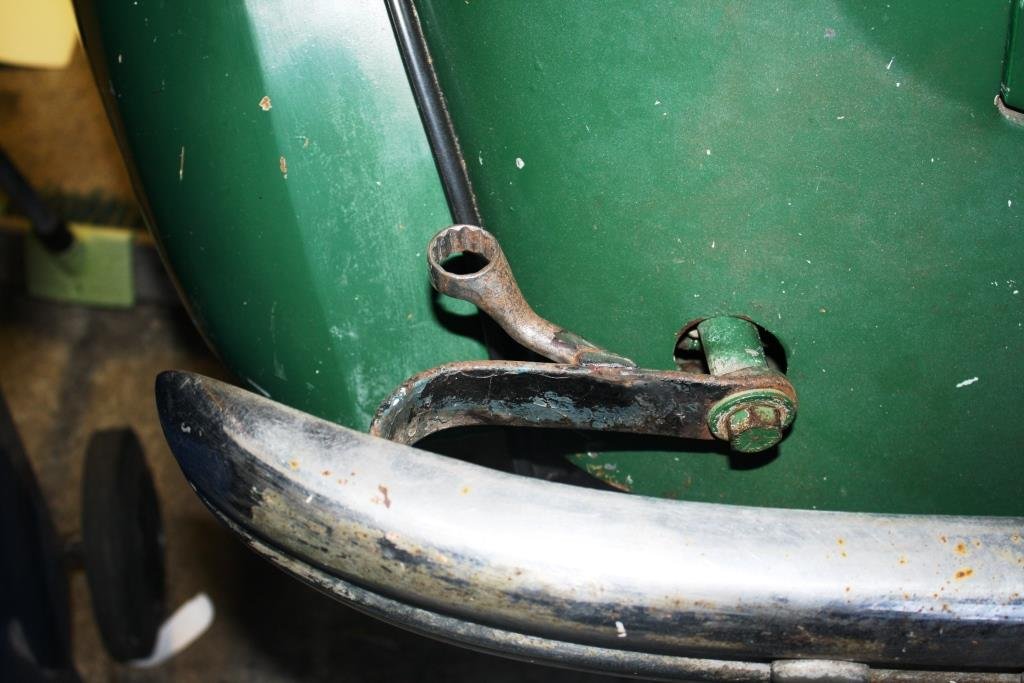
I attacked an old Whitworth offset ring spanner with an angle grinder…..
…welded the bits onto the bumper irons…..
….. with some fabric wrapped wiring they look the part - and they work!
-
22
-
- Popular Post
- Popular Post
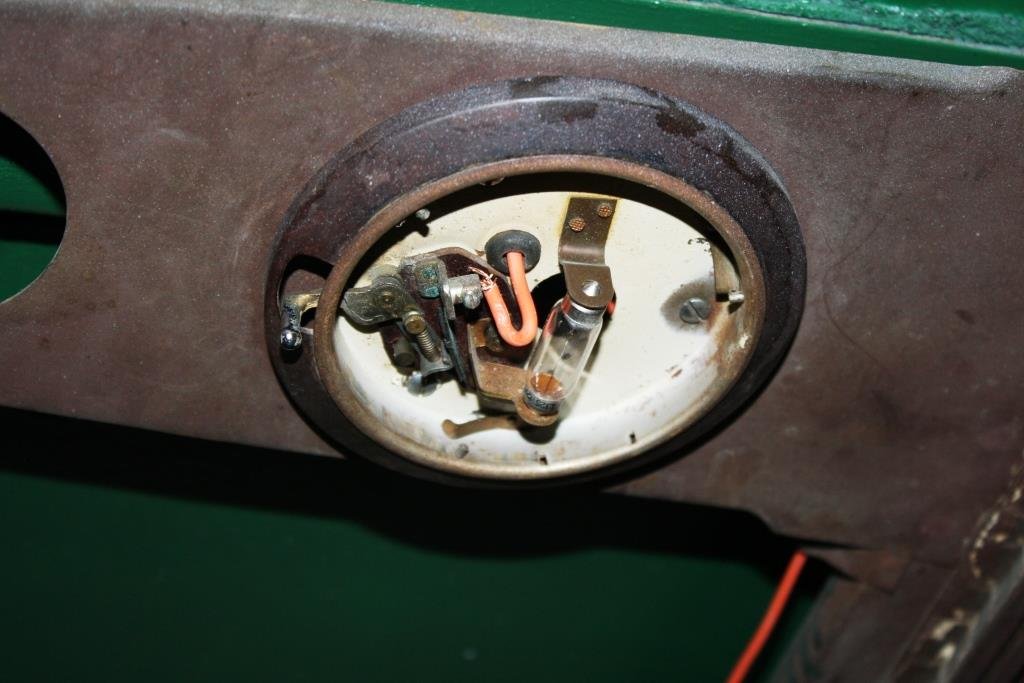
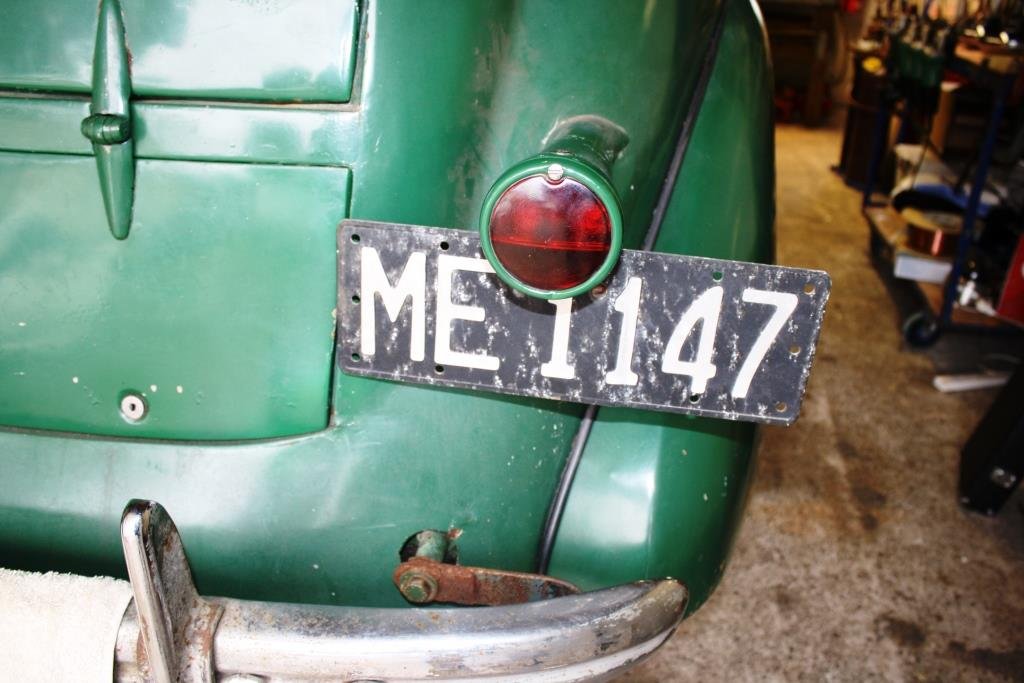
Working my way through the electrics…..
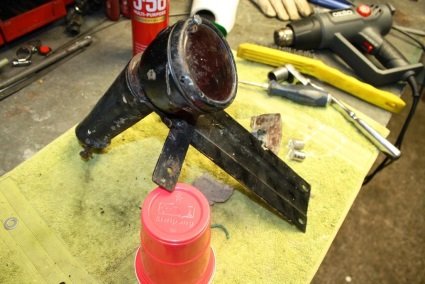
This is all that was left of the original tail light, (i.e. the bloody thing fell off!).
I started stripping down the tail light I’d got from the Vauxhall Car Club.
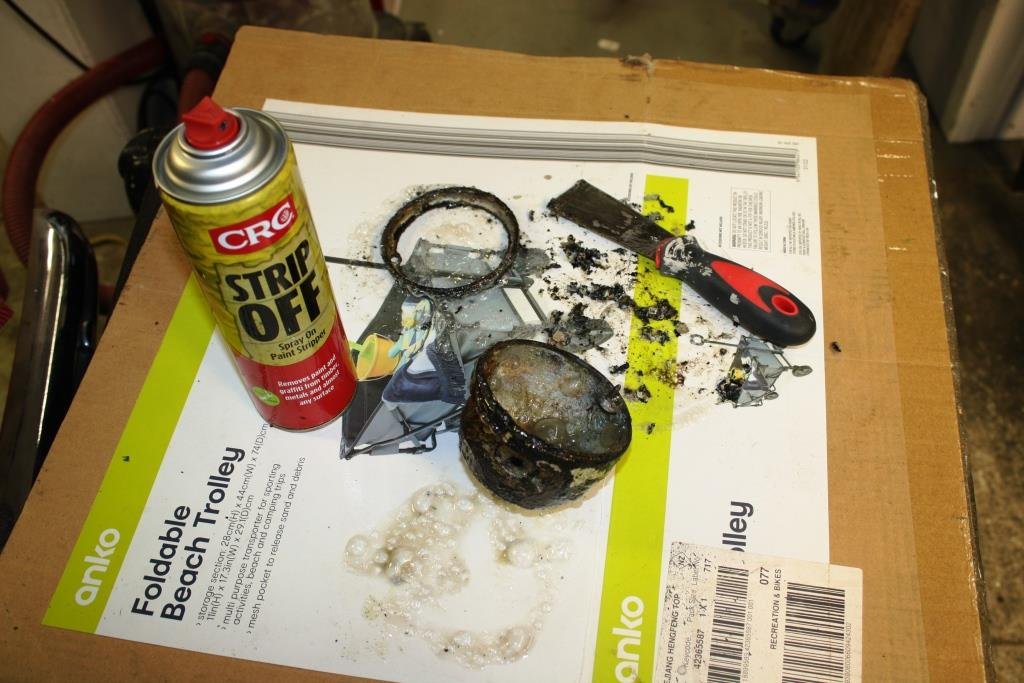
Paint stripper, rust kill and paint………
I replaced the clear number plate lens with plastic cut from a welding helmet lens cover.
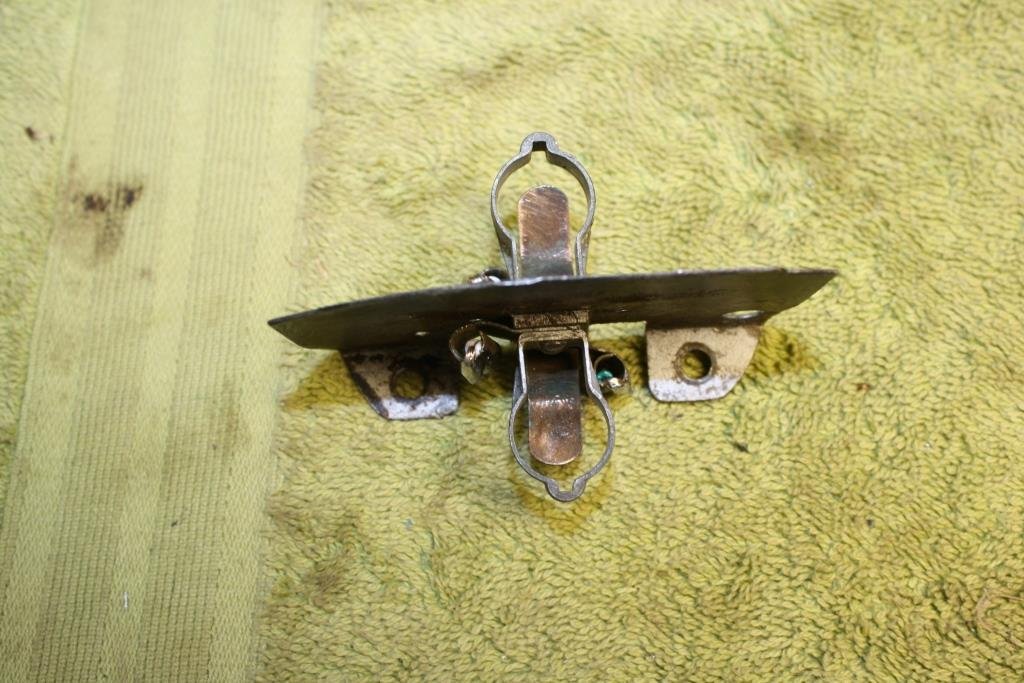
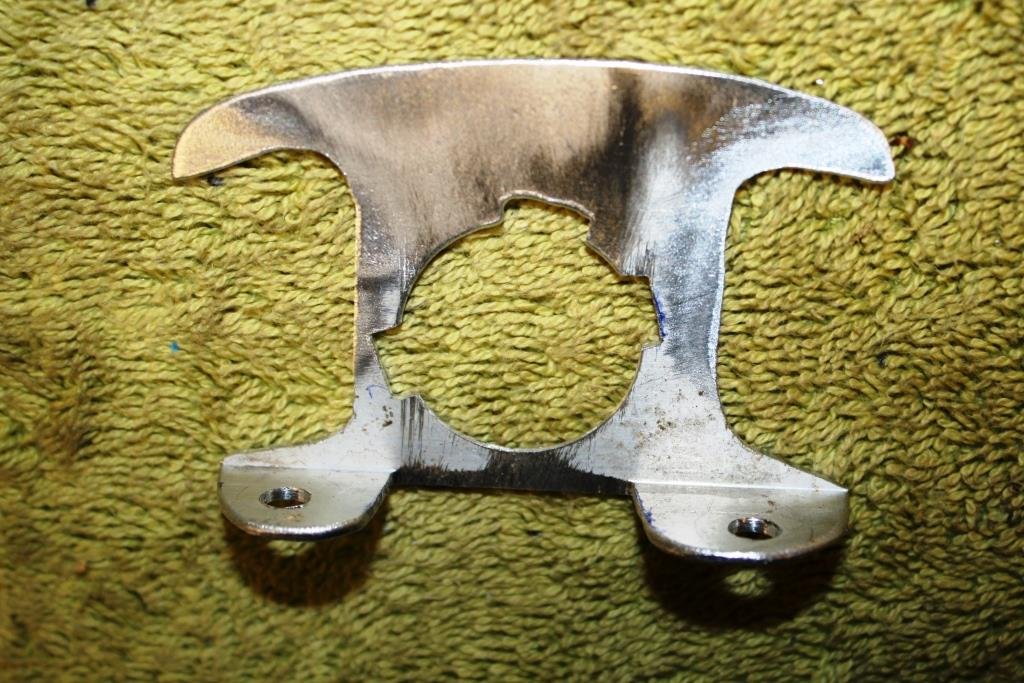
The bulb holders were badly corroded and shorting out.
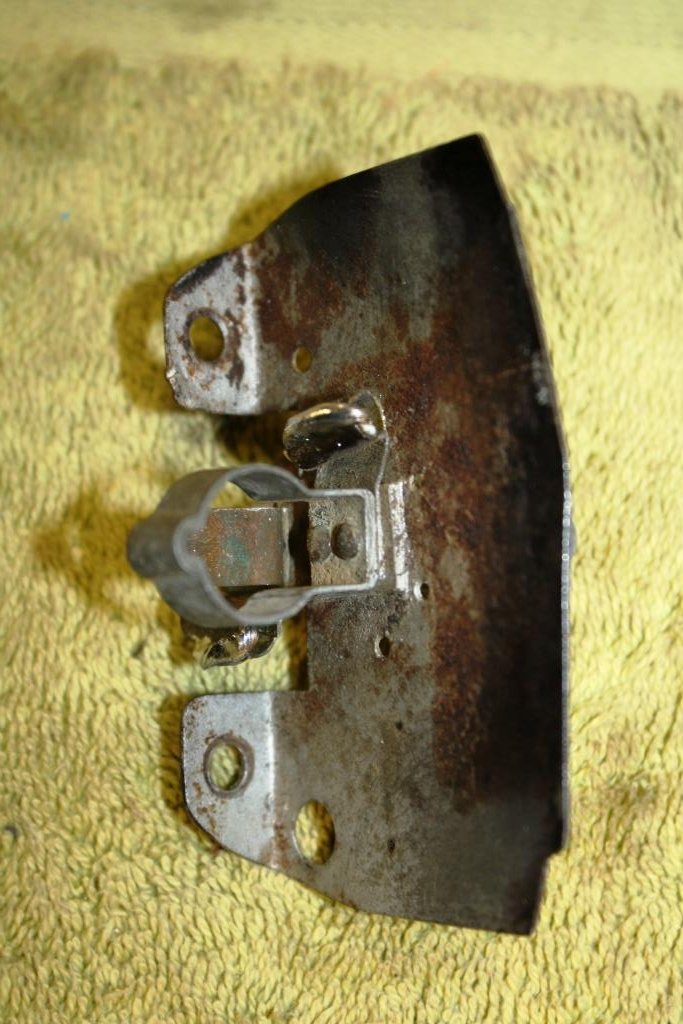
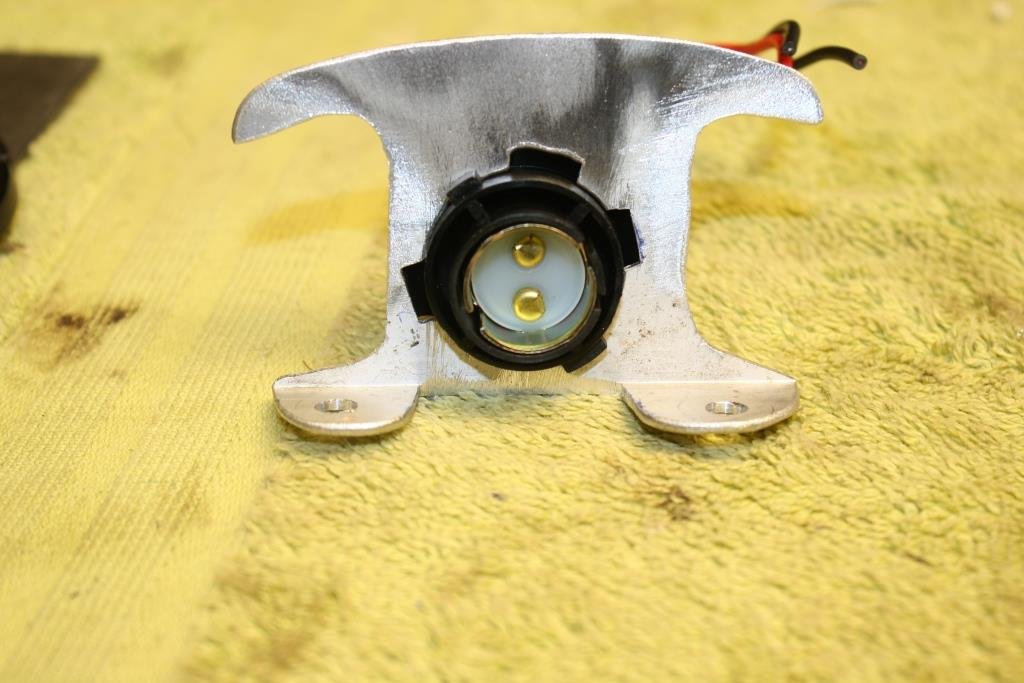
I made the call to upgrade it and made one of these out of a piece of scrap alloy.
It fits a modern bulb holder………
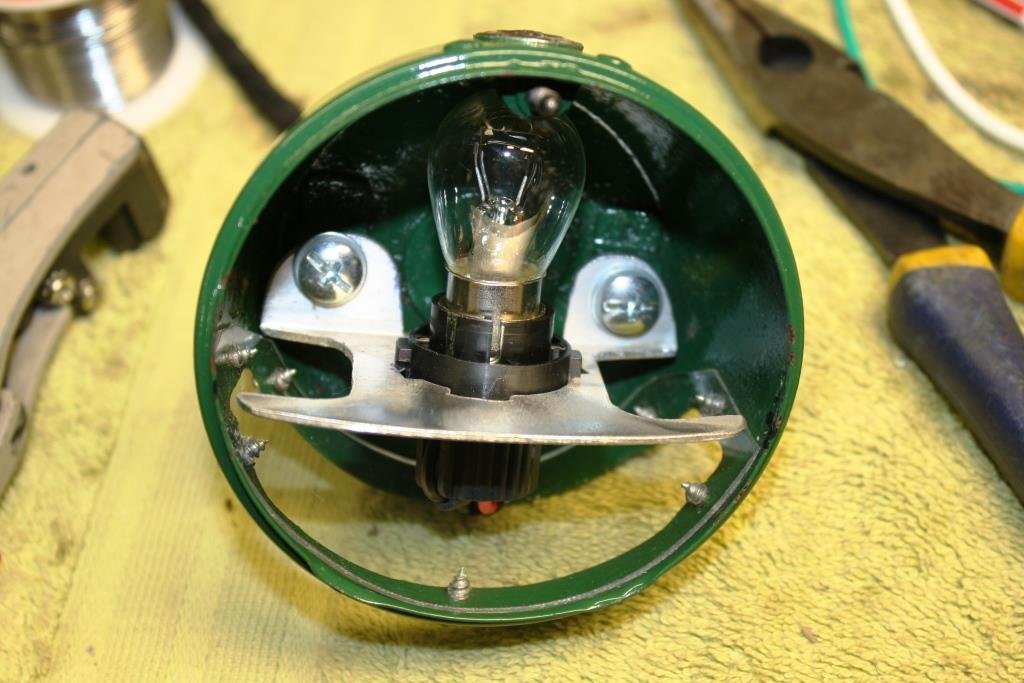
And just fits inside the housing.
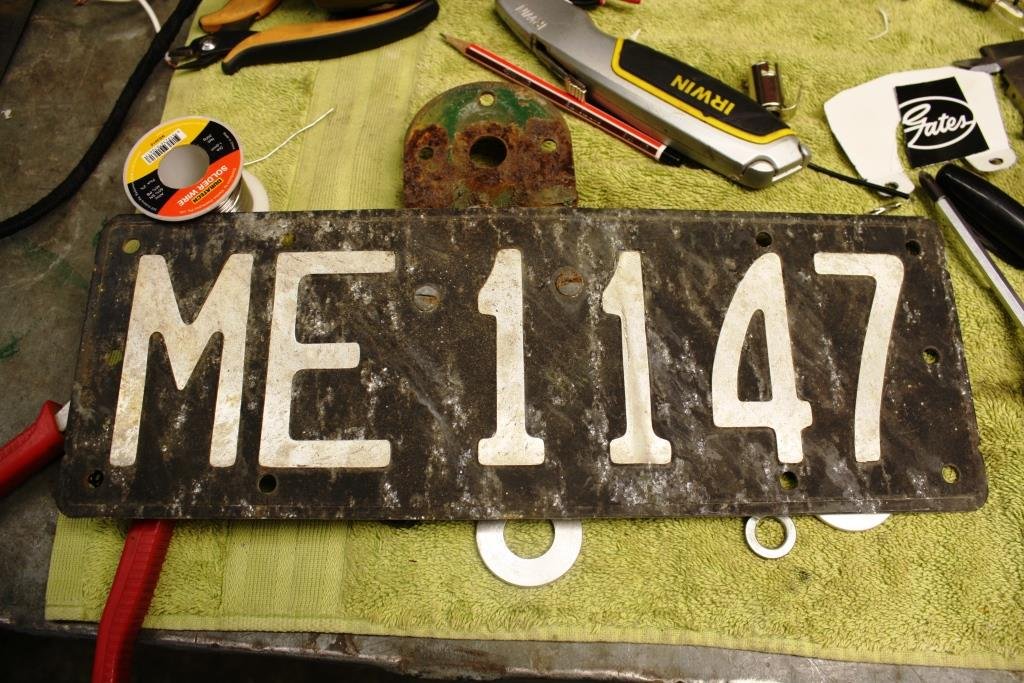
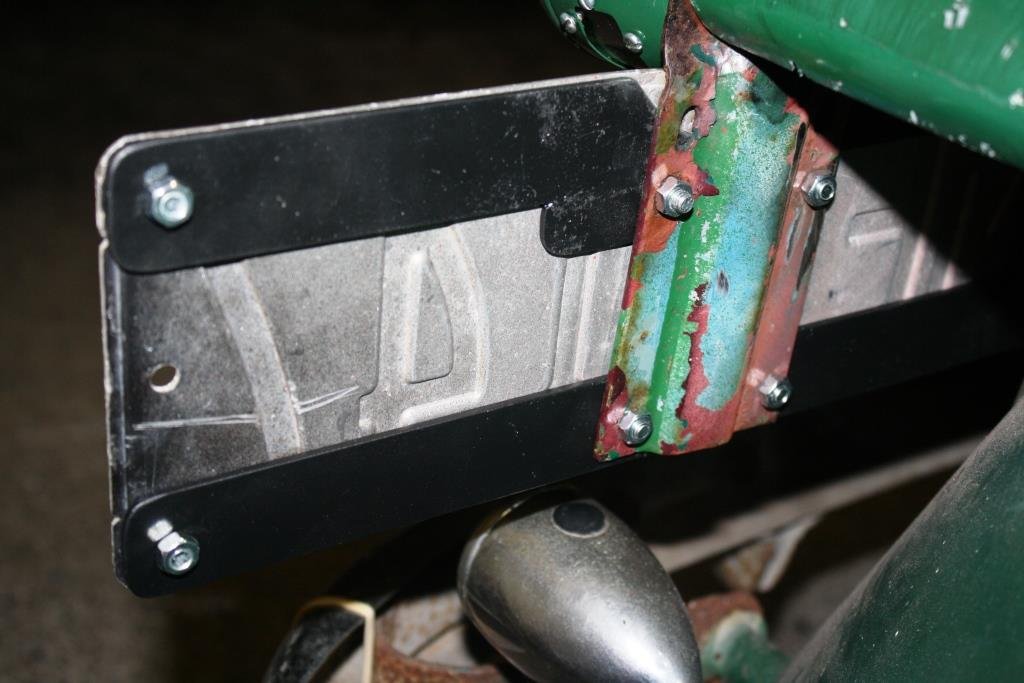
The number plate was a little bashed and battered so I reinforced it a bit.
Still looking suitably bashed & battered but it all works!
-
21
-
- Popular Post
- Popular Post
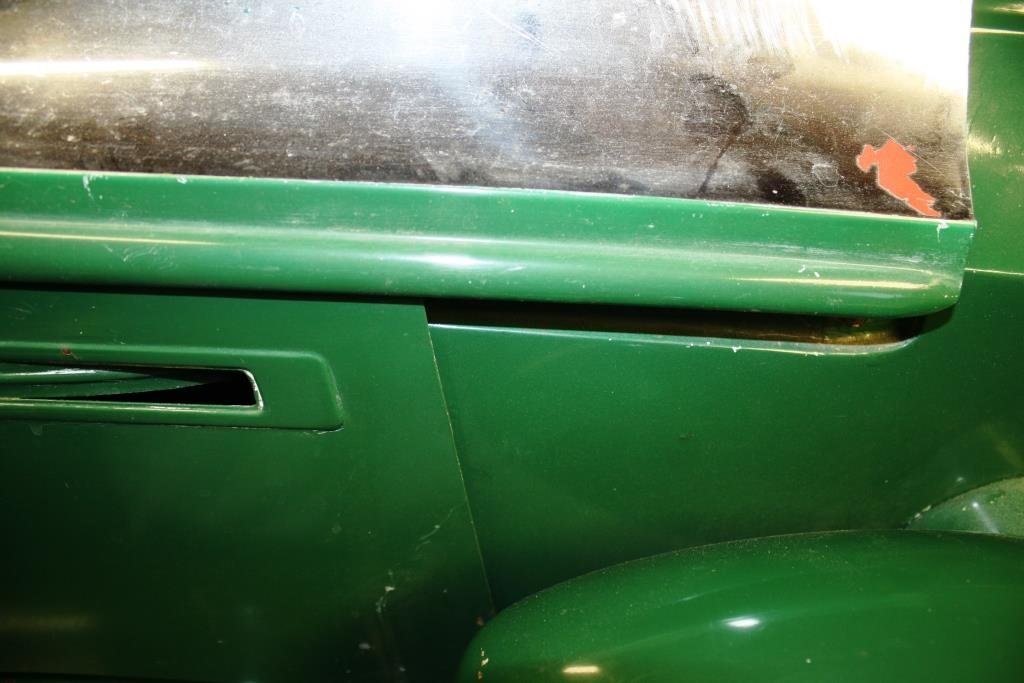
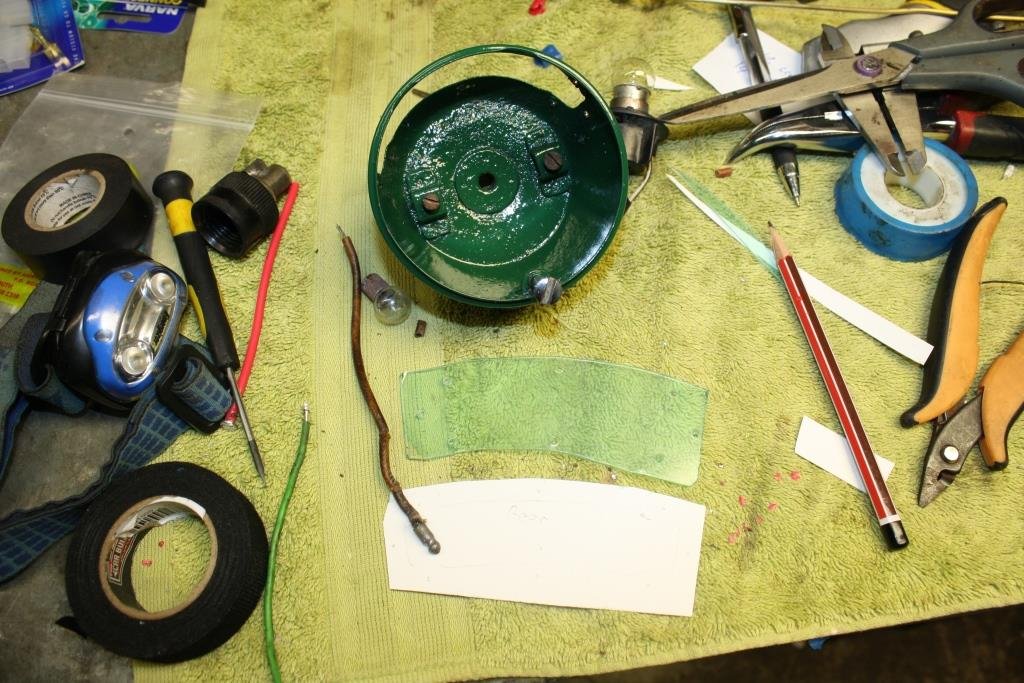
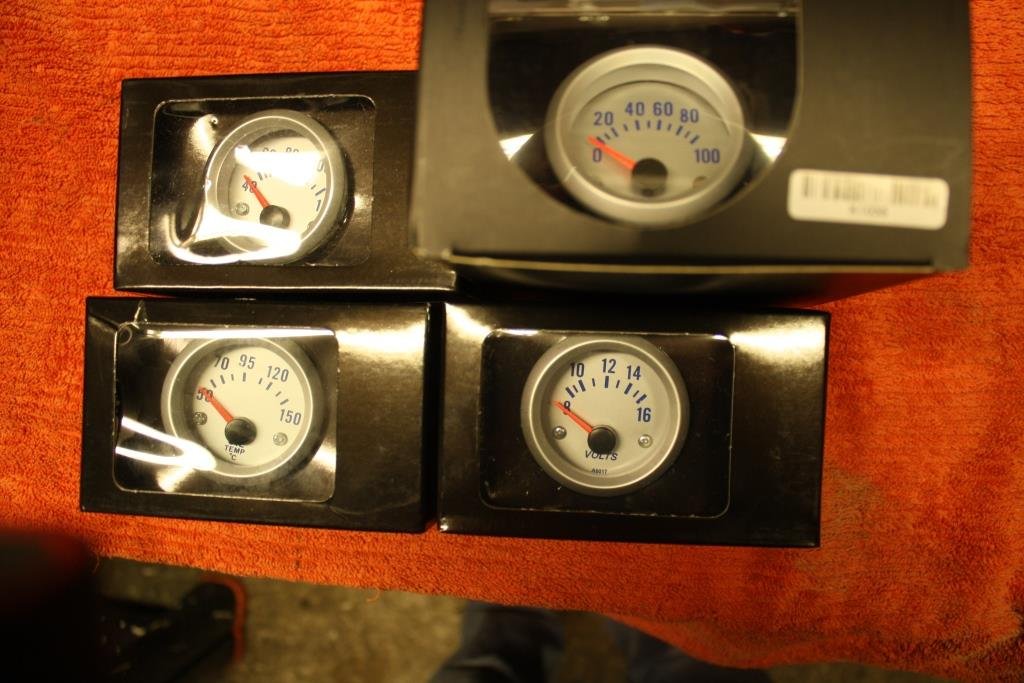
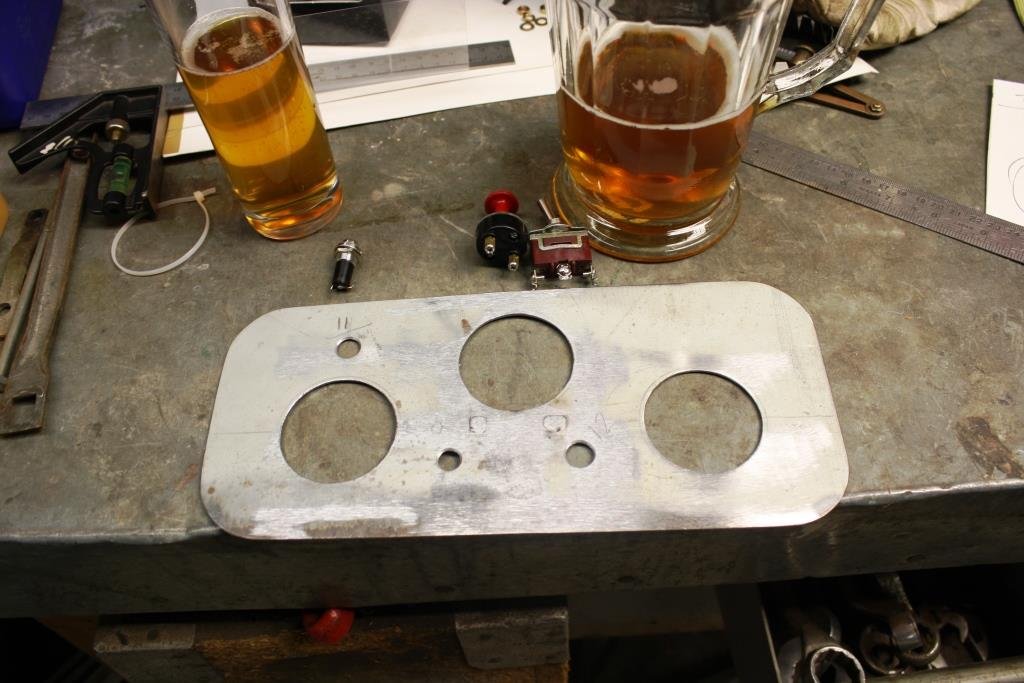
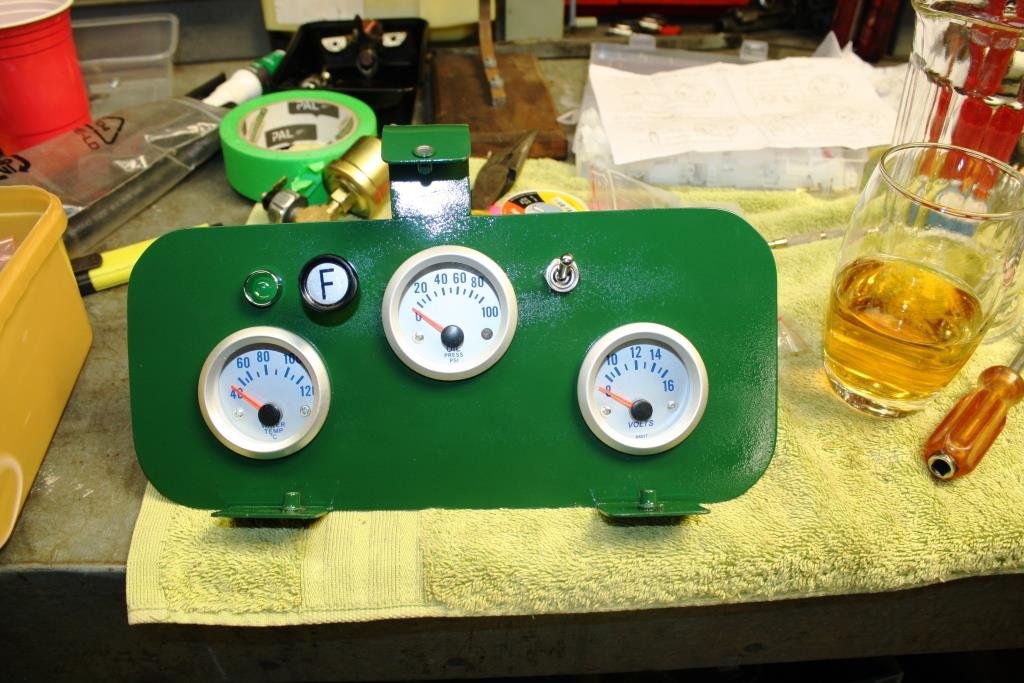
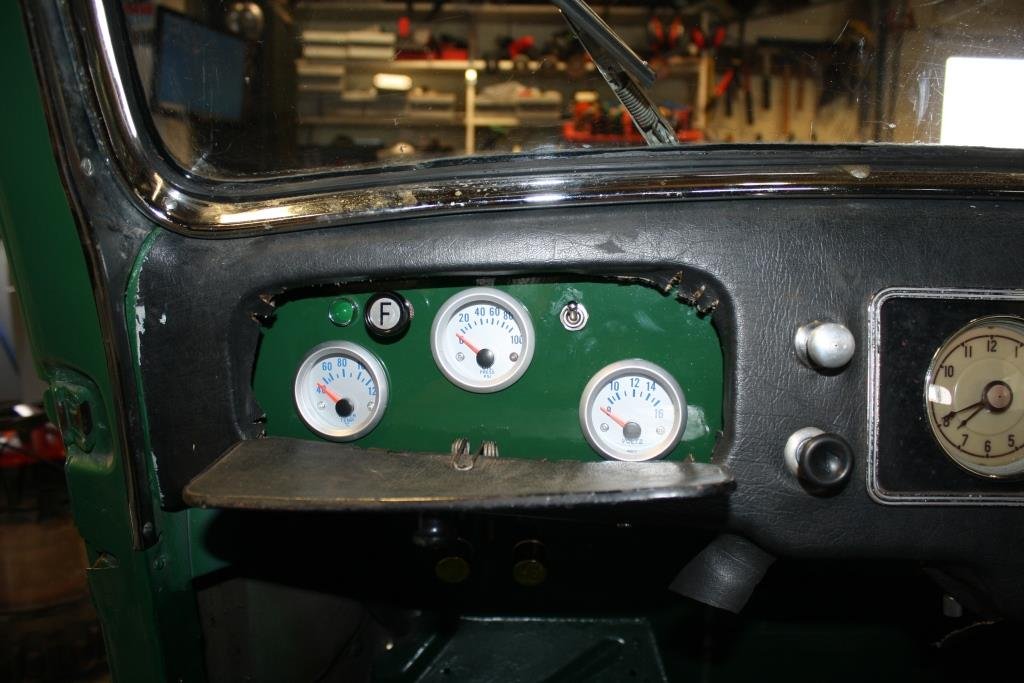
As I mentioned previously I’d bought a set of modern gauges but didn’t want them in full view.
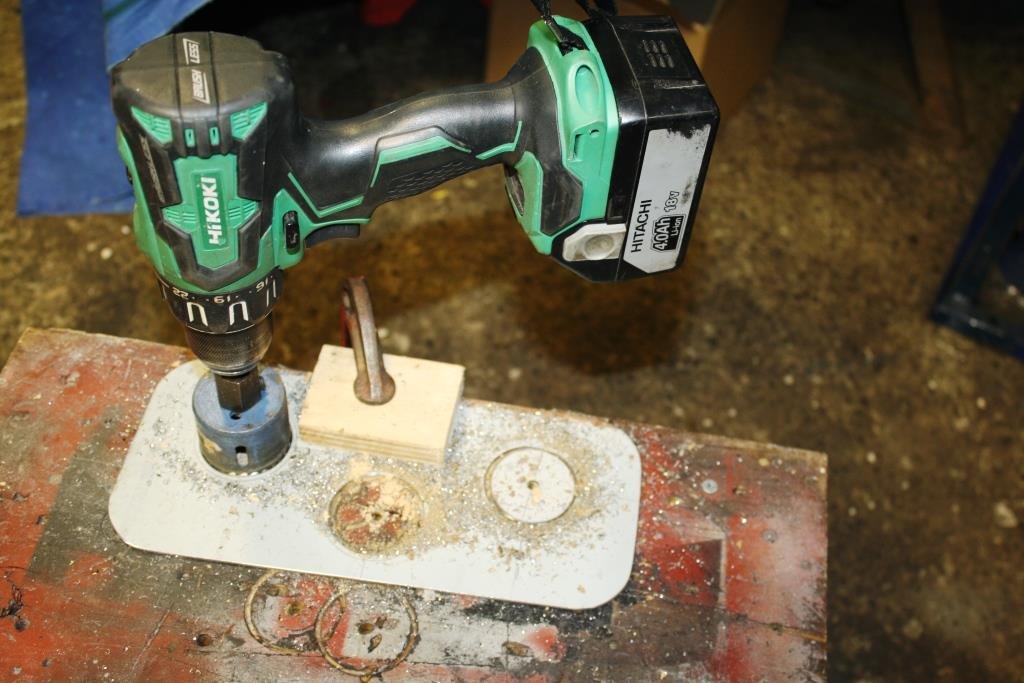
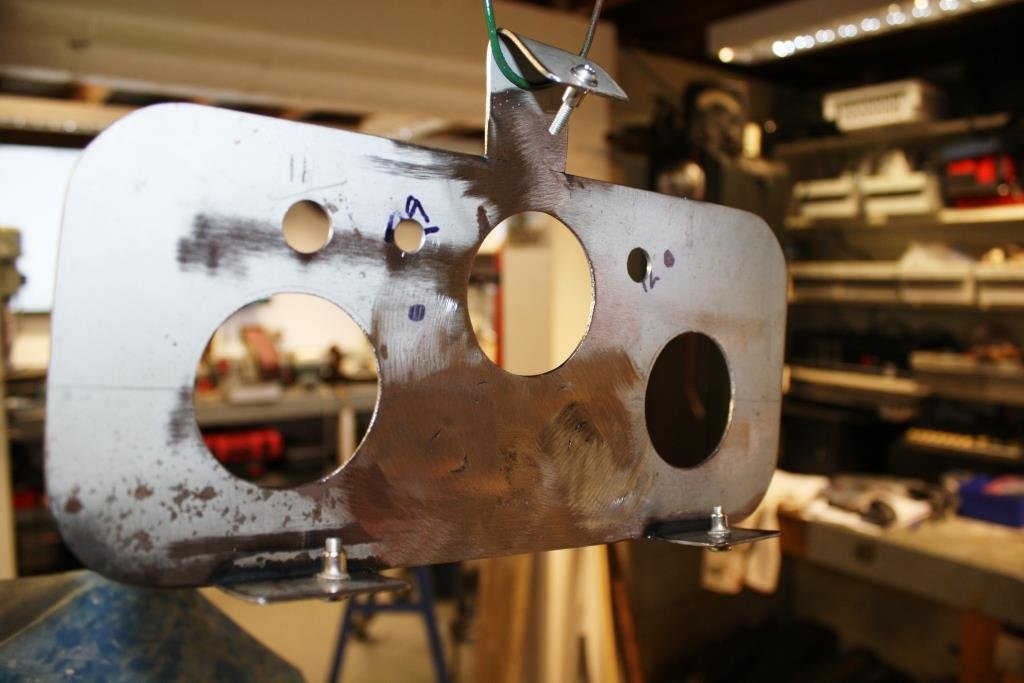
I cut out a piece of zintex that would fit in the port side glove box and drilled some holes in it.
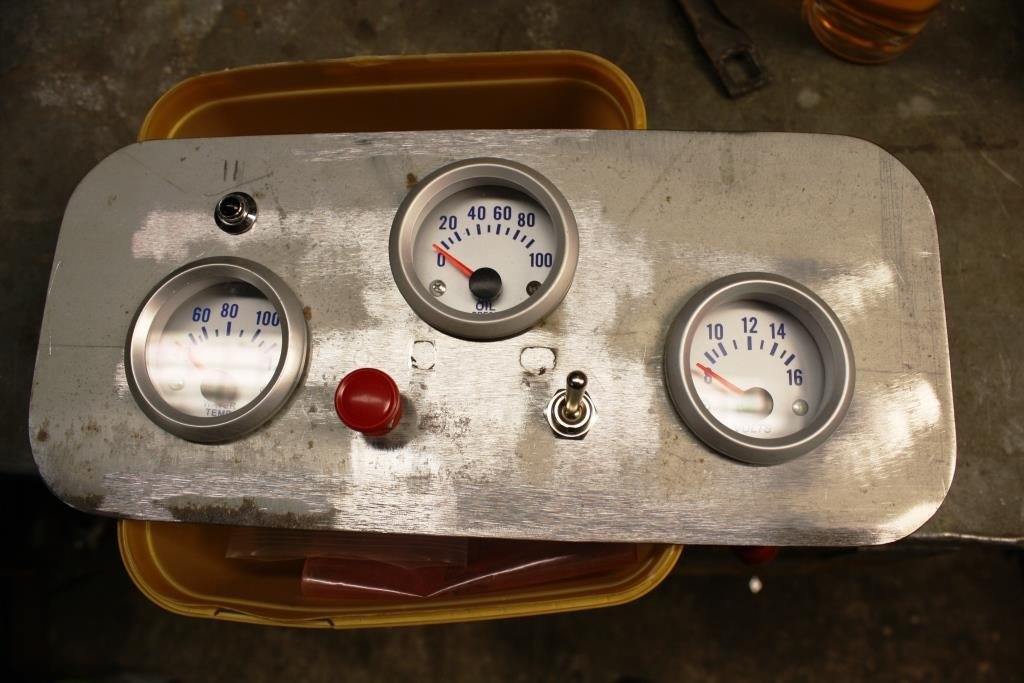
Did a dummy fit with the gauges, an override switch and LED for the cooling fan and a high/low switch for the wipers.
Welded some mounting tabs on and applied some paint.
Fitted the hardware…….
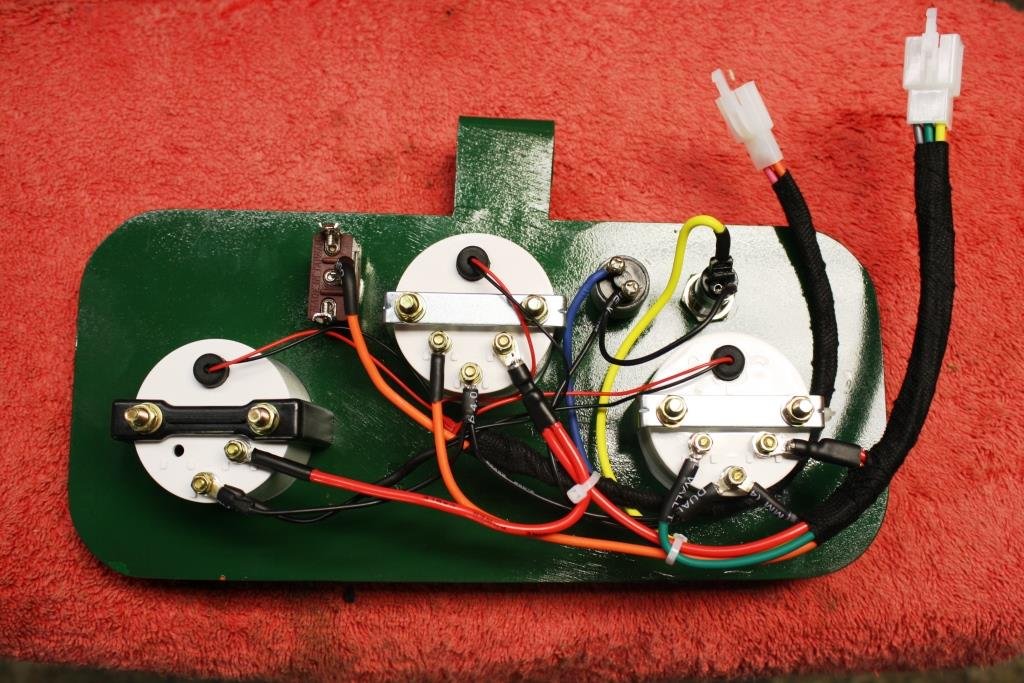
And wired it all up.
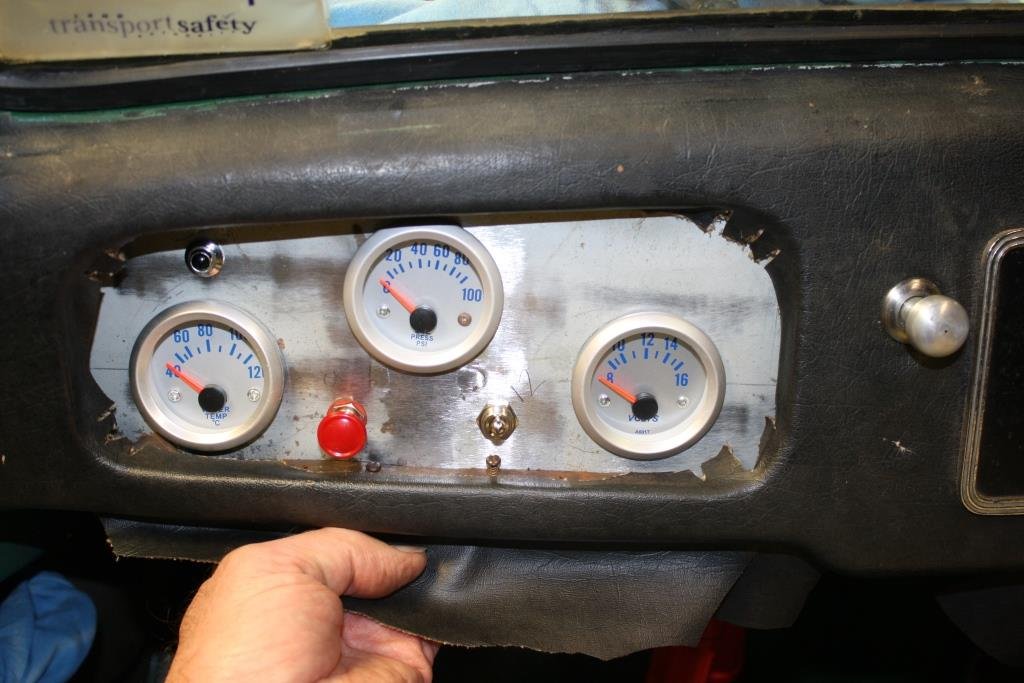
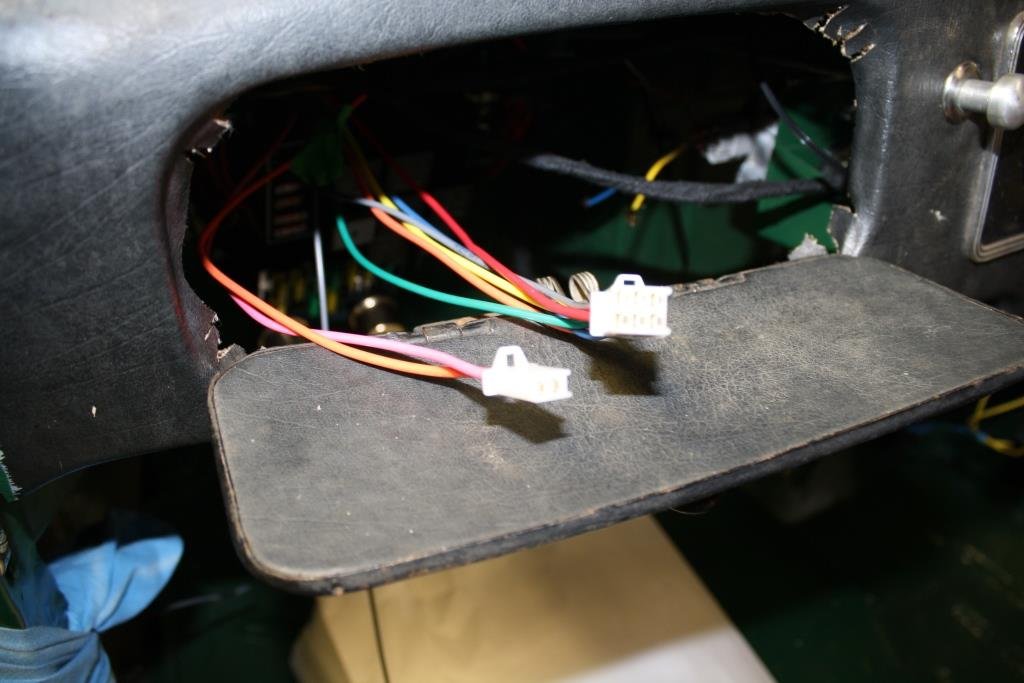
Did a little more wiring in the Port glovebox………..
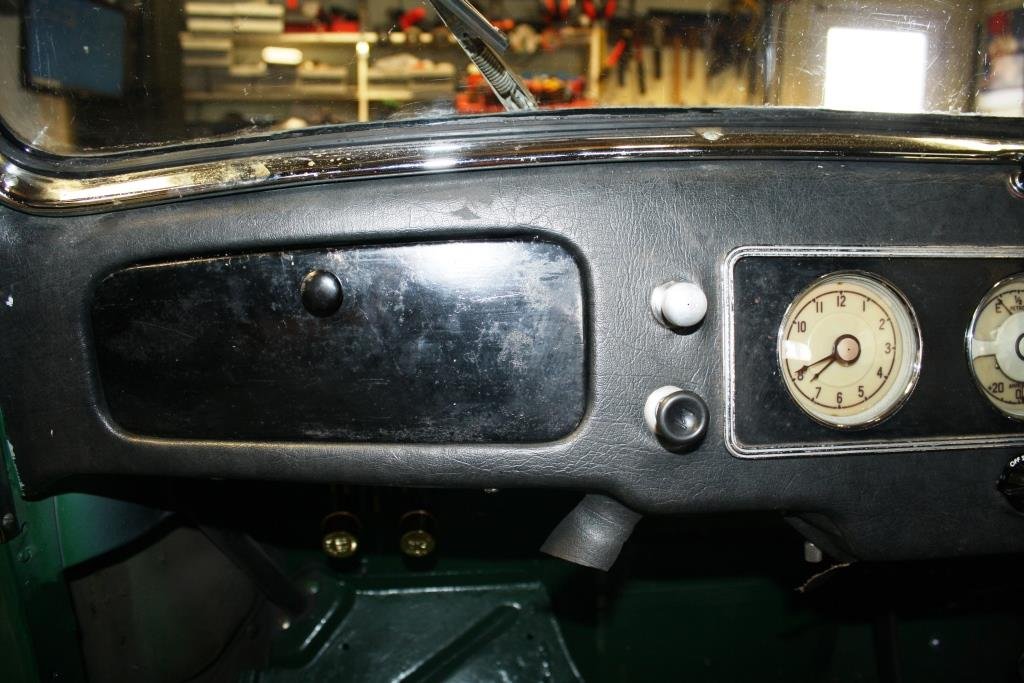
Glovebox closed…….
Glovebox open………
-
16
-
Try Auto Super Shoppe Forrest Hill. Heiko the owner is a German who has been working on merc's all his life (he used to own German Auto's). he did a great job of tuning the K-Jetronic on a mates 380SEC.
-
2
-
-
1 minute ago, Flash said:
Thanks Simon. And it's the wiper for the rear screen ?
Woops! Just did a quick double check on Google - it's actually a front wiper motor.
-
1
-


Advice required: Making complicated brake duct out of aluminium sheet
in Tech Talk
Posted
Some 20 years ago I made a pair of these out of 22 gauge Zintex for our Sierra Cosworth race car , they made a huge difference. With floating rotors The trick is to get the air in through the back near the center.