
- Popular Post
_Matt
-
Posts
453 -
Joined
-
Last visited
-
Days Won
5
Posts posted by _Matt
-
-
- Popular Post
- Popular Post
These updates are getting a bit big, should really post more frequently.
Made a new badge for the front of the heater since the old one wasn't in the greatest condition. Think it came out pretty good, but I reckon it could be better. Will give the low areas a paint and see how it looks.
These are the dies I used to press it.
Here's the finished thing made from 0.7mm stainless.
Got the parts back from chroming. Shoutout to Wanganui electroplating for not charging for them to be done. My parents had some bumpers there to be done as well.
The ashtray is a bit pitted but the raised bits aren't too bad and I was thinking of painting the low stripes anyway, so should look fine.Discovered there was no gap for the seat belts to fit between the seat, so bent up some 10mm steel tube and welded together some ovals for them to pass through.
Made some new ecu mounts. Spent more time drawing up the triangle cutouts to look right than anything else. Couldn't quite get enough length from the wiring to mount them all the way back as I would of liked, but this will do.
Took the rear fenders off the bed and took them, the runningboards, splash aprons and a couple of bonnet latch panels to the sandblasters. They did a good job so looks like it will be staying patina for a bit longer haha.
Primed them all up on the weekend, would be soooo much easier if I was painting the whole truck!
Sprayed some paint on today, pretty happy with how it turned out!
Will be undersealing the fenders and running boards but gave them a quick spray with what I had left over.
Was going to strip apart the front clip to take to the sandblasters, but decided not to as I still needed to finish the cutouts in the inner guards for the engine, as this was way easier to get right as one piece. Will sorta look like this except the bottom profile will have more of a "S" shape to it. Going to be a lot of work but hopefully should be able to blend it all in nicely.
-
 34
34
-
- Popular Post
- Popular Post
Got the re-cored heater radiator back, still fits which is a relief!
Bought a heater motor off Northwestern Ford, it wasn't exactly the same, pretty close just a little bit taller. It needed to sit lower so the fans were in the right place and didn't hit the radiator. So marked out a hole to cut for the motor to sit through.
Made up a mount for it out of stainless and gave it a polish. Possibly one of the shiniest things I've made so far haha.
Also the motor shaft was 8mm instead of ~ 6.2mm, so the fans needed drilling out or the shaft machined down. Decided drilling out the fans was the easiest. They had riveted in bosses so I welded around them first so they didn't fall out and then drilled them out larger. No pics of that though.
Gave the fan unit a beadblast, going to get them sent off to electroplating this week as well as a few other pieces.
Got the seat belt plates in as well. Need to modify the seat frame for the belts to go through now.
Since I lifted the cab up to do the seat belt plates I started on trying to get the engine loom to reach under the seat. There's two ecu plugs, one for the main computer and I assume one for the trans. The trans wiring was quite a bit (maybe 400mm) shorter then the other, which was only just long enough as is get to the seat. So stripped off all the tape and lengthened and reordered some wires and managed to get enough length out of them to reach. Need to cut a hole in the floor now and then I think I'll lengthen the fuse and relay box to fit under the seat as well.
-
19
-
- Popular Post
- Popular Post
Have patched and welded all the cracks and broken off brackets on the running boards and then bolted them back up to the fenders and tray, so that I could mount the tray in the right place. The tray was originally sitting 10mm to one side at the back, I have halved that which is as good as it's going to get without cutting off the bumper brackets which I can't be bothered with doing.
Cut off the airtank mounts and welded some new ones on the bottom and made them a bit higher so the compressors fit underneath it. Need to get some fittings and lines to plumb it all up now.
Pulled the heater fully apart and gave it a beadblast, also sent off the door flap things to the chrome platters, as well as the ashtray that goes in the dash. Took the heater core to get re-cored as well, apparently it was 90% blocked up with crap.
The old handles on the heater flaps where pretty worn so I made some new ones out of stainless.
It was a expensive week this past week, bought some epoxy primer and some blue 2K paint to do the engine bay and interior etc.
Also went and bought some new seatbelts, damn they cost alot!
Since I wan't happy with how I made the rear sway bar links the first time I tried again, this time used some rose joints, which allowed more rotation than the bushes.
It's starting to seem like it's actually getting reasonably close to being finished (still sooooo much to do though!), going to try and get all the panels that need painting underneath sandblasted soon and then hopefully paint most of the stuff during christmas.
-
27
-
 1
1
-
Thankyou very much!!
-
- Popular Post
- Popular Post
Have been slack at doing updates and thought I'd better post one soon so the posts don't get too long.
Made a stainless steel frame that those hinges lift up. It works well, need to figure out some sort of latch for it now.Fixed the rust at the front of the tray. Took awhile trying to decide how to go about it, the best/easiest was was to just cut it out and spot weld a new piece on. The wood will sit above it and so it won't be visible.
Dug out the old heater that came out of this originally. Will restore it, needs a new 12v motor which can be bought new and a heater core which I'll probably need to find and modify something to work.
Made up a stainless steel transition to take the air up to the front windscreen since the window vents have round inlets and the heater outlet is square.
Ages ago I made another fuel tank since I wasn't 100% happy with the other. This time made the top out of 6mm so it could be tapped without needing to weld on doublers.
Also modified a holden fuel pump unit to suit, with a new Walbro pump.
The parts from America also included a new window wiper motor. Thought I'd have to make some mounts for it since the dash brackets are mixed up between LHD and RHD but the RHD dash had both the mounts on the dash, whereas the LHD ones have them one on the bracket and one on the dash. Will make something to support the other end though as it's fairly heavy. The original wiper linkages are correct just need to bend them a bit so they sit a bit nicer.
Another thing I remade is the airbag tray thing. This time I centered the holes and used a proper dimple die and then folded it after to straighten it out. Looks heaps better!
-
41
-
- Popular Post
- Popular Post
The passengers door lock actuator seized at some point, only noticed it last week. When I was pulling the door apart I noticed there was a bit of rust coming through the front inside of the door, and since the door was basically half in bits I thought I may as well fix it now.
Looks like there may of been a previous repair done here.
Now I just need enough courage to fix the rust that will most likely result in a respray haha
-
13
-
- Popular Post
- Popular Post
Swapped the 175/50/13 yokohamas onto the starsharks. It's so slammed now haha. It's also nicer to drive in most ways because it sits at slightly higher revs, apart from high speed cruising which still isn't too bad. Speedo is waaaay out now though!
-
26
-
- Popular Post
- Popular Post
Gave the hinges a bit of a polish and made some nylon washers, it all should work well I hope. Need to find some wood for the bed now.
Decided I should go back and finish mounting the front sway bar. Started by making some new mounts since the ones that came with the rubbers weren't very nice.
Bolted it all down in the right place and stole the sway bar links off the rear since they need to be changed anyway. Needed to cut out the side of that gusset sorta thing on the front end that I made ages ago since the sway bar hit it when the front raises up.
Another thing that my parents picked up in America was an ashtray that goes in the middle dash panel, since neither of the RHD dashes came with one. Could of used the LHD one but wanted to keep that dash complete to hang on the wall or something haha. Had to get a second hand one since they don't sell them separate from the whole dash panel, and they were never made in stainless so it will need to be painted or chromed.
-
30
-
Apart from the poor palmy turnout, it was good!
More same pics
-
8
-
-
- Popular Post
- Popular Post
My parents arrived back from America with all the bits I ordered. It was a little less exciting as I thought it would be, it's basically just a bunch of rubbers and screw/bolt sets haha.
I also got them to pick up a pair of Classic Instrument gauges whilst they were over there. They were so expensive, but definitely way better looking and higher quality than most of the other types out there.
Folded up a bit of sheet for the c-notch cover
And also laser cut out the hinges for the back of the bed.
Then decided how to make them pivot and turned up some bosses and sleeves. Need to get a better tap, a couple bolts and a some nylon washers to finish it off.
-
28
-
1
-
- Popular Post
- Popular Post
Made a start on the bed over the past week, first thing was to remove all the old brackets and supports. They were a bitch to remove since they were spot welded ever 150mm or so and you couldn't see where the spot welds were, eventually got there after doing 1/4 of them each day after work.
Decided to put the c-notch up through the deck because I think they look terrible with a raised deck with hardly any depth.
After that I made up a frame out of 40x40 box section that fits on top of where the original wood would of sat. That means the deck will be about 40mm higher than standard, which is good because it will hide all the rust/corrosion behind where the old brackets were removed. Need to sandblast/paint where those brackets were and everywhere below the box section and fix the rust up the front of the tray.Was thinking of making the whole deck lift up so you can access stuff underneath it, but I couldn't figure an easy way to do the hinges. Then I realised I only really need to access the airbag stuff and the fuel tank so I'll just make the back third lift up.
Made a mock-up in Solidworks to test how the hinging works. The pivot point needs to be above the wooden boards so that they clear the c-notch panel when it lifts up.
Seems like it works well, can lift up to 60 degrees before it hits.-
18
-
My parents spotted this in their travels in the USA, so sweet!
-
7
-
-
- Popular Post
- Popular Post
Have finished the majority of the rust in the doors, just one little hole on the side of one to go.
I have welded on a new folded over flangey bit and painted all in there on the photo below. Has come out pretty good.
The other door was pretty much the same deal.
Another thing I did was make the cowl vent bracket fit this dash. Since it's changed to the RHD dash and I'm still using the LHD vent bracket it ended up mounting in the same place the glove box hinge was, so cut it up and drilled some new holes.
That's the vent fully opened, can also be set to be slightly opened. Needs a different seal as the current one is too stiff and doesn't allow the vent to pull down flush, otherwise it operates pretty well.
Filled up the two holes that were left at the top of the firewall as well, probably should do the same to those other two.Hooked up the accelerator cable. Then did some average panel beating and bogging to fix where the panel warped when I welded the bracket to the back of the firewall. Might need a bit more work one day.
The part that clips in to the firewall for the accelerator cable was a bit loose and needed some sort of spacer, so laser cut out some circlip sort of things.
Cable ties are sweet to hook the cable to the pedal right?! It does work well though, has good travel, feel etc.
Received the seatbelt mounts back from getting passivated.
Today I made up this after work. It is to mount the steering column to the firewall. Making a cone that small out of 2mm stainless without using rollers isn't very fun!
Pretty happy with how it turned out though.Don't think I could make the steering column any shinier if I tried! Haha
Borrowed a wheel off the Mercury to see what whitewalls look like. They're a bit wider and higher profile than what I'll be using, looks so sweet though!
-
34
-
Spotted a cool vw in palmy today
-
4
-
-
- Popular Post
- Popular Post
Not a lot has happened to this thing, still drive it as a daily.
Bought some 13x6.5" and 7" Hayashi Streets from Japan a year ago. They were fully powdercoated black so I stripped that off and gave them a polish. Only recently purchased some tires and fitted them.
They're too wide for the guards without pulling them out, which I don't want to do. So I'm selling them if anyone is interested.
Also after another pair of starsharks in 13x6.5" if anyone knows of any.-
27
-
I might attend.
Should probably change the thread title to something a bit more informative/definite now
-
1
-
-
- Popular Post
- Popular Post
Redone the gusset on the front end because I wasn't happy with how it looked, should be much stronger now.
Made a start on the handbrake linkage thing. Used some $2.50 block bearings from aliexpress, as I was not keen on paying over $100 for two in NZ that weren't even the right size (needed 12mm ID ones and apparently 12mm is a very uncommon bearing size) so would of had to sleeve 20mm ones to fit. The china ones seem decent enough for what they're being used for.
My dad had an aluminium air bag tank that he was planning on using for another car, but it fits this perfectly apart from the mounts being on the back instead of the bottom. So might buy it off him, cut off the mounts and re-weld them in the correct place.
Made up some more plates for seat belt mounts, this time for the floor.
The retractor bolts onto the back and then the lap belt bolts on to the part sticking out. Also has a doubler plate underneath the floor with some captive nuts.
Stripped everything off the doors to see if they needed any repairs.
Yes they did. This is the worst of the two. Was hidden under a rubber seal and the strip that holds it in place.
Left side door isn't as bad but still needs some patches as there was a few rust holes.
Found some on the outside skin which is a bit annoying, but the patch shouldn't be too visible anyway.
My parents are heading off to America soon so I made up a list of all the parts I need. Everything is so cheap but it adds up quickly. Hopefully it will all fit in their suitcases.
-
25
-
- Popular Post
- Popular Post
Exhaust is finally all finished fab wise. Got around to doing the rear most mounts.
It's pretty rigid now and hopefully shouldn't hit anywhere as there's some quite close clearances.Pulled the cab off again to do some stuff. Started by scraping off the remainder of underseal, that took quite a few hours.
Then finally got around to finishing the trans tunnel.
Made the holes in the corners bigger so some patches could be welded in and then just gave all the welds a sand to tidy them up.
No idea why the firewall rusts so quickly where the etch primer has been sanded off. Nothing else seems to rust much. Crappy primer maybe? Will sand it all back to metal one day anyway and use some better stuff.Fixed the rust holes in the rear cab corners. It's in pretty good condition compared to most!
Seemed to be missing some photos of those rust repairs but it's all done now.
Whilst the cab was off it was a good opportunity to pull off the shackles that mount the back of the cab to the chassis and give them a tidy up with new bushes.
Pretty surprised at how well they've survived, the shafts that the rubber bushes go over were still shiny steel!Gave everything a sandblast and then sanded off all the edges so they're a bit nicer. They made some cool looking sparks!
They're all painted now, photos to come soon.-
28
-
- Popular Post
My one the day I bought it
-
13
-
- Popular Post
My Granddad's old Chevy Truck, think it was taken around 1948.
-
10
-
- Popular Post
- Popular Post
Nothing too exciting has happened, just lots of little things, hence why there hasn't been many updates, but I thought I'd better do one before I get too many more photos.
Rust killed and painted the back of the dash today. I'm tempted to weld it in to the cab but I know that I will regret it when I need to fit the wiper motor, heater etc behind it.
Pressed the holes in on the airbag tray, looks heaps better! Needed to weld some box section behind it as it warped quite abit.
I'm thinking I might paint it with some black crinkle paint.Had the certifier come and have a look at how to mount the seat belts, since the upper back of the cab is a thin double skin.
Came to the conclusion that we needed to slide in and weld some plates in behind the skin and door frame. Hard to see in the photos but the inner skin has quite a weird shape to it; curves out and then back in and around to the rear window. It also slants down at an angle, so that's where these brackets come in. Took awhile to figure out how to make them as I started off trying to shape them to fit the curved profile but that was a fail, then realised that they could just be flat plate at the two angles.Drilled some holes, hoped they were in the right place. The plates fit through a gap up by the headlining. I could only just fit my hand in there, caused a lot of pain trying to get them fitting right.
They were perfectly in the right place so plug welded them in. Also another two plugs above and below the nut.
Scored a handbrake for a few dollars from the vintage car club
Cleaned it up and cut some holes in the floor
Because the dash has been swapped from LHD to RHD there wasn't any holes in the firewall for the support brackets. Instead of drilling holes and having some horrible looking threads and nuts sticking through, I made up a mount and shorted the bracket to suit. Need to do the same on the other side now.
Welded in the cowl vent pivot/gutter thing as well. Gave it all some decent coats of paint so hopefully it doesn't rust again.
Put the rubber seal in but it's too thick and hard so the vent sits a little high, will have to sort a new seal one day.
-
34
-
- Popular Post
- Popular Post
The dash now has all the rust fixed, really happy with how it turned out. Took maybe close to 10 hours to just weld it all up though. Should only need bog in a few places, the rest a few coats of primer will fill nicely.
-
31
-
- Popular Post
- Popular Post
Had to make another steering column tube since the first one was too long and the spline didn't stick out from the end. Also made the slot for the shifter longer so it has more gear selection.
Laser cut a mount out of 12mm Ali for the steering column, needs a little bit ground out of the main mounting hole as it's a bit small and the triangles could also be polished more.
Have also polished the shifter/indicator part of the column, looks heaps better than the silver paint. The steering columns going to be the flashest part of the whole truck haha.Done a bit more to the dash, has come out really well, very happy with it.
Wasn't sure how well this would turn out, but so far it's turned out mint.
Can't really see from the photos but I also fixed the left gauge surround, as it was terribly deformed, the front face was flared out a bit/not flat and out of round so the gauges didn't fit. It's pretty good now, just has a small rust hole that needs fixing.
Not looking forward to welding it as there's so much!-
23
-
- Popular Post
- Popular Post
Haven't done much more to the dash apart from fit it into the cab, as I am undecided how to approach the rusty holes under the gauges yet, a bit too many complex shapes!
My Dad had a 55 Chevy steering column laying around, so we started to mock it up. The shaft out of that column had been welded in multiple places so we found another column that had a mint shaft and it was also longer so didn't need an extra universal joint added.
The outer tube of the column was pretty average, had lots of extra holes, cutouts and had been shortened, so drew a new one up in Solidworks and got it put through the Tube laser at work. It's now made from 2 inch stainless tube.
-
39


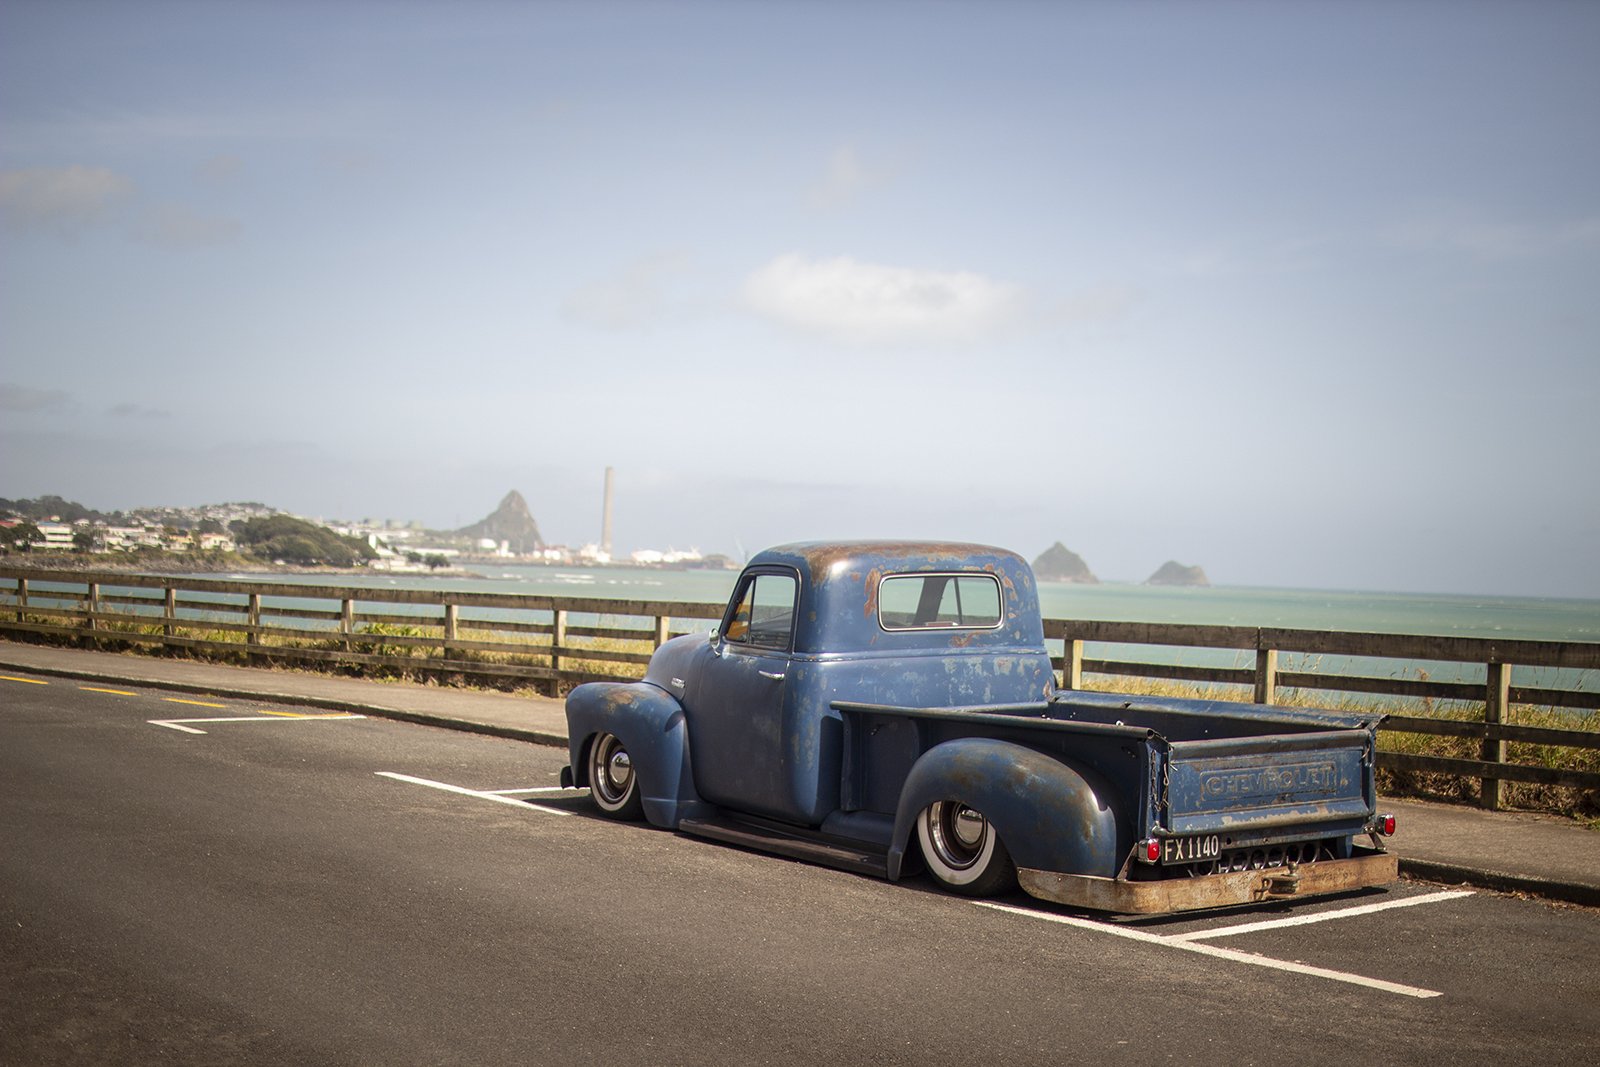
Matt's 1951 Chevy Pickup
in Projects and Build Ups
Posted
Got all the bits back from electroplating, came out pretty well!
Finished off the handbrake as well. Found the original 2-piece hand brake linkage and one of the pieces was the perfect length to use in this setup. Only just clears the driveshaft, exhaust and crossmembers.
Sprayed some 2k black on the underside of the runningboards. Have got some underseal that I'll spray on them, as well as under the guards and cab.
Masked up and painted the bed last weekend, took longer to mask up than to actually paint it. No pics of it painted for some reason though.
Whilst I had paint in the gun I painted the heater. Has come out pretty good! Have yet to get a paint run on anything!
Have painted the embossed bits on the badge too, looks a lot better I think.
Still need to make up another badge for the big front door where the slots are.