

PHLEX
-
Posts
244 -
Joined
-
Last visited
Posts posted by PHLEX
-
-
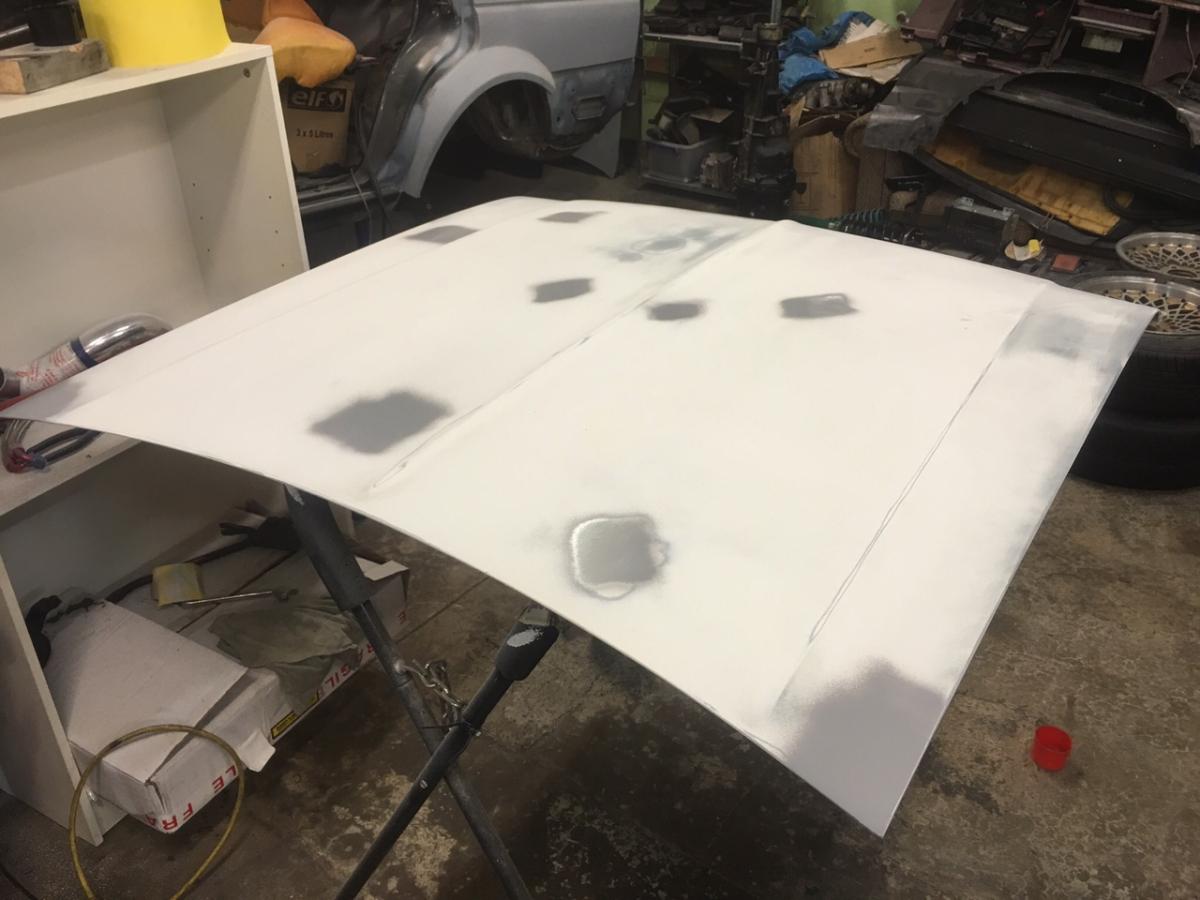
Very long time between updates as racing and snowboarding trips got in the way of progress. I managed to get a couple of weeks off work in August and spent one of the weeks doing bodywork and now have a car that's all one colour. We spent a good few days and nights blocking the whole car back and filling any imperfections and spot priming where needed.
Due to the previous rust repairs in the front valance being a bit rough we opted to use a paintable underseal at the line below the front and rear bumpers and also along the sills, this will provide some good protection against stone chips and looks quite cool too.
Painting went fairly well with the only issue being that the paint gun started playing up half way through so I left my friend Kyle to do what he could and I whipped down to super cheap to buy a better one, (I might add it had been on special until the day before so cost me an extra $30) Got a few small runs but nothing too bad. We painted the car with the doors bonnet and boot off and also no glass to ensure we got full even coverage. I am now working through the doors one at a time as they are taking a lot of prep due to this being about the 4th paint job since it left the factory!
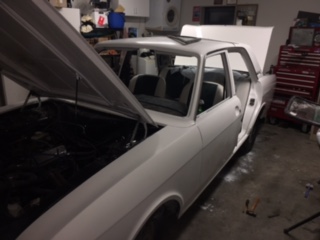
After a full month sitting back in my garage at home to give the paint a fighting chance to harden properly I have wet sanded the runs and any other imperfection I could find and am now quite happy with our efforts. I plan to hit the shell with the buffer this week to get the shine back and will continue with the doors, scuttle panel and side vents.
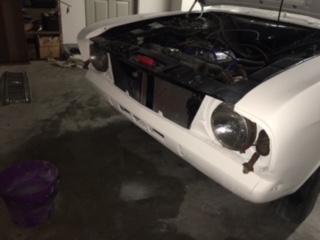
As part of the reassembly process I have sourced brand new windscreen and door seals. I'm yet to buy the seals for the door windows but they are next on the list once the doors are all re fitted. Couldn't help myself last night so re assembled the front end using the tidiest of the 4 pairs of headlight surrounds and about 12 indicators I have hoarded since I started the project. Plan is to sell off some of the spares once I have finished the car
Plan to have the car warranted before Christmas is fairly realistic at the moment if the motivation hangs around.

-
 2
2
-
-
Certainly will Al. I have 2 scoots ready to register and 2 that mates are finishing off. Going to make an attempt to get my 1990something Honda Dio registered on Monday, No idea what the original plate was and I built it out of 3 parts scooters and is multiple colours and missing seat and fuel flap lock barrels as I didn't have the key that matched those panels so will be the ultimate test!
-
Wow 6 weeks between updates!
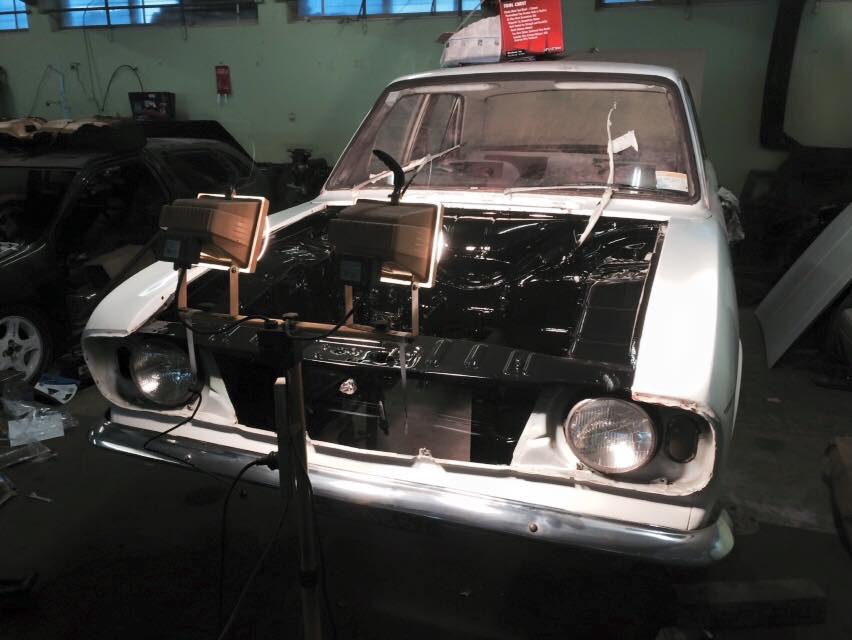
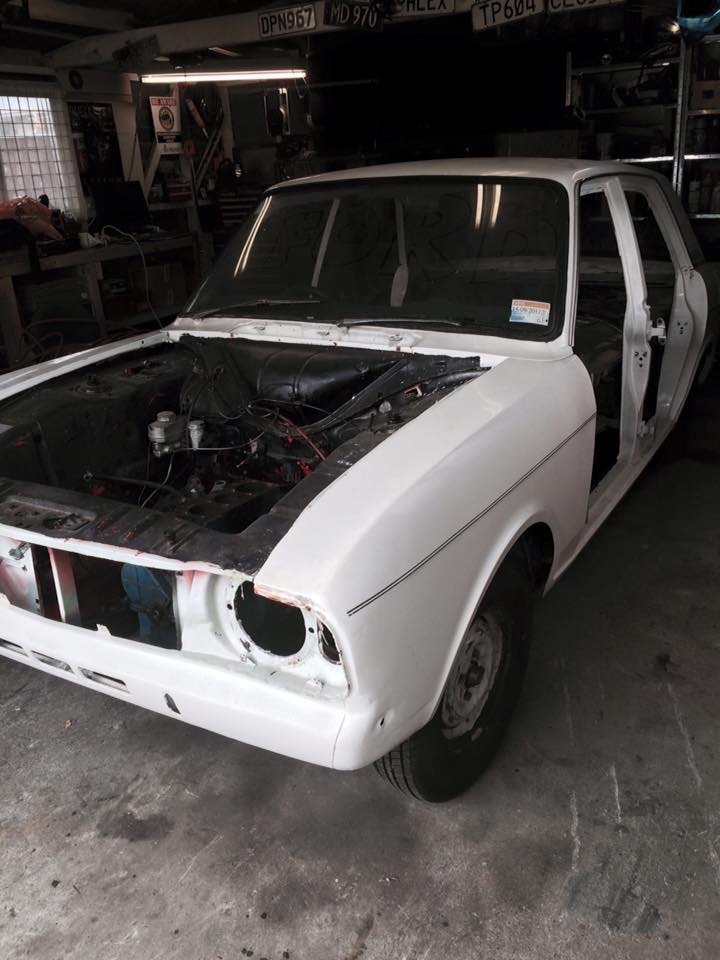
Bonnet is all painted and looks bloody good considering I haven't had much experience in painting 2K. Chose not to remove the front trim as it has been attached with some pretty hefty rivets and I can see an old repair to the front edge I didn't want to agitate.
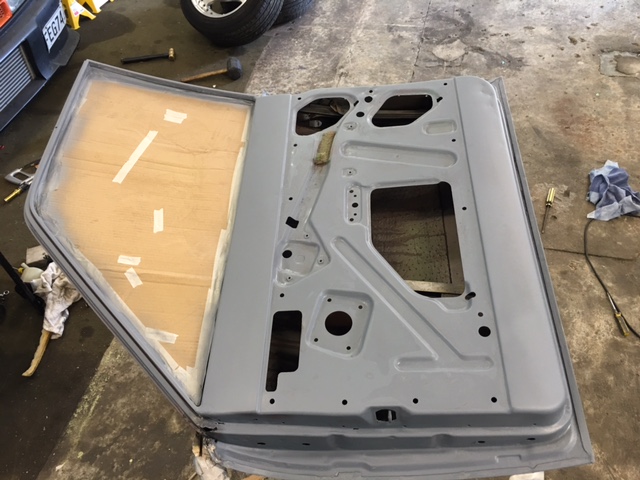
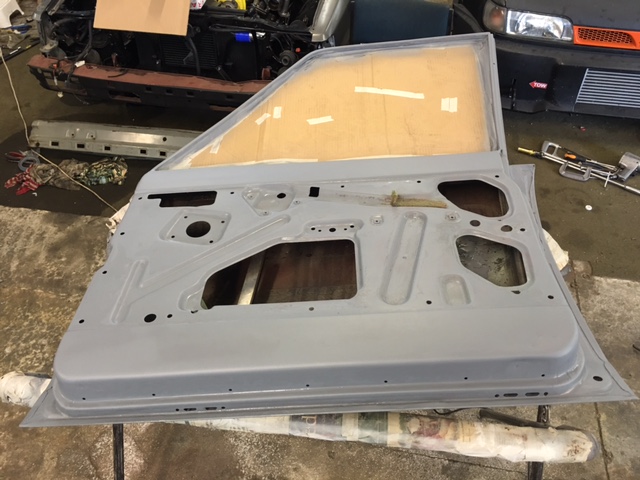
Made a start on the brand new old stock drivers door I scored. Spent about 3 hours sanding the stock primer off the door as it was powdery and brown so to avoid it coming through the top coat I went back to bare steel and etched the whole door, Even being brand new it required a small amount of filler in a few places from being knocked around.
Finally I tackled a job I've been holding off for ages and I swapped the internals of the carburettor into a new housing as the carb I was using had a hairline crack in it which was allowing fuel to leak. While I was in there I gave everything a thorough clean and its been sitting on the bench waiting to go back into the car for about 3 weeks.
I have a couple of weeks off in mid august so my plan is to get the unpainted parts of the car finished, replace front tyres and rear shocks and get in for a WOF check while I am on leave.
No photos this time as my work computer is blocking me from uploading them. Ill upload from home later!
-
2
-
-
Thanks guys! I have one ready to go now so will pop into VTNZ and try my luck. Last time I went to VTNZ upper hutt eh lady was very rude and told me I had to go to lower hutt so I went to VINZ who are usually easier to deal with and they stung me for a full inspection and it cost about $300 all up. This scoot is a 1987 where as the last one I did was a 2011 so hoping its easier than last time!
-
Hey team, thought it better to revive an old thread than start another.
Earlier this year I registered a 2011 Piaggio Zip and had to pay for an inspection and then registration and it was around $300 all up which was a shock as I had heard from several sources it should be $130 all up.
I have sold that as it was boring and now have a 1987 Yamaha Razz I am finishing off and would like to re register it. It has lights indicators and will have mirrors and most definitely doesn't exceed 50kph. Has anybody been through this before on an older moped? I really don't want to be fleeced $300 again, specially talking to a few people and hearing some places just hand you a plate when they sight the moped is in fact a moped.
-
Good read here and given me a bit of insight cheers guys
I have tried most of the Repco / Supercheap rust converters on various cars over the years and have settled with the septone rust converter from supercheap but we pour it into an old squirty bottle and spray it on and it seems to work very well for killing light surface rust before sanding and etching and we always use it to prepare holes before patching to clean up any remaining rust that might be hiding from us. So far we haven't had anything come back through but im definitely in agreement that it is best to remove rust and replace the steel with brand new steel and then cavity wax the inside to protect it from coming back.
-
Passenger door progress so far. Surprisingly good condition.
For those wondering about why its etched in sections, I was helping a mate work on his car so etched as far as I had cleaned up to prevent rust overnight and then cleaned up the upper part only to find we were out of primer!
-
Time for a well overdue update!
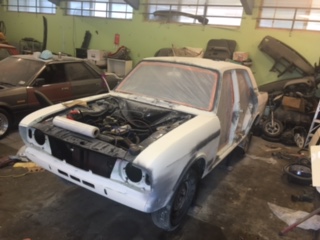
Cortina unfortunatley had to go onto the back burner for a couple of months while the focus was shifted onto my skyline race car which is now sporting a roll cage and some new seats and harnesses. Now that the Cortina is back in the workshop i'm hoping for some good progress
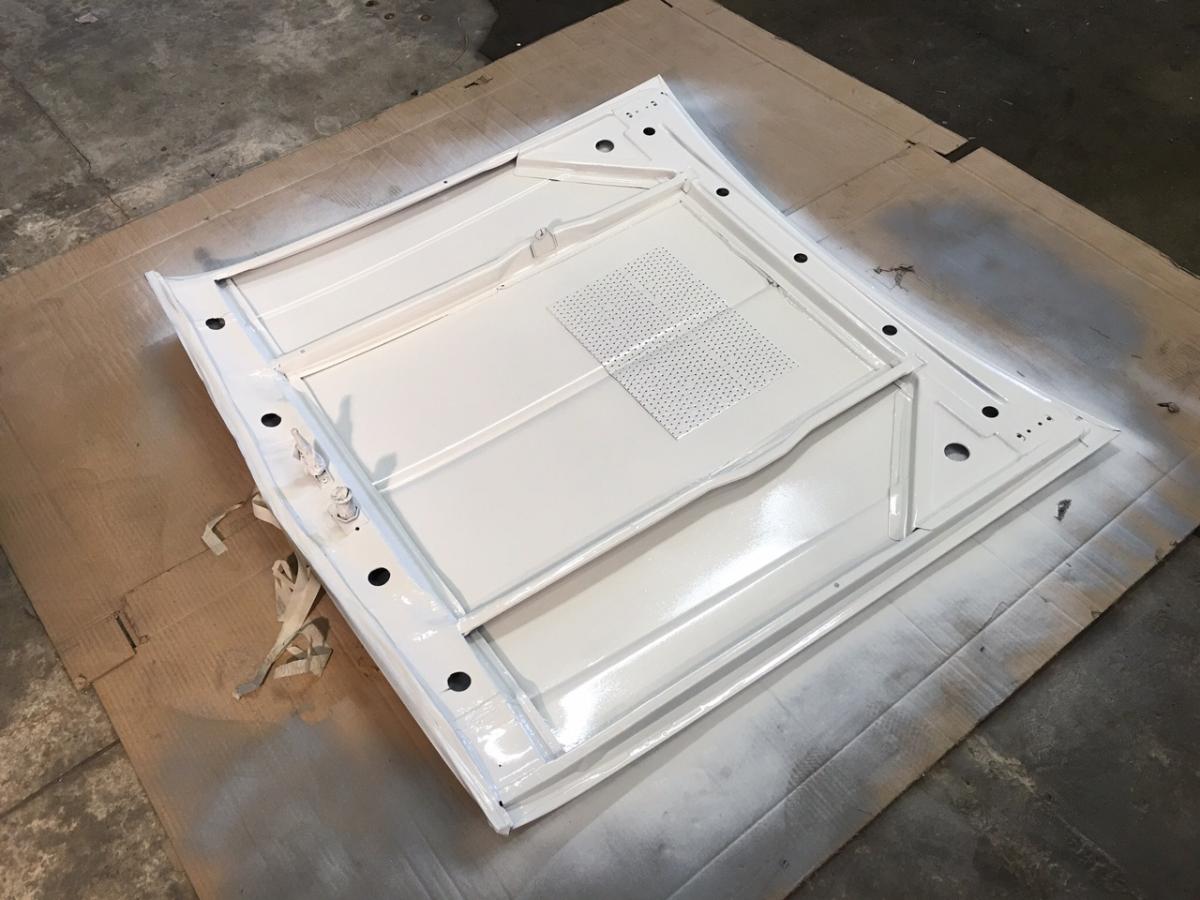
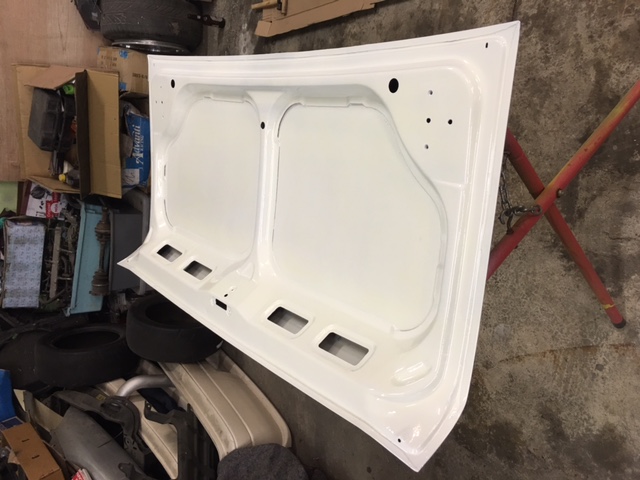
Got the top of the boot lid and underside of the bonnet cleaned up and painted. The boot had been taken back to bare metal and primed by the previous owner but it was no where near smooth or flat so took alot of prep work but i'm really happy with the finish and it was a good learning experience for me as its the first time I had attempted to spray 2K
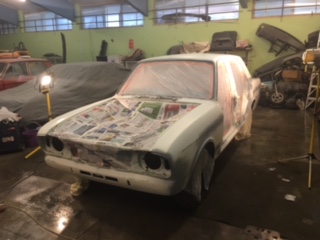
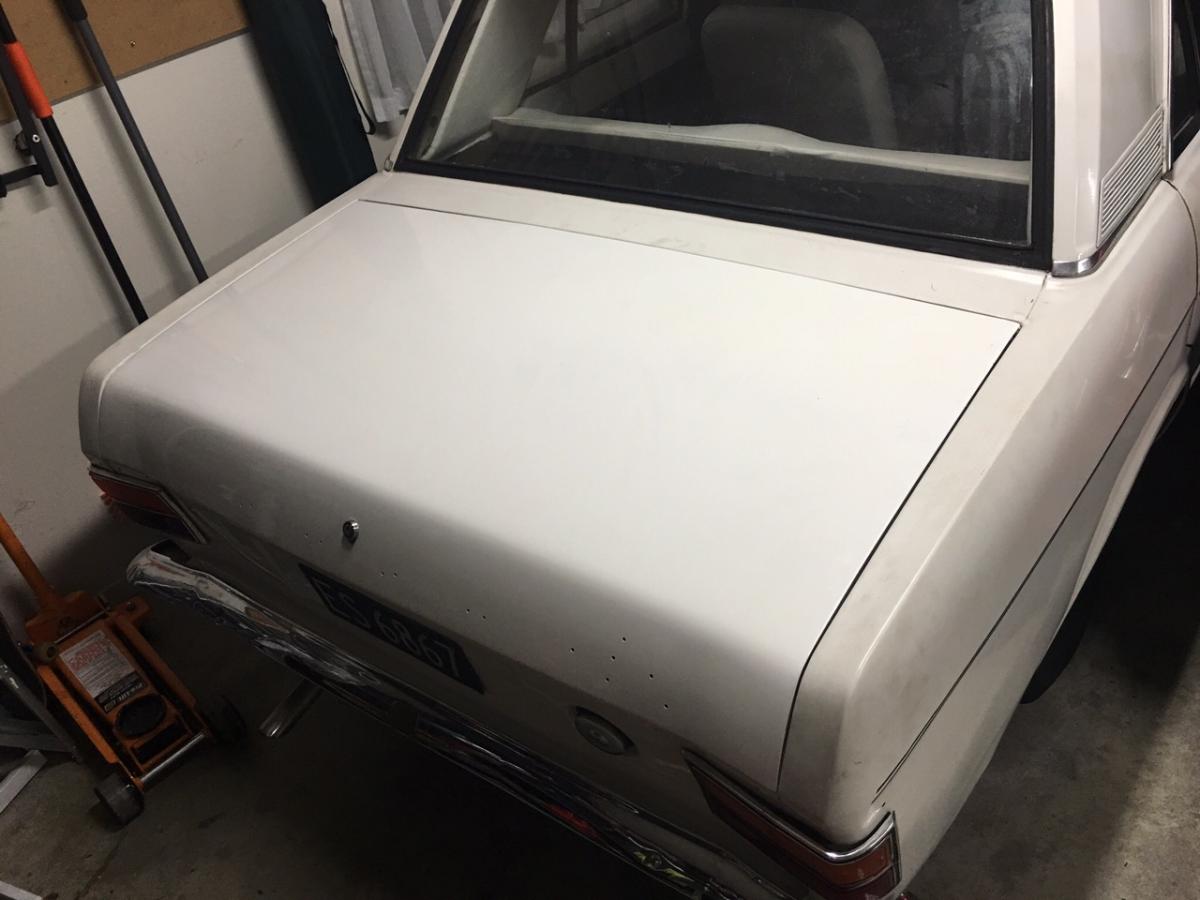
Major contrast between current white and the colour I have chosen for the respray
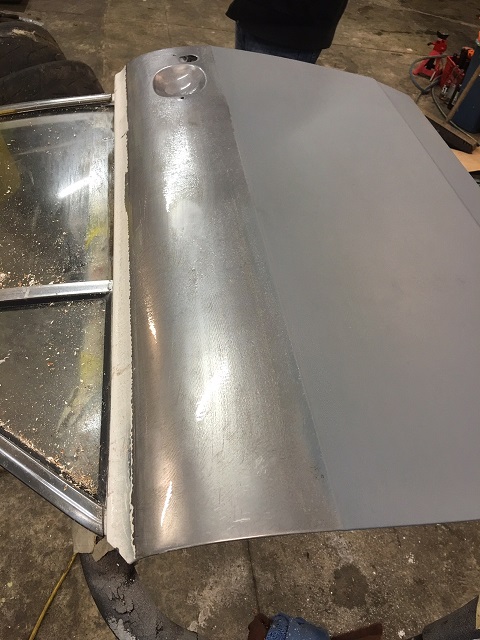
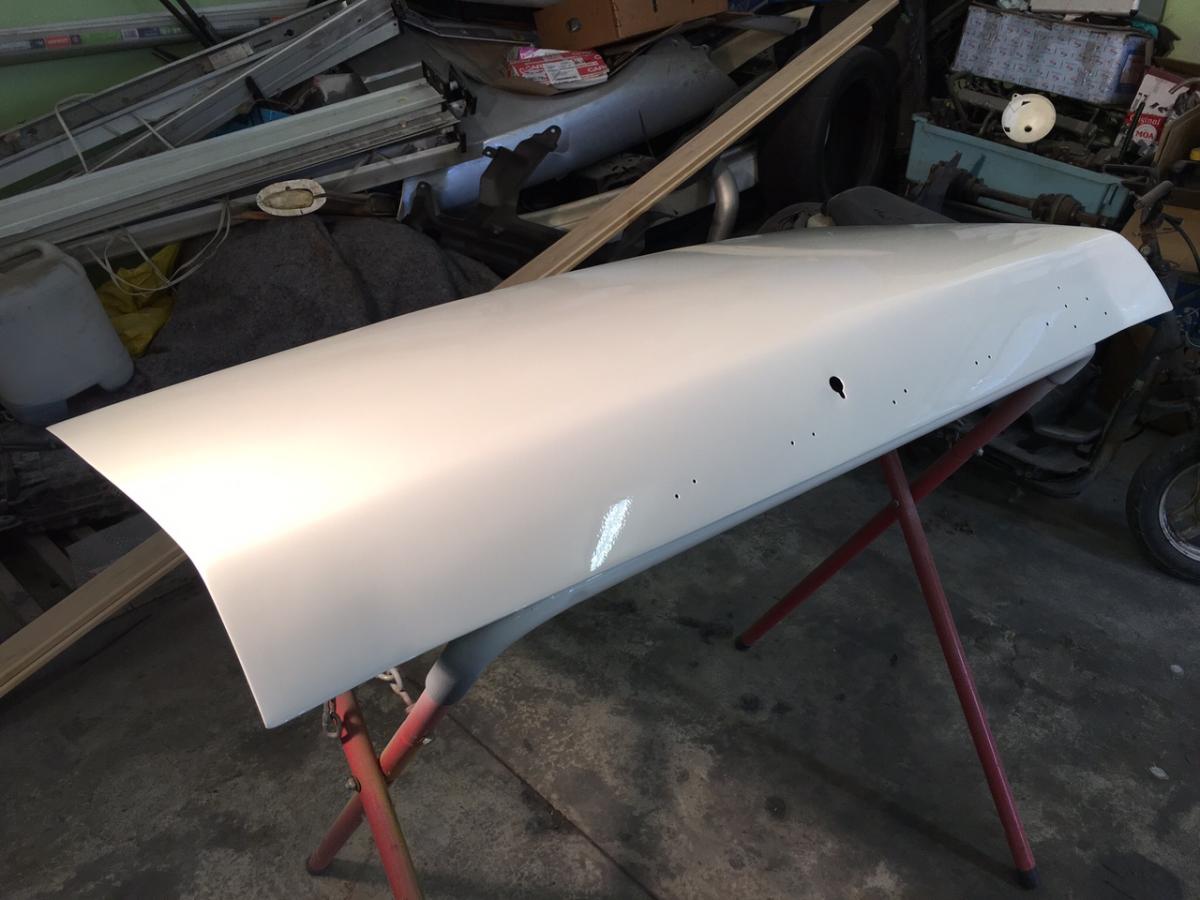
This week I have spent a bit of time on the top of the bonnet and that is now ready to be sprayed (dont have a photo of it after final sand)
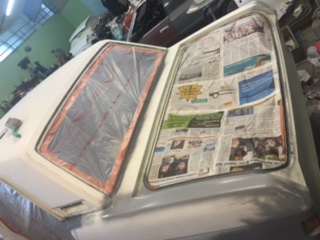
Next job is getting the passenger side doors stripped and primed. Both front doors were taken back to bare metal by the previous owner and I bombed them white when I got the car to prevent rust, I spent a bit of time today with some paint stripper and have got most of the front passengers door back to bare steel and its looking alot better already!
-
1
-
-
Been a bit slack on the updates but the work has continued along when ive found the time.
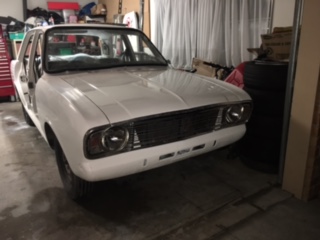
Decided it was time to start on the bodywork while I let the funds build back up as there is a few small bits still needing attention before I can go for a WOF check. The previous owner had stripped the front doors and boot back to bare steel as part of doing a full bare steel respray but due to the fact that the car has already had most of the rust dealt with last time it was painted I have decided to focus on getting it as smooth and straight as possible and doing a fresh coat of paint over the whole car. Sticking with white as I think it looks classy with the chrome bits and matches the interior nicely
Il let the photos tell the story here
-
3
-
-
Hey team,
I was about to ask a very similar question to above except I am using 2K gloss white. Wanting to know if it would look ok to paint my mk2 cortina doors boot and bonnet off the car as they are all being painted inside and out and then shoot the body separately so that I can get the door jams and the bonnet and boot channels nice and uniform?? I'm using straight gloss white 2K and wont be clearing it. Other option would be to paint the insides of the doors, underside of boot and bonnet, door jams etc and then do a closed door respray. What have people tried before?
-
I have a mk3 booster and cylinder that had been converted to fit a mk1 auto that could easily be converted back to mk3 if that's of any use to you. It didn't fit my mk2 as I have a clutch master cylinder in the way so I will stick to the plan of going remote booster
-
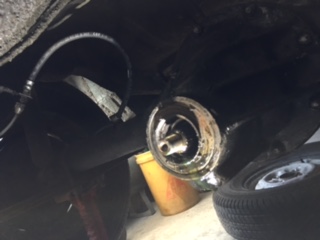
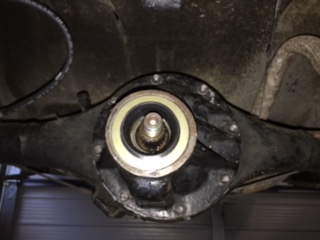
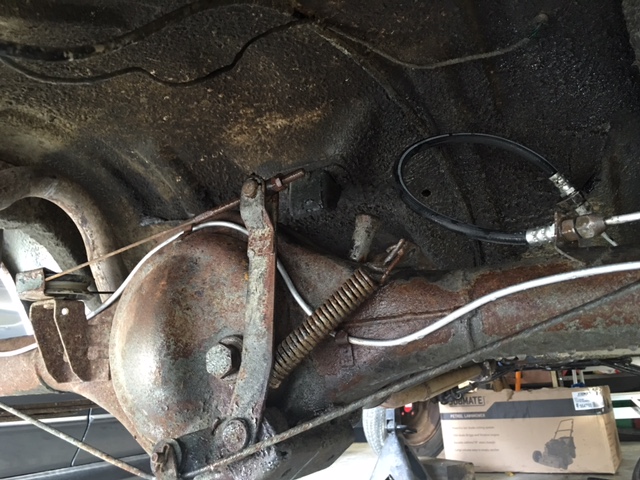
Got a bit of motivation on Saturday morning so climbed under the Cortina and got to work replacing the leaking diff pinion seal. Managed to get a couple of seals from a ford supplier on eBay and they came with very good instructions for replacing the seal without upsetting the backlash which was awesome. Took a while to smack the old seal out and I got a free oil shower when it finally came free. New seal fit perfectly and so far leak free!
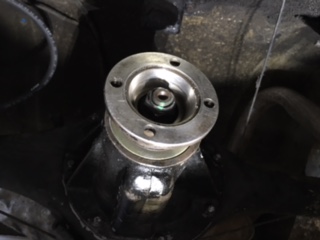
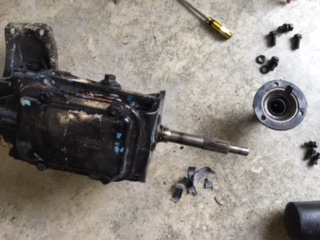
Next step was to find out what was leaking oil around the engine. I had assumed rear main seal as Im used to working on RWD Nissans and these are always the culprit. In this instance I found a bone dry flywheel and clutch and the leak was in fact the input shaft on the gearbox. 7 bolts later I had the seal out and went in yesterday and luckily Pacific Seals had one on the shelf. Refitting the gearbox will be tonight's job and hopefully that will be the end of the puddles of oil on the garage floor!
-
6
-
-
I know of a pair of front c33 carriers with 5 stud hubs up for grabs if he wants. They will fit straight into an a31 as they have the same lower control arm. As above any 5 stud rears fit except GTR due to bigger axle spline.
PM me for details in front hubs / carriers
-
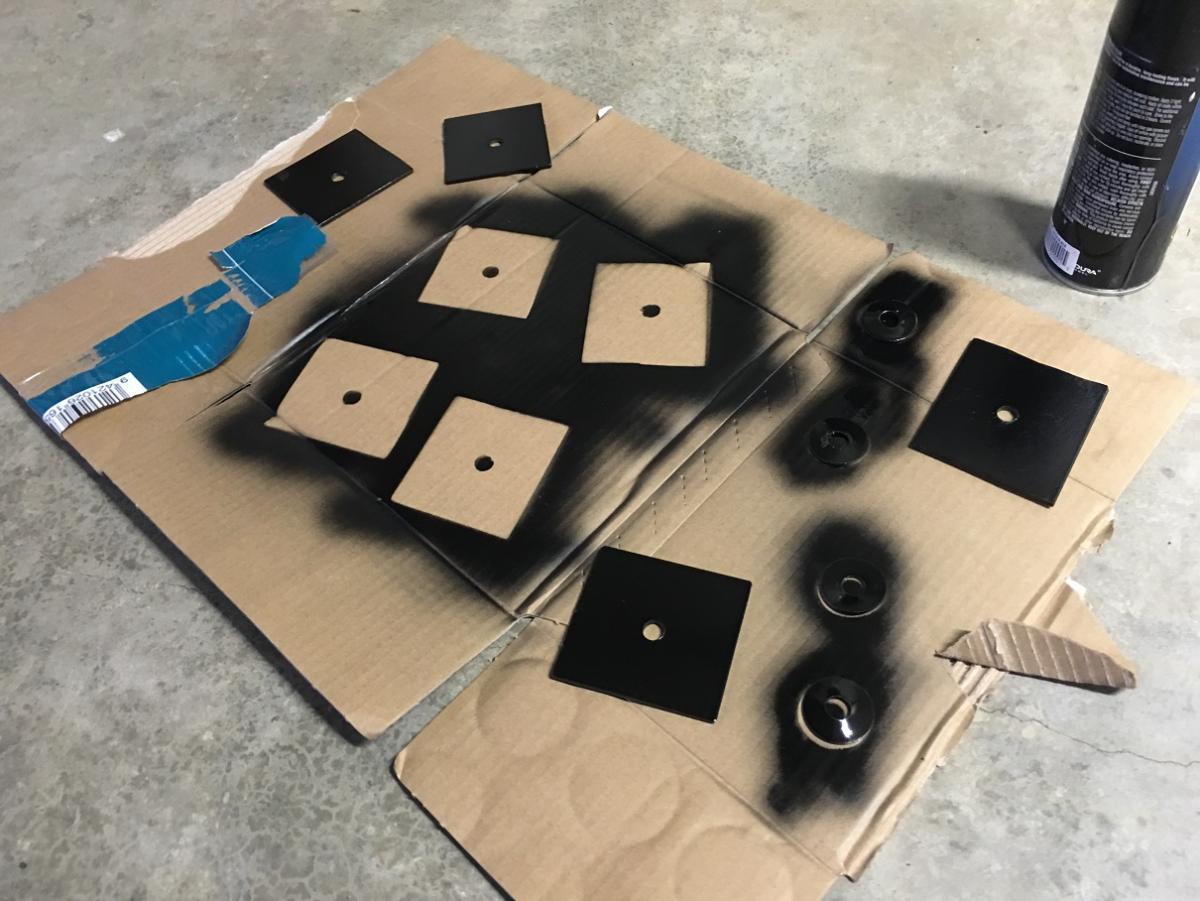
As im waiting for a diff pinion seal to arrive from the UK I thought i would get stuck into the interior. I managed to somewhat resurrect the very tired rear view mirror for now while I wait for a reasonably priced mirror head to come up and I finally got around to getting the drivers seat bracket welded up as it had cracked at some stage. Gave the mounts all a fresh coat of black to keep everything tidy.
While the seat was out I decided to make up some 80x80x3 plates to sit up under the floor where the seats bolt down to give some more strength, Again painted all the hardware black.
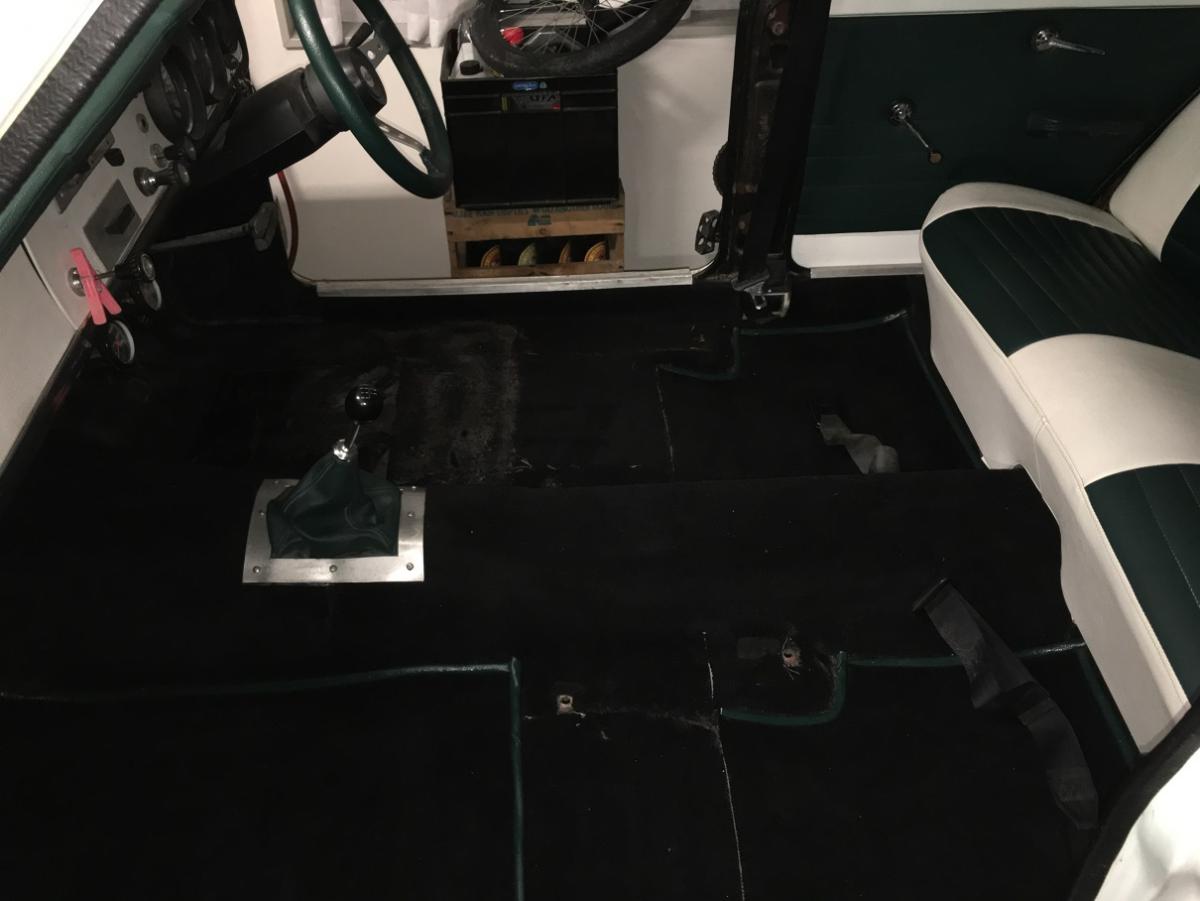
Since I was waiting for the paint to dry I thought I would give the carpet a good vacuum and clean with upholstery cleaner. The drivers floor mat had soaked up some brake fluid when the master cylinder was leaking into the car so I ripped that up (glued down??) and gave it a proper wash in the laundry tub. Gave me a chance to thoroughly clean the floor underneath it.
Final step for the night was to give the back seats a really good clean and they look brand new again!
Tonight's job is to put the seats back in with the new plates and give them a clean and then the interior is finished for now!
-
8
-
-
Managed to find some time to finish the rear brake pipe/hoses and just have one more hose to finish up front and the brake system will be ready to bleed up. Also managed to get the handbrake self adjusters to work properly and have finally got a handbrake! Hasn't had brakes for about 4 months so this is a big deal! Hoping to have the last pipe done tonight and the system bled up and checked for leaks
For the whole time I have had the Cortina it has had a second ignition barrel screwed to the bottom of the dash as the original one had stopped working at some point. Months ago I went to swap the good ignition into the original spot on the dash but realised it was much bigger than the original so simply didn't fit. I spent some time with a dremel tool making the hole bigger and after some slight modification to the ignition itself I have finally got it installed in the correct place!
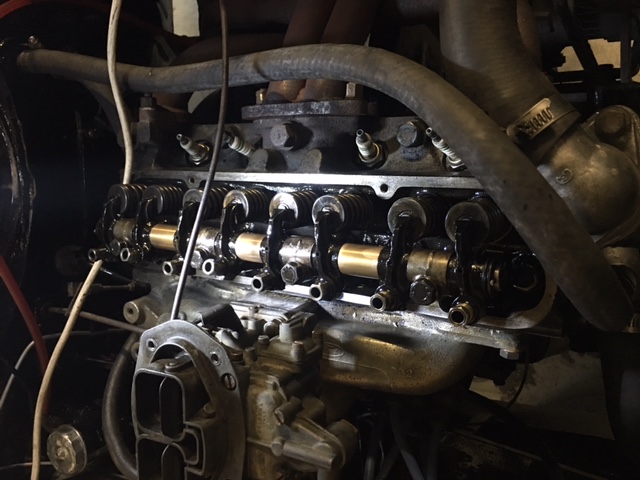
Since I tested out the ignition and gave the car a bit of a run in the garage I thought it would be a good time to adjust the timing which has just been set by ear up until now and once this was done and it was humming along nicely I whipped the rocker cover off and adjusted the tappets to make sure everything is in order. Only one needed a slight adjustment and that's another job ticked off the list!
-
3
-
-
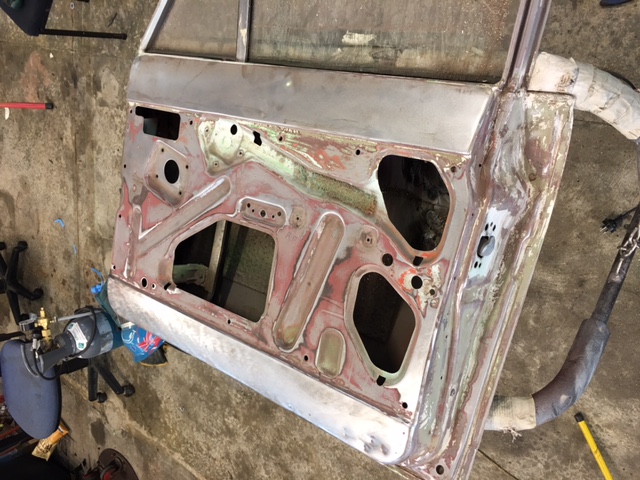
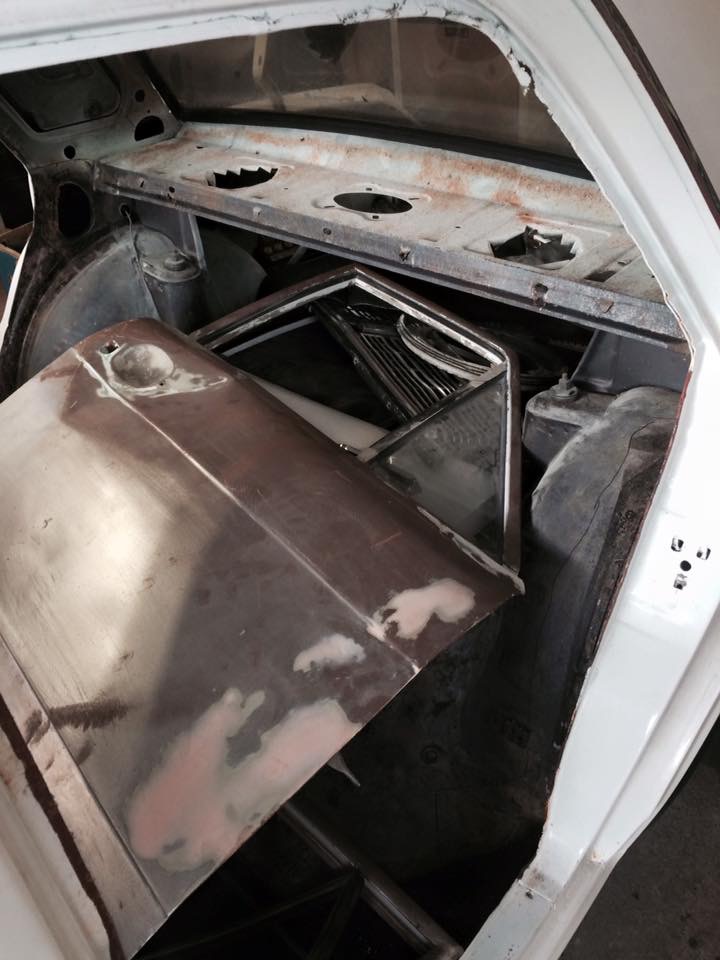
Next job was rust. Spent a fair few evenings and weekends cutting out anything that looked infected and rust killing the lot and Kyle welded in some plates. (Il add photos of these later) Once the welding was done we sprayed cavity wax in anywhere we could and etched the bare steel before filling where needed and priming. The cortina got a bit neglected for a few months once we were finished with the rust as I got stuck into some house painting and improvements and ended up buying another house and then going to the states for 3 weeks which meant the Cortina sat neglected under a car cover for a total of about 4 months until I moved it to the new house where I finally managed to source a brake master cylinder off eBay and am that brings us up to present day.
Over the last couple of weeks I have been bending and flaring up some new brake lines to suit the cylinder, it's off a left hand drive so the pipes come out of the wrong side. No bigge there as I bought all the tools to make lines mid last year when I made the first lot up. Last night I managed to finish the lines and filled the system with fluid but noticed that the rear brake hose has gone a bit rotten so I will replace this next week and update and take some photos of the new lines.
-
3
-
-
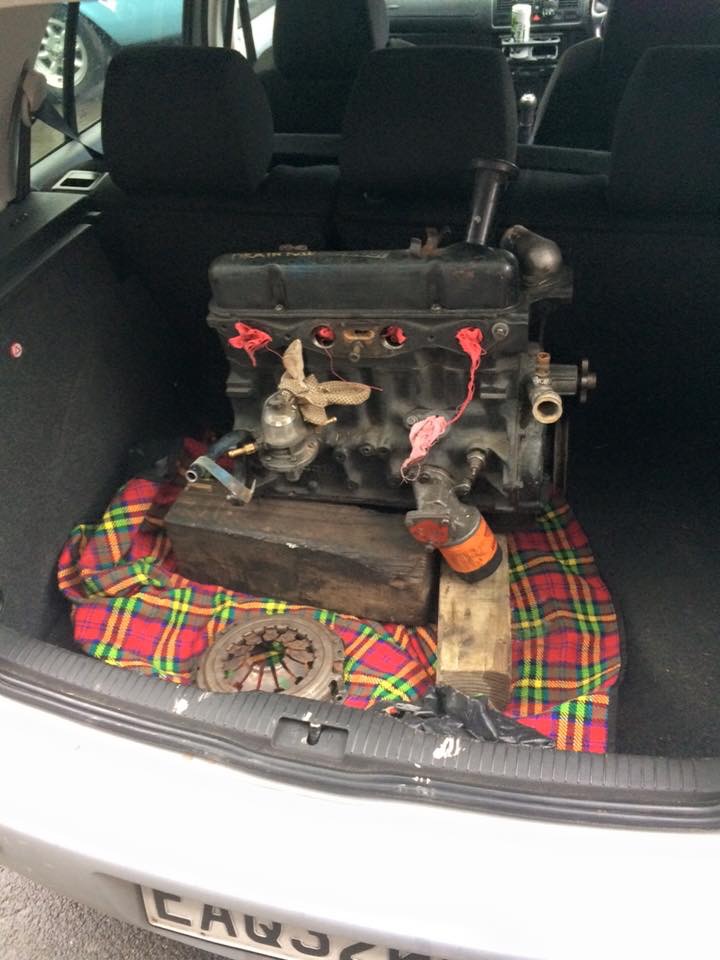
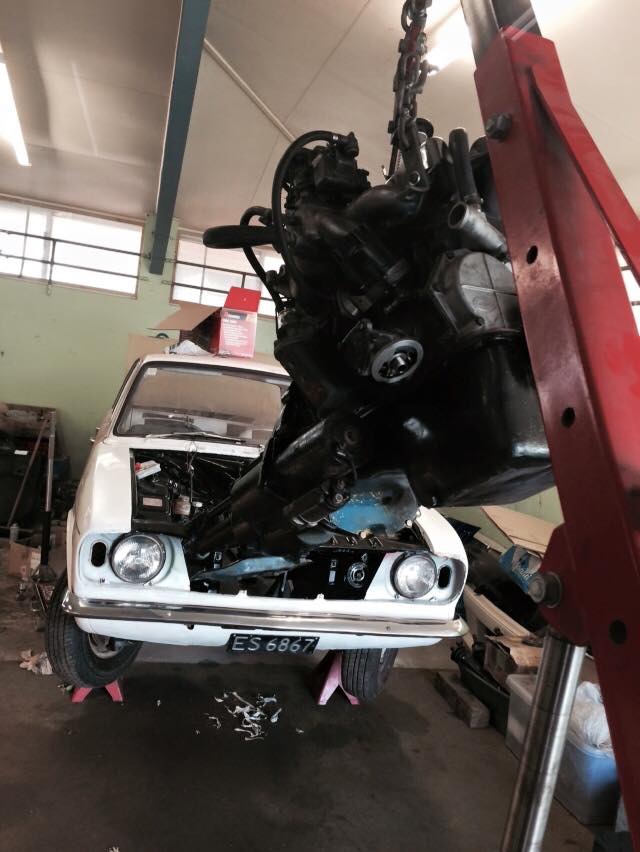
New engine on its way home in the boot of my golf...
At this point my build has out grown my single garage and I decided to rent a space in a friends workshop so I can spread out a bit and not worry about having to move it out of the garage every time my skyline needs something done.
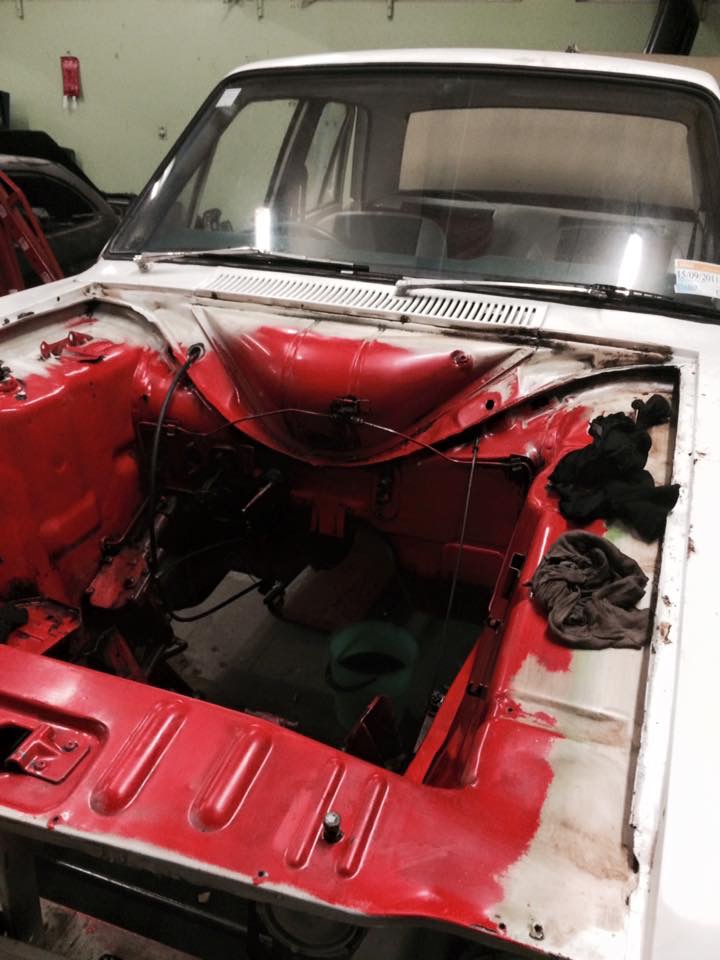
Fast forward to the old engine coming back out, engine bay being stripped and this is the aftermath of 5 nights 6pm-10 with thinners and a rag removing the UNDERSEAL they had used to paint the engine bay...this doesn't take into the account the time Kyle spent in there while I wasn't there, there was some serious hours in the prep of the engine bay thanks to some idiot with a can of underseal sometime in the past 48 years!
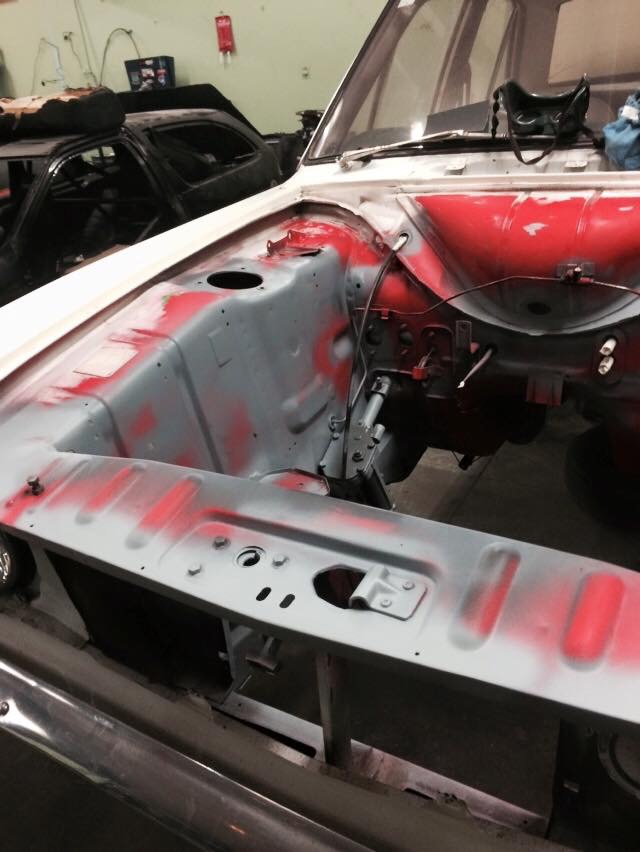
And after a few more evenings of being sanded smooth, surface rust removed from under the leaking master cylinder and a spot prime
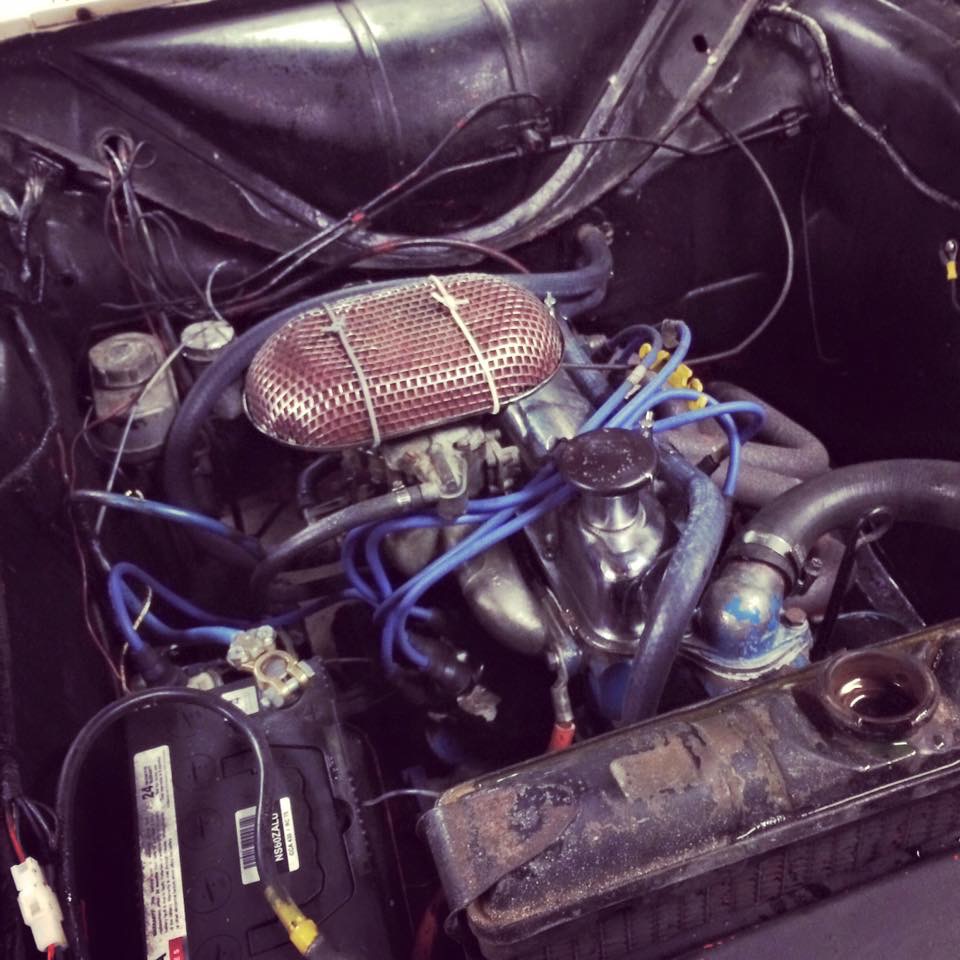
Nice painted engine bay. Originally wanted white but as I haven't 100% decided on exterior colour yet black would go with everything
After a couple of days to let the paint harden we had the brake lines back in and dropped the engine in with a fresh gasket kit and brand new clutch, filled it up with all the right fluids and had it running
I won't go into details of the celebratory burnout that left me with a very blown diff...
-
2
-
-
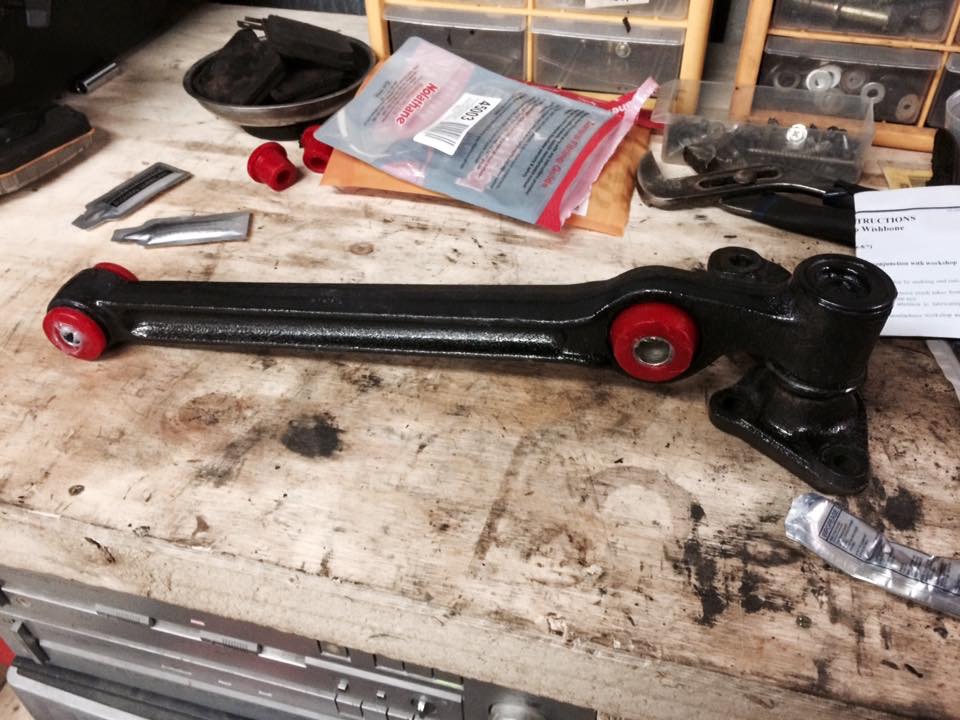
Managed to find all the bushes I needed by researching the nolathane / superpro numbers myself and heading round a few shops to see what was available. Cost about $200 to do the whole front end including paint so that's not bad!
Ripped the calipers off as one was dragging, master cylinder followed as that was weeping and sourced some seal kits and rear cylinders while I was there. Passed the calipers and master to a friend to rebuild as I haven't done anything that style before and I got busy re making steel brake lines as I noticed the old ones were a bit crusty. Got the brakes back and installed everything, bled it all up and was absolutely fine for about 2 weeks until the master started leaking again... More about that later!
managed to track down some leaf springs from a guy locally and he just happened to have a spare 711M 1600 engine they had pulled out of his dad's escort van. After a bit of negotiating we agreed on a price and they gave me all the info about it. It was a standard bore and had bearings and rings a few years back and they had put a cam in it and a few other goodies to bring it up to GT spec. Perfect upgrade!
-
So fast forward a few weeks of mucking round, we managed to get the engine unseized and all back together with a $50 gasket kit and one late night with a crate of sleights on hand and with the help of my friend Chris who has little car knowledge but isn't afraid to get his hands dirty we managed to get it to fire up!
Next morning I set off on the maiden voyage down to repco to grab some more supplies. It drove surprisingly well for a car that had been chucked back together with very minimal skill
And back home safe after about a 10km round trip. Next drive was down to a workshop to let a mechanic have a look over it and let me know what would need doing for a warrant. In short: Brakes leaking, perished bushes, minor rust, number plate light to operate and missing 2 of the leaves in the rear. Nothing major at all!
Suspension and steering arms out, bushes removed and painted in hammerite black
-
3
-
-
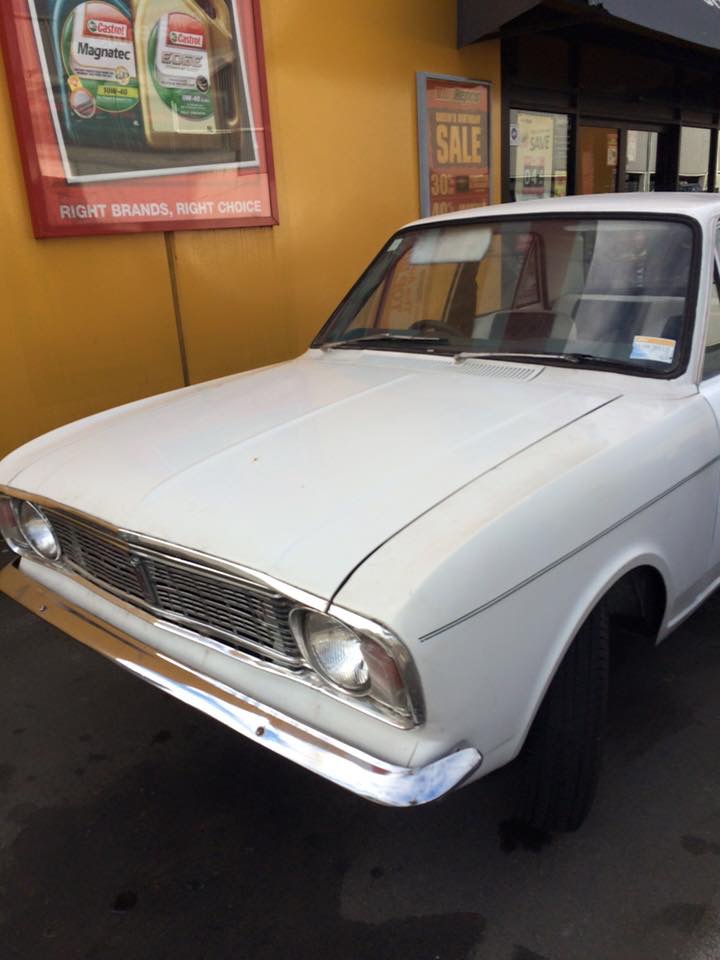
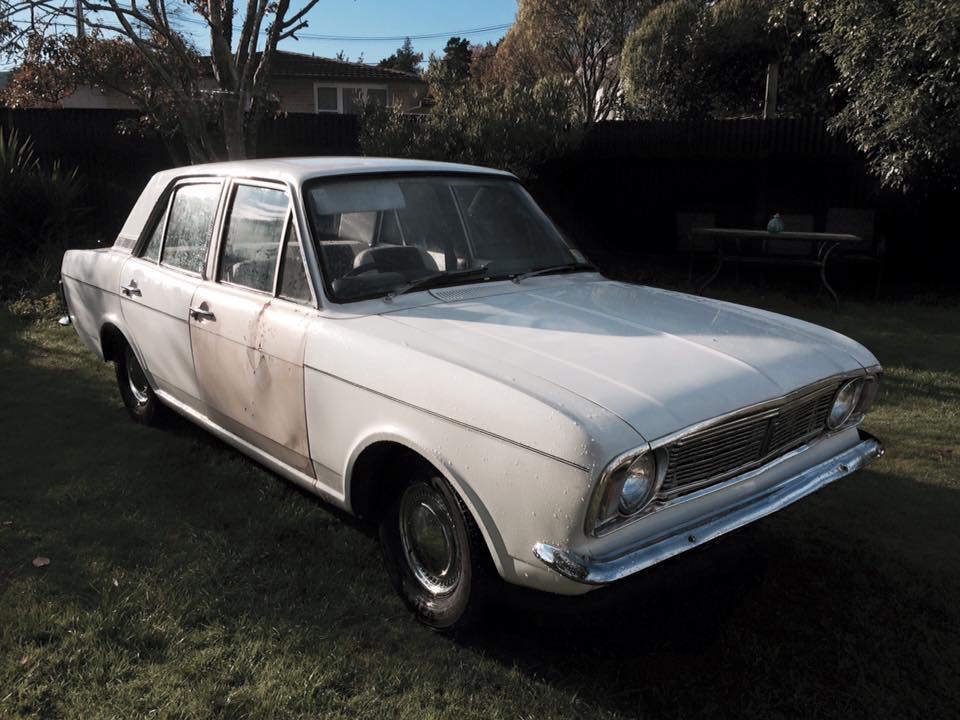
So I'm sitting at work one afternoon and get one of those generic "anyone keen to buy a..." text messages from a mate that come through from time to time and usually get ignored but today was different. His brother had picked up a 1968 cortina mk2 sedan a few years back and I had only ever seen it once and had completely forgotten he had it. Long story short he had gotten behind on some payments and needed some cash so they were trying to find a buyer for his cortina.
The car was built in Lower Hutt in '68 the only history we know is it had a fair bit of work done in around 2008 about a year before he picked it up. It had all the rust removed, a full respray in white and most importantly a full interior re trim. Aside from a crude under seal engine bay paint job the running gear wasn't touched. The guy I got it off drove it daily for about 12 months until the generator stopped generating and it wouldn't run. It was towed to the kerb outside his mums place which is where it's at for over a year and some awesome individual kicked the drivers door in and smashed the mirrors off it. While it was sitting here not running the engine siezed from not being turned over.
After a year of sitting in the weather it was moved to a dry storage unit where it was stripped down with the idea of giving everything a freshen up. He took 2 front doors and the boot down to bare steel, removed the interior, all trims, lights, wiring and pulled the head off the engine to start an engine rebuild. Due to lack of time and funds it sat in this state for another 12+ months until they decided it had to go.
My initial reaction when I saw the car all stripped and 50% of it in cardboard boxes was to walk away but after sleeping on it I decided I really didn't have much to lose as I could always part it out to recoup cost if it was too far gone.
Plan for the build was to keep it period and close to standard and make it so that anybody can hop in and drive it. I already have a race car and a couple of hot hatches so really just wanted something to cruise in. Plus I had never done a classic build but always admired them!
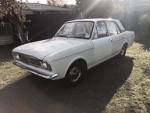
Here it is the day we got it back to my place
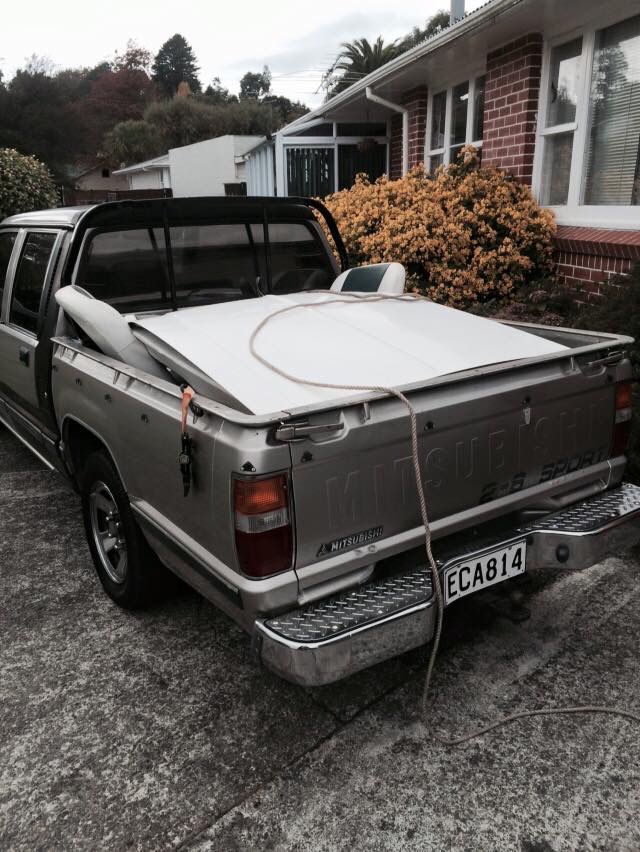
Ute tray load of parts
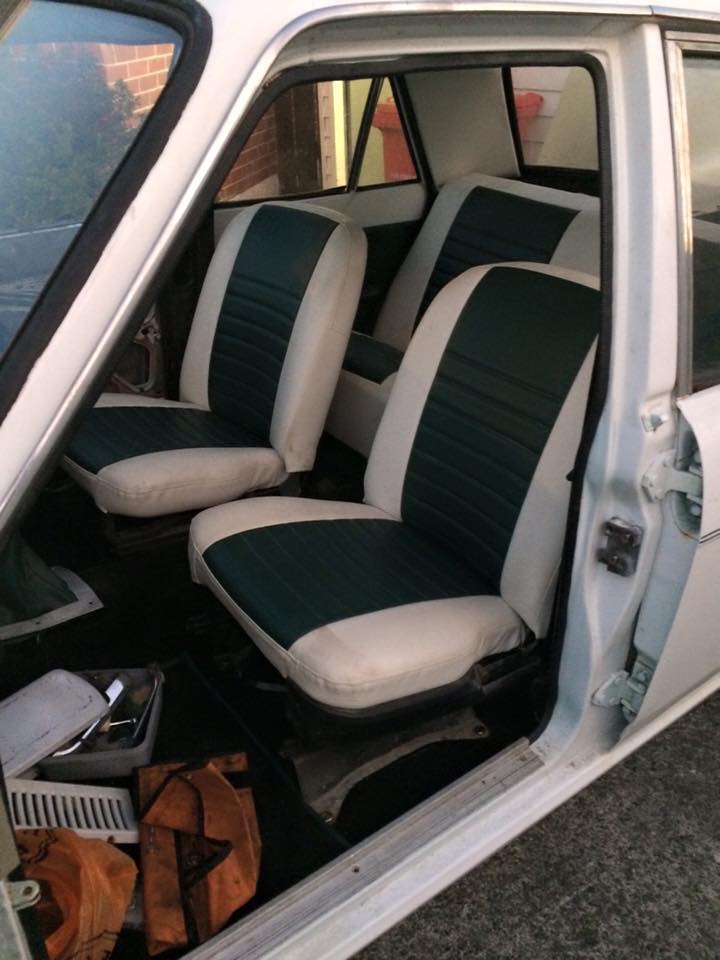
Retrimmed interior - really the selling point for me
-
2
-
-
Hey Guys haven't been on here for years so thought I would re-introduce myself
Name: Nathan
Location: Wellington
Cars: 1. '68 Cortina MK2 1600E - Been restored about 5 years ago and then pulled apart by previous owner. I am working to get it back together and find the missing pieces and get it back onto the road
2. '83 Honda City Turbo - Thousands wasted on this to keep it on the road and reliable, done a few auto crosses and now I need to decide if I keep throwing money at it or move it on
3. '92 R32 Skyline RB20DET - Stopped keeping track of the spend on this one several years ago but puts a smile on my face every time I drive it and its track ready too!
4. '97 Forester Turbo Auto - Swapped my ute for this, its lowered on WRX suspension and has a massive front mount cooler. Its for sale too!
5. '99 VW Golf GTI Turbo manual - All ive done to this one is put some lowering springs into it. I had to be cut out of my last one after a head on collision and they make an awesome daily driver!
6. '03 Mini Cooper S Supercharged 6 Speed - Girlfriends new daily. Bone stock and lots of fun to drive!
(yes I have a car addiction)
-
2
-


Diff qwick qwestion (escort)
in General Car Chat
Posted
I welded the diff in my Cortina as I couldn't find a replacement when I smashed all the teeth off the spider gears being mean to it, It was an absolute pain to drive and ruined the feel of the car plus ruined any chance of rebuilding that diff.
Found suppliers for spider gears brand new in the UK and they weren't too expensive. I didn't end up getting any as a friend found me a good condition replacement diff