


kseries.rookie
-
Posts
944 -
Joined
-
Last visited
Content Type
Forums
Downloads
Events
Gallery
Posts posted by kseries.rookie
-
-
-
What else is involved in doing the turbo conversion?
Would love to learn and play with turbos one day -
I remember I once toyed with the idea of going double headlight on my GN 'build'
I'm glad I didn't -
14 hours ago, datlow said:
Oh new exhaust for the gn or?
I’m looking for a muffler for my honda
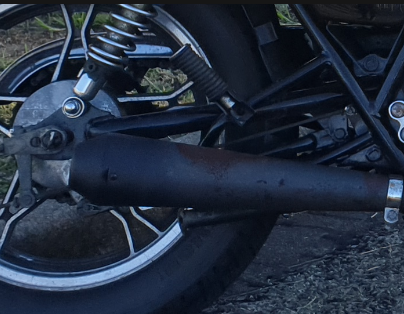
Yeah man, went from 'cone' style to a straight pipe style.
The cone was getting hella rusty. I don't have a photo of the state before I took it off but this was a month before hand so imagine double this
to this
I picked that one up from trademe for something like $60.
It's literally a straight pipe, no baffles so it is loud but it's still within being able to pass a WOF
AliX have some cheap mufflers, you just have to wait 4 weeks for it to arrive and most likely re-paint it because it's been damaged along the way.
You could always try on my cone shape to see if you like the sound/style? I'm in wellington and love any excuse for motorcycle bants-
 1
1
-
-
3 hours ago, spanners said:
I took my frame there to see if it would fit. There was NO WAY it would fit. So I bought it anyway.
I laughed out loud
This looks like a fun project. Subscribed for more updates-
 2
2
-
-
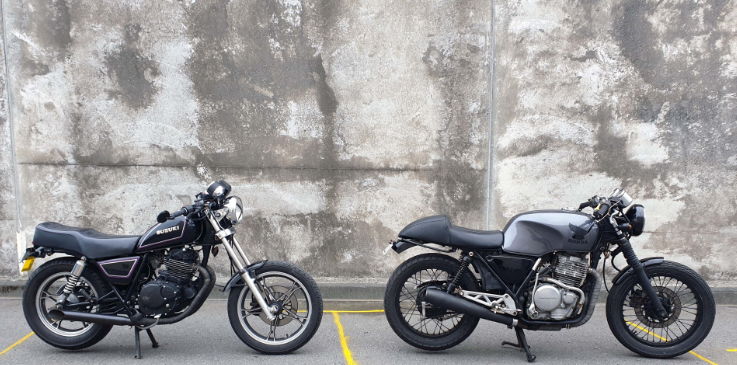
New exhaust, guards and tail light on the GN
Also, first time riding with the GB and GN-
1
-
-
-
-
-
these are just snips of the original photo so it doesn't smash ya internet haha
-
6
-
-
Some random pics i've taken over the years
Disclaimer; I dunno if they're all tangas but ye na yeah haha
-
6
-
-
Quote
last wof was beginning of last yr, can negotiate on getting one or just put it in your garage and just look at it like I do
made me lol
-
3
-
-
1 hour ago, My name is Russell said:
Have you been to Strokers HQ?
Nah man, I am not familiar with this - please provide more deets
-
1
-
-
37 minutes ago, Vintage Grumble said:
V-rod was the worst thing I've ever ridden .
Including a post op tranny.
How tight was it?
-
27 minutes ago, kicker said:
Came across this spot a few months back and thought it would be good for a photo shoot
https://maps.app.goo.gl/UMmfexu3hHSwmKDd9Thats perfect!
Just have to make sure it's not a busy road so I can lump the piece of metal in the middle of the road and take a photo haha -
Am wanting some fully sick backdrops to take some pictures of my motorbikes, in the lower north island
Anyone know of some sweet spots?
Some cool old building would be rad as one of the bikes is an 80s bike so would fit in well
Some rad tree lines, leaves all over the ground etc
Ocean back drops, lake back drops, etc
Any leads? Please and thank you -
1 hour ago, HighLUX said:
Kawasaki Vulcan 650 if you can find a cheap one which you occasionally can
Yeah, these are cool but I also struggle with the fact they look like a harley from far but sound like a ninja sports bike
-
New bike time! (Just a 'game')
You want a new bike. Criteria is as follows..
- Must be post year 2000
- Must have ABS brakes (front)
- Must be under 5k (I'd accept something for 5800 ish cause can be talked down)
- Must be 400cc plusOther key things to note..
Doesn't need to be LAMs approved. In fact, it's better if it's not.What would you get?
-
14 hours ago, cletus said:
its white with blue wheels though
Best colour!
Something that no one has mentioned yet but from what my friends tell me; the petrol tank size is a pain.. Many petrol station visits required -
10 minutes ago, cletus said:
Anyone ridden a DRZ400sm?
any good?
Wheelie machines!
I've ridden a couple. They go alright, nothing super fast but cruises along 100kms no worries with enough power to pass if required.
If I could find one for around 4k i'd get one for a daily but they hold their value and fetch around 5 - 6-
 1
1
-
-
If you bang the choke off and give the throttle a twist are you able to maintain life in the motor or does it die completely?
-
Saw one of these parked in the motorcycle parks in Wellington the other day
https://www.trademe.co.nz/motors/motorbikes/motorbikes/scooters/auction-2045975110.htm?rsqid=7f74c70fe79f4e02823eb73f7e2b325d-004
-
1 hour ago, sheepers said:
chur
Something to be aware of is the wonky dowles
E: disregard. yours are wonky -
Yep, the XR650L motor is a bolt in jobby. If you use the 400tt stator etc you can even maintain the OG wiring loom too..
Problem is, these parts are going to be just as hard to find
They're also incredibly expensive haha which so would swapping out a different motor but at least would be a pretty sweet sense of accomplishment-
1
-


Bike spam thread
in General Bike Chat
Posted
Picked up a new project today. It will be put on the back burner for awhile as i've just brought a house and that takes priority but I couldn't pass up the bargain.

199? Honda CD250u
Sounds throaty as for a twin cyl 250. Someone has attempted to turn it into a bobber, it's missing heaps of shit and it's tired but looking forward to getting stuck into this