

KLR250
-
Posts
103 -
Joined
-
Last visited
Posts posted by KLR250
-
-
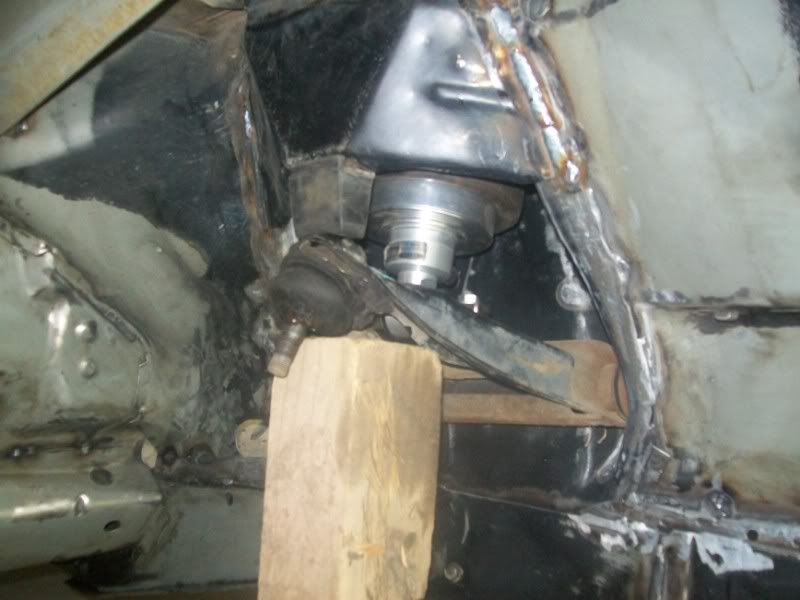
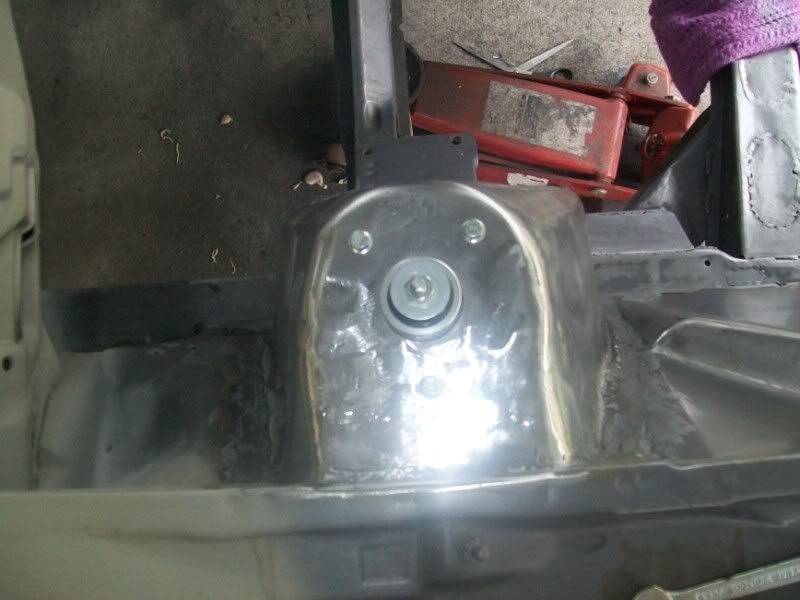
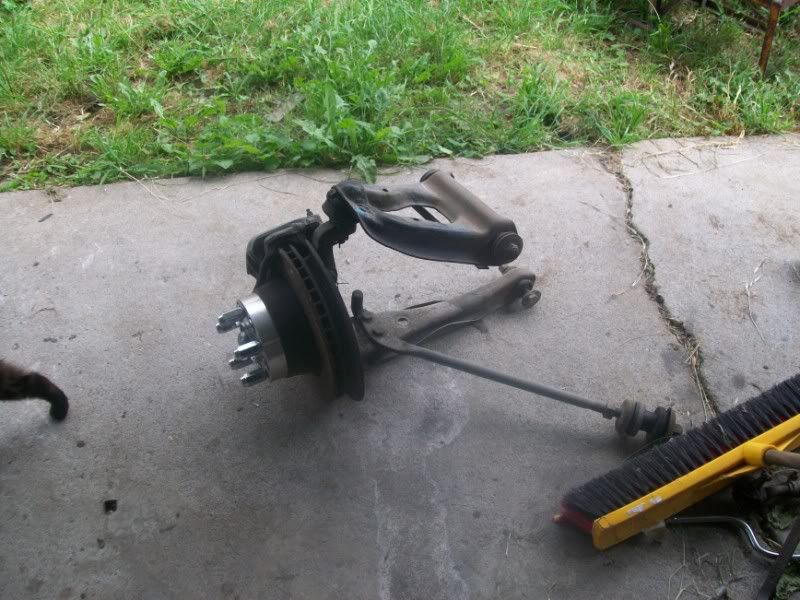
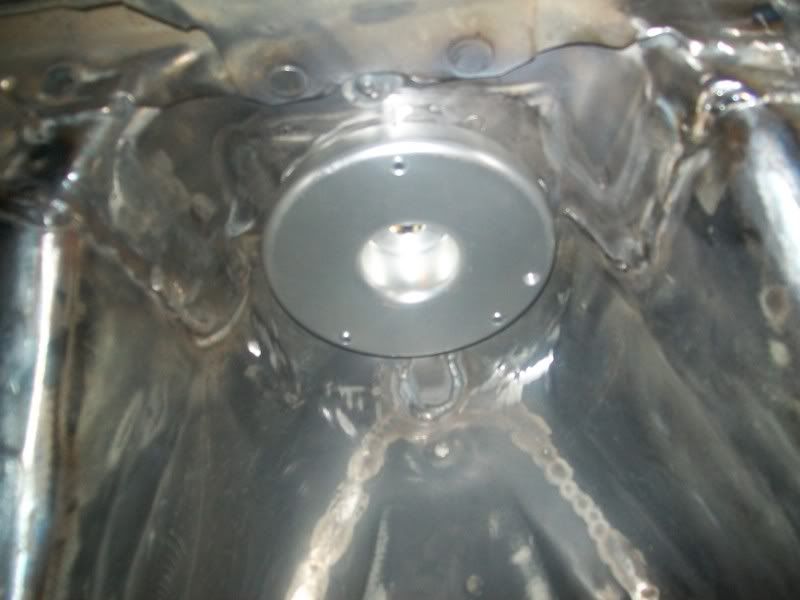
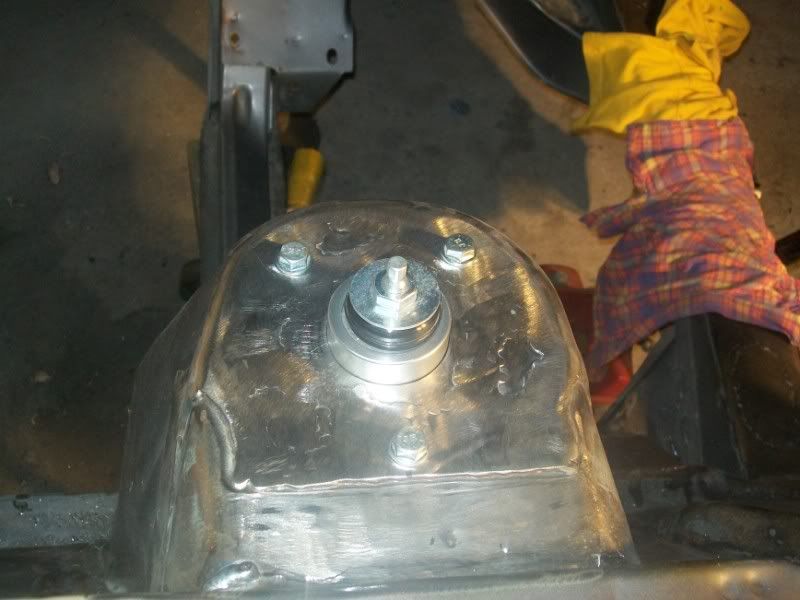
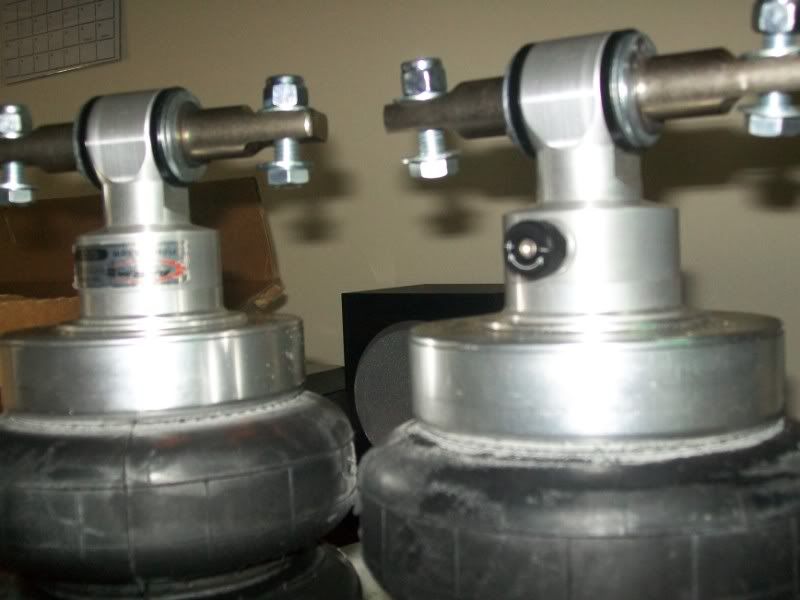
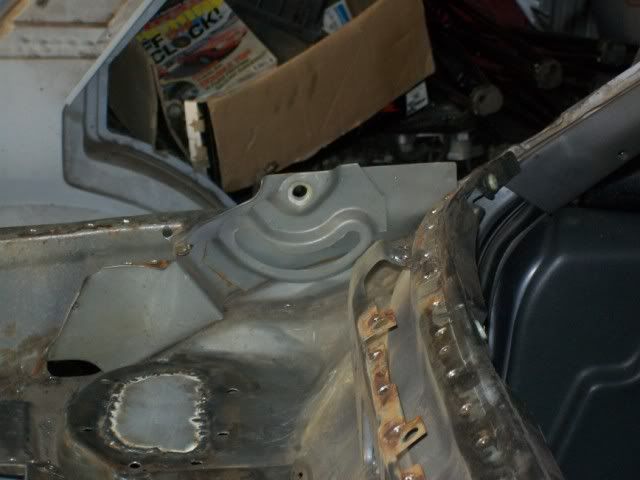
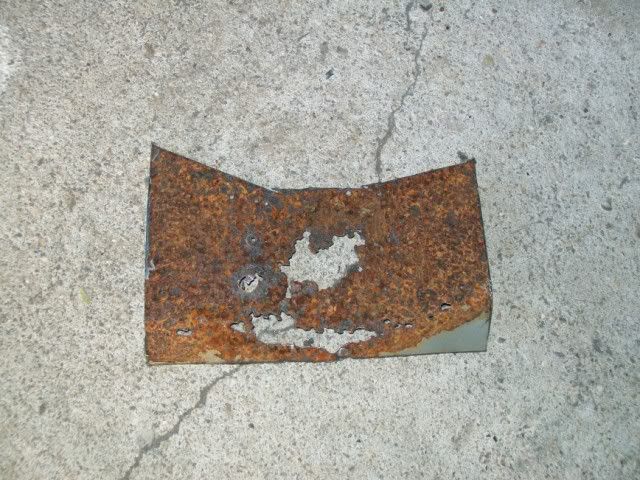
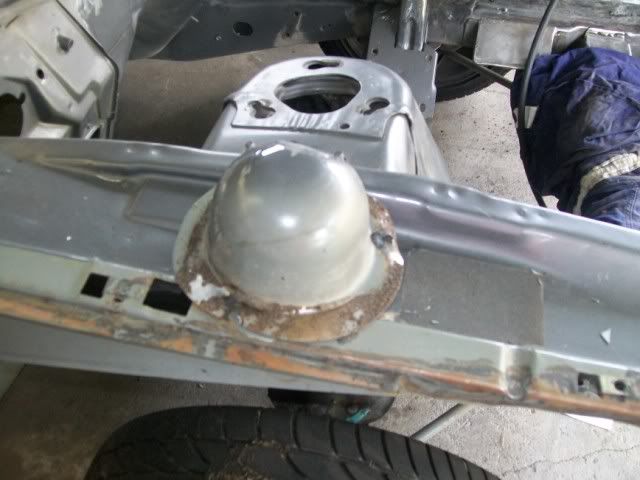
By flipping the bump stop around I can get them to sit at a better angle, I dummied up the upper wishbone and airbag so i could double check it all worked. The factory bump stop touch's the wishbone 5mm before the internal shockwave bump stop touched, and once all the weight is put on both bumpstops are firm, so it worked out perfectly

-
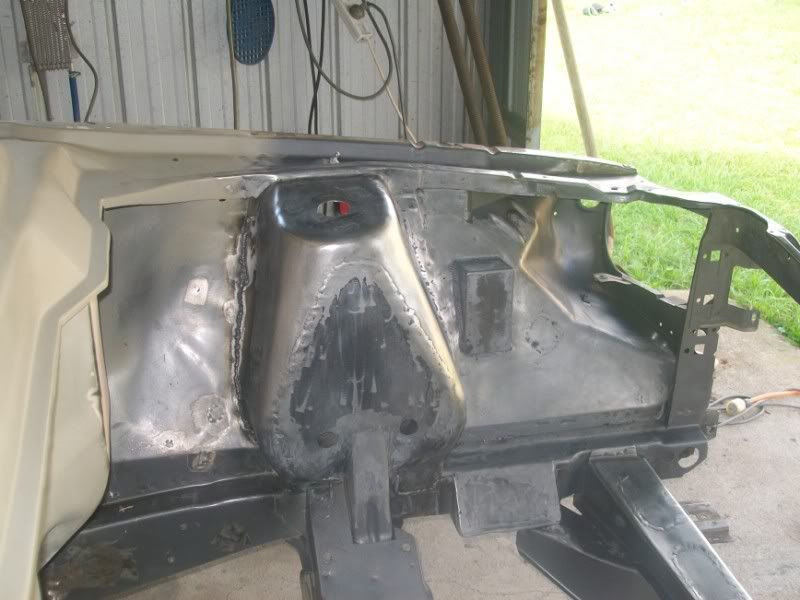
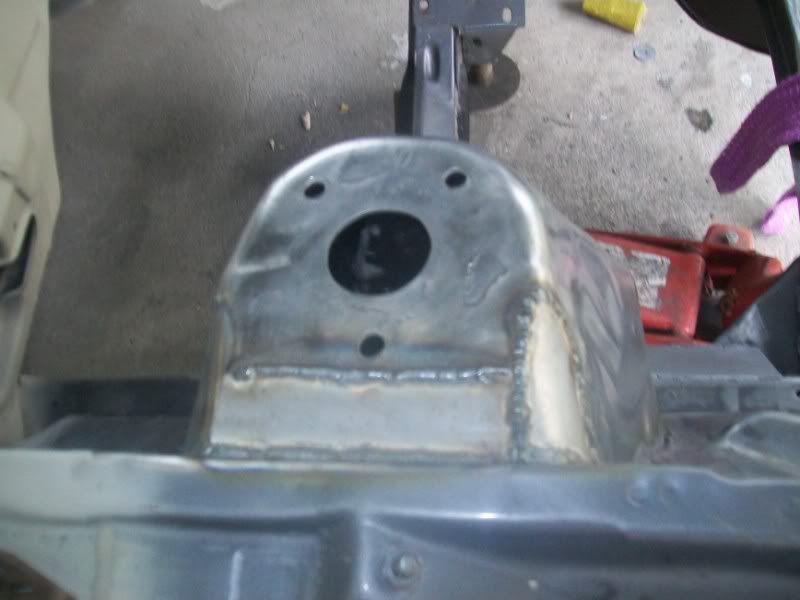
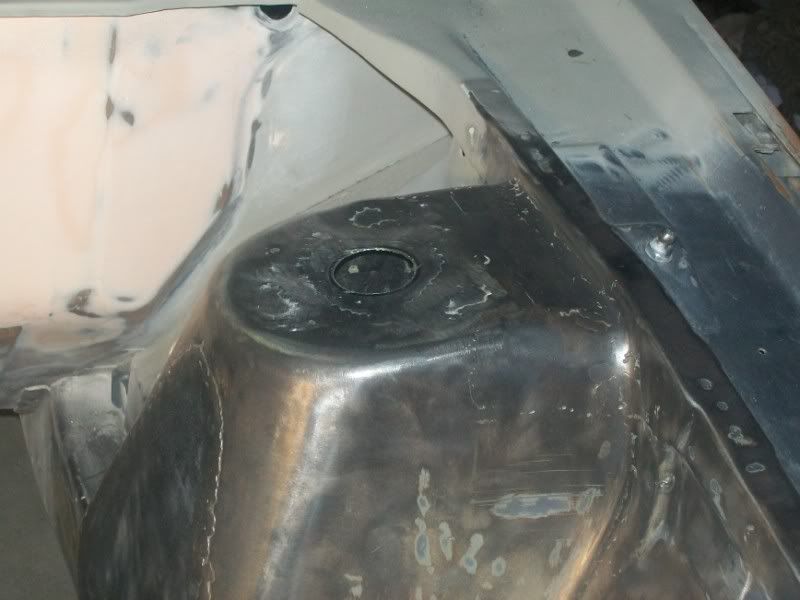
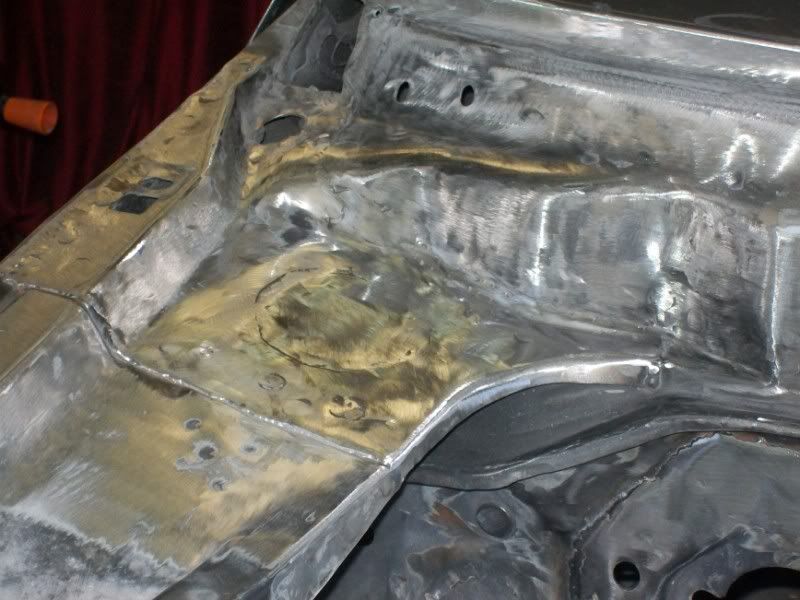
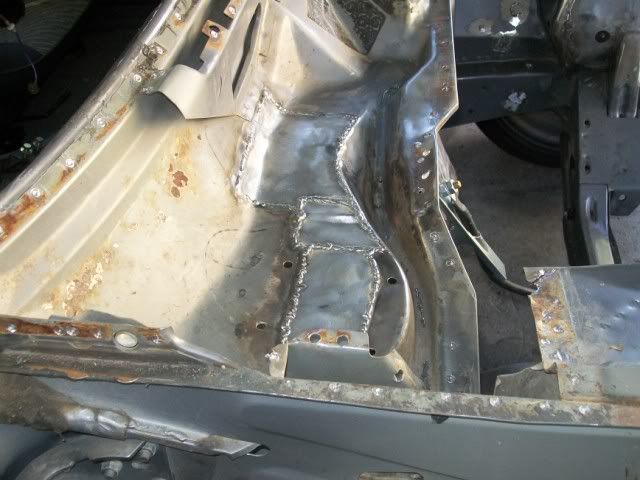
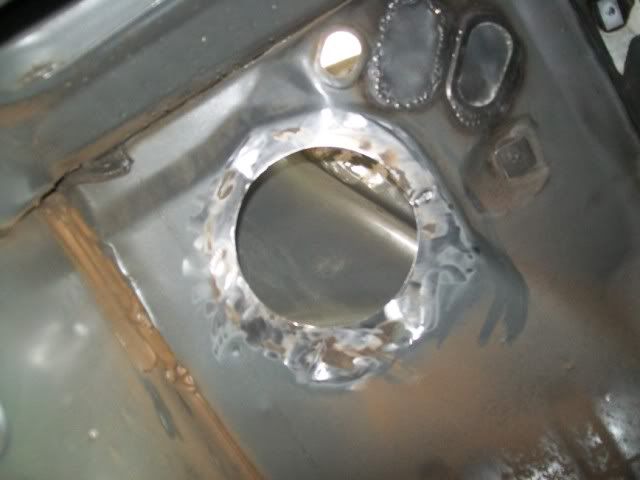
and here it is after grinding and smoothing with a flap disc, for the most part the metal work on the towers is done, just have to run a skim of filler over them and grind down the remaining welds
-
Today i decided to get rid of some surface rust, so i applied some phosphuric acid and rubbed everything with a red scotch brite pad, then i deactivated it by using a damp cloth (damp with water) then finally applying some wax and grease remover, ill repeat this a few times before i lay down some epoxy. this procedure for surface rust removal works really well.
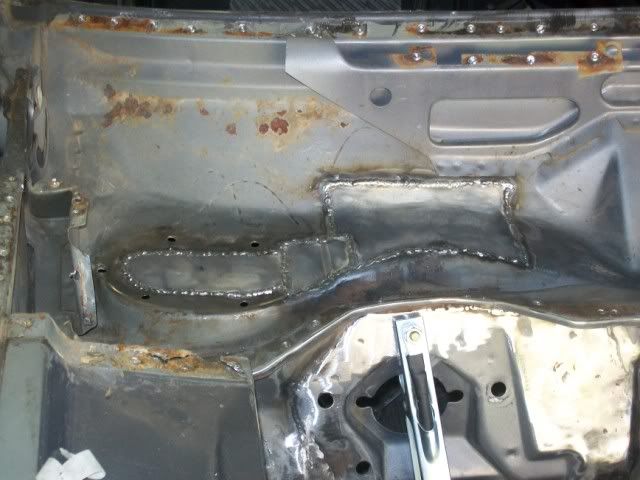
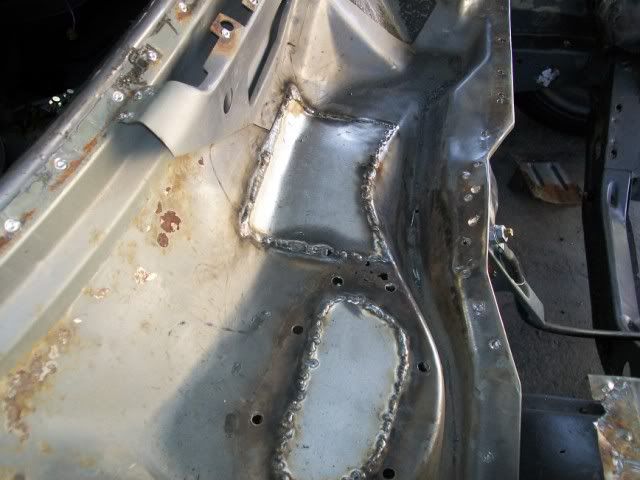
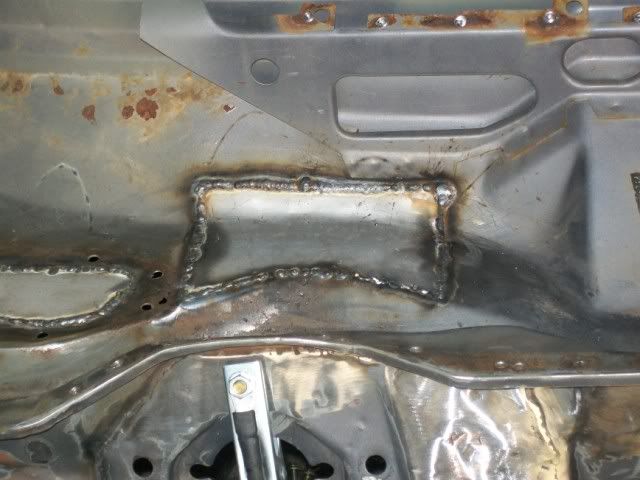
Then i started on smoothing the drivers side shock tower reapeting the procedure id previously done on the passenger side shock tower, I welded in some 1mm sheet
The filler i neglected to prime on the firewall will now be removed, bare filler left to long should not be painted over, as its porous and can allow rust to start underneath, not to mention any moisture that the filler will absorb over time, so ill have redo it
More soon
-
Update time
Bear with me as my keyboard is buggered and i cant find my spare the fullstop doesnt work
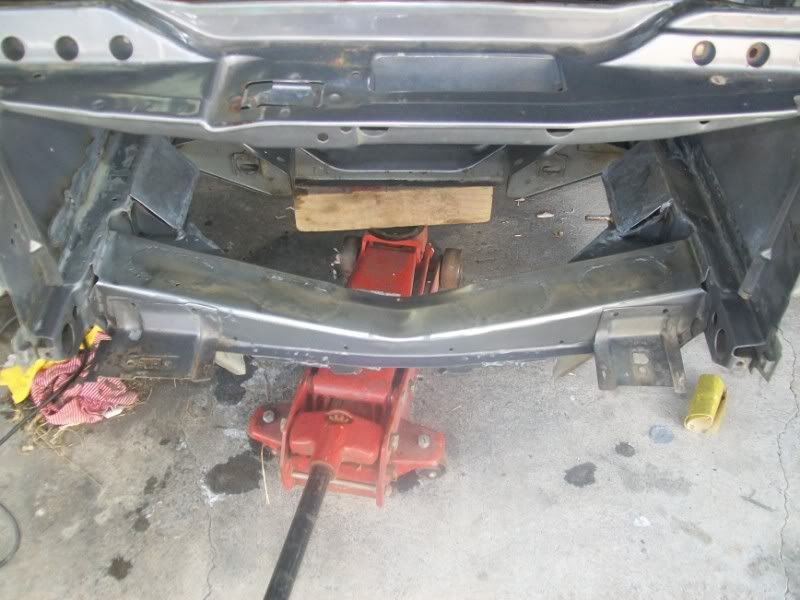
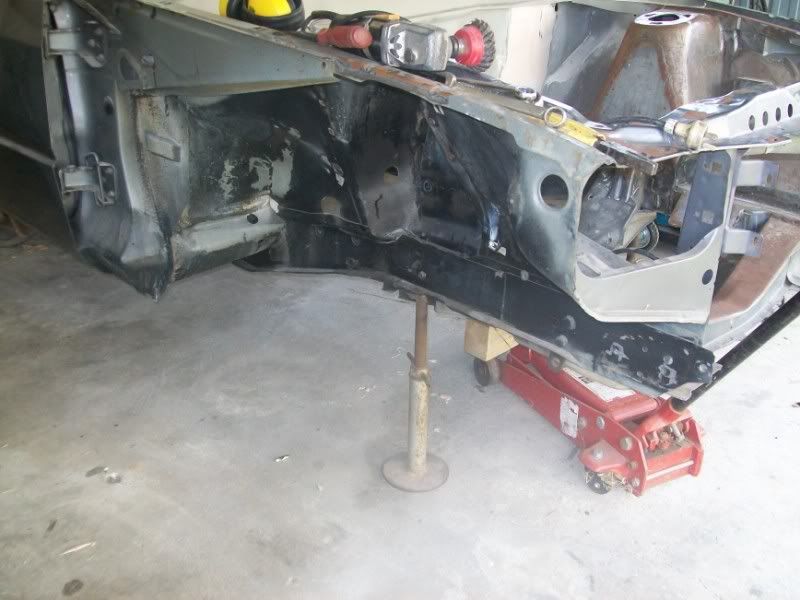
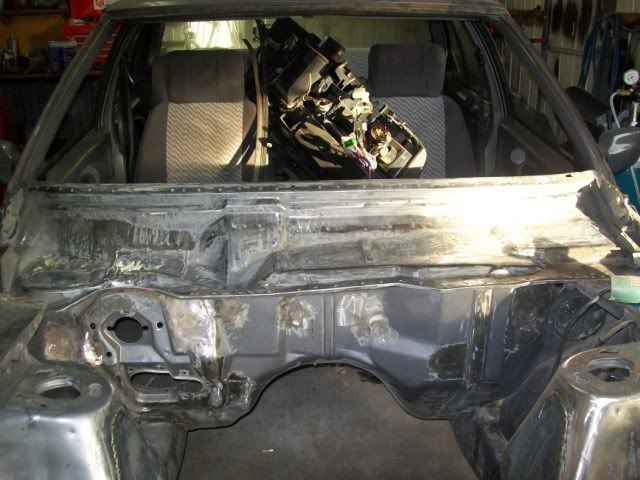
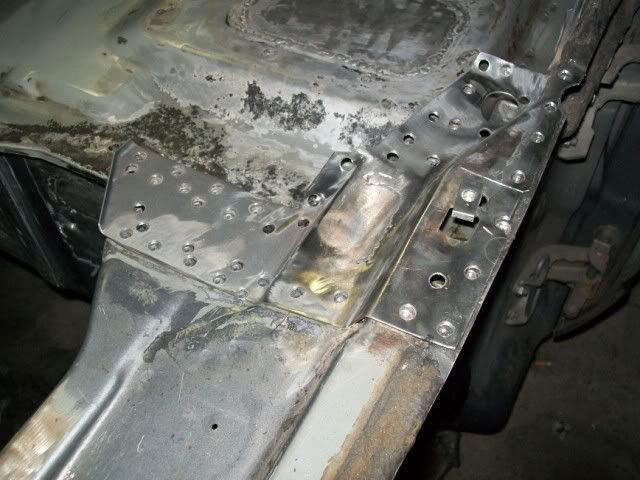
Suspension removed so i could start welding the other side
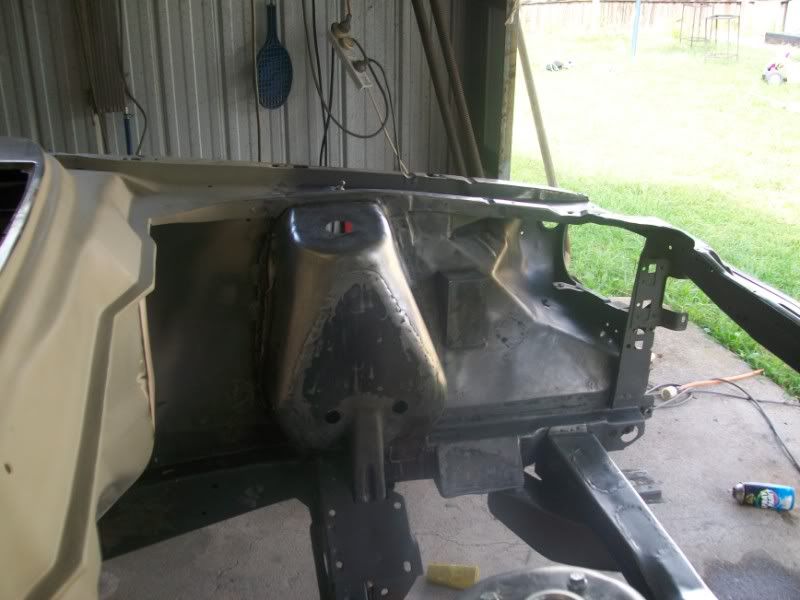
Started welding up the front end to get the thing a bit stiffer
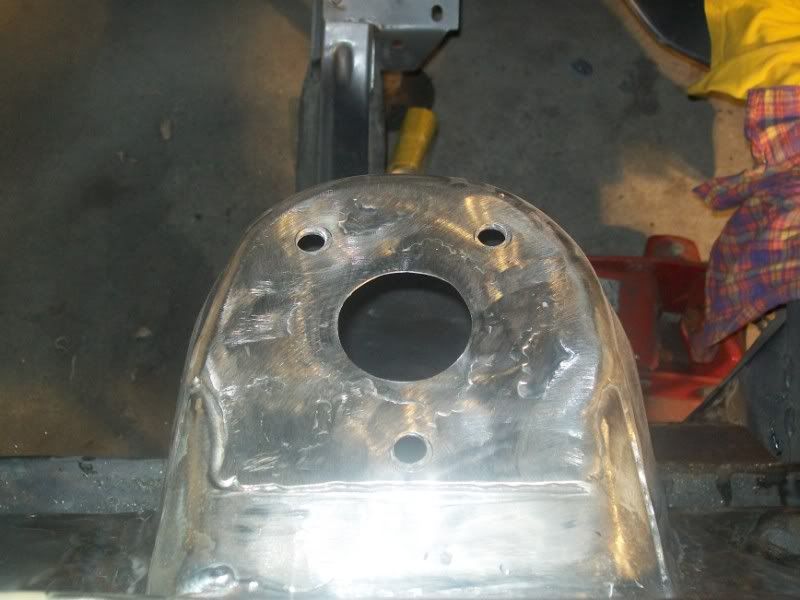
Then started welding up the top of the shocktowers to get a smooth uncluttered look
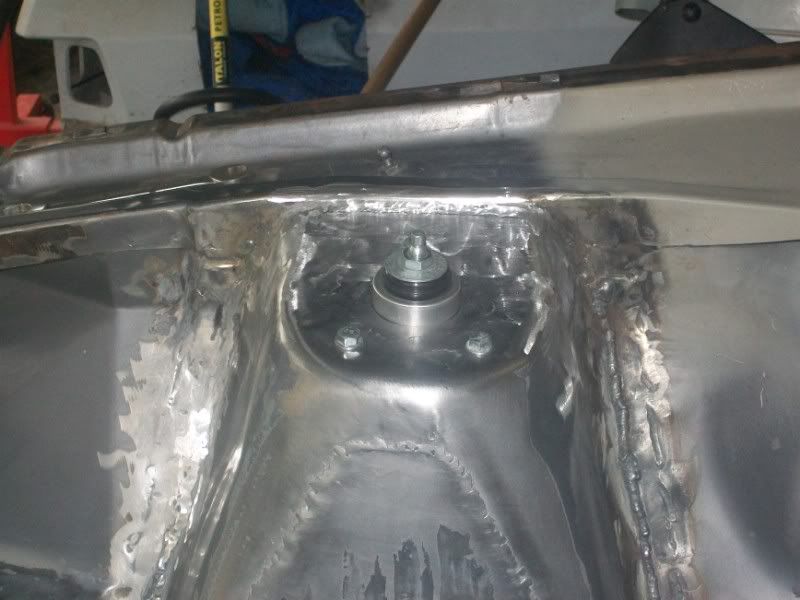
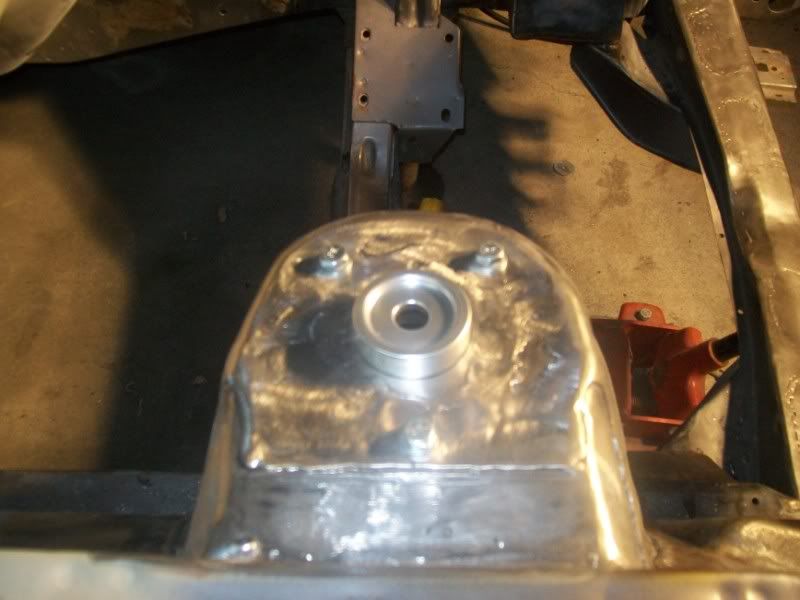
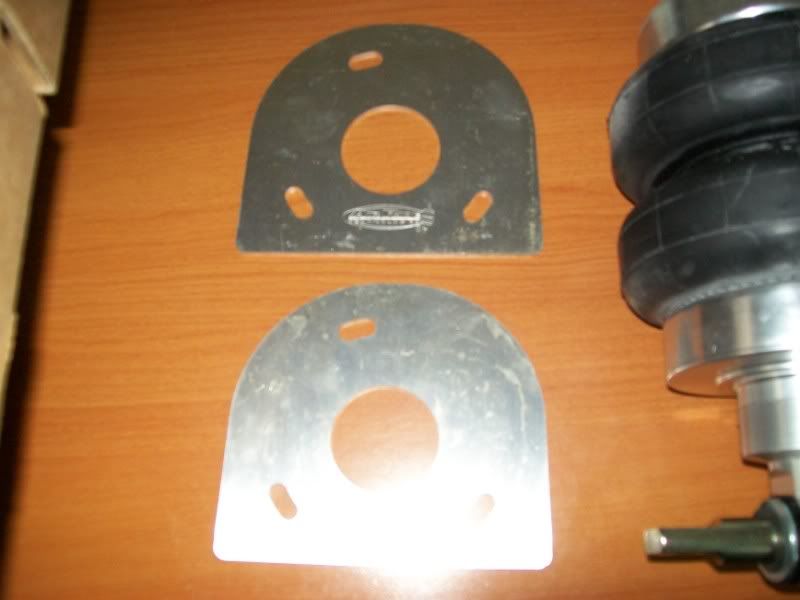
I repositioned the mounting holes
Lots of other shit but im having issues lifting the pictures of my memory stick ill give it another crack tommorow
-
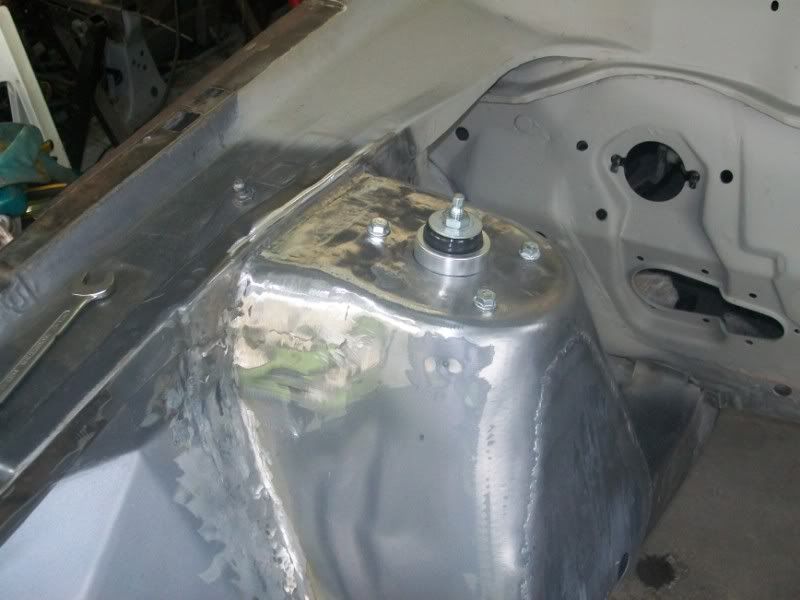
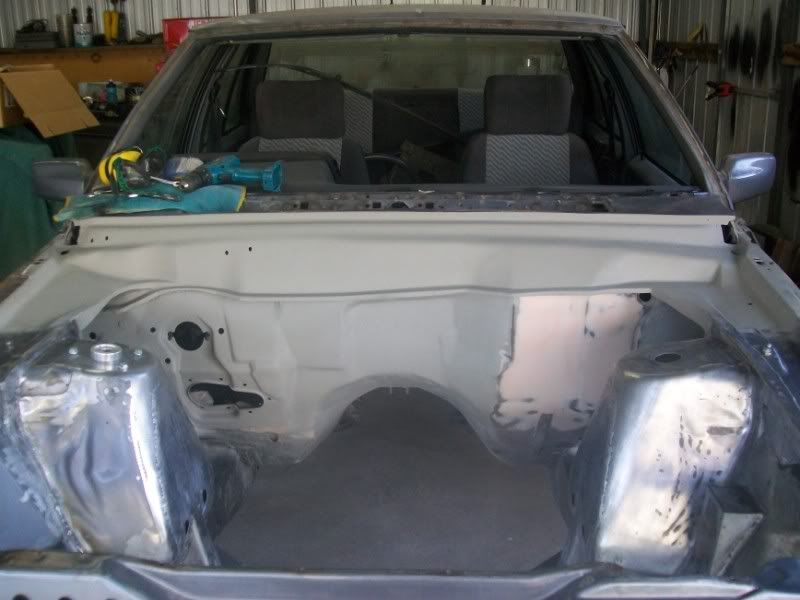
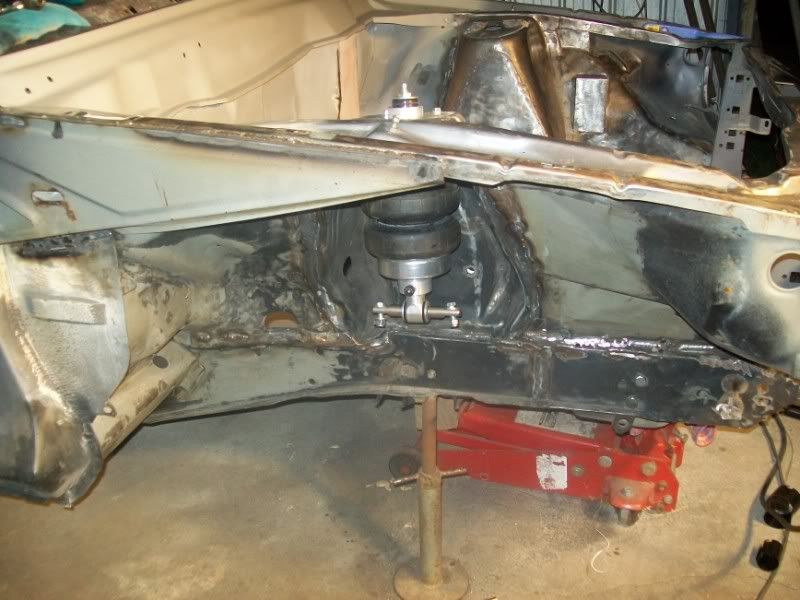
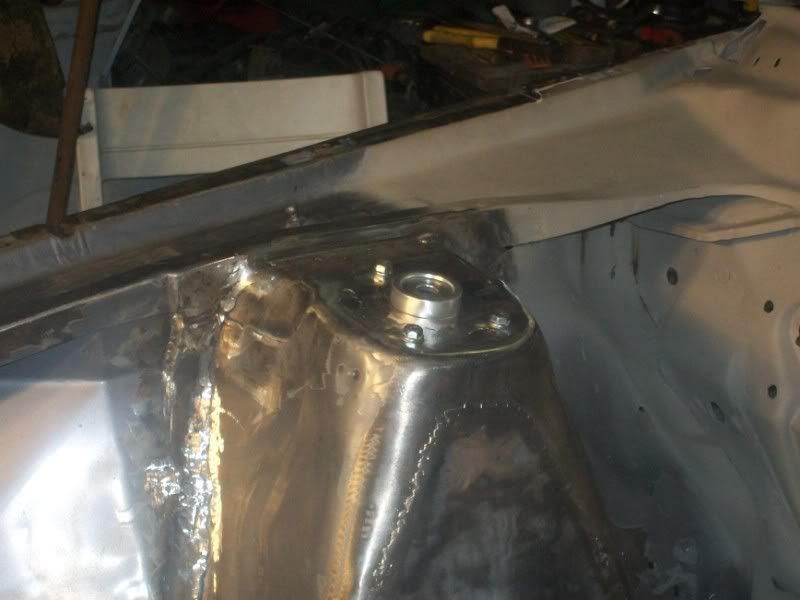
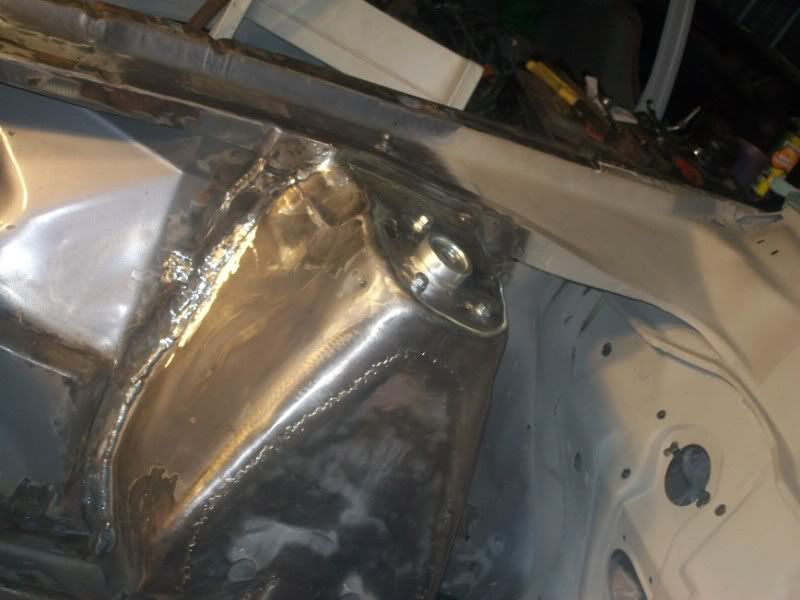
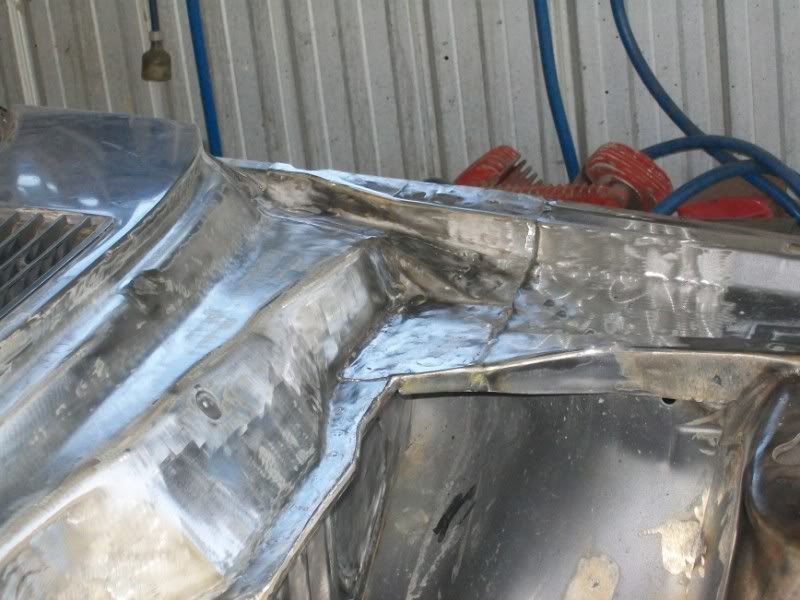
Ive been pretty busy over the last couple of days, I wont have pics till saturday though, just gotta sort them out. Ive stripped the front suspension out completly and am slowly welding up all the seams. Ive welded the strut towers inside and out, and have also welded up the outide of the chassis rails. Im about to fill all the holes on top of the strut towers and redo them to look better with the allloy billit tops of the shockwave airbags. I also want to make some strut braces from the towers to the firewall lip
Also found some Tribal graphic vectors online and have done a few photoshops of a few ideas
Georges car gets photoshopped for the 1000th time
Im thinking a mettalic silver graphic painted on, Im really liking the two tone now, excuse my dodgy photoshop skills, Im really considering the two tone option
-
Made my first slide show! haha
anyways, just for shits and giggles i uploaded it to Youtube
Been doing a bit to the car, Ill take some pictures on the weekend and make a decent update all going to plan
-
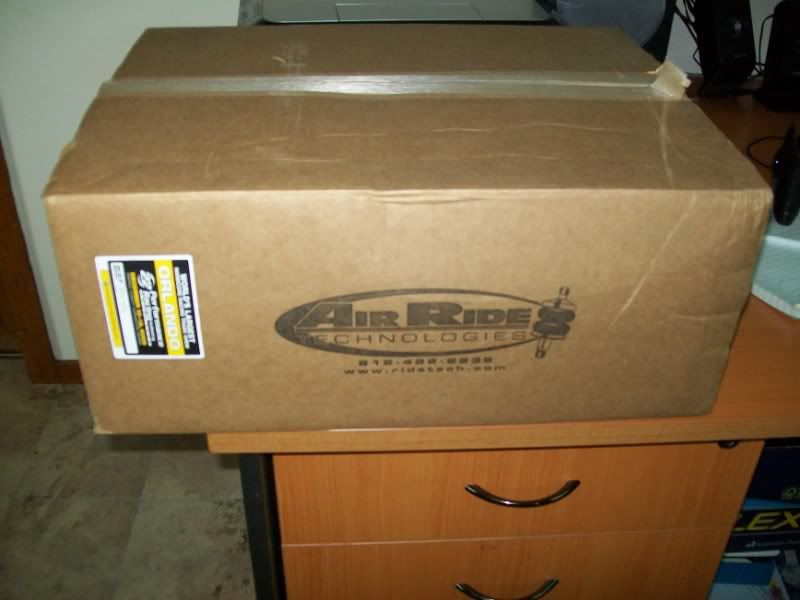
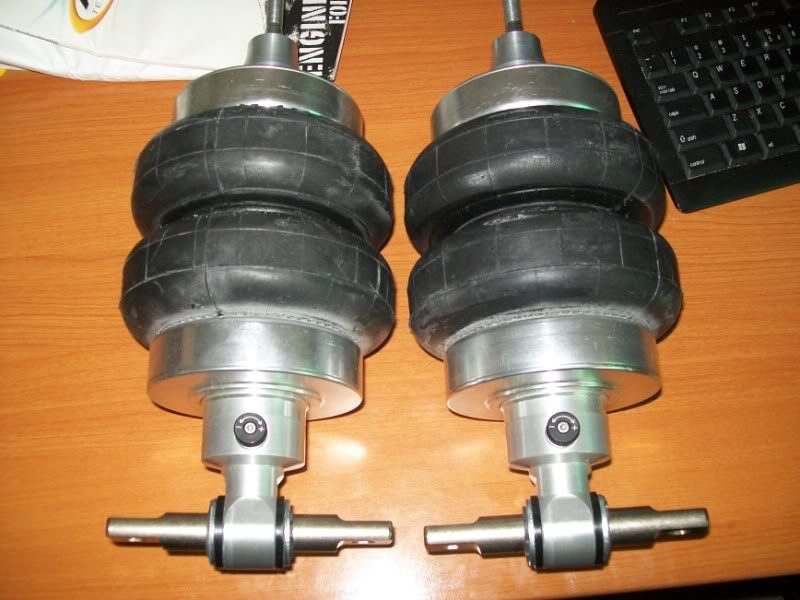
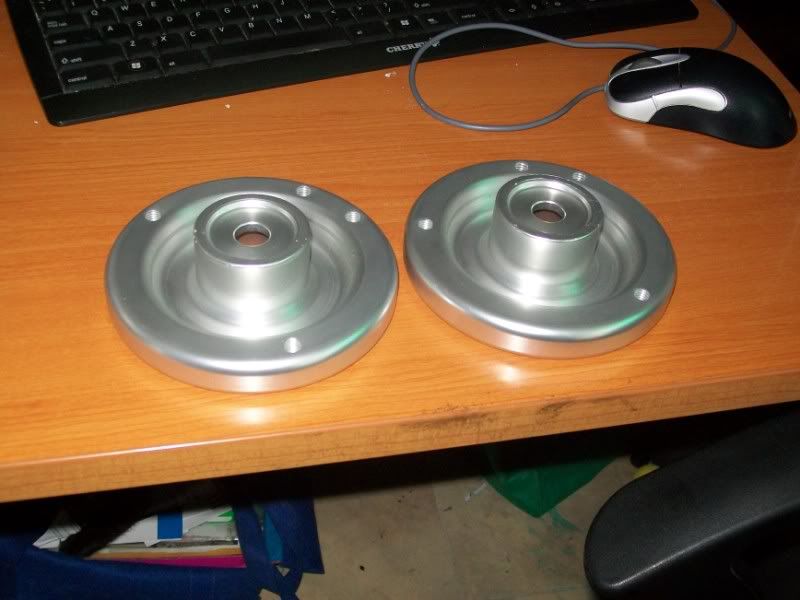
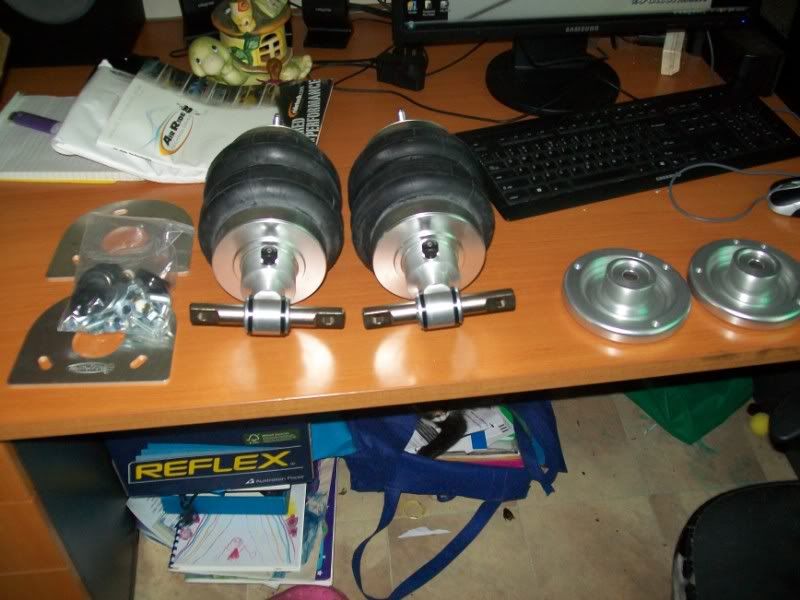
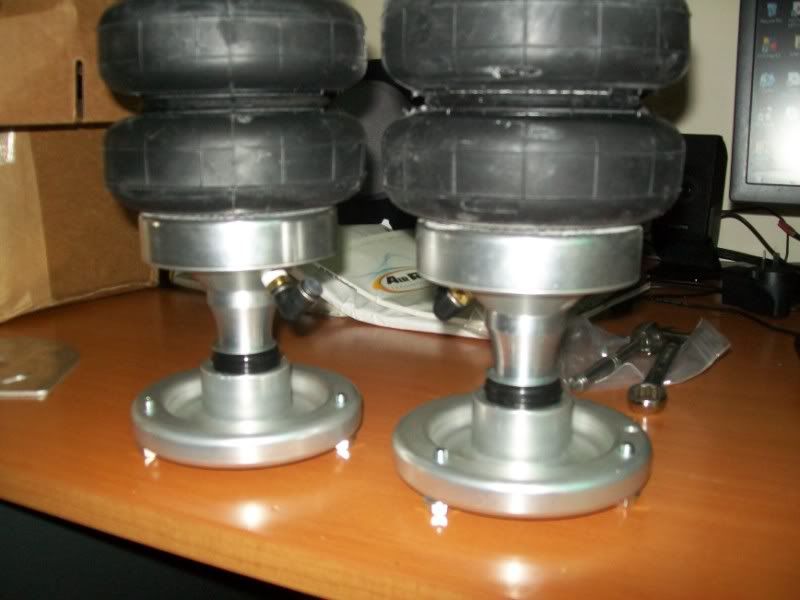
look what greeted me at work this morning
The Quality of this stuff is unbeleivably good, the finish, maching etc is just awsome. You know what its like, you see pictures on the net, looks bling, you get it, its not quite as bling as the pictures suggest, this stuff is awsome
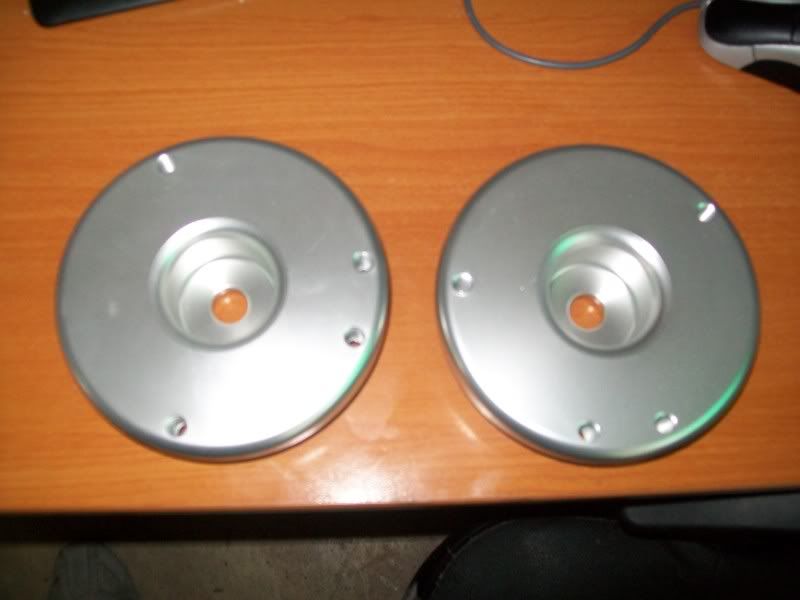
I couldnt help myself, had to put them together lol (I put the tops on upside down lol)
-
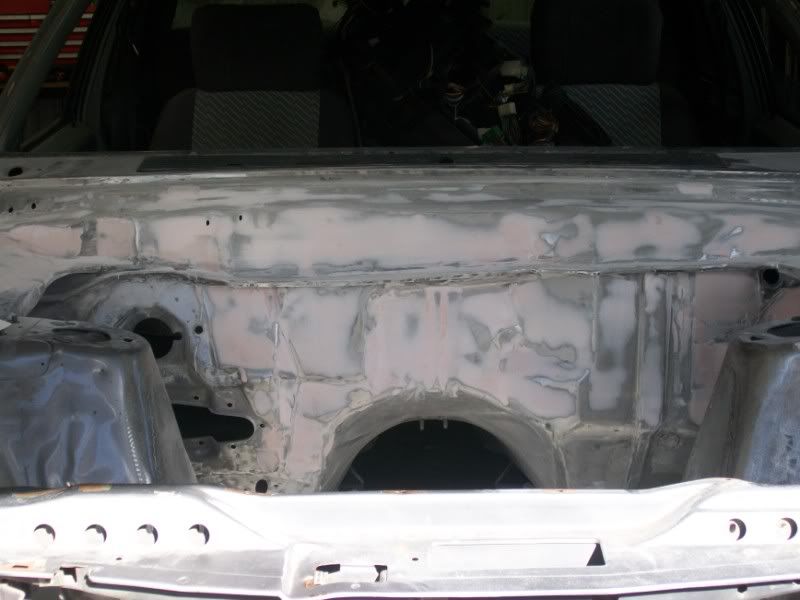
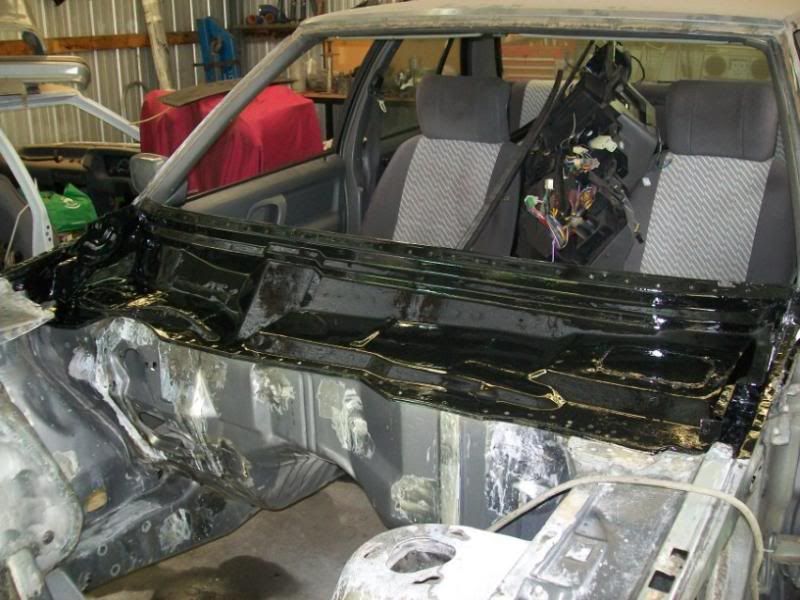
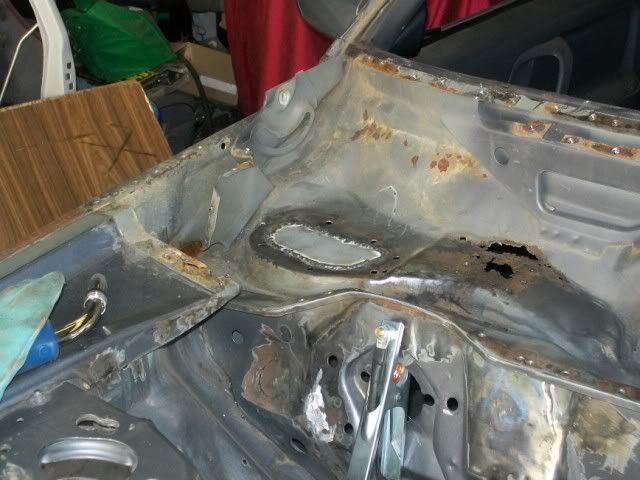
I had to epoxy the firewall, Im far from finished the filler work, but i needed to keep the surface rust away,and also get an idea on pinholes,edges,corners etc.
I reckon i have 15 hours left just in the firewall
I feel like doing what glenn suggested and removing the rib on the passenger side of the firewall, and also cutting those heater box mounting bumps out of the centre and the passenger side, will clean it up a heap nicer.
also have to get into the trans tunnell and sort those wrinkles out
Im wrapped at how its turning out,considering all my filler work is only roughed in
Front airbags will be here tommorrow, dunno why im excited, its not as if i can use them for ages lol
-
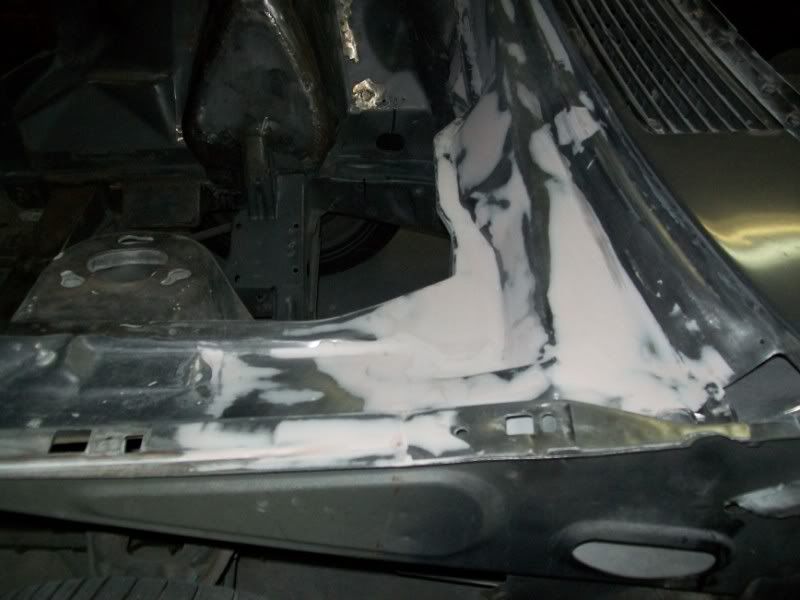
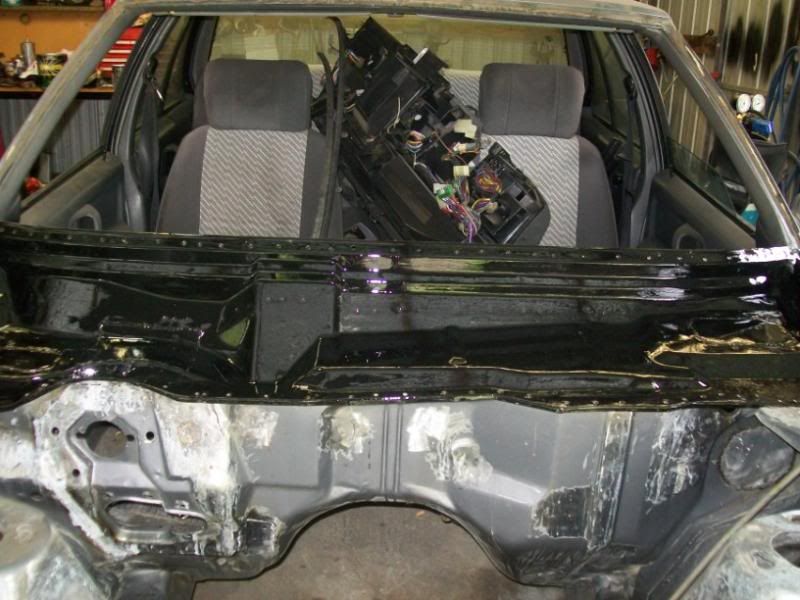
More pics. The corners are tricky, its slow going, but i spent 5 hours sanding and filling today beleive it or not, bear in mind, im not what youd call efficient at using filler lol, im learning as i go
still more coats to go, then a glaze coat once ive gotten things close
-
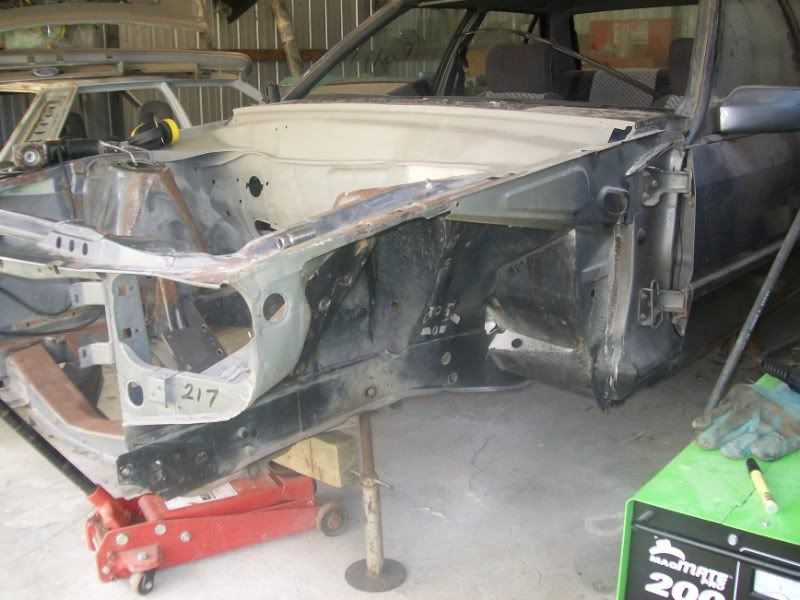
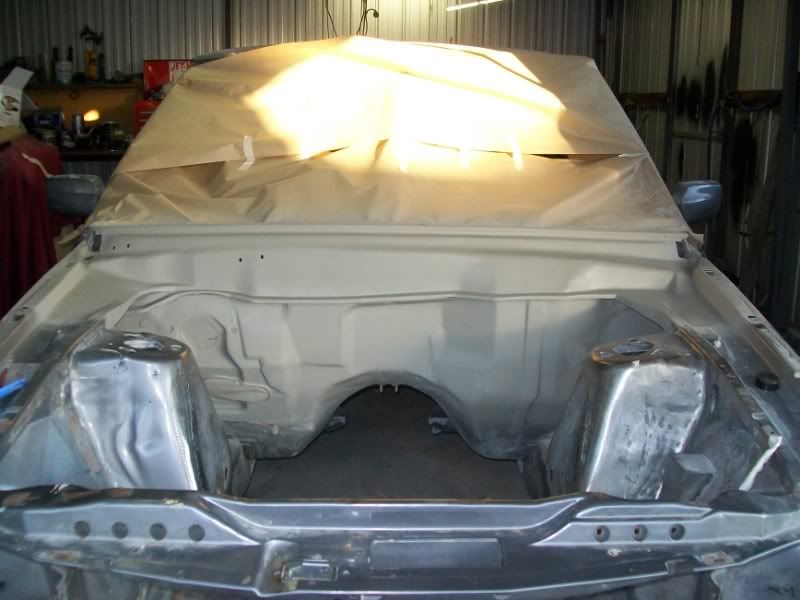
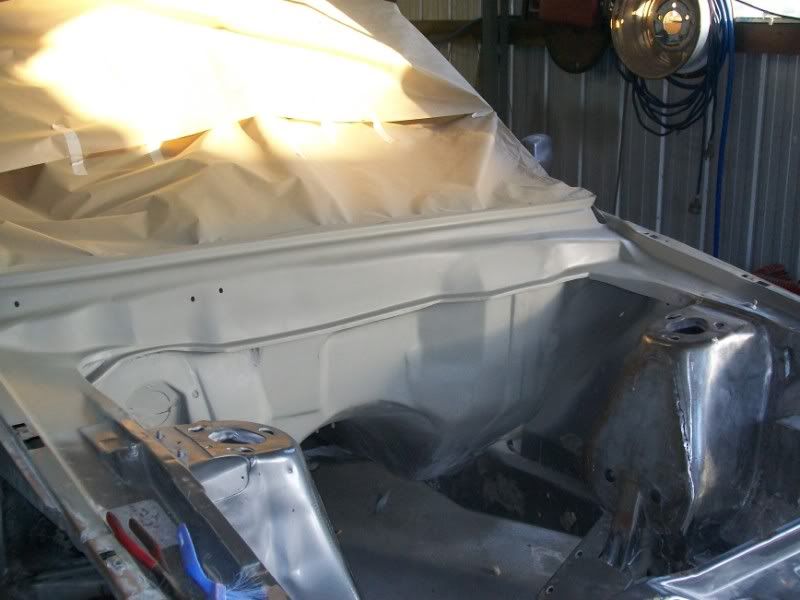
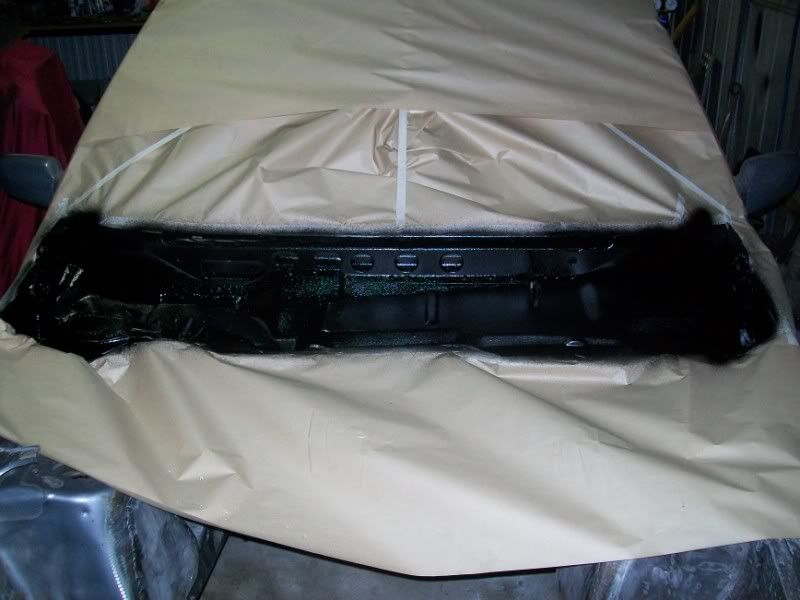
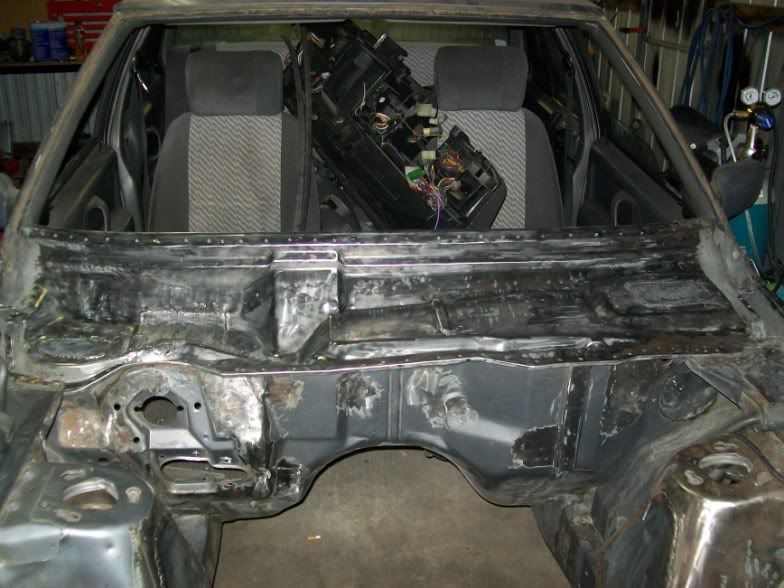
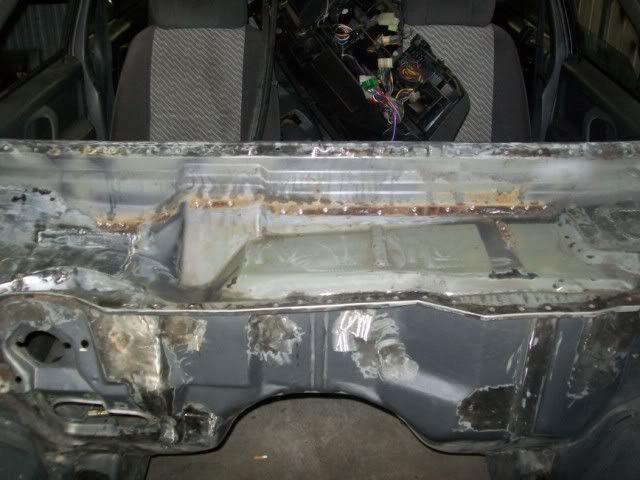
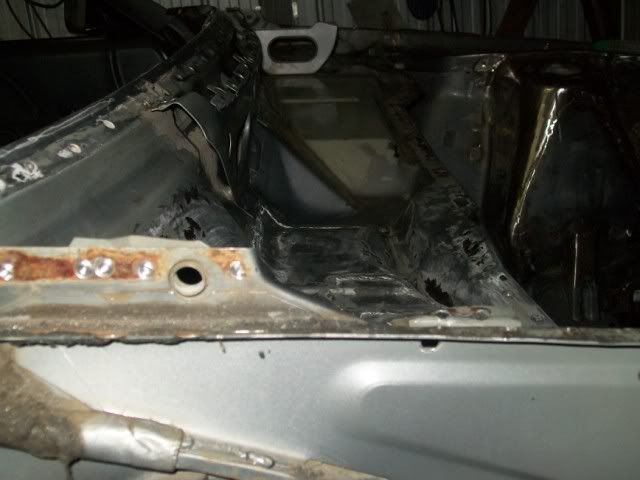
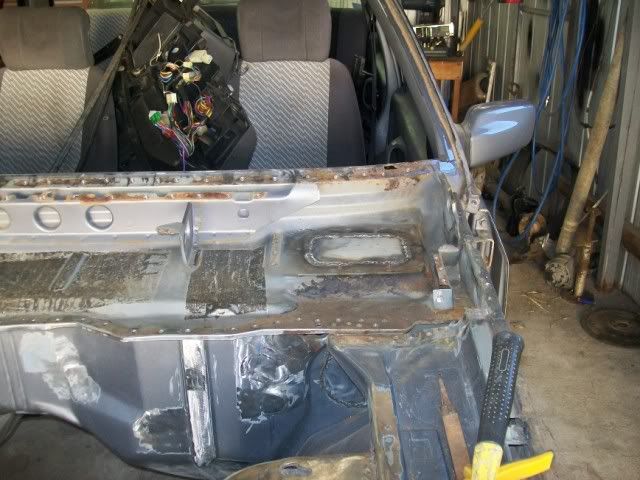
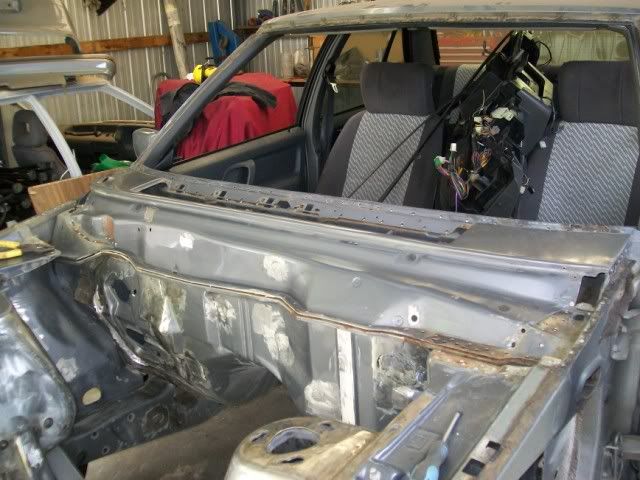
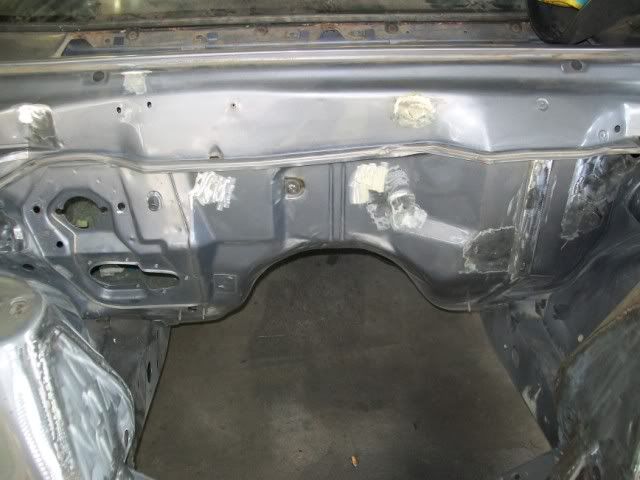
Finished welding the cowl back on, few more welds to go around the windscreen, but apart from that the hard yacka in that department is done. Just about ready to smooth the firewall with filler, so ive stripped the firewall and cowl to bare metal. The corner peices i welded and and blended them into the innerguards etc. I also cut the top lip off the cowl where it joins the firewall
some pics
blended corner peices
in this pic i welded a small strip in to join the inner guard to the cowl lip
stripped
To ensure everything is really smooth the whole lot will be covered in filler, obviously 95% of it will be rubbed off
so, the plan is to start smoothing the firewall and work my way forward, ive still got plenty of welding to do, so ill just keep poking along
-
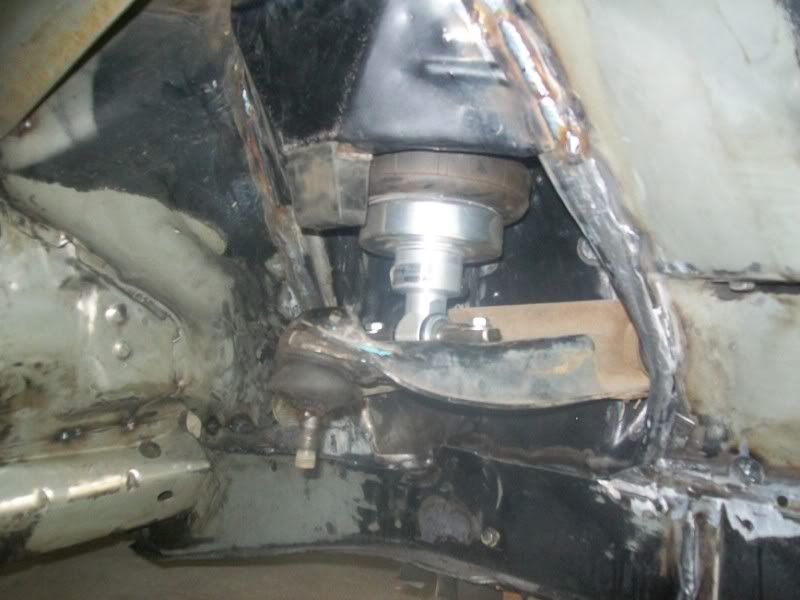
just found a front set of shockwaves on ebay, At least $250 cheaper than normal from airide melbourne so i bought them.
now i just have to chase up some rear shockwaves.
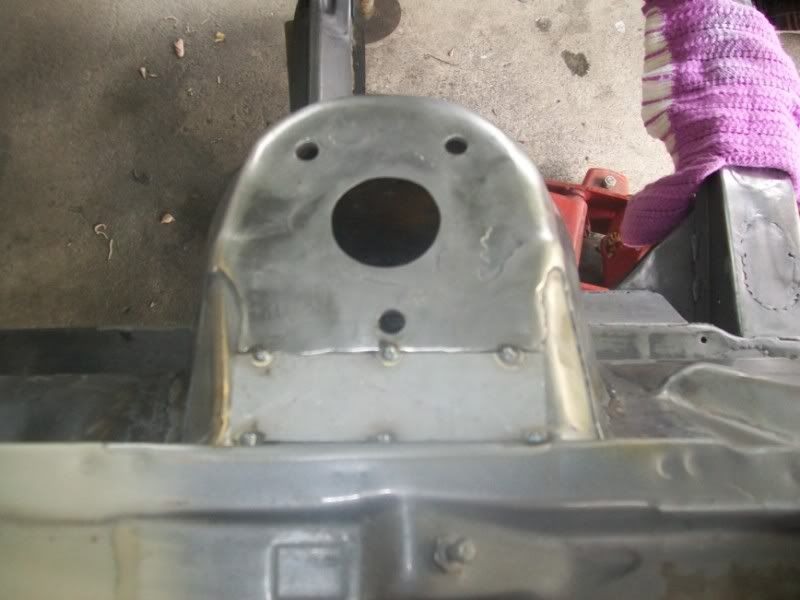
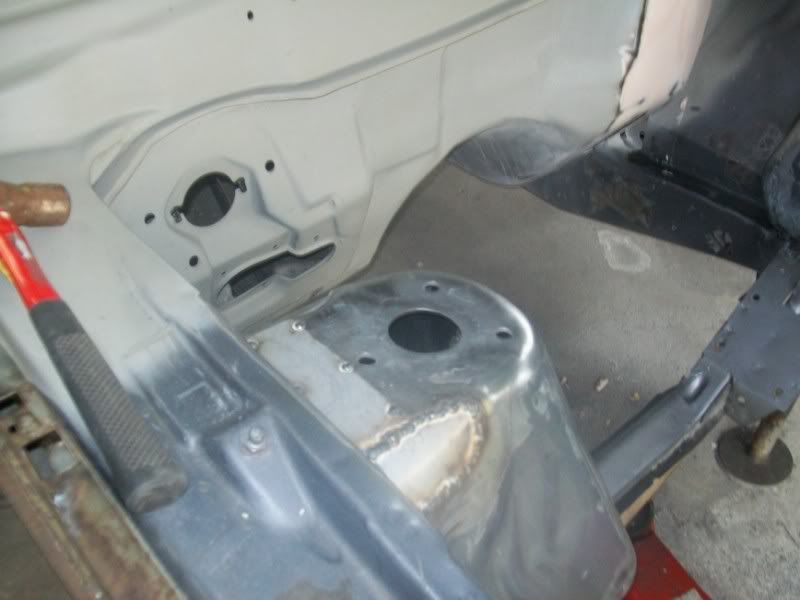
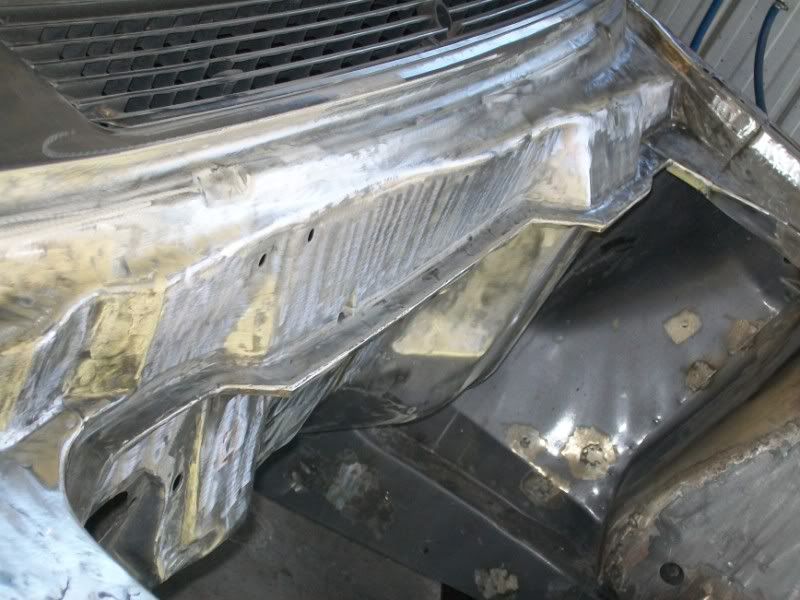
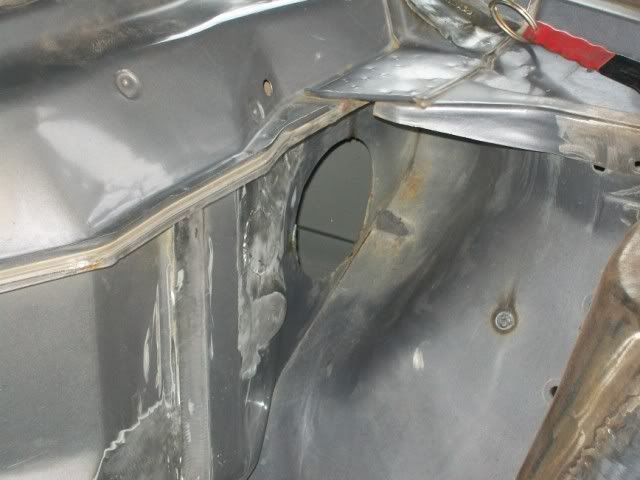
Ill be using SKW8000 series for the back with a stud mount top. These will go where the factory shock's would normally bolt. Because of the diameter of the shockwaves ill have to extend the lower shock mounting on the diff housing to acheive the travel i want, the body of the shockwave will not fit up inside the factory shock tower, so i need to pancake the shock tower (make it shorter) and gain the extra travel on the diff.
-
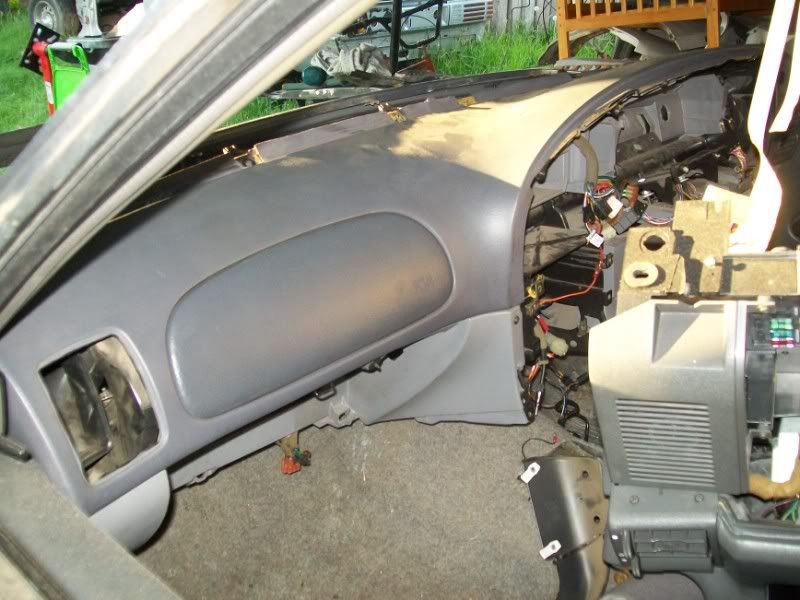
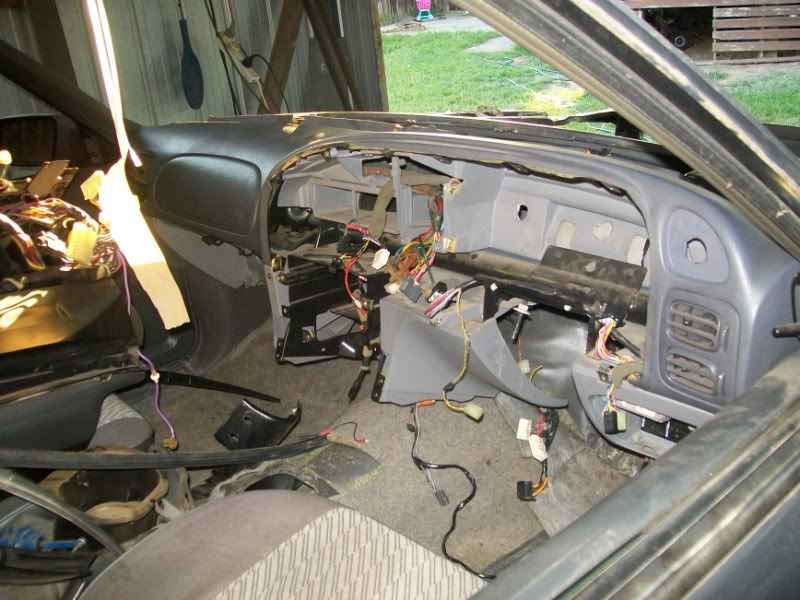
Starting trial fitting the EL dash, looks like its going to fit nicely (Once i trim and mod it)
suprisingly, the curvature at the top match's the XF
not quite sitting right yet, gotta do some mods.
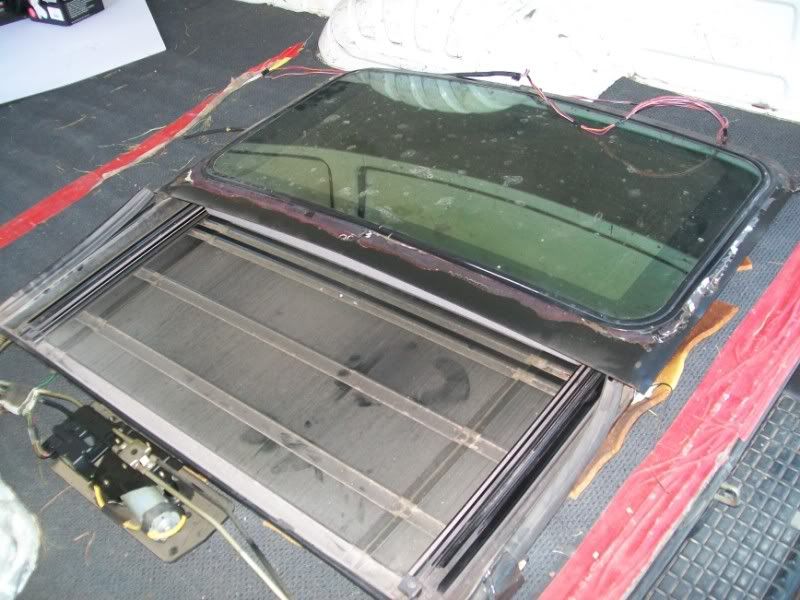
Managed to score the sunroof ive been after (EL XR). These dont require a rolled edge like the old style ones do, just a hole to be cut, then the rubber seal slips over the cut
-
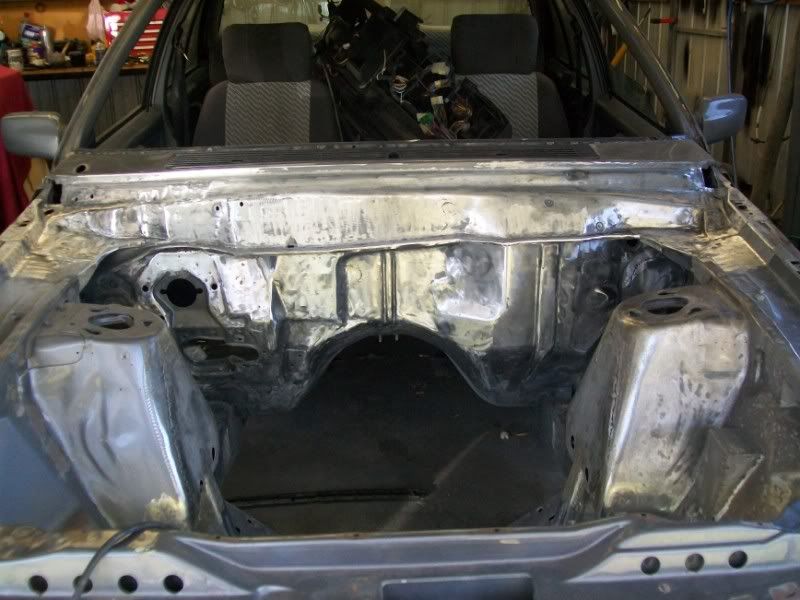
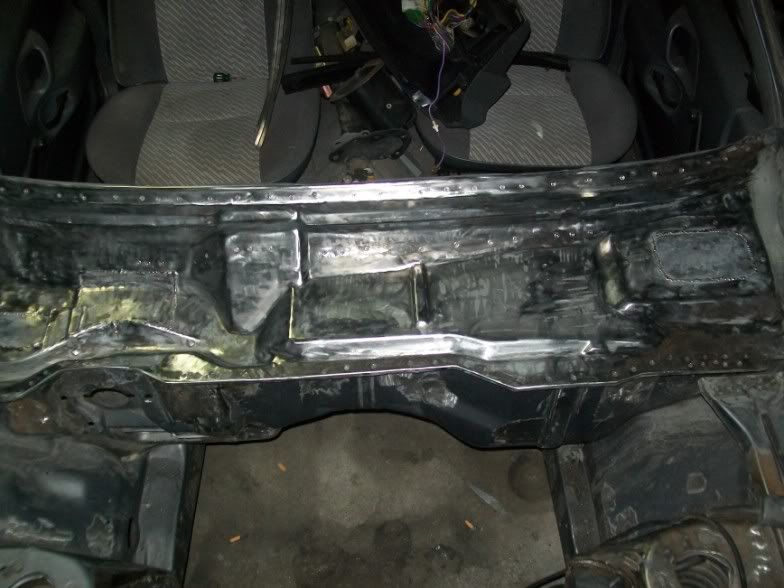
not much to report, welded all the internal bracketry back in, and gave it a final coat of 3M rubberised underbody coating just to seal things up really good. I ran out, it needs one more coat, so ill have to wait till tommorrow to finish. I masked things up real good, as this black stuff gets everwhere
Im welding the top back on tommorrow i reckon. I cancelled the cowl mods, its just going to take to long, and its a lot trickier than i first thought, ill do it on another build i think. I really need to get back to the engine bay work and get it in primer over the next few weeks
-
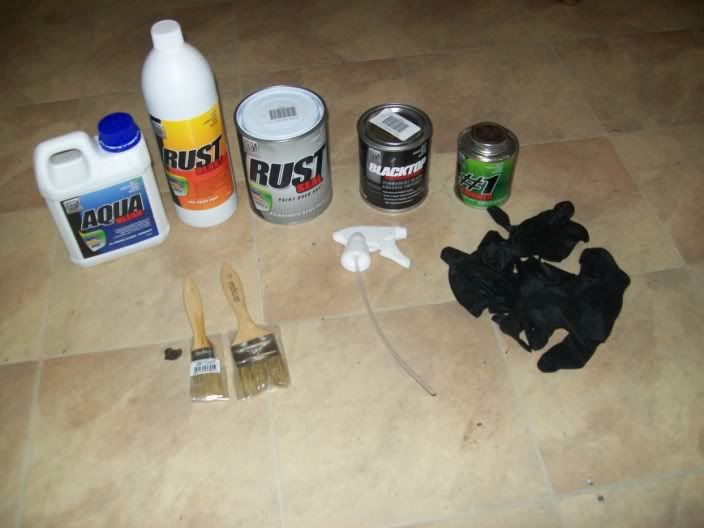
I was supposed to keep you guys in the loop with how i prepped the plenum floor using the KBS products. Unfortunatly i got a little to enthusiastic, and before i knew it i had a coat of the kbs rust seal laid on...
heres the first coat, still waiting for the stuff to dry I should be able to recoat in 2 hours. It lays out amazingly smooth, and goes a long way
First impressions, the kits awsome, except the busted arse paint brush's supplied leave bristles everywhere, not much of an issue as this will be covered, but handy to know for when i do suspension components. Already the first coat is levelling out.
The aqua blast cleaner is really amazing stuff, for something you dilute with water at 1.5-1 its really powerfull! Ill be buying a 4l container of this stuff for sure, as it will be handy on lots of things.
The rust blast in all honesty smells like phospuric acid, Its completly clear. It leaves a zinc coating wherever youve used it, and you end up with a white residue with a rainbow like colouring on bare metal areas. According to the instructions you can leave the metal uncoated without paint for up to 30 days. Probably a great thing for when your taking paint down to bare metal, handy to know
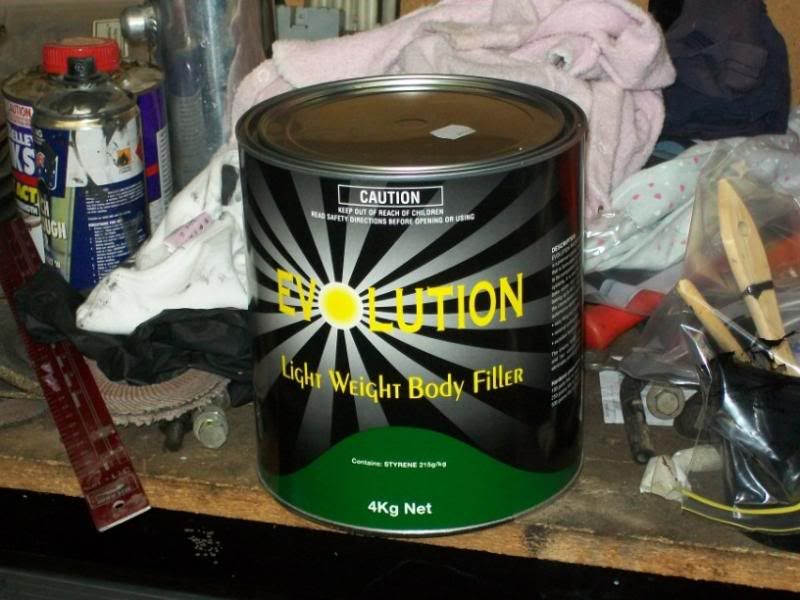
Ive decided to give a body filler i havent used before a go, its protec evolution, apparently very easy to sand, and pretty good as far as pinholes go
-
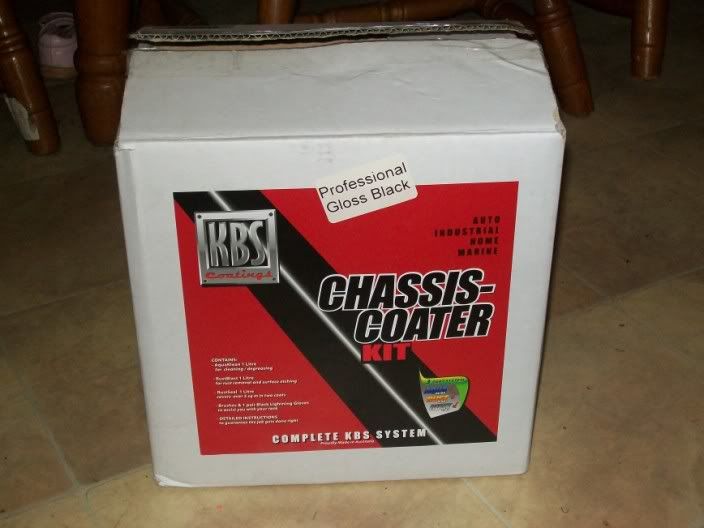
Got my KBS stuff today, Cant wait to apply it all and step ya's through the whole thing, im really keen to see how tough this stuff is, as it apparently goes almost as hard as powder coat.
Found a local supplier in traralgon who keep it in stock, preston motors who sell good name auto paint products, they had great things to say also
-
been busy cleaning the metal up still.
It all seems pretty boring i know, and it appears im not getting anywhere, but its all hard yakka
Paint stripper tonight, then wire wheel and scotch bright, Ill then use this stuff for that pitting and minor surface rust
-
not to much to report, waiting for my KBS coating which ill have friday
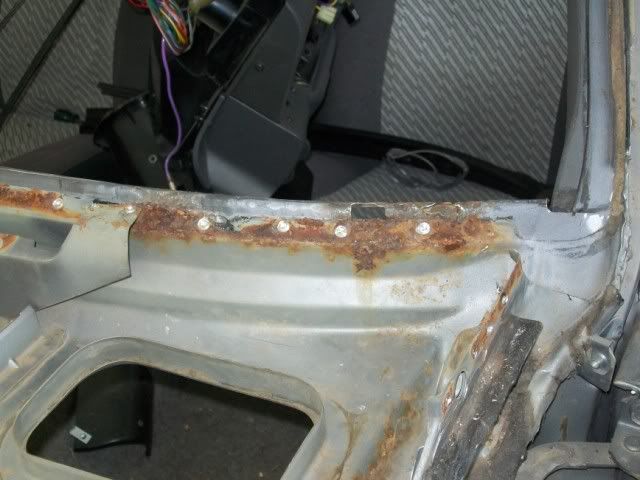
I decided to drill the spot welds and remove the wiper support, as i figured it was a bit of a water/rust trap, I decided ive come this far i might aswell elliminate another possibility of rust. Drill out the welds and removed it, lucky i did, surface rust setting in
Stripping the whole lot back to bare metal, as im finding rust under the paint, i definatly dont want this issue again
This KBS coating 3 step system comes with its own type of cleaner, rust convertor and coatings, so once i get all this prepped ill do the procedure in here and inside the cowl, i dont think ill have this back together this weekend.
If anyone gets a chance, watch the youtube vids on this kbs stuff, Much like por15, goes as hard as powder coat, and doesnt chip or crack, and dries with exposure to moisture, amazing stuff
-
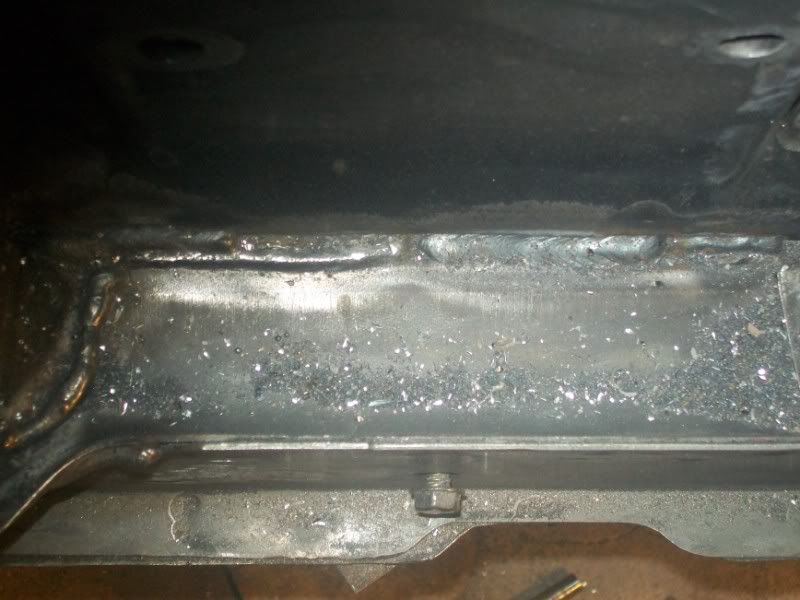
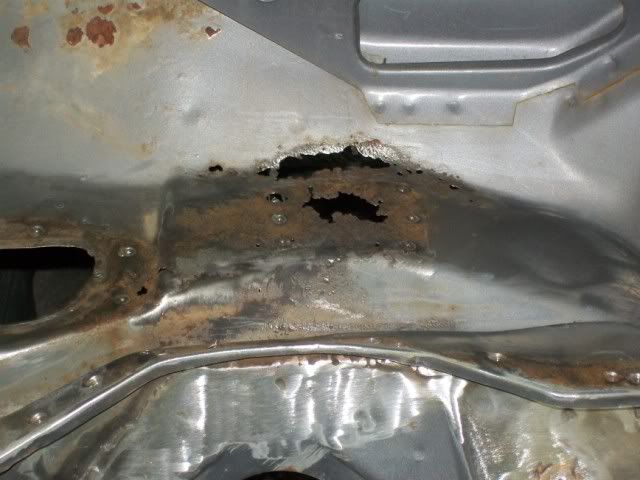
welded in another little patch, this seems to be the best way to do it rather than cutting one big section out, as each peice can be shaped to suit where needed instead of trying to duplicate complex curves on one big panel
finished off welding the holes left by the old vent and trim inside the car and have been rust converting, ive treated all rust areas 3 times now, metal is starting to look good, will go over it all with the wire wheel again tommorrow. You can seee how the phosphuric acid blackens all the rust areas
this is how many spot welds hold in the external plate on the passsenger side
-
Early start today, Trying to get as much as i can done with what i have left of argon, which is bugger all, dont think ill have enough to weld in new rust repair sections, but we will see.
Also fired up the heat gun and removed the sound deadner material
filled the air vents
the worst rust done, got a few minor sections to do
Basically i used the peice i cut out as a template, tricky thing here is it bends in two plains, so the best way i found to do it was to tack in the peice at the front, and slowly work my way around, hitting it with the hammer as needed to bend it so it could butt up nicely
Nasty
-
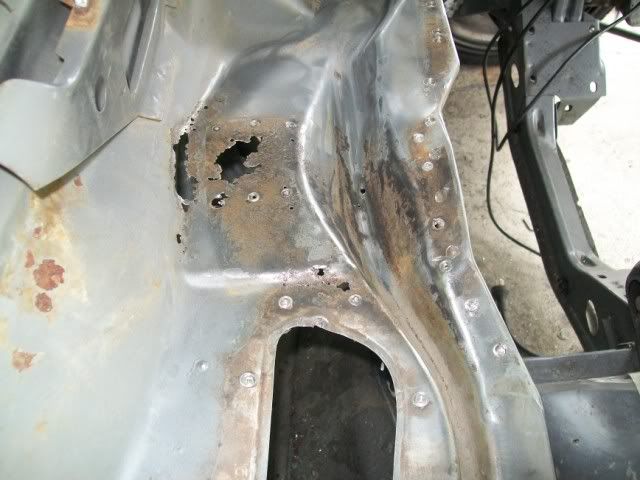
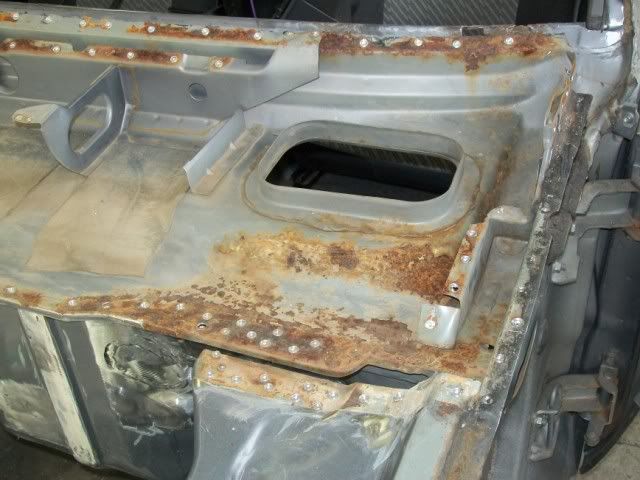
removed the vent shades, then went around with a dolly and hammer and flattened the lip down in preperation for some sheet metal to be welded in place, then cleaned everything up with the wire wheel, you can get a better view of the rust now as ive removed the reinforcing plate that goes over the water drain
Luckily I caught the passenger side in time, just needs cleeaning and rust convertor, metal is still solid
-
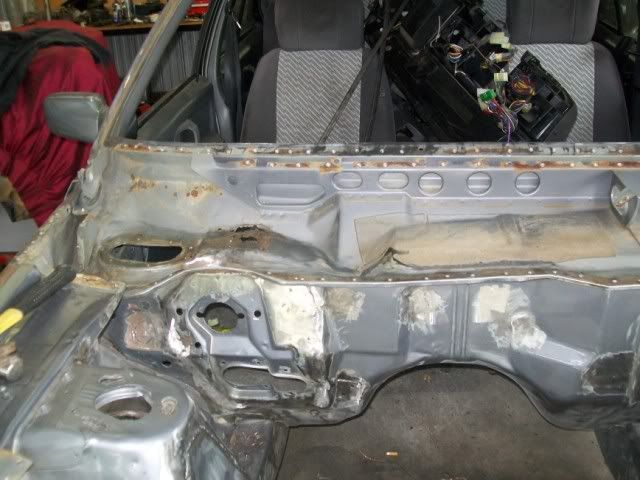
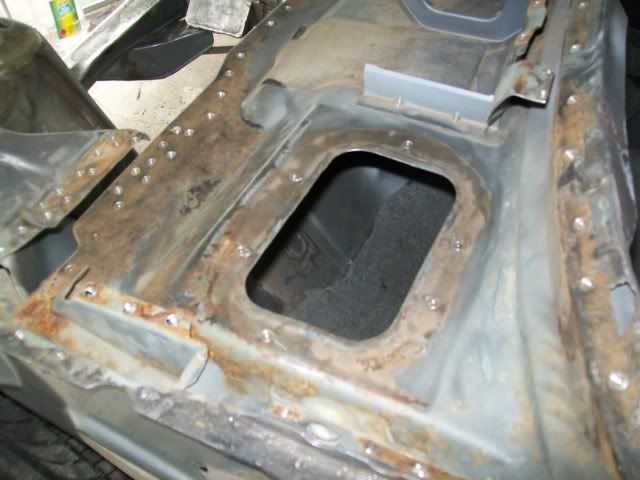
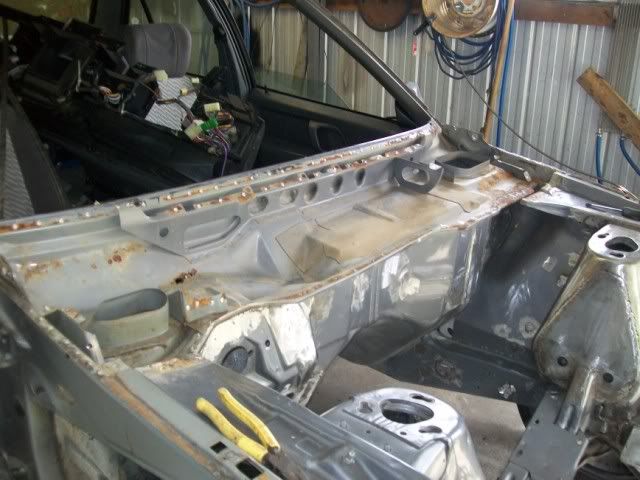
And i thought this thing had no rust! yeah right. This weekend gunna be a busy one for me. I havent worked on the car for 2 days. I found rust in the plenum area a little while ago, much to my shock lol, its pretty minor. The plenum looked perfect from the top, it never leaked water or anything, so it came as a bit of a suprise to find rust when i removed the dash. So this weekend involves drilling 100 spot welds and removing the cowl and fixing the rust. Ill take some pic, but the rust on this thing is unusual in that its in the high area on the drivers side. It appears moisture has gotten under the reinforcing plate across the water channel, and create a pinhole, moisture has then gotten inside and sat between the factpory under lay material and the tin, rusting from the inside of the car out, hence the reason i couldnt see any rust from the top. Both air vents are perfect, no rust around them, so it weird. While im in the plenum ill be cutting off the air vent extensions, and welding in blanking plates and smoothing the plenum floor...i really dont know how far ill get this weekend, even if i just get the cowl off and the areas all cleaned up ill be happy. Ill take some happy snaps as i go. Ill be giving the spot weld drill glenn gave me a big workout!
I removed the windscreen last night, very easy, i used mig wire, poked it through the seal, and tied a handle on each end of the wire and just cut through the seal, popped it out, and then cleaned up the black crap, which was really easy, as the windscreen is still the factory job beleive it or not.
removed the plenum cowl. In some areas the factory had spot welded 3 times in the same area meaning i hade to have 3 shots at it with the drill, real prick that was.
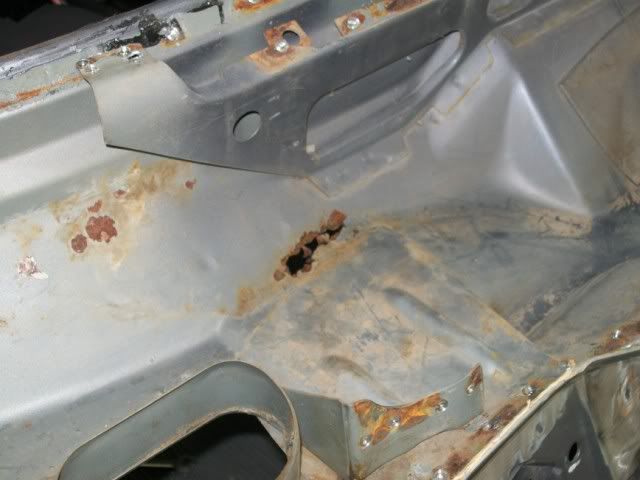
heres the rust i have to fix
all this is surface rust
this should be an easy fix
I need some 1mm sheet for the plenum floor, which is a bugger because i never bought any, now all the sheet metal places are closed
-
before
After
-
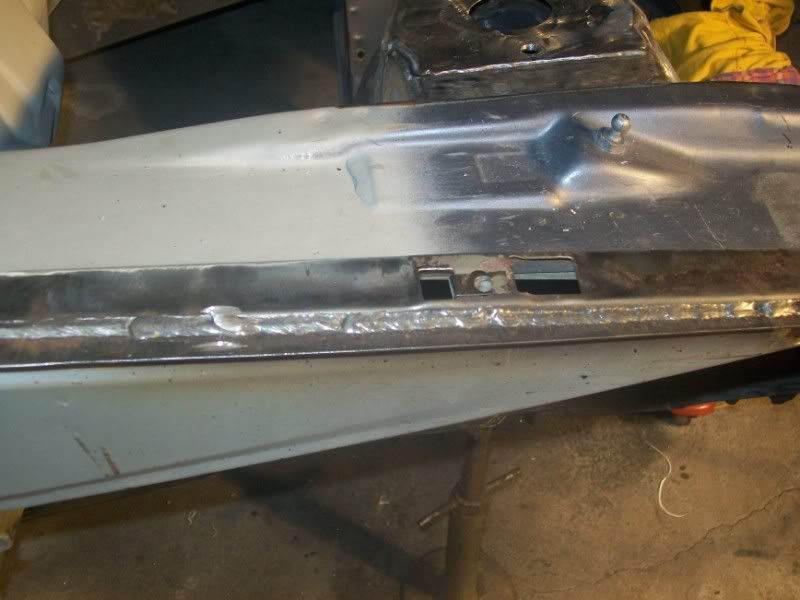
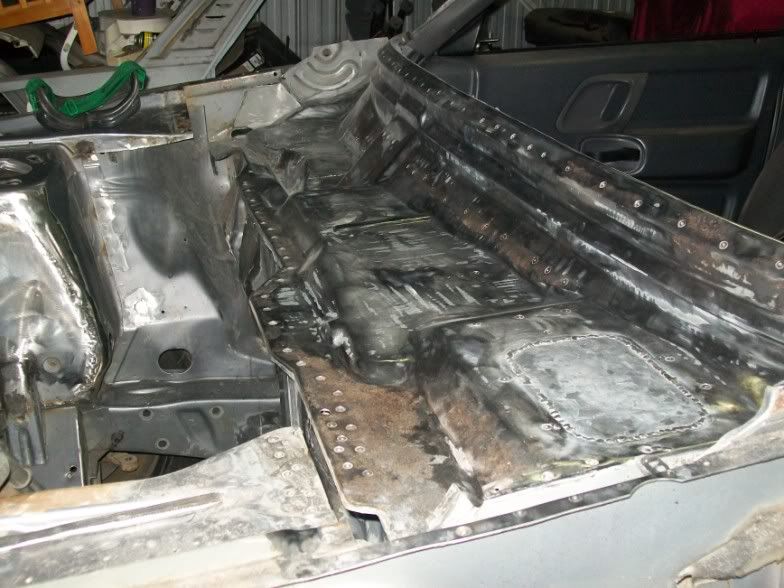
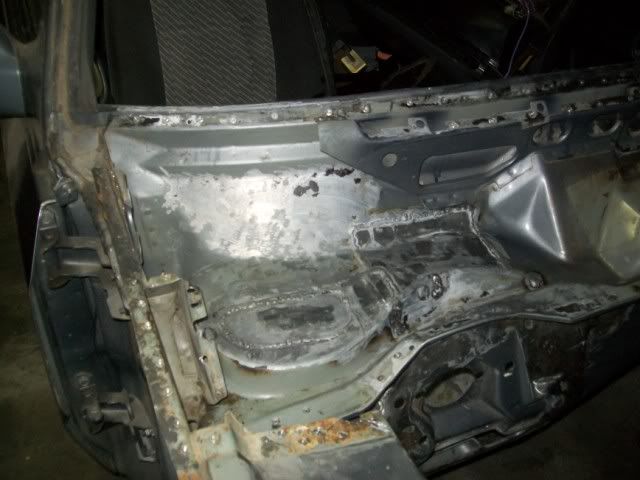
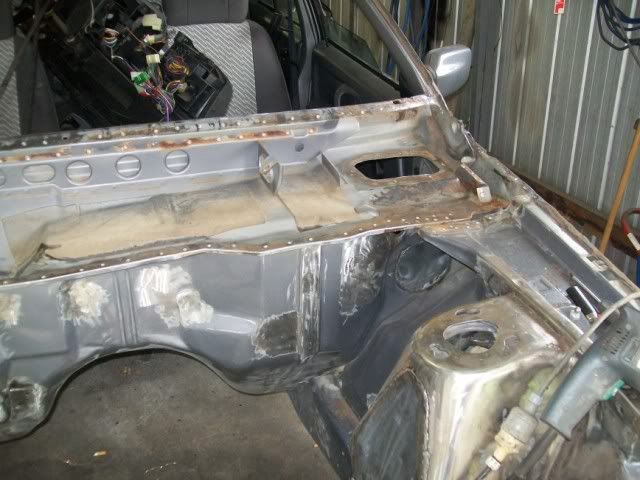
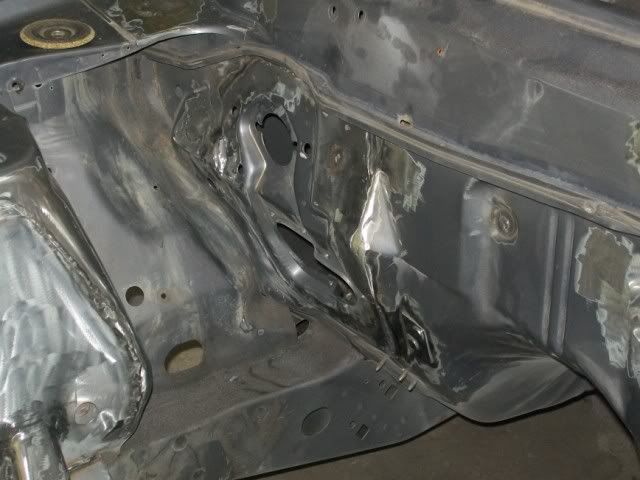
Okay, nearly finished the drivers side firewall, bit more welding and smoothing and i should be done. I welded up the clutch cable hole, as i figure i can make a nice bolt on bracket like Drew sugested down the road if i want to.
The lip is gone!
My welding is definatly getting better. In this pic you can also see the handbrake reinforcing plate. Ill weld this to the firewall and run use some stainless buitton head hex bolts here
-
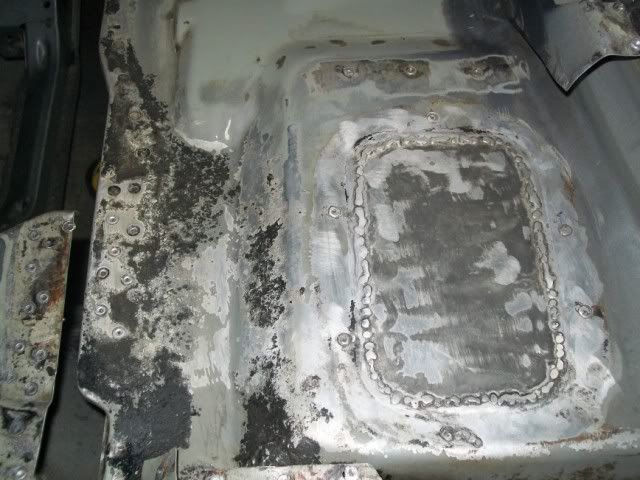
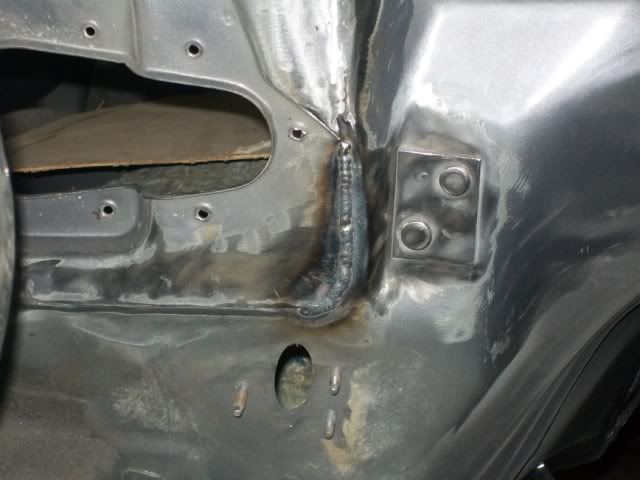
just removed the heater fan hump. These have three spot welds, Just drill em and hit it and it pops out.
then cut out a new peice and welded it in, tricky trying to keep it all flush, still have to go back around it one more time with the mig


KLR250, The build
in Projects and Build Ups
Posted
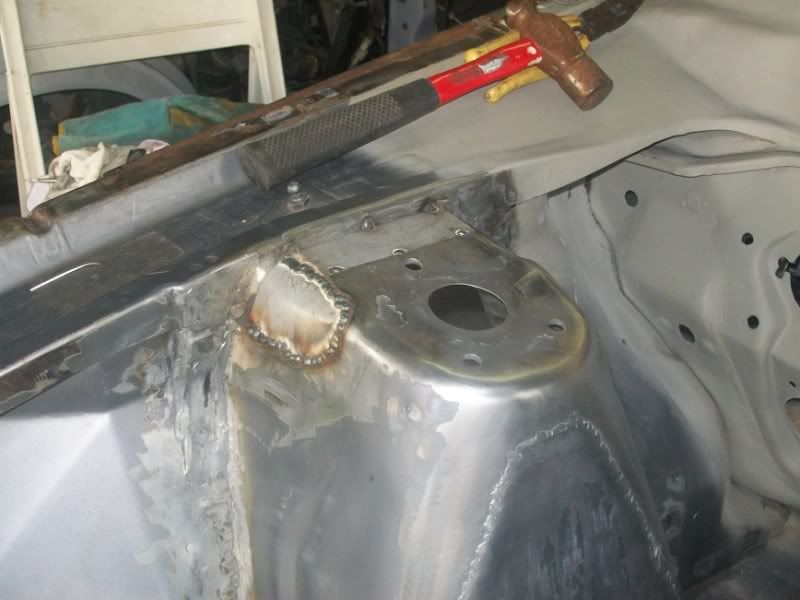
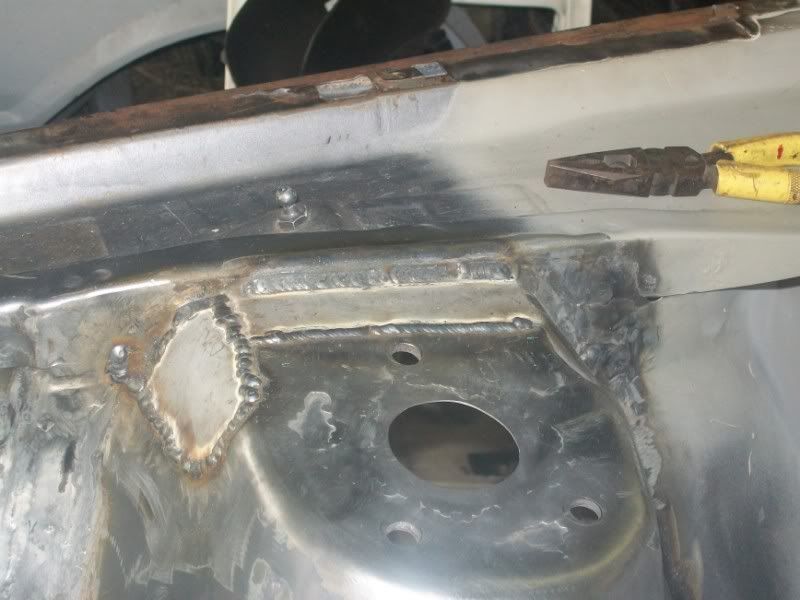
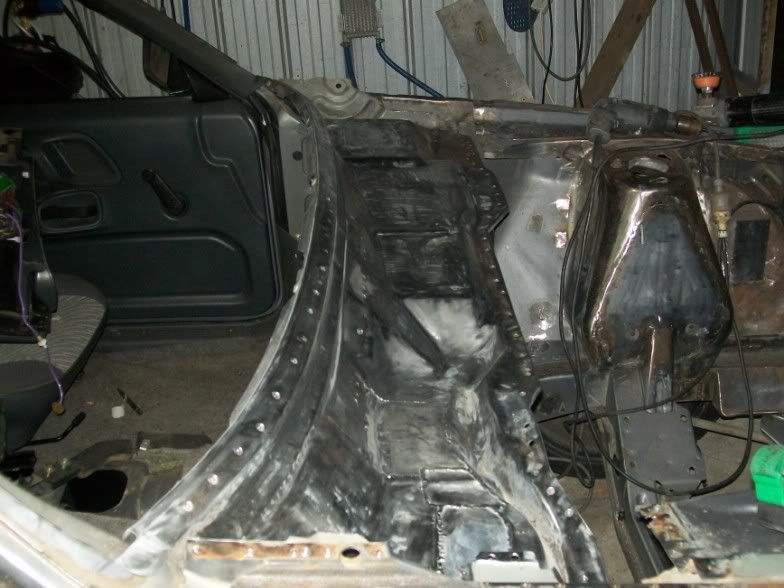
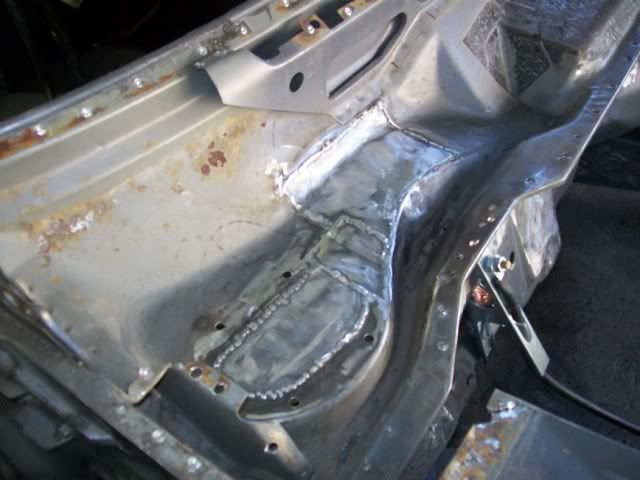
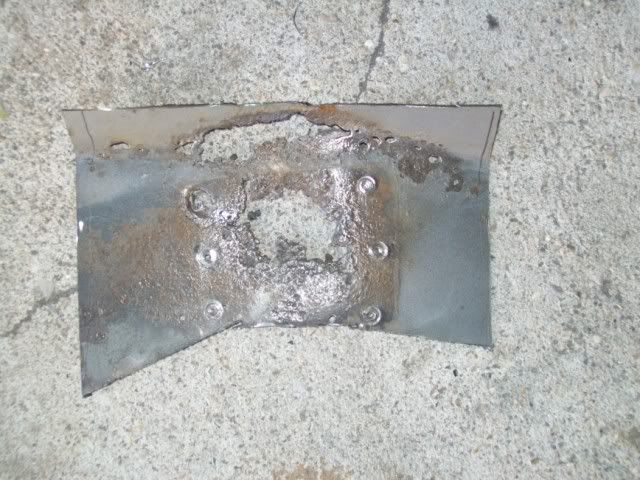
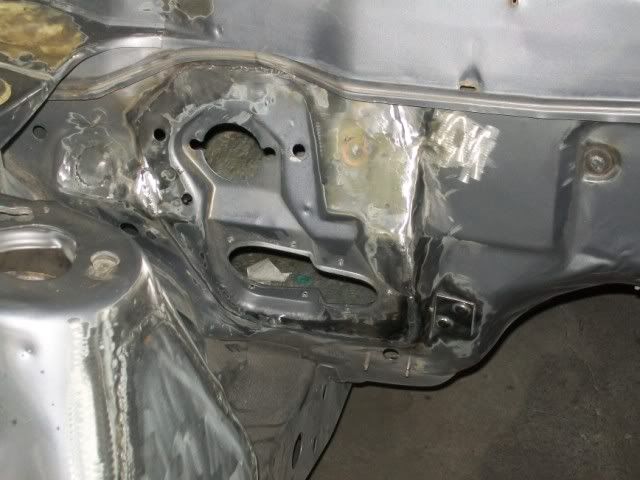
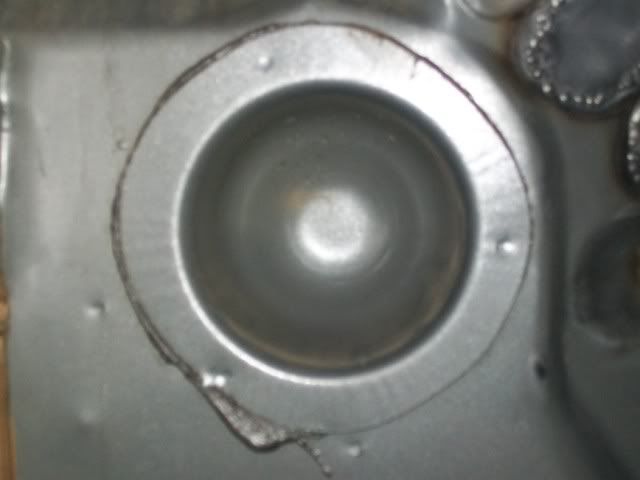
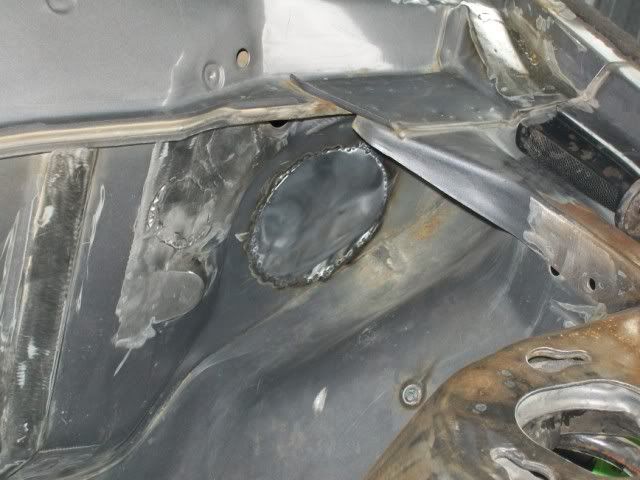
Finished welding up the passenger side today, Bump stop plate is welded in, nearly ready to use some filler on the inner guards
also had to do some shrinking on the inner guard, i put to much heat into it and warped it good, so i did a series of spot welds and quenched them with a damp cloth. Normally you would use an oxy to heat things up, i dont have one. its come up pretty good, just needs some finnessing with a hammer and dolly now
Hopefully i can get a start on my strut brace this week