

.jpg.2ad20741e10d50661d5fbaeddb6384ce.jpg)
Pininfarina
-
Posts
23 -
Joined
-
Last visited
Posts posted by Pininfarina
-
-
58 minutes ago, Jeffs_Emporium said:
Loving the height
preciate it cheers
-
2 hours ago, BlownCorona said:
this is so bad its circled back around to being awesome.
real authentic Japanese style of not giving a fuck.cheers mate
-
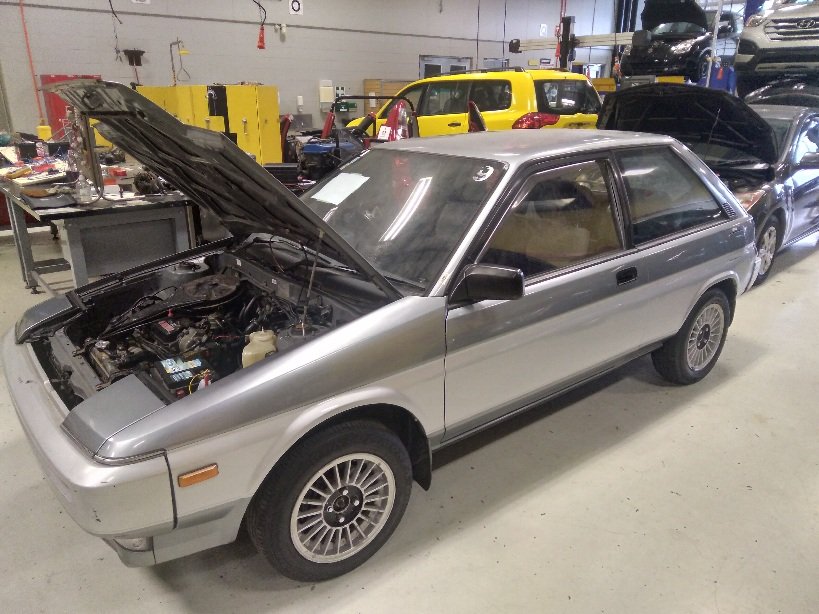
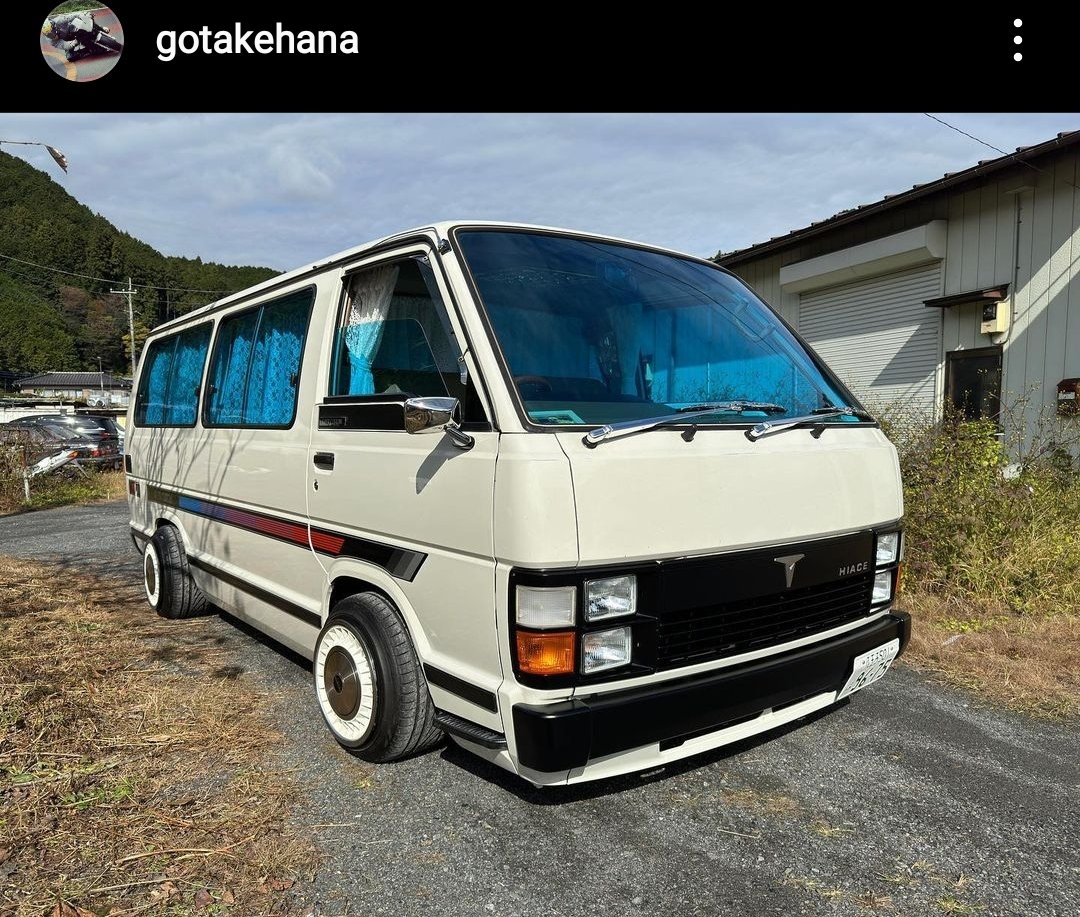
On 05/05/2023 at 20:03, Jusepy82 said:
At Hamilton wintech.

fwwaaa time for a 2e-te. If I spotted that id probably make an offer
-
 2
2
-
-
thanks bro. yeah had to get it low or else it just looks like nanas car haha. plus i love everything low
-
- Popular Post
- Popular Post
Around that time these arrived in the mail from elite wheels in chch:
Standard 12" steelies widened from a 4j to a phat 7j. 145/70 is the smallest r12 tyre available in the country, so that's the goal.
here's when I released they wouldn't be an easy fit:
shout out to mag n turbo petone
145/70 on 7j achieved.
Looks mint with the chrome ring and center cap added. big fan of the wide steelie look. plus where else can you find a 12x7 4x100 wheel with this offset?
The lip pokes out heaps with the chrome trim on
after gently massaging the guards for a couple hours it looked like this:
pretty stoked with how it came out.
and that's pretty much where I am with it today. This weekend I'll tidy some things up, sort out the lower engine support, get a battery for it and take it for a spin. I've got my carpenter flattie making a parcel shelf for me so the pioneers will be in soon.
plenty more that needs to be done to it, so stay tuned
peace-
24
-
 3
3
-
- Popular Post
- Popular Post
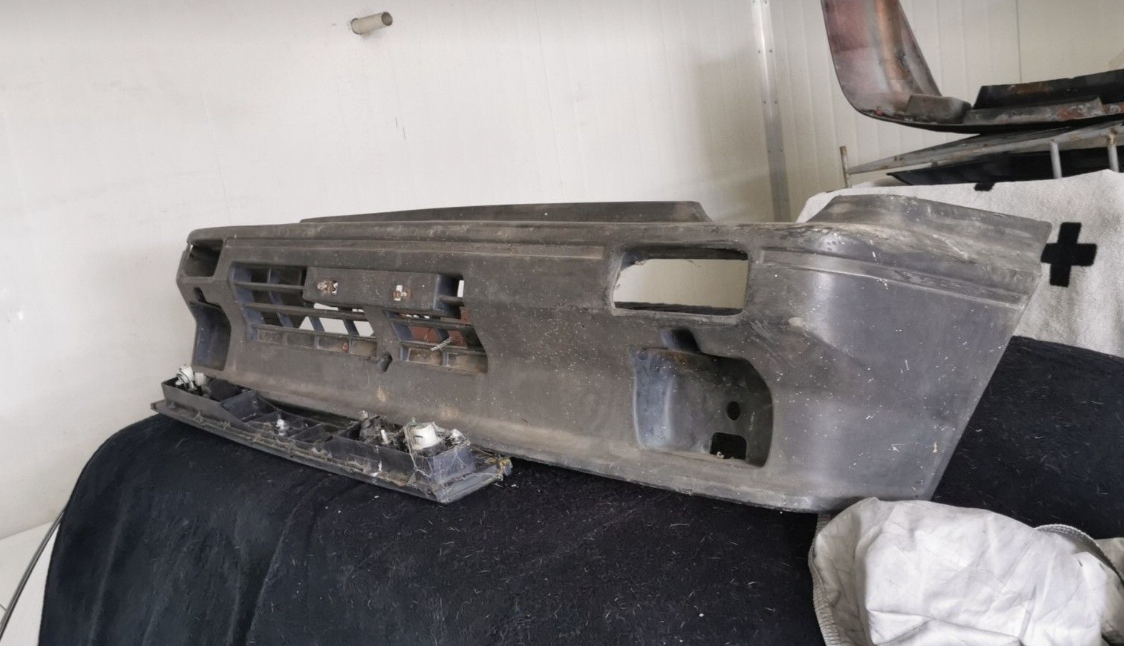
Final result with the turbo bumper on:
no longer nana spec.
unfortunately it is practically sitting on the lower engine support, so that will need to be re-engineered at some point.-
17
-
 2
2
-
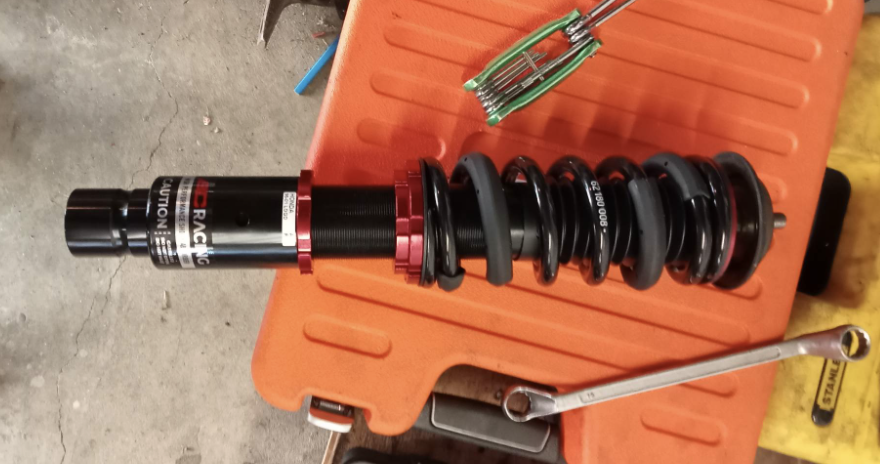
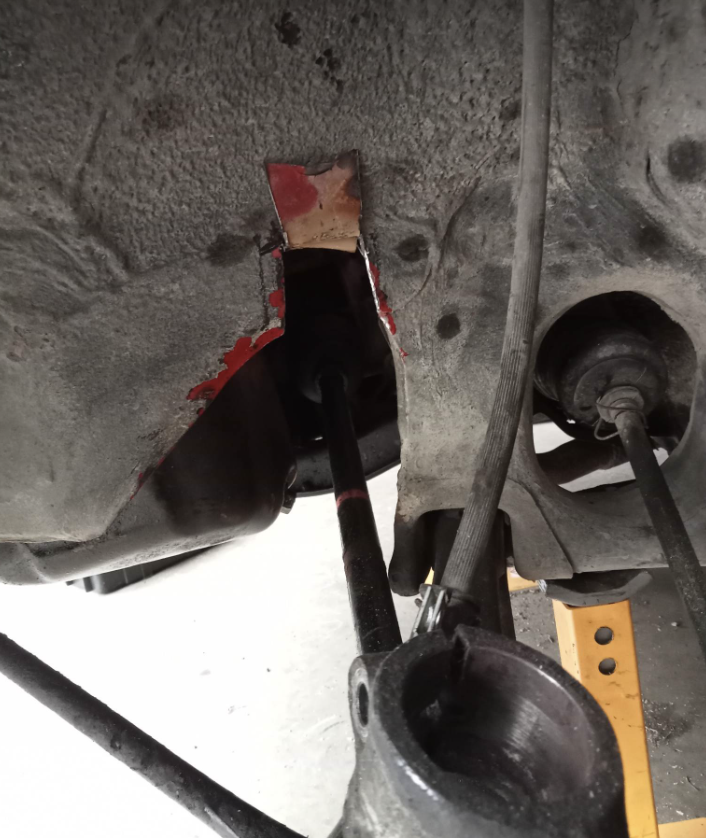
now for the juicy bit, slammage.
The rear was simple, I removed the springs.
The front was a bit trickier. I know from past experience that just removing the springs doesnt get them low enough, so I used juddies made for a later honda logo wound all the way down with the springs cut a coil or so.
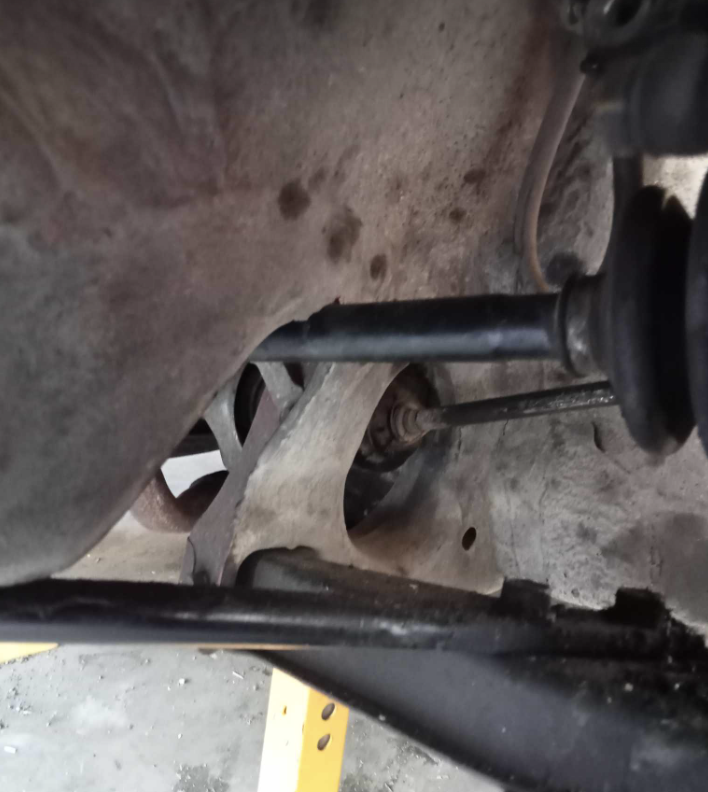
once I dropped it, i found it was sitting on the axle. I had to cut a small flap in the chassis leg on the passenger side to make way for the axle. The drivers side was fine as the axles are asymmetrical.
yeah it's a bit rangi. I will fold the flap down and weld it when it's wof time.
-
3
-
-
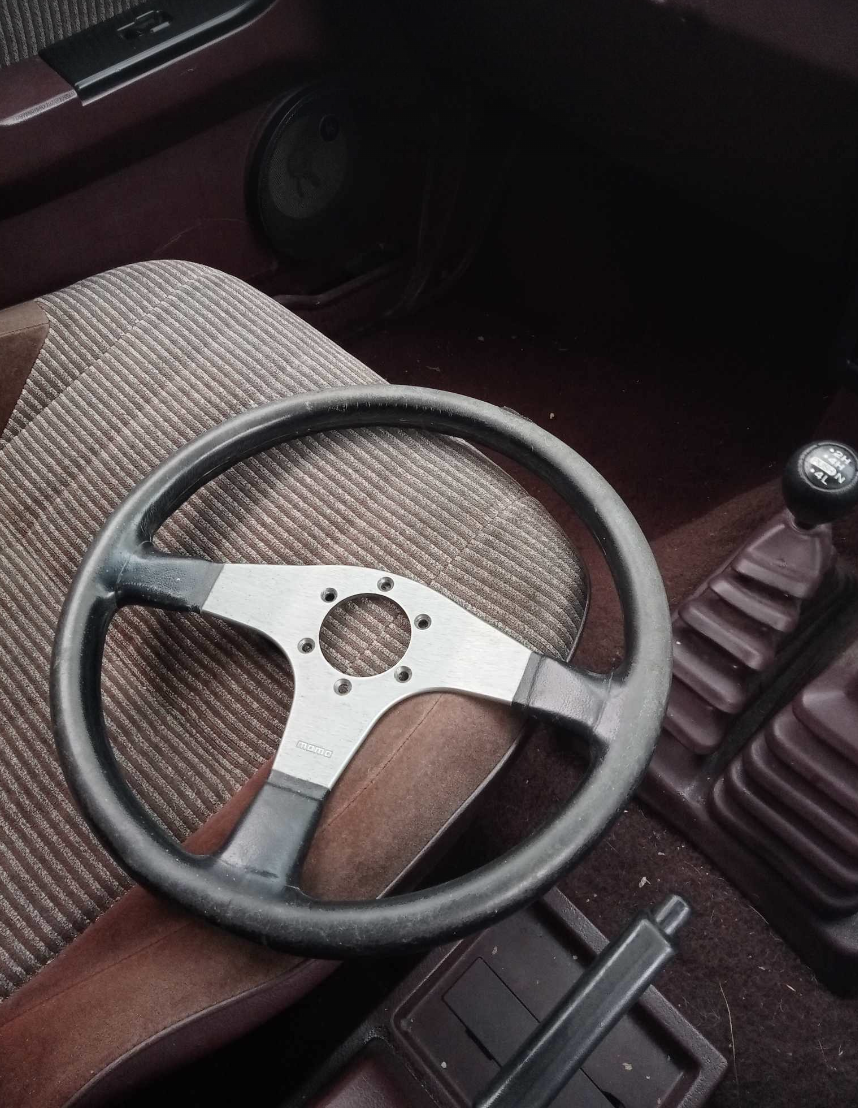
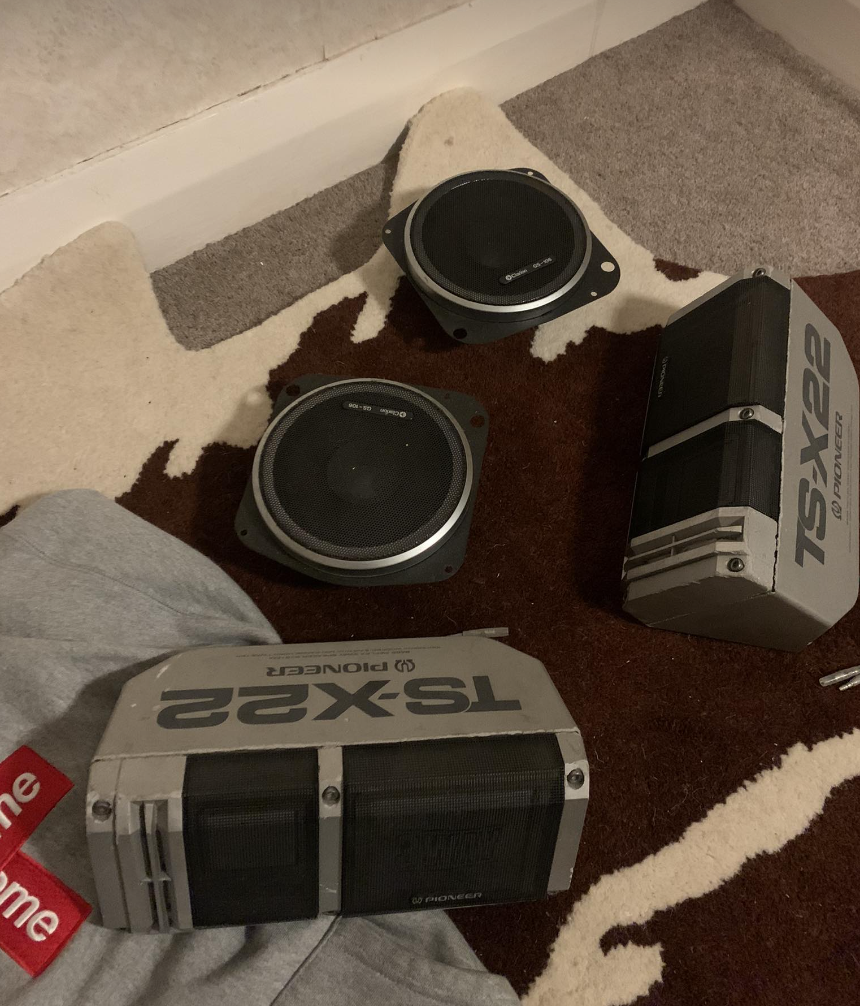
I picked up a few bits for it:
Old momo (stamped '91), t1 bumper and fog lights which I didn't get a picture of, and some period sounds. The pioneers are from @Jeffs_Emporium on facebook.
-
8
-
-
On 09/05/2023 at 19:19, thegreatestben said:
I'll make a thread when I get round to it, it's a driveway ornament at the moment. Thanks for the info!
-
2
-
-
- Popular Post
- Popular Post
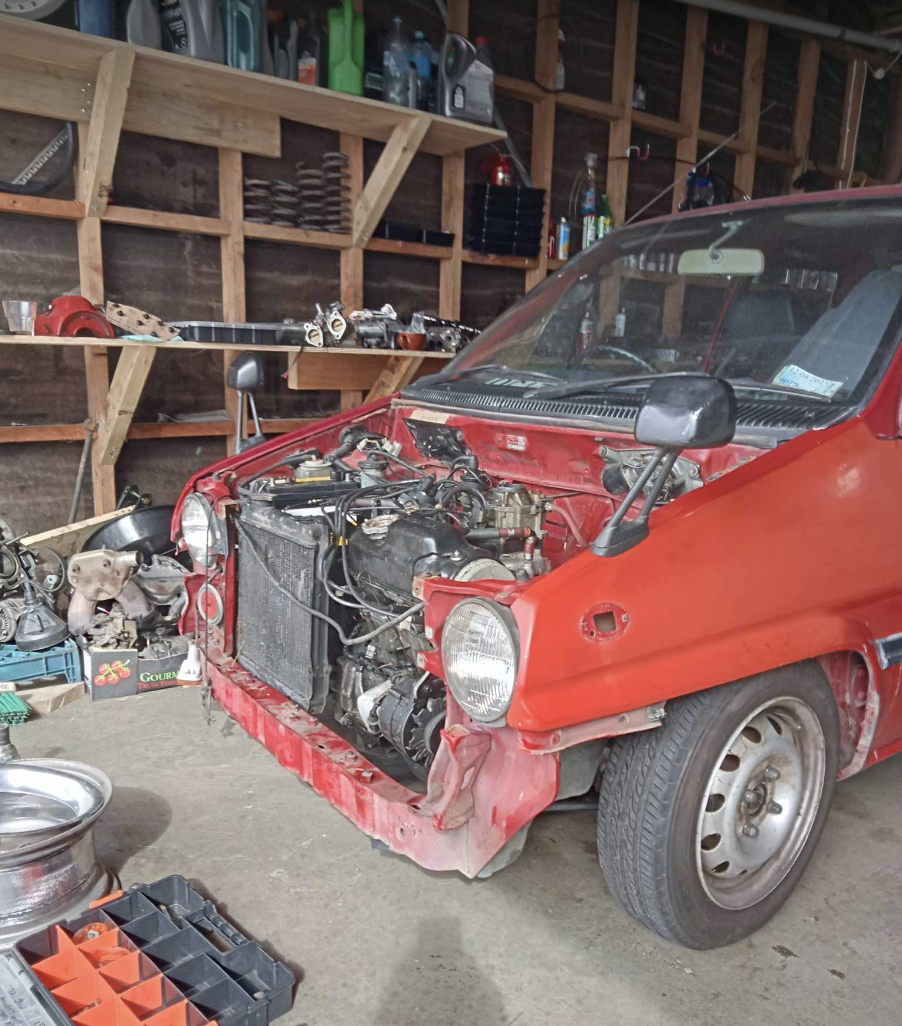
When it arrived I was pleased to find it was remarkably rust-free, but the motor ran like dick. It had trouble starting and had a super loud 'pinking' detonation noise under load.
I tried to fix the detonation issue by redoing the timing, thought the dizzy might be a tooth too far advanced but after confirming the timing i figured the weird emissions computer controlled carby was probably just running way too lean (which would also explain the trouble starting and hesitation to rev.)
My solution was to swap out the motor completely with a standard nz spec one, deleting all vacuum line spaghetti emissions gear in the process. including the cat converter which I reckon was also a part of the problem as a light would come up on the dash occasionally warning me about the exhaust temp. The motor came from my old city that rusted out. RIP
I also chucked a set of original fender mirrors and quarter glass to delete the door mirrors. I scored them from the legendary horopito wreckers a while back, super cheap.
when I can be bothered I will put the tachometer cable housing on the new motor to get that working again, as well as the cool red jdm “combax” cam cover.
-
14
-
discussion
-
let me know what you think
https://oldschool.co.nz/index.php?/topic/87638-pininfarinas-1984-honda-city-r/
-
- Popular Post
- Popular Post
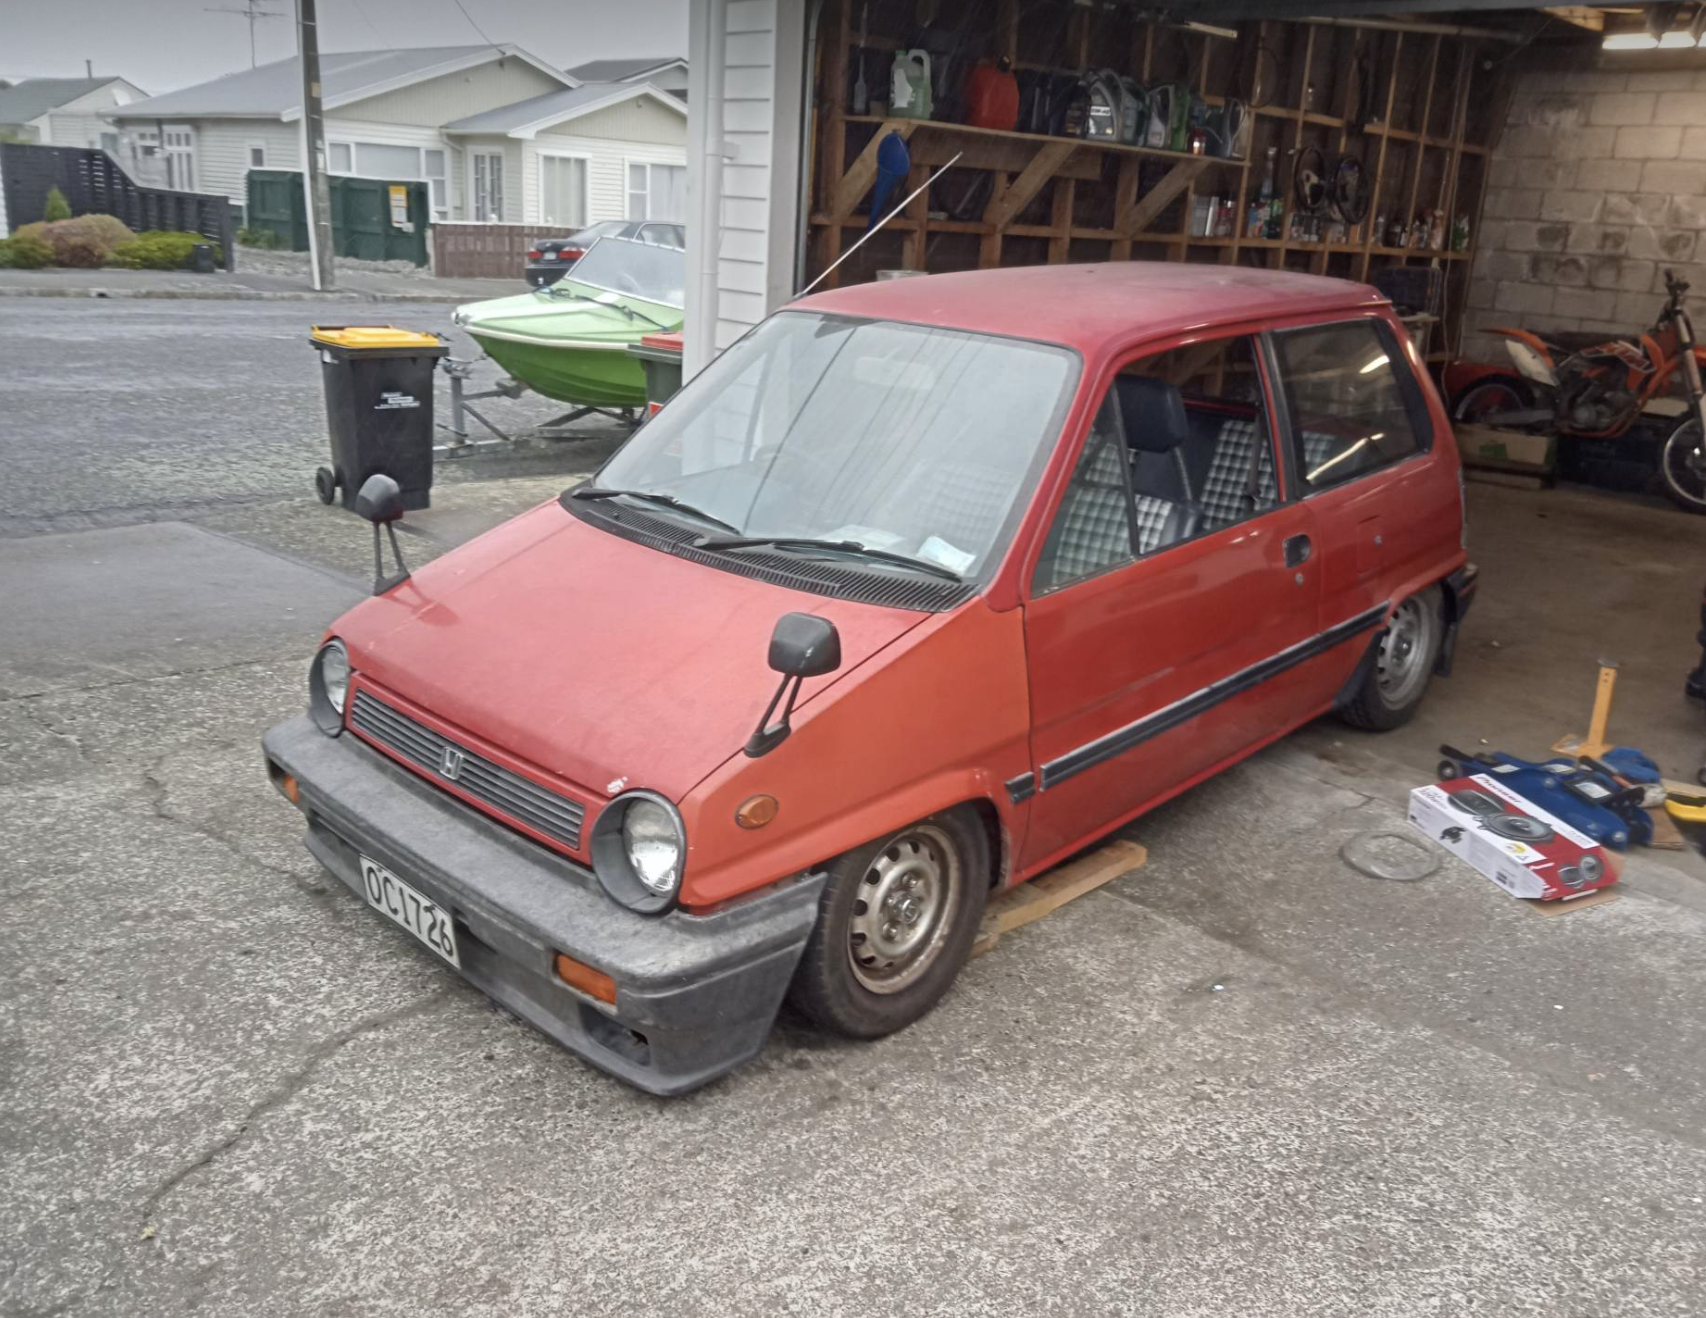
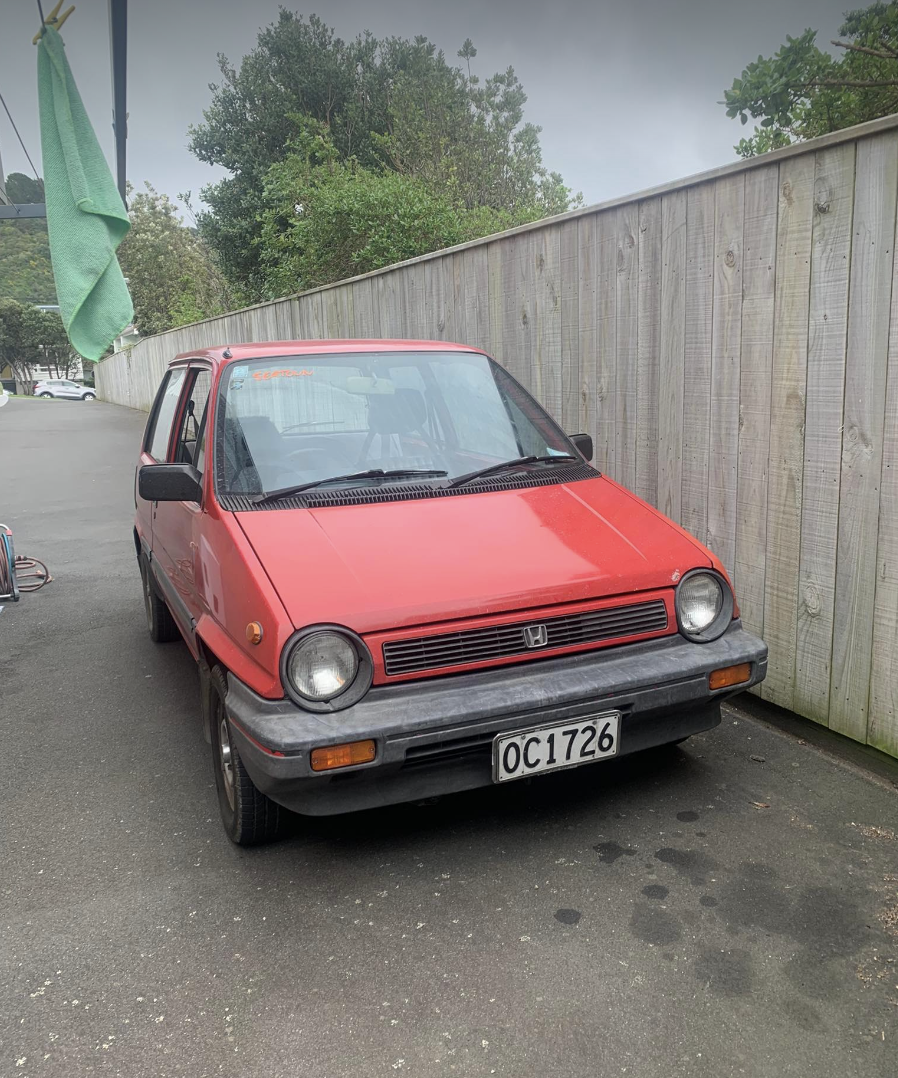
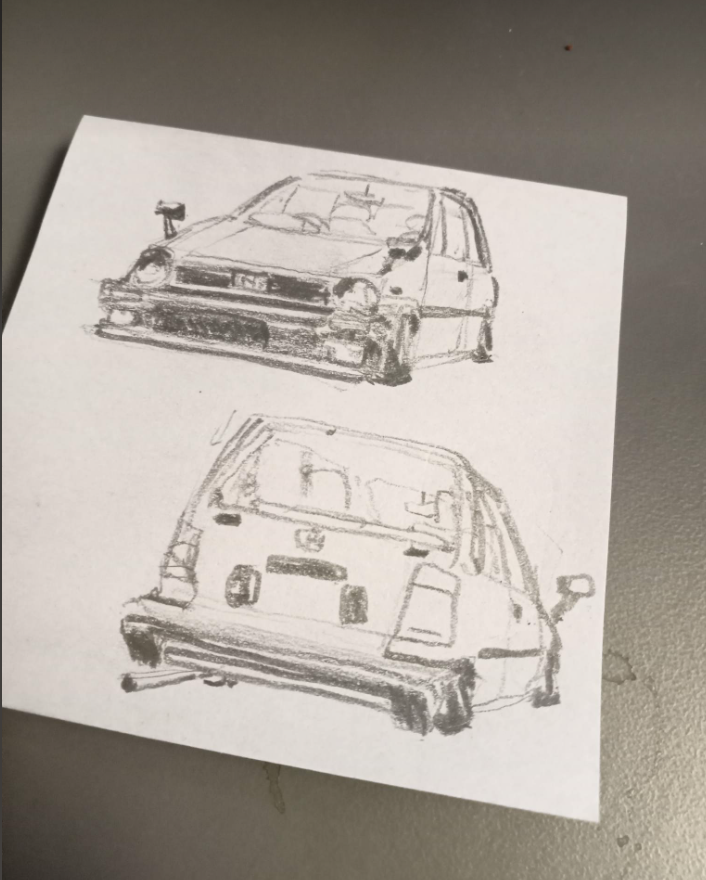
A few months back I picked this up:
It's a 1984 City R, jdm model.
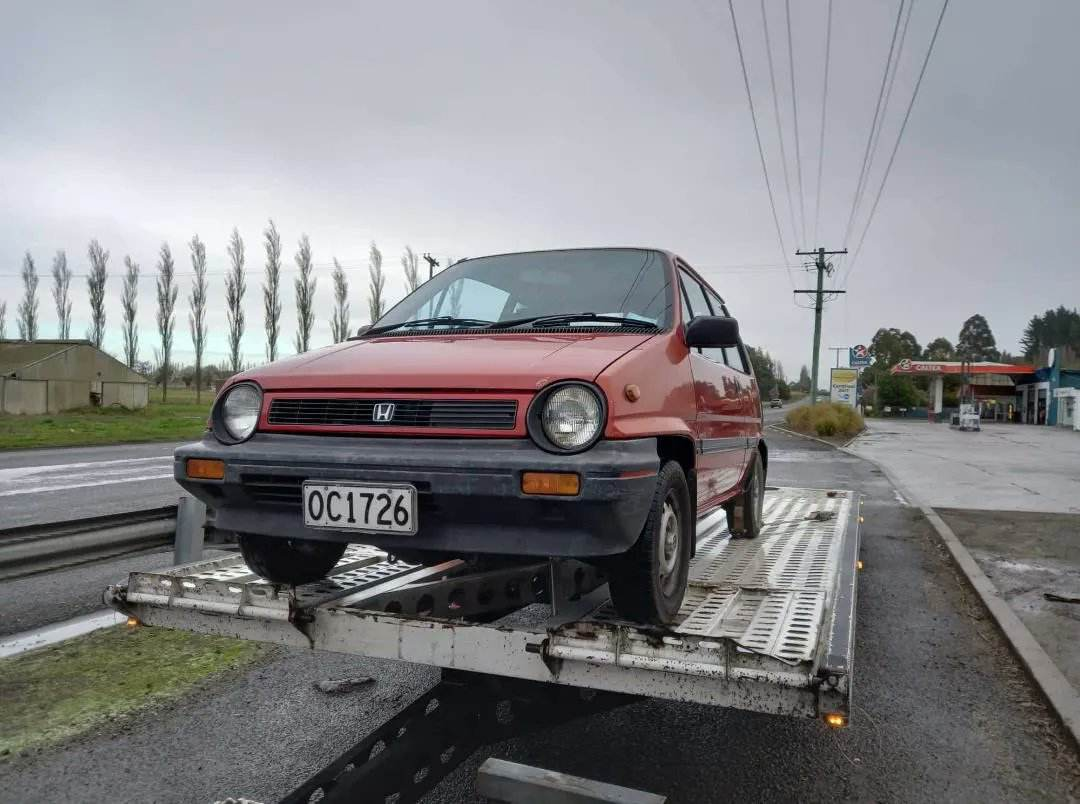
I bought it sight unseen off a retired couple in omaru and had it shipped to wellington. These jdm ones are pretty hard to find, I had been searching for a while. I won it on a trademe auction for cheap.
here’s the plan for it:
low as possible, widen the standard steelies, fender mirror conversion, turbo bumper, parcel shelf speakers and twin stainless peashooters.
I'm actually a bit of a ways through now but I'll post all the progress up to date.
should look pretty phat.
-
16
-
what a gem! i think rural nz towns are a better place for finding rare jdm cars than japan at this point
-
1
-
1
-
-
On 21/05/2021 at 22:16, kws said:
Ever since looking for a Corolla, the goal was that it HAD to be manual. Autos are lame, and no good for a fun weekend/track toy. With my car, I made the compromise of an auto based on availability and cost, but with the knowledge it would be manual swapped in the near future. Well, that time has come.
I've been squirrelling away parts for the swap since I got the car, and a couple of months ago the big bits fell into place. A C52 manual transmission, flywheel with near new clutch and various other bits I need.
During the Pick A Part run when I first got the car (the same time I got all the seats) We also pillaged a manual AE111 wagon there for the other major manual bits we would need like the shifter base with cables, master cylinder and pedals.With everything finally falling into place I arranged a time to take up some space that Iain, the friend helping me with the swap, has at a lockup, as doing the swap there with ample space will be easier than in my garage.
We planned that with the two of us it should take two days, but we were realistic that if anything goes wrong it would be pushed out, and that was OK, but it had to be done by the end of the week.
The plan was to remove the engine and box complete. I had debated if this was the best way and came to the conclusion that it will be easiest to deal with the various bits we need to swap over (such as fitting the shifter cables which is a ballache with the engine in place), and if I choose to do the cambelt and waterpump at the same time this would be a lot easier than in the car. Having the engine out of the car means we wouldn't have to try deadlifting the gearbox up onto the engine from under the car and line it up. That's never fun.
Sunday
The day before we were due to pull the engine out I had a list of jobs to do to prepare the car for the work. The main one was to strip all the interior dash trims out to gain access to the pedals and center console/shifter. Taking it out now means not having to do it at the lockup.To remove the panels the first part that needs to go is the center console with armrest. This is held in with two 10mm bolts in the armrest storage area, and two screws on the side. Under this was festy (this is a word you will hear a lot when I'm talking about the interior of this car...). Much crumbs.
Next, the center stack needs to come out. To do this remove the three climate knobs, and the recirc slider and then remove the two screws behind the far knobs.
The center stack will just pull out after that. Its held in with some clips at the top so might take some pulling. Be aware there is some wiring going to the cigarette lighter socket, and that will need disconnecting.This leaves you with the bare climate control and whatever is in the center area (a useless CD player and single DIN pocket in my case)
Now remove the contents of the center stack, usually a double din bin. There are four screws securing it. This reveals the ECU (and lots of festy as all hell mould from leaking drinks).
Next the glovebox needs to be removed. This is done by removing the small trim at the bottom of the A pillar that tucks under the kick panel. Behind that panel is a bolt, remove that, along with the screw in the opposite bottom corner of the glovebox panel and then the three screws along the top edge of the glovebox when open. The glovebox will pull free.The other part to remove is the trim above the drivers legs. This is once again held with a bolt behind the little trim panel at the base of the A pillar and a bolt in the opposite corner. The top edge is held in by tabs. Behind this, there may be a steel plate, which I guess is some sort of impact protection thing, and this is held with three bolts.
Now you can remove the rest of the center console. Its held with two screws on the far left and right top corners (would've been behind the glovebox and knee panel). It clips in at the top too. To gain more access to the shift cable retaining plate under the dash I also remove the footrest; this is done with a good hard yank toward the rear of the car.
Feels a bit weird driving around in a car with only half a dash and no center console.With the interior ready to go the only other work I needed to get done was to replace the axle seals on the gearbox, and replace the shift linkage bushes.
The axle seals are easy enough if you know what you're doing. First note is to take photos or make a note of how recessed the existing seals are. In my case, they were at the base of the chamfer, but I didn't take note of this when fitting the seals, instead hoping they would bottom out (they don't) and I ended up pressing them in too far.
This was a cockup that resulted in my wasting new genuine seals and having to fit aftermarket seals instead as removing them damages them. Removing the seals with the correct tool is easy enough though
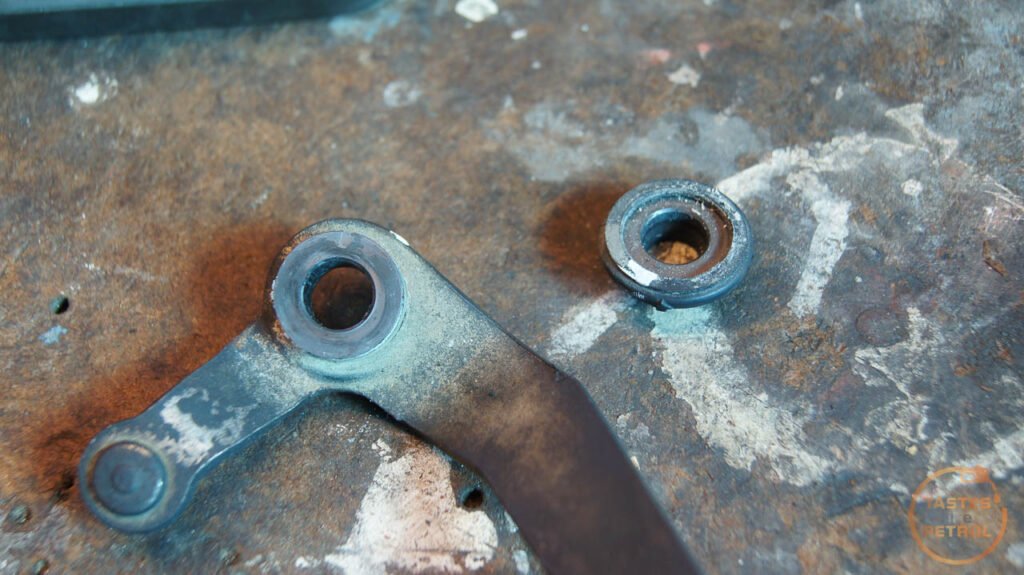
To drive the new seals in, place the old seal over top and use a hammer on the old seal to drive the new seal into place. Take care it goes in straight, and to the correct depth. It also helps to lube the outside of the new seal to help it go in. Once the seals are in place slather the inside lips in rubber grease to reduce any risk of the axle tearing the seal when refitting.The shifter linkage bushes were easier. Under the rubber cap is this nut. Remove it.
The linkage will then slide off. Take care of the lower slider as that can fall off, and the orientation of the rubber boot. There is a bush in the arm, and one in the rubber cap above the arm
The old ones weren't too bad, but they were running dry with no lubricant at all.
If your slider is plastic you can replace it, but in my case mine is metal so I cleaned and lubricated it before refitting. The slider is the bit in the centre of the photo. The new bushes got lightly lubricated before fitting too.
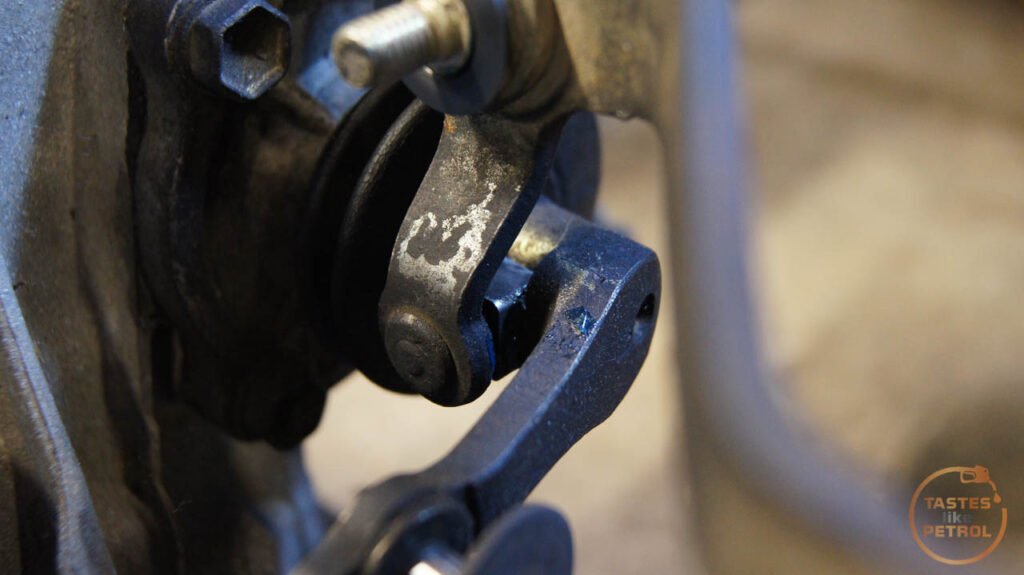
Refit the washer, nut and then the rubber cap
Job done. The car was loaded up with all the tools I thought I'd need (Needed more), all the various parts, and the next day it was driven to the lockup to begin work.Monday
I met up with Iain at the lockup, and backed the car in. After unloading, off came the bonnet and we looked at what we had to do. Iain had taken the time to write up a very comprehensive list, which we started ticking jobs off as we went.
Up on stands, and this is how it spent the majority of its time. Quickjack would have hindered us in this job as it would have restricted access to under the car, as I spent a lot of time with my legs sticking out the side.
With the car on stands, all the fluids got drained and the battery removed. Of course, the drain tap on the bottom of the cheap radiator isn't drilled through so doesn't act as a drain tap. We also cracked the hub nuts as this requires a lot of force and someone to stand on the brakes to do. They're torqued to 215NM, so quite tight.It's interesting how dirty the auto trans fluid was too. I haven't checked it since I got the car, and the trans was shifting fine (for a late 90s 4 speed auto). The fluid was black and stank; well overdue for a service.
The wiring loom was disconnected from inside the car, and fed through the firewall. The body side of the fuse box was disconnected and the engine side was left to go with the engine. The radiator was removed, and all the coolant hoses disconnected from the engine and tucked aside. The heater side of the heater hoses can be hard to remove and risks deforming the pipes, thus we removed them from the engine instead.
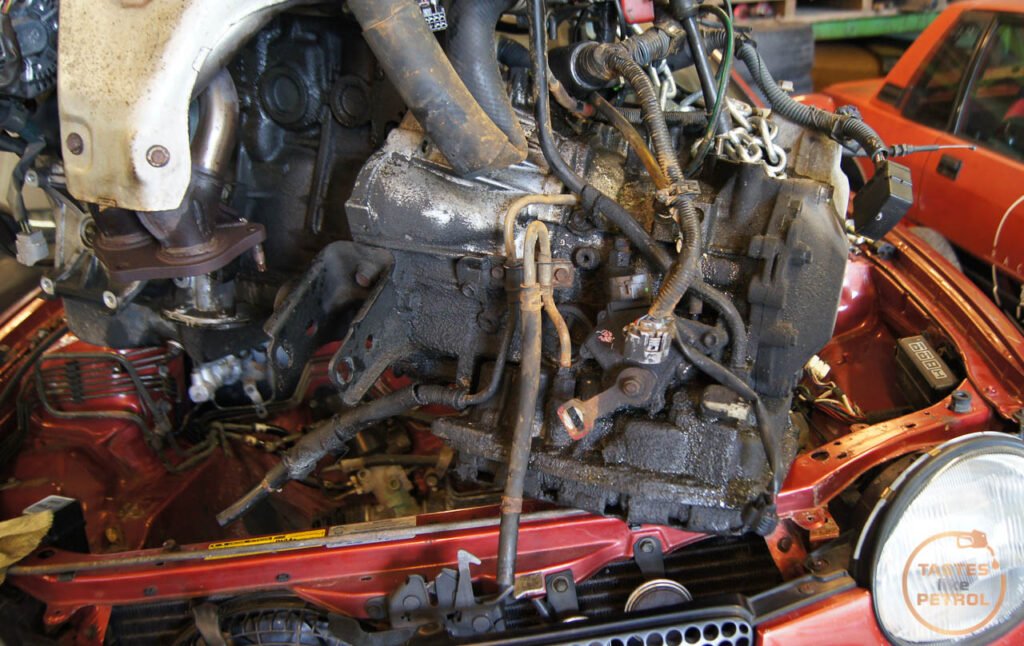
This is the big lump we're aiming to scrap
Next the axles had to come out. These are a pain to remove as they have a spring clip inside the gearbox. One of the shafts is accessible from the top, with a long bar and a hammer to whack it free, the other is only accessible from underneath, which resulted in me under the car on my back beating the CV with a pry bar and hammer until it popped free. When hammering on the shaft there are notches in the CV cup that you can use without causing damage
Before we could hoist the engine out we had to sort one critical thing, the AC. I didn't want to degas the AC system, and since it worked really well we had to be careful to keep the system intact. We unbolted the compressor from the engine and lowered it down onto a jack. This moved it away from getting caught up but stopped it hanging on its own hoses.The last thing to do before removing the engine was to disconnect the mounts. The Front and RH mounts are easy. The rear is a pain due to access but isn't impossible. Stack a bunch of long 1/2" extensions out through the RH wheel well and use a rattle gun on it to remove the through bolt; it has a captive nut.
It's a different story when it comes to the LH (transmission) mount. On the auto, Toyota has made it as hard as possible to reach all the fixings to get it free, because hey, why not eh? In the end it was a mixture of ratchet spanners and squeezing hands into spaces that are too small that got the bolts out.
With that done it was time to lift. A leveller is essential for this job, it's basically the only way you can get the engine in and out without smashing a whole bunch of other things in the engine bay. To get the engine in and out you need to tilt the trans hard down.
The poor engine crane was making some interesting noises lifting this lump. It's amazing how much heavier the auto and torque convertor is than the manual.
We finished the first day with the engine and auto out and on the ground ready to split.
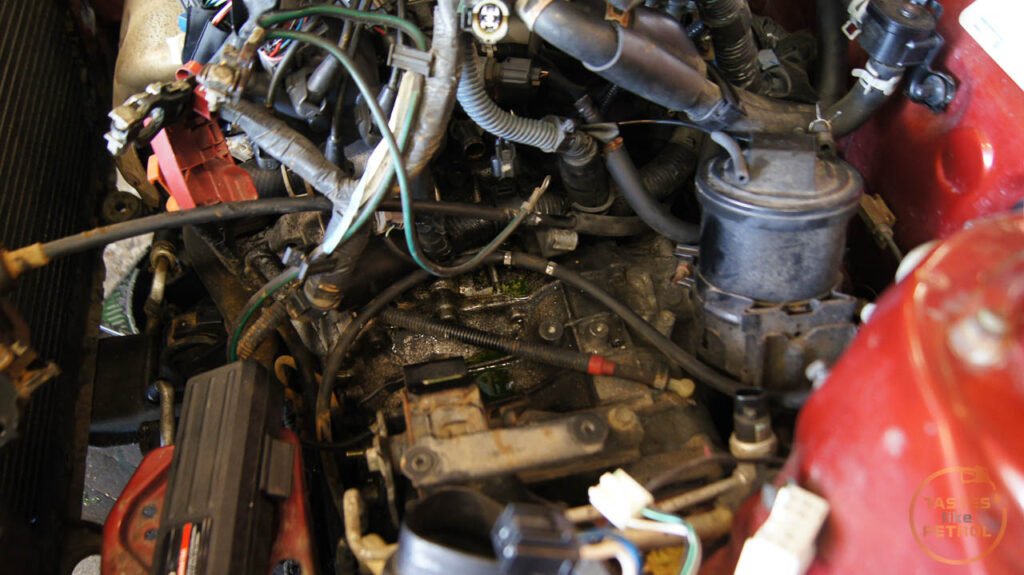
Its a bit oily down here. Most of this is from the valve cover and distributor O-Ring that were leaking when I got the car. It must have been leaking for years.
Its also left a bit of a mess on the crossmember
So the plan for Tuesday was to do the things you don't want to do with the engine in the car, such as the master cylinder and shifter cables. We also needed to fit the pedals, and run the clutch hard lines on the firewall.To be continued.
That pulsar exa in the background, i own that now. Do you have a thread on it? Some history would be nice
-
Colour match the century rims metallic blue:
-
 2
2
-
-
Hello 11 year old thread.... Anyone widened steelies recently in wellington? Brian from howatt says "no, I don't do that anymore" and Halcrow are in Palmy now... Any leads or suggestions are much appreciated!!!
-
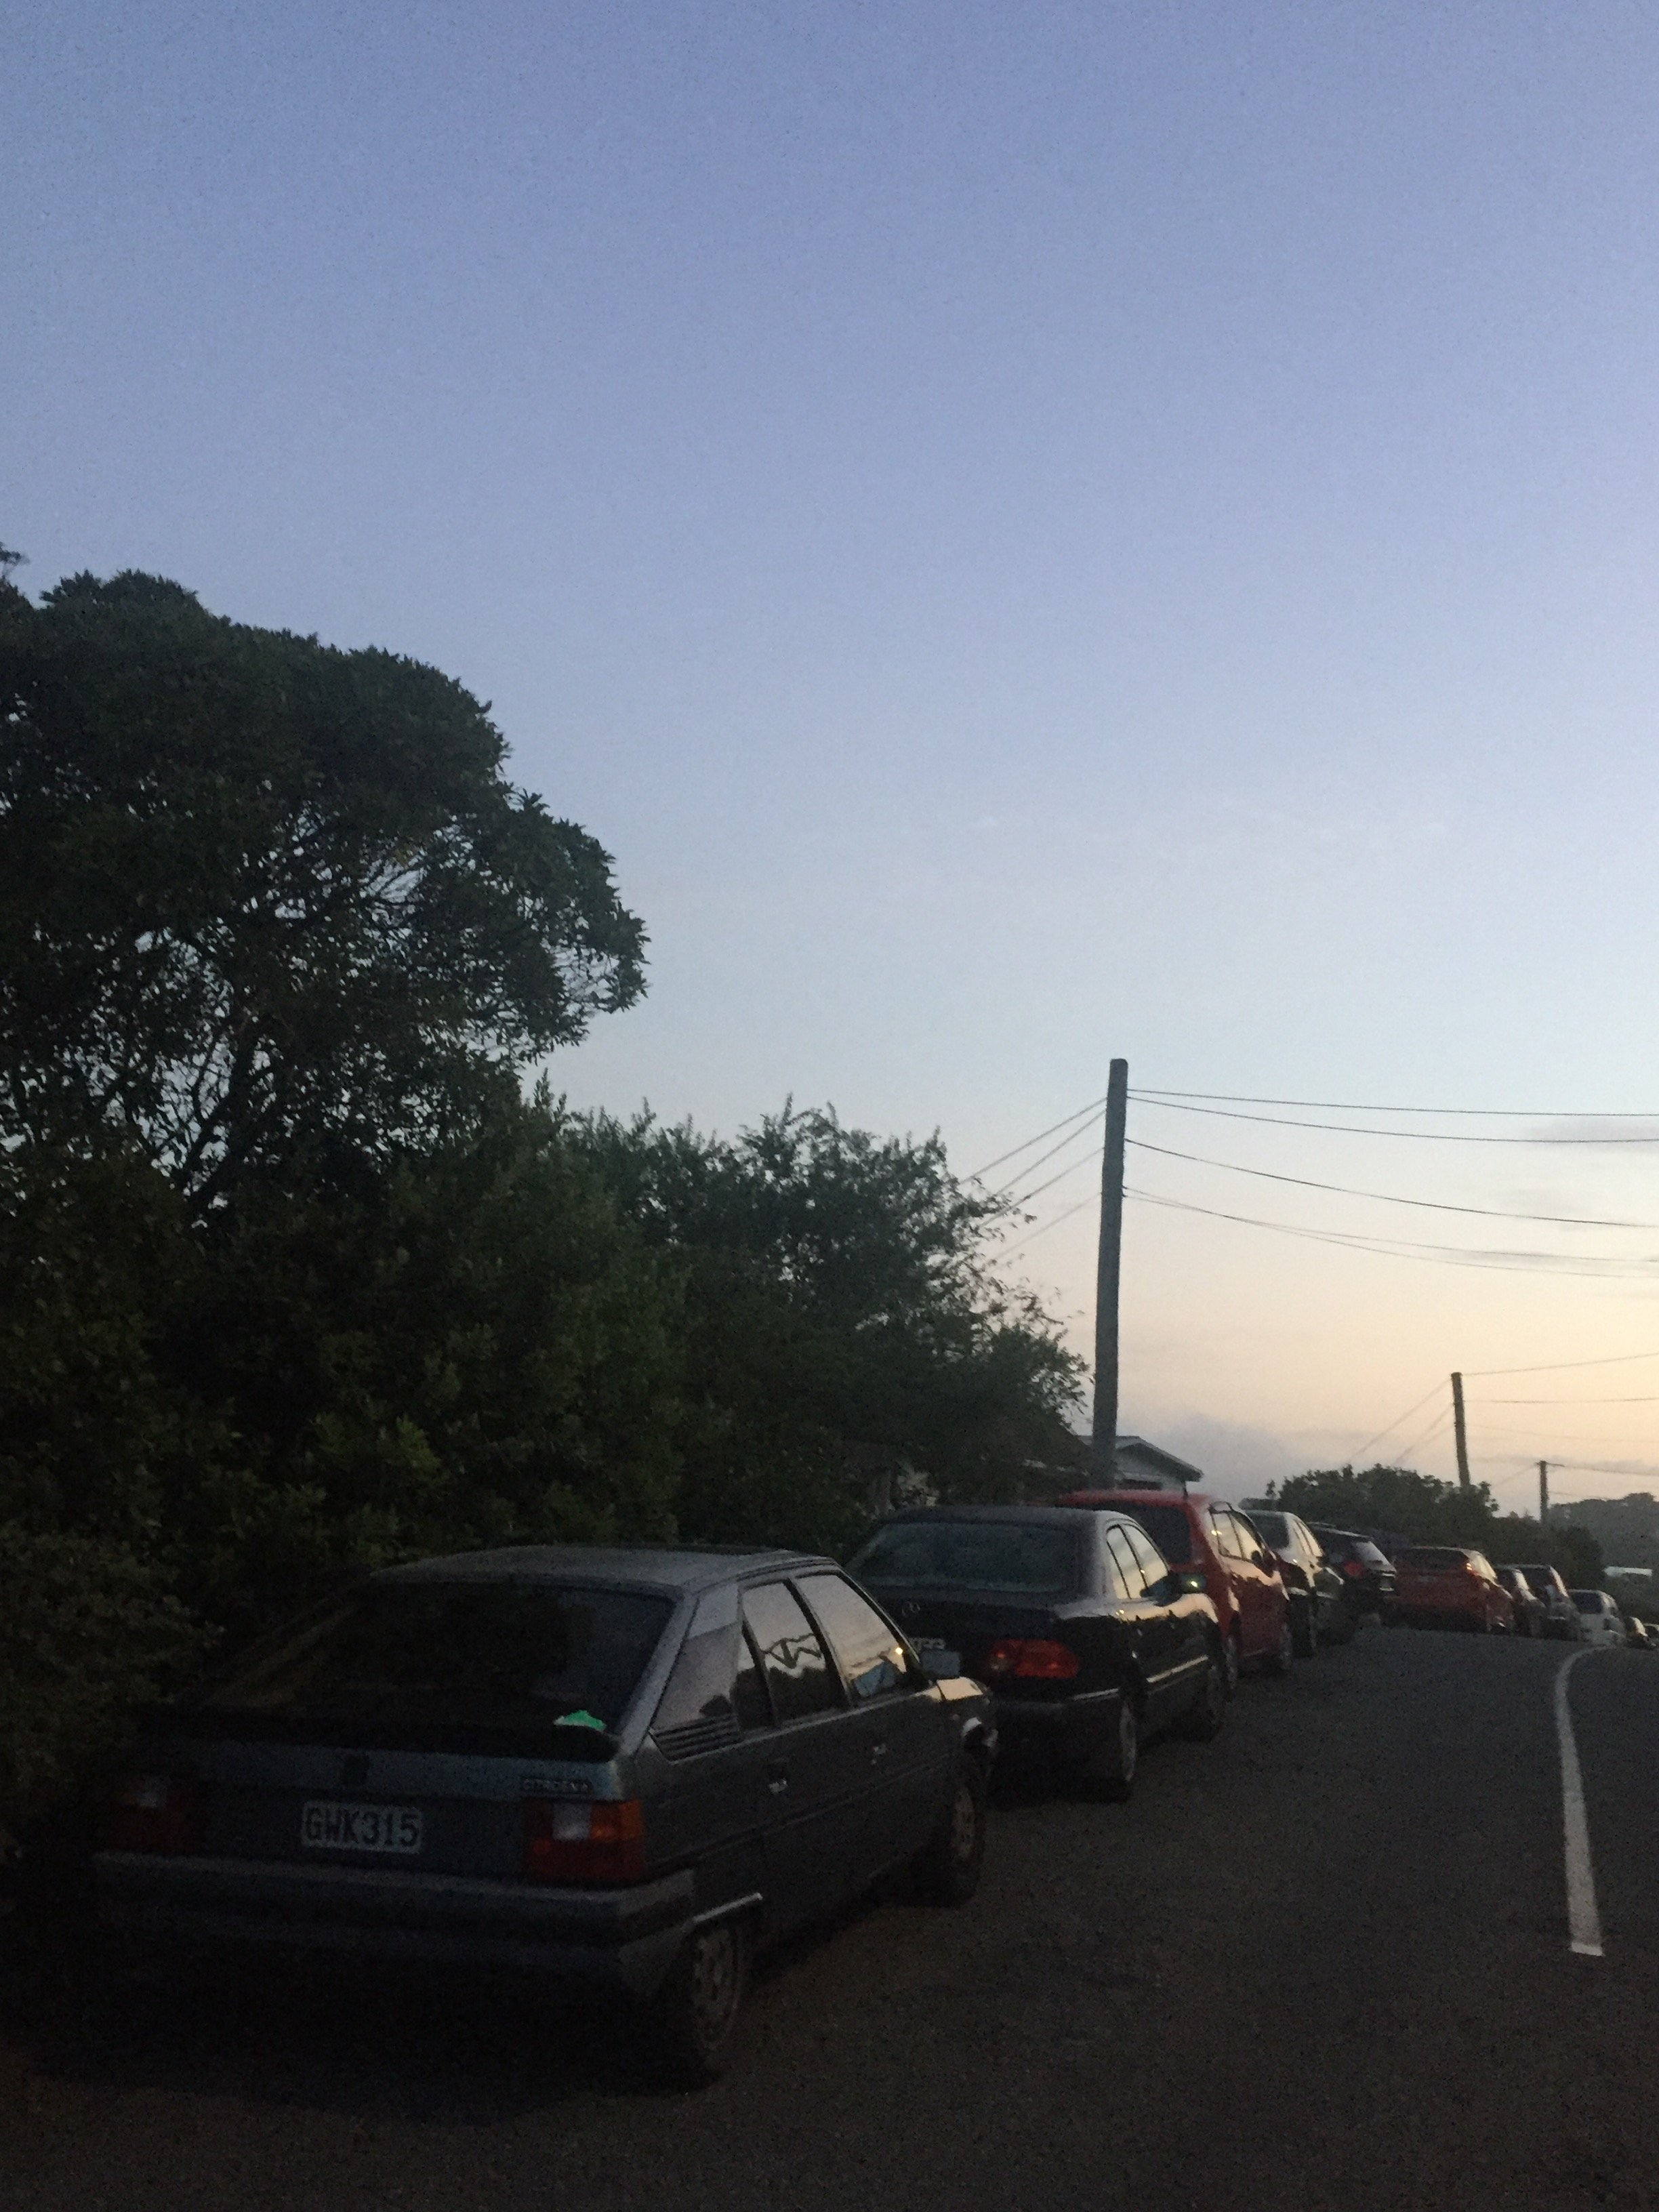
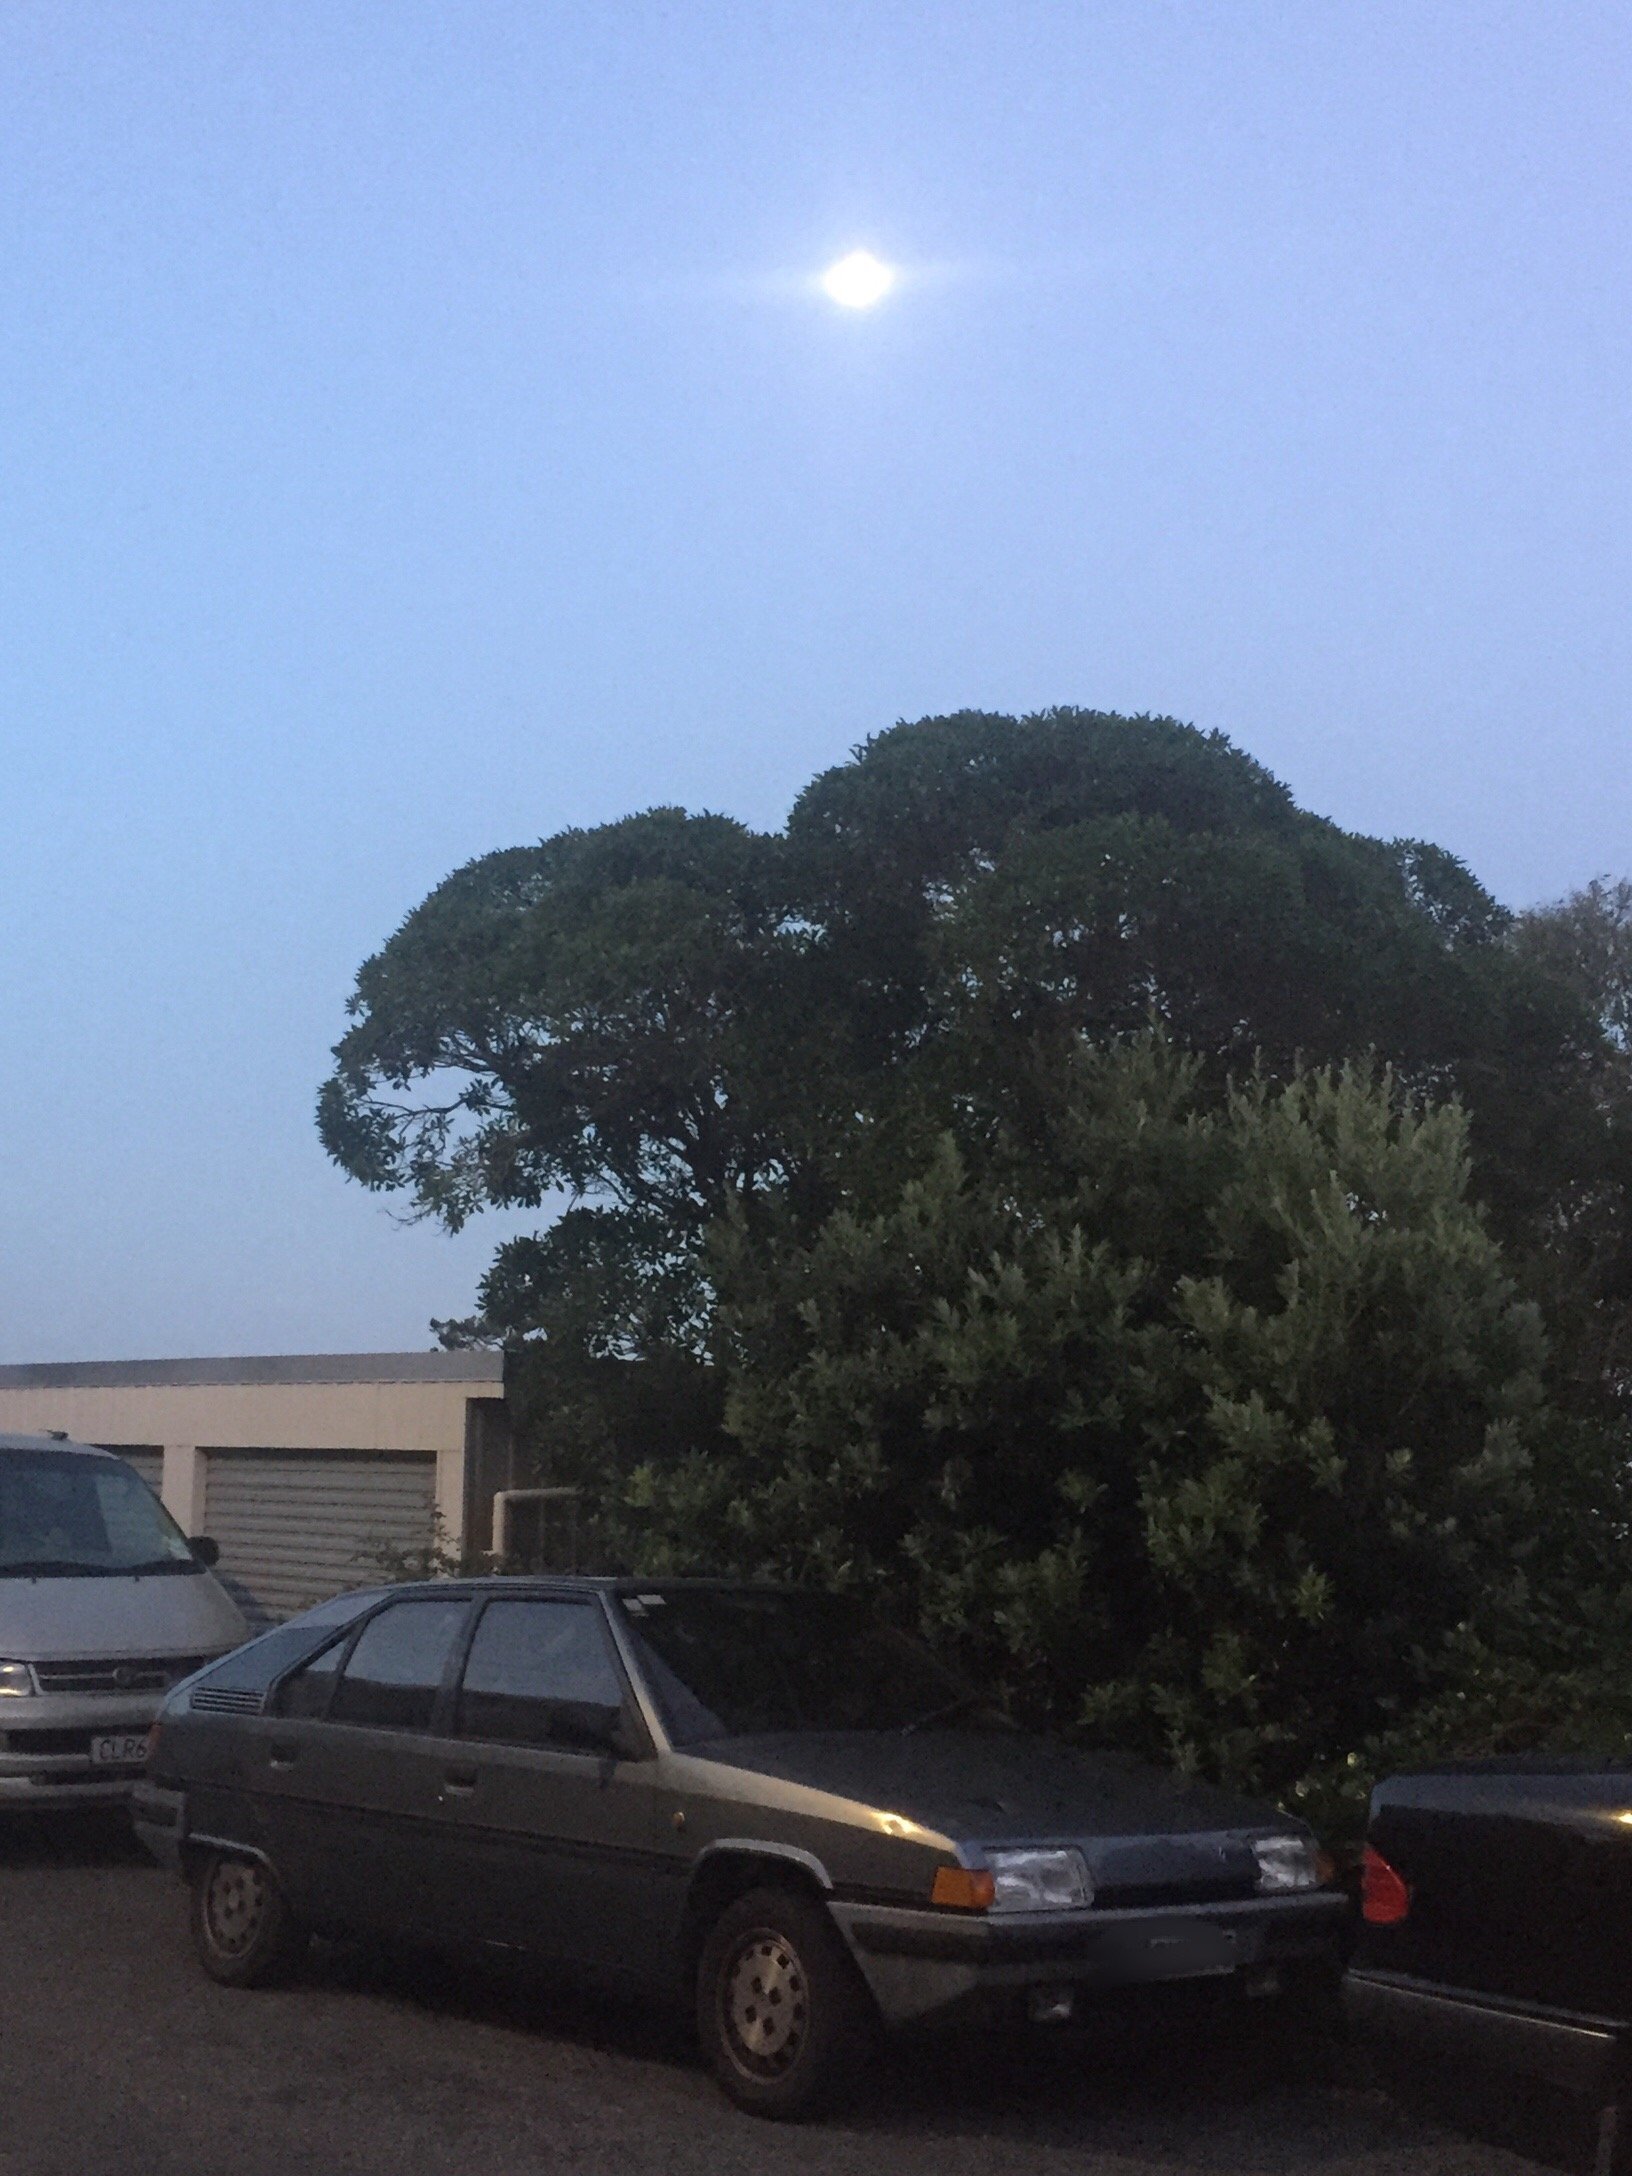
citroen bx!
styling by bertone... nice.

-
2
-
-
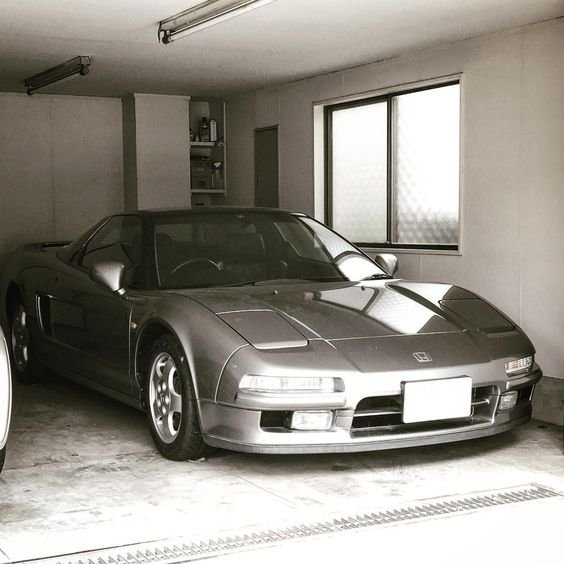
alpine a310 or unmolested na1 nsx
-
1
-
-
On 10/12/2018 at 18:36, Glen rush said:
Hi iam Glen from nelson panelbeater by trade currently taken ownership of a 1972 diahatsu 360 barn find 98% complete untouched car with restoration in mind also have a mk1 morris mini cooper that i have fully restored and use often am needing a few parts to have a complete car any help would be much appreciated thanks
haha nice, i remember seeing your Daihatsu on trademe!
-
Name: Coby.
Location: Wellington.
Cars you own: None yet
Mods to them (can be brief or detailed): None
Pictures: Don't have a car man
How you found out about oldschool: Most new cars suck
Anything else you want to add: 16y/o
-
1
-


pininfarina's city
in Project Discussion
Posted
nah, didn't just happen randomly. I reckon this sensor was working as it should. I deleted all that now regardless