

legendlives
-
Posts
379 -
Joined
-
Last visited
Posts posted by legendlives
-
-
Latest mod. Bobbins:

In the second and third photos you can just see the alloy chainguard - the first part in the new alloy hugger assembly. More pics to follow as I progress. -
HEL gold brake hoses. I did look at the yellow ones but the colour clash was horrible....
I've also had the calipers off and given them a dan good clean:Clutch line;
Rear brakes:
Front brakes:
With the front brakes I went with twin hoses rather than the original linked hose.
-
I think the big Hondas are lightweight enough. I had a Fireblade before this and the weight was never an issue.
Anyway, yesterday I wasted a whole day of my life polishing the exhaust system. Doesn't look fantastic until you compare it with the original 'as bought' picture.
Still haven't fitted the HEL lines (From GSS Performance in Penrose. Plug plug....) but that's this week's job.
-
 1
1
-
-
Next mod will be gold brake lines. Handy that I work for a HEL hose dealer.......
-
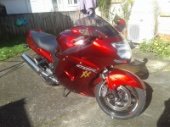
Bought this a few weeks ago.
Not really a project per-se, but I plan to do some mods (shorty levers and front mudguard extender already fitted) and make it as good as it can be. It's already pretty good though....
Shorty levers:
-
2
-
-
This is now (possibly) up for sale in the 'cars for sale' section.
Unfortunate as I'd love to finish it, but work and race commitments mean I will have zero free time over the next two years, and I'd rather sell it than leave it half-finished gathering dust.
I'm looking for a sportsbike (fireblade preferably) to help my commute so if you have one you don't want i'll swap or trade with cash either way.
-
Superb fabrication skills, and a great car!
That will sure be a heap of fun when it's done.
-
Hey man just been over and read the other forum. Wow dude that is some seriously fine metal wizardry, and the coolest concept idea.
Ive been escort mad since my old man got me into cars when i was a kid. Ive always toyed with the idea of gassering my wagon. Cant wait to see yours.
More pics please
Hey, thanks for that.
I keep adding pictures as I go through the project.
Keep an eye on the facebook page https://www.facebook.com/mk1gasser for updates.
-
Finished making the seatbelt harness mounts today.
Long piece for the shoulder-strap mounts welds between the rear wheel tubs and along the rear bulkhead tubes.
Shorter lap belt mounts weld between the chassis tubes either side of the seats.
Smallest is for the driver's 'ouch strap' and welds to the main chassis tubes.
Despite the hours of labour in these, most will be covered by panel-work. But hey, I know they are there, right?
All are in 5mm steel plate with full nuts TIG welded in place for the mounts.
-
If you're sticking with points and condensor, fit two condensors in parallel.
Modern condensors are cheap-as-shit Chinese made rubbish which fails easily, fit two and the failure problem goes away......
We used this mod on the FIA Historic race cars that had to run 'original' ignition systems, and never had another problem.
-
2
-
-
At the moment it's going to be race only, but I am making allowances in the build to make it road legal when I can afford all the compliance costs!
Ref the doors, what's been said here is probably right, it's the first experience I've had of fitting van doors to a 2-door so just reported my findings.
I've had it sat on it's wheels and I'm happy with the way it sits, but you'll have to wait and see!
-
Top tip if you're fitting van doors to a Mk1 2-door:
The lower hinge mount is the same, so you can just knock out the roll-pin and the lower hinge will go together as normal.
The top hinge is totally different though, so you need to cut the original hinge from the 'A' pillar and drill 2 holes to accepth the bolt-on hinge. I used a 13mm hole to allow a bit of adjustment.
Use the original van 'spreader plate' behind the pillar and tighten nuts in the correct place.
I did both of mine and had them correctly adjusted within about an hour and a half.
Discussion - //oldschool.co.nz/index.php?/topic/48619-legendlives-1970-escort-mk1-gasser/#entry1529258
-
2
-
-
Name: Trevor
Location: Howick
Cars you own: Mk1 Escort
Mods to them: Full tube frame and turbo'd 302 V8How you found out about oldschool: Through Garryg on here
-
3
-
-
- Popular Post
- Popular Post
Build-up (so far) of my Escort here:
https://www.facebook.com/mk1gasser
It's a Mk1 escort, powered by a 302 with turbo. C6 transmission, narrowed HiLux rear axle (with LSD), straight-tube front axle.
Suspension is modified R33 shocks at the front and an unknown pair of adjustable shocks on the rear. Adjustable height springs on both ends.
Full-tube frame which is integrated into the shell.
Autometer gauges in bespoke dash.
Wheels are 12x15" rear and 5x14" front.
Brakes are R33 rear and Holden front, all on fabricated hangers.
Big thanks to Steve at GSS Performance for allowing me use of the fab-room.
My last Escort was a bit more radical. Street driven in the UK and running 9's on treads:
-
10


Legendlives VTR1000
in Two Wheels
Posted
As mentioned, when I bought my VTR it had a hideous carbon hugger which was so much the wrong shape that it had been worn through by the tyre. The design was terrible also, directing all of the road shit and grime straight onto the chain.


The obvious thing to do was therefore make my own out of aluminium.
Just after starting to beat out the mudguard section it occurred to me that it would be virtually impossible to do it nicely without an English wheel. I didn't have an English wheel so I delayed the project while I knocked up this:
Made from tube left over from a previous car project, two old clutch release bearings pressed into a bit of stainless tube, and an old iron caster wheel.
It works well enough:
The chainguard was the first thing I made. This needs a bit of fettling as it was copied from the dimensions of the hugger which bears no relation to the run of the chain!
You can see the 'mod' line in marker pen.
These are the two sides which will join everything together. They also need some shaping:
Hopefully will have it largely finished this week. Will keep you posted!