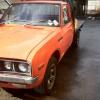
Jordon KE... Posted November 24, 2015 Share Posted November 24, 2015 Discussion //oldschool.co.nz/index.php?/topic/50926-jordons-1974-procrastinated-ke20-discussion/ Thought i had started a build thread on here for this but couldn't seem to find it, anyway here's the story so far Started a few years ago now!I i was looking fora clean ke70 on a college budget when corolla prices were on the rise. My ladies brother had one of the nicest ke70s ive seen and thought i need one of those, came across this ke20 on tardme. didn't really grab my attention to start with but after seeing a few ke70s that had 'minimal' rust work required i decided to contact the seller of the ke20. Asking price was over $4,000.00 with spares included. I ended up paying 2k for the car on standard wheels, running the original 3k. 'fresh' panel and paint with all rust removed of course... uhhh young and dumb!! oh and no wof, reg, carpet, whole interior painted black, like everything rocking some jamex bucket seats. Drove it home and broke down on the wellington motorway, apparently they had fueled her up and the petrol gauge was stuffed so read nothing. Well actually it read nothing because they hadn't fueled her up. Dad got me some fuel and off we went. Next was the wof, went to vtnz and failed on a few things like front strut being welded, rust (huh wasn't it all removed?), high beam dash light not working, lowing blocks weren't aligned and neither were the headlights. Fixed all of this, because i didn't know anything about anything at the time i took it to a sparky i knew tofix the high beam light and align my headlights. $450.00 later i decided to do all the work myself on this. By the time i had this fixed the recheck date had lapsed, oh well. failed on high beam light again... fuck vtnz!! took it to local garage and put it through there. all good and allowed me to do some work experience to pay for it. So i was pretty broke at this point so just enjoyed driving it. Usual issues of not starting, over fueling, dizzy playing up etc etc. Over the next yearish i did small things like spray the dash parts black, buy a centre console, make carpet, spray the door cards grey, respray interior trim, match all the seat belts, buy hot wires, sell hotwires etc etc. Just small things that i thought were awesome but were just a waste of time. after that i bought a 5k and thankfully Aaron (club member) who sold it to me pretty much got it going in the car for me. real legend as i had no idea of what i was up to. that probably took 8 months to sort out. Joe (goat) sorted me out with some perfect fitment streets and the money i had from selling the hotwires bought me some tires... dumb size tires. Panels got stripped parts got painted and polished. Ke30 discs, calipers and backing plates were fitted. Bought other parts along the way which will come later on. then i thought it would be a good idea to put a silver top in there, it was i think but i lost the end caps for the block... uhggg so the new story starts here I have missed lots out but thats a medium run down on the poor girl. shes been neglected for the last couple of years and has really deteriorated. Some photos for interest, look ok here but a lot of rust repairs and panel and paint is required. 2 Quote Link to comment Share on other sites More sharing options...
Jordon KE... Posted November 24, 2015 Author Share Posted November 24, 2015 Made some coilovers out of te71 strut assemblies with ae92 inserts. Before when she was looking clean and polished with a high ride height Dirty with lower ride height,still need to get steering arms as i sold my te27 ones because my bank acc got emptied by some ass holes!! also need rca's 1 Quote Link to comment Share on other sites More sharing options...
Jordon KE... Posted November 24, 2015 Author Share Posted November 24, 2015 Sneak peak of engine, prepped and painted these last night. Quote Link to comment Share on other sites More sharing options...
Jordon KE... Posted November 25, 2015 Author Share Posted November 25, 2015 Other things that have been started on this are as follows. Have cut out new panels for door cards and bought fabric, just deciding on whether or not fabric is correct or should i get Grant in Auckland to make some. Also thought of using velcro to mount them to the doors. Along with the door cards got some doors that i could prep off of the car. so far i have only removed the hinges and had them sandblasted and spray, cant remember what they were sprayed with but seems pretty durable Quote Link to comment Share on other sites More sharing options...
Jordon KE... Posted November 25, 2015 Author Share Posted November 25, 2015 Discuss //oldschool.co.nz/index.php?/topic/50926-jordons-1974-procrastinated-ke20-discussion/ Ok sothe rocker covers above started life in this. Mate was going to turn this into a derby car but cbf, so i grabbed engine while i had the chance. Stripped it down and gave it a quick clean before carrying it through the lounge now we are up to date with the engine. i have given it a paint but only really paid attention to the rockers. Dont think i will rebuild it as it was running fine. also got this, its for a t series box so just on the hunt for a cheap t50 or a t40 to mock up mounts, alignment etc. Quote Link to comment Share on other sites More sharing options...
Jordon KE... Posted November 25, 2015 Author Share Posted November 25, 2015 While doing the coil overs i also cleaned up the other components. reconditioned hubs with fresh paint and new bearings. Backing plates were blasted, acid dipped and powder coated (just a bit dusty), stripped calipers and painted them, on the hunt for a couple of pistons and maybe discs. Will see how she pulls up. Also need to get the fasteners zinc plated again. I would like to get the suspension and braking setup finished of soon so i can drop the car off of stands and mount the engine. Ill get all the fasteners dropped off this week hopefully and assemble it all as it is now and hunt down some steering arms when the funds allow it. 3 Quote Link to comment Share on other sites More sharing options...
Jordon KE... Posted November 26, 2015 Author Share Posted November 26, 2015 Oh and forgot to include this, te27 180km/h cluster, stripped and prettied up. Basically painted dials with paint pen, painted face black and detailed in white. turned out quite nice. Te27 because it has the writing around the hazard light switch 3 Quote Link to comment Share on other sites More sharing options...
Jordon KE... Posted December 19, 2015 Author Share Posted December 19, 2015 Finally made some decent progress that included the shell!! Everything I have been doing has been shit that I do at work like suspension, engine, interior etc. But today I needed the car, after properly removing 90% of crap from the engine bay I measured up the cross member bolt holes, slotted the new cross member to suit and bolt that in. Then I forgot to get an engine crane so invested some assistance and worked the engine into the bay and then fiddled it onto the mounts. All lines up nicely. It's pretty close to the fire wall but it does clear. Next is to fit the bellhousing and make sure that cleaRS in its current position. Once that's confirmed I'll fit the coilovers assemblies, see what the steering system wants to do then drop i let off of the axles stands. I'll need to tidy a few small spots of rust and dents in the bay then I'll take it out to get blasted. While that's happening I'll try sort something out for the brake and clutch system. Master cylinder doesn't clear intake so I am thinking of making some that I can mount off of the pedal box. While I'm trying that I will also change the accelerator pedal. At te moment that's mounted from the floor which always feels kind of shit. This should keep me busy for a while so will update in the new year. 1 Quote Link to comment Share on other sites More sharing options...
Jordon KE... Posted December 19, 2015 Author Share Posted December 19, 2015 Here is some proof. As you can see the bay is pretty untidy, thinking of using paint stripper and then blasting it. 1 Quote Link to comment Share on other sites More sharing options...
Jordon KE... Posted December 24, 2015 Author Share Posted December 24, 2015 So in the not to distant future i will be sending this off to be sand blasted. I need to start deciding on a colour, either going to go red which the car was originally or mustard. needing some suggestions on nice colour codes for these options, please discuss here Quote Link to comment Share on other sites More sharing options...
Jordon KE... Posted December 28, 2015 Author Share Posted December 28, 2015 A while ago after quite a bit of work the TE27 cluster gauge from Japan got blown off my bench during a storm after our new roller doors at work got blown in. This caused a bit of damage, I had also rest fitted it in the car the day before (this was why it was out) and found that the speedo didn't work. Everything else seemed fine. A couple of years later, today, I went to hunt out some clear blue plastic. This was used to replace the high beam indicator as the old plastic couldn't be found.Then I had to pull apart two other clustersTo make one, unfortunately there is some permanent damage and one of the locking tabs has come off. I may chop one off of one of the others and plastic weld it onto this one Managed to fiddle with a couple of bits in the speedo drive and now its working, i had to wind the coil up a couple of turns allowing it to spring back to zero correctly so hopefully its all good. 1 Quote Link to comment Share on other sites More sharing options...
Jordon KE... Posted January 1, 2016 Author Share Posted January 1, 2016 Will upload photos correctly when I get to a computer. Started polishing these up. Really want to run them but have a new study pattern. Might make up some adaptors. Quote Link to comment Share on other sites More sharing options...
Jordon KE... Posted January 5, 2016 Author Share Posted January 5, 2016 Small Update, went to Napier for a small break and on the way back found this in s cool little antique store. While looking for a new couch i we saw this AA badge so grabbed it, i quite like them and think they compliment the age of older cars. Also found the couch from another antique store if you were wondering And a better angle of the fins and the helper. I never get tired of looking at these wheels. Quote Link to comment Share on other sites More sharing options...
Jordon KE... Posted July 12, 2016 Author Share Posted July 12, 2016 Another project that has been sitting around. anyway small update, a proper coilover has been fitted to the car for the first time. AE86 LCA and steering knuckle 4 Quote Link to comment Share on other sites More sharing options...

Recommended Posts
Join the conversation
You can post now and register later. If you have an account, sign in now to post with your account.