Corbie Posted October 13, 2012 Share Posted October 13, 2012 So I decided to get back in the old-school game and shelled out a whopping $700 on my new stead.Its not to everyone's liking but here is my new Austin MaxiUpgraded to 1750cc Motor. complete with total loss lubricationA couple of tears to the front seats is the worst of the interiorAnd what English car is complete without a touch of rust.And Original ToolsPlans at this stage are to find and stop the leaking oil. Fairly sure it is gasket issues.Patch up those little rust holes, and give her a tune with my new toys I am expecting from England next week.Discuss/Mock/Complain ==> //oldschool.co.nz/index.php?/topic/34563-corbies-nappymaxi-pad/#entry952772 Quote Link to comment Share on other sites More sharing options...
Corbie Posted October 13, 2012 Author Share Posted October 13, 2012 The Maxi has a few neat tricks as well. 1 Quote Link to comment Share on other sites More sharing options...
Corbie Posted February 3, 2013 Author Share Posted February 3, 2013 Update time. So the maxi was having some fueling issues on the way to Hawkes Boes, so has been parked up for a while, after a few trips to Hamilton to sort it out I got it running to a point where I felt comfortable trying to drive it back to Auckland, Sweet. Though after sitting parked up for a couple of hours while watching a super charged velobike do dorts. It decided not to start again. The Maxi in its natural Habitat. Dead Starter Motor. Next Step is to throw a new starter in it, and weld up a crack in the exhaust manifold. 1 Quote Link to comment Share on other sites More sharing options...
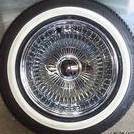
Corbie Posted October 6, 2013 Author Share Posted October 6, 2013 Mild Slam New Wheels Project done Now to sort out the motor. Discuss/Mock/Complain ==> //oldschool.co.nz/index.php?/topic/34563-corbies-nappymaxi-pad/#entry952772 1 Quote Link to comment Share on other sites More sharing options...
Corbie Posted March 19, 2014 Author Share Posted March 19, 2014 So have been doing little bits and pieces to this over the last 6 months or so. Tidying up a few bits and searching for rust Removed doors Dash Out Removed engine Making some room for this to go in. Needs some cleaning Original Idea was to mount the engine in the factory subframe But a few clearance issues mean a redesign is needed.. have almost finished this so will post it up when I'm happy. Discuss/Mock/Complain ==> http://oldschool.co....ad/#entry952772 7 Quote Link to comment Share on other sites More sharing options...
Corbie Posted March 27, 2014 Author Share Posted March 27, 2014 Got home this afternoon to be greeted by this Which Contained This Stainless Steel 'Performance Headers' USDM right there. Less than $250 delivered, couldn't make them for that. stoked. 6 Quote Link to comment Share on other sites More sharing options...
Corbie Posted June 14, 2014 Author Share Posted June 14, 2014 So Pulled finger and this is where I'm currently at. I lowered the engine into place today for a test fit to see where everything is going to sit.. looks snug. Left side is sitting up a little because the inner guard is resting on the tail of the gearbox. will deal to this with a grinder shortly. And Stance... because that's what the cool kids do right? (Actually due to displacers not having been installed yet and no steering rack.. which is something to look at later. Next step will be putting together a frame for the engine to sit in. Feedback line ==> //oldschool.co.nz/index.php?/topic/34563-corbies-nappymaxi-pad 5 Quote Link to comment Share on other sites More sharing options...
Corbie Posted November 30, 2014 Author Share Posted November 30, 2014 So yea, I have been a bit slack with this, and taking photos of stuff when I work on it. Over the last little while I stripped out the interior and went over the whole car checking the rust status, gladly it's not terminal. so with a few patches cut out. I finally started doing this. and started tidying up the rear suspension assmembly 4 Quote Link to comment Share on other sites More sharing options...

Recommended Posts
Join the conversation
You can post now and register later. If you have an account, sign in now to post with your account.