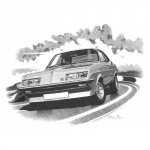
nzvohc Posted May 7, 2012 Share Posted May 7, 2012 Discussion here: viewtopic.php?f=18&t=33612 So this is my other project, because one is just not enough.... The plan is to turn this... into something like this... with the help of this... and lots of other bits! Story so far is this, bought the car as an unfinished project and without motor and box. Have installed a stock 2.3 OHC and Toyota W50 to get it mobile, which should be this month all going well. Have had to re-install everything in the engine bay and front half of interior, along with having new driveshaft adapted, and various other little tedious jobs to get it road worthy. Plan is to get it mobile with this drivetrain, fit new nosecone I got out of the UK, then get it all certed, painted etc. Will then build a fresh 2.3 engine, with big valve head, twin 45's, etc etc, and swap it out and paint engine bay at same time. This is how it looks at the moment, just finished interior this past weekend, although the front seats in the pics are destined for my Viva GT, have some others in the works for this car. Last major jobs to are to lower it a little on new springs and shocks, have new 2" exhaust system installed, and get brake lines connected and bled. That's the short version, more to come! 2 Quote Link to comment Share on other sites More sharing options...
Eddie Killbane Posted May 9, 2012 Share Posted May 9, 2012 Did you think about a make a replica for a Baby Bertha ? 2 Quote Link to comment Share on other sites More sharing options...
nzvohc Posted May 10, 2012 Author Share Posted May 10, 2012 That's a serious beast right? Quote Link to comment Share on other sites More sharing options...
nzvohc Posted July 21, 2012 Author Share Posted July 21, 2012 Quick pic update. Have had the car at Autofocus bodyshop here in Nelson for the past week to fit the nosecone and I am wrapped with the job done and the transformation made, looks awesome! Had been a bit nervous about doing this conversion but now it's done I am happy with decision. I will take care of the filling and fairing from here, but first job is to strip all the paint off to get back to bare steel. There is some bubbling of the paint from poor prep-work at last paint job, so all needs to be taken back and sealed properly before applying filler and primer etc. This will be my job for next few months, along with some fibreglass repairs to nose from previous damage, but nothing major. Will be ordering new repro light buckets from the UK though as one of them is too far gone to repair. No going back now! 1 Quote Link to comment Share on other sites More sharing options...
nzvohc Posted September 23, 2012 Author Share Posted September 23, 2012 So been waiting for weather to get a bit dryer to start stripping paint so not much progress lately on the body. Finally got sick of not doing anything this weekend and had a bit of a sort through my spares I have picked up over last few years to get go-fast parts for replacement engine together. I have a few spare heads, a couple have been modded with big valves, one is ex-'friendlyfire's with bent valves (see his post) and another in better shape and more severe flow work. This is the one I will be using. I dug out a wire brush head and drill and went to work cleaning carbon off and degreasing. Standard head on left, BVH on right. Looking inside inlet port of standard head and flowed head big chunk of meat around valve stem completely ground away. half way done.. old school porn.. Next job was to install a Stage 1 cam into it's housing after a good degrease etc. and adjustable cam pulley Also stoked when going through my flywheels noticing one felt lighter, so put it on the bathroom scales and found out that it is 2.1kg lighter than standard one. Should help the revs pick up a bit faster! Nice. Next I dug out the shiney bits I had put together a while back, 45 Webers and manifold. Was a good weekend getting dirt under the fingernails again and making old stuff new. I have a lightened and balanced shortblock waiting in the wings that I will post pics of when I start on it, and then hope to enlist yoeddynz's expertise when he gets back from lounging around in Europe and start putting this lot together. Roll on daylight savings and bodywork. Quote Link to comment Share on other sites More sharing options...
nzvohc Posted November 17, 2012 Author Share Posted November 17, 2012 Well decided it was time to pull finger and make some progress so work has begun again on stripping the car for re-paint. I masked all the openings and body seams to keep the paintstripper out of the shuts as I don't intend to strip those areas right back to metal. Tomorrow I will start sanding back the edges with an orbital sander. Will focus on one panel at a time sanding off remnants of paint and filler then sealing up immediately after with expoxy sealer. Once the whole car is sealed up again I will start the fairing process. Goal being to have it ready to spray over my Xmas break, going be busy! Quote Link to comment Share on other sites More sharing options...
nzvohc Posted November 19, 2012 Author Share Posted November 19, 2012 Quick pic update. Top panels and rear guard sanded clean and coated in 2 pot epoxy sealer. Working on having one panel done per day to get them sealed up asap. . Quote Link to comment Share on other sites More sharing options...
nzvohc Posted January 4, 2013 Author Share Posted January 4, 2013 So it's been a while since my last post, been many long hours of filling and fairing which is not terribly exciting to post pics of, but have finally got the car to the stage where I have now taken it to the paintshop for final prep. The nosecone took alot of fettling, taking it on and off to get the fit just right but pretty happy with final gapping now. Most recent job was to fit the new light buckets purchased from the UK, they are made oversize for trimming to suit. Have also had to epoxy the headlight mounting brackets to them. Tomorrow's plan is to glue the buckets to the nosecone and then coat the whole thing in expoxy sealer to stabilise the glass, same principal as gelcoat. Hope to start having colour applied to door openings, boot area and under bonnet early next week, and all going well paint the remainder of the car at the end of next week. Getting jazzed about seeing it finished now... Quote Link to comment Share on other sites More sharing options...
nzvohc Posted January 5, 2013 Author Share Posted January 5, 2013 Just had the morning on the car today, glued in the light buckets to the nosecone so it's a complete assembly now. Sat the glass lenses in to check fitment, all good and very Daytona-ish! Probably go in tomorrow for a few hours and spray inside and outside of the nosecone with the black expoxy sealer. Quote Link to comment Share on other sites More sharing options...
nzvohc Posted January 12, 2013 Author Share Posted January 12, 2013 Quick pic update, progress has been slower than predicted but the old girl finally made it into the booth yesterday for a coat of "Spritzfiller". This is basically spray bog, gives a nice thick all-over coating which is easy to sand (half ends up on the floor) and smooths out all the lines. After I have finished sanding this back it will be back in the hands of the painter for first primer coat. I will likely remove the bonnet and bootlid this week so the undersides can be prepped, and door openings will be done at the same time. Fun fun! Also mocked up the template for the rear decal. Will be stencil cut and sprayed on. Quote Link to comment Share on other sites More sharing options...
nzvohc Posted April 25, 2013 Author Share Posted April 25, 2013 So 3 mths since my last post, slack bastard, but to be fair I have been out of the country for 1 month of that, and I have a note from my mother, so... bit of a photo dump to show progress, main news..IT'S PAINTED!! Now finally the fun part begins of putting it back together, which I have started doing over the last week or so. Booth pics I had the rims spun to clean up the lips.. and the painted them... and with the shiney bits on... The painter was a good bugger and dropped the car back at the house for me while I was away, so good to open the garage door to this! I took a few shots to try and show off the finish but a bit tricky in confined space, will get some better shots outside soon. No shots with the nosecone on yet as the painter is yet to finish that, I think he must like having it around... Today the rims finally went back on with new Hankook 205/60/13's. Love these wheels and make such a difference to the overall look of the car. Today I installed the new door seals. There are no new ones being made for the Firenza's, but after a quick measure up of my HB GT it was obvious that the seals on that would work ok on the Firenza, which are being remade thanks to the Aussie HB Torana's having spares coming online. The top part of the door frame is perfect fit, but the pins for the bottom half didn't line up at all except for maybe 2 or 3. It's an easy task though to move these by adding holes in the rubber in the right spot to suit the door. I used a soldering iron to burn a nice clean hole, much less chance of the hole tearing when inserting the pins this way over trying to cut a hole. Anyway, that job's done, the doors are tight on the opening but will get better as they wear in. Also re-painted the metal top of the dash today in preperation for re-installing the front windscreen this weekend. Much easier to do now! Bought a can of black body deadner/underseal and painted out the wheel wells today as well, thought one can would do all four corners but I wanted it nice and thick and basically used a whole can on just the rear, so another can needed tomorrow. I dropped off all the chrome and stainless trim to the powdercoaters the other day and hoping they will be ready to pick up tomorrow afternoon so I can start putting those back on this week too. I have a major dose of enthusiasm again now after a long haul of seemingly endless bodywork and hoping to get the majority of the assembly completed within a couple of weeks, then onto getting her road legal! then a new motor...then new suspension...then new brakes....then new...you know the rest of the story. Happy chappy. 5 Quote Link to comment Share on other sites More sharing options...
nzvohc Posted May 18, 2013 Author Share Posted May 18, 2013 Hey all, enough done lately for an update.. Got my bits back from the powder coaters and have been putting those back on the car. First up was the tail lights. I gave the lenses a clean up with 2000g wet and dry paper first, then a good rub with a mild cut and polish. Then re-attached the black trims. and back on the car Next was rear wheel arch and sill trims. Then the door handles. Had to shave a bit of the coating off in places as things got a bit too tight with the build up of paint for the the button to work properly. Ended up working well though. About the same time the nosecone came back from the painter. Was a big day seeing this on for the first time and all the same colour. Real happy with how it's looking now. Have also been putting the doors back together. The top part of the door had to be re-upholstered with black vinyl, so took care of that first. Used 3mm foam underneath to pad it out a bit. Came out alright. Then had the fun task of re-installing the glass and winder etc. You know you had fun because there's smears of your blood on the paintwork.. So finished off with all the outside window trims and seals, and finally the wing mirrors. The passengers door is taking a bit more time becaue I had to deal with this first... doesn't make for good uppy-downy windows. I picked up a spare recently so took to swapping out old stuff with not so old stuff. new versus old. Will urethane the good one back onto the window and be good as new. Next job I think will be to fit the nosecone permanently and fit the headlights etc. Happy with progress so far and couldn't resist a quick pic of the two beasts beside each other as I was enjoying a drink. Not long to go now... . 9 Quote Link to comment Share on other sites More sharing options...
Popular Post nzvohc Posted August 22, 2014 Author Popular Post Share Posted August 22, 2014 Hard to believe it's been 15 months since my last post of this project! Crashed computers, new baby, work.....but pretty sure you don't want to hear any weak excuses so I will do a quick pic dump to show how the car came out. My goal was to have it ready for the road by Labour Weekend last year to make it to the Vauxhall Nationals in Tauranga, which I did, with just a week to spare. This didn't leave much time for road testing, but I had no need for worry as it made the trip from Nelson to Tauranga and back without missing a beat. Anyway, this is here all put back together. This is when I pushed her outside for first time with most of the assembly done but minus the headlight lenses and bumpers. ` Then I had later model reclinable seats bolstered up for more lateral support and painted them with vinyl paint. Old versus new. Getting close to all done at this stage. Lights working! Interior shot. Not great but you get the idea. Some pics of the car beside some other flat front Firenza's at the nationals in Tauranga. And some pics on our way back down the North Island. So I have barely done a thing to the car since then except put some more miles on it and plan the final stage, which is the engine and engine bay, which is still green. The plan had been to build up a good 2300 slant motor with some goodies I have collected over last few years...but then this little gem came up on TM and it was too tempting to pass up... This is a Lotus 907 all alloy twin cam 2.0L out of a Jensen Healey.These engines are basically an alloy version of the Vauxhall unit, but with the extra cam. Lotus actually developed the head on the iron Vauxhall block before casting their own alloy blocks. They are rated at about 140hp and considerably lighter than the Vauxhall unit. You can install the Vauxhall 2.3 crank to strock it up to 2.2L. It is a bit of an unknown as far as condition, but I have hooked up a starter motor and battery to do a compression test and it came up good on 3 cylinders, with the 4th a little low, but hopefully that will come up with some use. Regardless it should run. It just needs a few bits like headers and water pump. The sump will have to be cut around the crossmember too, which is the biggest job. Luckily it came with a twin sidedraft manifold and I have a new set of 45 Webers to go with that. Could resist mocking those up for a quick pic too. So that's where I am up to with this, just sorting the bits needed to complete the conversion and then to rope Alex (yoeddy) into doing the tricky bits for me. Hopefully this stage won't take another 15 months... better pull finger! 17 Quote Link to comment Share on other sites More sharing options...
nzvohc Posted November 30, 2014 Author Share Posted November 30, 2014 Bit of an update as I've got some plans underway. Having not being entirely happy with how my front seats came out I have been on the lookout for some suitable replacements that will give extra support and retain a similar look as the originals, and finally came up with some I like which are ex Rover Tomcat. It took 6 weeks for the guy to drop them off at the Mainfreight depot, but finally they arrived. Today I pulled the passengers seat out to see they would match up with the existing mount holes. Not great, but nothing a bit of cutting and welding can't fix (ahem!..yoeddynz). Looks good in the car. Thought it's time to add some sounds to the old girl too, but with no console to take one I have started to mock one up in cardboard. It will get made in 12mm plywood and covered in black vinyl. On the look out now for a suitable radio, not really interested in anything modern, something old and cool, maybe even with a tape deck! Another job completed recently was installing a H/D anti-sway bar to the rear of the car. This is a new 7/8th inch unit ex Jensen Healey that I bought out of the US when I was there. Super easy to install, utilises the spring mount hole for one mount and one extra hole drilled through the swing arm for the second bolt. Attended the Vauxhall Nationals in Blenheim last month, turned out to be a bit of a fizzer, but was still a good drive to meet up with Alex & Hannah. A couple of pics of our cars at the Show & Shine day. My wife is heading home to the US with our 10 month old daughter in a week, then I follow to meet them there for Xmas, so I have a couple of weeks of evenings and weekends that I haven't had in almost a year to make some progress on my next little mission. Looking forward to it! 7 Quote Link to comment Share on other sites More sharing options...
Popular Post nzvohc Posted October 29, 2016 Author Popular Post Share Posted October 29, 2016 Hi all, been awhile since my last post, just a couple of years, that's normal right?? I guess to pick up where I left off, the car has sat for about 18 mths unable to pass a WOF while I had the interior in disarray to fit the new console, which turned out to be a bigger job than planned. Aren't they all?! So ended up making it from MDF as I find it easier to work with over ply. Got the shape how I wanted it and fitting to the shape of the dash. Picked myself up an old Alpine stereo cassette off TM for next to nothing. I have always loved the look of these and of course it has a huge 25 watts of awesomeness! Big thanks go out to Paul for figuring out the security code for me. Next was working out the fascia and what I wanted to mount in it. Apart from the stereo it had to take a new light switch and I figured a USB charging outlet would be handy, so I picked up a double outlet version. I also decided to incorporate a tell-tale indicator light for the lights as they had from factory and used the original window from the old console. The remaining space was simply utilised for phone storage (or cassette tape!). Quite the fiddly job but came out well and wrapped it all in vinyl. Then I just had to make the top panel that takes the boots for the gear stick and handbrake. I started this post too late at night and have run out of puff for tonight so will see if this all uploads ok and add more tomorrow. Cheers 12 Quote Link to comment Share on other sites More sharing options...
nzvohc Posted October 30, 2016 Author Share Posted October 30, 2016 So to carry on where I left off..got the console to this stage. Next I formed the top panel, again from MDF. For the gearstick boot I sacrificed an old console I had and blended it in to utilise the molded edges for a more original look and also make attaching the boot a breeze. For the handbrake boot, I got real lucky in being able to use another left over part, this time from my wife's Opel she had once that I had replaced the auto gear shifter on, the spare boot from that was the perfect size! Once they were both pre-fit it was just a case of wrapping it in vinyl and fitting the boots. Yes, the two boots are offset to the centreline, just a Vauxhall quirk. The concave portion of the gearstick surround was a bit tricky to form the vinyl to, but a good quality industrial spray adhesive worked brilliantly. And finally installed into the car. Having a high quality sound to uphold from the expensive stereo I opted for a pair of 3-way box speakers (100 watters I think) to transmit the sound. I had planned to hide these somewhere under the console, but it turns out there is just not much room under there, so I went the easy (fast) route and mounted them to the side of the console. The office. Great to finally have some sounds in this car and we've had fun searching out old cassette tapes on TM and at local flea markets. Oh, and no external aerial added, went for one of the hidden internal type, which only just does the job. So next on the list to get done was adding a rear spoiler to the car, again a job I had started long ago that got put on hold. Mainly due to me being undecided about how to attach it to the bootlid. I was more than a little hesitant about drilling holes to bolt it on. I don't have many progress pics of this job, but in short I got the spoiler out of the UK, originally of a Vauxhall HC Sportshatch, and had it lengthened to extend past the bootlid edges to be the full width off the car. It sat at that stage for a couple of years while I procrastinated on how to attach it, until about a month ago with the motivation of the national Vauxhall meet coming up I decided to dust it off, final-fit it to shape of the bootlid and then gave it to my painter. With only a couple of days left after getting it back from paint and before leaving for the meeting in Oamaru I decided I would urethane the spoiler on and spare the bolt holes. Here it is at that stage. Fingers crossed it would hold! And success! Came out solid as and I'm stoked with the final result. More pics to come, having trouble adding more to this post... 2 Quote Link to comment Share on other sites More sharing options...
Popular Post nzvohc Posted October 30, 2016 Author Popular Post Share Posted October 30, 2016 A few glamour shots from the Vauxhall Nationals in Oamaru. Next, the engine...see you in a couple more years! 10 Quote Link to comment Share on other sites More sharing options...
Popular Post nzvohc Posted May 1, 2018 Author Popular Post Share Posted May 1, 2018 So, time for an update on this ongoing build, just getting my pics in order from the last year or so and will drop a bunch on here soon with some wordage. Meantime I'll add a teaser for now...cue sexy music... 13 Quote Link to comment Share on other sites More sharing options...
nzvohc Posted May 2, 2018 Author Share Posted May 2, 2018 I've reactivated my photobucket account tonight, so hopefully all the previous pics will be visible soon. If you've read through this thread you'll see that I purchased a Lotus 907 TC engine some time back for transplanting into the car. Either that or taking the head off it and adapting it to the Vauxhall block, which is possible due to the engines being so similar. It's a nice option because you get a TC head and 2300 block that doesn't require modifying anything from the head down, as opposed to a full engine transplant and all that goes with it. Here's a pic of that conversion somebody else has done. And here is a pic of the Lotus 907, in case the ones above never show up again It's a nice little unit, but a little low on ponies at about 140hp, and I would like a little more, as you can get 180hp out of the Vauxhall unit with fairly basic mods. So this sat for a while as I contemplated the best direction, and even started getting some of my Vauxhall bits together on an engine stand to build a good all Vauxhall engine as a simpler solution. I will likely still build that engine in the future, but it will be for my GT Viva. In January last year my TM feed came up with another engine which really got my attention. In the many years I've been scrolling through classifieds I have never seen one of these come up before and it was at a price I could justify. So after a discussion with the seller to work out exactly what the engine was and it's general condition I knew I had to move on it. This is another Lotus unit, but a later version of the of the 907. It's a 912HC (High Compression) 2.2L unit from a 1986 Lotus Excel, rated at 184HP and factory mated to a Toyota W58 box and hydraulic clutch. All very modern! This is how I received it, in all it's glory. (There is also an interesting story behind the car this came from, which I will post later.) These engines went through a series of HP upgrades over the years, from the 907, to the 910, then the 912 like this one, and then on further to be turbo charged in the Lotus Esprit, rated at 215HP. More mods were seeing figures closer to 300HP made by those brave enough to try. The 912 also has an updated head/cam design which I am lead to believe successfully eliminated oil leaks from the cam covers. The car this came from had both power steer and AC, so the engine had the associated pumps, which were the first thing I took to removing before giving it a serious degrease, (although it was a visually very dry engine, more just years of grime) which saw it going from looking like this... ...to this. Much nicer! Can actually see the engine now! Then a compression and oil pressure test were done, and both came up to factory spec. Much relief! 8 Quote Link to comment Share on other sites More sharing options...
nzvohc Posted May 2, 2018 Author Share Posted May 2, 2018 Pause to fix pics. Quote Link to comment Share on other sites More sharing options...

Recommended Posts
Join the conversation
You can post now and register later. If you have an account, sign in now to post with your account.