Popular Post kpr Posted April 10, 2025 Author Popular Post Posted April 10, 2025 Got the intake manifold welded together and finished. Doing some rough maths, have halved the turn in the port. from a 67 deg turn to 33 ish. Along with making whats left of it a bigger radius gave the outlet of the throttles a bit of a zing also, as outlet isn't round and kind reduces in diameter fast 35 7 2 Quote
Popular Post kpr Posted April 12, 2025 Author Popular Post Posted April 12, 2025 Started making some pipes Half of the internet told me i need to test stepped header because will sound like a f1 car. So i made some cones instead of steps 18 2 Quote
Popular Post kpr Posted April 13, 2025 Author Popular Post Posted April 13, 2025 made these today. 2-1 collectors, merge and transition to round all in one, with diverging cone. probably dont need a cone here, but it works in other places, so why not They took just as long to make as getting the whole bit above tacked together Think I said most of this in the discussion thread; they will be 4-2-1 with the primary length being similar to all my 4-1's. will put a flange just after these collectors. so can try anything from merging to 2-1 directly after the 4-2 merge. to stupid long. made tapered die on the lathe to shape the outlet, welded them with the die in place and they held there shape pretty good Look like this before shaping and welding after, cut to length 31 4 Quote
Popular Post kpr Posted April 15, 2025 Author Popular Post Posted April 15, 2025 Exhaust ports Relationship between the intake and exhaust 33 Quote
Popular Post kpr Posted May 16, 2025 Author Popular Post Posted May 16, 2025 Got the 4-2 section finished. 37 5 Quote
Popular Post kpr Posted May 22, 2025 Author Popular Post Posted May 22, 2025 Made some shiny pipes for the intake. In theory based on what works on the starlet, they should be a touch long. once its running will test and see what works best, but should be a good starting point and the 15year old in me likes to look at shiny stuff in engine bay Decided to run the throttles up this way, as i can deal with the throttle motor sticking up more than all the ugly stuff on the other side of throttles. With the intake runners sticking up so high makes it look less out of place Will have the vvti stuff in front of it also. Have a ke70 brake booster in there now, which lets number 4 just zing over top. its still pretty tight as is, but need to wait till gearbox is in before do anymore tweaks The factory injector holes are obviously long gone in this head. So going to use the injector holes in the throttles along with the bike fuel rail. which will be on the under side of throttles. Machined a new center section for the rail Will be a semi deadhead setup. as the fuel wont flow the length of the rail. one side of my new block will be feed, other return. I haven't figured out the rest of fuel system yet, so will drill and tap the block at later date. 35 Quote
Popular Post kpr Posted May 25, 2025 Author Popular Post Posted May 25, 2025 Have done a bit more on the headers . the merge is a bigger version of the other 2 with slip joints on it Since this car is still ages away from running. decided to test fit them on the starlet, almost hoping they wouldn't fit. but yeah just happen to fit perfect. So the plan is to test them them on the starlet against the other ones The 2-1 part on them ^ gets down past the floor of either car. from there on is just for testing purposes on dyno. im hoping it doesn't actually like it this long as will bypass the muffler location. should be an interesting test either way. 41 Quote
Popular Post kpr Posted June 1, 2025 Author Popular Post Posted June 1, 2025 the 4-2-1 work good on the starlet with the right length 2-1 section. so looks like they can go on this car rather than the bin. results later. 28 1 Quote
Popular Post kpr Posted June 10, 2025 Author Popular Post Posted June 10, 2025 results from the 4-2-1 testing numbers are length of the 2-1 section. yep the super long ones were junk in the bottom end.. in other news have been making foward shifter for the j160. is similar to what others do, the top of the factory shifter is cut and welded to the part i made from a bit of 25mm thick ali in the lathe 32 Quote
Popular Post kpr Posted June 21, 2025 Author Popular Post Posted June 21, 2025 Got gearbox mounted, which isn't exciting update wise. But means i can confirm everything fits and start on things it was holding up. intake runner number 4 is tight on the brake booster. but can tweak the intake or trumpets up a touch and should be happy days. as have a little clearance left on number 1 to the bonnet I was going to do a reverso mount on the clutch master like a fellow os geezer done. but ended up with a little more room than expected. So a shorter master or one that mounts closer to the firewall looked like it should fit. Rather than spending forever trying to find something that would work. picked up the angle grinder and zinged the flange off the one i already had. Tidied it up in the lathe and cut a groove in it. then wasted half my life making a clamp on flange. 36 Quote
Popular Post kpr Posted June 30, 2025 Author Popular Post Posted June 30, 2025 Avoiding making the pedal work with that ^ So started on some other stuff that i haven't finished either I have a 2 piece hilux driveshaft, which has the right ends and the hanger bearing will directly fit in the chassis, once zing the captive nuts off. Just need shorten both the front and rear shafts. plan was to just cut the end off each. shorten, weld, done. But decided to put front half the lathe as is and dial it up, before giving it the chop. turns out it spun like a skipping rope with around 0.7mm run out on both ends. Mr toyota just wacked some balancing weights on the low side at both ends. And yeah turns out the tube wasn't just welded on the piss. the bits the tube spigot onto were machined wack. So far i have trued up the hanger bearing end, building up the low side a touch then machined to a tolerance fit . Got the tube on there and is bang on. Probably getting way to picky but yeah. Rest is on hold till new uni's show up Next for no particular reason. decided to do some stuff with radiator Old setup used to look like this Some kinda nissan radiator. which i still had. was too tall to sit in normal place without sticking up and looking ugly, so done some butchery to the bottom tank to drop it down further Buying a radiator that fits may sound wise. but I wanted to make a gap on the intake side to feed the intake cold air. so an ae86 specific one would need to be cut anyway. So yep i cut some more off the side of this one which you can kinda see the rough cut above^ That meant the twin fans wouldn't fit anymore (they didnt fit good anyway) Again a normal person would have brought a fan that works But i despise junk aftermarket fans. So i cut one of the twin fans out leaving a flange around it. made an ali shroud. then wasted half of my life making this plastic ring to clamp the fan to the shroud Would have been a good job for a 3d printer and made in a couple of bits. but i have lathe and a bit of acetal that has been hanging around forever I haven't finished it yet either. still need to attach shroud to radiator and but made an amazing mess 27 1 Quote
Popular Post kpr Posted July 5, 2025 Author Popular Post Posted July 5, 2025 Got the fan mounted properly. waiting to see what water pump, top outlet etc can get hold before weld on tabs to mount in car. as may have to relocate the top pipe. Redone the tab on clutch pedal. so clutch master should be good to go Been making a new 2-1 section on headers specific to this car. Was going to use what was left of the test setup as starting point. but needed to gain a little more length, to get the correct length, before it got to the spot for the first muffler. so started from scratch my normal stainless place stopped selling the size i need for the 2-1 section, so the pipe is some crappy china stuff. which sucks to weld due to wall thickness being all over the shop. but got it done. will see how long before it cracks. i may change the flange for slip joints if has issues Somehow it all worked out after all that testing, that the correct length just happens to fit perfect in the car. the first muffler will go almost directly after the megaphone. If the 4-2 section wasn't the loop design, would have gone straight past the spot for the muffler. which would be a bad day. as need to have all of them to shut up a na 4age. 2-1 length is just under 700mm long 24 5 Quote
Popular Post kpr Posted August 3, 2025 Author Popular Post Posted August 3, 2025 exhaust stuff after the megaphone it goes straight into this 80mm muffler/reso Then some 3" pipe into this reso off ol mates chevy. its a bit under 3" but close enough Thats about where its at for now, need to get some more pipe and move the car before can finish the rest. so likely finish it at later date After the small reso it splits into 2x 2" tubes which will go under the diff into the trash can muffler 15 Quote
Popular Post kpr Posted August 3, 2025 Author Popular Post Posted August 3, 2025 So what is this abortion ? I was going to make something from scratch. but decided i would cut up this muffler old mate gave me. Its off a chevy truck thing, basically rolled off the lot and got an aftermarket system. so pretty much new parts It was huge, to big in all directions to fit under the trueno. so i cut it in all directions angle grinder for reference At first was just straight, but didn't agree with the available space. so made it bendy to follow the spare tyre well and not end up in the suspension / tyre trash can The chevy exhaust had flapper in it that just worked off exhaust pressure. I thought it would be a good idea to put it in my muffler. but i didn't like too much about it, so cut it up and used the shaft and end parts. since they already figured out how to make it seal and last. put it in a new bit of pipe with an old throttle plate. i spent way too much time doing this and probably should have just brought something some ugly insides, with some speed welding. the chevy muffler had a bit of perf in it. then just drilled some more holes. On the right is whats left of the chevy muffler All 3 mufflers/reso's are all straight through, but hoping will be fairly quiet even with the valve open. when the valve is shut it should act like a helmholtz resonator using the pipe length back to where in splits into 2 x 2" tubes. which should cut down the drone. so its kinda a 2 purpose thing. decreasing the pipe diameter and helmholtz resonator at the same time. 27 1 1 Quote
Popular Post kpr Posted August 10, 2025 Author Popular Post Posted August 10, 2025 Driveshaft uni's i ordered were wrong size. so resorted to doing more on exhaust got the front half all welded and mounted up. "insert picture" none of the factory mounts were of any use, so made some from scratch. in the above picture are the ones i made for front half. below for rear the trash can muffler getting everything to sit nice with the limited space / clearance takes most of the time. the pipes between are walk in the park. Triangles because strongest shape and stops shit flopping side to side So yeah you dont actually see much of the rear muffler, which is why not to worried about it looking like a trash can. will paint it black also. may change the tips also, they need to be cut down yet at least. will do for now Got one one the 2" tubes tacked up, other will be basically identical, so easy. once get those zing'd on will see if need anymore hangers or "clearancing" the aliexpress rubber hangers are a bit squishy. so doubling them up 18 Quote
Popular Post kpr Posted August 15, 2025 Author Popular Post Posted August 15, 2025 Exhaust finished, for now at least 4-2-1-2 to control the valve in muffler, will use this pneumatic cylinder that the old boy brought home in a box of junk about a million years ago. has been hanging around ever since. vacuum is enough for it to open / close the valve. got a aliexpress 5 port soleniod which will control it via the ecu, with some load based switching. Will wait till car is running and see what it sounds like before bothering with any of that though. 22 Quote
Popular Post kpr Posted August 25, 2025 Author Popular Post Posted August 25, 2025 seems leaving fuel tank with 1l of e10 in it for 10years isn't a smart idea. the worst of it is the baffles i had welded into bottom of tank, so zing'd it back out and made a new bit to go in its place I dont recall it ever fuel surging. so just made baffles the same other than some angles on the front, to direct and trap the fuel better top side of the tank is a little crappy, but should clean up fine, then weld the bottom back in. haven't decided if going to run a tank sealer kit though it or not. has any one had one thats been done long term? Got radiator mounted, The big hole on driver side will feed the intake cold air. If it gets some form of ducting or not, will decide at a later date. Had a fwd water outlet, which lined up with the existing top radiator pipe. but they dont compute with rwd water pump. as they dont have the thermostat bypass. It was buy a rwd water outlet that doesn't line up with radiator and cut radiator up again. or make a bypass fitting for the fwd outlet and waste half of my life trying to weld cast aluminum, that has had rusty coolant going through it for the past 30 years. you know what i did. Not great, not terrible 15 1 Quote
Popular Post kpr Posted August 29, 2025 Author Popular Post Posted August 29, 2025 Decided to make this bit as well. Done some weird stuff on the lathe/mill factory bottom hose fits. top just needs a generic hose with a 45deg and bit of straight 23 Quote
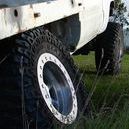
Popular Post kpr Posted September 3, 2025 Author Popular Post Posted September 3, 2025 may as well carry on re inventing the wheel spicy turn it on and run, Just those 3 big tacks wanted to turn it into a banana. beat it back straight as possible then faced it in lathe. so for that reason bolting most of it together, as throwing belts because pulleys are on the piss is a bad day. The original plan, the little m5 cap screws were just to locate and square things, then weld. but they can stay there with a little weld top and bottom. other side has 3x m8's so shouldn't go anywhere. Its pretty beef, because if you know 4 cylinder harmonics, things like to vibrate and break/crack. esp when 8000rpm + Need to do some more clearancing, so has more adjustment towards the block. Then will make the adjuster bracket 30 Quote

Recommended Posts
Join the conversation
You can post now and register later. If you have an account, sign in now to post with your account.