

nzvohc
-
Posts
69 -
Joined
-
Last visited
Posts posted by nzvohc
-
-
9 hours ago, CUL8R said:
Coming along really nicely indeed!
There's a guy down here, Tubby that works at Supercheap Auto that has a 2.3 Twin Cam Chevette Speedway car, I think one motor was setup for methanol, the other for Av Gas - pretty much retired the car from use but he still has it.
Cheers...it's actually a bigger job than I imagined it would be, but glad I didn't think too much about it before starting, otherwise I may have never taken it on.
Amazing to hear off what other people have done around the country. The Chevette would be interesting to see. Do you know if they were Lotus or Vauxhall engines?
-
- Popular Post
- Popular Post
So as mentioned earlier, the front end got a tidy up with a coat of paint. This should help the leaking oil clean off easier in future.

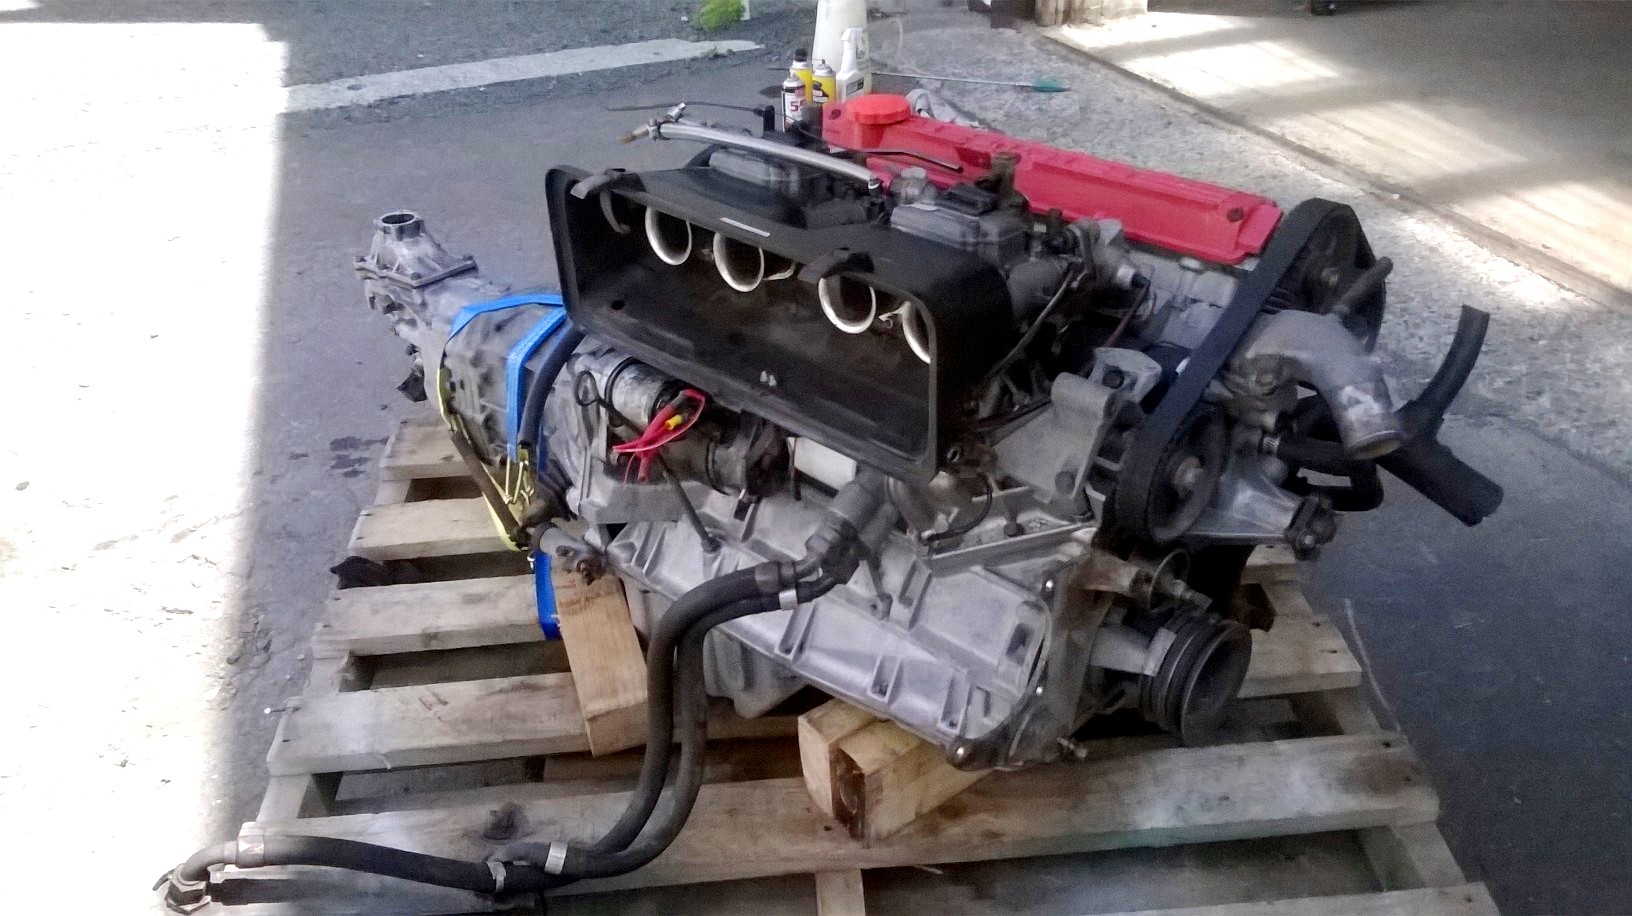
One benefit of these engines is the fact that they were developed and modeled off the Vauxhall slant engine, which includes the exact same mounting points on the block, so it was a simple case of swapping the Vauxhall mounts onto the Lotus block to set the engine up in the same location. This was really important to me as it meant that the gearstick location would end up in the same position as before, but more importantly the driveshaft length stayed the same with no need for any mods. (I was already running a W50 gearbox behind the Vauxhall engine, so the yoke matches too)
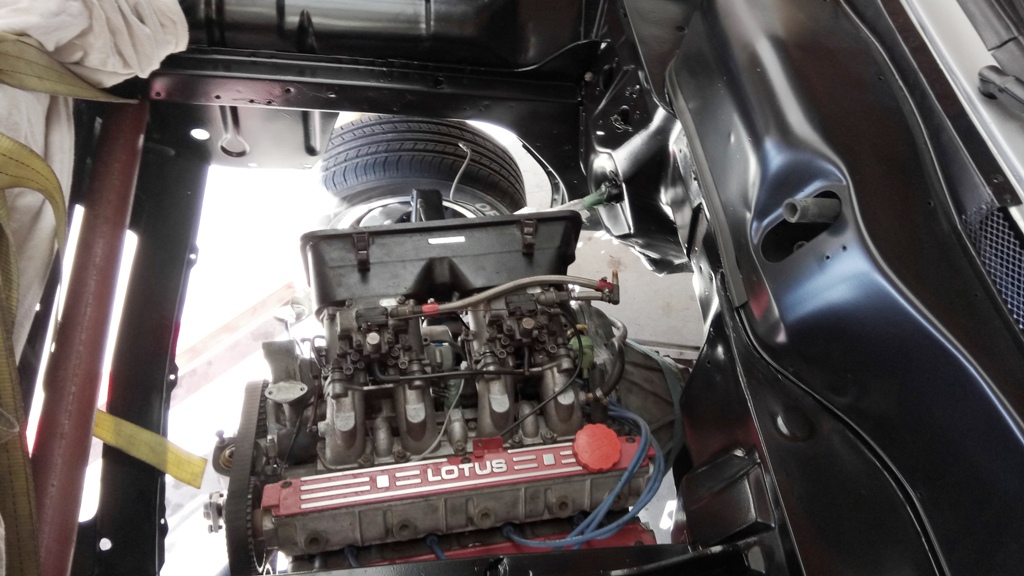
This the first fit to subframe.
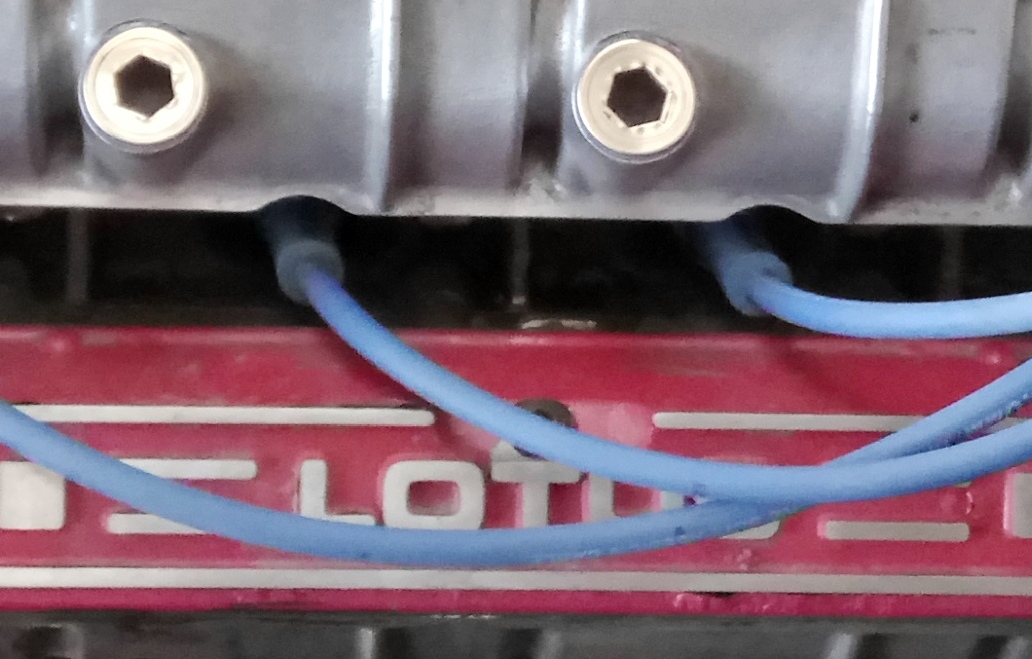
Note the exhaust manifold was removed by now as it fouls the mounts and can't be used. I had hoped I could avoid the need to replace these simply to keep the initial cost down and replace it later with some headers. So it just means I have to do it sooner rather than later now, likely to be in S/S.
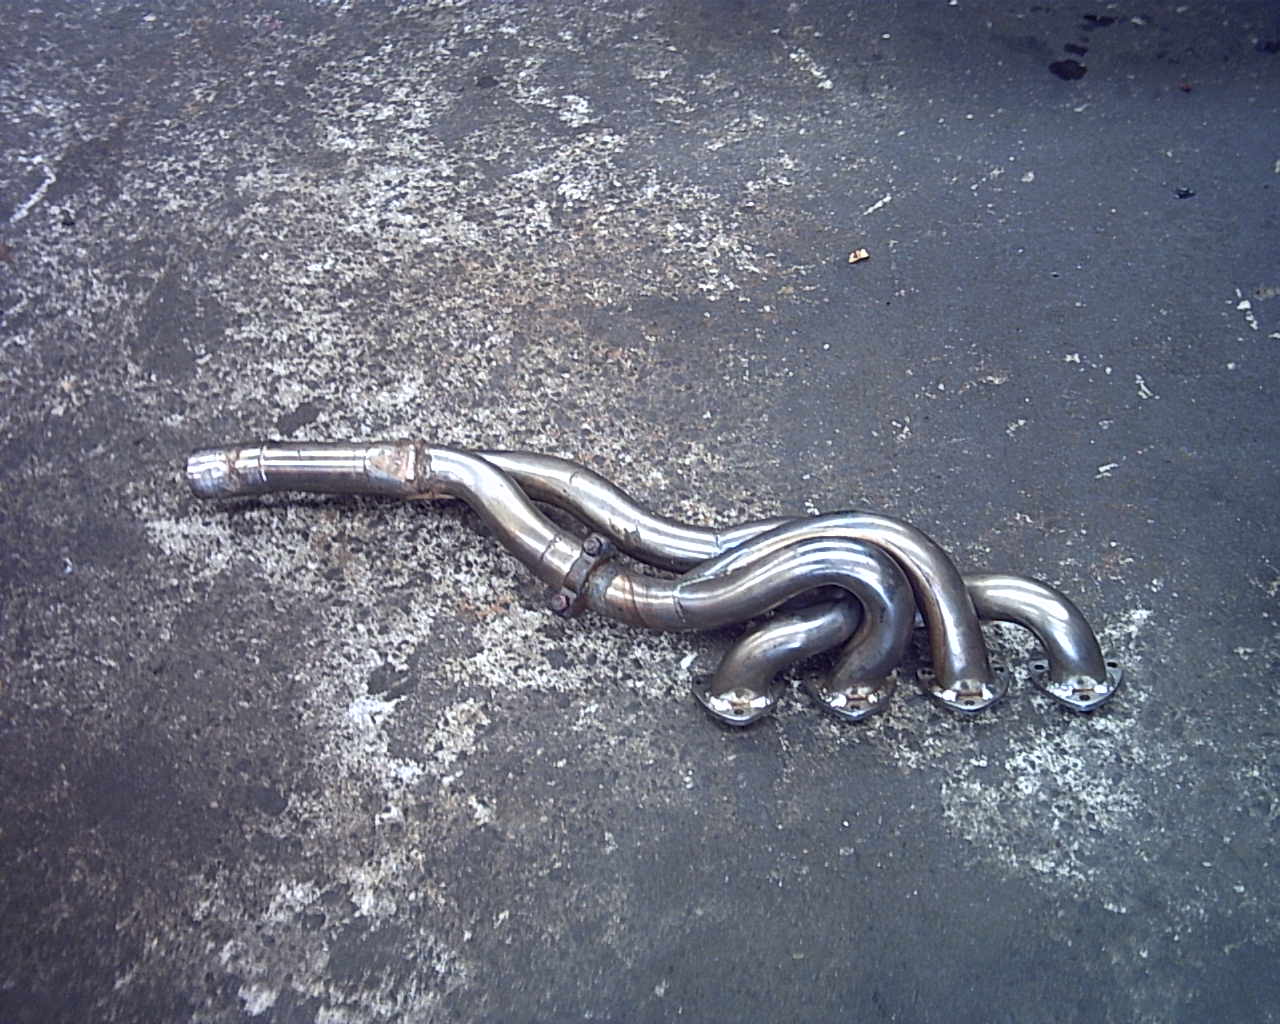
I am going to attempt mocking up a set of extractors while the engine/subframe are out of the car as it's so much easier to get around, and then have them made off site, we'll see how that goes...this is a pic of the header flange I have had laser cut in MDF to check fitment, which once happy with will be sent to engineering shop to be cut from 10mm plate.
Of course I would like to just buy a set of these...anybody want to chip into a GoFundMe account?? Worth a shot...but don't they look sexy??!!
A couple more pics of first fit.
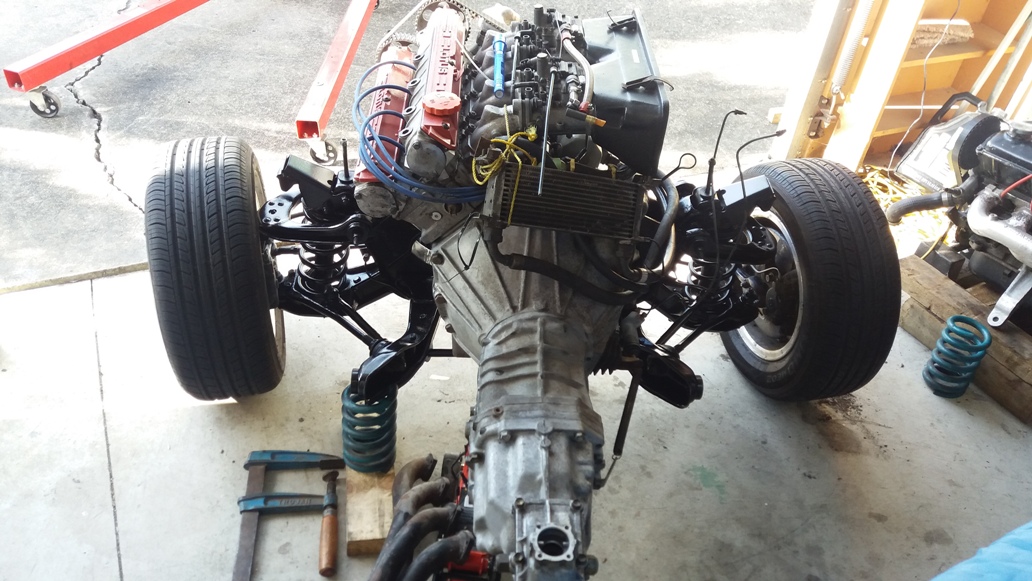
Although it looks good here, the sump is actually touching the cross-member. The Lotus block is quite a bit wider at the bottom end than the Vauxhall, so there will be no avoiding cutting the sump to make clearance.
The headers you see at the bottom of the photo are a spare set I have from friendlyfire's Chevette from when he had a Vauxhall engine in that. I was hoping I could possibly adapt these for this conversion, but they would require changing so much that I may as well start fresh, in S/S.
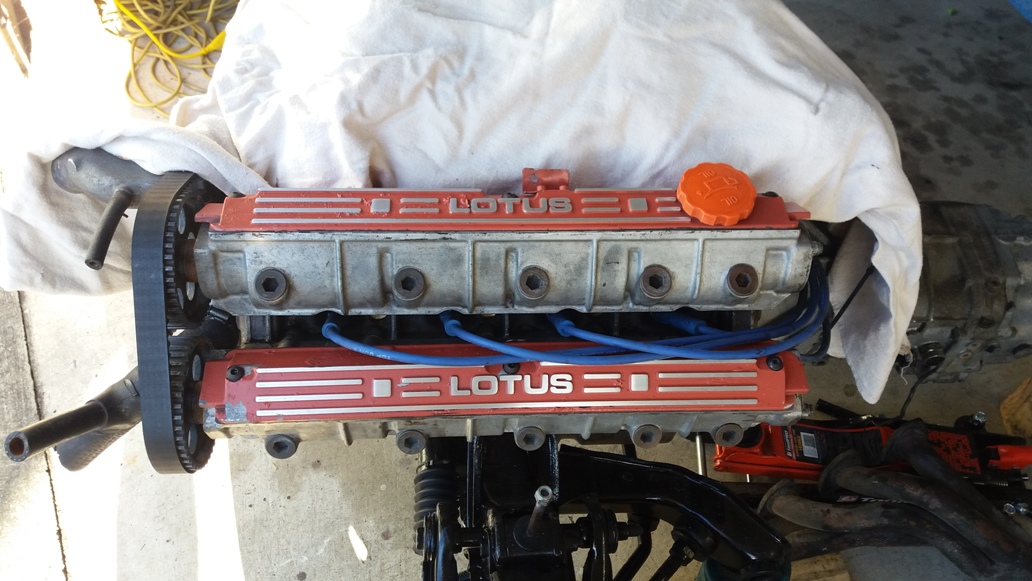
I gave the cam covers a tidy up around this time too by carefully sanding the paint off the raised lettering etc, which looks way better. They really need refinishing and will be done at a later stage as not a high priority at the mo. May change the colour also, any suggestions?
The orange filler cap will have to go too.
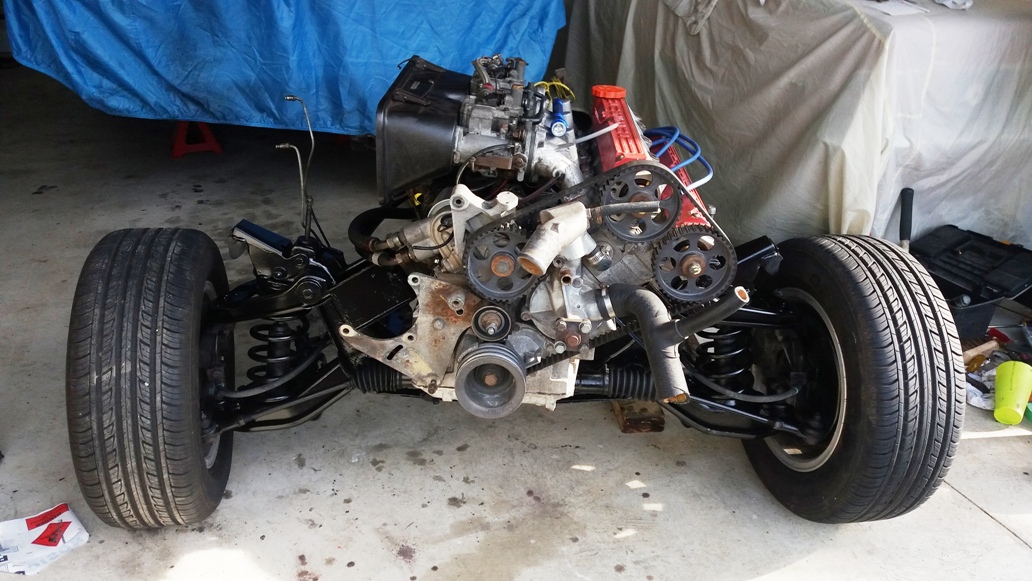
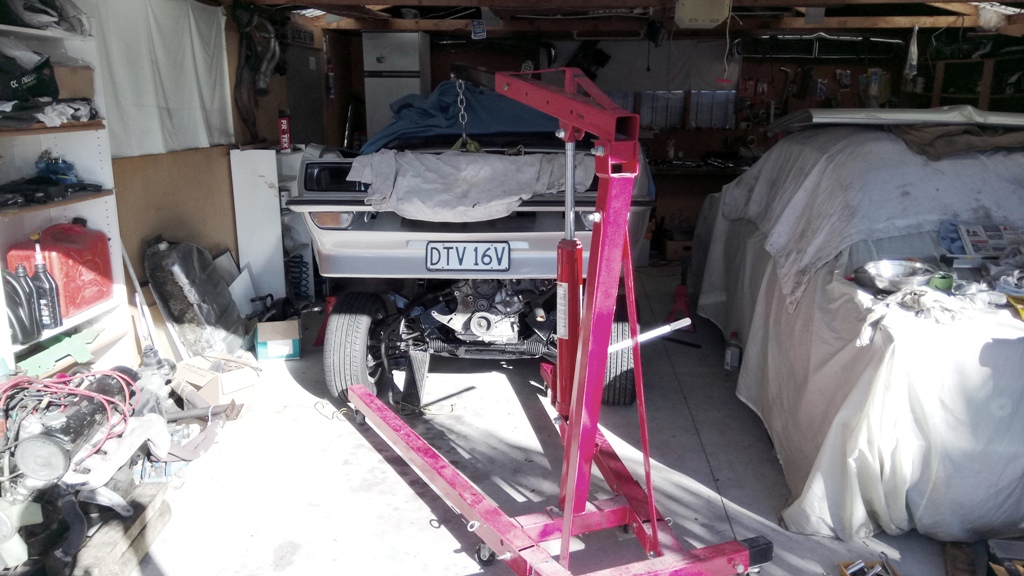
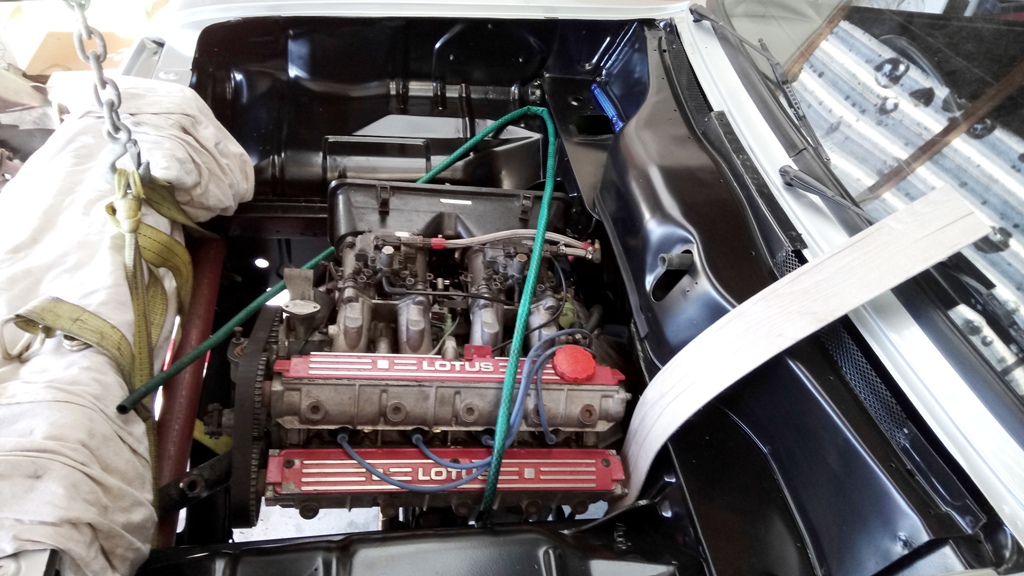
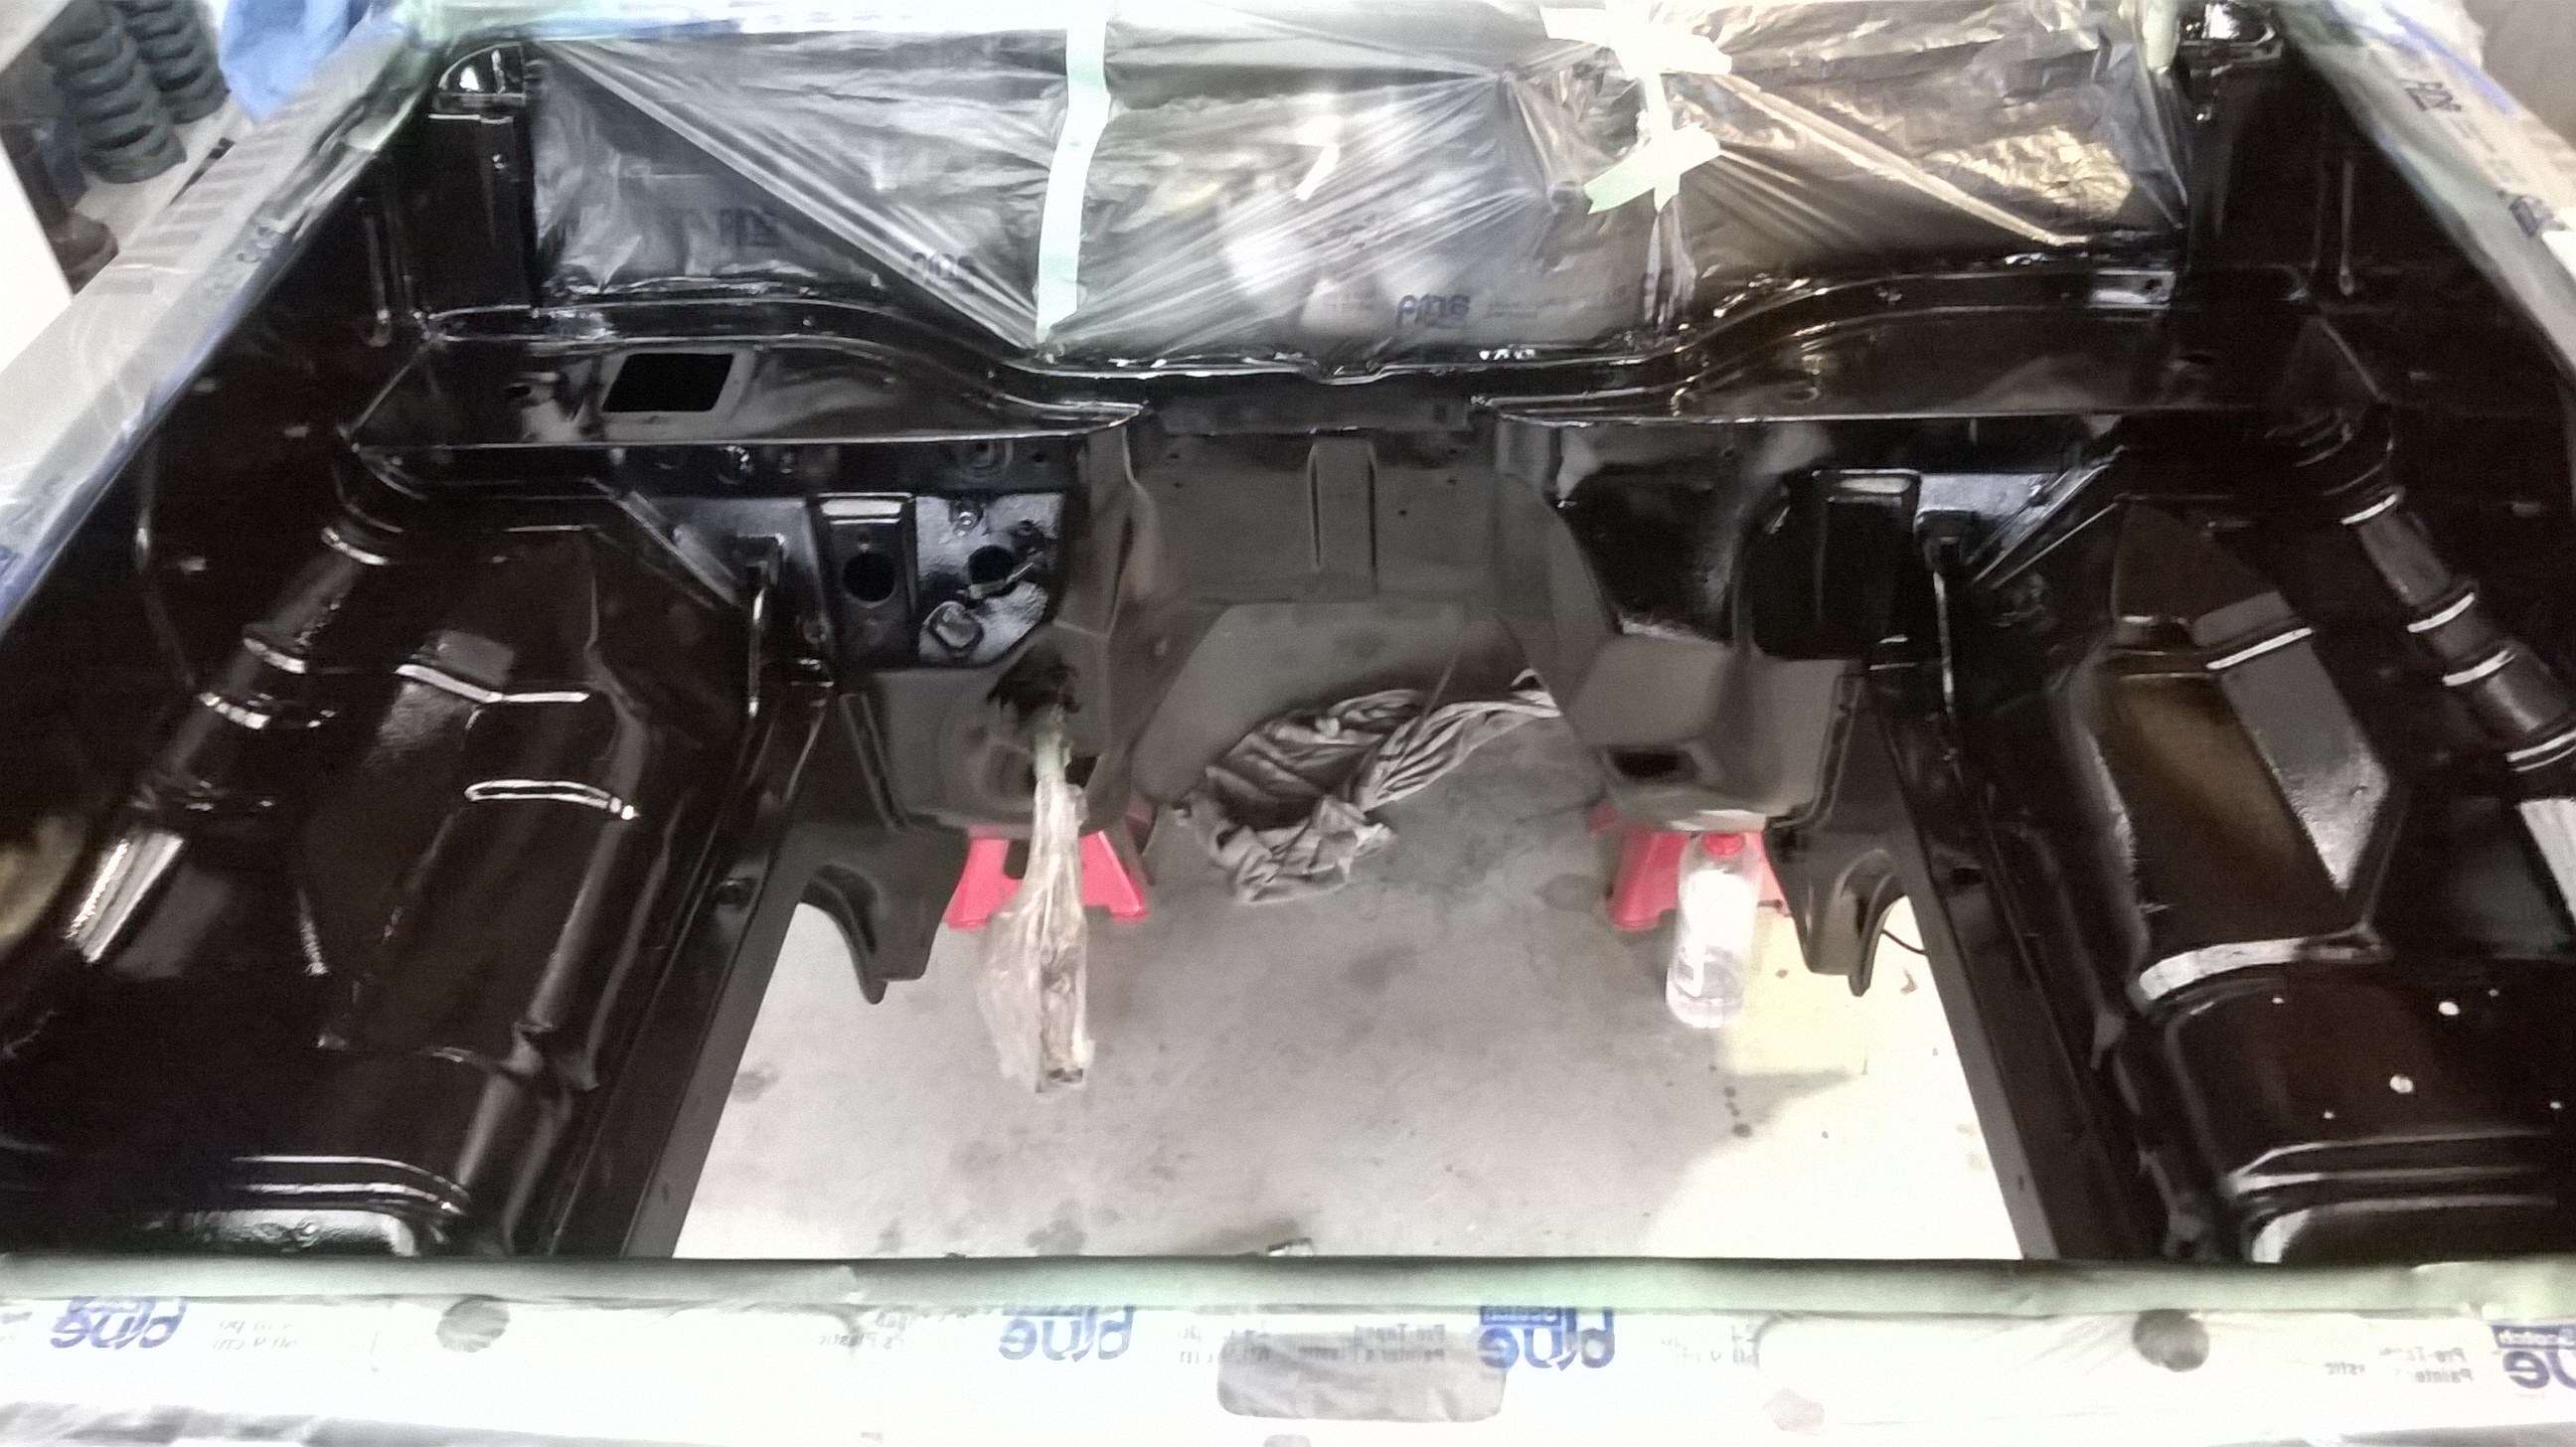
So before tackling the issue of the sump I want to check my theories that the engine/gearbox would sit in the right position and clear the bulkhead etc.
I rolled the assembly under the car for the first time and carefully lowered the car back down onto it.
By the way, I am not lifting the car from the slam panel, as it might look like here, I am lifting it via a heavy steel tubing that is tucked under the chassis rails you can just see in the next pics.
Almost there...
And in!
Yes, the bottom cam housing is millimetres away from the bulkhead and too close to leave like that, which I have a plan for.
But hey, it's in!
Next the sump cut.
-
 13
13
-
I think secretly you just love cutting out rot...you could have been a dentist...the principle is the same...take some "before" photos, scratch your head, dig, grind, fill, make small talk, grind some more, collect loads of money, repeat...
Just a thought. Nice progress btw.
-
1
-
-
11 hours ago, yoeddynz said:
Yay for updates!!!!
Boo for Photobucket destroying yet a nother really good photo packed thread!
Yay for latest Lotus Twink. Please do tell all about the history of this engine- its a good one
Looking good Andre. I bet you breathed a small sigh of relief when you found it only to be surface rust under that battery tray.
So many ways to rhyme naughty words with Photobucket to describe them it hardly seems fair...
Definitely good to get that battery tray off with minimal damage. I have seen other cars have far worse to deal with stemming from this area. I ended up taking the window washer bottle bracket off too and will remount that down lower where a bit less visible.
-
Thanks for tips @Truenotch I figured I might be up for doing that job sometime.
I don't blame you for forgetting it existed either, I've kind of done the same occasionally over the years!
-
Found pic of the original TC engine this car once had.
-
8
-
-
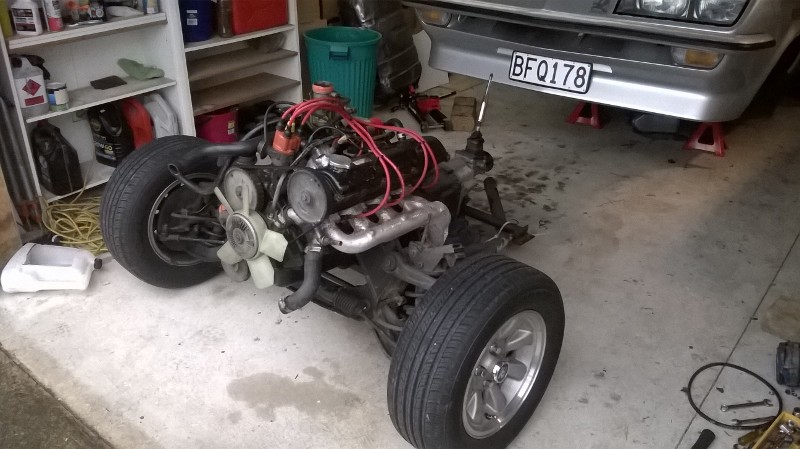
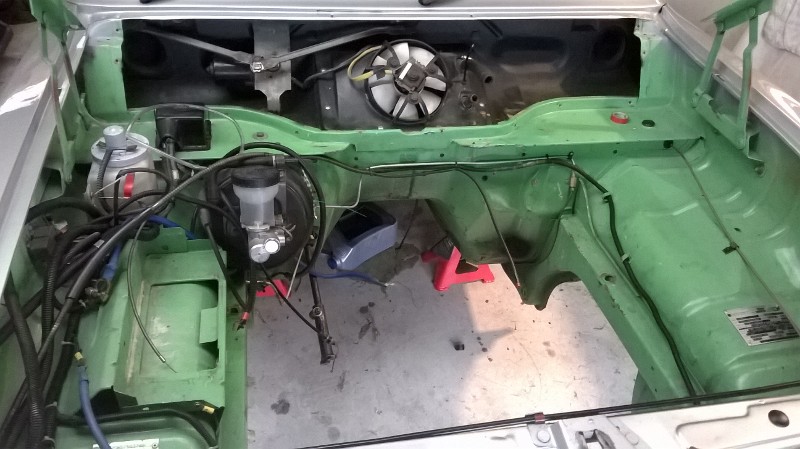
Ok, next was to get the engine home and start the transplant. It's going to be tight in there!
As you can probably see in the background, I had pulled the engine and subframe out of the Firenza by this stage to clean it up and paint it.
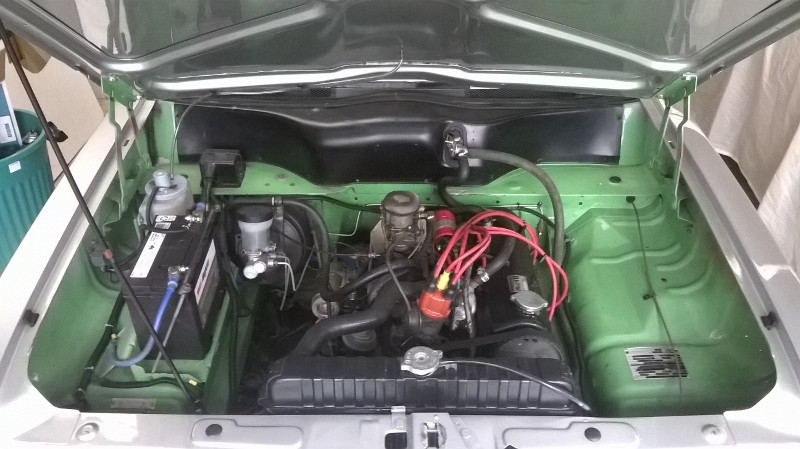
This is the engine bay as it was before starting. Got to get rid of that green!
And the old donk out.
The process involved using a engine crane to lift the car up away from the subframe with engine in place, then place jackstands to keep the car in the air so that the crane can be wheeled out of the way, then roll the subframe forward and out from under the car. I could then use the crane to lift the engine of the subframe . It's a process that's for sure, but has worked well and it's great to have the subframe out of the car for pre-fitting the new engine.
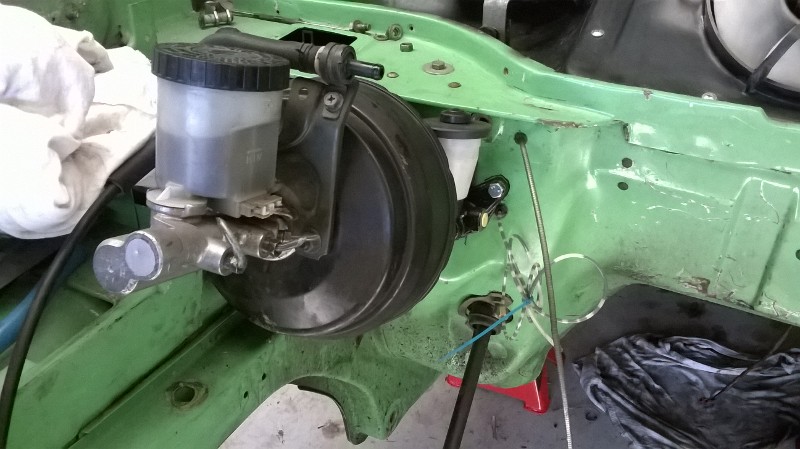
The next step I took was to prep the engine bay for painting. Before that though I installed a new clutch master cylinder and converted the clutch pedal from a pull-cable to push-rod. I don't have pics of the pedal mods at the moment, but here is the cylinder in place, tucked nicely in alongside the brake booster.
Yep, it's snug!
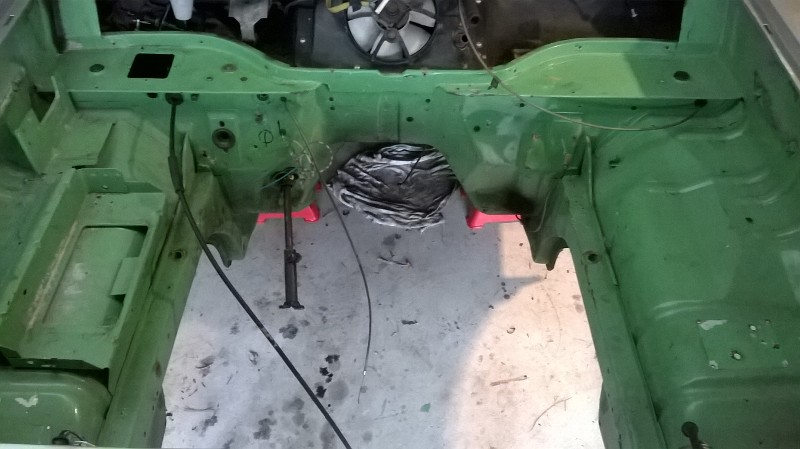
Then everything stripped out.
.
I could see problems lurking under the battery tray and knew that it would have to be removed to investigate.
Sure enough, nasty stuff but thankfully only surface rust. Will relocate the battery to the boot and remove the tray permanently for a less cluttered look.
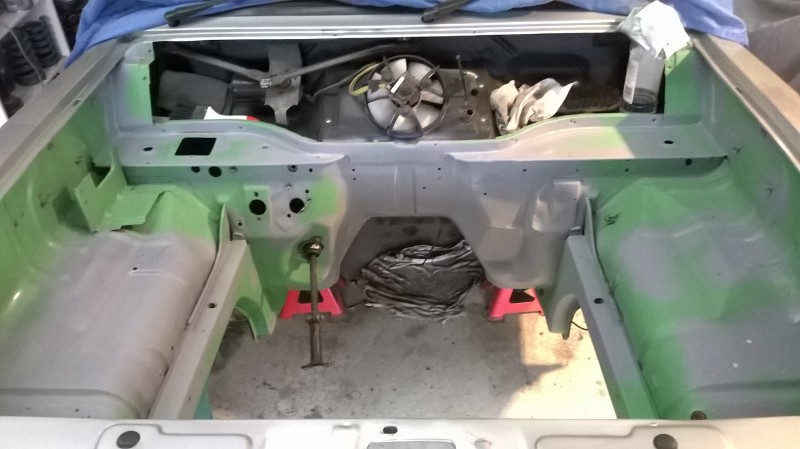
After that was taken care of, the fun begins with prep work. Got to love all those fiddly shapes and edges in an engine bay!
I decided on painting the engine bay black, as that was how the "Droopsnoots" were factory done back in the day. Borrowed a compressor and gun from work and squirted it.
I'm not entirely happy with the finish up close so it may get another shot later, but for now it is much improved.
About this time I also acquired a personalised plate for the car. This plate had been on the car many years ago when it originally had a very rare & genuine Vauxhall TC engine. The engine and plate were removed by a previous owner and used in a Chevette HSR replica rally car. A shame not to have that engine now, but this new one will pay homage to it nicely I think.I have a pic somewhere of the old TC engine which I will find and post. He still had the plate and I was able to convince him to part with that.
Next up is numerous trial fittings of the engine and subframe to get the engine/gearbox in the right place. More tomorrow.
-
7
-
-
Pause to fix pics.
-
I've reactivated my photobucket account tonight, so hopefully all the previous pics will be visible soon.
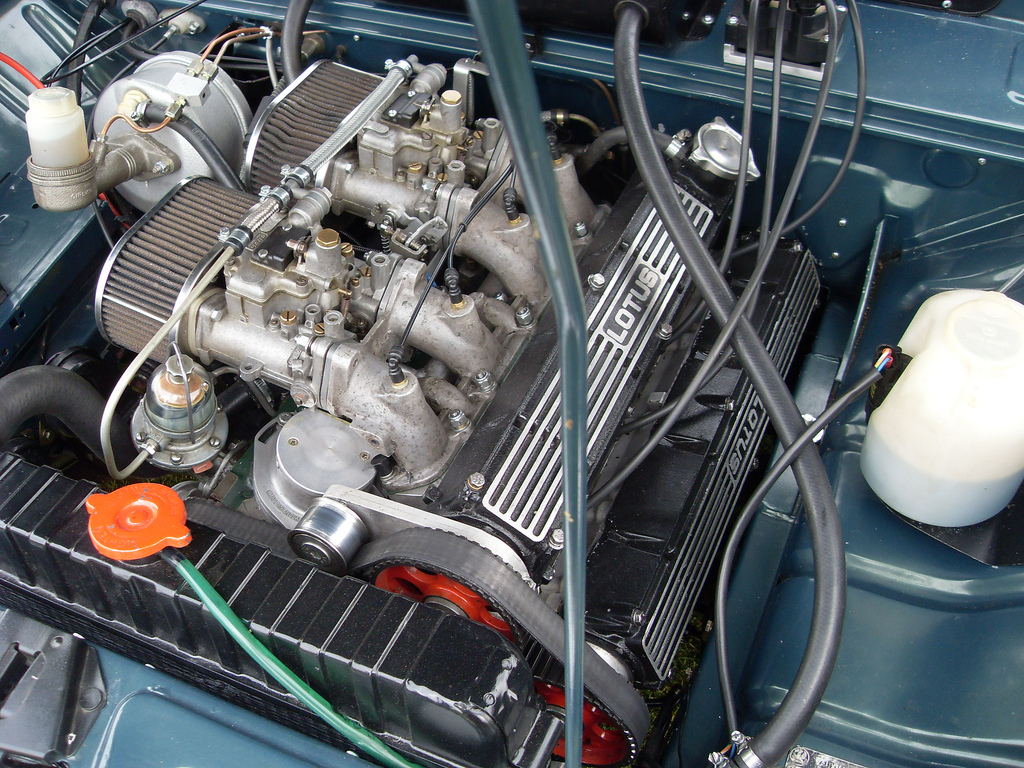
If you've read through this thread you'll see that I purchased a Lotus 907 TC engine some time back for transplanting into the car. Either that or taking the head off it and adapting it to the Vauxhall block, which is possible due to the engines being so similar. It's a nice option because you get a TC head and 2300 block that doesn't require modifying anything from the head down, as opposed to a full engine transplant and all that goes with it.
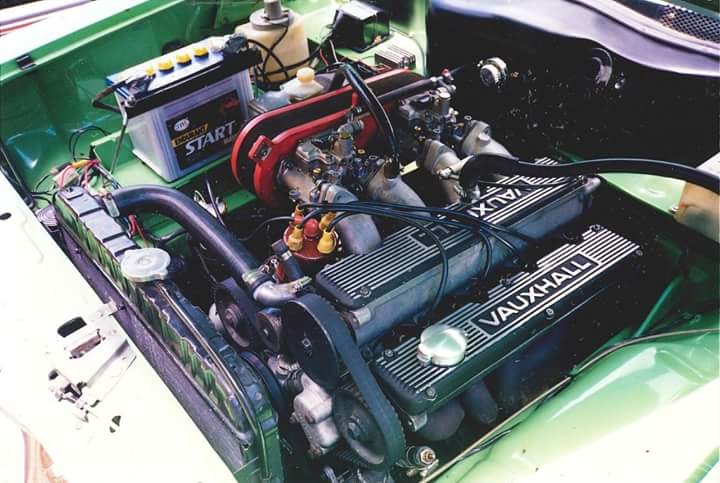
Here's a pic of that conversion somebody else has done.
And here is a pic of the Lotus 907, in case the ones above never show up again
It's a nice little unit, but a little low on ponies at about 140hp, and I would like a little more, as you can get 180hp out of the Vauxhall unit with fairly basic mods.
So this sat for a while as I contemplated the best direction, and even started getting some of my Vauxhall bits together on an engine stand to build a good all Vauxhall engine as a simpler solution. I will likely still build that engine in the future, but it will be for my GT Viva.
In January last year my TM feed came up with another engine which really got my attention. In the many years I've been scrolling through classifieds I have never seen one of these come up before and it was at a price I could justify. So after a discussion with the seller to work out exactly what the engine was and it's general condition I knew I had to move on it.
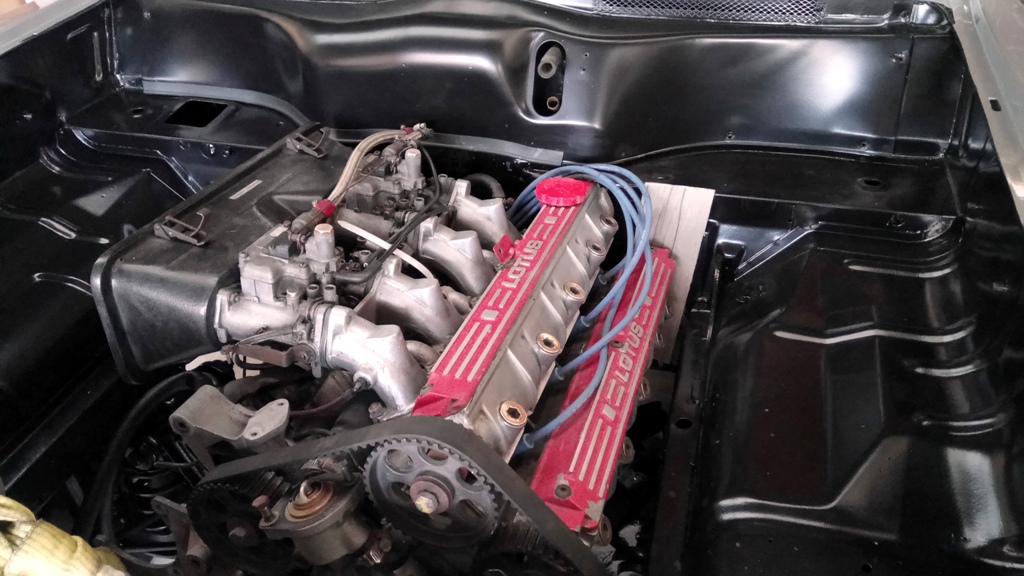
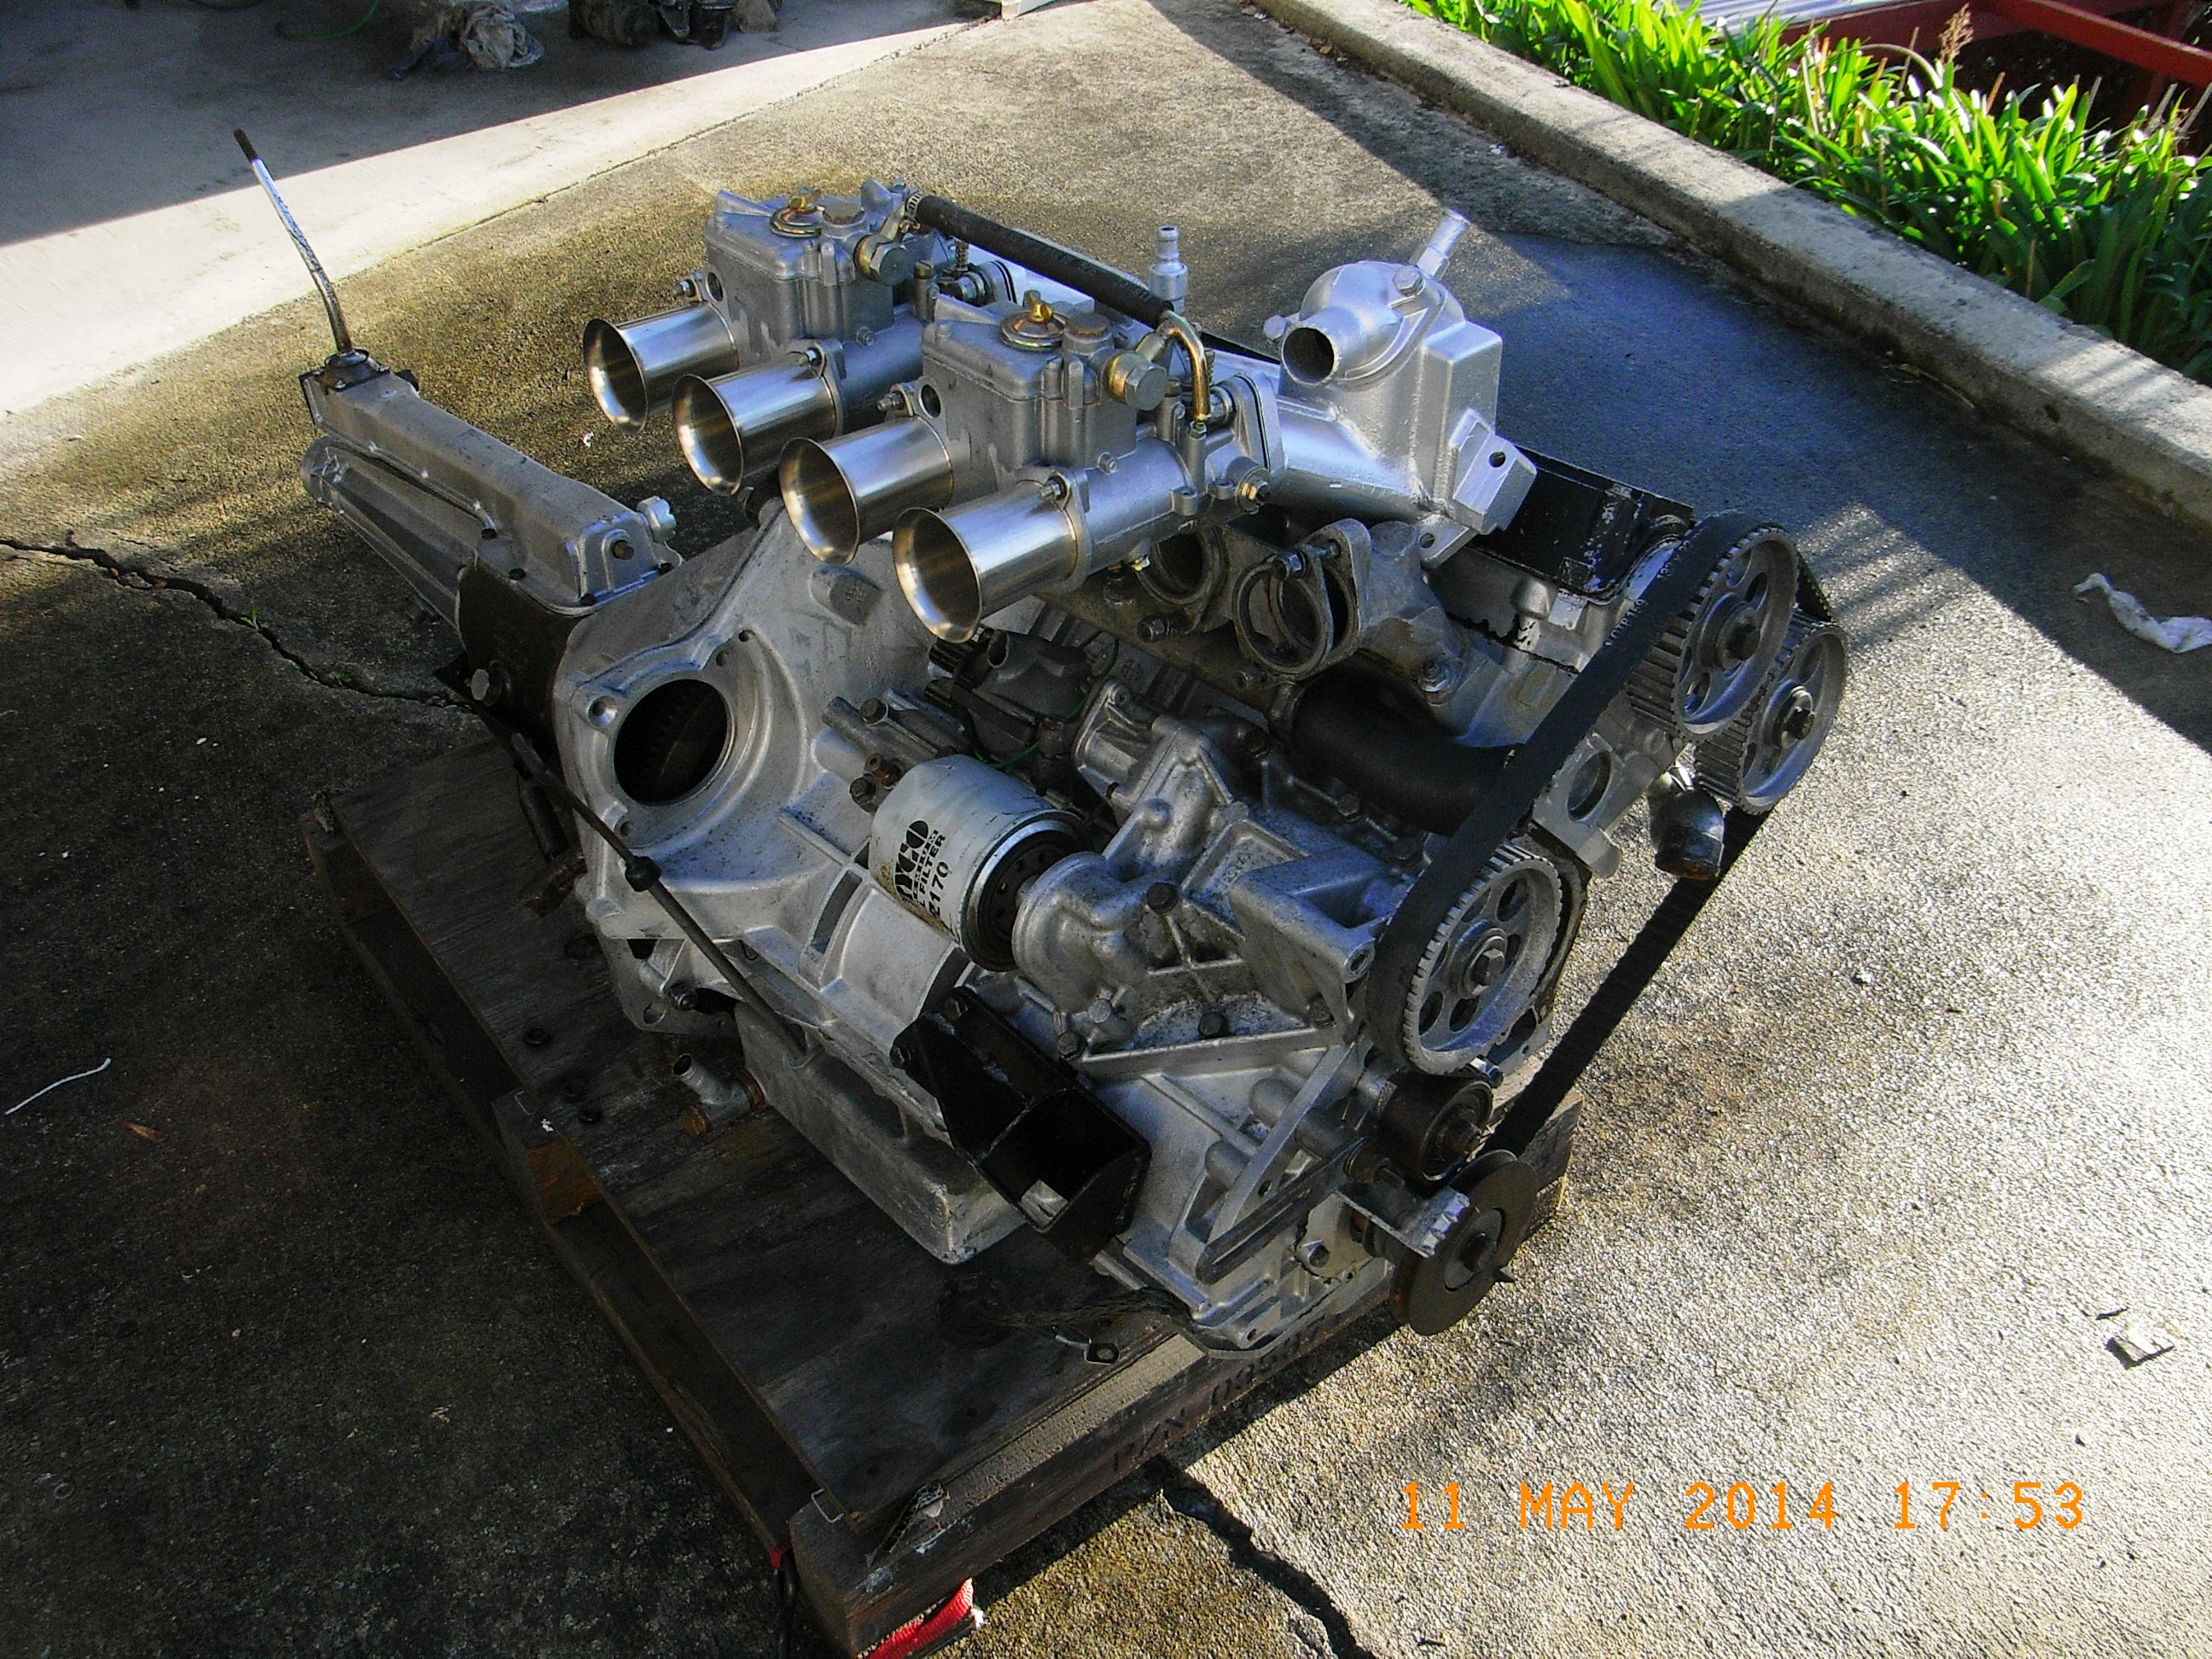
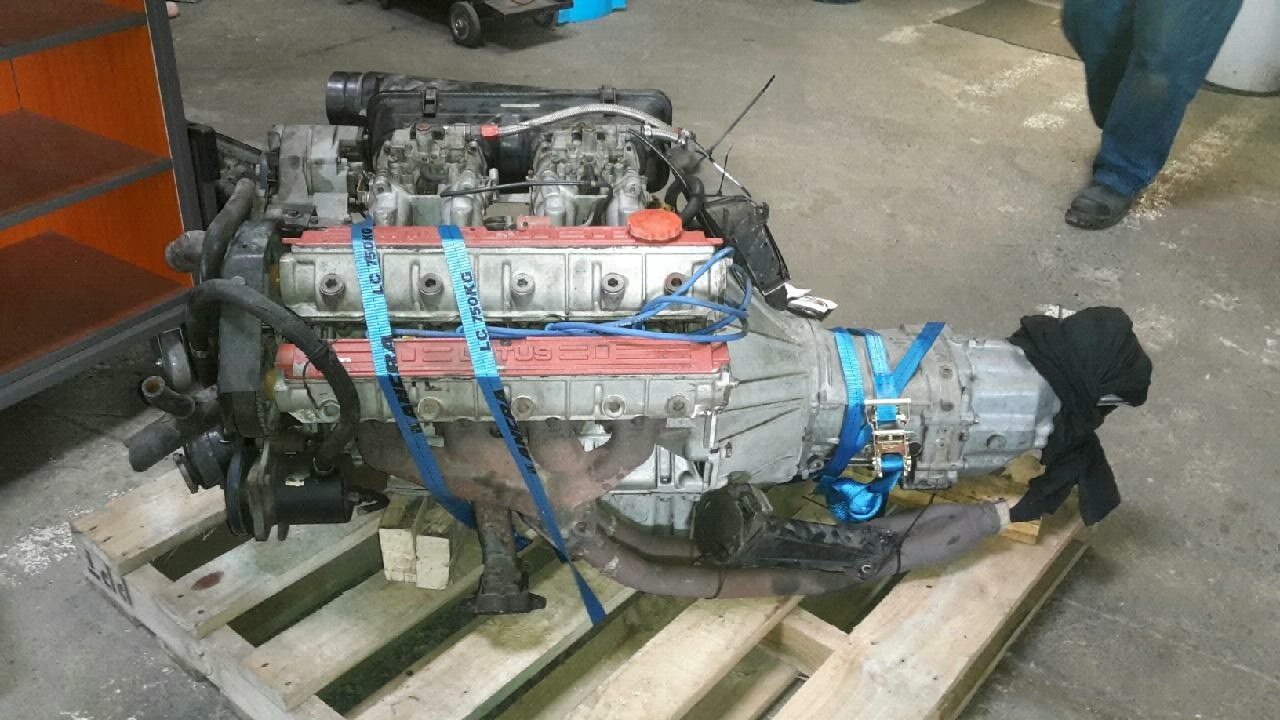
This is another Lotus unit, but a later version of the of the 907. It's a 912HC (High Compression) 2.2L unit from a 1986 Lotus Excel, rated at 184HP and factory mated to a Toyota W58 box and hydraulic clutch. All very modern!
This is how I received it, in all it's glory. (There is also an interesting story behind the car this came from, which I will post later.)
These engines went through a series of HP upgrades over the years, from the 907, to the 910, then the 912 like this one, and then on further to be turbo charged in the Lotus Esprit, rated at 215HP. More mods were seeing figures closer to 300HP made by those brave enough to try.
The 912 also has an updated head/cam design which I am lead to believe successfully eliminated oil leaks from the cam covers.
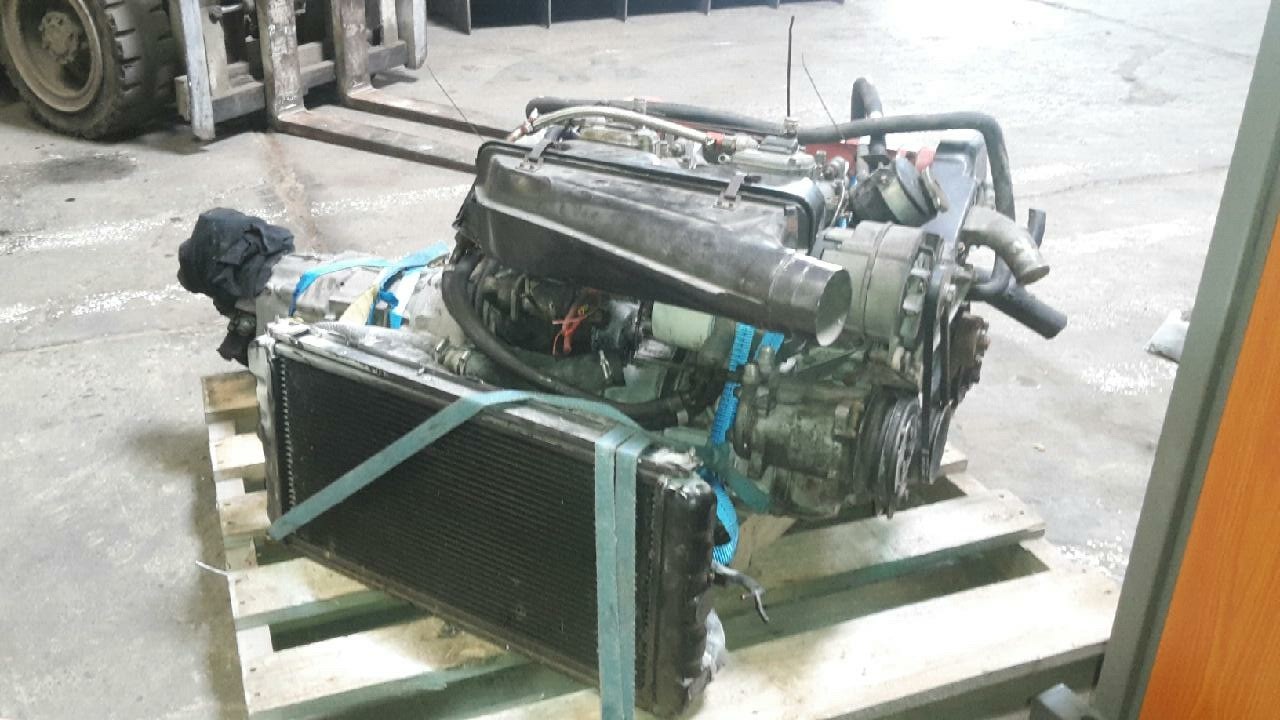
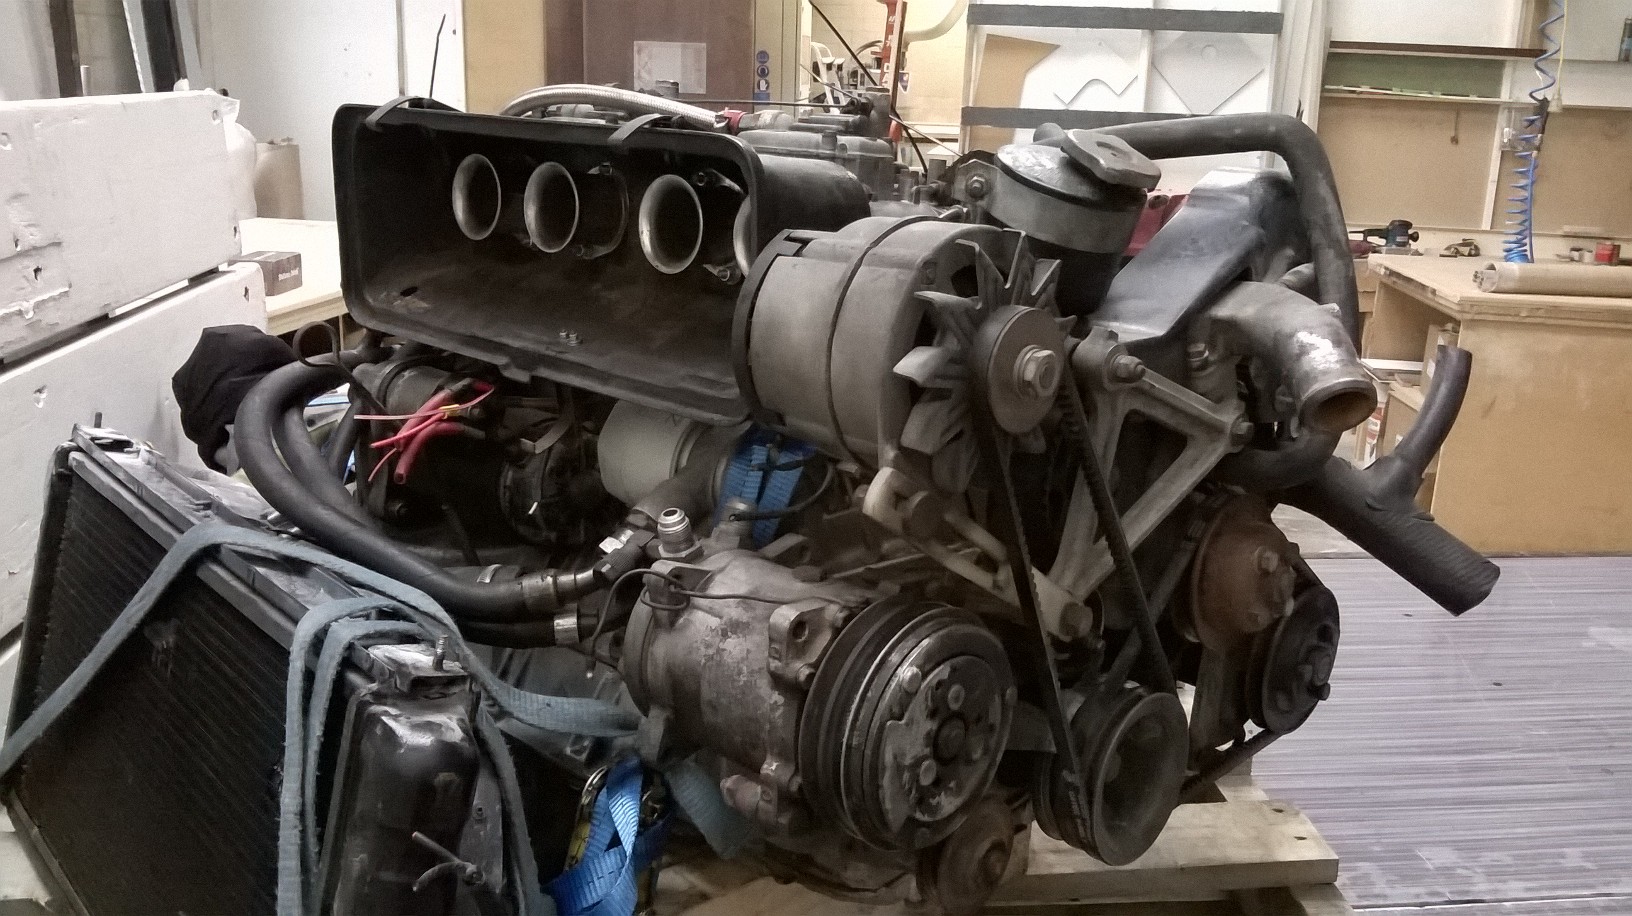
The car this came from had both power steer and AC, so the engine had the associated pumps, which were the first thing I took to removing before giving it a serious degrease, (although it was a visually very dry engine, more just years of grime) which saw it going from looking like this...
...to this. Much nicer! Can actually see the engine now!
Then a compression and oil pressure test were done, and both came up to factory spec. Much relief!
-
8
-
-
- Popular Post
- Popular Post
So, time for an update on this ongoing build, just getting my pics in order from the last year or so and will drop a bunch on here soon with some wordage.
Meantime I'll add a teaser for now...cue sexy music...
-
13
-
We plan to get to the boat show, always worth the drive and a look around. What day is everyone thinking? It's on Sat & Sun.
Blenheim Hospice Classic Car Show is the following Sunday 12th too Went last year for the first time and was impressed with the turn out, plan to go again this year with the Firenza. Anybody else making the trip?
-
Congrats on getting legal beagle, it's a great feeling after a long haul!
Pics look great. I think you should try and pick up an old surfboard to mount on the roof, would really suit.
See you at the meet.
-
1
-
-
Hey maybe Hannah can set to cleaning the moss off the windows for you, I think that would be really nice of her...cos you know the rest of the car is going to have to follow the example of the engine bay right?
If you are wanting an old radio to complete the look inside I have a few spare, I'll bring them next time we come over.
Keep up the good work, looking forward to see it on the road soon.
-
- Popular Post
- Popular Post
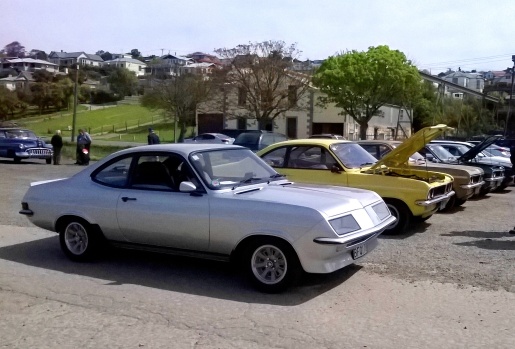
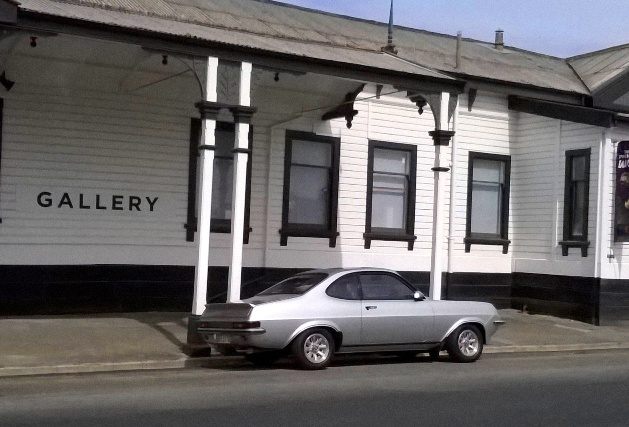
A few glamour shots from the Vauxhall Nationals in Oamaru.
Next, the engine...see you in a couple more years!
-
10
-
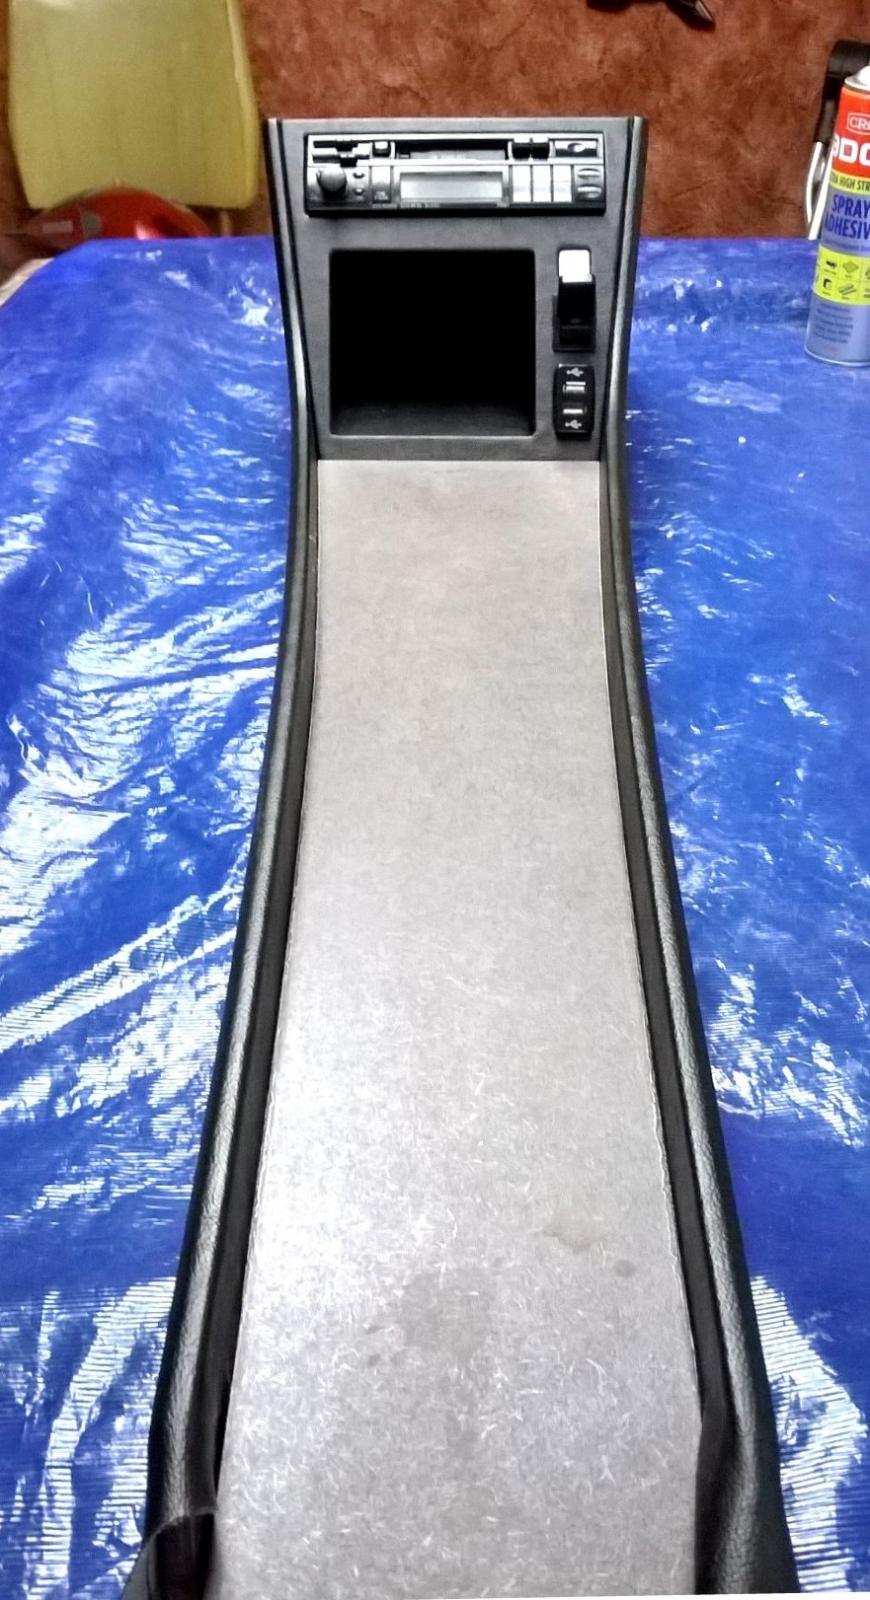
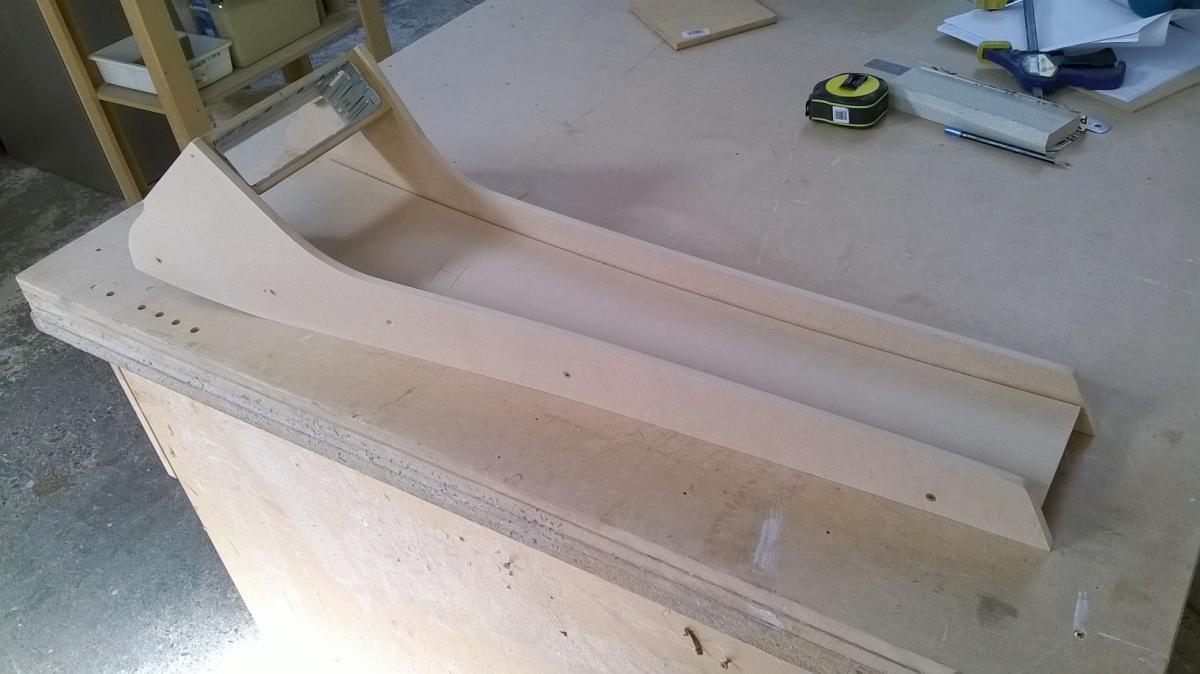
So to carry on where I left off..got the console to this stage.
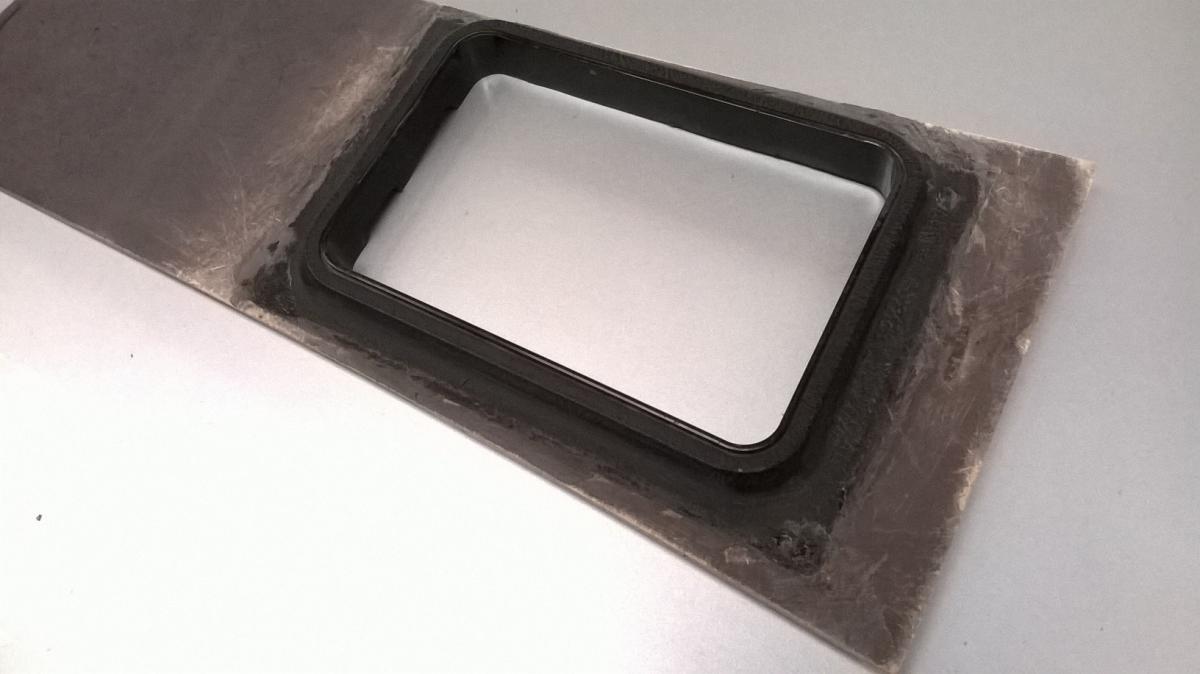
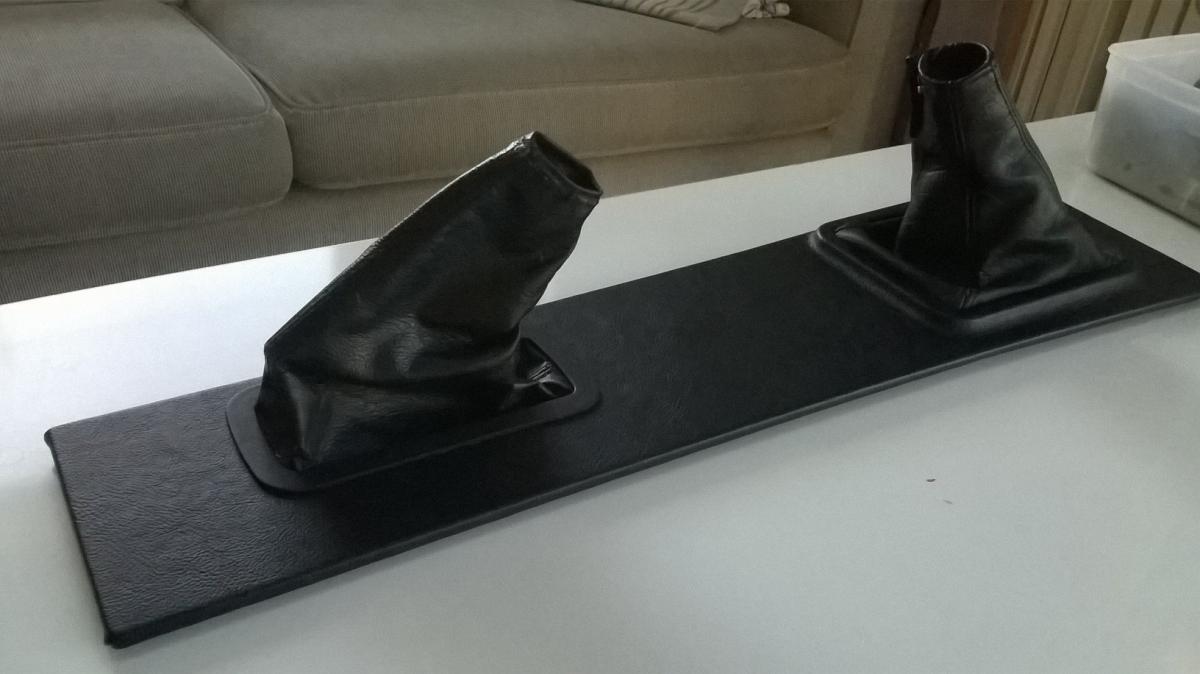
Next I formed the top panel, again from MDF. For the gearstick boot I sacrificed an old console I had and blended it in to utilise the molded edges for a more original look and also make attaching the boot a breeze.
For the handbrake boot, I got real lucky in being able to use another left over part, this time from my wife's Opel she had once that I had replaced the auto gear shifter on, the spare boot from that was the perfect size!
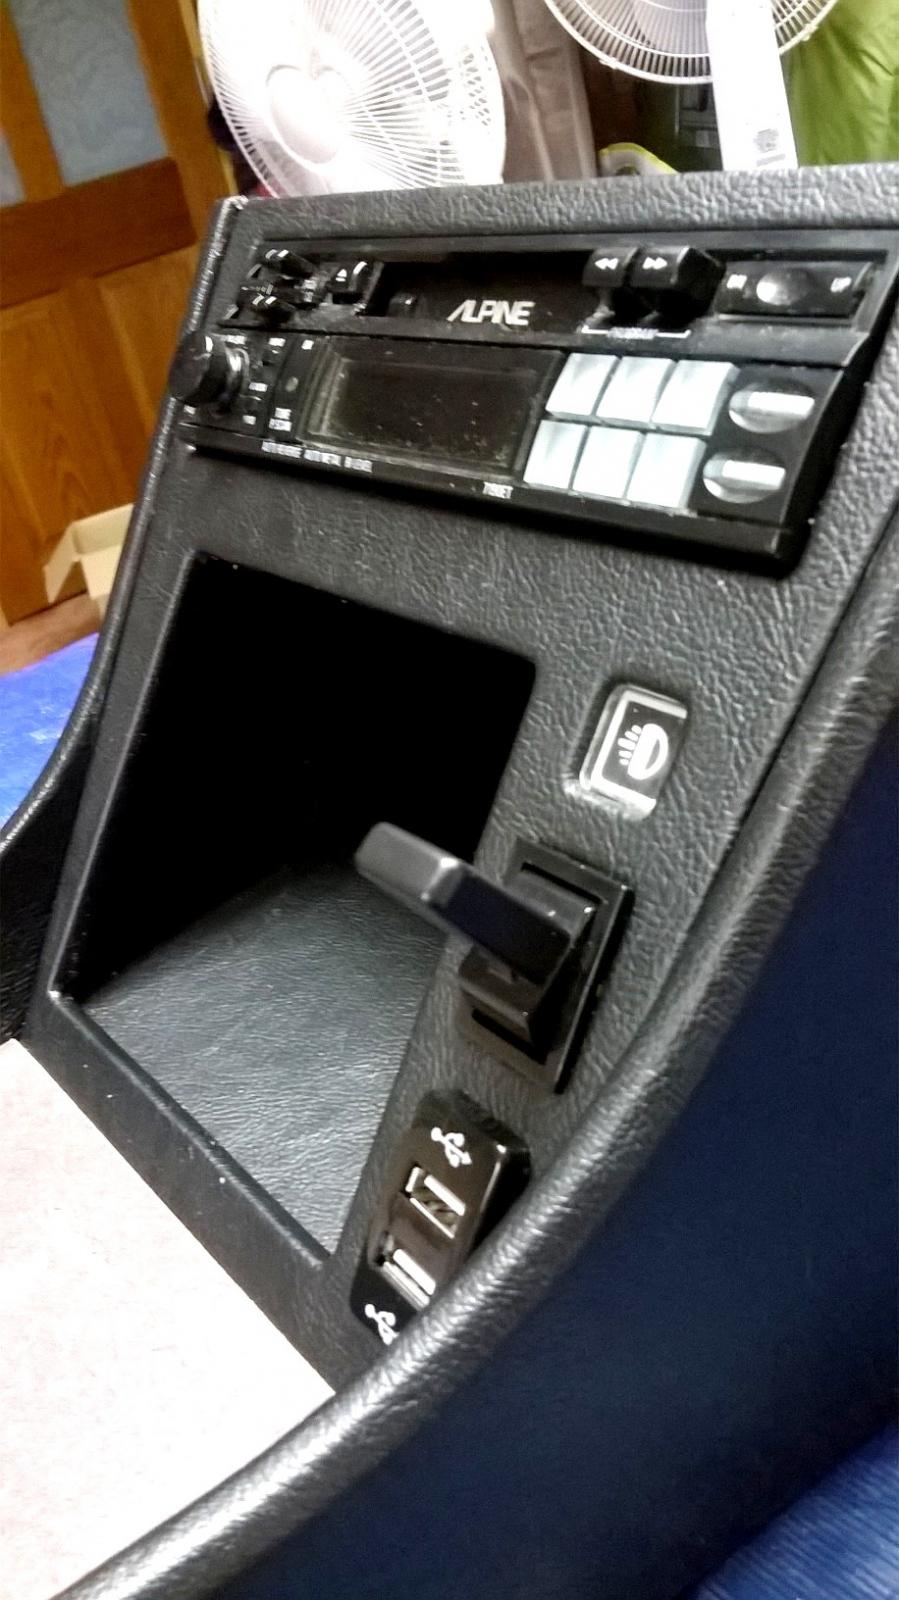
Once they were both pre-fit it was just a case of wrapping it in vinyl and fitting the boots.
Yes, the two boots are offset to the centreline, just a Vauxhall quirk. The concave portion of the gearstick surround was a bit tricky to form the vinyl to, but a good quality industrial spray adhesive worked brilliantly.
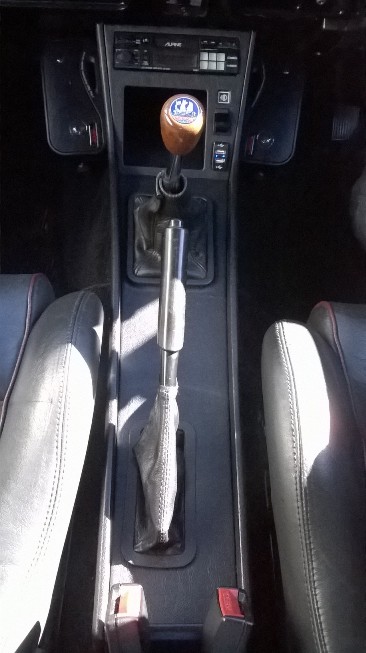
And finally installed into the car.
Having a high quality sound to uphold from the expensive stereo I opted for a pair of 3-way box speakers (100 watters I think) to transmit the sound. I had planned to hide these somewhere under the console, but it turns out there is just not much room under there, so I went the easy (fast) route and mounted them to the side of the console.
The office. Great to finally have some sounds in this car and we've had fun searching out old cassette tapes on TM and at local flea markets. Oh, and no external aerial added, went for one of the hidden internal type, which only just does the job.
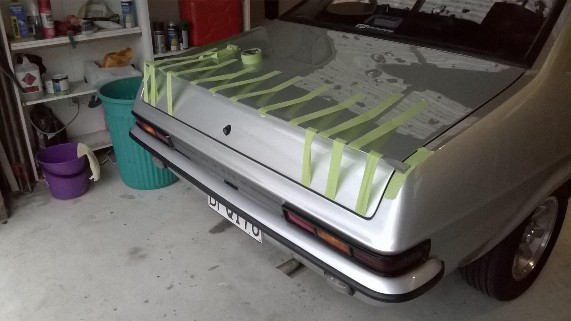
So next on the list to get done was adding a rear spoiler to the car, again a job I had started long ago that got put on hold. Mainly due to me being undecided about how to attach it to the bootlid. I was more than a little hesitant about drilling holes to bolt it on.
I don't have many progress pics of this job, but in short I got the spoiler out of the UK, originally of a Vauxhall HC Sportshatch, and had it lengthened to extend past the bootlid edges to be the full width off the car. It sat at that stage for a couple of years while I procrastinated on how to attach it, until about a month ago with the motivation of the national Vauxhall meet coming up I decided to dust it off, final-fit it to shape of the bootlid and then gave it to my painter.
With only a couple of days left after getting it back from paint and before leaving for the meeting in Oamaru I decided I would urethane the spoiler on and spare the bolt holes.
Here it is at that stage. Fingers crossed it would hold!
And success! Came out solid as and I'm stoked with the final result.
More pics to come, having trouble adding more to this post...
-
2
-
-
- Popular Post
- Popular Post
Hi all, been awhile since my last post, just a couple of years, that's normal right??
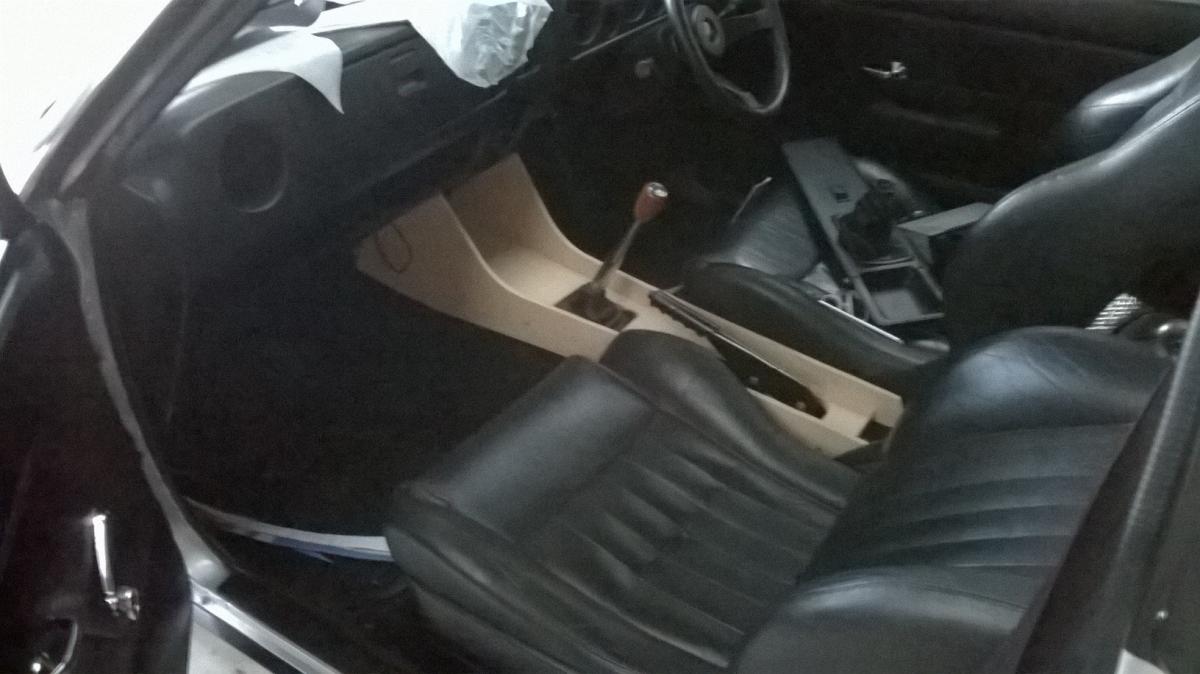
I guess to pick up where I left off, the car has sat for about 18 mths unable to pass a WOF while I had the interior in disarray to fit the new console, which turned out to be a bigger job than planned. Aren't they all?!
So ended up making it from MDF as I find it easier to work with over ply. Got the shape how I wanted it and fitting to the shape of the dash.
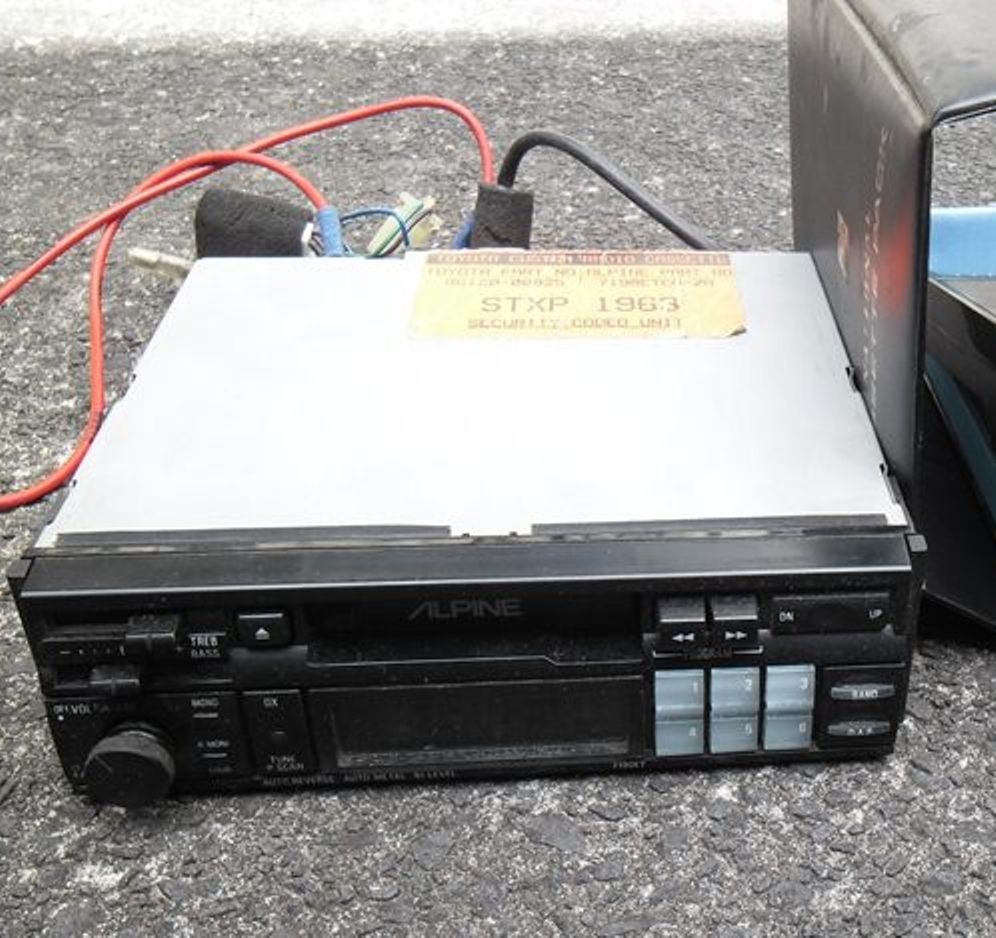
Picked myself up an old Alpine stereo cassette off TM for next to nothing. I have always loved the look of these and of course it has a huge 25 watts of awesomeness! Big thanks go out to Paul for figuring out the security code for me.
Next was working out the fascia and what I wanted to mount in it. Apart from the stereo it had to take a new light switch and I figured a USB charging outlet would be handy, so I picked up a double outlet version. I also decided to incorporate a tell-tale indicator light for the lights as they had from factory and used the original window from the old console. The remaining space was simply utilised for phone storage (or cassette tape!). Quite the fiddly job but came out well and wrapped it all in vinyl.
Then I just had to make the top panel that takes the boots for the gear stick and handbrake.
I started this post too late at night and have run out of puff for tonight so will see if this all uploads ok and add more tomorrow.
Cheers
-
12
-
Yes. Yes. Yes.
We are heading to Picton today and staying the night there, so we will hopefully hook up with you all on Sunday and join the cruise to Omaka. Looking forward to it, did the car museum a couple of years ago, keen to see the aircraft section this time.
See you all there.
-
1
-
-
We plan on making it there, looking like a nice day for it.
-
If anyone wants to take a car Sunday and have free entry you are welcome to take my BMW E28. You would need to collect from my place in Stoke. Holla if keen.
-
I will have the GT there on Sunday. Might park up in a different spot to last year though just for a change.
Why the lack of interest this year? Anybody else showing?
-
Hi chaps, I definitely need to clear some space so bringing a trailer of bits and some junk in the trunk, see you there 7-ish.
A
-
Looking great already. There's something cool about seeing old rusty steel being replaced properly.
I have a few old screen rubbers I have kept that would be better than the one in your car if you want to replace it temporarily. Next time you are over we can have a look if you like and pick out the best one.
-
1
-
-
Yay for porsches! Yeah hopefully Sam will be along again plus Andre in his not so fast but very tidy E28 bimmer. Might also be a chevette too- so there is the European element sorted...
Don't you know that I have added big shiney wheels and a tail to the whale shark? So it must go lots faster now...
-
1
-
-
We'll be there in the new family sedan, the Silver Shark, aka Grey Whale.
-
1
-
")


Daveyc's 1974 hc viva
in Project Discussion
Posted
Nice work, and good to see a 2 dr HC getting some love. Liking the choices you are making with grill etc and putting the car back to something near original. They're thin on the ground these days, look forward to seeing where this goes.