


Adoom
-
Posts
2183 -
Joined
-
Last visited
Posts posted by Adoom
-
-
14 minutes ago, fuzzy-hair-man said:
I was just looking at your thread and I've been working on the same solution to making the clutch hydraulic, I took the whole pivot there's two roll pins that allow the clutch release fork to come off. Mine is a new one as I wasn't going to split the box from the engine at the wreckers.
I think I'll try to mount the clutch master but I think it'll need spacing up or the rod shortened.
gotta love Nissan's parts interchangeability.
Yeh, it's so handy that the parts just fit!
I hadn't seen anyone else using this solution on the UK micra mini forums. I think I saw one person with a dirty great bracket to use a slave cylinder to push the cable clutch arm. Another with some aftermarket 'pull' slave cylinder that was apparently not so reliable. And on the nissan engined mini FB page, some guy was saying to just convert the mini to cable clutch cause it's "simpler".
-
- Popular Post
- Popular Post
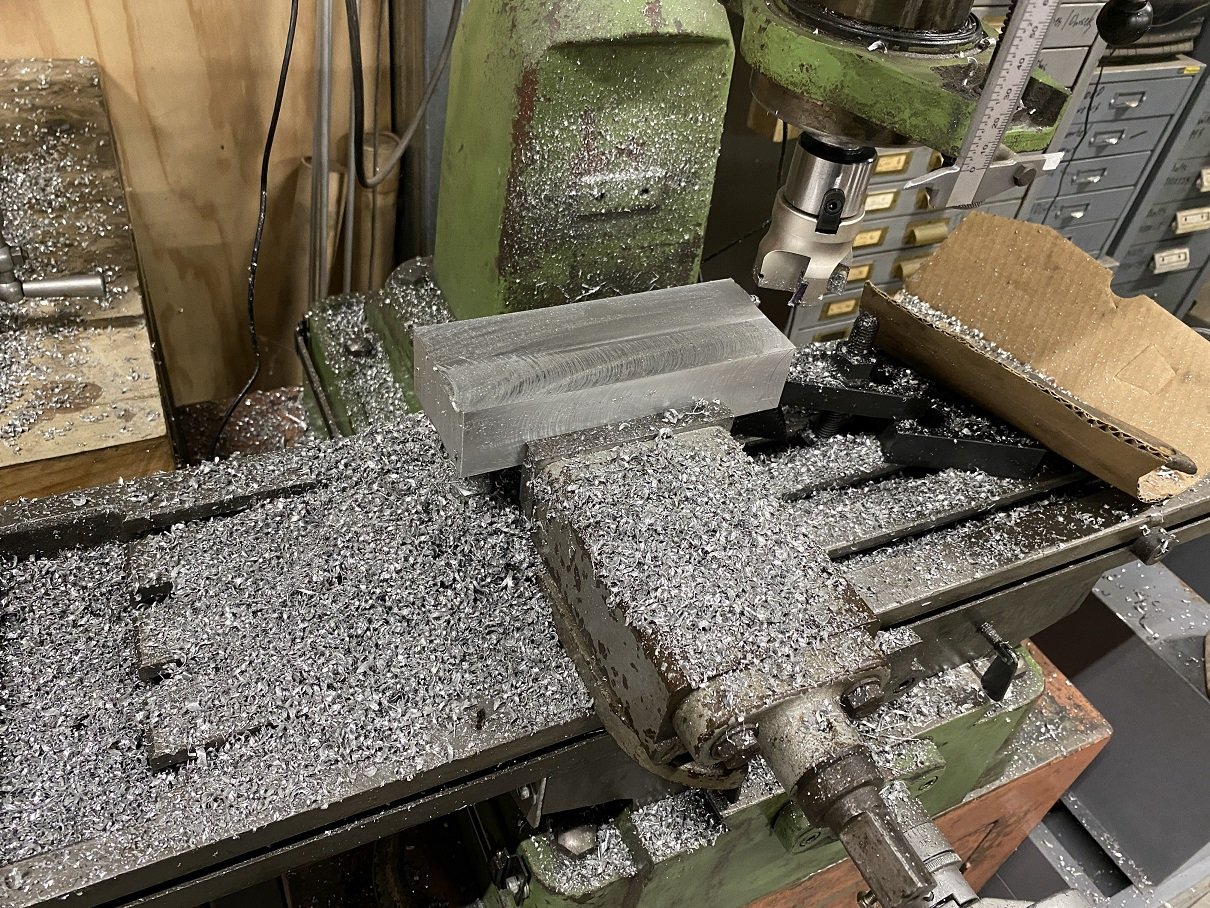
And now it's longer!
I drilled a 10mm hole 20mm deep in the end, then machined an over sized extension that would press all the way down into that hole. I put a wide groove where the join was then mounted it in the lathe and turned the VFD down to about 3rpm. FULL SLOW captain! It was slow enough that I could just put the earth clamp on the shaft and use a block of wood to stop it spinning and the lathe reeling in the cable. And zap zap goes the MIG.
Machine down to final diameter.

-
 16
16
-
2 minutes ago, Kerry-TGI said:
@cletus I've seen this but am a bit confused about what it is actually stating
What does it mean "wheel rim above horizontal plane"?
The way I read it is... Only the tread on the top half of the tire can't stick out past the guard, but the tread on the bottom half can. So you could have loads of negative camber and be all good.
-
- Popular Post
- Popular Post
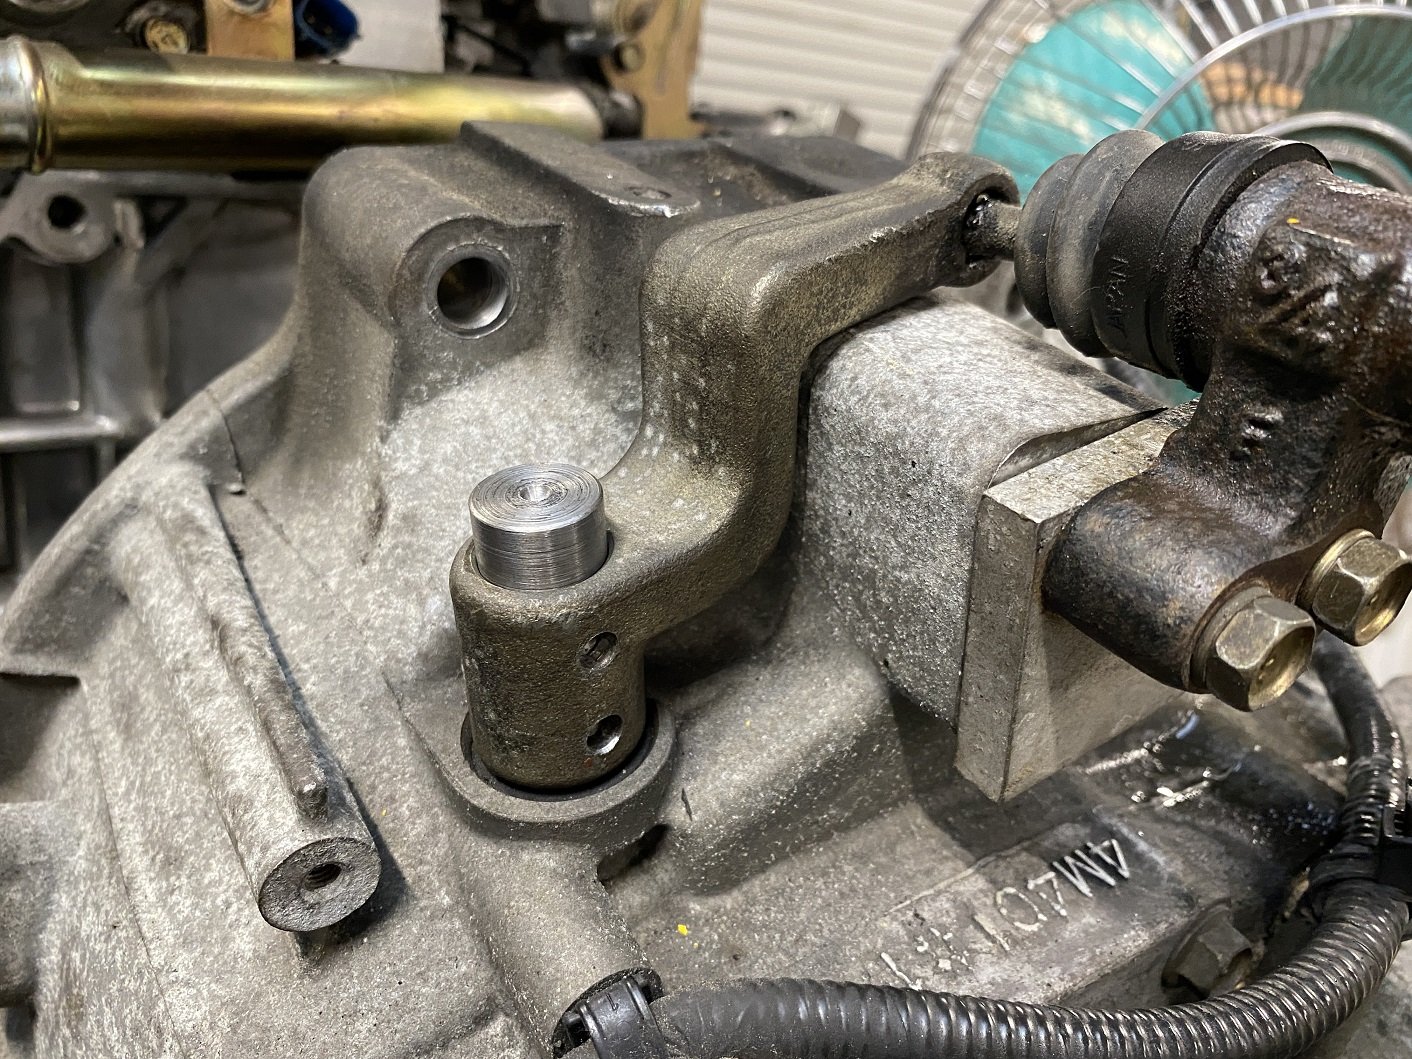
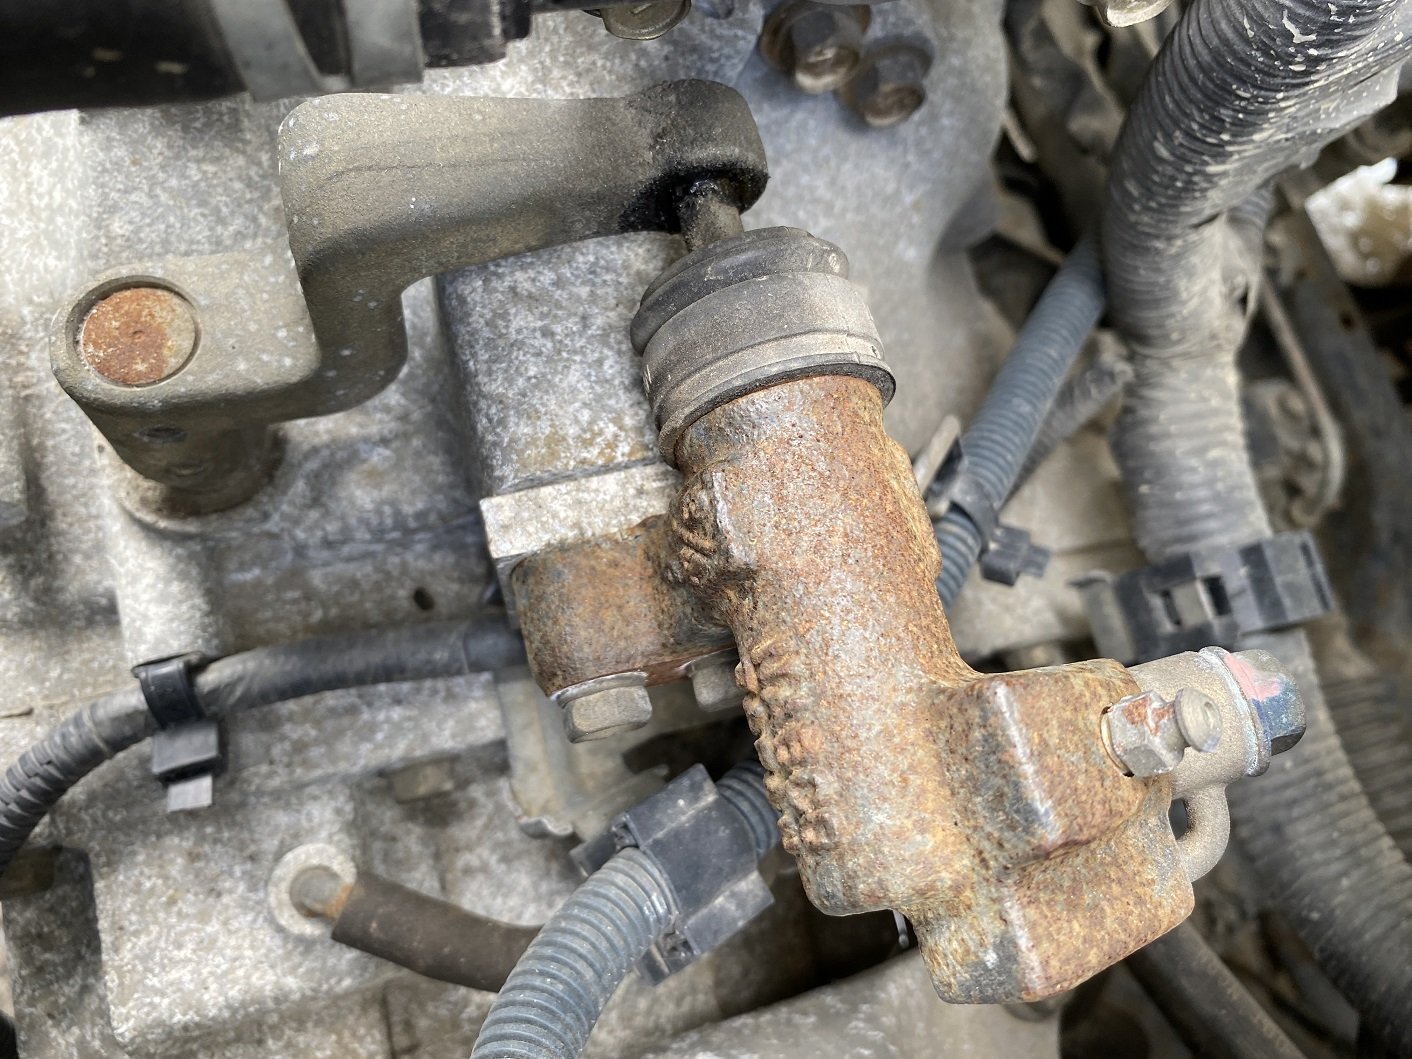
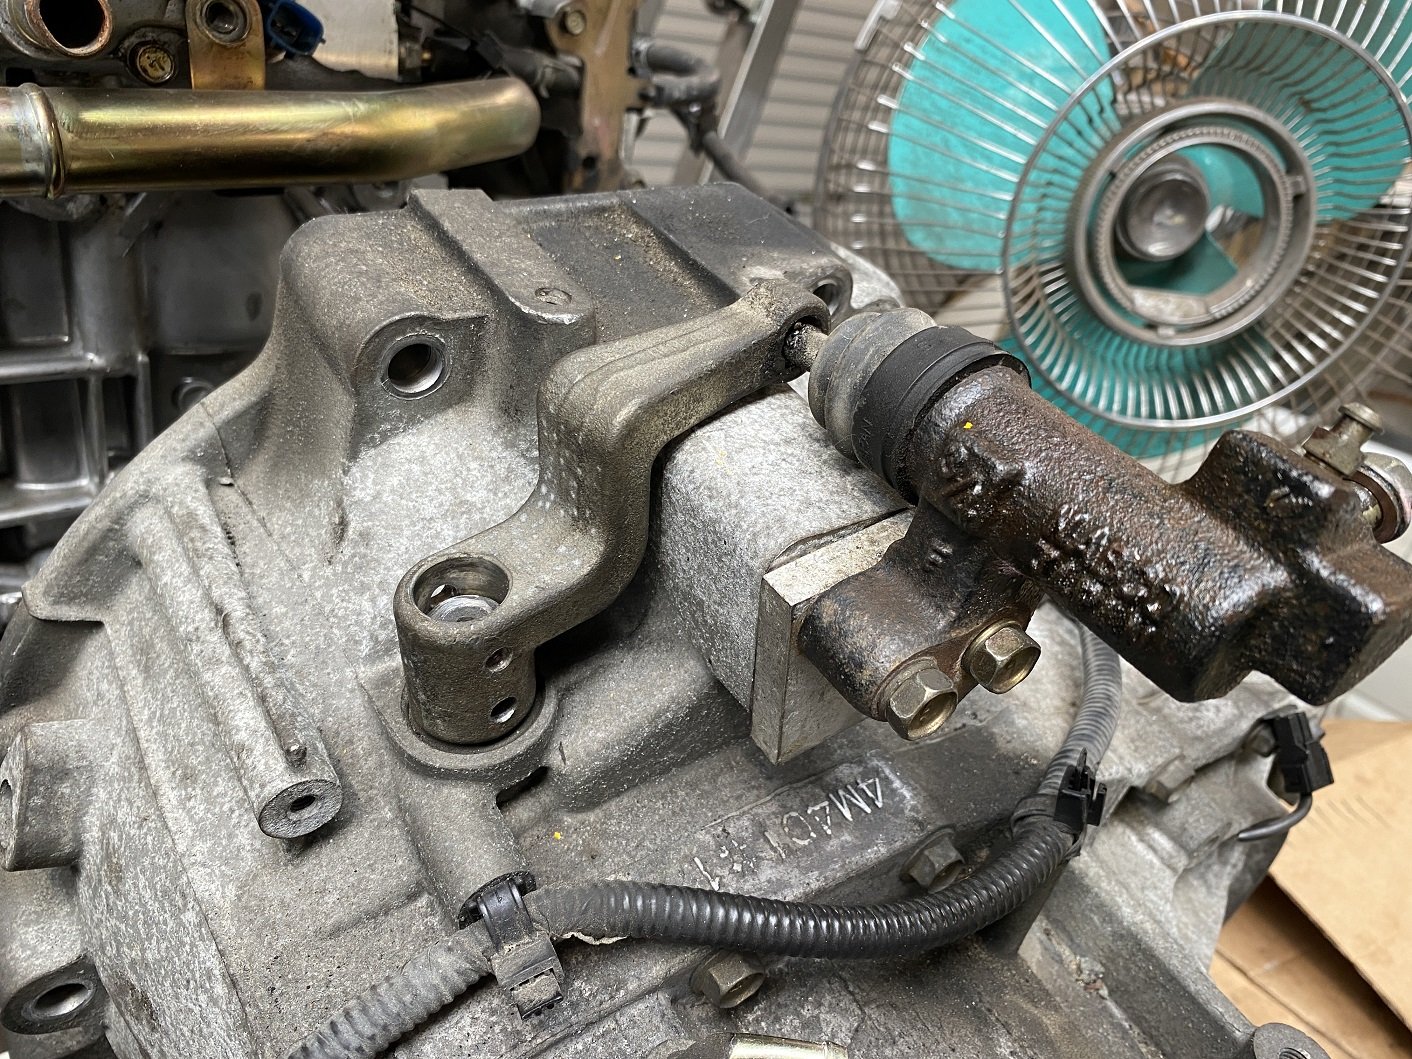
So the mini is a hydraulic clutch and the K11 gearbox is a cable clutch. I prefer to go for a hydraulic clutch because the lines can be tucked away.
I was thinking I was going to need to make a big bracket and stuff for a slave cylinder.
But then random PickAPart perusing of manual Nissans turned up an N16 Pulsar. The gearbox is very similar to the March, with a QG15 engine... but it has a hydraulic clutch!
The aluminium spacer seems like such an afterthought. But I have seen pictures of other N16 and they have the same spacer. I did find another later model N16 which had a cast spacer that does look like a factory part... I forgot to get it, ran out of time.
I CBF removing the whole gearbox in my lunchbreak to take the whole pivot shaft assembly, so I planned to knock out the roll pins and just take the lever arm and slave cylinder.
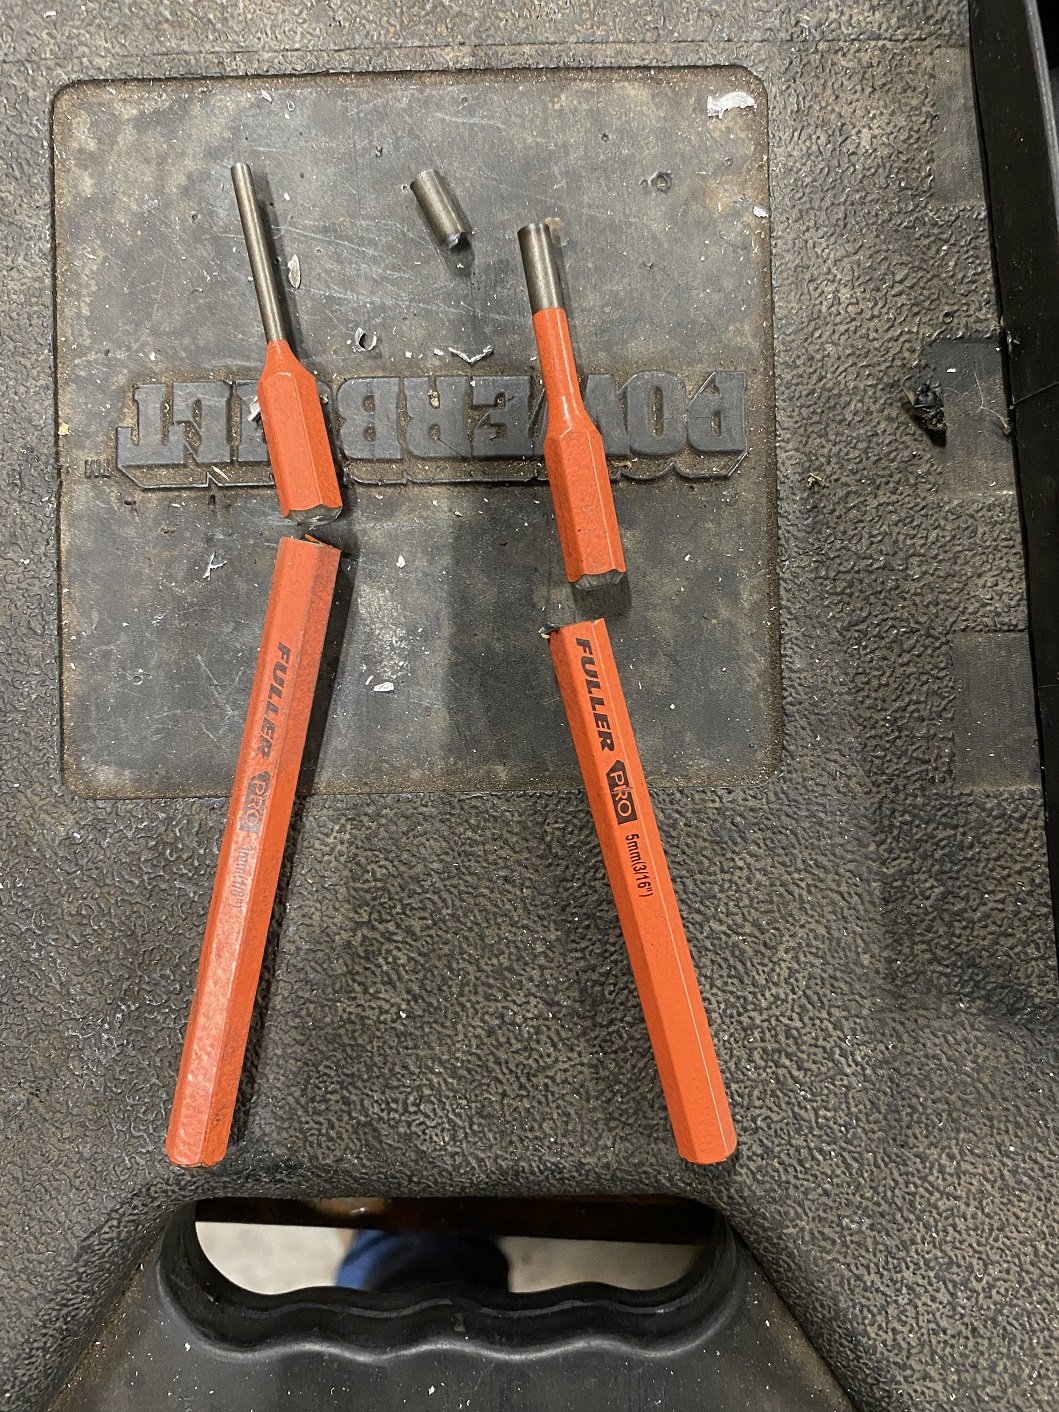
So lunch break day one. Got the slave cylinder off. But my pin punches are too long and there is no room to hit them with the hammer.
FINE THEN!!!!
They are nested roll pins, so need two sizes.
Lunch break day two.
Soooo I strongly suspect that the workshop manual for removal of this arm starts with "separate engine and gearbox and rotate clutch pivot shaft for clearance".
Shit, the bellhousing is in the way of knocking the pins out.
Que tool abuse and using my big screwdriver as a chisel to bash the shit out of the protruding part of the roll pin to flatten it, allowing me to bend it slightly, just enough so it rides up the bellhousing instead of driving directly into it.
45 minutes of bashing and swearing and I managed to get the pins out.
Next step, cut the welded arm off and machine it smooth in the lathe.
Ah... the shaft needs to be a bit longer. No biggie with the lathe, I'll just bore it out and press and weld and extension on.
Then I will use the mill to drill new and straight, roll pin holes in the shaft. After working out what angle to clock it at.
-
20
-
 1
1
-
6 minutes ago, Metalhead96 said:
I measure a piece I cut out and it was 1.2mm thick, would it be okay using something slightly thinner or does it not matter too much and is just easier to work with.
Also cheers for the feedback man, will definitely change up my plan a bit
Use the same thickness as what you are removing, makes the welding easier.
Watch all of Fitzee's Fabrications on youtube. ....But he does like to use thicker steel so he doesn't have to worry about making it too thin when grinding back welds.
-
2
-
1
-
-
- Popular Post
- Popular Post
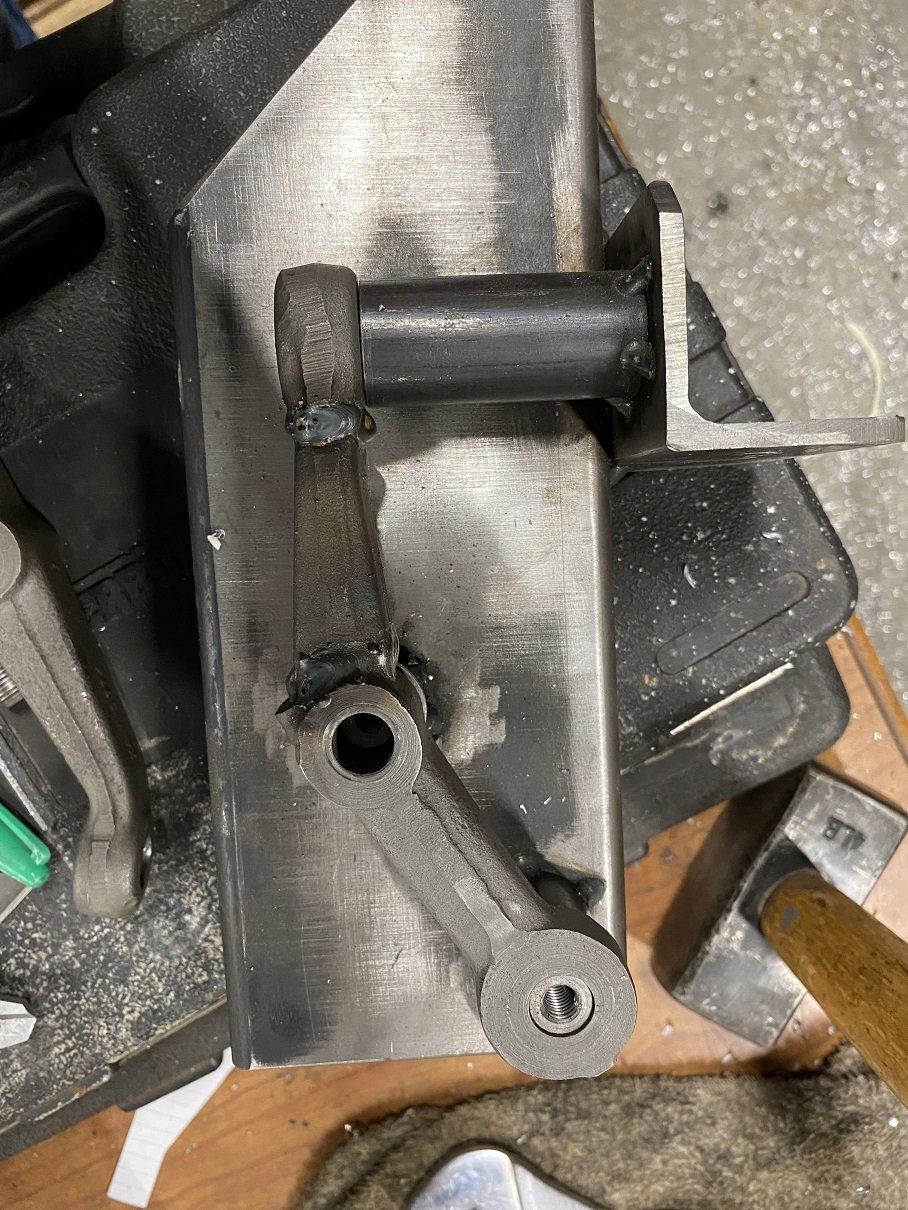
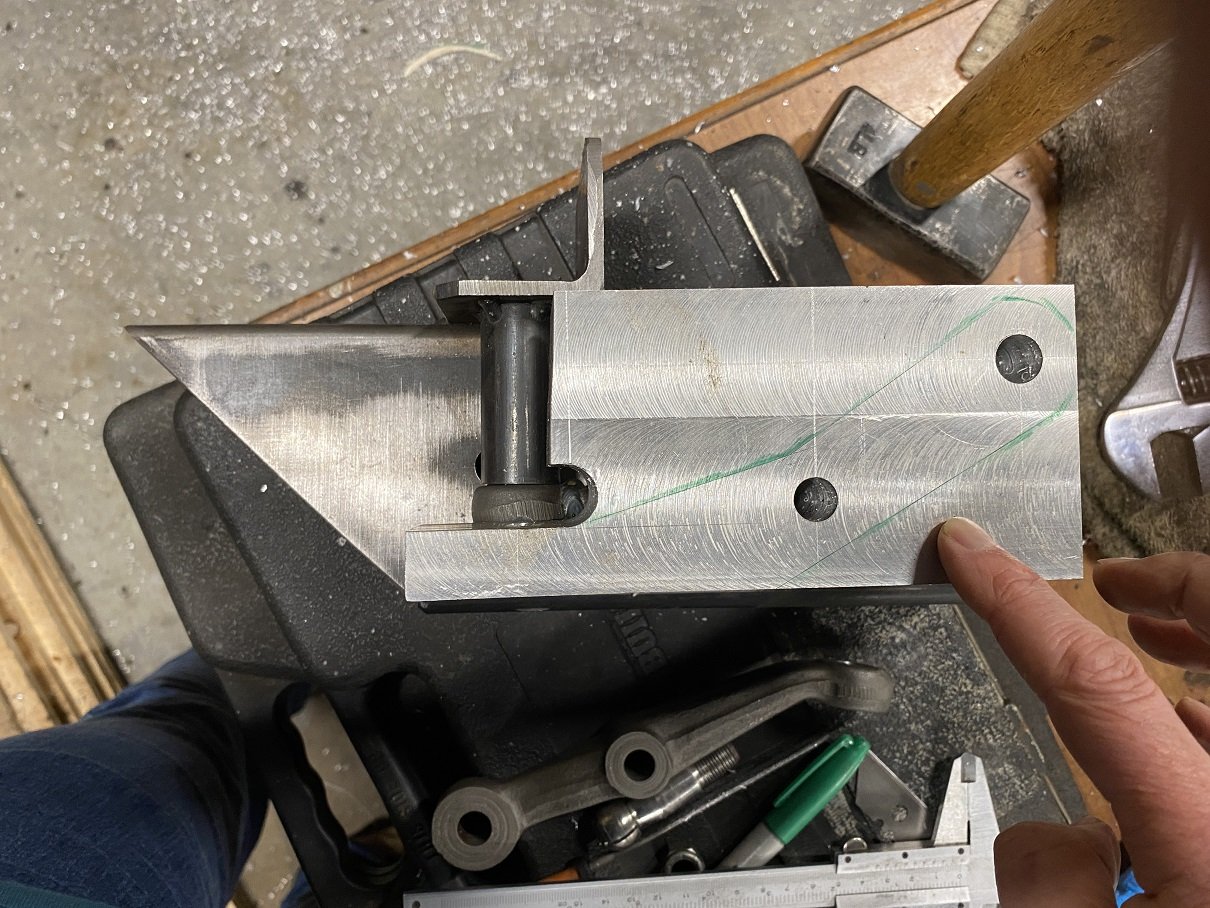
After weeks of procrastination I finally found enough motivation to go out to the garage and machine some more steering arm.
The non-critical dimensions are very rough, just enough for clearance to bolt it on.
I still need to check for binding and measure the bump steer.
-
17
-
I went to get a wof for this some months ago and they failed it on "the brake switch". "Oh you mean the adjustable bias valve? It's been there since 2006.". But they said it's not on the cert plate, so fail. Turns out it was on the first cert plate, but was overlooked by the cert inspectors on the last two plates(they didn't put it on the plate order form).
I spoke with LVVTA and they said it was not uncommon. They sorted me out at no cost and printed me a replacement plate. But I did need to take the car to them to do a brake test.
Of course on the day, it was pissing with rain.
Half way there I discovered that my alternator charge cable was unplugged?! So the battery was totally dead by the time I got over the Remutakas. Dad to the rescue with a jump start.
Then driving up Ngauranga gorge, still raining, some guy appeared to be planning the merge into the side of me from the left. So I picked the 'accelerate a bit' option. I left it in 5th and applied a little gas... fine fine fine BOOST! And the rear end let go. I barely managed to stay in my lane which was fortunate, because on my left was the curb and on my right was a wall of spinning truck wheels.
I figured that my tires were probably quite old and a bit hard. But still lots of tread.
A few days ago I finally remembered to have a look at the date on the tires. 2005!!
I suppose my semi slicks won't work so great anymore either.
-
9
-
-
I keep tracking swarf from the garage to the house because I never quite get around to sweeping. But I've discovered wiring brushing the soles of my shoes is quite effective at dislodging it.
-
2
-
 1
1
-
-
On my way over the Remutakas this morning. I saw a YELLOW CAR. The policeman standing beside probably would not have been pleased if I stopped and got my phone out...
Not to scale... but the orientation of the vehicle is correct.
-
2
-
2
-
4
-
-
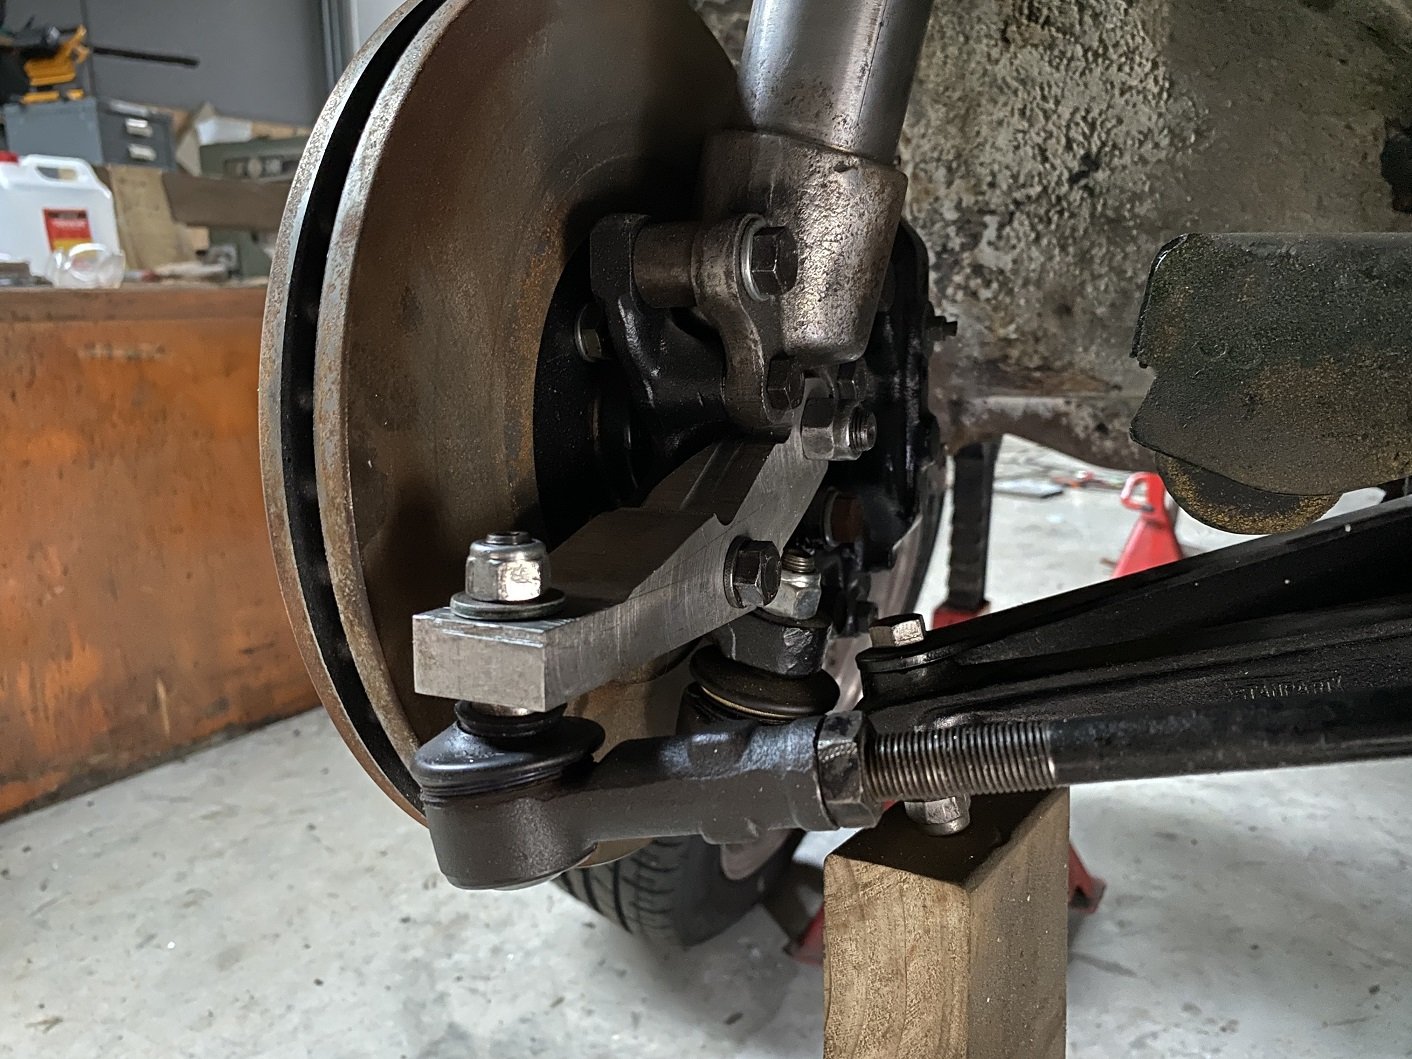
1 hour ago, BiTurbo228 said:
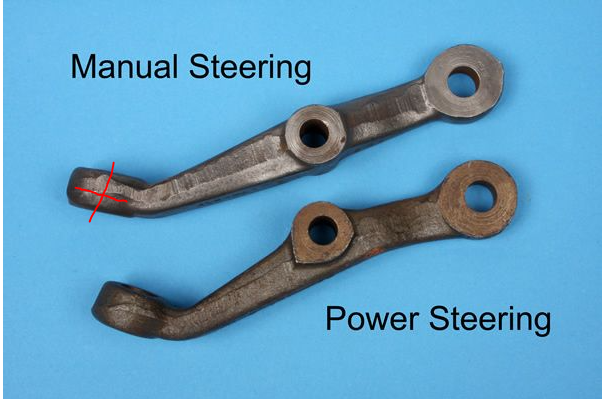
Here's a question you've probably already considered, but how different is the geometry of your shiny new machined steering arm to that of the factory power steering dropped arms with the balljoint fitted to the opposite side of them...
From the pic on your thread it looks like you've got manual ones on your car.
I did consider it. I did try, not very hard, to get some to measure.
The center of the balljoint needs to be about here for minimal bumpsteer. So I don't think they would drop enough. To 'flip' the balljoint, I would have to use a through-bolt and a rod end bearing instead of a factory balljoint. I'd rather use a factory balljoint for longevity. AFAIK the rules don't allow you to use an insert type thing to reverse the taper. You could ream the taper to reverse it, but then the hole would be HUGE and there won't be much material left around the hole.
-
22 minutes ago, datlow said:
What sort of compressor?
Belt drive i would go with start cap or centrifugal switch
3HP belt drive.
Apparently if the start cap is bad, I should be able to 'roll start' it and it should keep going. I can't/it doesn't.
Mine will turn over and seem like it's going to run, then pop the fuse.
-
1
-
-
Where can I get a 40uF run capacitor for my compressor? Mine is bung. I reckon it's the run cap because it turns over and tries to run, but then pops the resettable fuse.
Stuff I am finding is either drop shipped or has the stud on the bottom that makes it not fit or >$50
-
12 hours ago, SOHC said:
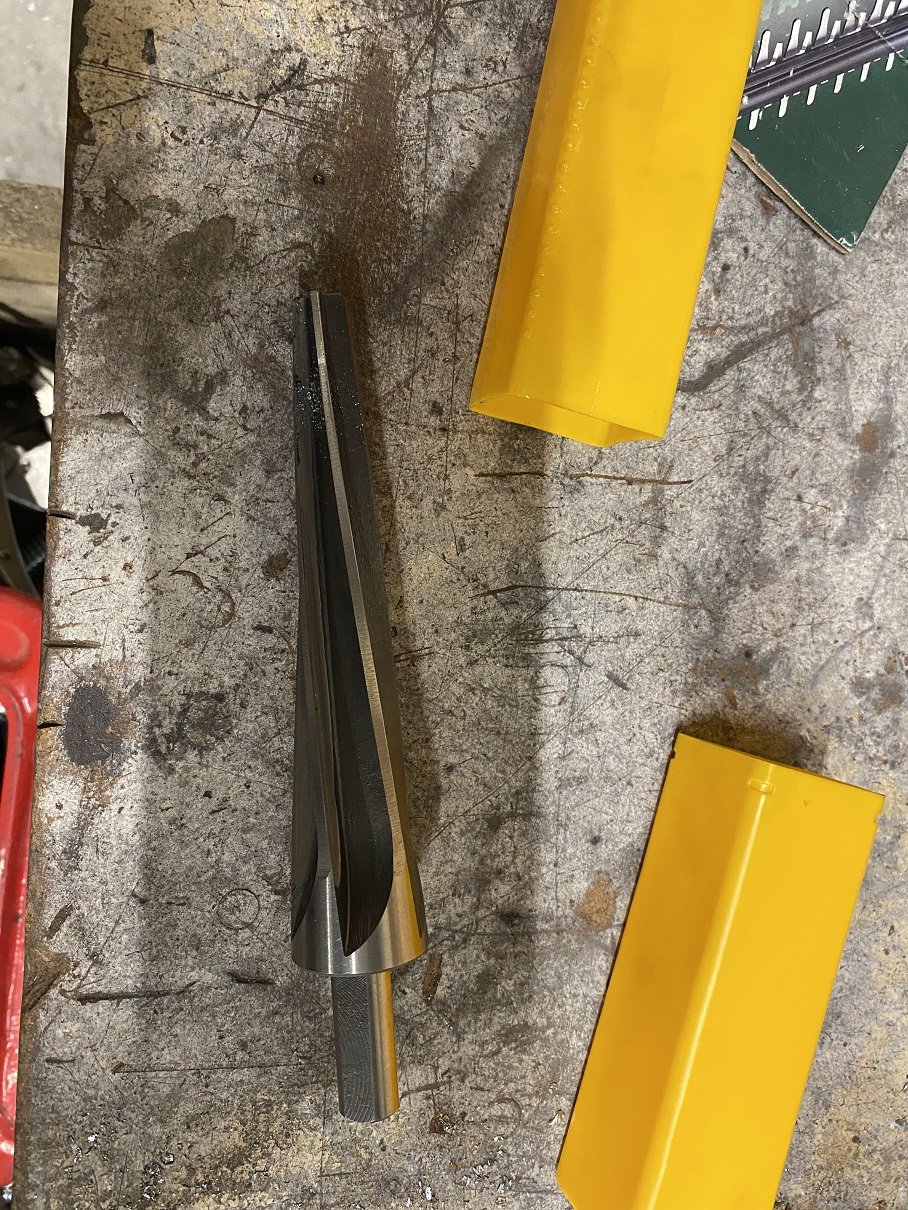
You can make tapperd holes by cutting the end off an old tie rod end and then drill a hole in the arm to the bolt size and heat it orange hot and drive it in.
I've got no bottles for the OxyAcetylene so I am incapable of making it orange hot. But anyway, the Car Constructors manual specifies that the steering arm balljoint taper is to be reamed.
-
- Popular Post
- Popular Post
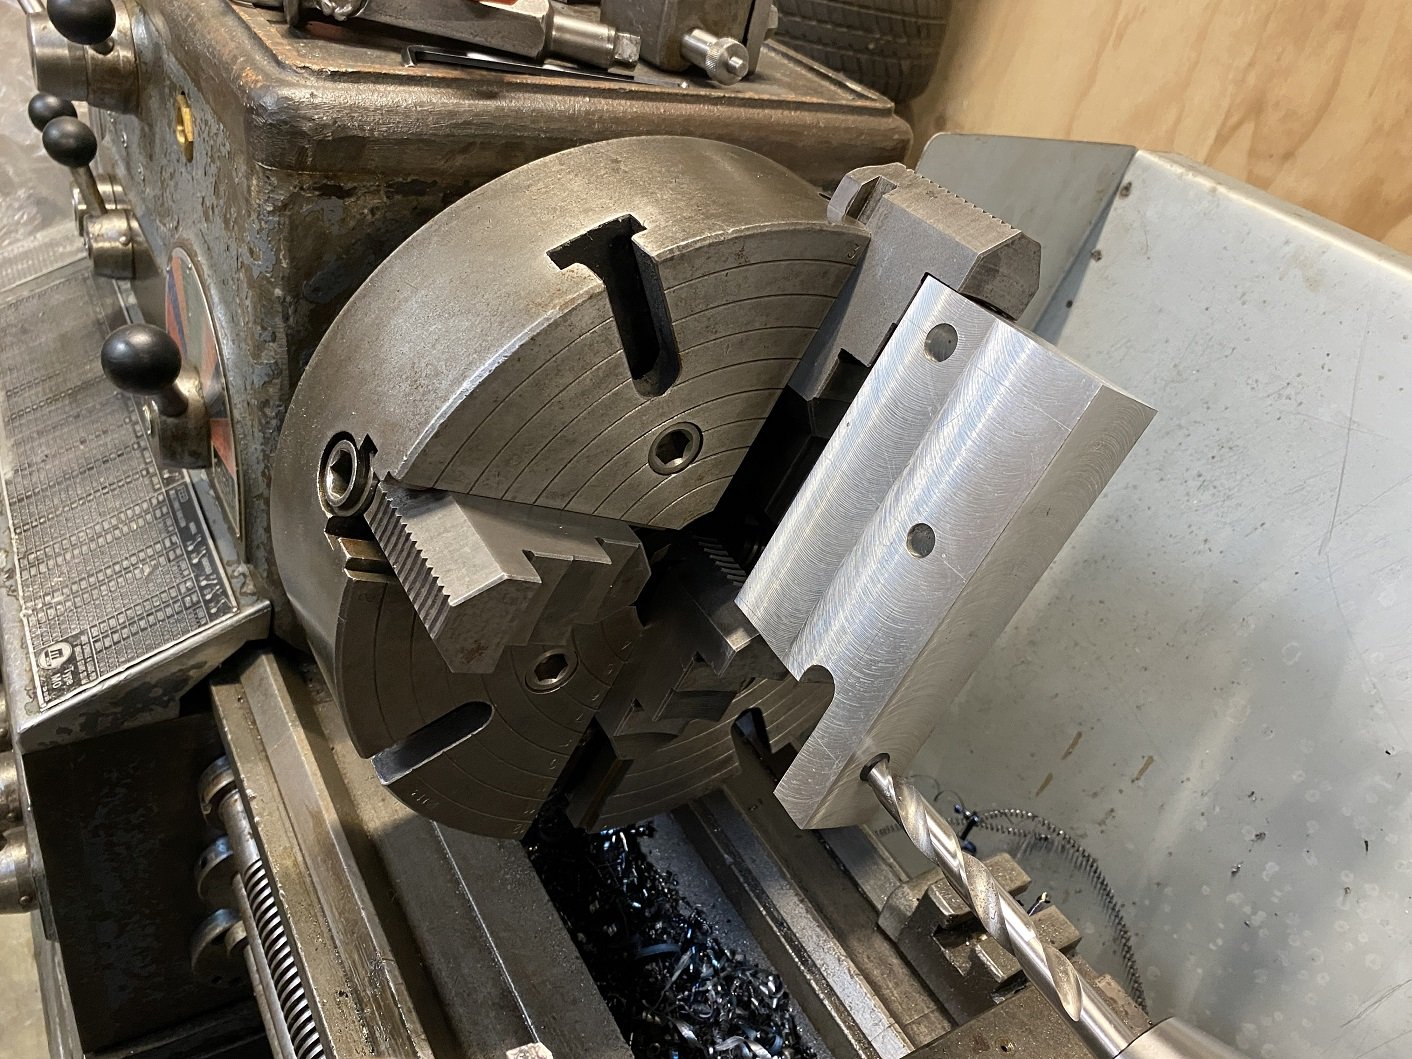
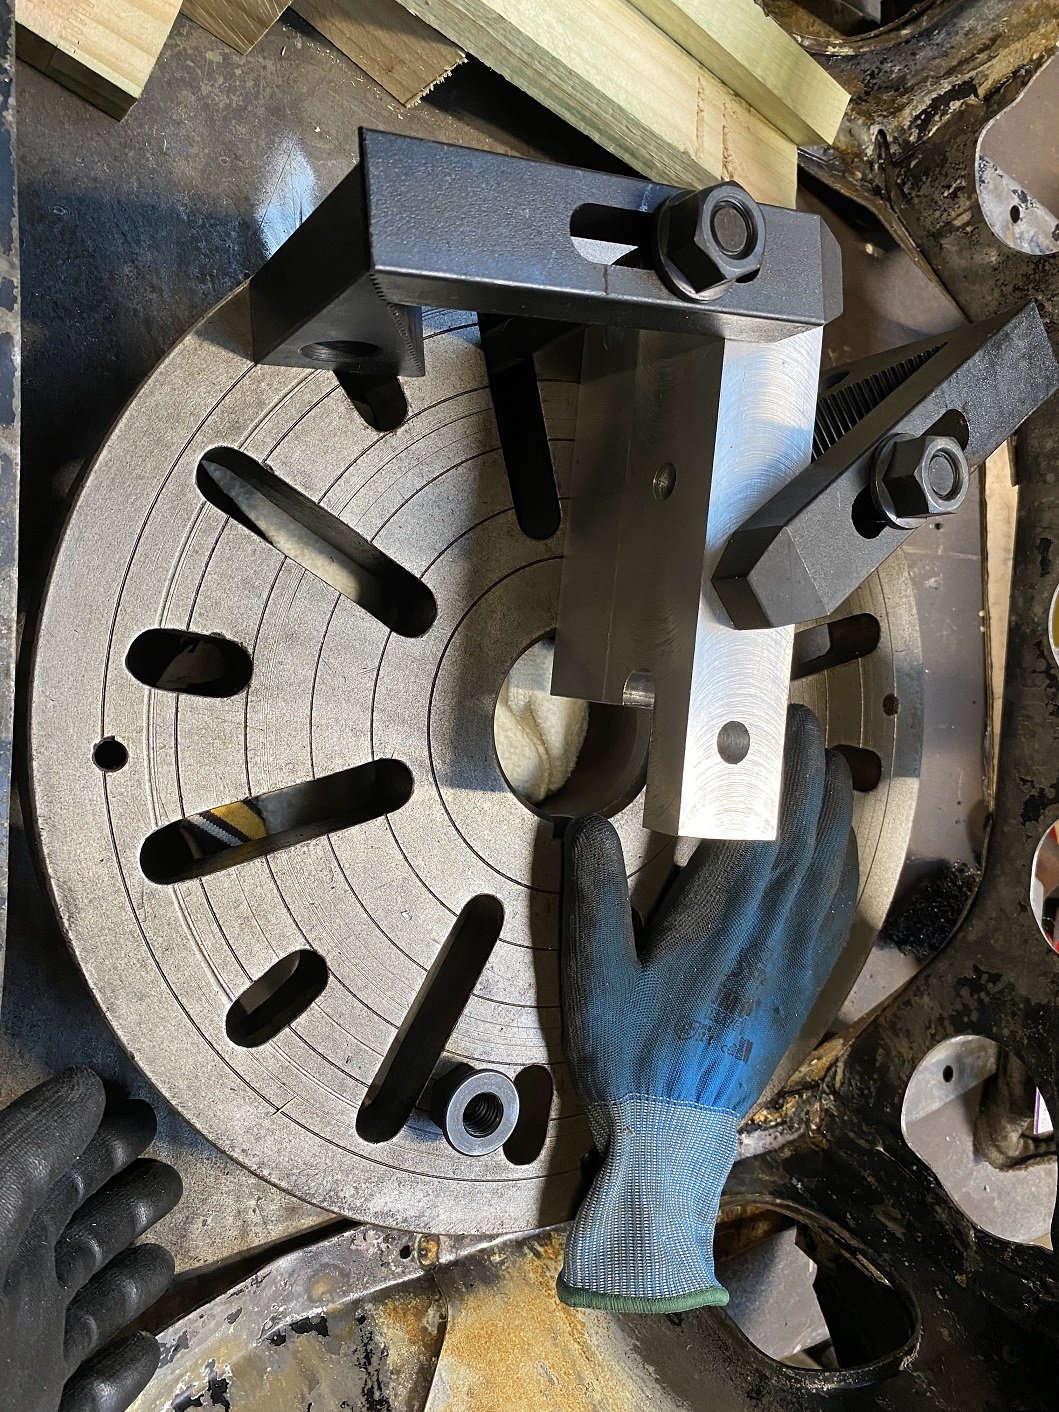
So the taper I machined on the lathe was 'close' but not perfect. A little wide at the big end.
But I thought, oh well, good enough to test with.
Oh, maybe I'll take the welded prototype off the car.
And compare it to the machined one.
FUUUUUUUUUU!!!!!. So I somehow managed to fuck up the original measurement by 11mm. Then drew the scale drawing using that measurement. Then machined it from the drawing.
So, start again.
SO
SO MUCH SWARF!
I also bought a tapered reamer. YAY! It's the correct taper angle.
Ouch! It was $175! Only $16 shipping from USA though. In only 9 days?!
-
25
-
I have some doors in a similar state to yours. My plan is to scrape and vacuum/compressed air blast as much of the loose stuff out as I can. Then make a water tight trough thing just big enough to place the bottom of the door in. Then fill it with a chelation rust remover like Metal rescue or Evapo-rust, enough to cover the seam. Then leave it for as long at it needs to make the rust go away. It doesn't eat the metal, so you can just leave it for ages.
This stuff really does work. But it does get used-up after a few uses.
Wash it out with water, then heat it up so it's 100% dry, then flood the area with epoxy. Later,once the door is painted, probably put some cavity wax in there too.
-
1
-
-
So work gave me some Repco gift vouchers.... #PROBABLYNOTGETTINGAPAYRISETHISYEAR
Does anyone have any experience with the spray guns they sell? Are they okay, or should I not bother?
I need something to spray epotec408 (>1.8mm nozzle I think). And an as yet undecided top coat, possibly 2k.
-
-
Was that Howat Engineering in Lower Hutt you used? What did he charge you for cutting the splines?
....I've got some CV shafts I need to get shortened and was planning to go see Brian about it eventually.
-
4 minutes ago, Hemi said:
Is kilim the Turkish place, man that was legit
Mixed grill FTW
-
1
-
-
18 minutes ago, flyingbrick said:
Yup Its a bloody trap
I believe it's there so that as you unscrew the ring it pulls the collet out of the taper.
Lol. I'm like "jeez this is hard to get out." and tap it with the brass mallet.
-
2
-
-
8 minutes ago, flyingbrick said:
Sorry if this is a stupid comment, but I'm surprised so many people don't know this...
You don't mean the ridge that the collect clips into?
I've looked at some pictures. Yeh, I should not have removed that ridge. In my defense it's not like they came with any instructions.
-
4
-
-
2 hours ago, sr2 said:
Looking at buying this from Bangood. Price looks right, too good to be true?
I got one like that a few years ago. Similar price. Also from banggood.
Only issue I had was a ridge inside the retaining nut thing that prevented it from working. Since I had a lathe, it was real easy to remove that ridge so it worked. That may just has been an issue with the batch mine came out of.
The are accurate enough for what I do.
-
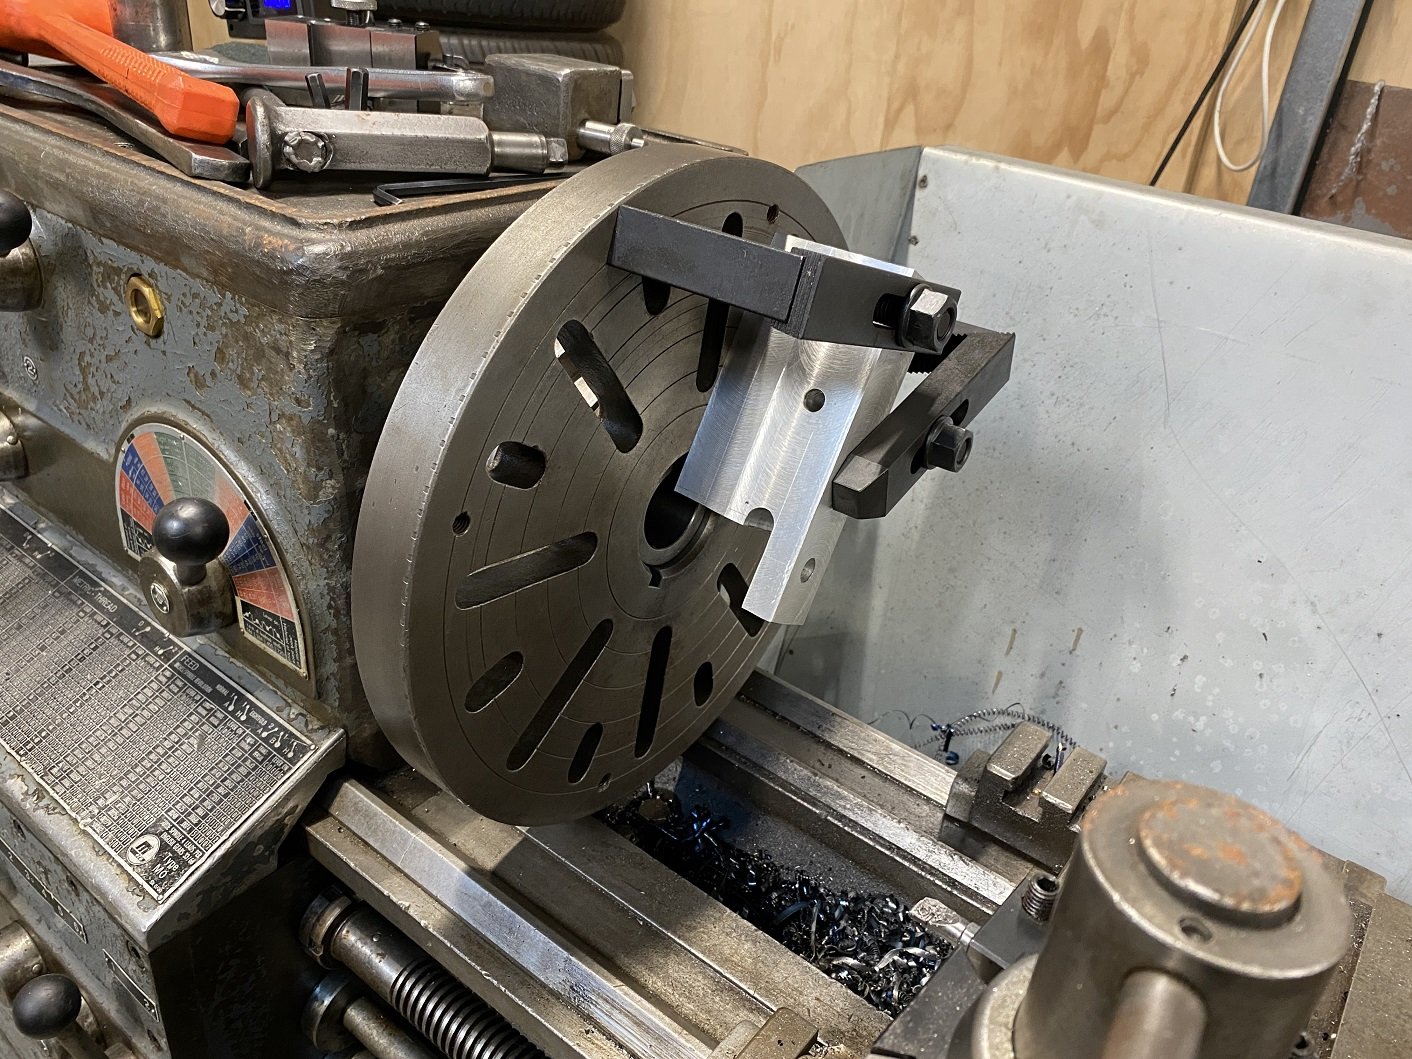
I found far too many NOPES for this setup to last longer than 5 seconds before exploding.
Maybe the faceplate......?
That seems..... less dodgy.
Never used a faceplate before.... Am I gonna die? Do I need some counterweight.... you know, so there's more shrapnel to fly off and hit me, or smash through the roof?
How many rpm....? It's a small hole and aluminium, so quite fast.... but death and dismemberment do not appeal.
-
9
-
-
Any idea what range you might get out of it?


Adoom's 1981 Mini 1000. Discussion
in Project Discussion
Posted
Ah, yes, I see what you mean. It's not really an issue for me since I'm really early in the build and I don't yet have a radiator or even started modifying the subframe.
Plenty of space to reroute that pipe, either just under the distributor, or go under the slave cylinder.