Adoom
-
Posts
2182 -
Joined
-
Last visited
Everything posted by Adoom
-
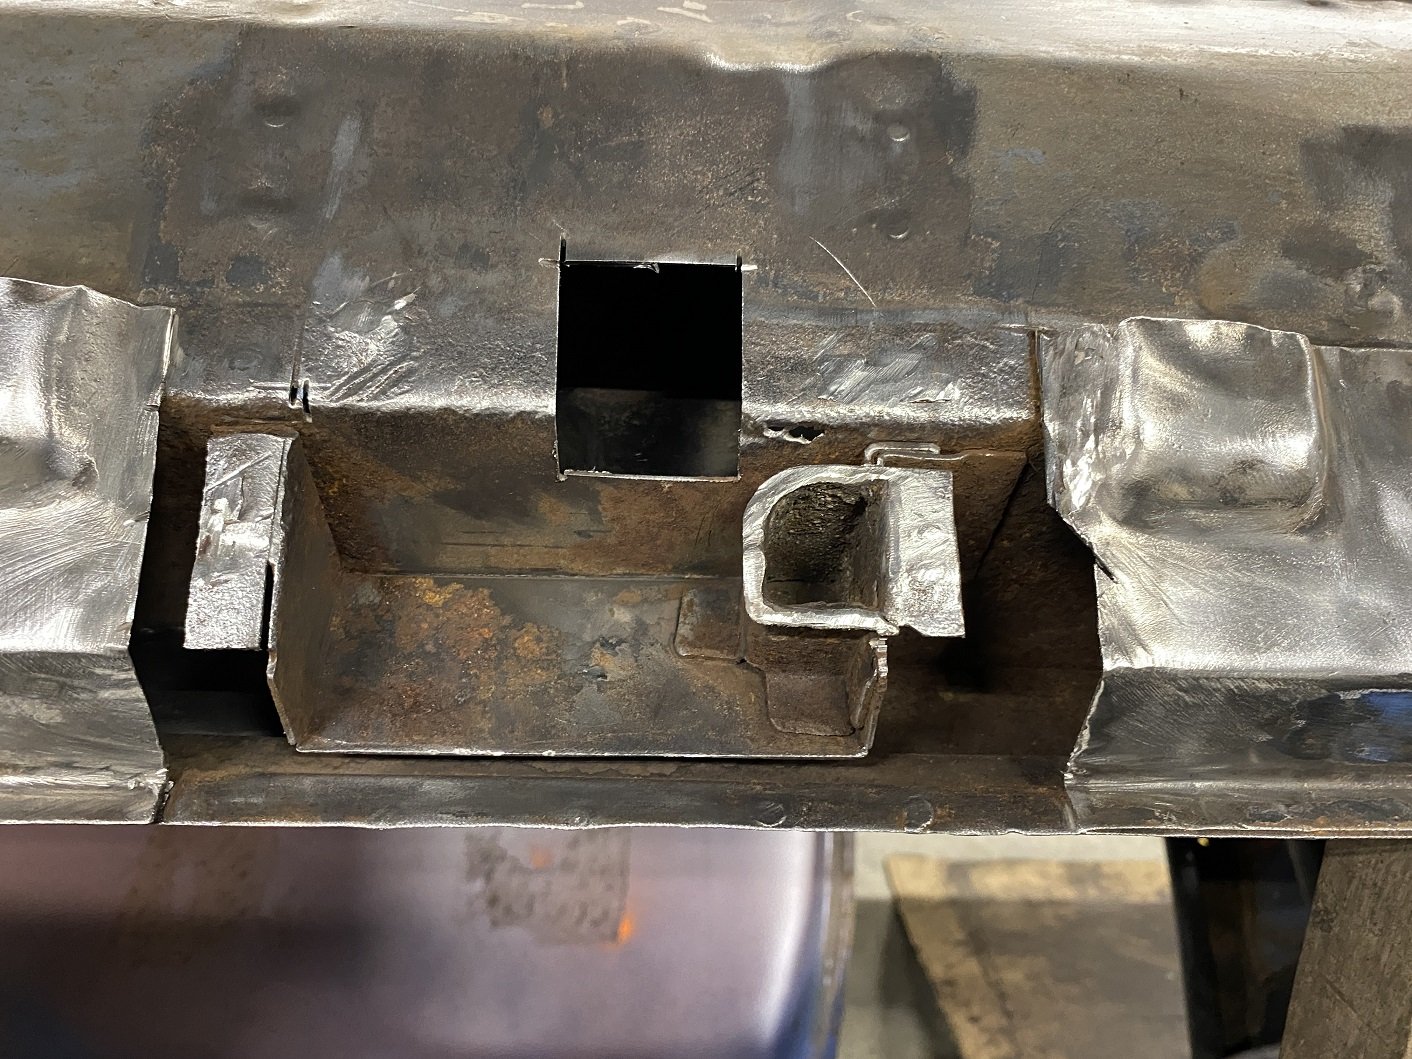
Other side. And same double plating over rusty metal. I think the sill has been replaced before. That hole at the top looks like it was caused by a chisel. And the flange on the left has been partially cut off. Clamping a bit of copper behind the holes so I can weld them without making bigger holes. And fixed all the cuts and nicks. I also used the vacuum and compressed air to clean out the sill and the inside of the crossmember that goes across the car.

- 48 replies
-
- 14
-

-
I think I'll pass. It would have been interesting to build an engine, but with the added cost of bearings and gaskets, I'll be better off just getting a good CGA3DE. Thanks for the offer.
-
Yeh, I did further thinking after going to bed. That all makes sense. According to the workshop manuals I have....... CG10 rod is ~9mm longer. CGA3 and CG13 uses the same rod length. All of the engines seem to have the same size valves. CGA3 and CG13 share the same cam. I'm assuming the combustion chamber volumes are the same for all engines and the pistons have more/less dish to get the compression ratio to 9.5:1 Assuming the CG10 pistons are flat top(google images seem to back this up), my rough mathculations for the longer stroke give me a compression ratio of 11.8:1 Which seems a bit high since I'd like to boost it. I suppose I could chuck the pistons in the lathe and dish them myself.
-
Hmmm. Hypothetically I could put my CGA3DE crank in it and make a 1311cc engine. I think I should be able to do that without removing the head and costing myself a top end gasket set and head bolt set. But I might need different crank bearings unless I'm super lucky and they are the same. If it was cheap, like $100 and @Nominal would be so kind as to pick it up and take it over the water with him for beers/booze/high fives. I'd be into it if you are. I can collect it from Nominal where ever he is in Wellington.
-
My CGA3DE is from a Z10 cube. It's a dizzy version, so in theory I could use the cams in a CG13DE. But then, are the cams in a dizzy/non-dizzy CGA3 the same? Looking at Trademe and PickAPart, for Z10 and K11's I've not actually come across any COP/non-dizzy models so far. I think I came across something saying all JDM CG engines were dizzy versions and the non-dizzy was a Euro market. Could be wrong though. Most of the ones in NZ will be JDM as far as I know. No idea what you guys got in 'straya. Most of the info I've come across on these engines seems to be people on forums who are guessing or repeating what another person has said... who may also have been guessing.
-
Thanks, I'll have a look at your thread. I worked out, by counting revolutions, my gearbox is 3.915:1. So on paper... or excel, I came up with similar rpm at 100kph on 10" wheels to you. 3240rpm. I suppose I could get a CG10DE, keep the original pistons, use the CGA crank to get a capacity somewhere between a CG13 and a CGA3, unless that makes the pistons come up above the deck. And the CGA cams...? I've been unable to find any information about differences between the cams in a CG10/CG13/CGA3. Plans to build a franken engine is a bit scuppered when a full gasket set(from a local supplier) costs >$400!!! And a CGA3 or CG13 longblock assembly from the engine importers is <$400. I did notice that AliExpress has full gasket sets for under $100.... but does that automatically make them shit...? It's about what I would expect to pay for a gasket set from RockAuto but the US never got the CG engine.
-
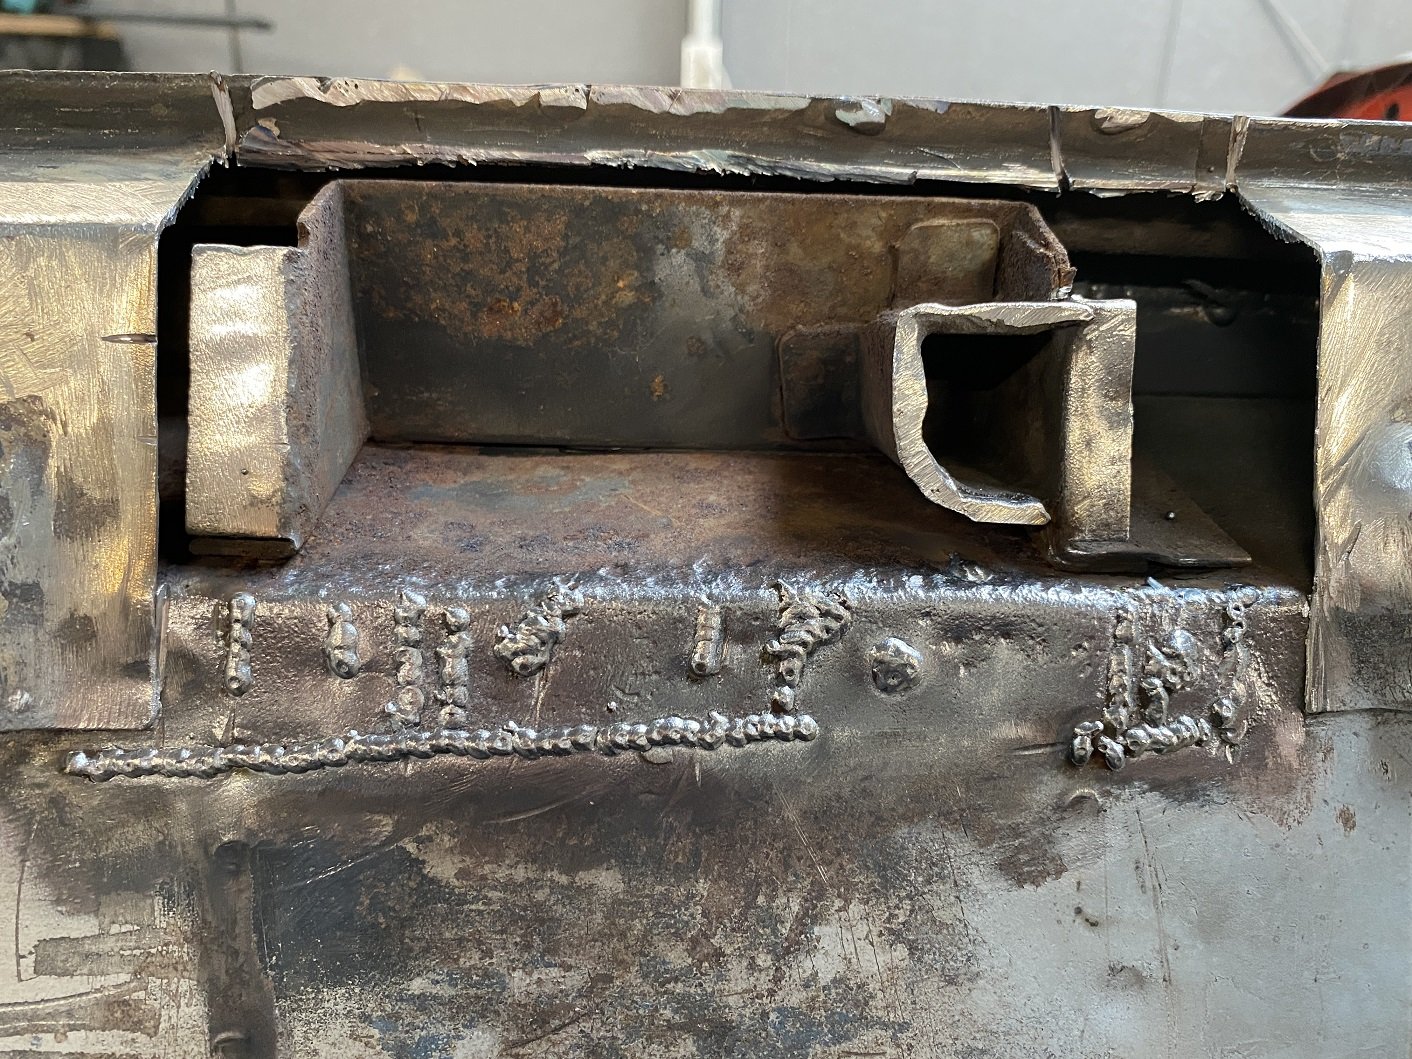
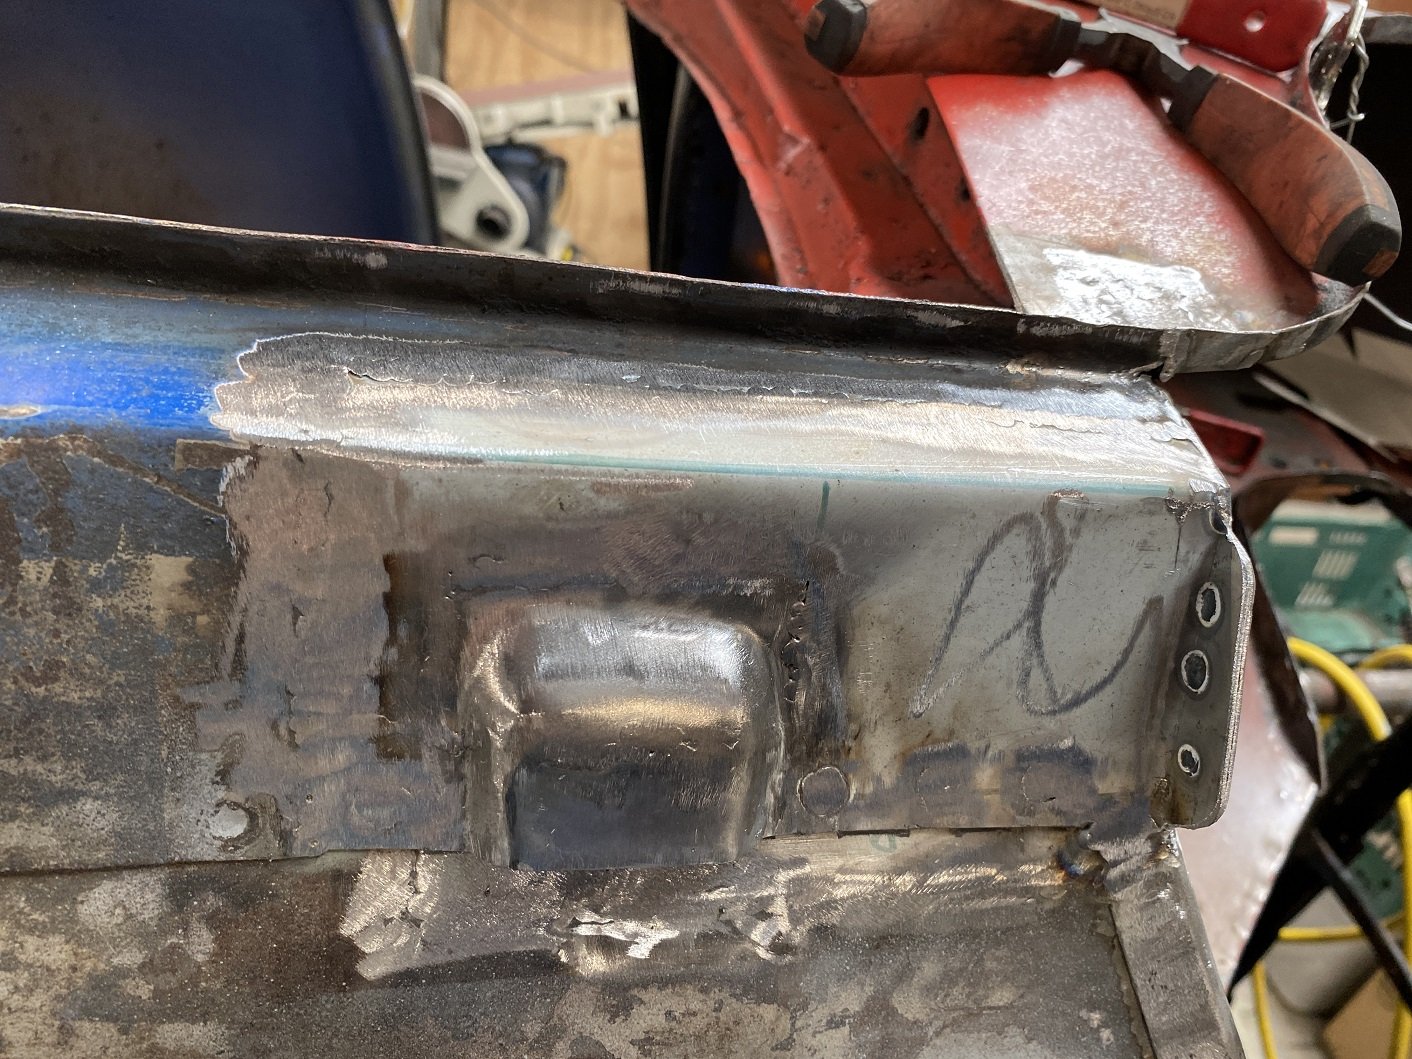
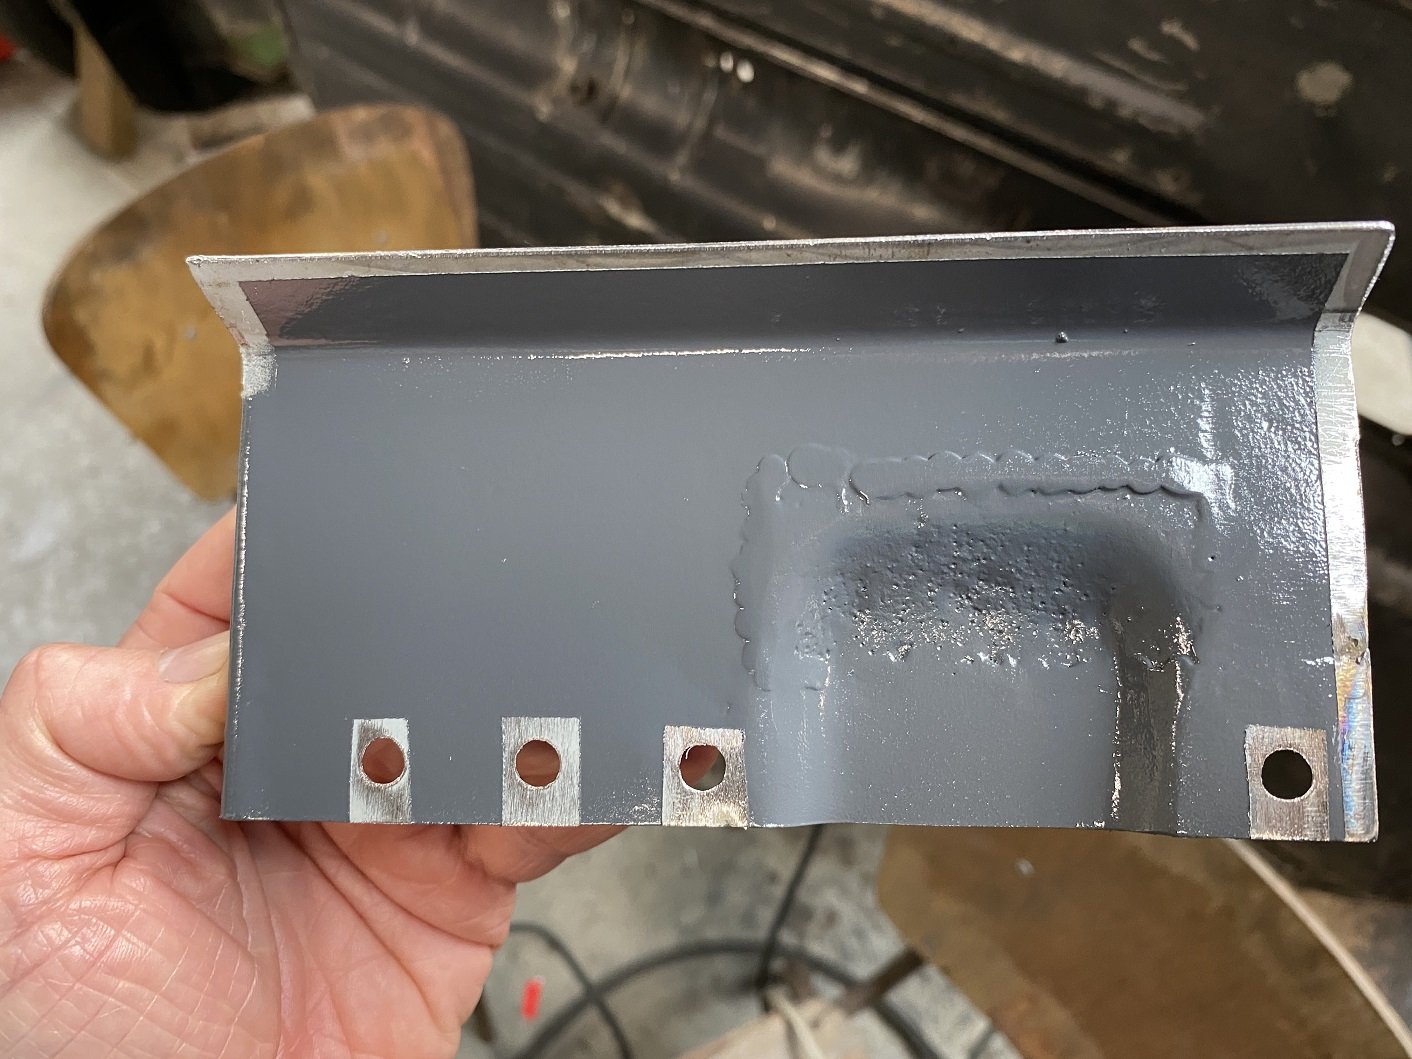
Much better. Just got to linish the welds and trim that edge. The other side jacking point has a reinforcing square around the hole... I doubt I'll ever use that jacking hole ever, let alone enough to dent the area around it... But if I don't add the reinforcing square, it won't match the other side....
- 48 replies
-
- 14
-
-
And then... I know it's not really ideal to be painting over the existing surface rust. But some Zinc It has got to be better than nothing at all. I'll shoot some penetrol and cavity wax in there once it's painted. I'm assuming epotec epoxy primer won't stick to the penetrol.... but I want to use something that will creep into all the seams (that 100% will have rust in them) before I seal over them with epoxy.
-
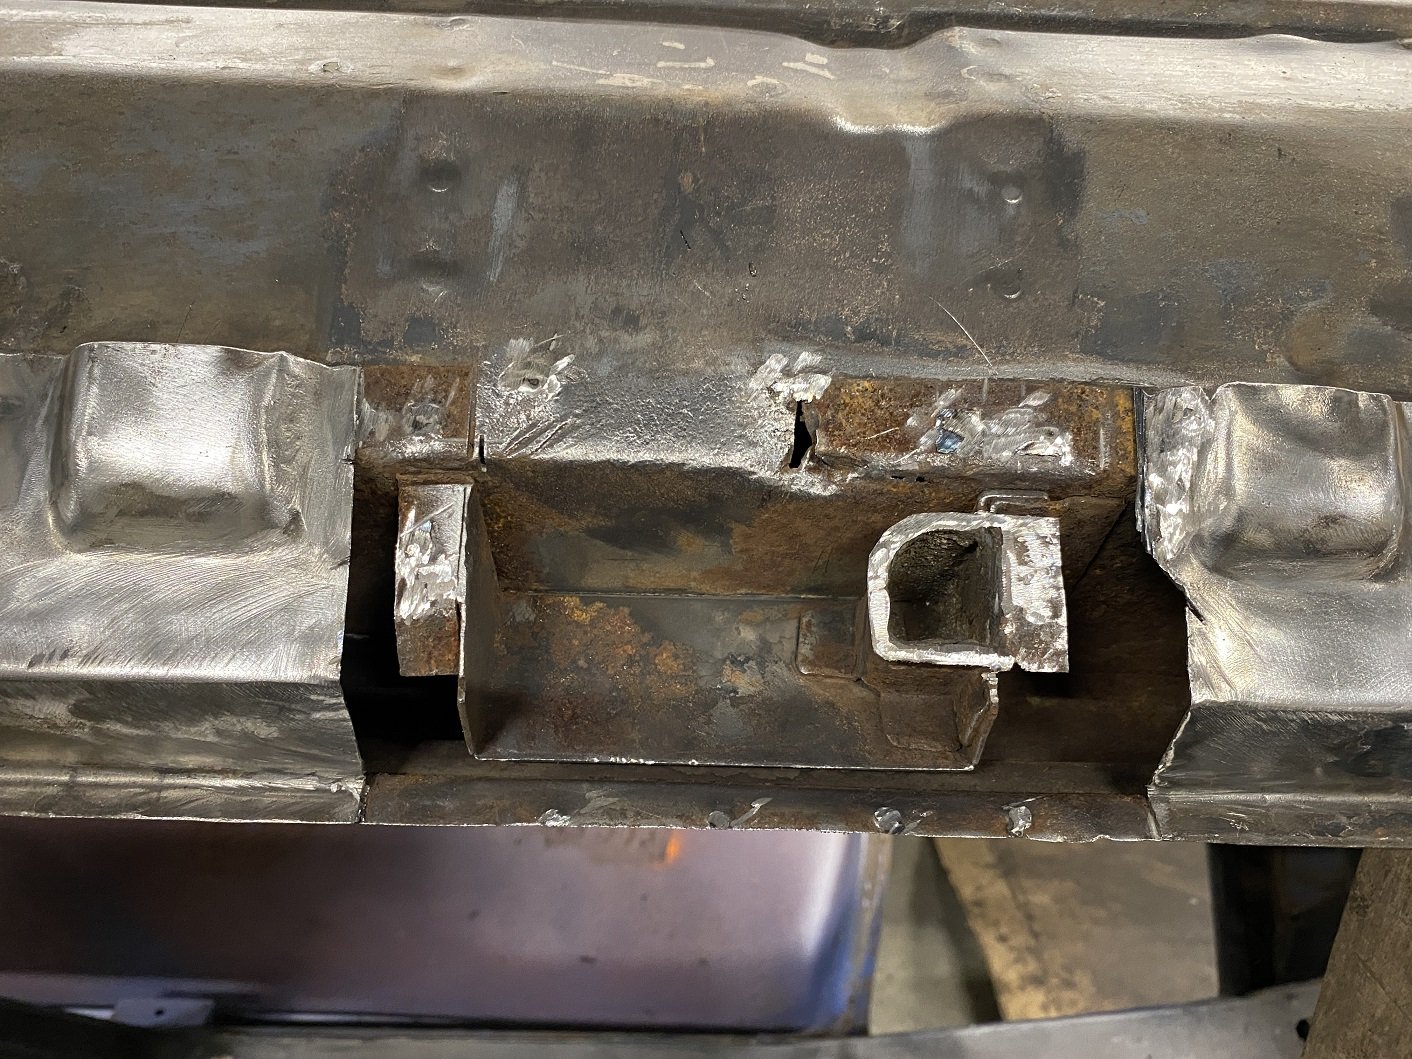
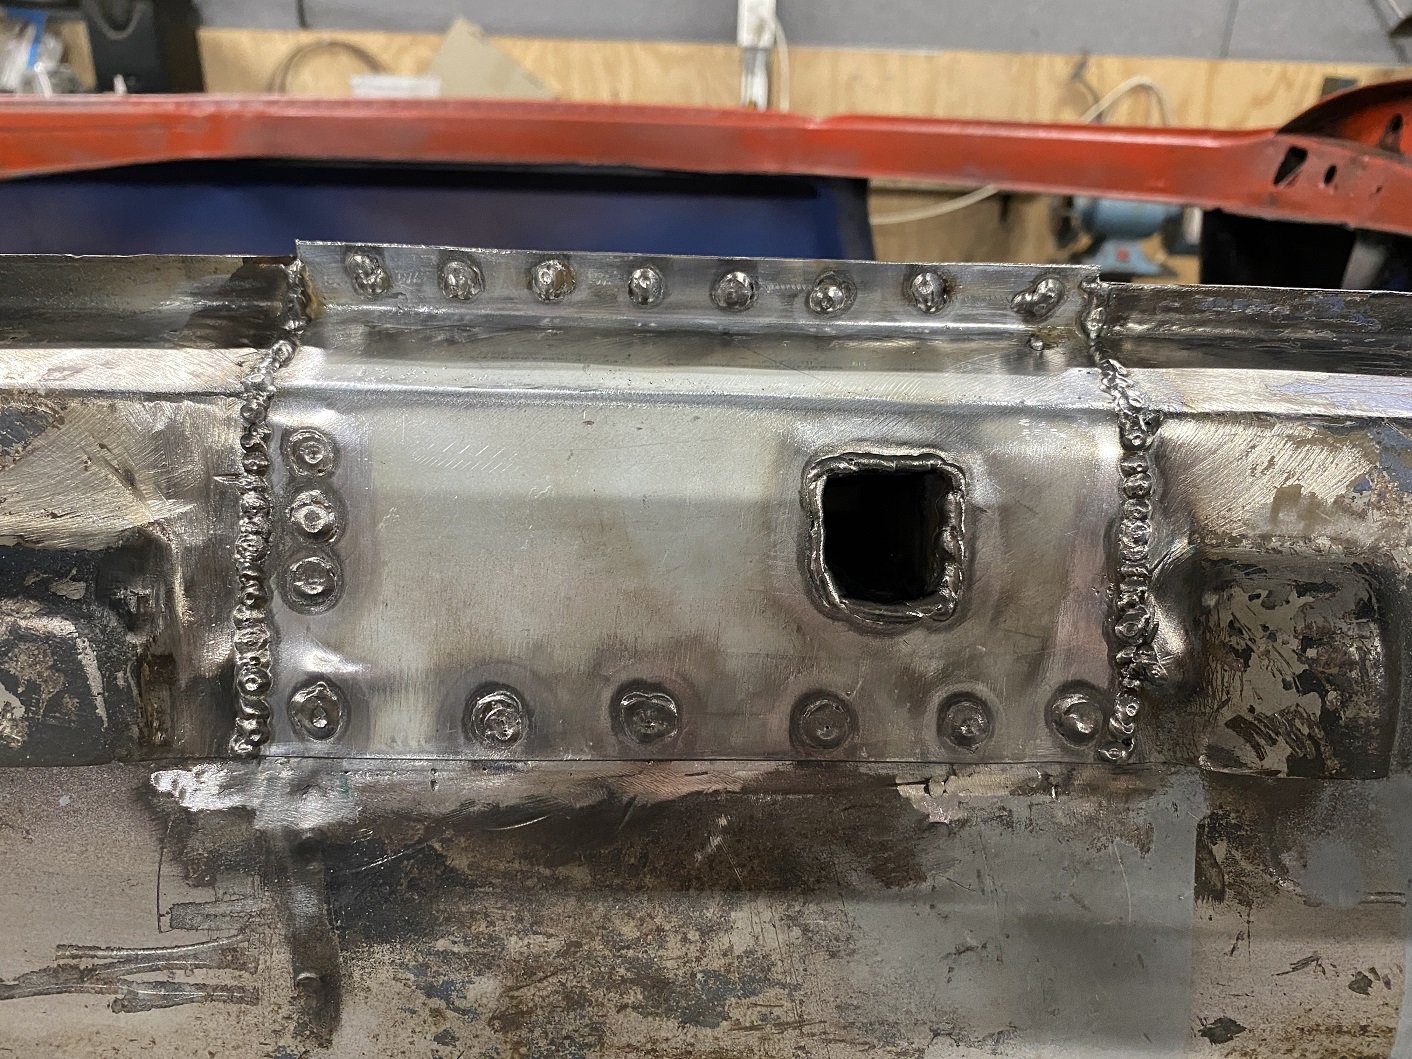
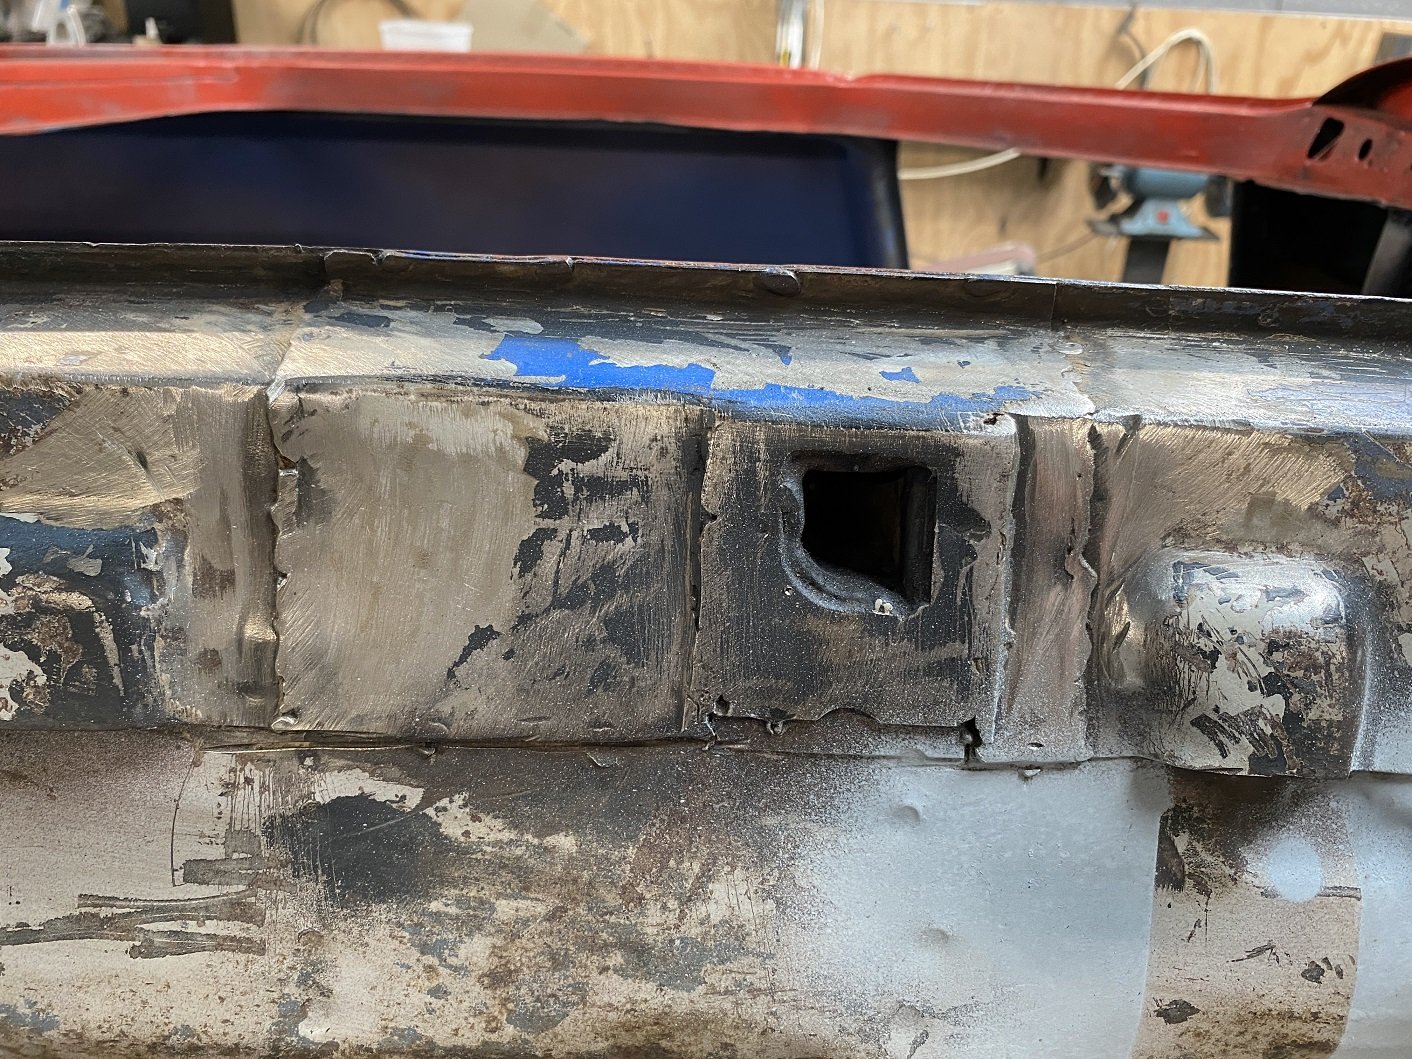
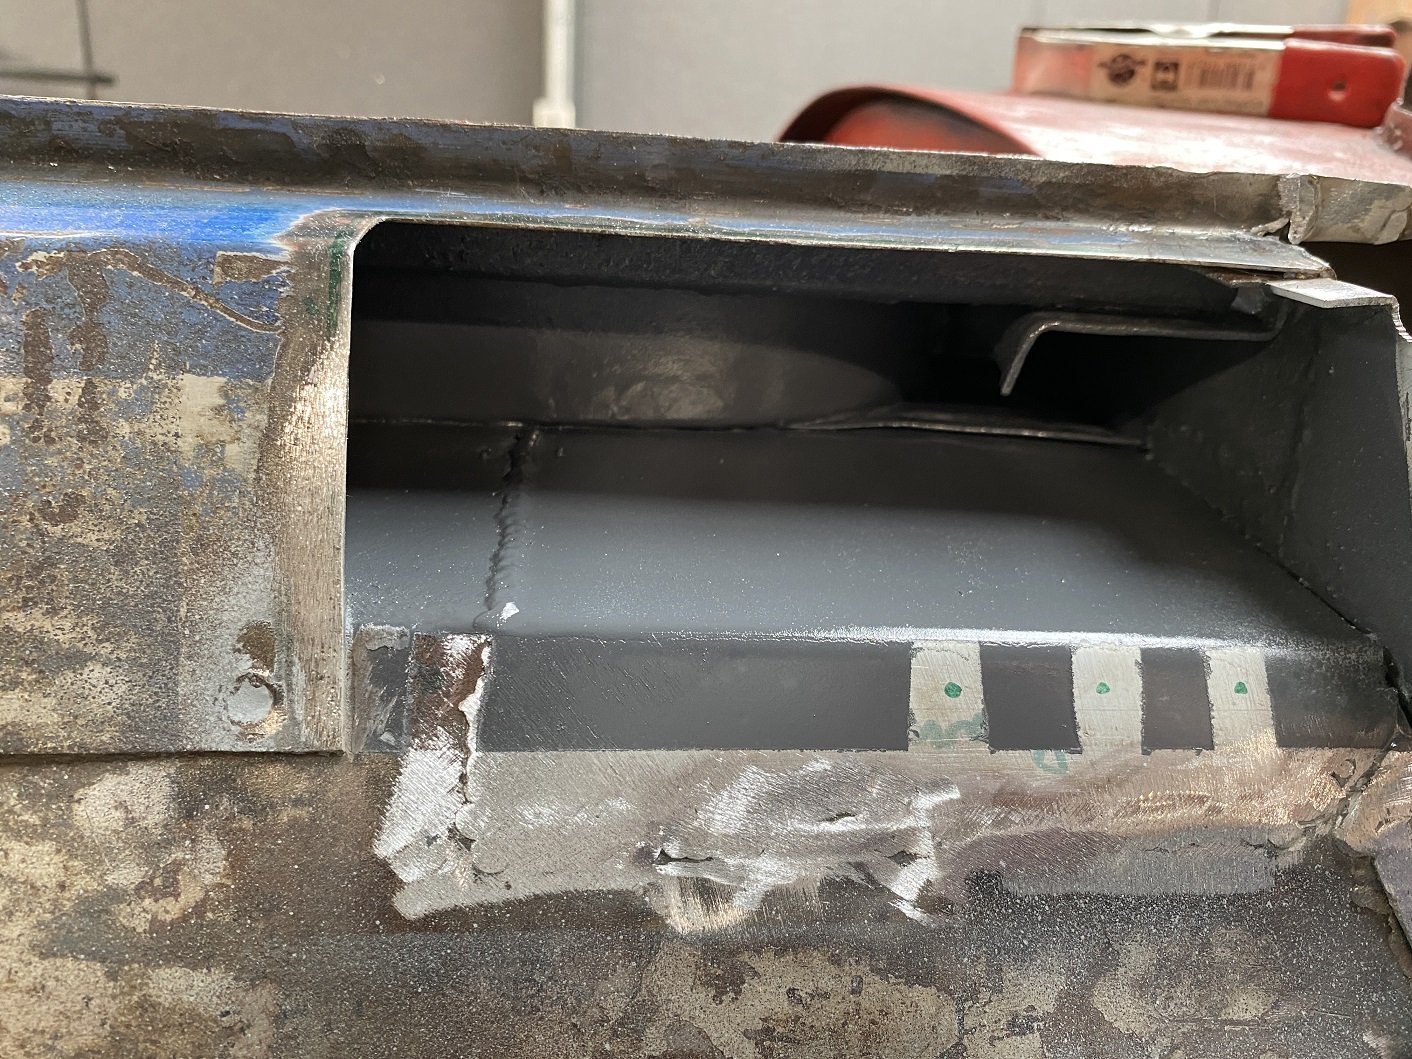
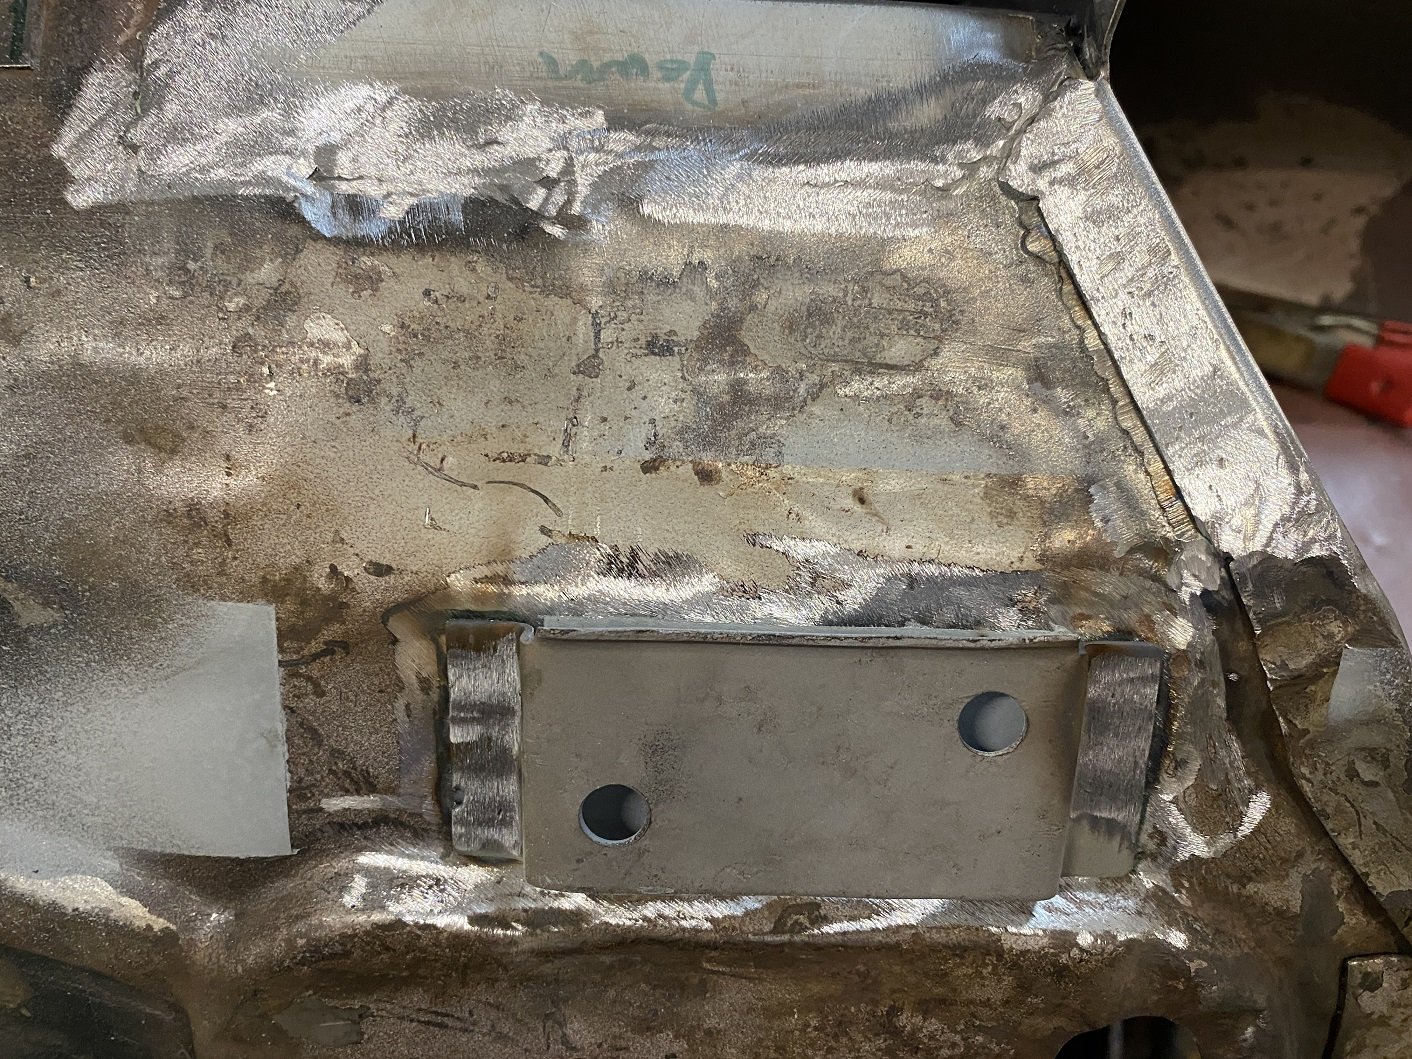
But I didn't like the look of this. Did some cutting and it was double plated. So cut it all out. Lots of gouges from who ever was in there last. I decided to fill them with weld because the jacking point bracket and the back is not being accessible because the box section is behind it, made patching the area not feasible.
-
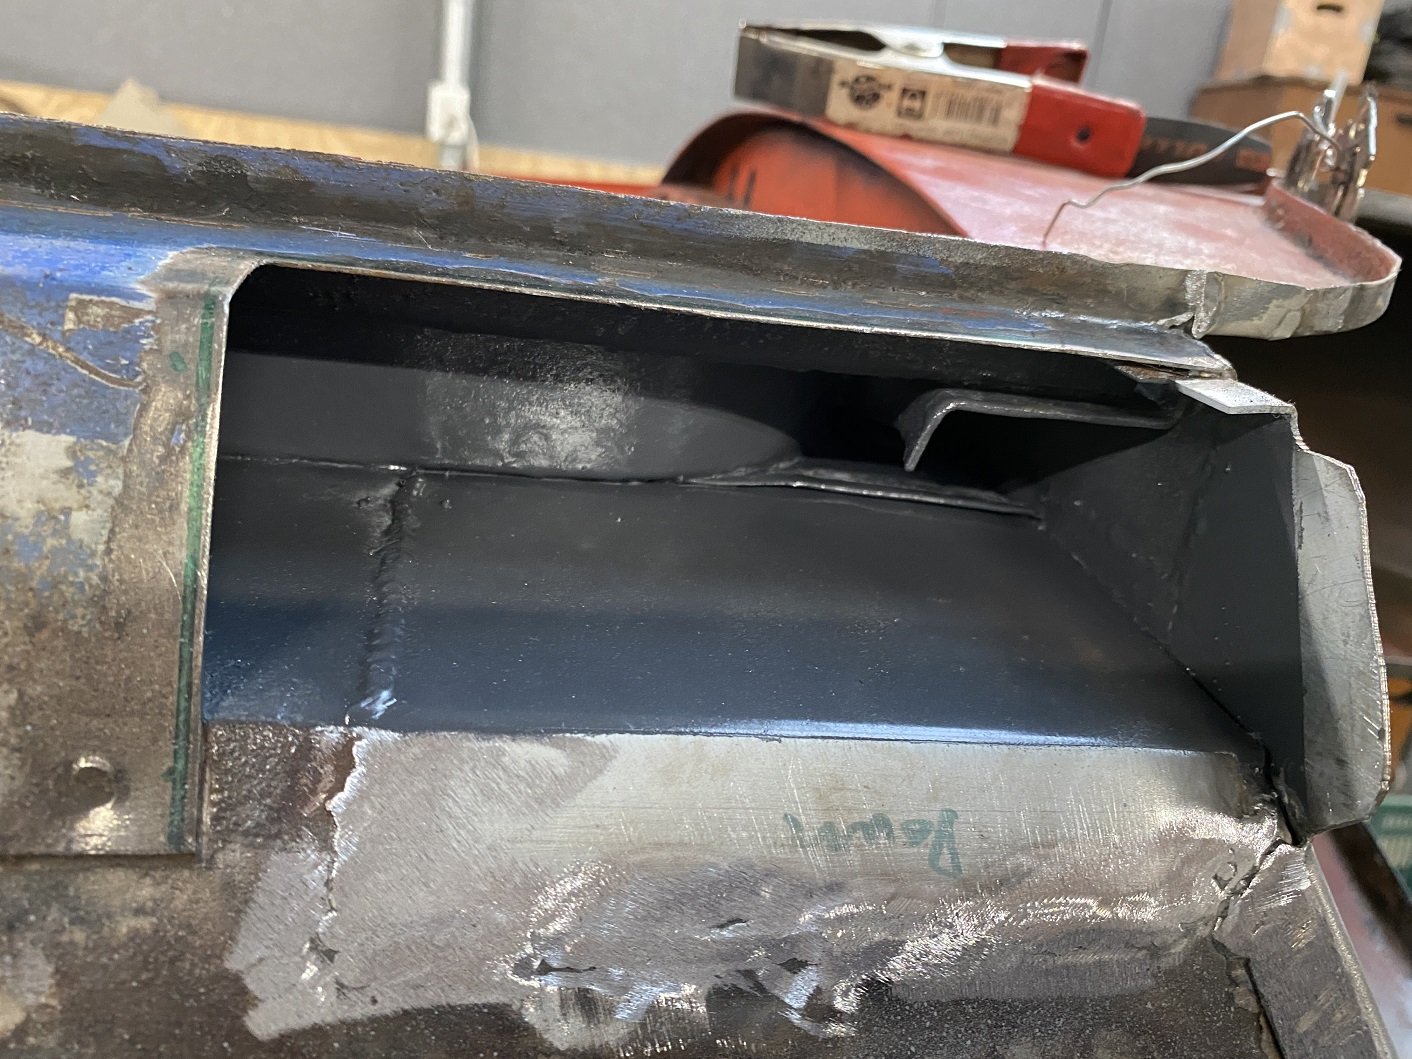
I used as little as possible of the vent shape because it was a bit thinner. Some more paint where the spot welds aren't. Done.
- 48 replies
-
- 10
-
-
Anyone have a handle on what kind of turbos are commonly available from wreckers these days? Like 18 years ago I could go to PickAPart knowing there was a pretty good chance there would be a GT Legacy there that I can get a IHI VF8 off for ~$70. I think they charge ~$90 these days. But what cars should I be looking at now? I'm looking for something similar to a T25... but not 30+ years old. I have a T25 off a CA18DET... it has a little play but hasn't hit the sides, so I assume I could rebuild it. But maybe I can get something more modern for the price of the rebuild kit???
-
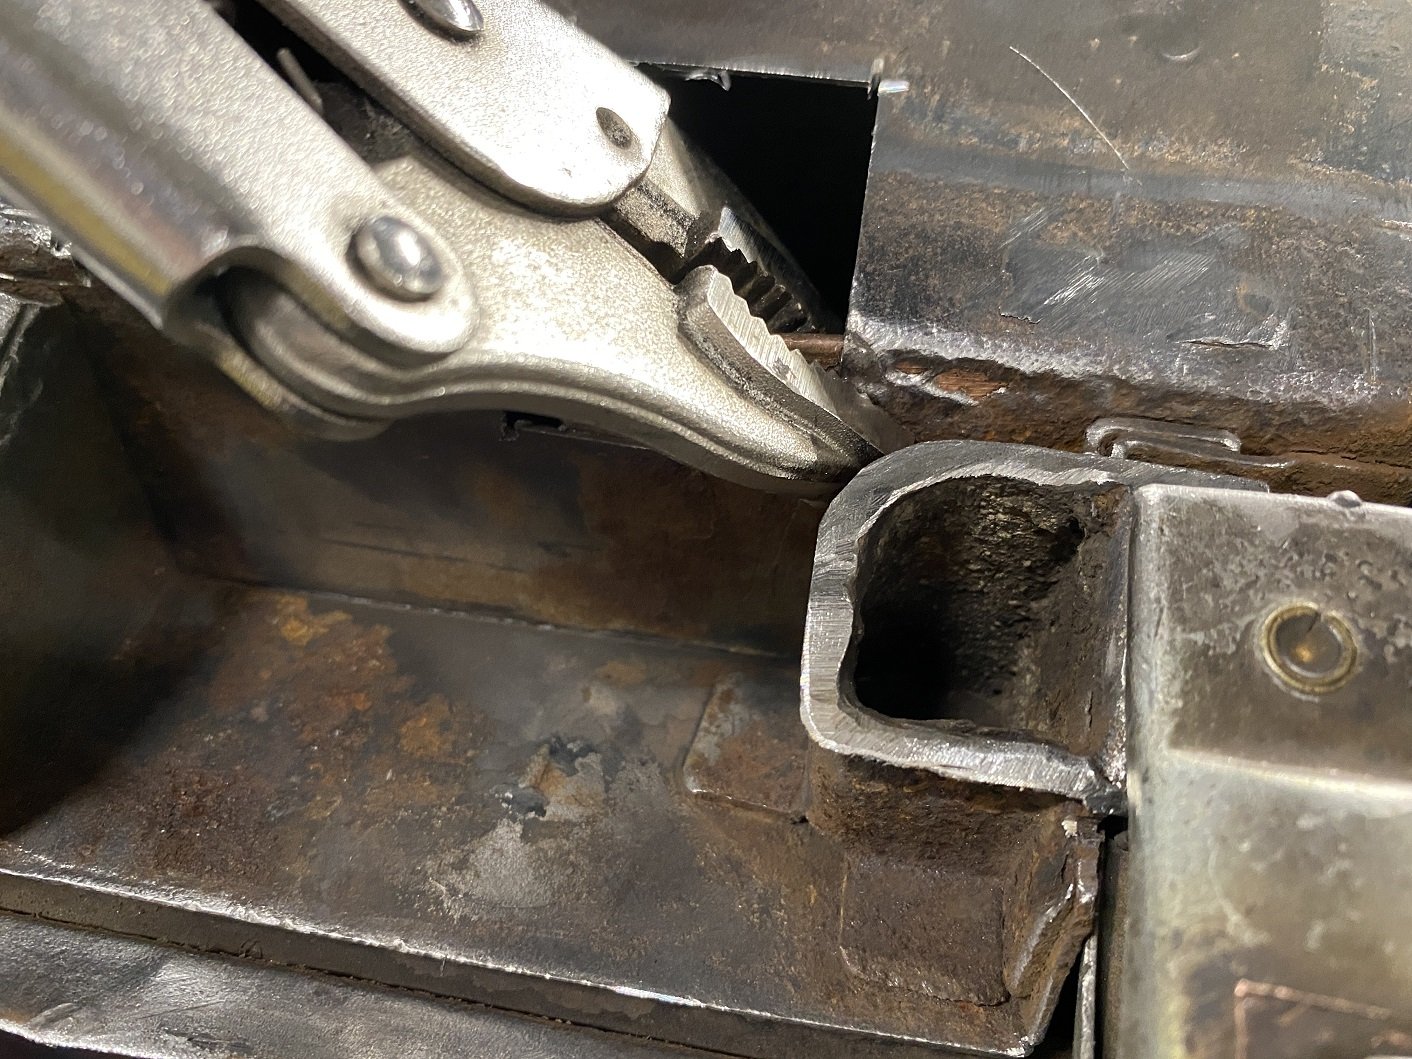
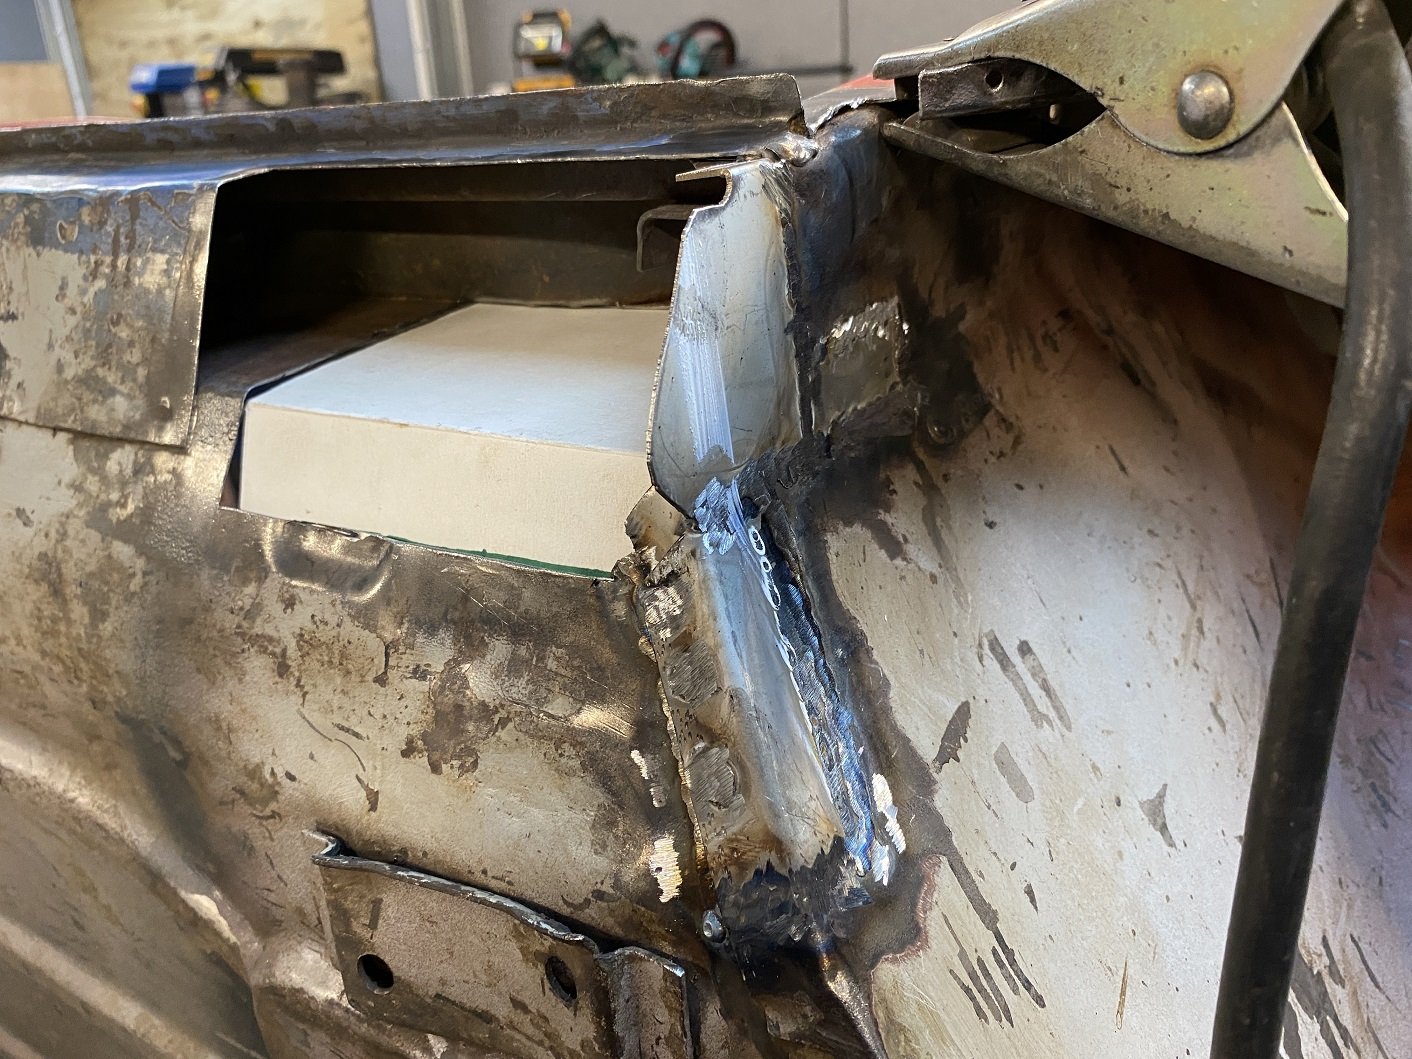
Affirmative. Requires special jack with the sticky uppy bit to engage with the orifice. I'll be doing some exploratory surgery around one of them on mine. It has a rough looking repair around it that was covered with filler. I suspect it predates the much neater repairs that were done by the previous owner. It's either been done using MUCH thicker steel, or there is some double plating going on.
-
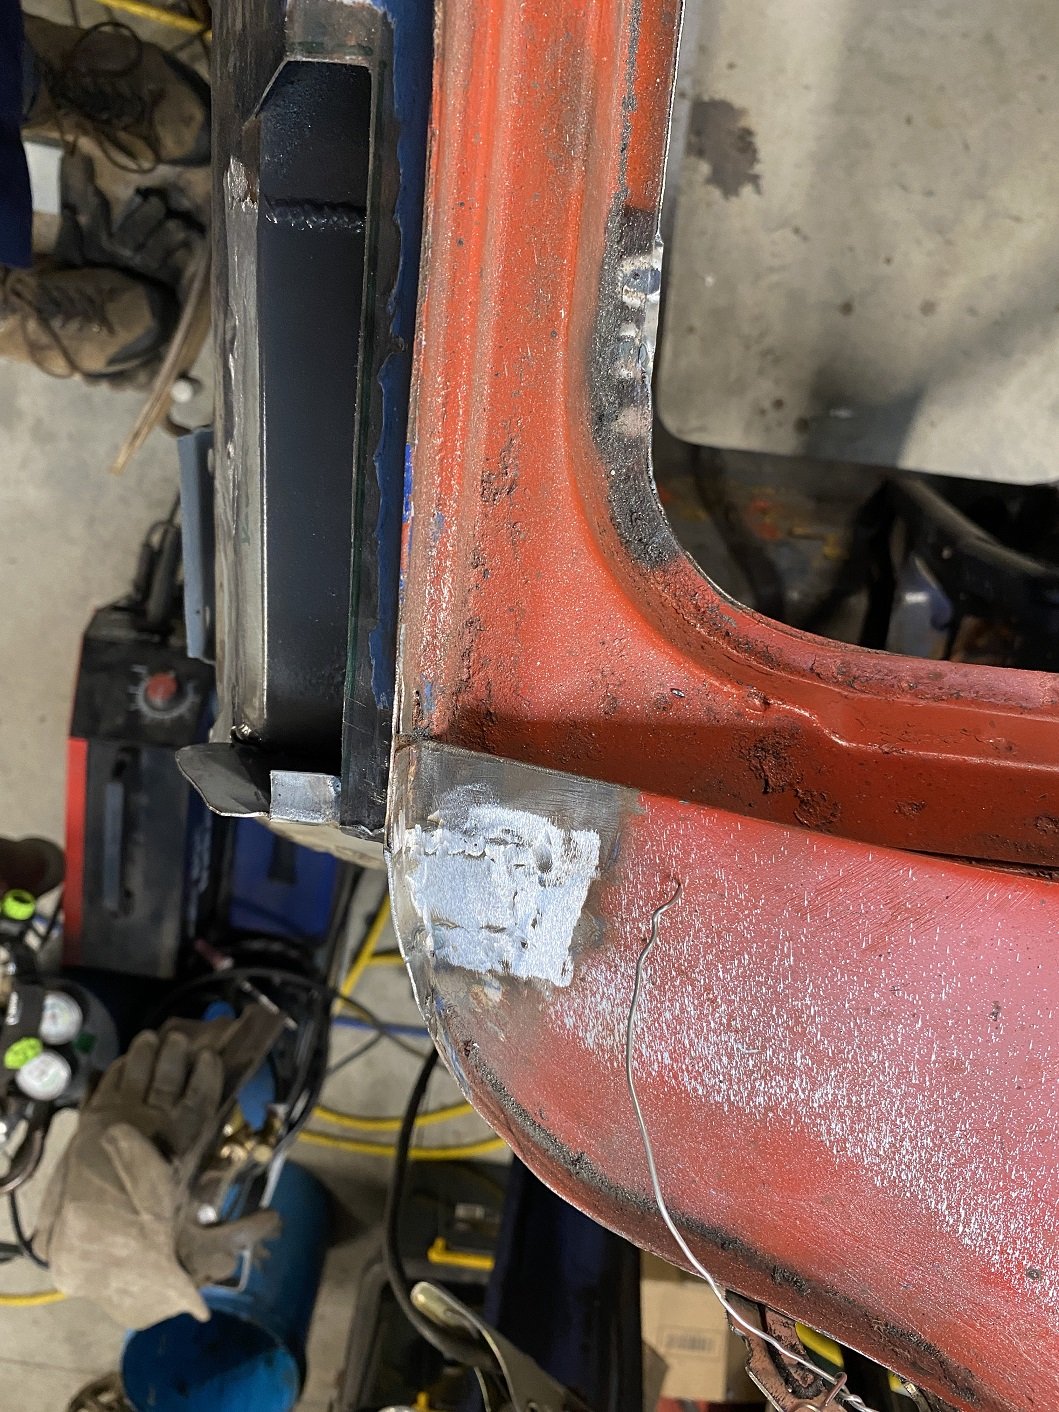
Julian Cheer the local certifier came to look at the Triumph today. Nothing major to do. Engine mounts need more beef. I was on the fence about whether they were adequate anyway. I'll remake them in 6mm. And because I've butt-welded the subframe together to narrow it, he wants it double plated. It will be easy to do. I'll probably do something like this. No issues with the floor mods. He wants me to do a bump steer test on the rear suspension. He's going to drop off his bump steer testing bars later this week. I don't see why it would be any different to nissan OEM, I'm optimistic.
- 188 replies
-
- 19
-
-
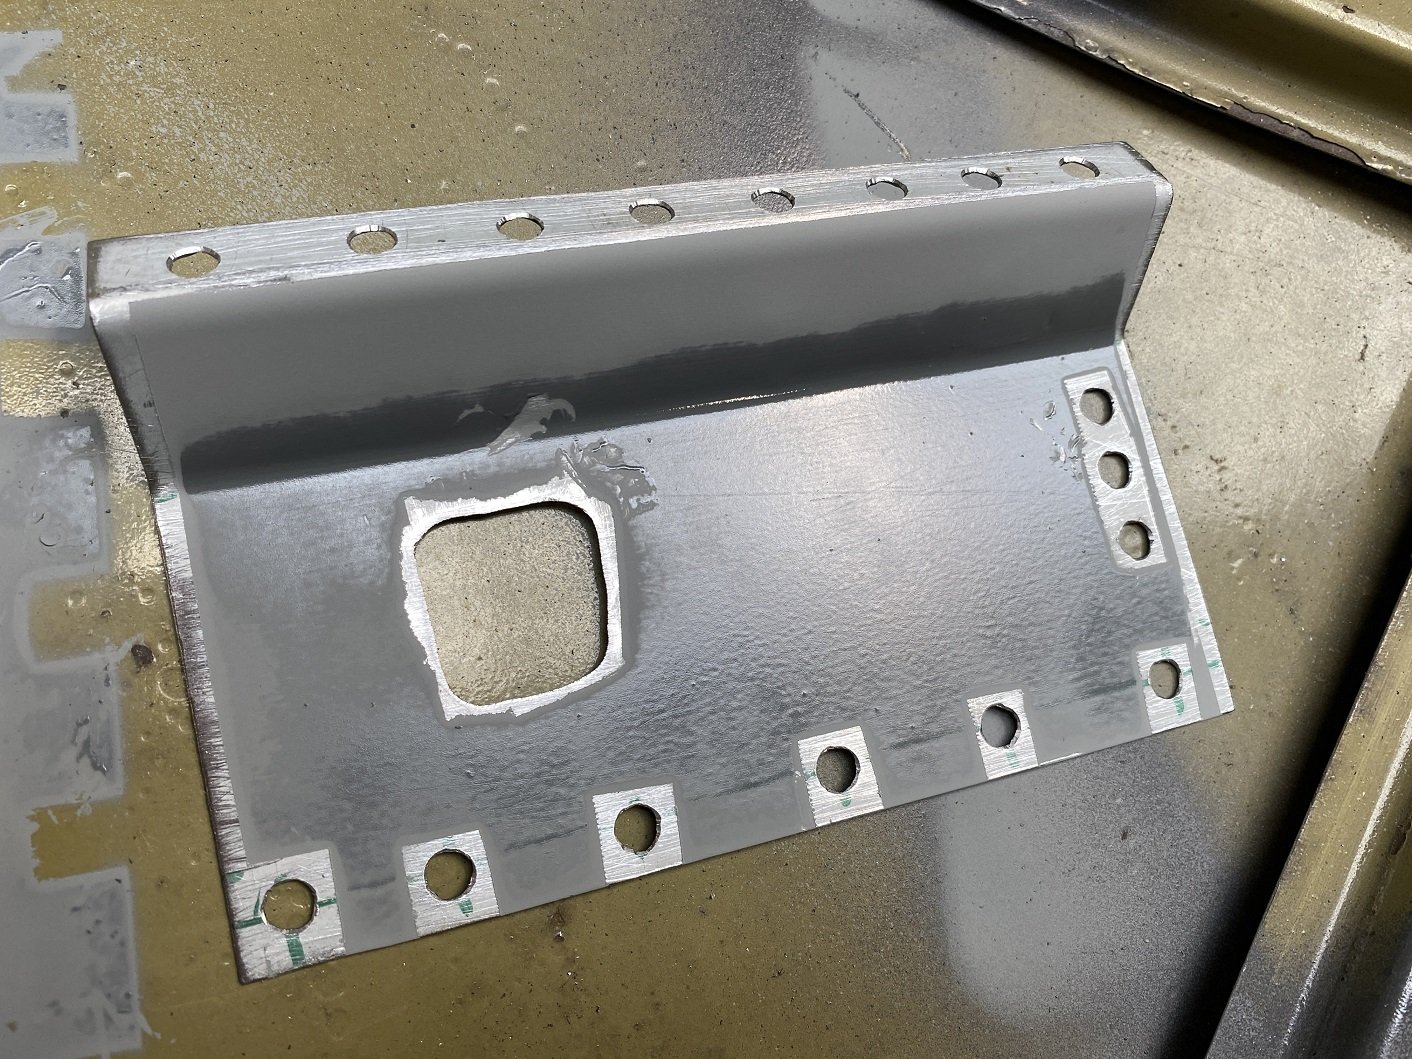
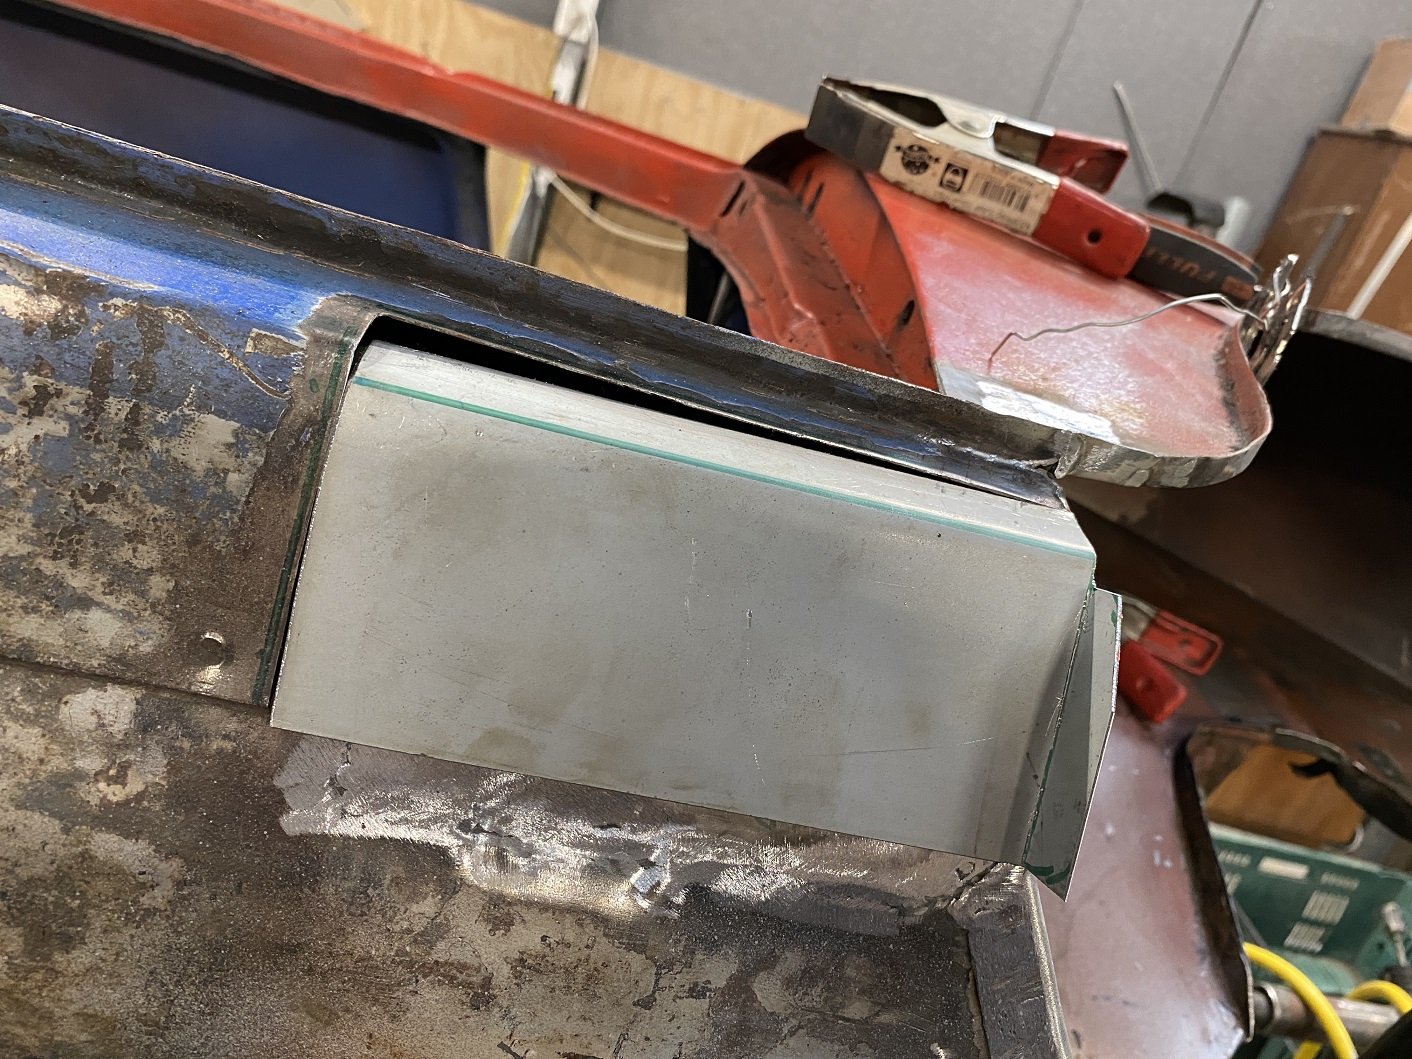
Filled in some more hole. Threw some paint at it. Made the closing panel. But still need to make the vent thingy.... it would be so easy to have no vent. But I can't do that.... Instead of making the vent thing, I procrastinated by filling in this hole. And removing this bracket that was squashed, so I could flatten the floor a bit and reshape the bracket. Apparently these are not actually jacking points, they are used in the factory to hold the floor assembly to a pallet thing as it moves along the production line.
- 48 replies
-
- 12
-
-
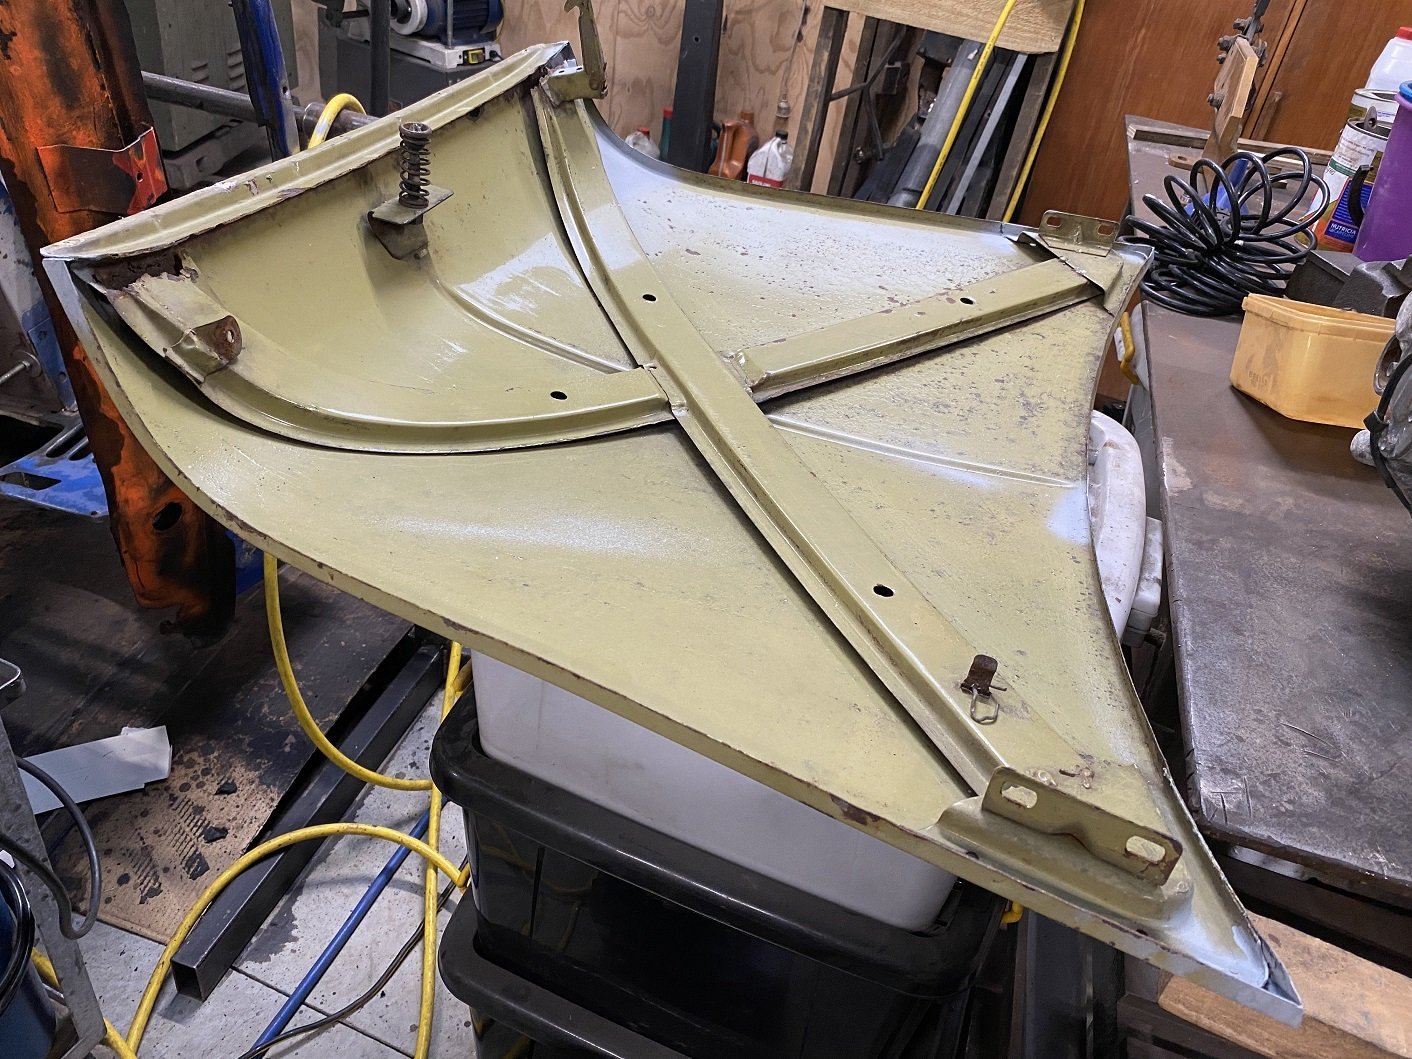
On Saturday I went on a mission to Waipukurau and collected a mini bonnet. It had some cracks around the edges. I've already welded those up, as well as welding the corners. The front ends of the support ribs have rusted away. There is enough left of one so I know what it should look like. The ribs will be easy to remove. As far as I can tell, the rear end of the ribs are only held on with two tack welds each. There are also some rust holes along the front edge of the bonnet, under the chrome strip, they shouldn't be hard to fix.
-
Can you drill a hole or two on either side of the tap, then tack the nut back in from the front side. Like how you do 'spot' welds with a mig. ... the tap is holding the nut in the right place, then when it's tacked, you will be able to remove the tap/finish cleaning the thread.
-
Filling in the hole I made.
-
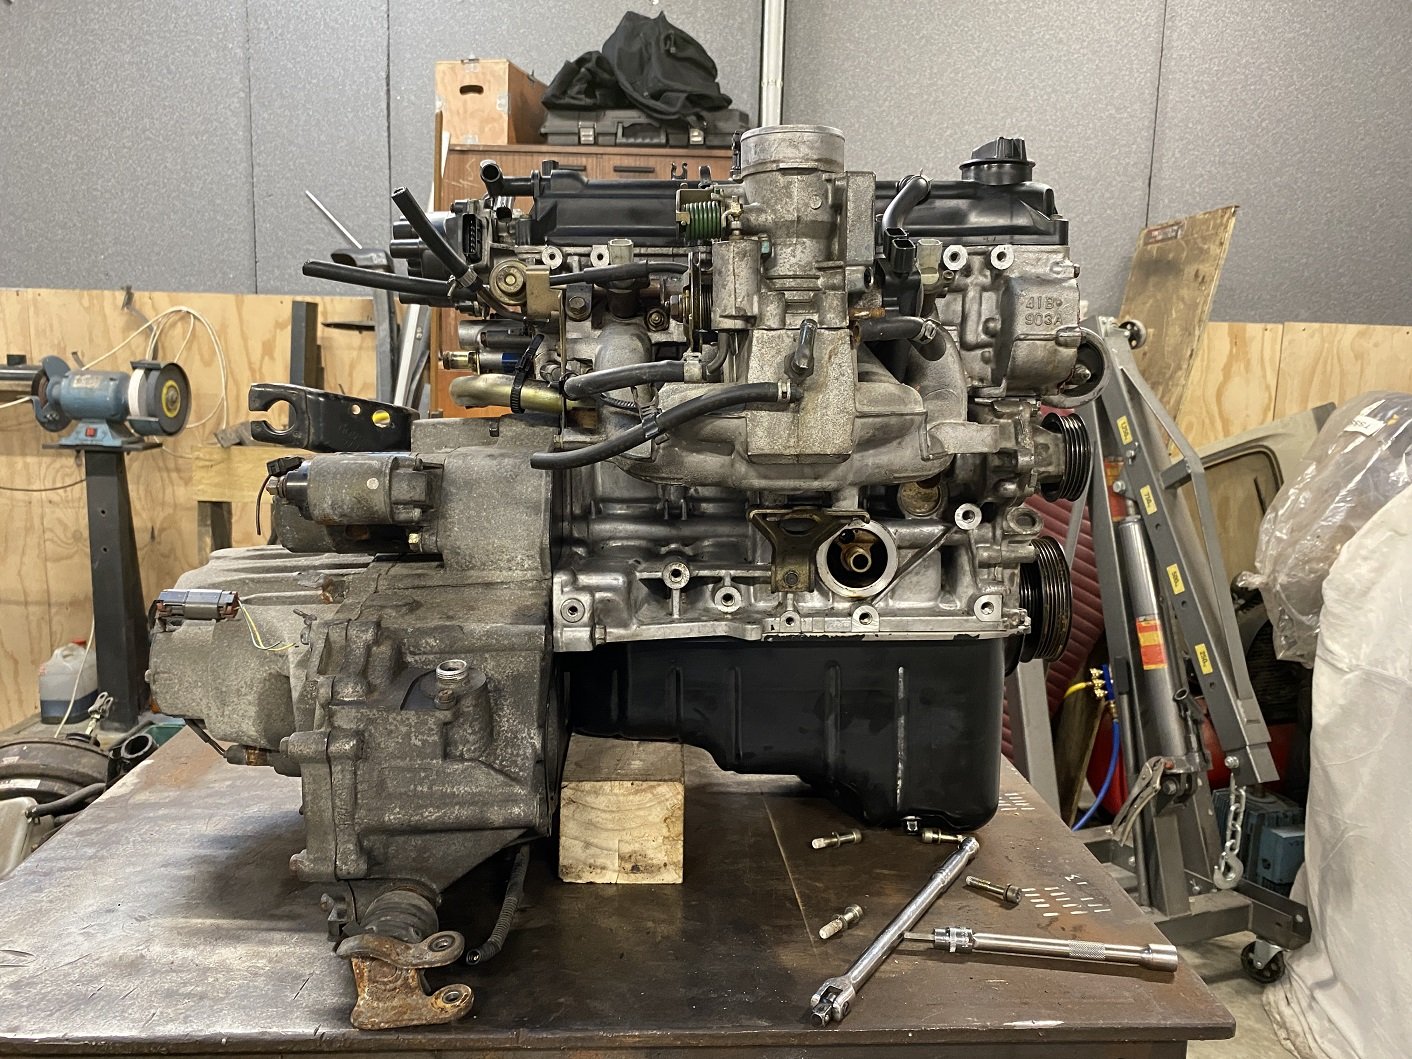
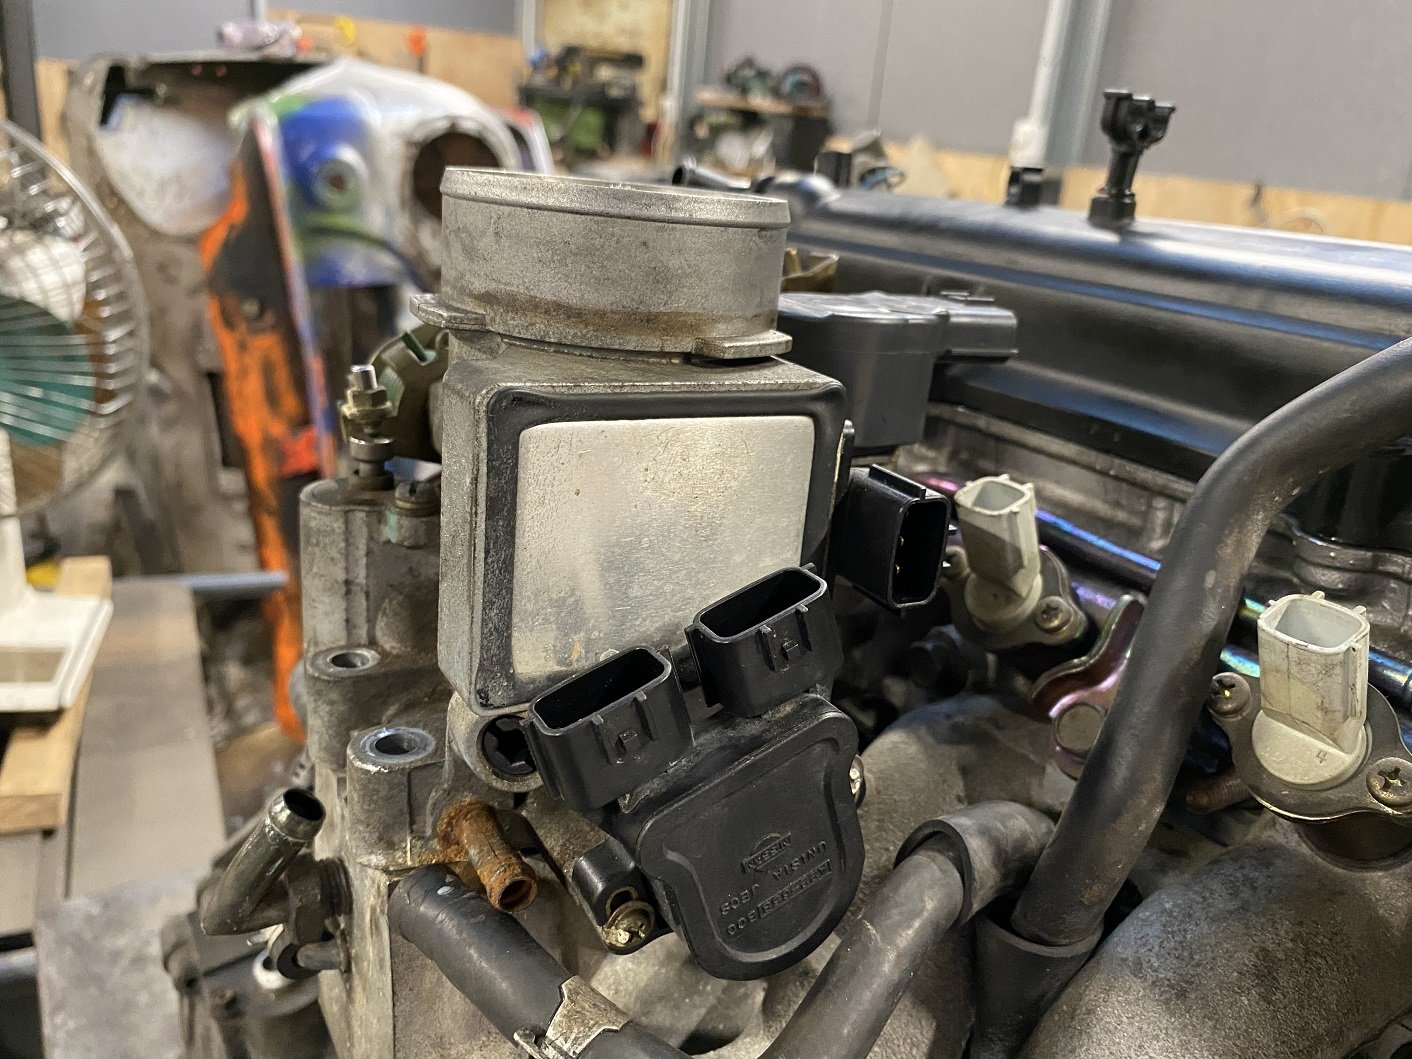
I realise there have been no photos for a while and people love photos. Putting the engine back together went a lot faster with no internals, only the crank so I can have the pulley for clearance checking. The throttle body on these things is crazy. They have managed to fit throttle, tps, cold start wax plunger thingy, combined idle-up and IAC solenoid( it has 5/6 pins so I thought it was a stepper, but the manual says solenoid so there are two solenoids, or one that does two thing), MAF and IAT all into one unit! I think the 2nd plug on the TPS is for the idle switch and is only on the automatic cars. I also chased some rust with the cut-off wheel.
- 48 replies
-
- 15
-
-
Aaaaaaaaand it's a bit fucked. After cleaning, yes it had blown the head gasket, the sealing ring on #1 had failed and it was blowing into the water jacket. The play between all the valves and the guides is 3 times what it should be. So new valve guides, at least. #1 cylinder has a brown mark(rust?) I can feel with my finger, and it doesn't come off. So a hone, at least. #2 big end bearing has a big pit in it. So new big end bearings. Main bearings looked...okayish. Full gasket set is >$400! Head bolts are stretchy ones, so a new set is $50 The deck surfaces have oxidation that doesn't clean off. I was quoted $230 to resurface them. I think that was it.... I'm cutting my losses on this one. I'll use it as a dummy for fitting. I'll get a known good engine later.
- 48 replies
-
- 10
-

-
Unfortunately not. Still got a distributor. I did discover that the coil lives inside the distributor, which I've not seen before, but I assume they all do?
-
I got a gearbox and all the manual bits a week or two earlier. Was quite a bit, ~$400! Box was $130, but axles, gear linkage, gear lever, flywheel, starter, clutch plate, clutch pressure plate were all extra. They have another bigger crane, looked like it had flat tires. But they rejiggered the aisles to fit more cars in some time ago now only their narrow crane fits.
-
So I got a CGA3DE from PickAPart. $250 with inlet manifold, sensors, injectors, fuel rail, TB, alternator. Extra $19 for the loom with all the engine side connectors. Carjam said it had done 140000km. I suspected a blown headgasket because there was a little white foamy shit around the oil cap. I was already 1 hour in(when I remembered to check under the cam cover), so thought I can deal with a blown head gasket and kept going. Fucked my 14mm socket using the impact gun, with lots of 14mm bolts to go. Packed up and drove to repco, got a $15 impact socket. Back to pickapart, someone else has the crane..... 3 hours later it's in the trailer. 1 hour drive back home. Looks like it's not had frequent oil changes. Took the sump off, oil left in there was kinda brown. There was a bit of old black oil buildup, but it's thin and should come off easy. Haven't inspected the bearings yet. It looks like the cam chain has been changed, they used ALL the red RTV closing it back up. Pulled the head.... NOT a closed deck like internet people suggest. But no sign that the gasket had blown anywhere.... Revisit carjam and look at the odo history.... Seems it was driven regularly up until 2015.... then stopped. So could all the water in the oil have been from condensation for sitting for years??? Maybe it was run briefly before it went to pickapart and that foamed up the oil. I guess I will strip it right down to inspect and also make it easier to clean properly.
- 48 replies
-
- 15
-
-
Company still seems to exist. Have you tried emailing them to see if they have historical manuals?
- 1 reply
-
- 1
-
-
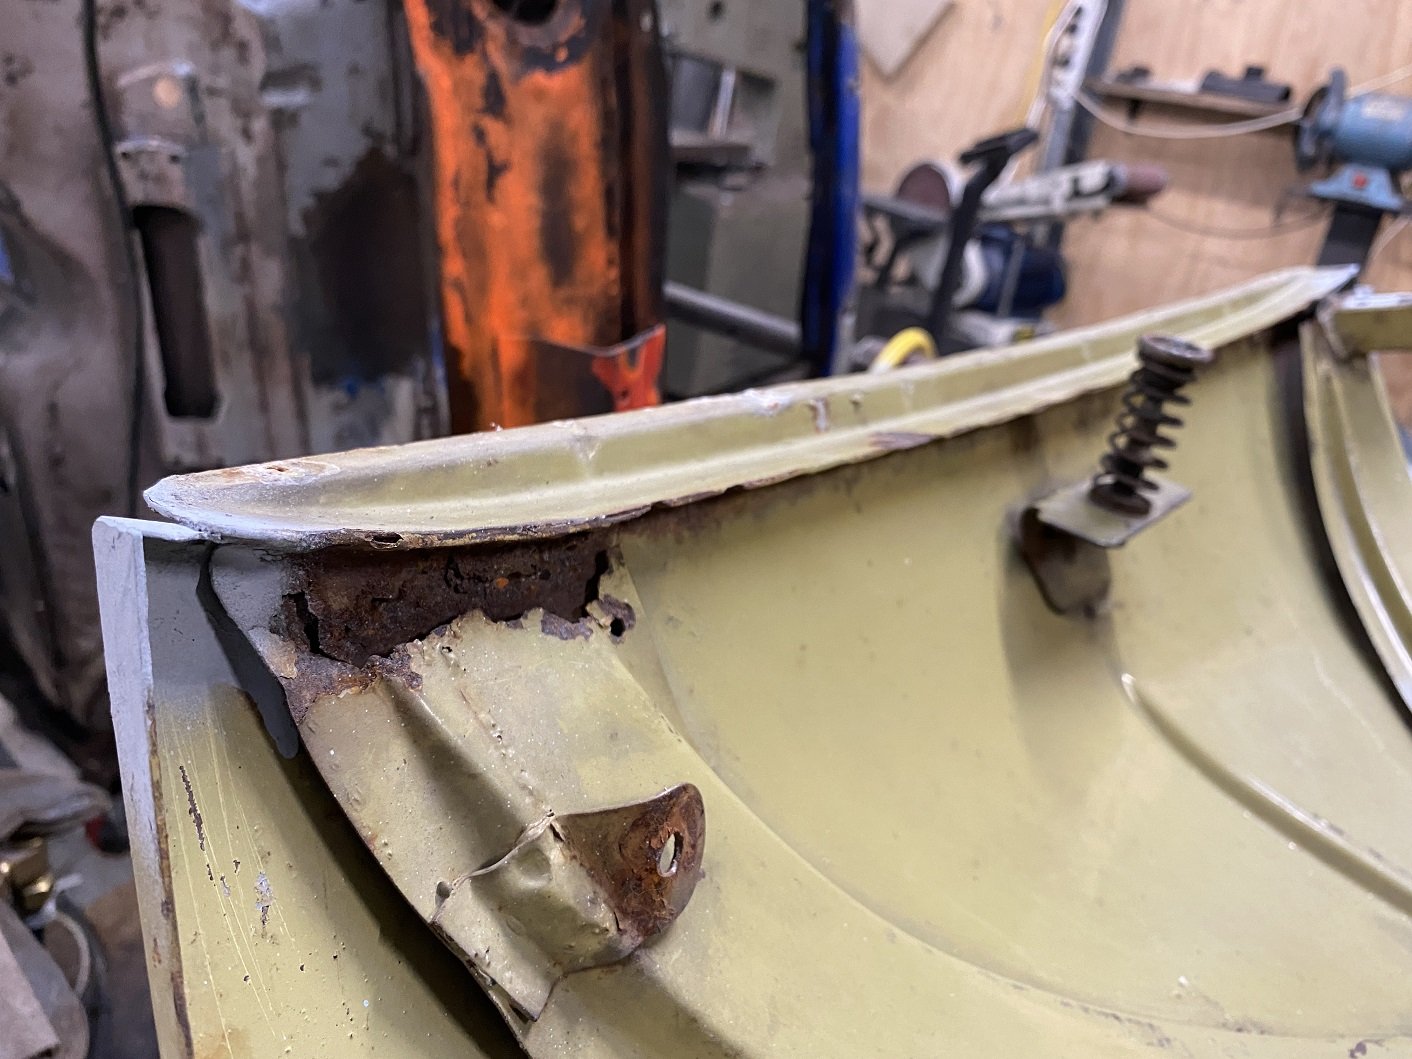
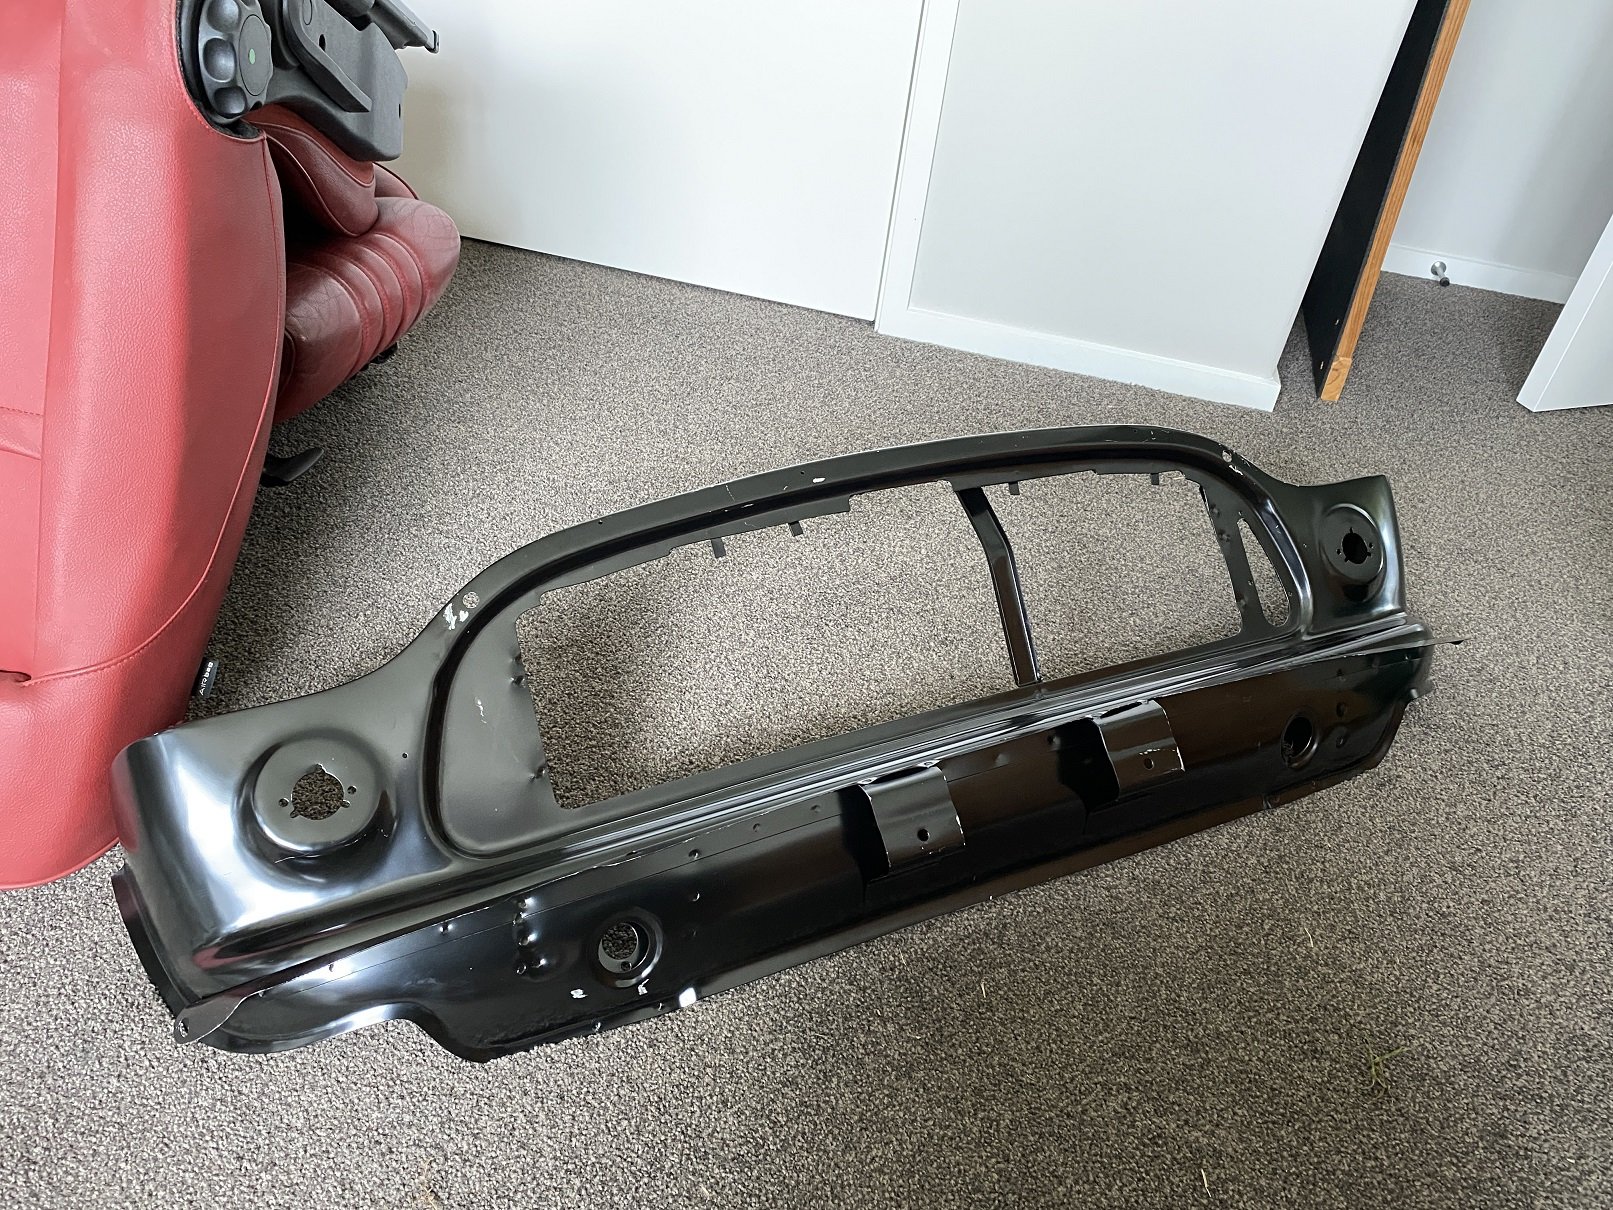
This just arrived, it is the "cheap" non-genuine front panel. Still $300 in NZ, twice what it costs in UK. I've not checked if it would have been any cheaper to import it myself. Minor shipping damage. It was just in bubblewrap. The end of the bumper lip is bent. I think I'll go over the edges with a file, some of them are quite sharp. It looks okay, the ugly spot welds are mostly covered by the grill and bumper. Hopefully it fits to the guards without too much work. I guess I'll have to remove all the black before I can paint any of it. I'll epoxy the backside while it's off the car.
- 48 replies
-
- 16
-
-
Cleaned out most of the underseal under this guard. Didn't find any rust just redy browny paint. I need some of those rubber gloves the cow midwives use... so I don't keep getting the black all up my arms