
- Popular Post


Adoom
-
Posts
2184 -
Joined
-
Last visited
Posts posted by Adoom
-
-
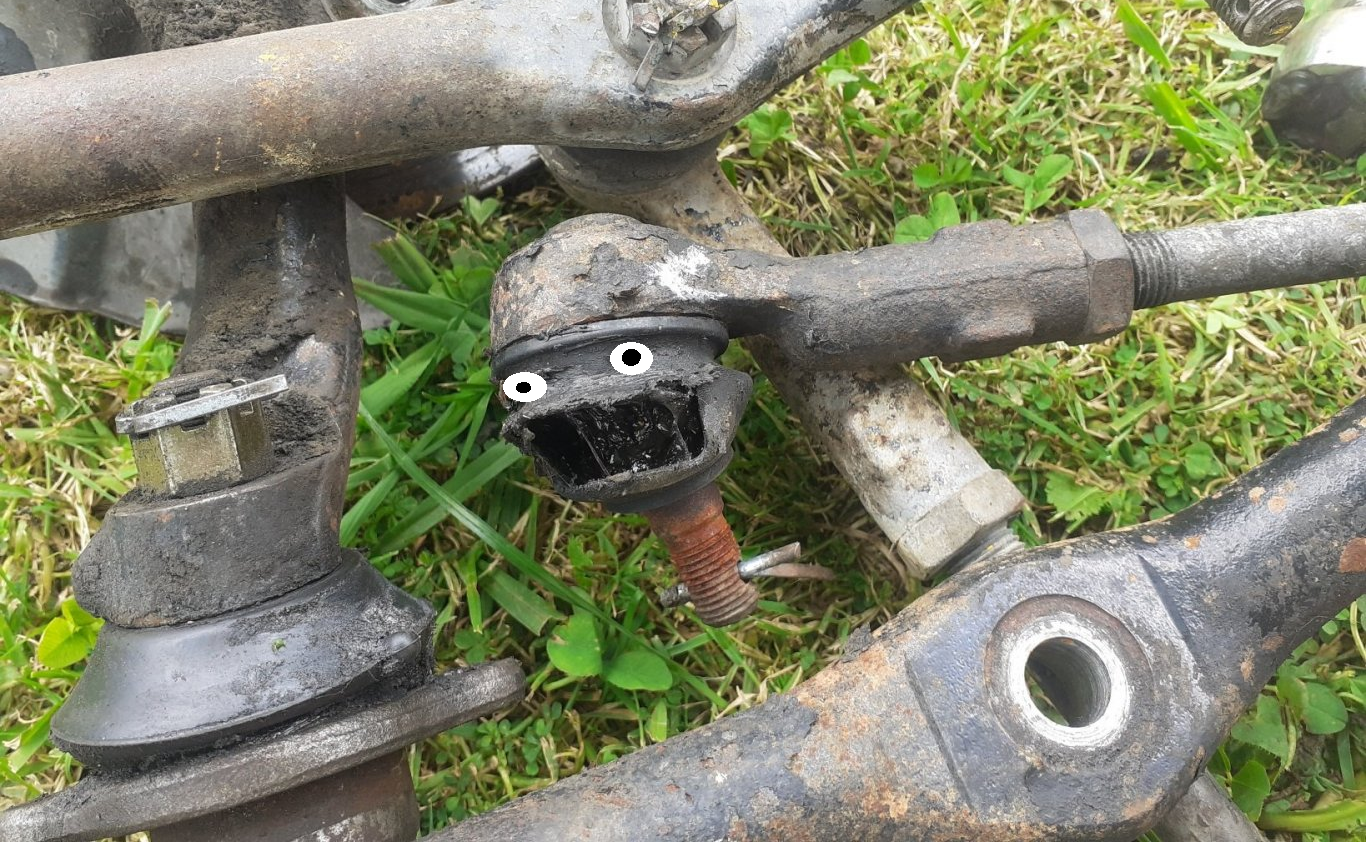
Anyone else see this?

-
 2
2
-
 1
1
-
 6
6
-
-
11 hours ago, JustHarry said:
Tar/underseal we just use a heat gun and a scraper to remove at work. It's a shit job no matter what. But that's the cleanest way to remove. Wire wheels usually just heat it and make a gooey mess same with sandblasting or sanding
Then solvents usually paint thinners to get the last sratchings off.
Yeh, that's what I've been doing.
-
1 minute ago, NickJ said:
I've been trying with LN2 on some nasty aftermarket tar-like goop on the Datsun underbody, no real result ended up resorting to a knot brush & grinder and various scrapers, heatgun and finally acetone.
D-, will not do again.
Liquid Nitrogen? I thought of that. I've never had the opportunity to get my hands on any. I wondered if it would work when poured onto something, does it just instantly sublimate away without doing much cooling? Every time I see something frozen with LN2 it gets submerged.
-
Has anyone tried using dry ice to remove spray on underseal? I've used it on the sheet stuff with great success, but Triumph used a spray on product on the floor of my car. This is inside the car, not underneath.
-
50 minutes ago, AllTorque said:
Correct. Reverse lights are a permitted lamp. So you don’t need them.
Just try reversing your 1973 mini estate with no reversing lights down an unlit winding driveway after delivering pizza to the address at night time. Is that bit of dark darker than the other dark? Yes, it's a post and you have just run into it.
#oddlyspecific
-
3
-
4
-
-
Made my jig rejigging jig. The big box section has two sets of holes for the studs, the original location and the narrower location.
Once I bolted it to the studs, I welded some random bits of scrap to join the two jogs together. Then I could cut the mounting studs of the first jig, move them to the new position holes, weld them to the jig again, then cut the rejigging jig off.
It not very exciting to look at...
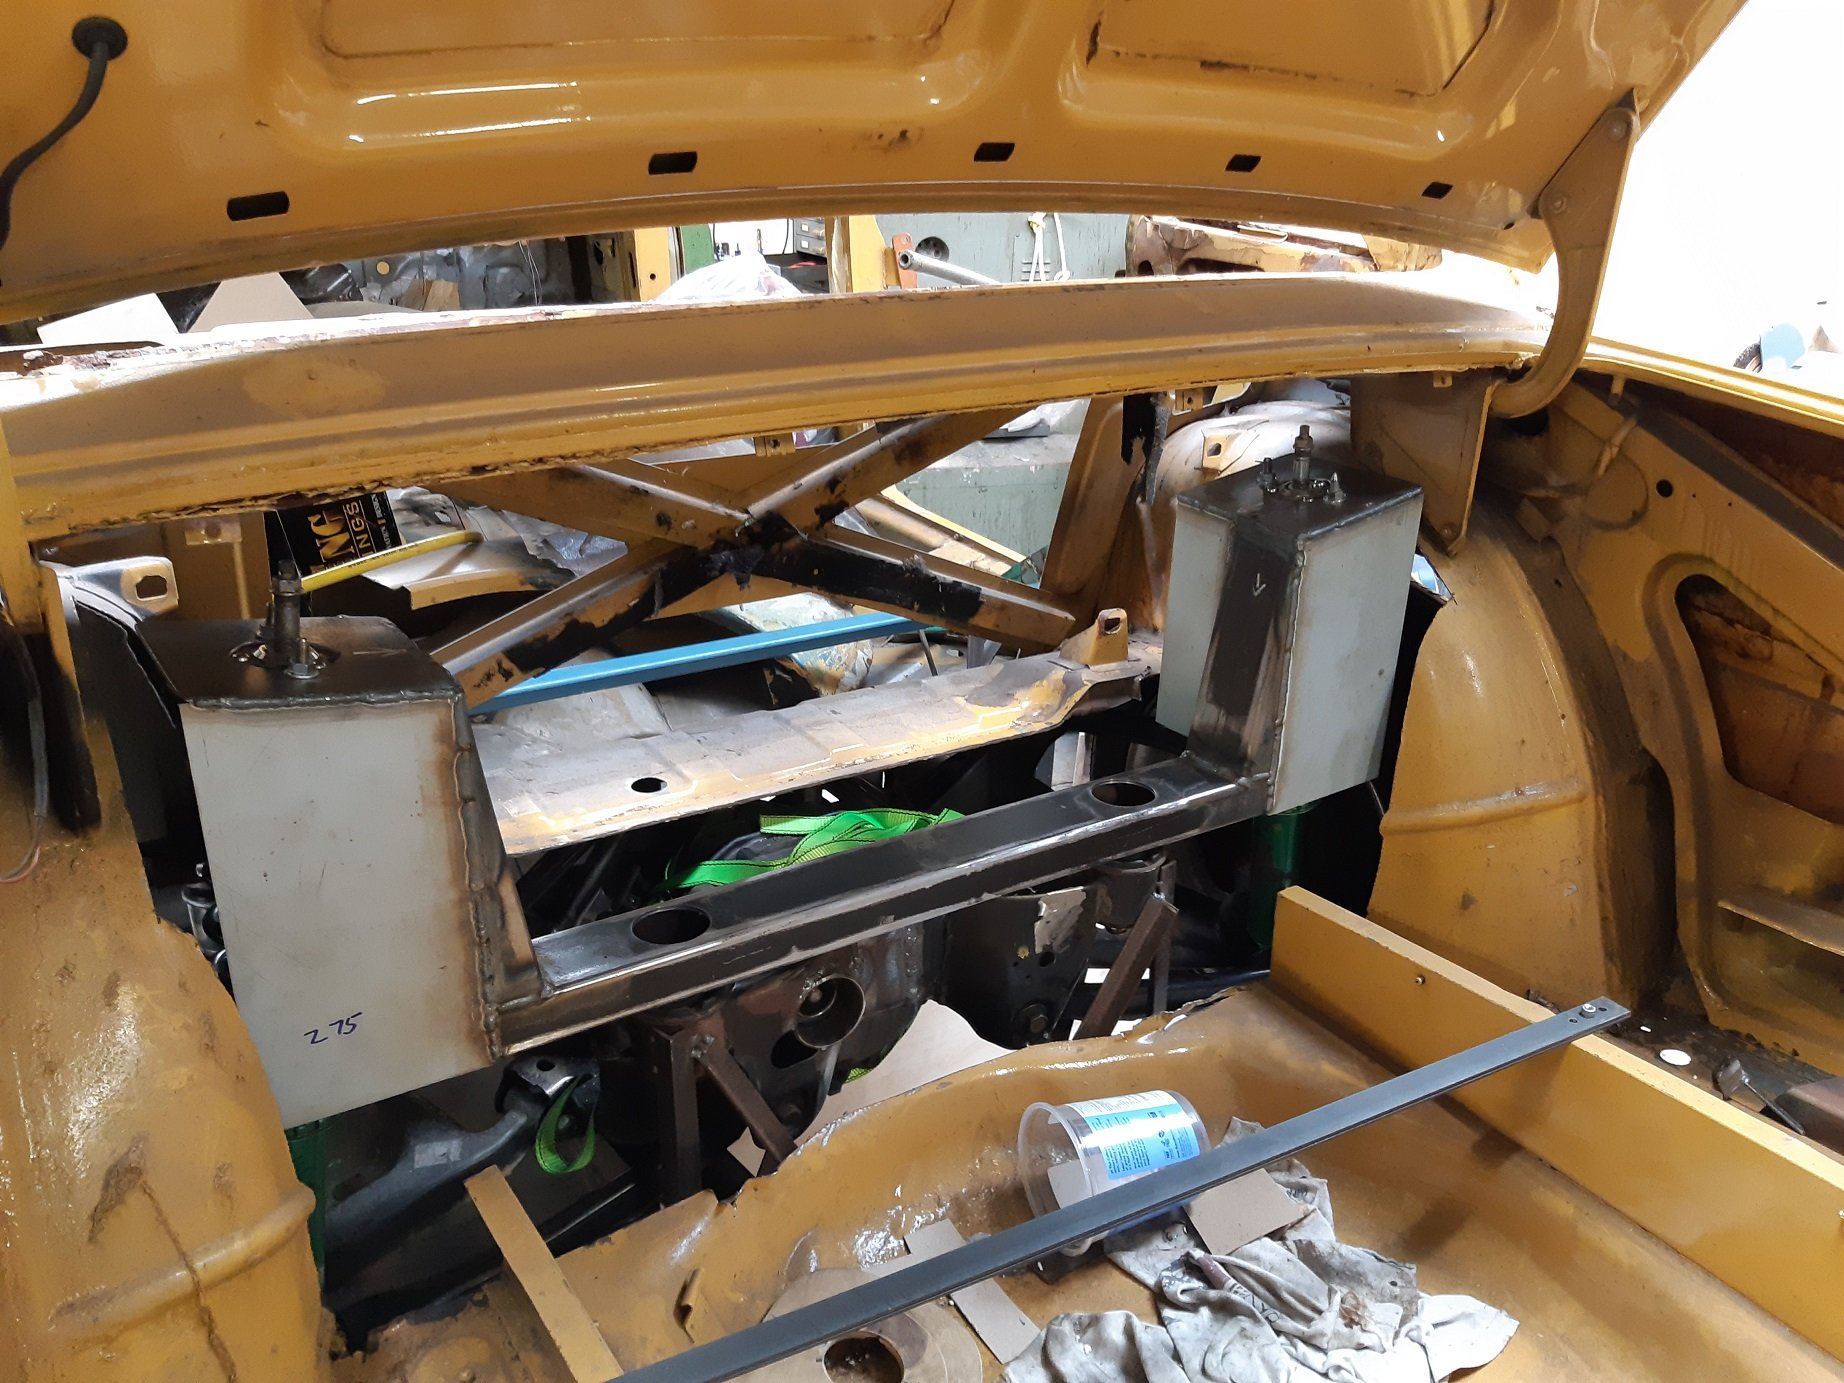
I got the subframe positioned in the car and bolted up to the repositioned front mounting studs.
I need to think of a way to temporarily attach the strut towers and box section to the car. But it needs to be removable so I can put it in the other car and have it in exactly the same place. I'm going to guess that the position of most of the bolt holes is "close enough" and won't be the same between the two cars
I'm definitely going to need a custom fuel tank.
-
8
-
-
- Popular Post
- Popular Post
Yesterday....
Precariously balanced really heavy thing done become unbalanced and had an oopsie.
I don't have a less precarious system for lifting it ~700mm into position. Scissor jacks are required for levelling.
Sigheth. Well, I did need to get back in there to relocate the two front mounting studs. They need to be 50mm closer together. Fortunately, they are attached only to a bolt-in jig. I'm gonna make another jig, with holes for the old and new stud locations, that will align on the existing studs, then attached to the body, that will allow me to detach the studs from the bolt-in jig, move them to the new holes, then reattach them to a modified bolt-in jig.
JIGS!
-
10
-
The Fabricator youtube welder guy.... On one of his rollcage videos he did all the scraping, then used a small blowtorch to burn out all the little scraps left.
-
- Popular Post
- Popular Post
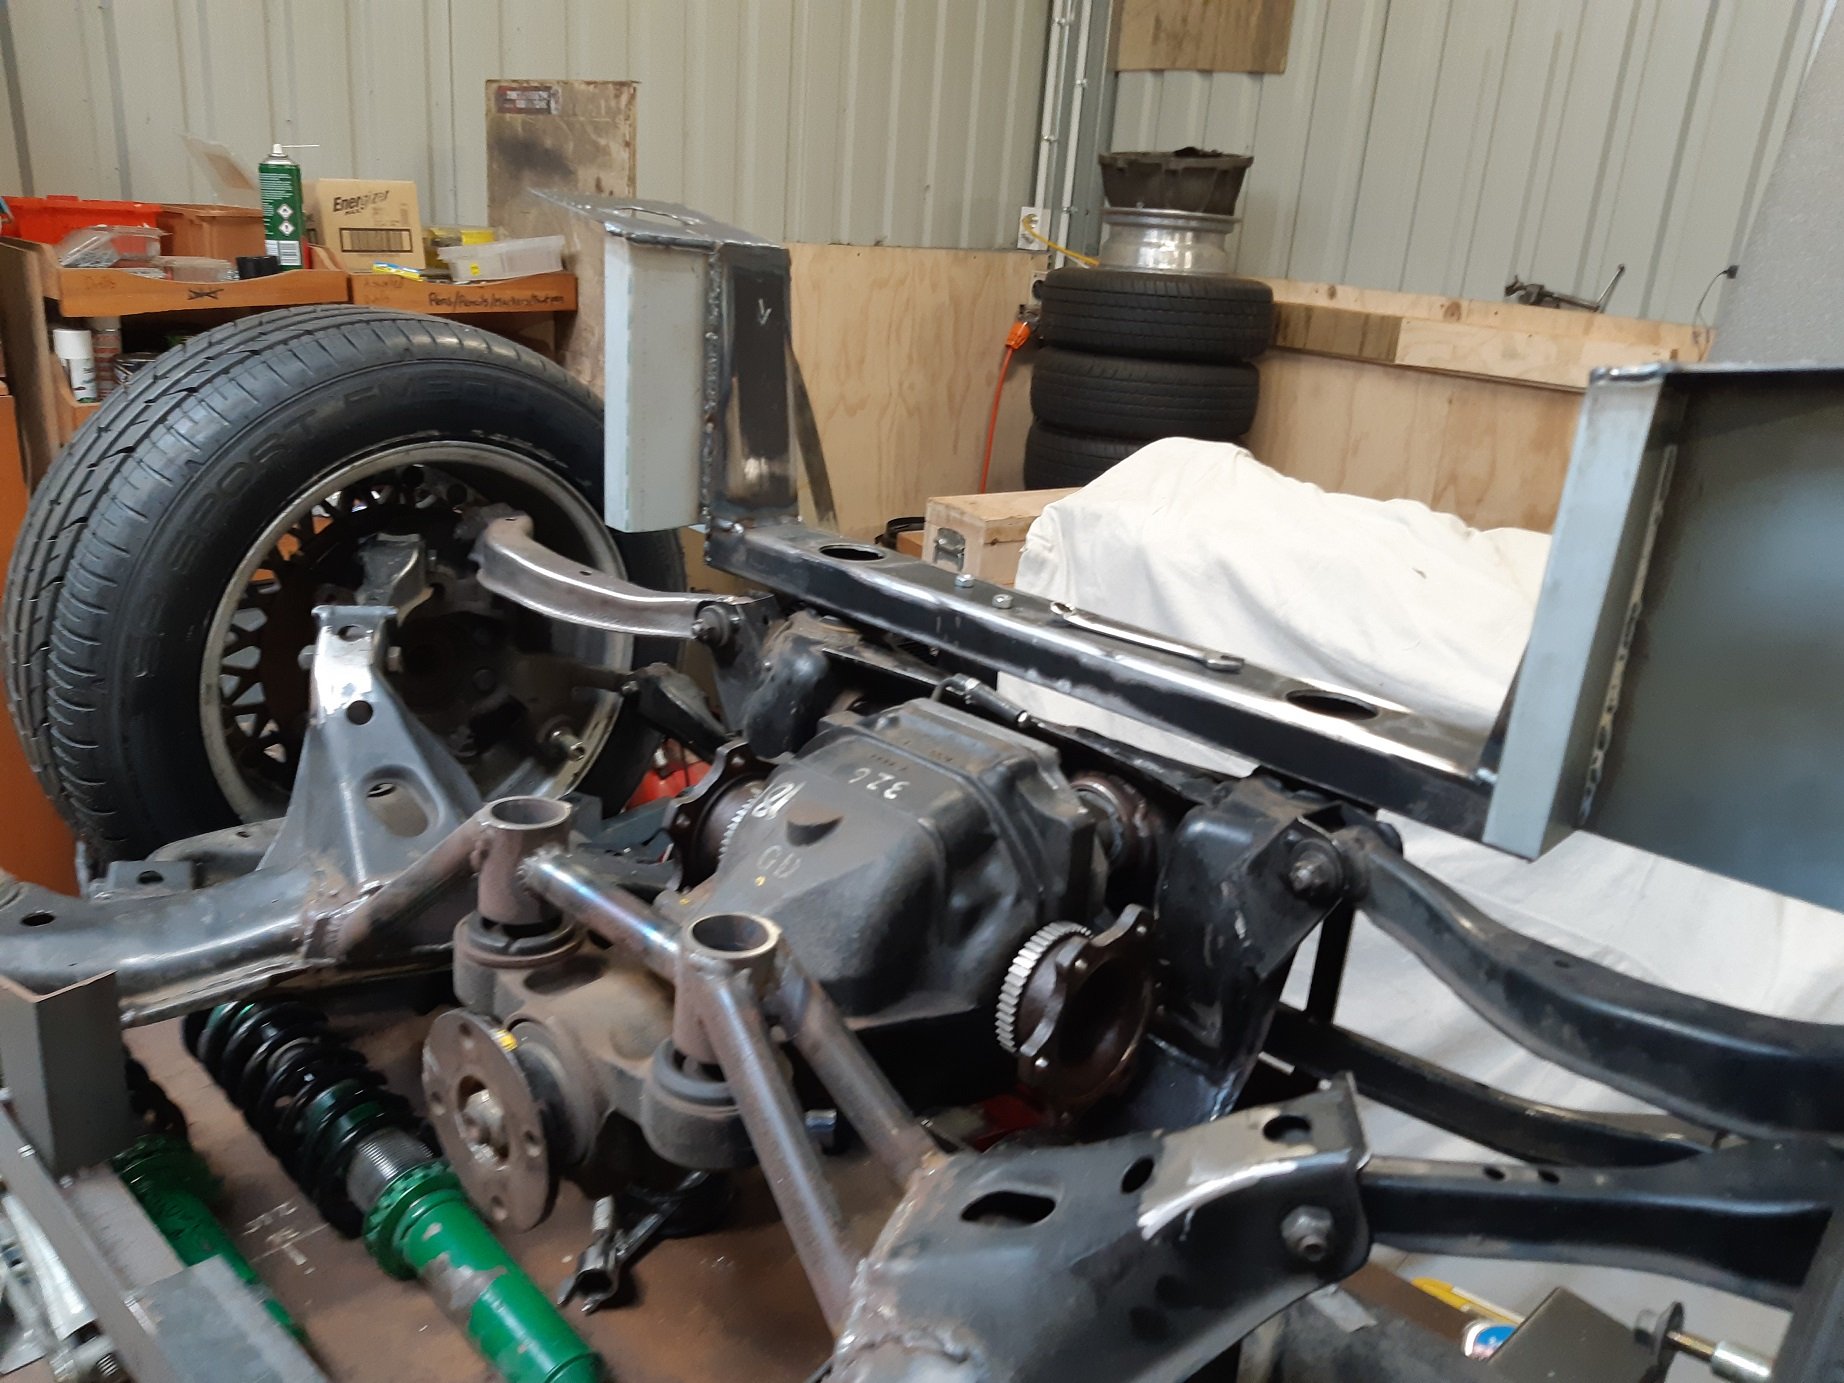
Finally at the back again. Made cross member MK2. Used some 1.6mm steel for the sides, 2mm for the top. The vertical metal bandsaw is right up there in the favourite tool list, it makes cutting this stuff up a piece of cake.
Zip zap welded it together.
Blurry photos.
I really hope I worked the heights out correctly. This should give me ~70mm bump and droop from ride height.
-
11
-
Hotrod yacht please. Install a stealthy jet boat jet thing for yacht drags at the boat traffic lights.
-
4
-
1
-
4
-
-
I bought mine from these guys. https://panelstore.co.nz/products/408-epotec-primer-kit-4l-1l-white
-
1
-
-
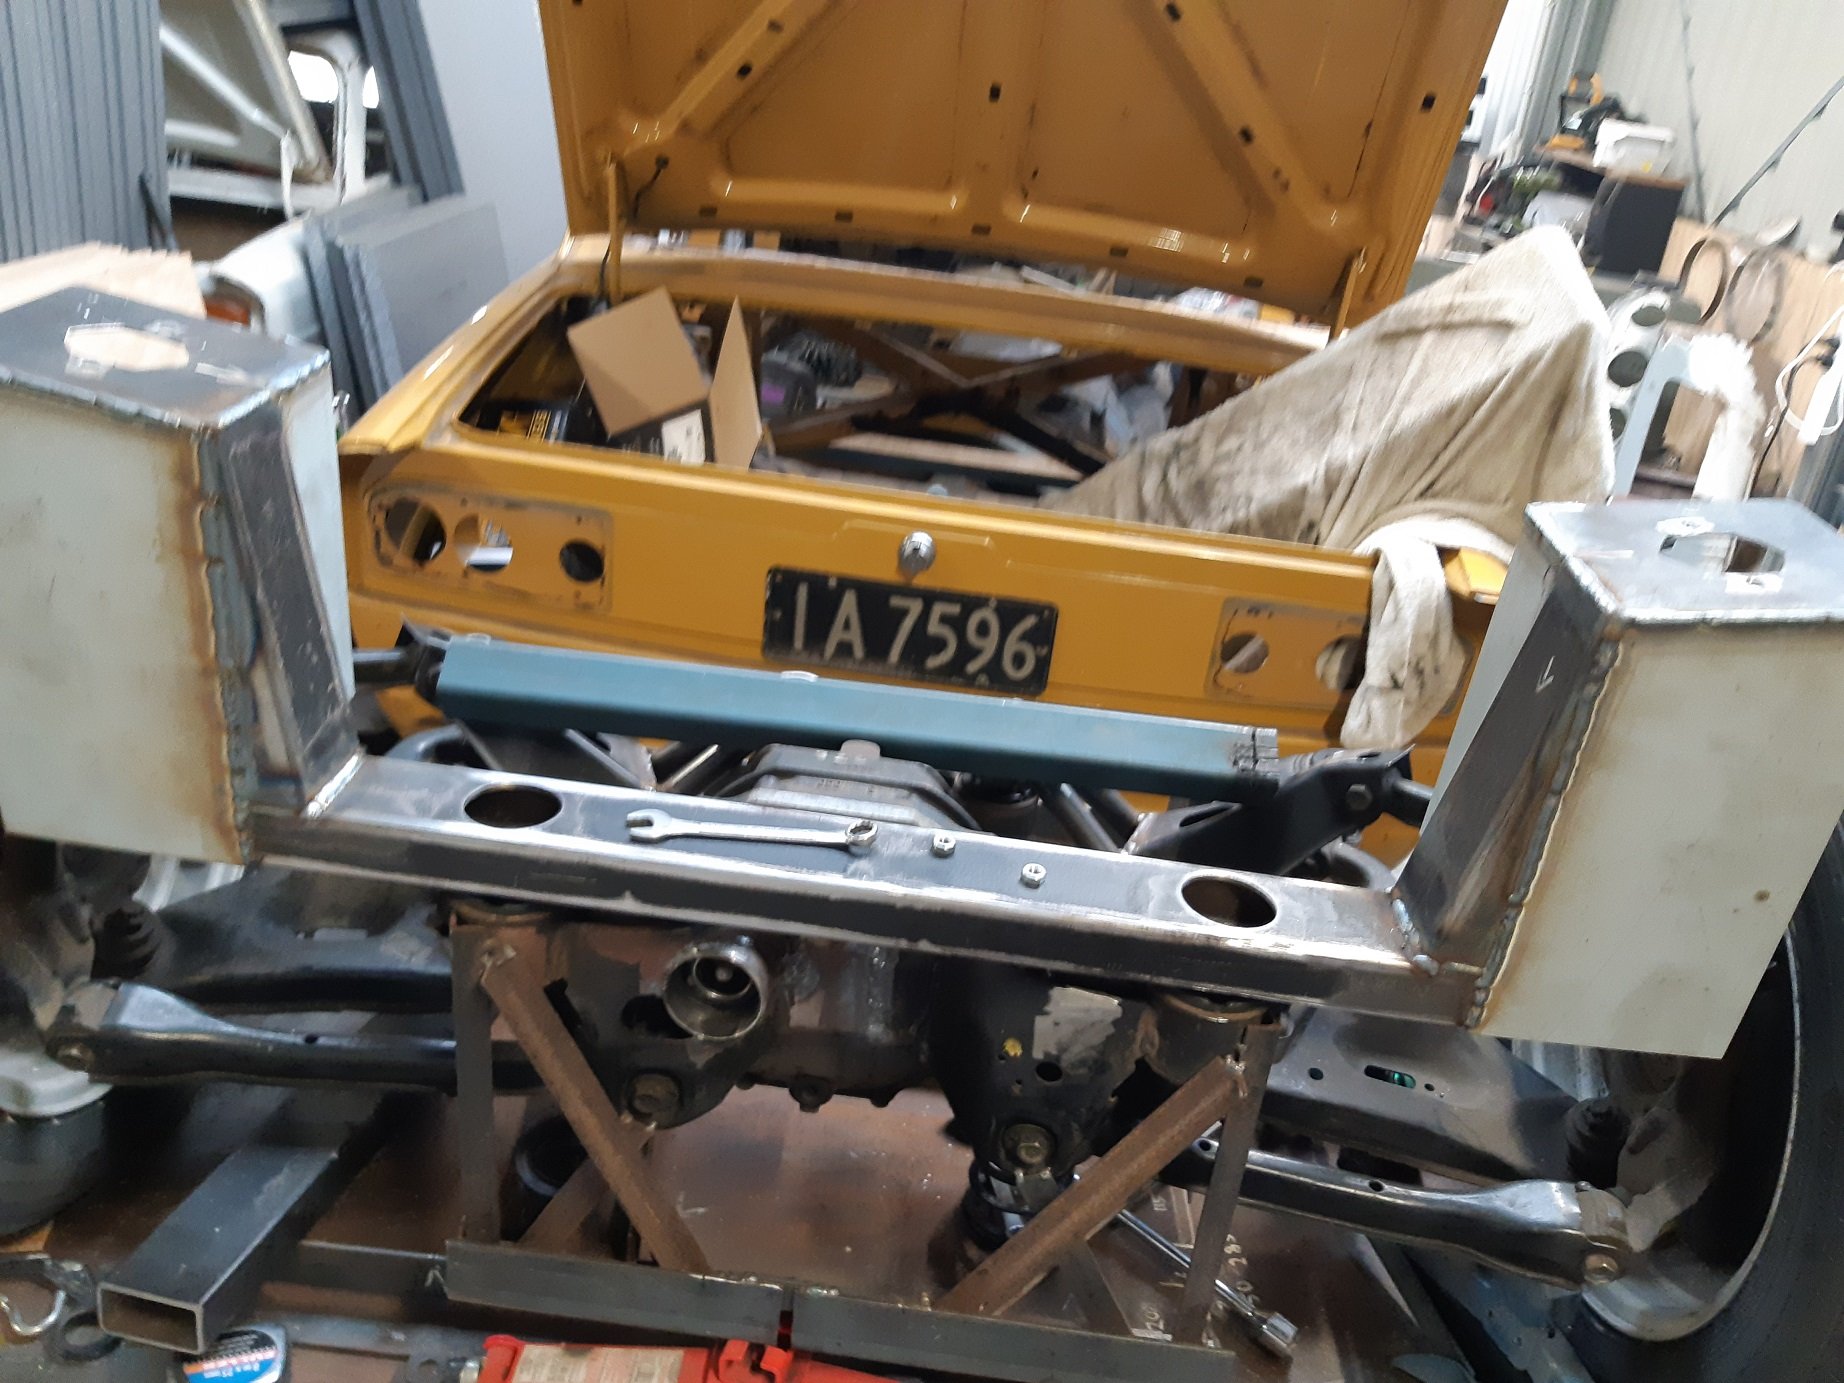
Made a fan shroud. Also made some clearance around the radiator cap, the radiator needed to move forward a little more.
-
9
-
-
1 hour ago, Abarth said:
What am I looking for with a auto darkening helmet? I was doing a bit of welding on the weekend and came away with scratchy feeling eyes. My current helmet is a entry level one, even though I jammed a new battery before I started I don’t think it’s as good as it should be, also it looks like it has grinder swarf melted into the lens so I’m 100% sure that isn’t helping.
In the market for a new one, recommendations? My eyeballs thank you in advance
")
There should be a plastic cover over the lens that you replace. The std rectangle ones are only a few $ at Mitre10.
I bought one of these Optrels two years ago, it may be an old model now. It was pretty expensive for me, $800. But the clarity in dark and not dark mode is fantastic, a massive improvement over my previous one! It also has a big viewing angle, not like the typical letterbox view.
https://www.prolineindustrial.co.nz/product/optrel-panoramaxx-auto-darkening-welding-helmet-204544
I'd definitely recommend it if your budget can accommodate it.
Note: My previous experience has been with a cheap non-auto darkening helmet. Then a ~$200 auto darkening helmet. Now with the expensive optrel.
-
1
-
-
- Popular Post
- Popular Post
EDIT: In the discussion thread... I solved the leaky clamps by spraying silicone spray between the hose and clamp allowing it to be tightened without pinching the hose.
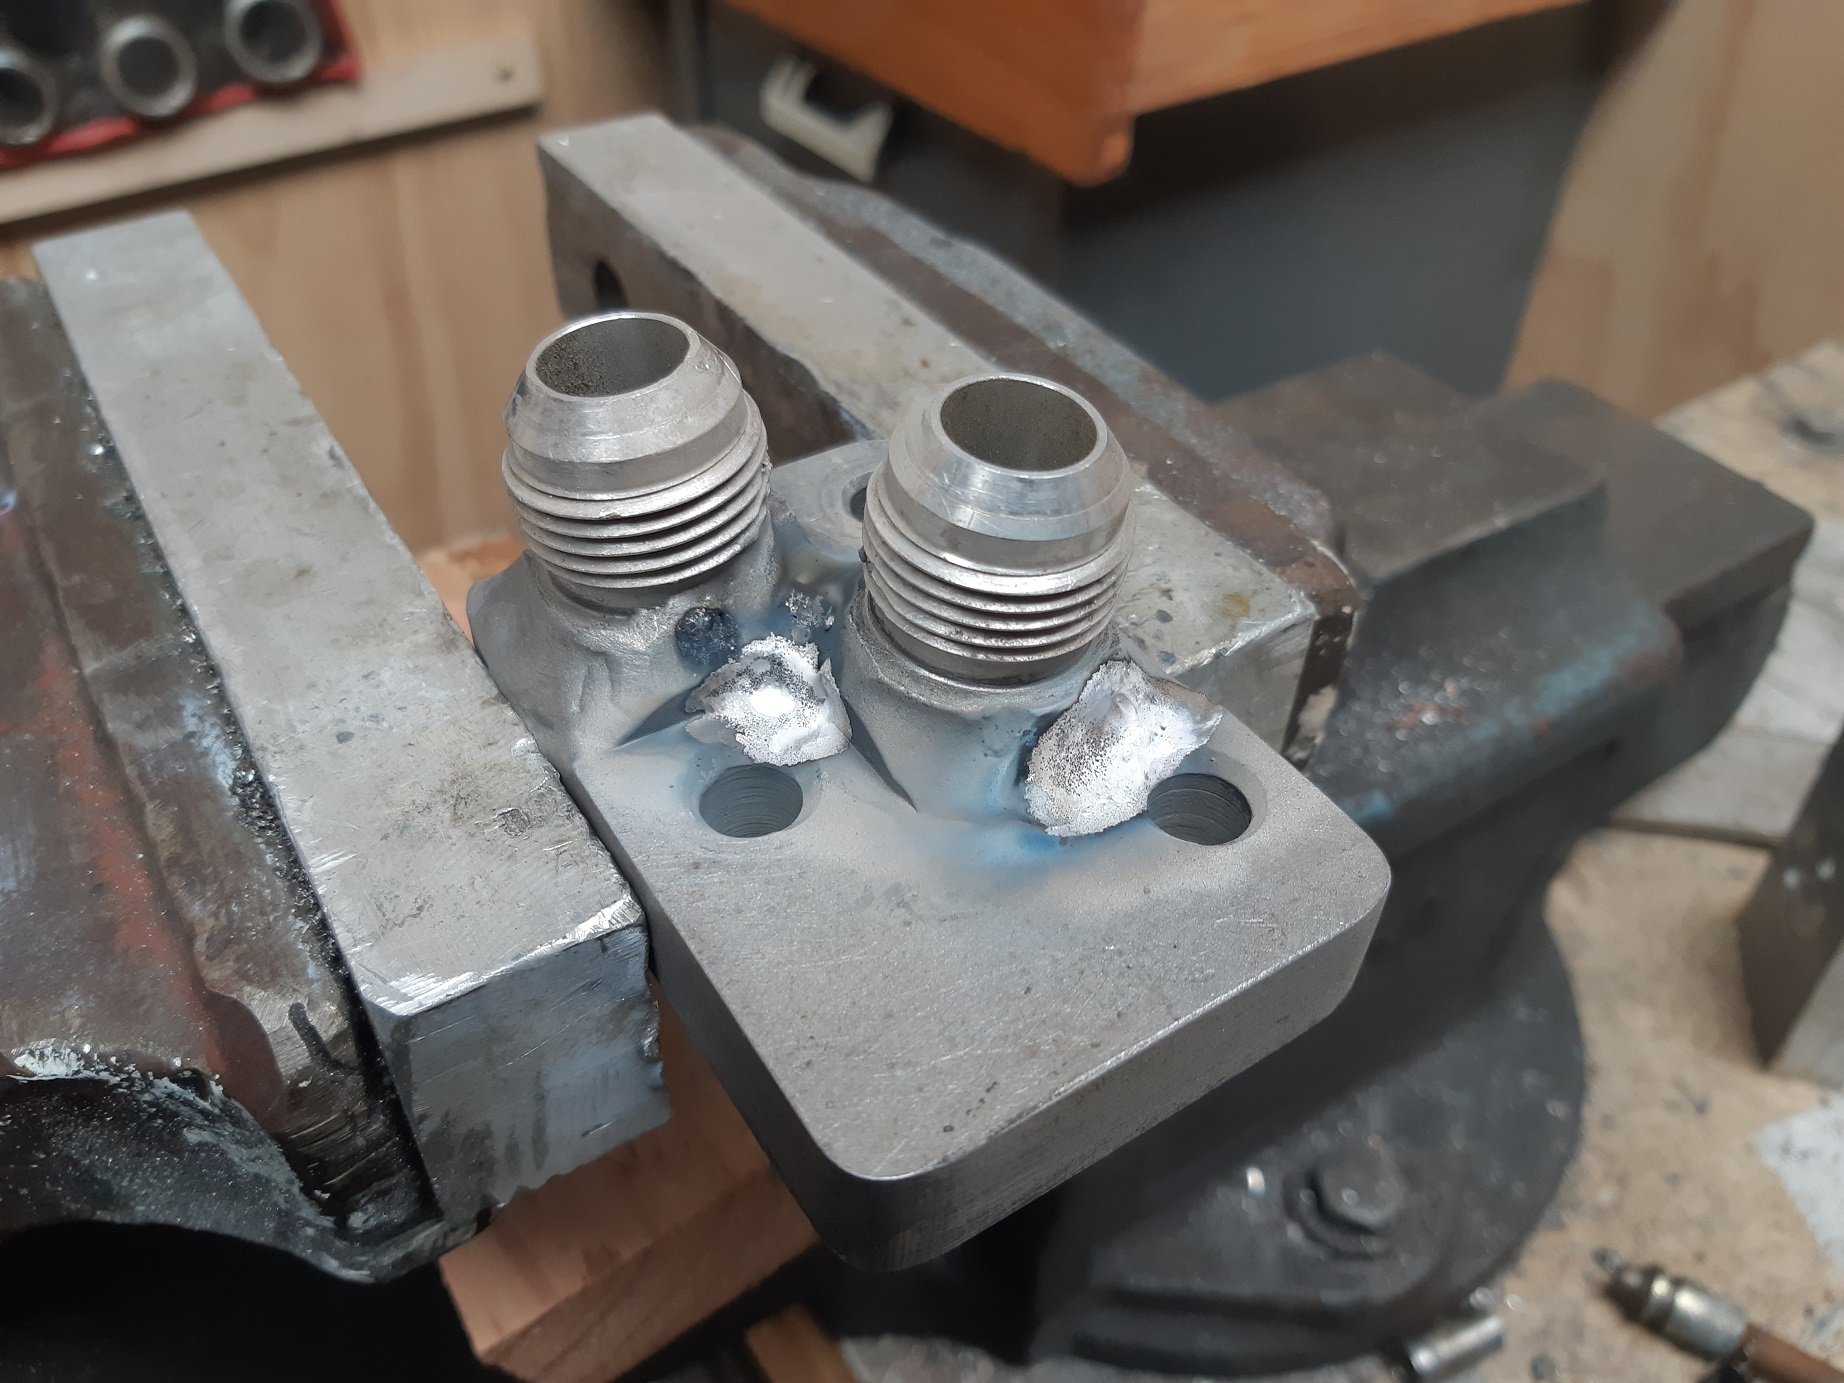
I found the oil leak eventually. When I welded on the AN fittings to my remote filter adapter plate, I had to machine a relief into the weld for bolt clearance. Doing this had created a tiny little pin hole, I could barely see it but when I removed the bolt and ran the engine I could see a weep of oil coming out of apparently nowhere.
So I bathed it in acetone, stripped off all the paint, spot blasted the weld area with the sand blaster then bathed it in acetone again. Then dried it with the heat gun.
Luck seemed to be with me and I managed to get a puddle going without it turning to a pile of slag. The weld on the left didn't obviously leak, but it had a suspicious looking dot, so I remelted it just in case.
Forgive the welding, I am still a tig novice. This fix is probably only the 3rd time I've welded aluminium.
The engine bay part of the loom wrapping is basically done, I used that expanding sleeve stuff. I wouldn't say I'm ecstatic with the result, but I suppose it's acceptable.
I also sorted out the wiring for the alternator so the charging circuit works now.
-
15
-
10 hours ago, flyingbrick said:
I know many pro welders that use a dab of stainless when shit gets bubbly.. never even seen a failure coz of it.
I must get some stainless rod and try this! I assume that unless you are welding safety critical parts for NDT, it won't matter using a bit of stainless?
-
1
-
-
1 hour ago, Goat said:
Hello welders,
TIG filler rods.
What type and diameter would I need for the following:
- Mild steel exhausts, panel steel and motorbike frames. BOC seems to only offer 1.6 and 2.4mm diameter. 1.6 fine for what I need?
- Stainless exhausts (is this usually 304?)
Hearts
Where is the best place to get this from online?
I got my tig stuff from these guys, just because it's all online. https://www.prolineindustrial.co.nz/cat/welding-equipment/tig-welding/tig-filler-wires
I am still a novice, but I used 1.6mm for my mild steel exhaust. It went okay, you have to be really crazy with cleaning the weld area, any trace of oil or dirt and the weld fills with bubbles then you have to grind out and start again.
-
1
-
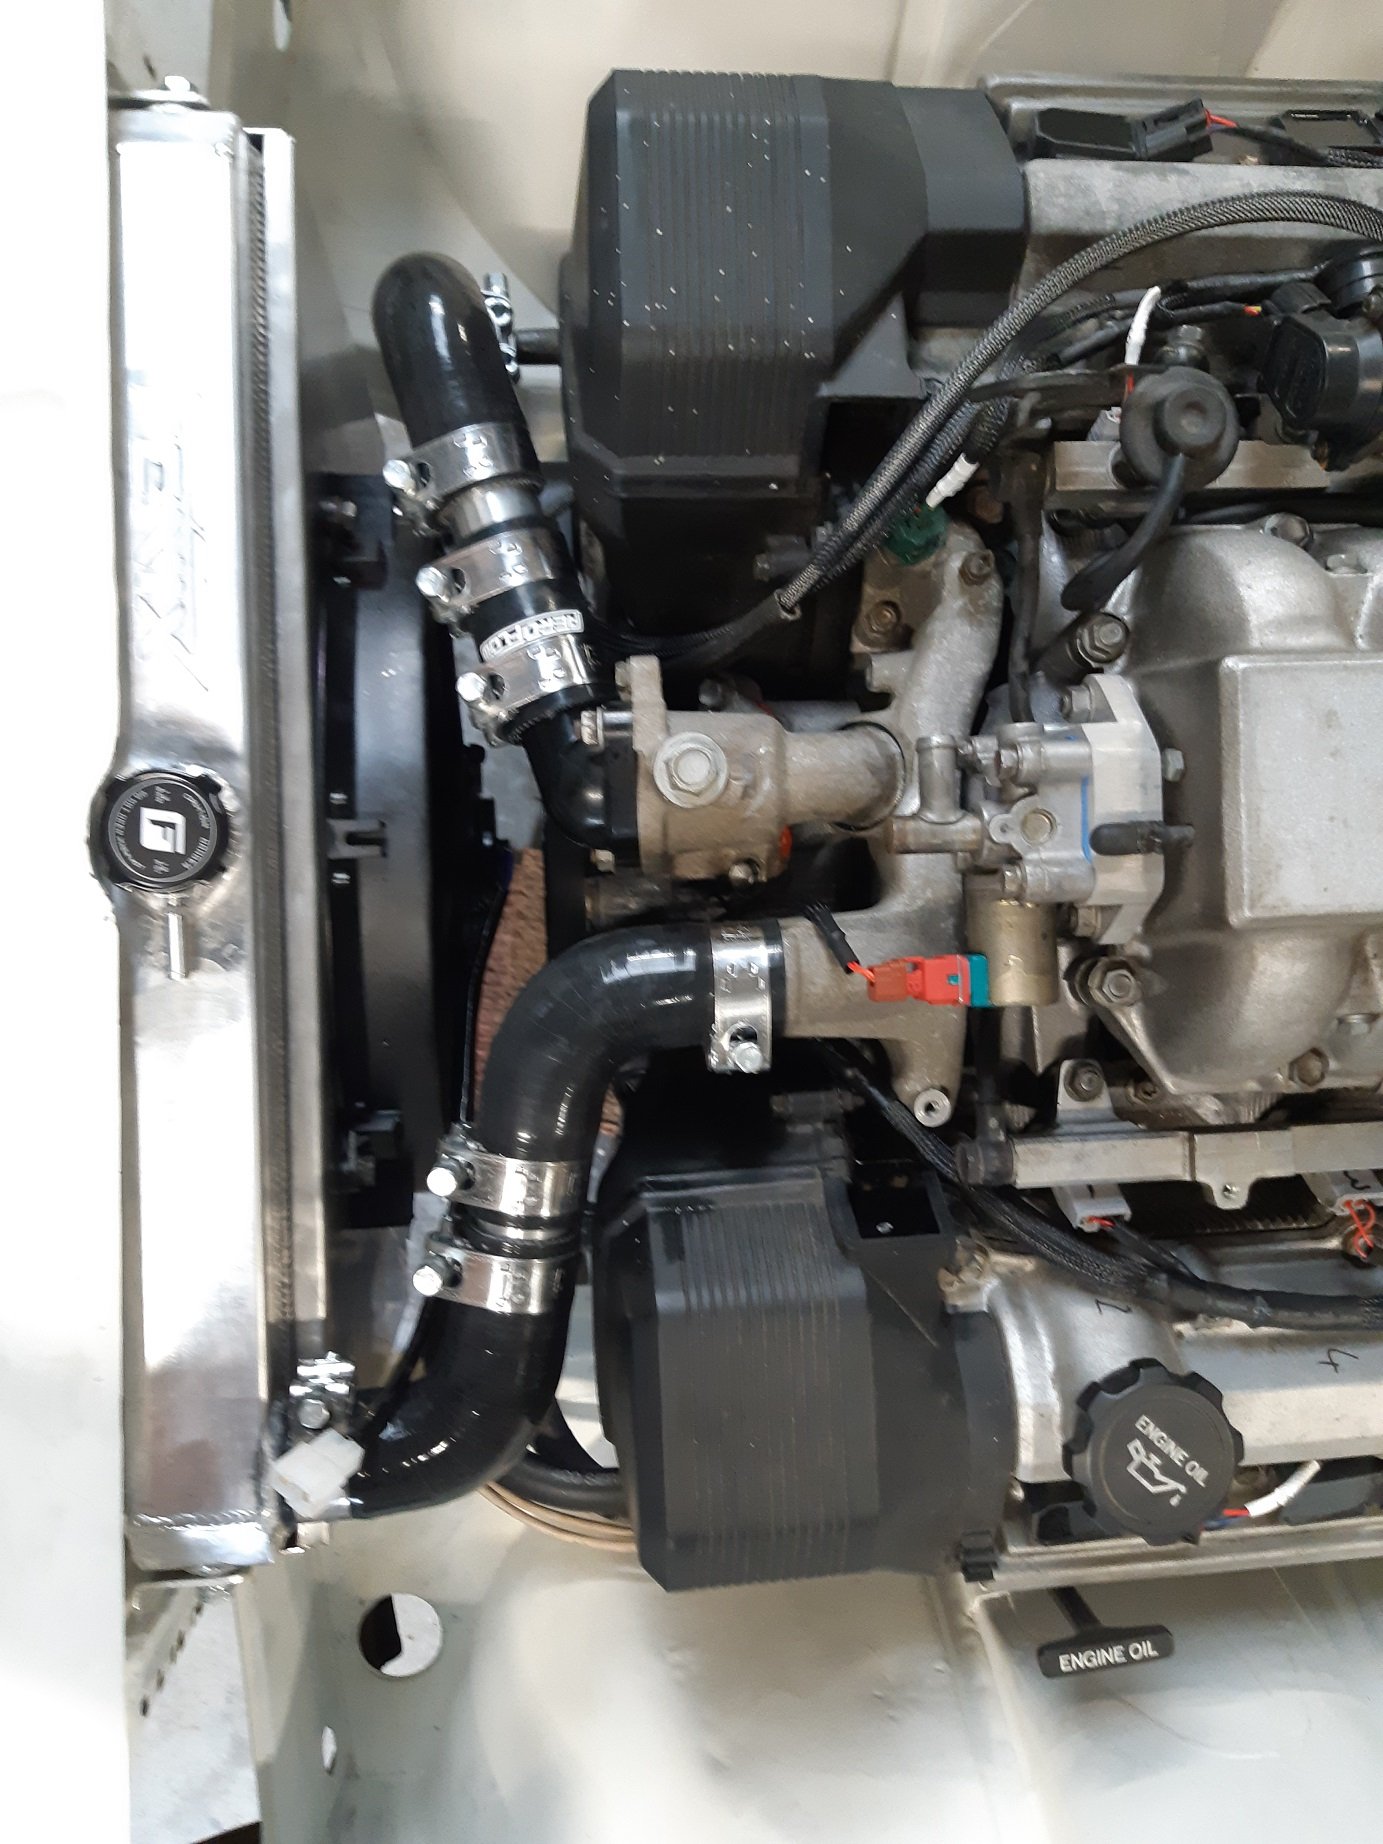
Lubricating the hose under the clamp with silicone spray so they don't pinch when tightening appears to have fixed the leaks.
Now I'm trying to identify the cause of an oil leak at the adapter plate for the remote mount oil filter. I'm hoping it's just the figure 8 o-ring that needs replacing, not a pin hole in the weld.
-
2
-
-
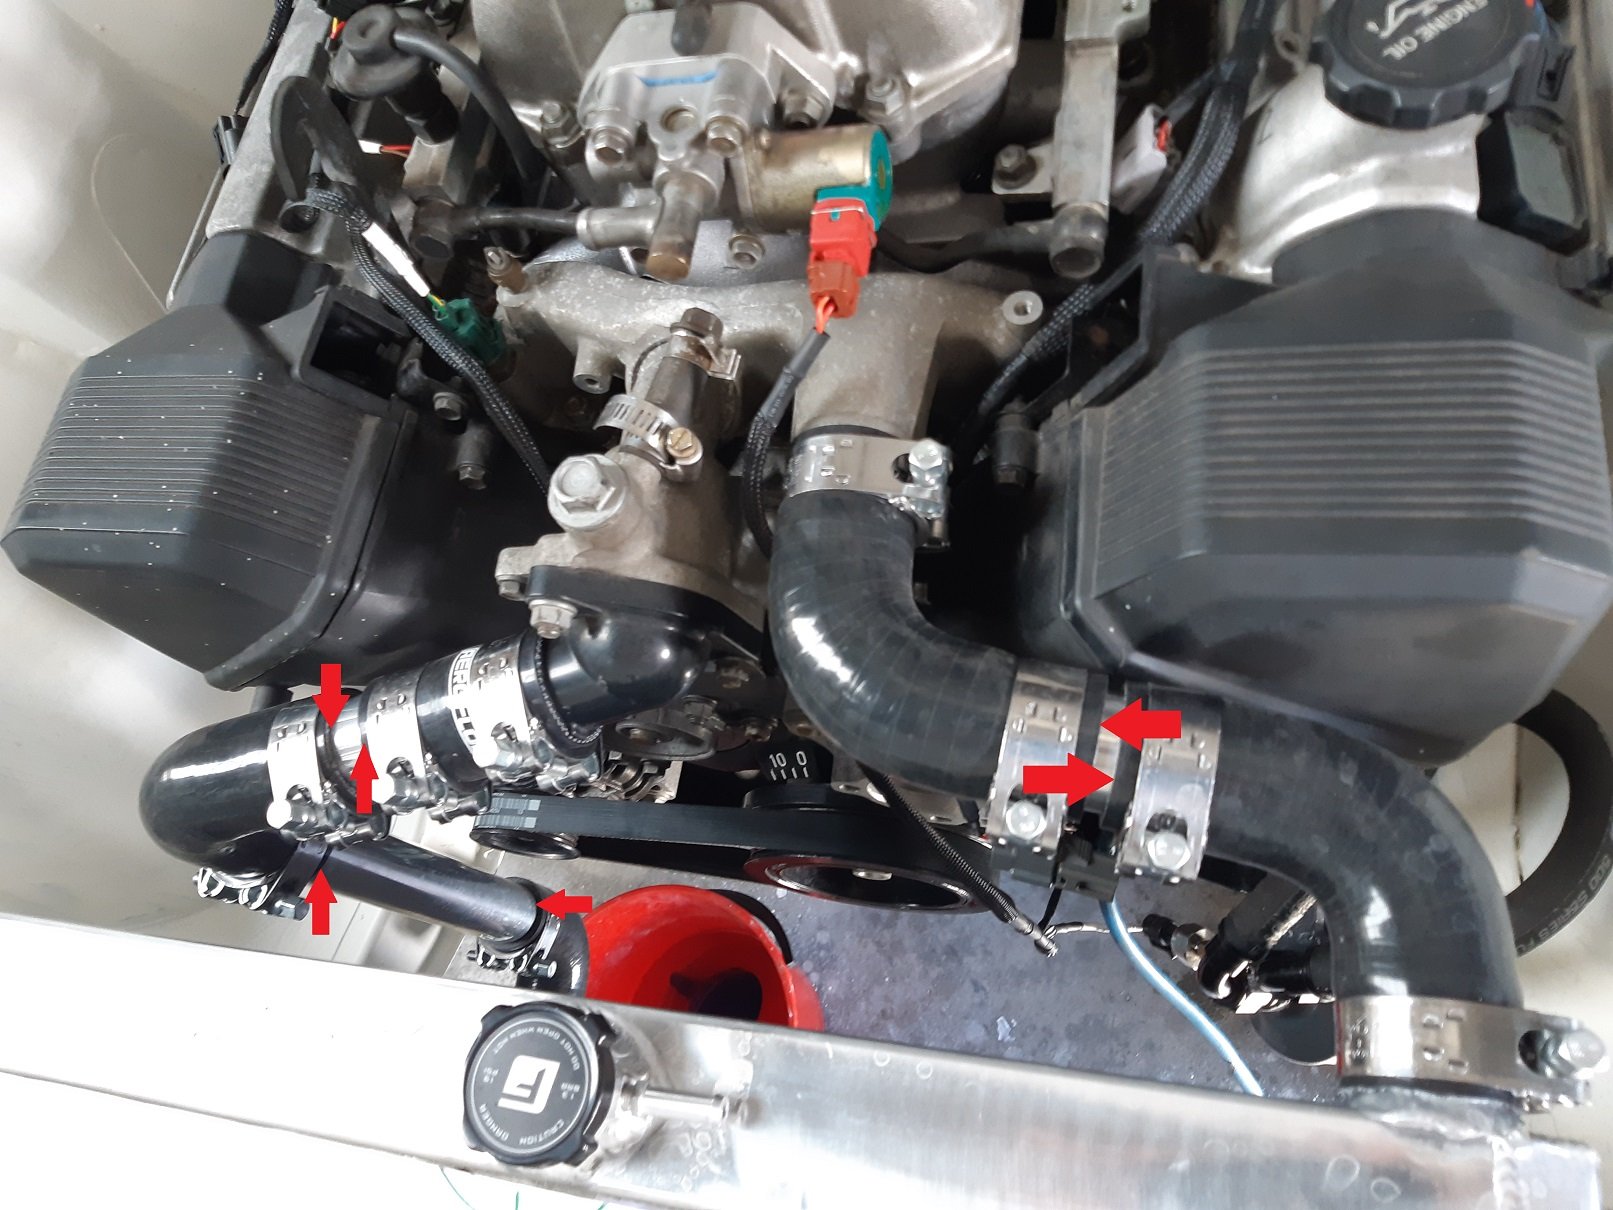
Internet has suggested a lubricant between the silicone hose and the clamp allowing it to slip and not pinch the hose.
I'll try that before I abandon $60 of clamps.
-
1
-
-
45 minutes ago, mjrstar said:
In my experience your leaks would disappear if you threw away those cool looking clamps and just used budget worm clamps.
The t-bolt clamps can work OK-ish when you gave a barb or bead to shoulder to snug up against but seem to be near useless when clamping over a bit of parallel tube.
Damn, I got the cool looking clamps because there were going to be so many of them and right in your face.
I did put a bead on the aluminium tube, using the modified vice grip method. Maybe it will help if I move the clamp right on top of the bead, rather than beside it?
-
- Popular Post
- Popular Post
Pieced together the radiator pipes. SO. MANY. CLAMPS! It was actually slightly cheaper this way than buying some random rubber pipes with the right bends and cutting them up.
It was still far more than I was expecting.
I have cranked the clamps up as tight as I can but I still have leaks when the engine warms up. A bunch of leaks.

It seems to be sealing okay at the engine and radiator connections. I'm thinking that since the joints where it is leaking are almost never going to need taking apart, I'll squirt some silicone sealer between the pipe and hose, then put the clamps on again.
-
10
-
10 hours ago, JustHarry said:
Is it possible to make the alternator moveable like most things?
In theory, yes. But I don't think it's advised because the mounts are single shear when most pivoting alternators are double shear. In my scenario, I don't have the clearance to move it anywhere.
Some people make a bracket to mount an adjustable idler pulley. But this "stretch fit" belt is by far the easiest option. I just don't want to find that it is possible to be too tight and damage the alternator bearing.
I tried looking up multi-v belt tension specs, but they required specialist measuring tools.
-
Can a 5 rib poly-v belt be too tight and damage the alternator bearings or something? Or are the bearings stronger than the belt?
I am running an alternator only setup on my 1UZFE, so there is no tensioner. An internet person recommended a gates stretch-fit belt of a particular size that fits.
I looked up the special tool used to install the stretch-fit belts then made do with random stuff that was the appropriate shape.
I got the belt on, but it's pretty dang tight. Should I be concerned for my alternator?
-
2 hours ago, WhangareiKE70 said:
I genuinely don’t know if you are trying to be rude or if that’s just how it is coming across.
Clearly, I made a mistake buying an Apple product for this, but that’s for the same reason I posted this topic asking for advice, I do not understand this stuff.
I was of the incorrect impression that because the app was available for both platforms then it would work. Semi-expensive mistake, but such is life.
From reading that list it doesn’t seem like any desirable ECUs are compatible with the Apple products.In saying that, even the Android/Windows list says that the current Link G4X range is incompatible, and Hatltech isn’t listed either, so maybe the Realdash app isn’t suitable for me anyway.
I'm am not trying to be rude. I'm from IT, I tend to over explain sometimes.
-
1
-
-
8 minutes ago, WhangareiKE70 said:
Well that’s dumb. But I mean worst comes to worst I just bought myself a tablet. Then I have to get another something for dash use.
On that thread, did they mention if any particular type of ECU was compatible with Apple products?Hyperblade posted the Link forum link along with GIANT screenshots. near the bottom of the first page, Adam, the Link guy, says "iOS doesn’t support usb serial port or Bluetooth serial port so it will only work with a few ECU’s that have an Apple approved WiFi bridge.".
So it sounds like if you want to use an iOS tablet, you need an ECU with Wifi... but it also has to be Apple approved Wifi.
If you just go to the Realdash support page, they list the iOS approved ECU's.


Adoom's 1972 Triumph 2000
in Projects and Build Ups
Posted
Can't change my mind now...
I also removed the spring mount and chassis rail as it gets in the way of one of suspension mounts.
I'll be making a new chassis rail on the inside, that boxes in the corner between the floor and the wheel well which will wrap around to join to the sill. That will tie into the new box section between the towers and the new front subframe mounts.
Those two panels either side of the spare wheel well will become chassis rails to tie the framing at the rear of the boot with the strut tower box section and have plates inside with captive nuts for towbar mounts.