Jeffs_Emporium
-
Posts
1220 -
Joined
-
Last visited
-
Days Won
5
Everything posted by Jeffs_Emporium
-

Jesse's 1988 Toyota Liteace KM36
Jeffs_Emporium replied to Jeffs_Emporium's topic in Projects and Build Ups
A fella from the nz Datsun parts Facebook page was kind enough to post some b310 engine mounts up which have worked perfectly. They are bout 12mm thicker with an offset pin. All of this time under there ive noticed the gearbox rear seal needs replacing. I'd drained the Gearbox oil incase I needed to remove driveshaft when doing that release bearing so its no bother to swap a new seal in while I'm here. Those mounts have given me a good amount of lift on the box, pretty chuffed. I'm awaiting a bung for the sq engineering rear water outlet since I'm not running ecu or cold start sensors. That rear seal and an inline fuel filter. Radiator is mounted for good, fan clears engine by 5mm. Nearly ready to fill with water and bring up to temp and watch all the leaks =/
- 131 replies
-
- 19
-

-

-
Jesse's 1988 Toyota Liteace KM36
Jeffs_Emporium replied to Jeffs_Emporium's topic in Projects and Build Ups
2.5m of heater hose and 10 clamps later
- 131 replies
-
- 13
-
-
Jesse's 1988 Toyota Liteace KM36
Jeffs_Emporium replied to Jeffs_Emporium's topic in Projects and Build Ups
-
Jesse's 1988 Toyota Liteace KM36
Jeffs_Emporium replied to Jeffs_Emporium's topic in Projects and Build Ups
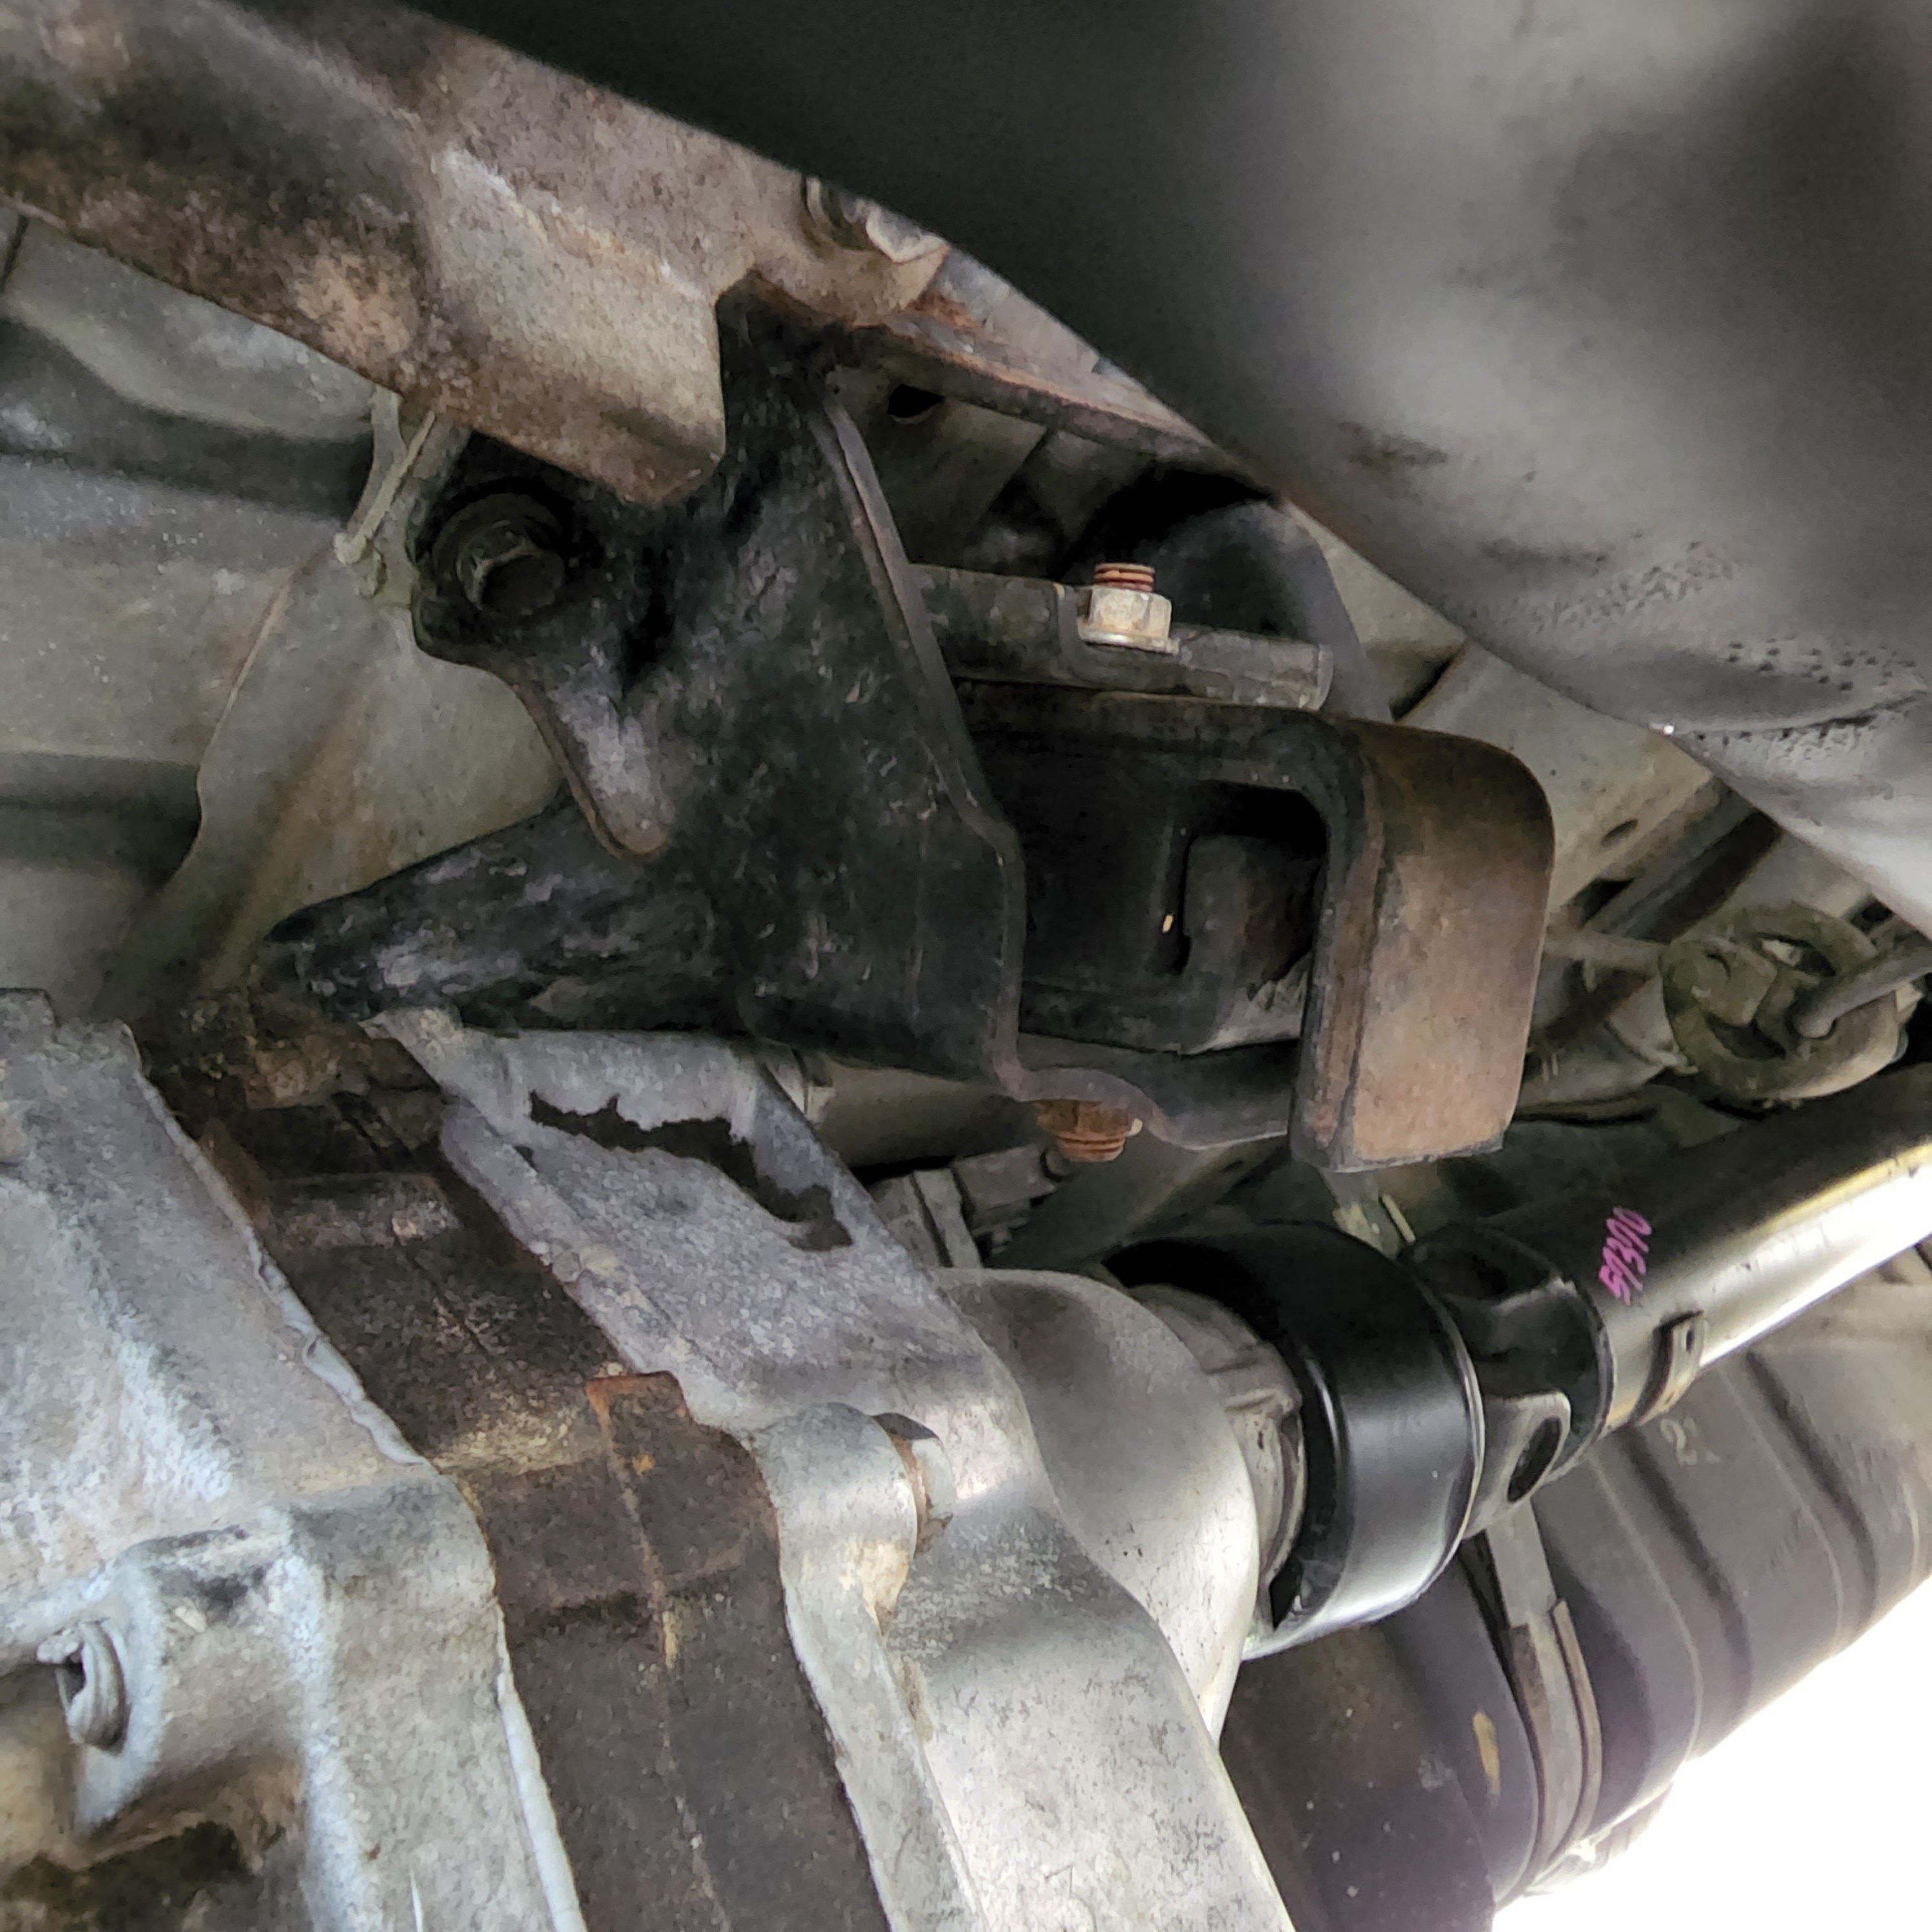
Searched the kelpro catalogue and these bottom two nissan ones look pretty good. Except the dimensions shown vs the written measurement seems to have been mixed up. One looks like it's from b110 engine mount. A quick check shows a12 is 97kg and g52 is 35kg so they should be up to the task? Rock auto has a pair $35 delivered but they won't arrive until April 4th so if anyone reading has a used pair kicking around to confirm that would be handy then I can order new also.
-
Jesse's 1988 Toyota Liteace KM36
Jeffs_Emporium replied to Jeffs_Emporium's topic in Projects and Build Ups
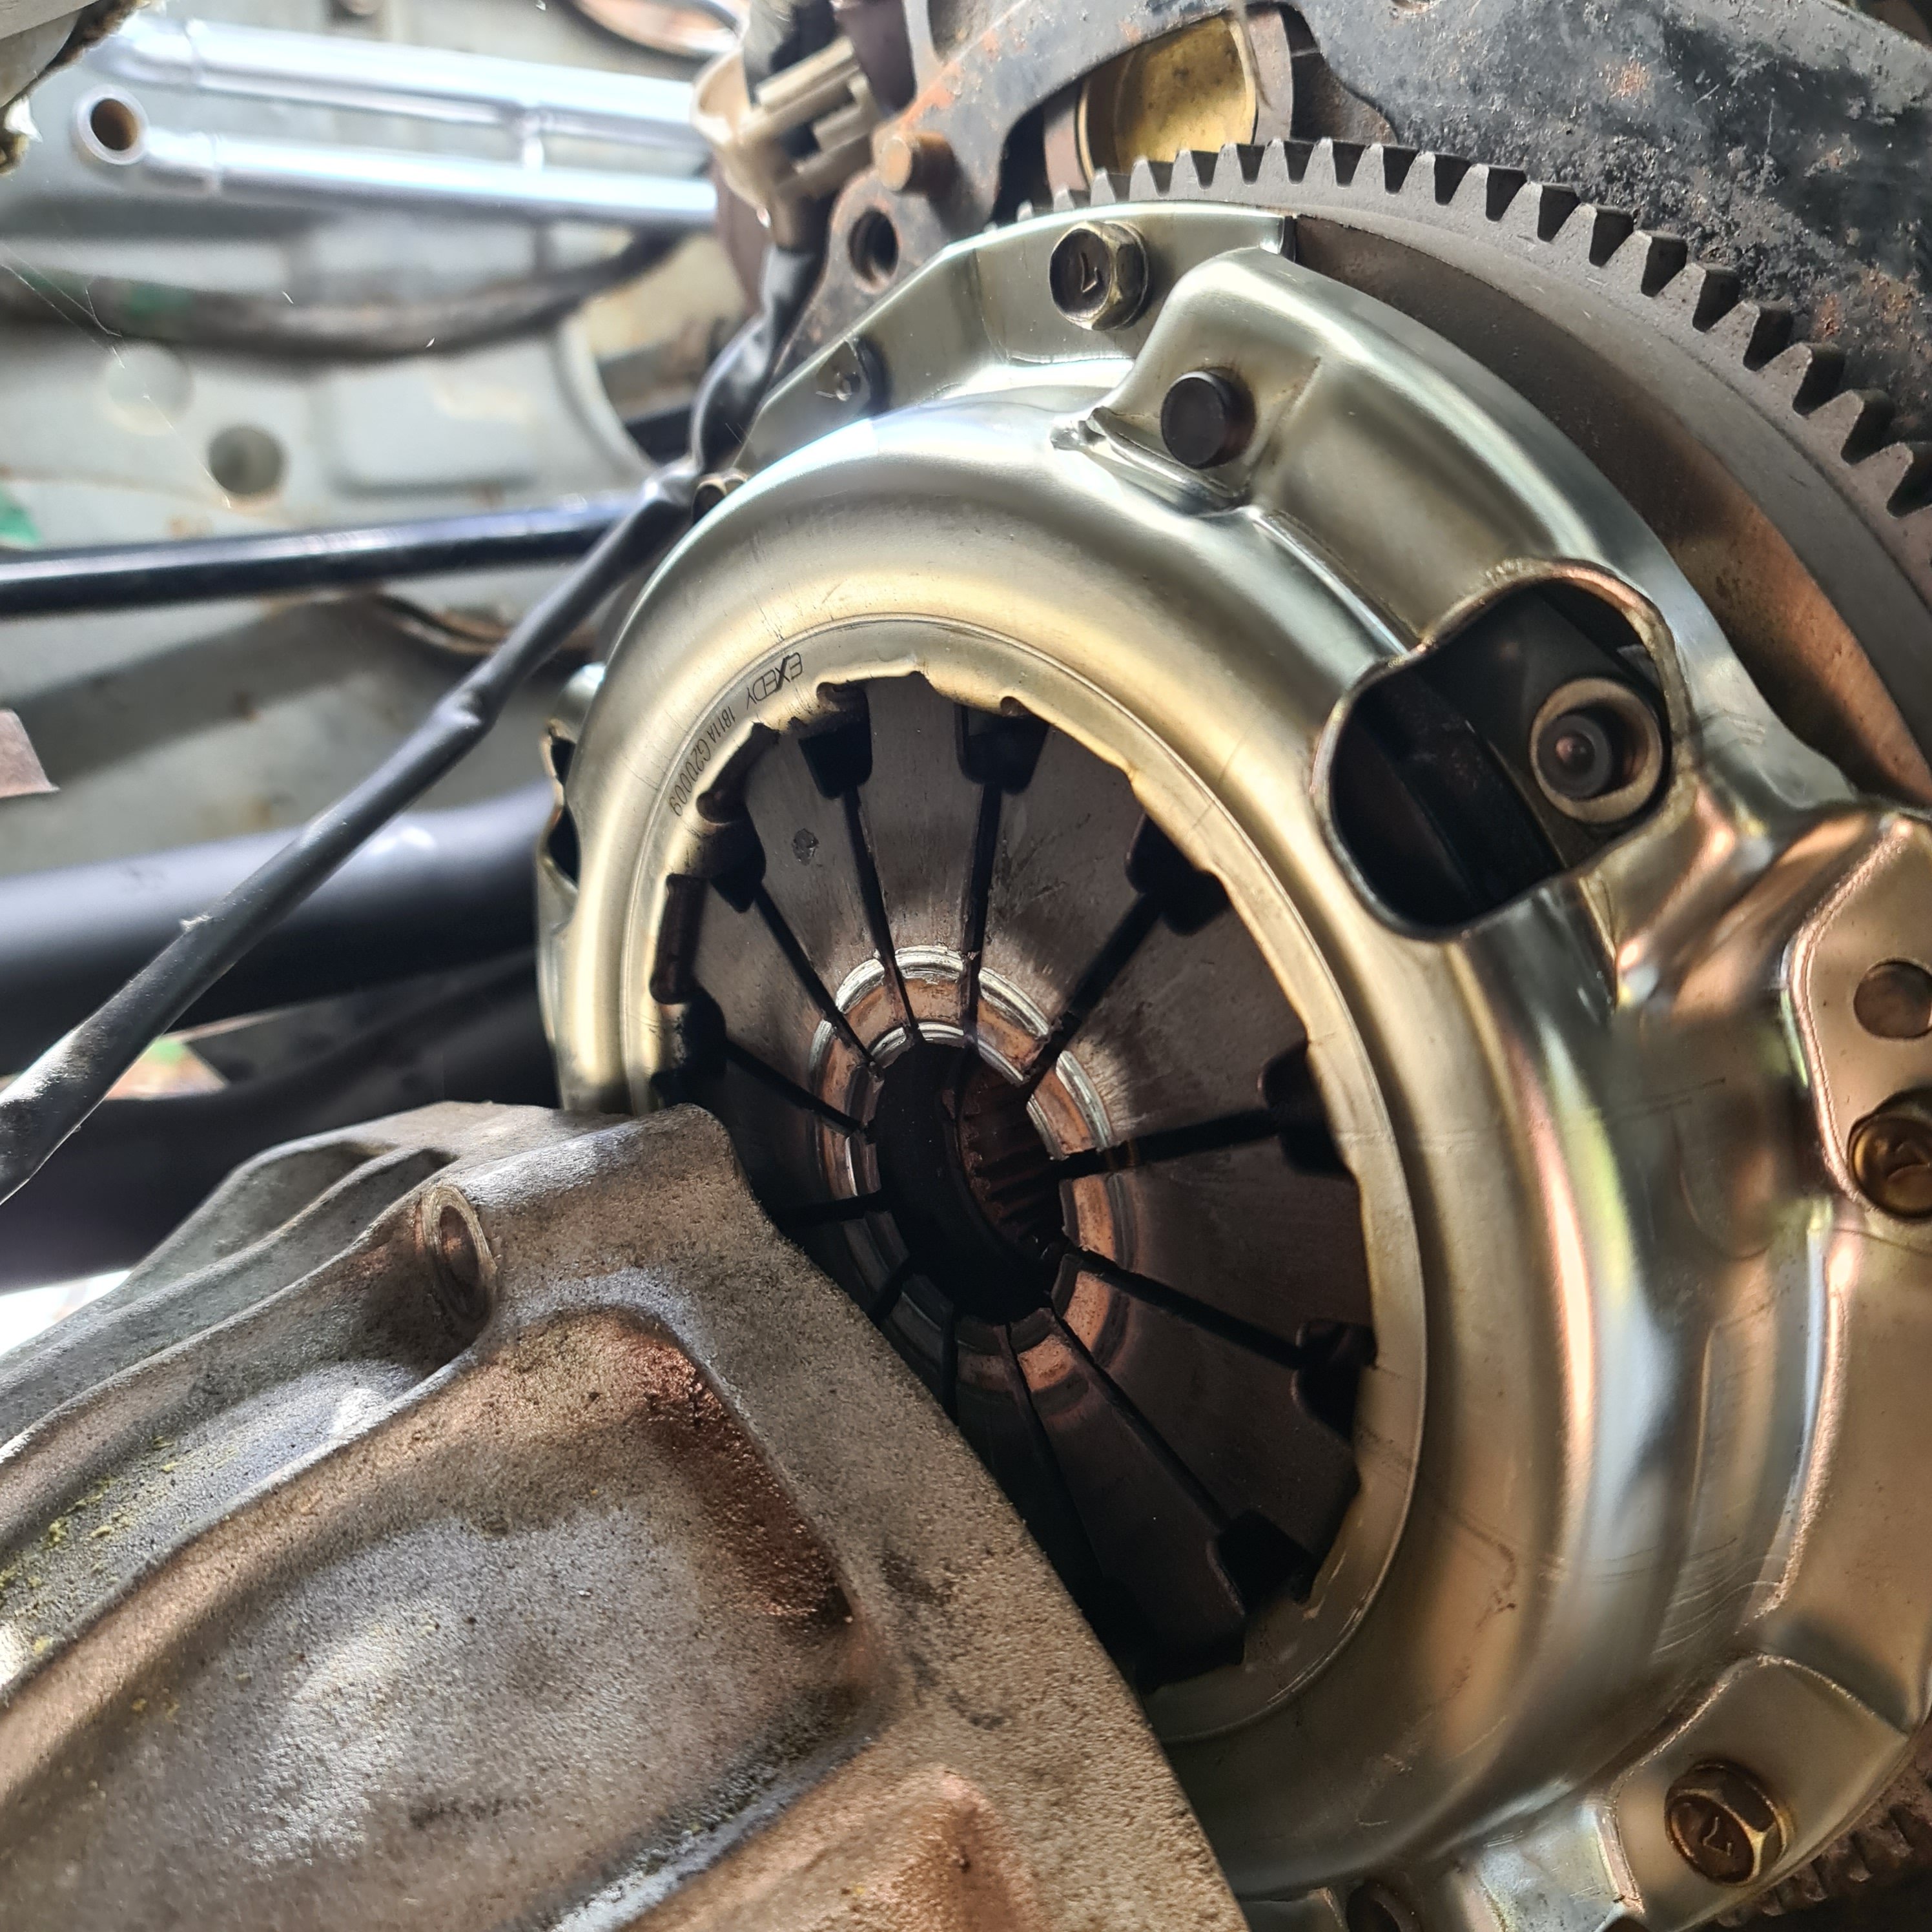
Purchased a new release bearing and installed yesterday. Pretty easy job with space for a ratchet behind all the bellhousing bolts. Having a look at my Gearbox rubber mounts they really need replacement. They are the items highlighted green which are no longer available new (genuine). Might use this opportunity to use something taller to lift Gearbox, there's about 20-30mm clearance above it currently. This would also help with the driveshaft angle since the diff is a good 4" closer to the body than stock. I'm guessing going to a taller rubber I'll have to weld and re-drill new holes, maybe even put a plate on crossmember so I can get the pin on the mounts in the sweet spot.
-
Jesse's 1988 Toyota Liteace KM36
Jeffs_Emporium replied to Jeffs_Emporium's topic in Projects and Build Ups
Looks to be a case of backwards release bearing. Woopsie
- 131 replies
-
- 13
-
-

-

-
-
Jesse's 1988 Toyota Liteace KM36
Jeffs_Emporium replied to Jeffs_Emporium's topic in Projects and Build Ups
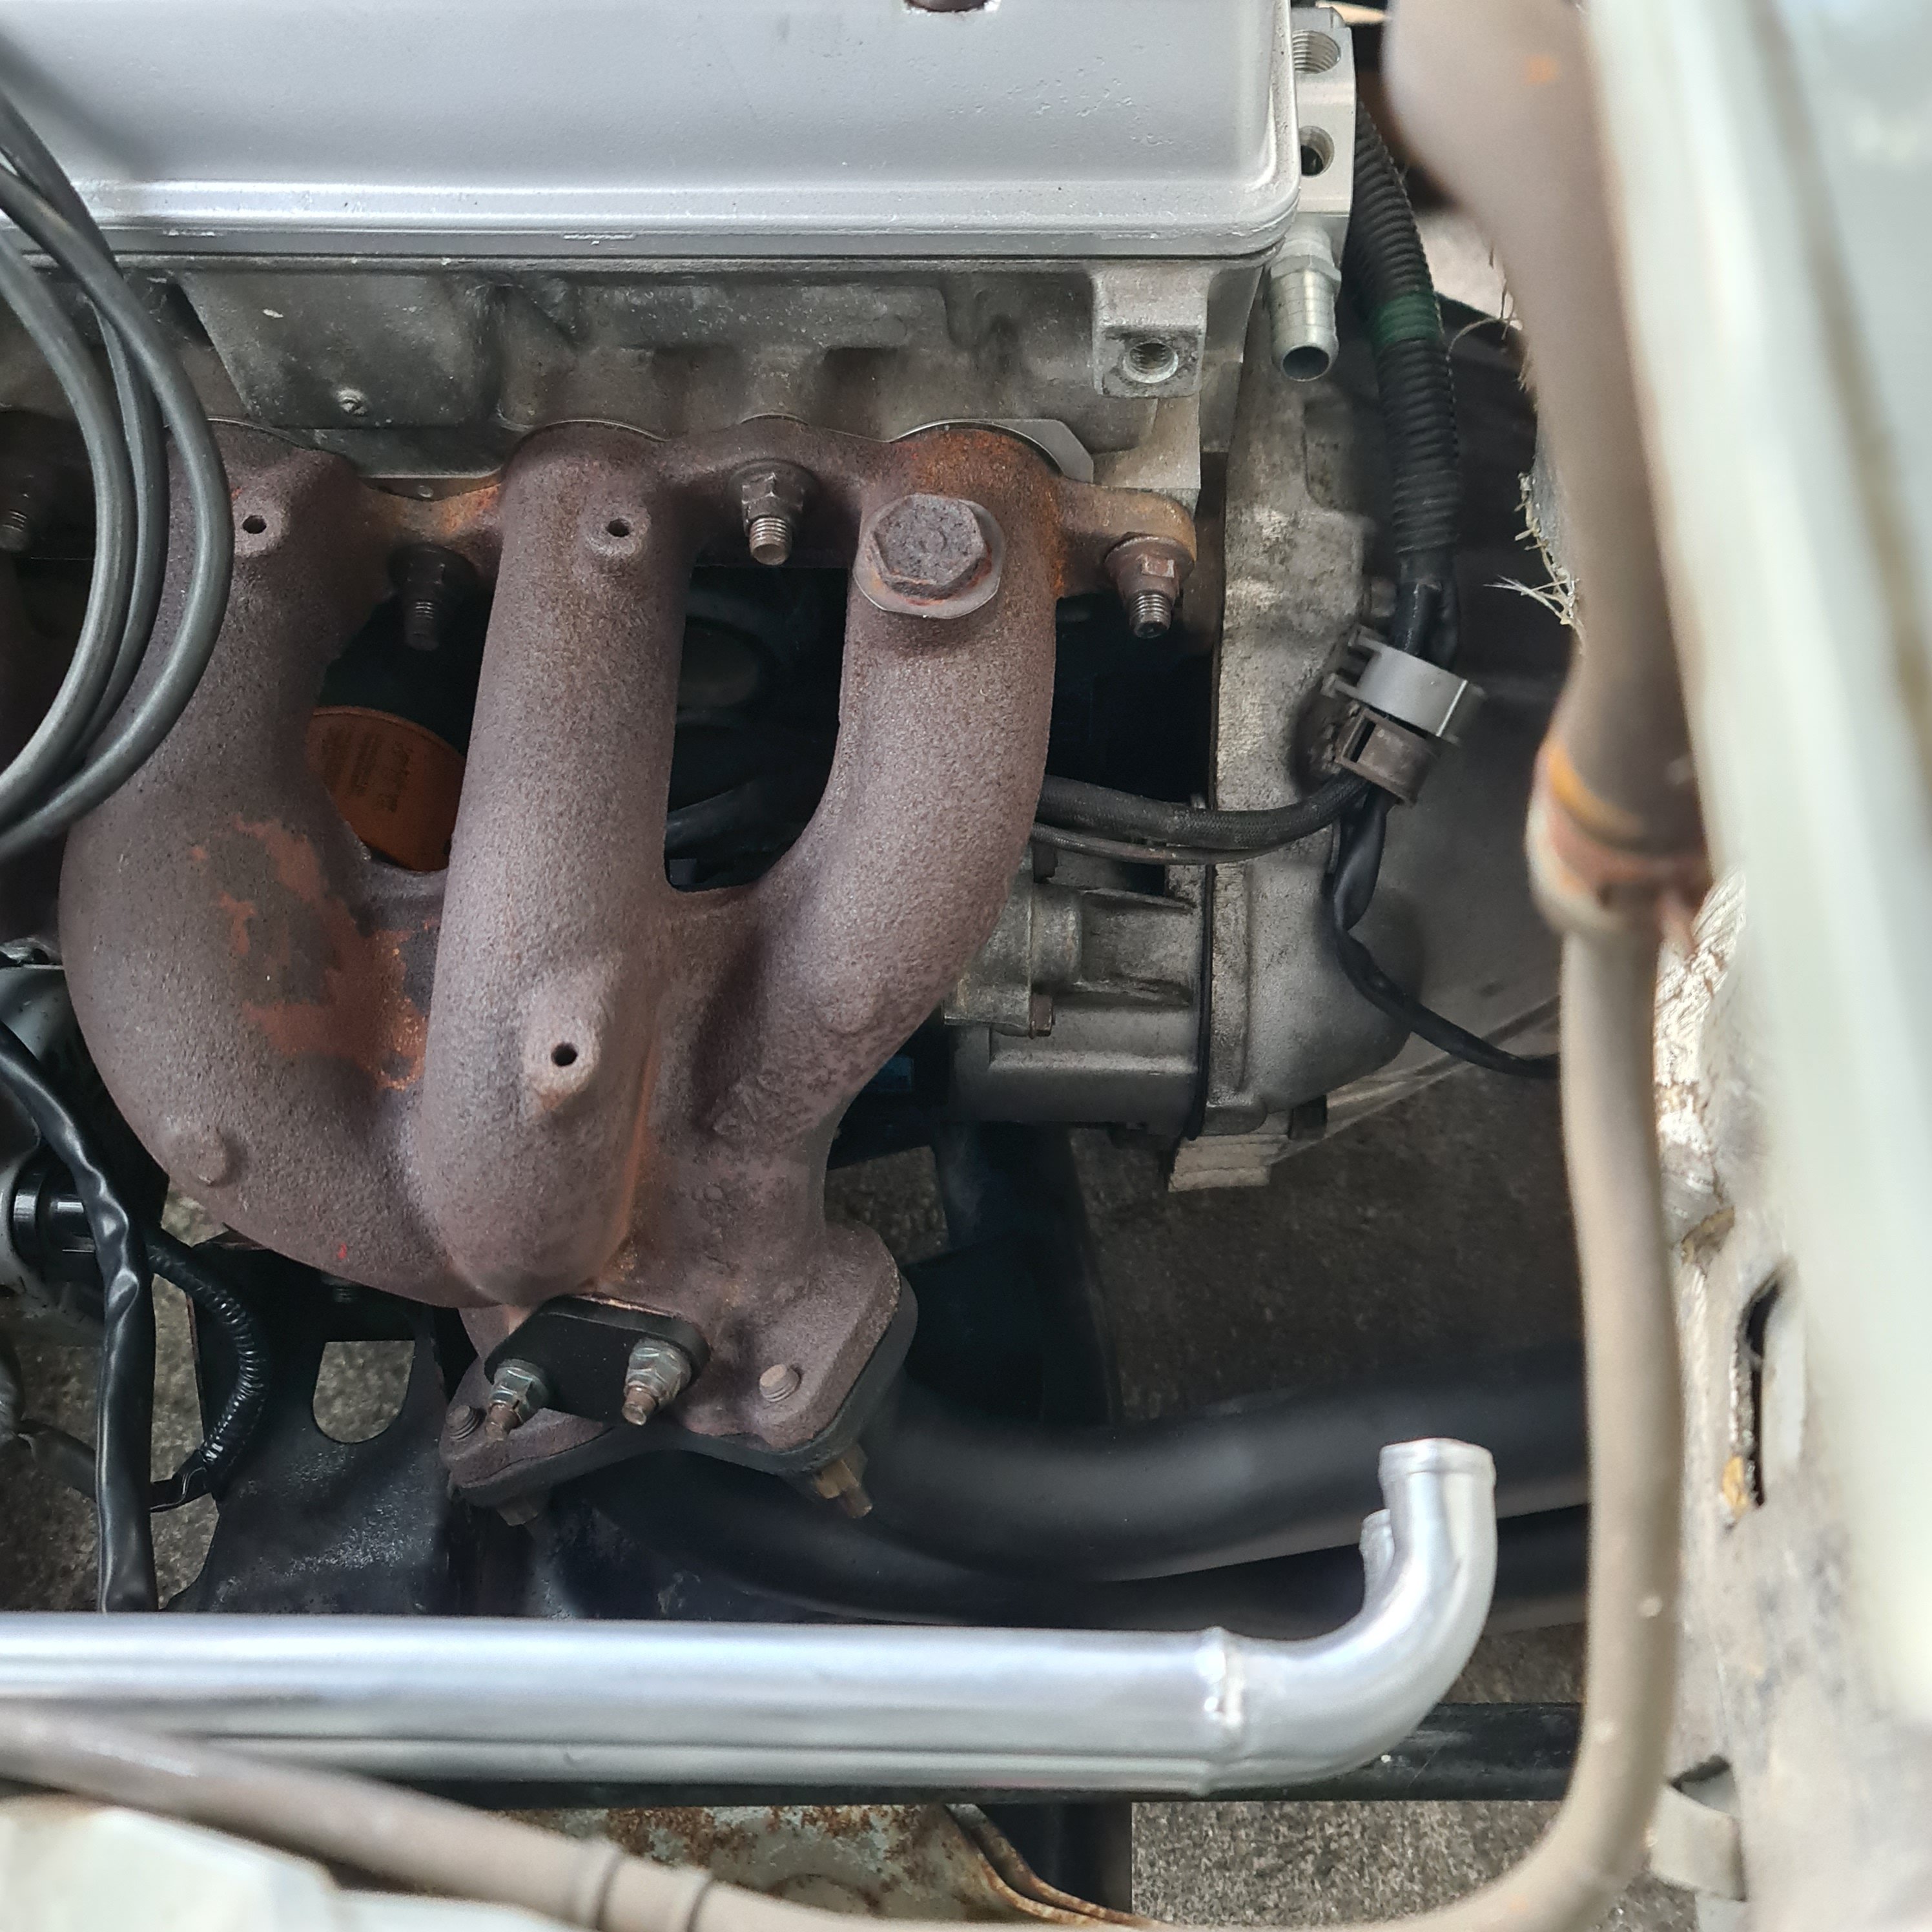
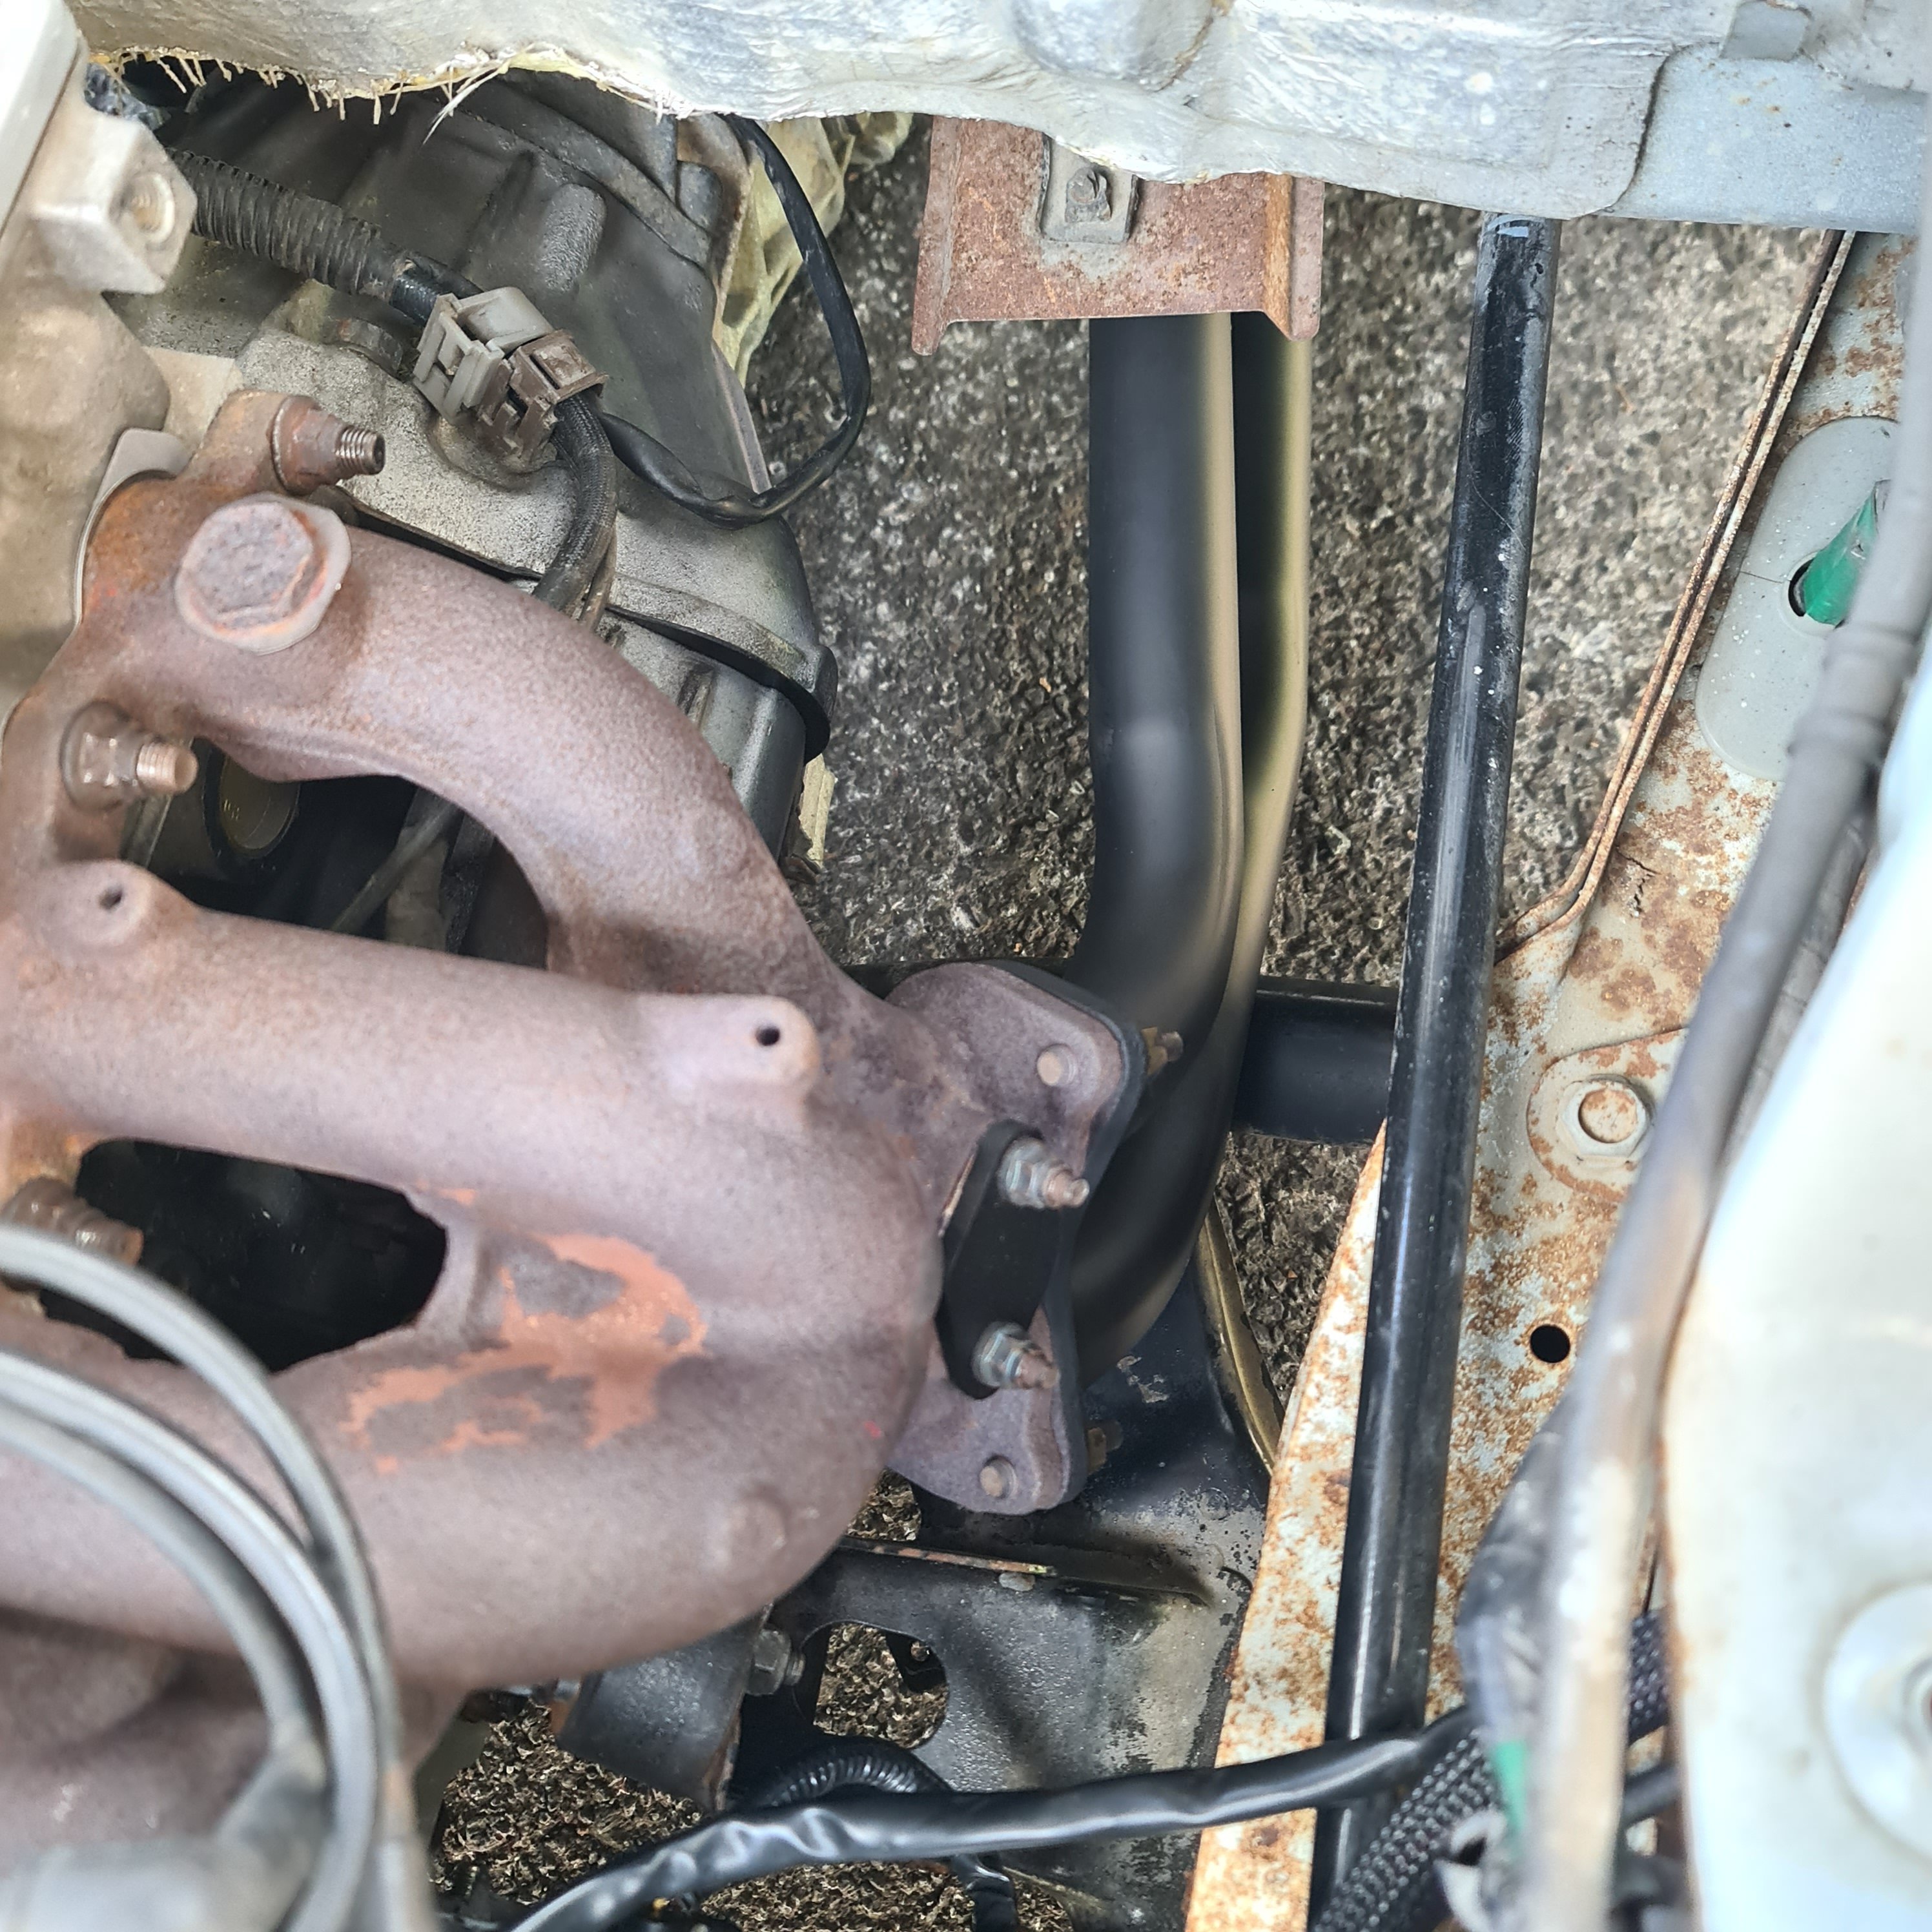
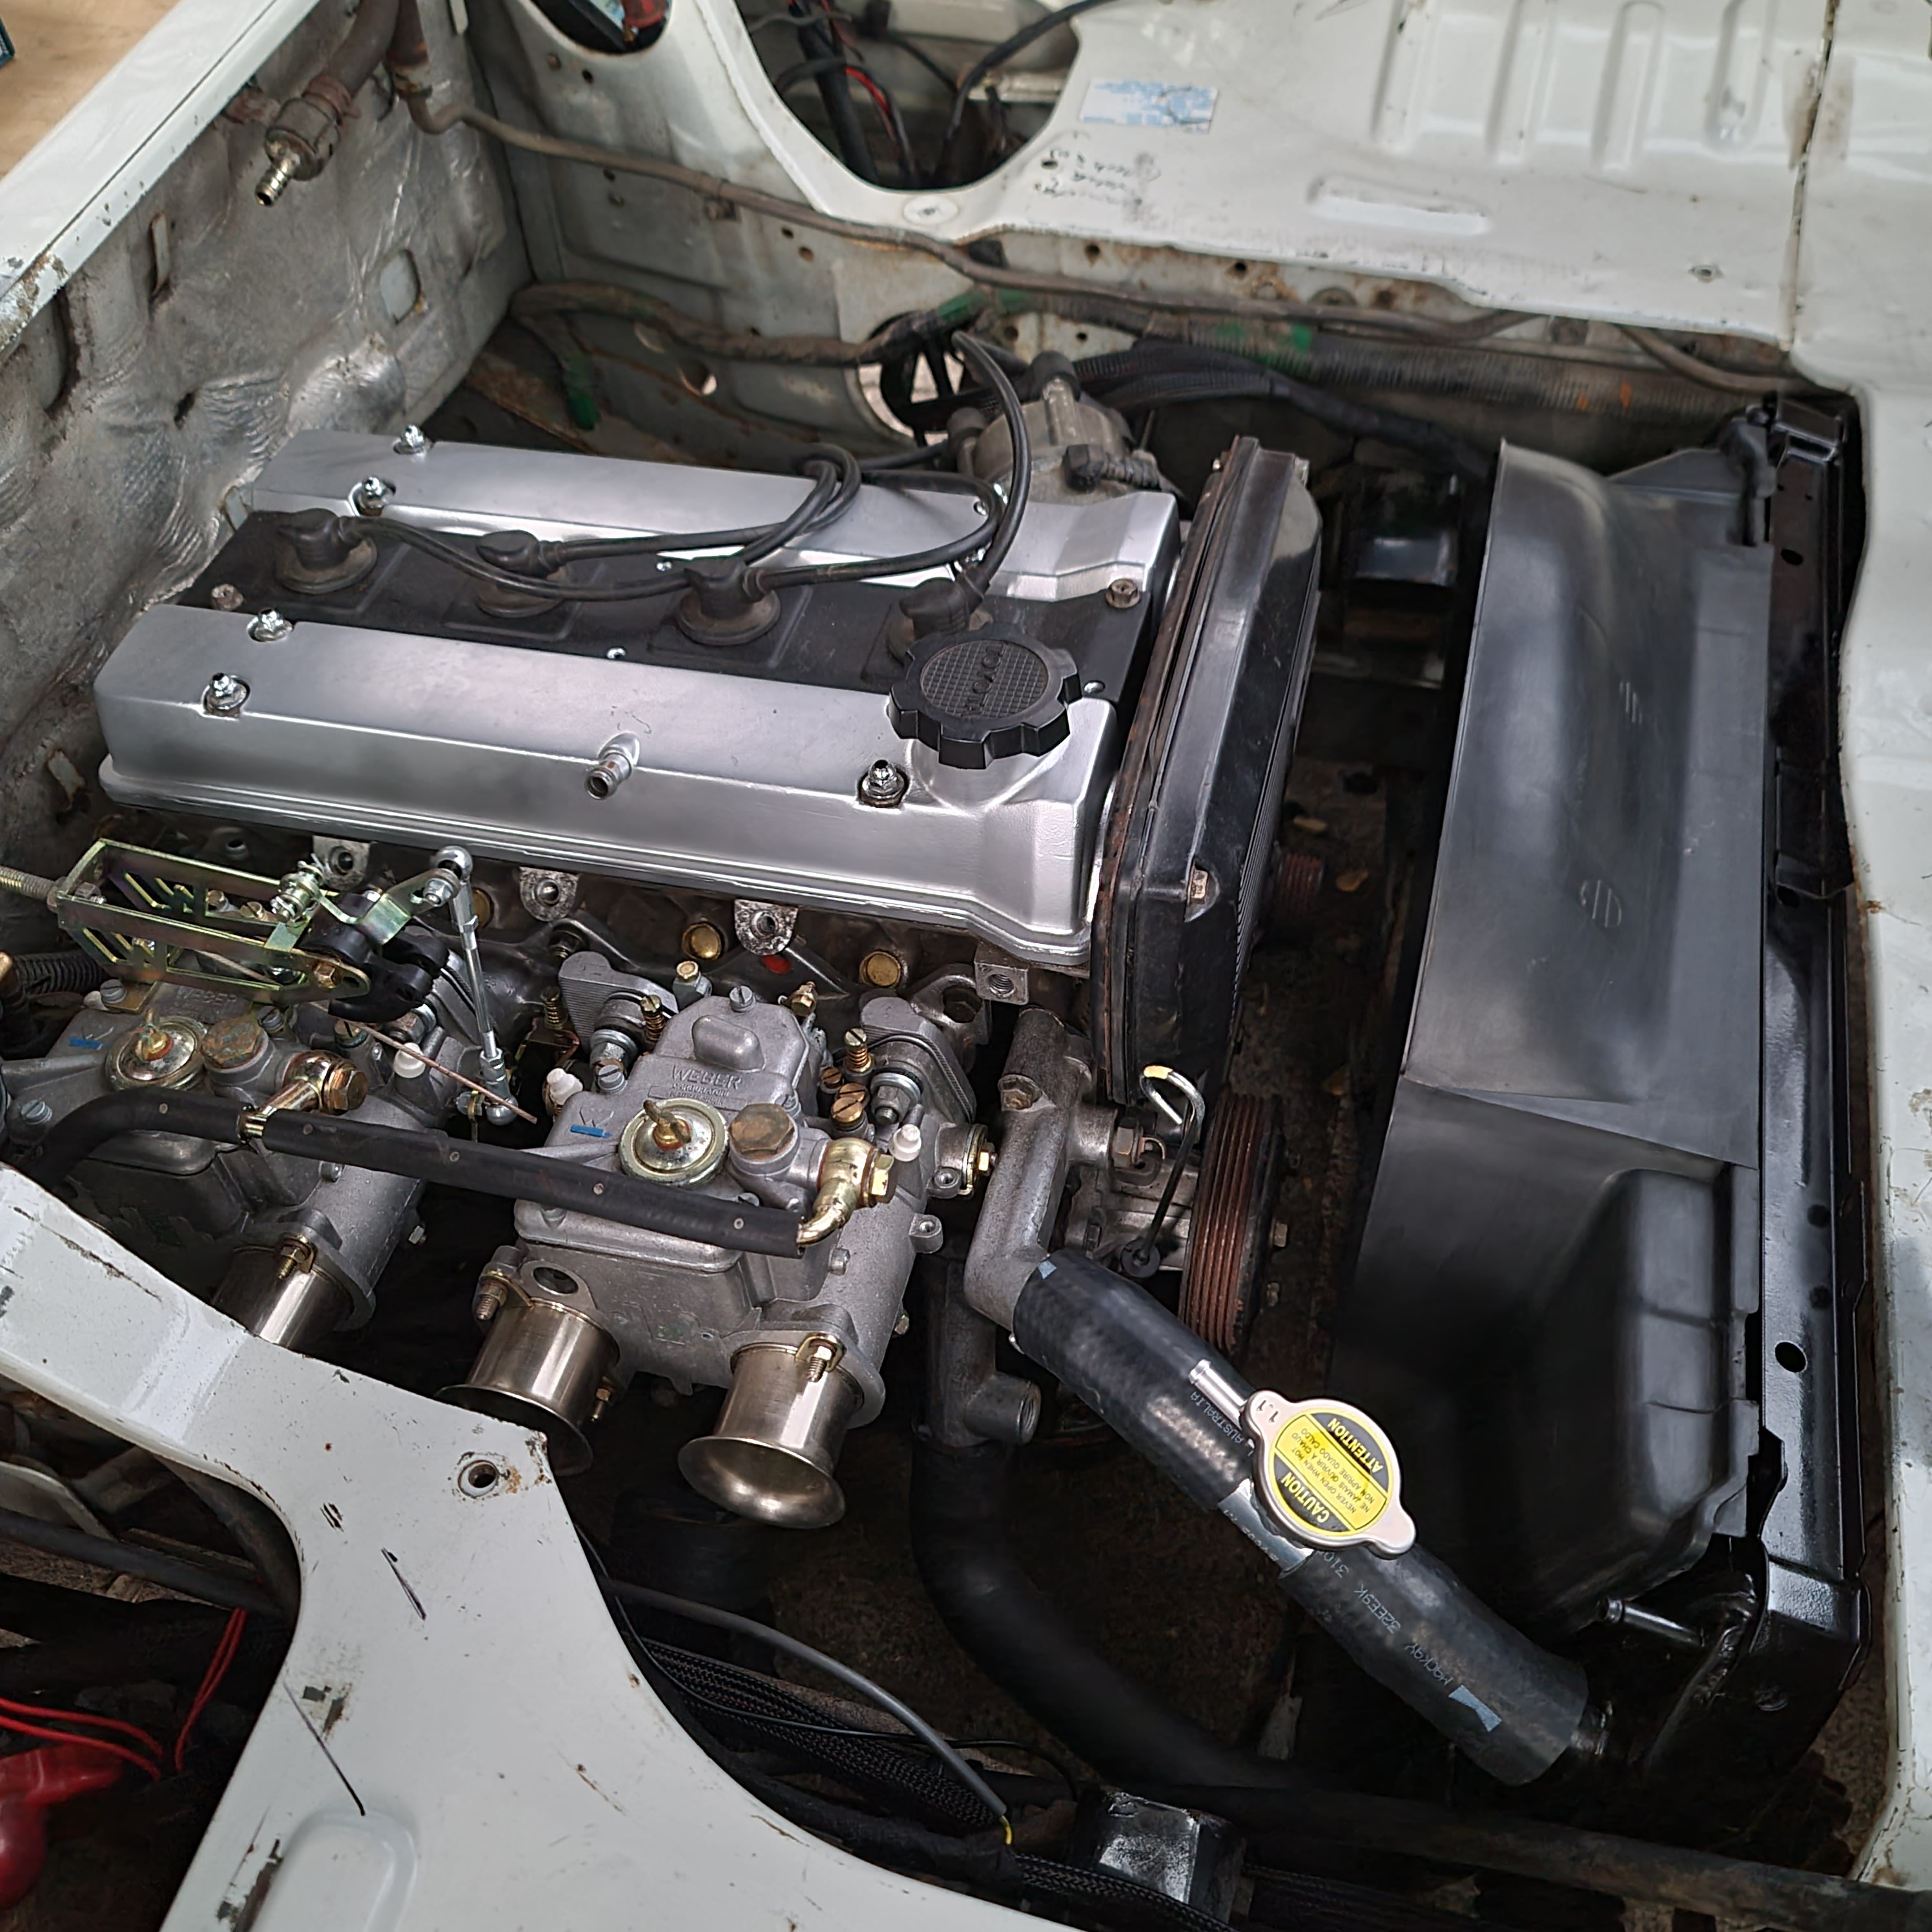
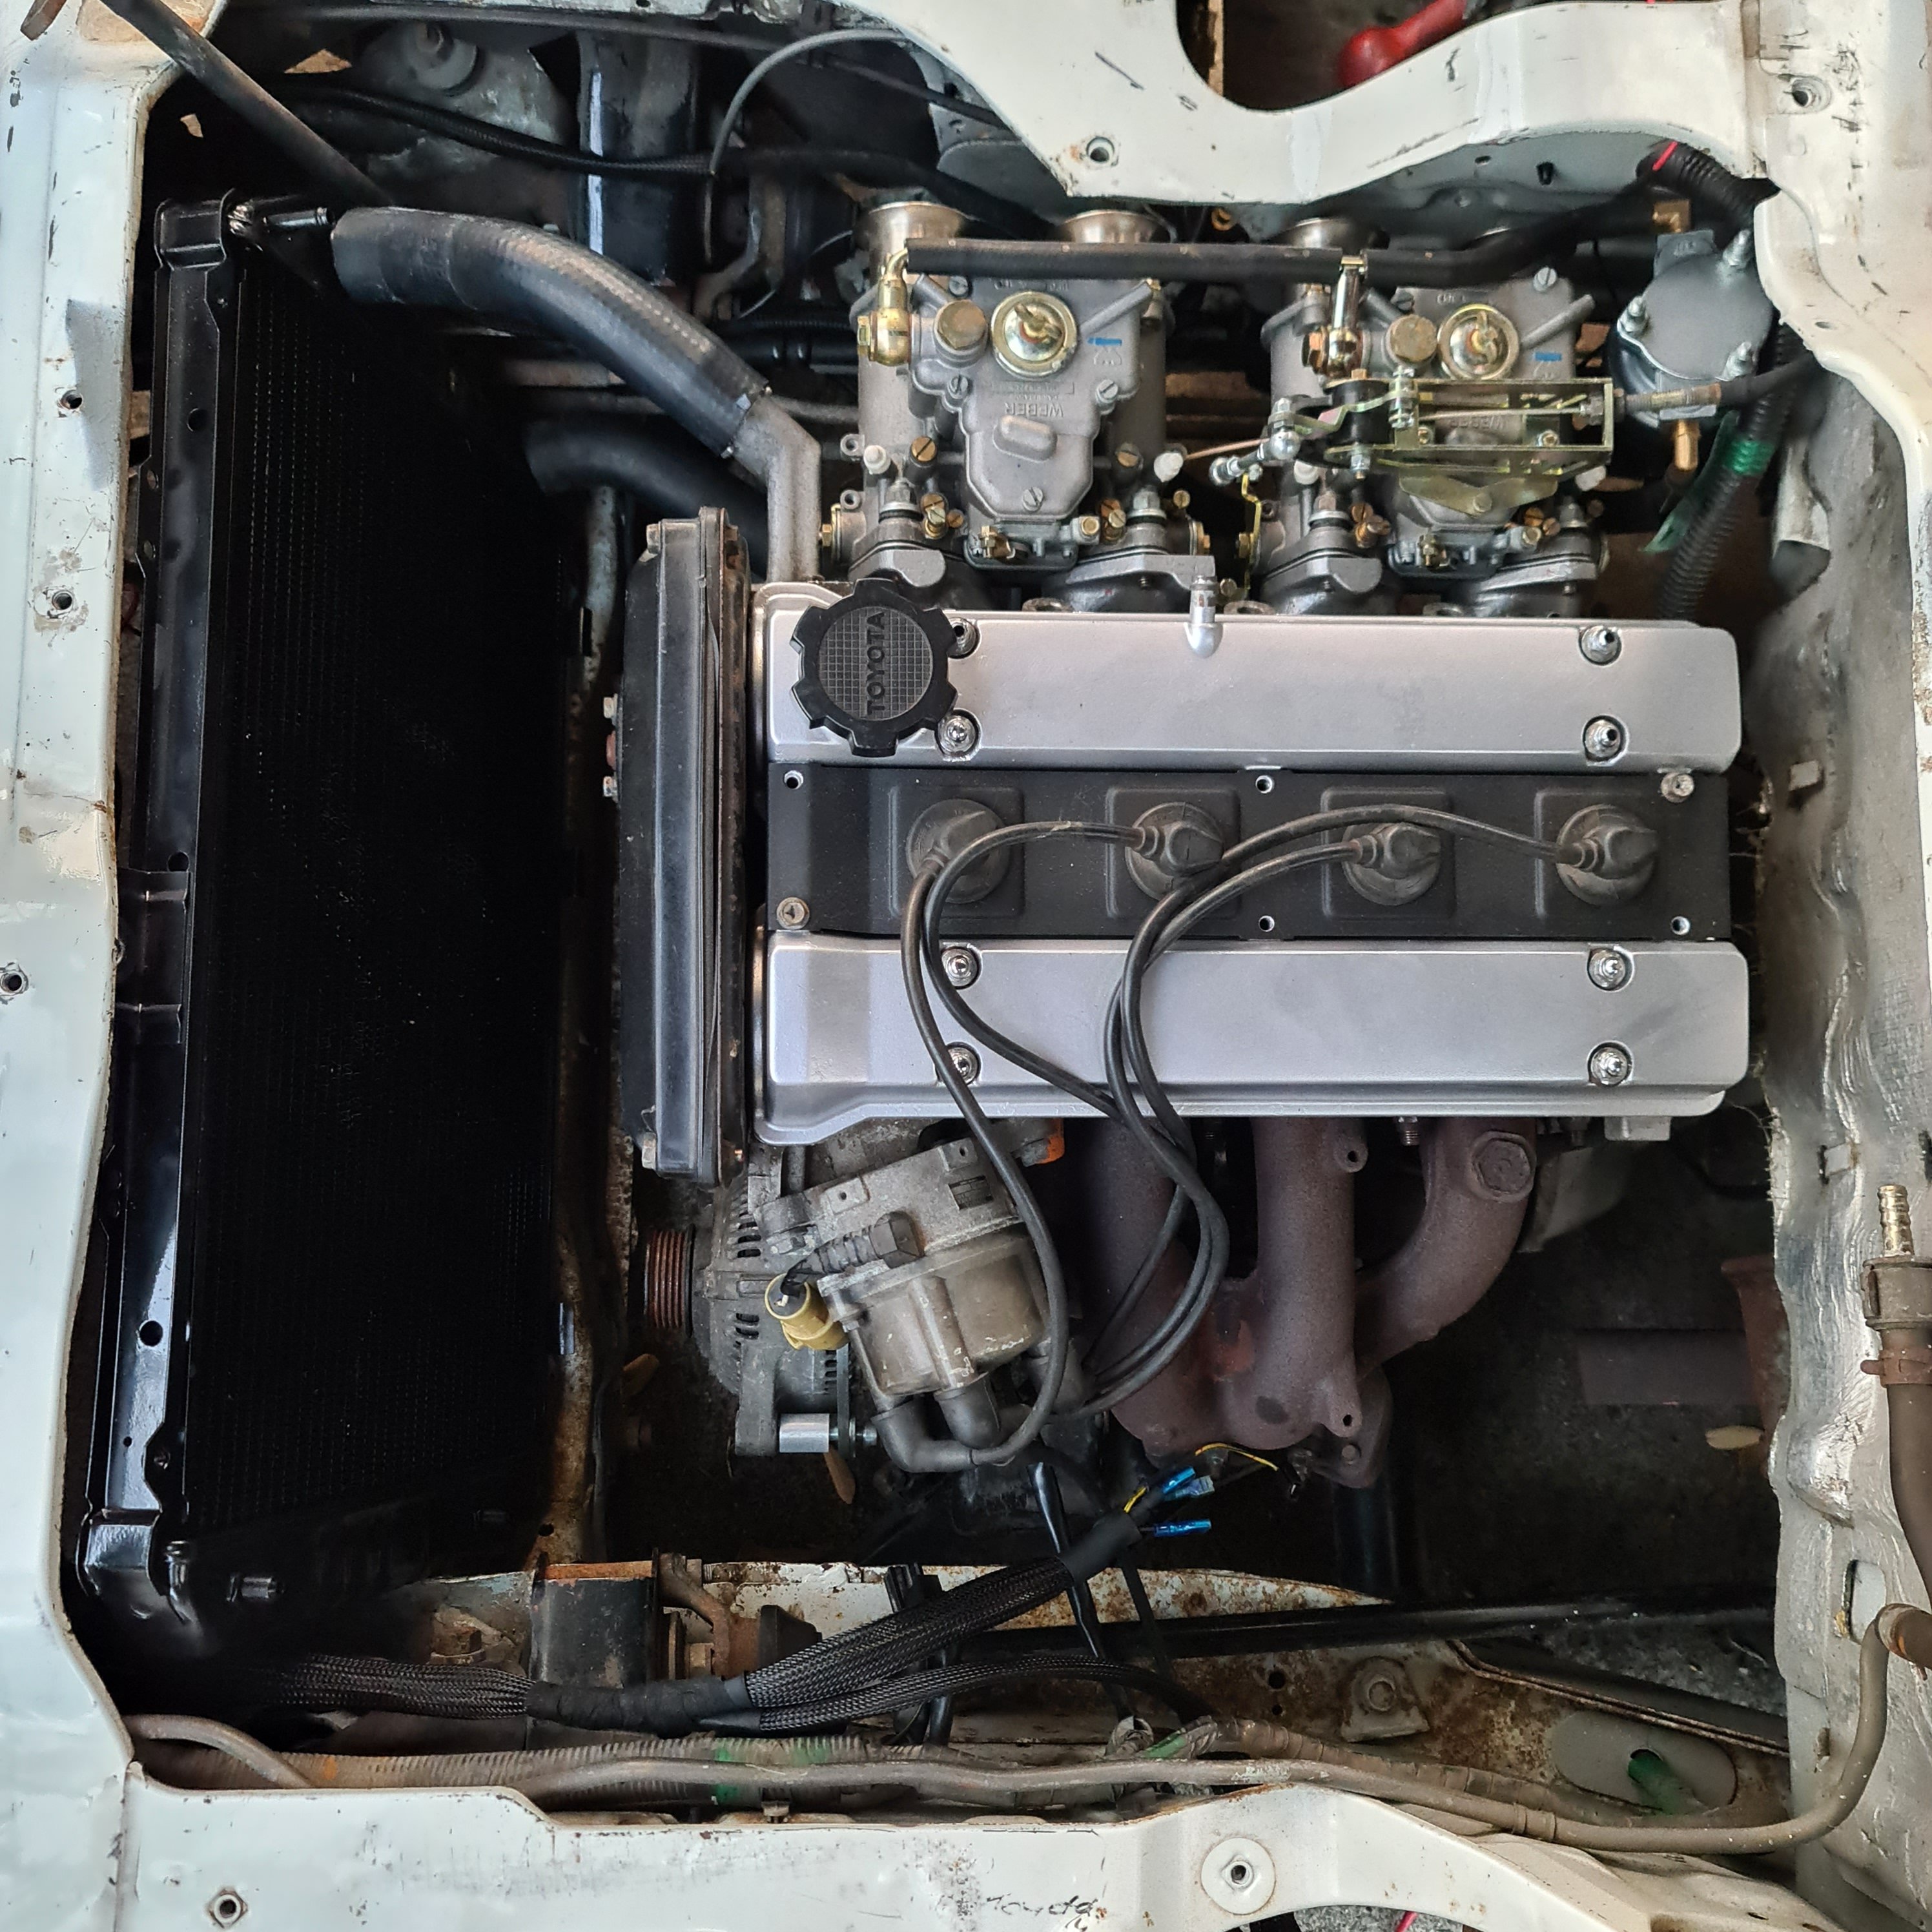
Puts heater pipes at rear of engine bay pointing directly at head and Intake side is extended pointing same direction need to find some blank plugs where ecu temp and other sensor would go in rear water outlet on head.
- 131 replies
-
- 10
-
-
Jesse's 1988 Toyota Liteace KM36
Jeffs_Emporium replied to Jeffs_Emporium's topic in Projects and Build Ups
Some Gucci pipe work.
-
Jesse's 1981 corona mark ii grande discussion
Jeffs_Emporium replied to Jeffs_Emporium's topic in Project Discussion
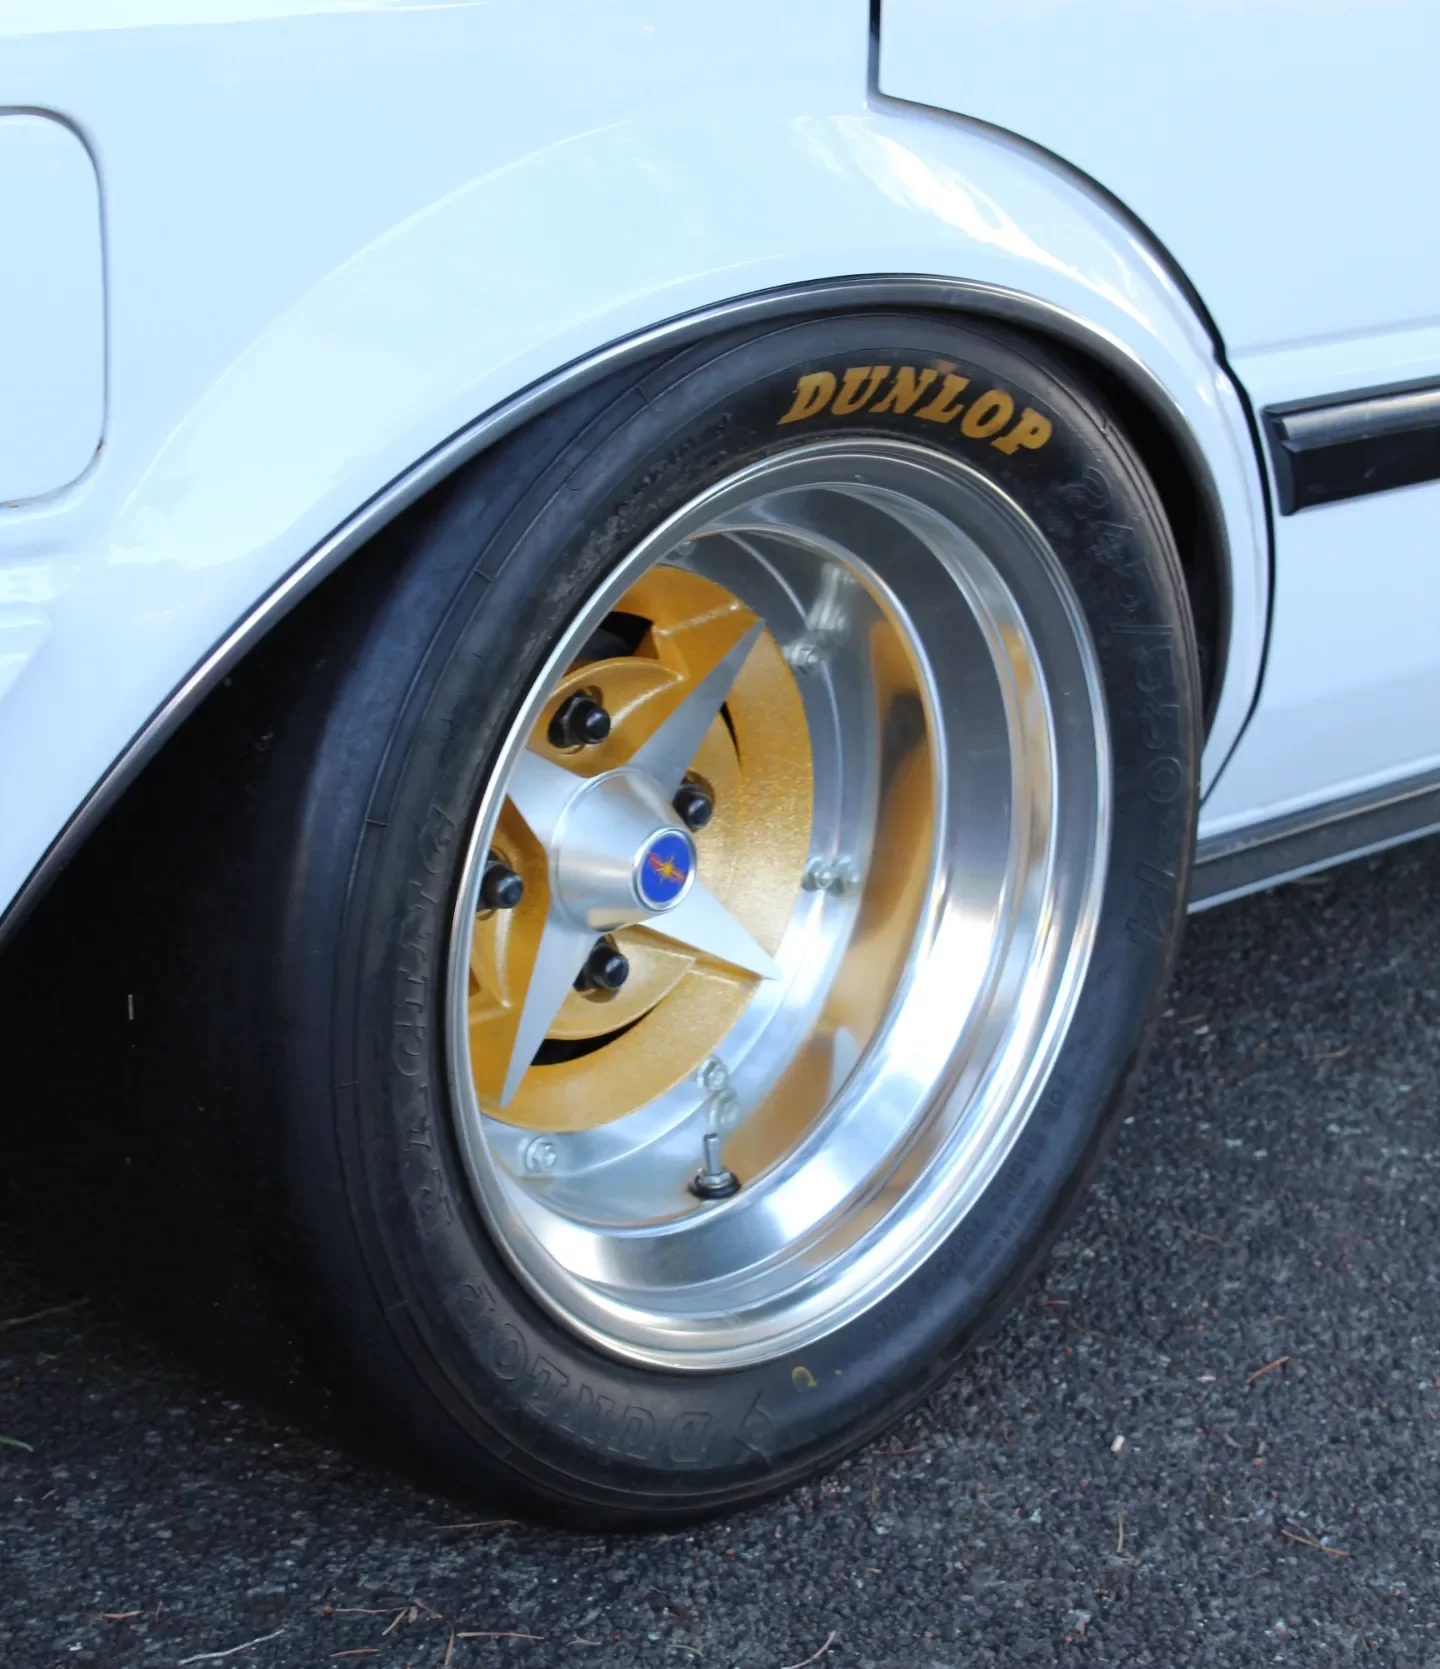
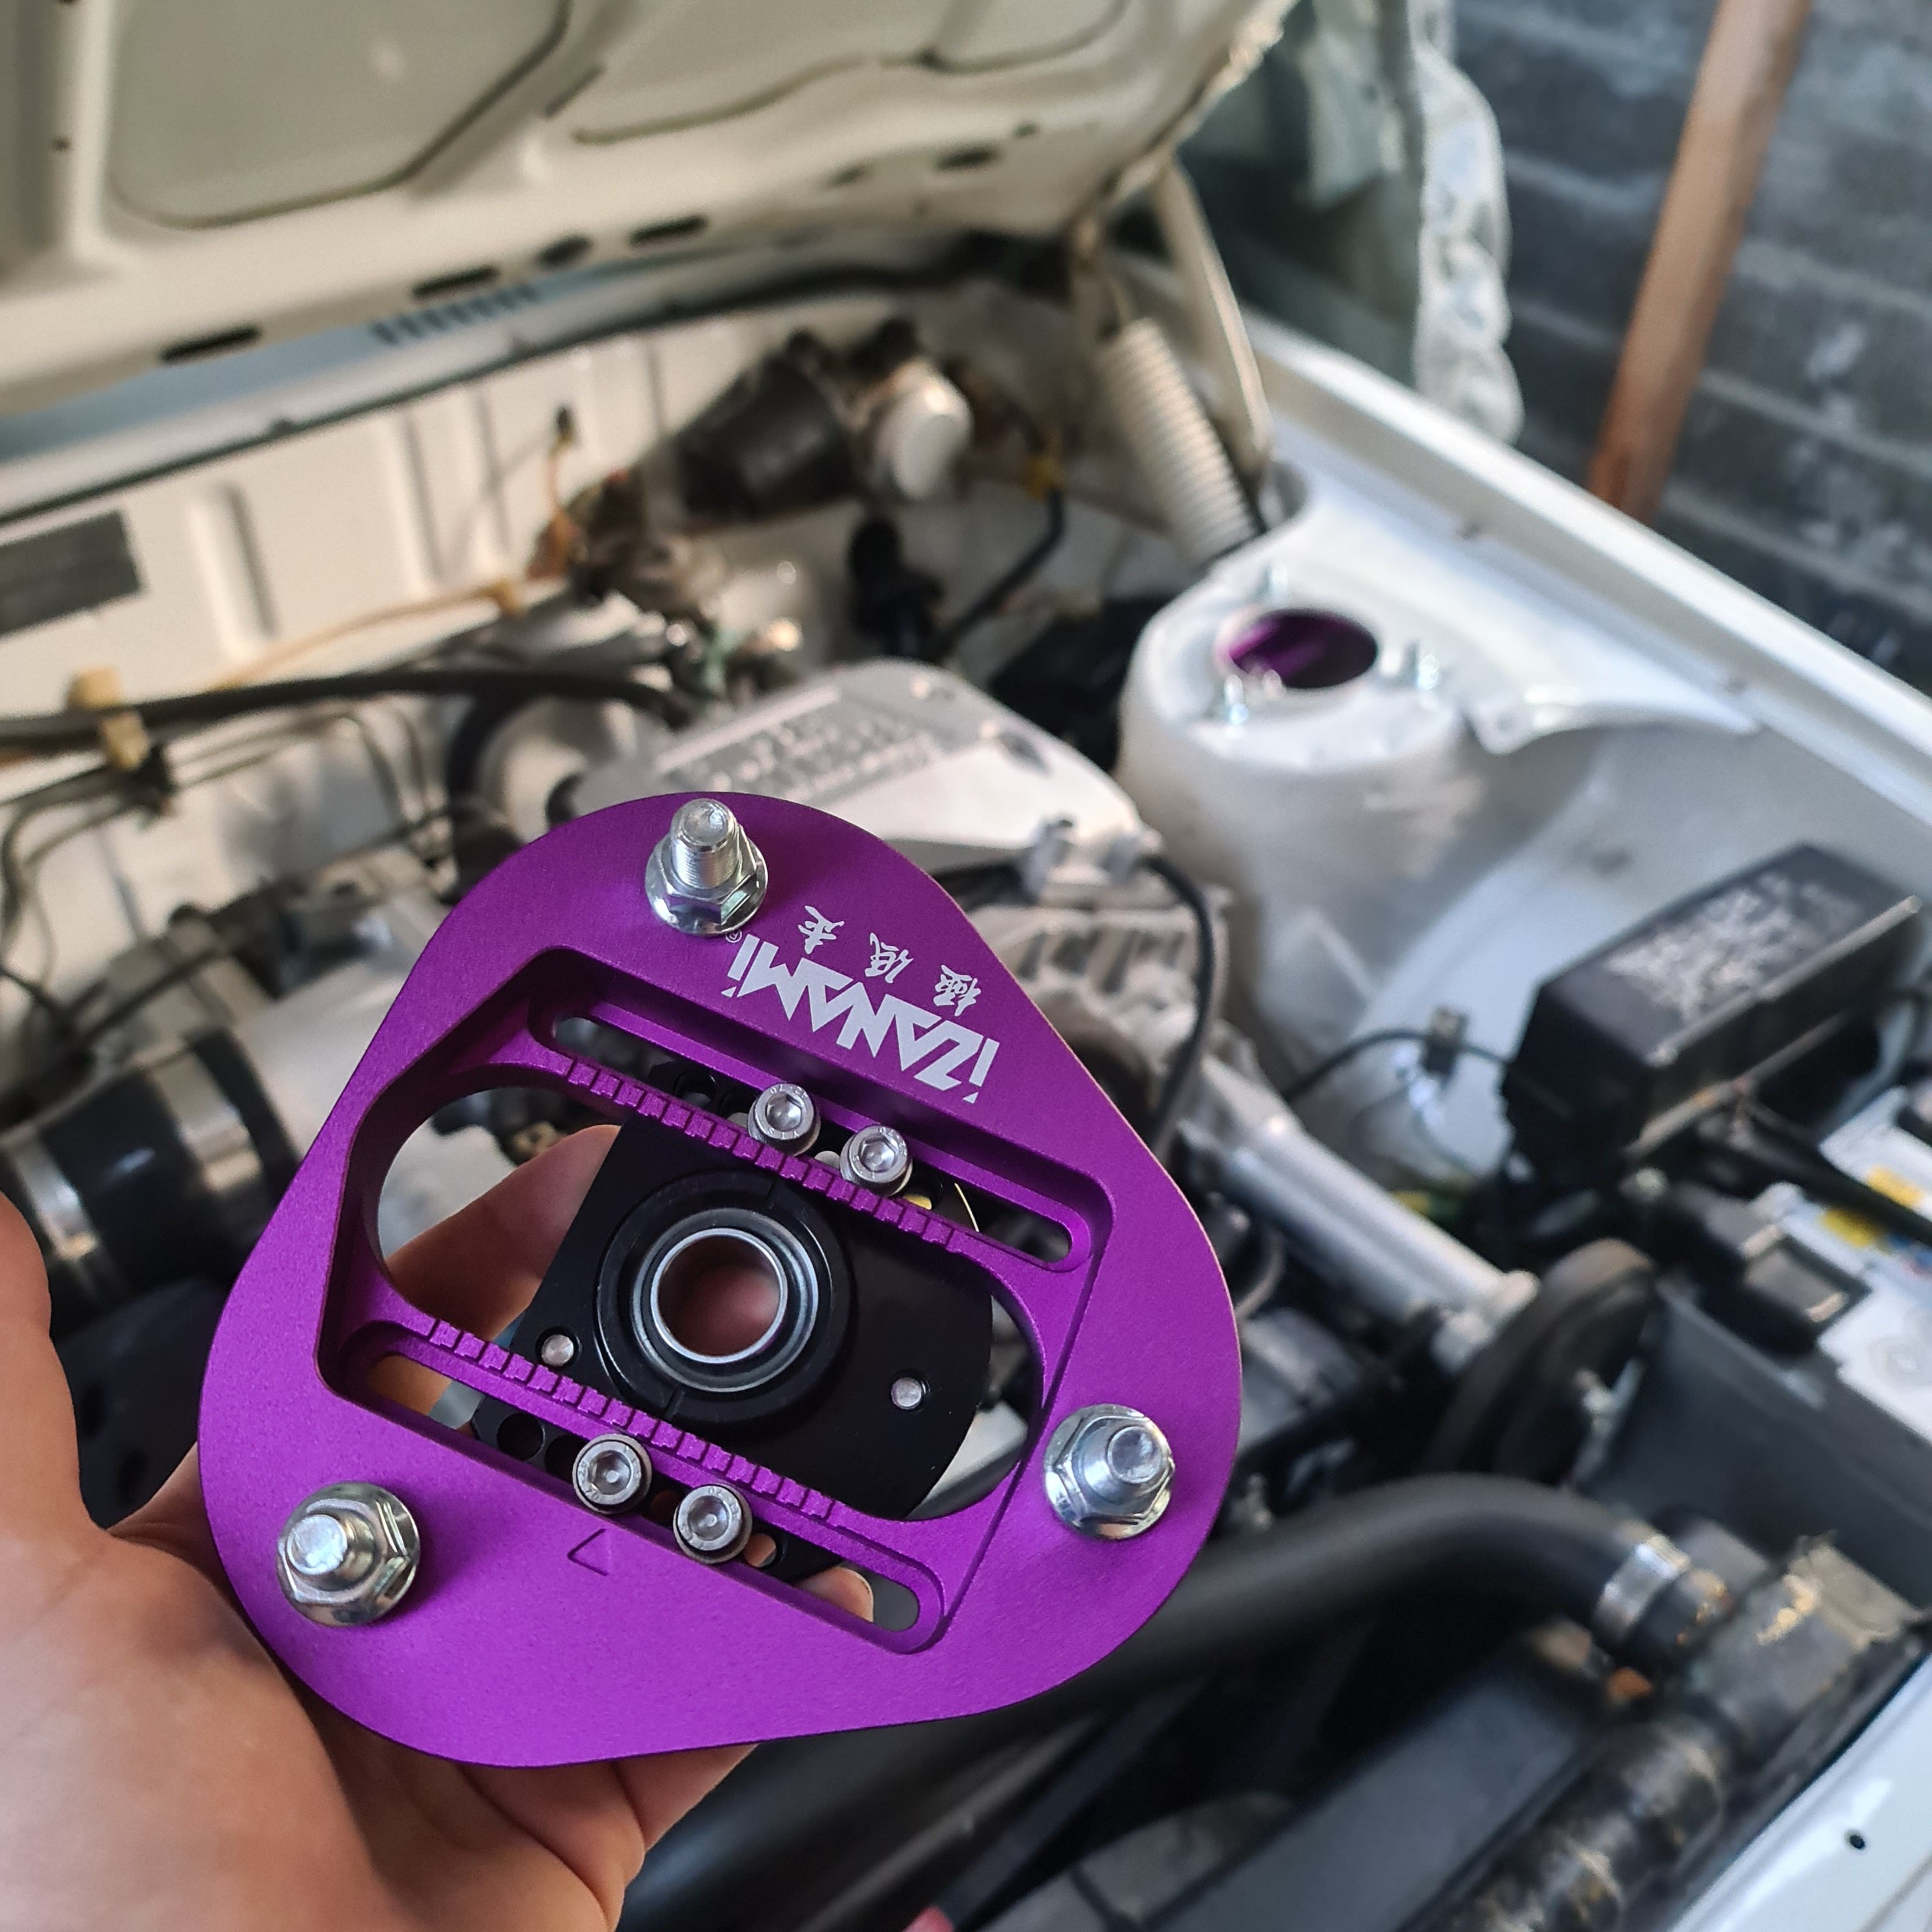
https://www.izanami-wheel.com/en/product/pillowballuppermount/ -
So after setting the gear lever to specific heights it seems I have all the gears but in the wrong orientation. Reverse is where second should be (closest to steering wheel) and first being closest to dash board. Also having some Clutch problems. When I push the pedal in it loads up the engine? Trying to think what could be up with that
-
Jesse's Toyota Mark ii Grande gx61
Jeffs_Emporium replied to Jeffs_Emporium's topic in Projects and Build Ups
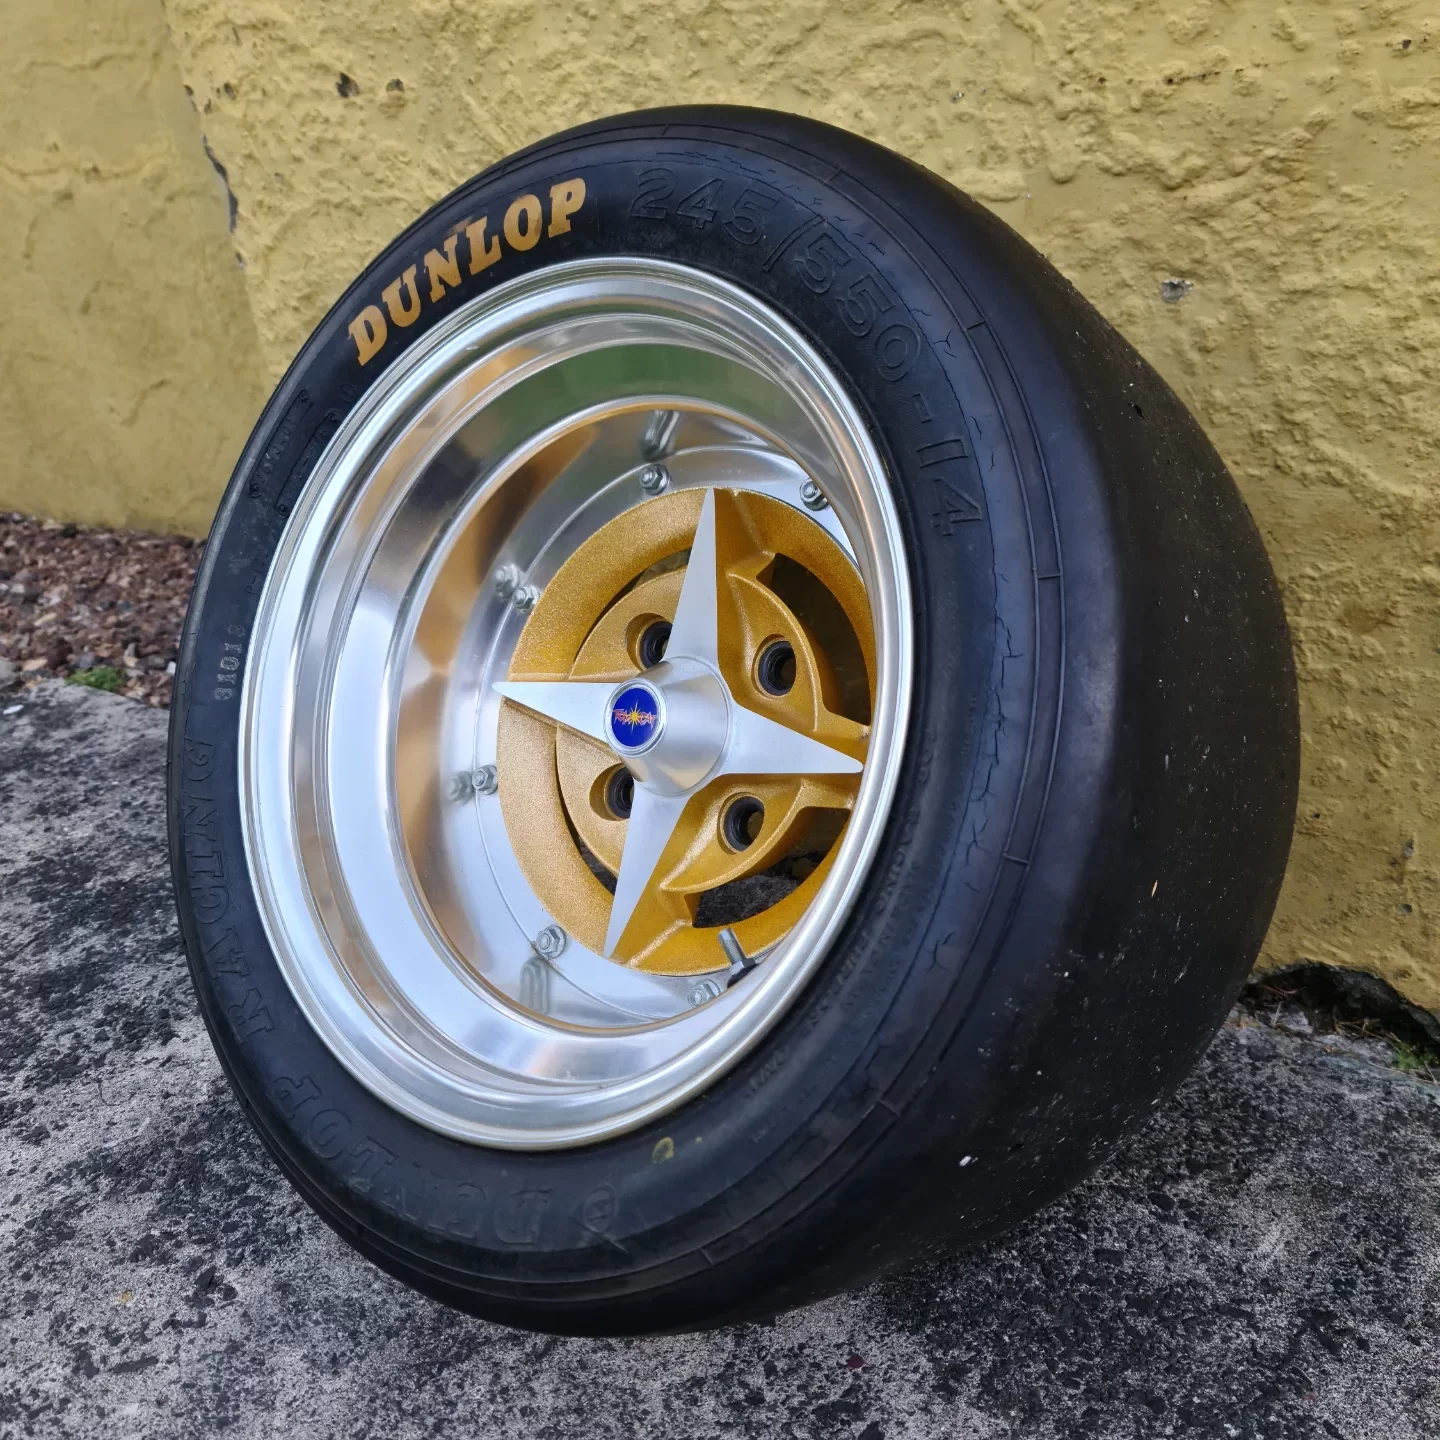
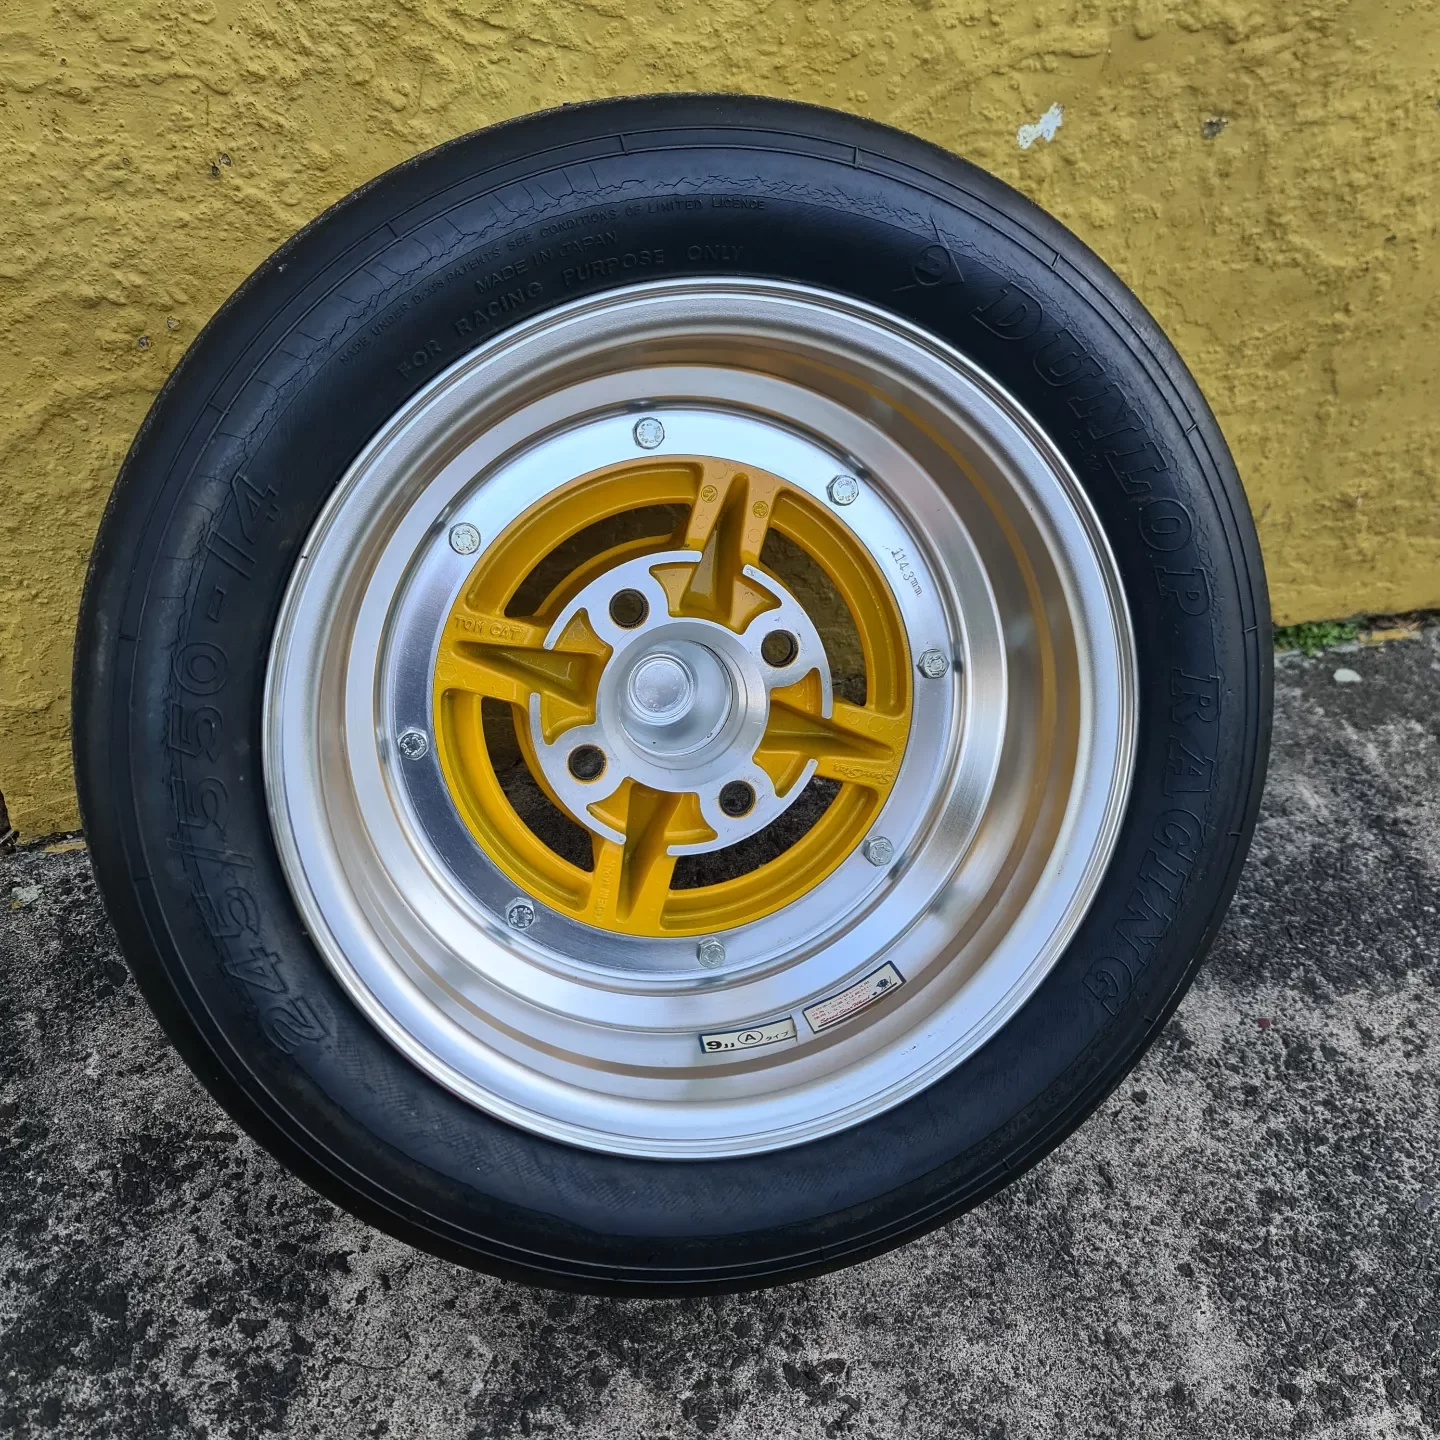
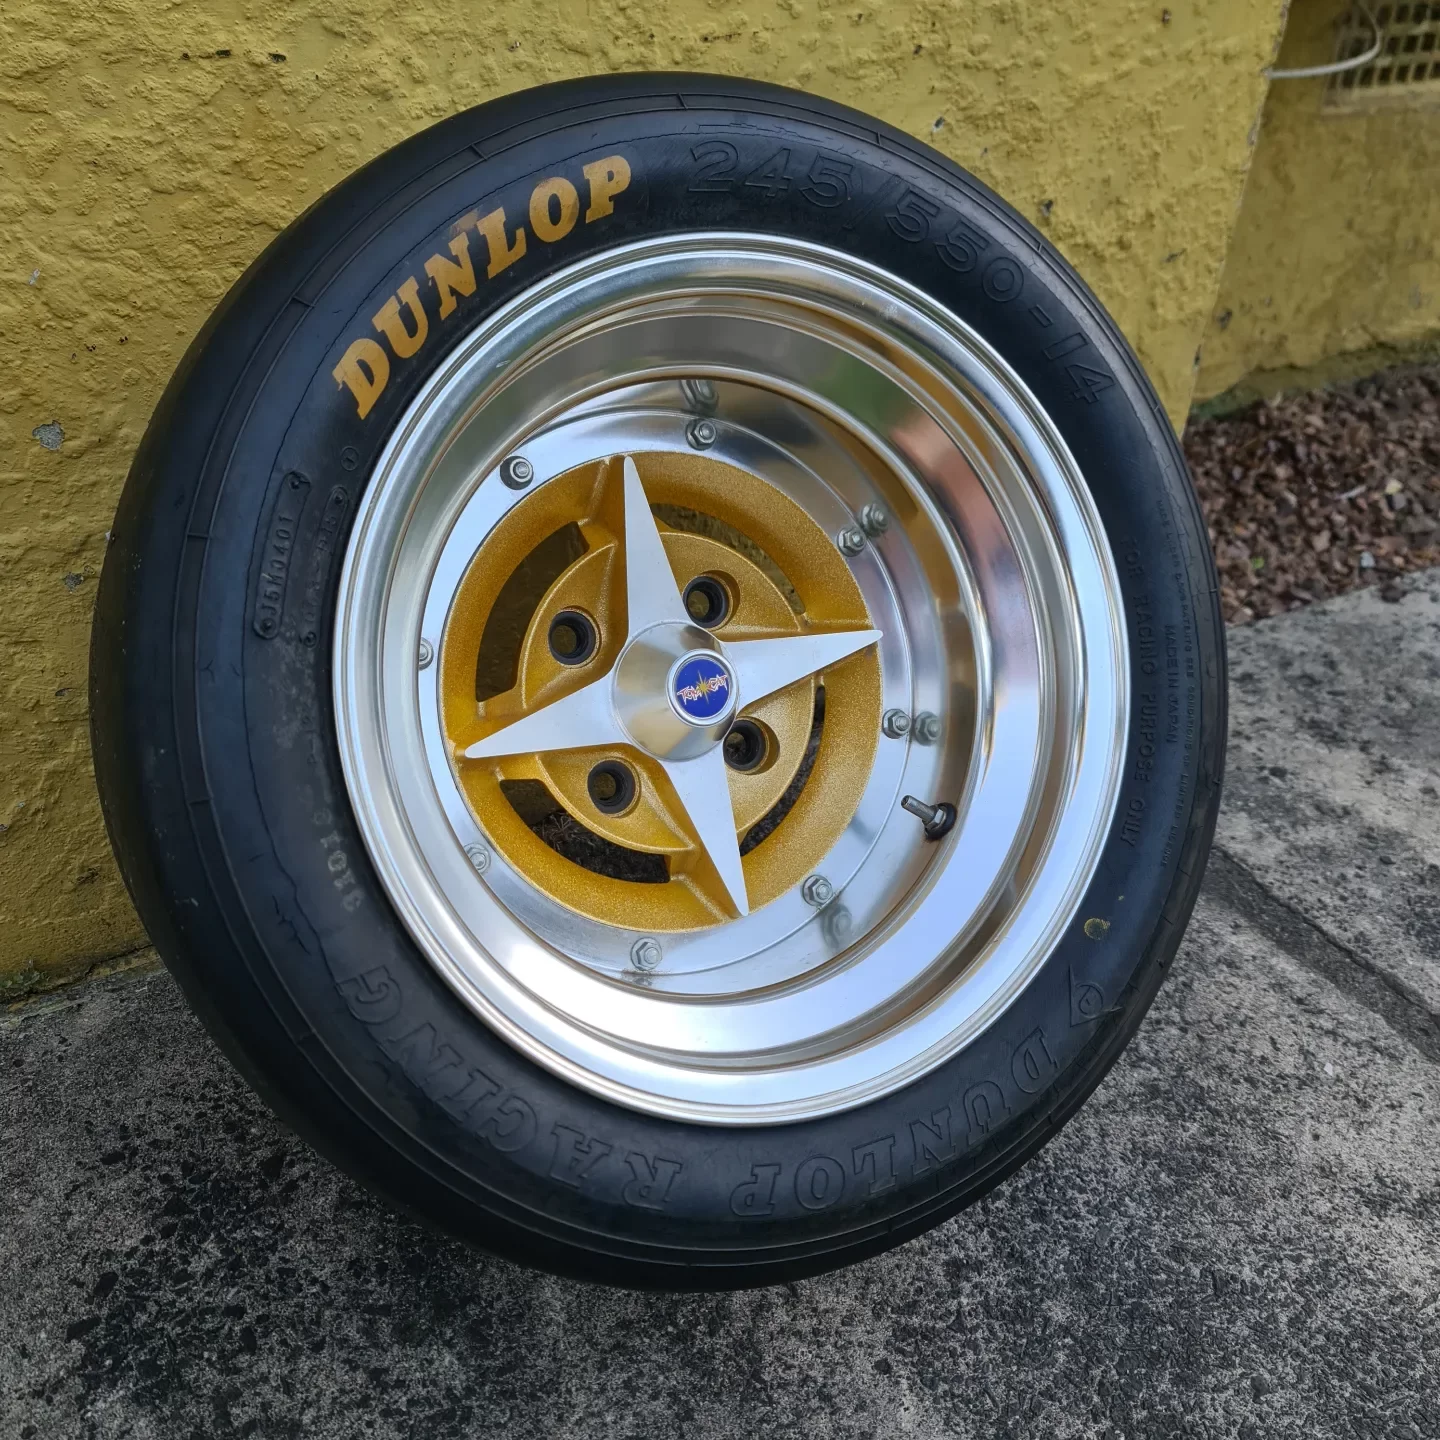
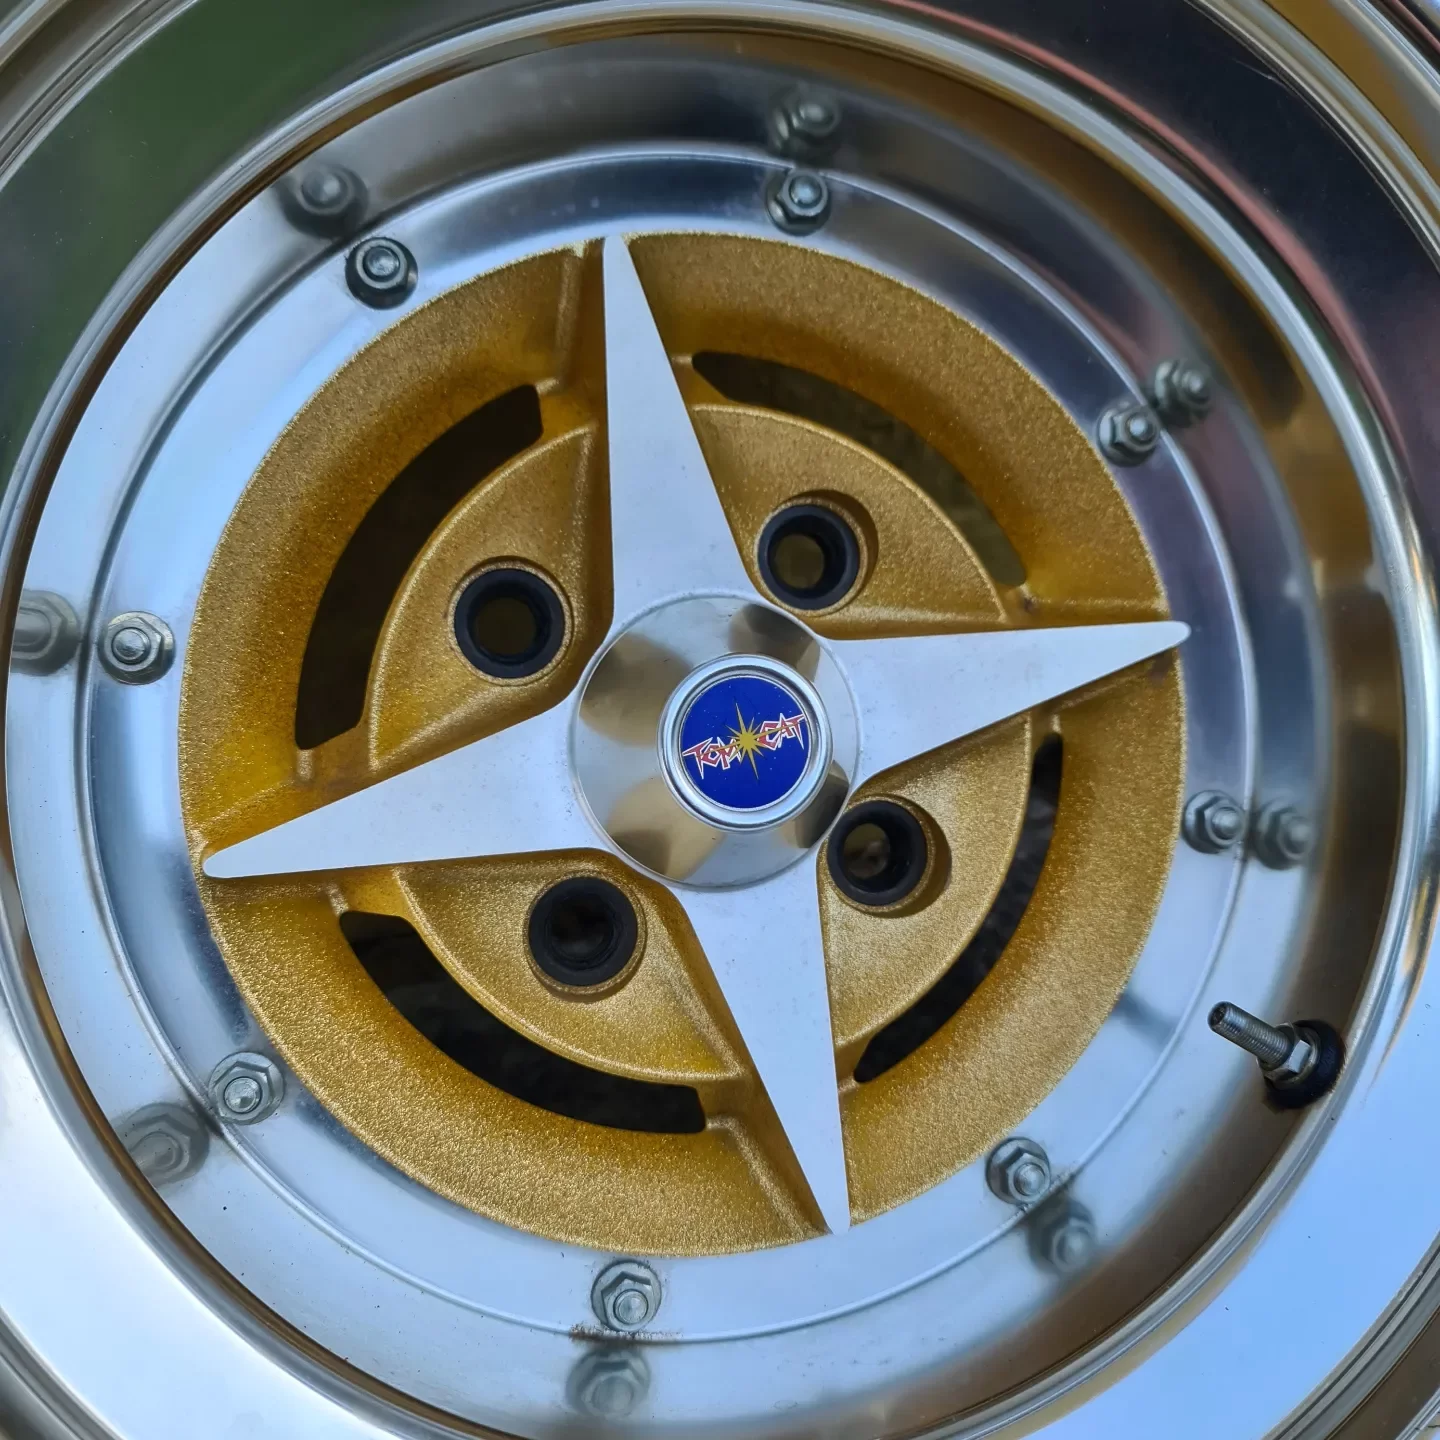
Some tom cat spam for your viewing pleasure December 1982 wheel that up until yesterday hadn't been on a vehicle as far as I can tell. This brings the collection to three wheels, the other two are with Aidan at Pine engineering currently.
- 129 replies
-
- 38
-
-
-
Jesse's Toyota Mark ii Grande gx61
Jeffs_Emporium replied to Jeffs_Emporium's topic in Projects and Build Ups
Purchased some new camber plates from Izanami wheel that are thicker to allow more adjustment (top shock nut can travel below strut tower)
-
The workshop manual has references where to set the neutral position of the gear lever in relation to distance forward from steering wheel and up from centre of hub so I'll make a start with that. I hooked reverse last night where 2nd or 4th should be so that's promising
-
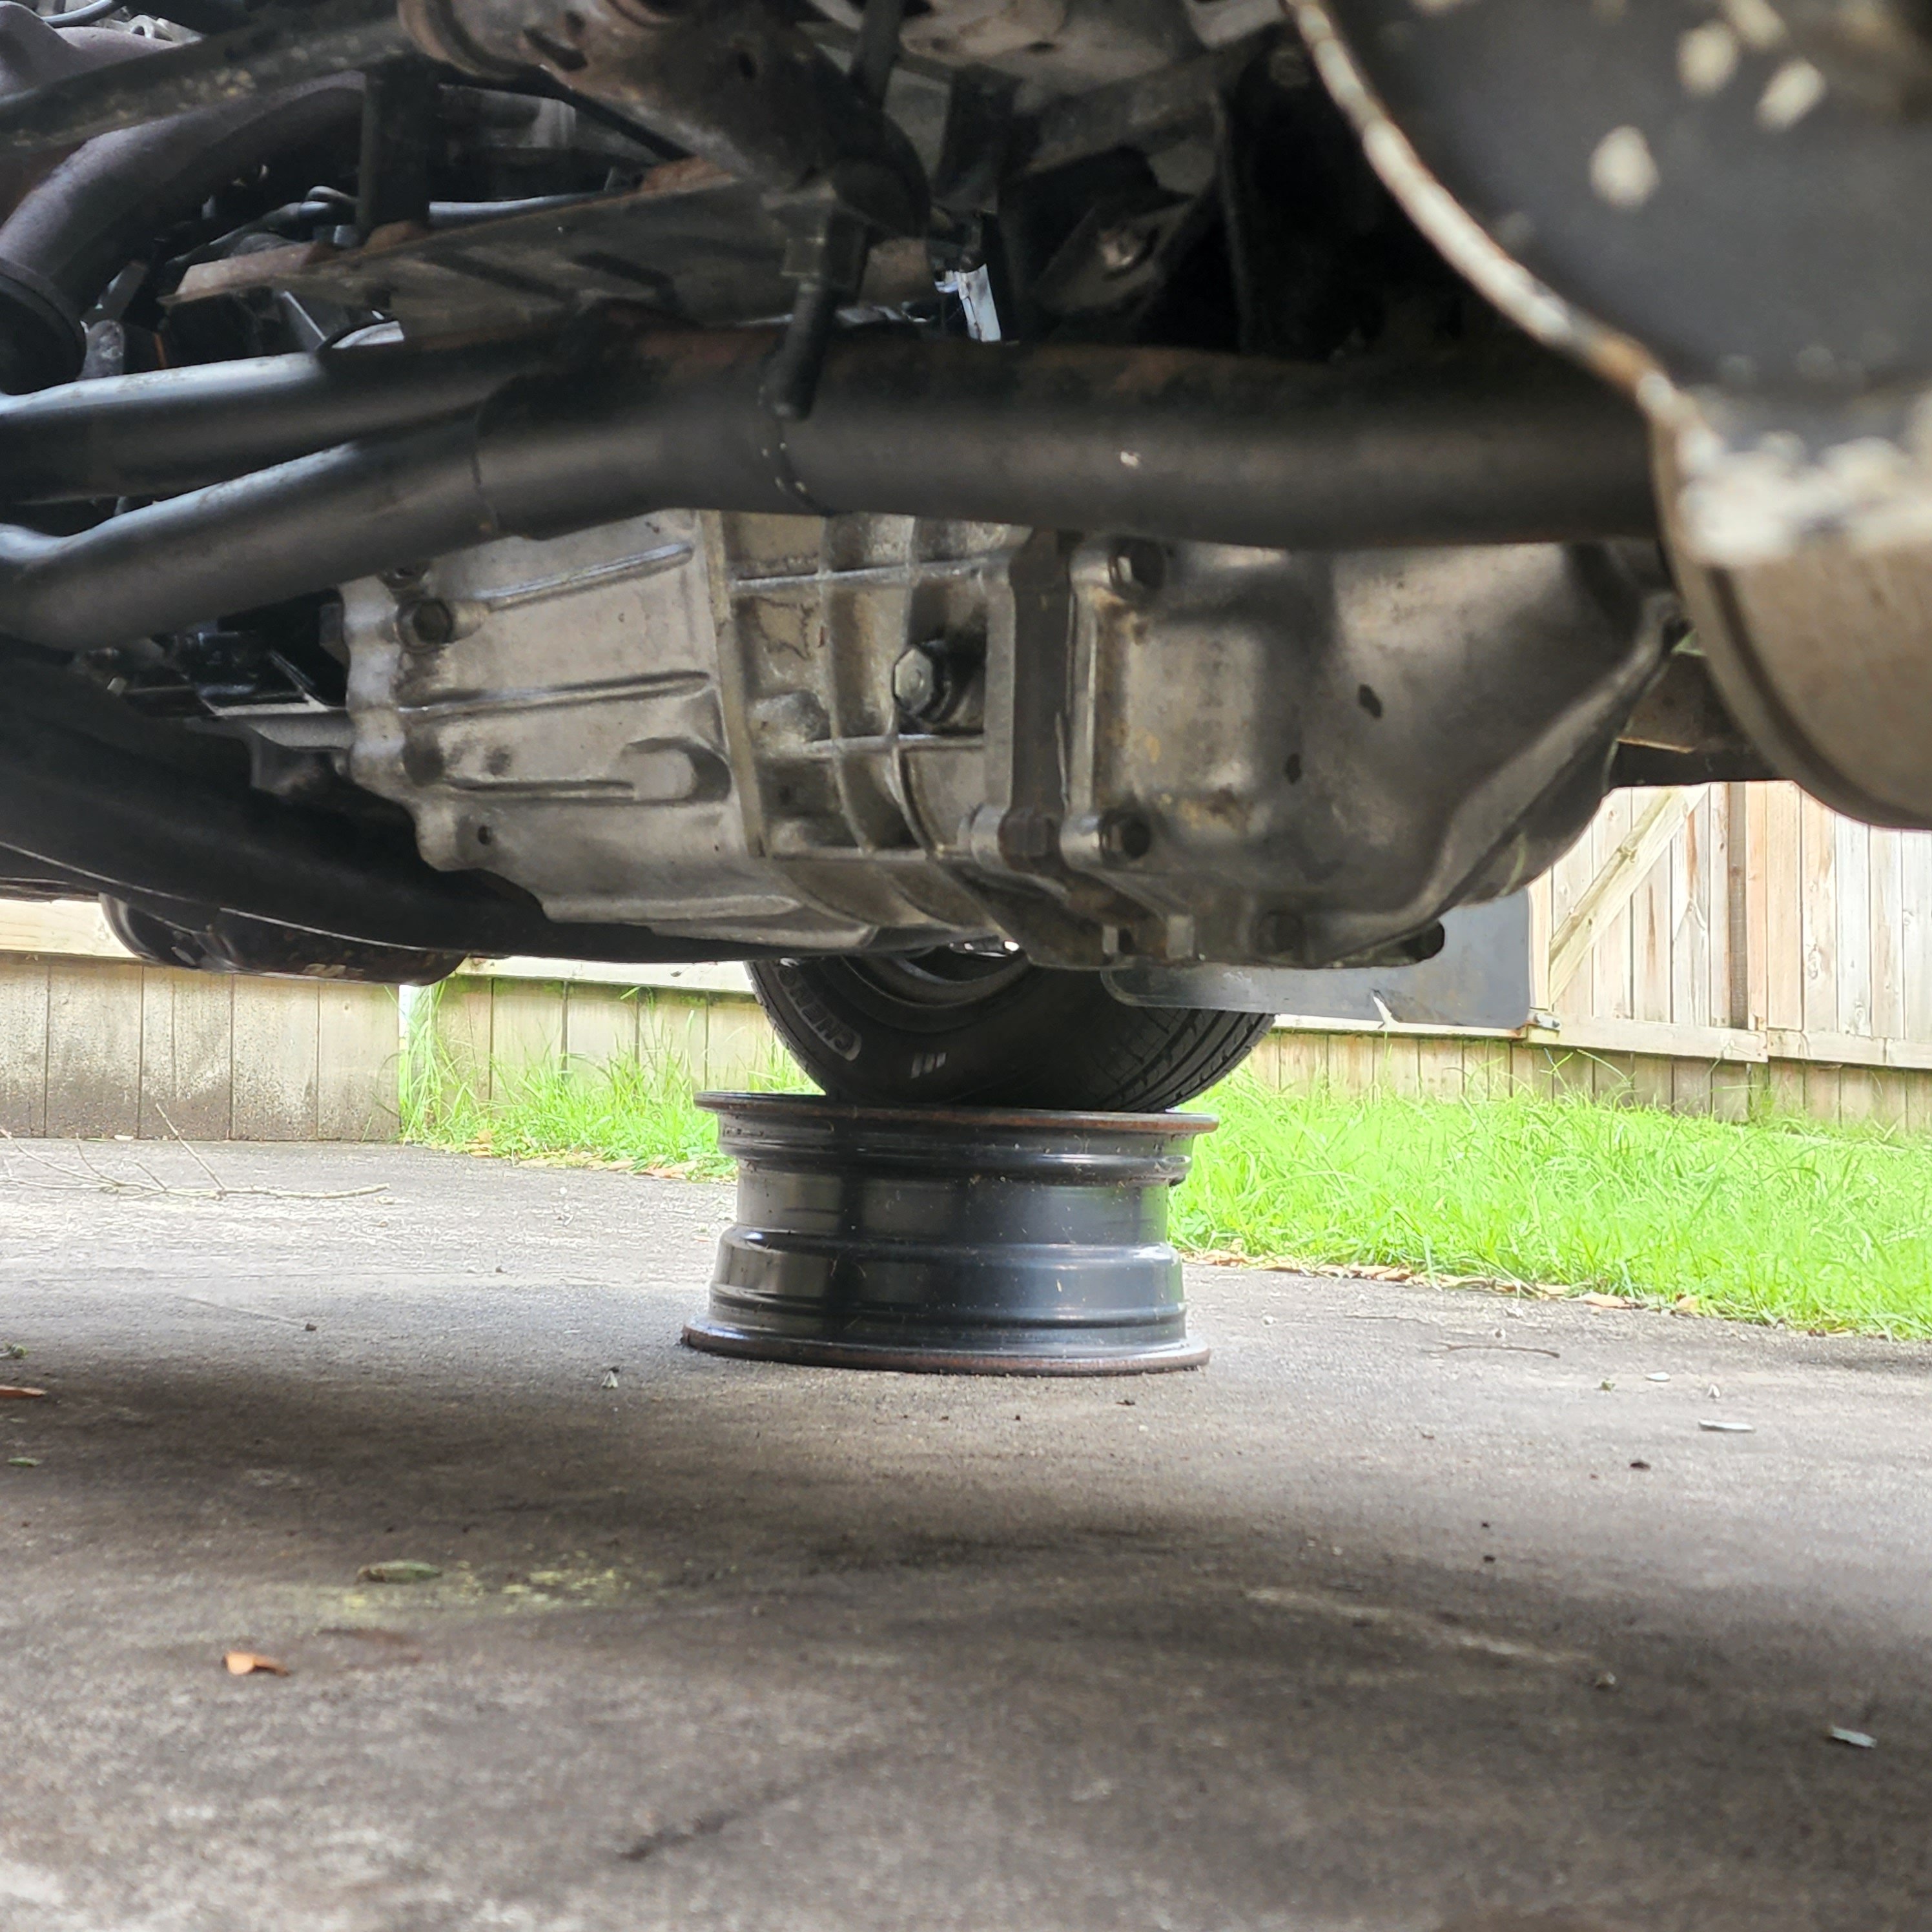
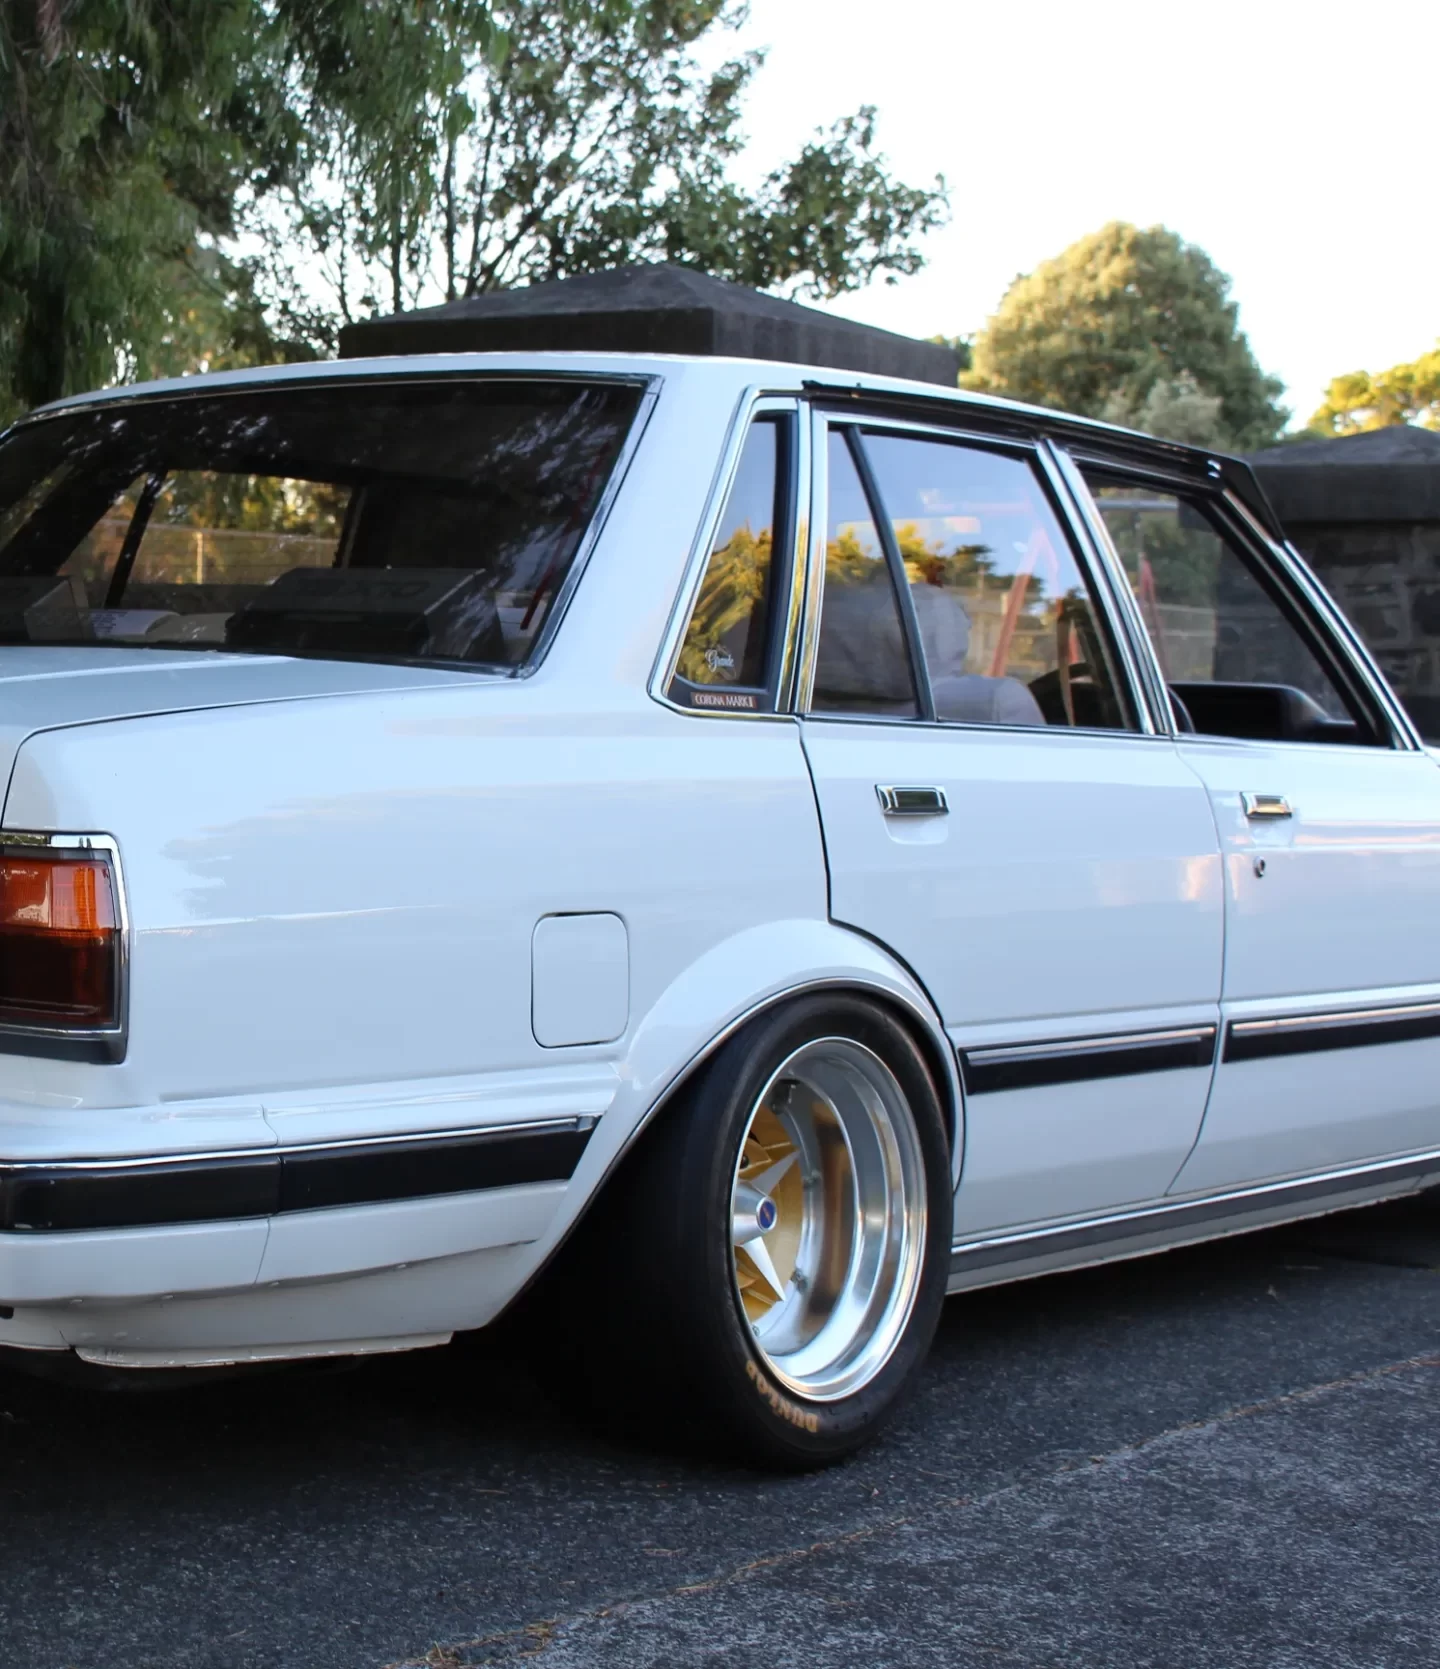
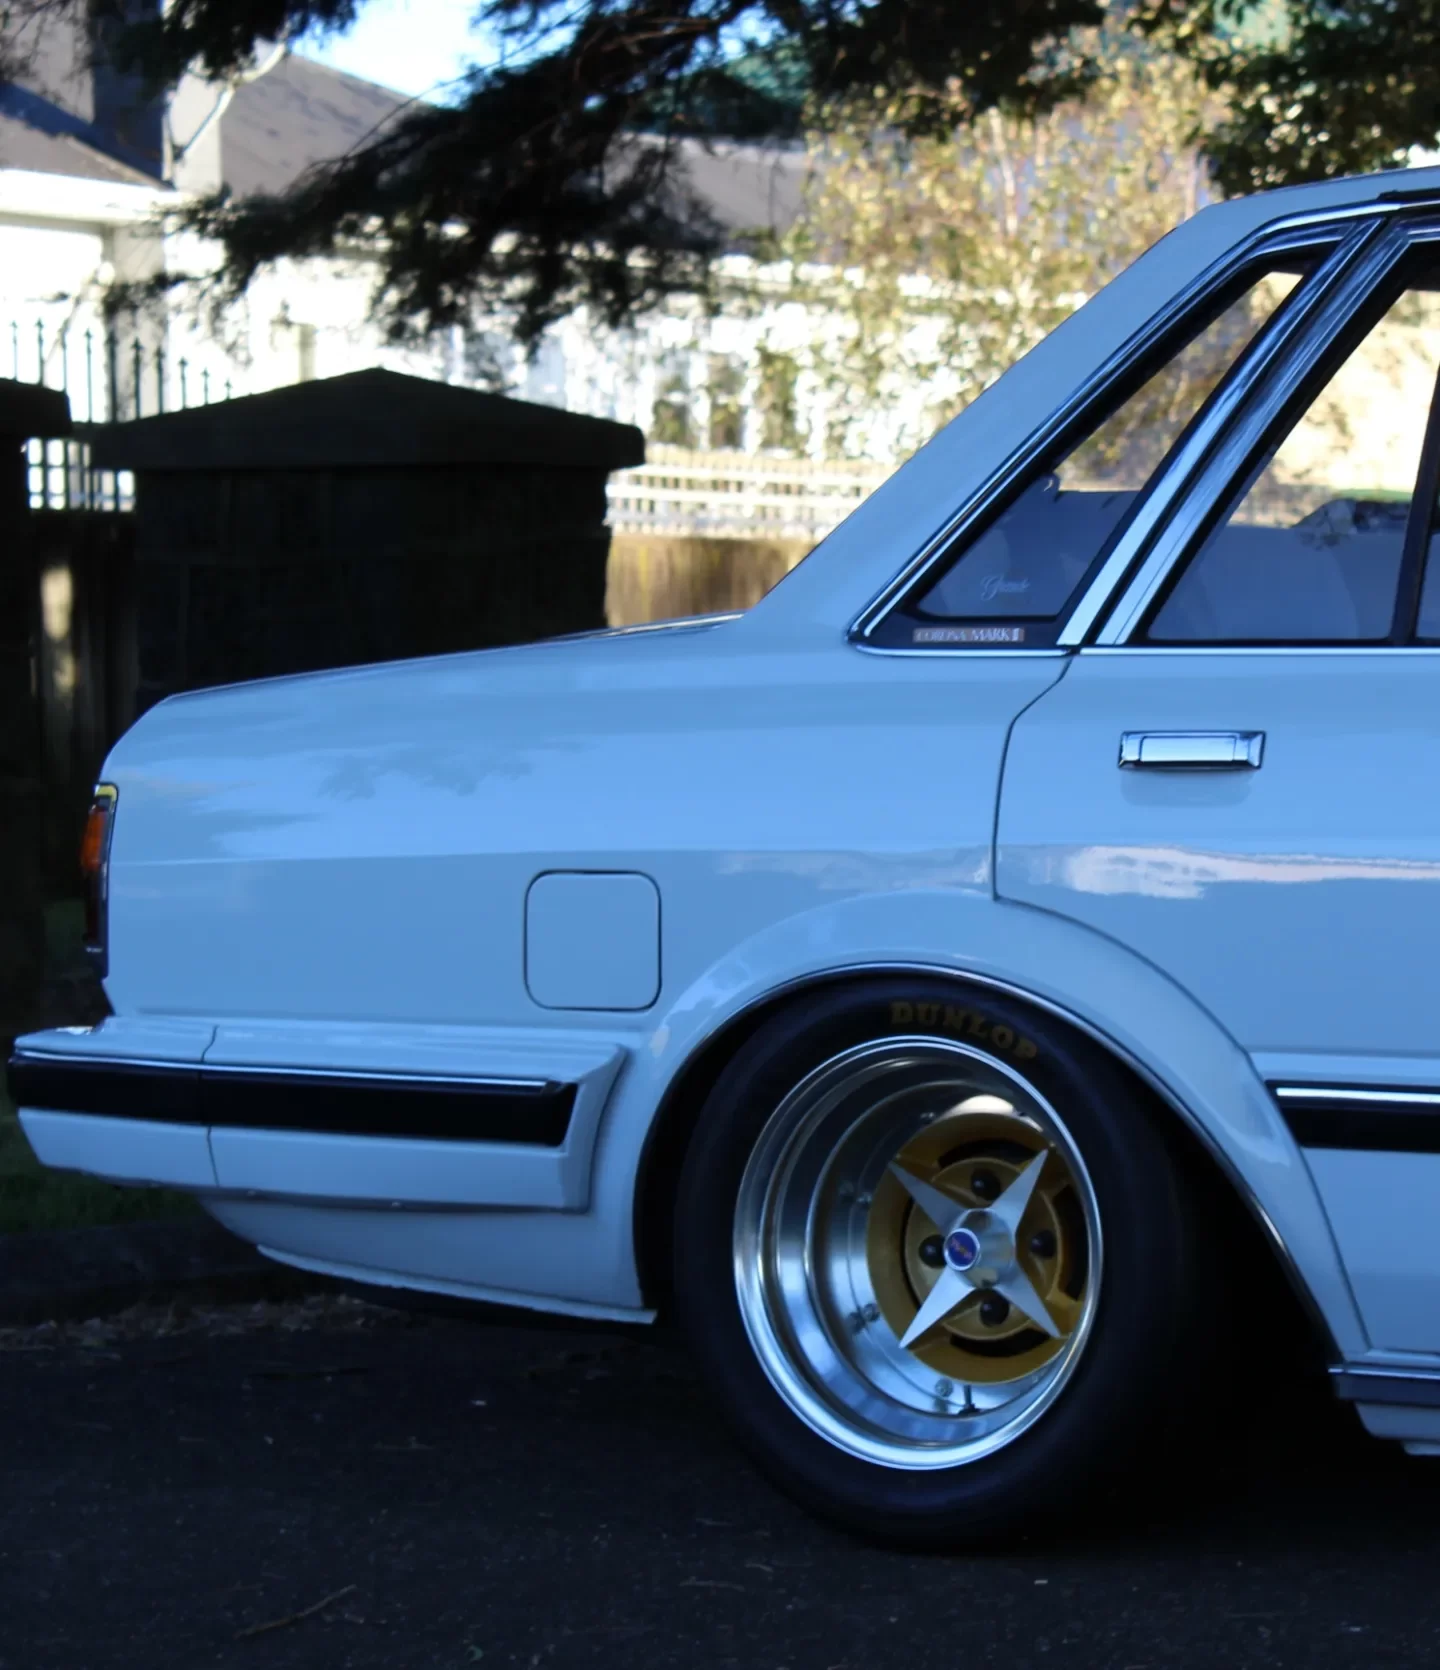
It's a bit of an illusion in this pic, there's a hump in driveway between front and rear wheels. But yeah this is torsions jacked back up and steelies/stock tyres to get on woolf's hoist also and the reason why I've messed around so long to keep engine as high as possible
-
Jesse's 1988 Toyota Liteace KM36
Jeffs_Emporium replied to Jeffs_Emporium's topic in Projects and Build Ups
- 131 replies
-
- 14
-
-
Jesse's 1988 Toyota Liteace KM36
Jeffs_Emporium replied to Jeffs_Emporium's topic in Projects and Build Ups
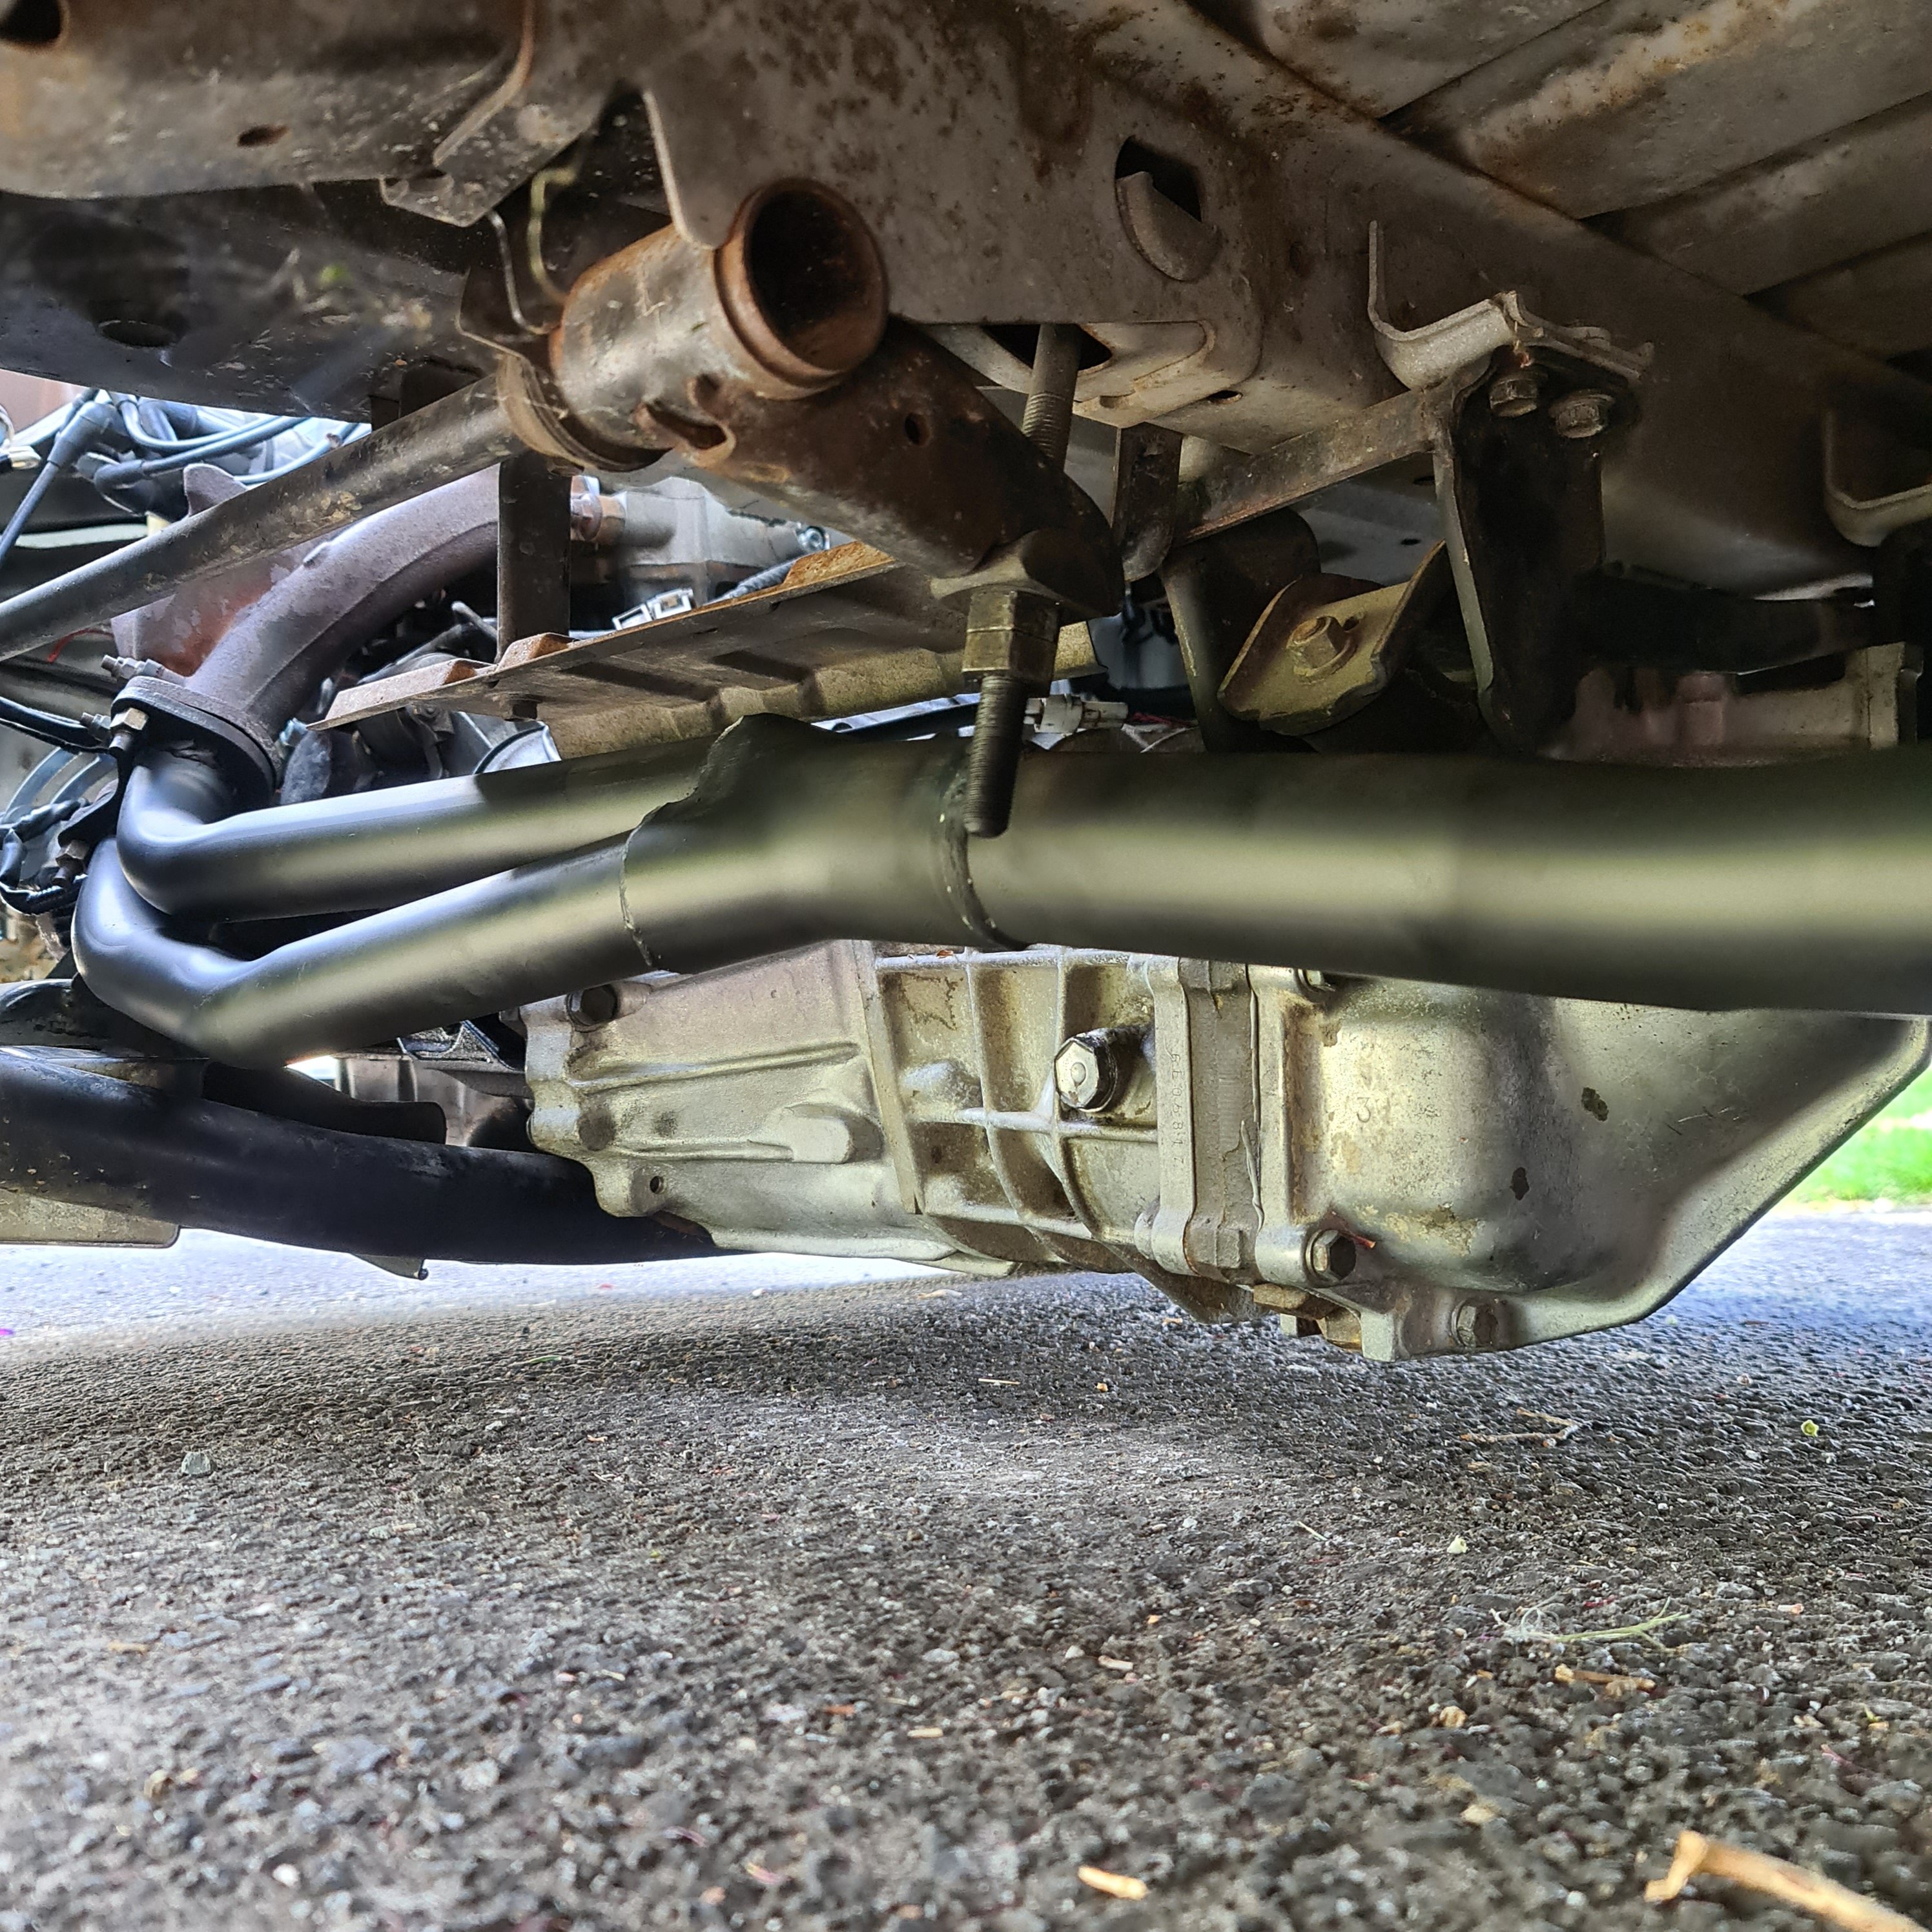
Just dragged it home from woolf mufflers. He's done a tidy job of the sharp bends to get by the k frame and just hooked into the 5k muffler to get me going for now. Trying to actually drive it im having some issues with gear selection and a clutch sounding noise. I just recieved the workshop manual which shows me where to set the colum lever so will try that and see how i get on with selecting 1st. Feels like im trying to launch in 3rd and cant find reverse. Hoping i havent kooked release bearing size or anything.
- 131 replies
-
- 12
-
-
The nz made hyperpak module
-
Jesse's 1988 Toyota Liteace KM36
Jeffs_Emporium replied to Jeffs_Emporium's topic in Projects and Build Ups
I'm a huge fan
- 131 replies
-
- 14
-
-
-
Jesse's 1988 Toyota Liteace KM36
Jeffs_Emporium replied to Jeffs_Emporium's topic in Projects and Build Ups
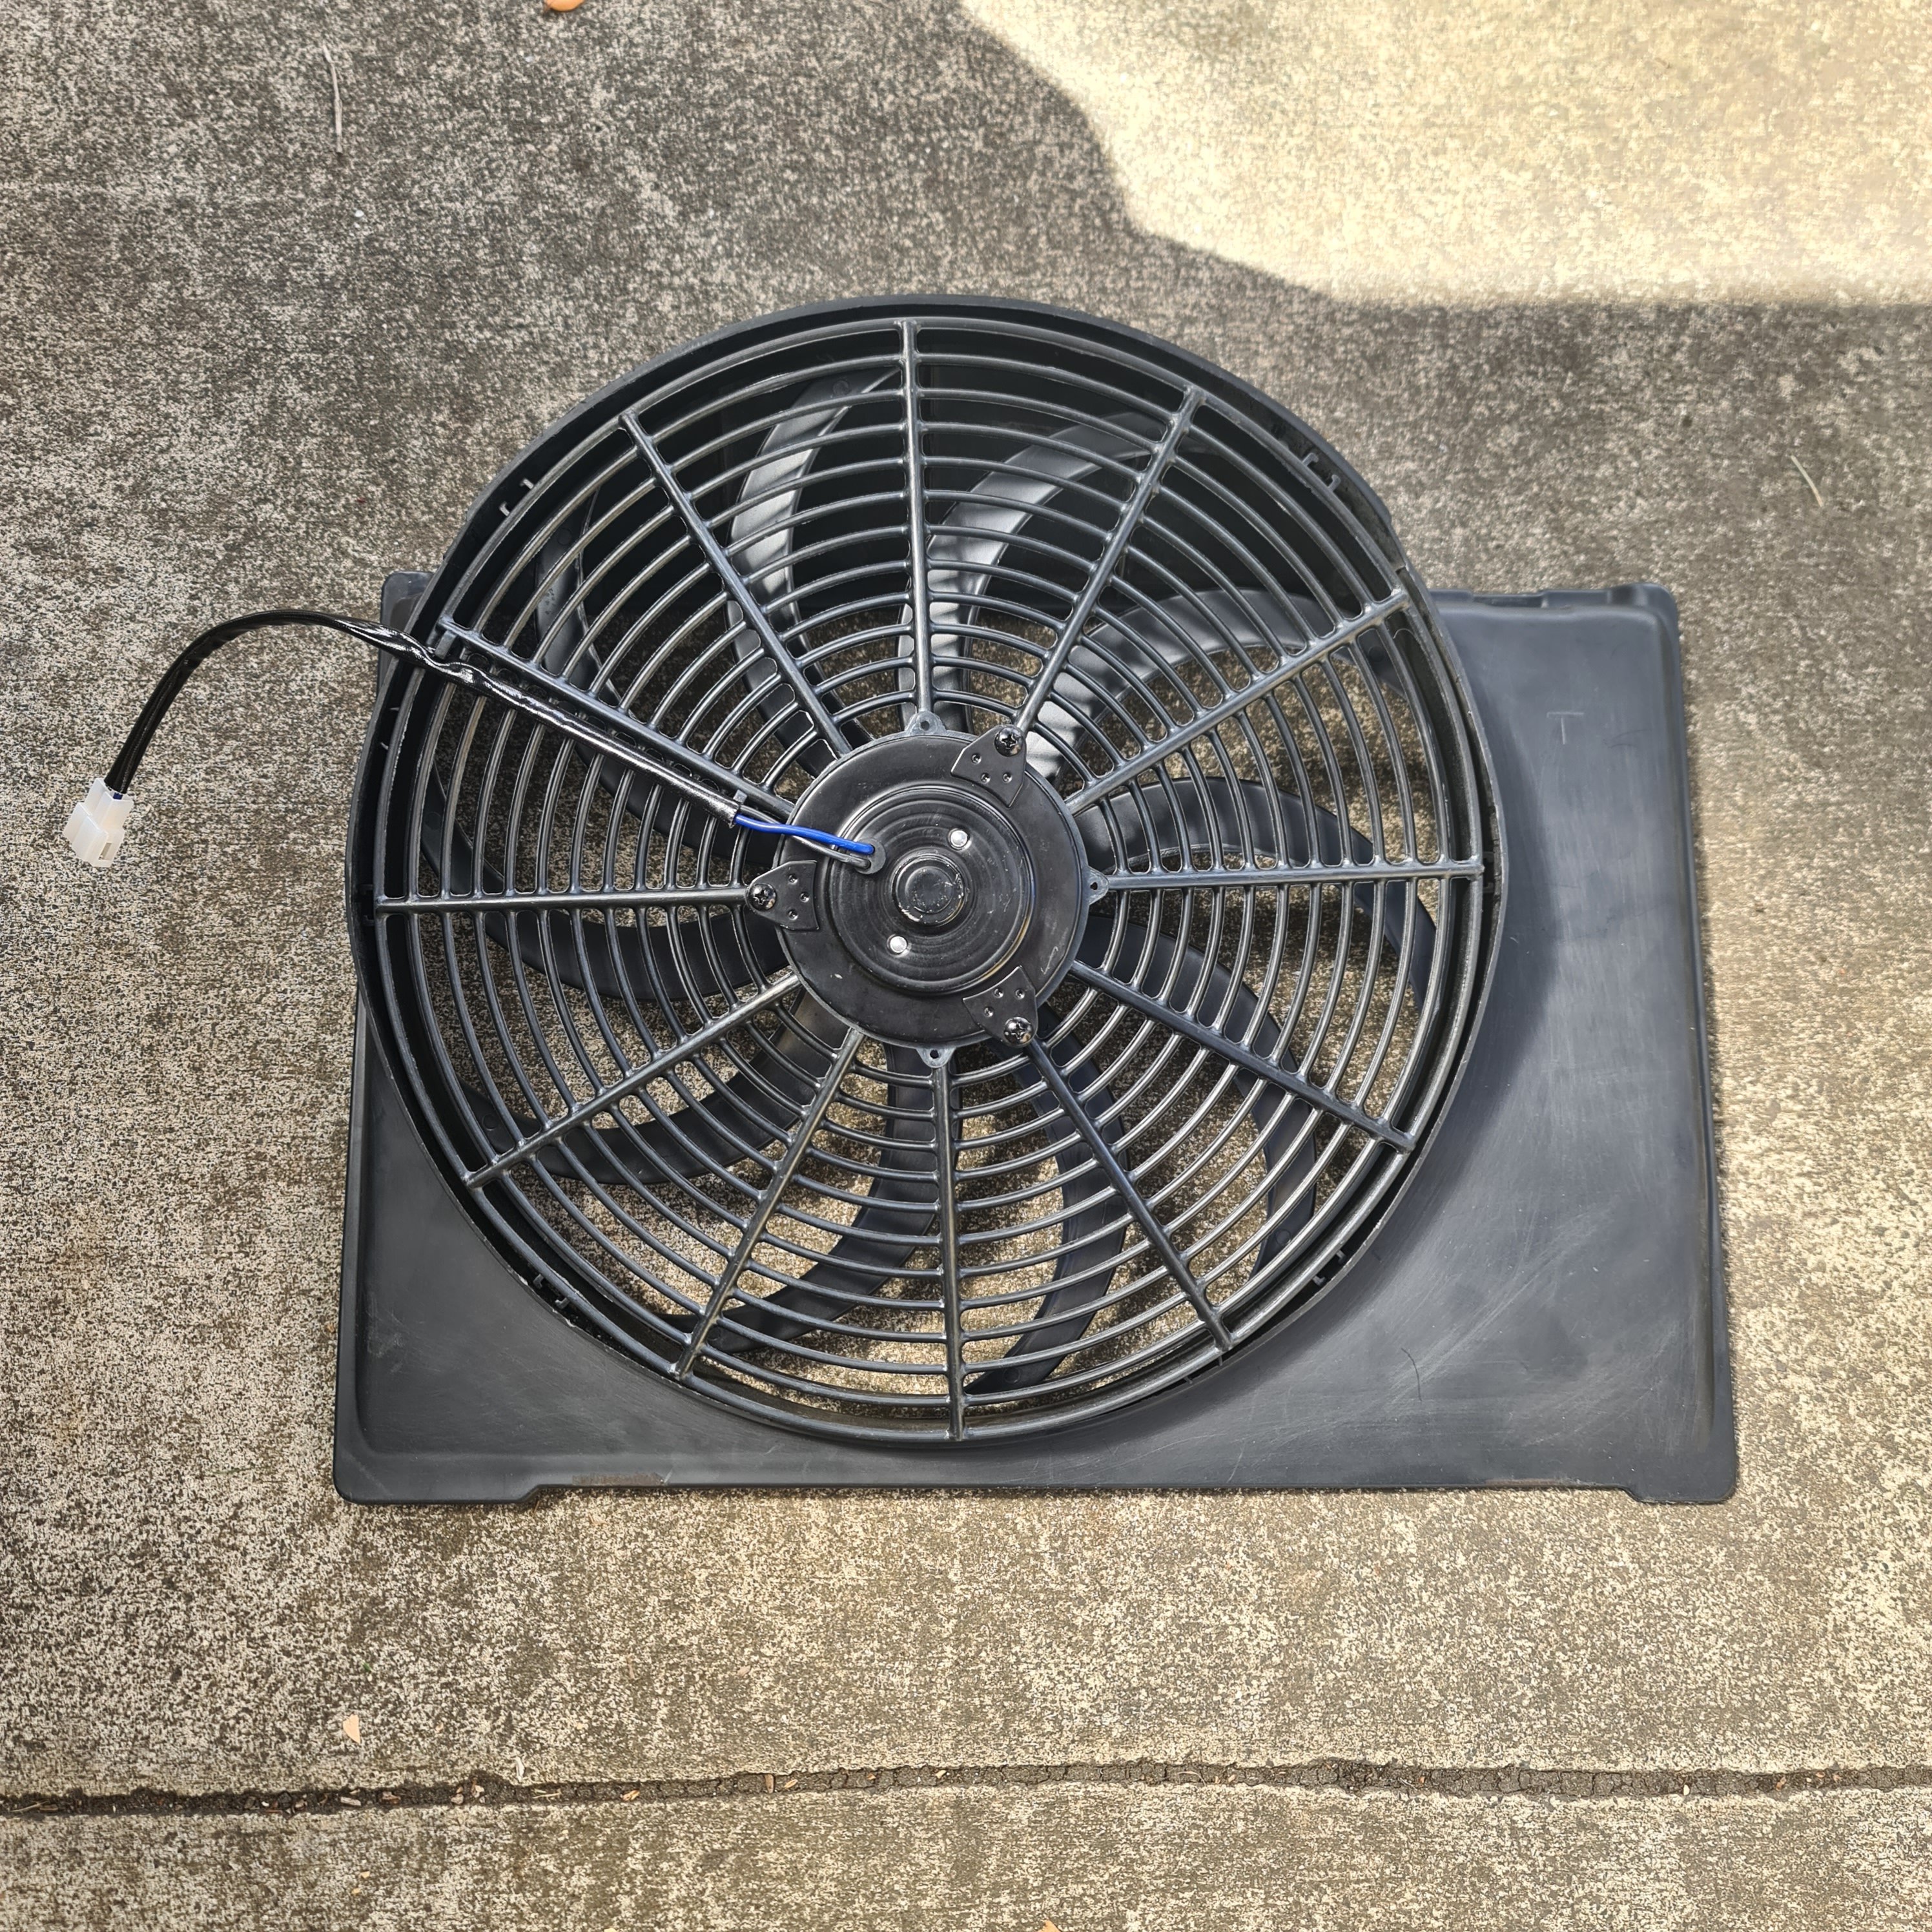
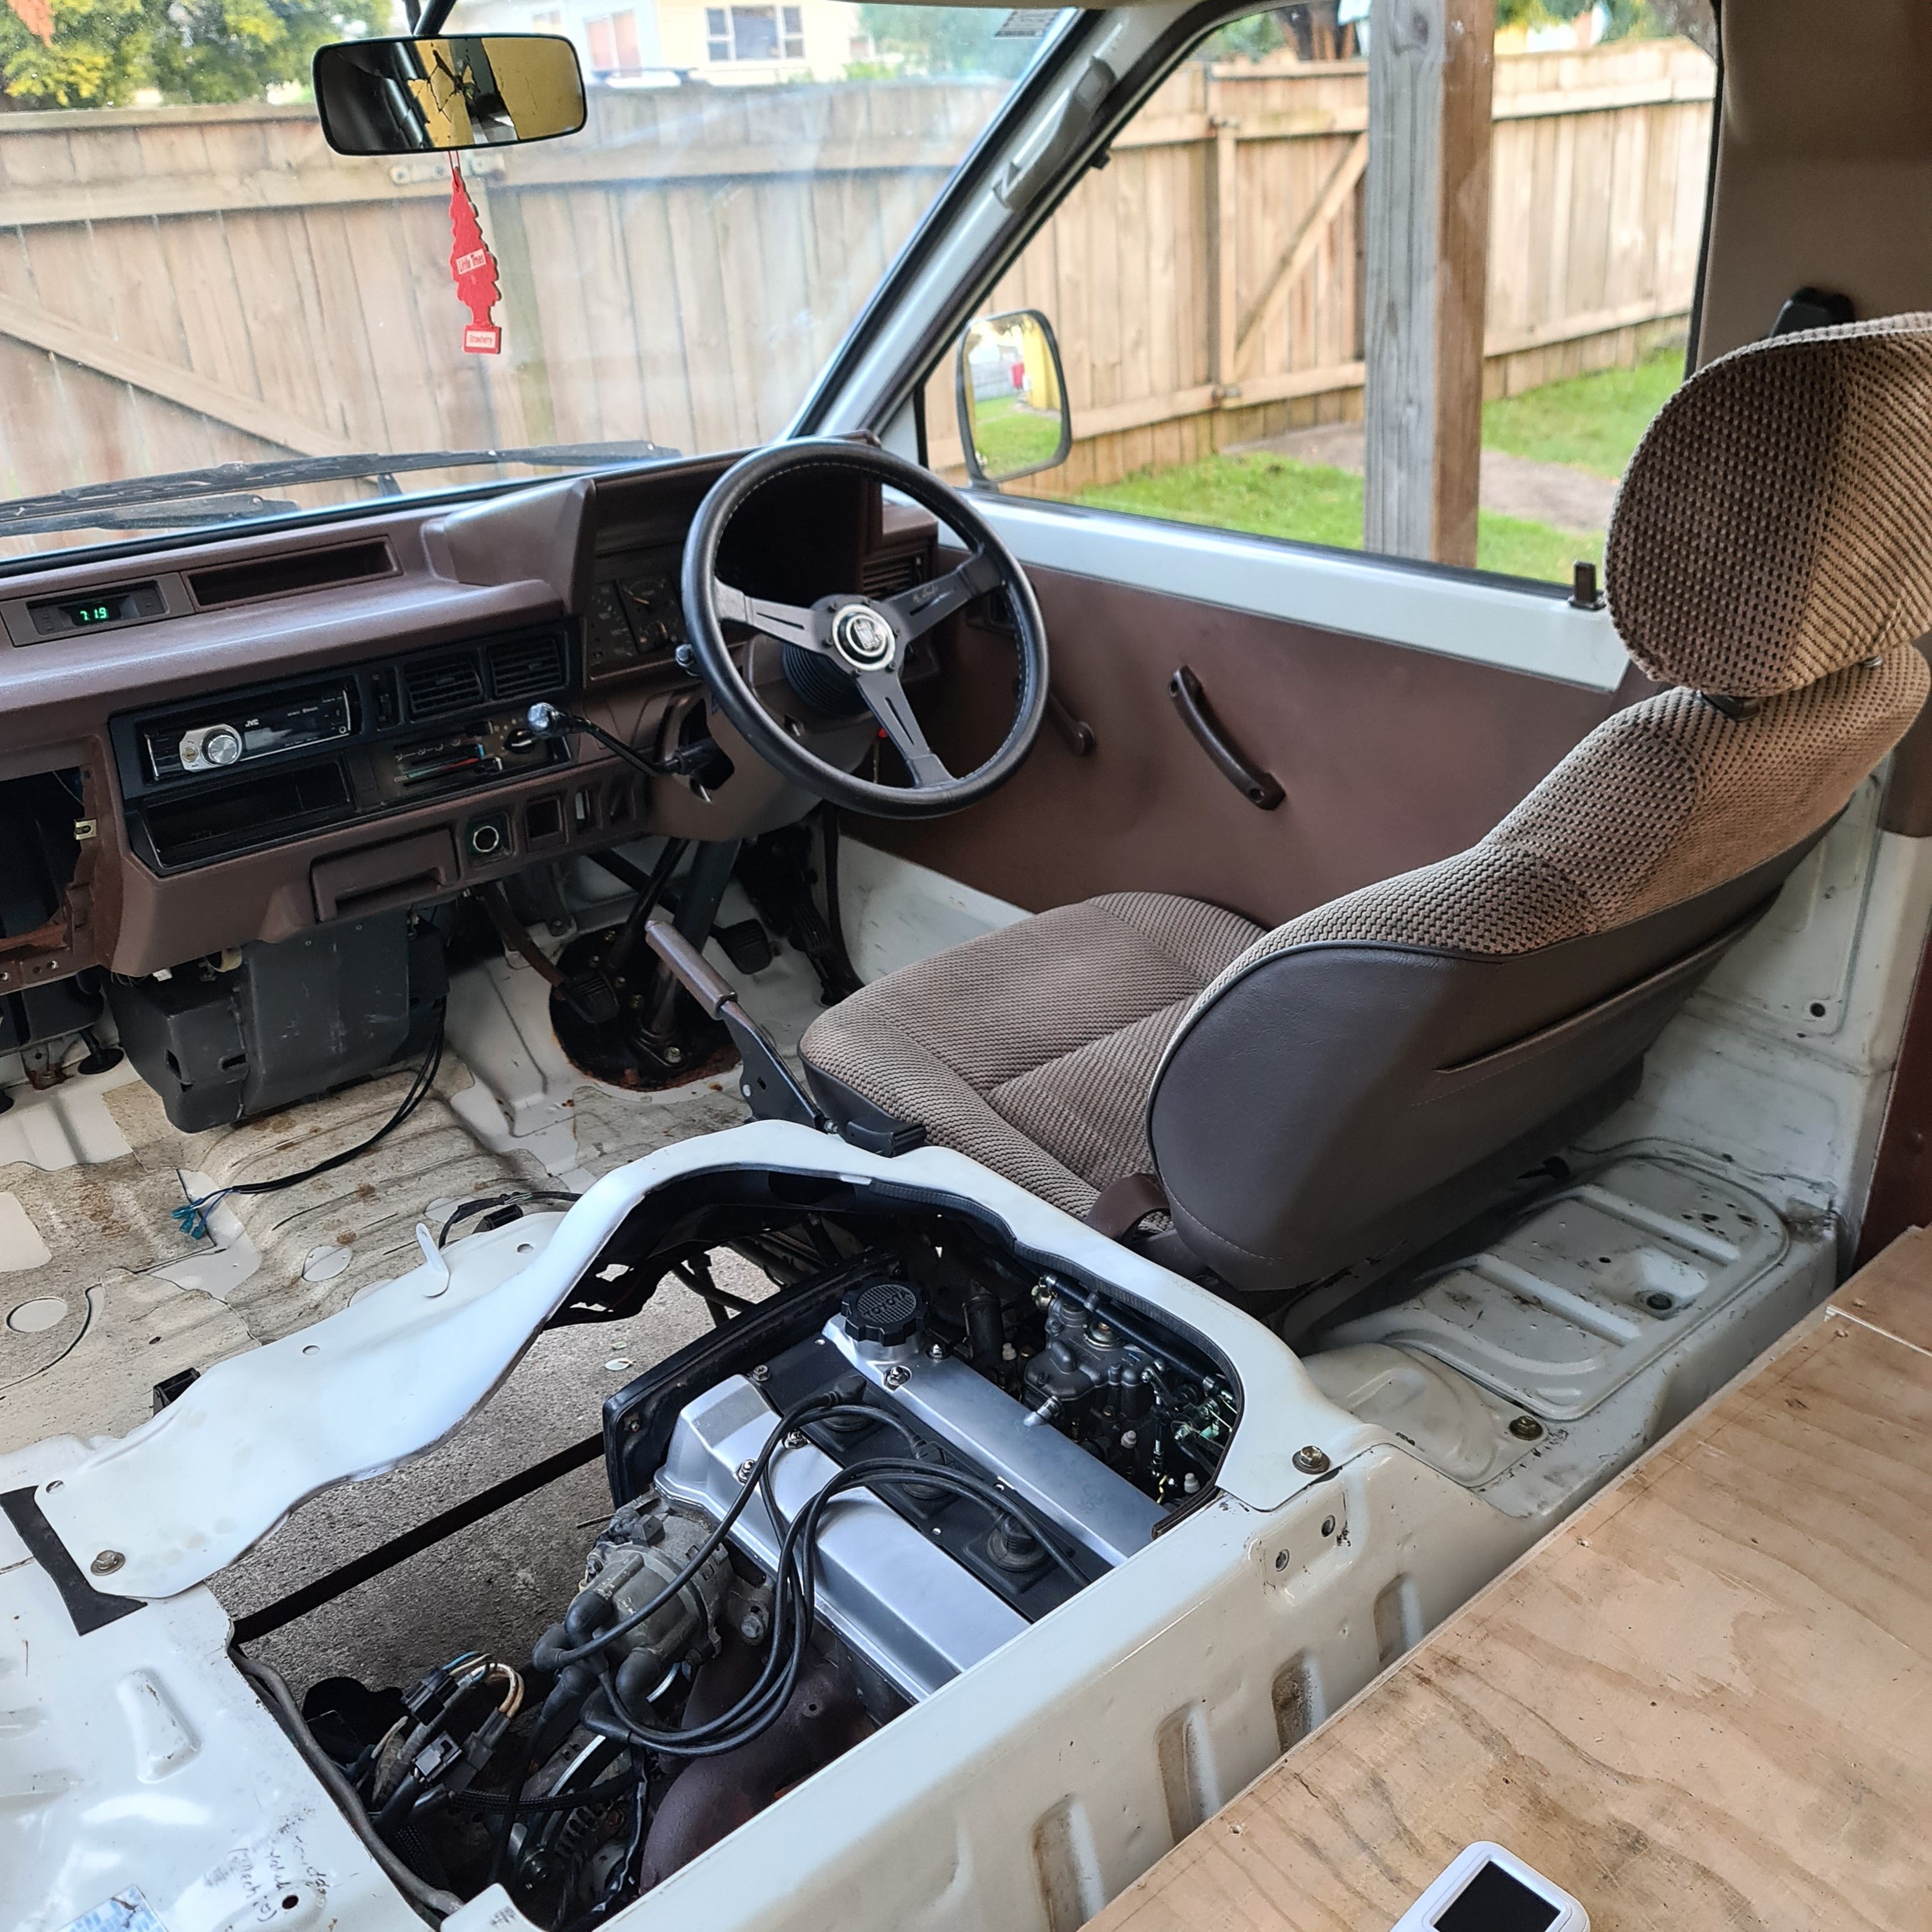
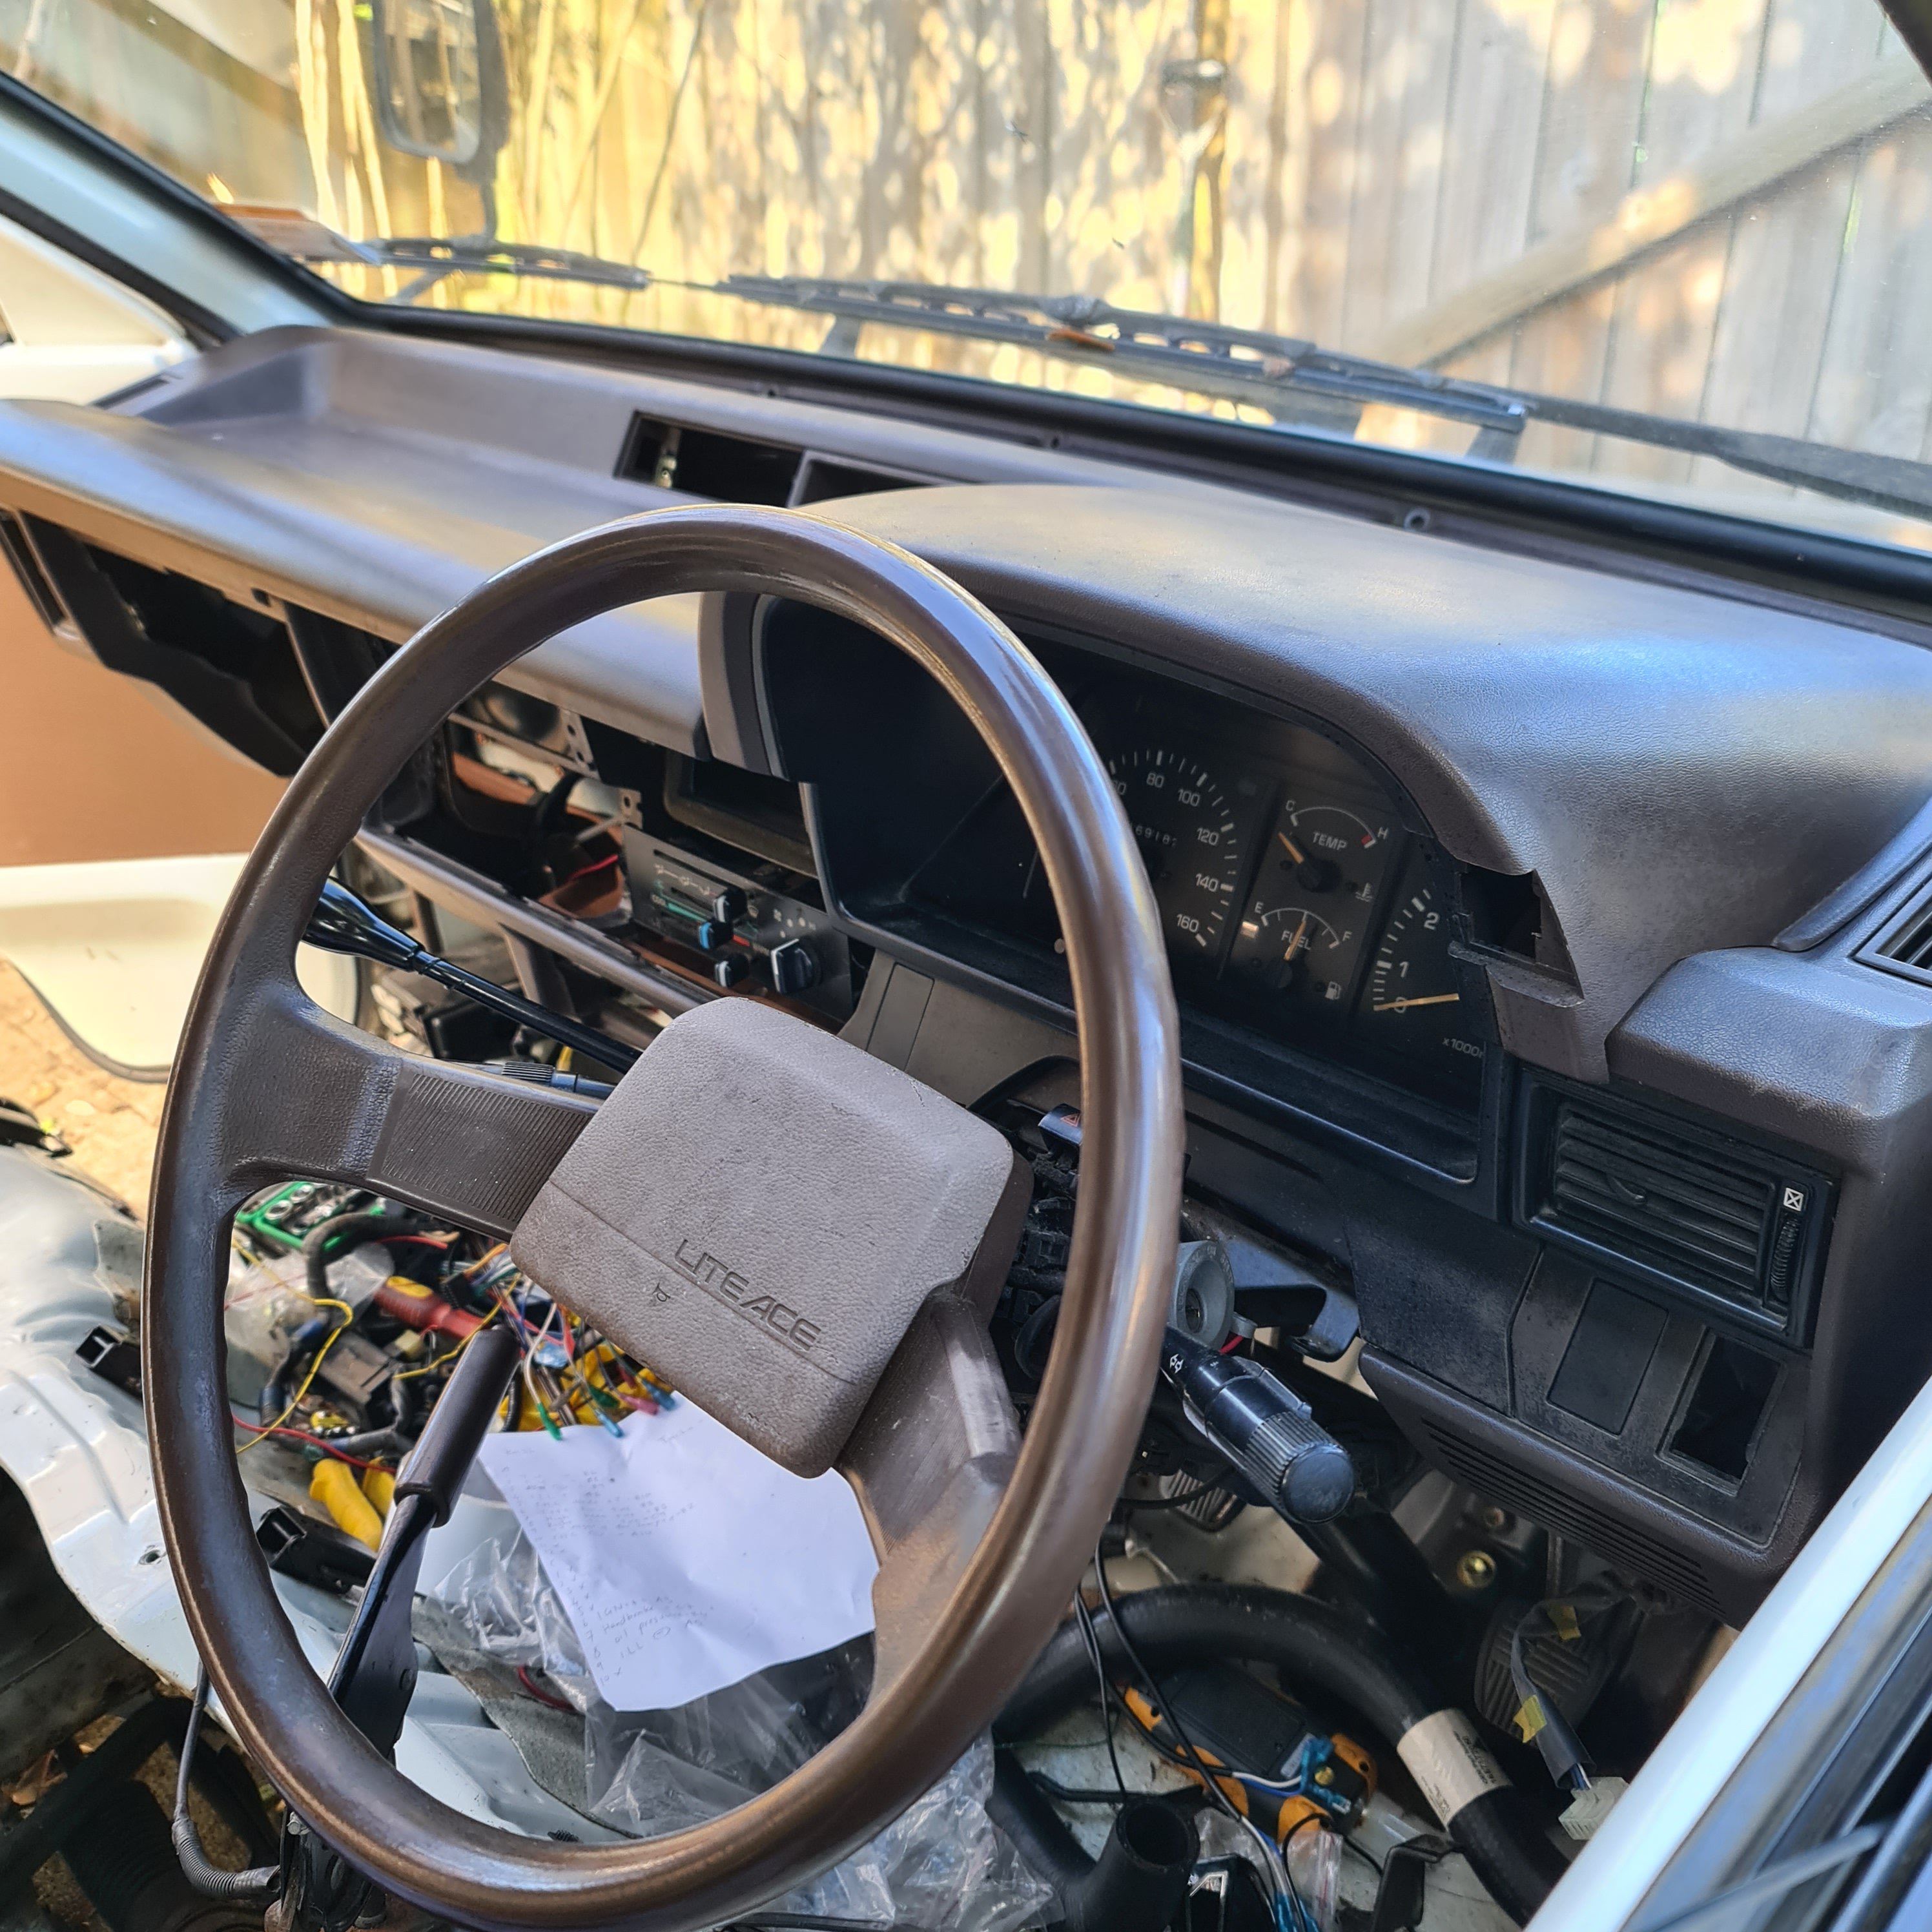
Big push again this weekend to try get this done. -Clock installed and wired up -cigarete lighter changed to one with green halo and fiber optic to ashtray (need to connect to headlights still) -Old dash installed. -365mm Nardi classic installed with boss kit pinched from my gx61. -Alternator wiring I thought I had sorted but not. -Floor shifter seat cover fitted, way more clearance but still needed to slice a bit off the front carb and cut and re-weld engine mount to drop the intake side. This has also helped level the Gearbox on its mounts (it was tweaked before) -16" m&h electric fan trimmed up to fit into shroud, its huge but fits shroud nicely. Also it's worked out that it's offset to the exhaust side which will help blow exhaust heat out of engine bay and not blow shit through the carbs Hopefully. Still waiting on those cooling lines, need to hook up brake vacuum and exhaust is booked to be connected this Tuesday.
- 131 replies
-
- 14
-
-
Jesse's 1988 Toyota Liteace KM36
Jeffs_Emporium replied to Jeffs_Emporium's topic in Projects and Build Ups
Went a bit further with assembly. I'm keen to track down an electrical fan to fit into the factory shroud
- 131 replies
-
- 15
-
-
-
Jesse's 1988 Toyota Liteace KM36
Jeffs_Emporium replied to Jeffs_Emporium's topic in Projects and Build Ups
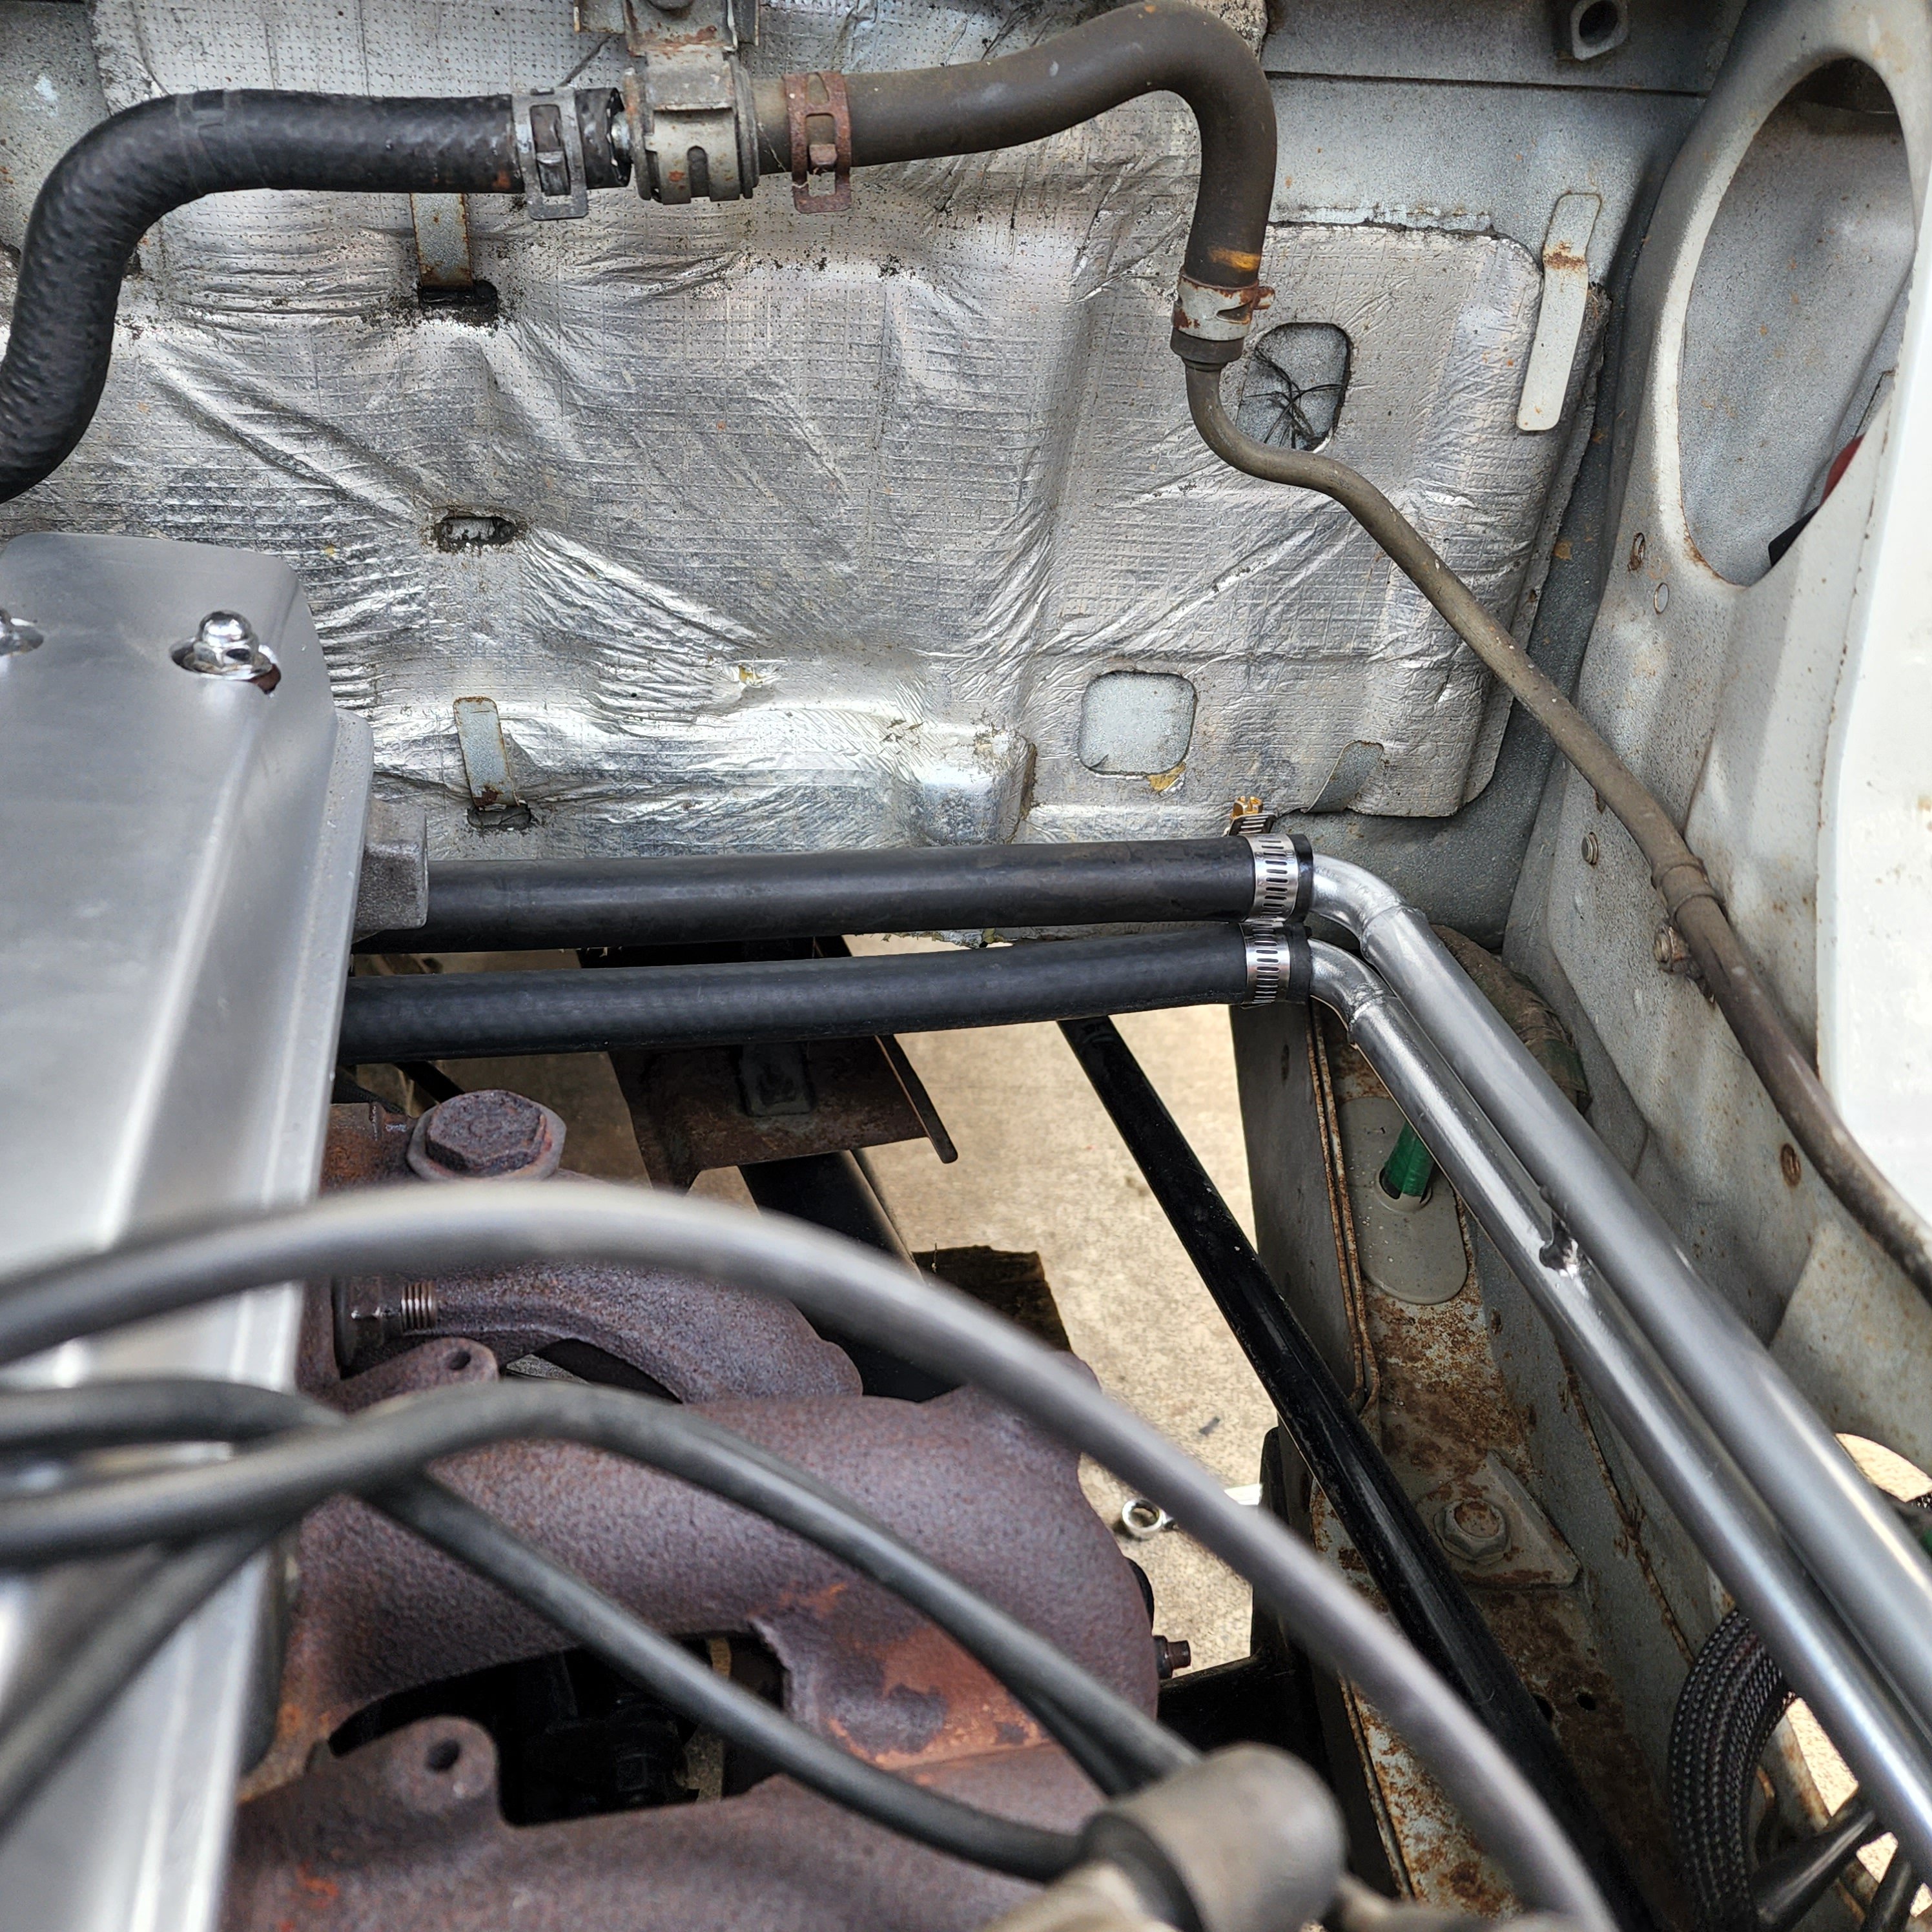
Decided that since I had my money back from parts van I should invest into changing radiator bottom hose to the correct side. I also had them size match to the 4ag as there was a 2mm variation between motor and radiator. Quick plumb up and I am happy with my investment. Of course i need to add my inline remote filler into the top hose mix but you get the idea. Also dropped the heater pipes down to same guys to get them where I want without unnecessary hoses. If it works out they will just go straight across back of engine bay to join either side and one running parallel to the back head outlet.
- 131 replies
-
- 10
-
-
Jesse's 1988 Toyota Liteace KM36
Jeffs_Emporium replied to Jeffs_Emporium's topic in Projects and Build Ups
Tried the round dash but I'm not keen at all the modernisation is nice but doesn't suit anything else on the van
-
Jesse's 1988 Toyota Liteace KM36
Jeffs_Emporium replied to Jeffs_Emporium's topic in Projects and Build Ups
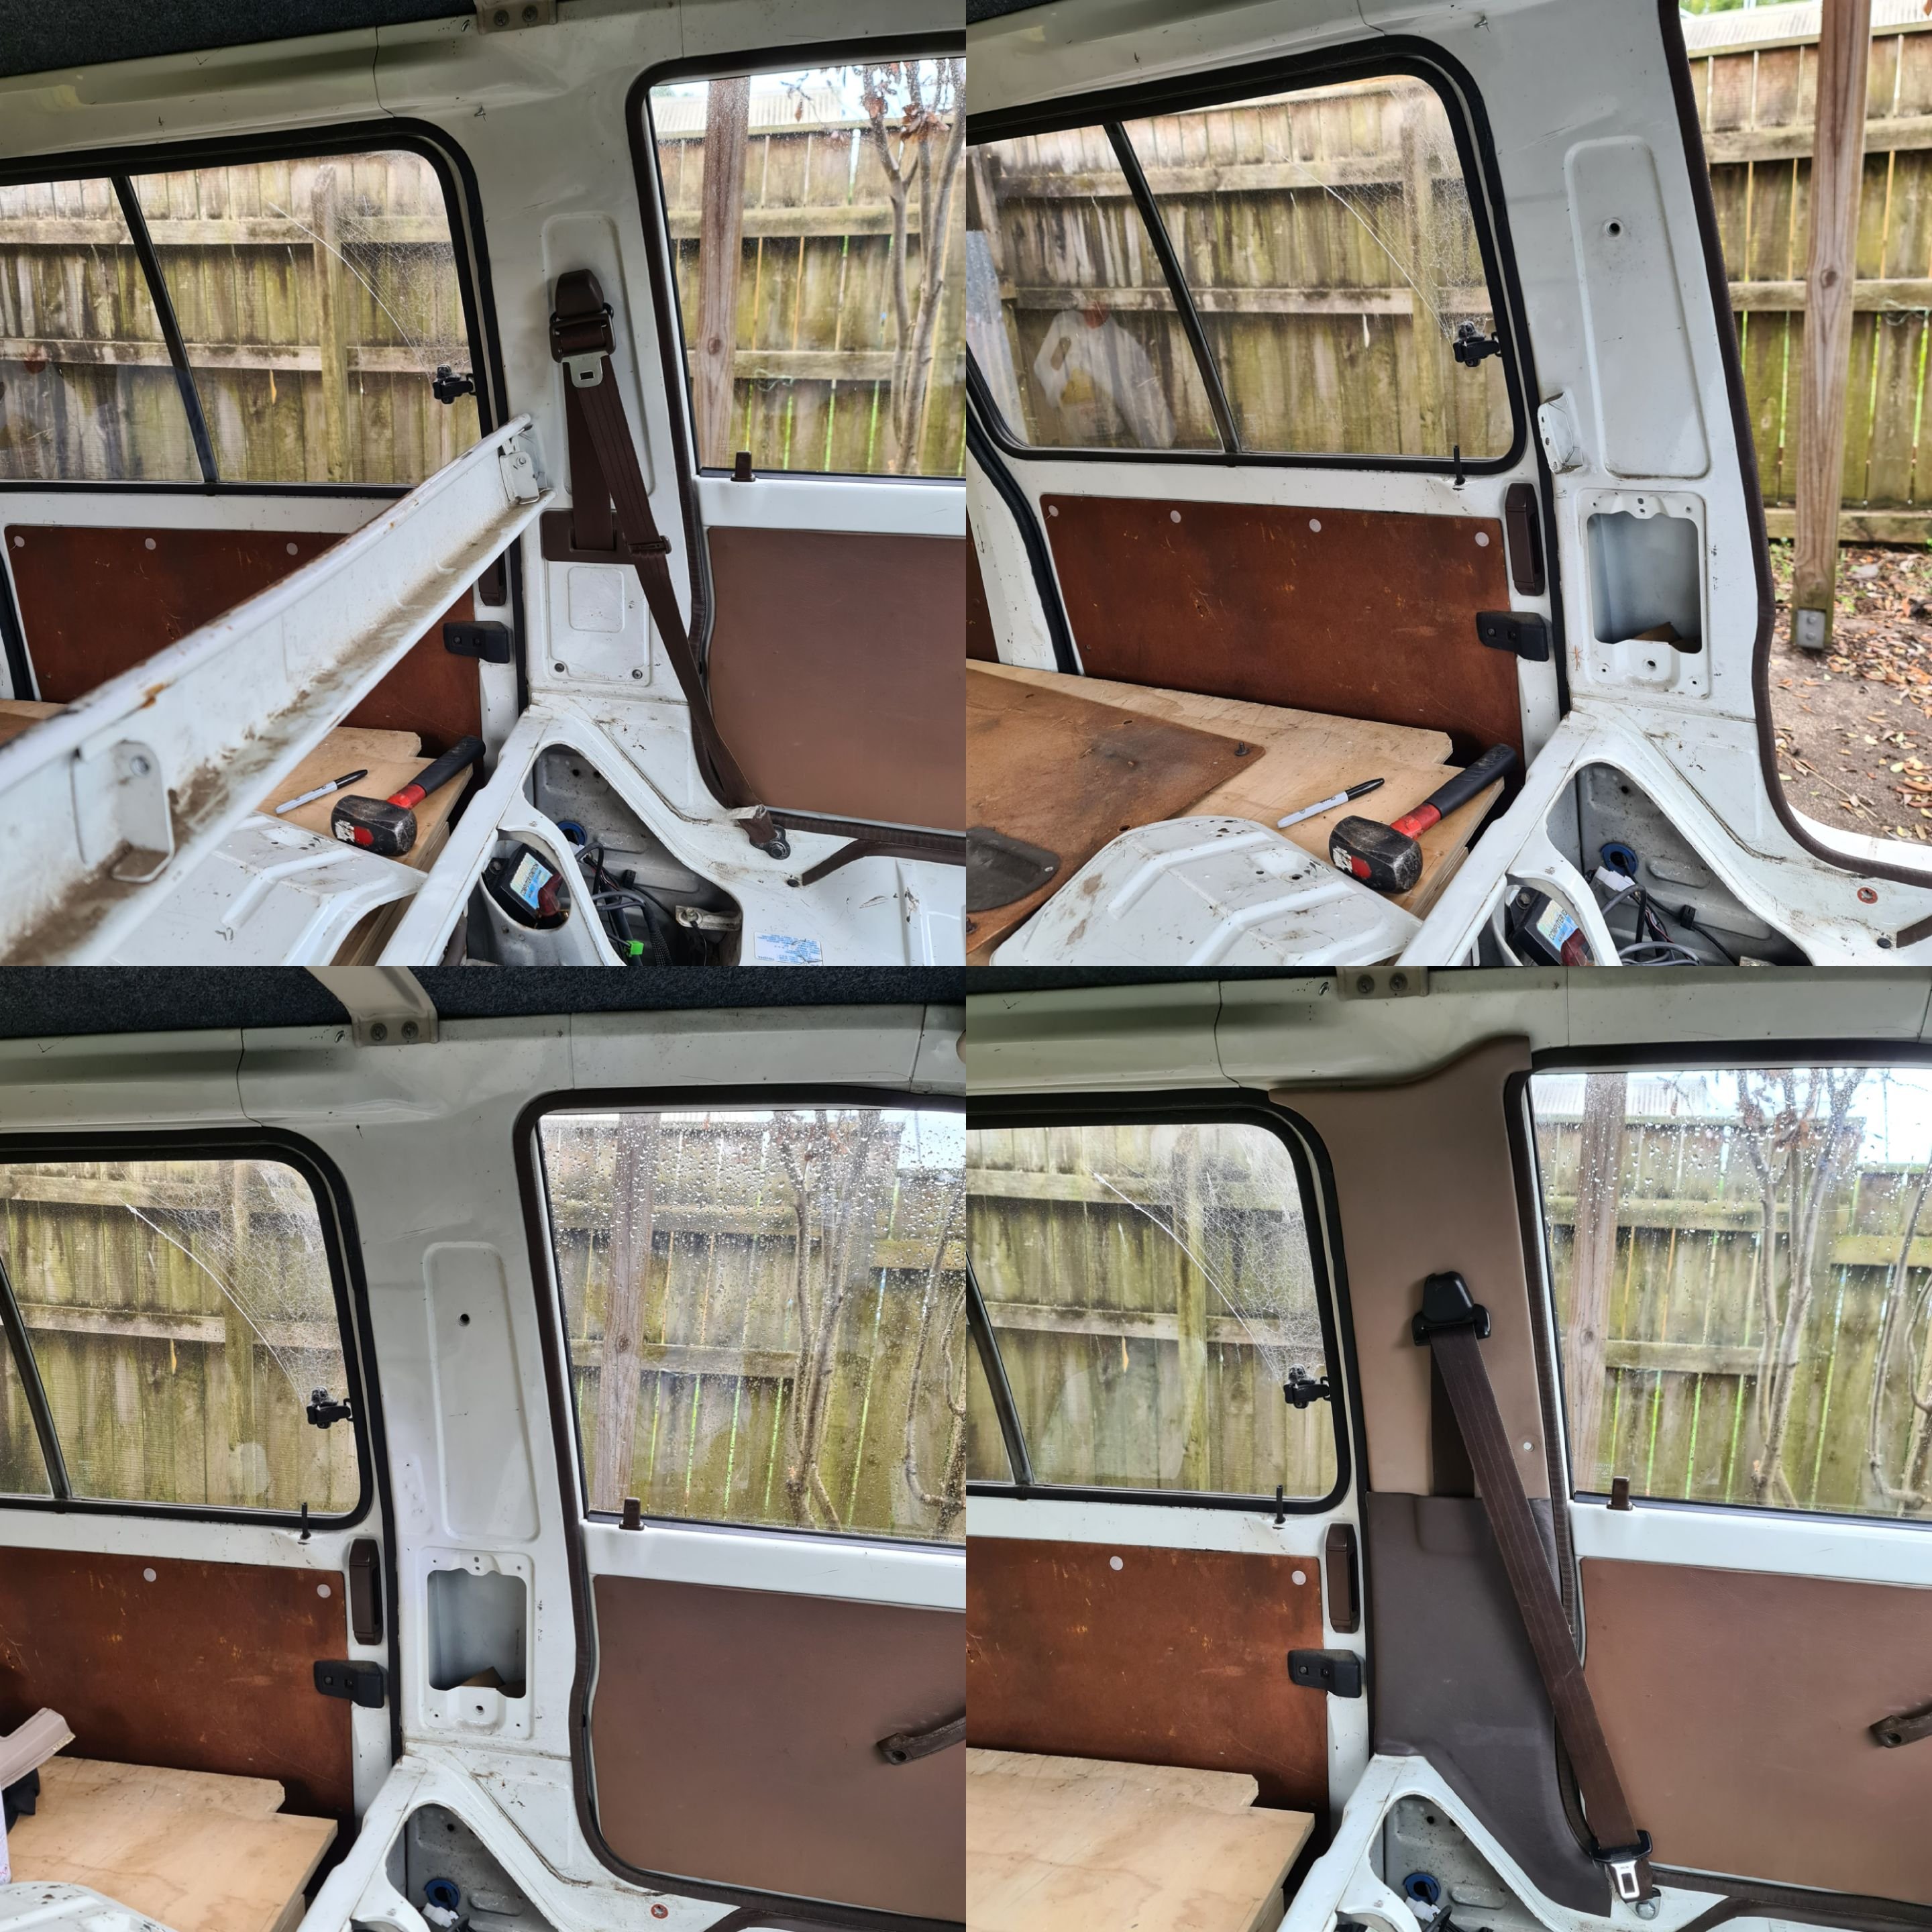
Flimsy bench seat brace removal and tidy up with the import trim
-
Jesse's 1988 Toyota Liteace KM36
Jeffs_Emporium replied to Jeffs_Emporium's topic in Projects and Build Ups
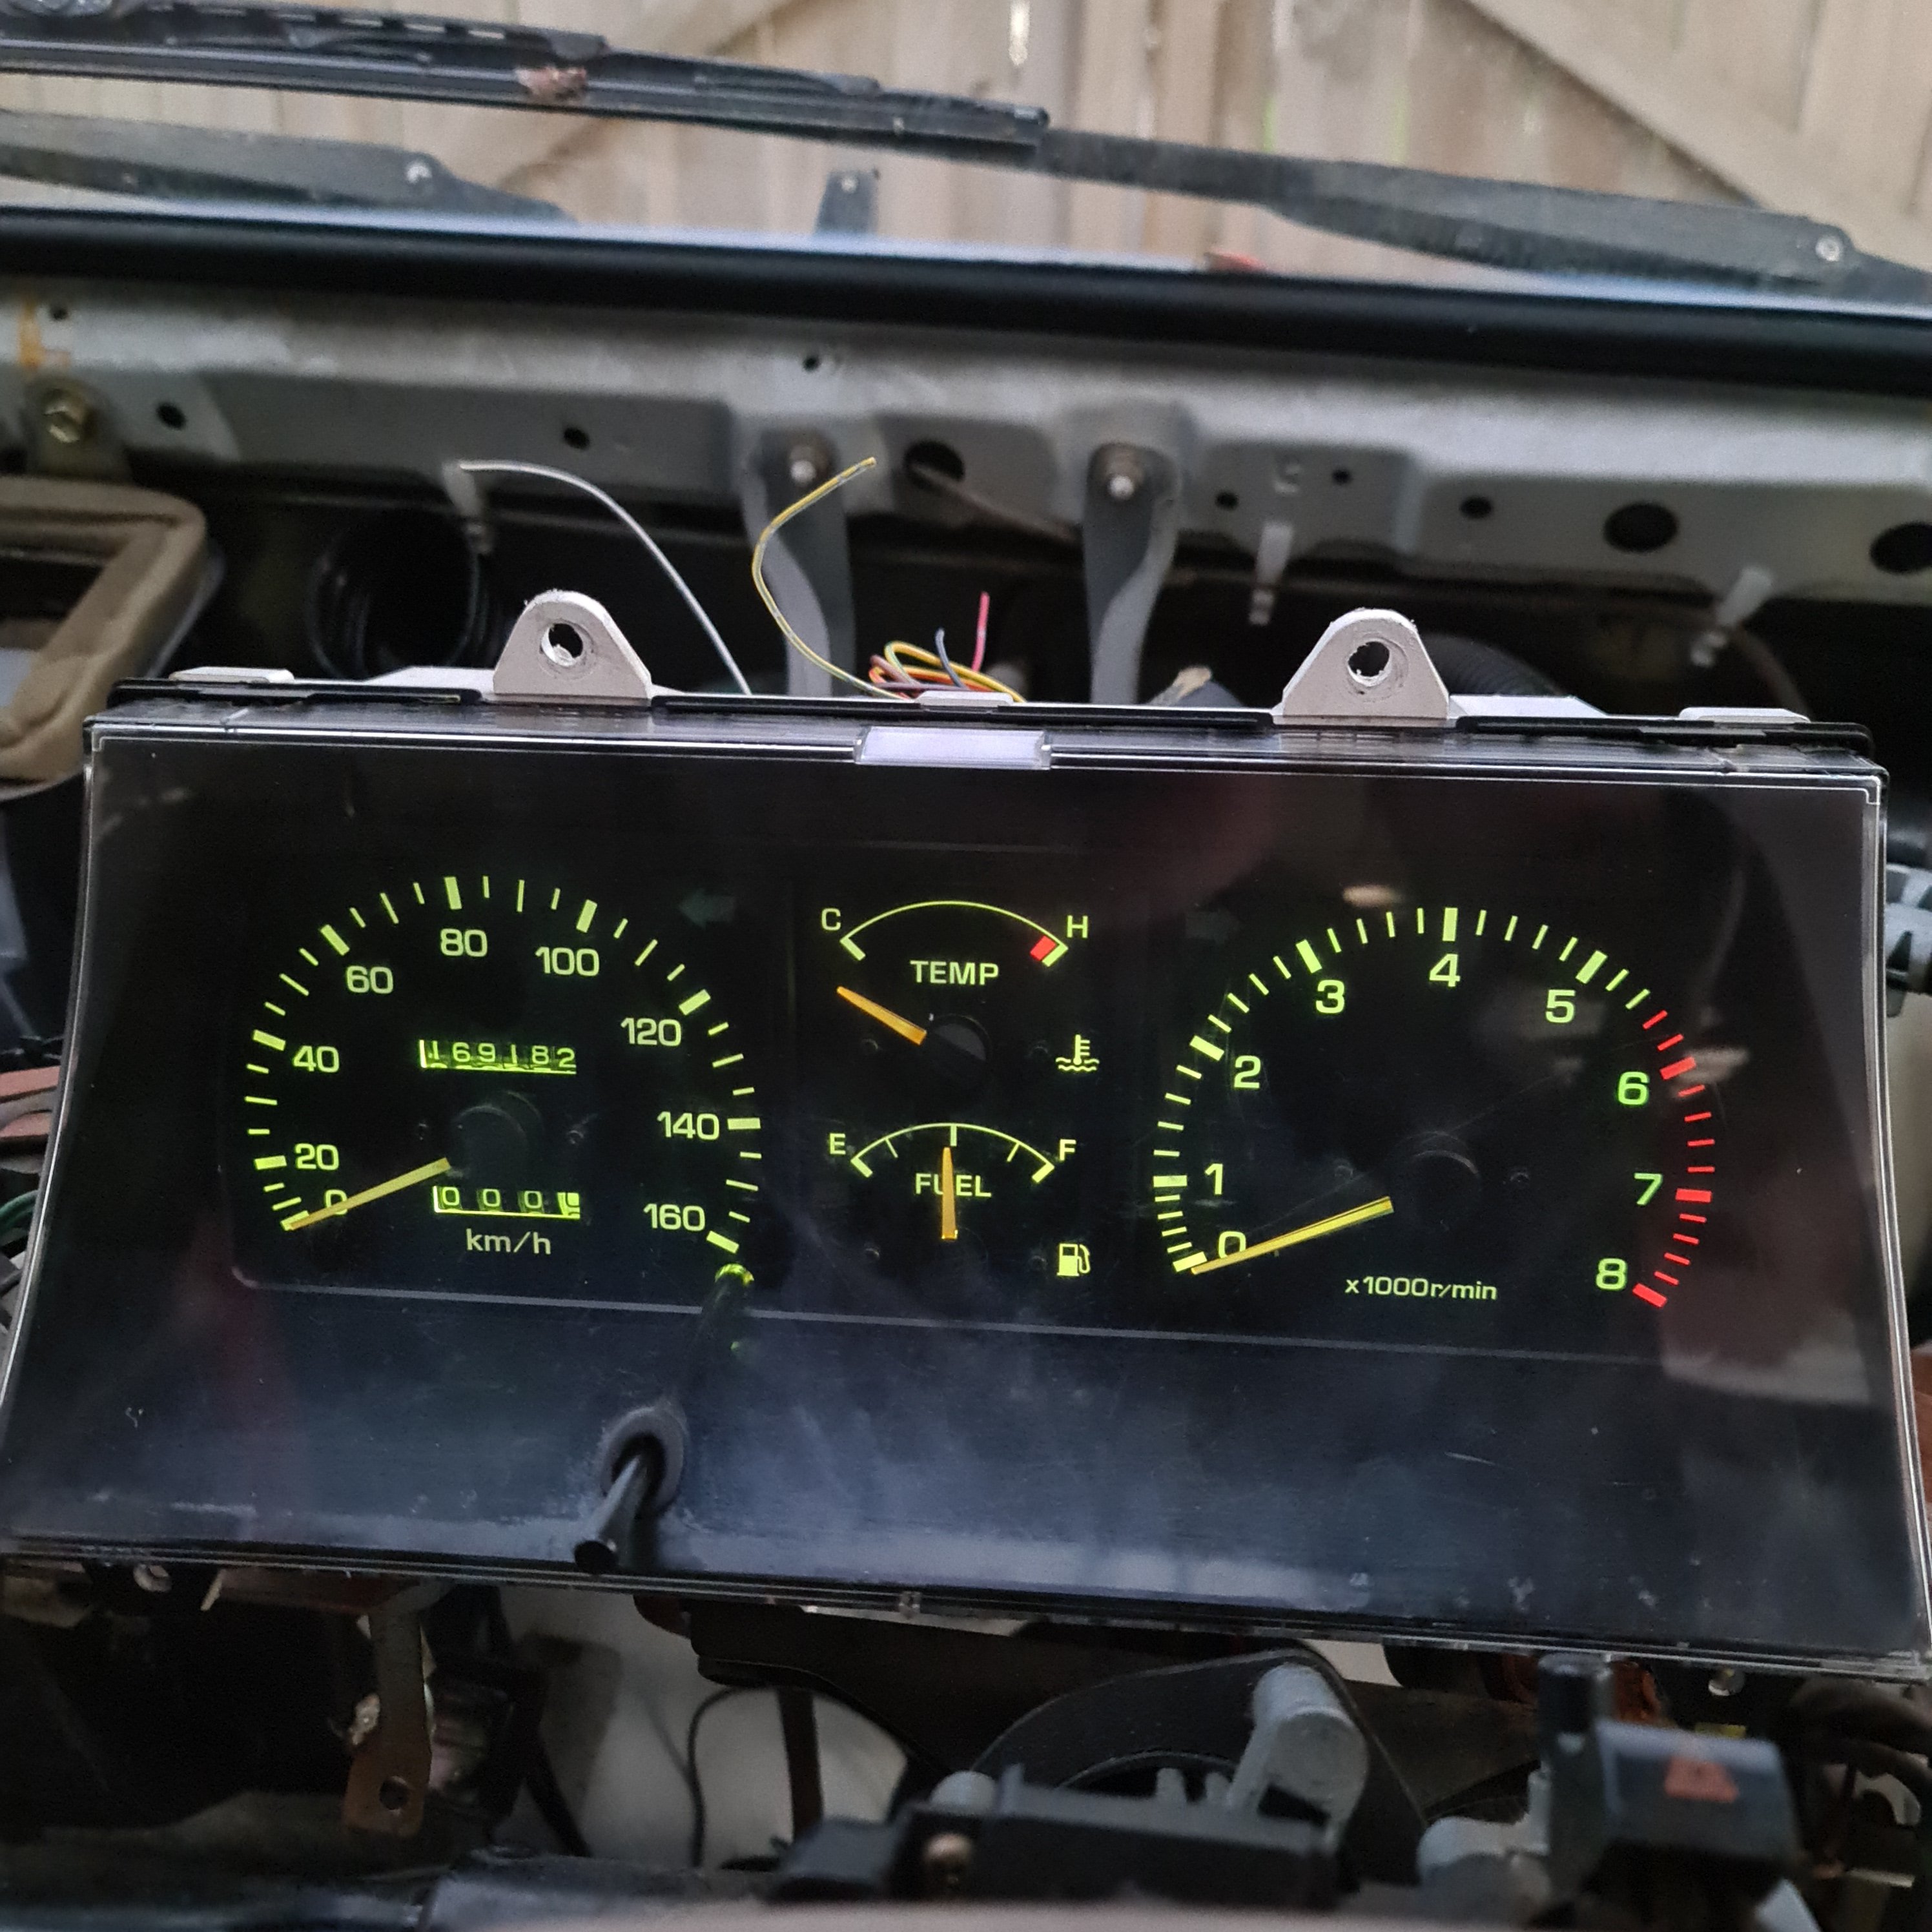
There weren't issues with the oil pressure and handbrake light I just hadn't hooked them up. there is a problem with the charge light but it's related to my alternator wiring I think (still need to delete the 5k voltage regulator also) as there is a loud humming from reg when key on. Need to sort this and finalize the fuel pump and electric fan override switches that are already wired in then I can put one of the dashboards back in. Coolant pipes and exhaust are the only remaining jobs that come to mind.
- 131 replies
-
- 16
-
-
Jesse's 1988 Toyota Liteace KM36
Jeffs_Emporium replied to Jeffs_Emporium's topic in Projects and Build Ups
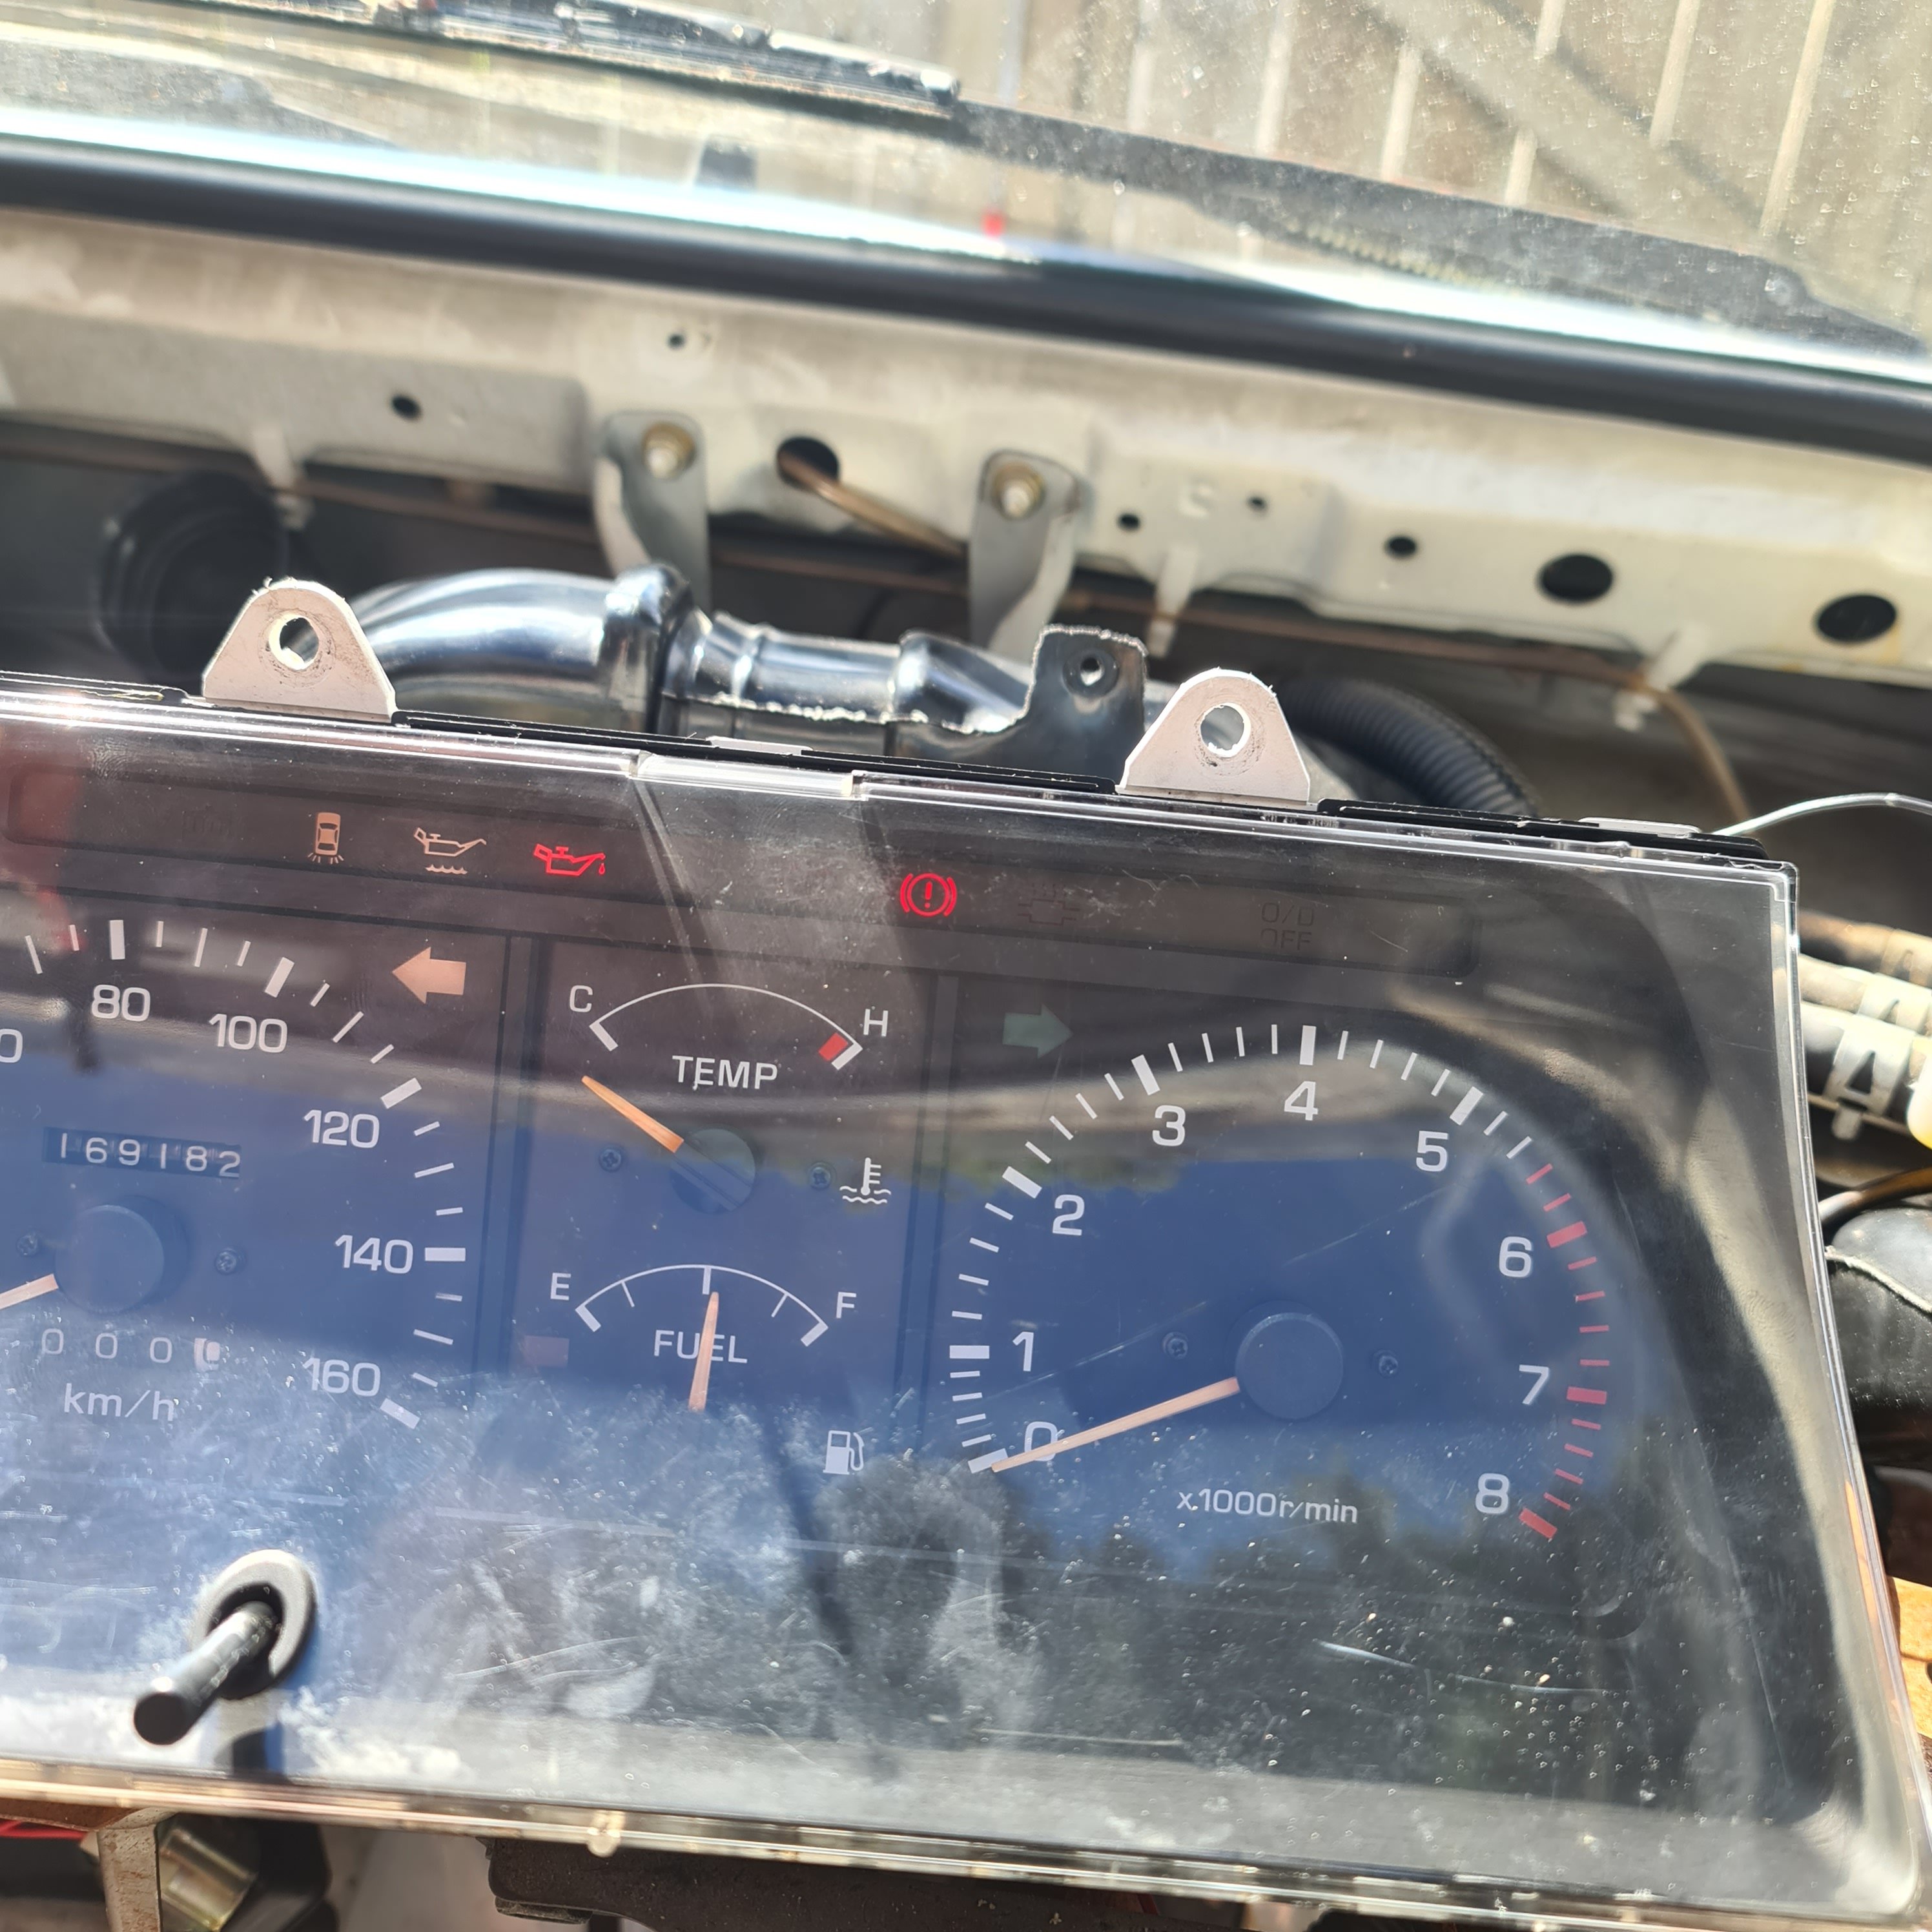
Rev counter dash has 3 plugs My one has 2 So I traced all the copper tracks and made a list where the pins needed to move to in the 3 plugs. All of the wire colours except three where actually the same. Everything works except for three things. Charge light and handbrake light, oil pressure light. Good to see the fuel level has come up to same spot as other dash as ym30 van seller mentioned a problem with fuel gauge.
- 131 replies
-
- 15
-
-