flyingbrick
-
Posts
11652 -
Joined
-
Last visited
-
Days Won
2
Everything posted by flyingbrick
-
 I require pics of golf balls being fired through various materials plz. Car doors be good
 -
Fark that's genius. A bullpup spud gun
-
VK304's 1988 Nissan Vanette w/ added SR20DET
flyingbrick replied to Willdat?'s topic in Project Discussion
Hey man I have some joints, pipe, weld in threaded ends etc here for the ute that won't be used for years (ever) if ya still doing ya tramp bars after lockdown I could visit with it all, you mind find some stuff useful -
Discuss here about Yoeddynz's little Imp project...
flyingbrick replied to yoeddynz's topic in Project Discussion
shit that is epic, I'd missed tons of updates so that was a cool surprise. -
VK304's 1988 Nissan Vanette w/ added SR20DET
flyingbrick replied to Willdat?'s topic in Project Discussion
Good to see ya moving on this again Hope you are enjoying the new job! -
Good work man! Hadn't seen this thread before today- was a good read! Pretty cool seeing your welding improve so much over the 4 pages.
-
Dude... Nice bike! Doesn't get much better than that. Doubt it will take you long to get it running like new. That color and tail looks great in my opinion..
-
Lol.. Just bodged it together... Damn, that sort of DIY is so far out of reach of the average person it's crazy lol. Love it.
-
@CUL8R damn this thing looks tough!
-
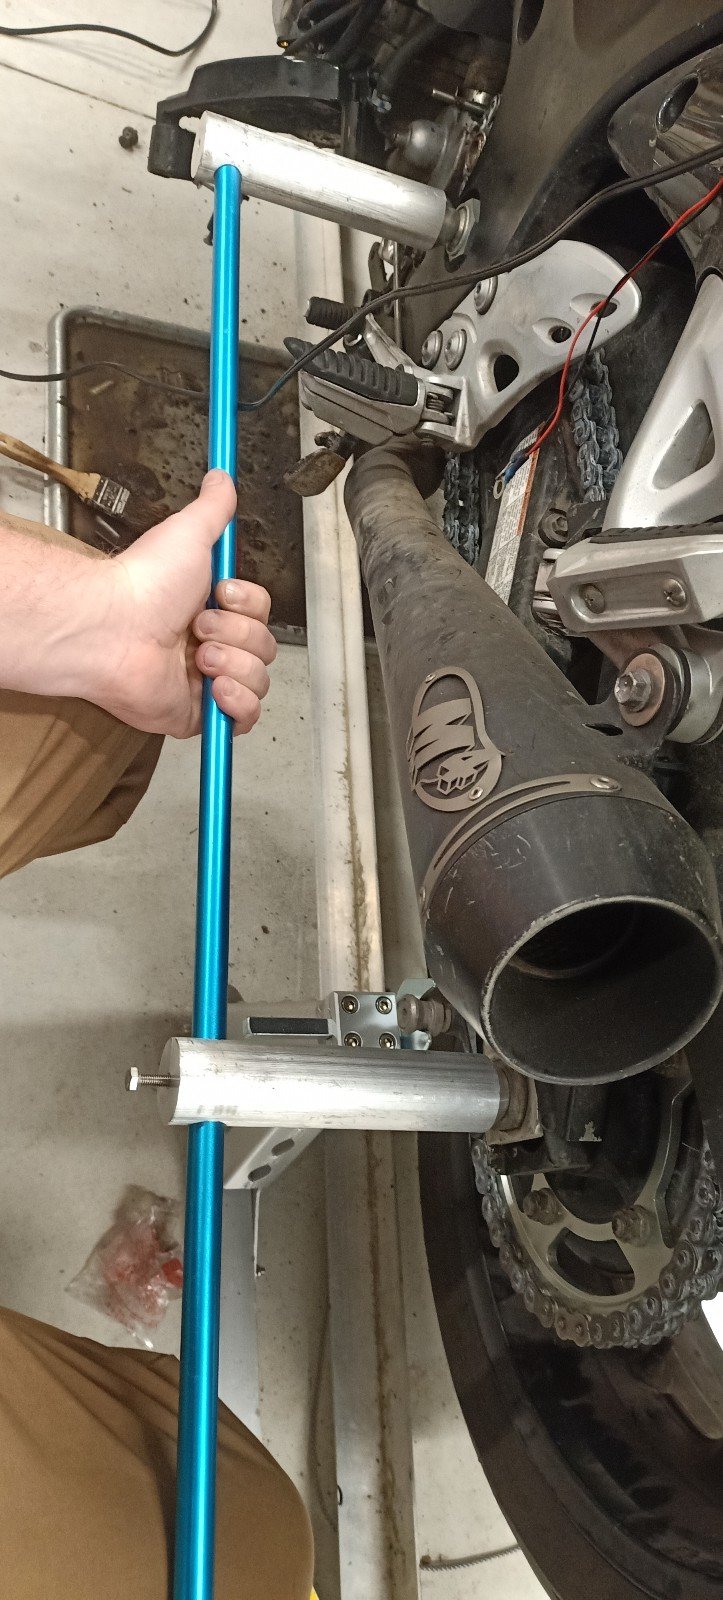
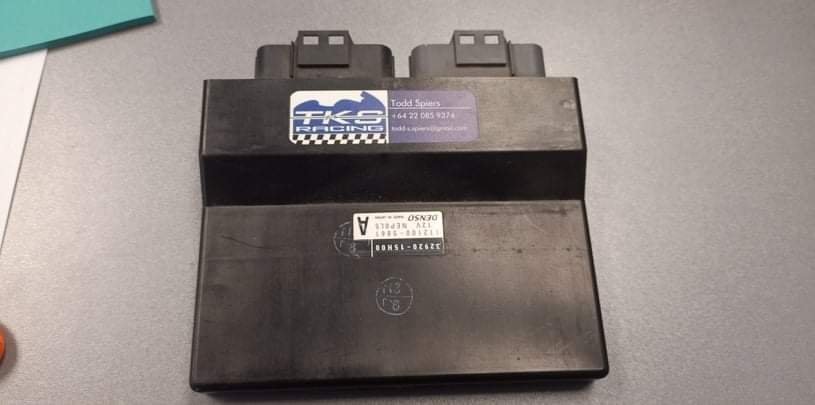
Pulled off fairing and old sprockets. They were both pretty worn on one face each. Surprising because the rear axle was perfectly aligned with its notches. I asked a mate with a busa(he has a couple including a bking and a turbo busa drag bike) , he uses a laser thing to align his bike and tells me all of the marks on these bikes are wrong from the factory. I Google it and he's right. Apparently there's quite a few different models of bike with shit house marks. I managed to find some decent info about how many race teams align their rear wheels then gave a basic drawing to @Kimjon. Within a few days that bloody brilliant chap had machined up the bits for me. I skid them onto half a flounder spear shaft and boom, foolproof and extremely accurate alignments every time. The cone ends center themselves into the swingarm pivot and the rear axle, you just lock the tool and compare one sides measurement to the other side. And on Tuesday I sent off the ecu to the same bloke who gave alignment advice. He flashed the ecu for me and put a sticker on it. These computers are pretty advanced and have nearly as much tuneability and functionality as a modern link. It adjusts 8 injectors with maps for each of the four cylinders, fuel and timing depending on which gear you are in, which power level you have selected (basically three different sets of maps which you can flick between on the fly to change power levels or whatever else you want to change maps for). Its also completely tunable with just a basic cable and some software (which isn't that expensive). But cheaper than that is just having him to do it. He has a very popular set of safe maps that make it a bit smoother, a little more powerful, more free revving etc plus turns on fans at a slightly lower temp. These bikes are so popular around the world that there's a pretty comprehensive recipe to get them running their best.

-
Fibreglass, Carbon Fibre, Paper Mache - The composites chat thread
flyingbrick replied to Roman's topic in Tech Talk
Yeah what dave said. Its actually easier than it sounds. The most critical thing is to wax the Hull and flange material quite a few times prior to putting any epoxy near it. Fucking that up will ruin your Hull pretty quick. Use a mold release wax, rub it on, let it dry, buff it off and repeat until you cbf repeating it any longer. Also, get some digital kitchen scales to help with measuring out the resin accurately. -
Fibreglass, Carbon Fibre, Paper Mache - The composites chat thread
flyingbrick replied to Roman's topic in Tech Talk
Hey man. No, don't use a plug to make your new hulls. You will end up with a nice Hull interior and a shit exterior which requires untold hours of filling and sanding. You need to make a normal mold of the exterior of the Hull. In practice, once you knuckle down and do it this won't take long. I'd start by turning the Hull upside down and gluing it to a flexible sheet of something like coreflute. You could slice one side of the material along it's grain so that it flexes easily in one direction but is still rigid in the other. Put the uncut side toward the hull, push it into a curve of the hull (where the deck would usually fit) and glue it firmly to the hull with hot glue so that the mold is formed with a sturdy perimeter lip. Then seal any gaps or holes with quality modeling clay, smash down some wax and then lay your fibreglass. Start with straight resin mixed with pigment to make a gel coat (so you can see where it's going), wait for it to firm up until just tacky then add fibreglass tissue, then cloth or mat. -
When I actually looked- turned out kims one just unscrewed too! I topped it up with distilled water- but yeah didnt really seem like it was filling the other cells at the same time. I think I'll try harder to get the cover off.
-
I am still playing with @Kimjons battery. The Bluetooth battery monitor logging is brilliant. I thought my desulphation charger thing only had a set voltage but turns out it alternates up and down for some reason. It is getting better, managed to actually run a discharge cycle on it yesterday.
-
I guess you could drill holes in the top- big enough to check level and fill but small enough to seal with Hot glue.
-
I'm running 4000w of heater off a multi plug in our garage- doesn't even get warm Edit. The heaters get warm... the plug/socket does not.
-
@NickJ that is a brilliant idea! Do the cells all join at the top? EG if I fill up one will it top up the rest? Also, worth shaking it up first and checking the specific gravity of the electrolyte? (I think thats a thing?) IF you know more about this than you are letting on, you should definitely share
-
I find battery tech quite interesting for a multitude of reasons. We all have this physical item made out of basic and identifiable materials which is expensive to purchase and costly (to the planet) to recycle- yet repair is largely out of the question. It shouldn't be because a lead acid battery is incredibly basic! @Kimjons battery bugs me. I can charge it to over 14v (Using bluetooth battery monitor to log voltages is amazing) but then the instant you apply any load it drops to below 12v. The float/indicator is red even at full charge which could simply mean that one or more cells is low on electrolyte- but the battery has a firmly glued down cover which does a pretty good job of preventing any level checks or top ups (without making it look like its been butchered) TLDR: battery companies go out of their way to ensure these things aren't serviceable. Bastards. With that said, have had a few good wins with the desulphater (Validated by load testing down to 12.2v and measuring capacity).
-
Wanted: someone with a mill, Hamiltonish
flyingbrick replied to Evan's topic in Upper North Island Region
Just pop down to the closest machine shop and ask for a price. You might be surprised by how cheap it is. -
Ooooooh yeahhhhhh
- 15 replies
-
- 14
-

-

-
Tortron's 1985 DR200 *they call me mello yello*
flyingbrick replied to tortron's topic in Two Wheels
Thanks bro, same address u came to last time plz -
Tortron's 1985 DR200 *they call me mello yello*
flyingbrick replied to tortron's topic in Two Wheels
None I was just being cheeky when I saw u guys at it -
Tortron's 1985 DR200 *they call me mello yello*
flyingbrick replied to tortron's topic in Two Wheels
I know you bid against Kim and then me ha -
Tortron's 1985 DR200 *they call me mello yello*
flyingbrick replied to tortron's topic in Two Wheels
Oi you don't need any more bikes. -
haha yes the problem is that you only get a small amount of desulphation before it starts to boil and you need to wait for it to cool off- but it will definitely help.