-
Posts
1254 -
Joined
-
Last visited
Everything posted by ProZac
-
And by carbs, I clearly mean throttlebodies.
-
If you're keen on pulling the carbs to bits, we can sort you out with using the wet blaster (vapor blaster) at uni. It cleans up aluminium casting like nothing else I've ever used. Simply amazing. internal coating stuff sounds like complete waffle.
-
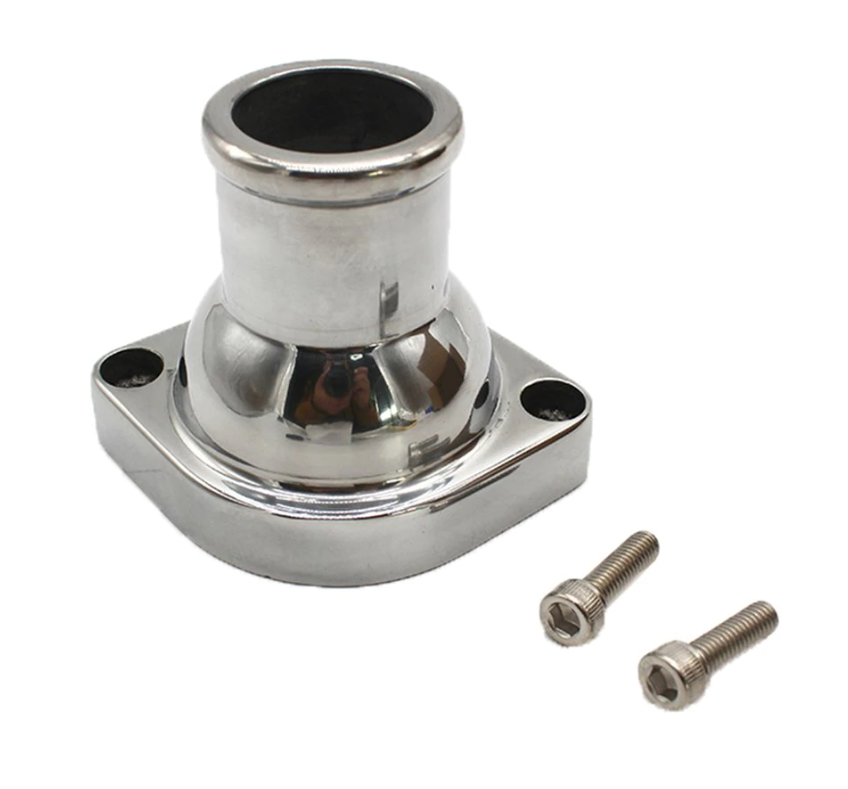
Back on the mojo-train a little with this project, it's been nice to make a little progress. First up I fixed a stuff-up with the fuel rail; I tapped the ends m18x1.5 for the AN6 threaded adaptors, and got some nitrile bonded washers to seal everything up... I was in the groove and winged the tapping, figuring that I couldn't get it too far off with a tap that big.... Mistakes were made. I tapped one end on the piss quite epically :-(. Got it in a mill at work and squared the end off perpendicular to the threaded hole, so it should seal... Luckily the rotation of the angle is such that its not noticeable when all plumbed up on the manifold. I modeled up the thermostat section I will need to weld to the intake manifold with ease of machining in mind, have ordered a straight through LS1 upper housing from China-land, hopefully it'll get here some time in the next couple of months Need to get it and measure it before I machine the lower half part and weld it (or have it welded, I'm a but rusty and I want it to look nice ) in place. That should be the end of the mods for the intake manifold. Sometimes I think I should have just built one from scratch, but I'm too deep into it to turn around now ;-). Actually I lie, I still need to mount the fuel pressure regulator, but that should just be a simple bracket. Part of the plan has always been to fit a pair of Starion bucket seats to it. I love these seats, always have, they're really comfy, lots of adjustments and look just weird enough to fit with the rest of the truck. Because my truck it a sport model, its got the threaded mounting holes in the center of the cab for bucket seats. The non-sport ute I had for parts didn't have these, which was an interesting find. This is great, as it would let me use a second set of l200 seat rails (now having a pair on each side) and adapt buckets seats to them... But because the adjustment handles on Starion seats are pretty integrated with the seats themselves, I can't go this way... As per usual I completely over complicated things because I wanted to muck around with cool gear to do the job... This let me pick up on the bolt holes and required angles of the existing mount points in the floor. I used some wood and other props to get a seat in about the right place and took some measurements to get the other half of the puzzle, the mounting points for the Starion seat sliders (with the original sheet metal bracketry to fit the Starion chassis removed). The mounts are designed to be welded together out of simple bent sections of 3mm sheet steel. Hopefully this, and the original fasteners will satisfy a cert-man as I wont be having the seatbelt stalks mounted to the seats (which they are in a Starion).... At worst I have all the measurements now, so will be able to come up with another solution if required. I printed a test set of brackets to check the fit. I always get jumpy when something fits first time... but here we are. I've mounted them quite low, as it gives a good feeling of sitting 'in' the truck, as opposed to 'on' it. I've also centered the drivers seat with the steering wheel a bit better. It's a compromise with the pedal centering, but feels good when you're in there. The actual seats I'll fit are a pair of grey fabric ones that are in excellent condition. I've got two sets of these black leather ones, neither of which are fantastic, but between the two, and some money I'm sure, I'll be able to get a really nice pair for my Starion project (which is a long term thing... far in the future ). I'll have to get some black carpet, and some new black seatbelts too. Then retrim the door cards and roof lining. Sheese. Should look pretty tidy in there then. Well, once I do something about the massive gaping crack in the dashboard as well... Future problems. I had a couple of sits and everything seemed great. They might be a touch too far outboard, but you can reach all the handles and still wind down the windows without bashing your knee. I want the space in the middle for a center console (more storage is betterer). I've gone from having about 3" of clearance to the roof (I'm 5"9') to around 6", so they're certainly a bit lower! The inevitable result of my fat ass wiggling the seat around, but the prints served their purpose. Will get the component parts profile cut, bend em and weld em up. Fun fun.
- 19 replies
-
- 13
-

-

Bearded Baldy's 1985 Mitsi L200 Discussion Thread
ProZac replied to Bearded Baldy's topic in Project Discussion
You might find with the sport dash and tacho your high-beam light on the dash doesnt work. Its a simple fix, I've got pics somewhere. -
Can you put up some pics? I don't think any of the later intercooled Starion front compressor covers had the TD marking embossed into them, they usually had a spot on the casting where it was supposed to be, but usually not stamped, so they just read '05-12'. They were TD turbos though. If yours had TD embossed into it, its probably not a stock starion compressor cover. 060 refers to the exhaust housing size, it has a 6cm^2 passage measured radially at some specific angle. It's mitsies way of indicating what garret calls the A/R ratio. 060 is the smallest, there are also 070 and 080. 070 Seems to be the sweet spot for a modified SOHC 4g63. Yes, you can machine out a 12a compressor cover for a 14b wheel, not sure about all the way out to a 16G, but it'd be worth a shot. Years ago I had all the compressor maps for this stuff, did the calcs and came to the conclusion that for a worked SOHC 4g63 an EVOIII big 16G was where you wanted to be, should be smack bang in the meat of its efficiency range at around 1 bar of boost. I bought a stock evoIII turbo, rebuilt it with a mitsy rebuild kit, and bought kinugawa housings for it, 070 exhaust and a big front cover. The front cover is machined for the EVOIII big 16G wheel, but is the same casting they also machine out for 20G and 25G wheels, so looks externally much bigger. Gotta have the aesthetics, yeah? ;-). Early non-intercooled stuff is the TC range, hopefully that'd not what you have, not a lot can be done with them.
-
Another one here for the list of 'life, house and kids'... Black Starion hasn't seen the light of day in 7 odd years. One day... One day.
-

Bearded Baldy's 1985 Mitsi L200 Discussion Thread
ProZac replied to Bearded Baldy's topic in Project Discussion
If they have more than one 3.909:1 8" CW&P setup, let me know, keen for my Starion GSR-V clone project. Nah, I dont reckon the 7 bolt (RVR) motors are as bad as they make out, not if you keep it maintained and aren't asking huge power from an internally standard motor. They do make the install easier having the timing gear on the front of the engine. -

Bearded Baldy's 1985 Mitsi L200 Discussion Thread
ProZac replied to Bearded Baldy's topic in Project Discussion
Cool truck! love the wheels :-). Only the later Starion stuff (5 stud) with the bigger 8" CW will fit, the earlier 4 stud stuff (more common in NZ) is the smaller 7.25" CW. Finding 3.9 gears for the 8" stuff is a might tricky. Early L200 sport models had them. I put 3.5's (from a widebody starion out of the states) and a 2nd gen LSD head in mine though as I wanted better highway cruising. The 3.9's that were in mine were pretty worn out and noisy. With the smaller tyres on it putting the taller diff in it has corrected the speedo which is excellent :-). -

Tortron's 3.8 Mayte fair dinkum Mitsi Ute
ProZac replied to Threeonthetree's topic in Project Discussion
If you can figure out a way of getting it to you, I've got a pretty good condition cab down here I wouldn't want much for, doesn't seem to be rusty really. I've robbed the headlight mounting panels from it as it was a twin round headlight one. PM me if you want to investigate further :-). -
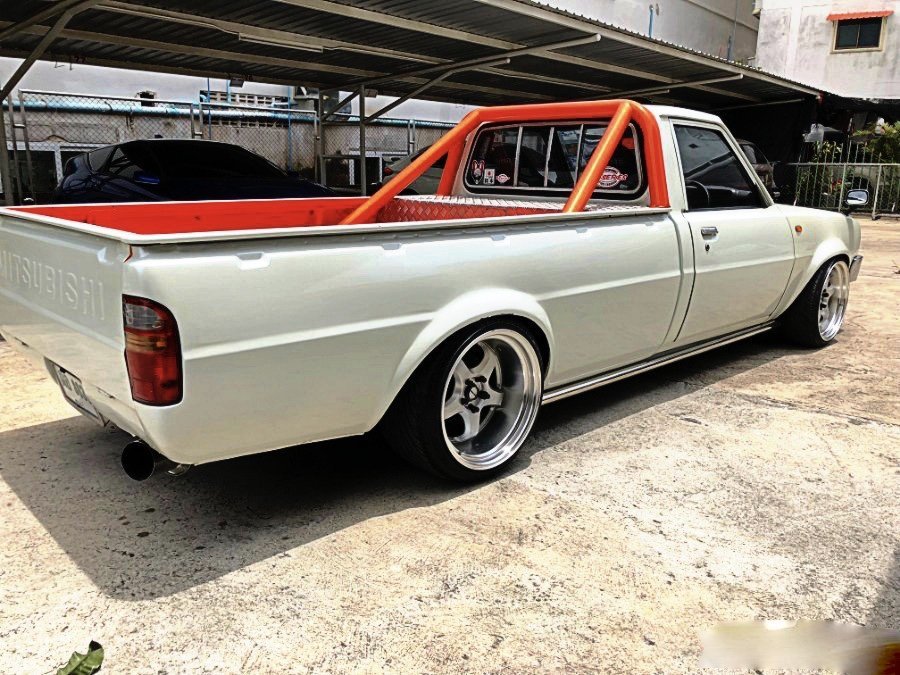
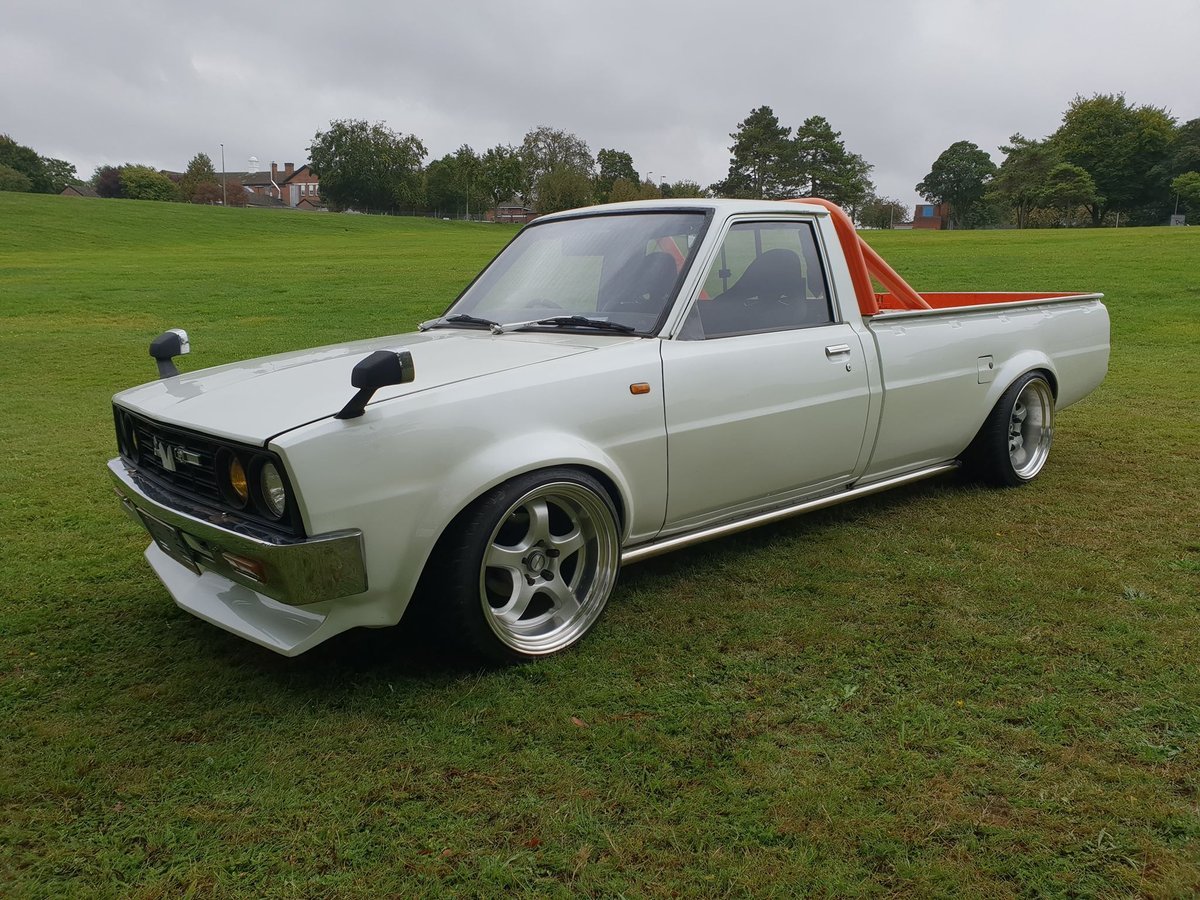
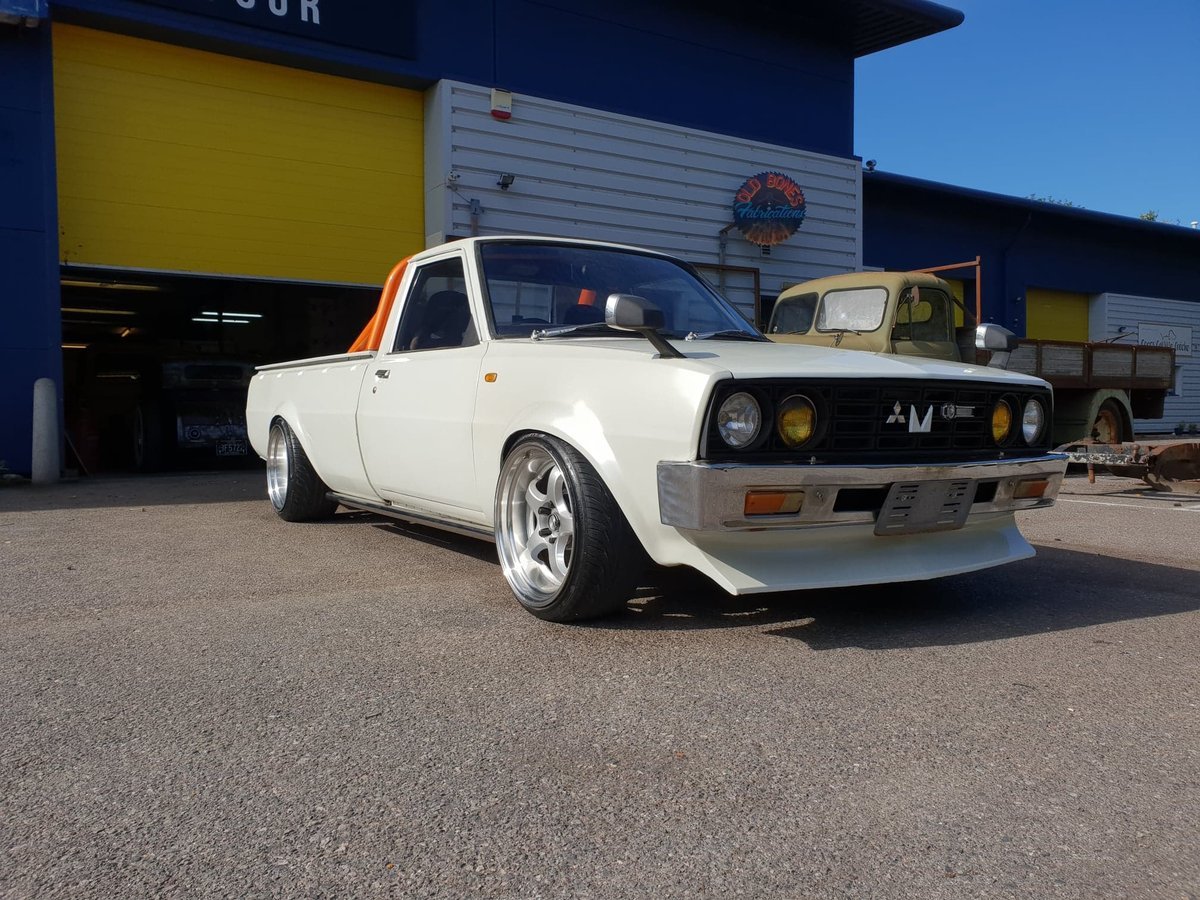
Warning: No actual work in this post! I found some pictures of an L200 I really like though, thought I'd put them in here to keep track of them as inspiration. I'd go for slightly smaller wheels, and probably a box style flare. I like the bar in the back though, but a smaller diameter tube and not orange. :-).
- 19 replies
-
- 15
-

-
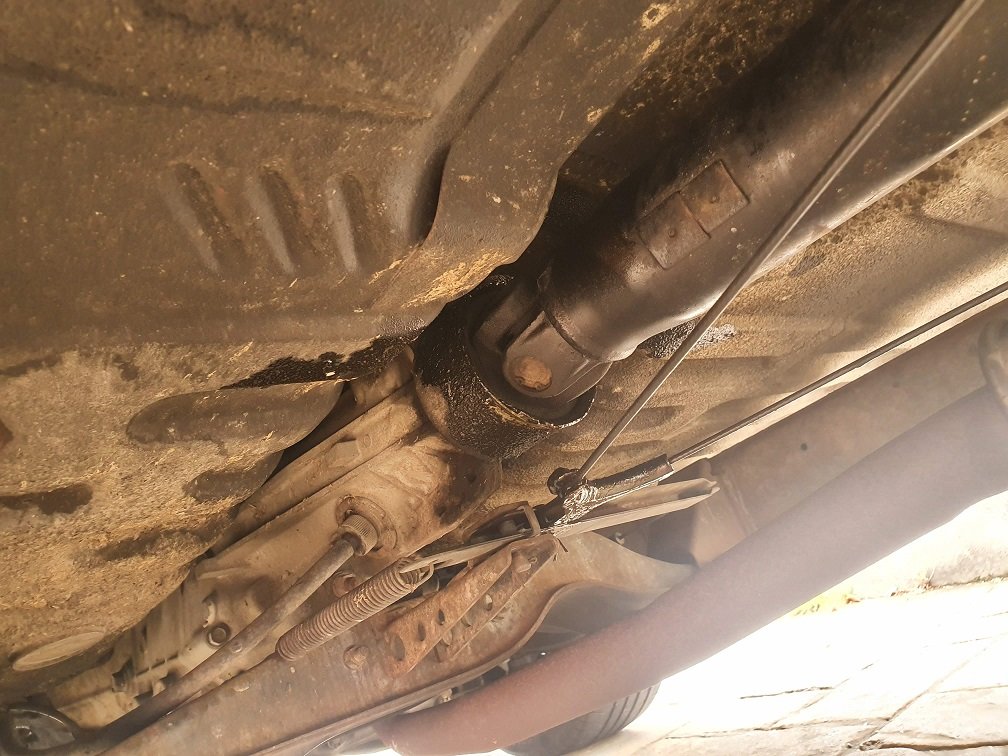
Haven't had huge motivation level behind working on this the last month, so not a lot of progress really. Work is pretty hectic atm with the whole COVID-19 thing... I suspect I'll either get absolutely zero time to work on it in the next month, or the Uni will close down and I might have more time that I know what to do with... Anyway, I drive this thing with headphones in most of the time, listening to audiobooks. This means I don't hear all the sounds it makes. My headphones were flat the other day, and I drove home without them... Really really odd noise was coming from the gearbox area, related to vehicle speed. Didn't take a lot of sleuthing to find the problem: This was completely dry just a couple of months ago when I put the new diff in, so it's let go in a pretty decent way. Managed to get a replacement seal and the use of a hoist as I don't like rolling around on the ground if I can avoid it. About a 15 min job to swap it out, took longer to refill the gearbox than swap the seal. Seems fine now, no weird noise and no leaking... I sort of suspect the output shaft support bush might be flogged out, but this gearbox will be replaced once the new engine goes in anyway, so as long as it holds oil I'll be happy. Silly regular maintenance instead of mods. Lame. Front left wheel bearing felt a tiny bit loose too, so gave that a nip up, and tightened the hand-brake cable too. Once I fix the exhaust leak at the manifold - exhaust point it would probably actually pass a warrant!
-
The one I pulled them off is also an 82, and a todd motors vehicle. It was a 1.6 with a column change 4 speed, so pretty base spec.
-
Nice. Love the twin round headlight front eh. I've pulled the mounting bits off the parts truck I have and will convert my red one to the twin round front one day, hmmmm :-).
-
Work and real life have been pretty busy recently, so haven't found much time out in the garage. Students are back next week too, so work is likely to be a bit hectic for a bit. I did manage to get the ignition leads built this afternoon. It's really starting to take shape. SOOOO many nickle and dime jobs to do though. Still need to machine that trigger wheel. I've tapped the fuel rail for M18x1.5 fittings that I'll seal in with bonded washers... But the M18x1.5 -> AN6 adaptors are coming from China, and everything out of there is on the go-slow due to the virus. Not that I'm complaining (much), its got to be pretty horrific. Once those fittings are here though, and I can permanently fit the fuel lines, I can sort the front thermostat housing. Really really procrastinating about that... :-/. Also, I really need to build a garden shed and get all the gardening gear out of the garage.
- 19 replies
-
- 14
-

-
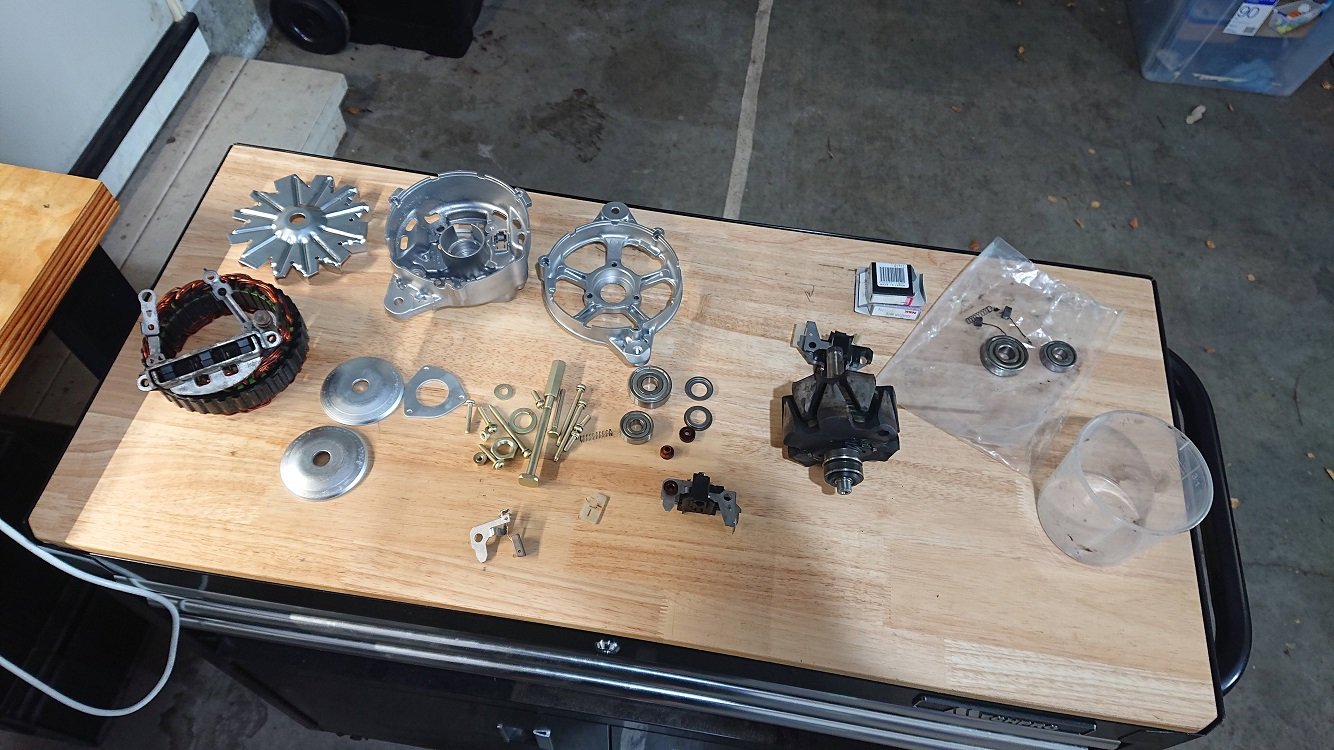
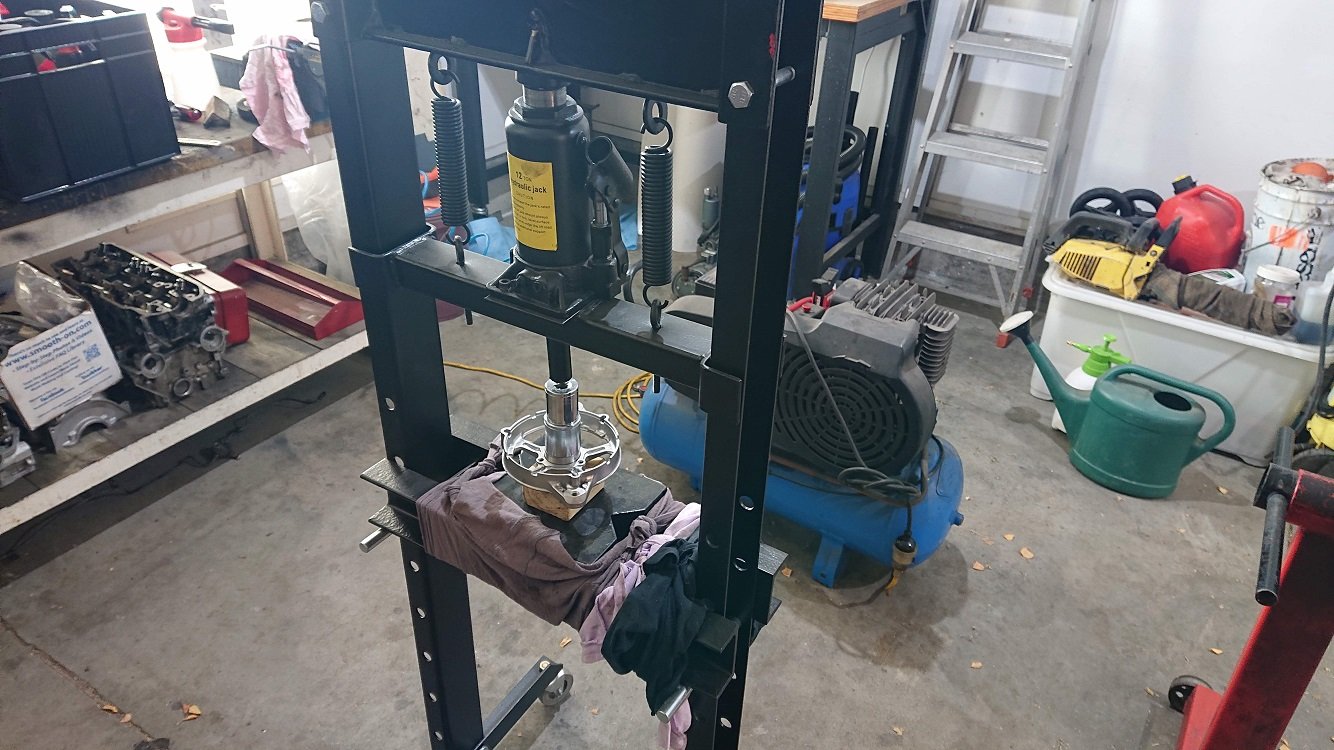
HOLY FUCKING SHIT IT IS HOT TODAY. Needed a quiet easy project to do in the heat, collected up all the bits for the alternator jigsaw. A couple of months back the alternator on the side of the 4g52 in the truck at the moment spat the dummy, brushes were doneburgers. I couldn't find a replacement one second hand locally, as they're different to the ones fitted to 4g63's, which are pretty common. I grabbed a 4g63 one anyway, thinking I could at the least harvest some bits from it. Turns out the voltage regulator / brush holders are the same, so I swapped those over and my truck was charging again. This left me with a super crusty 4g63 SOHC alternator, with worn out brushes and dry bearings. I took it apart, ordered everything it needed and vaporblasted / zinc plated everything. The replacement reg / brush holder I ordered was damaged in shipping, so I harvested the new brushes from it and swapped them into the reg / brush holder that had originally been in the 4g52 alt. Then had to remember where all the plastic isolators went. Got it reassembled with some new bearings pressed into place too. My workspace is just a typical internal access double garage. I don't complain as its better than what many people work with, but It does mean I need to keep things mobile, and stored away when not in use. This is about the cheapest press that money can buy, but does the job for 99% of what I do. Putting it on wheels was one of the best things I've done, as its so easy to store out of the way the 360 days a year its not needed ;-). Nothing more super exciting about the job, everything seems to fit up. The zinc plated fan and pulleys are a little bling though, they might get some rattle can black action. In other news the 1/4 BSPT to AN-4 adaptor turned up, so I could fit that to the back of the oil filter housing the start eyeing up the turbo oil feed. I'll need a 45 on the oil filter housing end, and a right angle on the turbo end, plus some heat sleeving. The bits to make the ignition leads also turned up. I got the spark plug ends all done, but the manifold / coils are still at work, so couldnt do those. Next week maybe, but I'll be away up in the Coromandel for Ledfoot, so maybe not. Now I think it'll be time for come cider in the sun.
- 19 replies
-
- 13
-

-
Hmmmmmm, nice. Great to see another L200 getting the good treatment they deserve :-).
-
I've got a box from a 2.6 2nd gen L200, so wideblock and cable, should bolt to everything / existing mounts and be the right length. I've got a spare Starion box too, so might look at swapping the gearsets if the Starion boxes have longer legs, no idea if they're even any different.
-
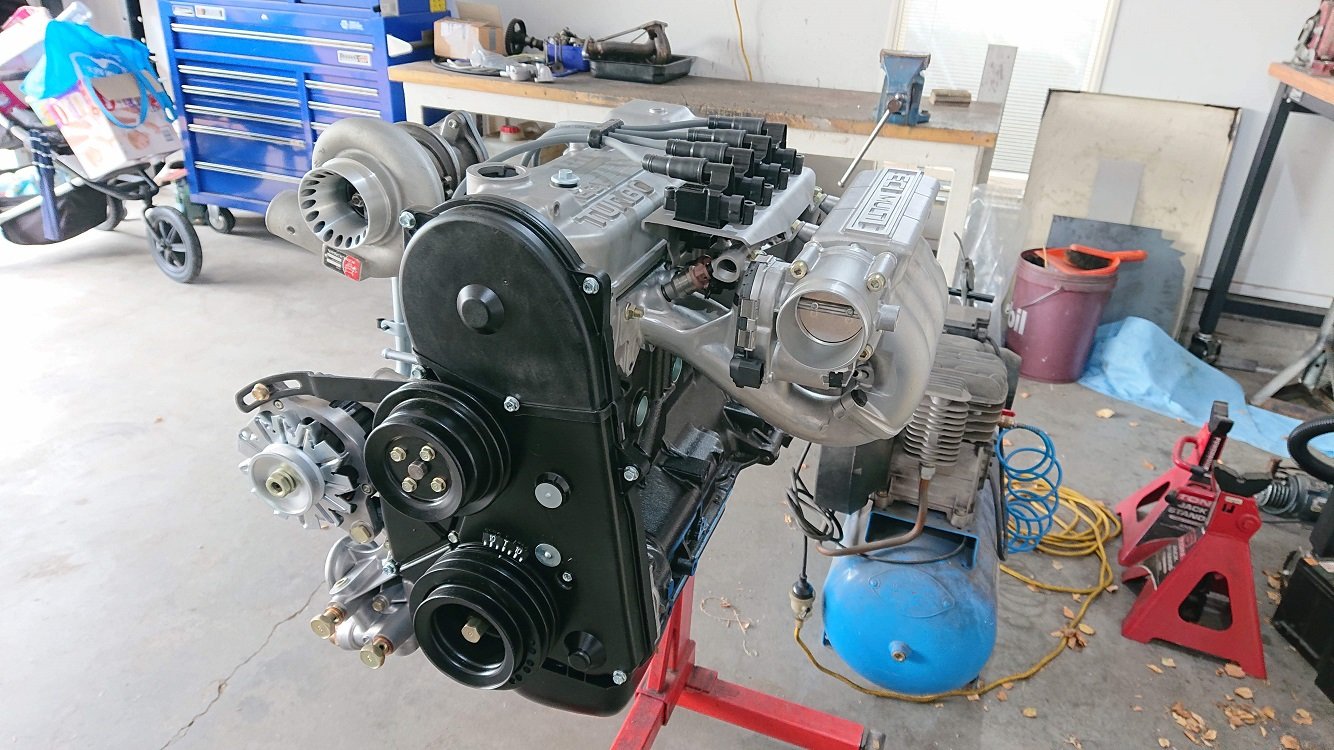
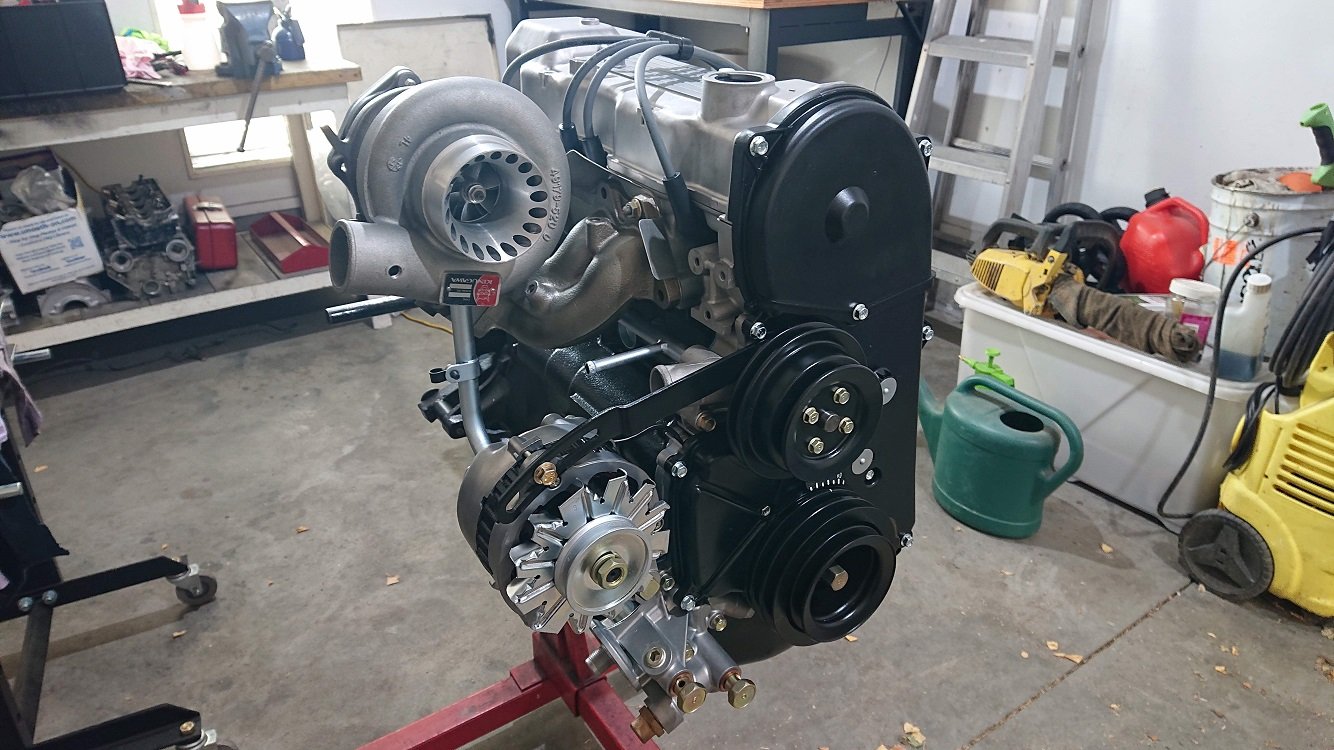
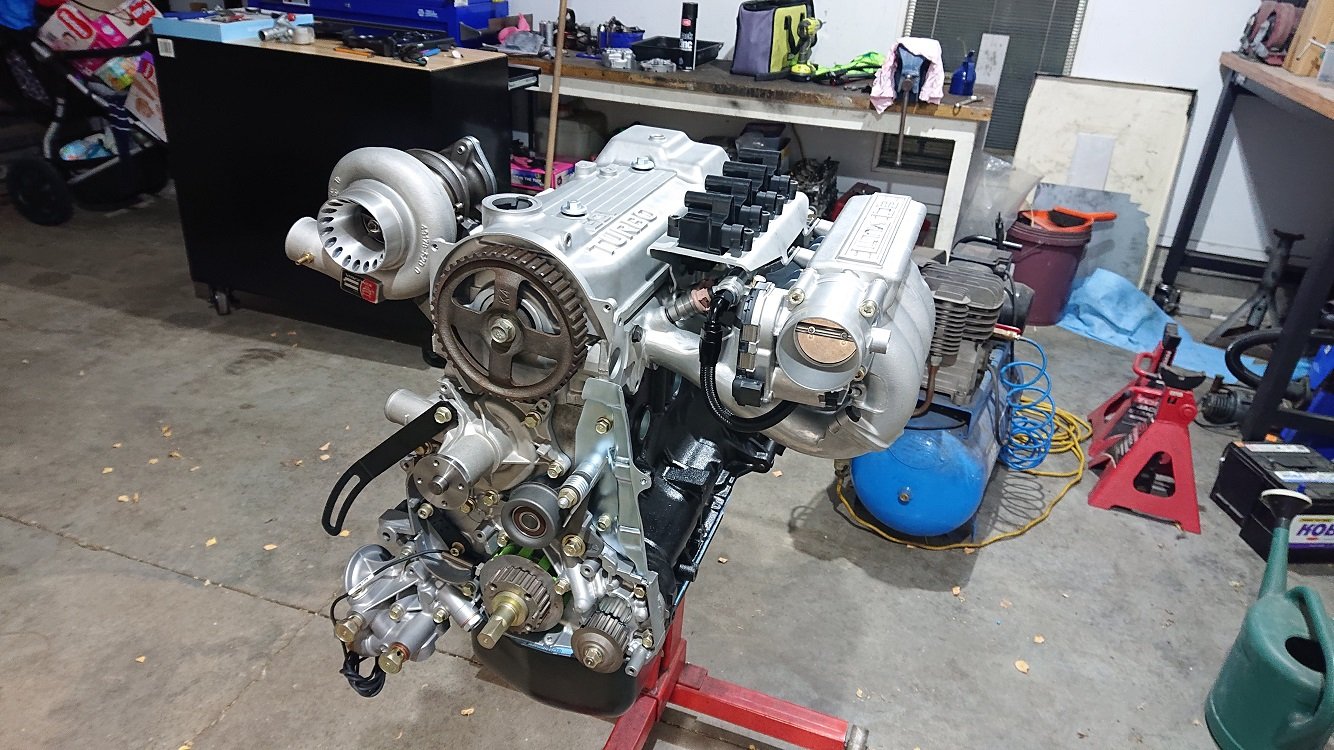
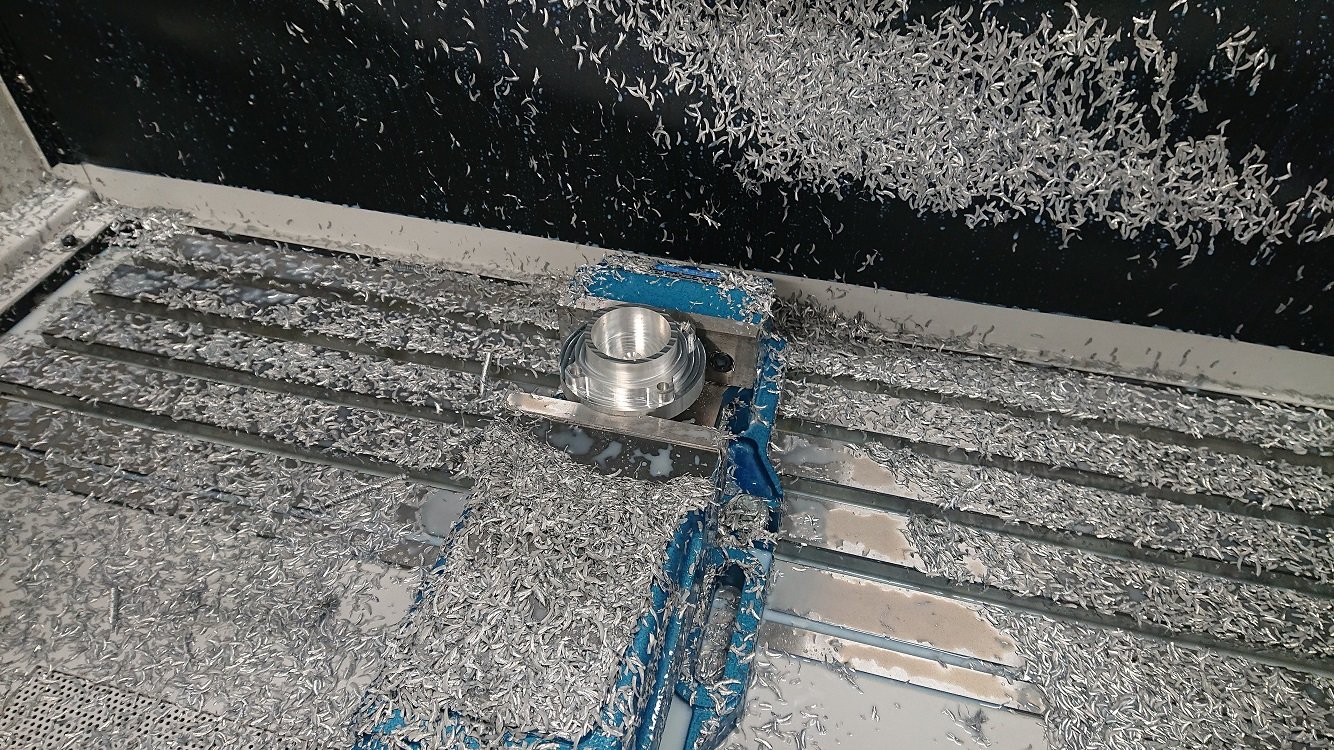
Bugger all progress on this in the last week unfortunately. Lots and lots of kids (include my own's...) birthdays organised and attended though, hah. I got the throttlebody flange machined. Went perfectly as soon as I added coolant. I'm almost wondering if this 6061 isn't heat treated, and that's why its gummier than I'm used to? Anyway I made lots of chips and released this object that was hiding inside the bar-stock. I got it tacked into place also so I could check the fitment of everything. Shot myself in the foot with the fuel rail though! I got some weld in AN-6 plugs for either end, thinking it would be nice and weldable like the rest of the Mitsy castings from this era (in my experience anyway). It is not. It spits, goes mad porous, and generally doesn't behave at all. Luckily I tested this on one of the mount ears that needed to be removed anyway for the throttlebody to clear, so no harm to the actual pieces I need. I've since ordered some M18x1.5 -> AN-6 adaptors, and tapped the ends of the rail accordingly, will seal it with some buna-n bonded washers. I'll have to machine the end surface of the fuel rail nice and flat for this, but no drama there. The weld in bung is just sitting there in that shot, its a nice fit, shame I can't use it. Sorting the fit of the FPR now. It's Tomei one that I took apart a years ago to clean out as it was full of junk, thus the bolts holding it together instead of rivets. The housing was all scratched up so I've blasted it. They're a nicely made piece of gear, the diaphragms are really tough, but I hate how they mount, it's really annoying using the PCD of the clamping bolts. I haven't quite figured out what I'll make for it yet, but something will come to mind I'm sure. This end of the fuel rail will also have an AN-6 fitting, to a 5/16" barb. As my truck is a sport model, its got a feed and return fuel line already, which are 5/16" and 1/4" respectively, thus the 1/4" barb on the bottom of the FPR also. I just need to put in high pressure rubber hose instead of the carby stuff, and fit an EFI pump after the tank (decided not to go in-tank, too much faffing at this stage, will just live with noisy external pump for the moment) and that should be the fuel system sorted. The pressure sensor is a low cost brass bodied one, but is still a Honeywell part, and safe for fuel, just $70 instead of $170 ;-). It's coming together slowly, the turbo looks ridiculous (...ly awesome), but it really is just an EVOIII 16G, the compressor cover makes it look much bigger. I've got the front plastic engine covers painted now, and it looks nice and tidy with them on. Once my fuel line fittings turn up I can go a better dry-fit of everything, a little bit more scanning and then design the weld on thermostat housing, which I'm really procrastinating about.
- 19 replies
-
- 16
-

-
The loving projects is mutual mate :-). The black stuff was ABS, Imagin brand. Prusa i3 MK3s, generic ABS temp settings, no tweaking. It warps a bunch on larger prints though, as not a heated build chamber. Mostly I print PLA on it though, and get awesome results also. RS Components branded stuff, just for prototyping :-).
-
That would be about right, I was coming home from work. I like the canopy, but it limits the usability too much for what I do with the truck, so It'll be coming off :-/.
-
Hah, lets wait and see if any of it works first... ;-). I'll make two of a few things though, as I'll be doing another SOHC motor in the next couple of years for my Starion.
-
Yeah, I got some CAD-eye on that one... But the coils are pretty heavy, and I have one bend that is greater that 90deg, dont want it to fatigue and break in the near future...
-
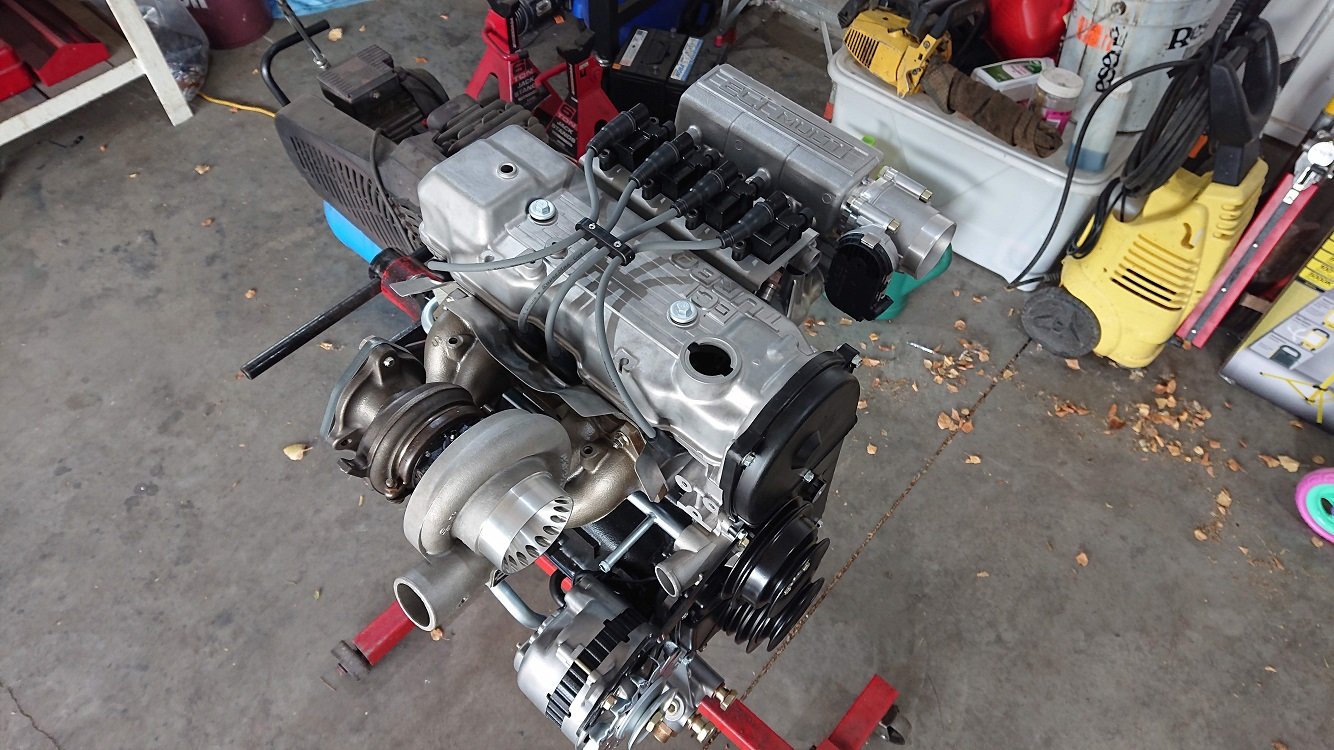
Well, the momentum got a little lost unfortunately, life got in the way for a wee bit. Managed to get a couple more things done though. One good step forward, but also a couple of annoying steps back. First, the backward steps; my modified dizzy cam trigger idea would work, but it really crowds the area where I need to build the thermostat housing. Not impossible, but just really annoying. Dad was around the other day and we were talking shit and he noticed a little nubbin sticking out of the factory cam... So I think I'll make something up to use that as the trigger tooth. A mount that uses the cam tower bolts. This means that I'll have wiring inside the rocker cover, which gives me pause for thought... But motorsport wiring is something I've got a lot of experience with, and I'm confident I can make it reliable :-). A GS1005 sensor, booted and potted, with DR25 sheathed M22759/32 wiring and It should stand the test of time. I'll make up a custom half-moon seal for the back of the head for the wiring to exit out of. The other step back was also trigger related. I've got a Link ECU for this, and it clearly says in their doc that the crank trigger wheel needs to have a number of teeth that divides into 360 with no remainder... Damn integer math! The SOHC balance shaft sprockets have 32 teeth, so that's not going to work :-(. This is a pretty easy fix really, I just need to machine up a replacement for the sprocket that has a number of teeth that divides in 360... I modeled up a replacement with 12 teeth and printed a test to make sure it would clear everything, its all good. I've shamelessly ripped this off from the kiggly racing trigger kit, but its like $400 to get one of those landed and I'm just not keen to open the wallet to that extent on this thing. I've gone with 12 teeth, dictated by the tooling I've got on hand to make the cuts, hah. Although now that I think of it, we've just had a new EDM wirecutter turn up at work, if I waited a few months I could do any number of teeth I want on that... Ahhh future me's problem. 12 tooth is a little coarser that I'd like with a 272 cam, but all it will mean is a little bit of timing jitter at idle. I'll tell myself it'll just make it lope a bit more at idle and I'll look cool at the lights. Yeah, sure. Right on to the win! I got the coil mount I designed up profile cut and bent it up, and golly gosh, it actually fits! There is something uniquely satisfying in seeing something you've only designed in CAD as a physical object in the real world. I need to get the right fasteners for it, and I think i'll paint it wrinkle black, as that's what the rocker cover will be (with polished lettering of course, because 80's). I'd love to get rid of the ECI-Multi on top of the inlet manifold, because the text is around the wrong way and it drives the OCD nuts, but I cant think of a tidy way to do it... Any ideas out there? I bent it up on a combination of a press-brake and a big finger folder. It needs mild persuasion to get the bolts in place, but really only half a mm or so, which I think is pretty decent for a 3mm sheet metal part with those angles. What I really should do is spend some time calibrating my fusion360 sheetmetal profiles to the tools I have available. Maybe next week? Probably not. I can start on the pattern for the wiring harness now the coils are mounted, that will be another great job to get ticked off. I'll be building it out of offcuts and what not, but will keep it nice and tidy, Fun times :-). Hope this post made sense, I'm 4 ciders deep and waiting for pizza for dinner. Hmmmmmmm Pizza.
- 19 replies
-
- 19
-

-
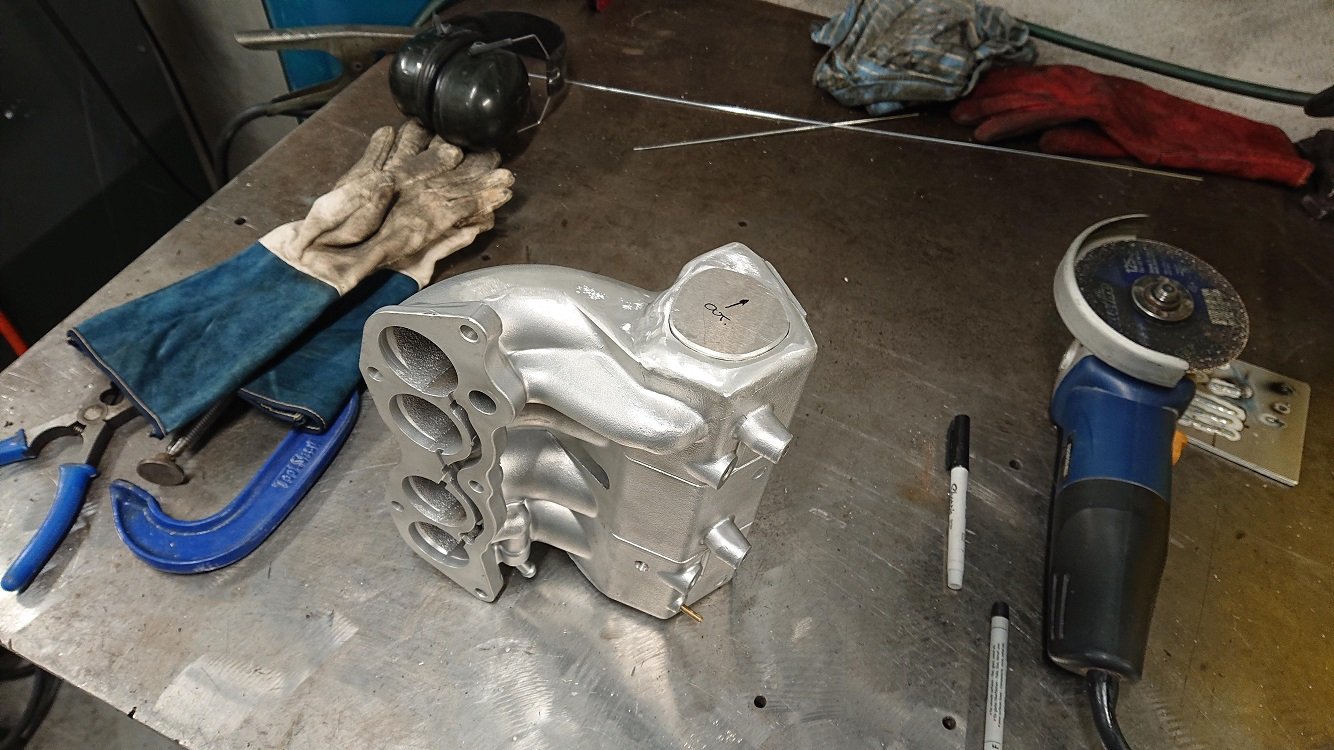
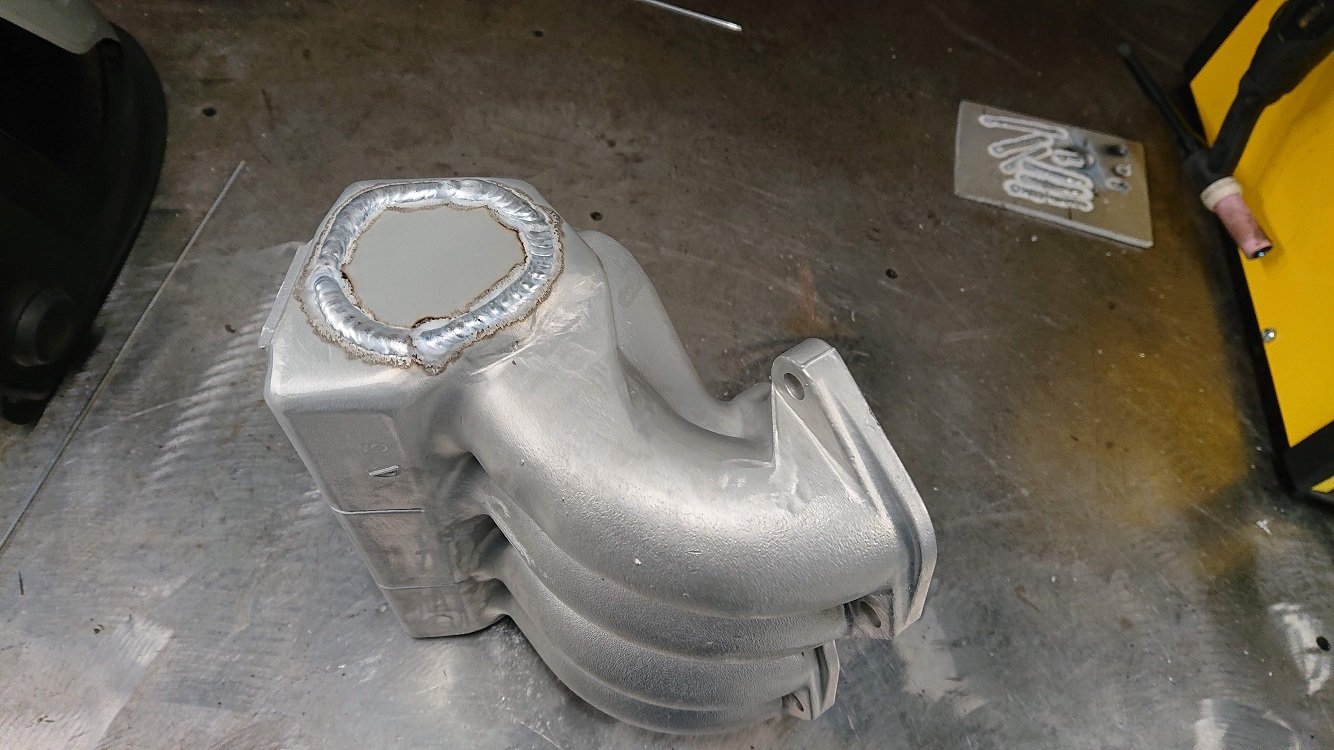
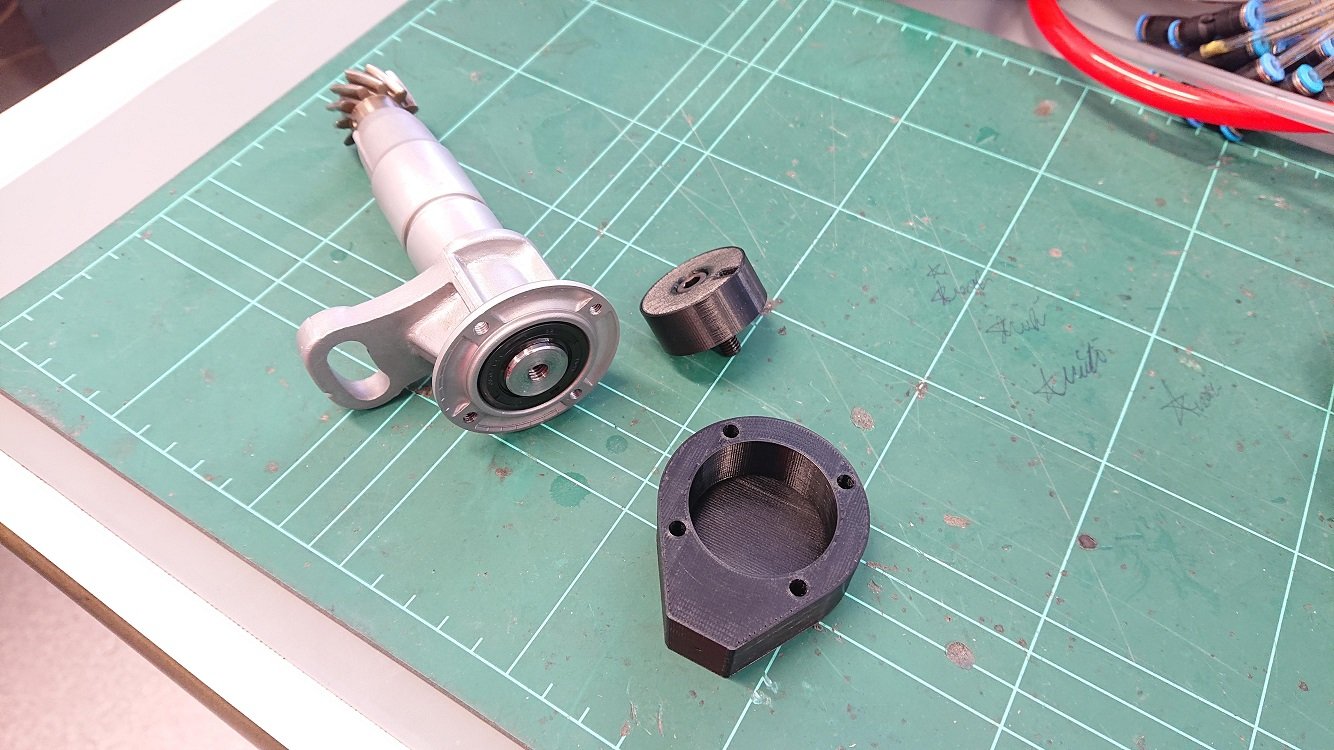
CAD and CAM'd up the throttlebody flange, got into machining it, but the mill is half way through having its coolant changed, so doesn't have any in it... Thought I'd give it a go anyway, but the chunk of 6061 I nabbed to carve it out of seems gummier than I'm used to... The endmill is also a cheap chinese one, which might not be helping the situation, but it's chip-weld city, so had to leave off and will continue once I get some coolant in it next week when the rest of the workshop staff are back and can show me where it is, lol. Cut out a plate for the other end of the plenum though and tapped it into place. Got it sitting pretty flush after much back and forth on the belt sander. Gave both bit a quick vapor blast and cleaned them up with some IPA... Then buzzed it in. I haven't welded any aluminium in a couple of years, but it went well. The cast welds pretty nice. A little bit of crap bubbles out of it, but nothing that wont seal up. Was a welder I haven't used before also, and ESAB one. Seems like a bloody nice unit. On my old one you were fixed to 50Hz for the AC, but this one was adjustable. I cranked it up to 100Hz and it was nice and stable. Really want to get the throttlebody flange on there so I don't lose momentum, Things are progressing along pretty well at the moment :-). I reprinted the cam trigger housing in ABS, and printed a trigger wheel as well that locates on the 17mm stub of shaft sticking past the seal, as well as taking a small inserted piece of key-steel as a ferrous target. I'll wire it up and hook it to a drill, spin it up as fast as I can and see what it does. I'm hopeful I'll be able to just use the printed parts. Dunno if it'll hold up. Should be good for prototyping at any rate, and then easy to replicate in metal or something else stronger if I need to. Printed the cap with a little divot where it needs to be drilled and tapped for the sensor, but there will be a little bit of setup involved in getting it right, so I'll so that tomorrow when I'm a little fresher :-). Hopefully I can get the throttle body flange machined and welded on too! Then the last remaining bits will be getting the coil mount cut and folding it up, the water passages / plumbing, and a mount for the FPR. That will require a little bit of noodling to make it easy to mount and weld, but should be able to model something up so I can machine it and have it all sit in place nicely, hopefully.
- 19 replies
-
- 17
-

-
Just fucking beautiful.


