-
Posts
1254 -
Joined
-
Last visited
Everything posted by ProZac
-
That is the hardest balance to find, and I've never once managed to pin it down. Now I just enjoy the process. (That's 'bullshit' for 'incapable of finishing anything').
-
I fitted (well, actually it was Dad) an aerotech rear spoiled to one once, and I remember us commenting on how it was going to invite rust. If I were to do it again I'd just glue it on, no drilling of holes. I'm going to fit a stock 3 piece spoiler to my car, and that's the route I'll go for sure. Loving the progress :-).
-

Tomble's 1983 Starion GSR-X fumbling / hand-holding / discussion
ProZac replied to tomble's topic in Project Discussion
So good to get a bit of seasons holidays progress eh! Your video confused the hell out of me until I noticed the 'TURBO' on the cam cover was mirrored, lol. I'd give your main grounds a really good check and clean up. The stock starion battery ground cable goes from the battery negative down to a point on the body below the battery tray, and then onto a bolthole on the side of the block. Take all these off and scuff them up so you're getting really good metal to metal contact on them. Bit of resistence in there goes a long way to slowing a starter down, as well as getting really hot an making zee smoke. My experience with starters is pretty binary, they either work and crank like they should, or they dont work at all. When they crank slow I usually find the problem is somewhere else. -

Tomble's 1983 Starion GSR-X fumbling / hand-holding / discussion
ProZac replied to tomble's topic in Project Discussion
Because, as our taste in cars also bears out, we both have excellent, refined taste! :-). -
I saw your security footage of it getting reversed into, fuck that hurt to watch, right in the feels, man. I'd go bronze on the wheels, but paint the lips nicely as well. Fully bronze wheel on a black car = winning. However, silver with polished lips would match the targa band quite nicely... I like the targa band, but I like weird shit :-).
-

Zac's 1982 Starion, Steering into the OCD Skid.
ProZac replied to ProZac's topic in Project Discussion
I was seriously contemplating buying your car when it was for sale by the PO. Looking at your thread, it was a good buy, it looks like an honest car, and being an early GSR-X model is very rare and very cool. It's your project to do, but I'll sure help however I can! :-). -
Can relate. Hard to take all your leave in a year I find :-/. I've got a buddy that's almost finished his aircraft engineer / mechanic apprenticeship / degree. Seems like good work.
-
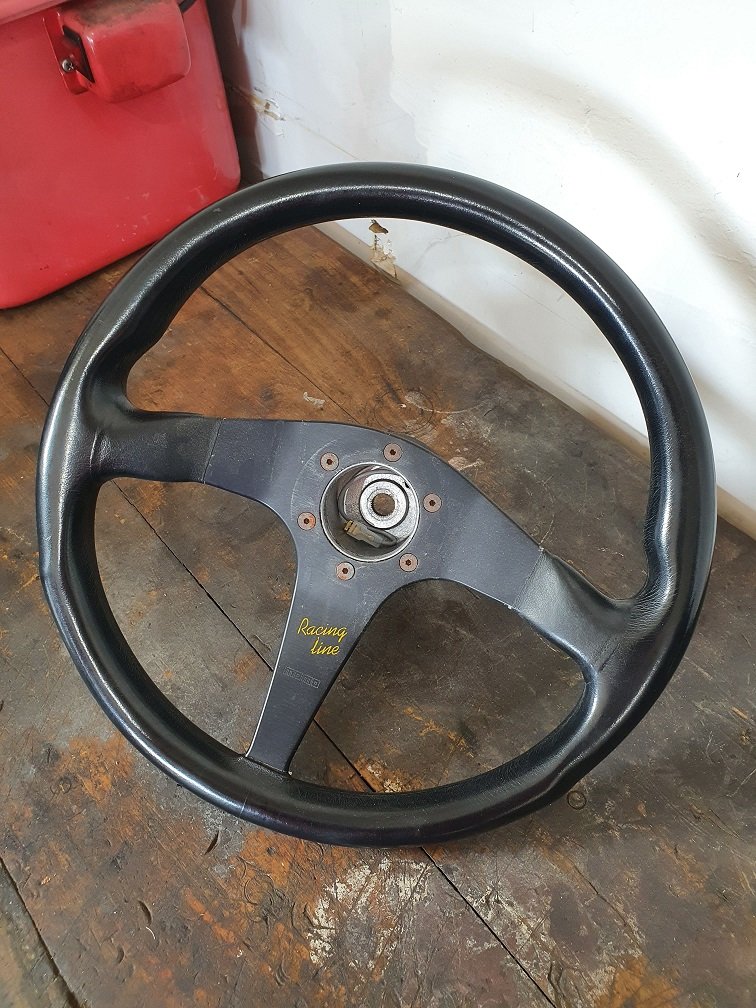
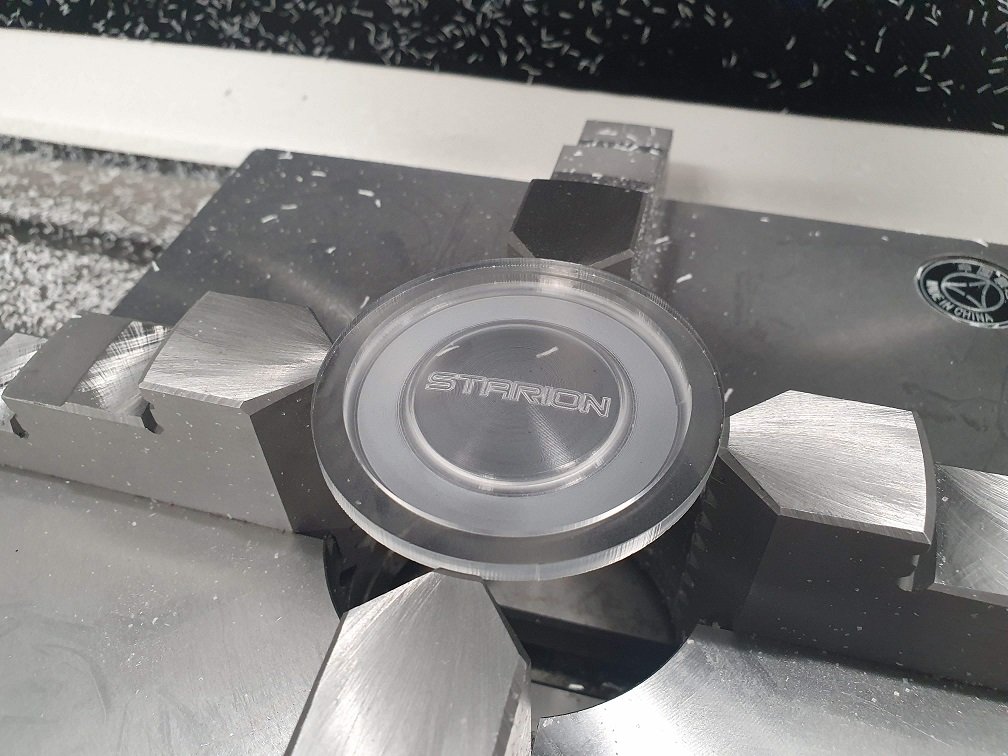
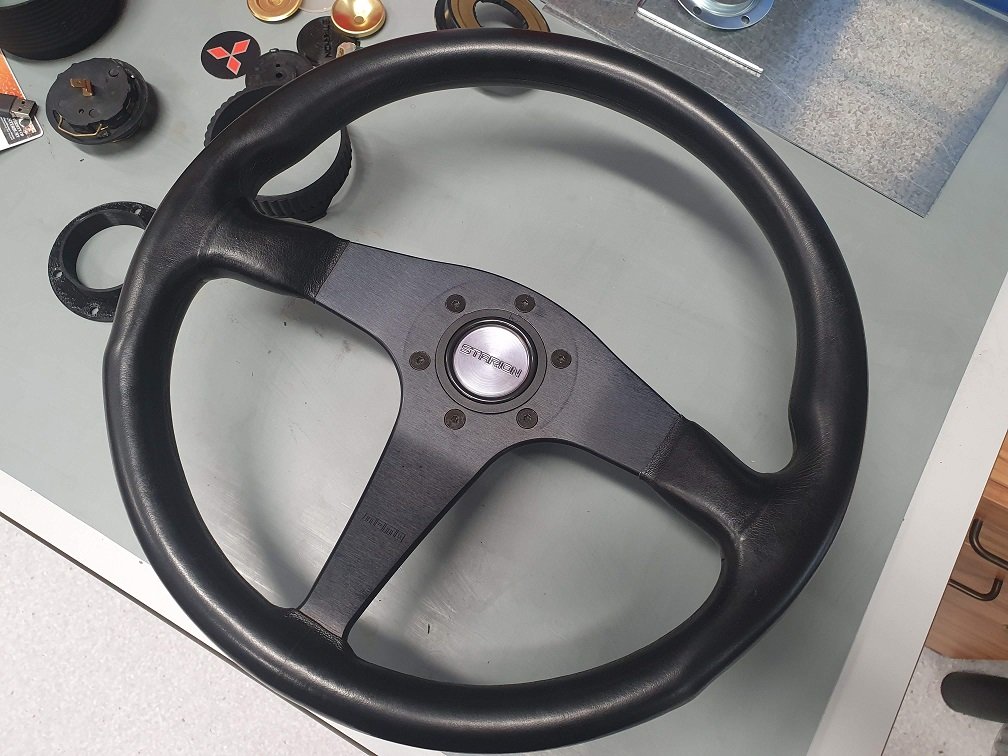
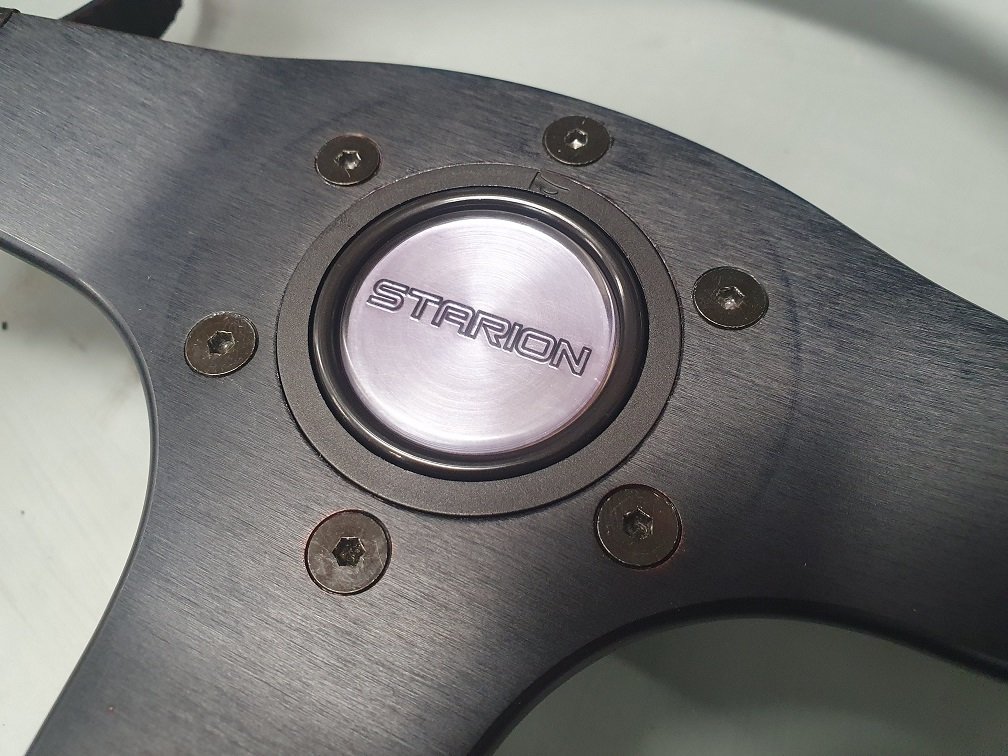
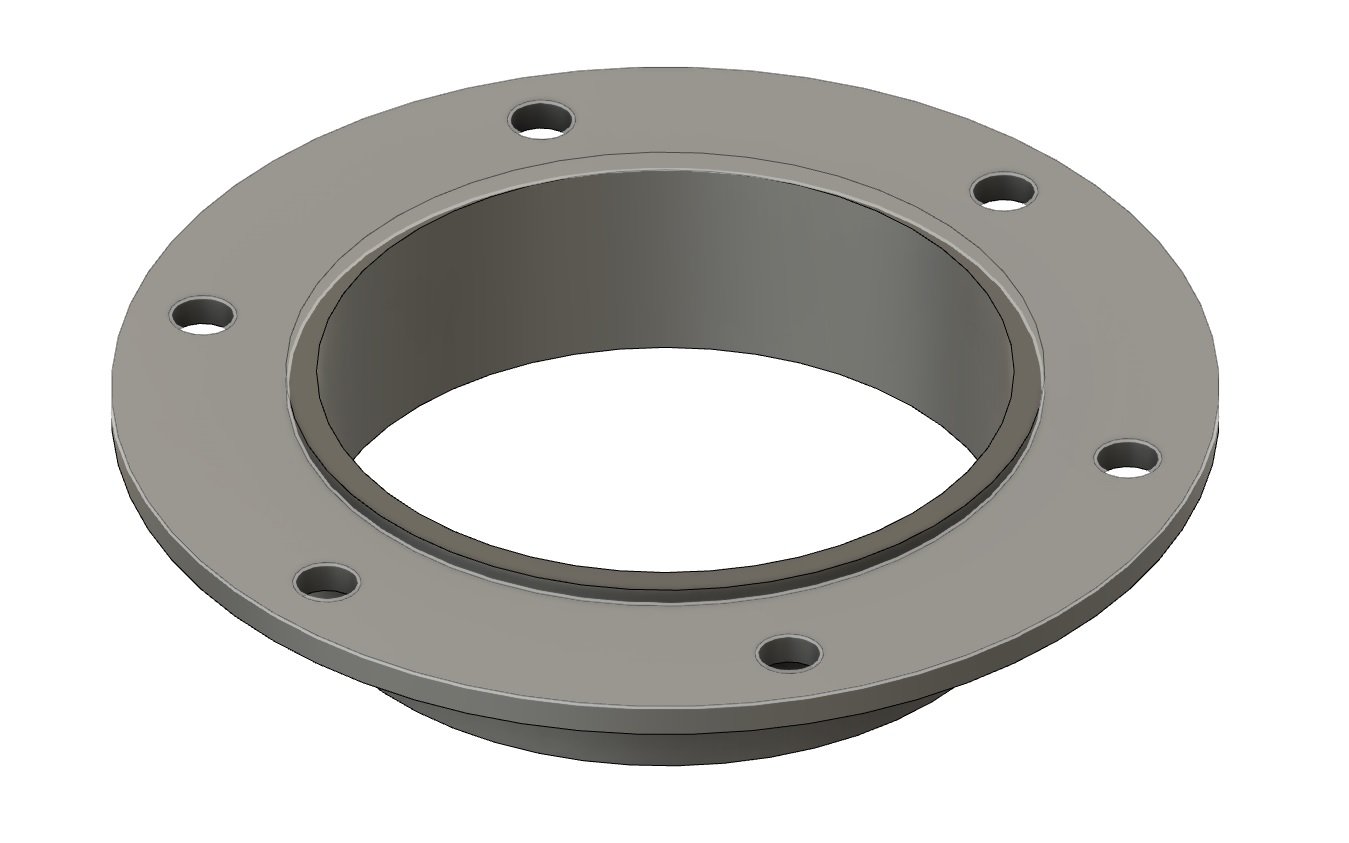
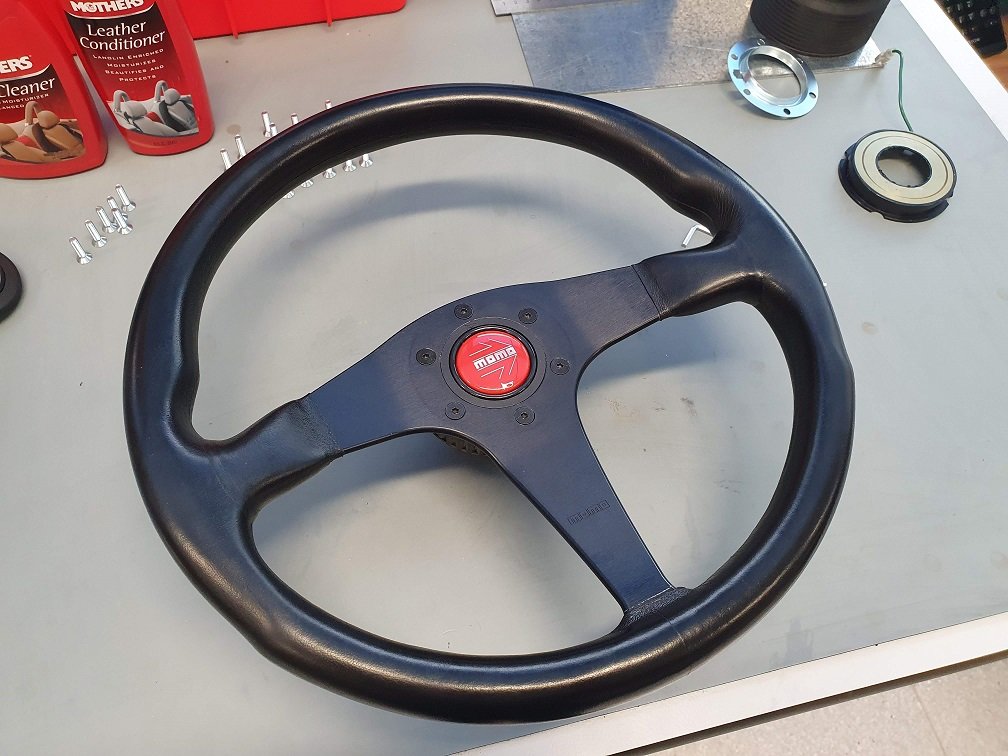
Remember at the top of the thread when I promised infuriating detail, and no real progress towards an actually usable car? Well, this afternoon I made a horn button, super fucking important eh. This MOMO Racing Line wheel came on the 86 parts car. It was pretty grubby, but actually in quite good nick underneath all the scunge. The yellow 'Racing Line' text was pretty battered though, so I removed the remains of it to tidy it up. The date code on it is from 1994, so it's well used. Very polished and shiny, but no tears or rips or anything. Really nice shape to hold too, and is 350mm, which is my ideal wheel size for a street car. I gave it a good leather clean and condition, and it actually came back to life pretty well. Got rid of most of the human juice that was on it and made it much nicer to touch . Happy Days. One thing that really annoys me with aftermarket steering wheels is that they so often have loose or wobbly horn buttons. This wheel had an aftermarket triple diamond button on it that was well part it's used-by. While pondering what to do about this, the Mrs popped her head into the garage and informed me that she'd just purchased a purse for $200, my Christmas gift to her apparently, and I should spend a somewhat similar amount of money on something for me.... Hmmmmm. A little interwebs time later and I had a couple of genuine MOMO horn buttons on the way, as well as a matching retainer ring. Now, as far as I can figure out, most MOMO wheels have a 55mm centerbore. There are two types of horn buttons, ones with a rounded front flange that sit proud of the face of the wheels, and ones with a flat front flange, the OD of which is 55mm, and they're meant to sit flush with the face of the wheel. The back half of the horn buttons and offset from the mounting surface to their face is the same though, meaning if you purchase a flush mount button, with the commonly available retainer ring, the button still sits about 3.5mm out the front of the wheel! Luckily, none of this is super complicated, and I'm good with CAD, so..... I constructed one of these. It's just 3d printed at the moment. I should really machine it out of aluminium, but honestly, the flange spacing out the wheel is 2mm thick, and the screws pass all the way through it... The whole stack (boss kit, horn retainer, wheel) is drawn up pretty tight when the screws are tightened down, so I really don't see it being a problem. This fits snugly down inside the boss kit, the wheel goes on top, the centerbore is the right size for the friction fit of the horn button, and the spigot sticking out the front gives the right offset for the horn button to sit down nice and flush. This got me here: Actually looks pretty bloody sweet! Button is nice and tight. The throw on the button itself is very short which is nice. Even Happier days. But it's red, and says MOMO in two places... OCD triggered. I dismantled the button (they come apart super easy, its nice), measured some things, jumped on zee CAD and then the 3d printer and proved to myself that a horn button saying 'STARION' in the 'bitsumishi' font (such a good resourse, that!) would look pretty awesome. The idea was to fill the embossed 'STARION' text with some paint / coloured epoxy, and sand it all smooth, but, because I did it on my prusa with a 0.4mm nozzle, the printing of the font is a bit too coarse. I love that machine, it's awesome for knocking out quick proof of concept things, and even some finished parts (ask me about my TV speaker brackets some time (actually, don't, I wont stop talking about them, and will bore you to death...), whoa double parenthesis...), but for something that's central in the drivers view, and a bit of show piece that isn't going to cut it. More CAD, then some CAM, then remembering how the coordinate offsets on the 3 axis at work, work.... Thats part way through the second side op, the 'STARION' is engraved on the other side, 0.25mm deep with a 60deg chamfer bit. The topside profiled to have the same rounded shape as the original button with a 4mm. 0.25mm stepover, took 20mins to machine that small area, lol. I sanded the face down to 1200 to get rid of all the machining marks, and will polish it further when I get home, where my proper plastic polish resides. I machined up an aluminium insert to fit into a counterbore in the back, which is what connects the circuit when you press the button. But of back and forth there to get the button throw right, but it's all good now. Hare trigger horn for maximum fuck you road rage... Some permanent marker all over the back face, letting it fill up the engraved lettering, then washing it off the flat back face with brake cleaner. Had to do this a couple of times to get it nice and crisp. Than assembled, installed, and boom! Pretty happy with that. Will look even better once it's polished. The permanent marker (A Sharpe twin tip, because work pays and I'm a baller) actually does a not shit job of touching up the small scratches in the black anodizing too. And afternoon well spent methinks, bloody enjoyed it :-).
- 5 replies
-
- 37
-

-

-
What is it you do to earn a crust? The rust repairs on your car are a work of art. I got an angry email from HR last friday. I'm a 'leave offender'.... As in I had too much stacked up. I'm now off till the beginning of Feb. Not all of it is holiday though, have some side hustle work booked in for Feb which will be nice.
-

Tomble's 1983 Starion GSR-X fumbling / hand-holding / discussion
ProZac replied to tomble's topic in Project Discussion
Lots of crud in there, but that doesn't look too bad! Score. I've seen videos of people putting lengths of chain inside them and ratting them around for ages to knock off all the loose gun and rust, then cleaning, then coating... If it isn't super expensive, getting someone else to do it is certainly the way I'd say. -

Zac's 1982 Starion, Steering into the OCD Skid.
ProZac replied to ProZac's topic in Project Discussion
DOOOO IIIIITT. -

Zac's 1982 Starion, Steering into the OCD Skid.
ProZac replied to ProZac's topic in Project Discussion
I bought one of the Caswell kits in from overseas for some stuff at work, and it's fricken expensive by the time you get it here! Plus, they cant actually supply the passivation solutions because they're DG's. I'm on contact with an industrial supplier up north, and they've given me a heap of material to read, just need to sit down and go through it all to figure out what we need :-). -
With the fuel tank taken care of, I picked another project, this time the dashboard. The original grey one was in pretty average condition. Had a boost gauge cup glued to it when I got it, and the mark where it was wont come out, there is burn mark above the ashtray... Also, it's grey, and I want a black interior :-). Black on Black is where it's at. Years ago I acquired a black dash from a late model JDM car. It's also in pretty terrible condition alas, couple of chunks of foam missing, and lots of screw holes. I had thought maybe I could flock it and tidy it up, but then there was the one from the 87 Euro car... It was pretty good. A couple of dry spots behind the gauge cluster and a couple of screw holes down by the drivers knees... Then I picked up that 86 Euro car and, surprisingly, it's dash is MIIIIIIIINT. It was super dusty, adn the metal frame behind it was rusty, but the dash itself cleaned up awesome, and there isn't a mark or dry spot on it. It's center vent was pretty wrecked though, but luckily the center vent from the JDM dash was perfect... This theme continued and out of the four dashes I have, I've managed to make one minty mint mint black one, and one really good black one. So if anyone is after a black dash in good nick, let me know! Once again, really down into the weeds with the details. All the vents I've disassembled, cleaned, re-lubed and reassembled. They all operate nice and smoothly now, and have the right amount of friction to stay in the position you set them. The weird details you notice when mixing all this stuff together though, like the decals showing the vent positions on the euro dashes have orange legends, whereas the two JDM dashes I have (both grey and black) have white. I mean, it doesn't matter in the slightest, just weird shit, you know? Like, someone at some stage had to make the decision about what colour these were to be, how did they end up with two different options? Another one is the HVAC control panels. On the later Euro stuff I have there are 6 positions, but on the earlier JDM stuff, there are only 5 (it's missing the demist/foot combined position). Speaking of the HVAC controls, they got rolled into this part of the project aswell. Infact, the blower motor, AC Evaporator and heater box were all blown apart to their last component, everything cleaned, reassembled, adjusted and lubed. The diverter flaps have a foam on them that, by this age, has pretty much turned to dust. I CAD'd templates for all of these and laser cut new pieces, and glued them all into position. I'd say that the glue off-gassing might help give me that 'new car smell'.... But lets be honest, that glue will be well and truly off-gassed by the time they get refitted ;-). I used 3M super 77 contact adhesive spray, and I might have to revisit this, as it's not giving a good grab to the rubber sheets.... The control sliders for the heater boxes were another part of this project. I've done plenty of stereo installs in Starions over the years, and when you pull the center console out, you often find these piece of plastic sitting in behind there: They're low friction shims to give the right spacing for the slider controls. They're usually missing, and it means the slider is really hard to actuate, as it cocks sideways and jams up. This is what causes the center vents mounts to get smashed out, as the user needs to put in heaps more force to move the heater controls. I didn't have any material the right thickness knocking around, so I 3d printed some replacements out of PLA. It's not likely to get hot enough behind there to cause issues... I hope anyway. PLA is pretty low friction, and I've lubed it with a solid lube stick. With everything cleaned, blasted, painted, reassembled and lubed, it now feel much, much better: The blower motor, ac evaporator (I'd like to reinstate AC if possible) and heater core are all reassembled and looking mighty fine too I've got some more vents and stuff to clean, but I think I'm actually near the point where it could all go back in... If I wasn't completely paranoid about rust at the base of the windscreen... Mine is really good there, but I can still see the pinch weld starting to separate. I'm going to remove the windscreen (I've bought a new replacement, they're still available) clean it all up, treat everything and paint it properly with some encapsulating paint. I reckon the reason they all rust out at the base of the windscreen so badly is because they were never painted there properly from new. I don't want to have to worry about it ever, so I think some POR15 will be the go. Will look at removing the screen some time soon. Need to go pick the new one up and get it into storage too, will give them a ring tomorrow :-).
- 5 replies
-
- 19
-

-

Zac's 1982 Starion, Steering into the OCD Skid.
ProZac replied to ProZac's topic in Project Discussion
Indeed, I hope it continues. @tomble and your threads inspired me to actually write something about working on this car. Really enjoying reading other peoples progress too! -
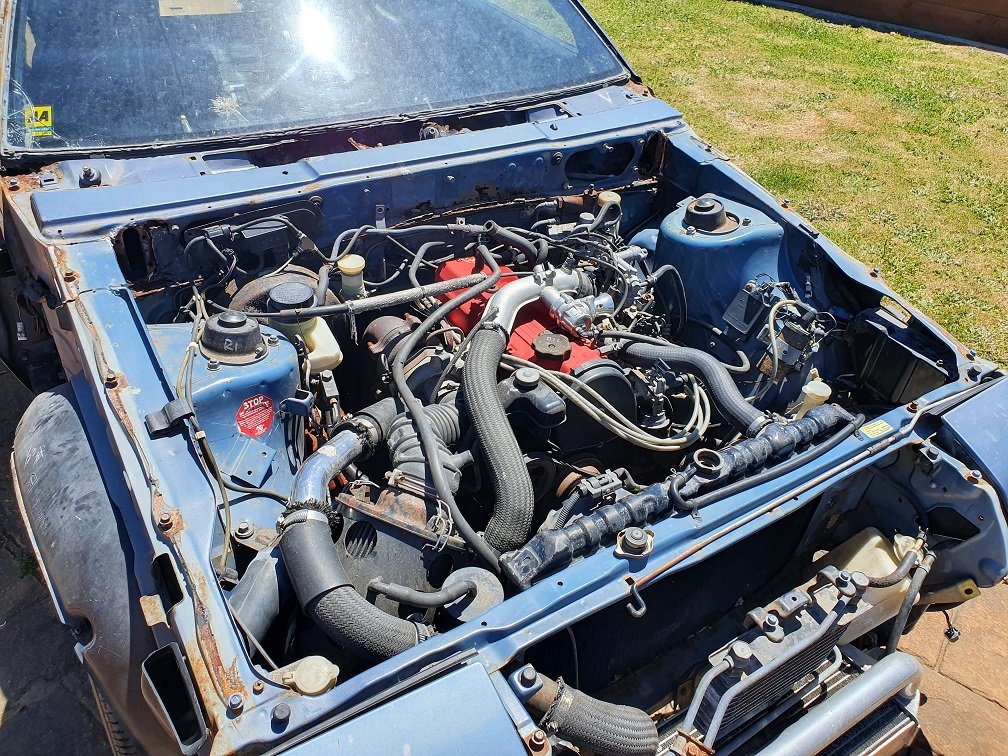
A couple of years back I picked this up: A 1987 NZ New model. Typically, the later cars had more desirable parts. 5 stud hubs with a bigger 8" diff. Most of the euro / nz new stuff had leather interiors too, and being an 87, had the facelifted interior. This car was missing a heap of bits (not engine or fuel tank :-/ for example) and had plenty of suspect rust repairs with lots of new rust setting in. I stripped it to its last nut and bolt and got the shell taken away. Look back, it was probably savable for someone keen enough, so I feel a little bad about scrapping it, but at least I have all the parts to help keeping Starions on the road. A couple of weeks ago, history repeated itself: This one is a 1986 Euro import model, in the same Atlantic Blue (it's a bloody nice colour actually!) This one I wont feel bad about stripping though as it is the rustiest example I've ever seen. It's pretty sad, as I remember this car from back in the day, and it was a really nice example, well cared for and well loved. It lived in redcliffs though, and I suspect the salty air got to it, its really really far gone. However, the morning after getting it I spent a bit of time mucking around with it, and actually got it to start up and run. No weird noises, no smoke, and it idled smoothly / revved cleanly. Poking through the receipts that came with it, there is one for a cam grind in there, and some other diagnostic and engine work... Could be a good motor. Maybe perfect to yank, tidy up and put in my black Starion. Looking at it parked next to my truck, its really apparent how small Starions actually are. My L200 is pretty small by modern standards, and its much longer than the Starion. 80's mitsy life.
- 5 replies
-
- 23
-

-

-
First job I've tackled since getting this into the garage is the fuel tank. I've seen heaps of people on the FB groups and forums asking for them in recent years, and they're becoming pretty hard to find. I've got multiples of pretty much any Starion part I can think of, except for a fuel tank, so I was a little concerned because mine had been sitting for so long, I it might be pretty rusty in there. I'd left it with about 10L of fuel in there, which just smelled lovely by this stage. After draining that and dropping the tank, I pulled it all apart and was happy to see this: Pretty damn clean really. It's had the fuel cap on the whole time, and I removed and blocked off the pressure vent system back when it was running (actually, a dumb thing to do....) so it's been well sealed the last few years. I washed it all down inside and out, then put the heatgun on it to dry everything out. This got the whole tank nice and hot. I did it a few times over a couple of days to hopefully ensure there isn't any moisture left in any of the crevices. As mentioned, I'm going full retard on most aspects of this car. I love the detail work, it's therapy :-). To this end I vaporblasted all the hardware and pieces from the tank, and have had it all zinc plated. This is a continuing theme of working on this car, and I'm researching a zinc plating setup for myself. Easy enough to do, but not trivial to get a really nice bright result straight from the plating tank. Plus the passivation chemicals used after the plate can be a bit nasty apparently. Work in progress, but Christchurch Metal Finishers has been doing an excellent job to date, and if you batch stuff in it's not super expensive. They love the result they get on the vaporblasted parts. Most of these tanks I've seen from factory have undercoat on the bottom half of them. This is probably just due to them being under the car, and undercoat being applied when the cars are imported. With the tank nice and clean, I reapplied a good solid coat. Had a decent accident with my Shultz gun while doing this that resulted in one hell of a mess to clean up in the garage, but I got the job finished. The tank is mostly reassembled now. I've replaced the pump with a Walbro255, as apparently they are better suited to a setup like this with the pump on top of the tank. The 044's can have problems drawing the fuel upwards? Anyway, the part numbers are: pump = GSL-392 fitting kit = 400-952 The last part of the puzzle is the fuel level sender. They're NLA from Mitsubishi, in any of the four different part numbers they had over the years (one of these was actually different though, for the cars with the fully digital dashes). Mine is an early one, so has the early style connector on it, and actually seems like it's in okay condition... But I keep seeing requests for the senders popping up on all the groups / forums, so it'd be nice to have an aftermarket solution. The resistance range of a 2nd gen Pajero sender is the same, but the shape of the float arm and fitting flange are totally different. The flange can be taken care of with a ~5mm adaptor plate pretty easily. For the float arm, I've bent one up out of some stainless TIG rod, and am working on a way of attaching it to the Pajero sender unit reliably. Don't want the thing to come loose and be rattling around in the tank! If my idea works and is cheap enough, I think I'll try selling them as a kit so there is at least a solution out there in the market. I really need to finish this off as the fuel tanks are big, and I'd love to get it into the wardrobe for storage and reclaim some flat space in the garage!
- 5 replies
-
- 16
-

-
Harass me about detail work with no real progress here :-).
-
Hi, my name is Zac, and I'm a Starion Weirdo. If you're not into excessive detail and a substantial lack of real progress, this isn't the thread for you :-). I've owned this thing for around 10 years now, and its been running for *maybe* 2 of those. Standard Starion ratio really :-). It's a 1982 GSR III model. It's a bitsy thing, as the front bumper and lip have been replaced with later model items, but it was originally optioned with an LSD diff, which is very unusual for an early JDM car. Back in the day when I was driving it, I had it pretty slammed on a set of D2 coilovers and some 15 x 9 rotas. I still think it looked pretty cool like this, but the D2's were a bit bouncy, and having it that low was problematic. I managed to tear the exhaust completely open on it one day, for example. I can't even remember why I pulled it off the road now, but when I did the motor was pretty tired. I played around with doing an MPI swap, did various things, but it basically just sat in the garage. We moved house, and it went into storage for a while. Then I bought it home, put it next to the garage under a cover and it sat there for a couple of years too. I've had a couple of other Starions over the period of owning this one, but for some reason, this is the one I love the most. It's a really solid shell, no major rust issues to speak of, and it seems really honest. Haven't found any previously repaired damage while poking around it. This is the one I've hung on to, and this is the one I want to build into my dream Starion :-). During Lockdown I gave the garage a big clean up and moved it in there, and have been pottering away with it ever since. I'm steering into the OCD skid, and it's quickly turning into a nut and bolt restoration. I'm really enjoying working on it like this, as there is no timeframe for anything and its just fun to get deep into the weeds with all the details.
- 5 replies
-
- 18
-

-

Tomble's 1983 Starion GSR-X fumbling / hand-holding / discussion
ProZac replied to tomble's topic in Project Discussion
Yeah, fuel tanks and parts for these are getting a bit unobtanium these days, they're prone to rusting out from sitting for so long. Get a flashlight and shine it down the openings in your tank and see what it's like. If it looks really rusty in there it might be worth a few calls to radiator repair shops to see if they can clean it out and re-coat the inside? It used to be radiator repair shops that did that anyway. There are some products you can buy to do it yourself as well, I've not given it a go, but it doesn't look super complicated. If you've got access to compressed air, I'd disconnect the fuel line going into the fuel filter in the engine bay, as well as the fuel return hose from the injection mixer and give them a little squirt to blow out any crap that could be in there. I've been working on an aftermarket solution for fuel level senders, as I keep seeing people needing them. I need to do a bit more work on it and some testing, but if you get desperate I've got an MB183926 sender (same as what you have) sitting here I'd sell. Although things look pretty rough from it sitting so long, it doesn't look like it's been played with too much in the past. Most of the original brackets, hoses, canisters and what not are still there, so that's a plus! Finding that stuff to put it back, or diagnosing problems when its missing is a complete ballache. You've been inspiring me to get some work done on my one, have been having heaps of fun, so cheers! :-). -

Tomble's 1983 Starion GSR-X fumbling / hand-holding / discussion
ProZac replied to tomble's topic in Project Discussion
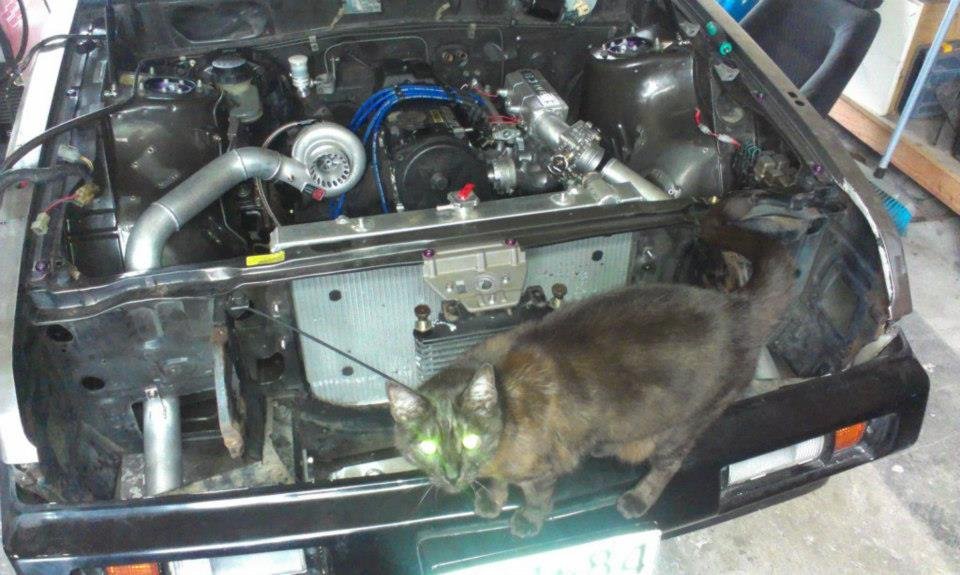
What a dude. Is his fur white underneath? Mine has lasereyes. He gives me the stare when I'm off task. -

Tomble's 1983 Starion GSR-X fumbling / hand-holding / discussion
ProZac replied to tomble's topic in Project Discussion
Ahhh, yeah, that just looks old and rusty, not mixed with oil which would be a bad thing. Your mate is right that its likely the water pump impeller rusting away :-). I got an email from HR last friday telling me I had too much leave and was against company policy.... So I'm now off till the first of feb. Have been doing some work on my Starion for once, which has been really, really enjoyable :-). -

Tomble's 1983 Starion GSR-X fumbling / hand-holding / discussion
ProZac replied to tomble's topic in Project Discussion
Also, I require more pictures of your cat, he looks like he's got a charcoal coat. ASAP. Kthxbi. -

Tomble's 1983 Starion GSR-X fumbling / hand-holding / discussion
ProZac replied to tomble's topic in Project Discussion
91 is fine to get it up and running and cruise it around a little, but it'll knock for sure if you start to give it the jandal. They're a surprisingly easy motor to make knock, and it kills the factory ring lands on the pistons really easily as they're very thin. I'd go with 98 :-). When you say your coolant was chocolate, do you mean that it was just brown (rusty water) or it was more like a milkshake? Put up the some pics of the dizzy you got :-). The basic process to getting and engine to fire is to check it has air (compression), fuel (in a reasonable quantity), and spark (at the right time). An engine will show signs of life with a surprisingly wide tolerance on these three things. Most fuel injected stuff has diagnostic procedures which can be super helpful to figure out what is going wrong, but not your generation of Starion unfortunately. This is just a stepping stone to getting the engine started, as you'll probably be able to get it to fire relatively easily, but that will expose further issues to sort. It's all fun though :-). For a Starion in particular, this is what I'd do: (once you've got a dizzy in place, are you familiar with how to fit the dizzy and make sure it's timed correctly?) Fuel: Remove the cross over pipe that connects the turbo to the intake manifold. Get someone to crank the engine and see if you can see any fuel spraying out of the injectors. You can do this because Starions are throttlebody injected, having two injectors placed above the throttle plate, not an individual injector per cylinder. If you can see fuel spraying (should form a pretty fine mist), move on to checking spark. If you can't see any fuel spraying, you've found a problem. Doesn't mean there aren't also many more problems, but this is certainly one! Check there is actually fuel in the tank, easiest way to do this is just be chucking $10 in. Then you know. Remove the fuel pump access panel in the boot. Passengers side, under the carpet. Single screw, probably sealed down with gum-tape stuff, pry it up nicely. With someone cranking the engine, feel the fuel pump to see if it is vibrating at all, or making any noise. If it seems completely still, its not running for some reason. Tap it lightly (the housing it aluminium, don't dent it) with a hammer and try again. If its still not running, its either a dead pump, dead MPI relay, or a wiring issue. How are you with a multimeter? If the fuel pump is running, but no fuel is spraying, your injectors are likely at fault. They could be gummed shut from years of sitting (most likely), or they're not getting a signal (ECU or wiring fault). There isn't really a way to check them that doesn't involve pulling the injection mixer apart. You can connect and LED (make sure to get the polarity correct) to the injector wiring going to the injection mixed and see if the LED flashes when you're cranking the engine to check there is some sort of signal. It's probably worth replacing the fuel filter (engine bay, passenger side, mounted down near the chassis rail) as a matter of course, but it's unlikely to be completely blocking fuel flow and stopping it from at least trying to fire. Spark: Remove the cross over pipe that connects the turbo to the intake manifold. Get a can of 'Start ya Bastard' from Repco / Supercheap. With someone else cranking the engine, spray this down the intake manifold, stand a little way back, and not directly in line with the intake manifold opening. This stuff is much easier to ignite than petrol, so even a really weak spark will set it off. Usually there are three outcomes to this: The engine fires normally, tried to run, and then dies (this is what you want to happen ) There is a backfire through the inlet manifold and some fire comes out. This probably means your distributor timing is 180 degrees out, and you need to refit the dizzy correctly, and make sure the plugs leads are in the right place. Your factory service manual should have a good section on this, just make sure when you time the engine to top dead center on cylinder 1, its on the compression stroke, not the exhaust stroke. This is the second best outcome as it's likely to be an easy fix . Nothing, just cranks and is dead as a doornail, Sad Panda. In the case of option three, you need to completely confirm that there is no spark. To do this, remove the no.1 sparkplug. Re-fit it to it's ignition lead, and run a small crocodile clip from the ground strap of the plug to the battery negative post. Get someone to try and crank the engine while you watch the plug (rest it somewhere, don't hold it). Chances are you'll see nothing, confirming that there is no spark. If there isn't a spark, I'd first check the coil. Using a multimeter, you can measure the resistance across it's two terminals. There will be a spec in the service manual for what this should be. If its open circuit, the coil is dead. Replace it with a 12V can coil for an electronic ignition system and try again :-). If the coil checks out fine, you're into the realm of needing to scope signals and what not... Not insurmountable, but requires a bit more gear A couple of things to be aware of when you're reading diagnostic stuff on forums; Starions run a completely divorced injection and ignition setup. The ECU in the cabin controls the fuel delivery only, with the igniter box mounted to the inner passengers fender controlling the ignition. This stuff is from the beginning of the fuel injection era. It's actually pretty robust, but a little different to troubleshoot :-). Also, most testing I'd usually do with the cross over pipe connecting the turbo to the inlet manifold removed, so I can see the fuel injectors firing. The engine will fire like this, but probably wont continue to idle, as the air flow meter isn't connected to the intake manifold, so the amount of air entering the engine isn't known by the ECU. Once it fire and want to start, reconnect this and give it another kick in the guts :-). Fingers crossed you can time it up, fit a dizzy, plug it in and she at least fires up :-). They're actually pretty reliable old girls, so I'd be cautiously optimistic as long as it hasn't been to fiddle-fucked by previous people playing with it :-). -

Tomble's 1983 Starion GSR-X fumbling / hand-holding / discussion
ProZac replied to tomble's topic in Project Discussion
I've found him to be particularly painfuil to deal with, but there is a guy in NZ with a bunch of old Mitsy parts, Brett Campbell. If you join up the various Starion groups on the ol faeboes you'll see him posting quite often. Twice I've agreed to buy things from him though, and he wouldn't get back to me with shipping costs or more pictures or anything. I don't think he's dishonest, just disorganised? hah. -

Tomble's 1983 Starion GSR-X fumbling / hand-holding / discussion
ProZac replied to tomble's topic in Project Discussion
It's okay, it'll still tick and burn oil :-).- 172 replies
-
- 10
-

-


