Mr.Mk1
-
Posts
3457 -
Joined
-
Last visited
-
Days Won
4
Everything posted by Mr.Mk1
-
The Mrs took it to work and took some snaps She was trying out Temu app (like aliexpress, free shipping) and wanted to fill the cart so I found some stick-on rubber universal spoiler and ordered. It was about $7. Looks like I’d imagined, hope it stays stuck! It came in a 8.2 ft roll so the ends should relax and uncurl with time. If it doesn’t I’ll make some wee brackets to push outward
- 24 replies
-
- 21
-

-
Finally got the leaves reset 2inch and new bushes.
- 24 replies
-
- 30
-
-

-
Gooder

- 24 replies
-
- 18
-
-
I got the rest painted on Saturday morning. Half sick and fully fumed out it was bloody hard to see what was happening but luckily it’s not all streaky, lol. Again, the ground coat went on fucking gravy, topcoat thick. I slapped some bumper paint on, spray bombed half of the trims + scuttle and grille.. they had faded from the3 year stint out in the sun. Number plates totally weren’t sprayed and sanded back. Also welded a stainless tailpipe on, visually made a big difference. still have to flat and buff it some time, tint the tail-lights & install the new rare spares outer door glass weather strips.. what’s left of the factory ones are as hard as plastic
- 24 replies
-
- 46
-
-
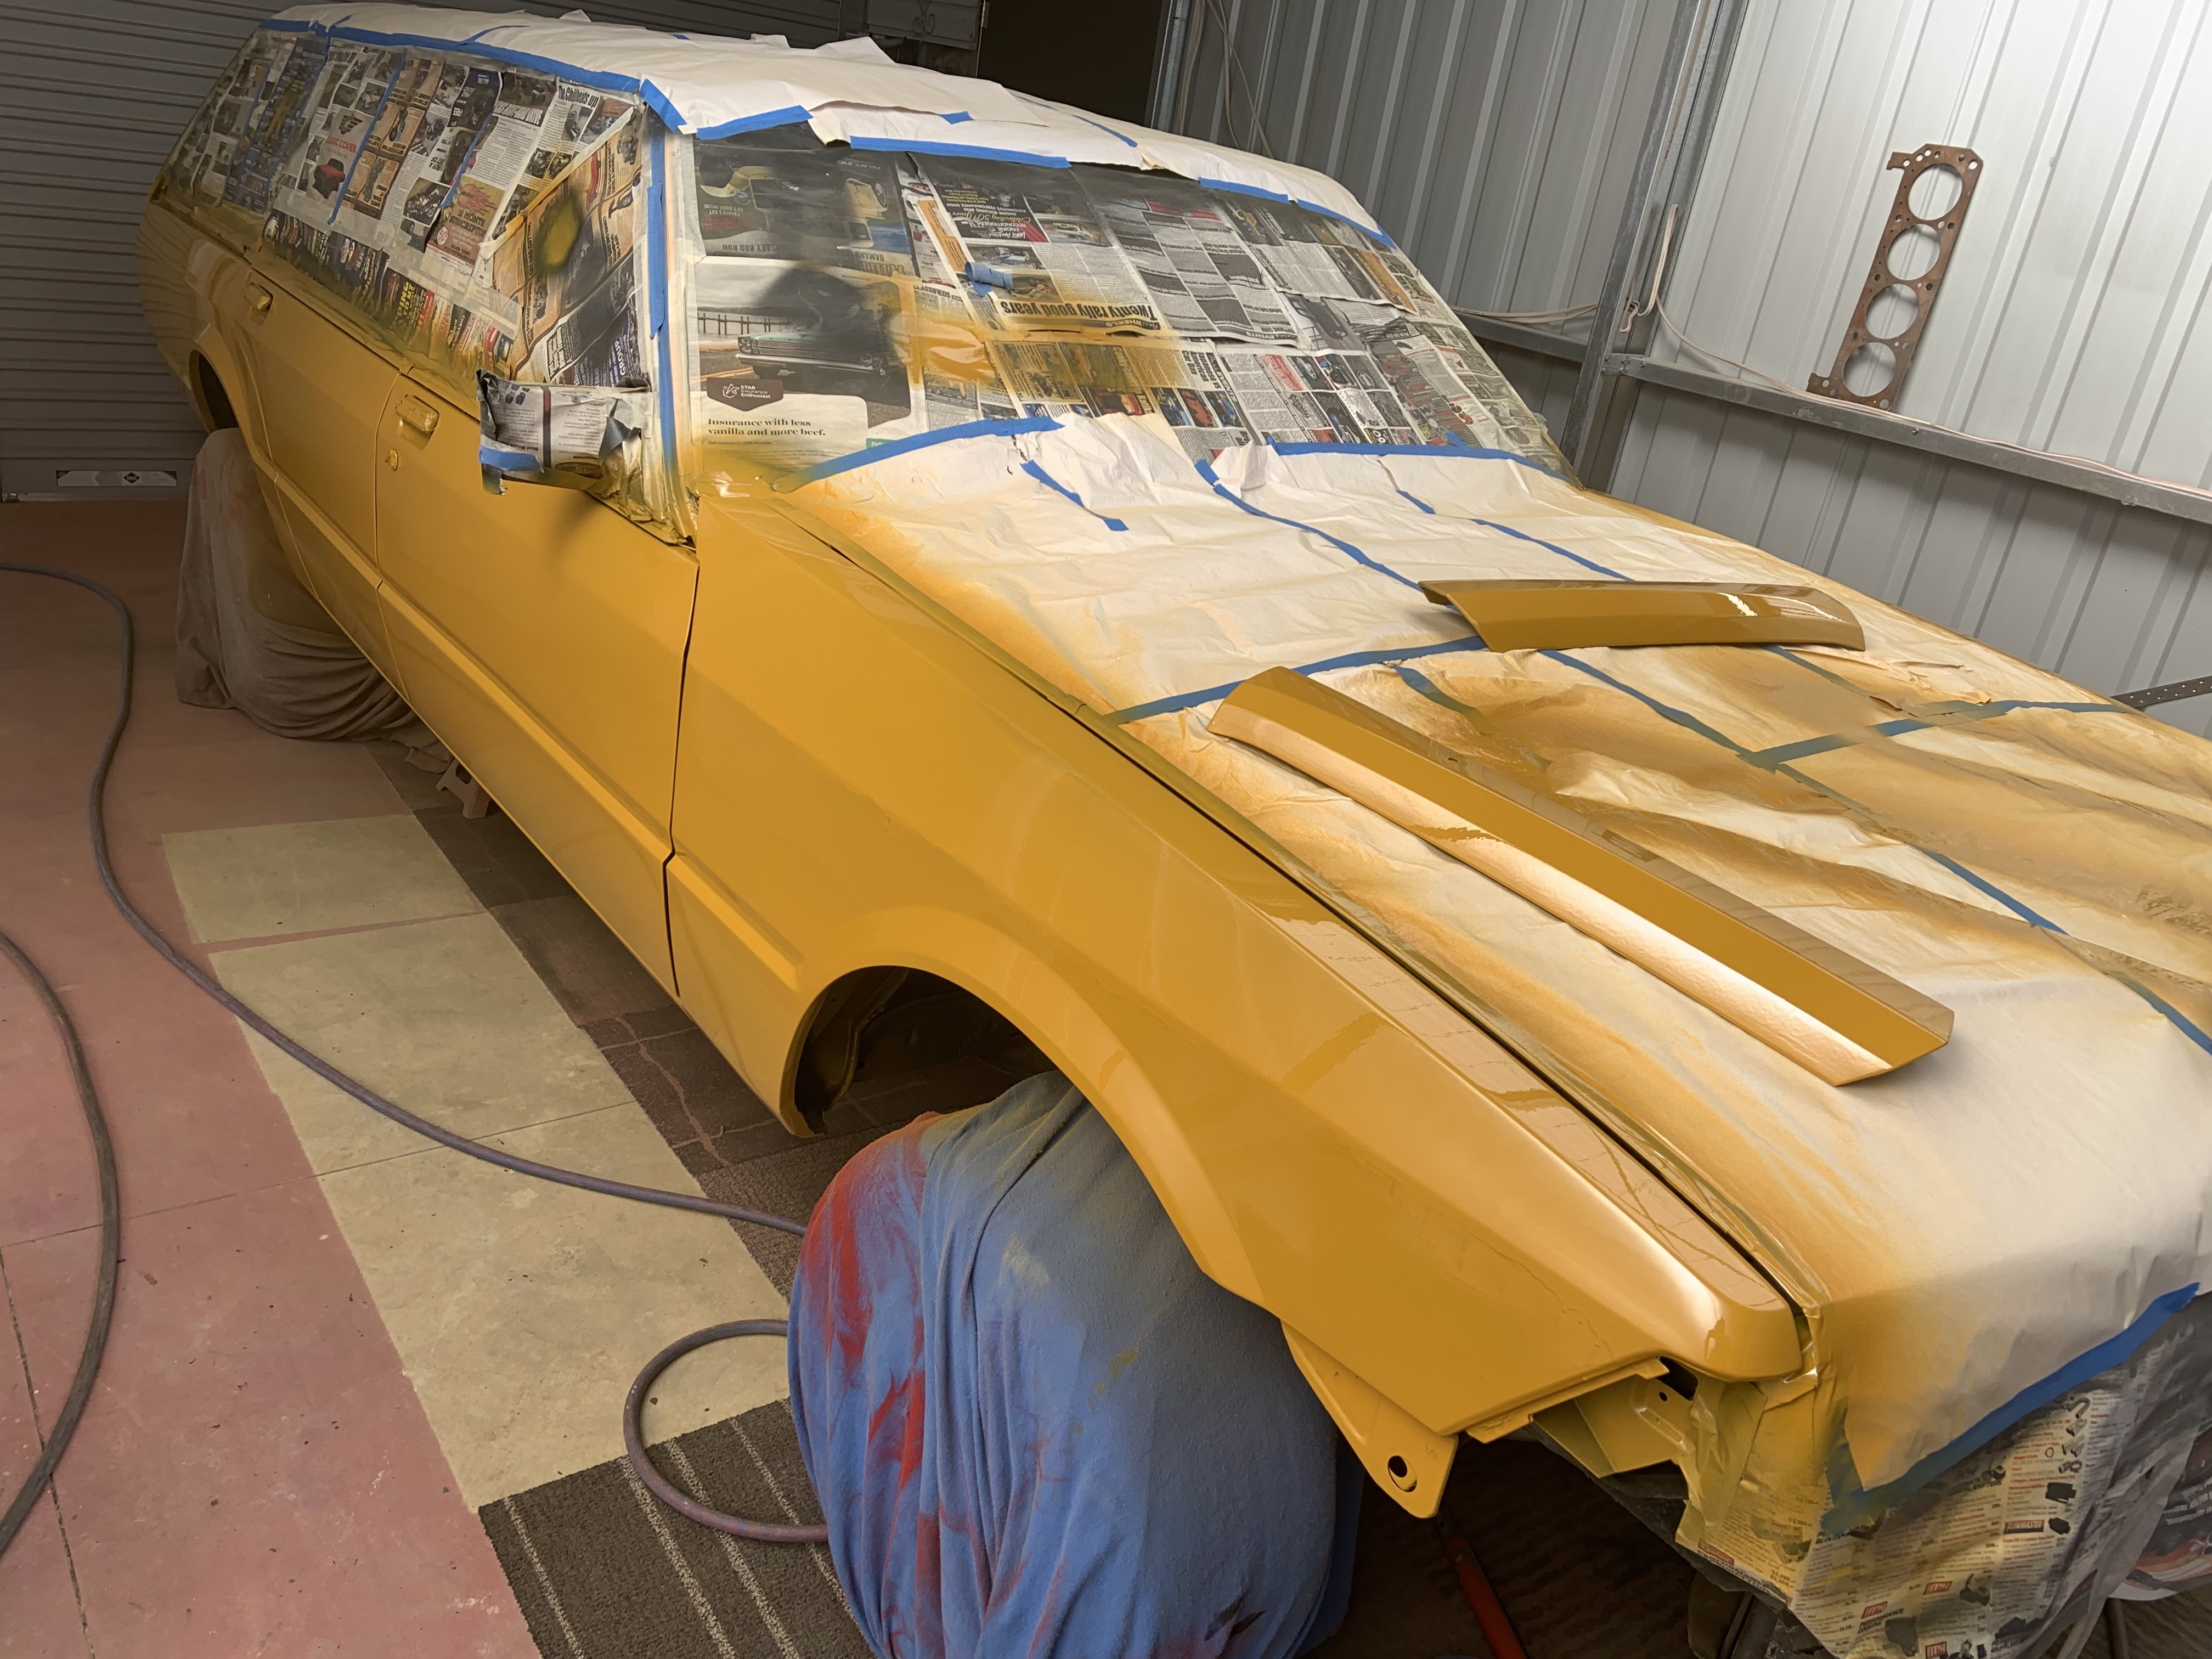
Well I’m half way there. The base coat went on BEAUTIFUL, like best I’ve ever laid paint. the top coat went on thick. Guts.. Thinned it more but cautious of runs like last time. Ah well, can’t un-do it so put plenty on. Got a sweet run on the front guard that will shave off but the car is pretty legit otherwise! Now to wait for it to harden and I can back-mask it and blast the roof, hatch and bonnet. Disclaimer* I never gapped the panels, I just wanted it sprayed and to put an end to the god forsaken dust in my nice shed.. so we can line it up another time/winter
- 24 replies
-
- 28
-
-
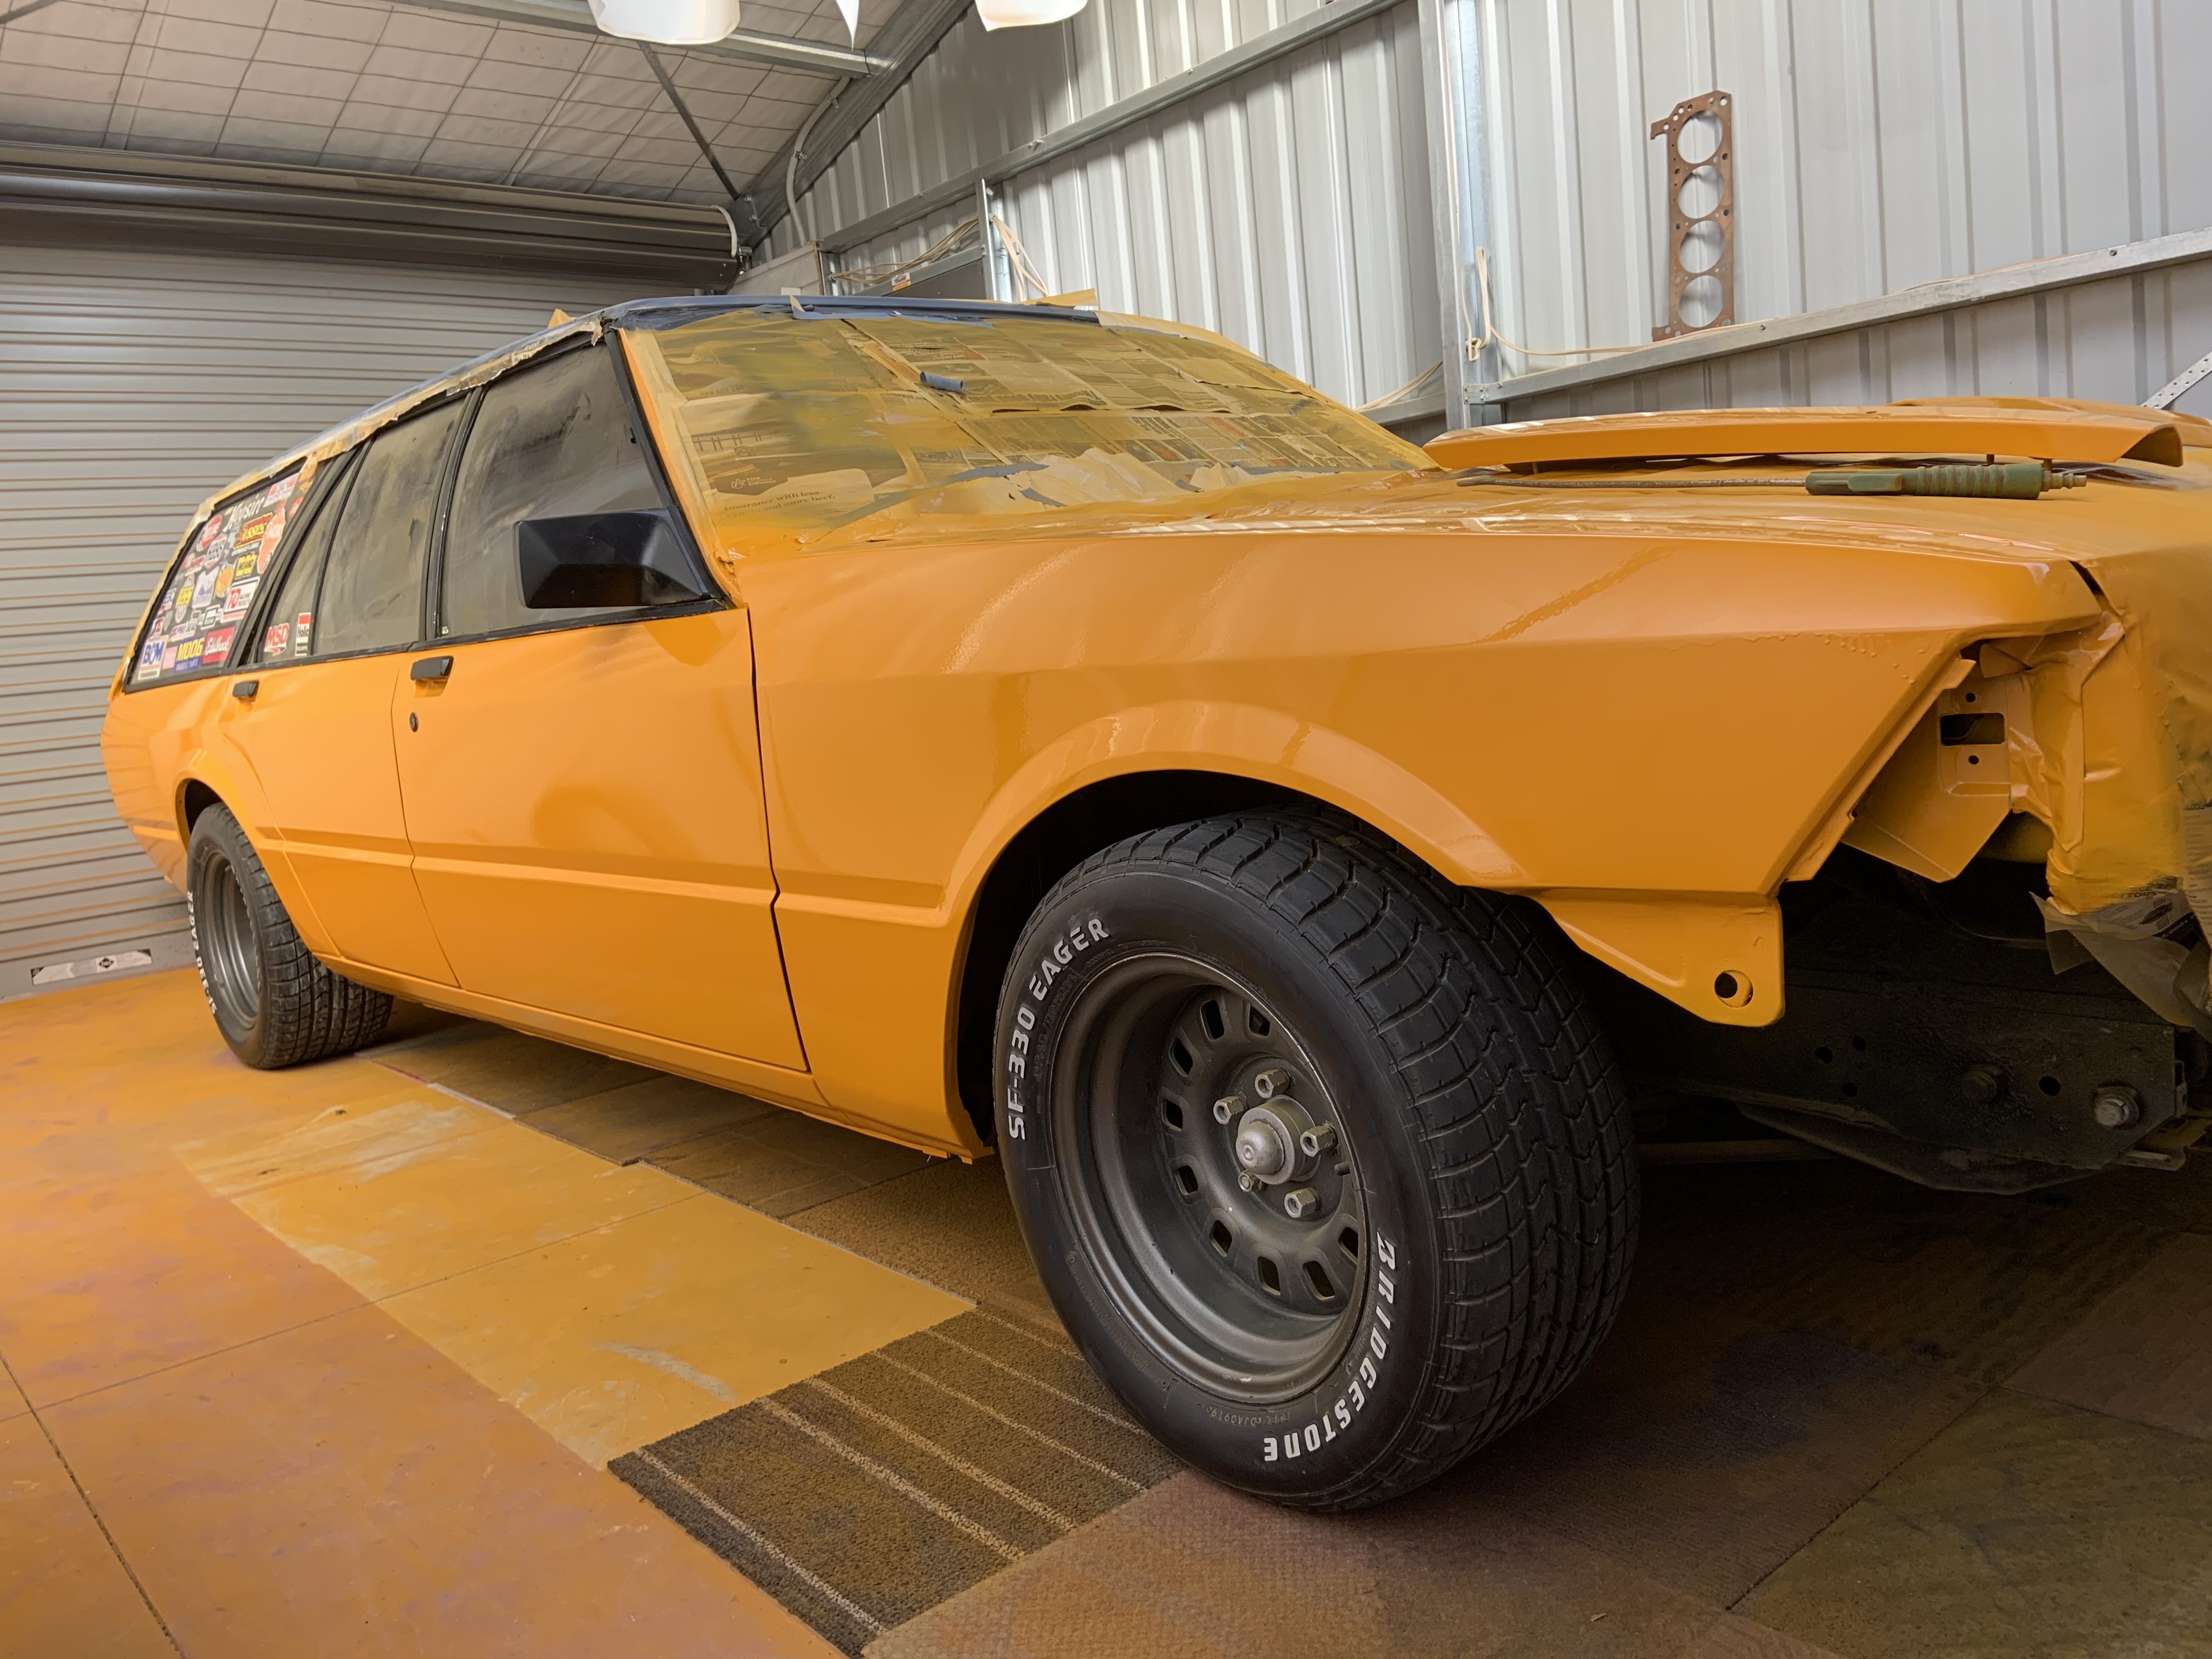
Well we got it rubbed back and I shot the base coat. Went terribly! I brought this metalux paint when I did the Datsun, and the red was transparent as fuck. Yellow being yellow, I thought oh hell, I’m in trouble. A mate had a tin of mustard yellow so I was all on to bash down the mustard then the topcoat would cover easier. My ground coat was too heavy so it ran, then a heap of fisheyes appeared. Must have come from the wax & grease rag or the last minute latex gloves I used from a hair dye set. Pretty fucked off, but glad I’d decided to mask the roof, hatch and bonnet so I could minimise overspray and have more control by doing those secondary. I was planning to wet-on-wet the base then the topcoat. was looking forward to de-dusting the shed too but I guess that has to wait!
- 24 replies
-
- 14
-
-
-

-
Finally collected the guard marker lamps. Made new rubber gaskets, cleaned them up and fitted them..they even work!
- 187 replies
-
- 19
-
-
Cake is iced!
- 24 replies
-
- 17
-
-
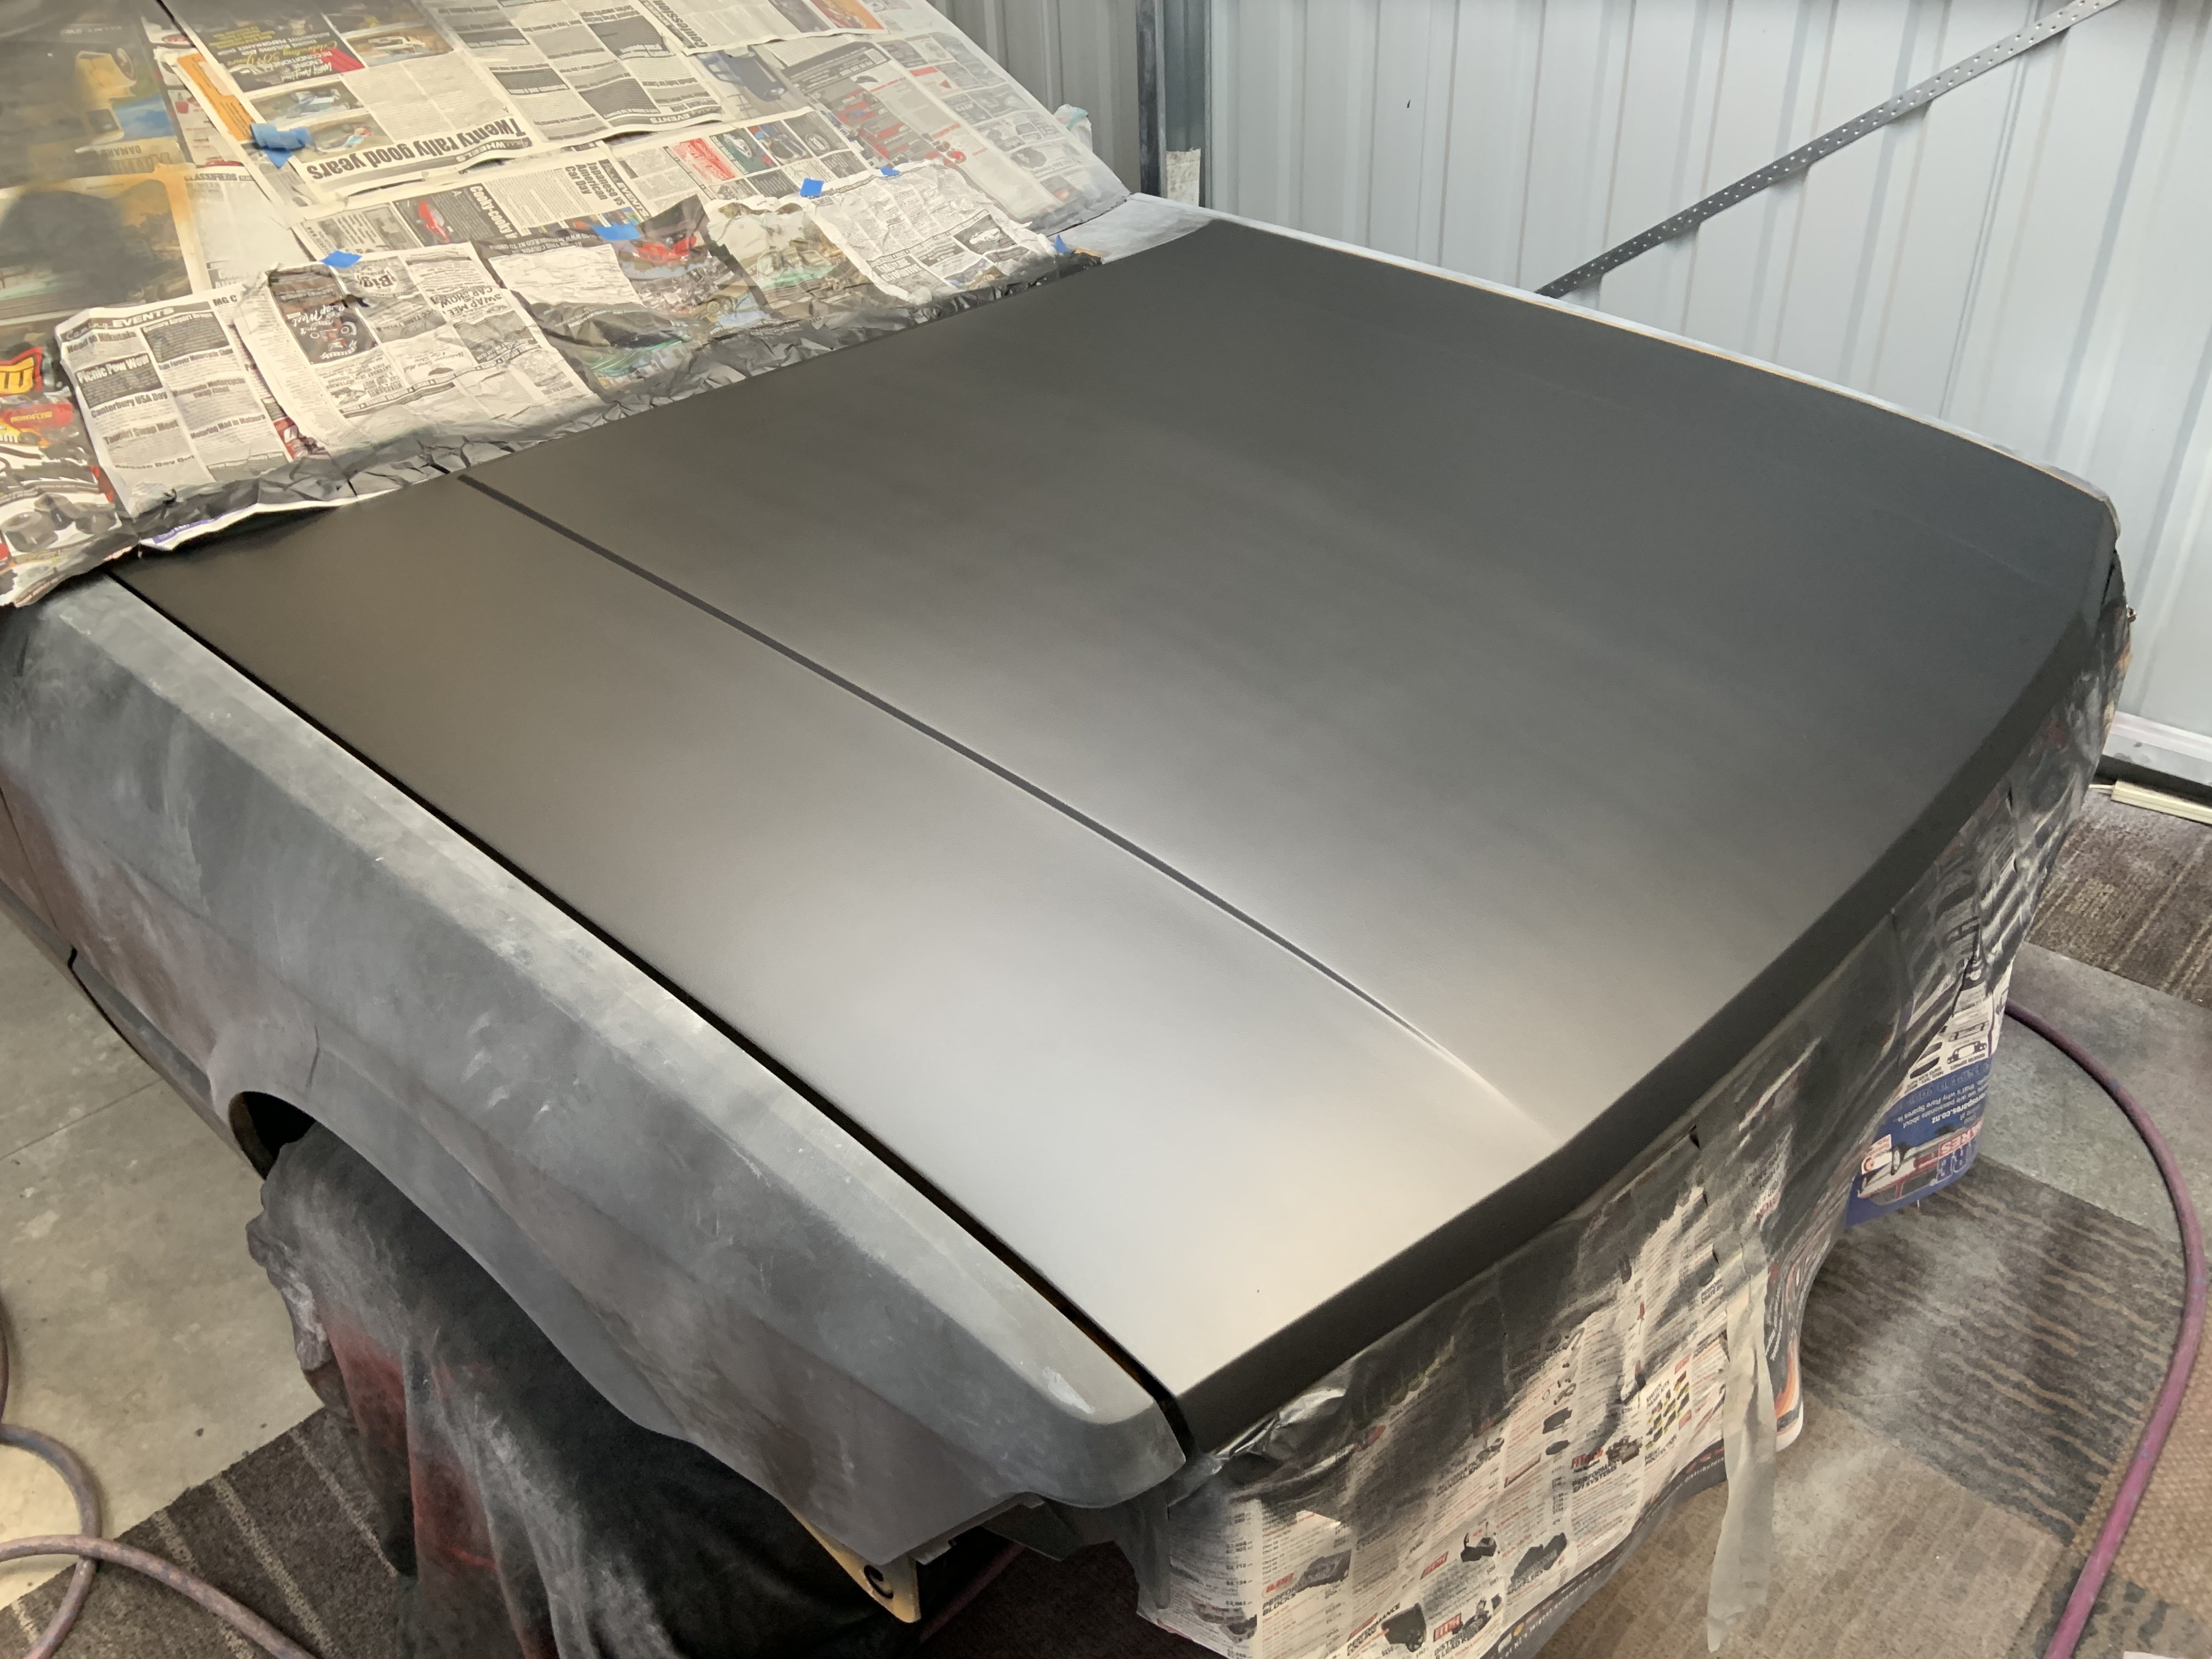
Few crummy pics of the progress up to today. The bonnet is like making a golf ball smooth but at least there’s no rust in it yet! It got a good dose of spritz and needs a few more hours but the rest of the car is good. Manda tidied up the bumper and scraped off the poorly adhered previous layers, it needs a wee plastic weld then it can be prepped too
- 24 replies
-
- 26
-
-
Seems I forgot to update this over a year ago with some more cancer removal.. She loves a dump run, almost all I use it for lol!
- 24 replies
-
- 29
-
-
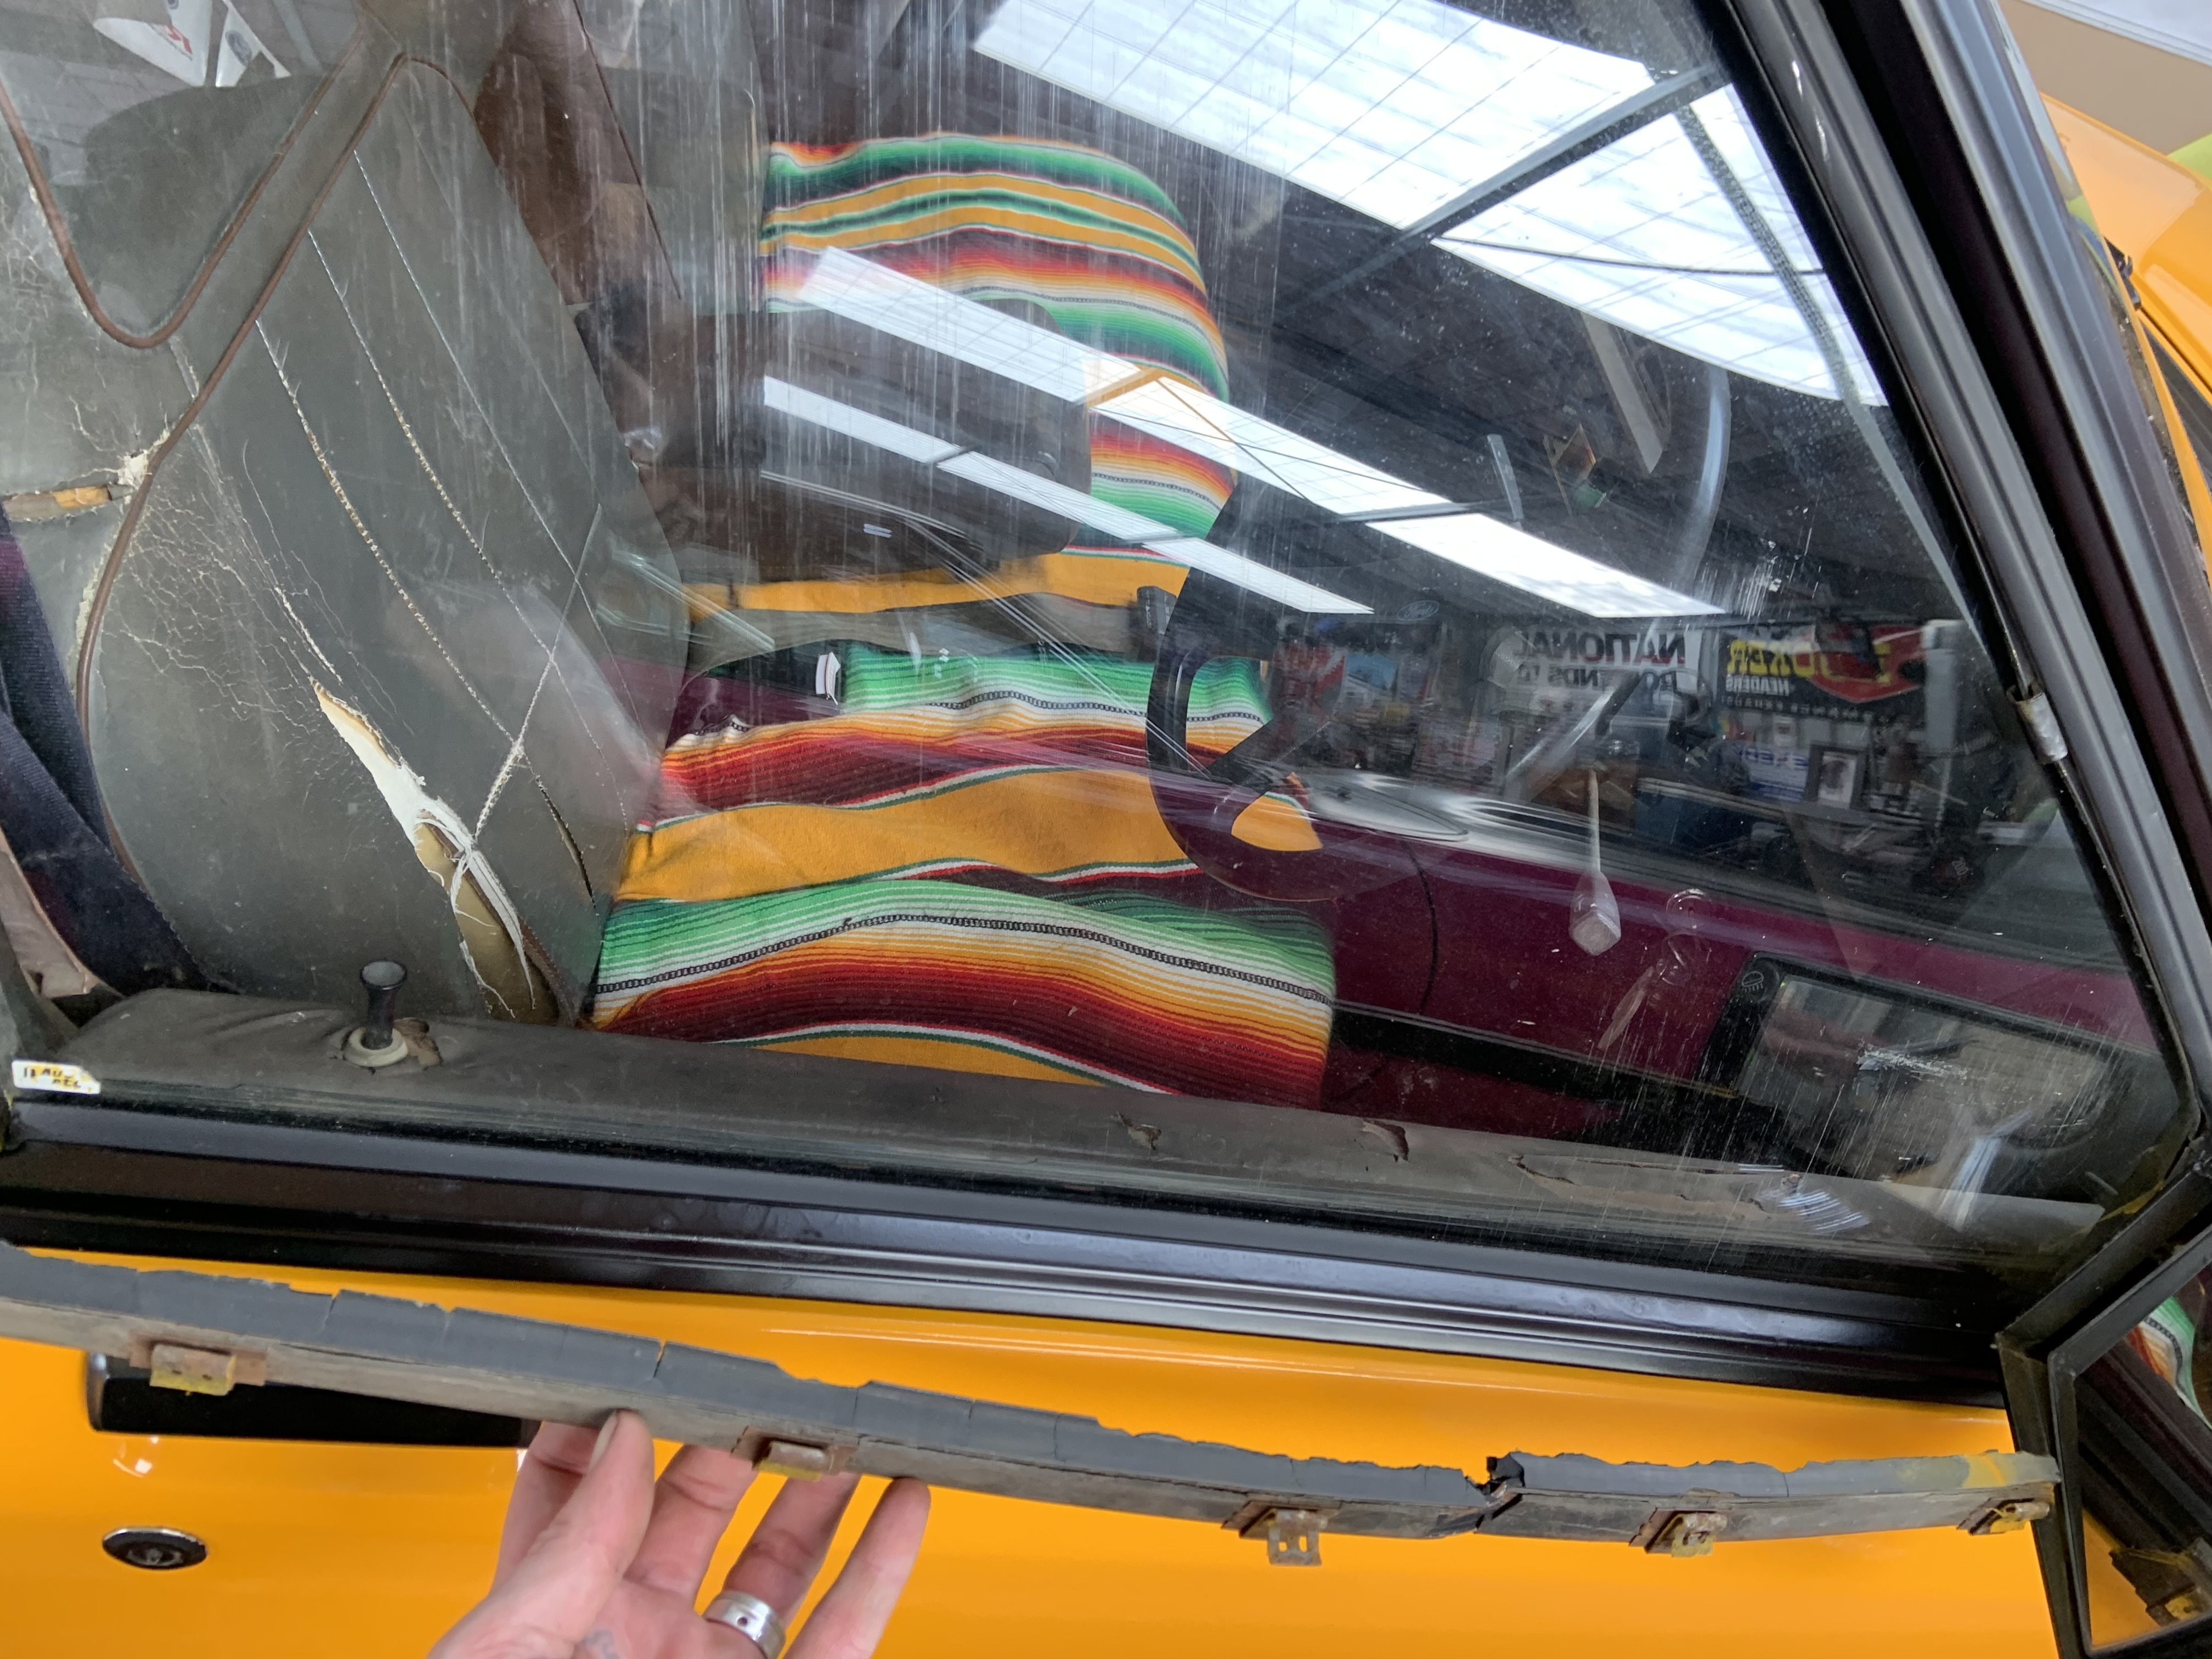
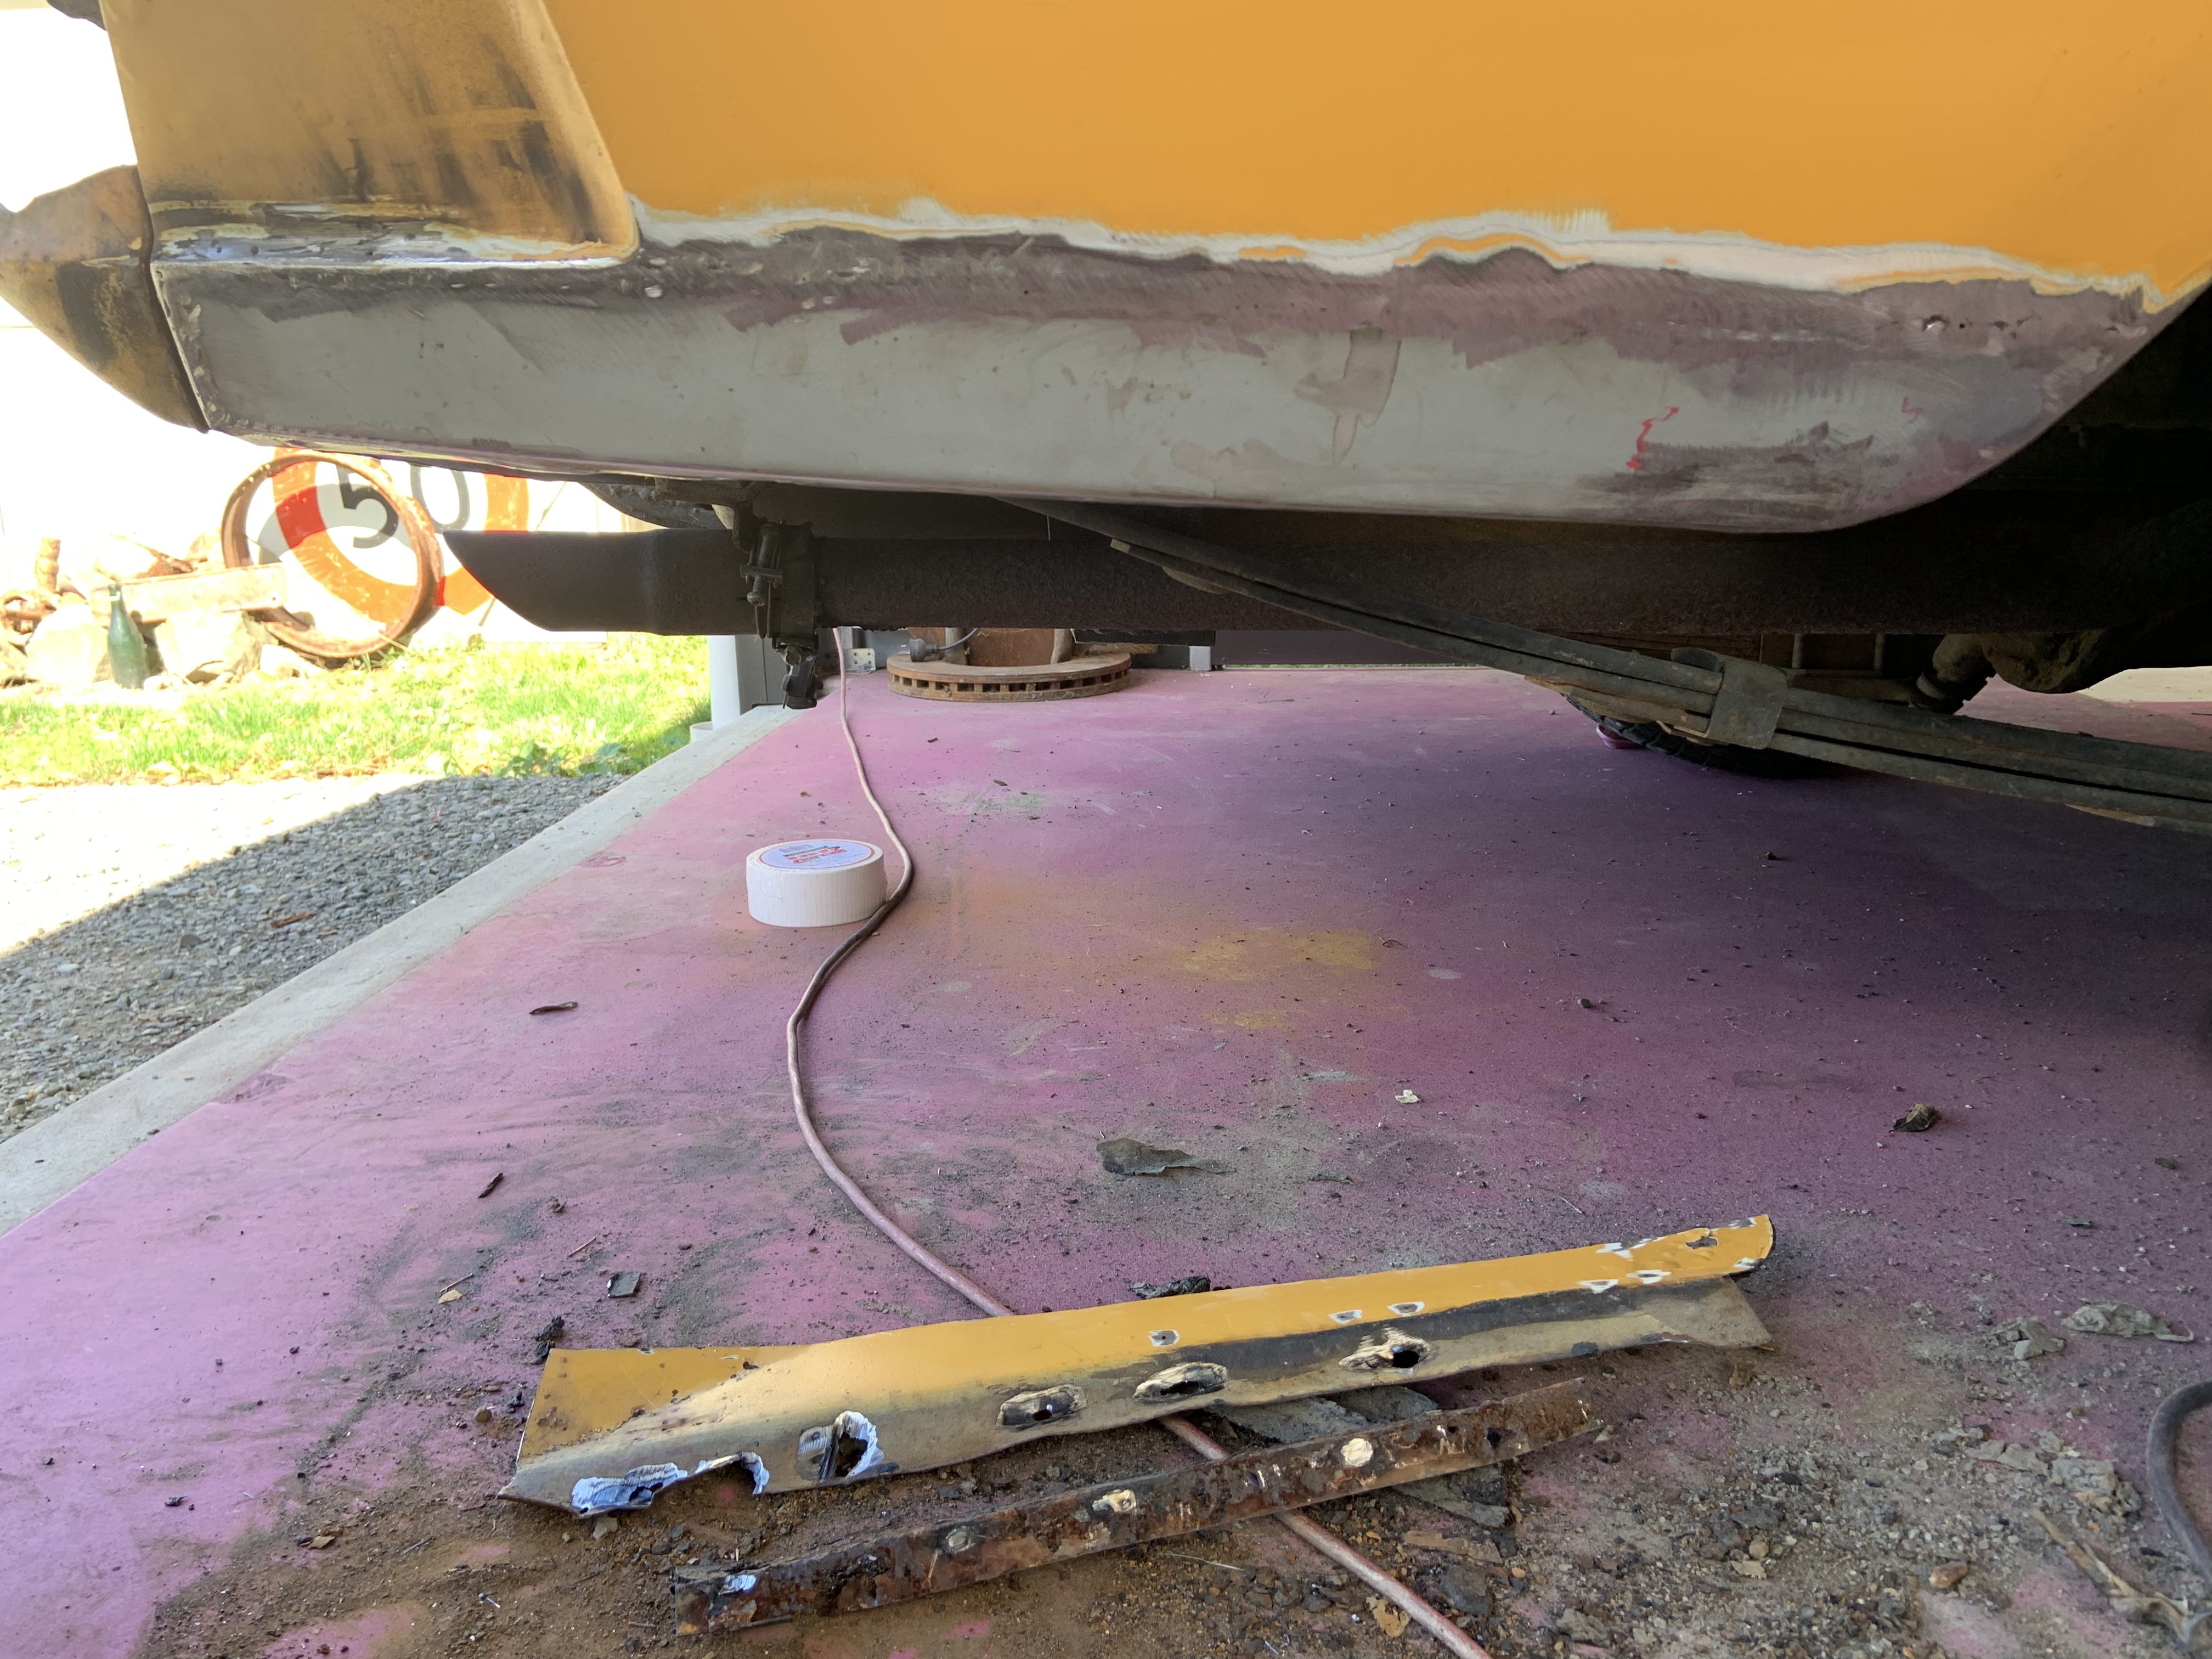
Just taking the last of the exterior rust out of this old slag and giving it a quick spruce up. The bottom foot has been shabby since we got it so it will be a big improvement when it’s all one shade of the same bloody colour! Can put in the new tail lights we found on marketplace, and source some door-to-glass rubbers since they have turned hard as plastic about 20 years ago. Also toying with the idea of using a mk4 cortina rear rubber bumper insert as a lip along the bottom of the front bumper ala XE and ESPs.. they look way way better but are hens teeth nowadays because of that. Shes lived outside a lot of the time we’ve had it, hasn’t done it any favours but I always knew it was getting a birthday and that parts that deteriorated were still available. It’s been in the flash new garage all summer so it’s bones are dry and ready for a new coat!
- 24 replies
-
- 21
-
-
I got Elite wheels to move the centres 30mm outward, bringing the tyre in and away from the wheel arch. We now have clearance and a much better stance! Always a shame to lose max dish, but still plenty there. I’ll risk tangling with the guard if I put lowering blocks in..will let everything settle and re-assess the situation. Have not achieved much else to be fair, the electrical shit has me beaten. I did get some rubber to go between the guards and engine bay (it was dum-dum paste originally but it would stick like buggery and cause damage if I need to take it apart in the future) I haven’t been lazy though, I built a lean-to for the Escort and then tore the Falcon down to finally do a quick panel & more importantly, paint!
- 187 replies
-
- 28
-
-
-
It looks like the pistons are closing the gap up? If the plugs are as-per the book, is the gasket too compressed or something? Wrong pistons?
-
I’m still here, still chipping away! Deep into the electrical gremlins now. Not much worked when I first got it other than headlights, amp gauge and interior lights.. now I’ve coaxed out of it: reverse lights, charging, heater blower, wipers, brake warning light functions with e-brake, horn, all lights go but not properly or reliably when it comes to hazards and indicators. Ive got no dash lights and that means a broken circuit so that’s the main killer.. I dare say things will start to improve when they come back on. Still need dash dimmer,temp,clock,gas and the rest of the back-lighting eg radio and ash tray. I also hooked up all the vac and PCV stuff roughly so I could give it more of a time up and set an idle
- 187 replies
-
- 40
-
-

4V Century V8 powered Dyna Camper Discussion
Mr.Mk1 replied to HumberSS's topic in Project Discussion
Love watching this evolve, good shit!
-
Did you get yourself sorted?
-
Yeeeeeah hell yeeeeeah, coming along nicely! How good is it having the proper tools at hand
-
Better fill in a gap I didn’t have spare time to post earlier.. The package from USA with the vinyl top arrived on Wednesday! Bit hilarious the day after doing screens but just no time to slap it on nicely. That package had the glovebox liner and rear C pillar trims too. Now the billboard bit. These are not standard in any way. It’s my home-brew concoction with inspiration from Plymouth cuda. I’ve never attempted anything that permanent and with bugger all time left it was too high risk to get it looking perfect and paint in 2K. I decided to rip down to the warehouse and get a few rolls of 2000x45 black duraseal. unfortunately the space needed was like 2600x47 so a join and a compromise was in the pipelines. Baking paper taped to the car and a marker pen roughed out using a finger as an anchor point running down the swages. Slap some cellotape around the perimeter for added stiffness and cut it out. I then laid it backwards into the backing of the duraseal and traced around it carefully, then cut that out too. Happy with the fit, and after sliding cardboard down behind it to trace and cut the bee circle, I started taking backing paper off in sections and smooshing it down in an arch motion to get rid of bubbles. It went to tits when I got to the side scoop as it wouldn’t heat and conform so I made some wee slits and pushed it down. Then it was onto the 440 call-outs. I faffed around on the work computer printing and editing them in block style In the different sizes and cut tapers into the top and bottom edges to accentuate the angle and sorta match the door part. I considered using the templates to mask it up and paint pink, or getting pink duraseal and hoping it stuck onto the wrinkly area already durasealed.. so both those weren’t going to look good. I went the danger route and traced it all out and cut the film with a razorblade. End of the day any wee scratches I can puff clear over them again and polish out, it I get this sign-written properly, their design will cover the scratches too. They came up mint, bare in mind it was a bold number, had to measure 14mm in and outboard of all lines and slice those too, to give the outline/doubled effect. For the wrinkled portion in the crease of the scoop, I managed to cut much of the wrinkle out, or replaced the whole part so it worked out well. onto the other side, flip the template and do it all again. polisher finished up so I could dig into the front paint now + hood. Once that paint hardened I attempted the screen. High stress! These are pretty whack and it was a first doing this style + short stock and mad expense if it cracked. Took it slow with plastic trim removal tools + aerosol glass cleaner for lube and it bloody went in! I didn’t seal it as it was a trial and it has to come out again for the vinyl roof application. The rear screen sits on a sausage strip of non-setting butyl so I cleaned everything up, stuck it to the screen the dropped the screen into the car.. was pretty straight forward and it sealed all the way around. Picture a 10mm bead of the sticky shit that holds the plastic sheet to the inside of your door panel
- 187 replies
-
- 43
-
-
-
Well, I made the fucking deadline! I didn’t have time to tune it properly, the rear tyres rub and the brakes need bedded in but those arefuture problems
- 187 replies
-
- 90
-
-
-
The clear came right the other day so wet sanded it in 1200 and the polisher started on Sunday! Dash in and all hooked up. Found the interior light base! <3 Strapped the seat covers on and slapped the rear seat in. Ive given it a very partial one-man brake bleed and only one fitting weeped/could have dripped fluid from above too as it was right under the master..I’ll keep a tab on that. GC Damon at Let’s get graphic made me some new super bee decals.. had to use my sample then flip for the opposite side so the bee flys forward on both sides. Look awesome and very very reasonable price! since I need the body colour to show through the decal, I had to come up with a way to mask it. I had a stroke of genius instead of just a stroke like usual lay out 2 layers of masking tape onto clean glass. Put it on the revolving wheelie piece from the microwave. Find a plate the right diameter and run around it with a new razor while spinning on the wheelie doofer then pick off the edges and peel the disc. Worked awesome! Also printed this period Dodge decal, traced it to some cheap satin black vinyl/duraseal type shit I had and cut out. Loosely planning on placing them on the front guards or something like nascar, but will see how it looks once the blackouts are done. I was going to start masking the side panel tonight but I need a roll of 16mm tape to make my life easier for a pretty daunting task. I’d been trying to get the bastard to start for a week. So many factors against me such as it’s been apart for 2 years, everything’s been painted so earths could be shit, bent dizzy, timing, sad battery. Was getting a bit paranoid I’d run a bearing as it wasn’t getting a chance to oil properly before I had to give up and swap/ charge batteries.. it seemed to be getting tighter. Well whatever combination I tried tonight fucking worked and it fired into a reasonable fast idle!!! Huge relief, the car show I’m trying to get it complete for is 10 days away. I was kinda keen to bail if I had to push it in but now I’ve got a second wind!
- 187 replies
-
- 51
-
-
-
Ideal it was not. Yes it sprayed out much nicer but still a bit of peel, then I ran out of paint so the shell only had one coat and the rest two.. putting me back in the position of not enough meat to flat and buff any of it safely. I walked away for a few hours while it cooked and went over several scenarios. The upholstery guy rang and said the dash was ready so I swung down and grabbed that, looks fucking ACE! Have fitted it, rapt Back to thinking.. About the only way of not losing any ground was either not buff it & deal with it looking back-yard for ever, or to go get some clear coat and just bury the cunt then flat and buff the clear which makes peel and dry-spray magically disappear, with the added bonus of giving the paint some ‘depth’. Didnt want to, but spent a couple hundred and went to it. The wind had kicked up fierce since this morning and all manner of new shit entered the chat from somewhere but I don’t care. Will only notice 10% once it’s finished. Also that wind coming past the door seals almost laid the plastic drop sheet onto the rear of the car several times which would have been a major. So yeah, dream result - literally never, but a result nonetheless! Will give it a few days and see how it sits then whizz over it with 1200 or 1500 and hope the polisher man is still on for the weekend!
- 187 replies
-
- 39
-
-
-
In typical Josh fashion, I’m doing it all again.. I was 10 minutes into wet-sand and chill when I spotted something I haven’t encountered before. It would seem there was a slight colour variance between the last two pots of paint I mixed up, because I rubbed through on some decent peel and found this motherfucker! The amount of peel and the specs of crap in it meant there was no way around it so I tore the car apart and started again.. pretty close to the end of my rope but have pushed through and I’ll spray again tomorrow with thin paint, small tip and higher pressure.. paying much attention to panel distance and being a robot! Prior to all this I was ahead of schedule so thought I’d have a crack and install headliner myself. Came out well, took ages but they are supposed to. Don’t chirp me for the wrinkles, I haven’t gone back to tighten the sides yet! the only part I’ve lost in this whole journey is the interior lamp base, pissoff cause it would look great in the middle there right now! gave all the tyres a scrub and got the manky old blue off. test fit all the window surrounds and clips with reasonable success. Spray day again tomorrow. The ideal situation is it lays out beautifully and I don’t have to have it buffed on Saturday by a mate I arranged last year
- 187 replies
-
- 35
-
-
-
-
No no no no nooo looks not performance, hopping up v8s is just a never ending money pit, then it costs more to run!
-
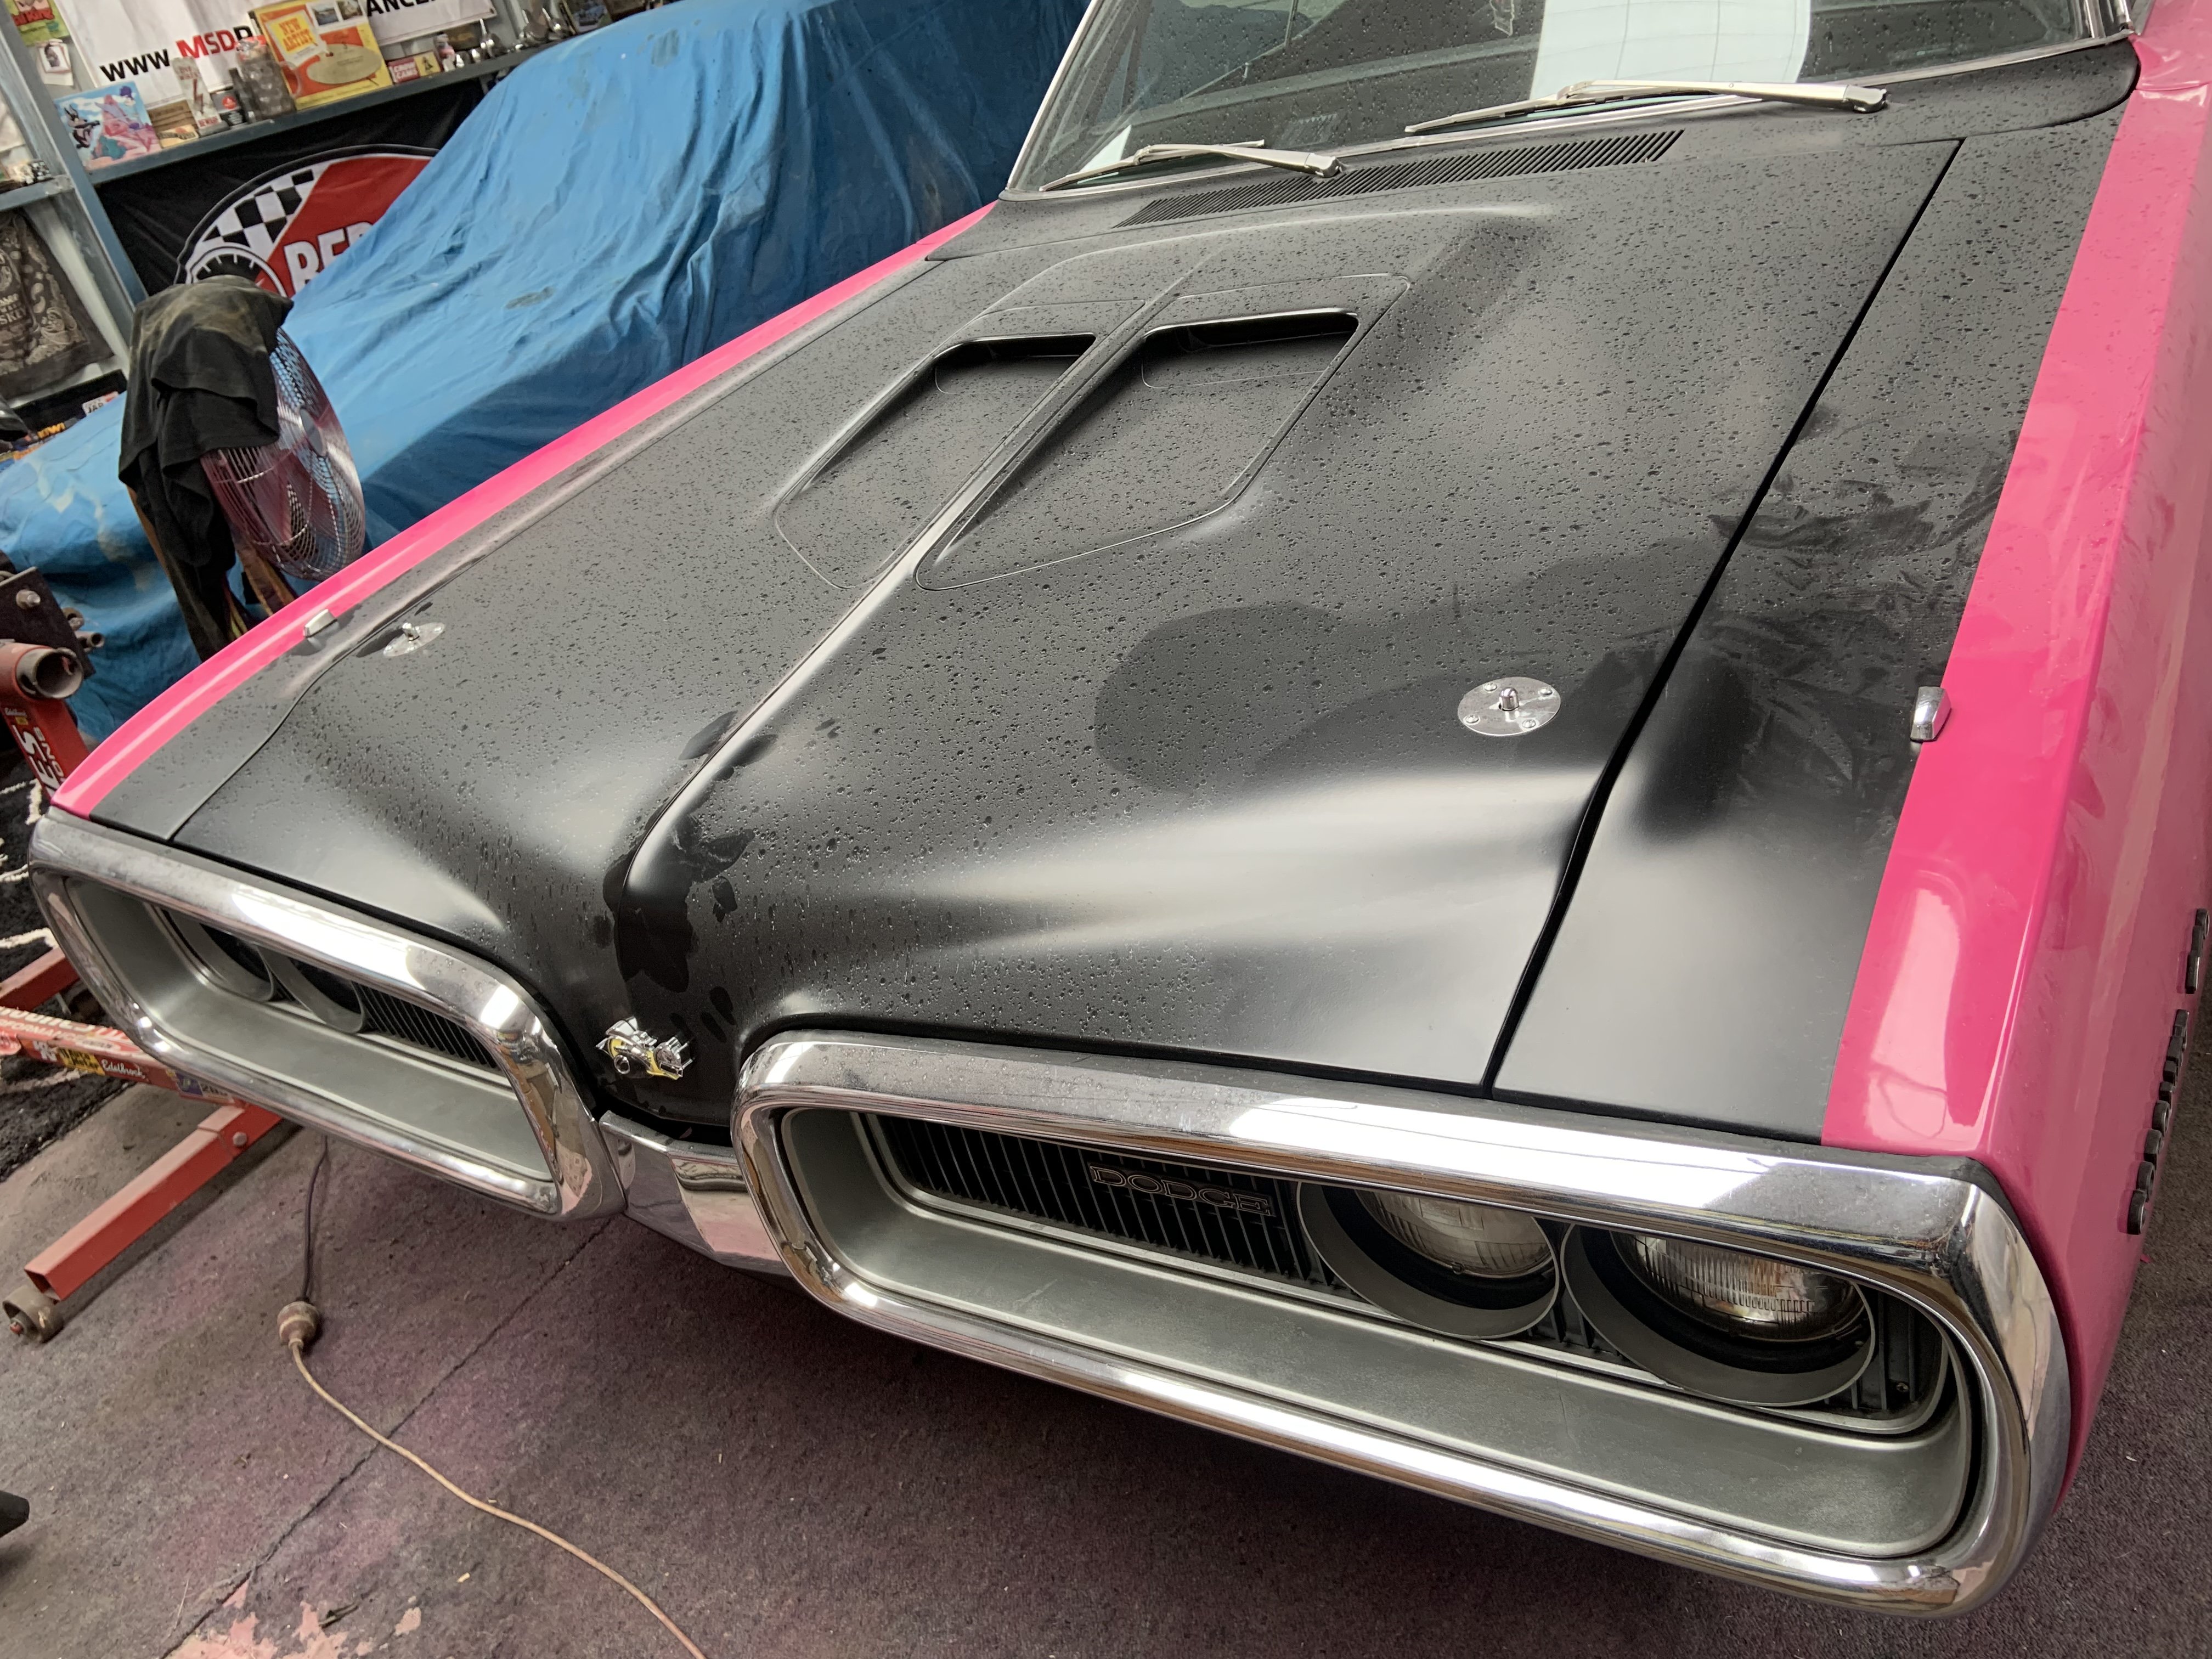
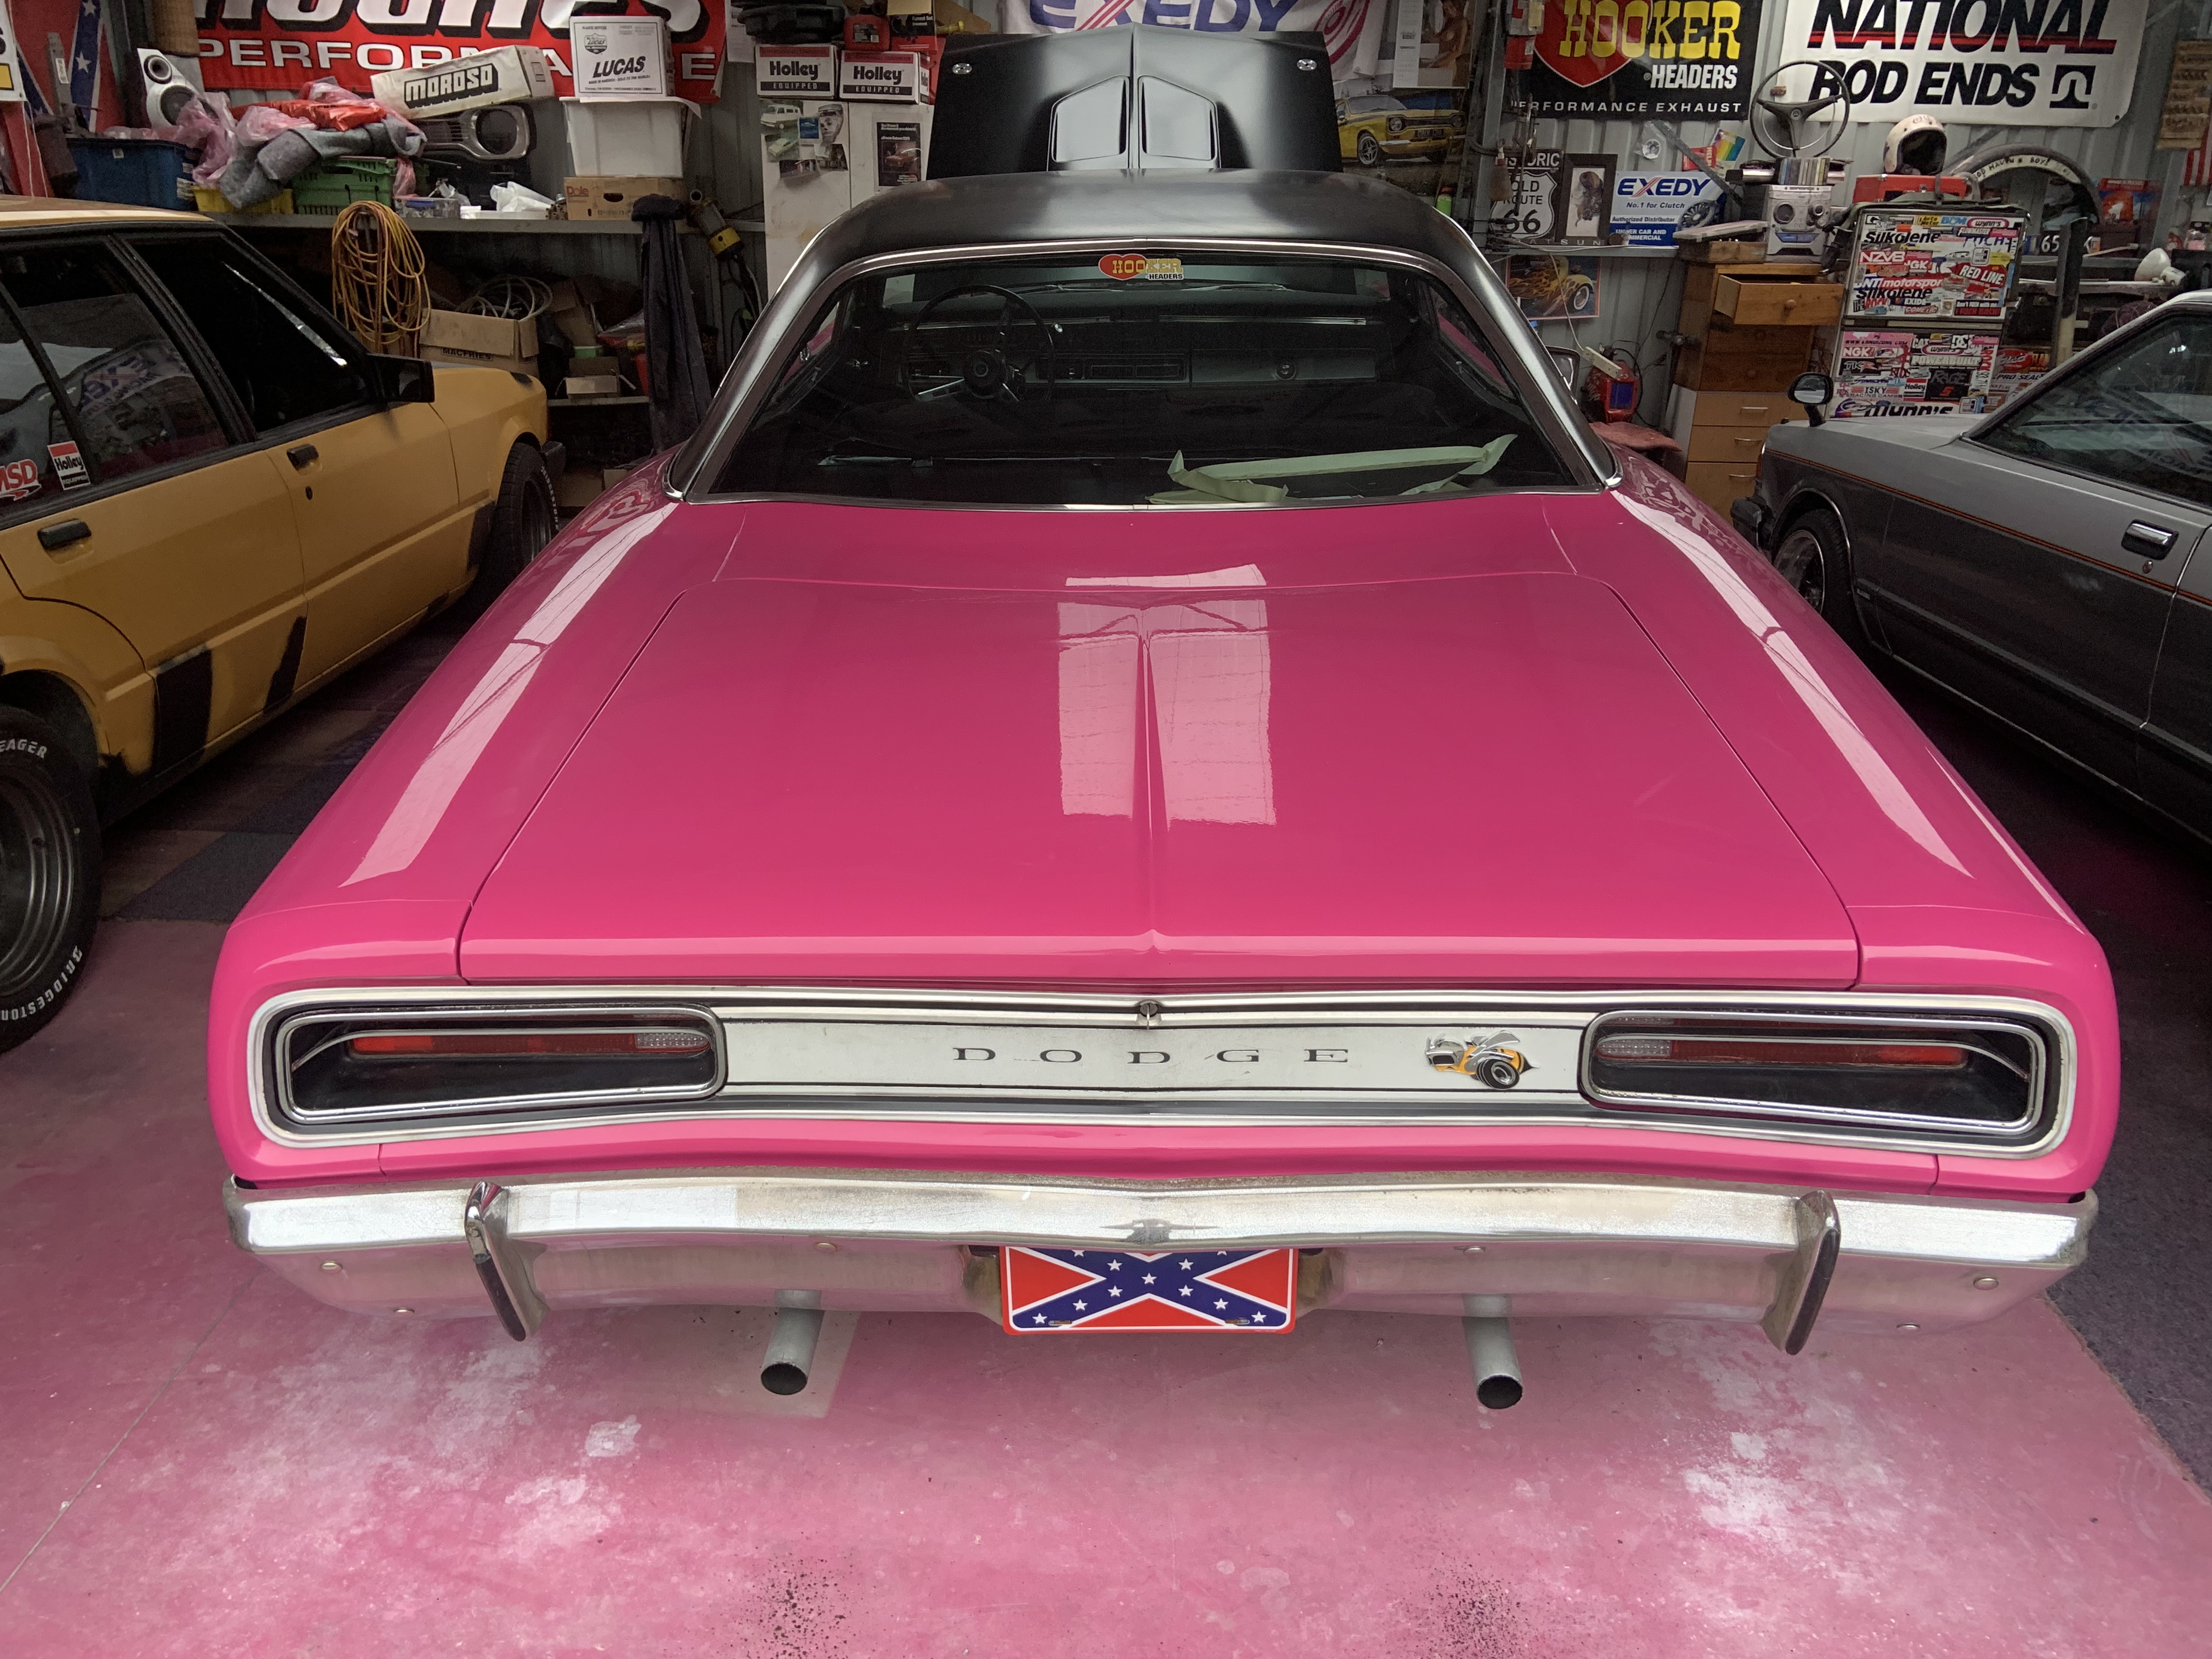
There will be a strip on the very outer of the guard that’s left pink but the rest all black. Picture a 69 GTX the twin scoop hood and the power bulge were options aside from a standard flat one. The scoop type could be a vacuum grabber N96 package as well, but bulge just has removable blank-offs. nah, no money left for extravagances like future engines! This one’s Probably a ripper!
-
The shit I have is Mipa Rallye black, mates panel shop swears by it. Got it from RJP