Themi
-
Posts
67 -
Joined
-
Last visited
Everything posted by Themi
-
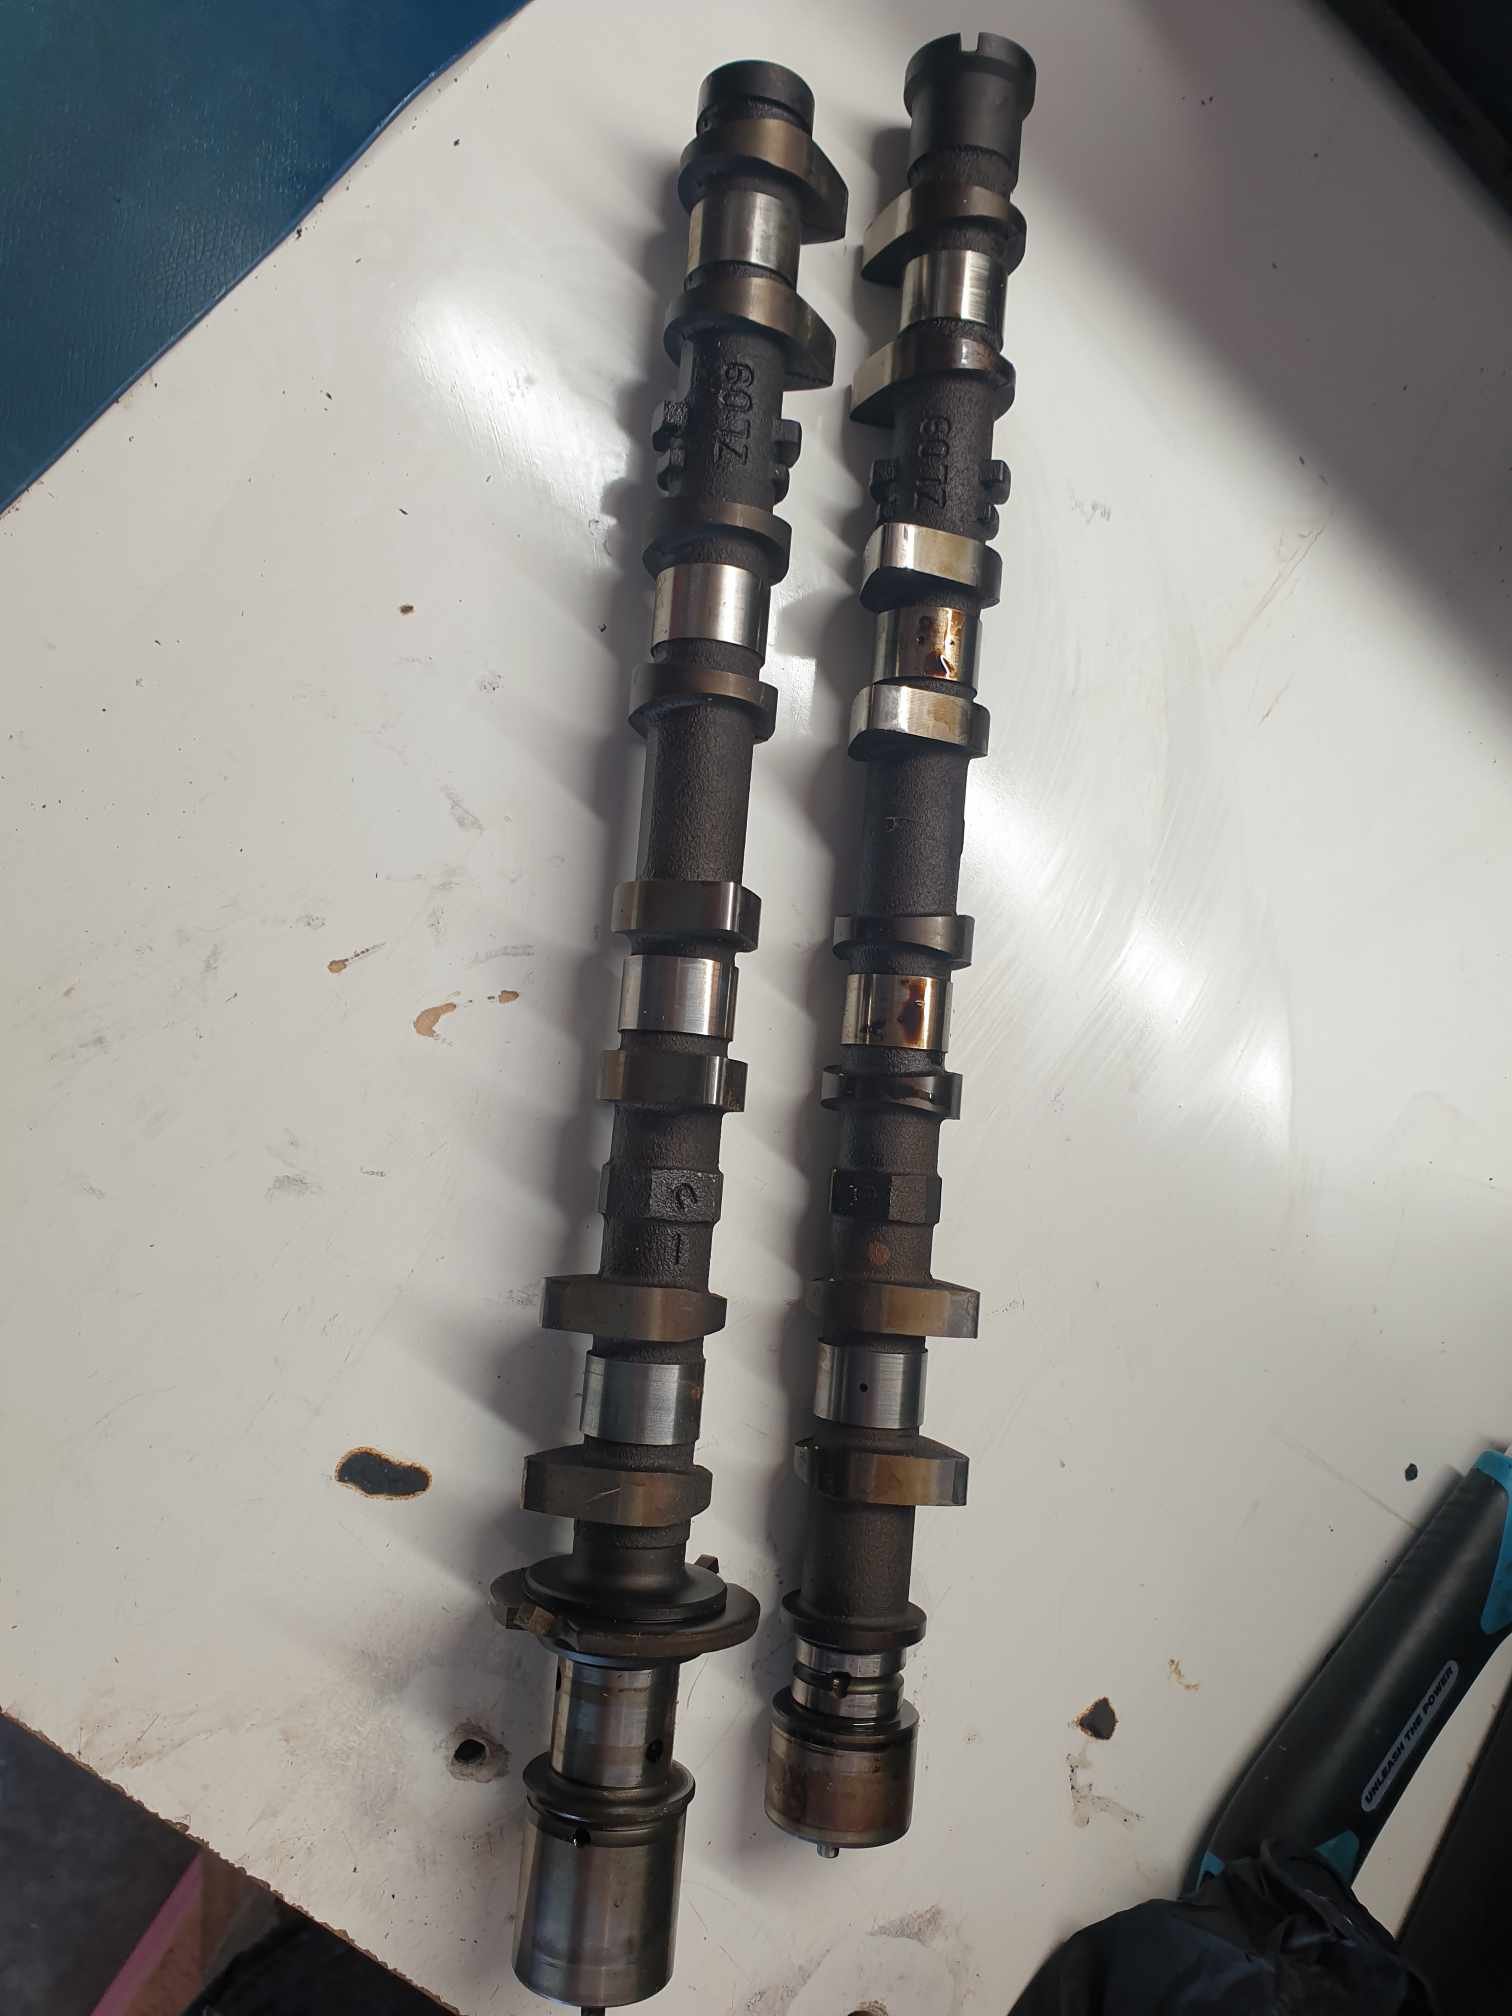
Yep! 226/233, less lift. Same with the ZM-DE (I've had a friend measure the ZM-DE cams and theyre actual trash). Also yes, unfortunately. Its the only VVT motor Mazda made with this cylinder spacing so I'm almost certain its the only cam thatll fit. Thanks for the suggestions though, I wish I could grab some off-the-zebra (RIP you will be missed) cams for this but I think getting regrinds is the only way, given the fancy oiling they had I don't even think brand new cams from a billet would be cost effective. On these cams, the intake cam has all of the oiling setup for the VVT system so I'm not so certain anything will drop in. The cam journals are all oil fed from the head. On the exhaust cam, the cams self-lubricate from a single feed on the frontmost cam journal, which is distributed throughout the cam through tiny wee oiling holes on the rest of the journals. The exhaust cam has more lift and duration than a B6 intake cam I think, so it could maybe end up being a cheap drop-in exhintake cam for NA 1.6 mx5s? To be looked at further, by someone other than myself. Another point of interest is that the backs of the lobes (in the base circle) taper really narrow, does anyone know if this is an issue with re-profiling cams?

-
Woah 2 updates in less than a year? I must've had too much caffeine. The plan is: Remove the intake manifold. Grind down the clutch master where it touches the TPS. Less sketchy than it sounds, its just a mounting tab for the old reservoir. I kept the master wet to cool it while cutting. Remove the throttles. Tidy up the mating surface between the intake and throttles. Drill out the threaded mounting holes for the throttles. The tapped aluminium was always a bit sketch, I never had the confidence to really tighten down the mounting bolts for the throttles. Grey RTV the mating surface, longer bolts with nylon locknuts on the back. Re-install the things. Hoon. So, intake off: Clutch master cut down: I did the things I needed to on the manifold, I also trimmed down the flange a bit to be less intrusive (compare with older photos): Back together: Aaand in the car: Results: Started first pop, was running like shit and my exhaust spat out more fuel than the last 15 seconds of a prepaid BP pump (not hard). Turns out you need your MAP hose connected (seen by my washer bottle/chassis tag in the previous photo... lol). I guess the vacuum gave enough fuel for it to run super rich, basically WOT fueling. On the first drive the car was fine. The cyl4 vac leak was gone as expected and I'd spent more time grinding out the inside of the intake manifold, so some of the weird whistles I used to get seem to have gone. Datalogs looked expectedly poor. I had some help from a very knowledgeable friend about some oddities in some analog sensor readings and we have determined I should probably both chase my grounds and make sure everything looks fine, and also change back from a hybrid SD/alpha-N tune to pure alpha-N, with a bit of analog smoothing on the TPS signal. This will help resolve the very difficult to tune accel-enrichment values and hopefully result in a better driving experience. Future: I think besides all of the constant fixing of past-me's neglectful corner-cutting, I need to really look into longer duration cams. I believe the 230/240 8.5/8.9mm values really aren't enough for the kinda tomfoolery I would like. As the ZL-VE cylinder head has really never done much more than haul groceries, nobody makes cams for it. Regrinds are in order and I will try to take as much inspiration from the NB VVT engines as I can. Maybe 270/270 9.5/9.5mm which purport to be fine for shim-over-bucket lifters. Realistically, moving to shim-under-bucket will cost more than the cams. I think my engine will become interference with the cams I'm wanting, mostly because the stock b6 pistons have the valve notches for the wider cam spacing (obtuse valve angle) and the valves being closer to the piston when at rest in the ZL head. Oh well, it'll be fun while it lasts!
-
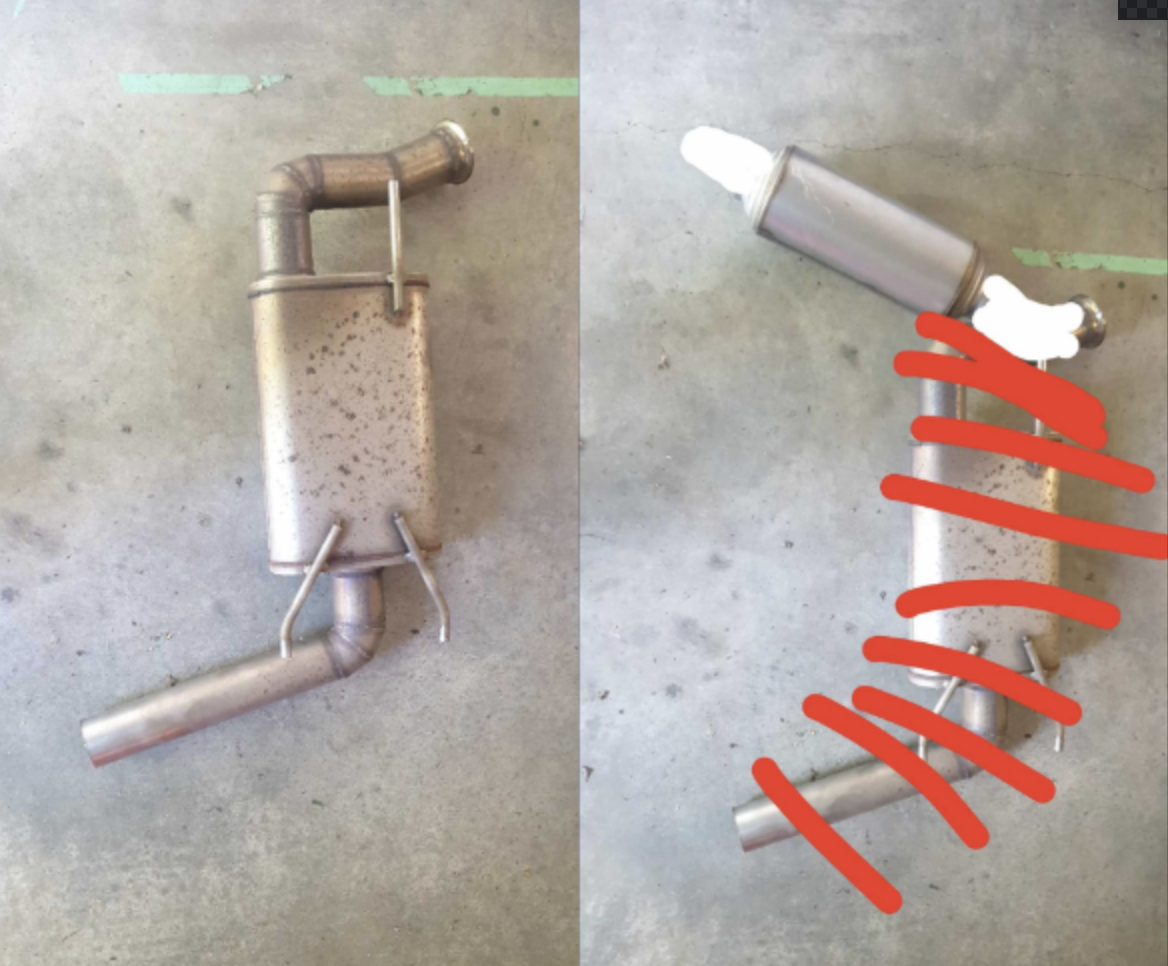
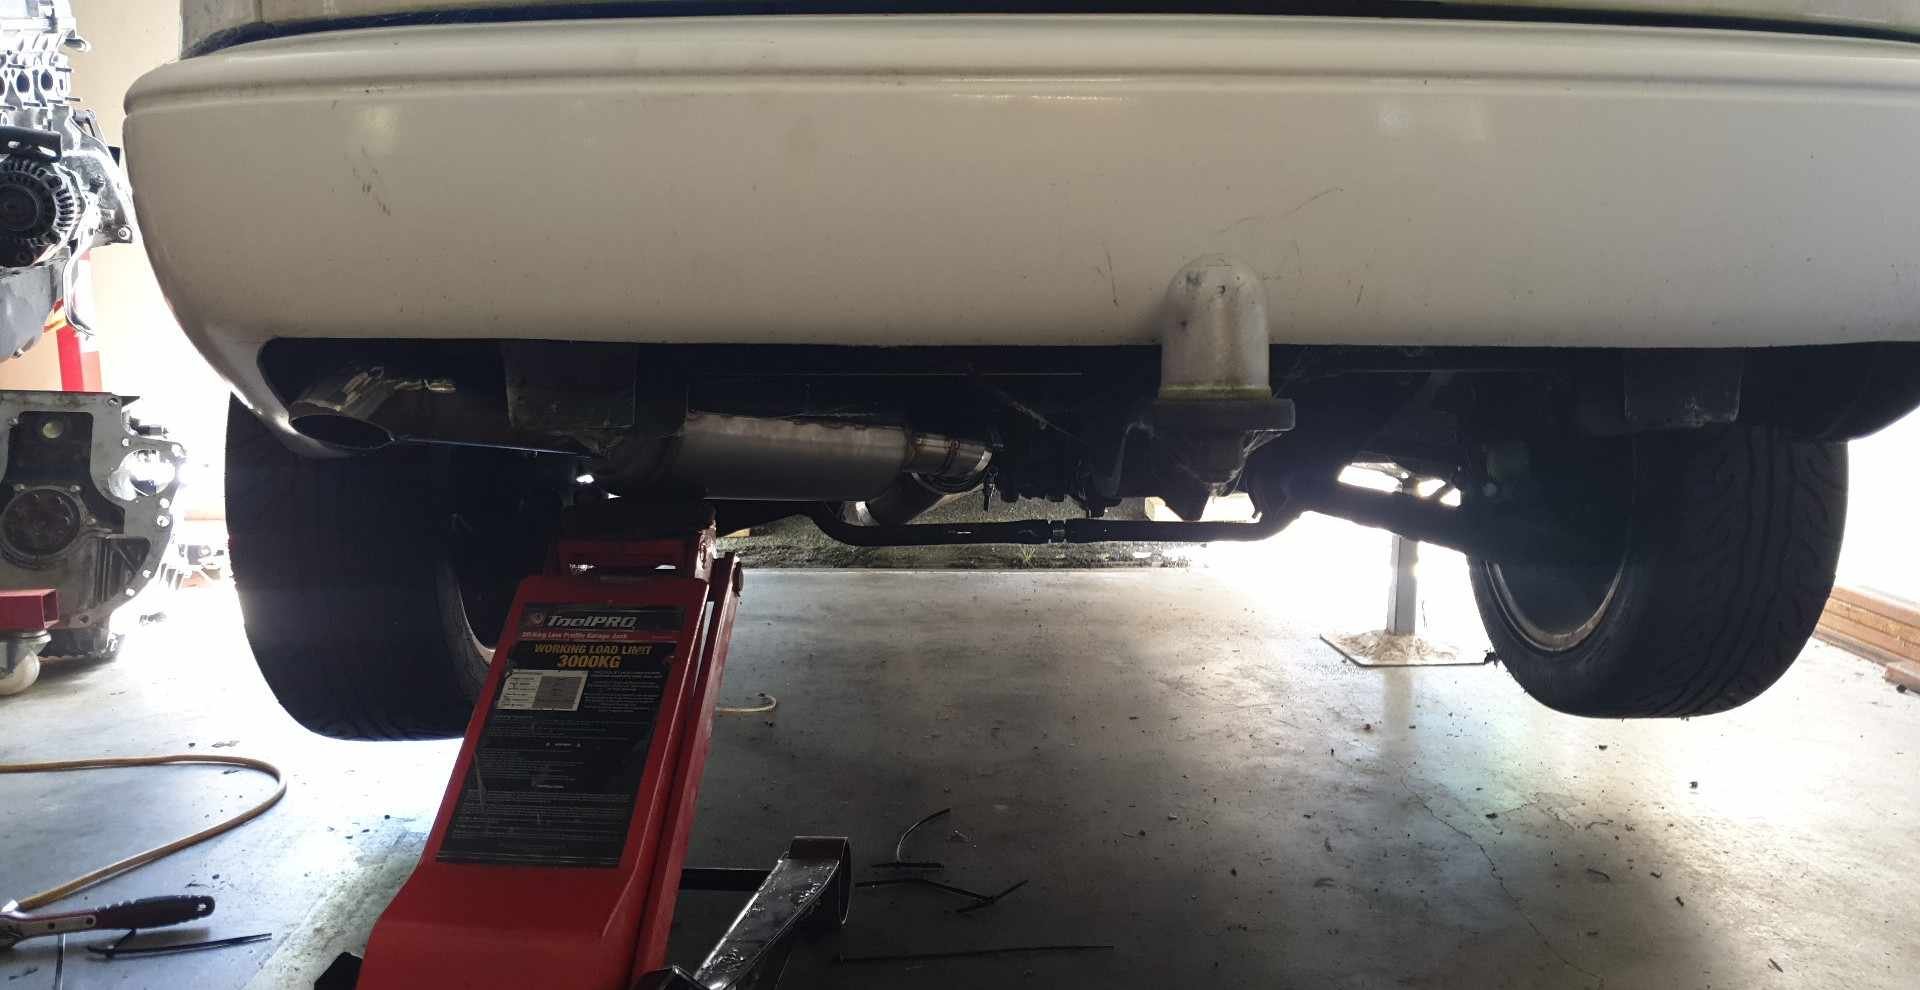
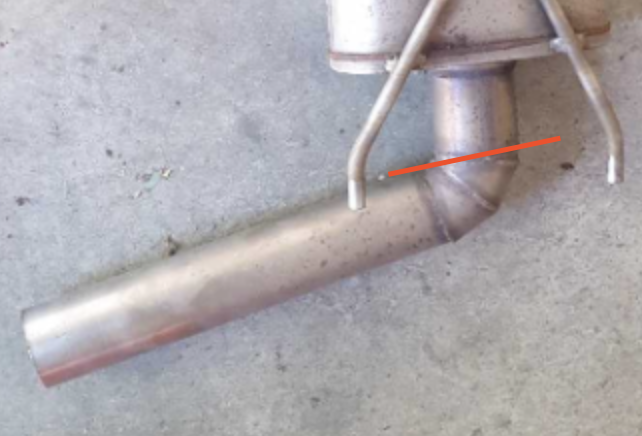
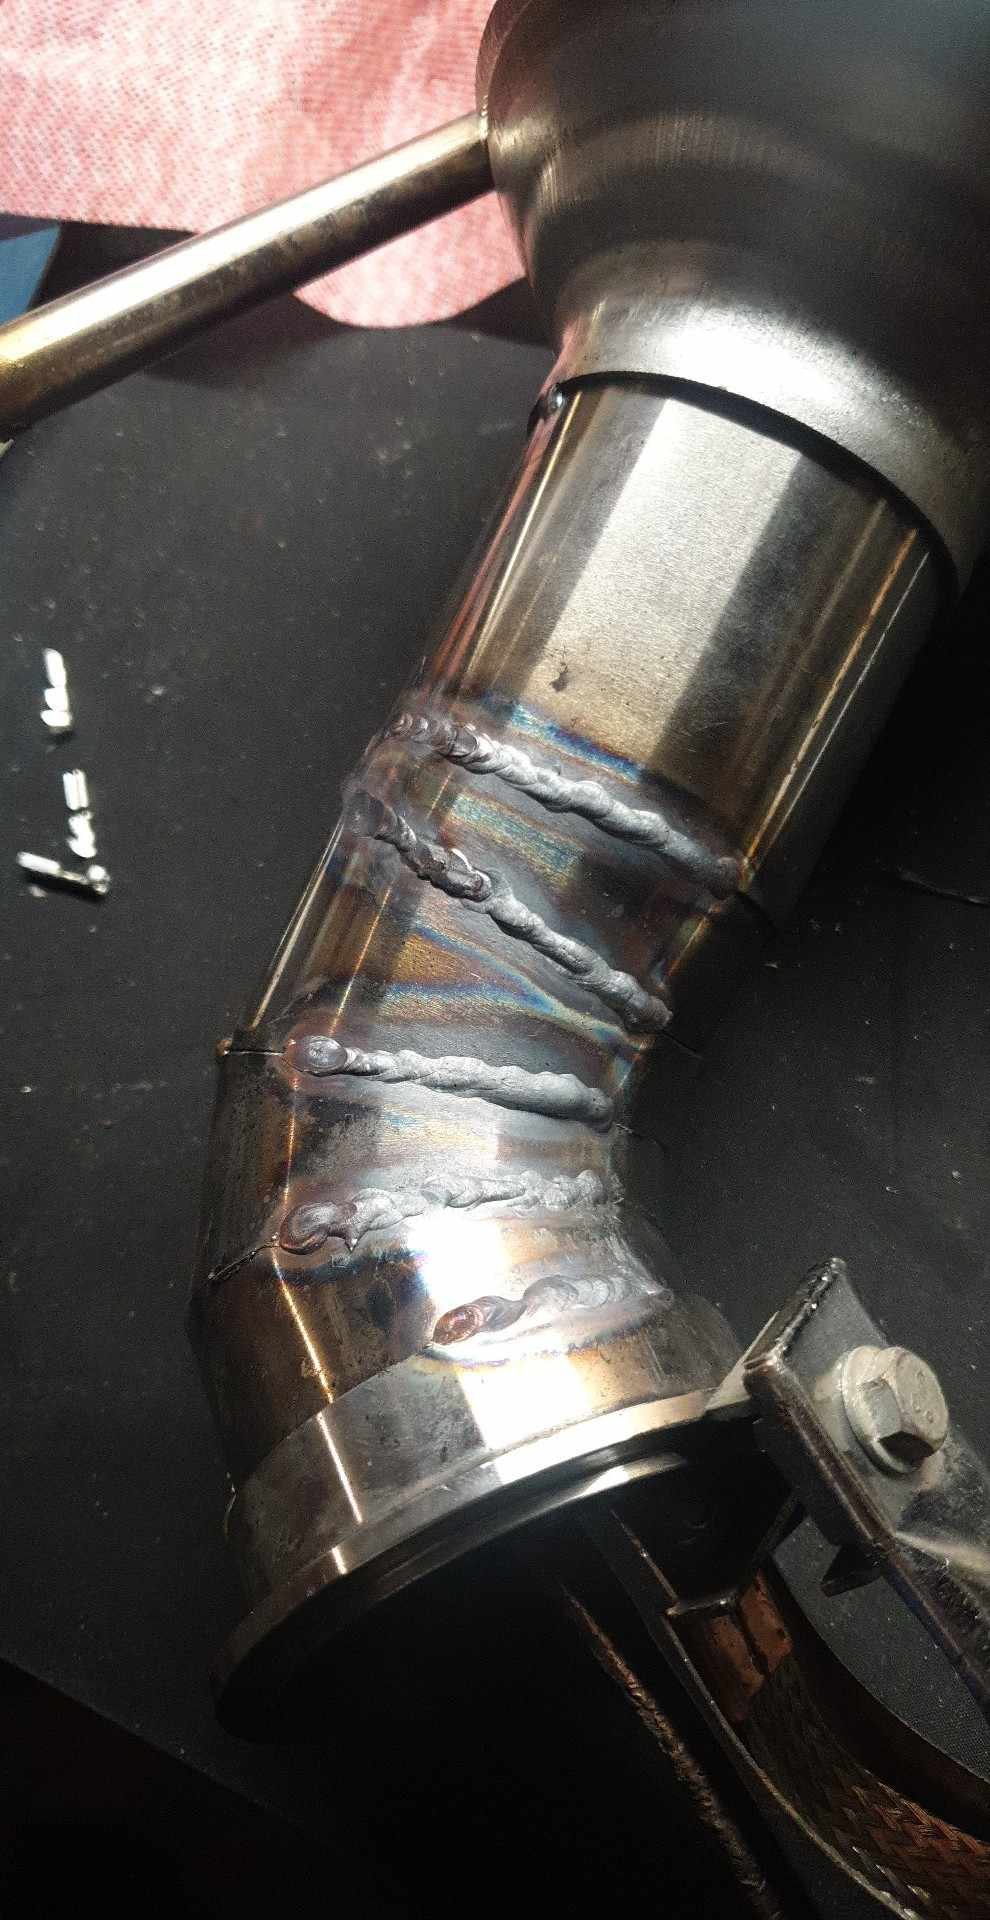
Another few months of nothing and then I decide to sign up for another sccnz motorkhana. At this point it is 10am saturday, and the motorkhana is 10am sunday. Last time I checked, my TPS is falling off, throttle #4 has a vacuum leak from being yanked about when the tps was knocked, and there is maybe a slight misfire. Instead of even opening the engine bay, I decide the exhaust needs more work and I have a muffler just lying about SOOO a plan is formulated... I'm also critically out of stainless filler and argon, but that won't stop me Contemplating new muffler position, was tempted to have it riight out the bumper but I don't hate myself that much. Instead, we tuck the muffler right up underneath the car and do a downturned exhaust tip. At this point I was chopping up the old muffler to save argon. Here is where the downturn tip came from: After procrastinating a fair amount, I get the muffler all tacked and have completely exhausted my argon bottle. Nice, its about 3pm and I'm making dinner for some friends before a comedy show. Make a lasagne then quick trip to bunnings at 5.30 for an argon swap, comedy show and start "welding" again at about 11.30pm. Do I need more gas coverage? Sure. Are my "welds" shit and rushed? You know it. Do they work? To be decided. Midnight:30, job done. Car lost some rasp, gained a LOT of bass. Right at 90Hz at motorway speed, heaps of it. So much bass I was getting a headache, and that was not fun. I figured its about time to actually make the car quiet, so I make a (suss) slip in silencer after the motorkhana. It had to be short and on an angle to be able to get up the downturn exhaust tip, but it does the job. Bass is gone, rasp is gone, car sounds pretty reasonable for once!
-
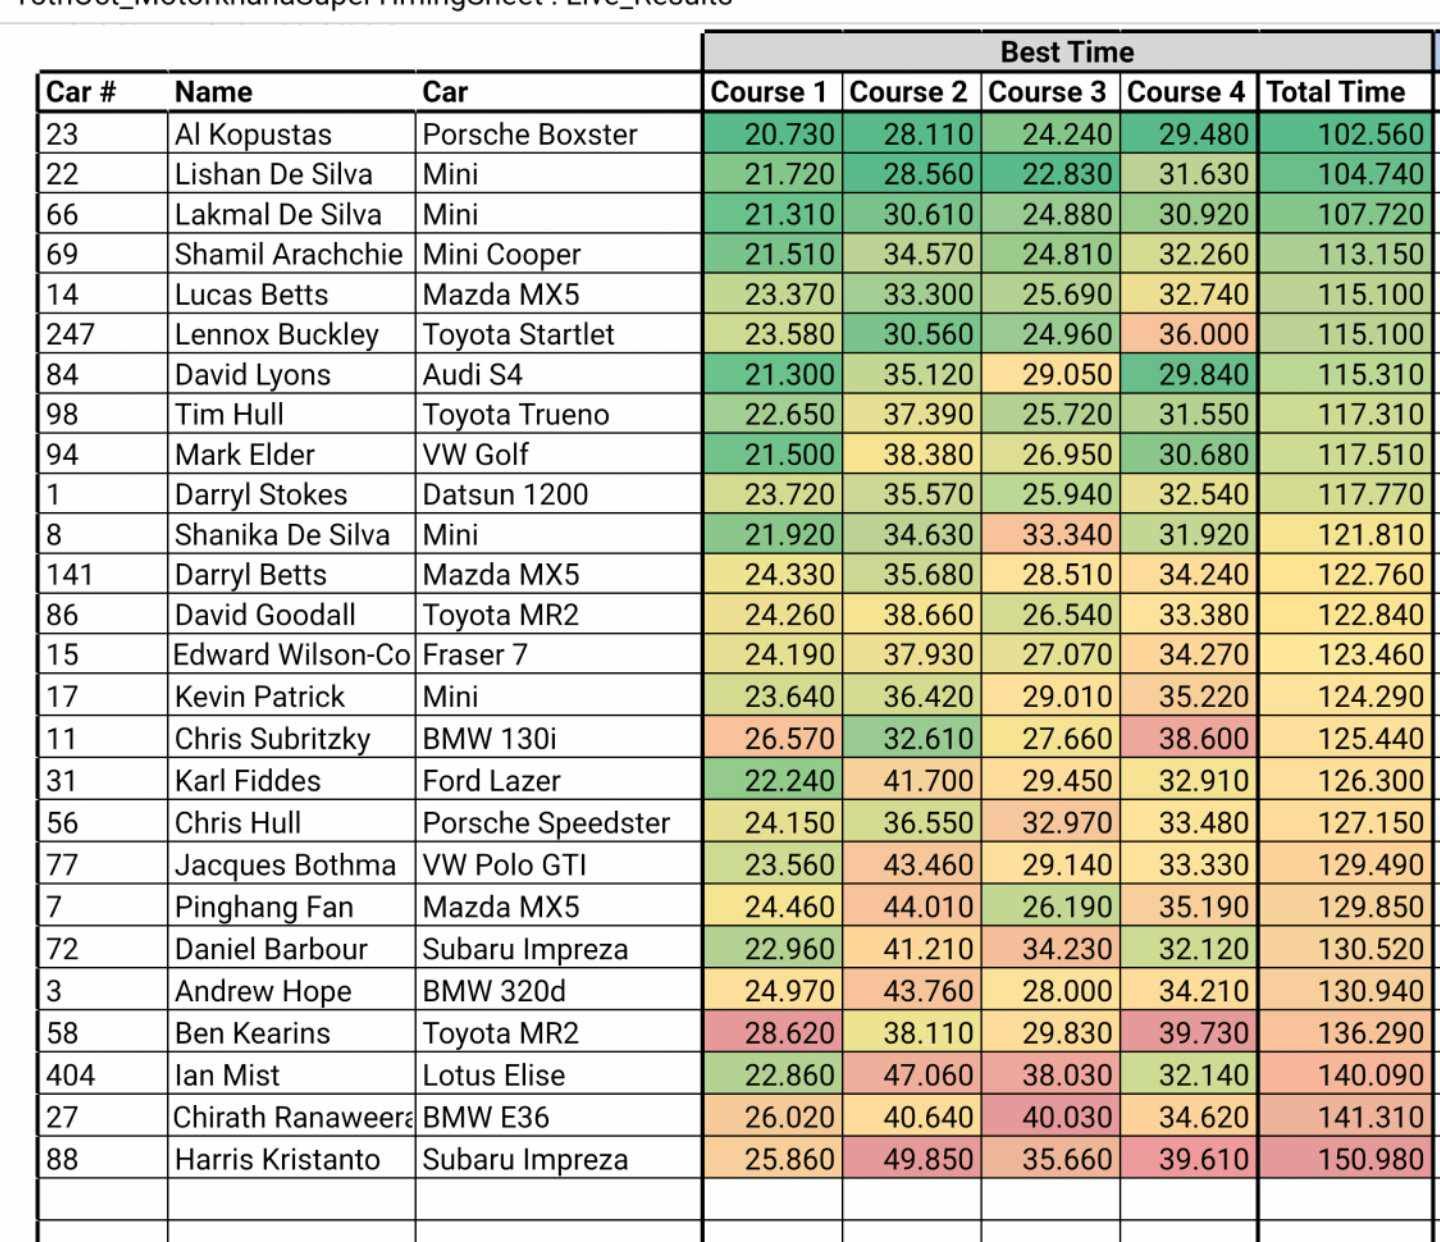
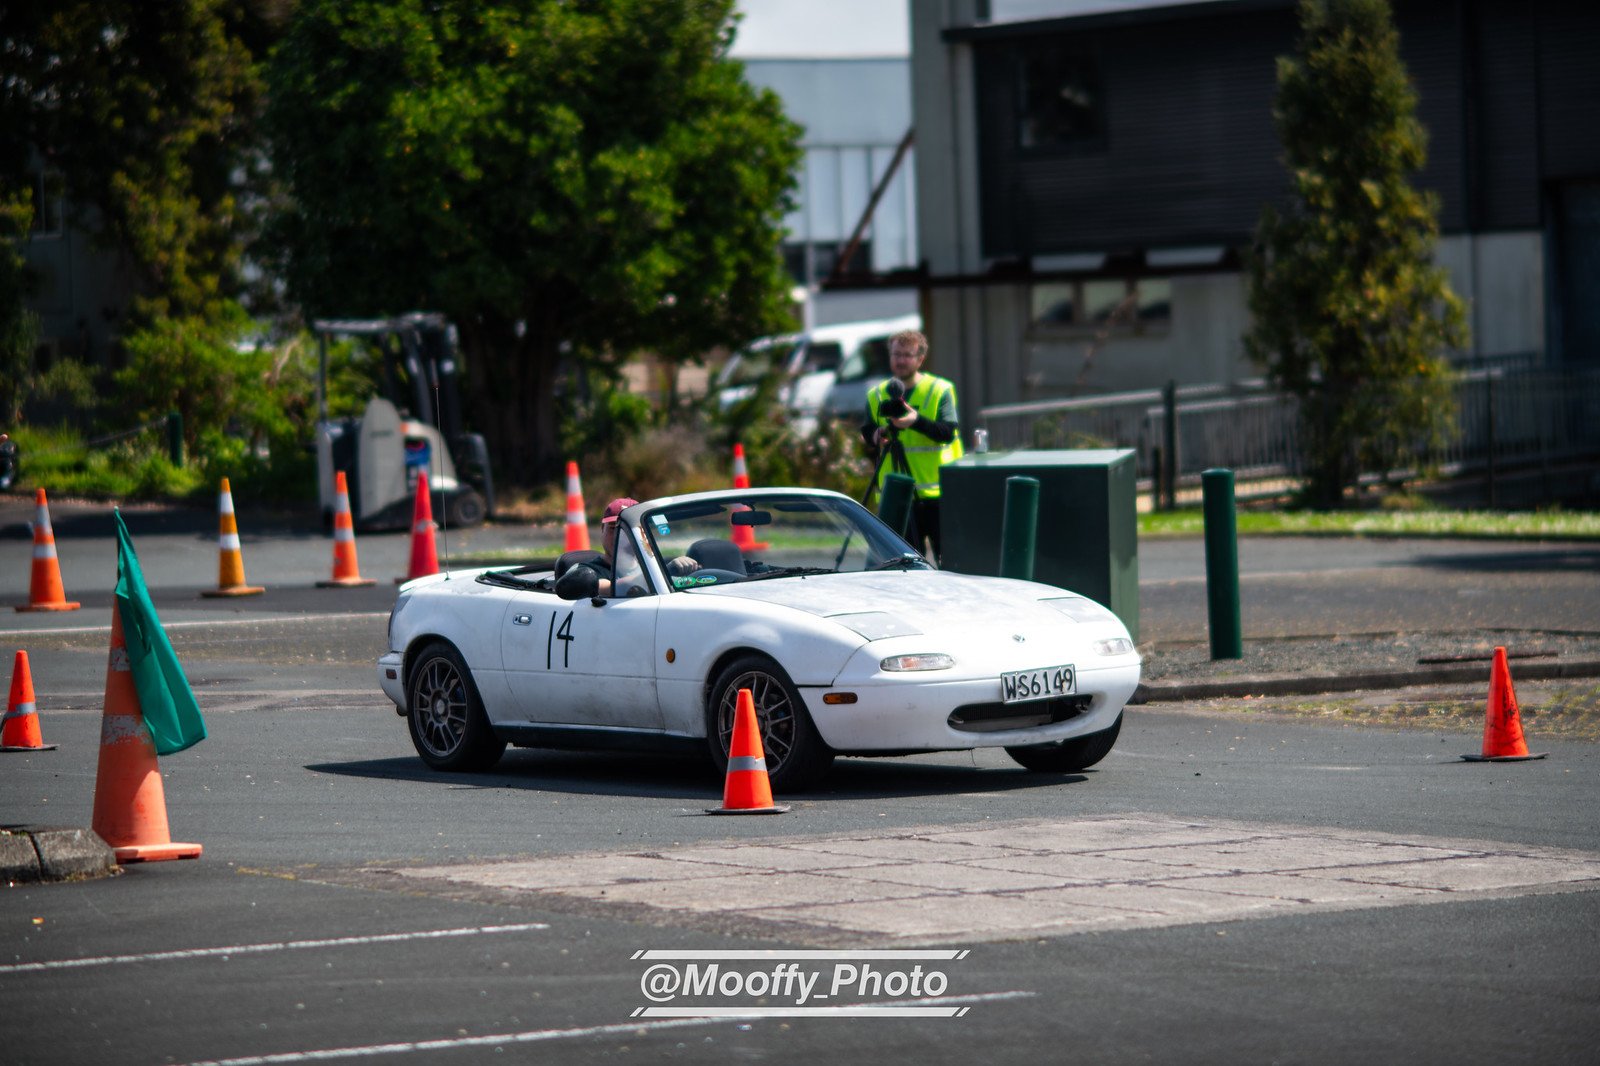
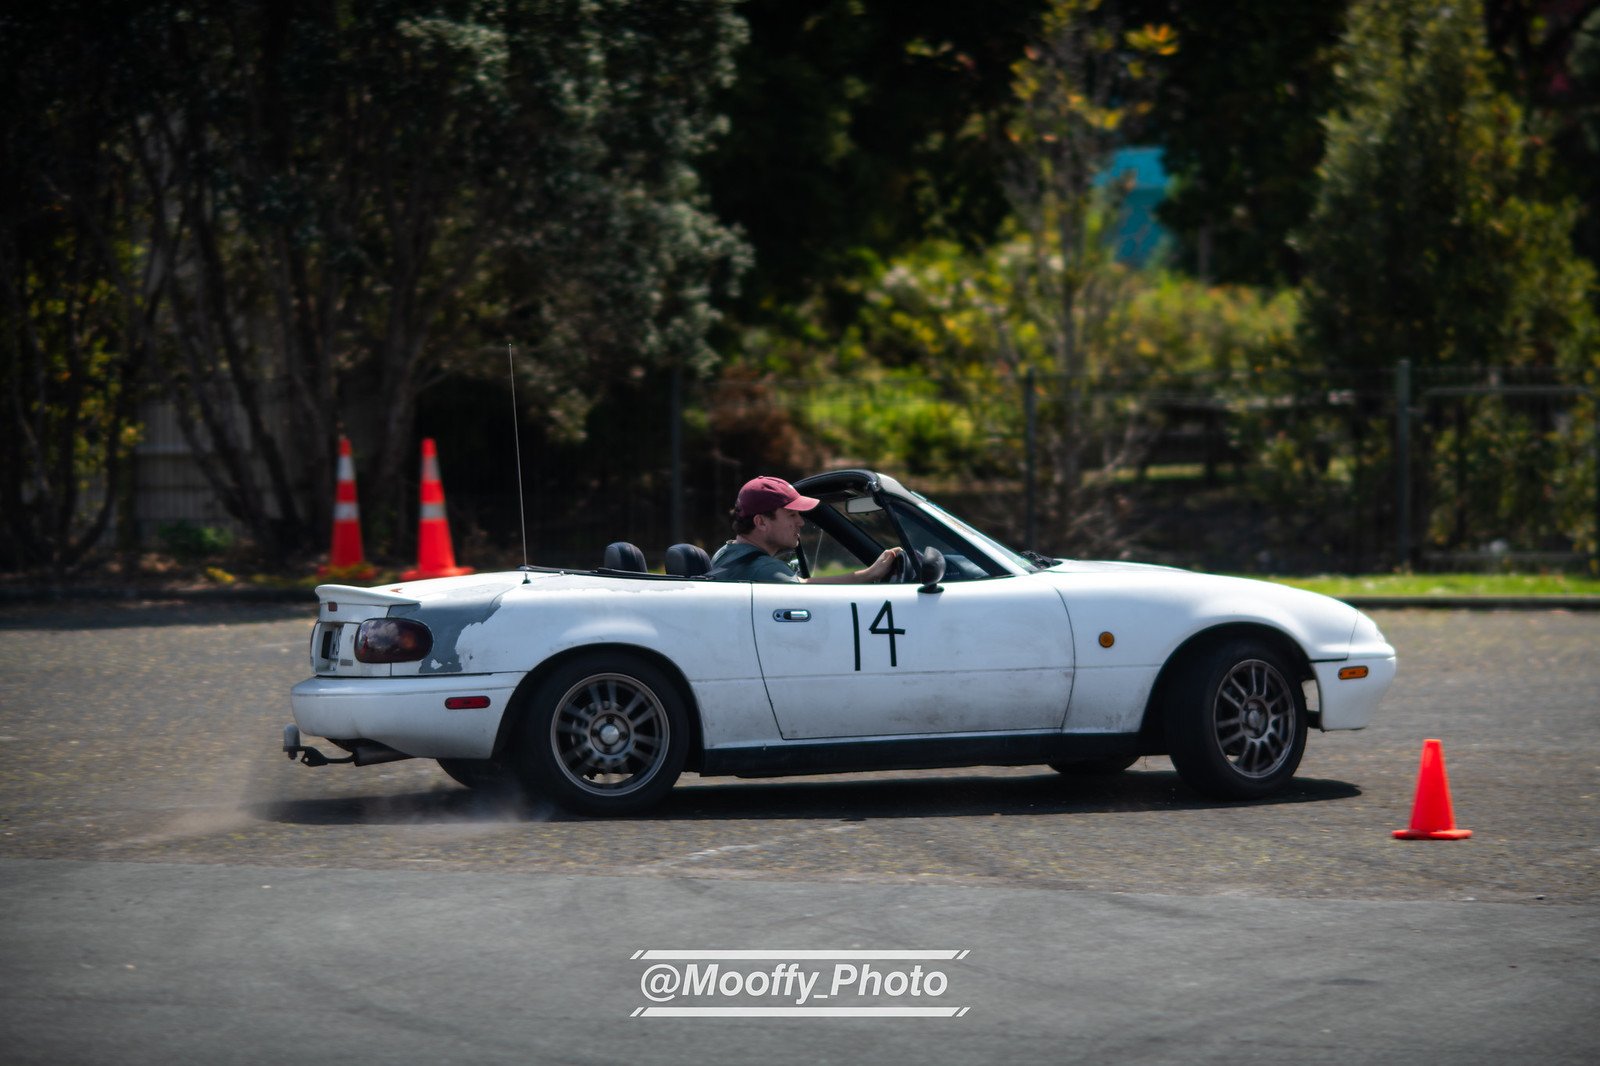
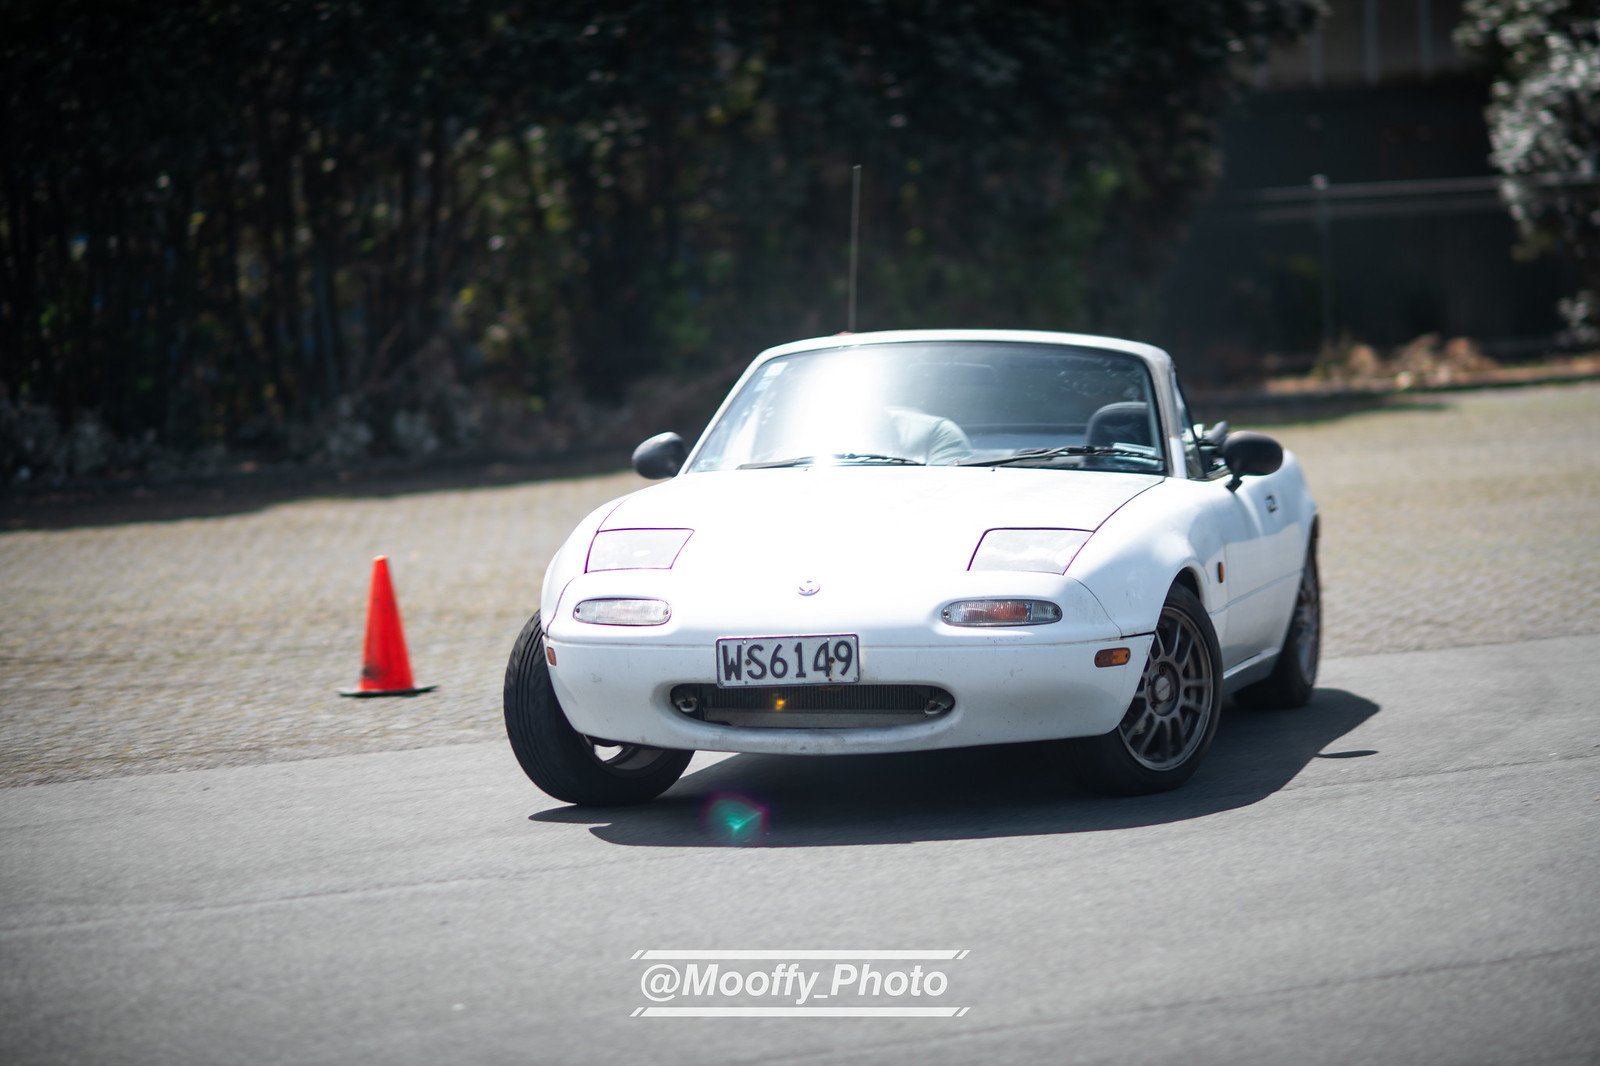
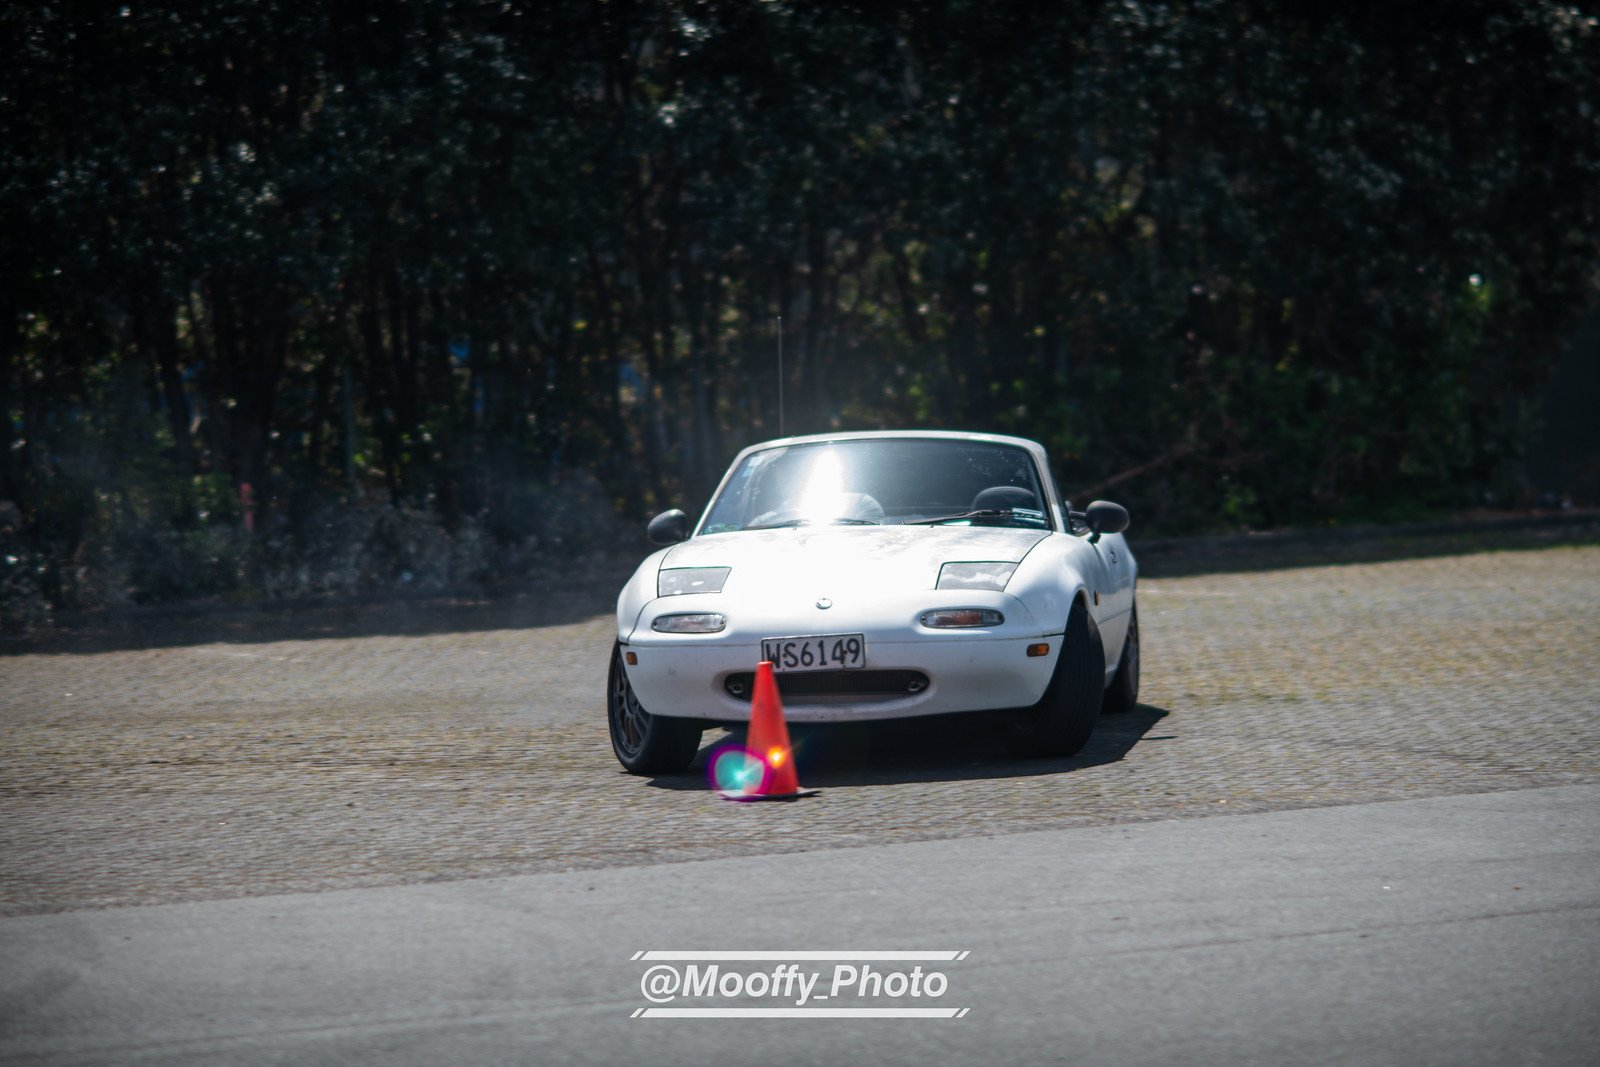
Okay so the handbrake is still NFG but the brakes themselves are awesome. It's probably just having fresh fluid and non glazed pads but the brakes feel far more linear to lockup, whereas before they didn't do much until the fronts just completely locked up. (I didn't hit that cone, somehow) I did a sccnz motorkhana yesterday (Sunday), placing 5th overall which I'm stoked about! I think the bigger cars struggled on some of the tight courses and I'm sure it would be a different story in an autocross. My dad also drove my car earning a very respectable 12th place in what might have been his very first time trying to drive a car with more than 20% throttle! Someone also took a video of my slower run of the fourth course: https://drive.google.com/file/d/1aCg9DYelcsQd_GZSELs4I_Cb2tV9oiOn/view?usp=drivesdk Still need $$ for further car improvements. Up "next" are new equal length headers and probably replace the muffler as I am now pretty sure the combination of my crap unequal-length headers and a cheap muffler are causing the last of the tinnyness in the exhaust note. Then I'll need to replace my suspension, the car still behaves very soft even with the dampers set as firm as they will go. Photo from @mooffy_photo (@mooffy_photov2 on insta)
-
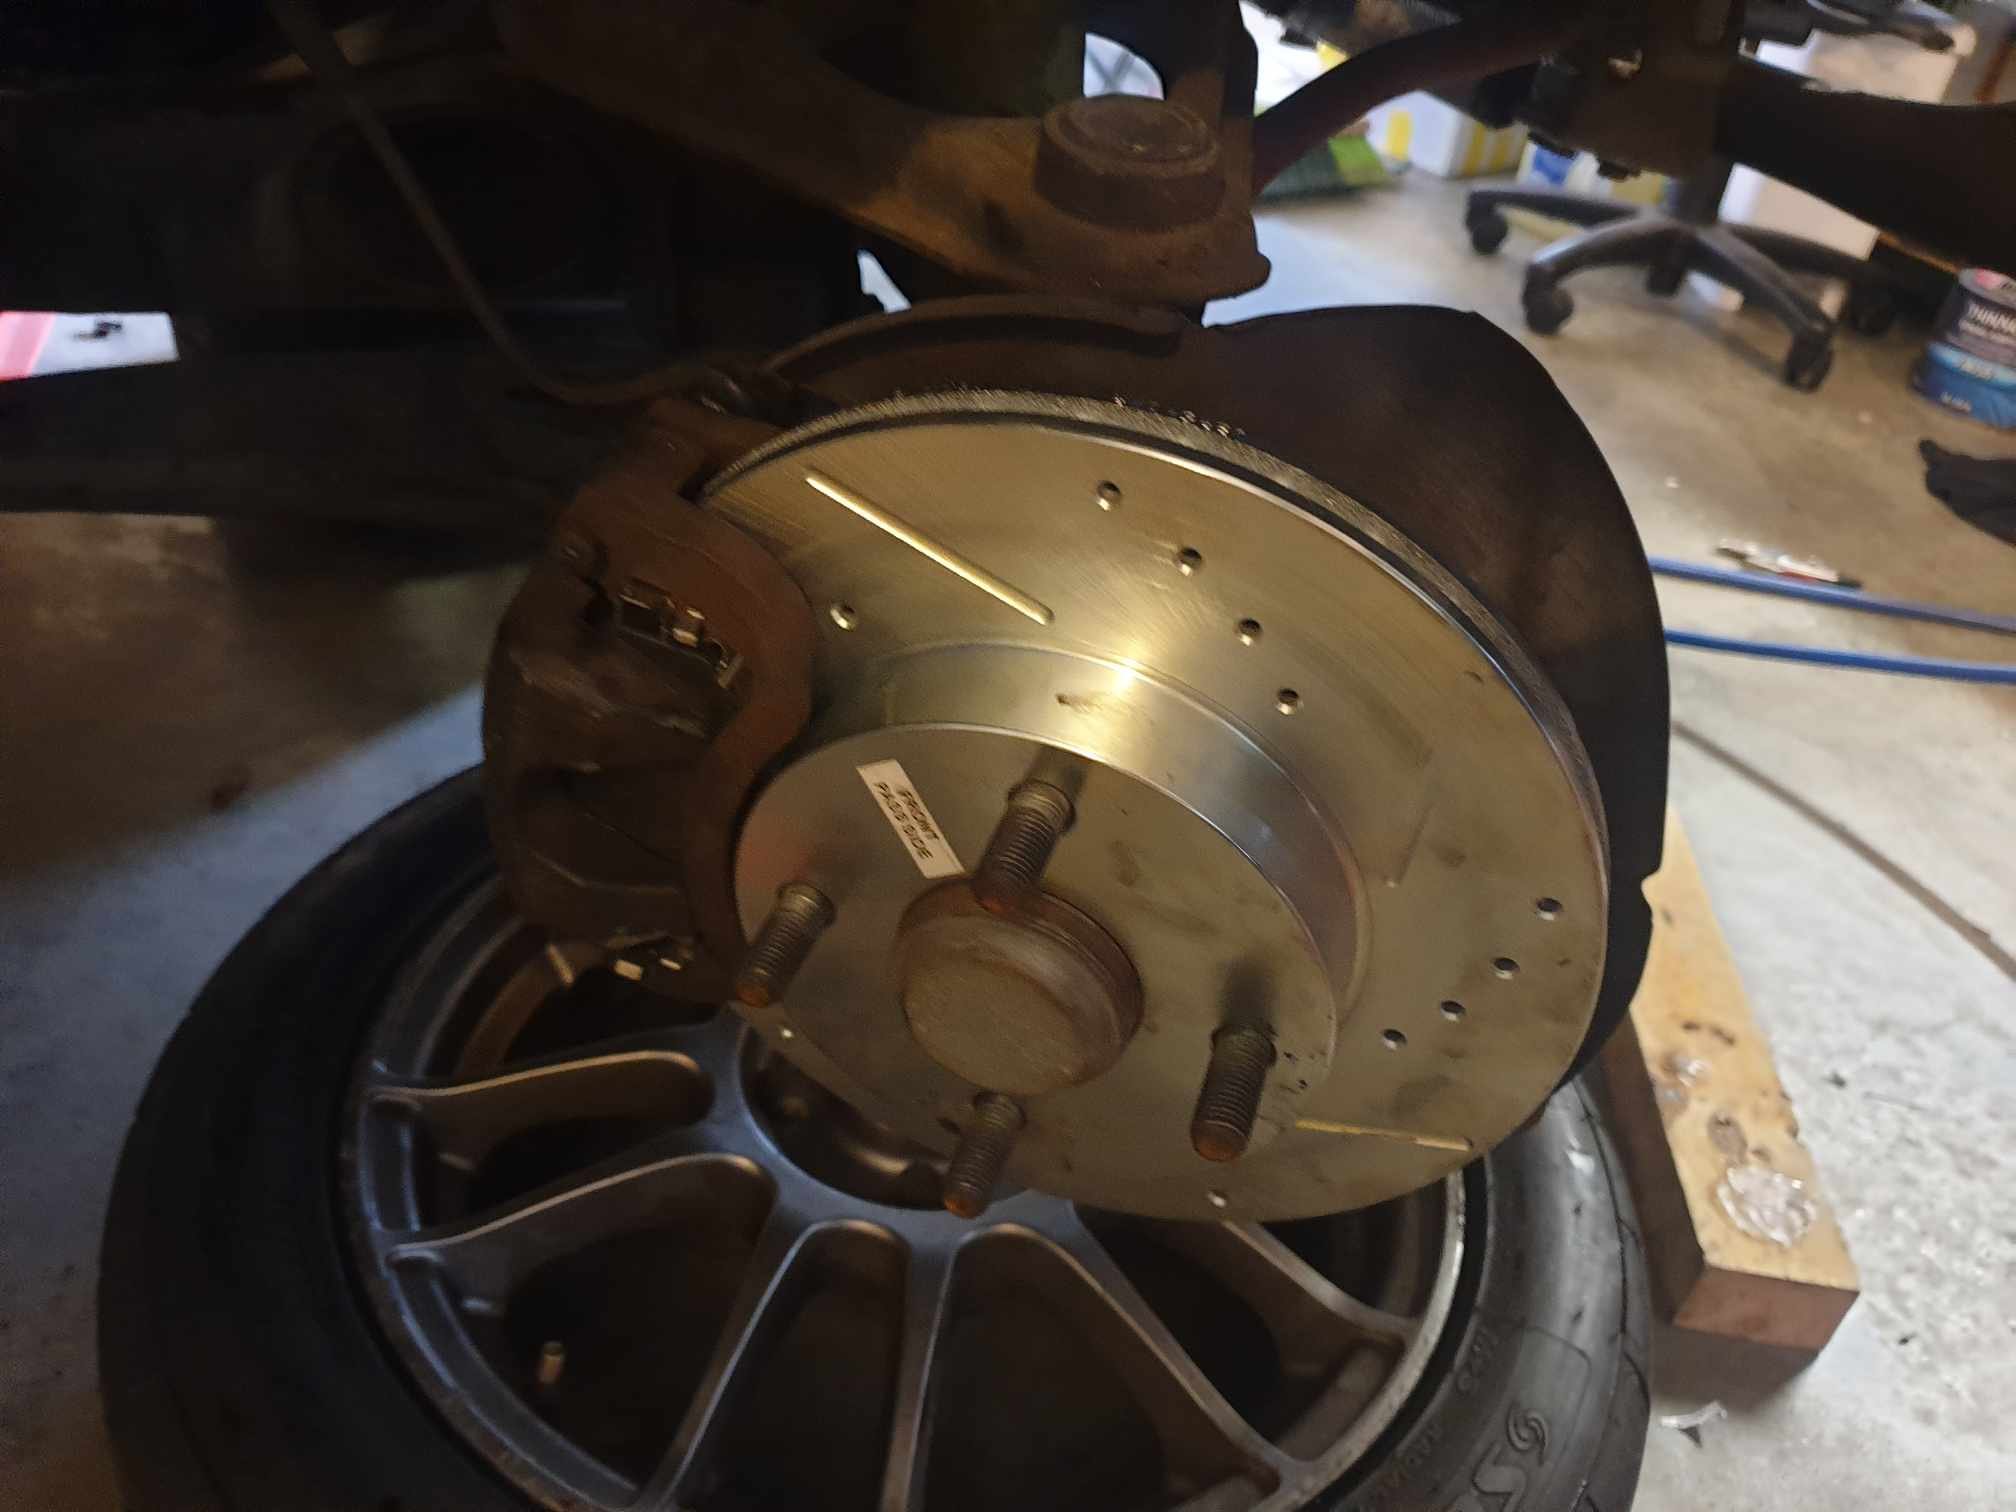
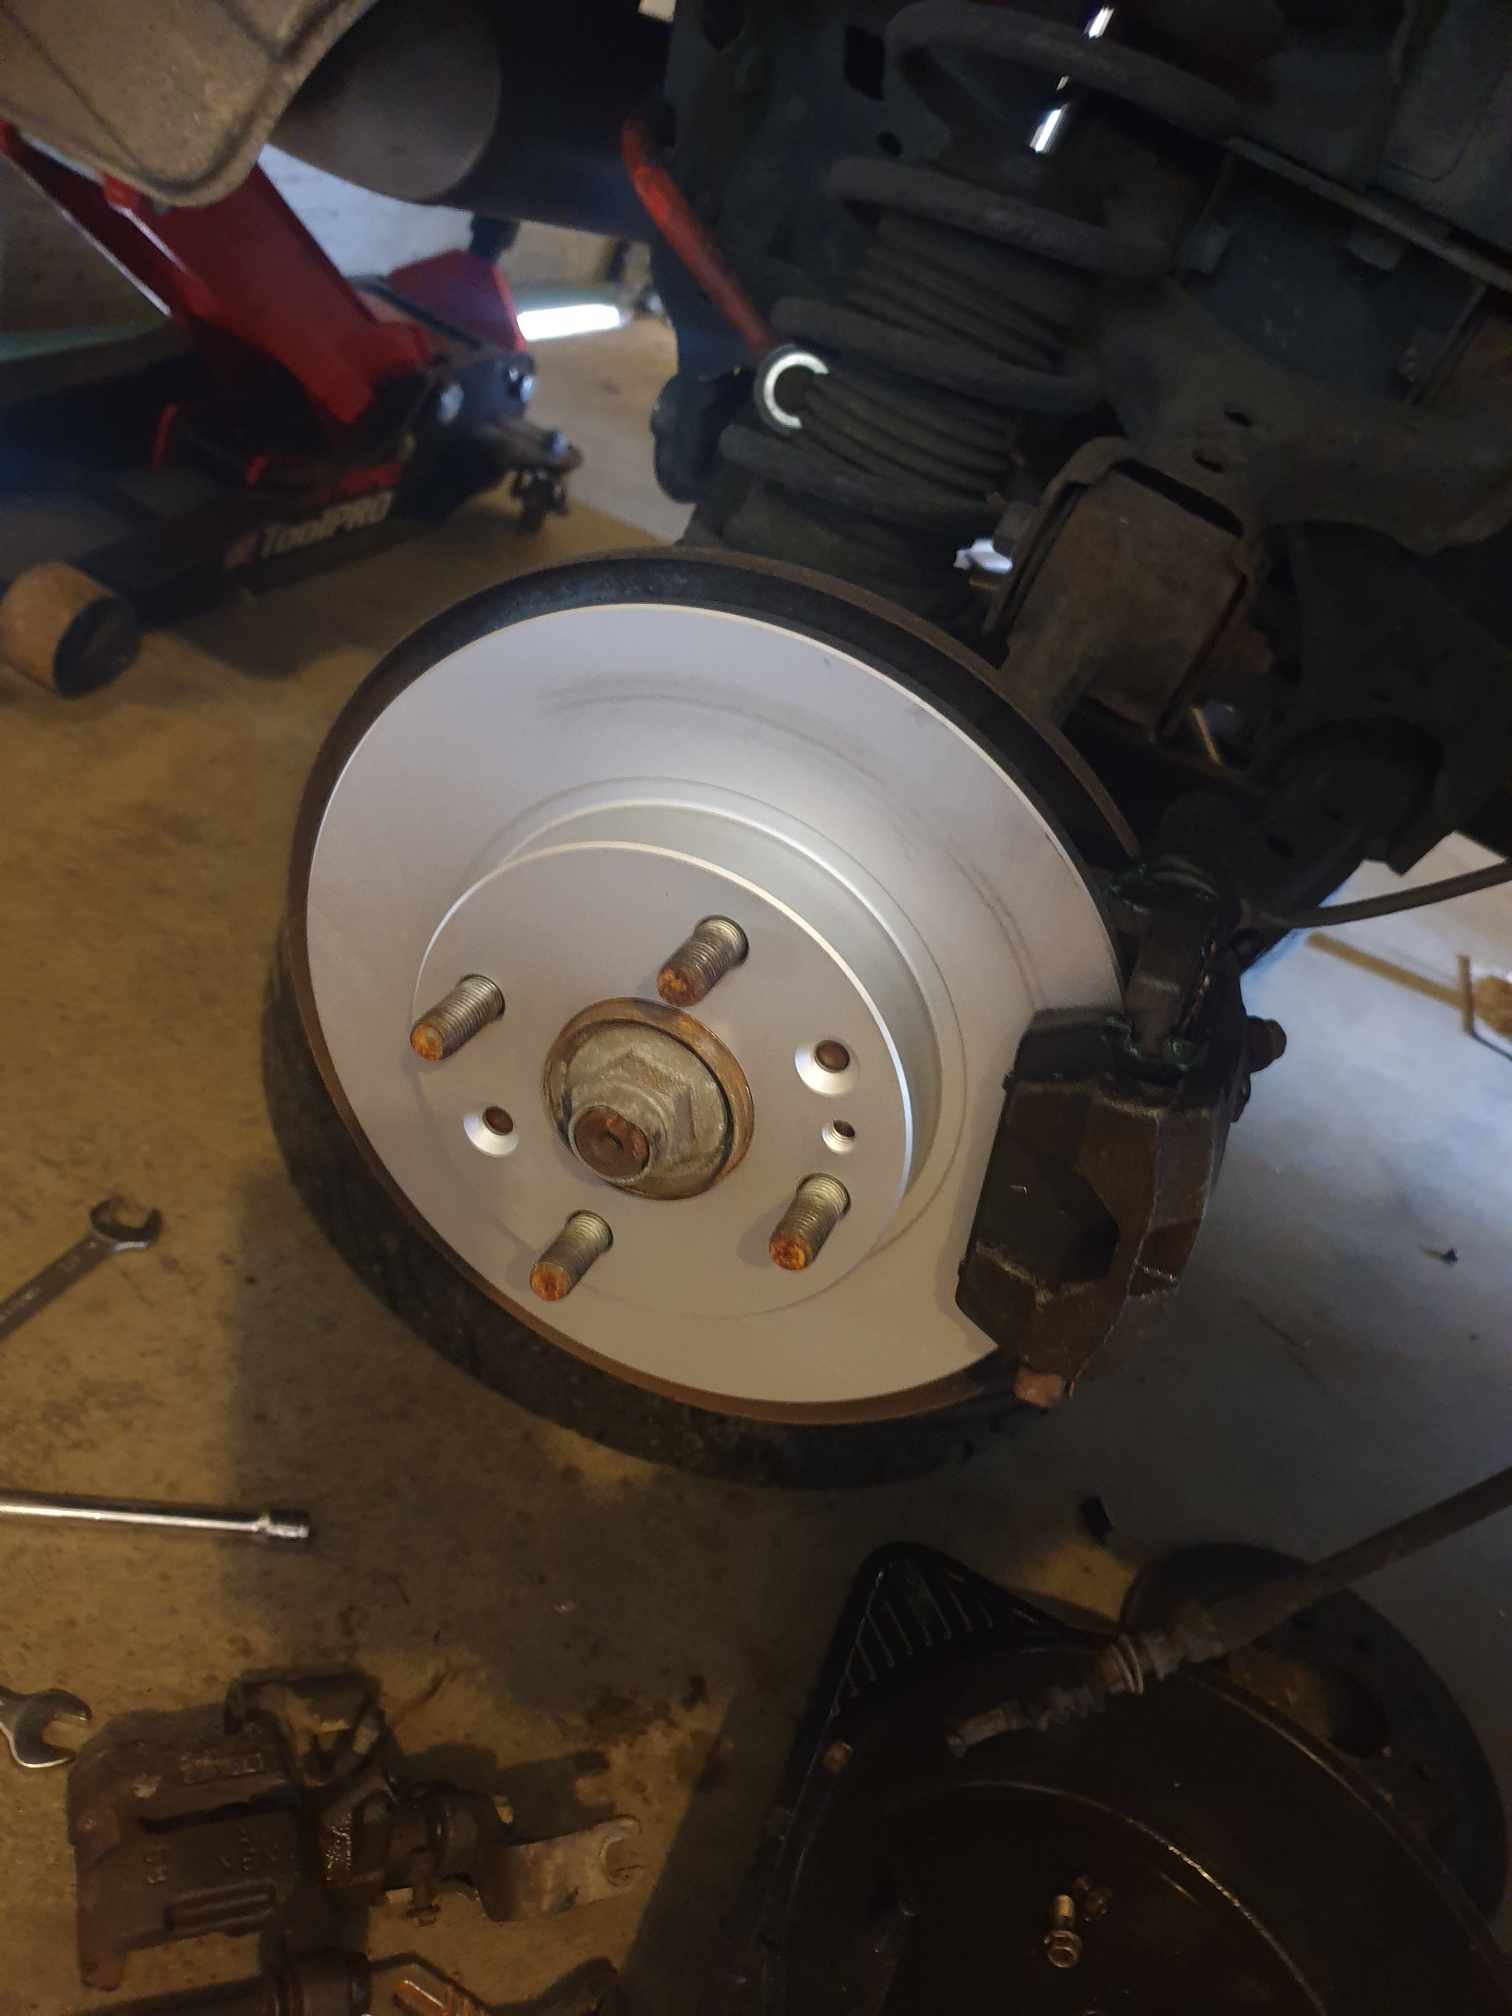
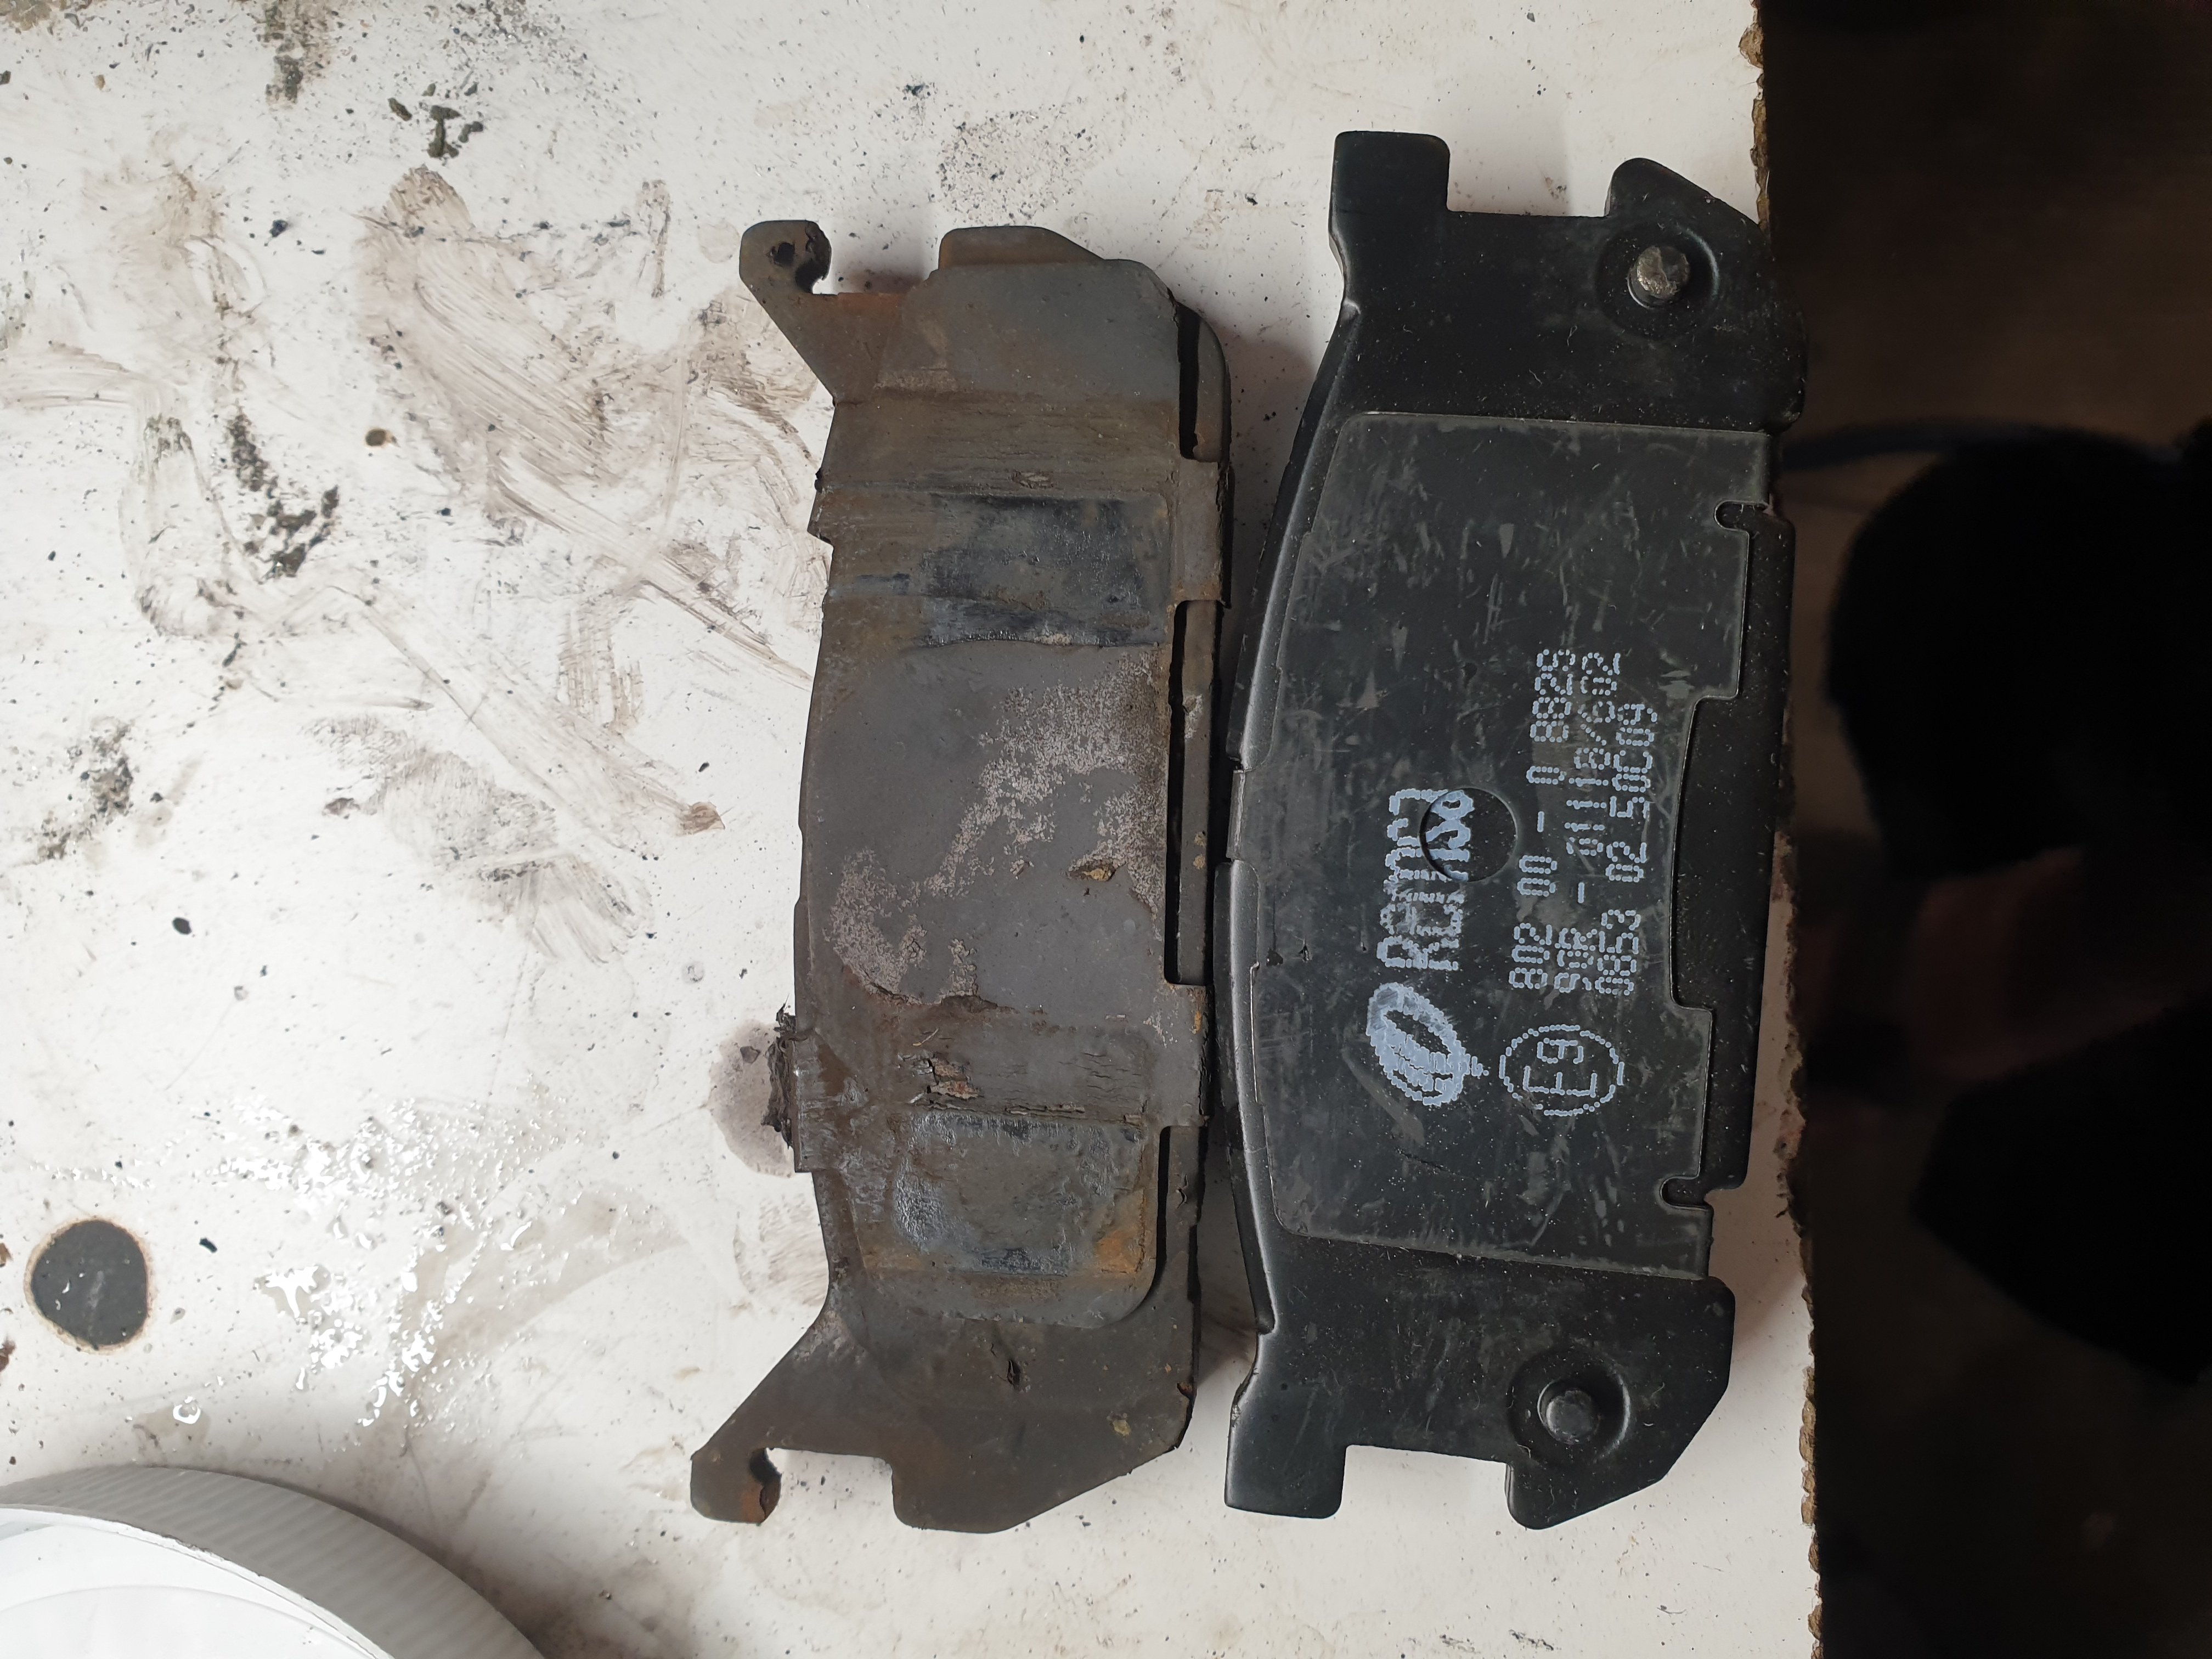
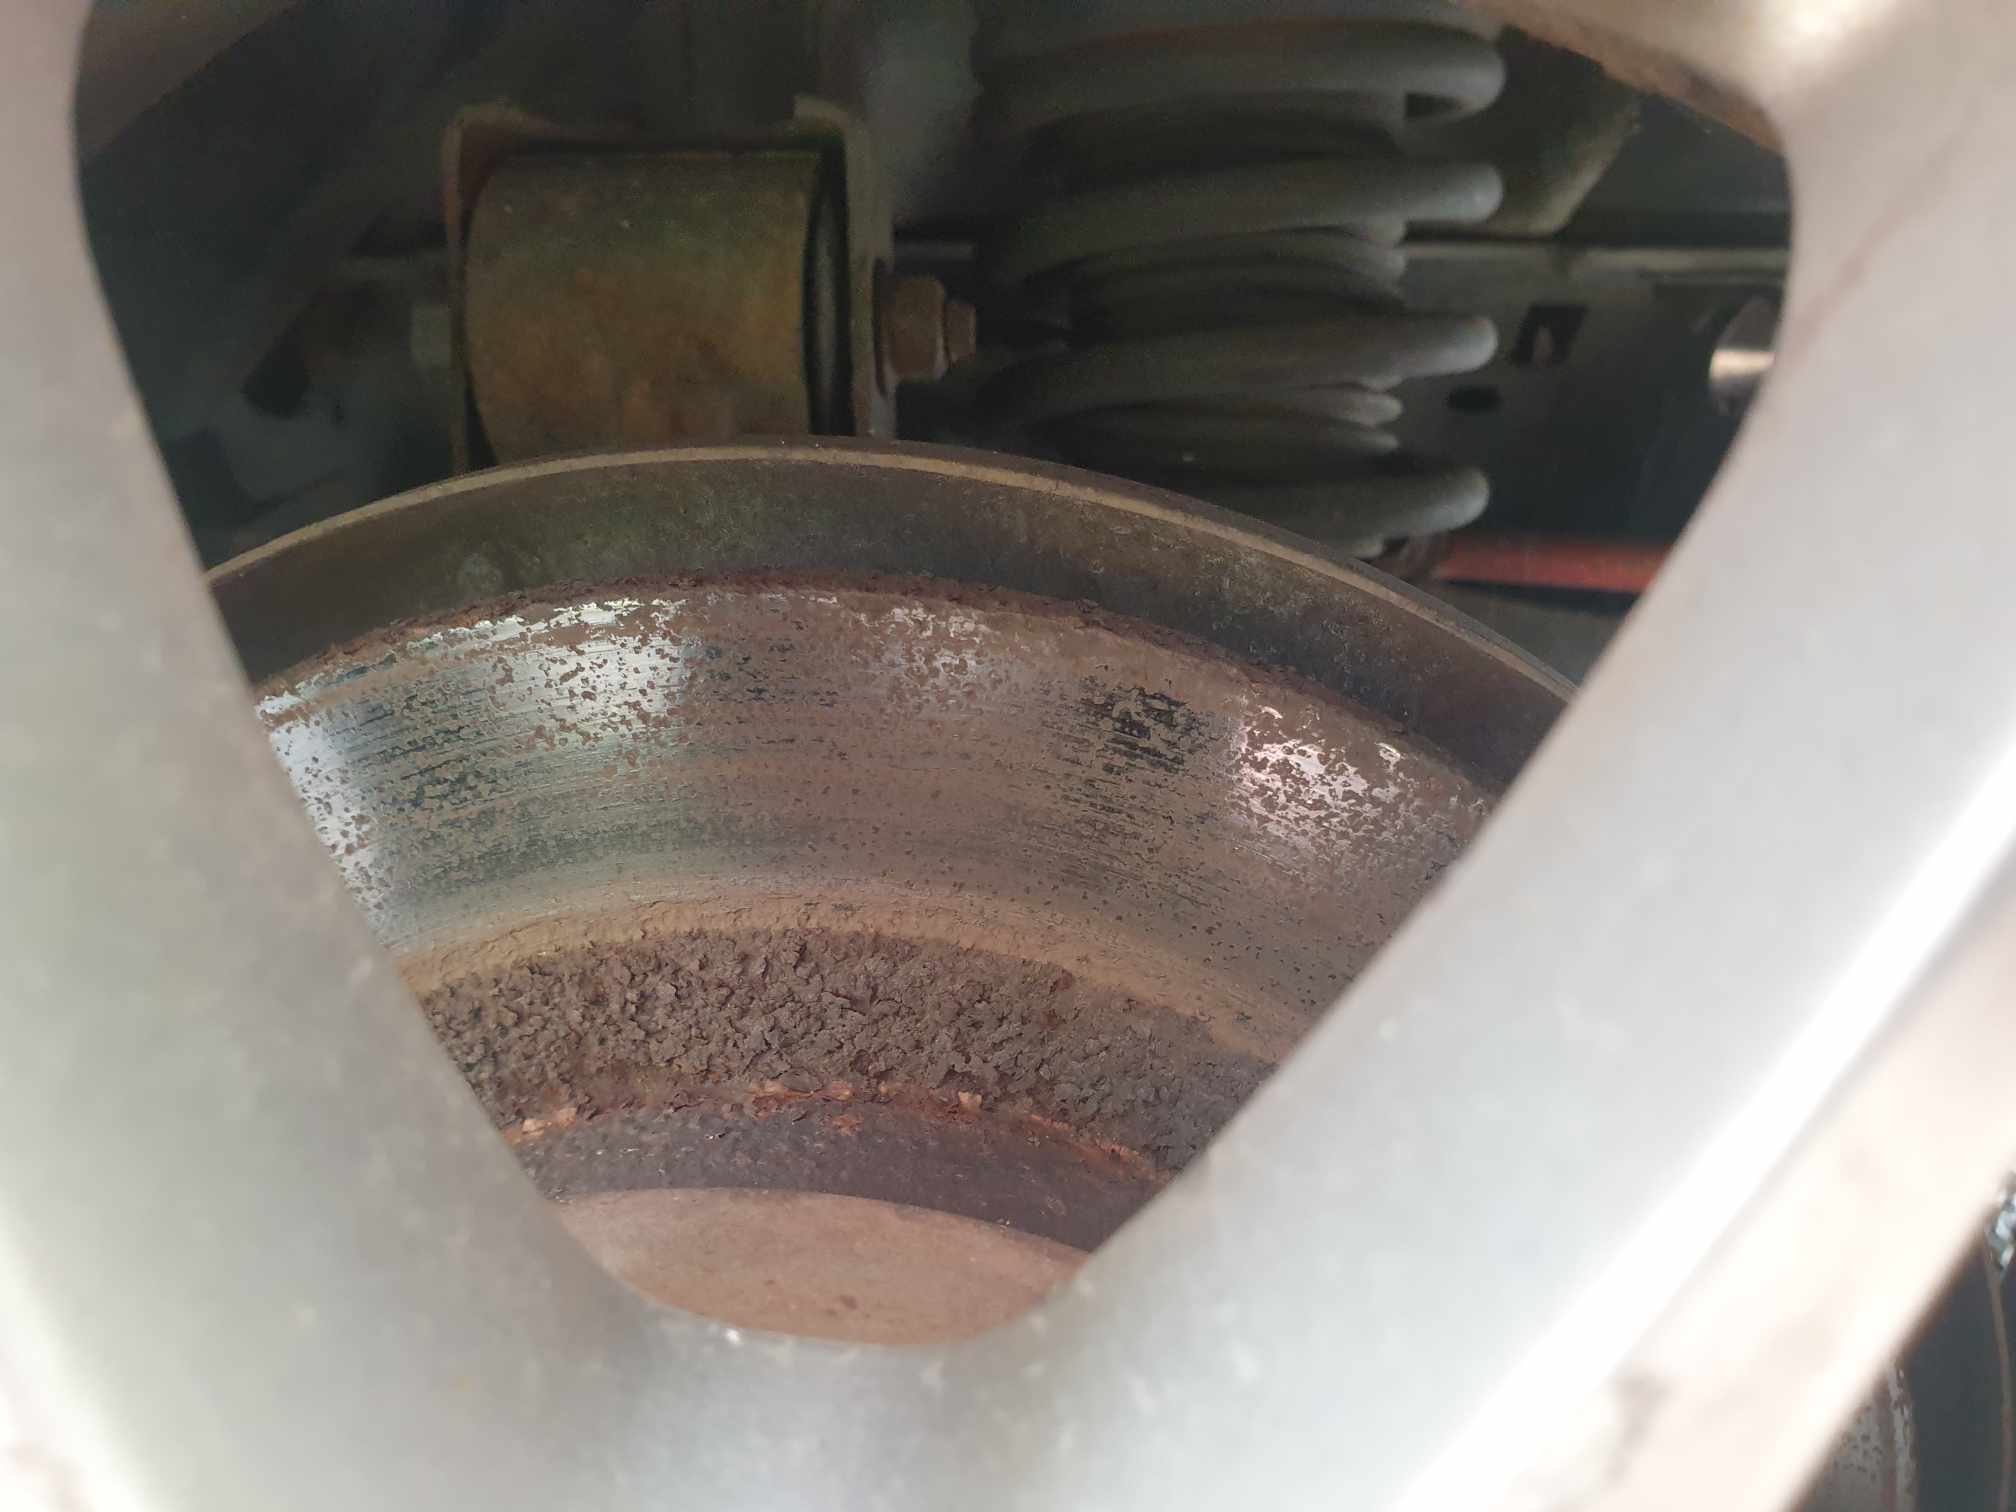
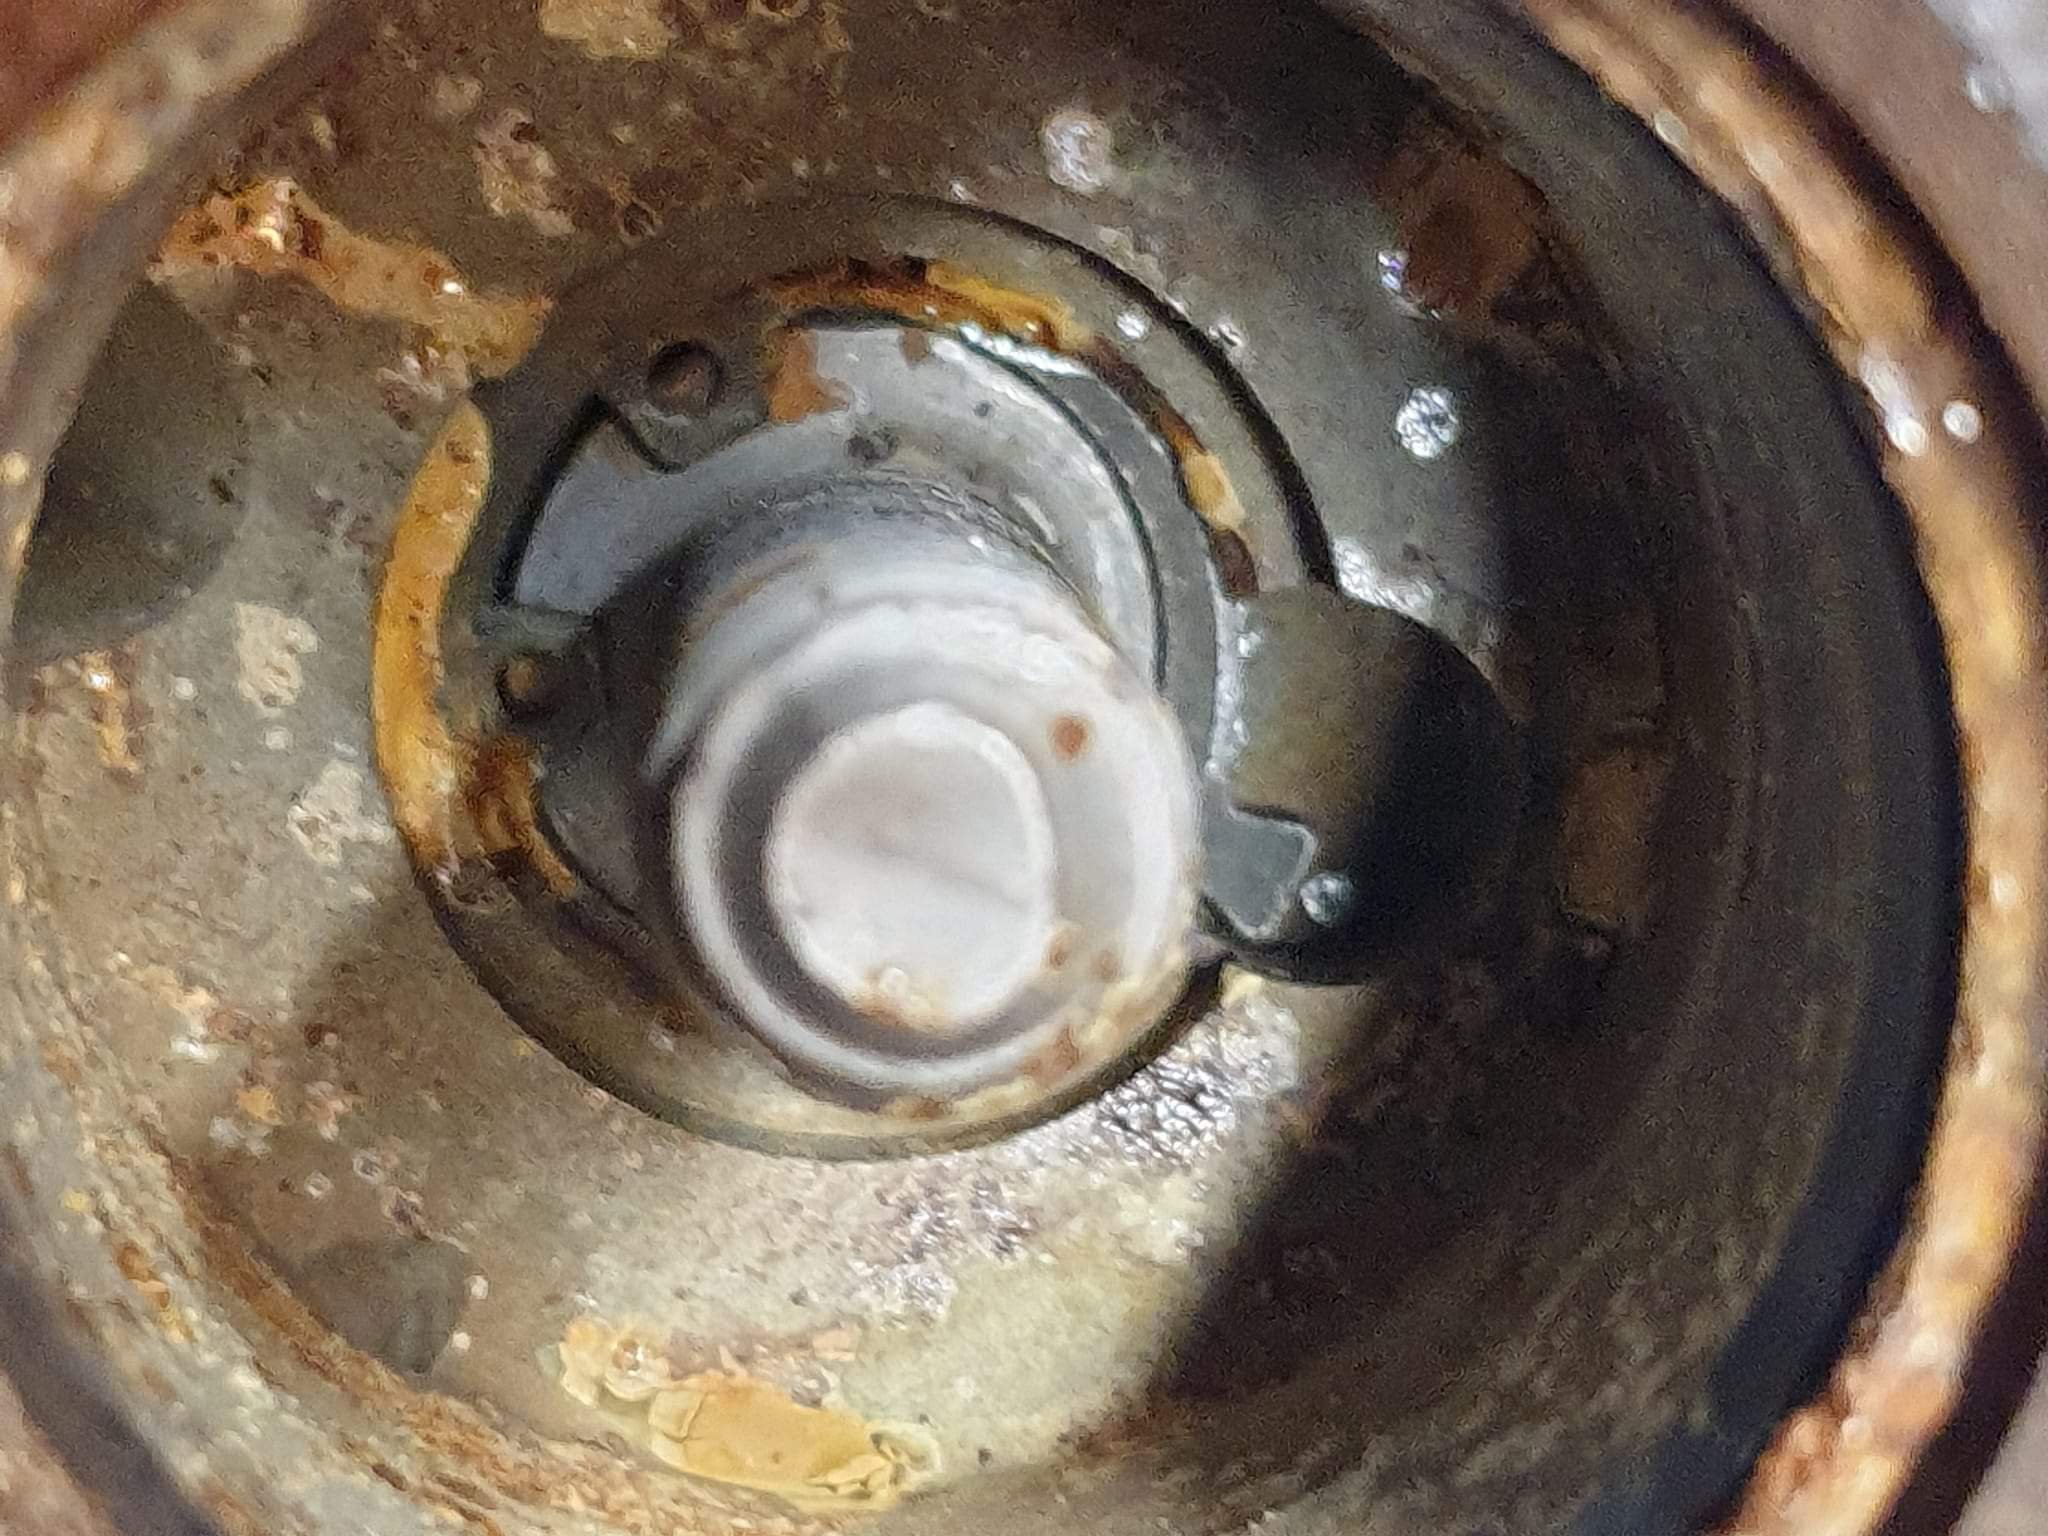
My mx5 is not 6lug nor does does it have a big brake kit, so the arrival of GMC sierra/Chevy avalanche/Cadillac Escalade front rotors for the rear of my mx5 was a bit of a shock. Rockauto was good about the refund and I guess I now own some shiny wall ornaments. The fronts and front pads arrived just fine, but rear pads were gifts from a friend but are also incorrect (nb). I want a refund on those too... Anyway NZbrakeco sorted out some rear rotors overnight and BNT had some nice pads for the rear so now the brakes are all pretty much done. Just need to mess with the handbrake adjustment points and check everything is okay (cable isn't stretching or frayed etc). And yeah drilled/slotted aren't necessary for me nor are they as "good" as plane Jane vented rotors, but I think they look cool and they were on special, so cost about the same as any other coated vented rotors. Edit to point out the crustiness of my old rears, and the reason I wanted to replace them:
-
My hopes were up Nah I was pretty convinced that it wouldn't help my handbrake, but I know my fluid is bad and I'm sure my adjusters are unhappy, so this is a good thing. I'll probably try get new discs all around and new pads too. Actually thinking back I believe at the last wof I can remember that was at a place with a brake machine, my rear balance was out of wack anyway... oops
-
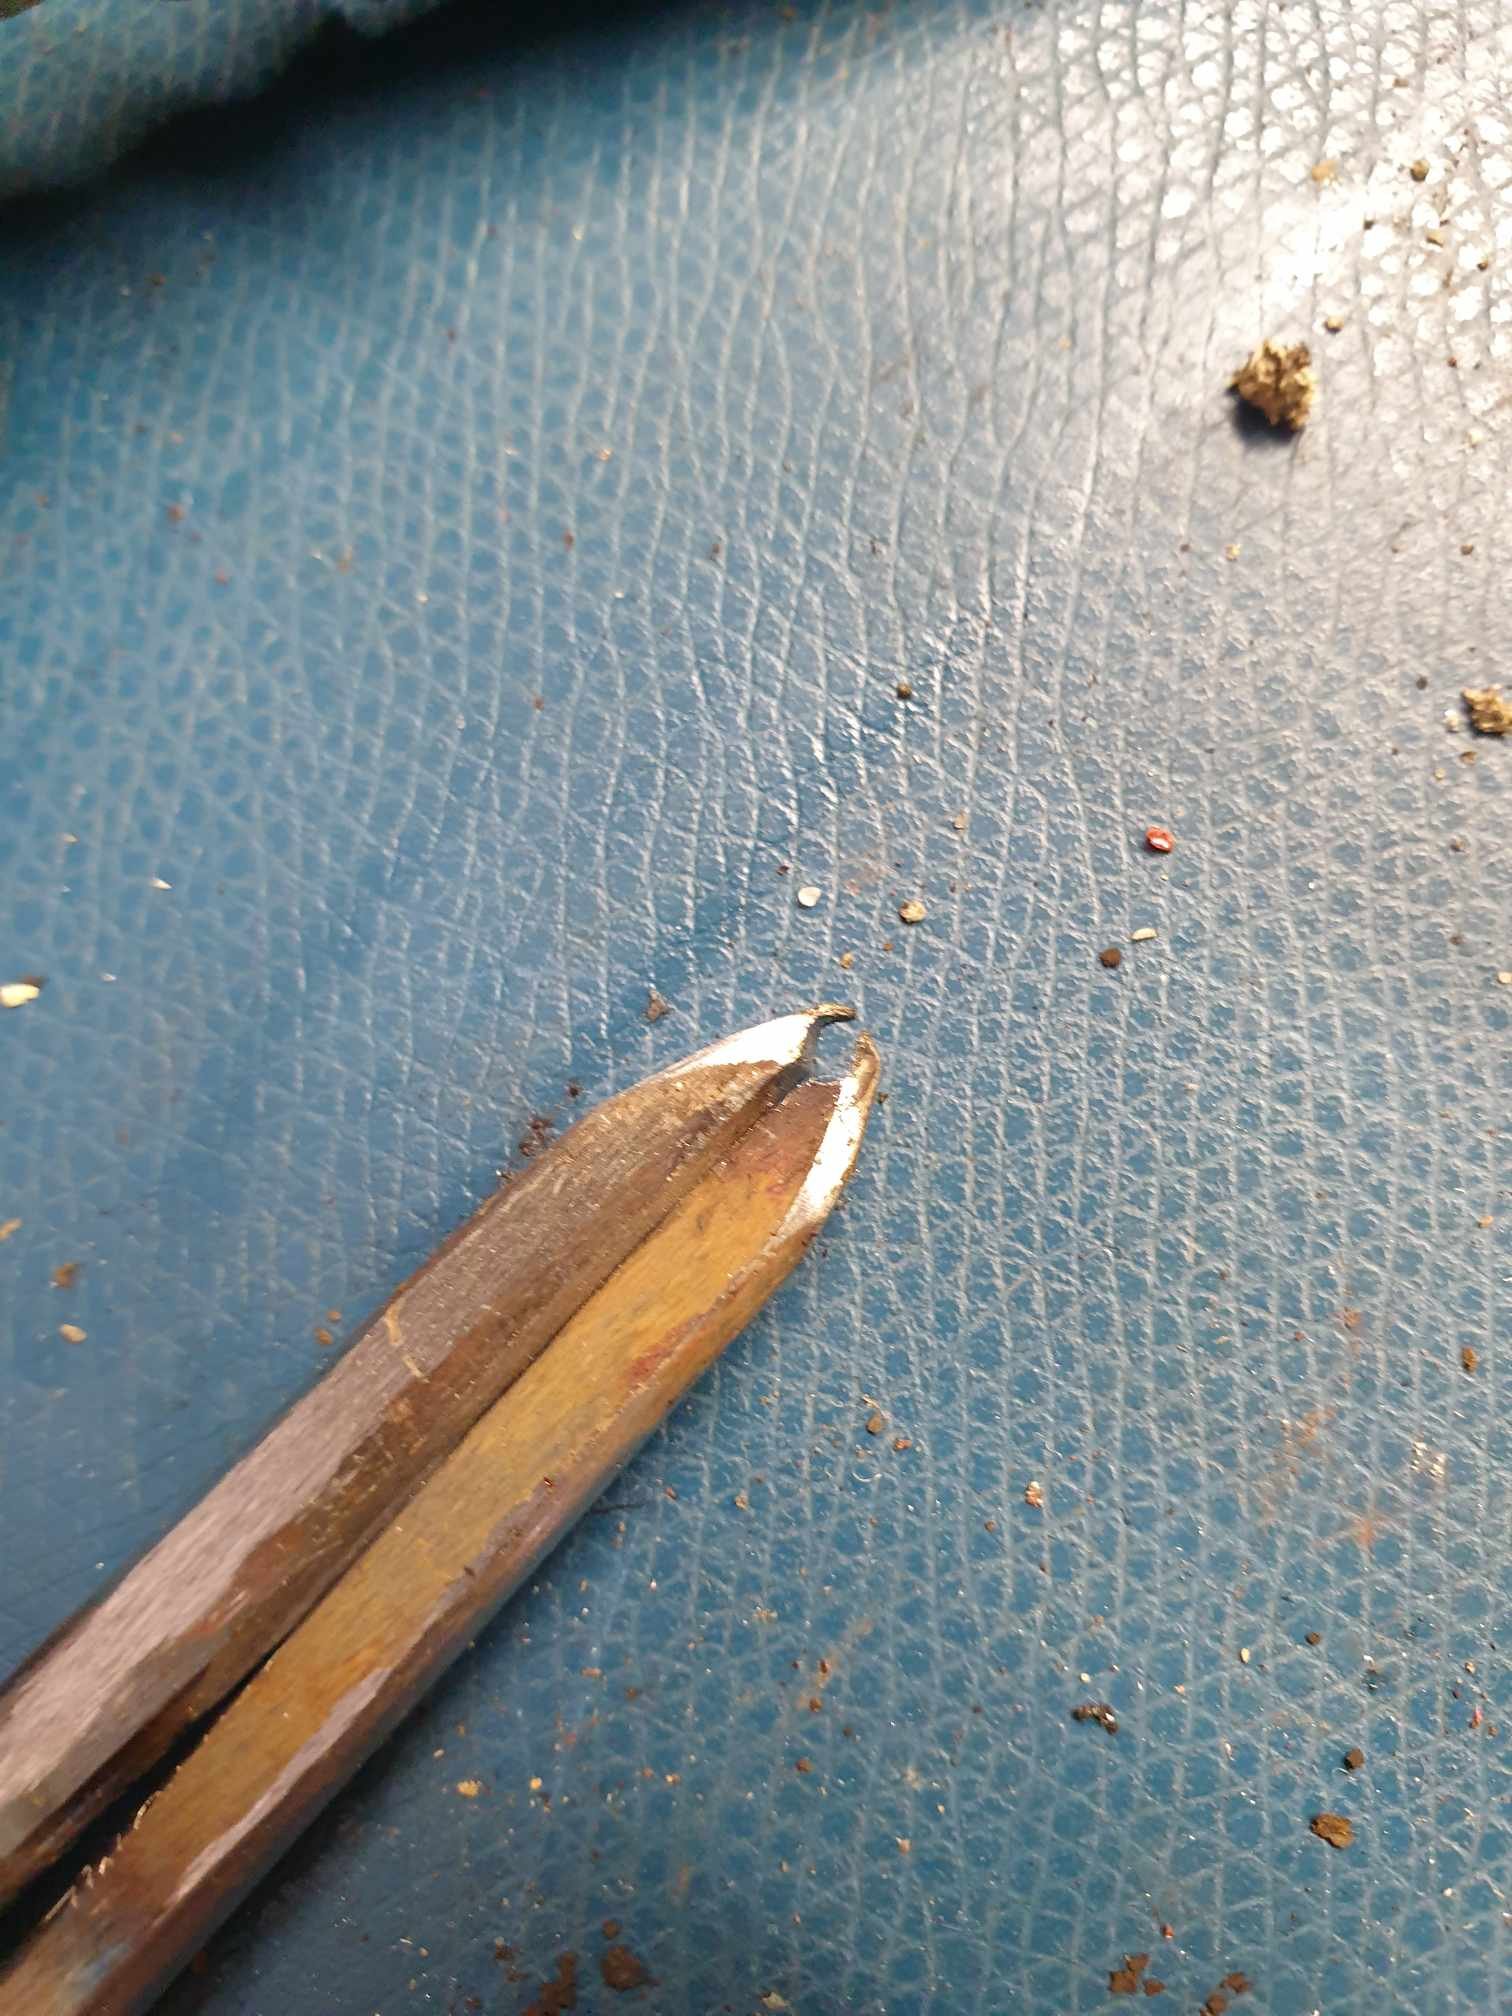
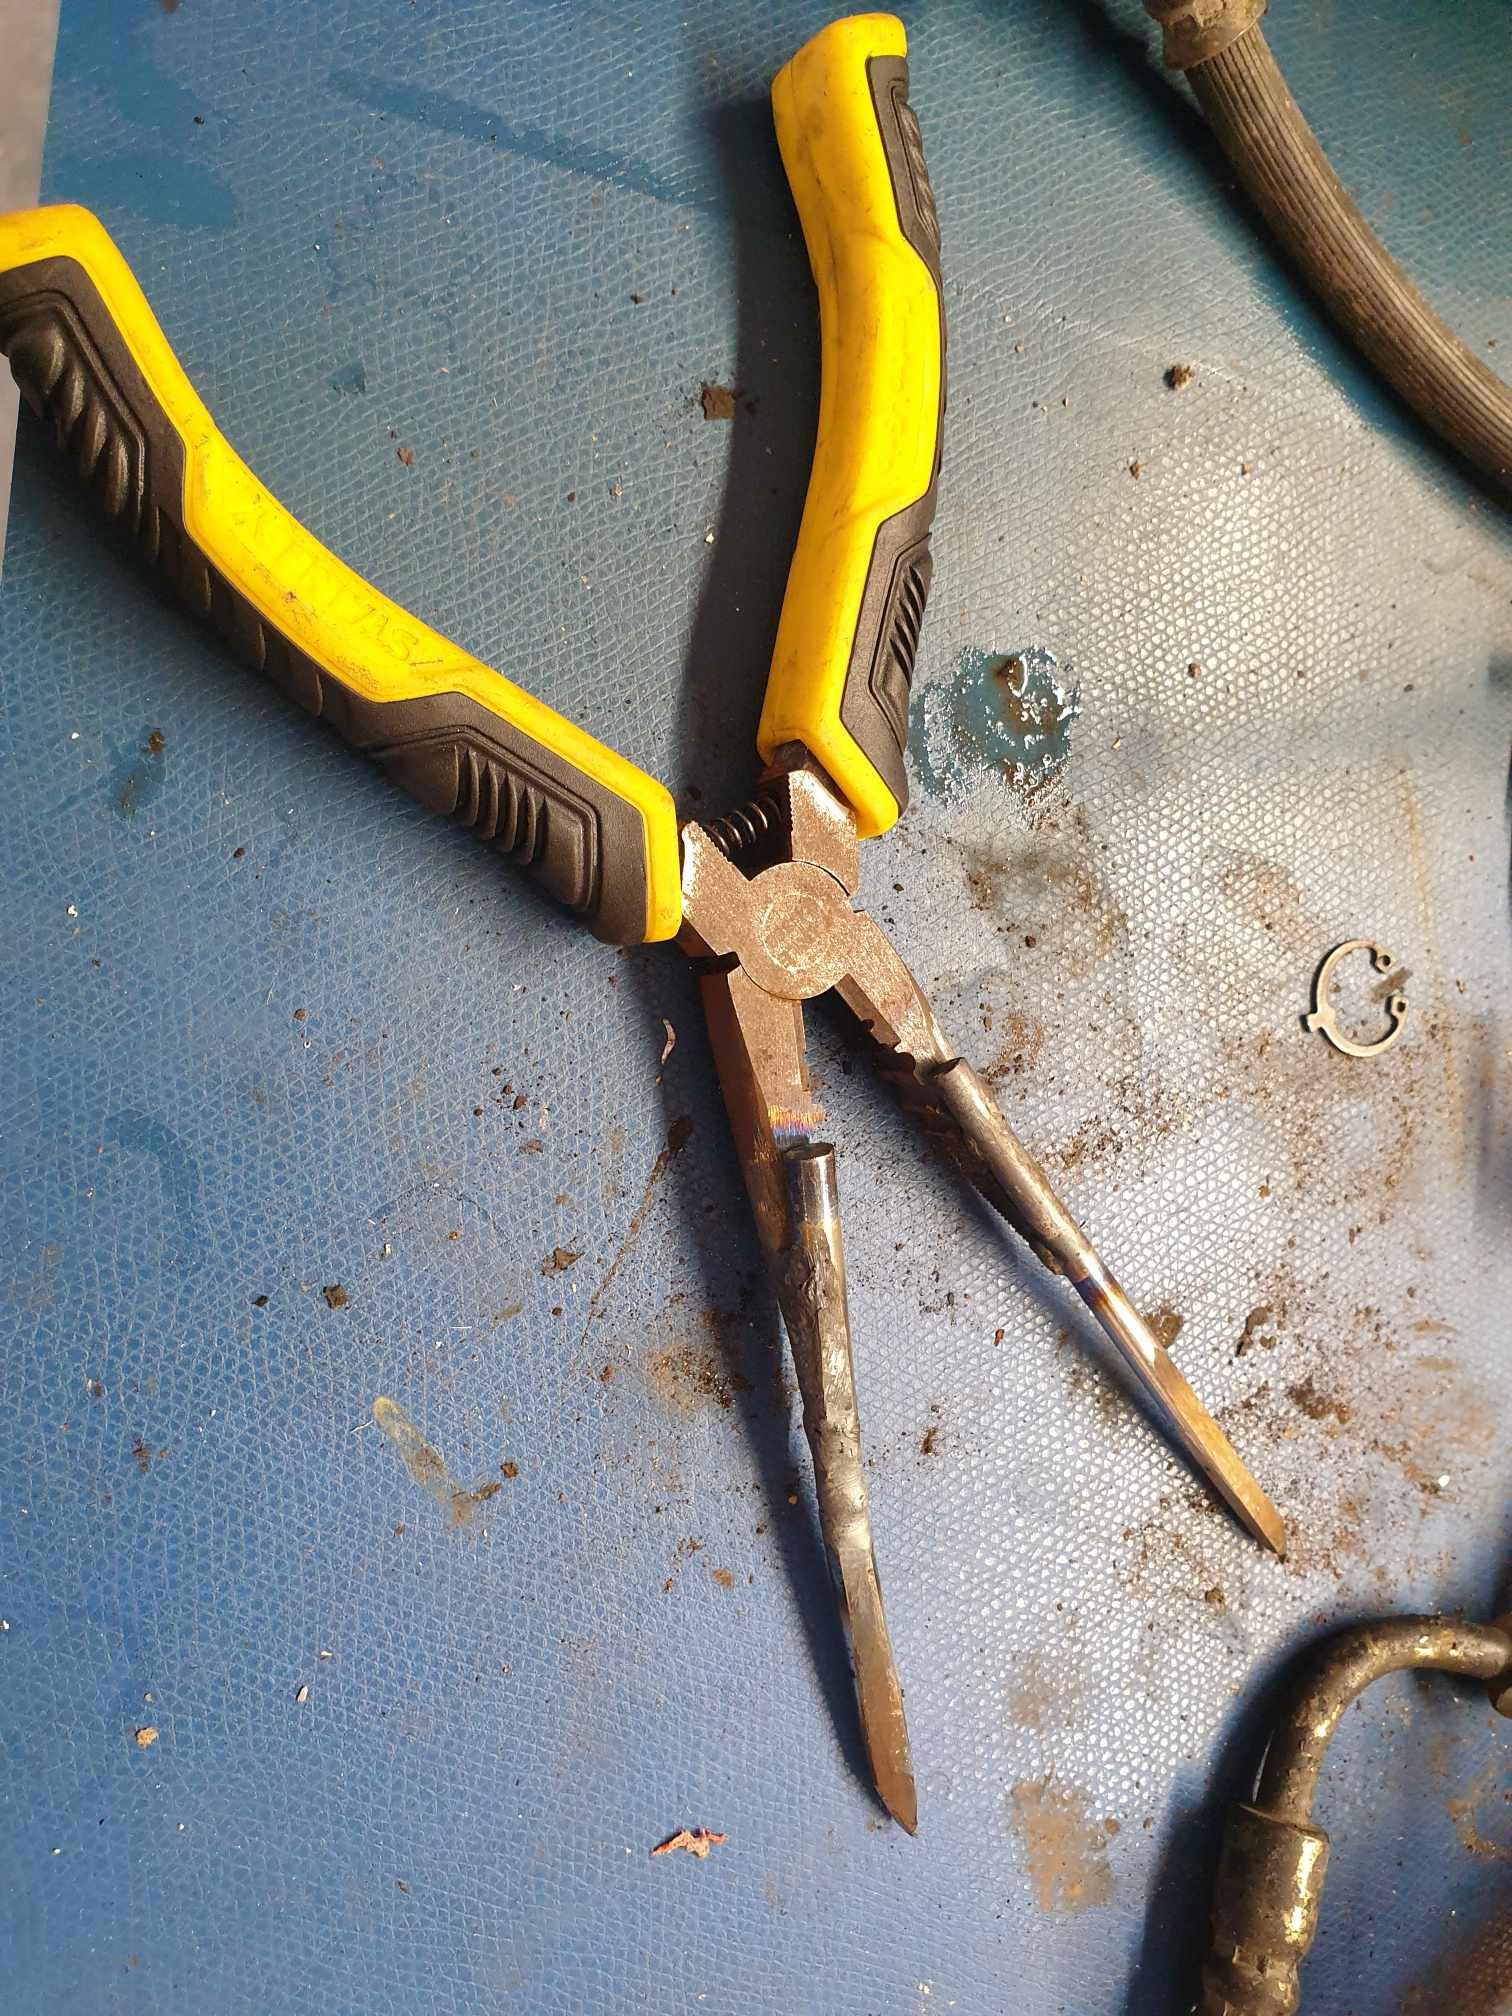
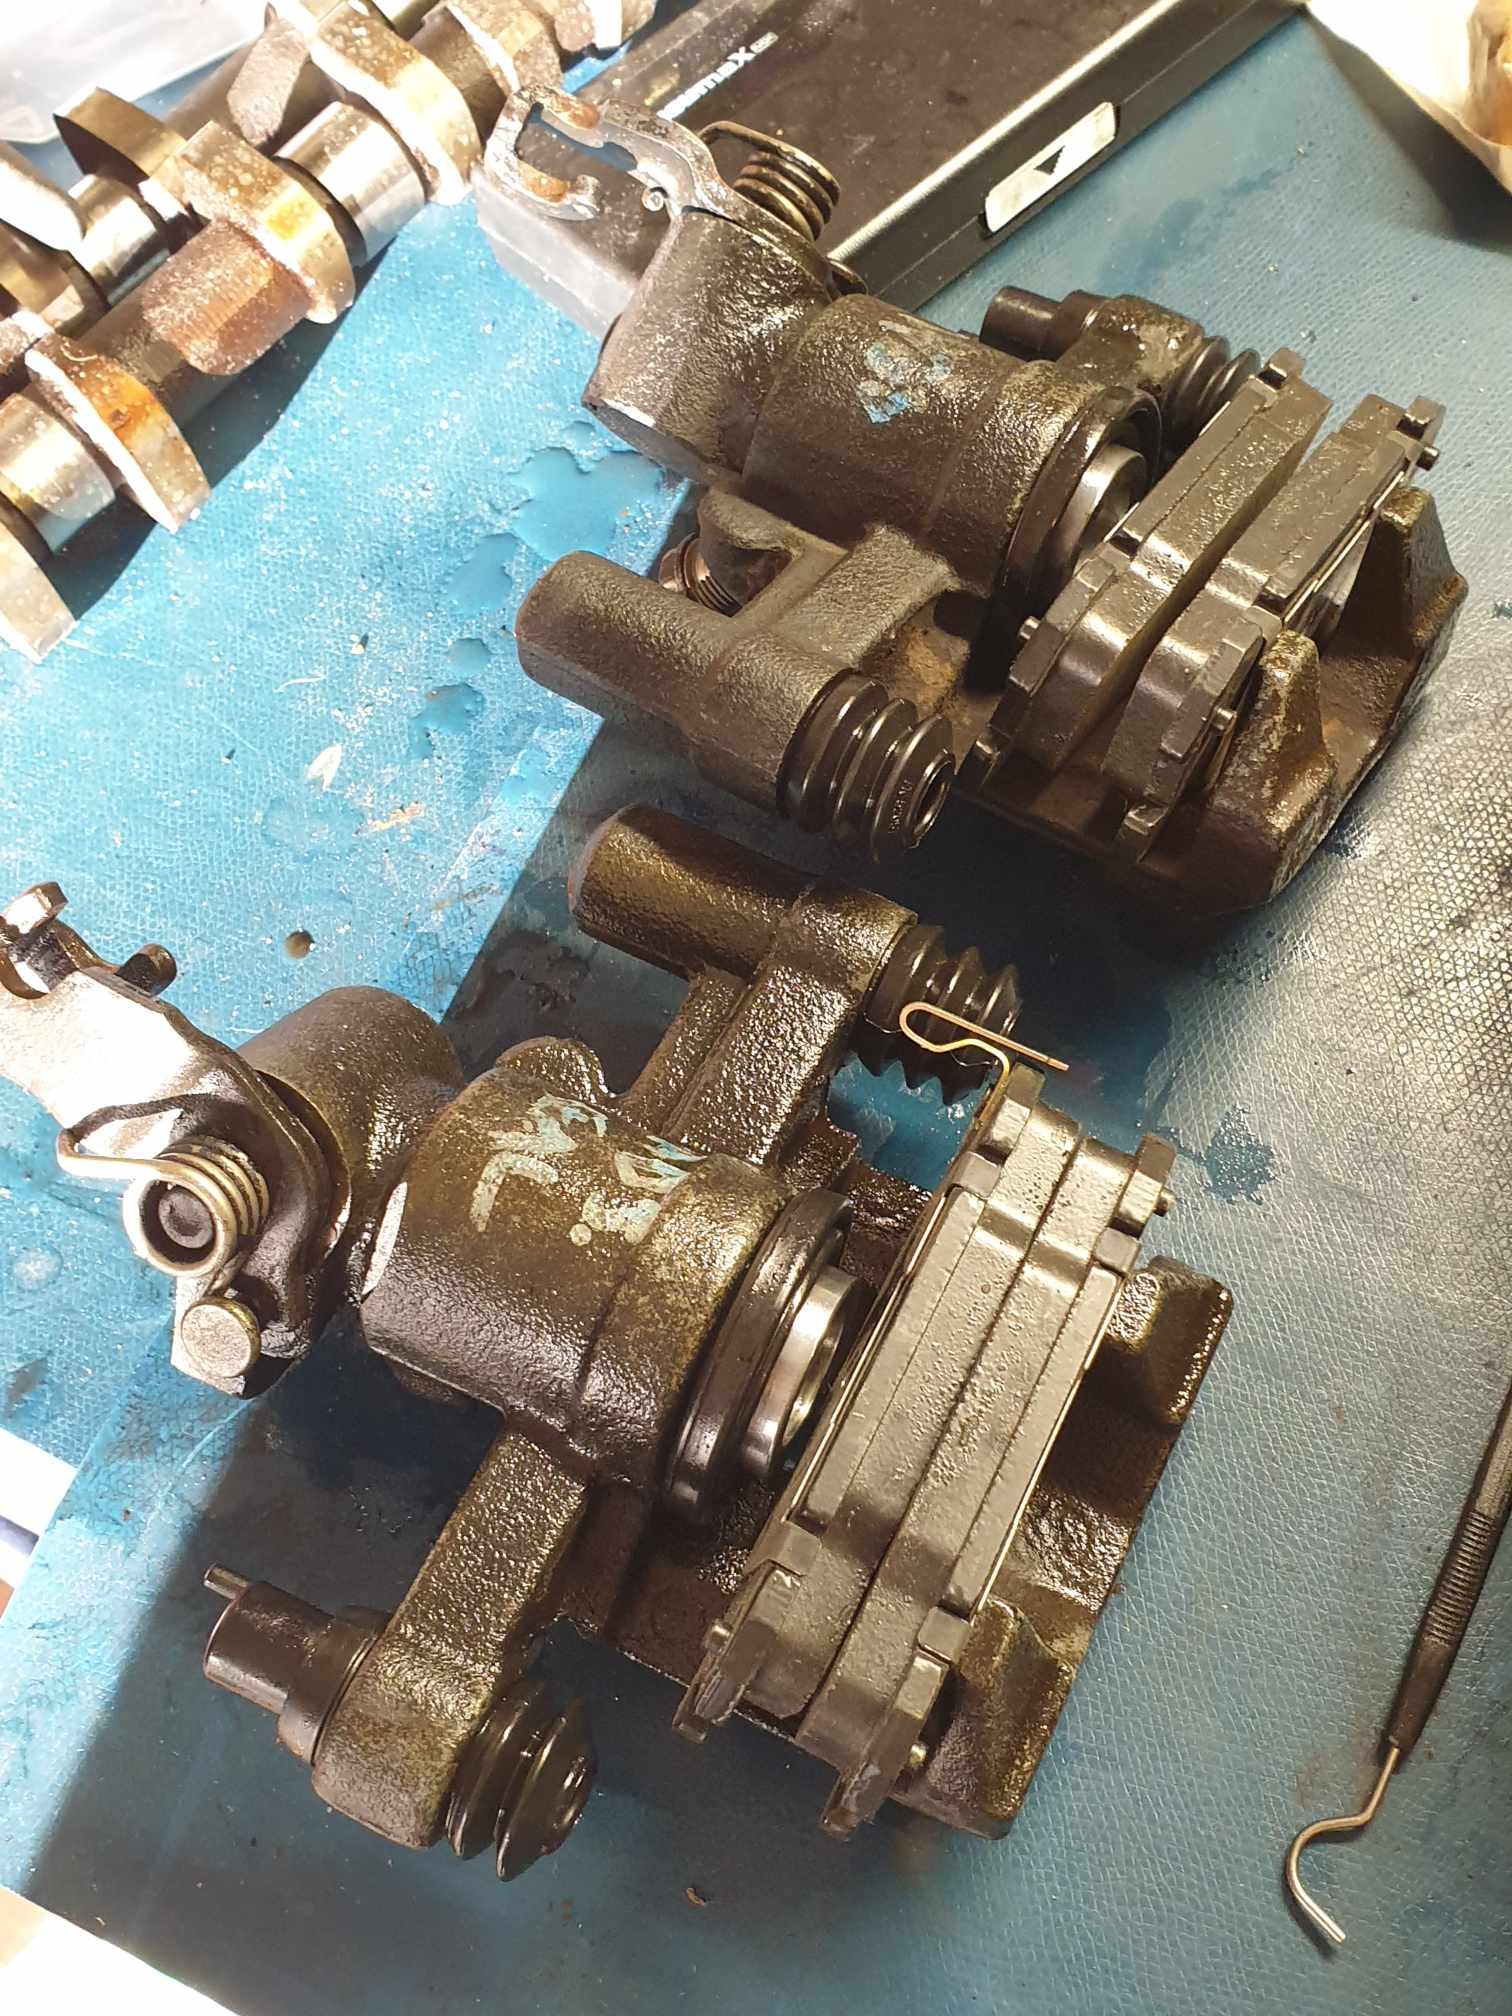
Completely unrelated to any important task at hand, but I've found a box of calipers that "we" gave up on a few years ago, and started working on them again. The fronts were already reassembled, rears have a painful circlip around the piston adjuster mechanism. They're down the back of the bore and really difficult to get at, so I had to make some ultra long circlip pliers. I don't think this ranks in the top-50 on the list of sketchiest things I've done. It did however get the job done, so now I have some rebuilt rear and front calipers to go on my car. I'm hoping this will help with my non-existant handbrake before the next motorkhana in mid October. Also my car is probably far overdue for new brake fluid and I can now kill 2 birds with 1 stone.
-
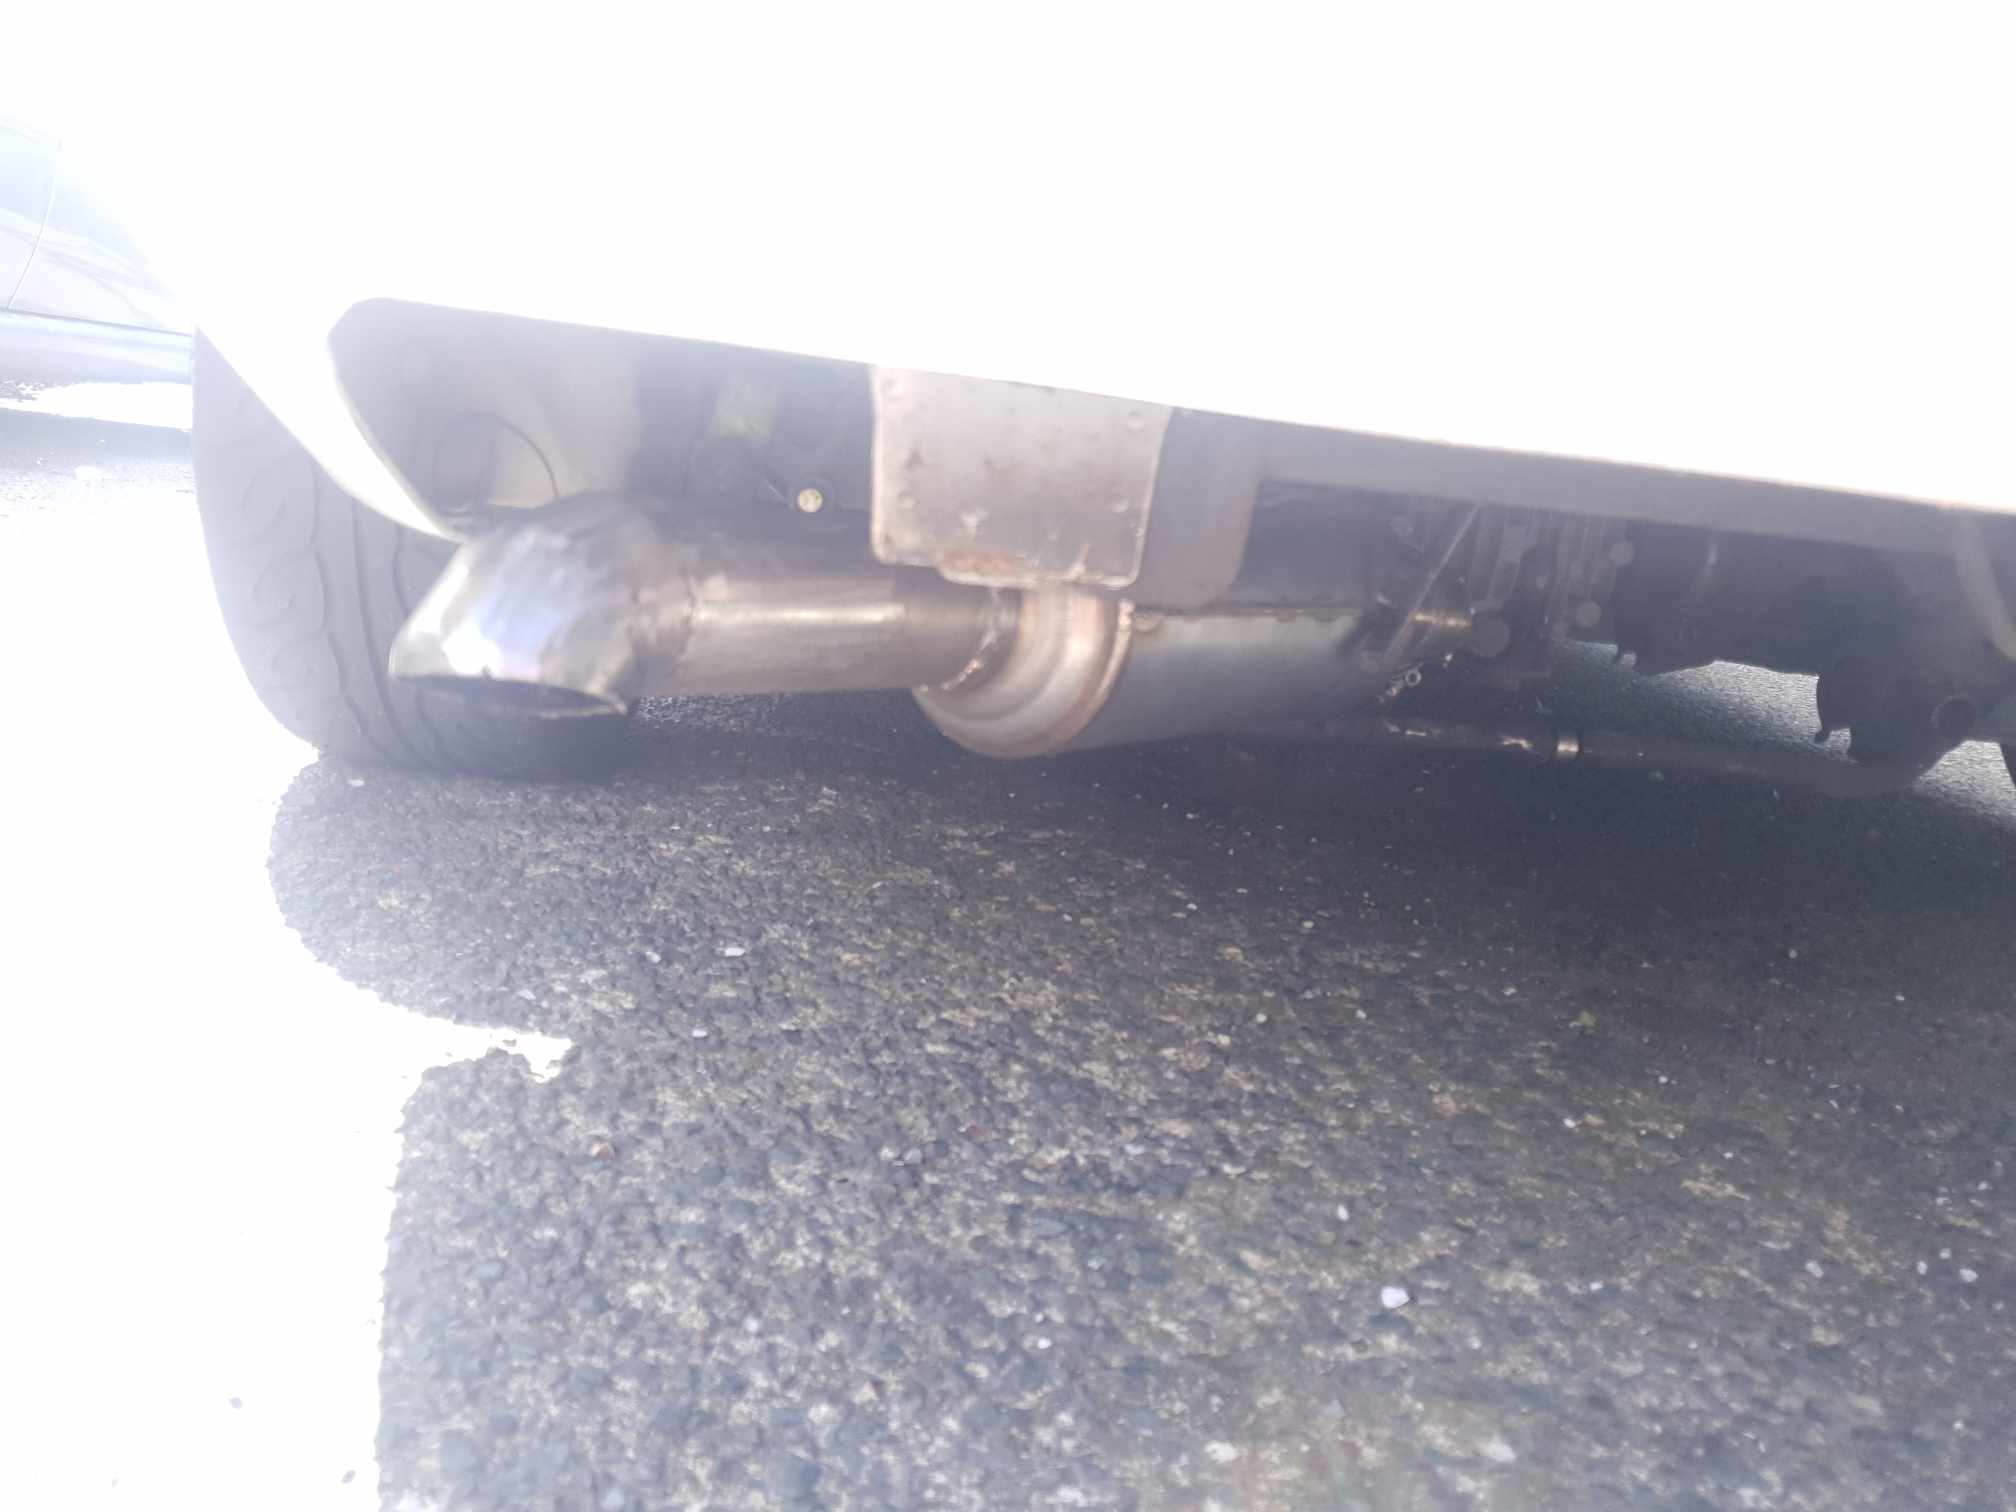
I'll get to the "current" exhaust video one day - however these are before videos of the old setup (bad intake, shit resonator) at a motorkhana held by SCCNZ in march. Not the tidiest I don't think this course was meant to have a loop Cue excuses: no handbrake, no power steering, no abs, bad driver The reason I have few/no "current" videos is that I have this annoying "chirp" at mid throttle: it sounds like the intakes are whistling? I believe I need to take my intake off and really smooth down all intake surfaces so there are no lips/edges for air to flow over and make noise, because it is super frustrating to drive like that. It also makes cruising super frustrating because most gentle inclines cause the chirping noise again. I'm also going to get a new rear muffler, I think my current one is fine but I want something that reduces the total exhaust volume significantly, as it is a bit loud at motorway speeds, reducing the top-down comfort I'm expecting to need this summer. Gratuitous overrun on the way to a meet in Tauranga.
-
Apologies if it has been discussed already in the last 17 pages but a quick ctrl+f didn't find it. Regarding DBW control - RusEFI boards have open source DBW hardware and firmware available for you to look at. I mean I'd suggest getting some proteus boards manufactured (including 2 for me ) however component shortages are a right pain. The Proteus handles dual-DBW so the hardware/schematic could be taken from that repo, and to control it perhaps picking apart the rusefi firmware would be the way to go. https://github.com/rusefi/rusefi/blob/master/firmware/controllers/actuators/electronic_throttle.cpp https://github.com/mck1117/proteus
-
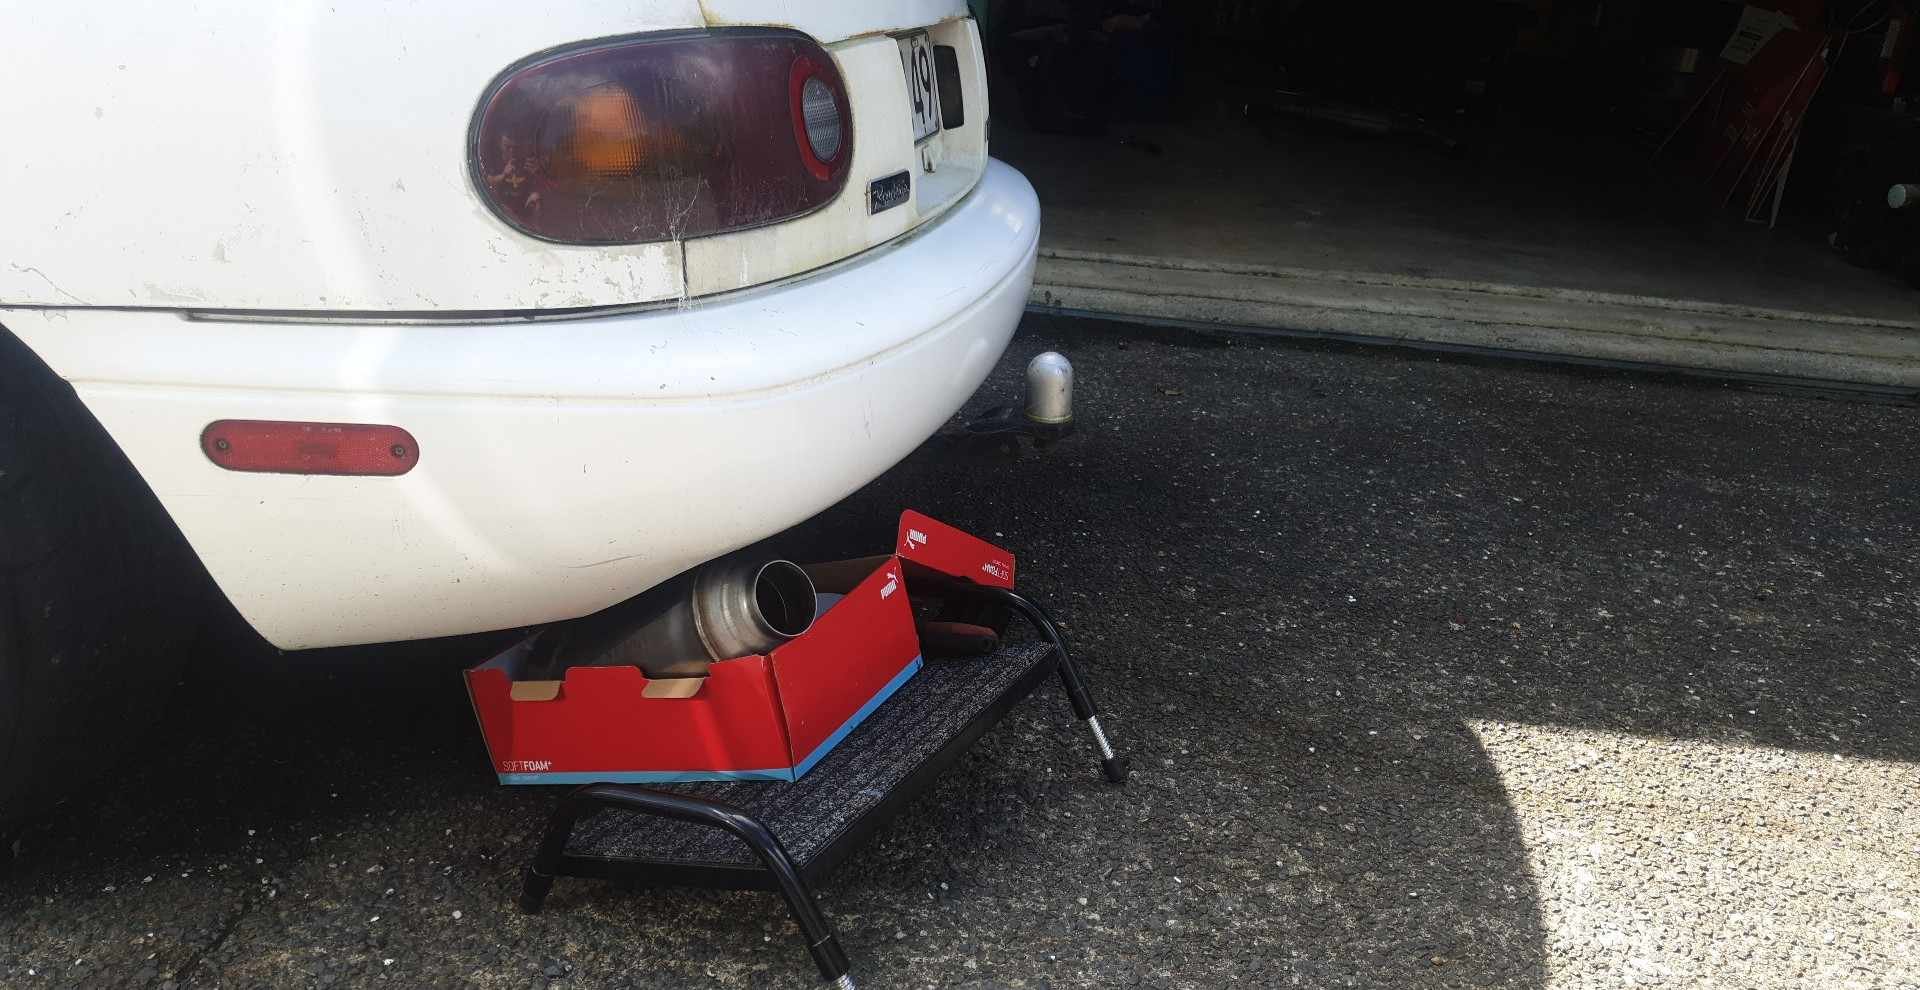
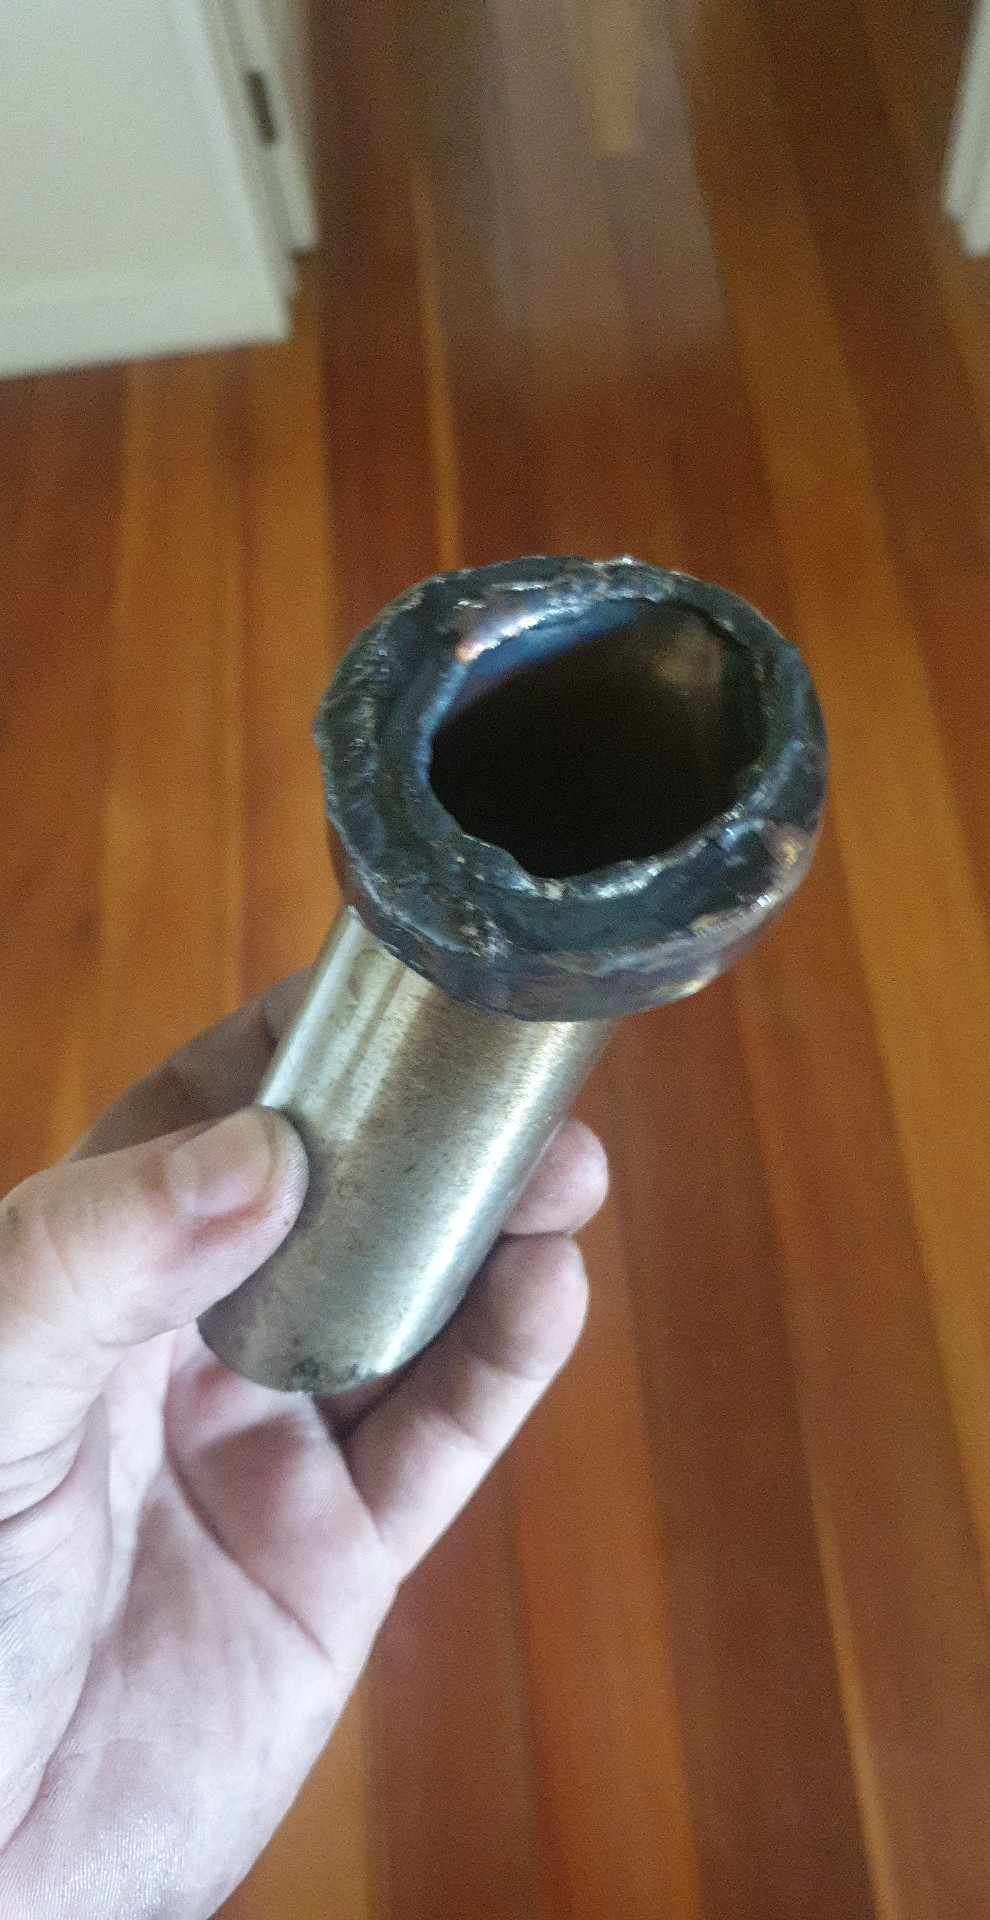
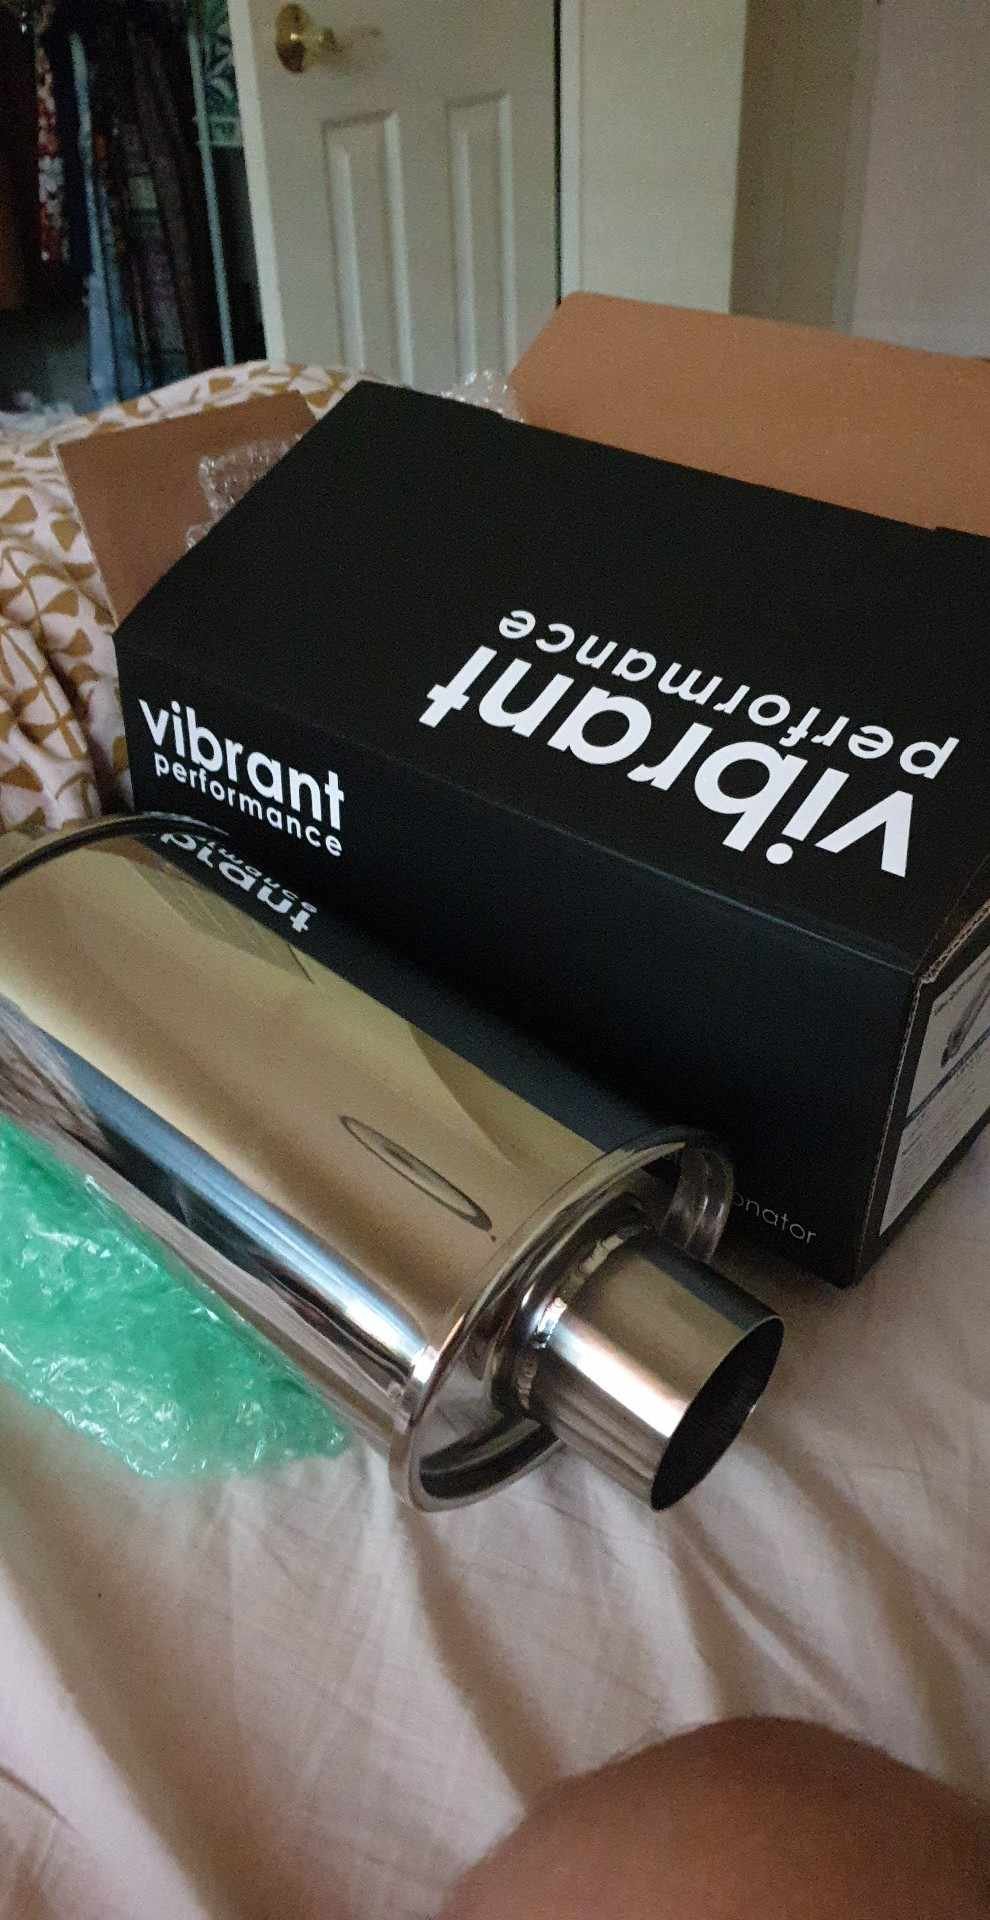
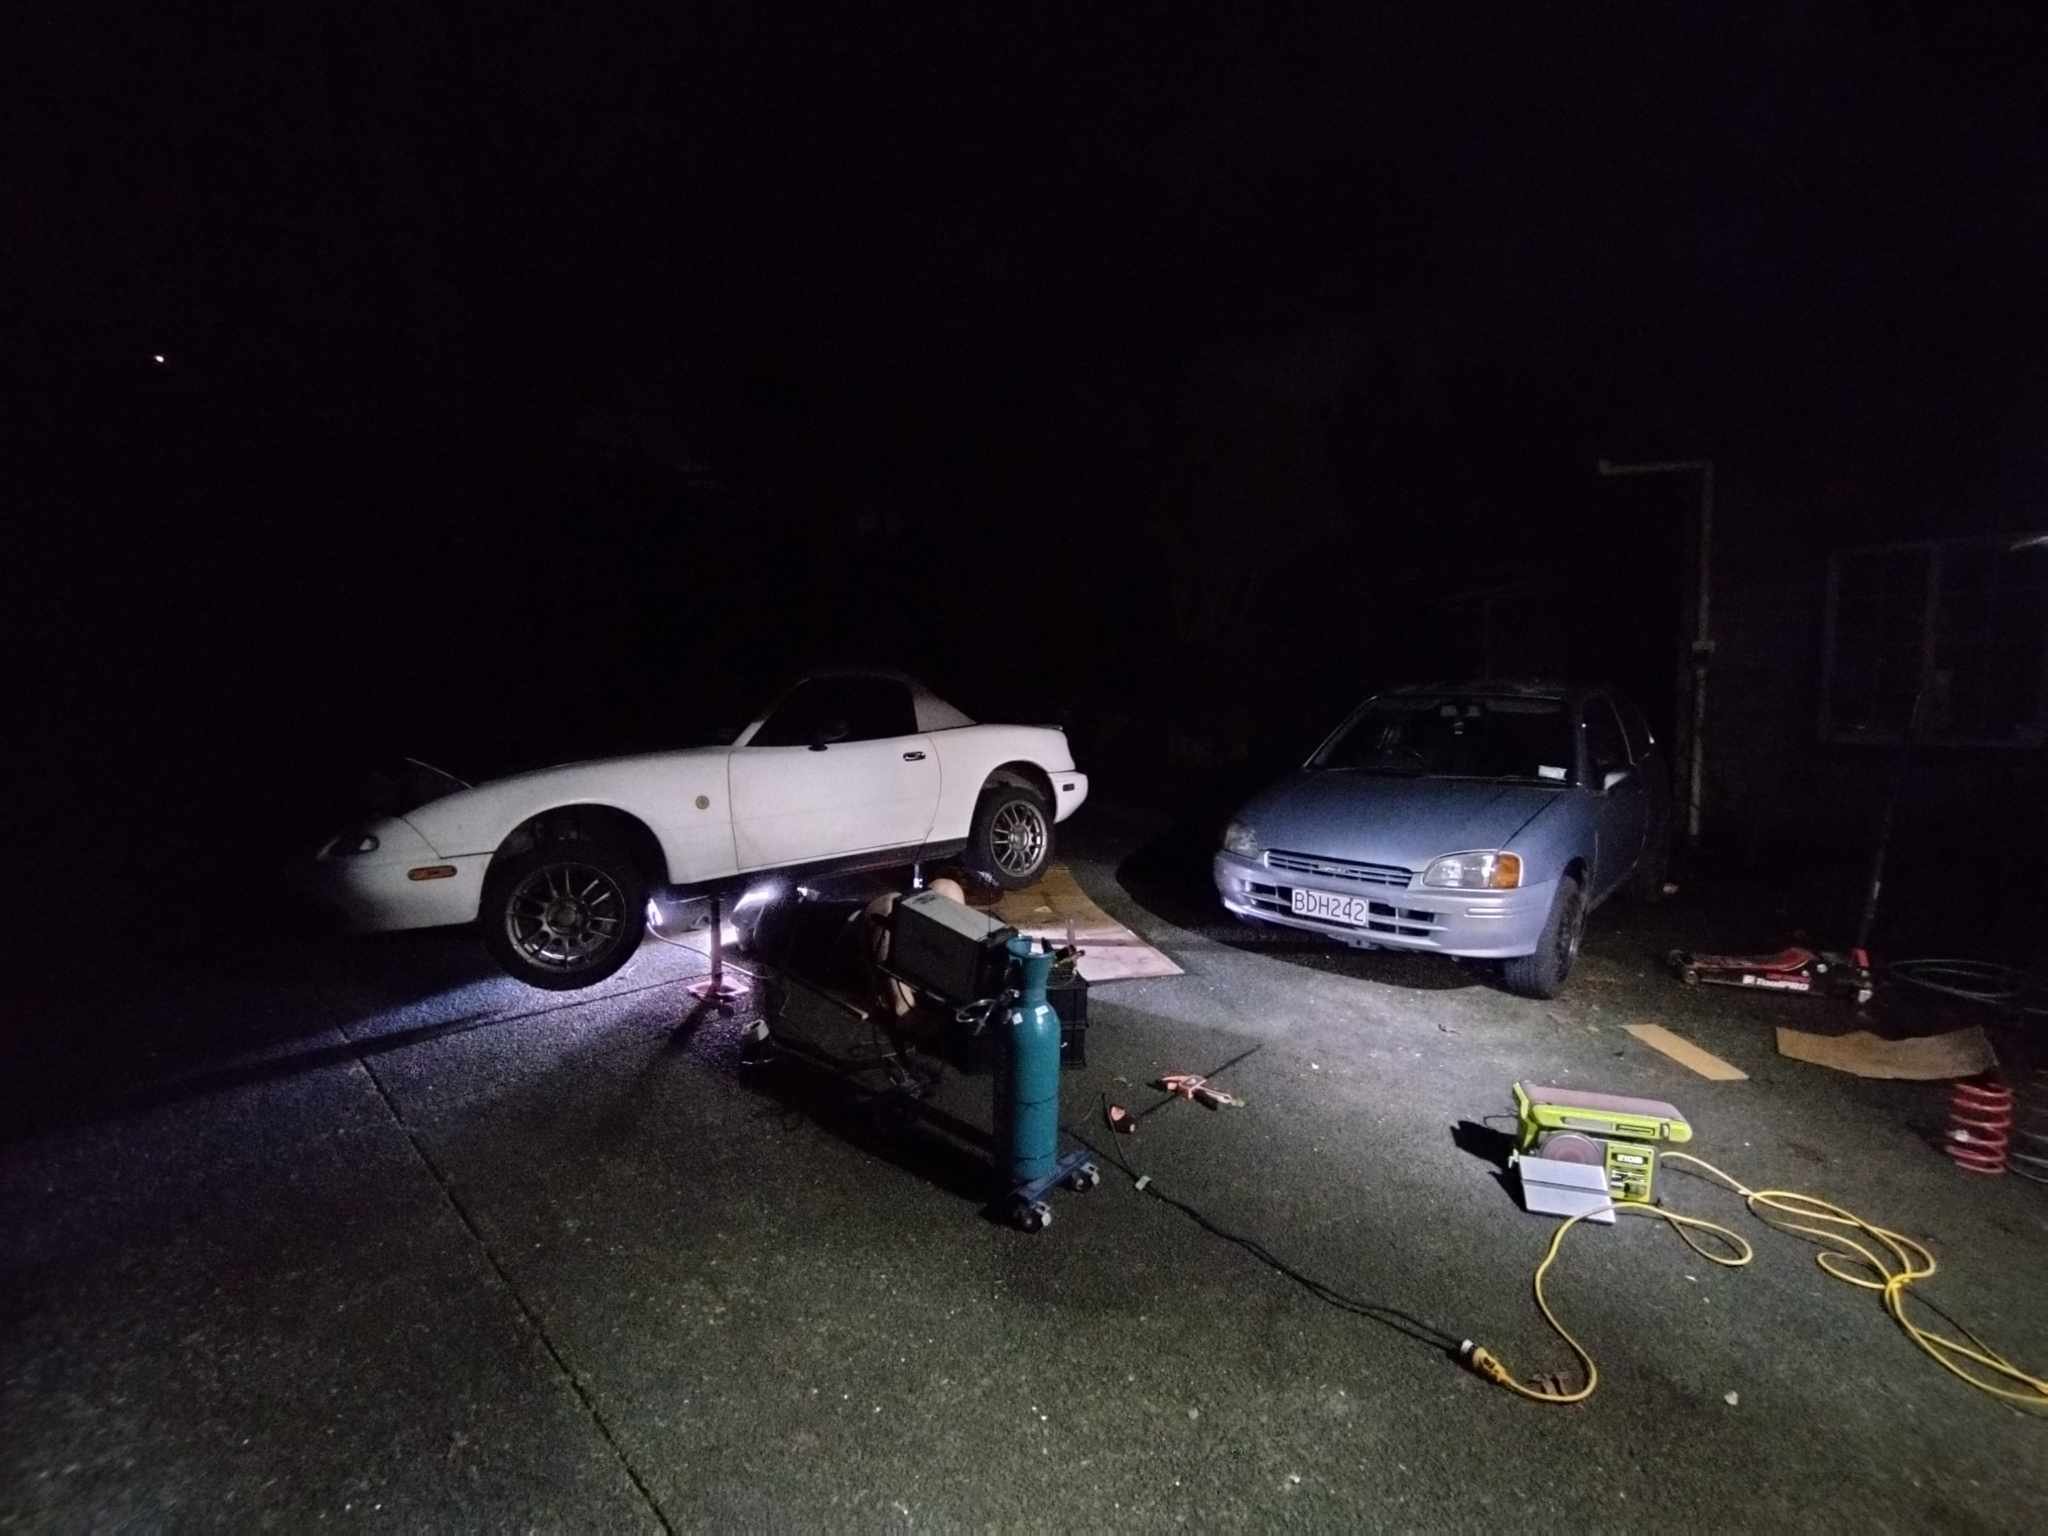
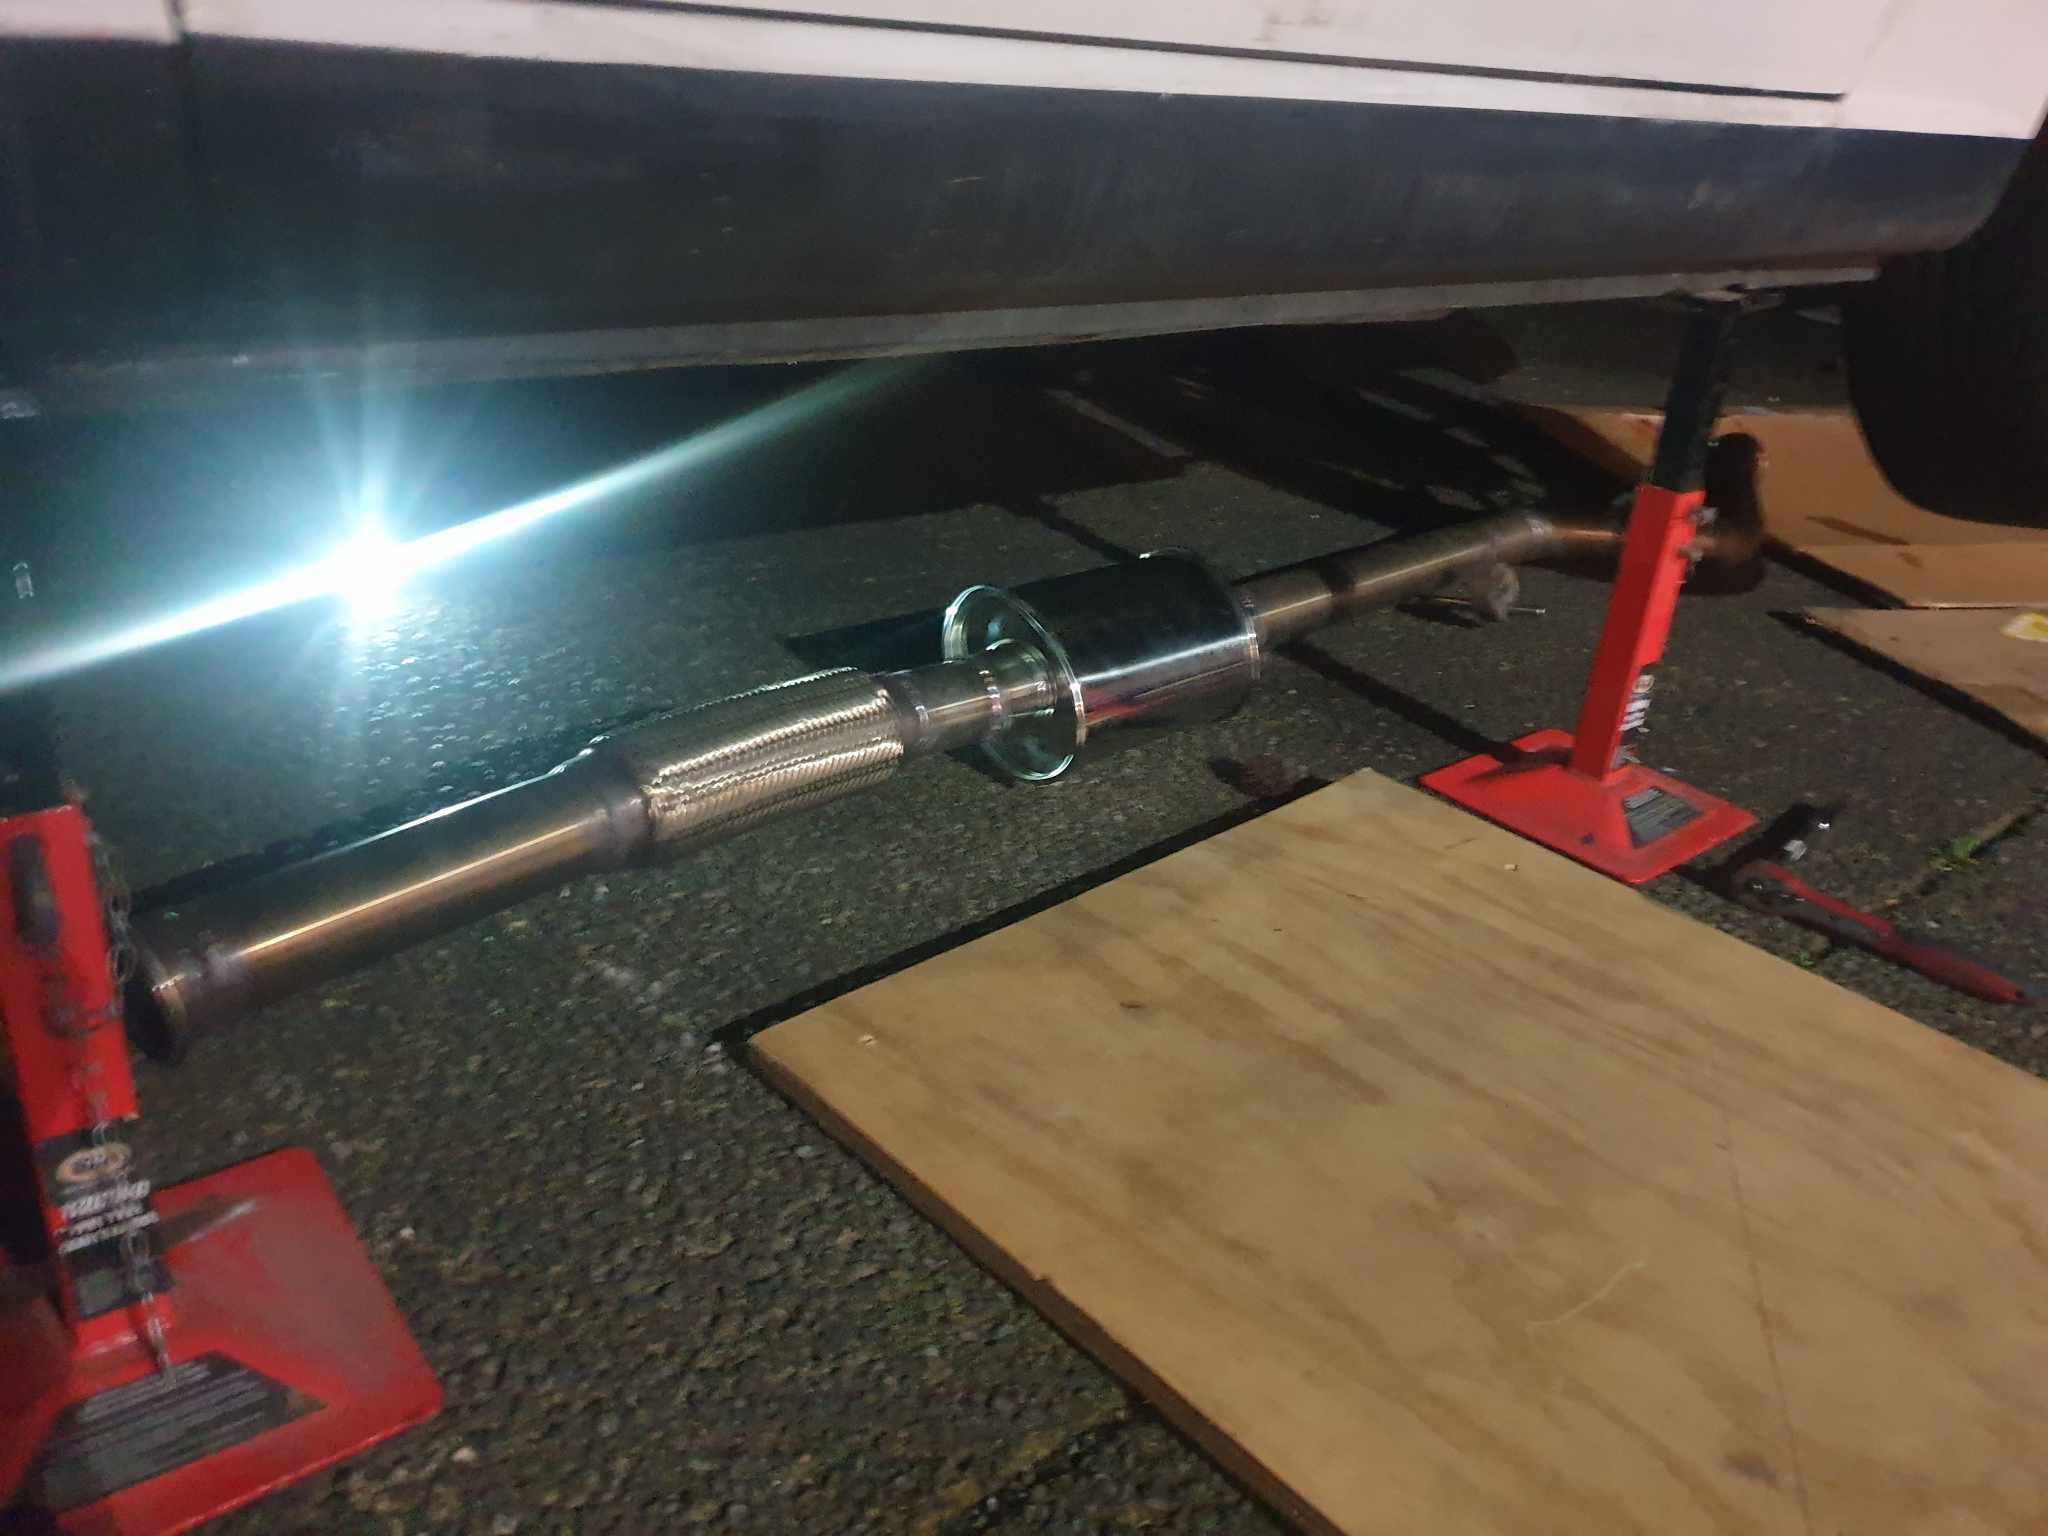
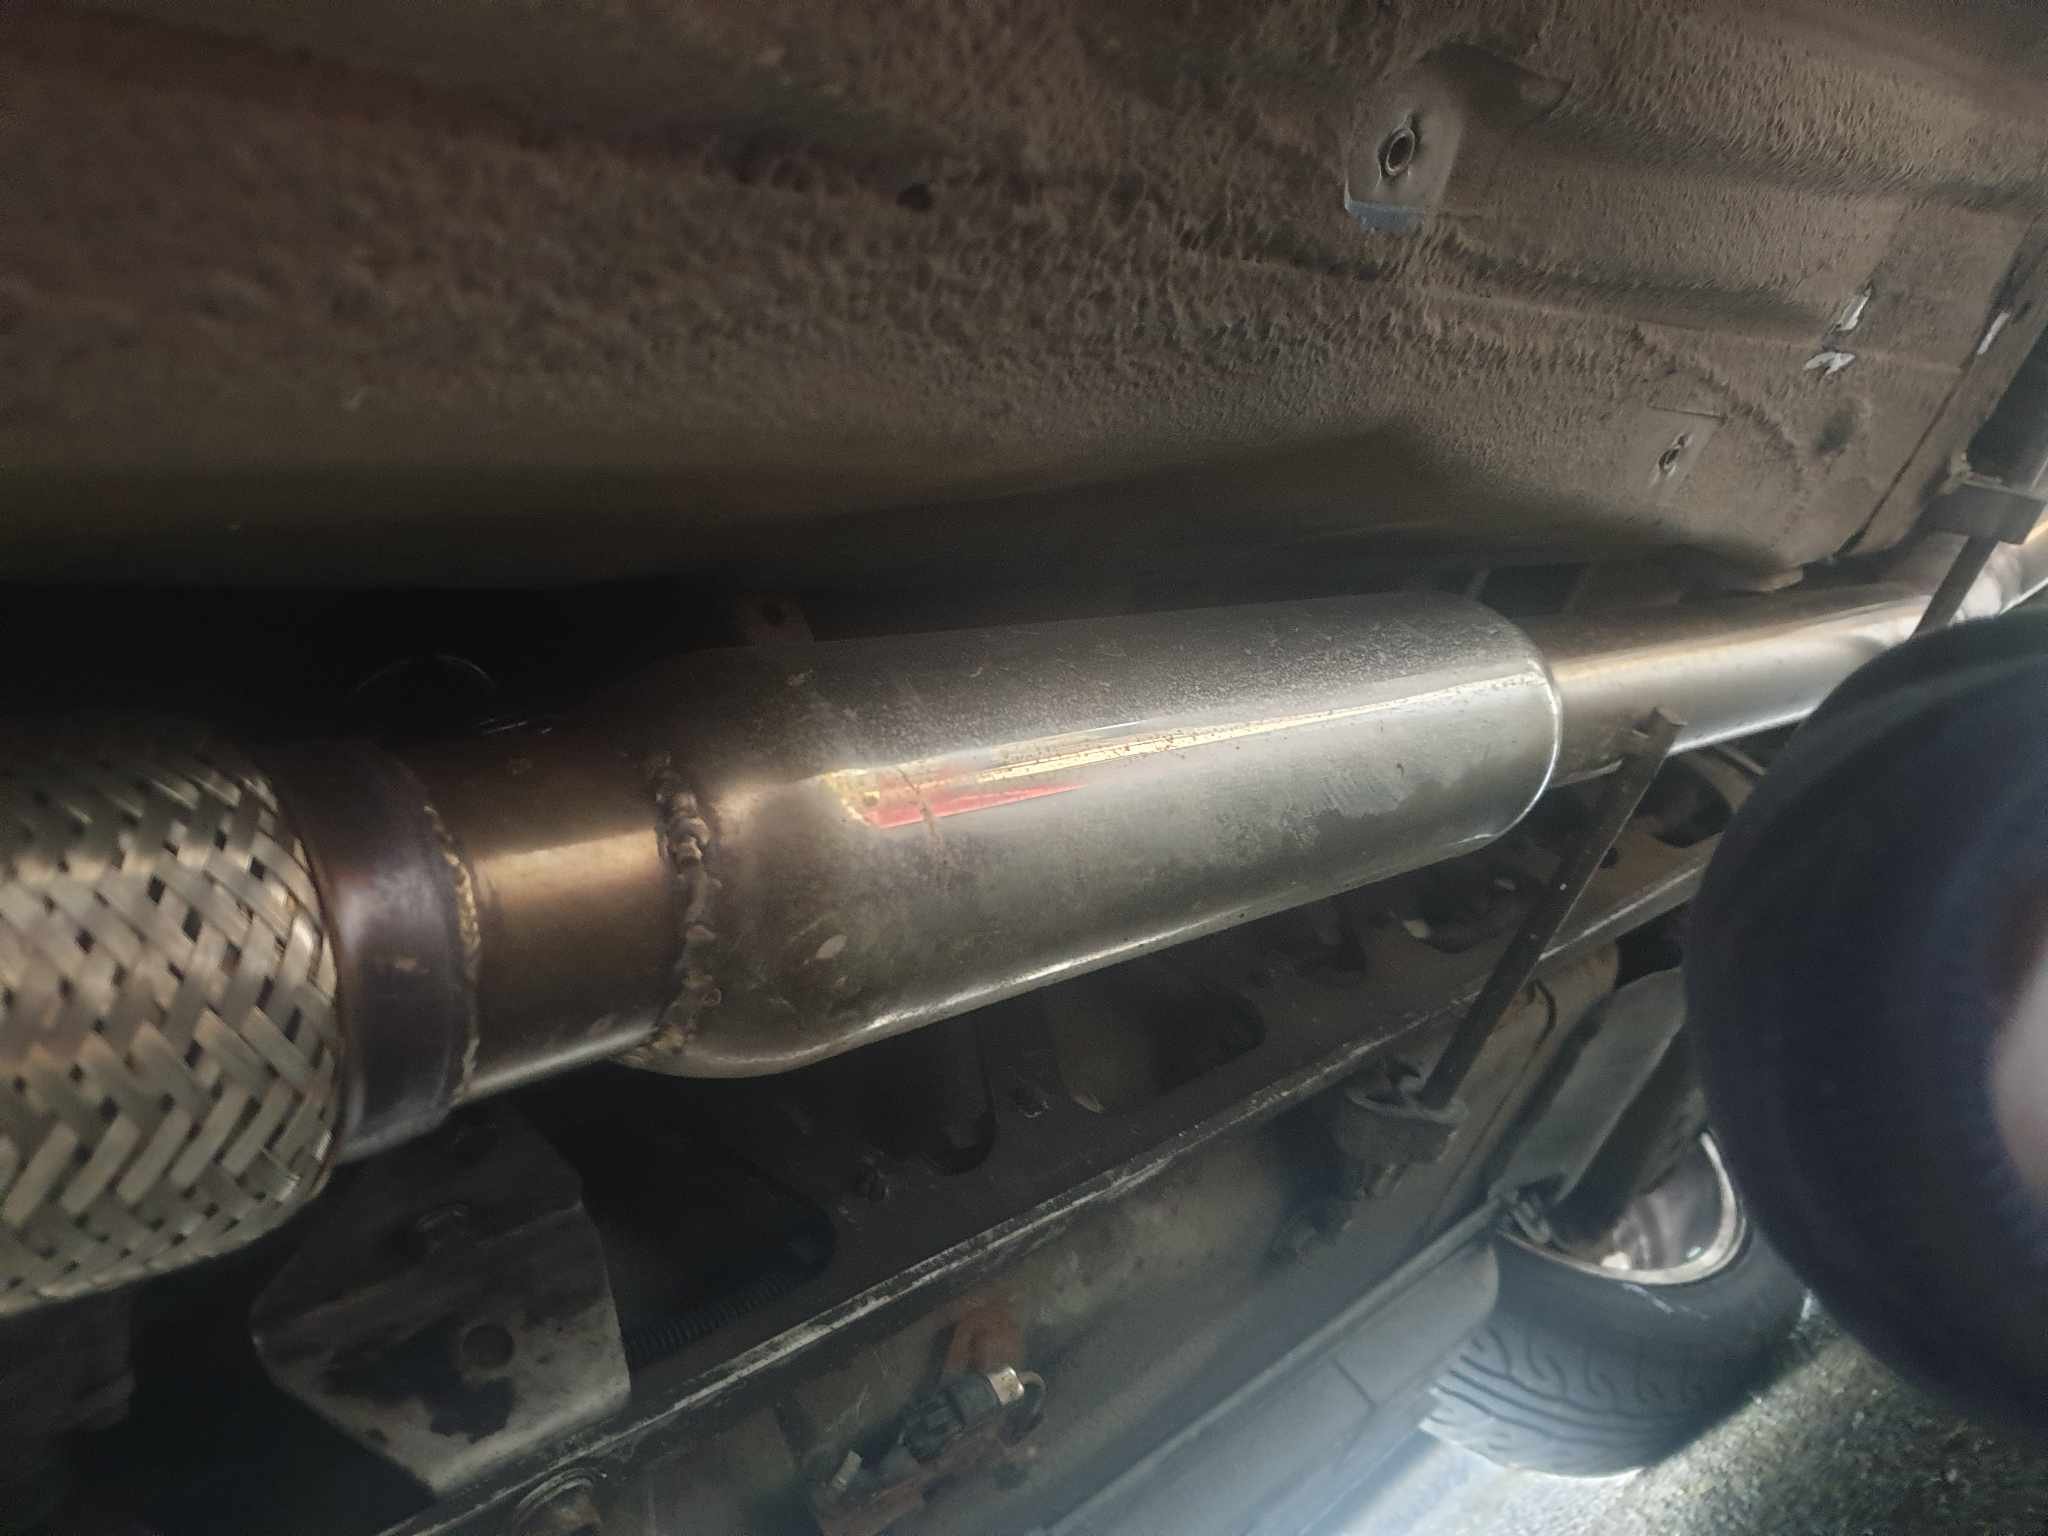
Alright Friday night shenanigans. Im making the drive to Tauranga on Sunday and it's time to remove the drone and rasp from my exhaust. Previously I had the absolute cheapest stainless resonator I could find but I splurged for a Vibrant Ultra Quiet 2.5" resonator to replace that. I ordered it late last night, arrived today and I was very happy (jump scare face reveal included). And yeah. The money shot: Some late night welding: And the old resonator: New one welded on: And the end result... Well it's not ultra quiet, but it has none of the old farty rasp that my exhaust used to have. Finally an NA setup that doesn't sound like trash! I really like the new sound. Growl and bite but no bark. Ready for a good weekend! Oh and I got a wof, with a few minor suggestions...
-
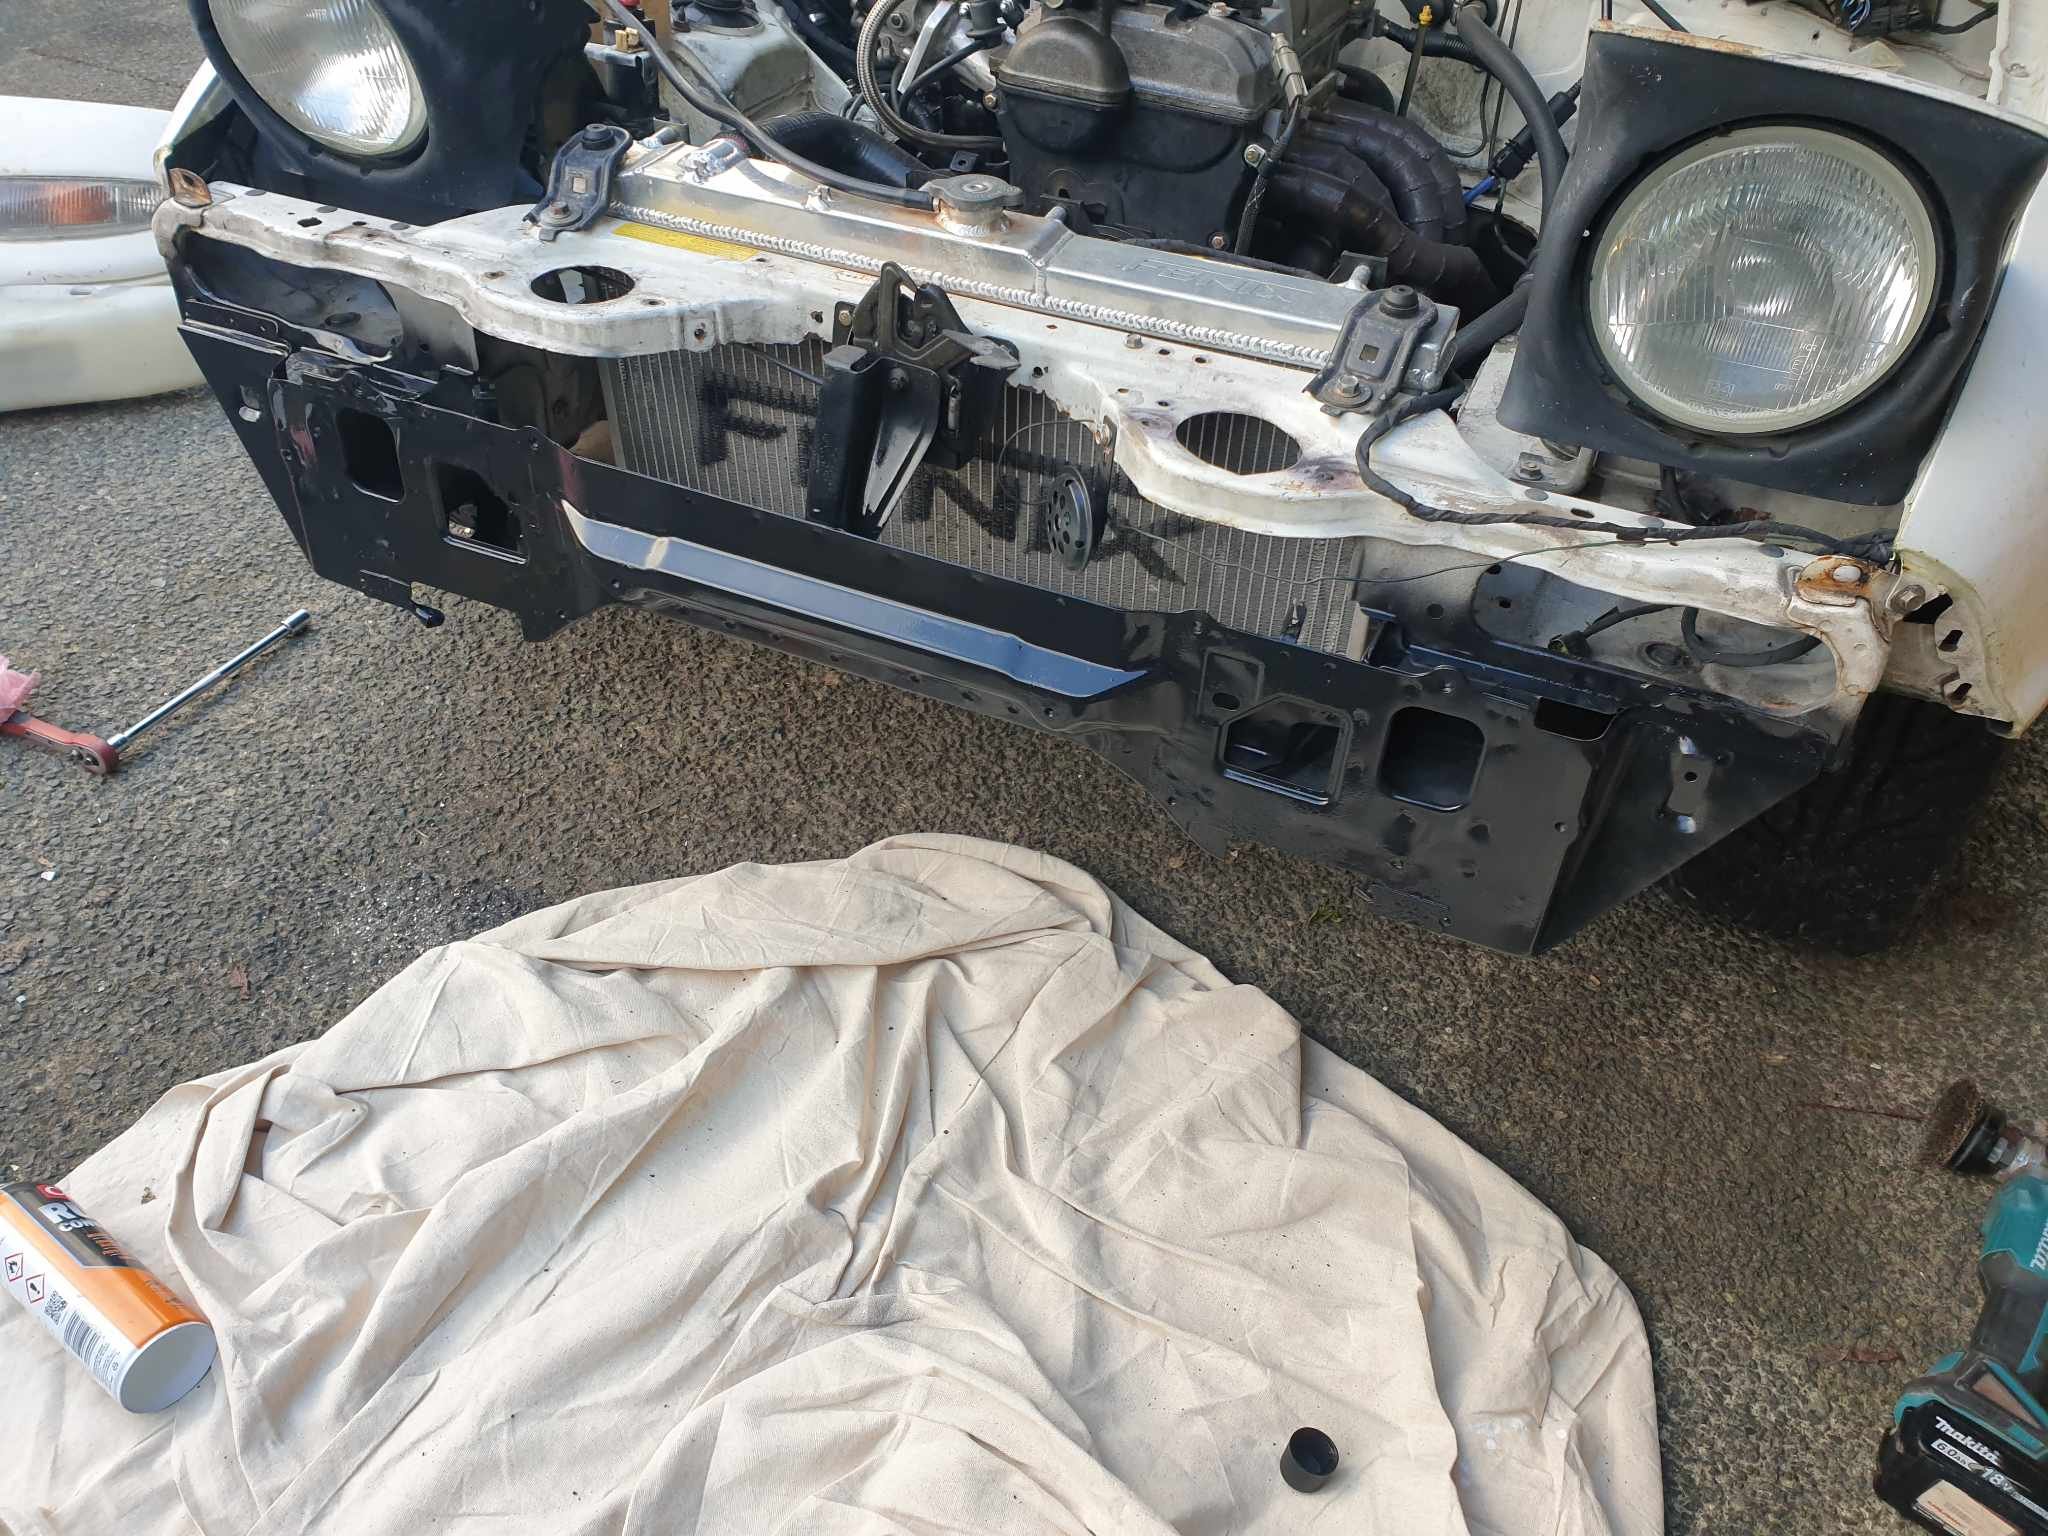
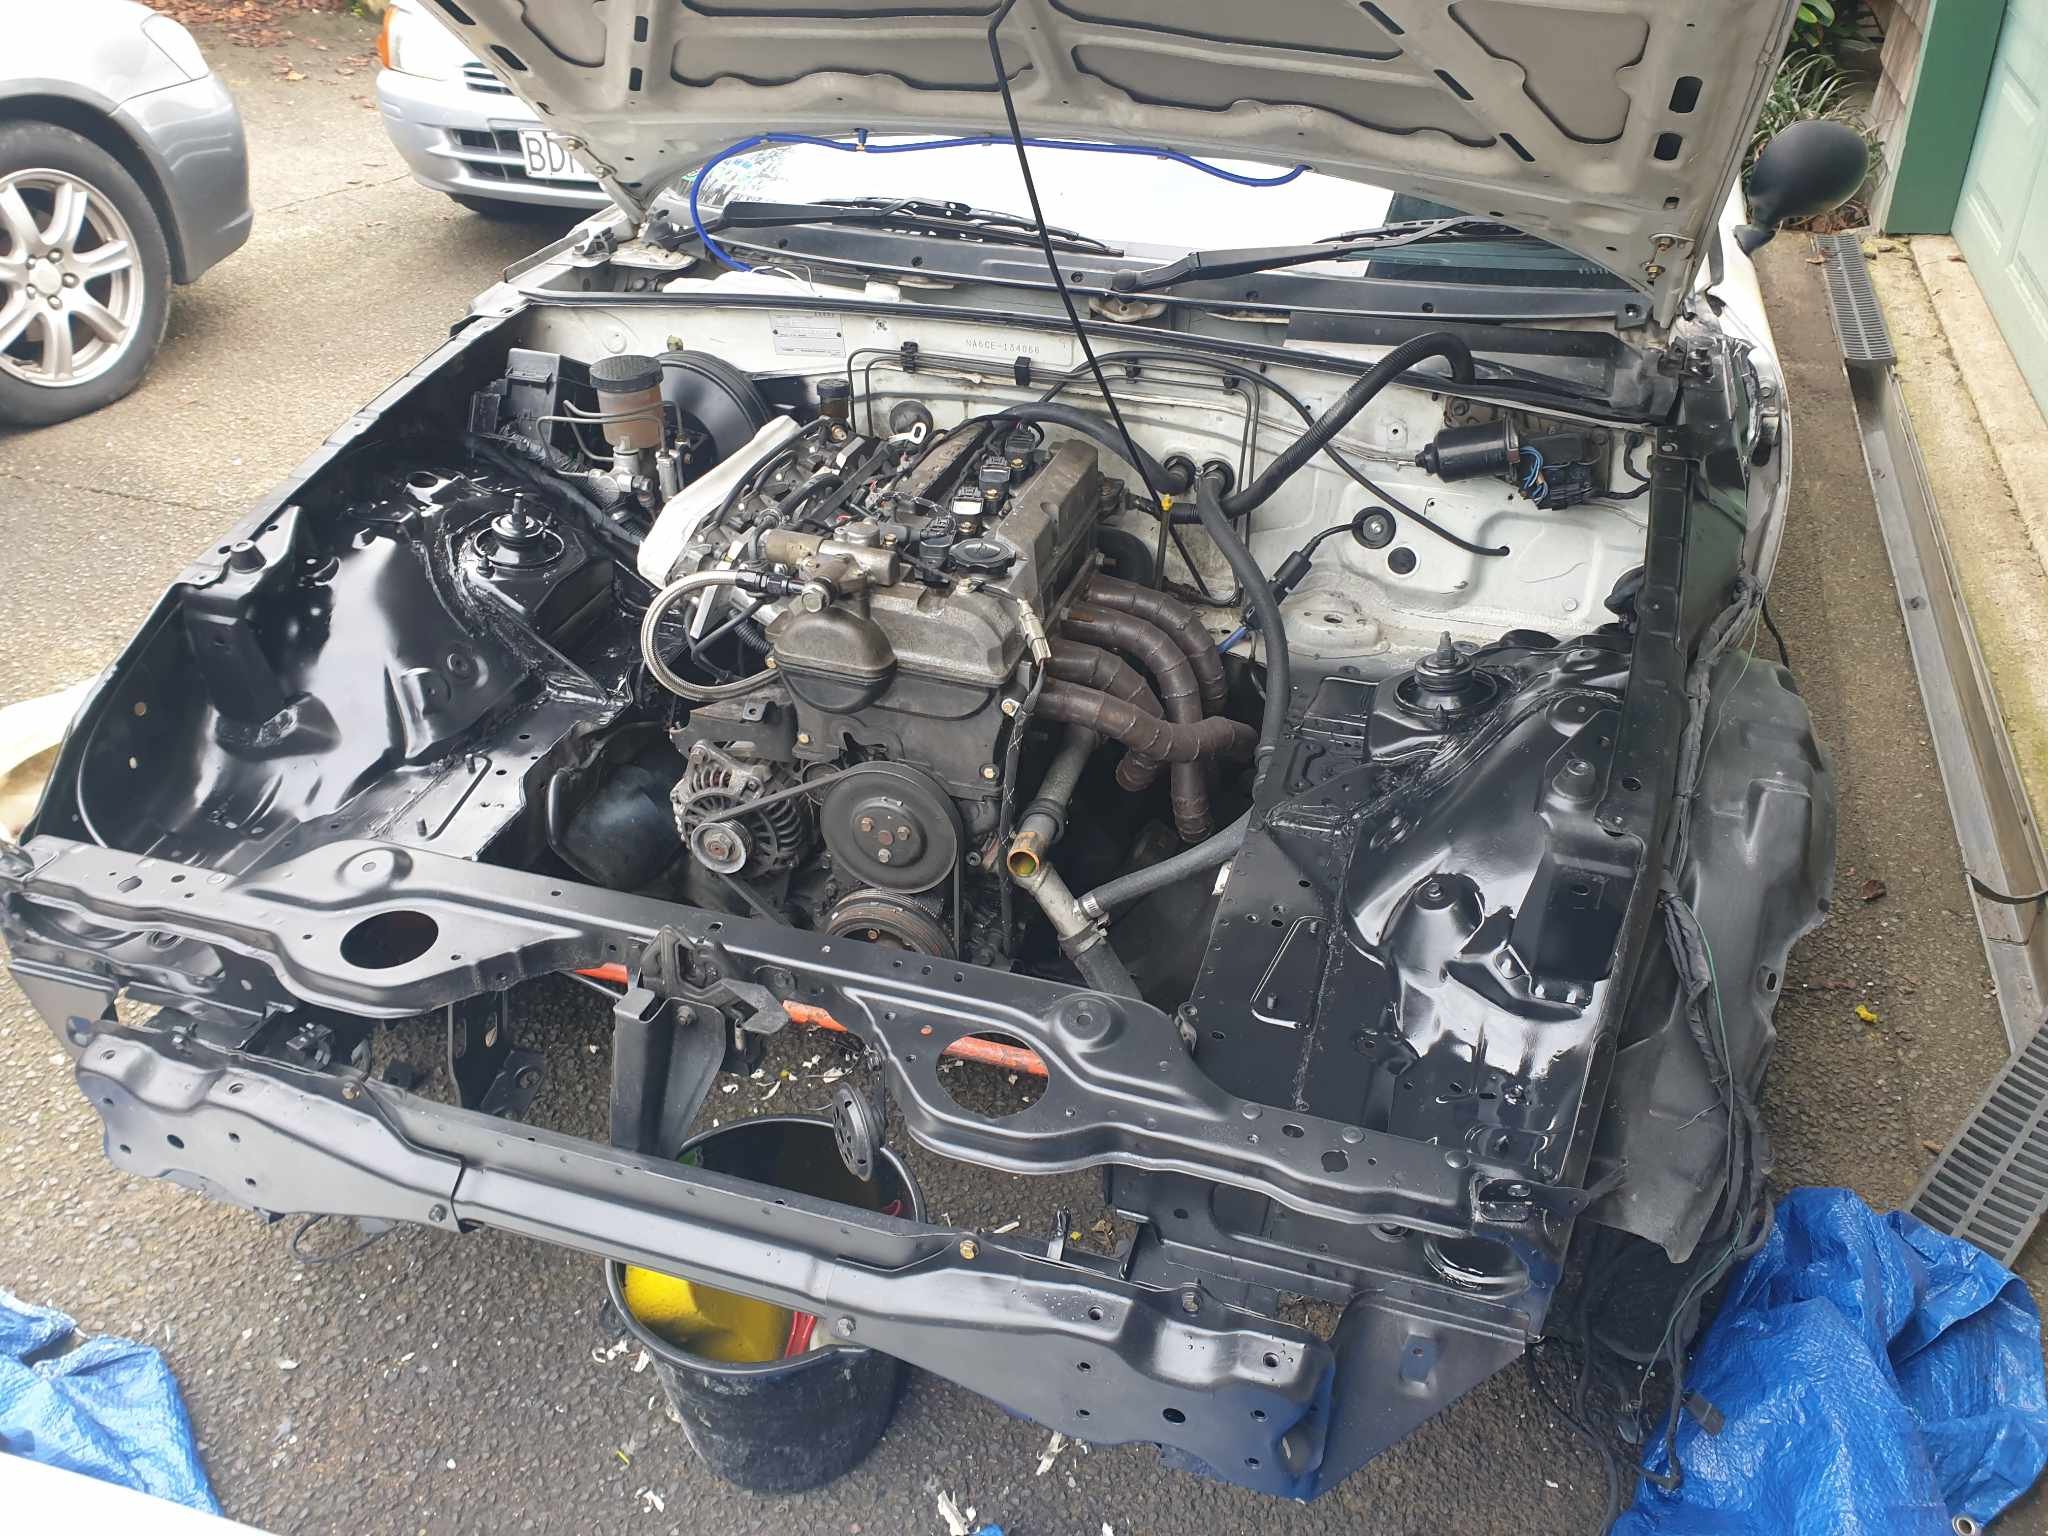
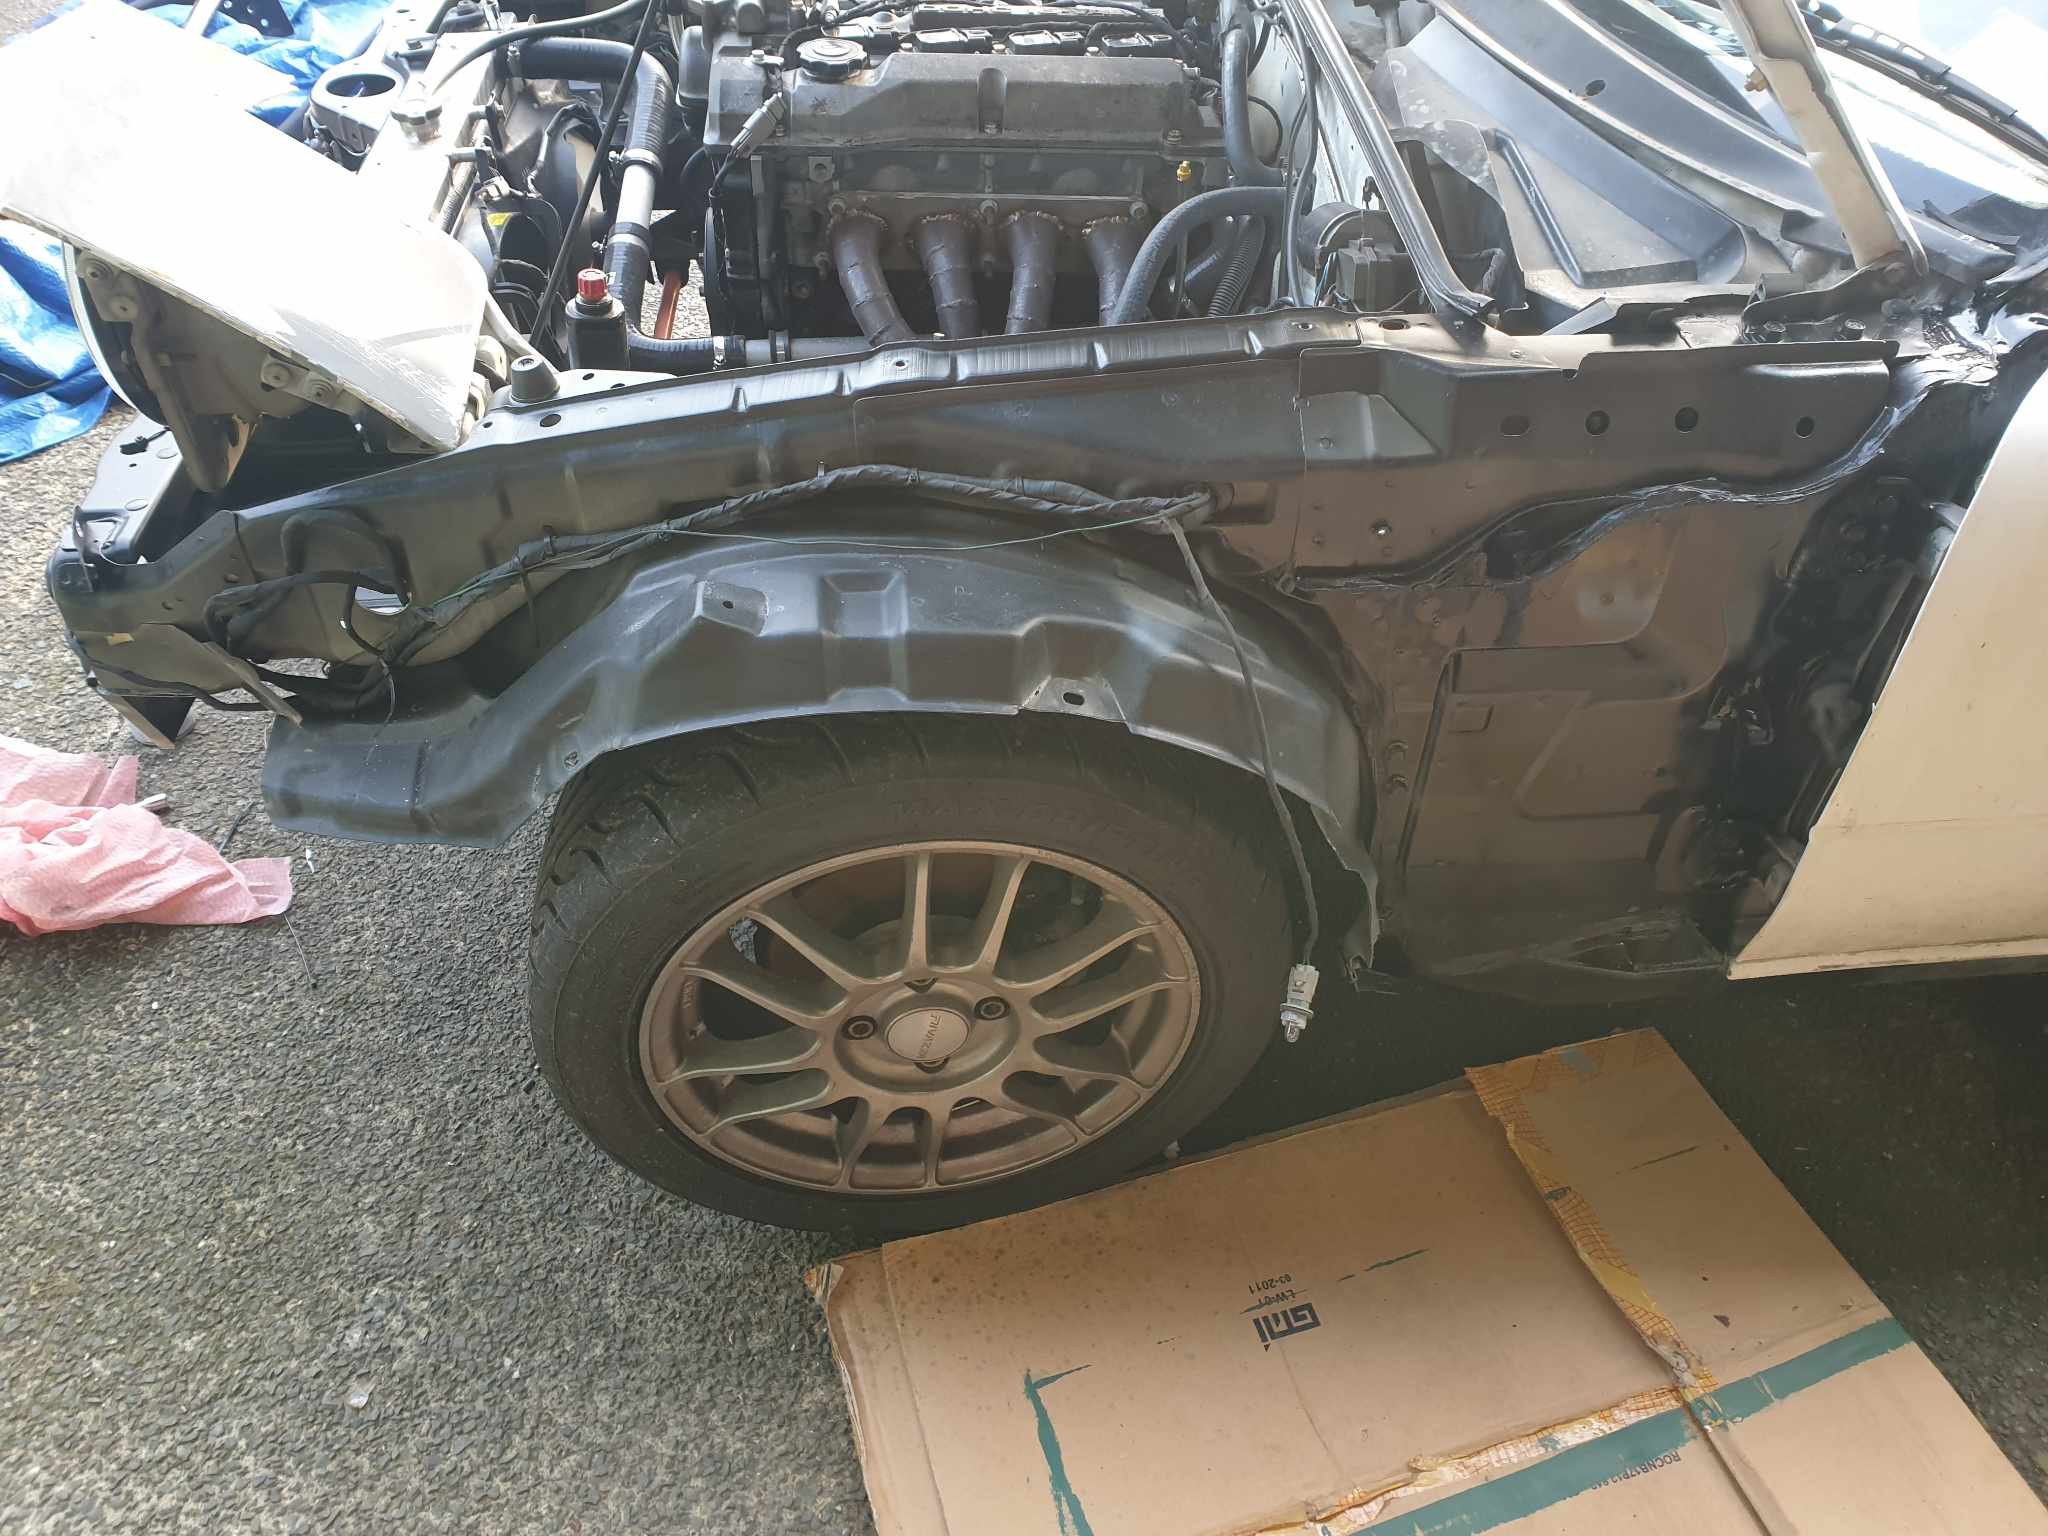
The suggestion given to me last wof was to tidy the front bumper mount and tow hook points. I did that, plus tidied the front sills and most of the engine bay. Its amazing how much the engine looks more at home in a halfway tidy engine bay! I'm also reassembling the interior and tidying up the guards and front bumper a bit before final reassembly. Should be able to take it for a shakedown soon to see how the intake behaves, then hopefully wof this week. Meet in Tauranga next weekend so I'm hoping for a pass first try... (Broke a lamp...)
-
Are you at all concerned with the "modified" section at the back? Lol
-
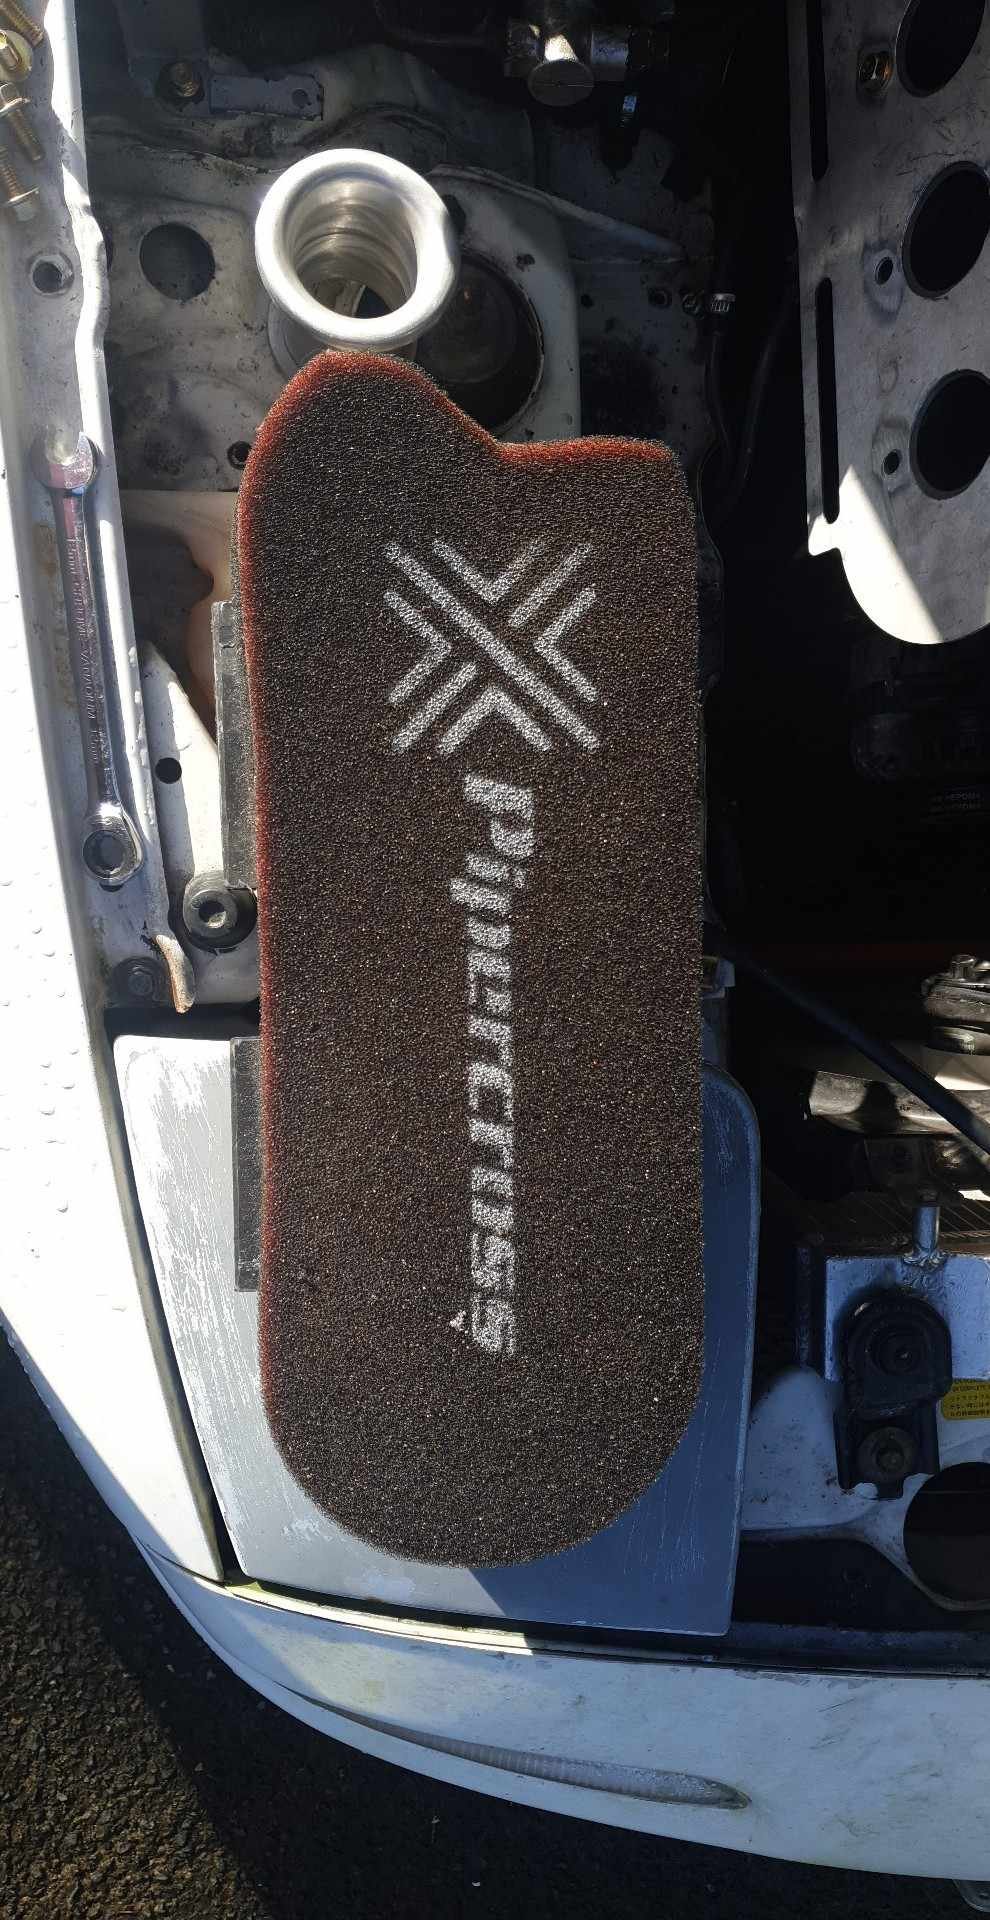
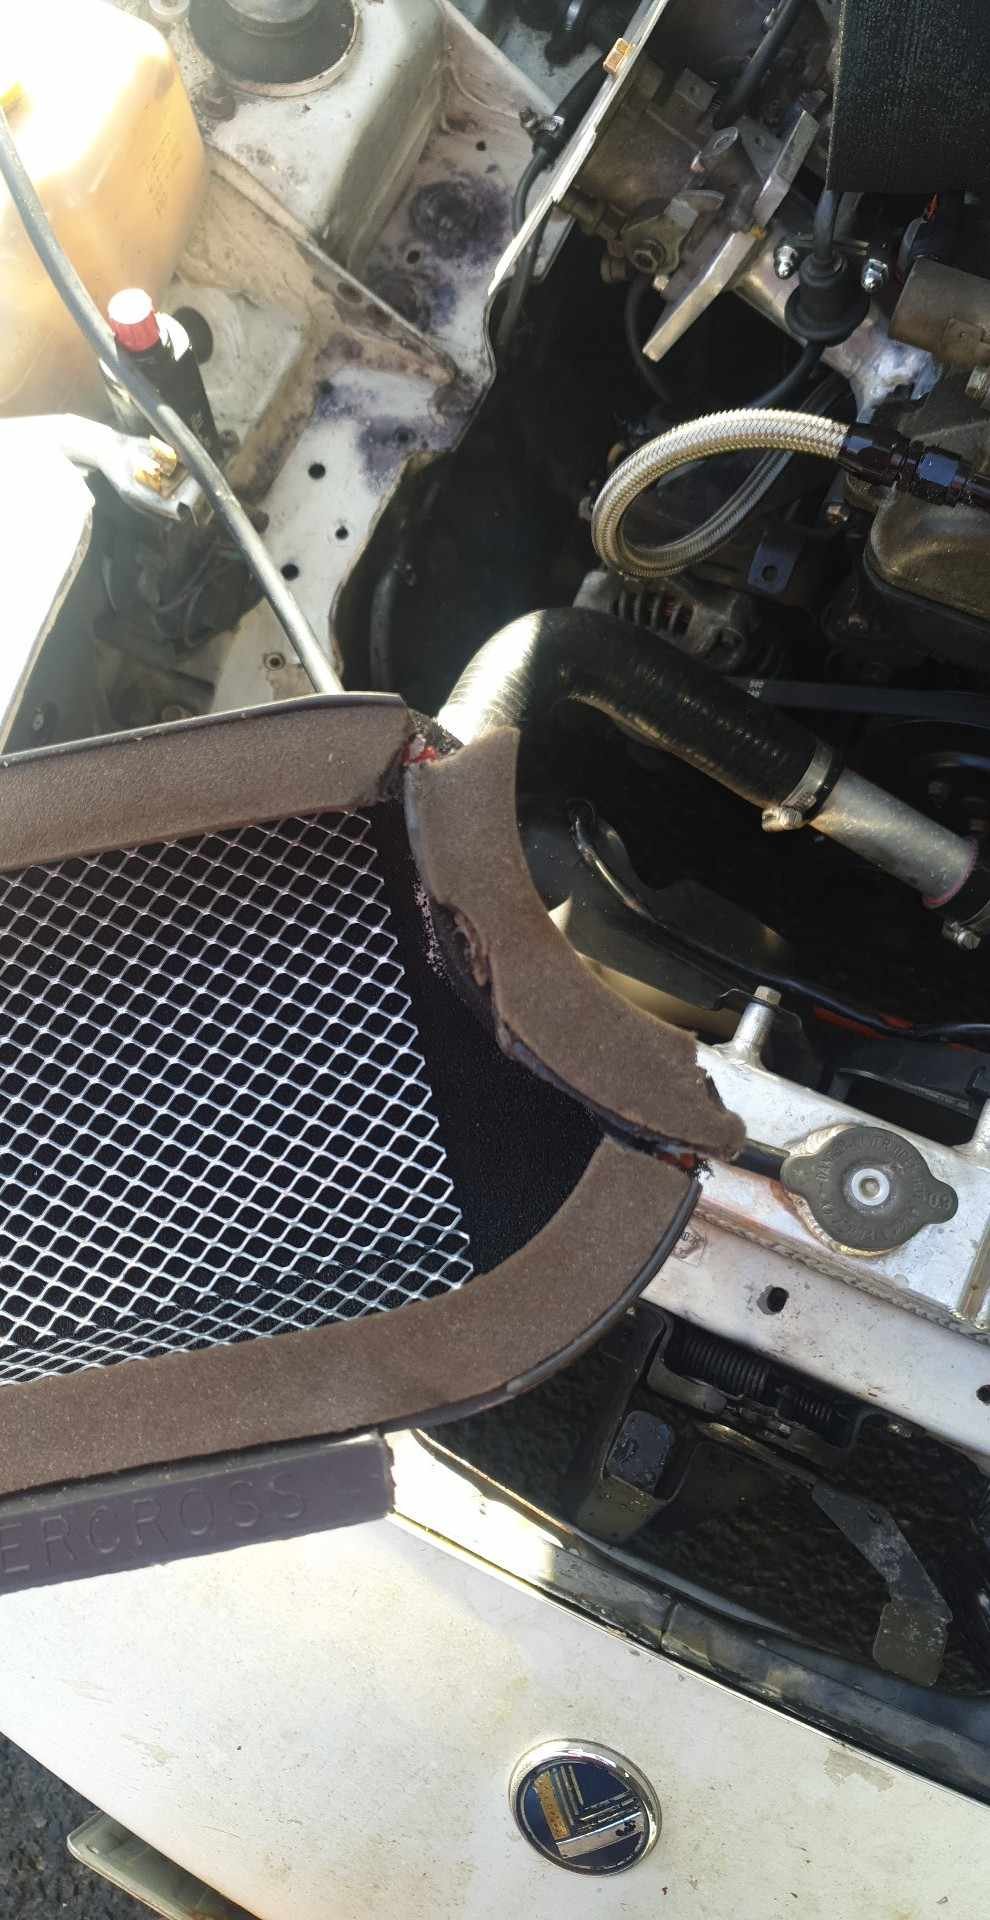
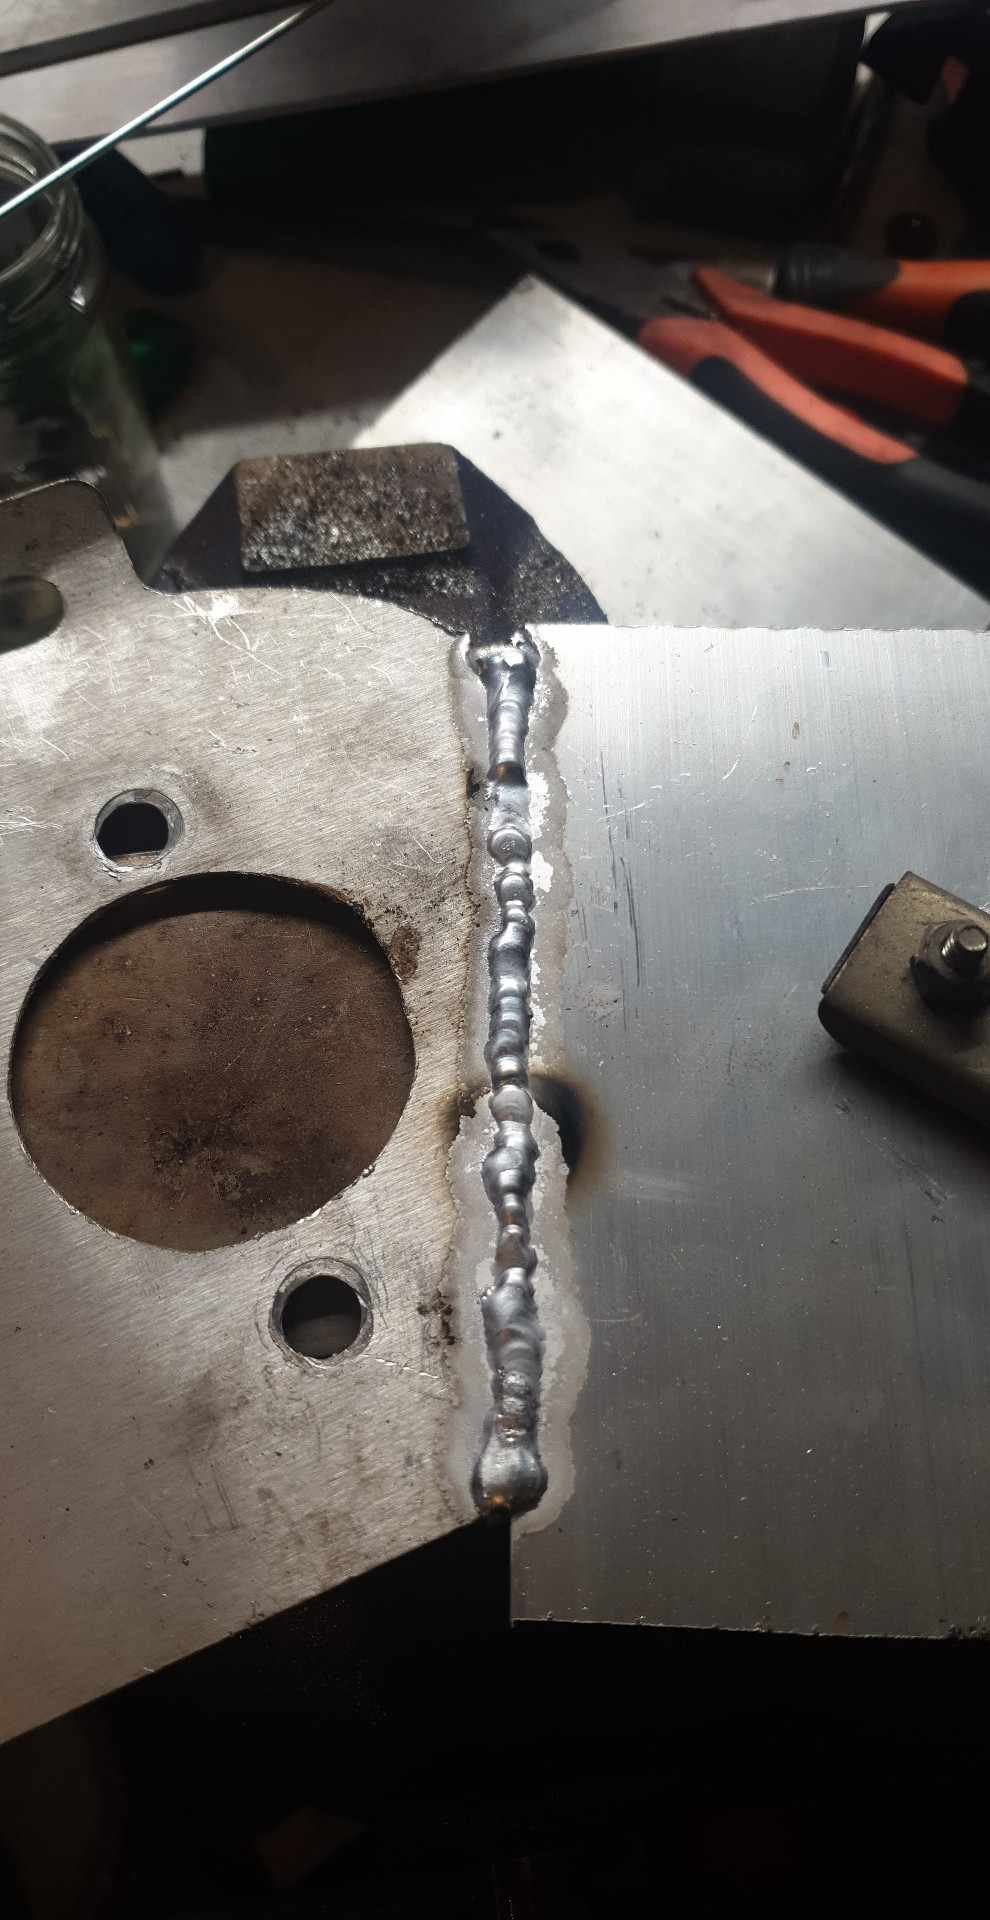
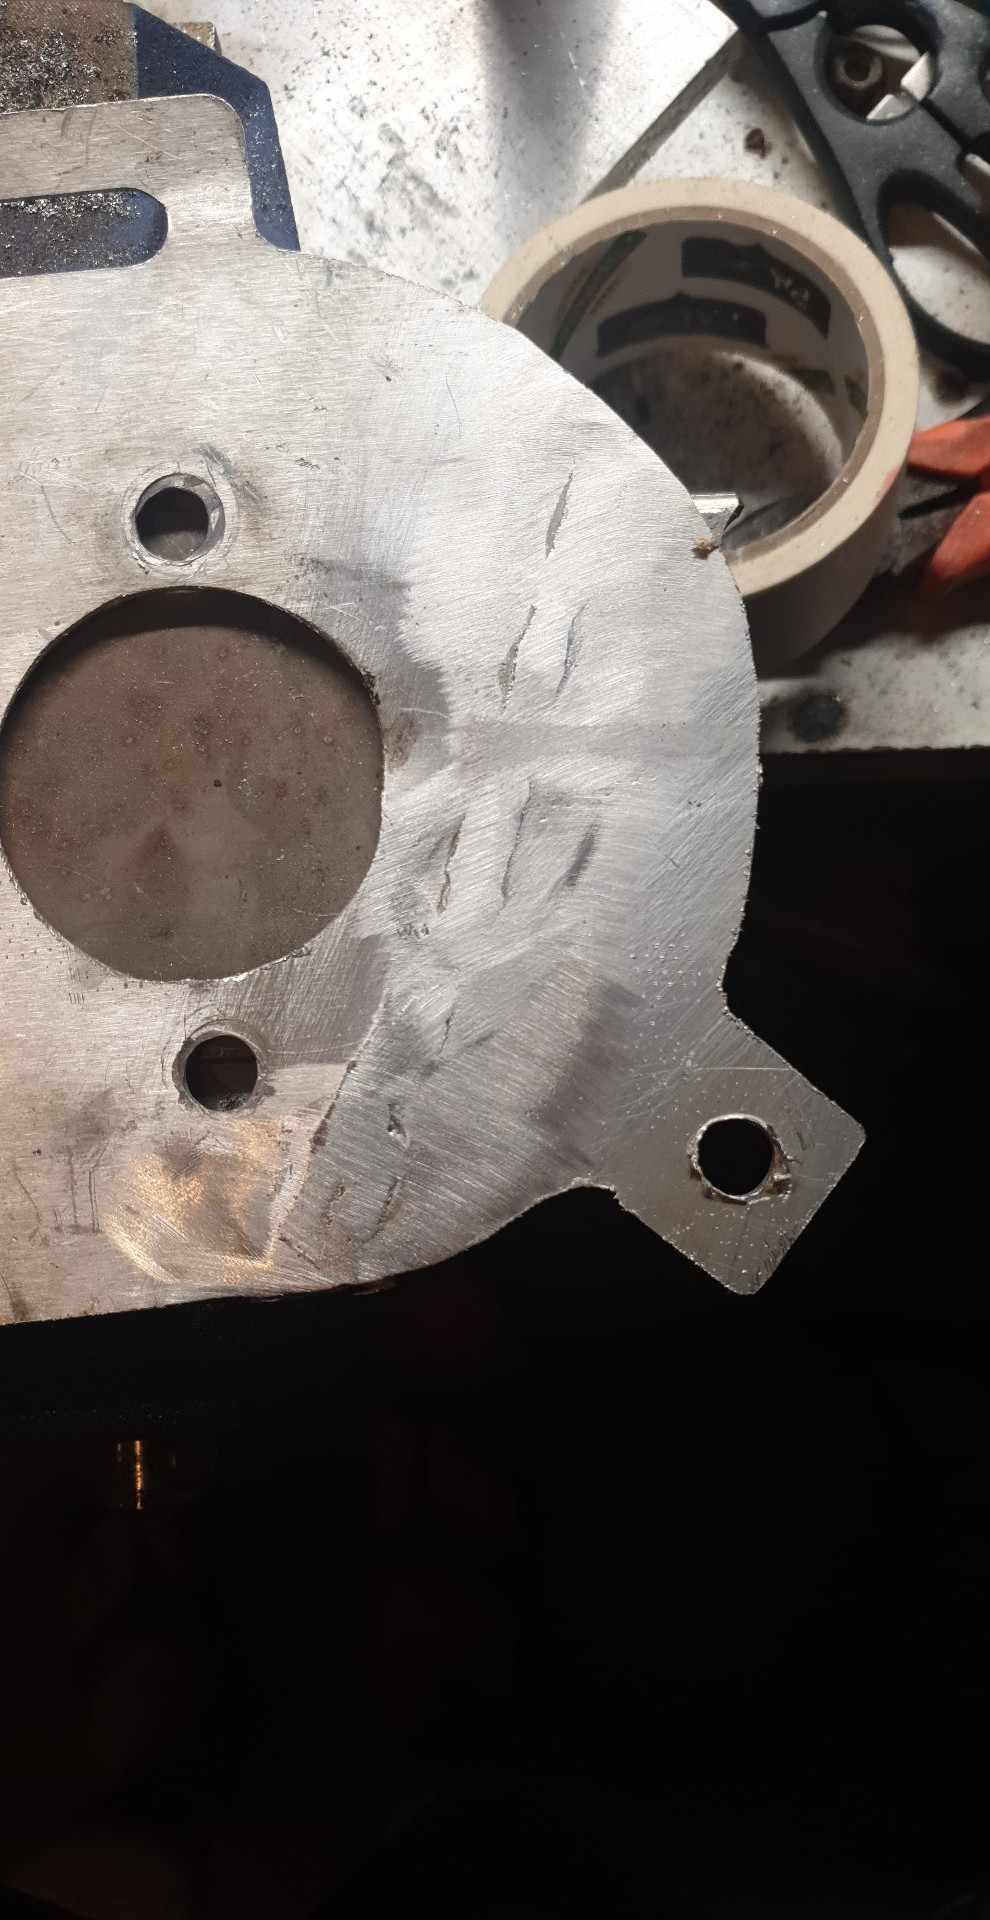
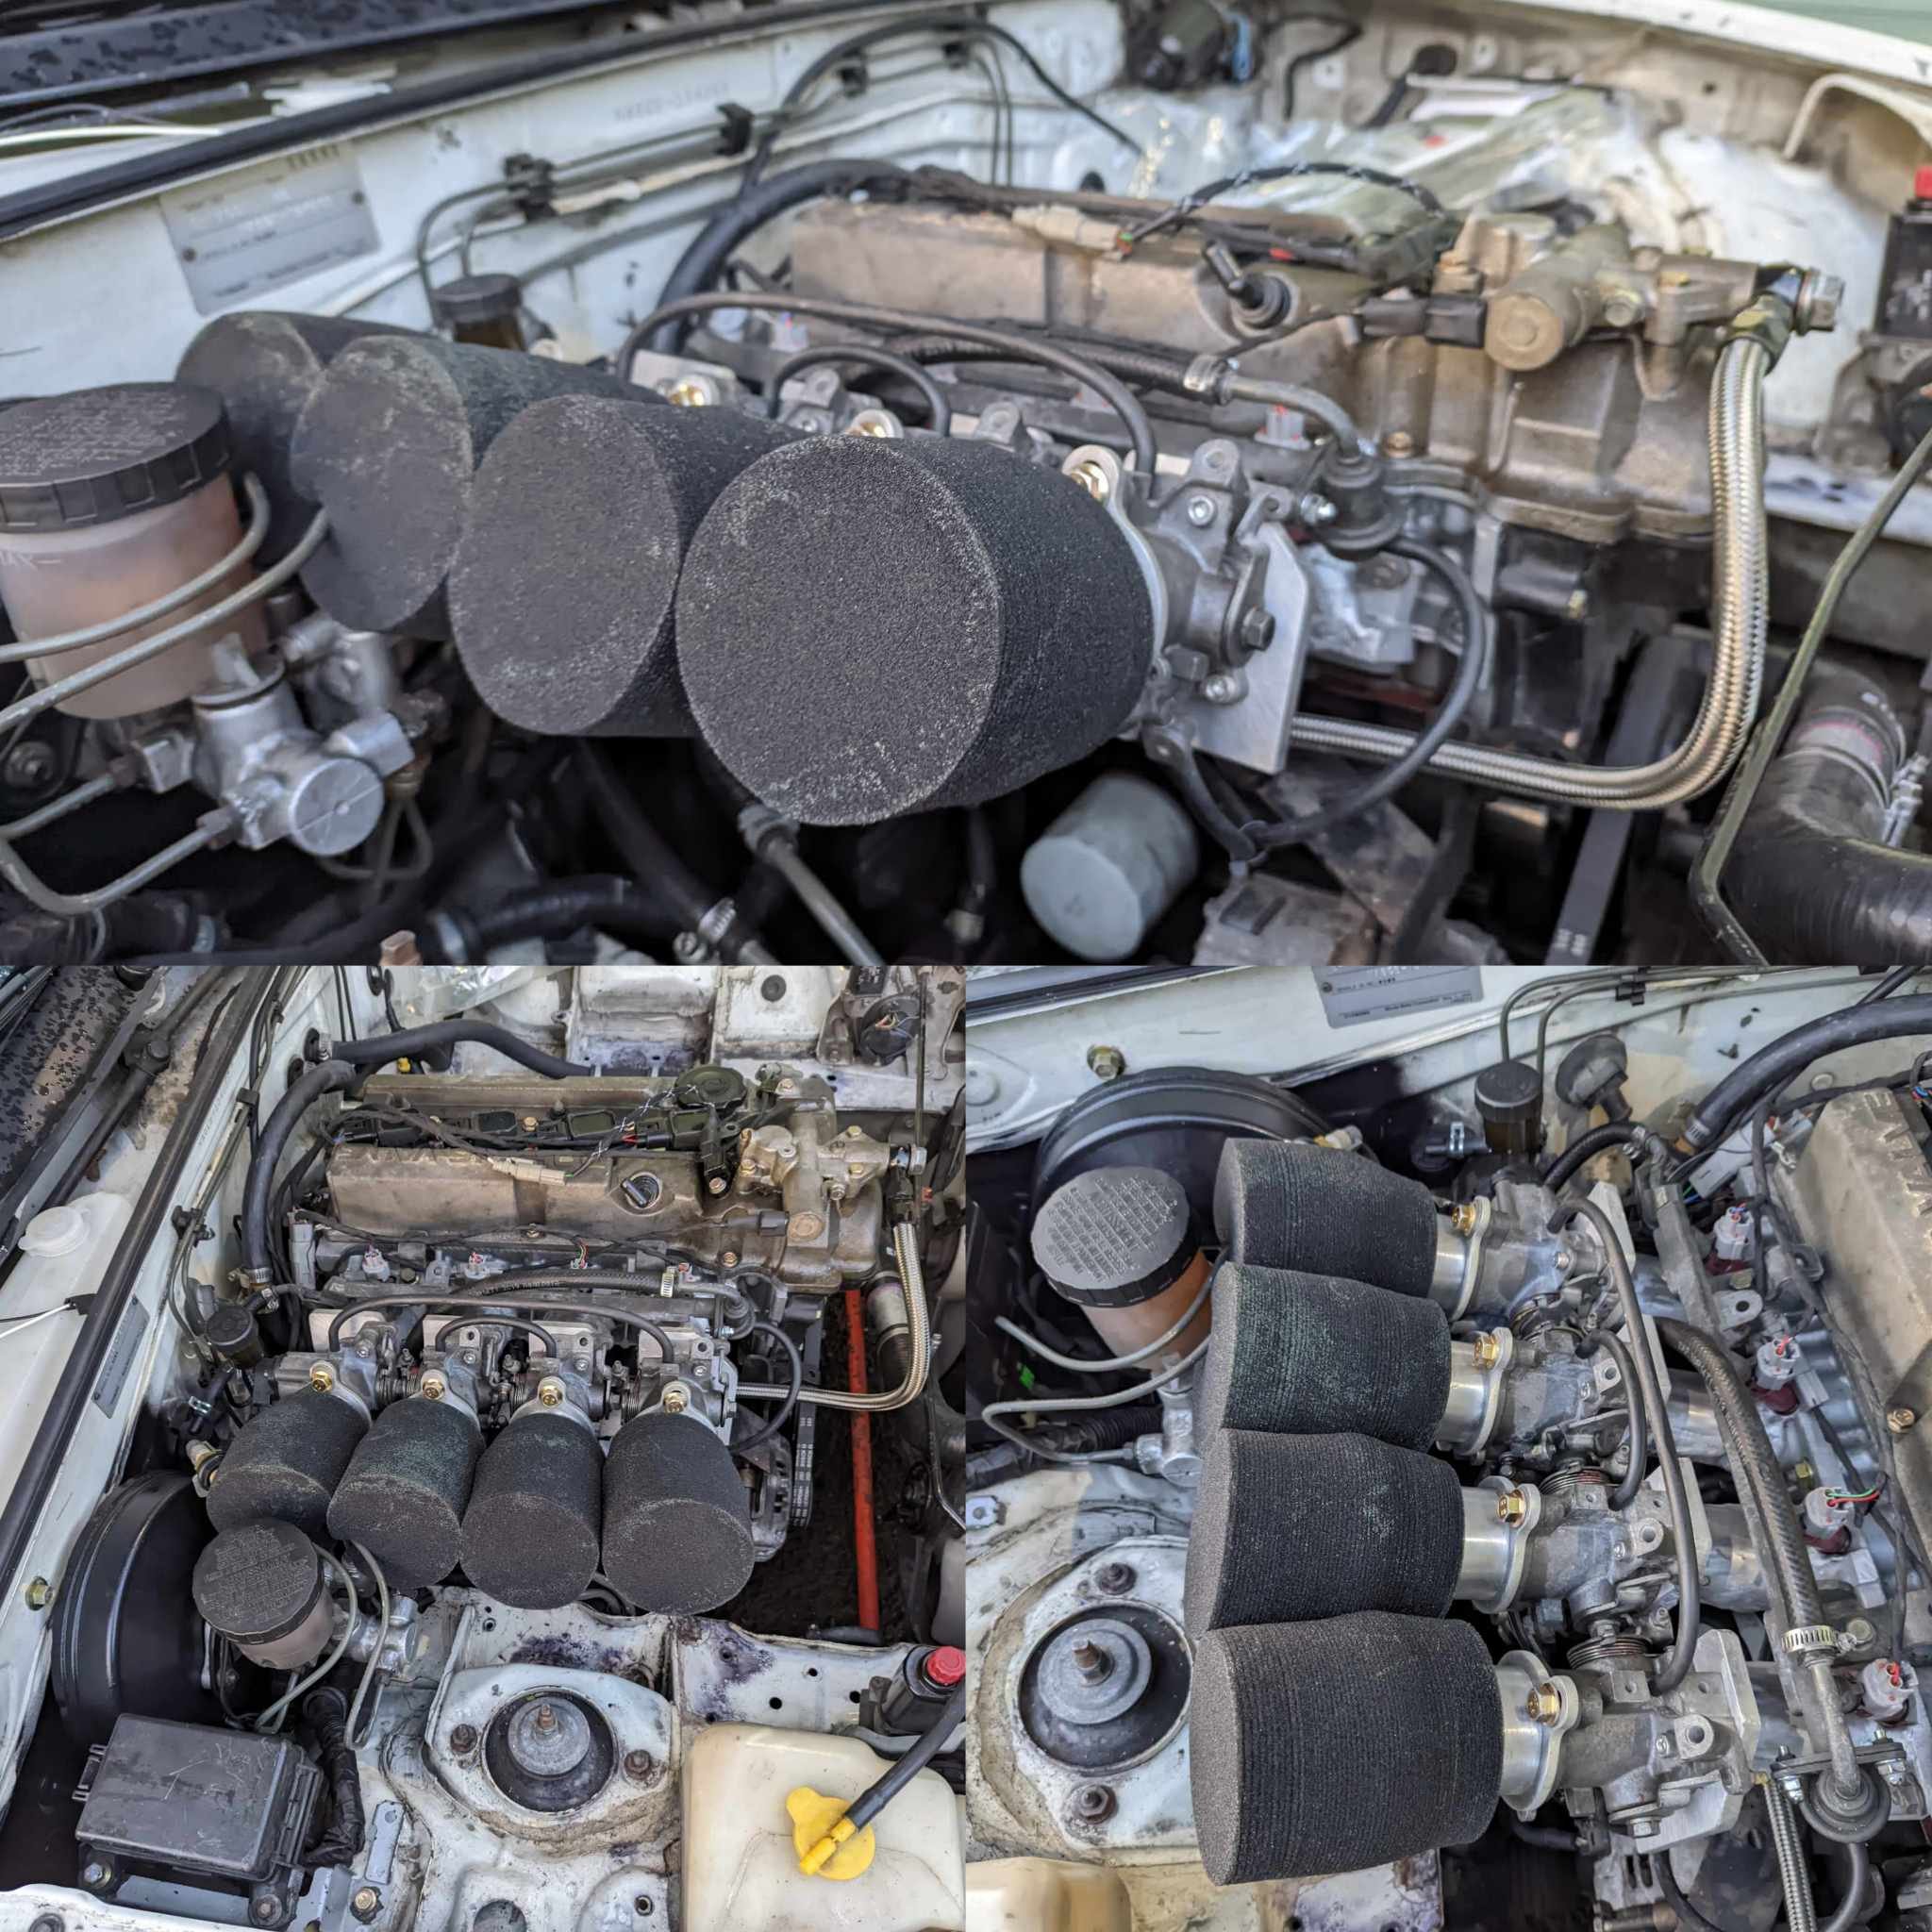
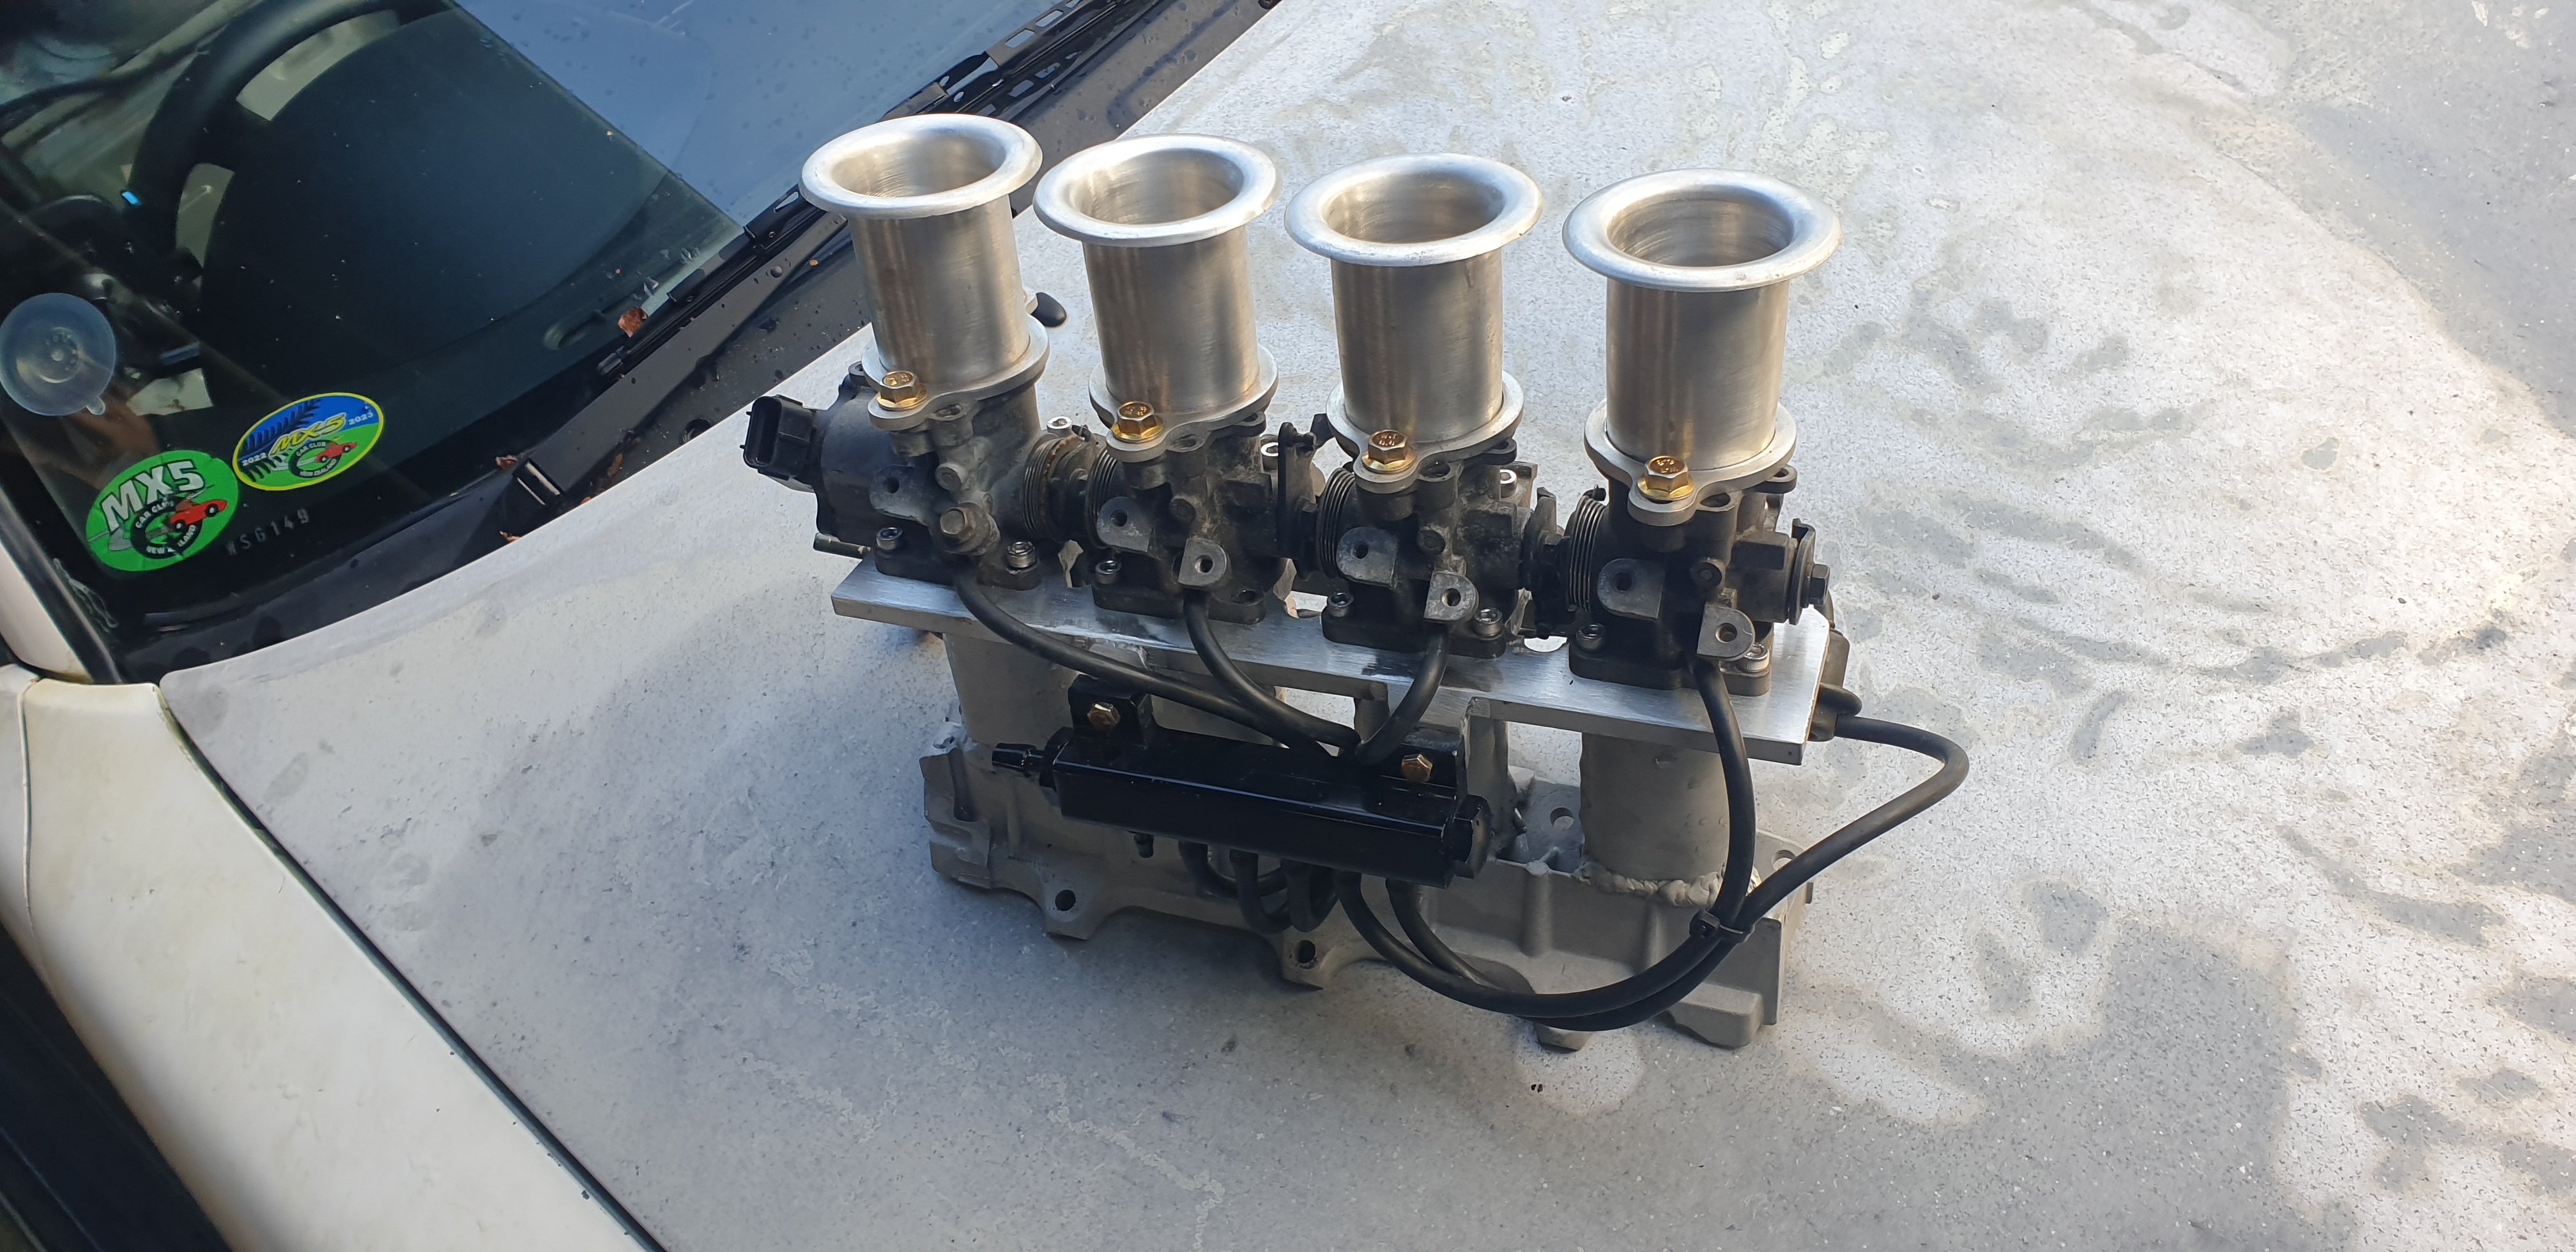
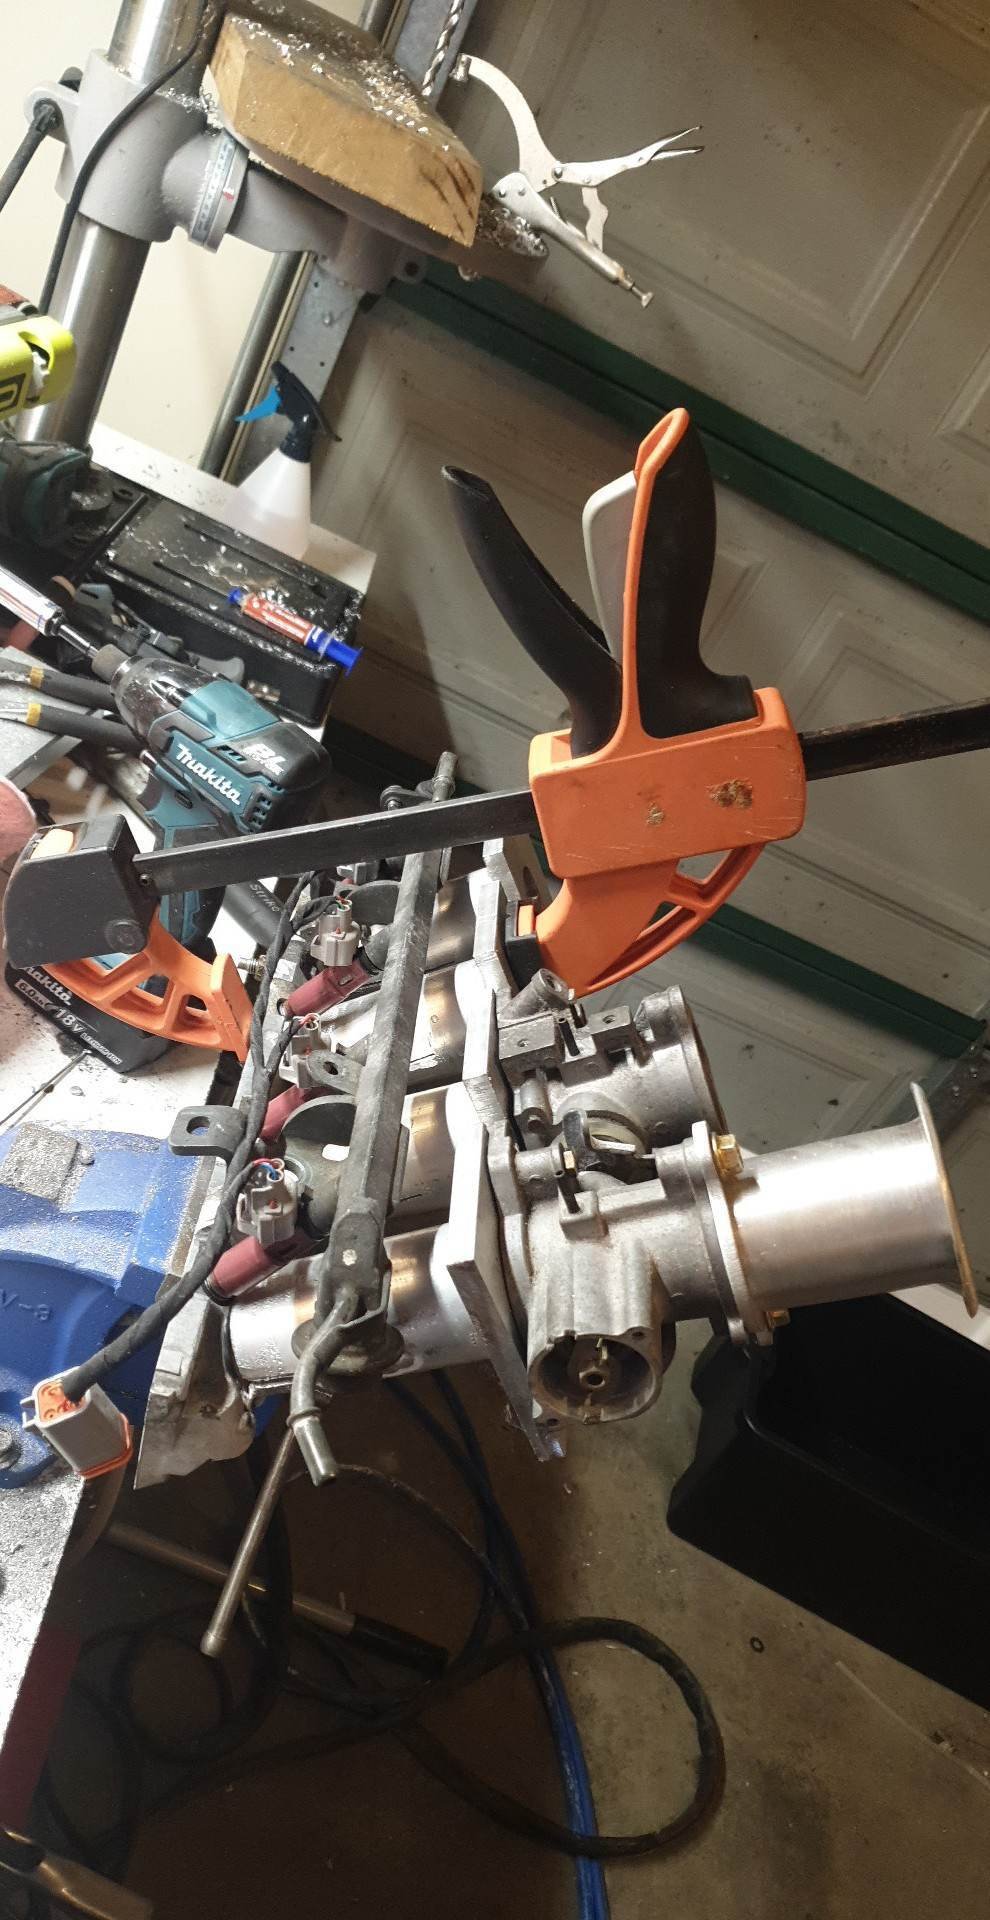
Alright air filter time. Bare trumpets are cool, but every bit of roadworks or loose surface scares the shit out of me. I don't have an engine undertray so rocks are a very real concern! Some cheap filter socks came up which fit great. I don't mind the look, but they are very restrictive for airflow. A friend had an ITB'd BP on the Dyno and gained 10kW removing his socks, so they aren't excellent for performance. Some may have seen that I used to have a pipercross px600 box air filter, which I had modified to clear the clutch slave in my old setup. Well I wanted to un-modify the backing plate to save money, and possibly eventually replace the box filter with an unmolested one. I welded a new plate on where I cut earlier, then ground it flat and cut the shape up. Now I have to replace the box filter but we have option number 3: a badass box filter setup. My trumpets don't fit under this filter and the filter is a bit hacked up at the back, however I love the look. Soo yeah, filters are cool but the box one will prove expensive. I'm not sure what option I'll settle with but if anyone has any thoughts (or a cheep box 80mm or domed 120mm px600 filter) let me know!
-
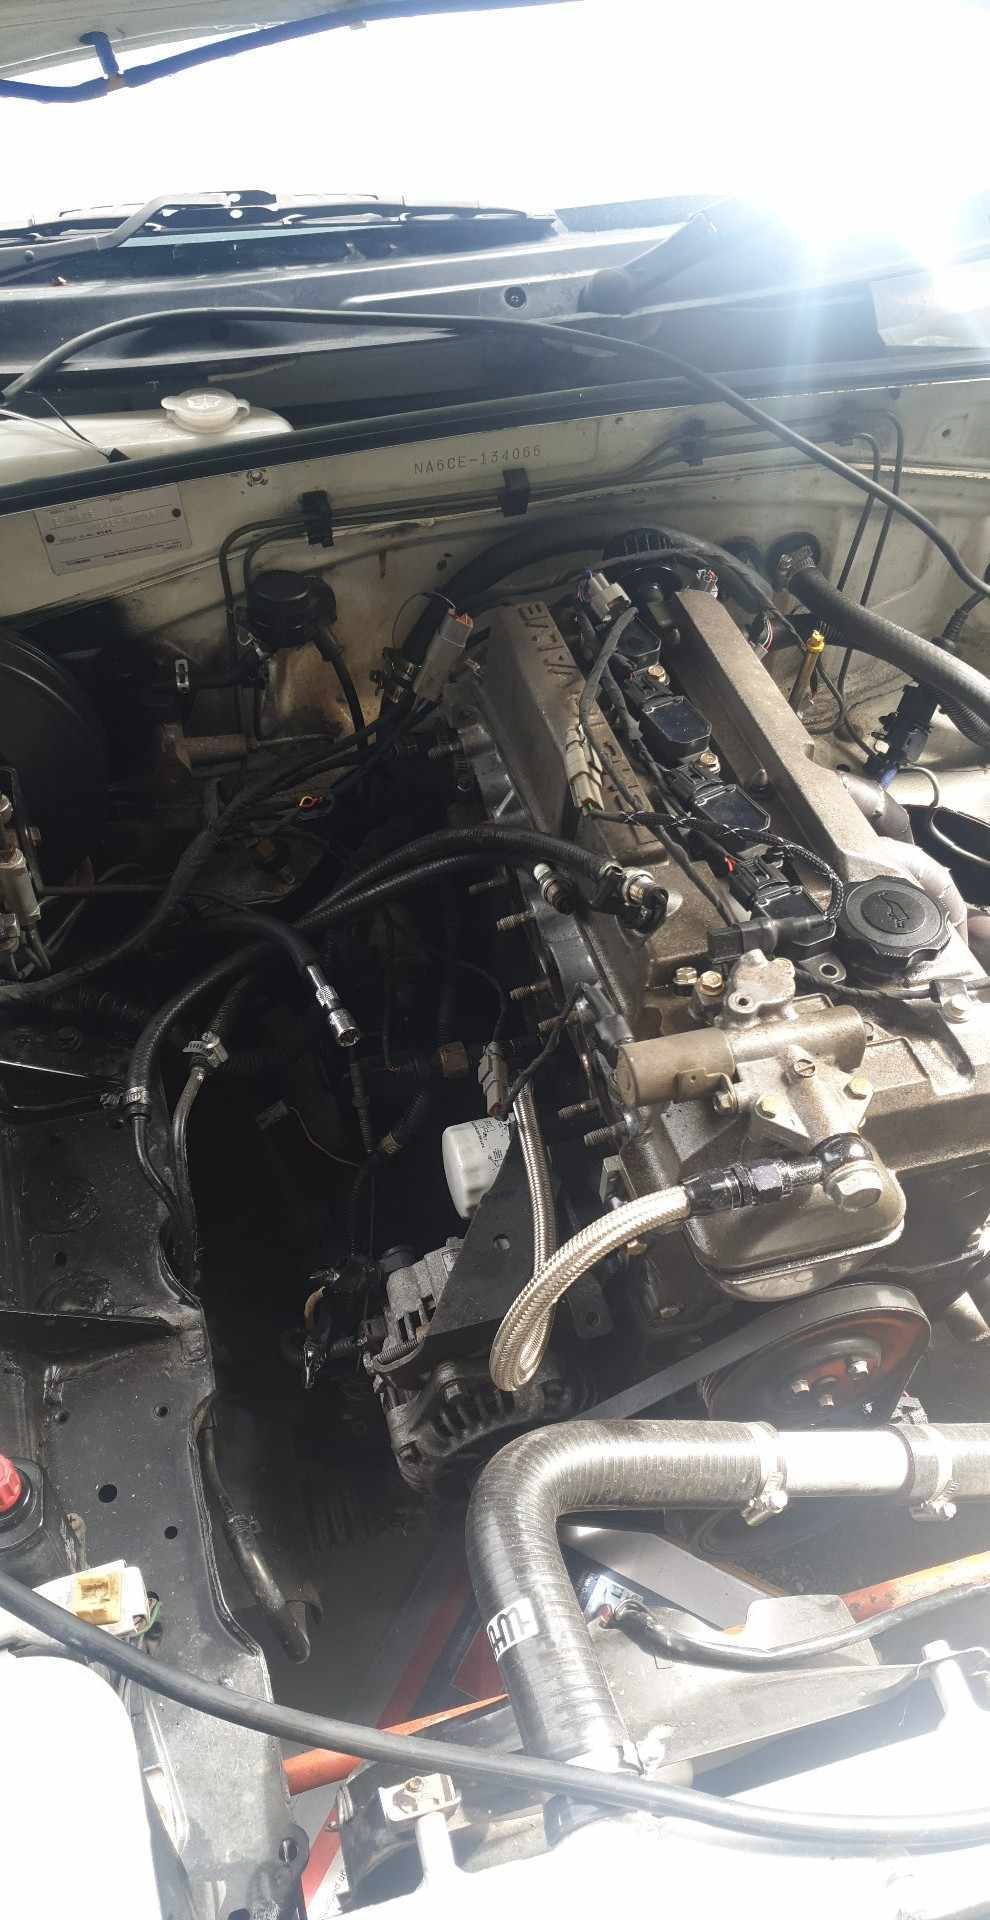
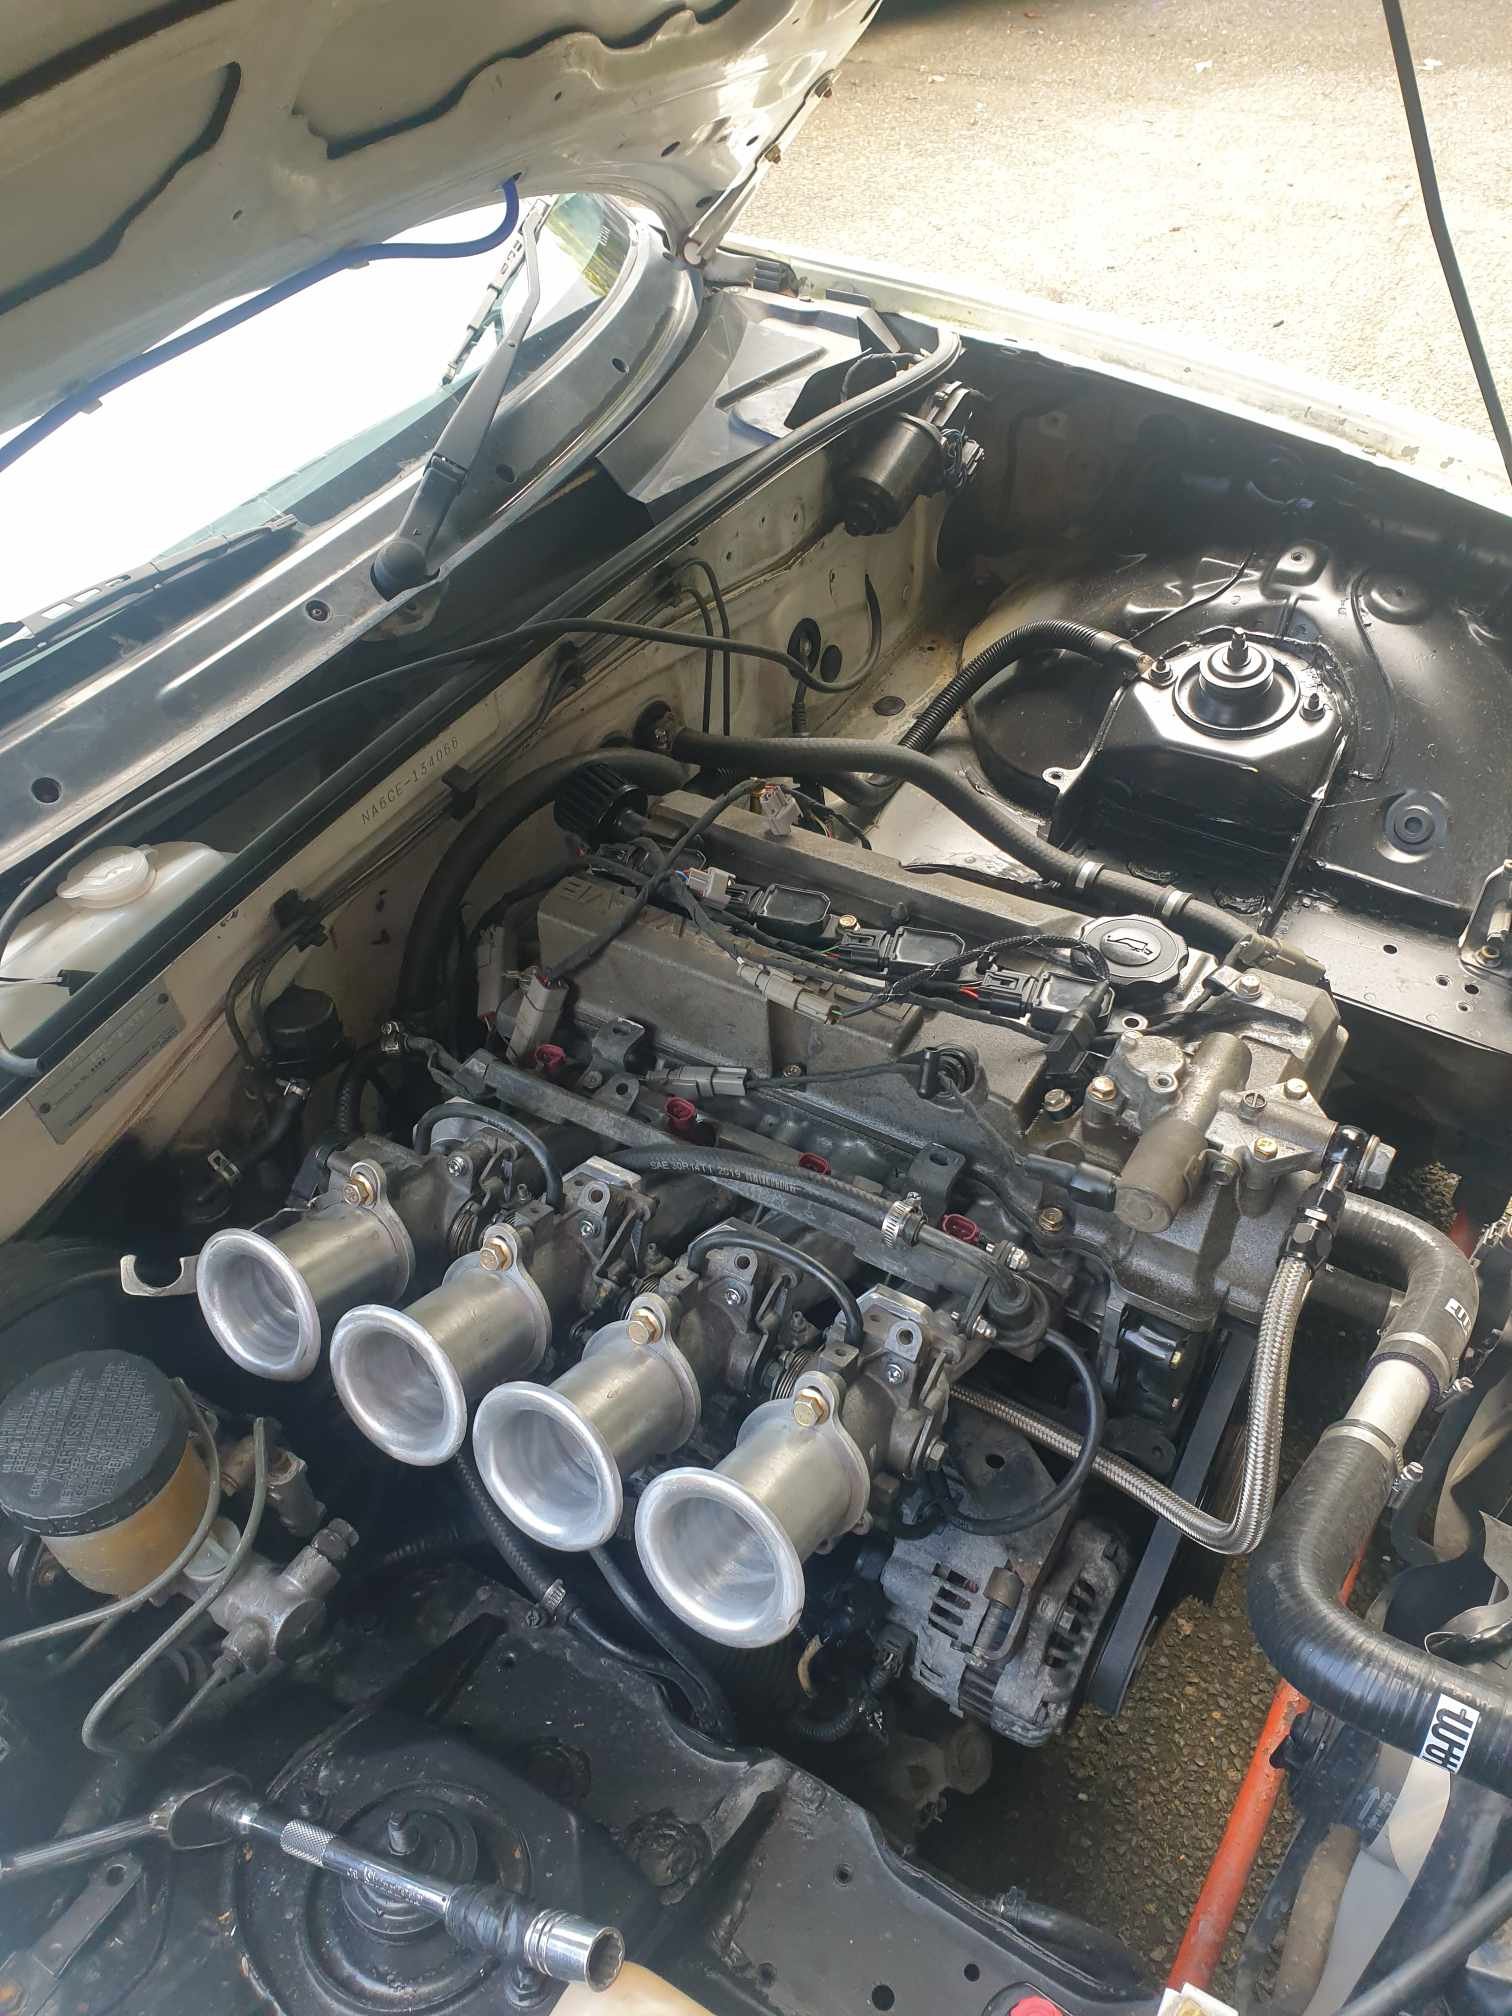
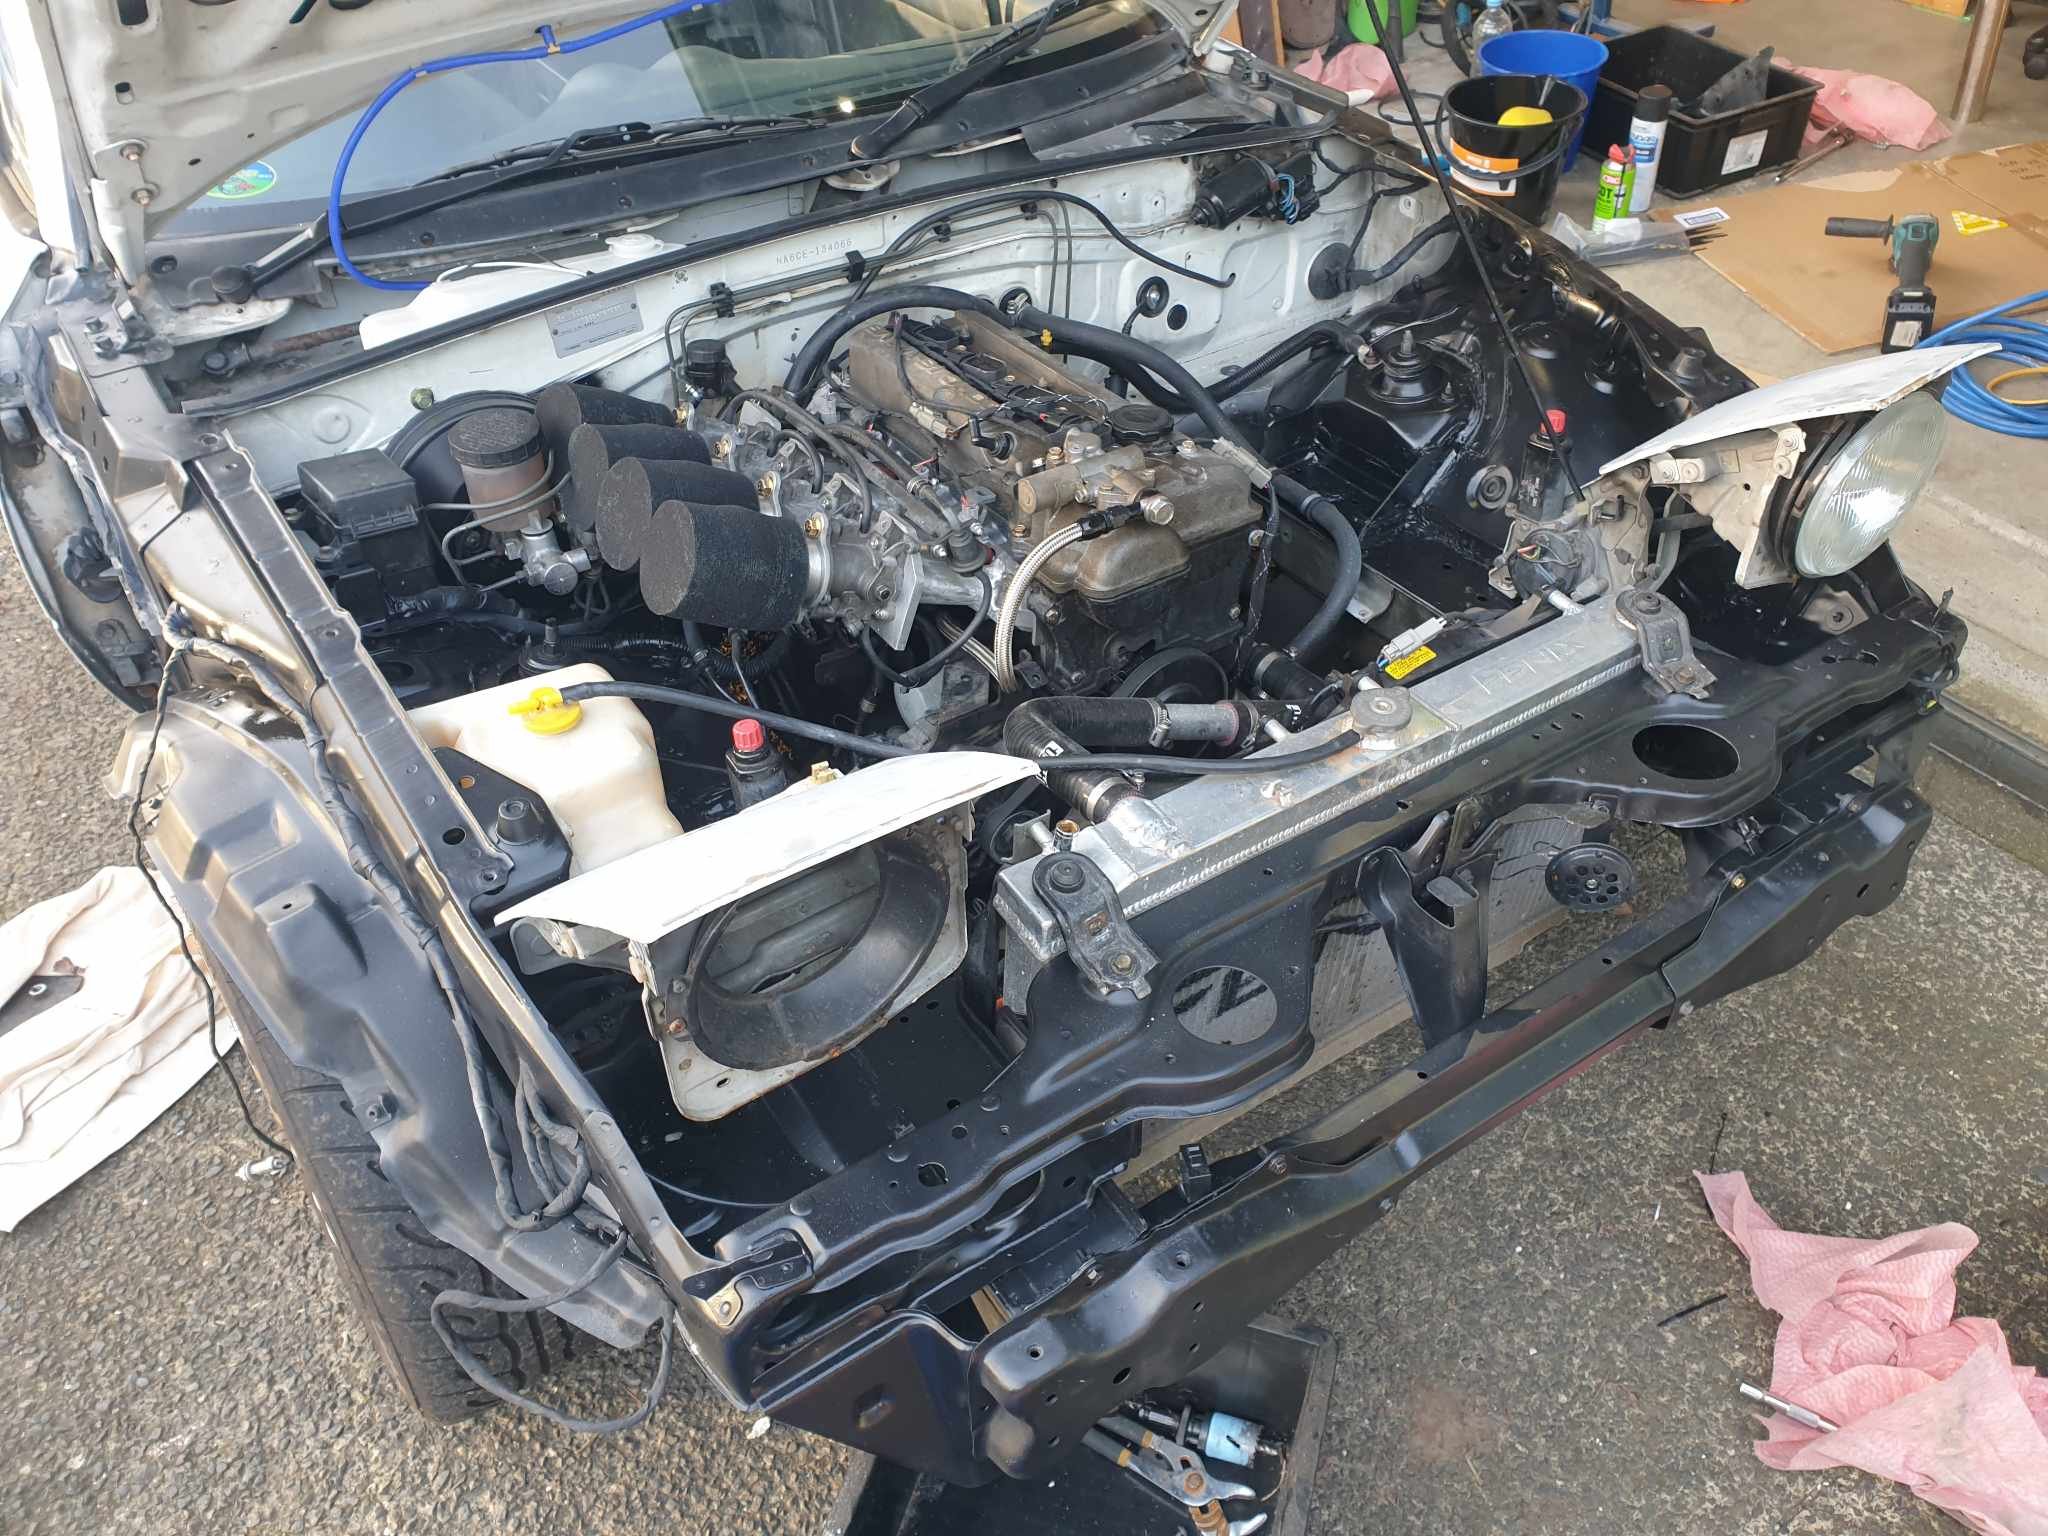
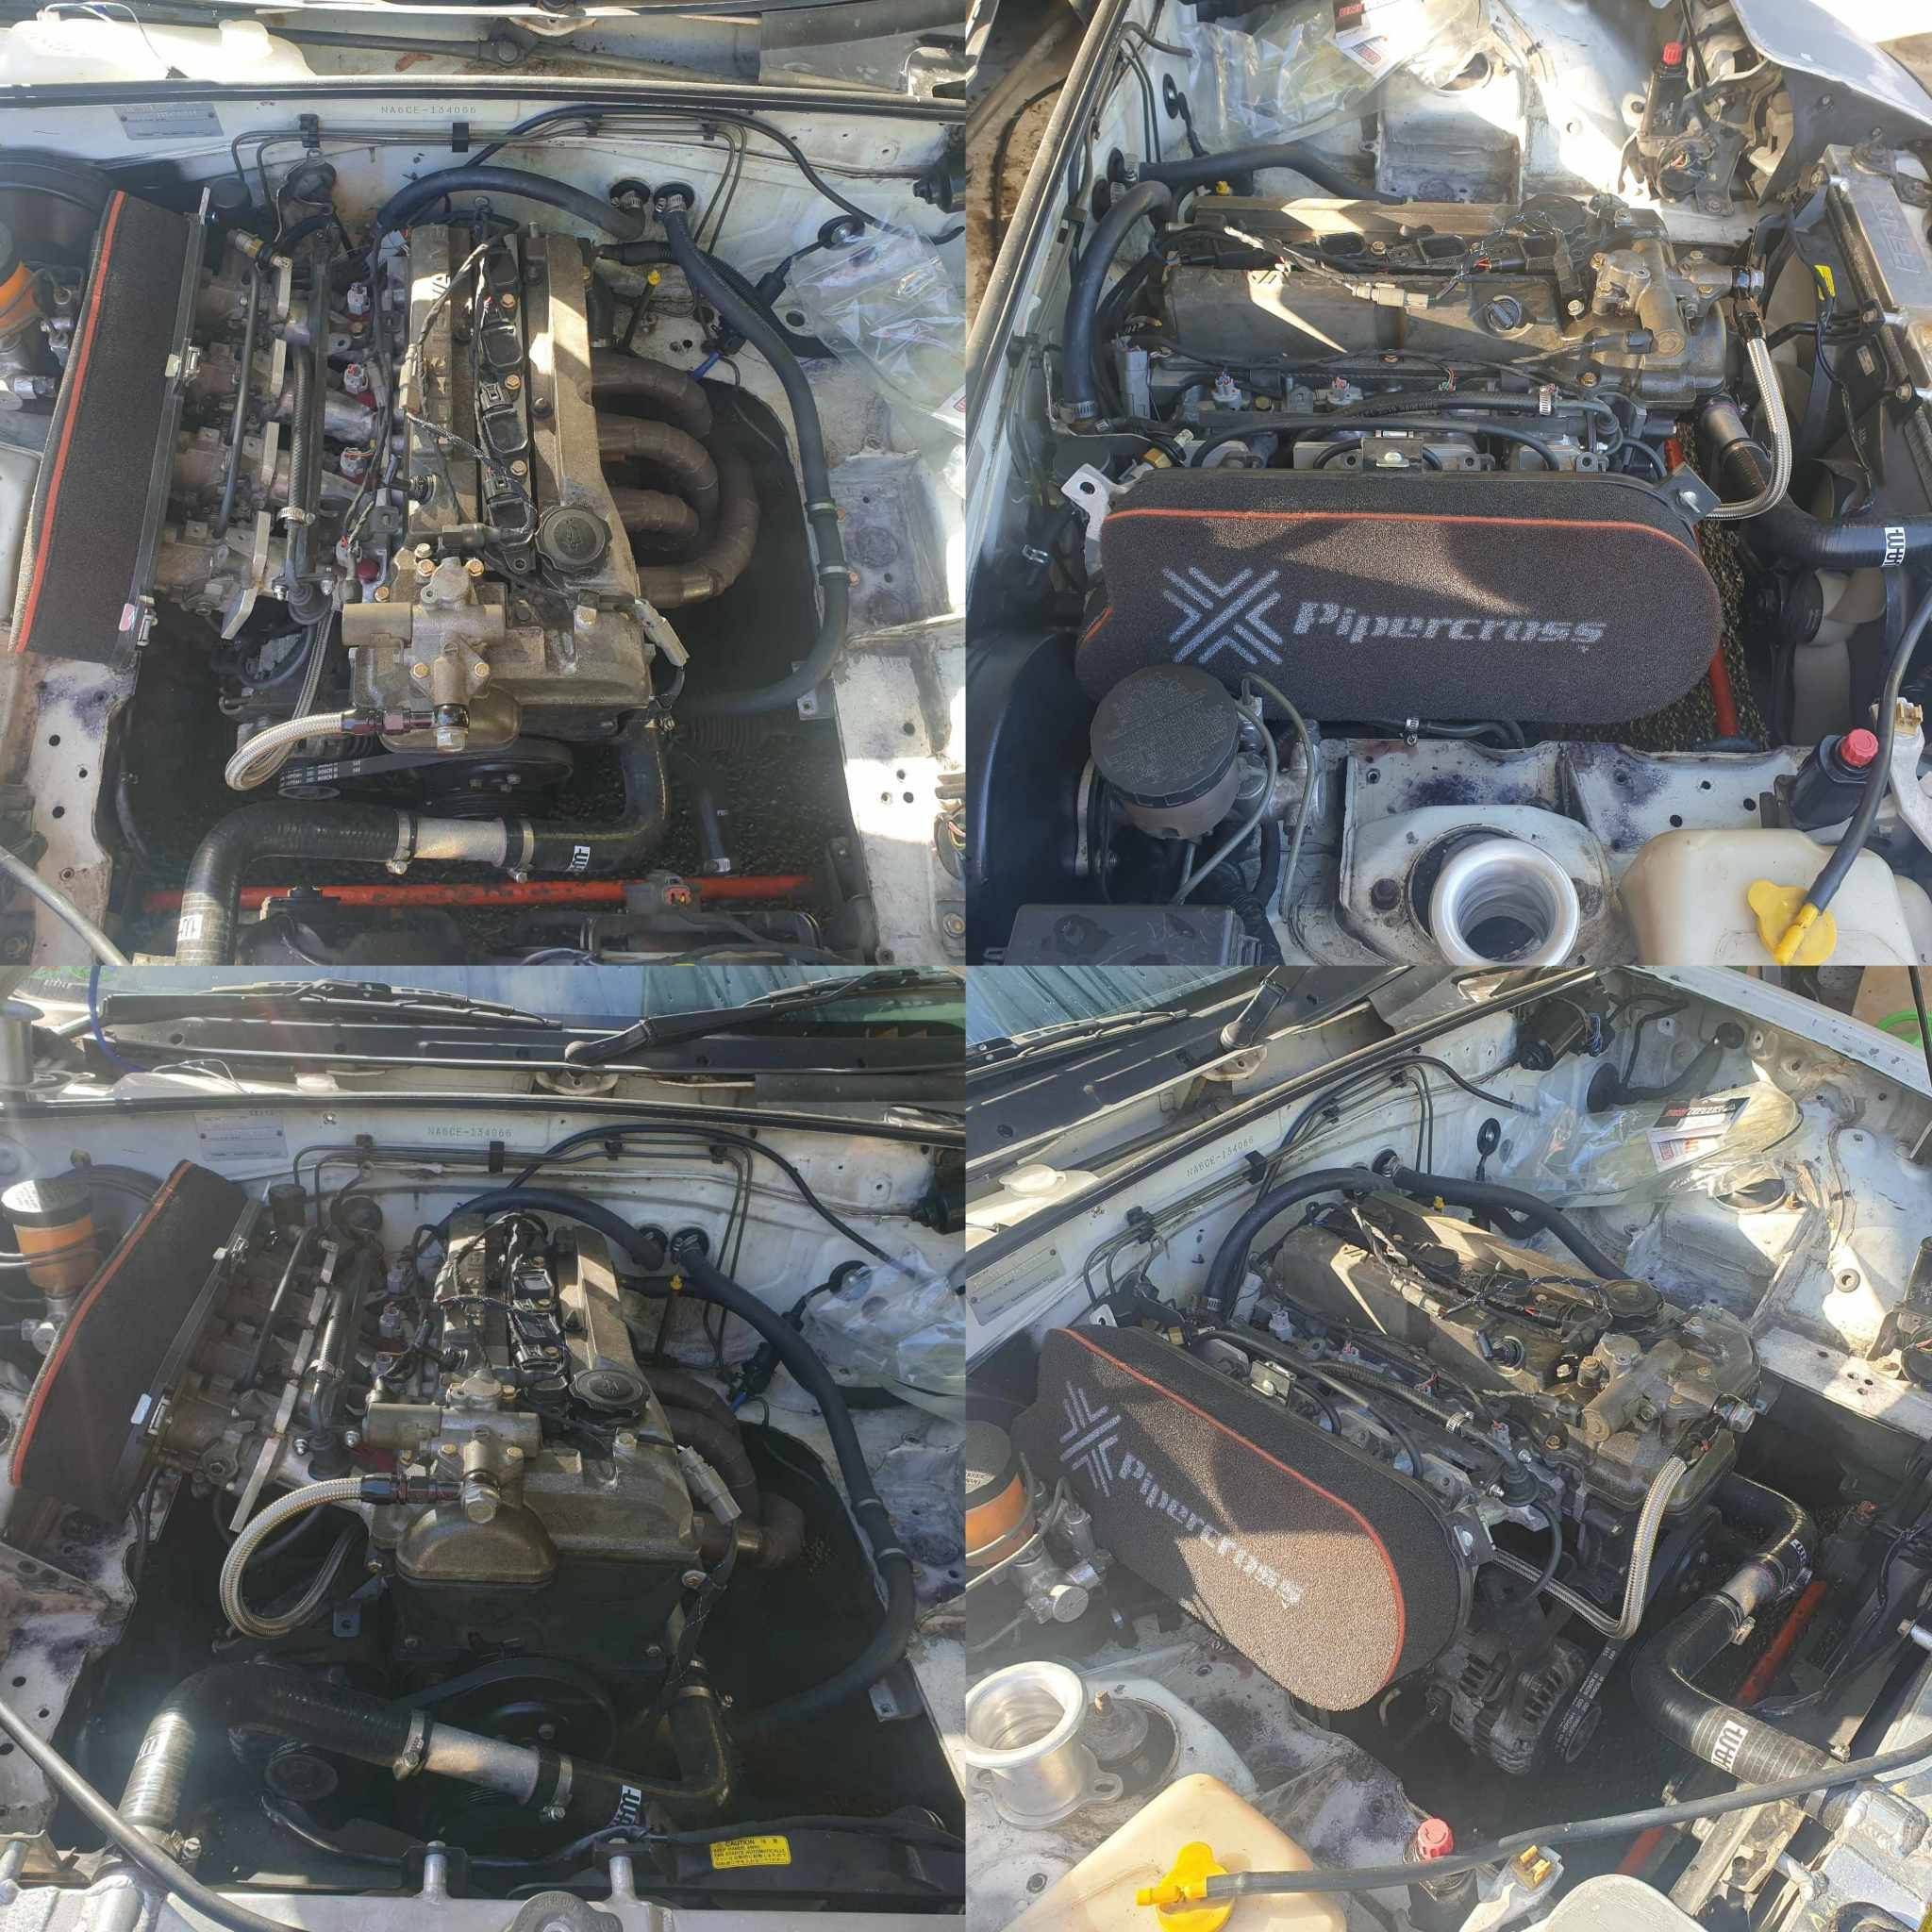
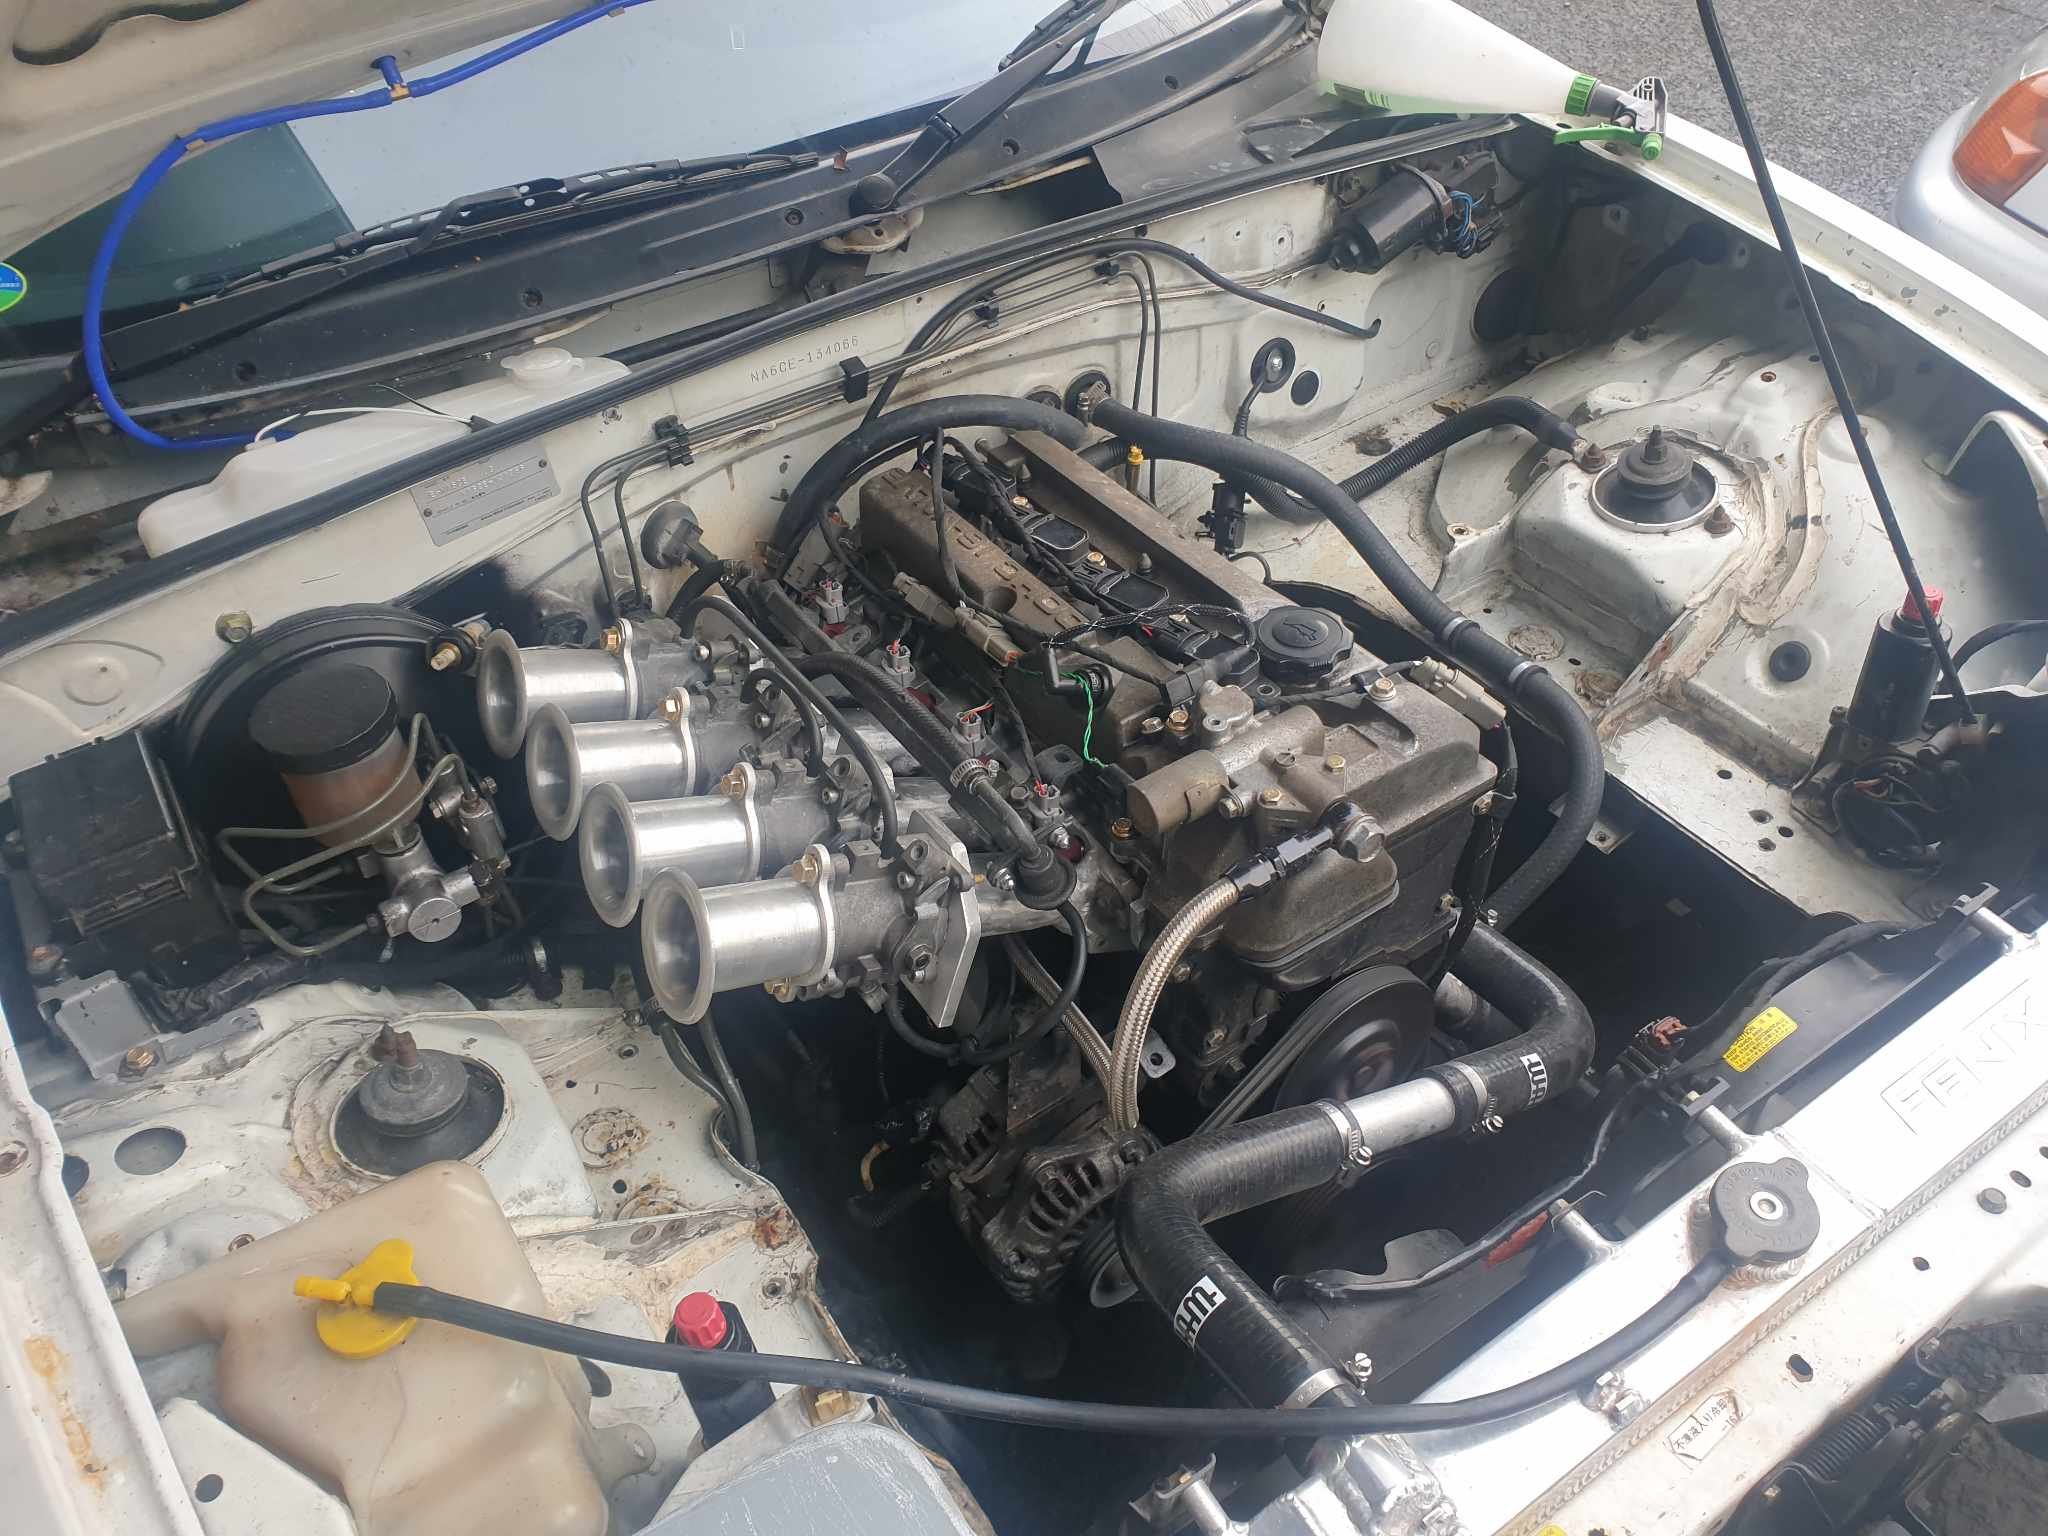
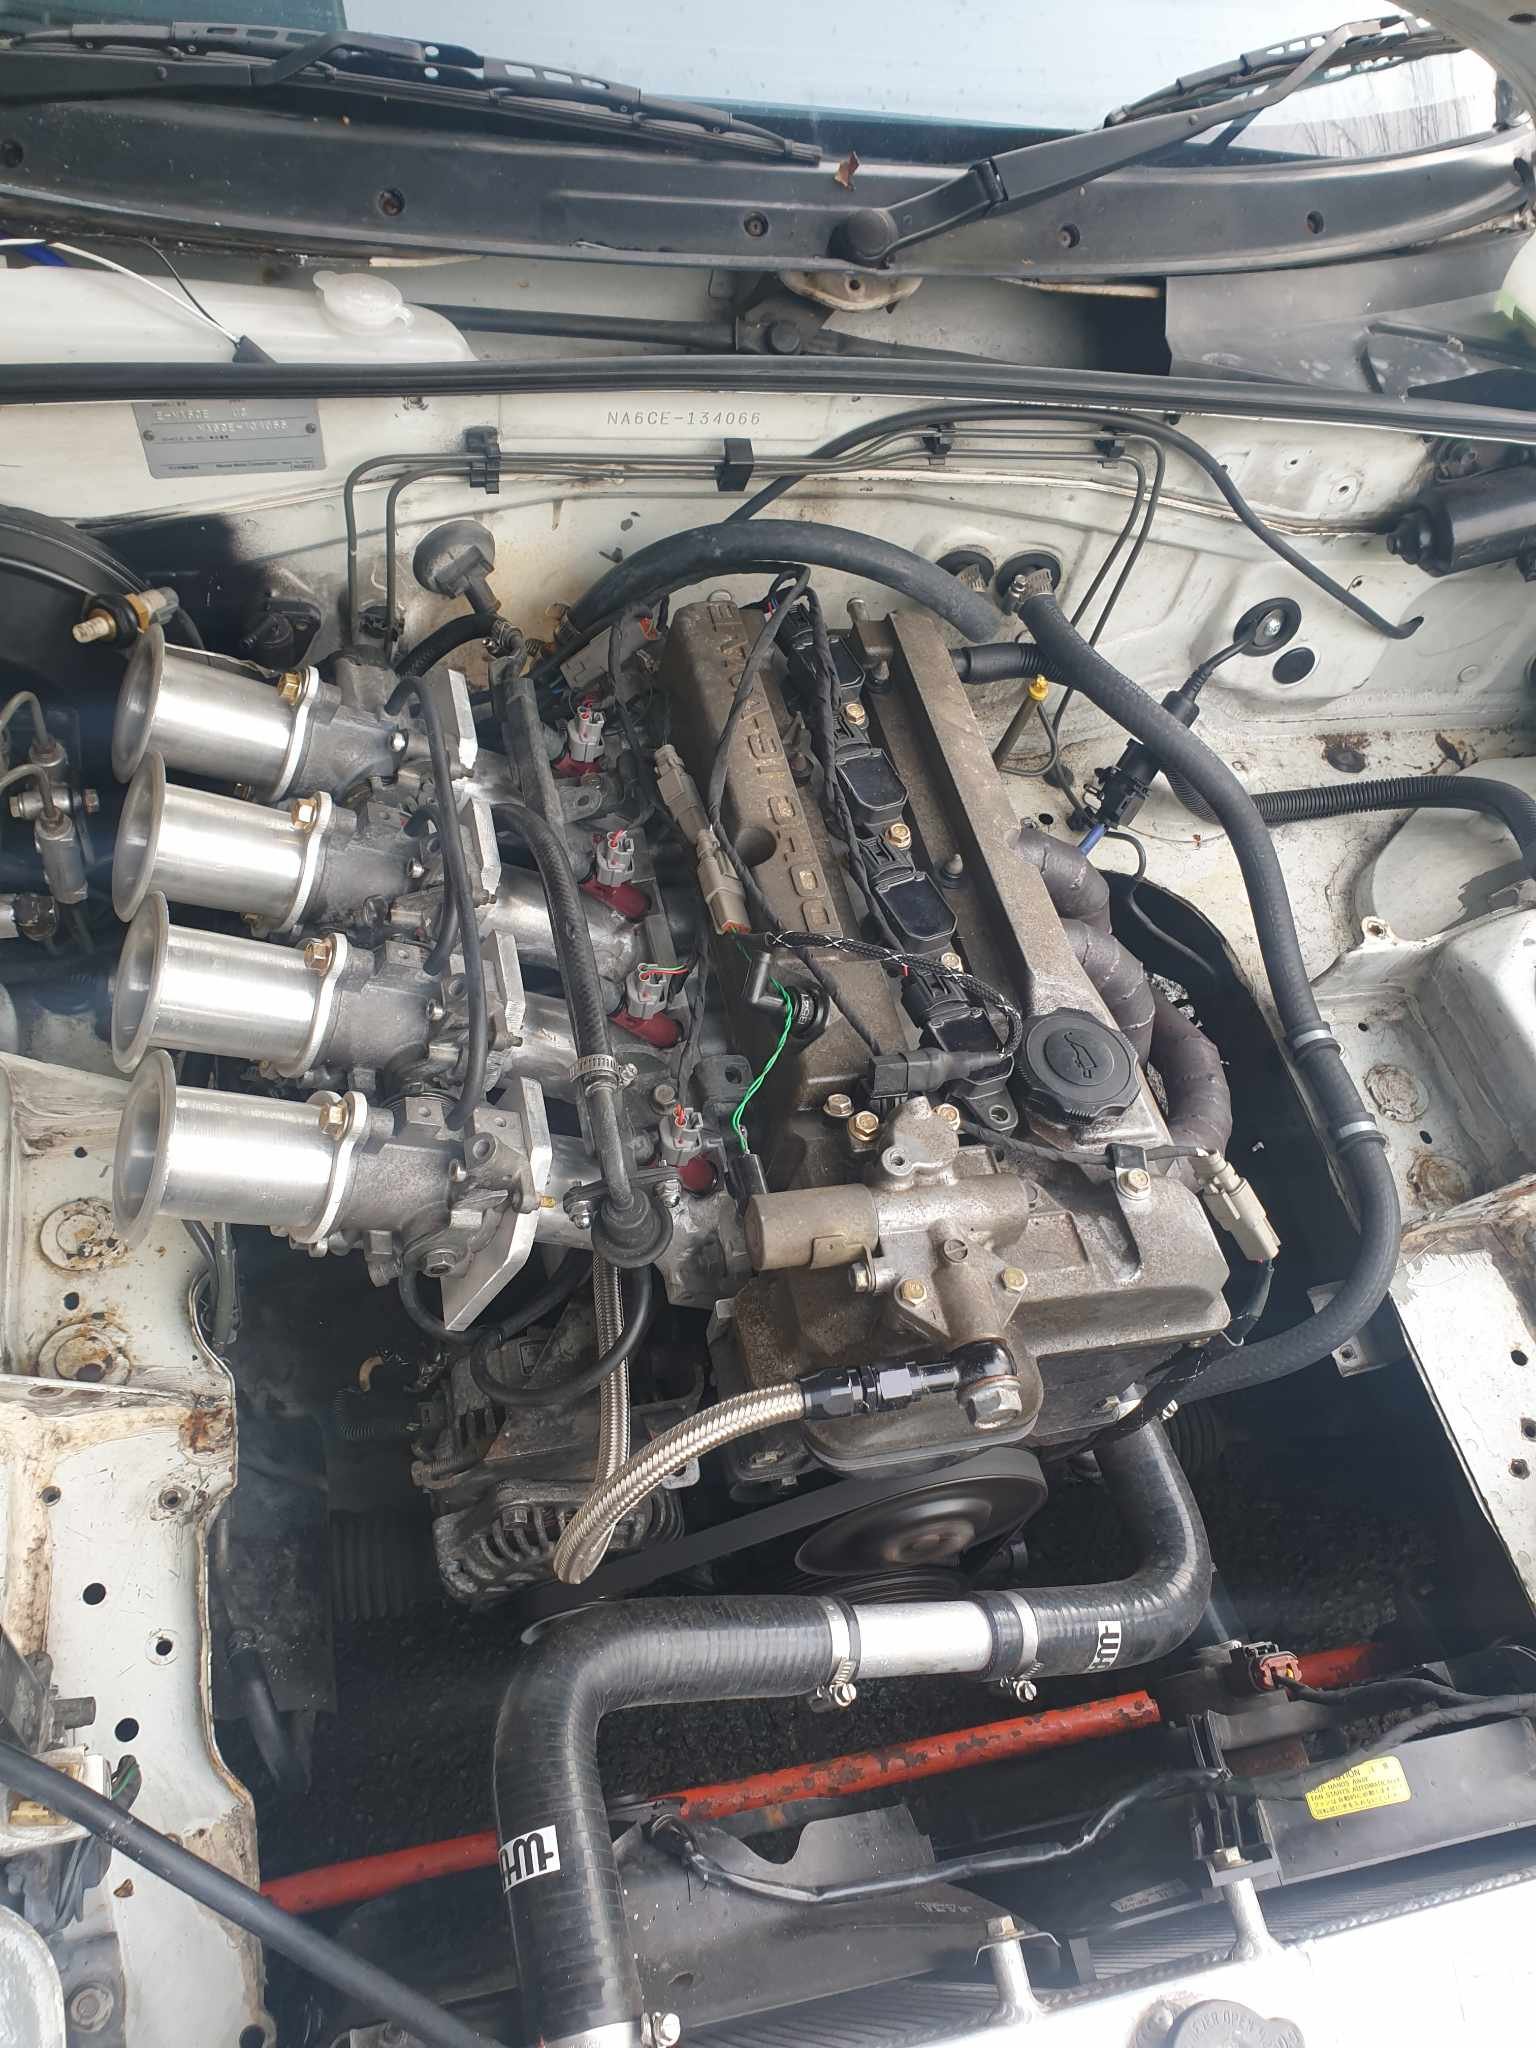
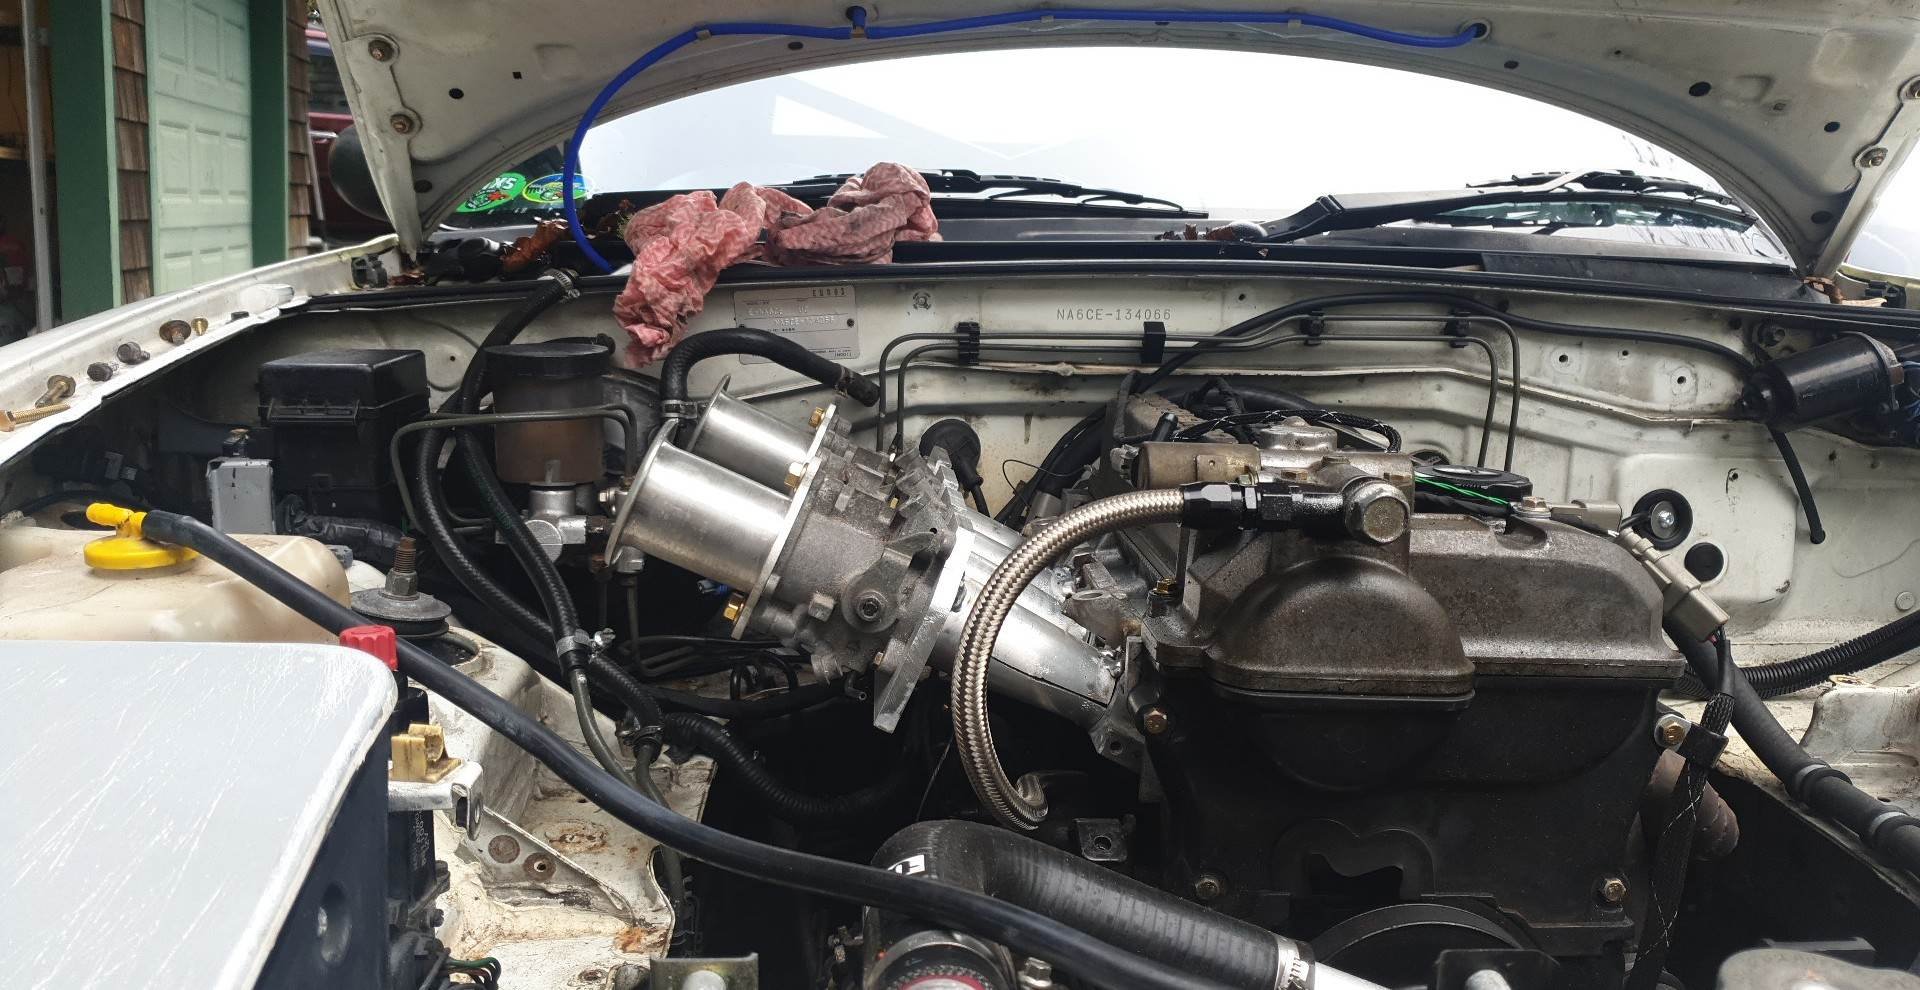
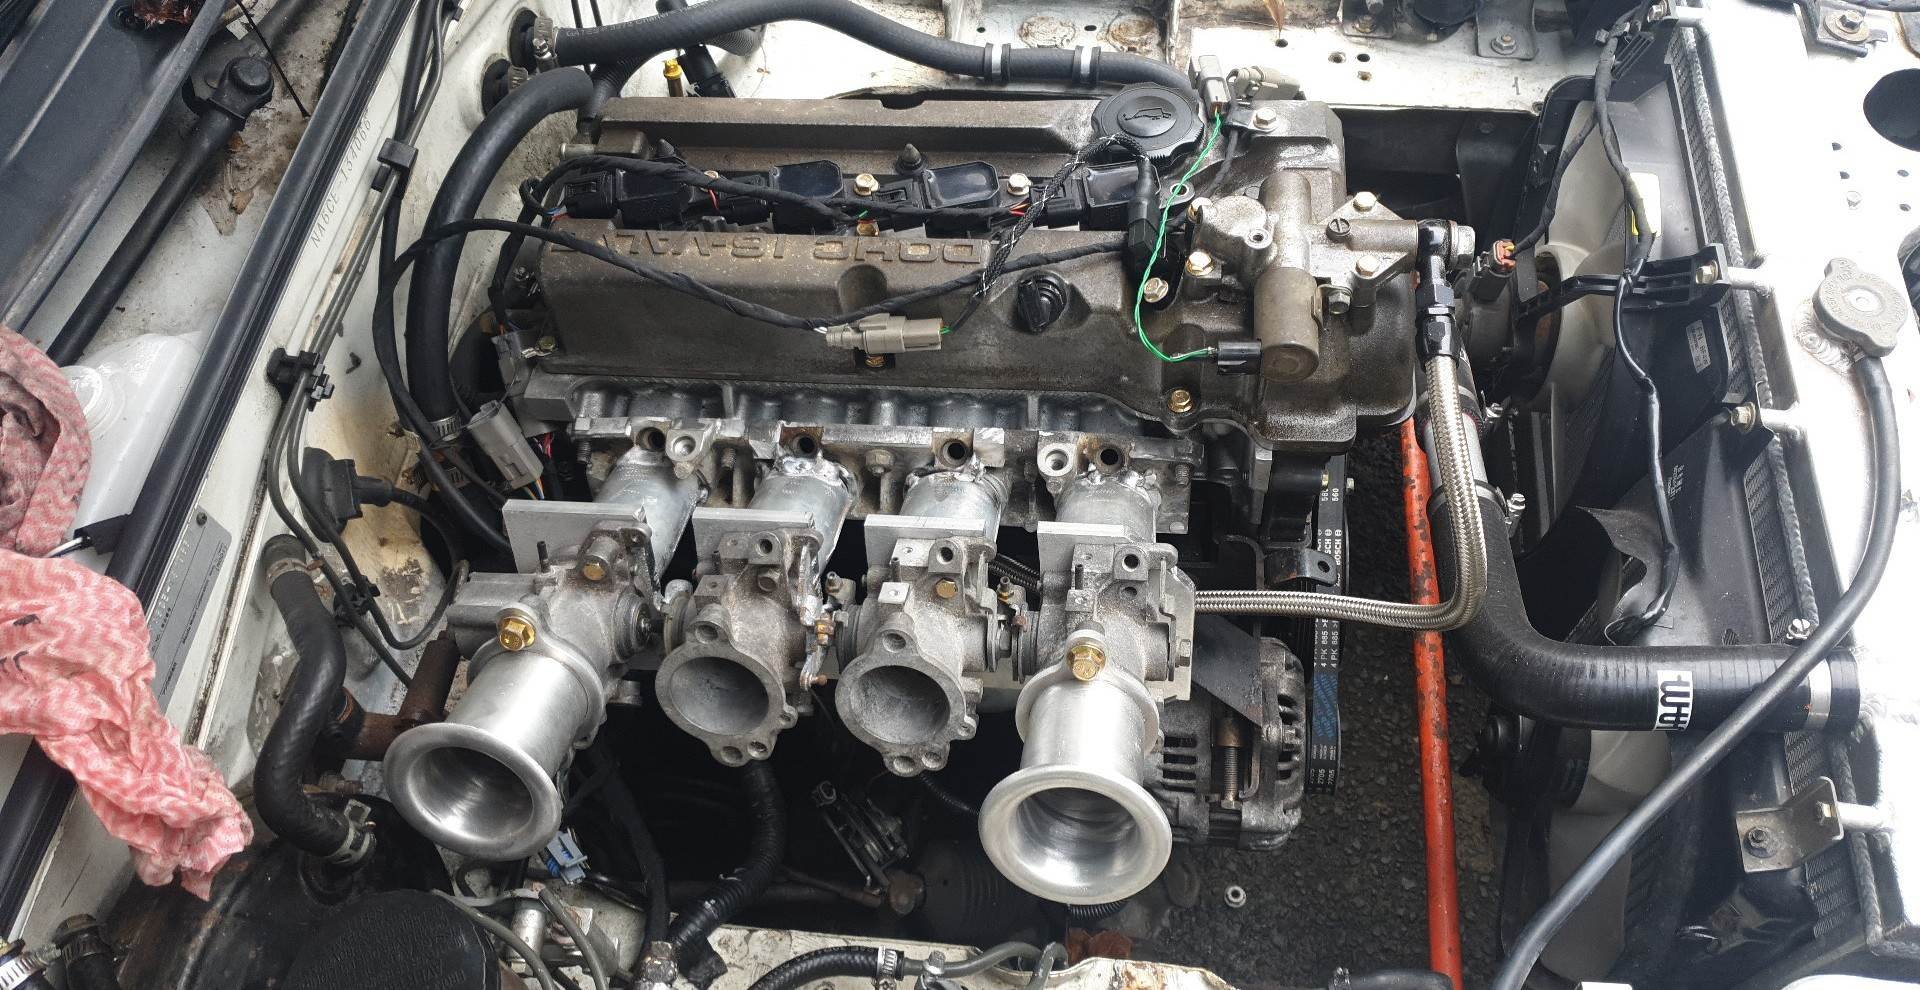
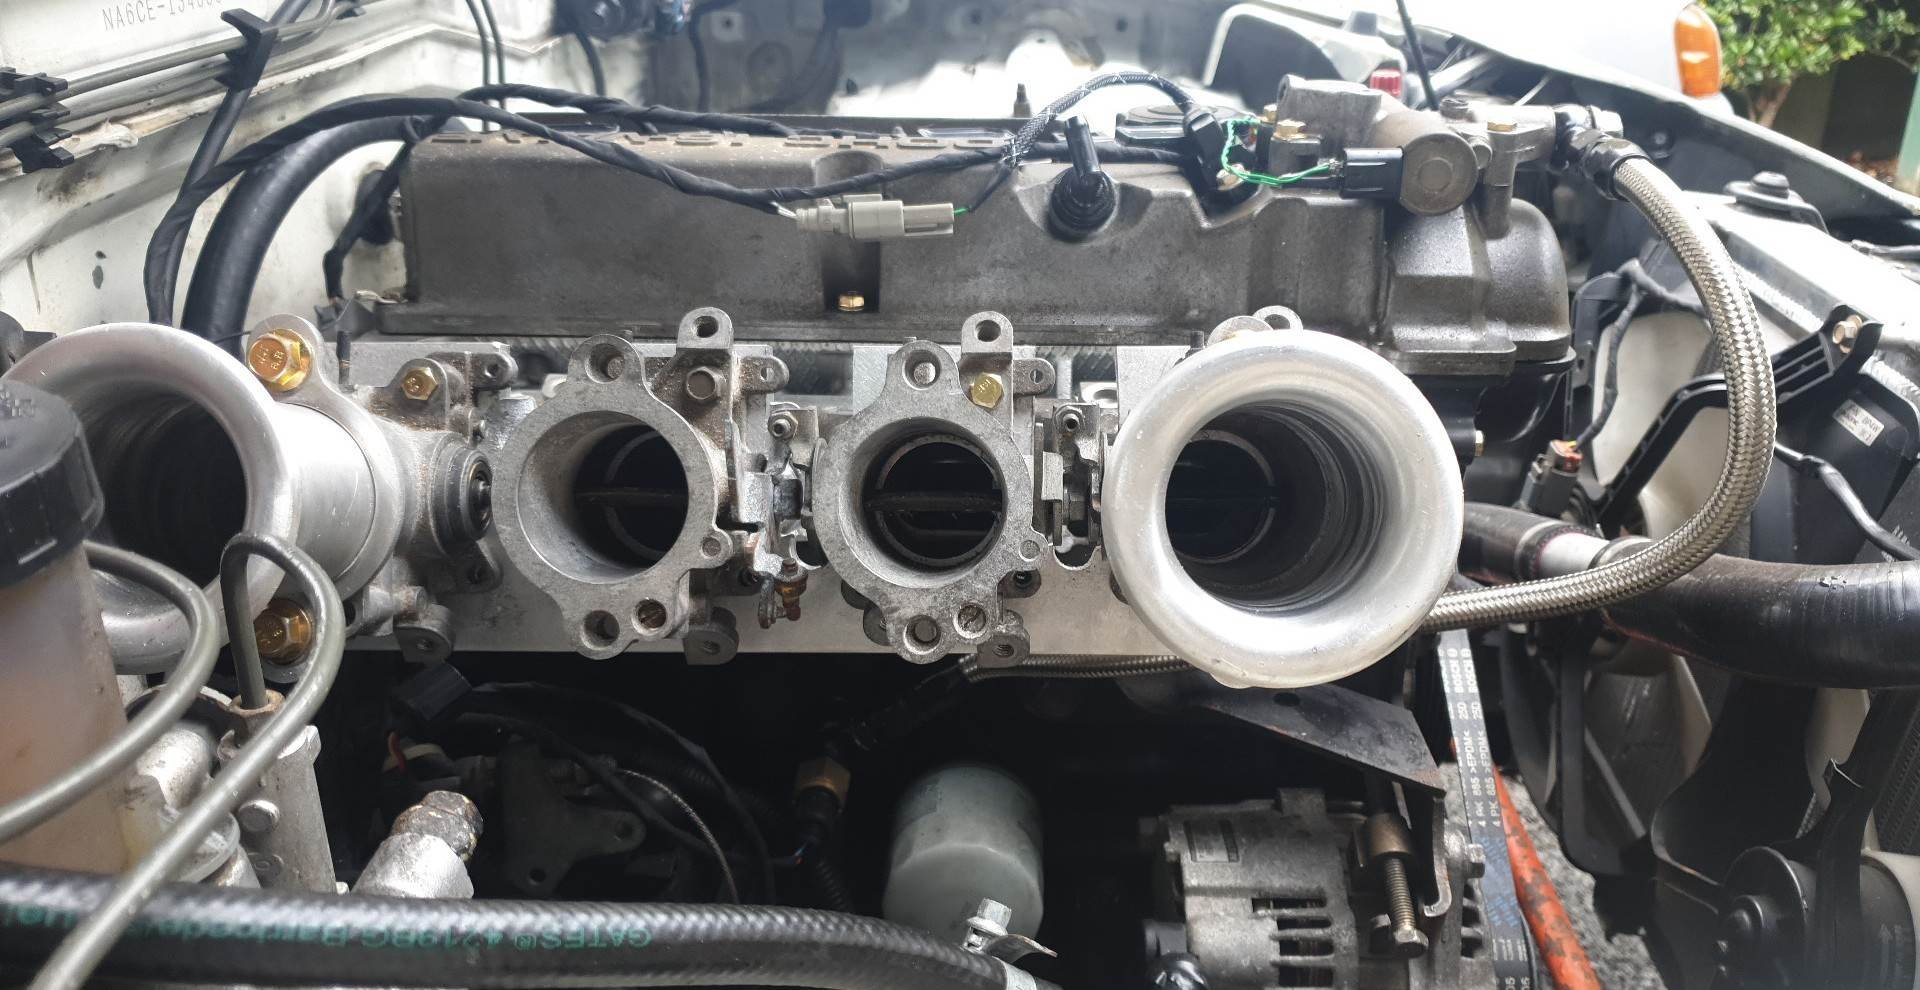
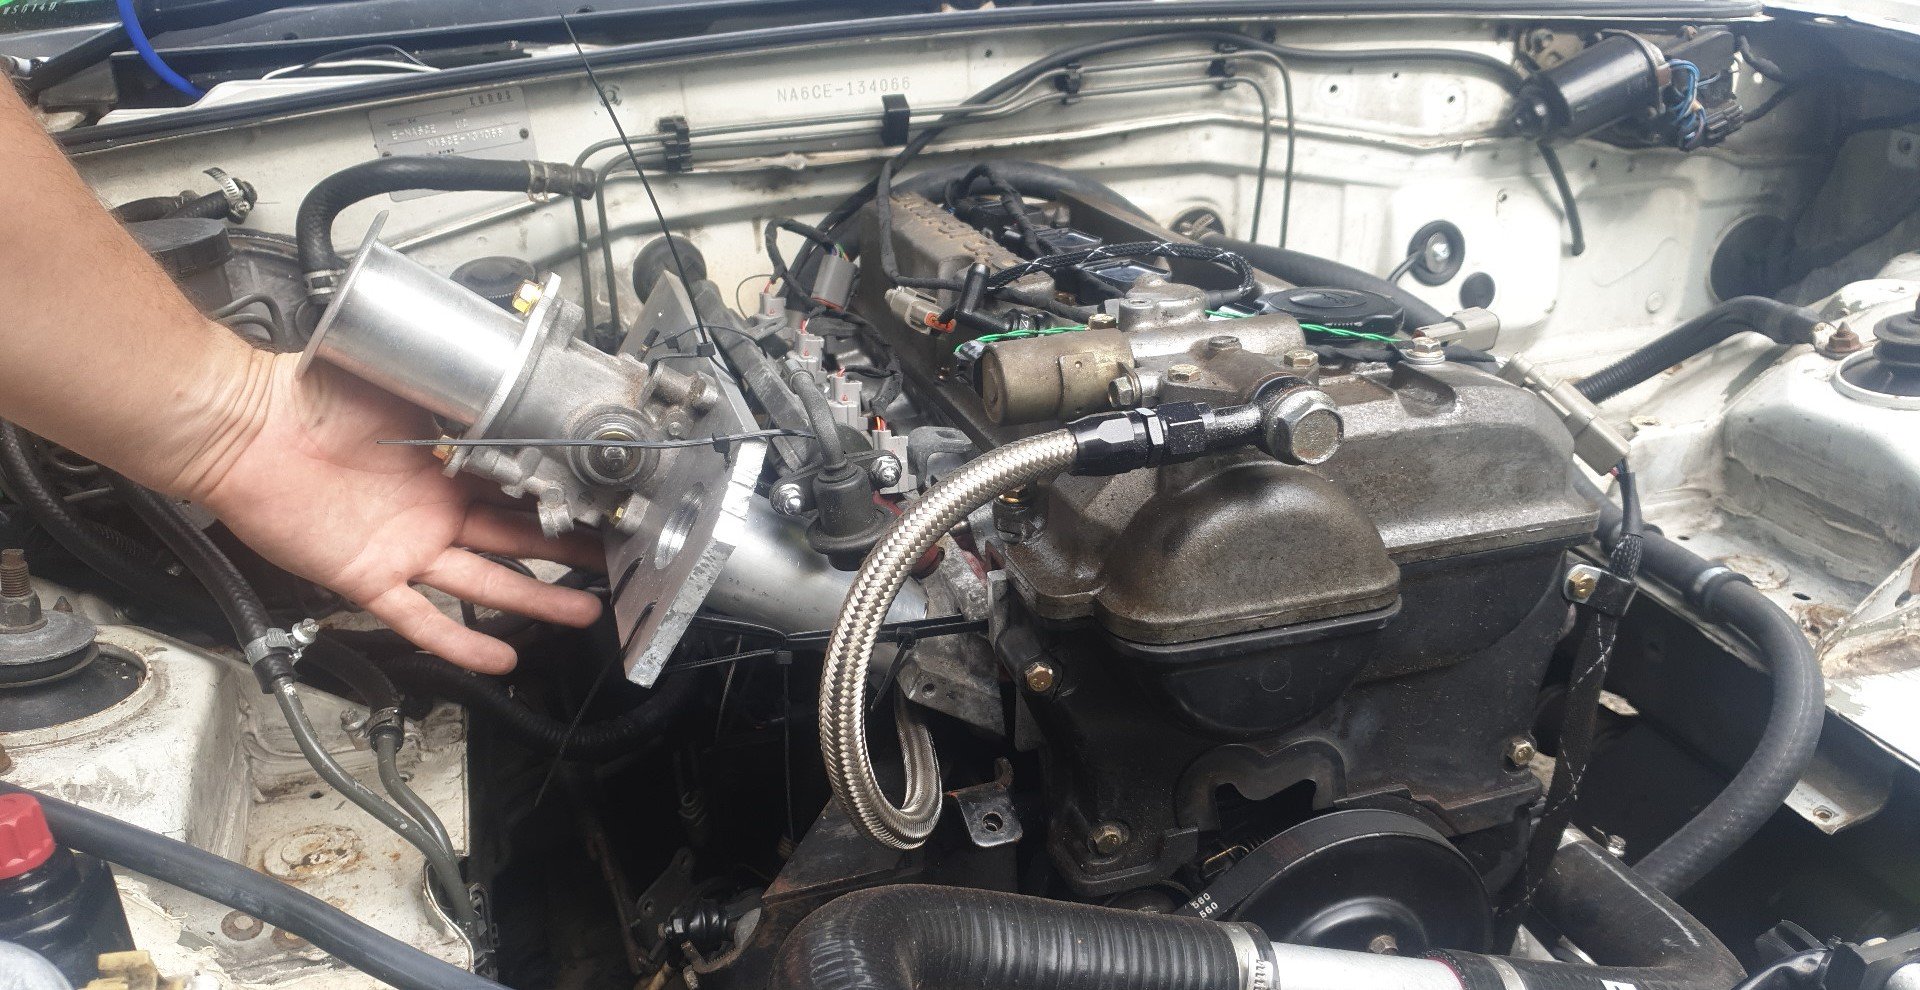
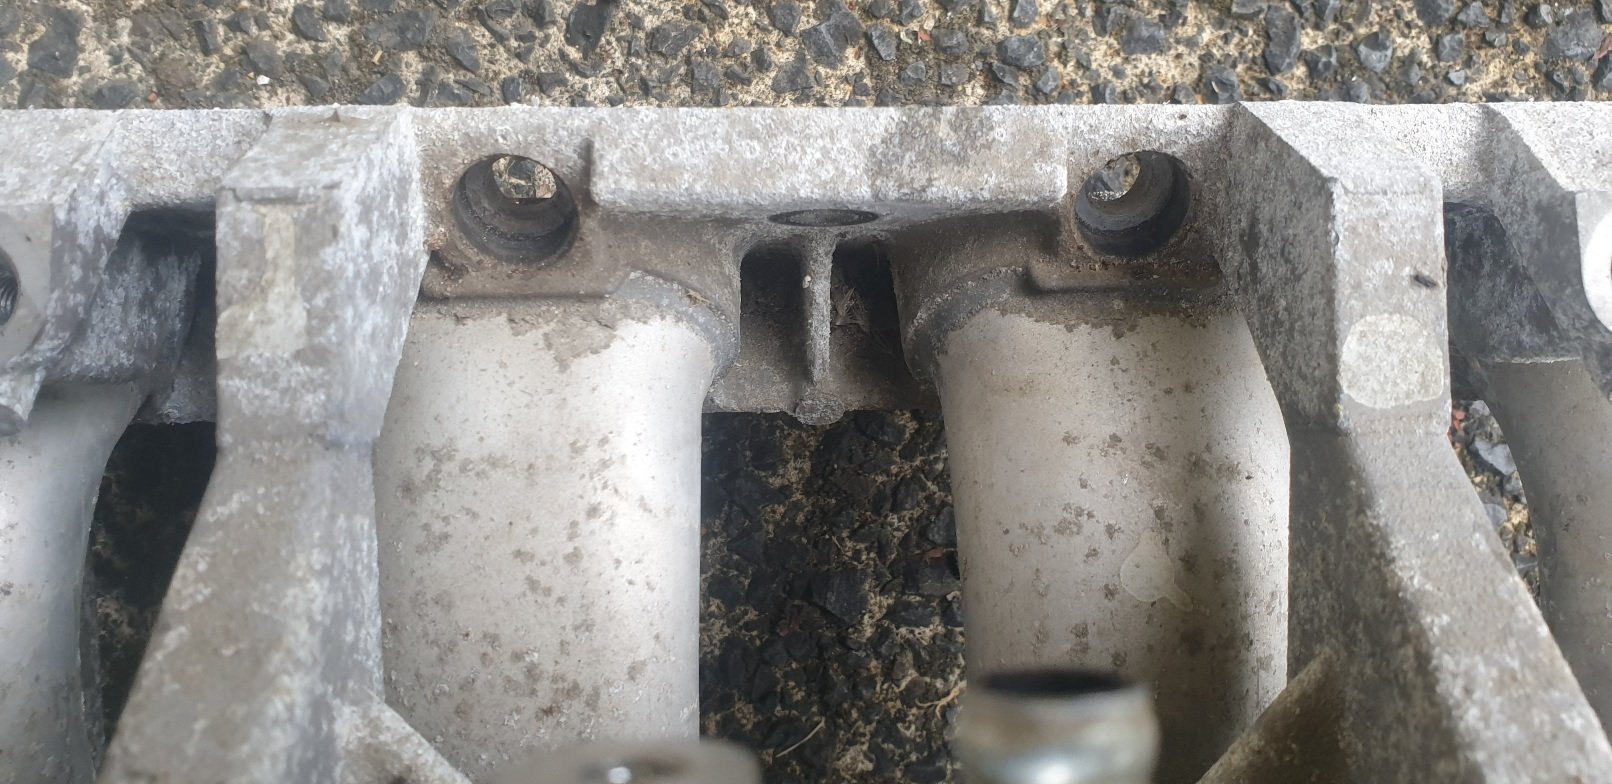
Lights out and away we go, the new manifold is on. I had to flip my brake booster to clear the trumpets, painted it again at the same time to tidy it up. Also I had 10,000 vacuum leaks. Turns out my aluminium welds are just as shit as ever, thick casting doesn't help my problems. Eventually I noticed that one little bump on a weld was touching injector #3, stopping a good seal at the base of the injector. Rectifying the air leaks and solving fuel hose routing, plus a few other things done. Now the car is back to running and driving but still always more to do! Wof is expired so I'm needing to tidy up some of the gremlins that have appeared before taking it back in. Video of dorts here
- 68 replies
-
- 11
-

-
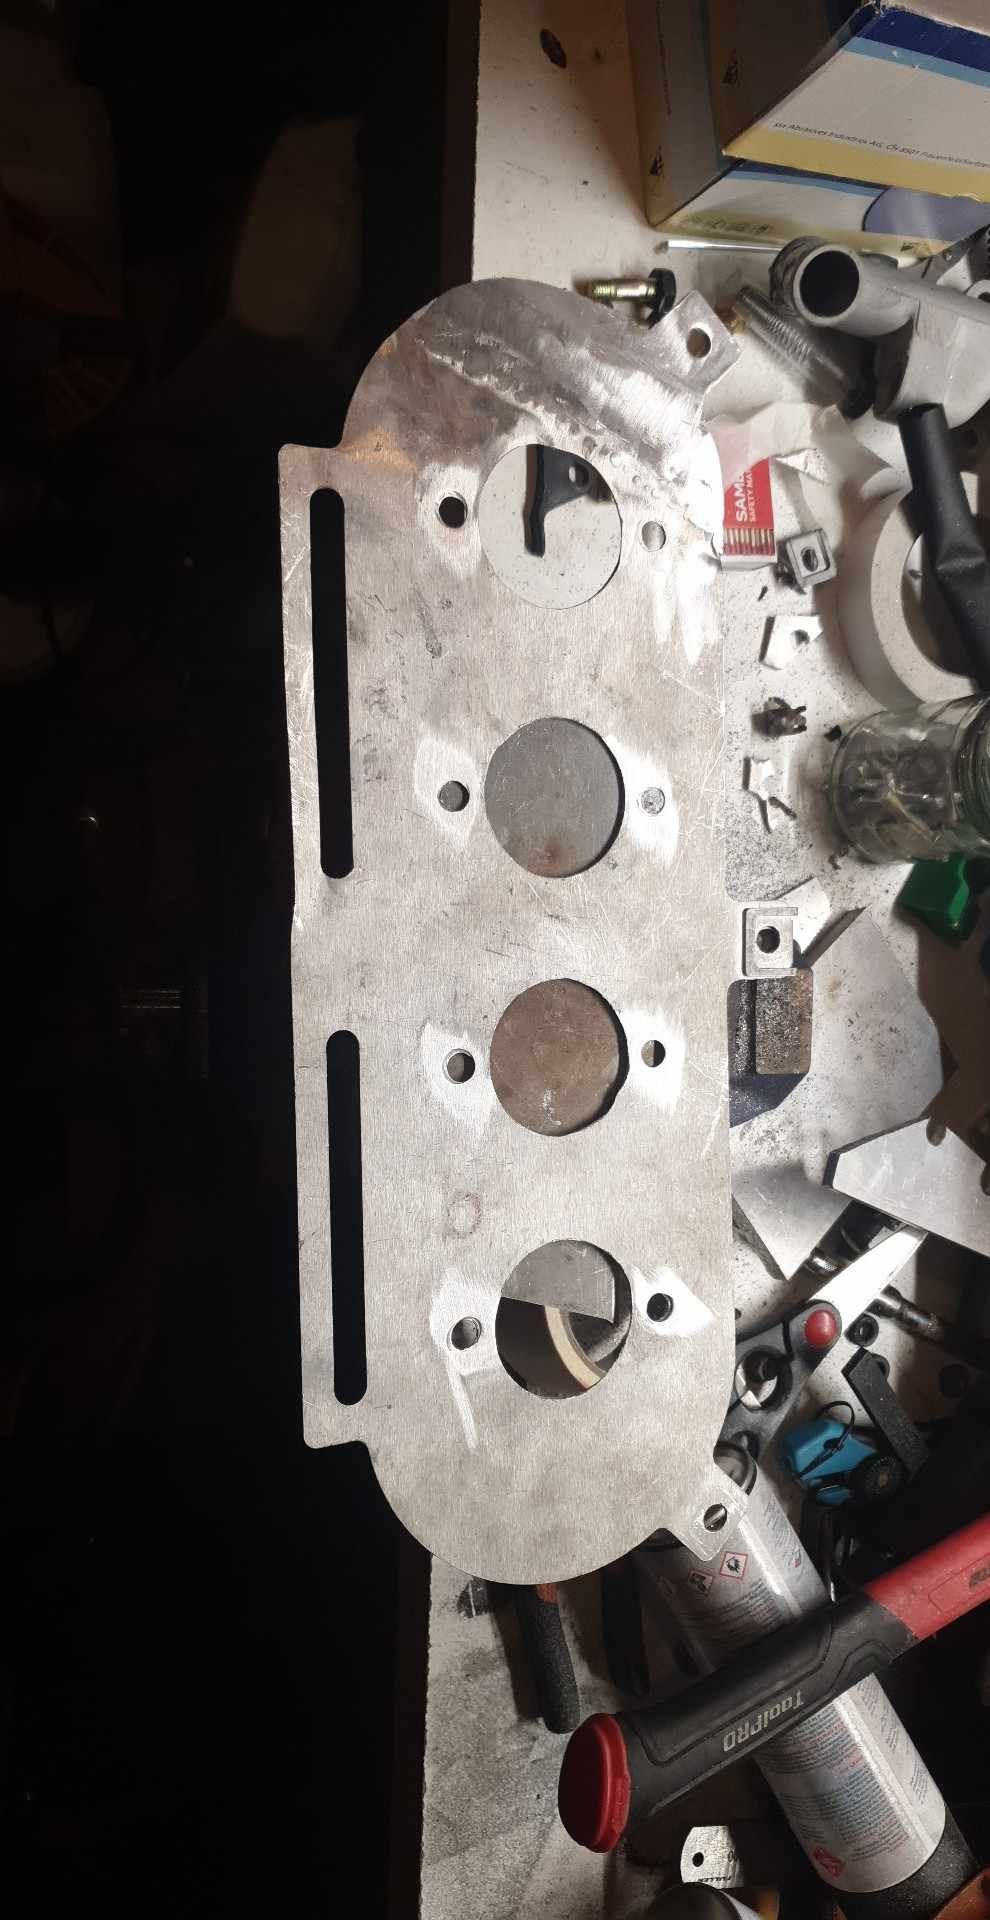
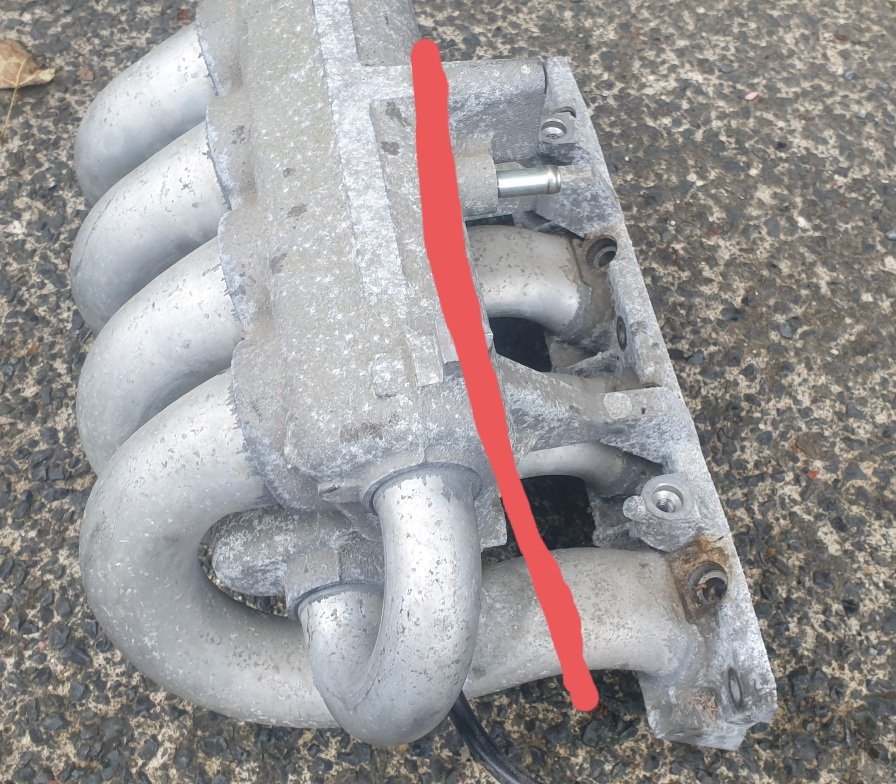
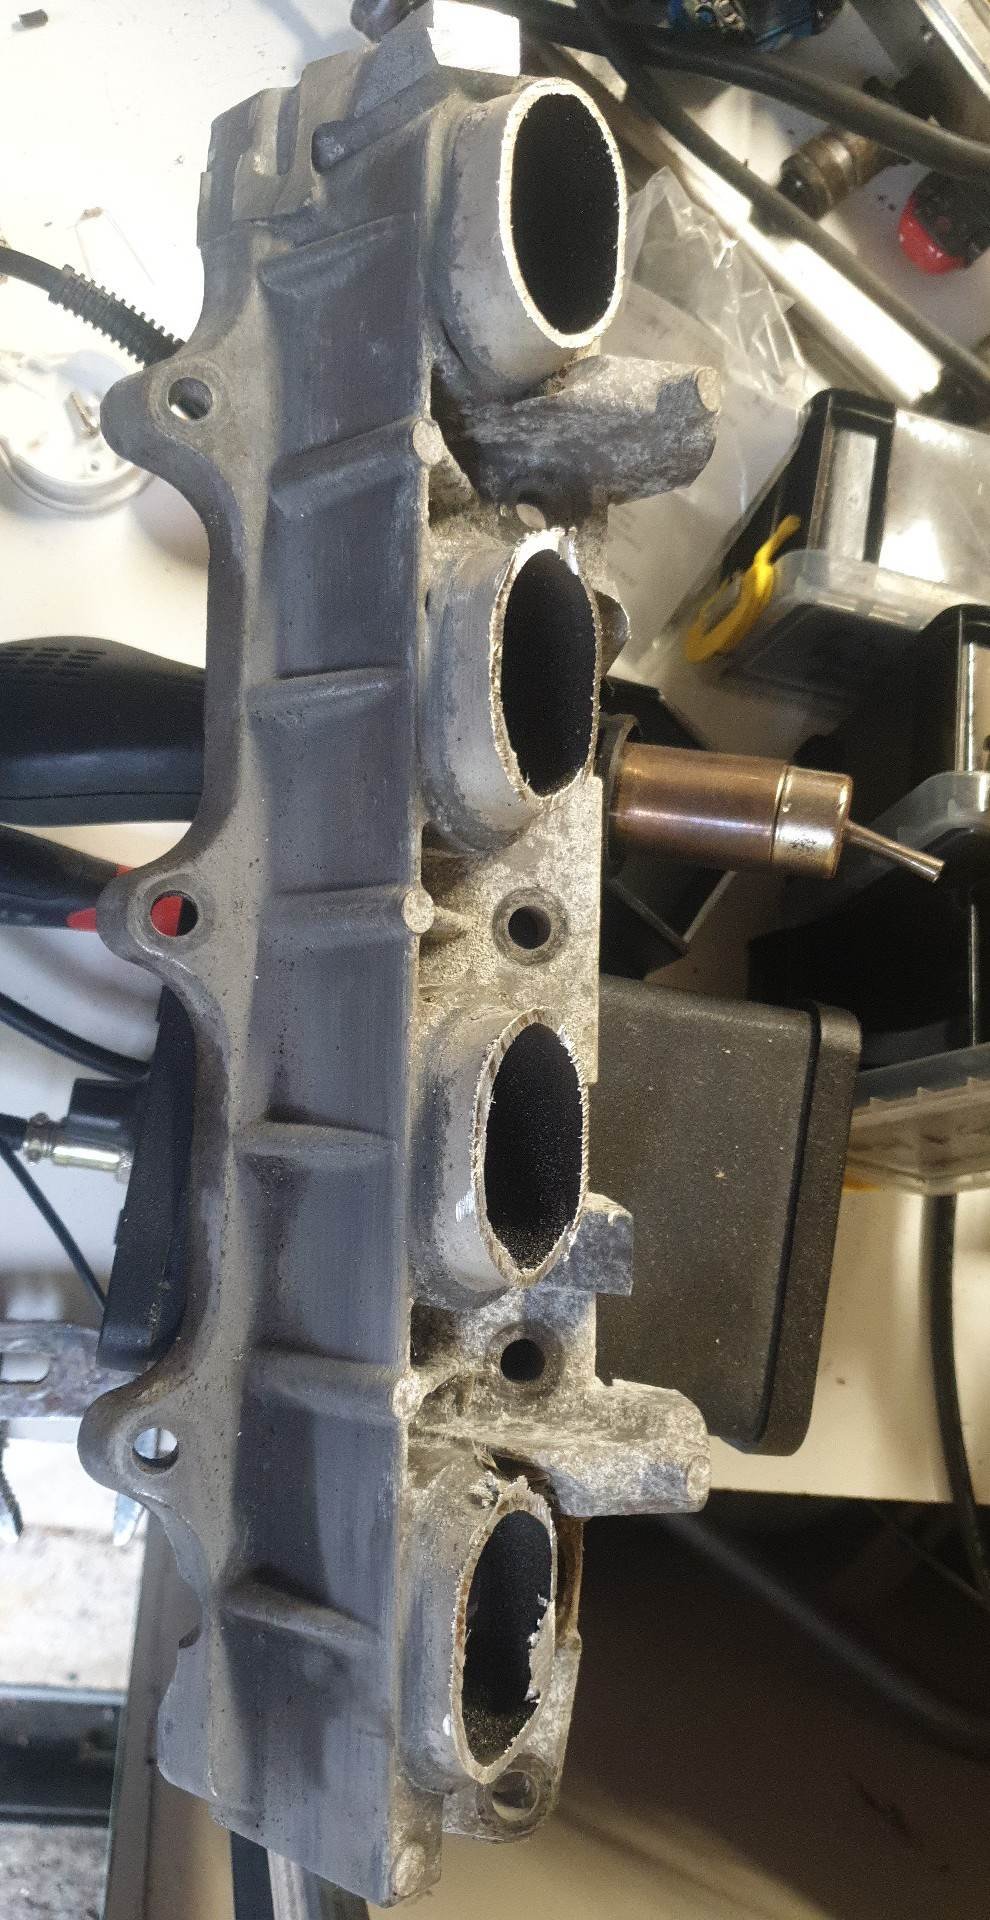
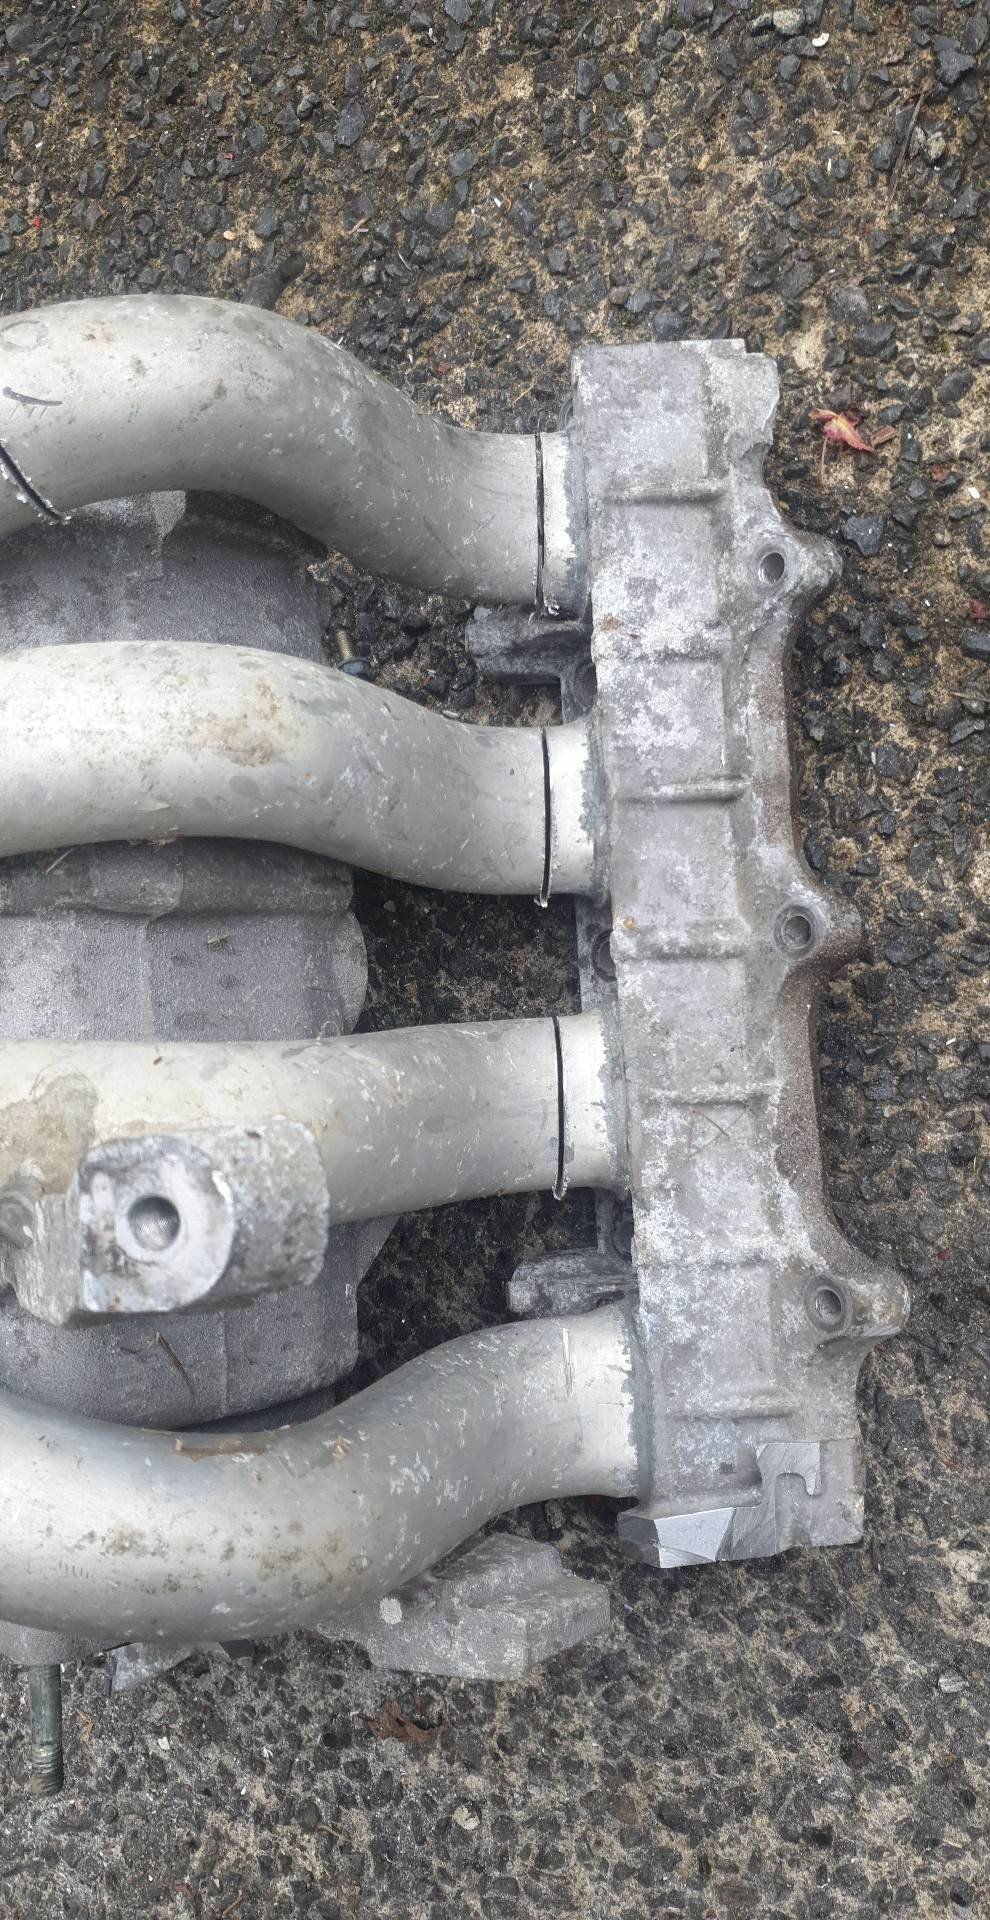
I've been busy with a major milestone at uni, which I have (un)officially completed as of Friday so I could spend the long weekend carrying on with this. I've tacked together the intake manifold. need to get some roloc pads from blackwoods to do proper surface prep before continuing as the tacks are pretty dodgy to say the least. The ZL casting is far worse than the old 4age flange I had on the old manifold, this is full of crud and loves to pop and splatter, however once new material is infused into the casting it doesn't do too badly. As I was hoping for, it clears the fuel rail, brake/clutch things and bonnet. Perfect. One day I'll get around to making a plenum for it, but for now it'll remain open to atmosphere.
-

Random slightly cool stuff you built but not worth its own thread, thread
Themi replied to h4nd's topic in Other Projects
Tig foot pedal - Arduino style My smaller Tig welder doesn't support a foot pedal, just an up or down button on the torch. It doesn't really give the control needed for materials like thin stainless, so here we go... I used a knockoff Arduino uno and a cheap Jaycar protoboard. The wires headed to the welder are soldered on as the control box will be glued to the side, but the 4-pin connector is the one that will go to the foot pedal and the on/off button on the Tig torch. The pot in this case will probably be for "scaling" the foot pedal (perhaps full travel should be +/-10A, or +/-50A?). In terms of control, the three buttons for the welder (up, down and "on/off") sit on a 5v pull-up and are pulled low to activate. There are 2 ground pins in the connector. I've got up and down switched by some transistors but the on/off needed a relay as the Arduino was being reset when the argon solenoid triggered. I used a diode to control flyback but I think the solenoid plus the HF start were enough to funk-up the Arduino. Due to the debouncing in the welder buttons I found the minimum pulse duration to be 30ms and 20ms between pulses. This gives about 20 pulses per second, leading to a maximum amount of up or down per second to 20A, which should be plenty for a foot pedal. I haven't actually built the foot pedal yet but I was just thinking of attaching an arm to the potentiometer to make a linkage, and using a gate hinge + spring as the pedal itself. Real welding foot pedals are surprisingly expensive! It's not the most interesting project but it solves a pretty annoying problem...
- 1288 replies
-
- 18
-
-
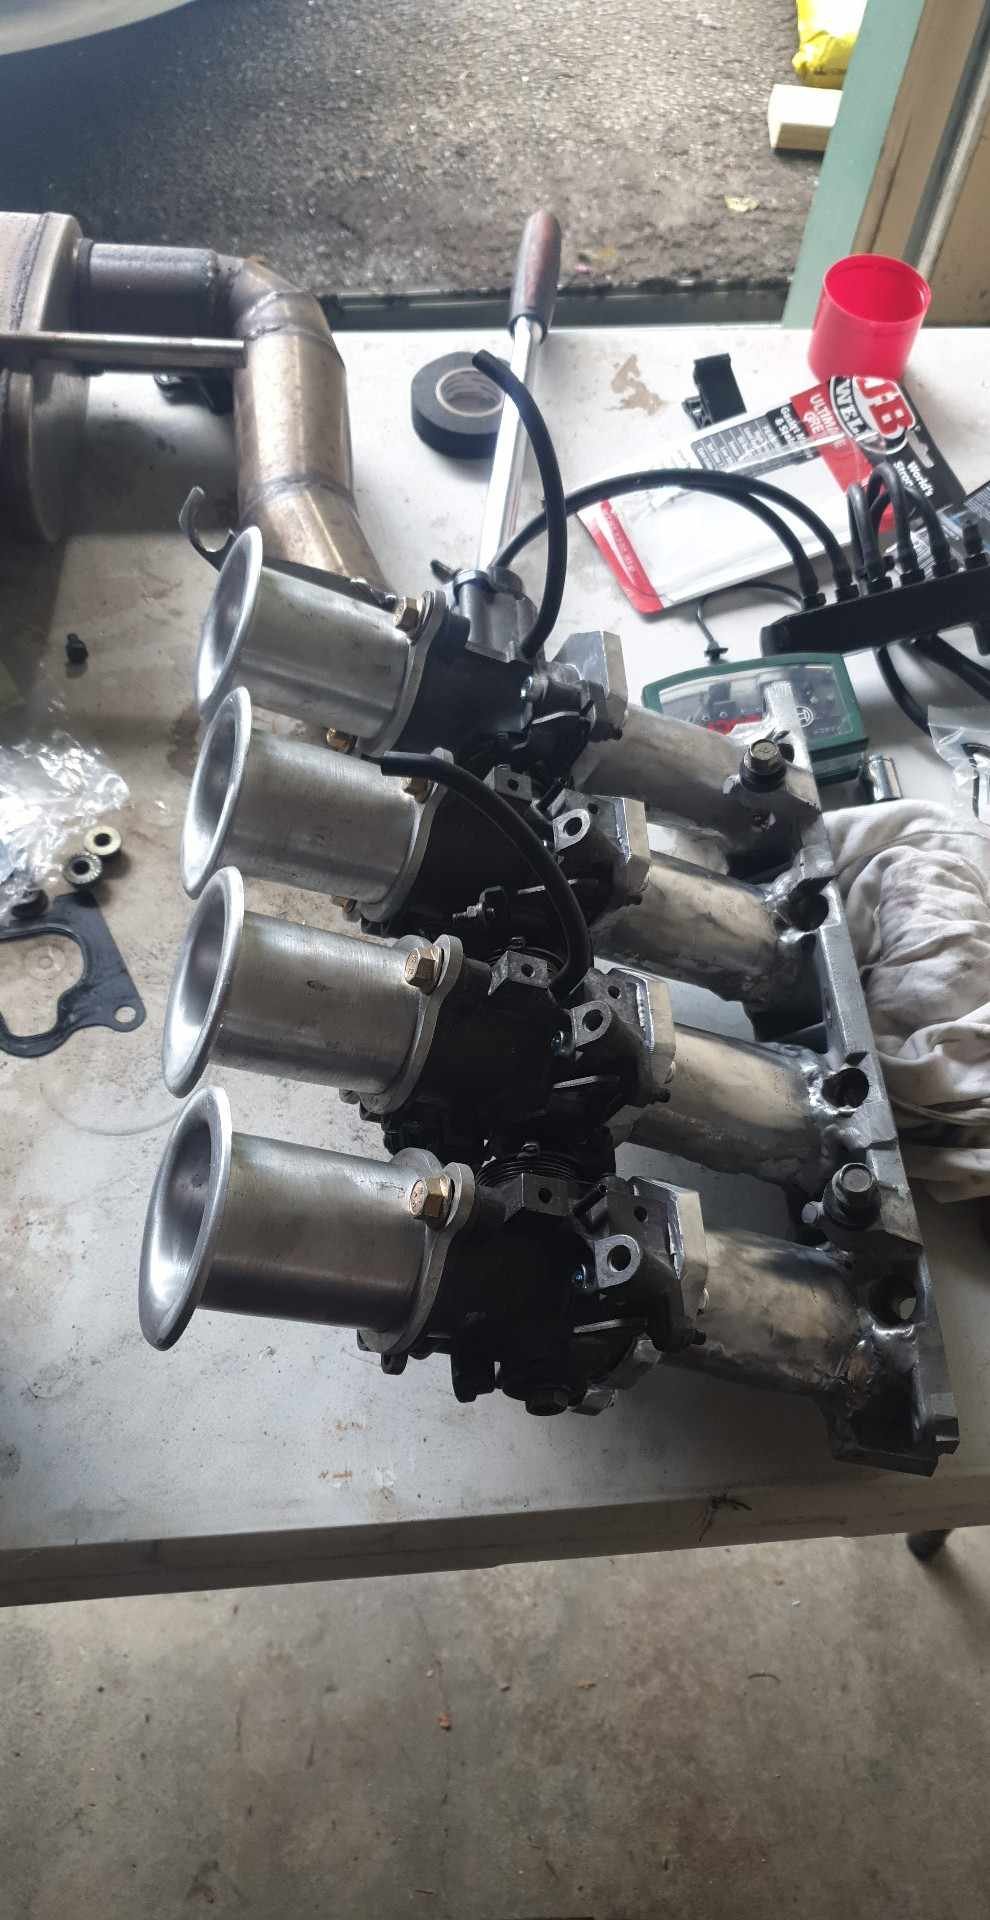
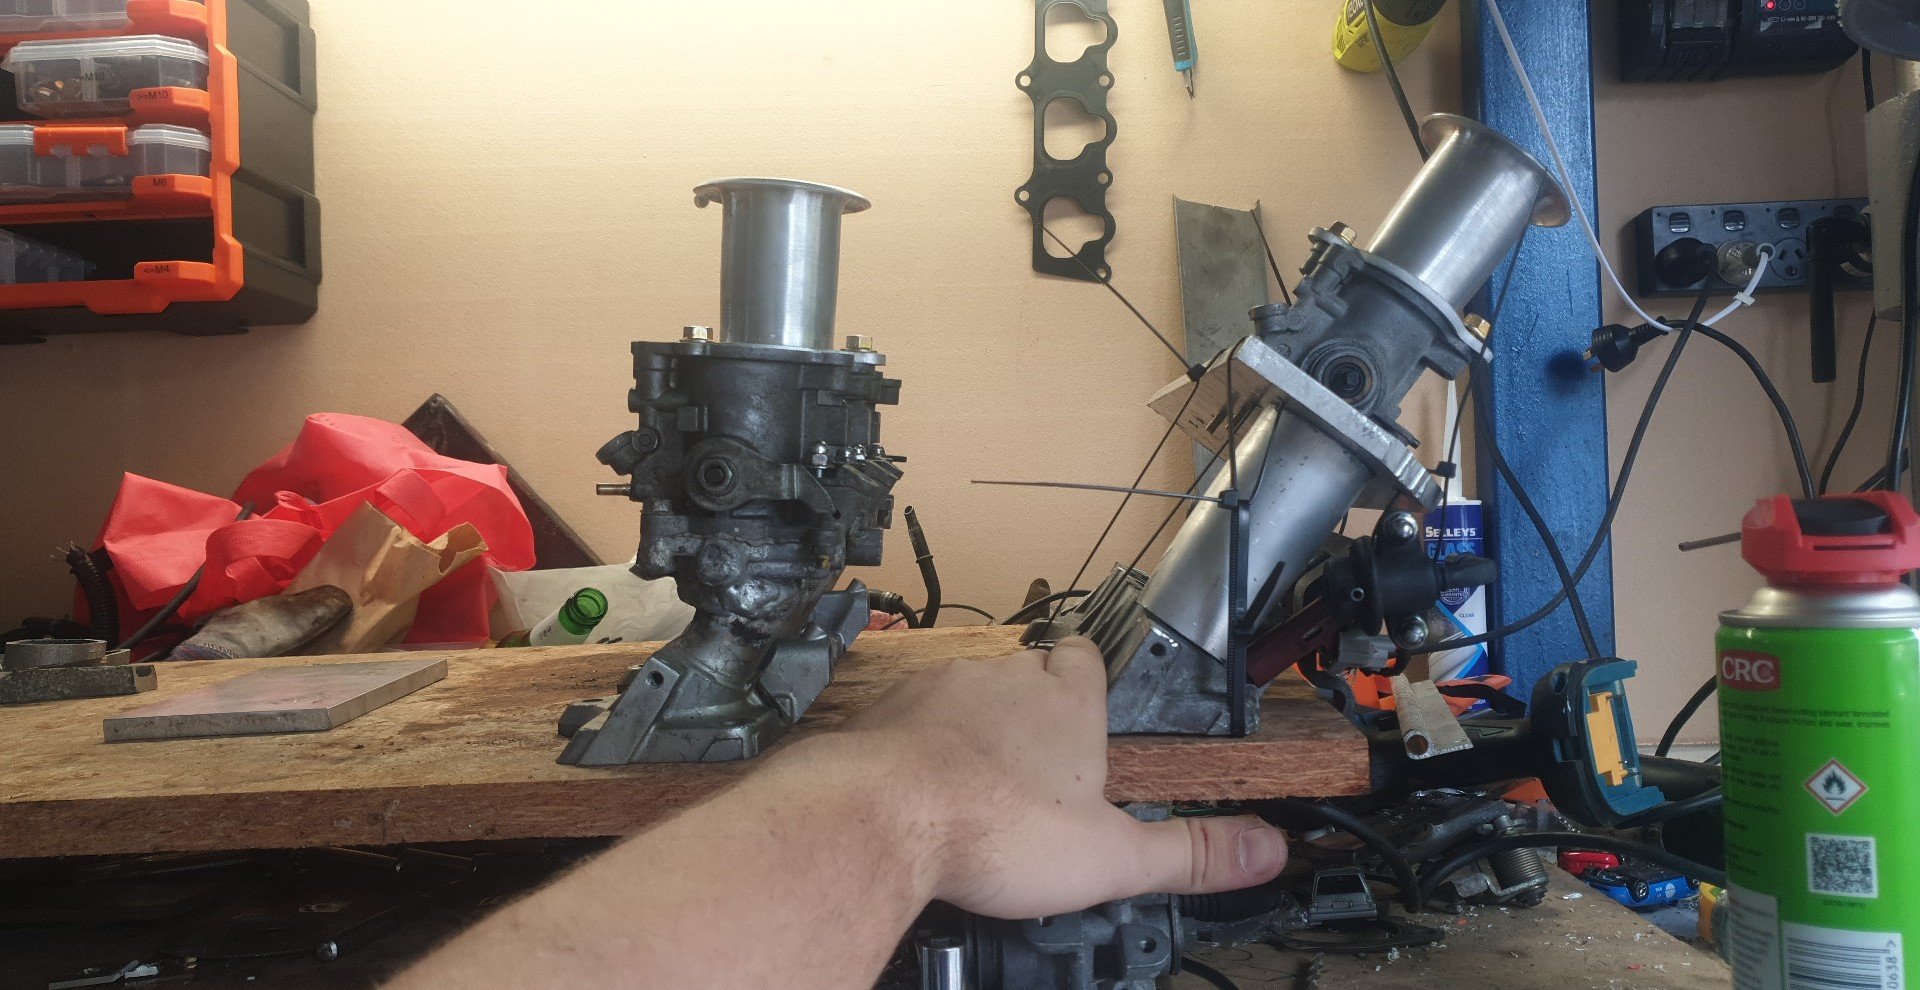
Itb manifold part deuce: New runners are 95mm long 2" OD aluminium tube with 3mm wall thickness. I'm using 10mm thick aluminium plate as the flange, which will be trimmed to size later. I made a real effort to get the angle just right to match the port angle. Looking down the trumpet at WOT you will be able to see the top of the piston! I can't shorten the runners as them parts of the fuel rail interfere with the throttles. The comparison between the old manifold and new one is quite stark. Also, I'm not so sure if the new one will clear the bonnet... But the main issue is the TPS now will interfere with the clutch res. Anyway, I haven't welded everything together as I have quite a bit of prep and tube "massaging" to make everything fit. Still I'm happy with this progress.
- 68 replies
-
- 14
-
-
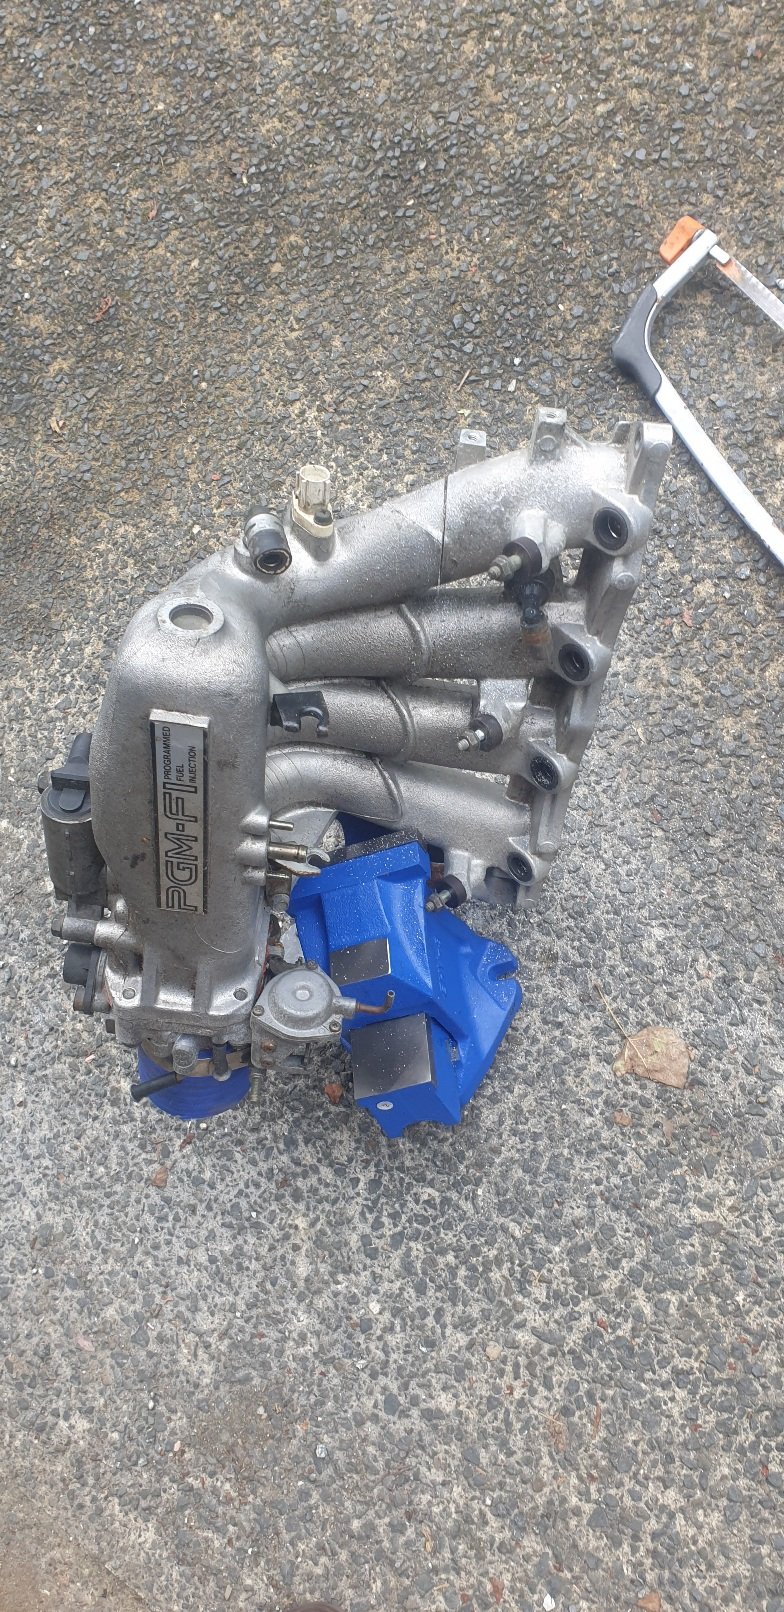
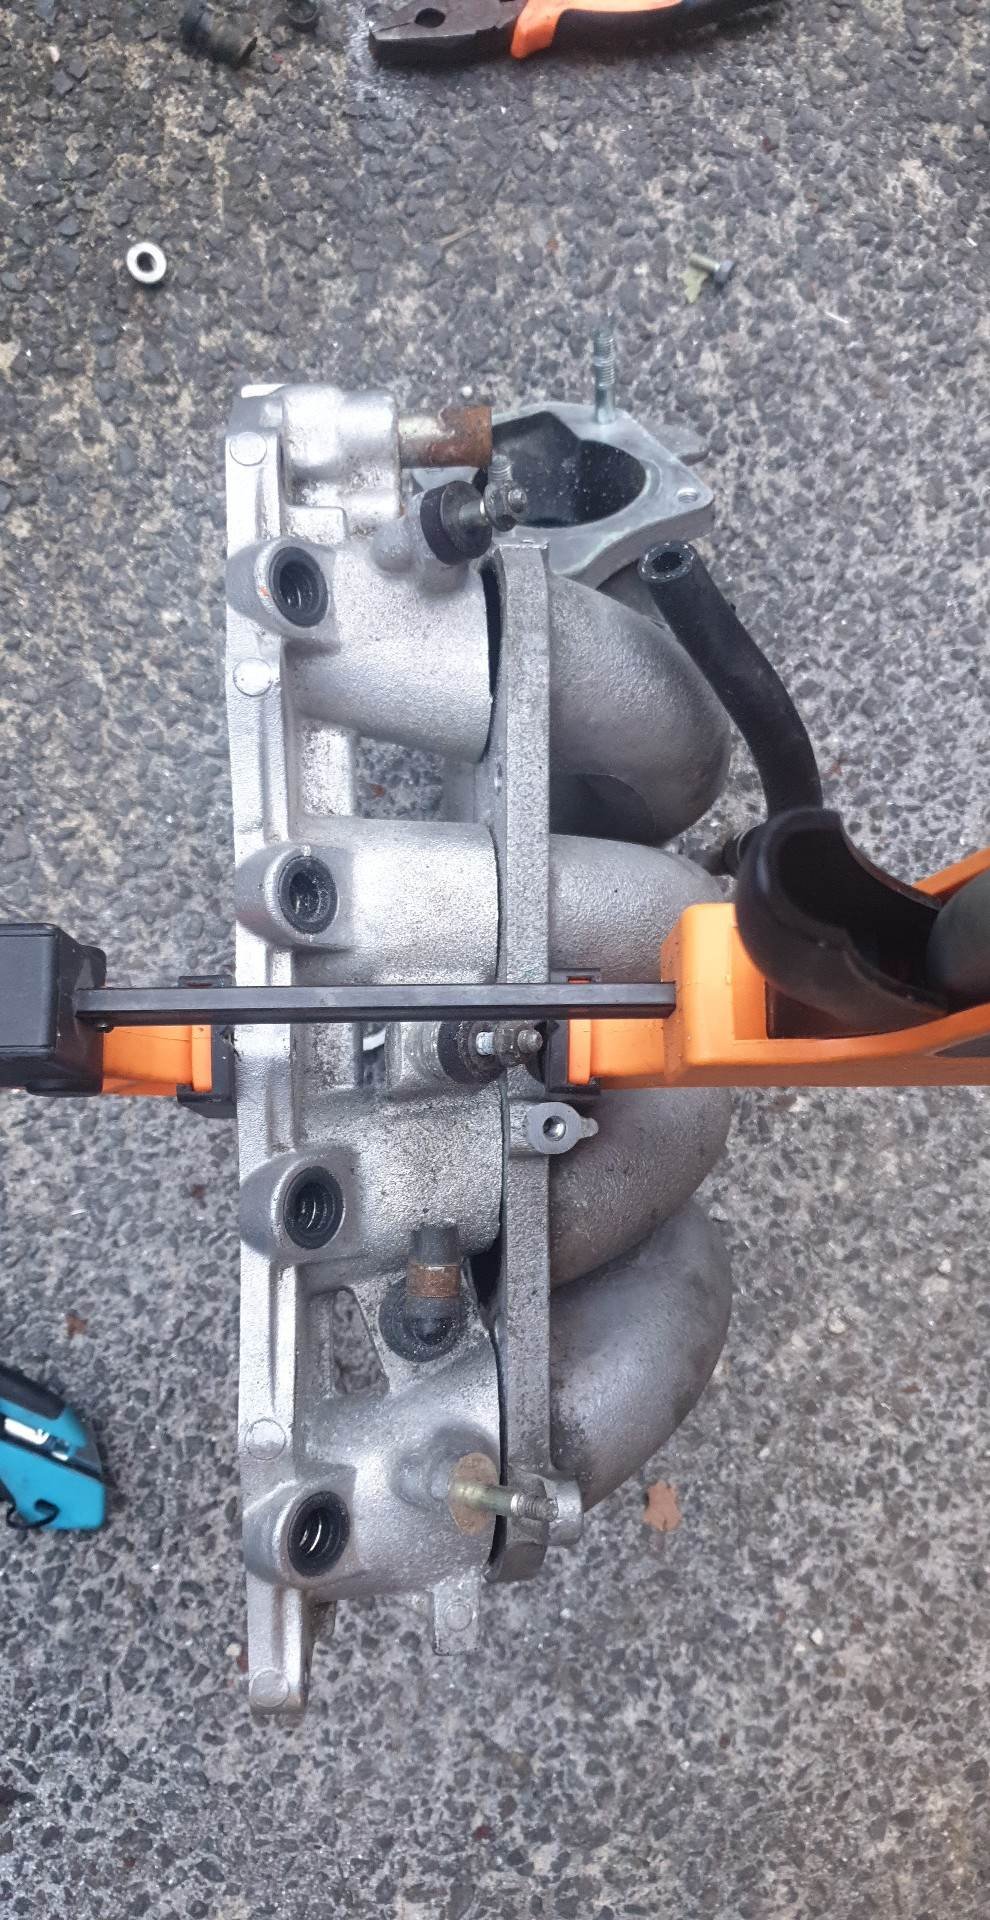
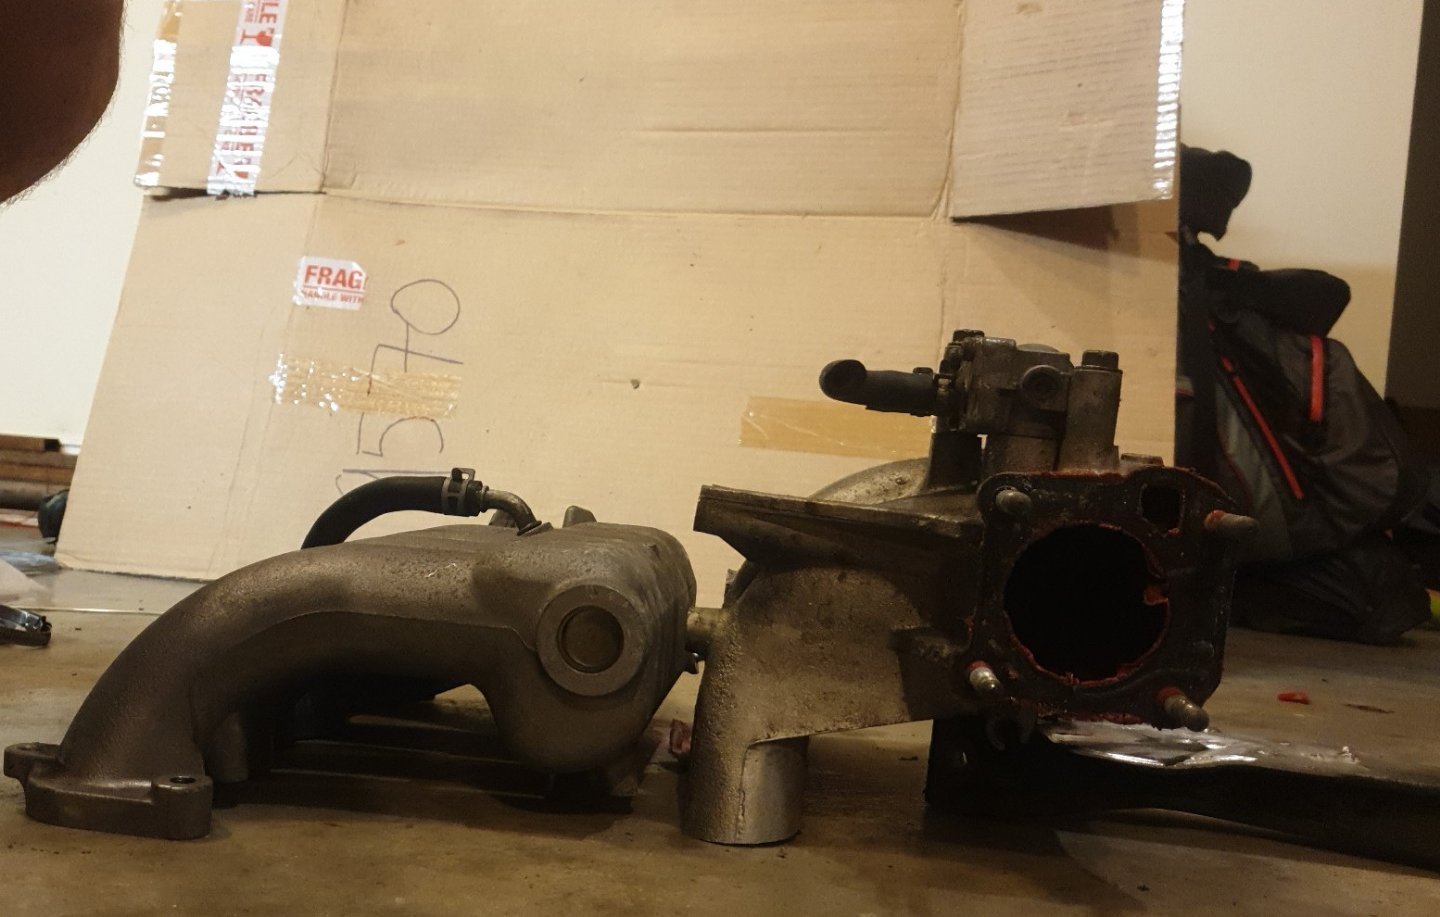
This might not be worthy of the second post here but we knew it was going to be slow, so it'll just be a small update. Anyone who's seen my Mazda knows that chopping intake manifolds seems to be my favorite pastime but I PROMISE that is not the case! Today I purchased a K24 RAA intake manifold, which has a very nice 2-piece design. I also cut my ZC intake manifold in half, shortening the runners but attempting to line them up with the RAA's plenum section. I intend on cutting a flange and welding it to what's left of the ZC manifold allowing me to bolt that to the RAA manifold. Space-wise, this has saved me maybe 10cm at the back of the engine bay which is a huge amount. In the bottom picture you can see just how much space saving this really is. The picture is only the start as I have already trimmed a further 4cm from the Honda intake manifold (up to the fuel rail mounts), saving additional space again!
- 1 reply
-
- 8
-
-
So I don't have a 3d printer but I diiid borrow an AC Tig welder, so I'm "here we go again"'ing it and going to make my replacement intake out of aluminium, just without the gross bend. Here you can see how even the stock runners "flared" where they were joined to the old intake. The cross sectional area increases quite significantly here, which is bad mmkay. Next, a little illustration of where my old manifold was cut and shut. Now here's me using a totally normal and not at all weird method to hacksaw through this manifold. I hate hacksaws but my angle grinder was hating this more. And lastly, the chopped manifold. I intend on cleaning those holes up with the angle grinder flush to the flange, and then using the die grinder to cut out the rest of the tube from inside that hole. I think from factory it is basically glued in? Im going to make a flange for the 4age ITBs to come straight off this flange at the same angle as the ports, just barely clearing (or even mildly touching) the fuel rail. Anywho, hopefully the aluminium tube and plate will arrive this week so I can weld up the runners properly!
-
Yes, I hear this haha. Cool as, I might keep hunting through forums and see what people have successfully run on a ZC. Lots running different td04 and td05 combinations, generally with quite large turbine housings yes. I think the D-series enthusiasts Facebook page had quite a lot of love for td05. I think popping a block would be upsetting but yeah my rods aren't going anywhere. They'll take whatever I throw at them.
-
That just seems huge - I don't know if the s40-b000 will take much more than 250whp, 300 was a stretch but I figured a light car would reduce the amount of stress in the gearbox. The other issue is the sleeves - I'm running stock sleeves and not sure they'll hold much more than a 2860 can give. Do you have a dyno sheet from the b16 by chance - so I can see the response? I'd imagine if a 3071 size can get in boost by 3k, the 2860 will be spooling by 2! This seems a bit more practical for the build, to me. Regardless I do appreciate the input, I haven't completely dismissed the g25-550 I will just need to do some more research.
-
Really? This is interesting thank you. I have done some limited research and I'm wanting to get into the high 250whp on full boost. I did some googling which suggested a gt2560 won't get me there hence the gtx2860 which is expected to get about 300whp with a better spool (gtx vs gt). My "knowledge" comes from mazdas which flow like shit. The pulsar GTX2860 Gen2 comes in a .64 or .86 5bolt rear or I can get the .82 3" vband rear housing. I don't have a big enough wallet for the real deal Garrett haha. I was thinking of the VBand .82 outlet because I dislike bolted flanges. What turbo would you be suggesting if you had the choice?
-
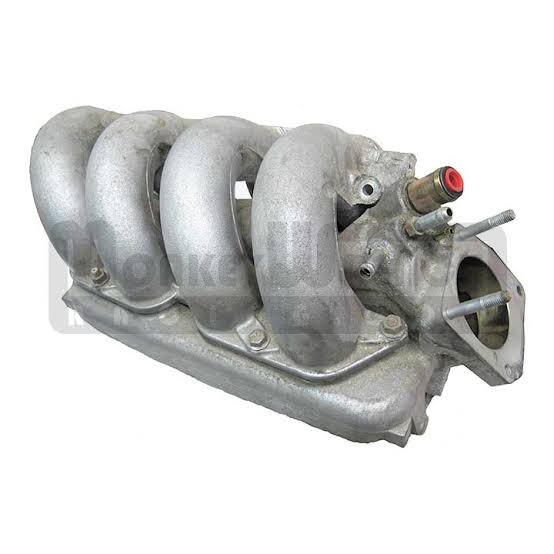
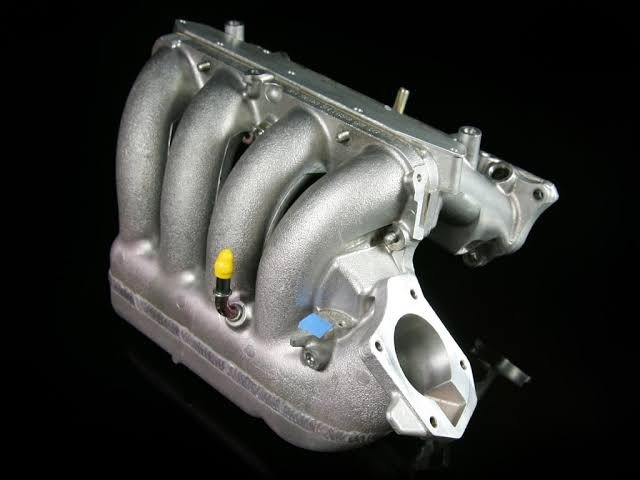
I guess it isn't exactly "build" related but more theory-crafting. This person has done an extremely tidy job of putting a DOHC ZC into a 1st gen civic. The big concern is that half of the engine bay is taken up by intake manifold, hence the comments on the main thread regarding RBB or 2zz intake manifold. Both of these have low-mount intake manifolds, with the runners curling over the top. It is worth noting that my ITB manifold on the Mazda was made by welding a ZL-VE intake manifold to a 4age intake manifold, both chopped off by hand with a hacksaw. Here is one variant of the 2zz intake manifold. The 2zz has similar port spacing to the ZC, so it won't be too difficult to cut and shut the stock ZC manifold on at the start of the runners. The removable plenum that came on the corolla 2zz (but not the celica) will help with welding the lower section of runner. Here is the K24 RBB intake manifold: The key benefit is that it unbolts half way through the runner. This means if I modify a stock ZC intake manifold to match that first section of runner, I get easier access with a die grinder to port it out. The drawback is that these are often more expensive, and are larger than the 2zz manifolds. Additionally the K24 has much wider port spacing, so mating the two manifolds might be a non-starter. Regardless, it will be a bit of a journey to make an intake manifold fit for the engine placement I am after. This is not something I specialize in and it is hard to find exact make/models of car for specific intake manifolds at wreckers. It might just require a good half-day of walking through pickapart to find the perfect manifold. I'd love to hear anyone's ideas on this, tell me how bad of an idea it is or suggest a better intake manifold, I'm all ears!
-
Placeholder first post for my 1979 civic build. Link to build is here:
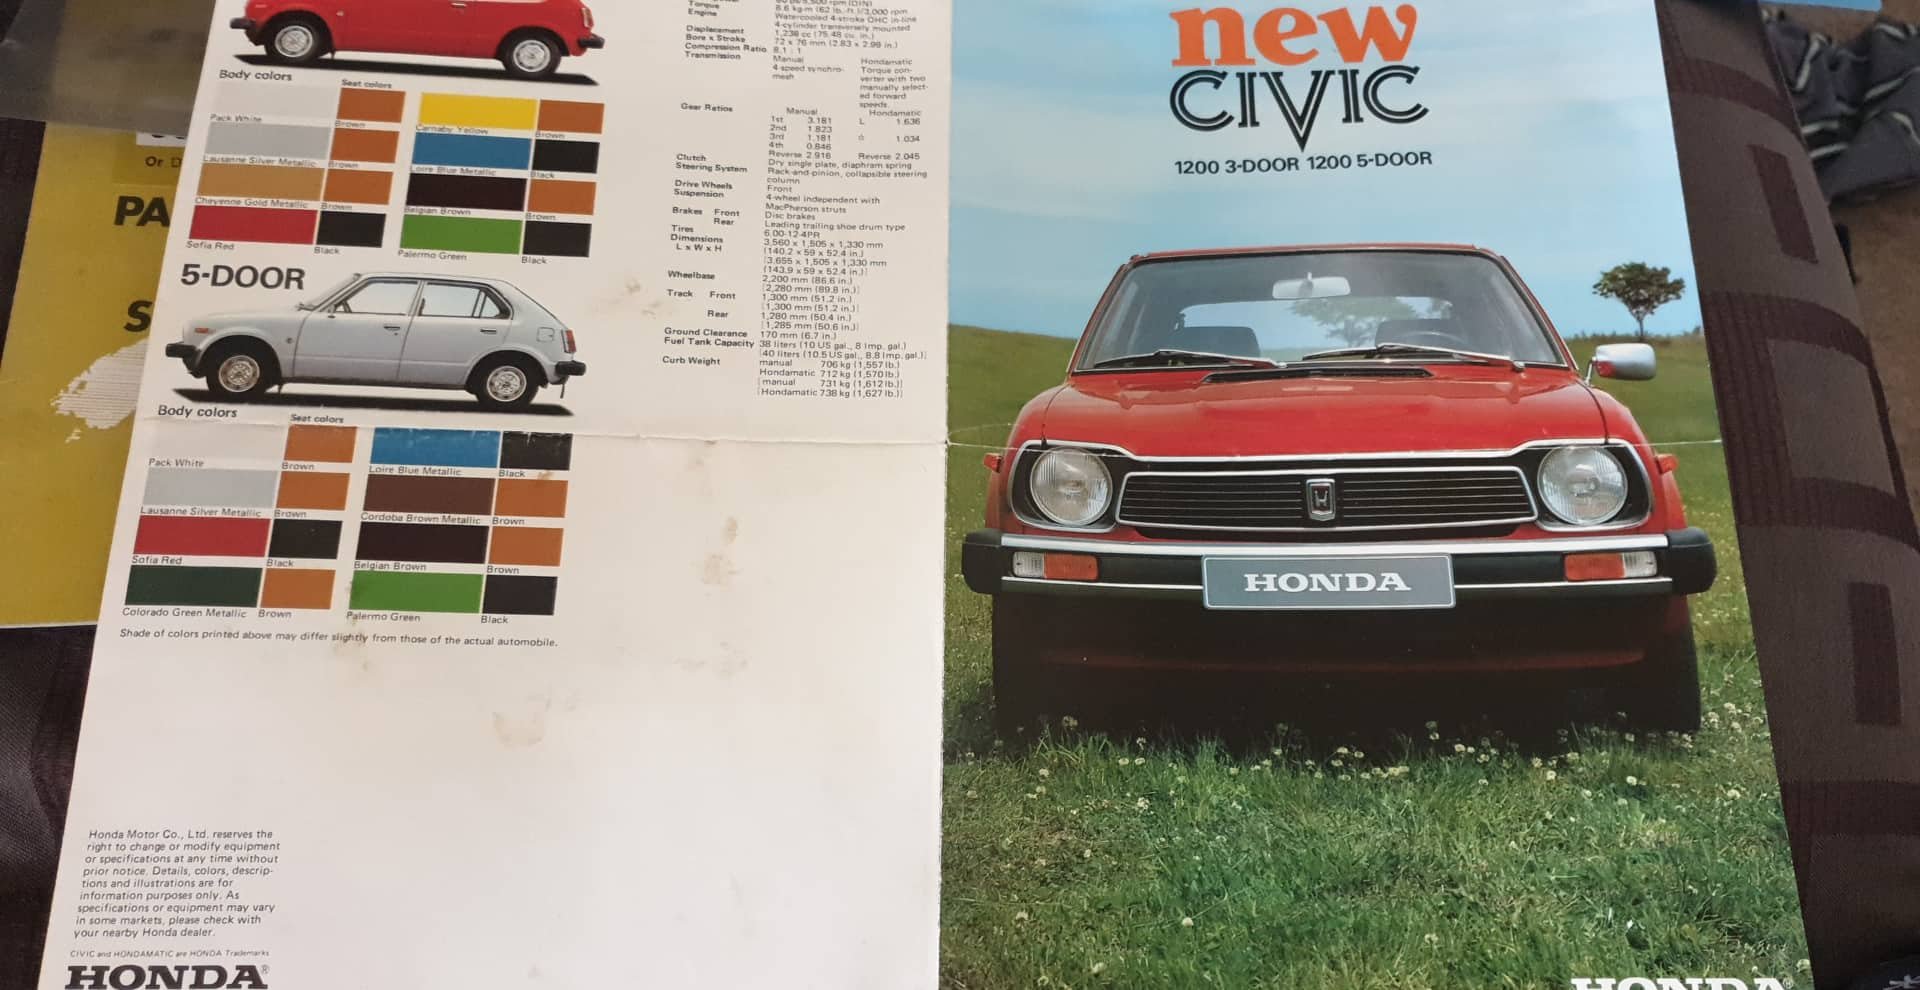
-
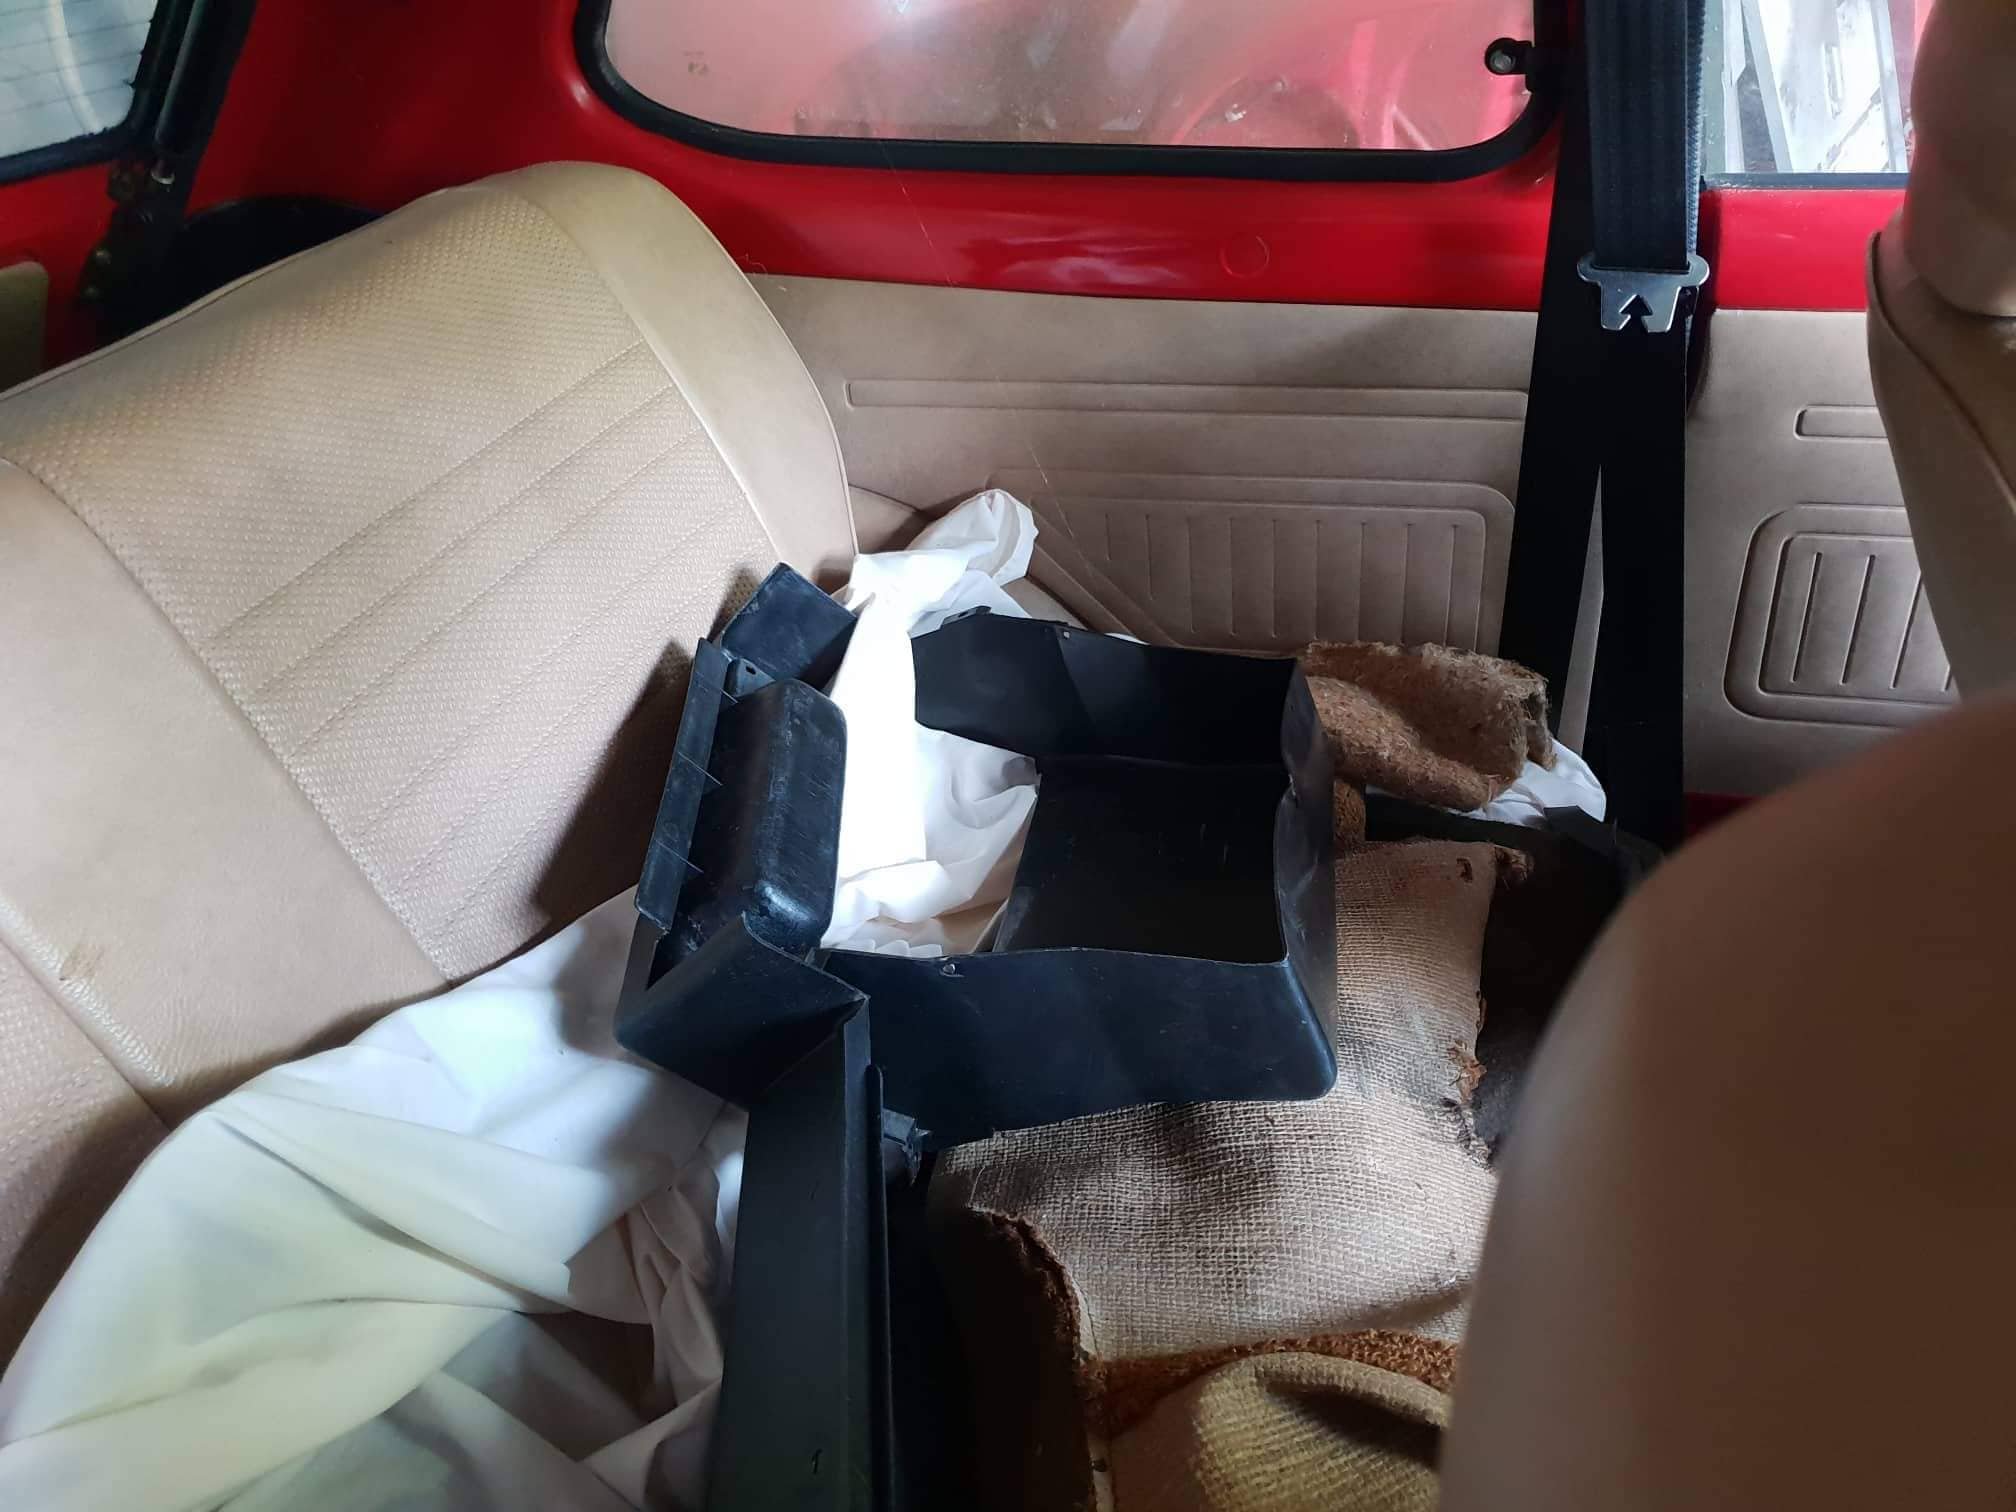
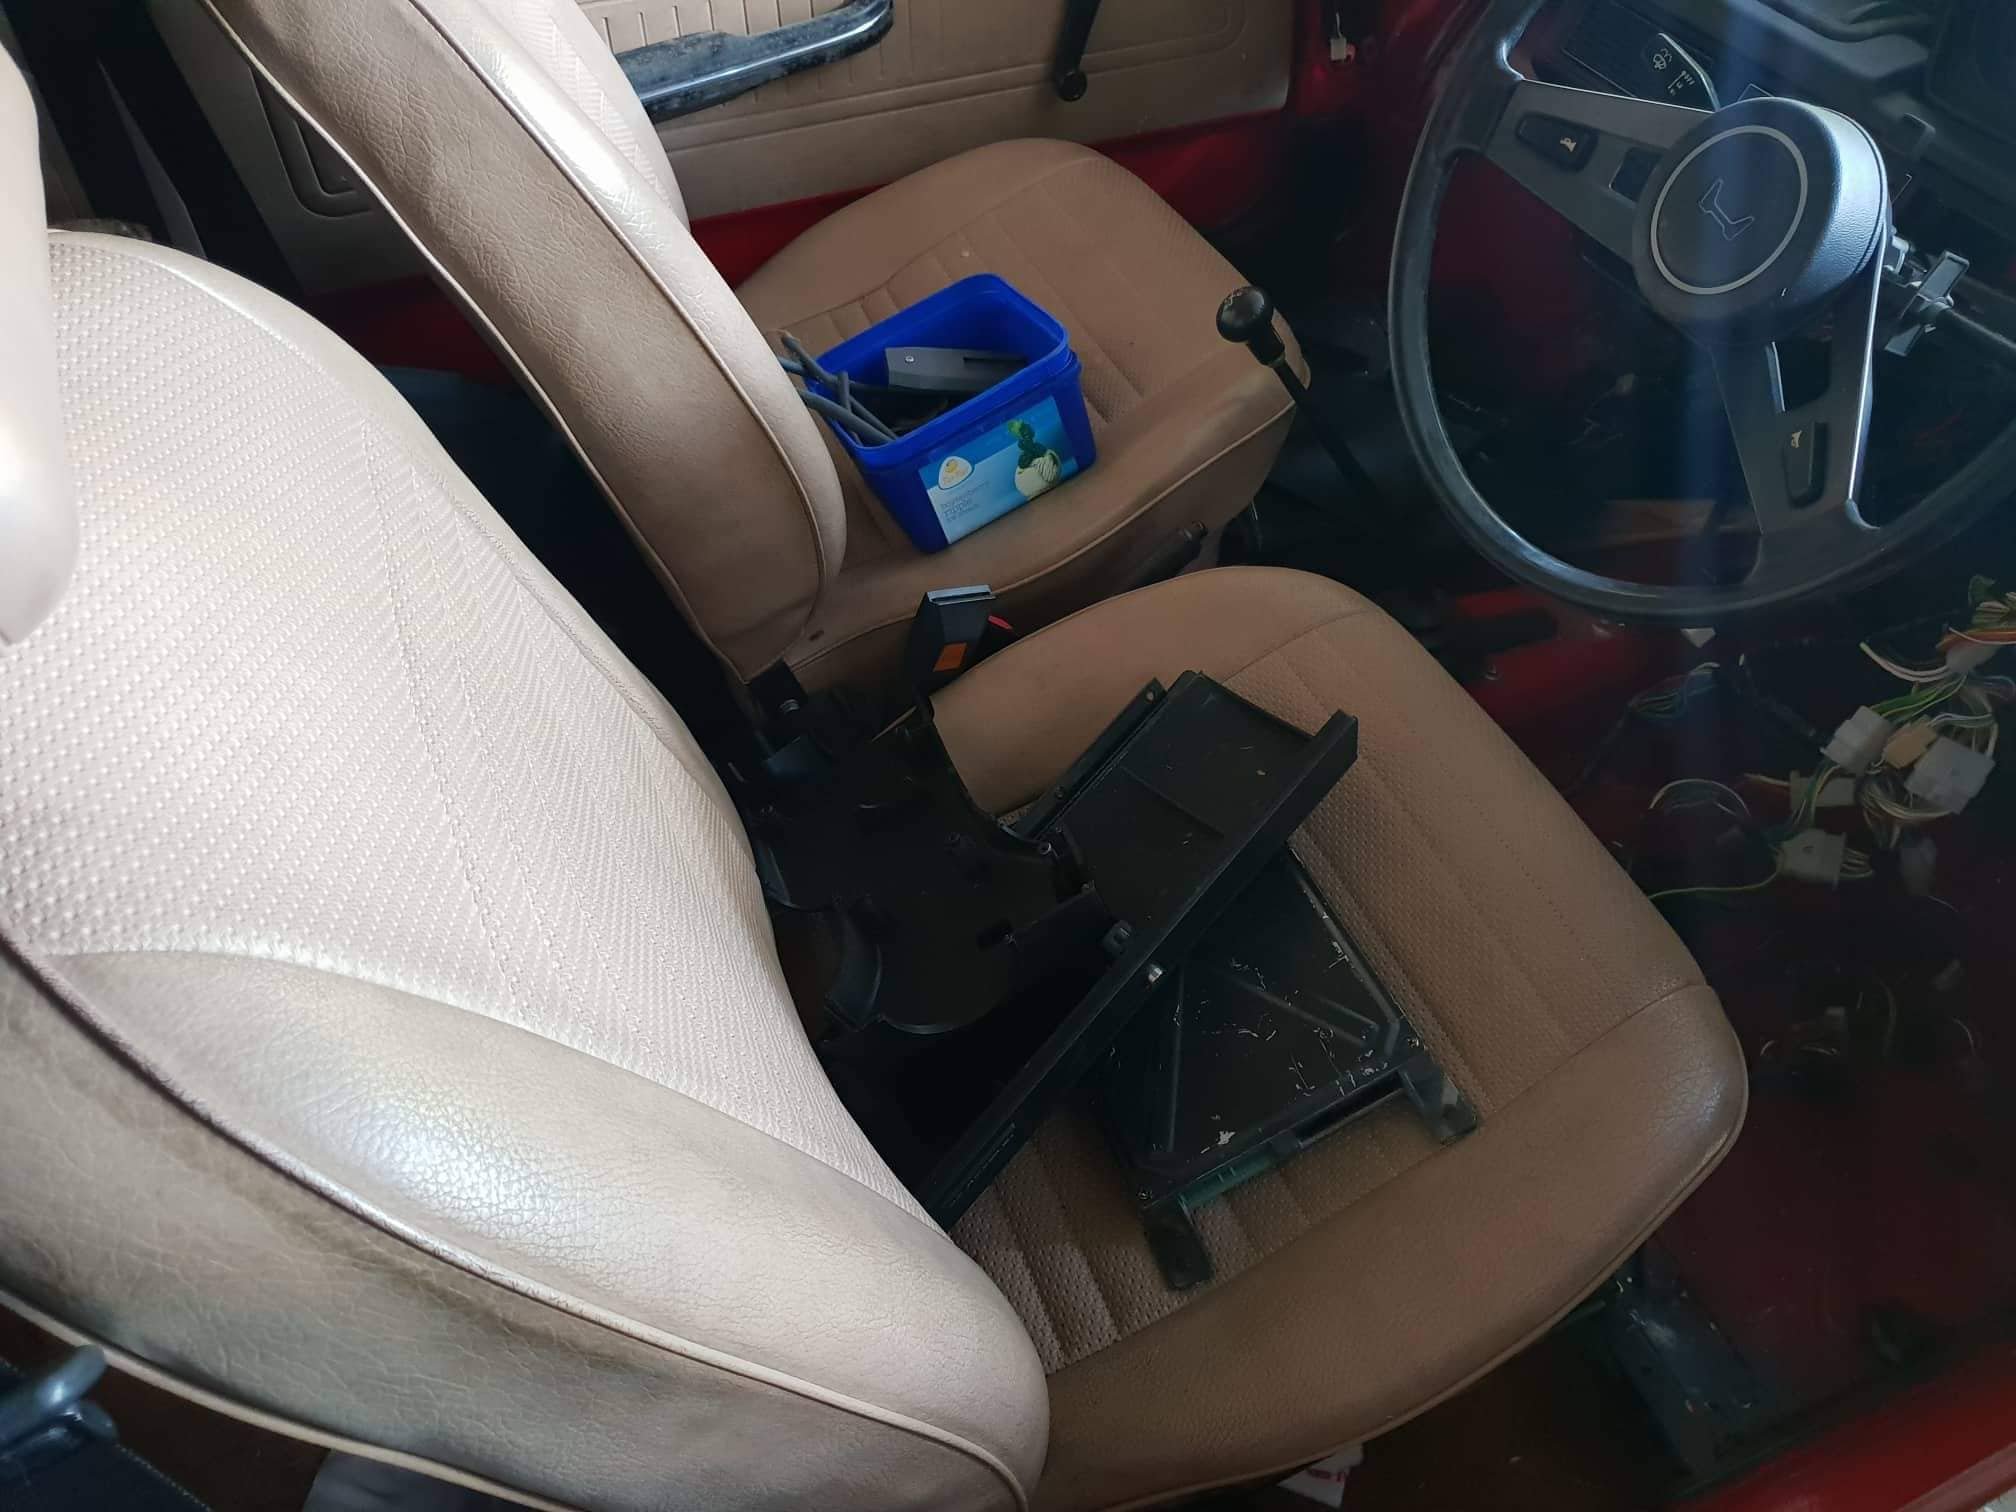
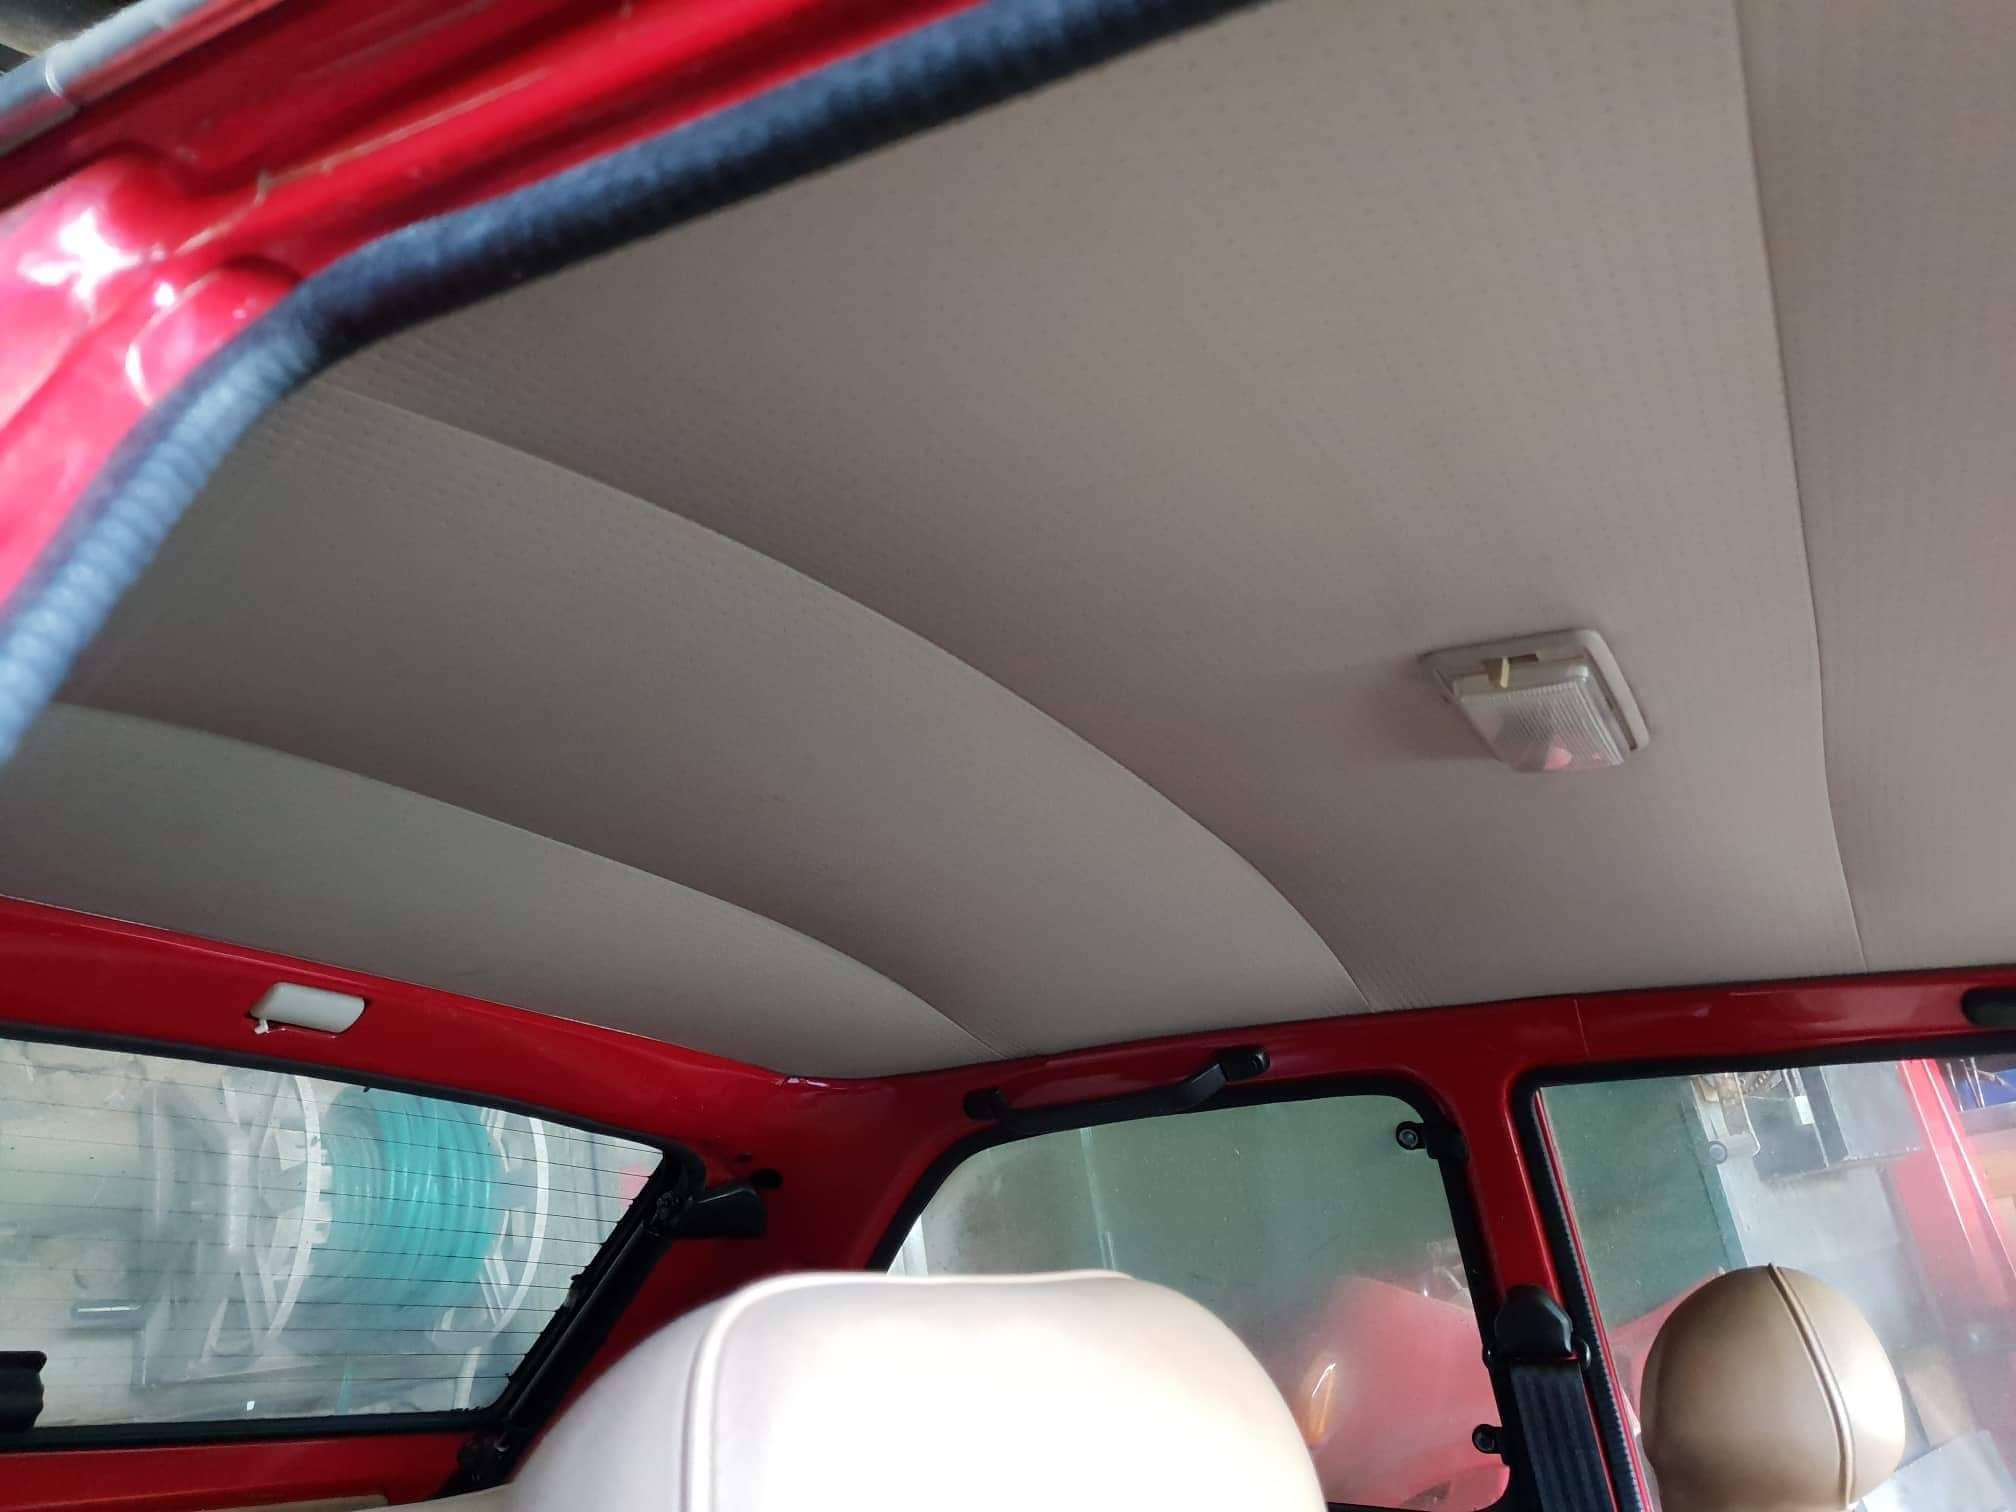
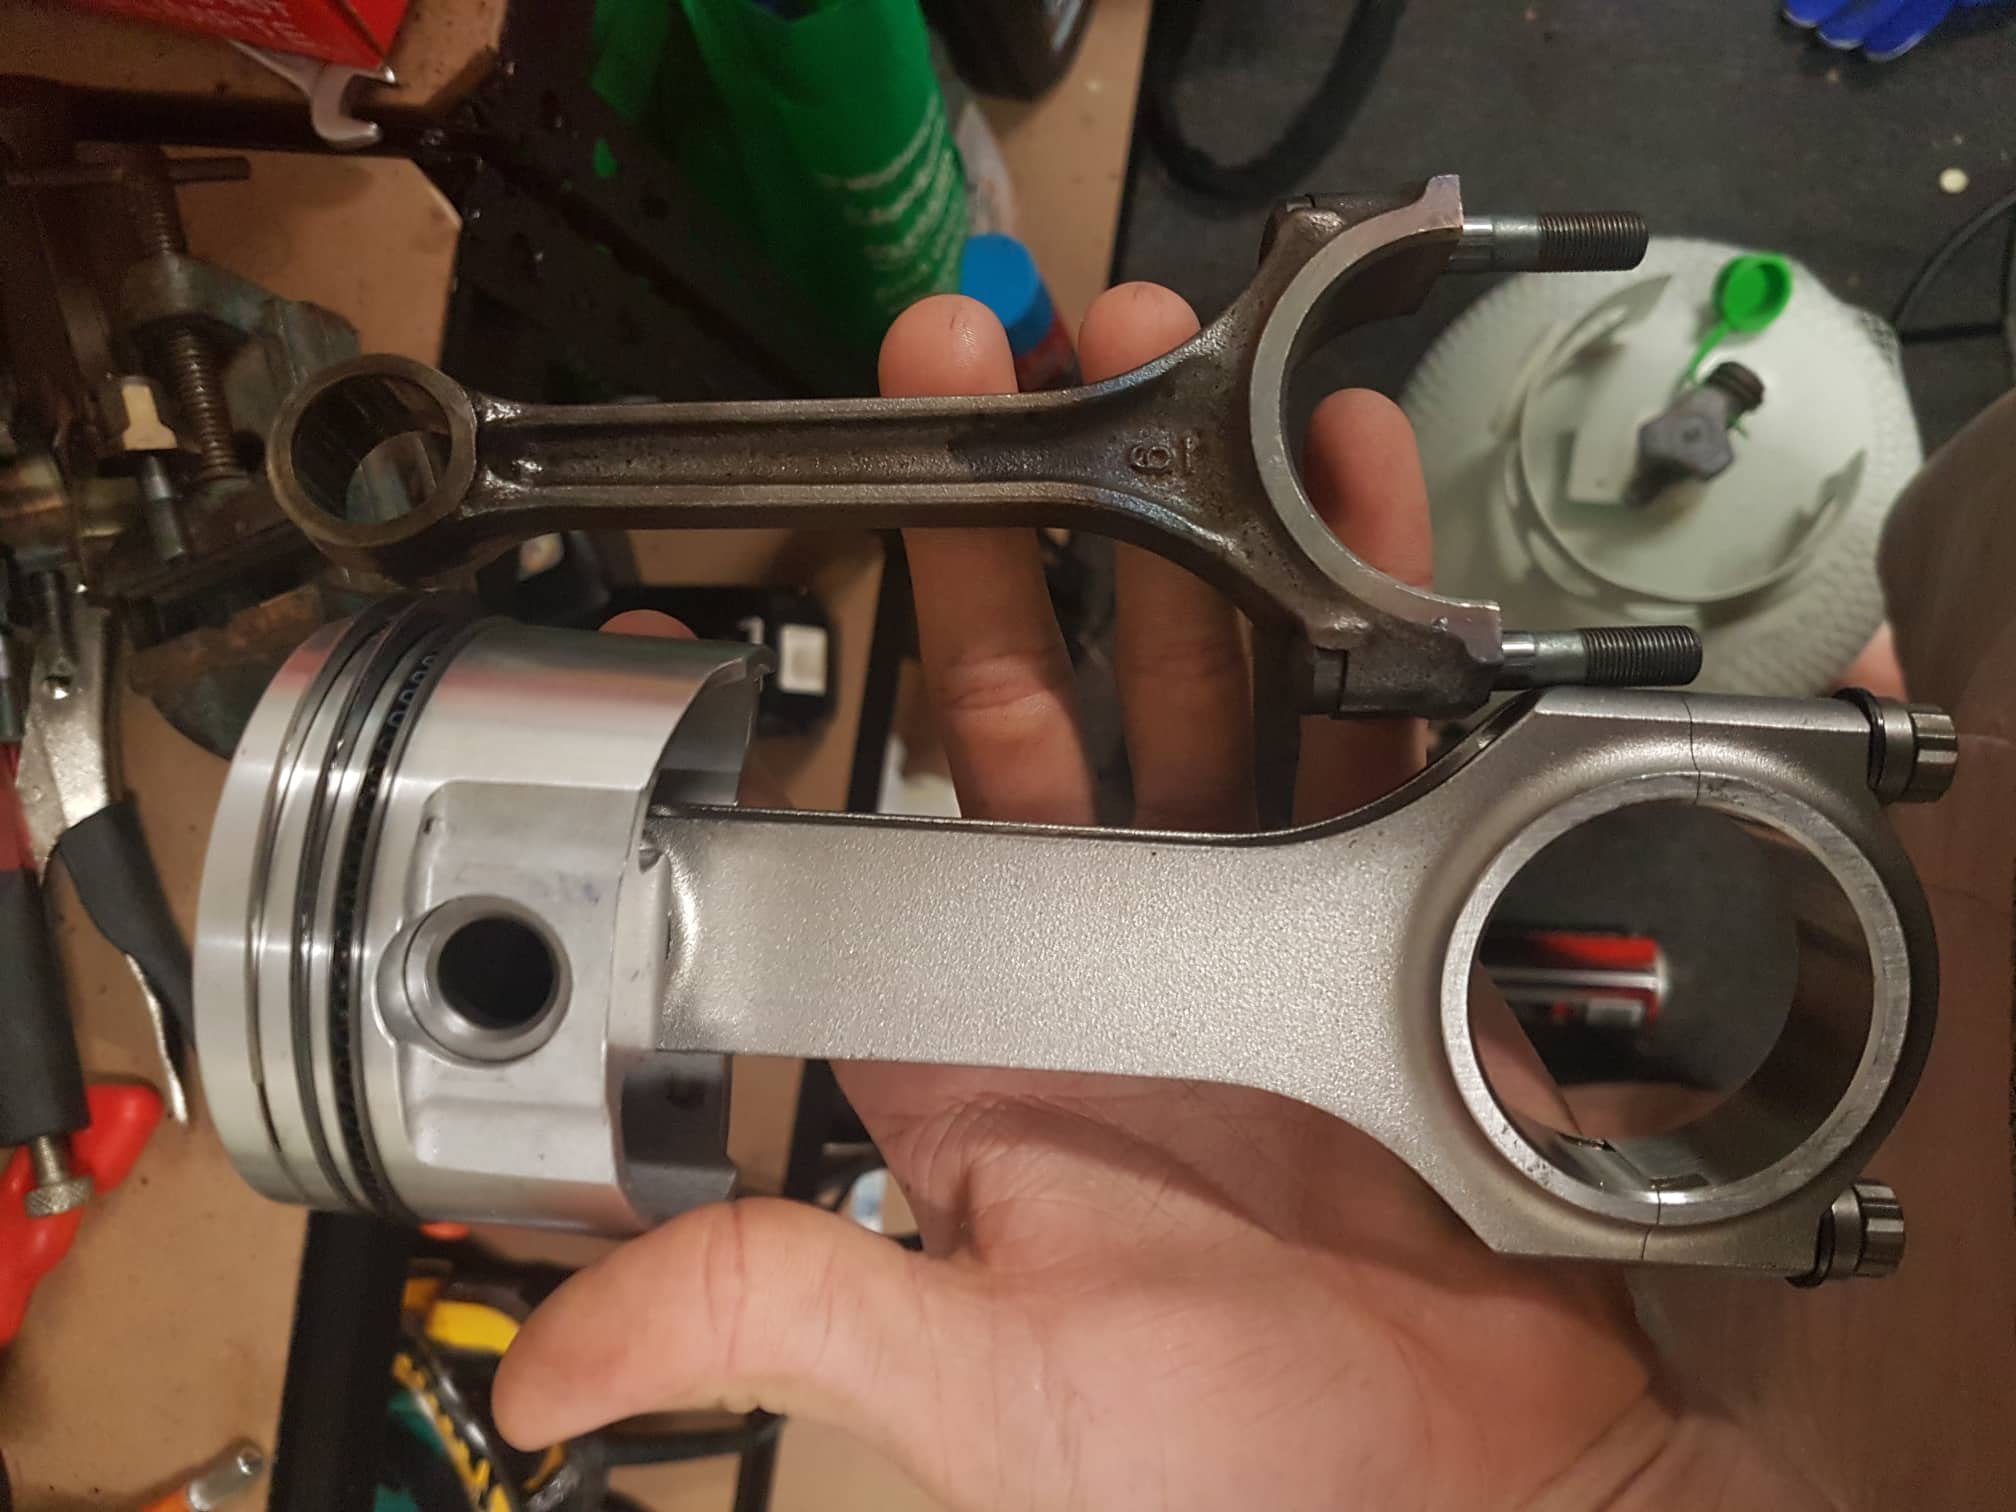
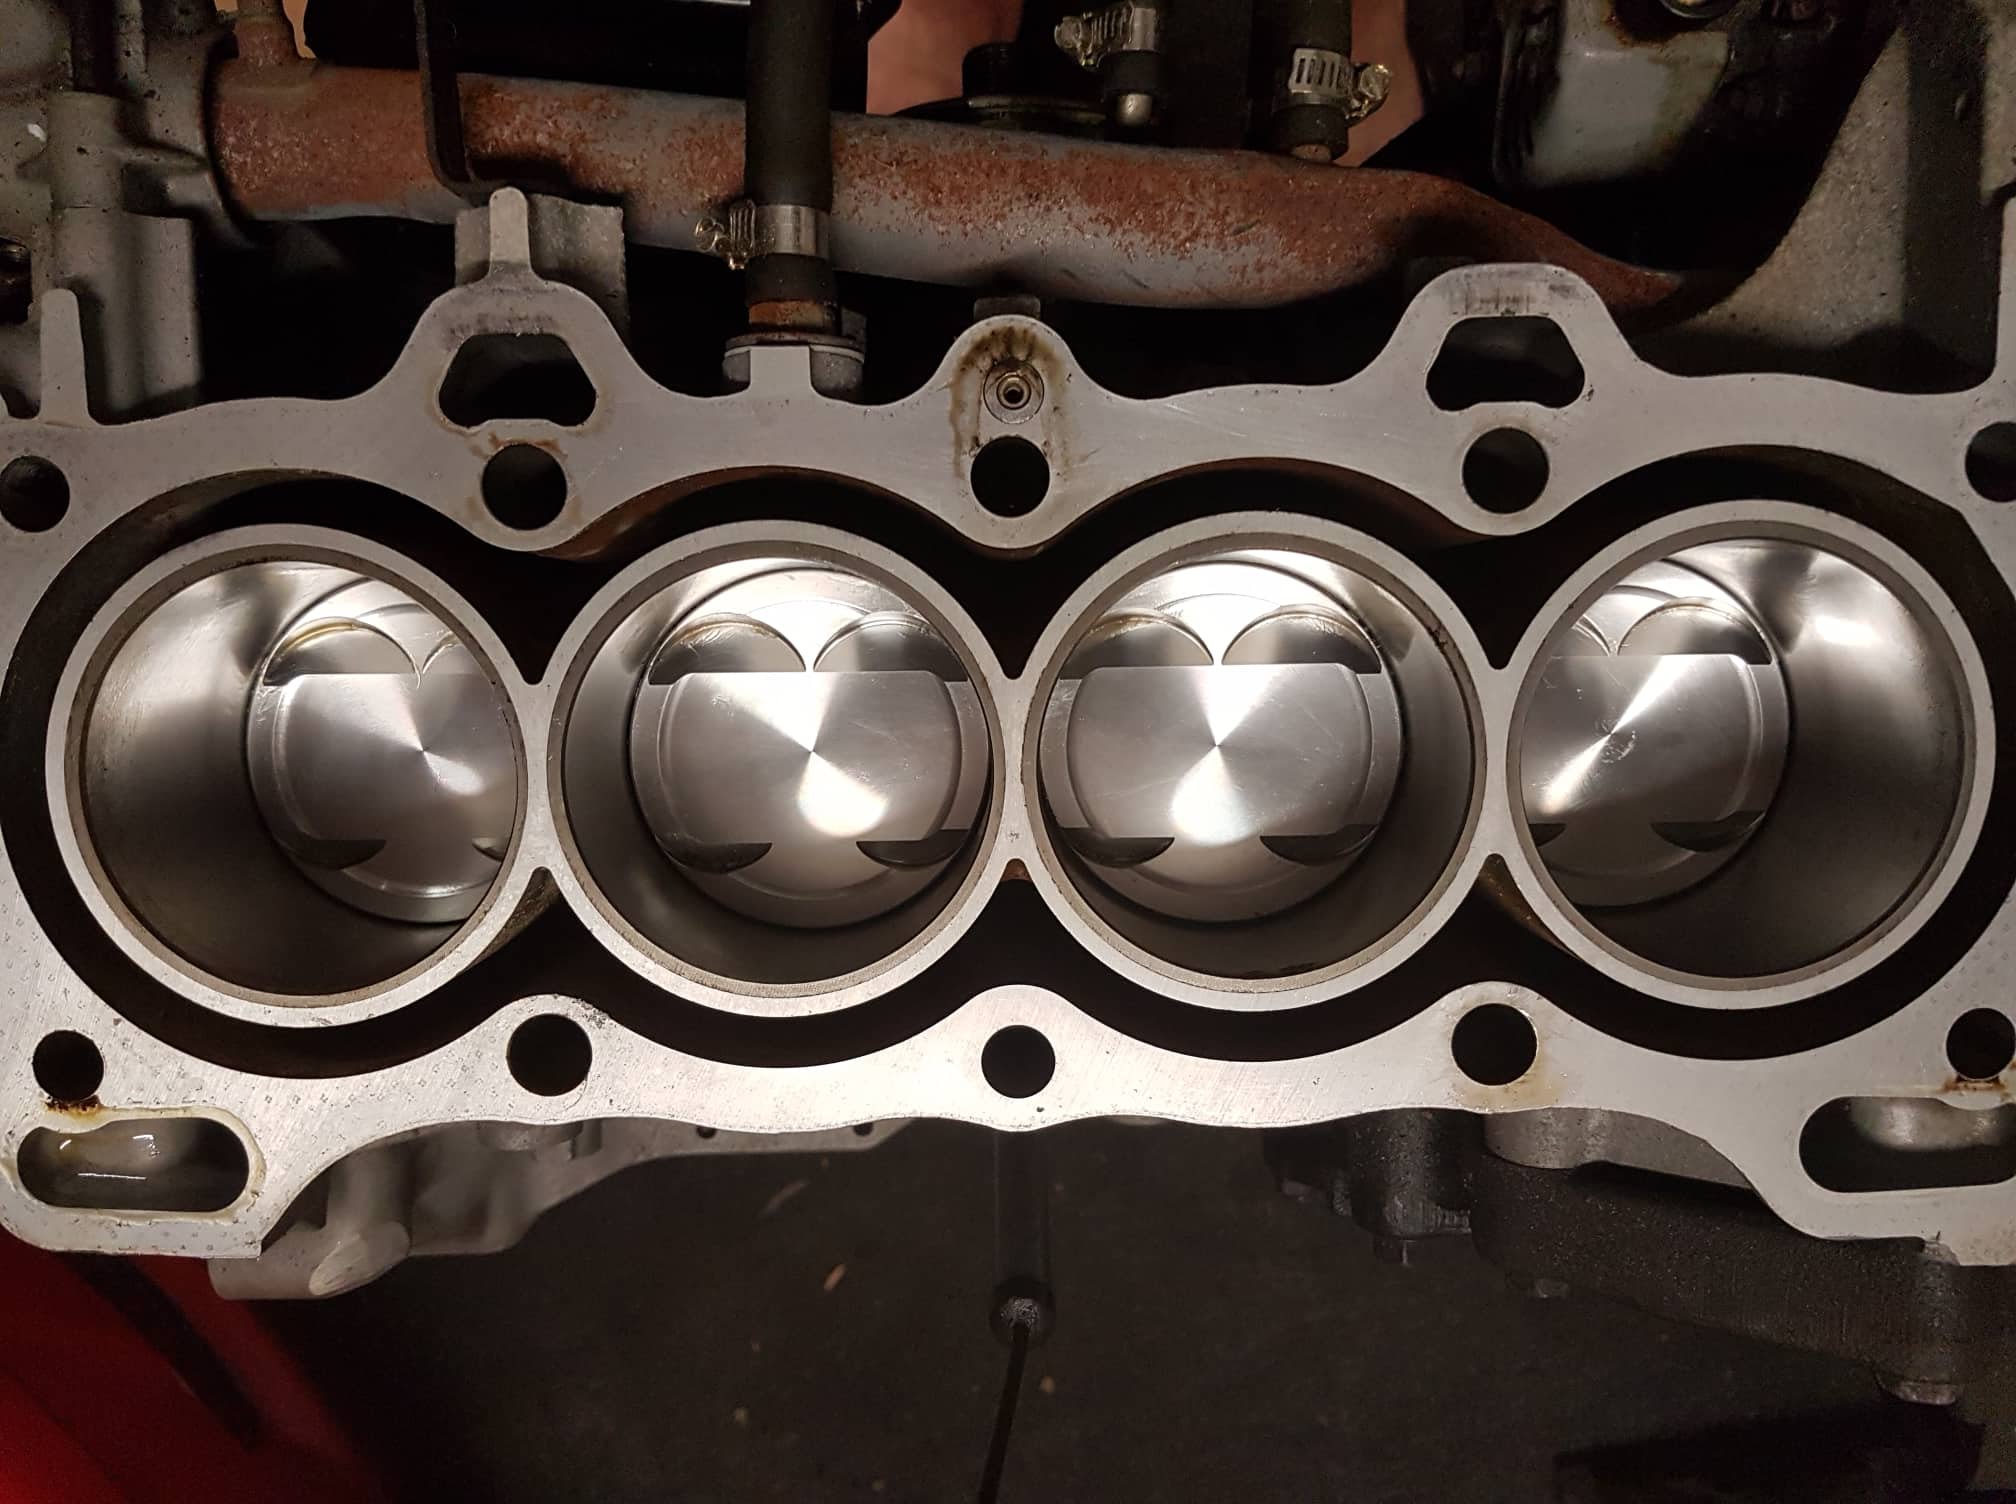
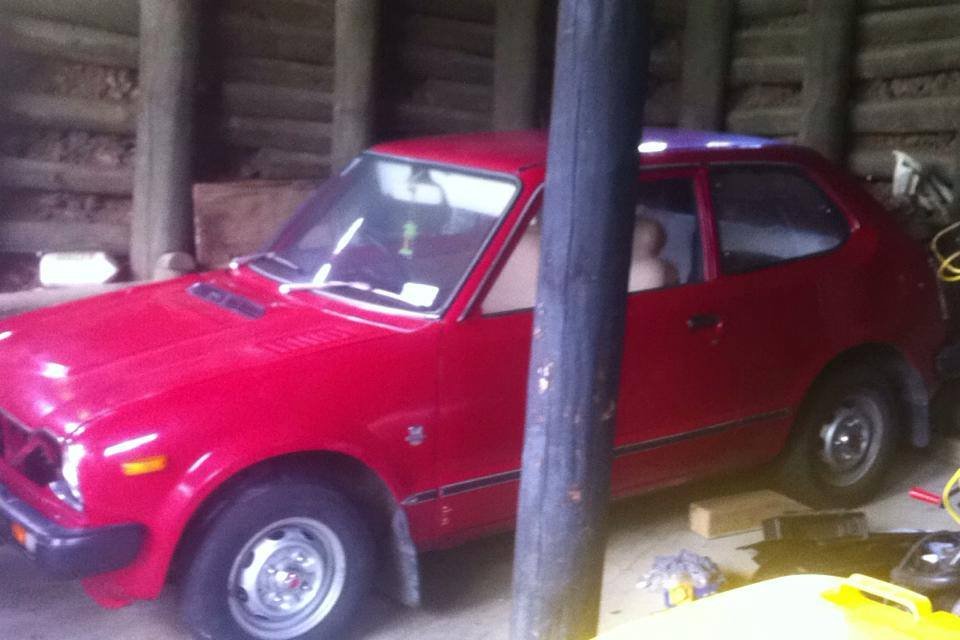
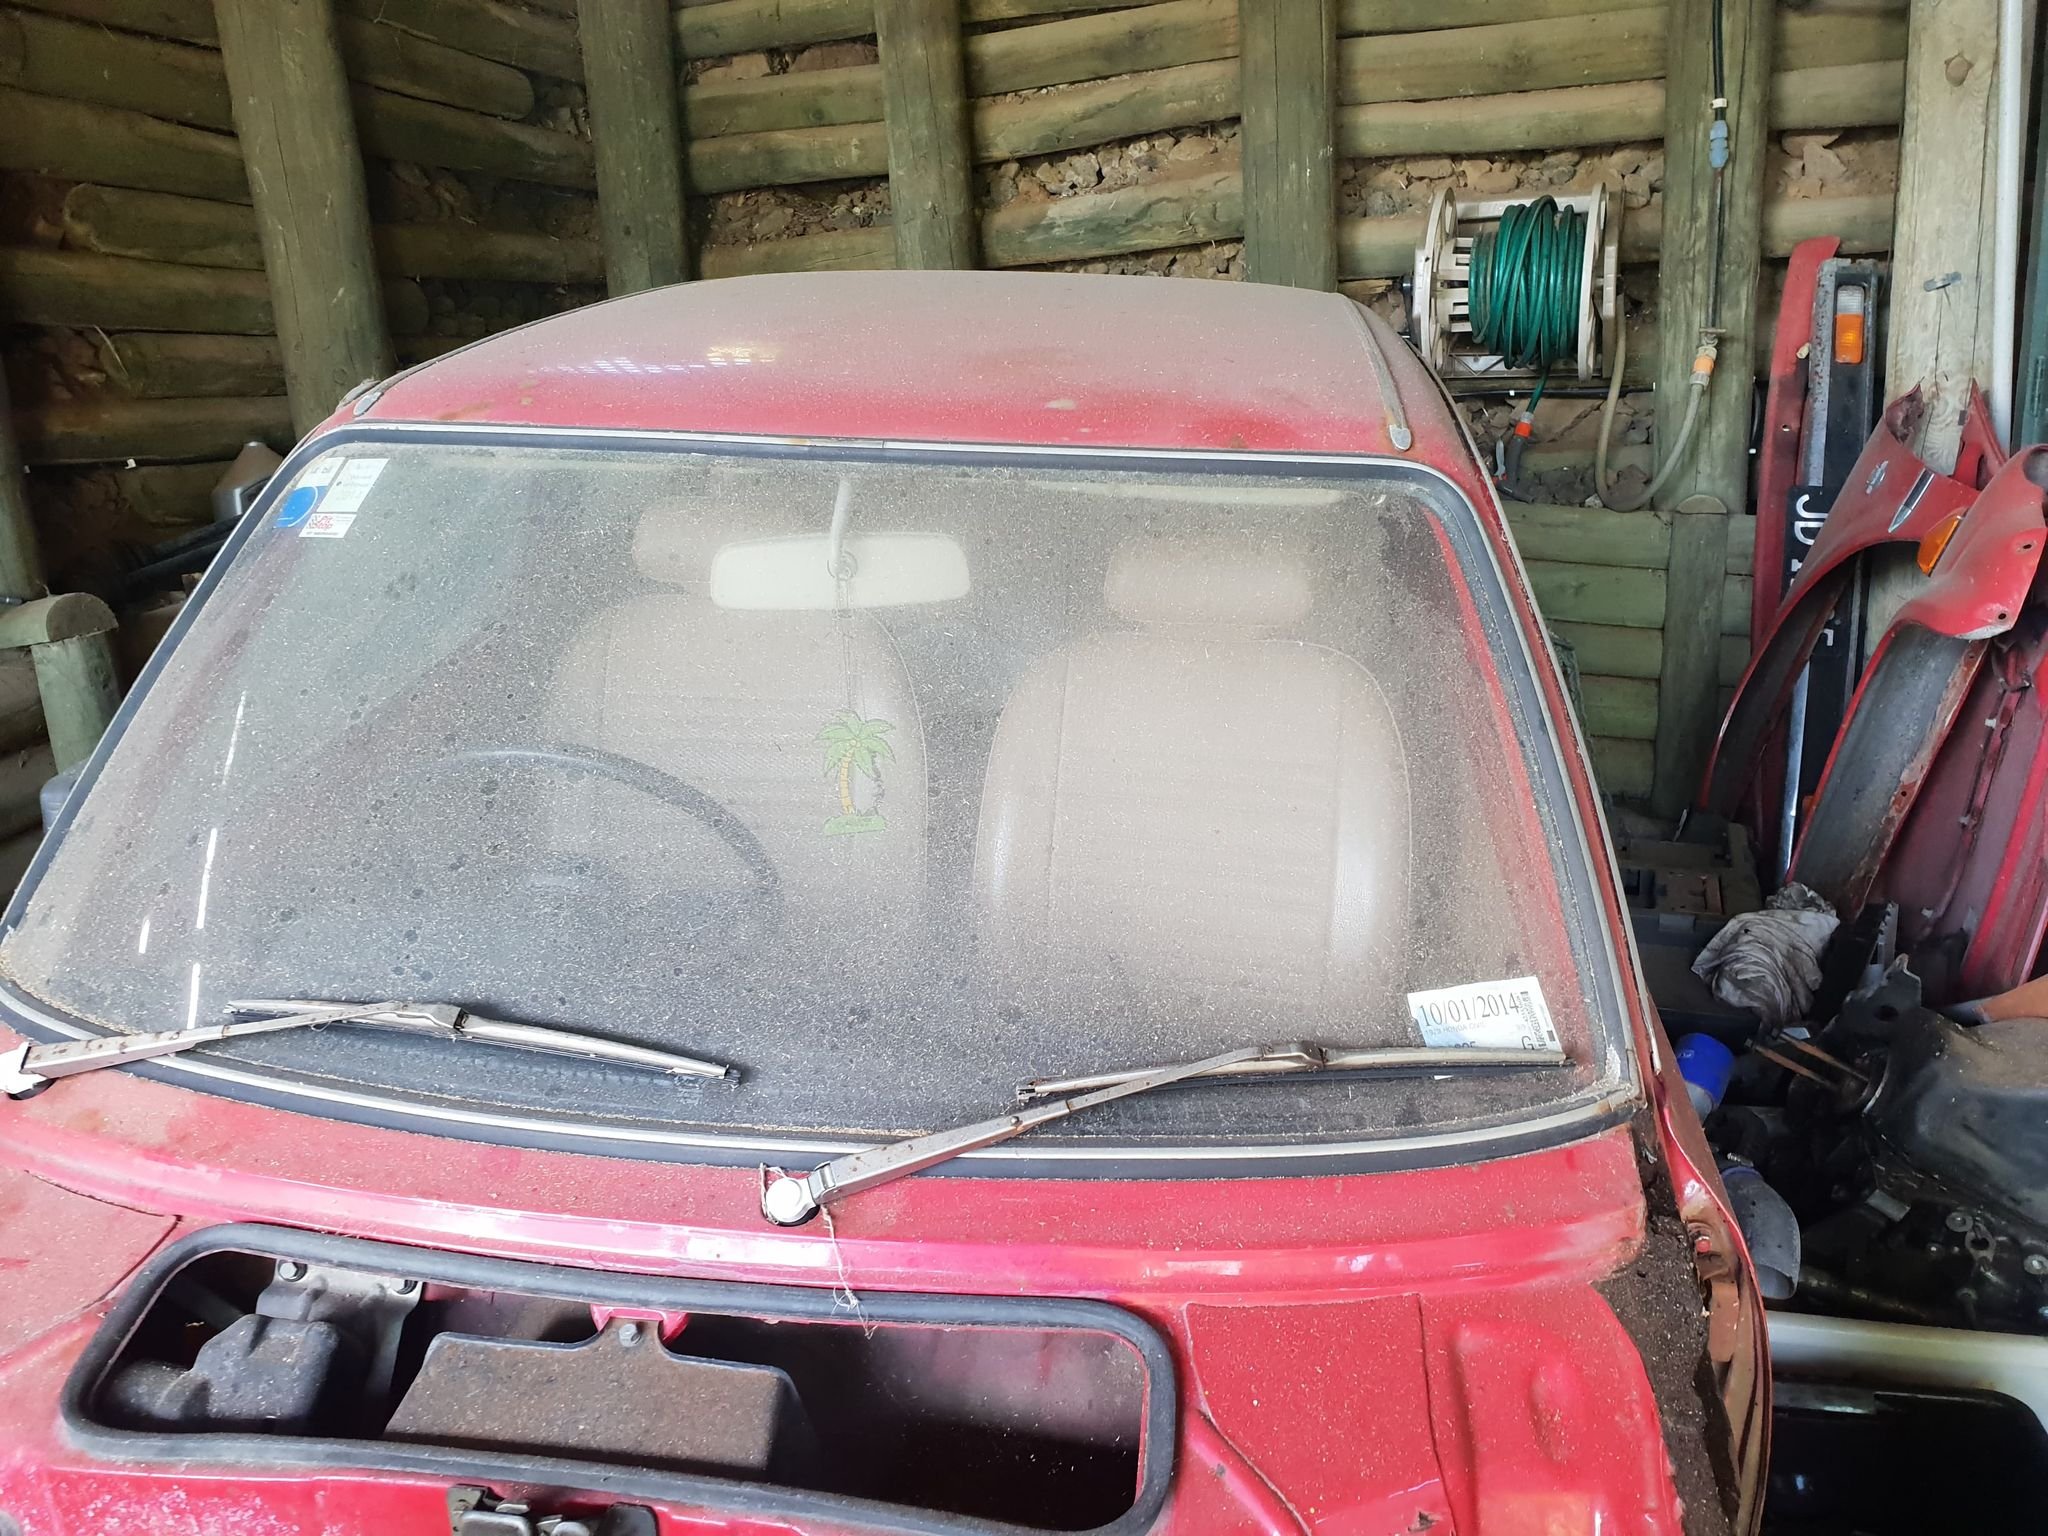
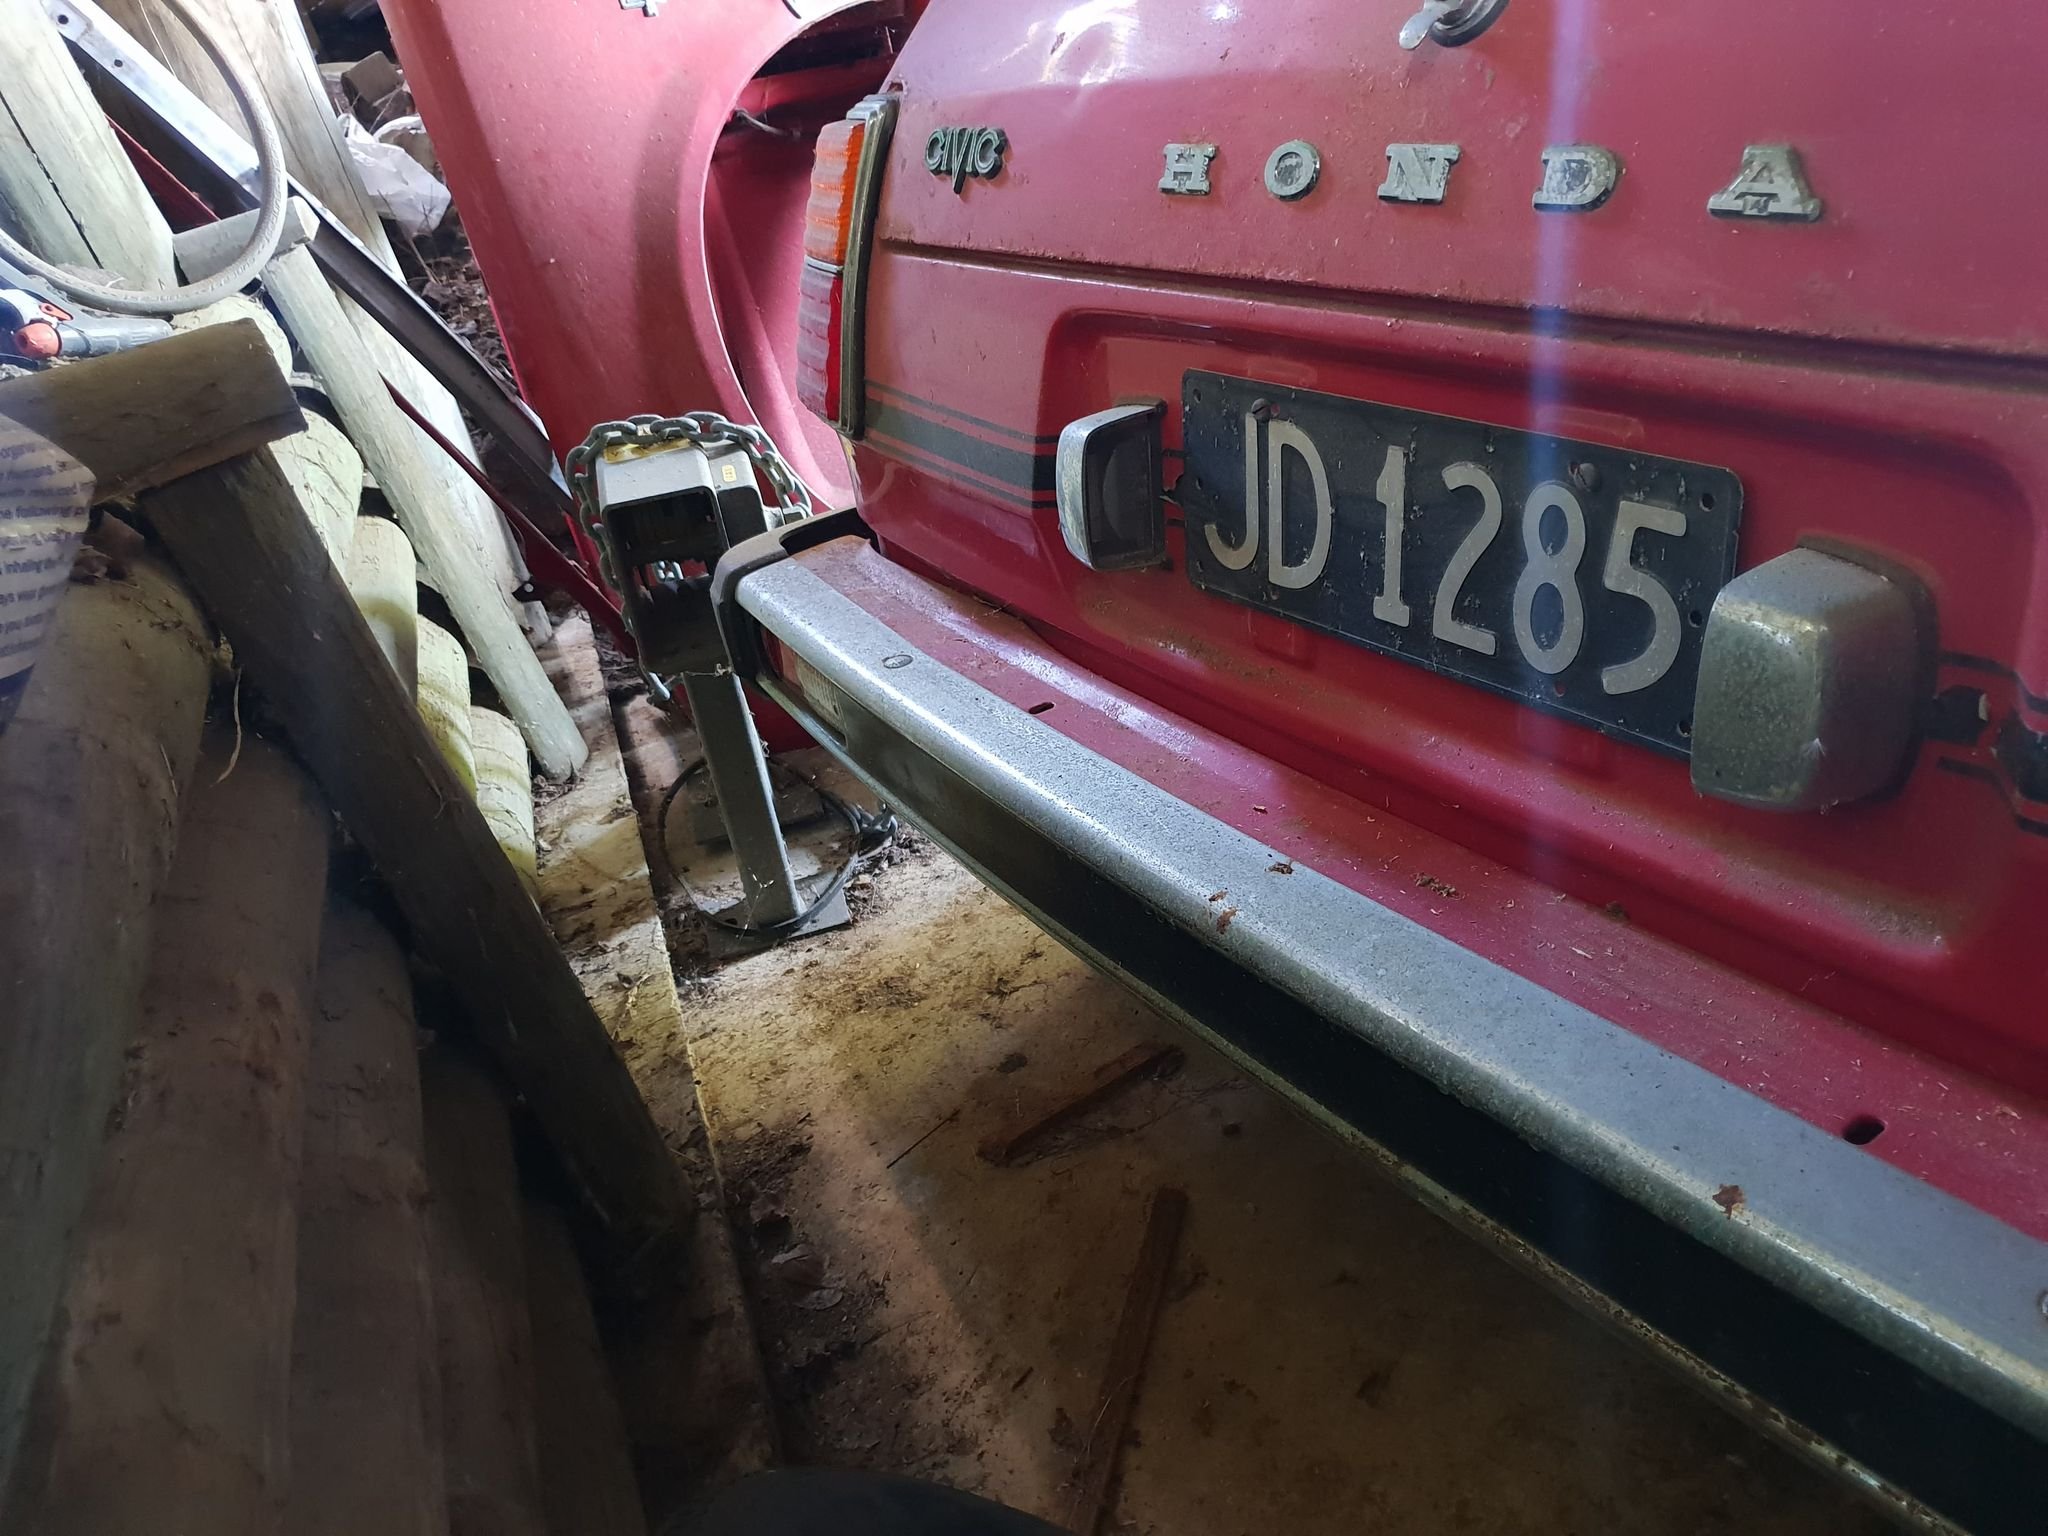
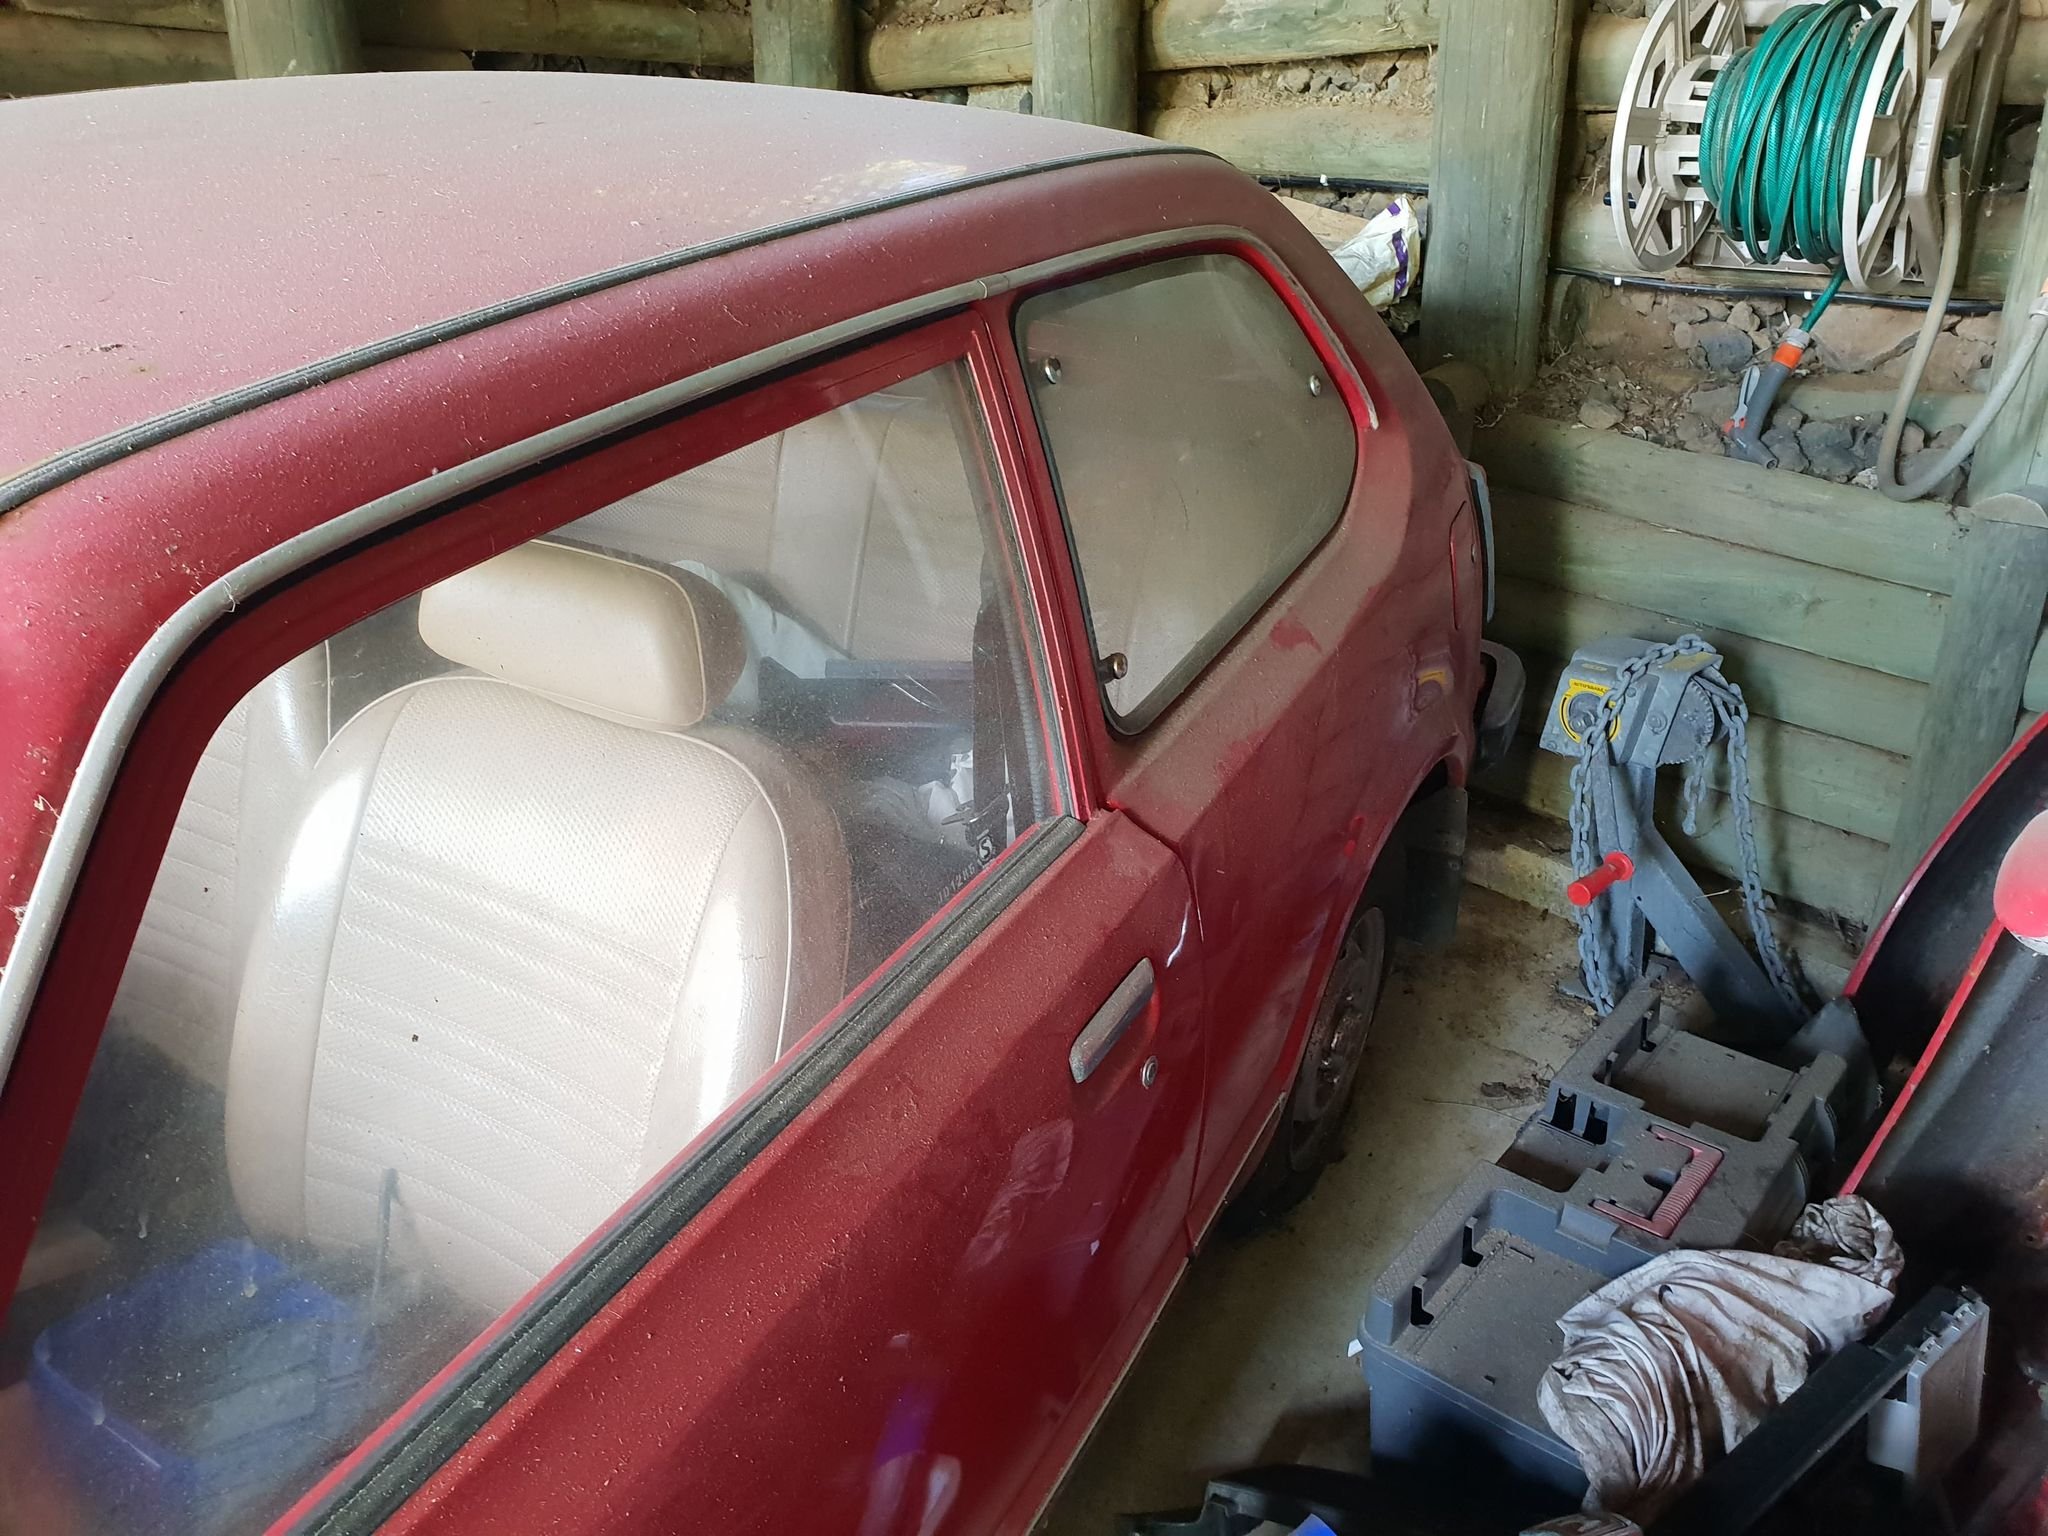
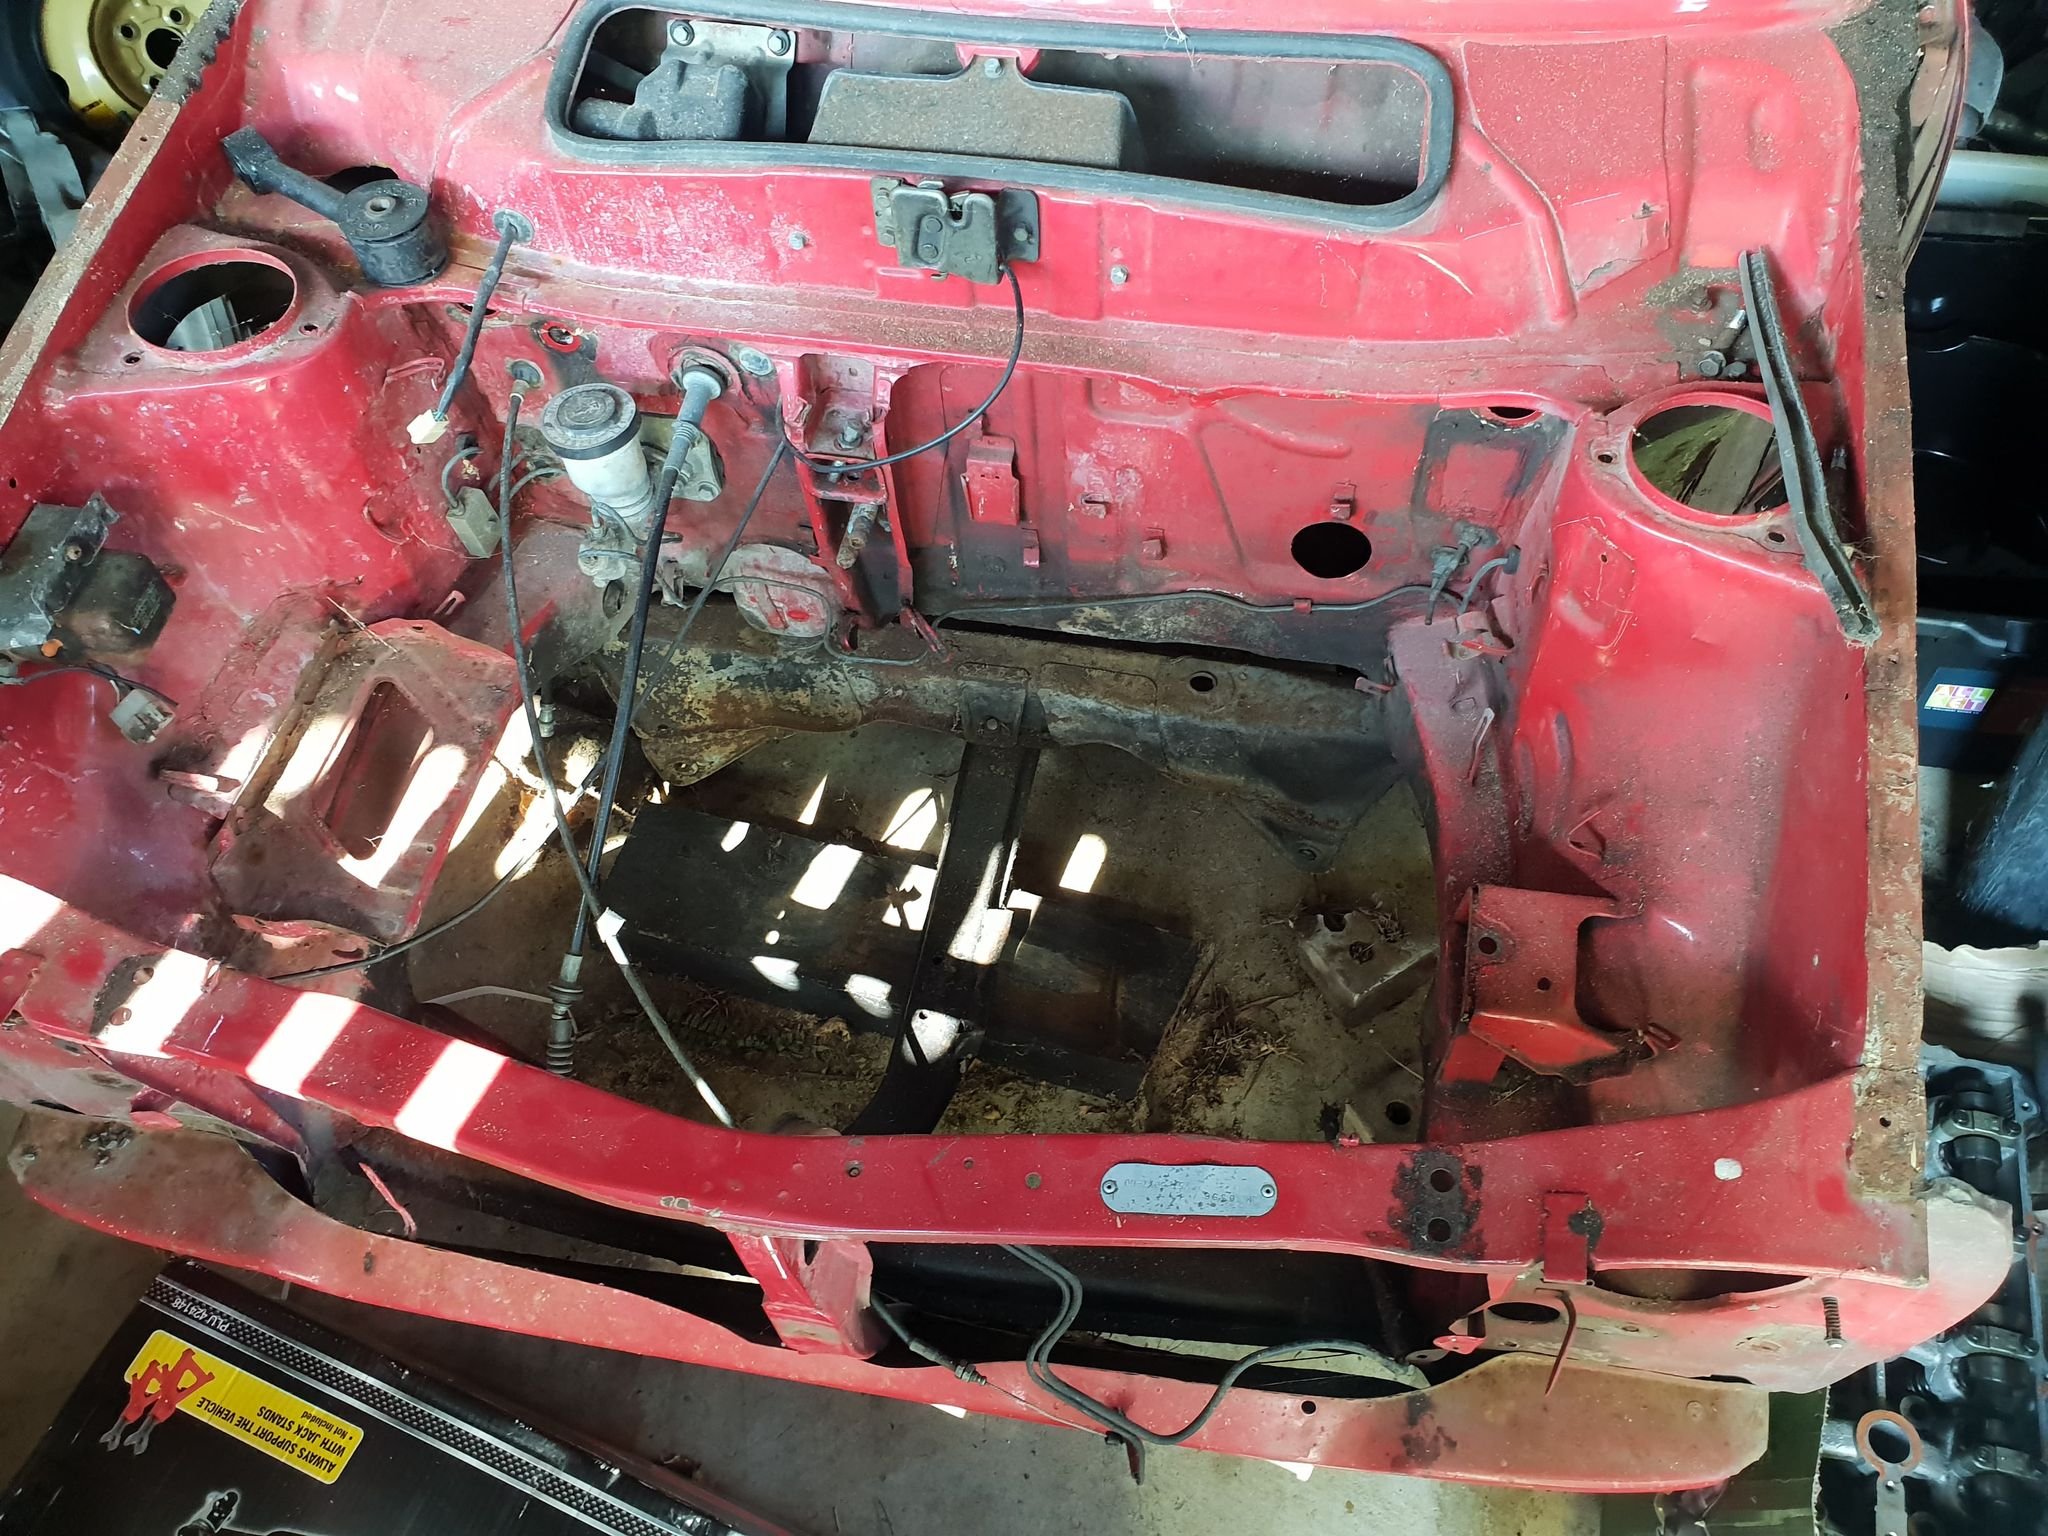
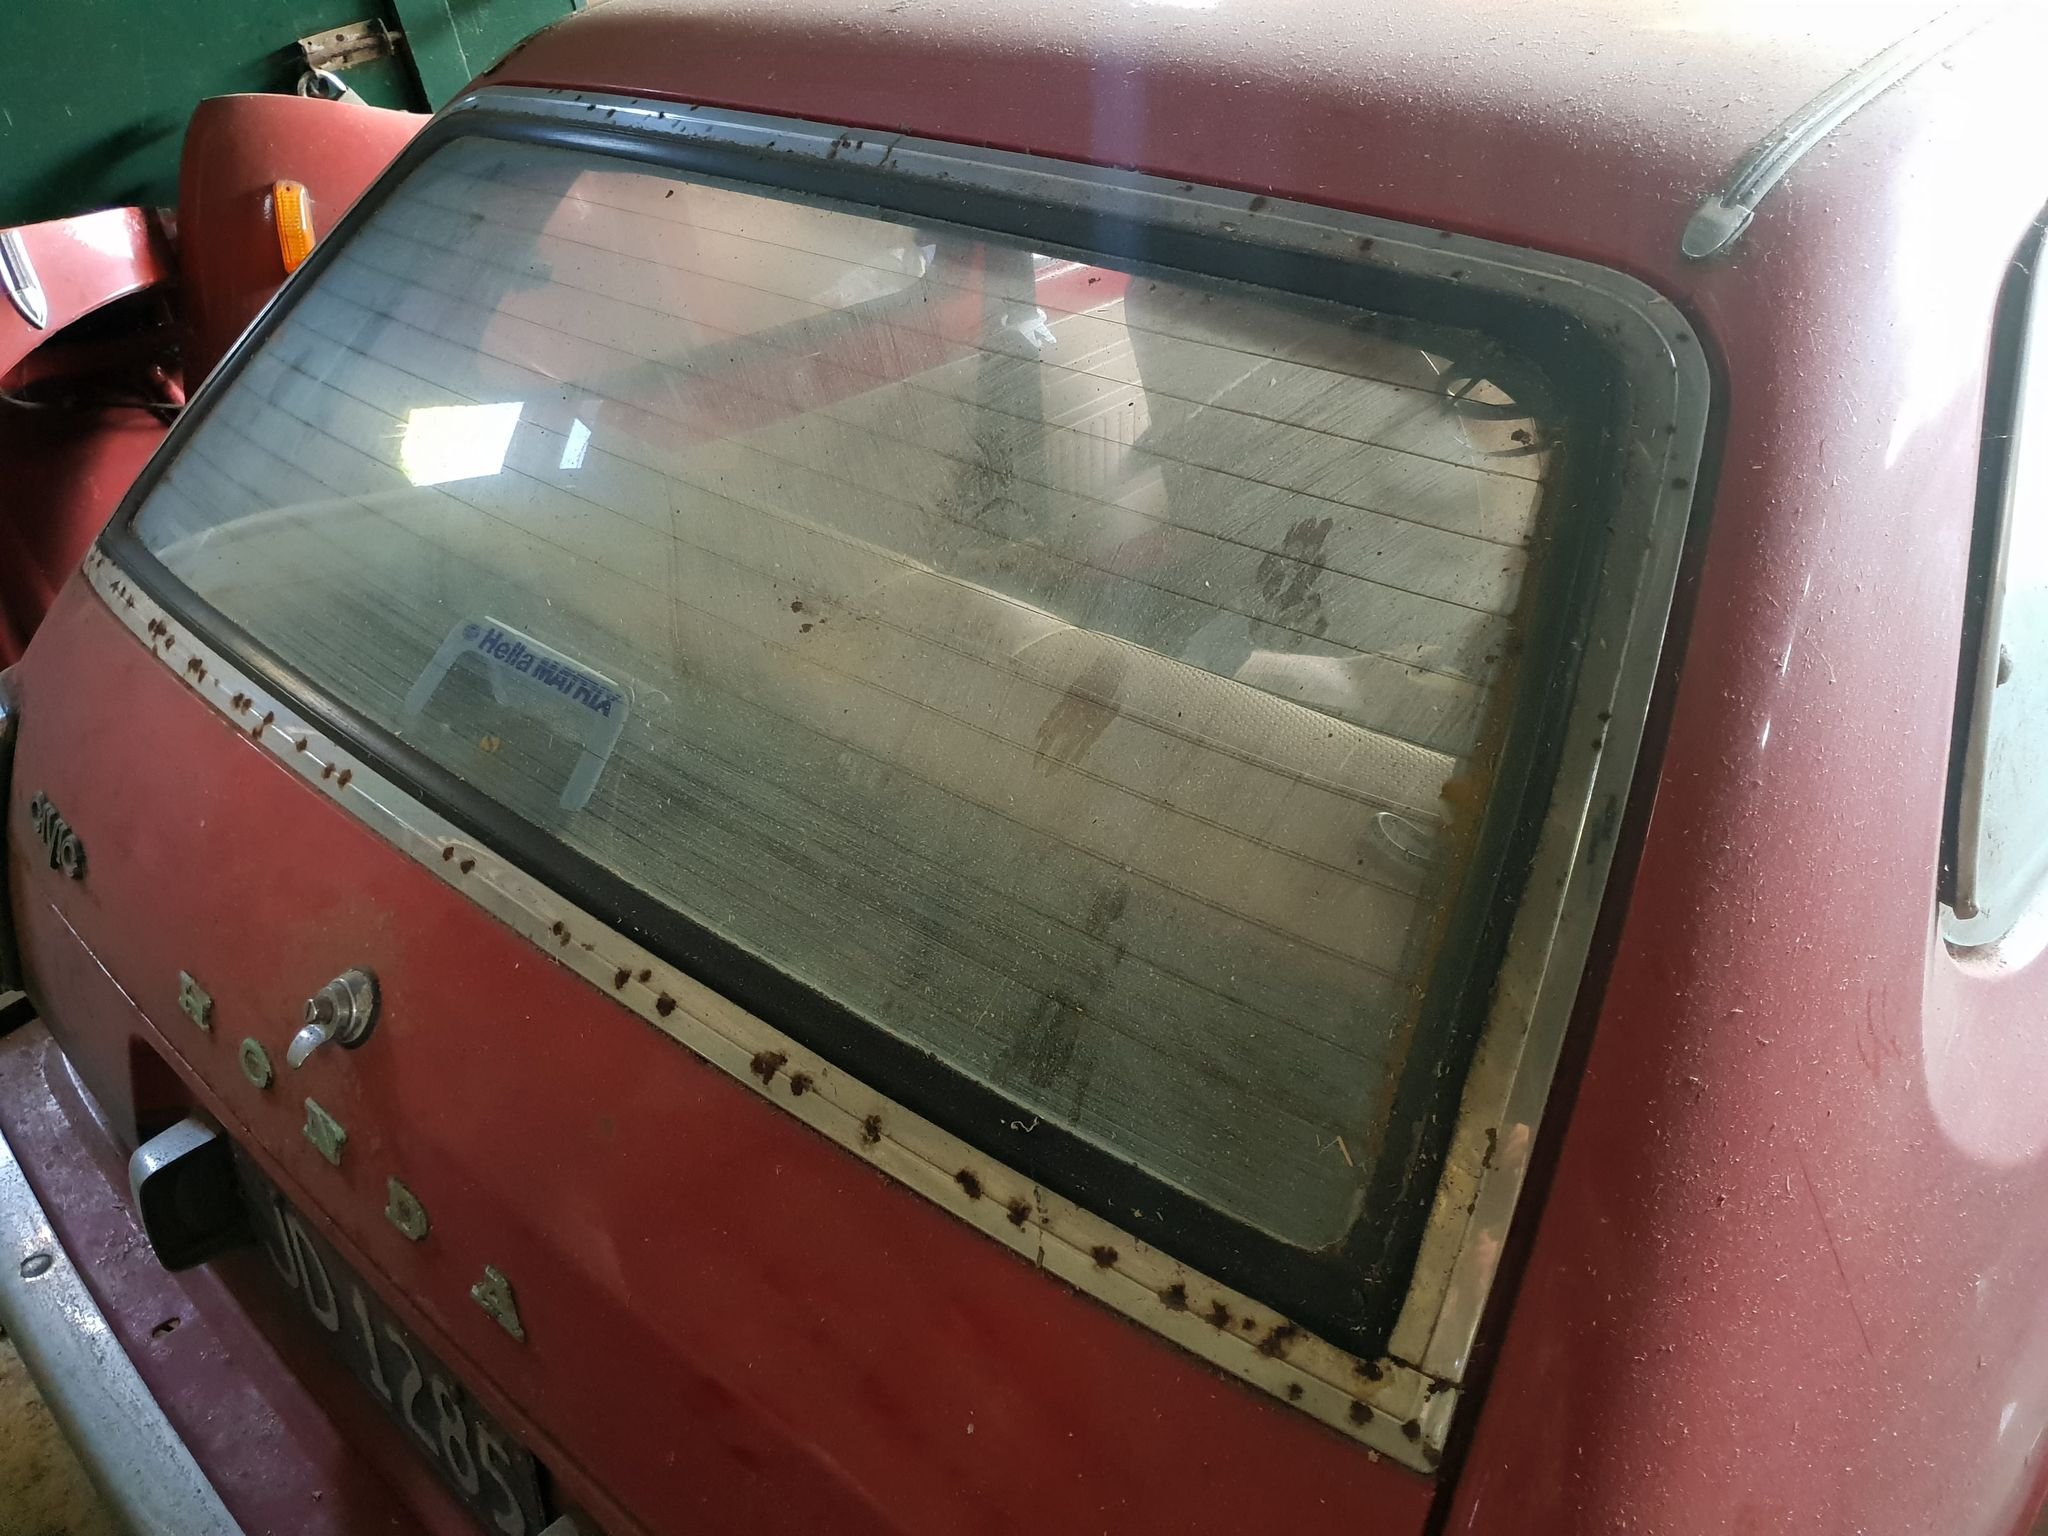
I guess this is just a placeholder first post for this car. It has been sitting under my dads house since maybe 2015, and last had a WOF in 2014. First pic is when it was first "parked". This is the only picture I can find from back then, when it actually looked like a car. It is a 1979 Honda Civic 1200, made in Nelson and originally purchased from Percy Motors Auckland on the 28th of March 1979, approximately 18 years before I was born. It has 8X,000km's on the clock, and service history for the majority of its life indicating it did not roll over. The original documentation said it was in "Signal Red" but I believe the actual colour (from the sales brochure) was Sofia Red, with the brown interior not black. This could have been swapped in, but the head lining matches brown so I'm not so sure. I purchased it with a half-complete City Turbo 2 engine swapped in, which was seized from sitting for too long so I gave up on it and pulled it out. I sold that with all of the (many!) city turbo bits that came with the car. The exterior of the car is now in pretty poor shape, with quite a bit of surface rust coming through under the paint, and some areas (like below the A-pillars) with really quite bad rust holes. I'm not sure what it is like under the car, but it was fine when I got it! The interior was pretty much immaculate, except for some minor damage to the wood veneer on the dashboard and the carpet had been stripped. I managed to acquire a DOHC ZC engine (d16a8/9) from a CRX, with forged pistons and H-beam rods. The details of the me purchasing this engine in ~2018/2019 are fuzzy, but I believe it was built for a turbo in a track car. Here you can see the new rods compared to the stock ones. The plan is to have the engine swapped in as soon as I get the car moved, with basically a hack-job of motor mounts just to get it in roughly the right place. Then I will worry about axles, suspension and chassis. I intend on using a GTX2860r Gen2 on a log-style manifold to suit the space restrictions, and modify either a 2zz-ge intake manifold or K24 RBB intake manifold to mate up to the ZC head. The intake manifold is about 1/2 the length of the engine bay in its stock form. While people have made this engine fit with a small-ish turbo, I don't want to modify the firewall at all just for an intake manifold. This will not be a fast project, I don't even have the car yet! But hopefully the end result will be a fast project. Link to discussion here:
- 1 reply
-
- 26
-


.jpg.f6247005b4012672e377fe22ae206390.jpg)