Lord Gruntfuttock
-
Posts
13006 -
Joined
-
Last visited
-
Days Won
26
Everything posted by Lord Gruntfuttock
-
 Yep tried factory ford covers with better baffles but the roller rockers hit them. Cut out where they touched then oil was shooting into pcv valve. Bought edelbrock alloy covers as they had baffles and more clearance, assumed they were ok, but not so...
 -
Lord Gruntfuttock's 1971 XY Fairmont
Lord Gruntfuttock replied to Lord Gruntfuttock's topic in Projects and Build Ups
A quick shape and test fit using the 2 screws that held the original baffle in place... Old baffle placed to indicate it was located between the rockers, plasticine was around 4mm thick here... And a very thin layer indicated there should be enough clearance, if a bit tight... So a clean up and it looks like this... Big plate area blocking oil splash, no folded edges and a large gap around the edge for low velocity air flow... And loctited the screws in and installed. Hopefully it'll be the end of this sort of thing... I put my finger on it through the hole while I rotated the engine to feel if there was any contact... And great success. Went on a 30km thrash at lunchtime, and where this would have been full previously, there is a smear of oil in the bottom of the can, which could largely be residue from the oil that was already in the separator mesh.. Quietly confident I have sorted it, will see how the plugs look after some more miles...- 149 replies
-
- 22
-

-
Lord Gruntfuttock's 1971 XY Fairmont
Lord Gruntfuttock replied to Lord Gruntfuttock's topic in Projects and Build Ups
So all legal and been using it a bit, seemed to be going all right considering the rough tune, but after I took her out to a car show at Mataura it damn near run out of oil, The catch can was chokka and the plugs were a sooty, oily mess... So depressing, immediately thought the worst, I'd somehow coozed the rings (perhaps with a cheeky skid as soon as I got it going). A quick compression check though and all cylinders were around 160psi, not particularly high but was a cold test and were all pretty close... Then started thinking about what could cause the problem. Valve stem seals kept coming up, particularly as it gave a puff of smoke on startup, but they were damn near new heads. Was gearing up to pull a valve with the heads on for a look when some extra research led me to look at the baffles in the rocker covers. I knew there were baffles there... This seems like it should protect the PCV valve well from oil splashes, but a theory is the small gaps at the edges create a high velocity draft that pulls oil into the baffle, and the folded ends means oil can pool there, getting sucked into the bottom of the carb. A cotton swab inside the hose at the carb end confirmed oil was getting through... It was an easy thing to test so started knocking up a bigger, flatter baffle after checking clearances with plasticine... And found a bit of suitable scrap... -
Yep grabbed it at lunchtime. Wheel alignment done and full of fuel. WOF check friday... Alignment guy commented on how new everything was underneath. And now the steering wheel is pointing where it should be...
-
I agree. Stupid house renos pretty much halted progress, made it hard to pick things up again. Main reason I take heaps of pics and document build progress, proved invaluable over last few weeks...
-
Lord Gruntfuttock's 1971 XY Fairmont
Lord Gruntfuttock replied to Lord Gruntfuttock's topic in Projects and Build Ups
JB Weld is a miracle, when it hardened to a putty consistency I flattened it out, pushing it under the lip, and looked good (put it on dash of other car in the sun to speed up curing)... And cranked up good with no fuel spills, ran it 10 minutes to cycle coolant and cure header paint... And a quick hoon with no bonnet... No probs apart from some hoses needing tightening, plus the upper arm is pretty close to the tyres, hopefully an alignment will improve this... And bonnet on and time to wash off 3 years of storage dust and grime... to Mr Sparkle... And down the bottly for a celebratory ale... Another check and nothing amiss, still need to fit air cleaner and fan shroud, plus top up trans fluid... And deserved I reckon...- 149 replies
-
- 43
-
-

-
Lord Gruntfuttock's 1971 XY Fairmont
Lord Gruntfuttock replied to Lord Gruntfuttock's topic in Projects and Build Ups
Busy weekend, ripped into it last night instead of drinking beer at the footy, and up at sparrow's this morning to get back into it. Ticked off all the little bits and pieces like diff oil, draining the tank of old fuel, torqueing water pump up, rechecking cyl head/intake/sump torque, connecting trans selector rod/kickdown cable, installing dizzy and plug leads, torquing and pinning steering tie rods etc. And after filling with fluids was ready to go... Apart from the brakes I'd forgotten about, so jacked her back up and installed the new pads... Then a quick spin to get the oil pump primed, plugs in, and it started damn near straight away. Was stoked till I noticed the stream of fuel pissing out of the secondary bowl... Thought it was dried out seals but after a tighten and starting again it was obviously the blanking plug that was leaking...? Did some research and apparently theres an o-ring behind these, or they just come loose, and you can't do much about it apart from trying to peen it back to stem the leak, or drill and tap it to accept a taper plug. Easier to replace the bowl, so ordered one, but a bodgy fix is to JB weld it, so cleaned it up as prep... And applied some goo... This should let me give it a burst tomorrow to bed in the rings and cure the header paint anyway...- 149 replies
-
- 16
-
-

-
Yeah didn't see any match in XY or XA manual.
-
Lord Gruntfuttock's 1971 XY Fairmont
Lord Gruntfuttock replied to Lord Gruntfuttock's topic in Projects and Build Ups
Another productive lunch break. Used my supercheap arbor press to install the UJs, went ok but it's not bolted down and things got wobbly, so finished installing them with the big vise and a large socket. Never actually changed universals before... and cleaned up the trans for it's new seal... used another plumbing fitting to tap it in, went well. This one has a boot that isn't necessary, but was what they had at SCA... And I had another look at the pinion seal nut, apparently these are done up to around 260ft-lbs, and as my wrench only goes to 150 I put a big pry bar on and pushed with my foot till it tightened a little more than I could heave it lying under the car. Re-checked the torque req'd to rotate it and is now spot on with what I tested before replacing seal... And driveshaft is in.. Just gotta tighten the clamp bolts at the diff end and that's most of the awkward underbody stuff done...- 149 replies
-
- 13
-
-
Really big ceiling fan pls...
-
Lord Gruntfuttock's 1971 XY Fairmont
Lord Gruntfuttock replied to Lord Gruntfuttock's topic in Projects and Build Ups
More unexciting updates, looked at the radiator, had it flushed 3 yrs ago but been sitting, so hosed it out in both directions... And blew the mummified bees out of the fins with compressed air, then sat it in the sun to dry out. Impatient, so blew the hot air gun through it to prep for paint... A very light coat of engine enamel to make it black again... And in. Ordered a new lower hose as the old one got squashed in storage and crushed the spring... And had another go at knocking in the diff pinion seal, used a plumbing fitting and went in nice and straight this time, helped that I'd jacked her up a bit more... And I had diligently marked the shaft and yoke so things went back together the same way, then just as diligently stripped and painted the yoke, removing all traces. Some forensic examination of old photos showed some distinguishing marks that let me line it up as near as dammit, and torqued it up to bloody heaps... And re-created my shonky connection to check torque required to spin the wheels... Came out near exactly same as when I removed it, yesterday's pic... And 3 years ago. Not an exact science, so surprised it was as close as this tbh... So assume things are pretty much ok. Thought I may as well pull the old rear trans seal and replace that at the same time... And used my new seal remover tool, thought it'd pop it out without all the hammering I normally do, but was sealed in pretty tight, so fancy tool just ripped the old seal up. Ended up knocking one side in as per normal to get it out... So the underneath pretty much ready to go back together when pits arrive Satisfying, if boring tasks ticked off...- 149 replies
-
- 12
-
-
I'll have a look later...
-
What era? I've got some XW - XB parts manuals...
-
Lord Gruntfuttock's 1971 XY Fairmont
Lord Gruntfuttock replied to Lord Gruntfuttock's topic in Projects and Build Ups
Was away all weekend but ticking jobs off slowly. Installed headers, LHS was a piece of piss, RHS not so much. Had to snake them past the trans cooling lines, steering box, trans selector linkage etc, wrapped them in cloth to protect soft paint as much as possible before they're cured by heat (also kept most of the copper anti seize off them) and bolted up exhaust flanges... Also fitted trans filler tube (new o-ring and a smear of Permatex non-hardening above it), main pulley, starter motor, fuel pump, accessory brackets and found the missing engine mount bolt I'd misplaced, looks like I can still get to it so will replace that next time I'm underneath. [Edit] - replaced it at lunchtime. Also did a bit of wiring, there's bugger all of it on proper OS cars really, radiator and hoses next while I'm waiting for pinion seal to arrive, getting closer...- 149 replies
-
- 12
-
-
EA Sports Old School fatarse rally car
Lord Gruntfuttock replied to Lord Gruntfuttock's topic in Other Projects
Local rallies. -
Lord Gruntfuttock's 1971 XY Fairmont
Lord Gruntfuttock replied to Lord Gruntfuttock's topic in Projects and Build Ups
Busy weekend but got under car and sorted a few things, torqued and pinned cross member bolts, installed shift linkages, kickdown cable and speedo drive... And looked at headers, Pacemaker Tri-Ys needed a clean up... Just rubbed down with scotchbrite and cleaned with degreaser... And bombed with VHT flameproof header paint... So at the stage now of just bolting things on, should be able to do a bit most days...- 149 replies
-
- 16
-
-
EA Sports Old School fatarse rally car
Lord Gruntfuttock replied to Lord Gruntfuttock's topic in Other Projects
Yoinked the slug motor... Slight lip on the bores so 30 thou over on the cards.. and the gubbins laid out... Plan is solid bottom end and new cam/heads to get some more oomph. Factory heads very restrictive, shrouded inlets really restrict flow. Probably blast the body and give it a quality outside spray job. Owner is looking at pistons now, dithering over how far to go. I reckon just get it going and look at sorting out drivetrain etc. Diff ratio change on the cards too. Funniest thing is he's a diehard holden/chev guy and is frothing over the options with a 302, watching so many youtube tuning vids... -
Found it. I'll pull the stays off to make it smaller to send. Will post next couple of days, sure you can figure out how to put it back together...

-
Lord Gruntfuttock's 1971 XY Fairmont
Lord Gruntfuttock replied to Lord Gruntfuttock's topic in Projects and Build Ups
Painted it yesterday, you can see how it's a bastard to get in being so long, have to slide it in behind engine and it hits the steering column once you wriggle it past all the other bits. Big screwdriver levers it past that, then some contortions and it's in... And it swings freely without hitting the engine block now... Throttle closed... Throttle open, pulls the kickdown lever forward at full noise, just gotta fiddle the cable adjuster length to set it right...- 149 replies
-
- 13
-
-
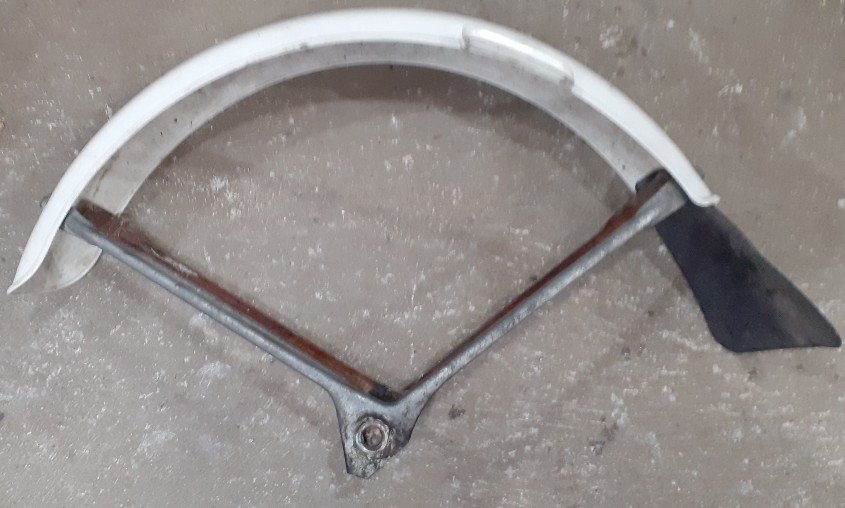
Got a front guard if you want it... [Edit] got your address ok. I'll try to get it away in the next couple of days. Will see if I've got any other FA bits in the shed left. They're a cool wee bike but pretty lightweight. Rear spokes get loose and frame can buckle if you do jumps. Got mine going over 60 km/h on the flat which is pretty good for standard bore, but I had to Fred Flintstone it up hills. Designed for 45kg women carrying flowers not 90kg blokes doing max speed runs...
-
Lord Gruntfuttock's 1971 XY Fairmont
Lord Gruntfuttock replied to Lord Gruntfuttock's topic in Projects and Build Ups
Some other little bits and pieces. Deeper new trans pan meant I had to make a new support jig to fit on my bike lift... Cut reliefs where needed and weight of trans is taken by bolts around rim. Made it a doddle to mate up to engine... And the old bearing caps had been bashed to bits, so looked at a way of fitting new ones... Big washer that was a snug fit and a plumbing fitting, BOSH with a hammer... And done... And the kickdown operating lever had got bent when I pulled the motor with the cable connected, so now it fouled against the engine... I really wish I'd remembered this before I put the motor in, as it is a complete bastard to wriggle out and in again. Finally got it out, and thought it'd be a simple job to bend back into shape, but oops... And tricky not knowing where it should sit to weld back on, but found this diagram which helped... And a bit of hot glue at lunchtime today... And is nearly right. After struggling to get it in it needs a slight tweak to be in the right place, so will pull it out again, give it a nudge and a bit of paint before bolting all the brackets etc back in that I had to remove to get it out. Would have been so easy with an empty engine bay, that was there for 3 years...- 149 replies
-
- 18
-
-
Lord Gruntfuttock's 1971 XY Fairmont
Lord Gruntfuttock replied to Lord Gruntfuttock's topic in Projects and Build Ups
And sits higher than I thought it would at the front, but still a bit of weight to add, and I think new springs settle a bit...- 149 replies
-
- 25
-
-
Lord Gruntfuttock's 1971 XY Fairmont
Lord Gruntfuttock replied to Lord Gruntfuttock's topic in Projects and Build Ups
Day off and sun out, so time to do shit. Wheeled everything outside... Gratuitous topless Putin-spec manly man pic lining things up... And engine - trans mated up easily after seating the torque converter, good to go... Doing this on my own cos every other bugger at work, was going ok but the engine was tilted siideways and was causing max frustration. Also thought it'd be a good idea to have the trans cross member installed, it really wasn't... So pulled it again, removed cross member and realigned the chains for better balance... And with a rolling jack supporting the rear of the trans it pretty much slotted straight in... So much room with no headers/radiator etc... So a well deserved beer and ice cream... Really pleased to get this done, was a bugger as had to run around after kids today and beer fest tomorrow, so if I hadn't got this done it would have been another couple of weeks probably. A real milestone...- 149 replies
-
- 30
-
-
Had seen that before. Actually looked for some Hydrogen peroxide in town today but couldn't find any...
-
Sunny day so carried on, top 2/3 of the tank done here... Just hand sanding with a slurry of Jif, water and simple green. Went from 240 - 400 - 1000 grit paper.. But still some yellow bits I couldn't shift. As it was sunny I tried bleach again, used some oxy stain remover as well and it fizzed up into a sticky foam, which was encouraging... Not sure it did anything, but gave me the chance for a break while it sat in the sun. Washed the residue off and a quick polish and it now looks like this... So lots better but still has some staining, had to remind myself it's not a show bike so this'll do. Still some YAMAHA graphics to go on, and it looks far better than when I started. Pretty hard yakka, but satisfying...