Hyperblade
-
Posts
327 -
Joined
-
Last visited
Everything posted by Hyperblade
-
Hyperblade's KP61 Racecar "KP61R" Discussion
Hyperblade replied to Hyperblade's topic in Project Discussion
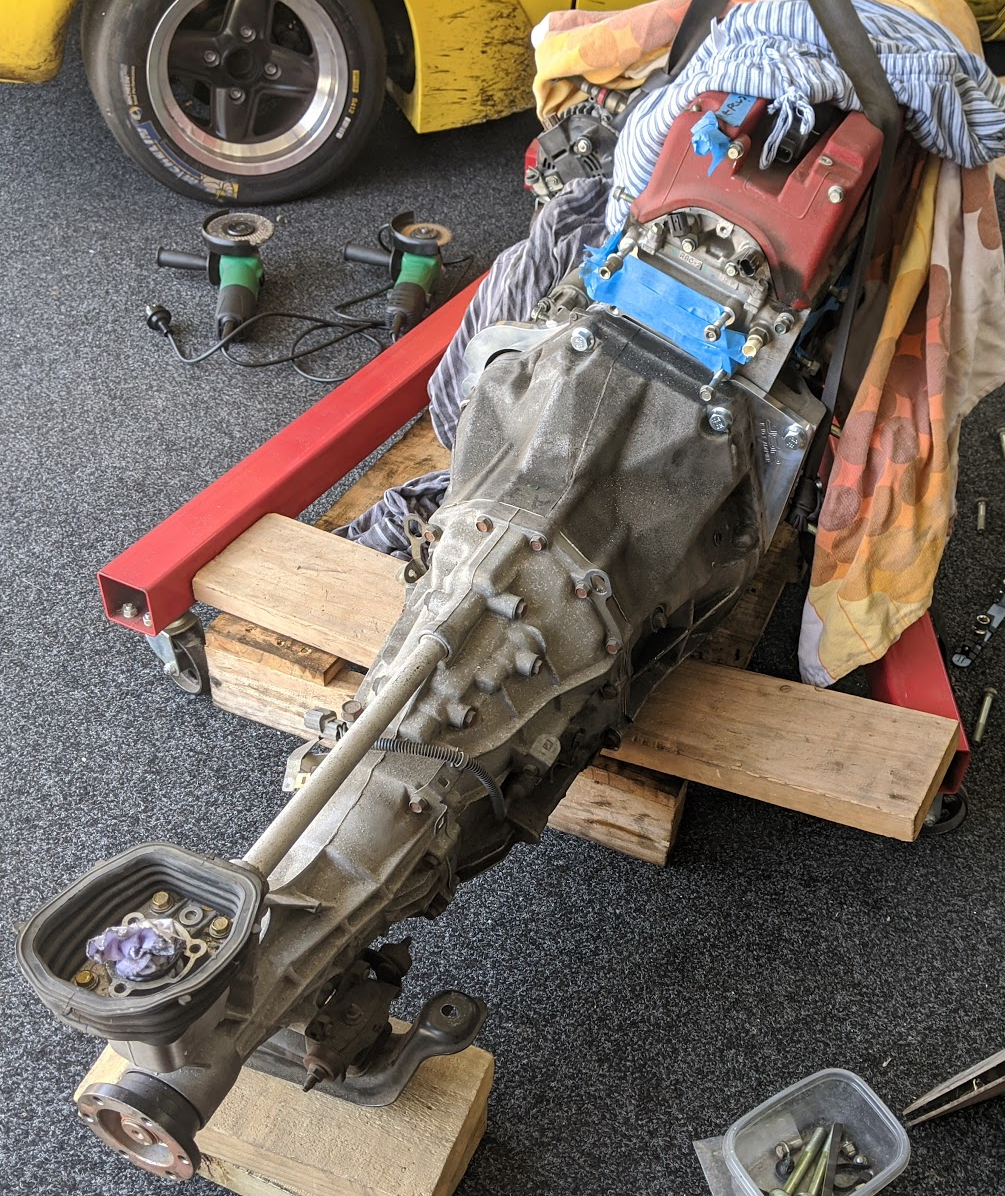
Your going to love what i'm going to post, I will go into detail on reasonings, differences, sizes etc I happen to have my spare BEAMS motor sitting the garage so easy for me to compare at the moment. S2000 AP1 box. -
Hyperblade's KP61 Racecar "KP61R" Discussion
Hyperblade replied to Hyperblade's topic in Project Discussion
It's not a cheap swap, but there is some stuff that would make it easier, I will be very detailed. I can't weld so the main fitment will be done by Bert @ palmside exhaust done by JPW Performance and I think I can do the rest with off the shelf parts. Feel free to ask away here happy to answer questions, I am working with Speed Science on giving them updates for their facebook, so I can't get ahead of those, but I can be a lot more detailed here. 2L K20a Type R motor The rear sway bar made a huge difference, the car was so much flatter, even with the valving wrong in the shock it was an improvement. I had Bert drive the car and he picked up the valving being wrong straight away, but said overall the car handled really well, so fingers crossed the car is transformed when i get the shocks back. Here's with no sway bar. Here's with the sway bar. -
Hyperblade's KP61R - Toyota Starlet with Honda K20a
Hyperblade replied to Hyperblade's topic in Projects and Build Ups
Teaser: Now interestingly enough a certain someone @Roman had some interesting comments on this engine in 2007 on another forum. and than went onto have a long discussion about the merits vs the BEAMS
-
Hyperblade's KP61R - Toyota Starlet with Honda K20a
Hyperblade replied to Hyperblade's topic in Projects and Build Ups
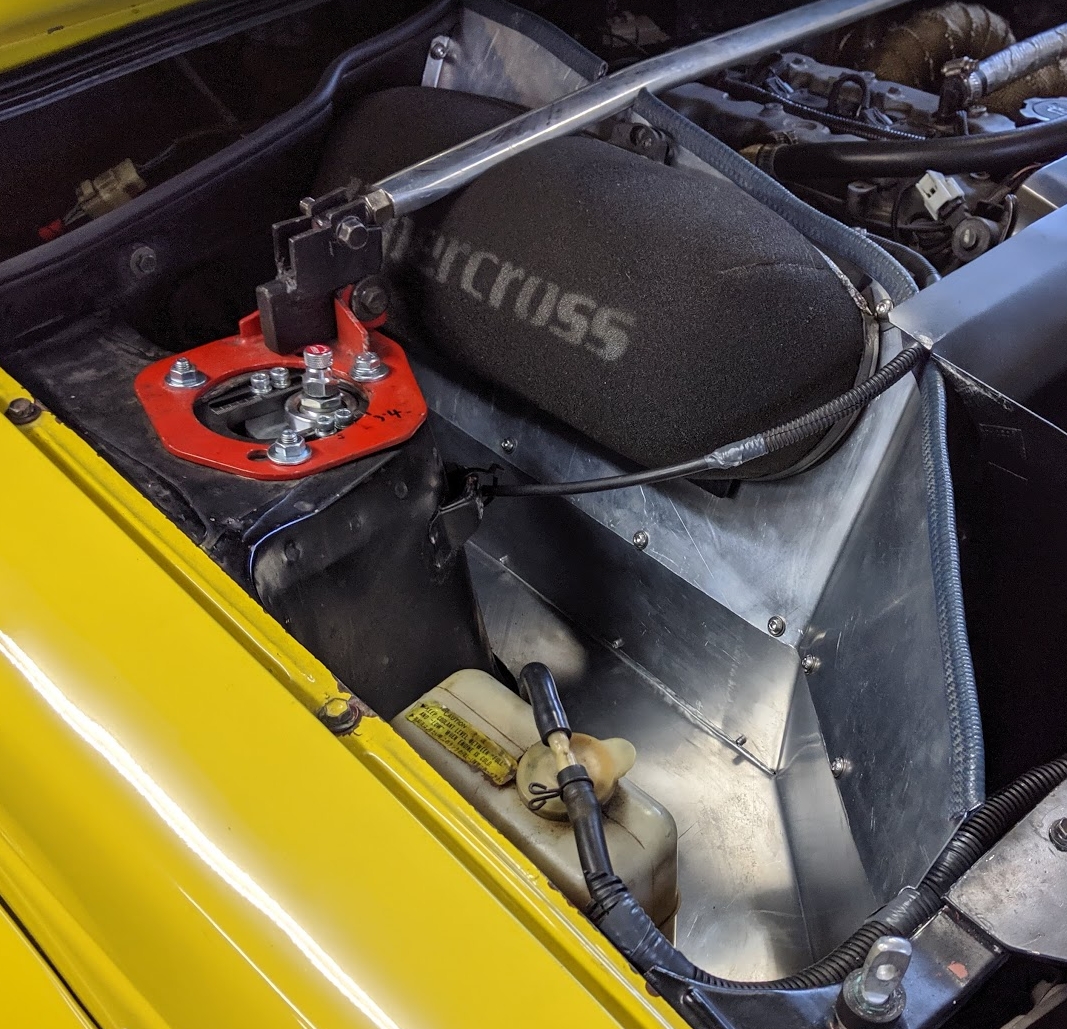
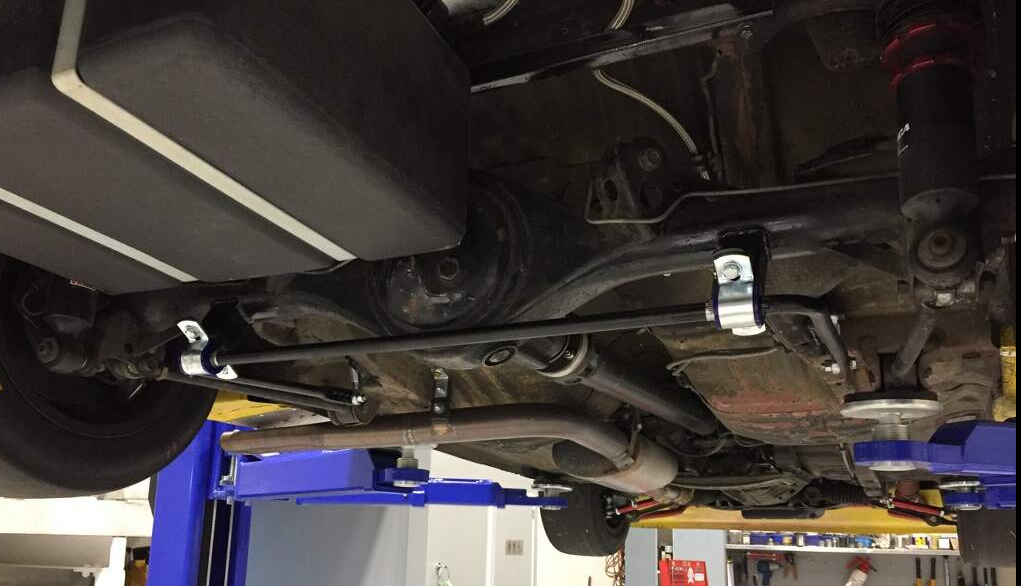
Been a while since I've updated this. Decided to do a cold airbox around the existing filter. Made no difference to intake temperatures, still up around 40 degrees, i suspect it's heat soak through to the filter plate where the sensor is mounted. I've been struggling with keeping the rear brake temperatures down, and it's been meaning the front have been doing more work and they started getting a bit hot and micro cracking. Also into the hairpin which is where the brakes are the hottest the car just hasn't felt like it's slowing as fast as it should considering the weight, which I picked was the rears going to hot and losing the friction. Before they become full cracks in the rotors I had to sort the rear out to relieve the strain on the front, some new AP Racing rear brakes, same calipers as the front just 20mm wide instead of 25mm, with full vented 2 piece rotors were fitted. It's a very tight fit behind the rear wheels so they are slightly smaller in diameter than the front. Thankfully that's finally got all the temperatures sorted, and both front and rear are now way down, so that's finally solved that issue, don't let anyone tell you the rear brakes do nothing on the track... I've been struggling with the new suspension. Changing so much at once made things hard to diagnosis some of the issues. I have now added a rear sway bar which has certainly helped in keeping the nose down now and helping with the turn in. However the car has been shuddering under braking and had no grip, tried softening everything still didn't help. Turns out the valving and pressure in the shocks is way to hard i.e SuperTourer figures (for a car that's significantly lighter), not sure what's gone on there, but getting revalved now, waiting on the lock down to end to get them back. But I've decided it's time to move on to Evolution 4 of this build. Evo 1: Street Car with 4AGE Evo 2: Race Car with 4AGE Evo 3: Street Car with 3SGE Evo 3.5 Race Car with 3SGE Evo 4: Race Car with ???
-
Yep, was expecting it to be an issue, can't run less then 10L otherwise get starvation tank takes 30L and car used 10L for an 8 lap race. I just keep it fully topped up, at the moment.
-
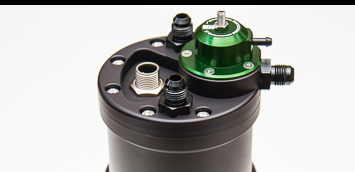
I was in a rush to get it all done for race day, so if i had run a FPR I would have had to find out the pressure it was running at before then match it, plus would also had to run all the return lines, this way i didn't have to get a retune, or stuff around with the rail. I also plan to put a surge tank in at some point, and i'm looking at a Radium one with the inbuilt FPR so would be a waste of money to buy another one in the meantime. http://www.radiumauto.com/FST-R-Fuel-Surge-Tank-with-Integrated-FPR-P348.aspx The other thing is simplicity, I hate how race cars have all these hoses going everywhere for fuel, it's just more points of failure, all that shit should be built into the tanks/surge tank. Normally you see in race cars (for returnless) Tank > Filter -> pump > Surge Tank > FPR > Filter > Rail FPR > Surge Tank Surge Tank > Tank Currently I have Tank > Filter > Rail Future Radium Setup will be Tank -> Surge Tank (FPR) -> Filter -> Rail Surge tank > Tank. That's pretty simple, and simple means more reliable and safer also. /end rant about how people designing motorsport products aren't understanding the problem the customer is trying to solve...
-
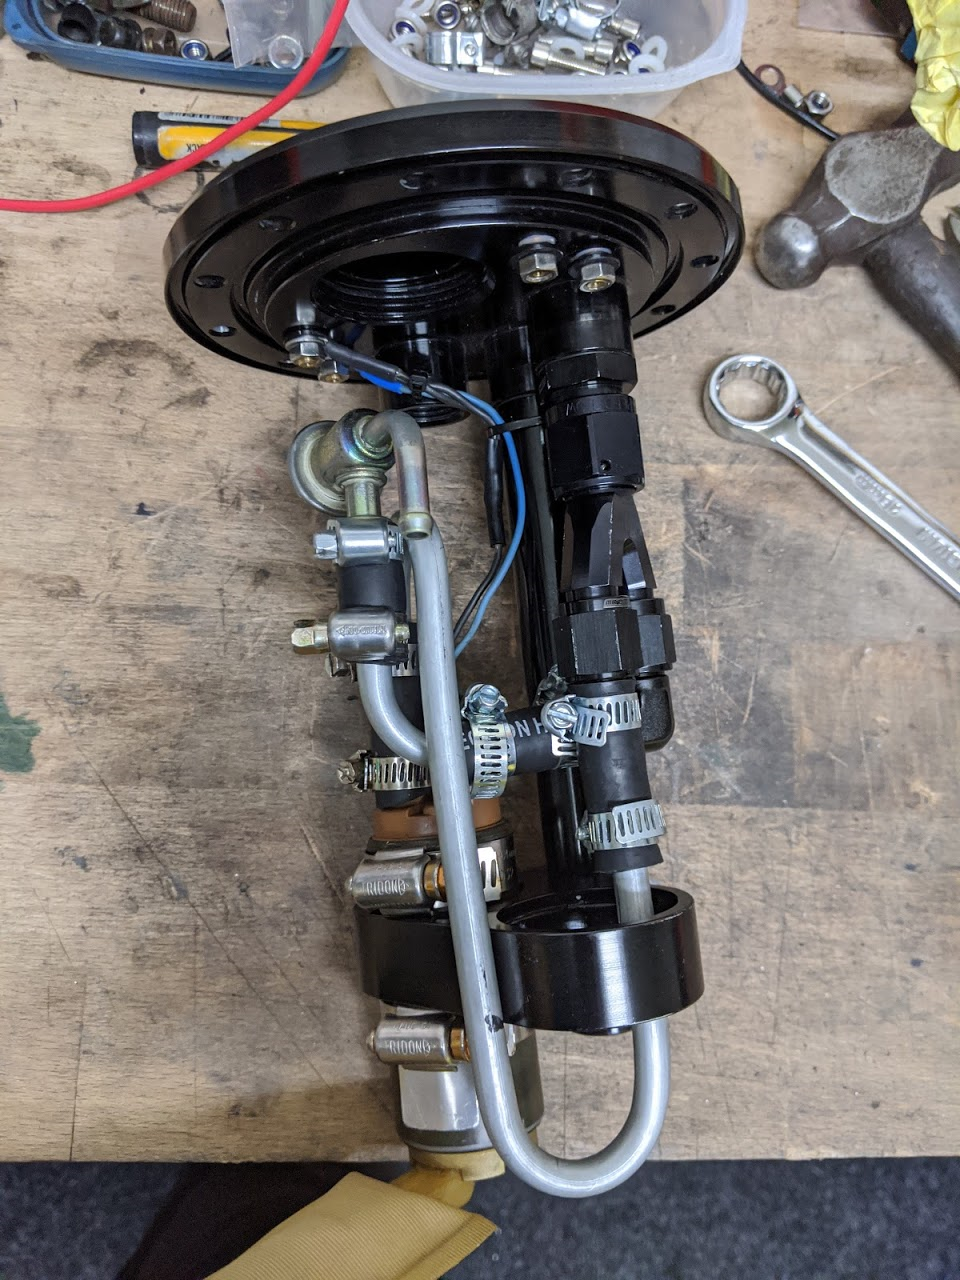
I was down to my last ones and getting desperate! The fact it works at all is a small miracle. Had to do the hard line to get everything in position. Could have brought more AN fittings but this is only v1 will tidy it up at some point (I'm sure everyone says that)
-
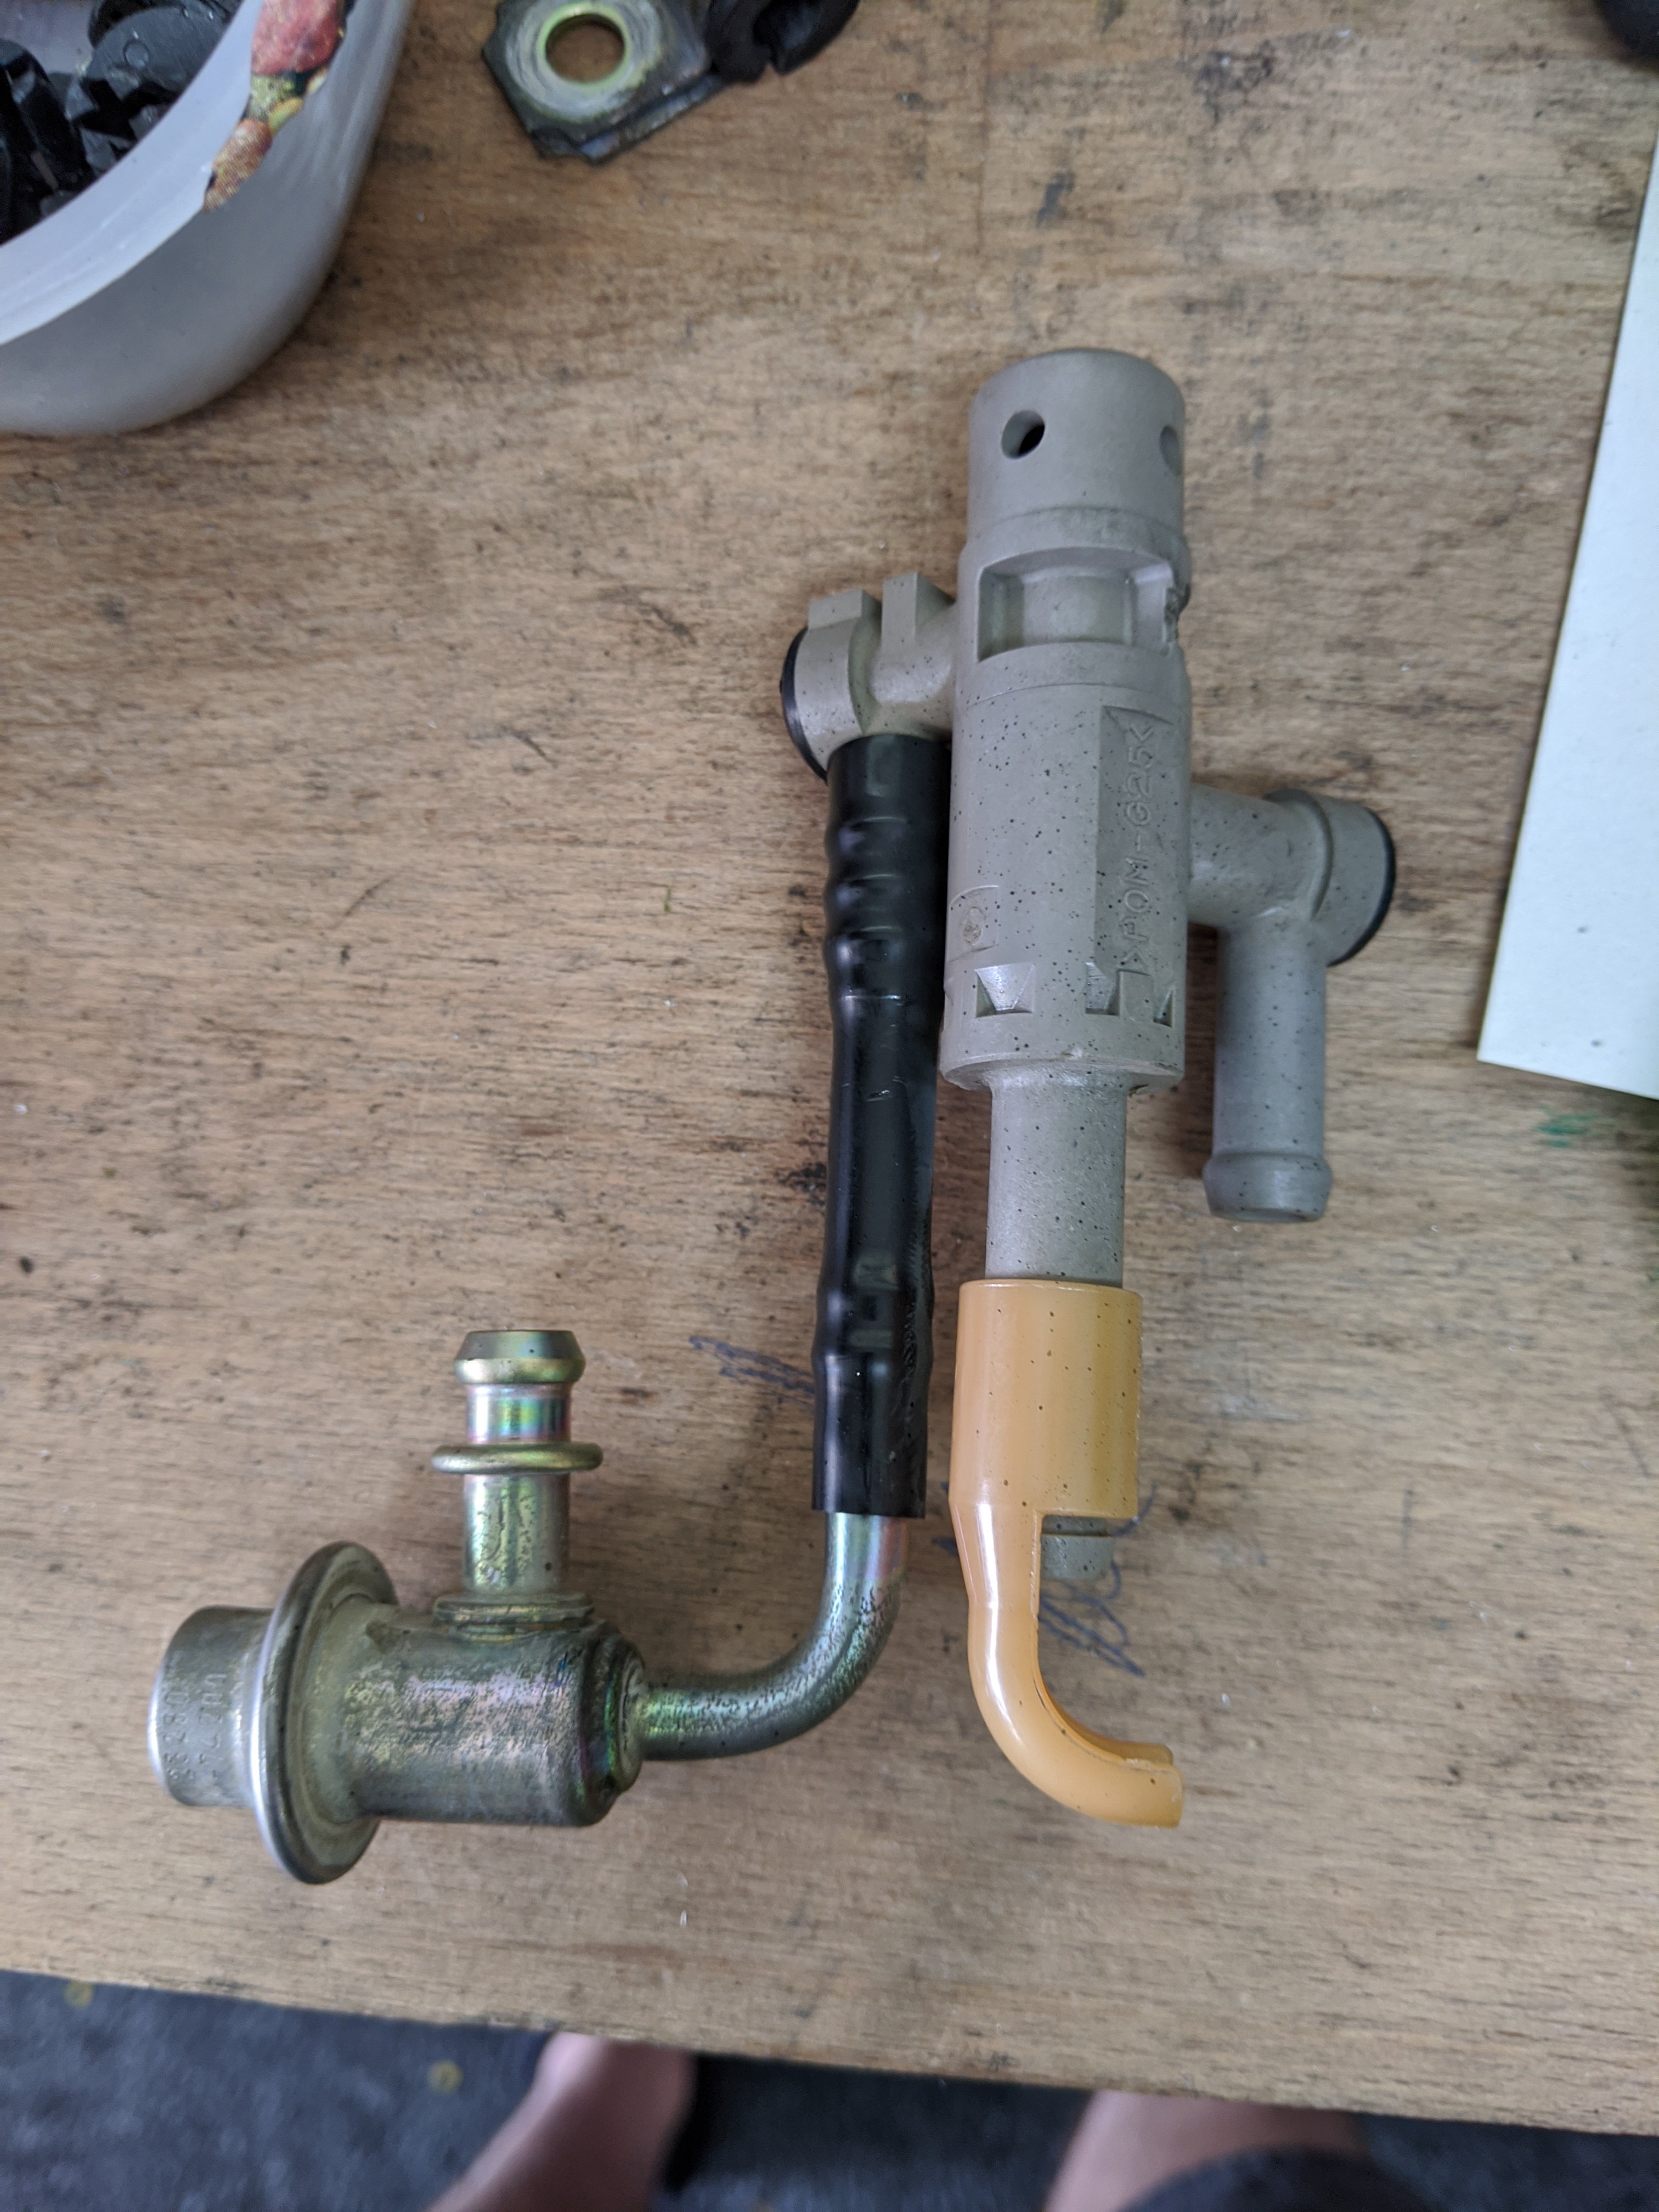
Just a further update. I've been putting all of this into a new fuel cell so was a bit unsure of what pressure the fuel needed to be at. Many posts on the internet were saying 62psi for the BEAMS engine. So to be safe I reused just the regulator and adapted it into the fuel cell. yeah was a bitch of a job as the whole lot had to fit in through the main hole... I also had a pressure gauge on the output which meant I could see the fuel pressure was at 51psi. Which i was a little bit worried about, but the car ran flawlessly at this pressure all day racing. I reached out to NST and they came back to me with the correct Toyota part number for the whole unit which is 2302074010. Now looking that up on Amayama shows that that unit is used across 3SGE, 1GFE, 1MZFE, 2MZFE, 5SFE, 3SFE engines. https://www.amayama.com/en/part/toyota/2302074010 Doing a cross match on the Lexus RX300 which has the 1MZFE engine found me this aftermarket regulator https://www.autozone.com/fuel-delivery/fuel-pressure-regulator/gp-sorensen-fuel-pressure-regulator-800-468/203289_594834_0 Which shows the operation pressure at 50psi. This ties up with what i had also read where the IS200 was the same part number as the RS200 one and it was standard 50psi. This of course all makes a lot of sense, as having one part means easier for Toyota to source and brings costs down, and they just change injectors and tune to suit. Hopefully this info helps someone in the future
-
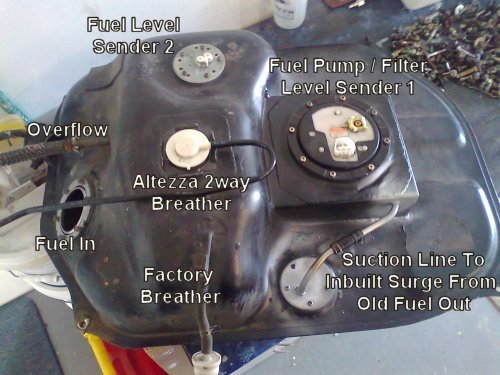
Perfect timing. Thank you! For others: It is used to transfer fuel from one side of the saddle tank to another. It does that by using excess pressure from the pressure regulator.
-
Yep
-
The grey fitting I think went to the suction line. Is it some way of using excess pressure to transfer fuel from something to main tank?
-
Out of Toyota Altezza RS200 I've worked out the metal piece of this is the regulator which runs around 58psi. Buy what is the plastic grey bit for? Seems to act like a regulator too but at like 30psi. The partnumber appears to be for this entire unit. Anyone got any ideas how it works?
-
Hyperblade's KP61 Racecar "KP61R" Discussion
Hyperblade replied to Hyperblade's topic in Project Discussion
I was looking at the fortune auto originally, but when i contacted them they were unsure about the valving, and I would have had to send them all the way back to the US if they were wrong, which didn't make sense to me... I ended up going through Deane and Bert at Palmside. There was a couple of reason for that, one was that I didn't want to be responsible for the measurements I wanted someone who knew what they were doing. So I took the car in as it was previously and Bert measured everything and worked out what would need to be done and also what needed to be modified on the car (which was the rear shock towers to clearance the shocks that were slightly larger) he could speak their lingo so I knew they would arrive in the correct state for fitment. The other is that Deane works directly with Murray for the Rally guys and so already had that line of communication. Because I wanted the damper adjusting at the top of the front shocks Murray got Josh to supply the main shocks, then did some further machining to suit my car. They took 2 weeks longer then planned to arrive as MCA was busy with stuff. When they arrived Bert then had to fit them to the stub axles I supplied then he cut down the blank camber plates to suit my existing hole spacing (T3) which meant they all just bolted in (this was the advantage of getting someone to measure and plan it all, as off the shelf camber plates would not have worked). It all bolted in as expected which was nice. Quality seems good so far, only had one issue which is the height adjusting ring coming undone on the front, and they have advised on what i need to do to fix that, so will see how that goes. Other thing to note is they don't come with brake line holders, which for me is not an issue. Spring rates they recommended were 7kg (400lb) front and 3.5kg (200lb) rear i was previously running 400/350 (rear was too hard which i knew). So a fairly big change on the rear for me, which was noticeable, a lot more grip. They are definitely better then my old ones (Blisten HD/Gaz) as i can actually run over the curbs and it soaks them up, where as before it would be bouncing me off them across the track. Also the whole car is not rolling as much, even with softer springs on the rear. -
Hyperblade's KP61R - Toyota Starlet with Honda K20a
Hyperblade replied to Hyperblade's topic in Projects and Build Ups
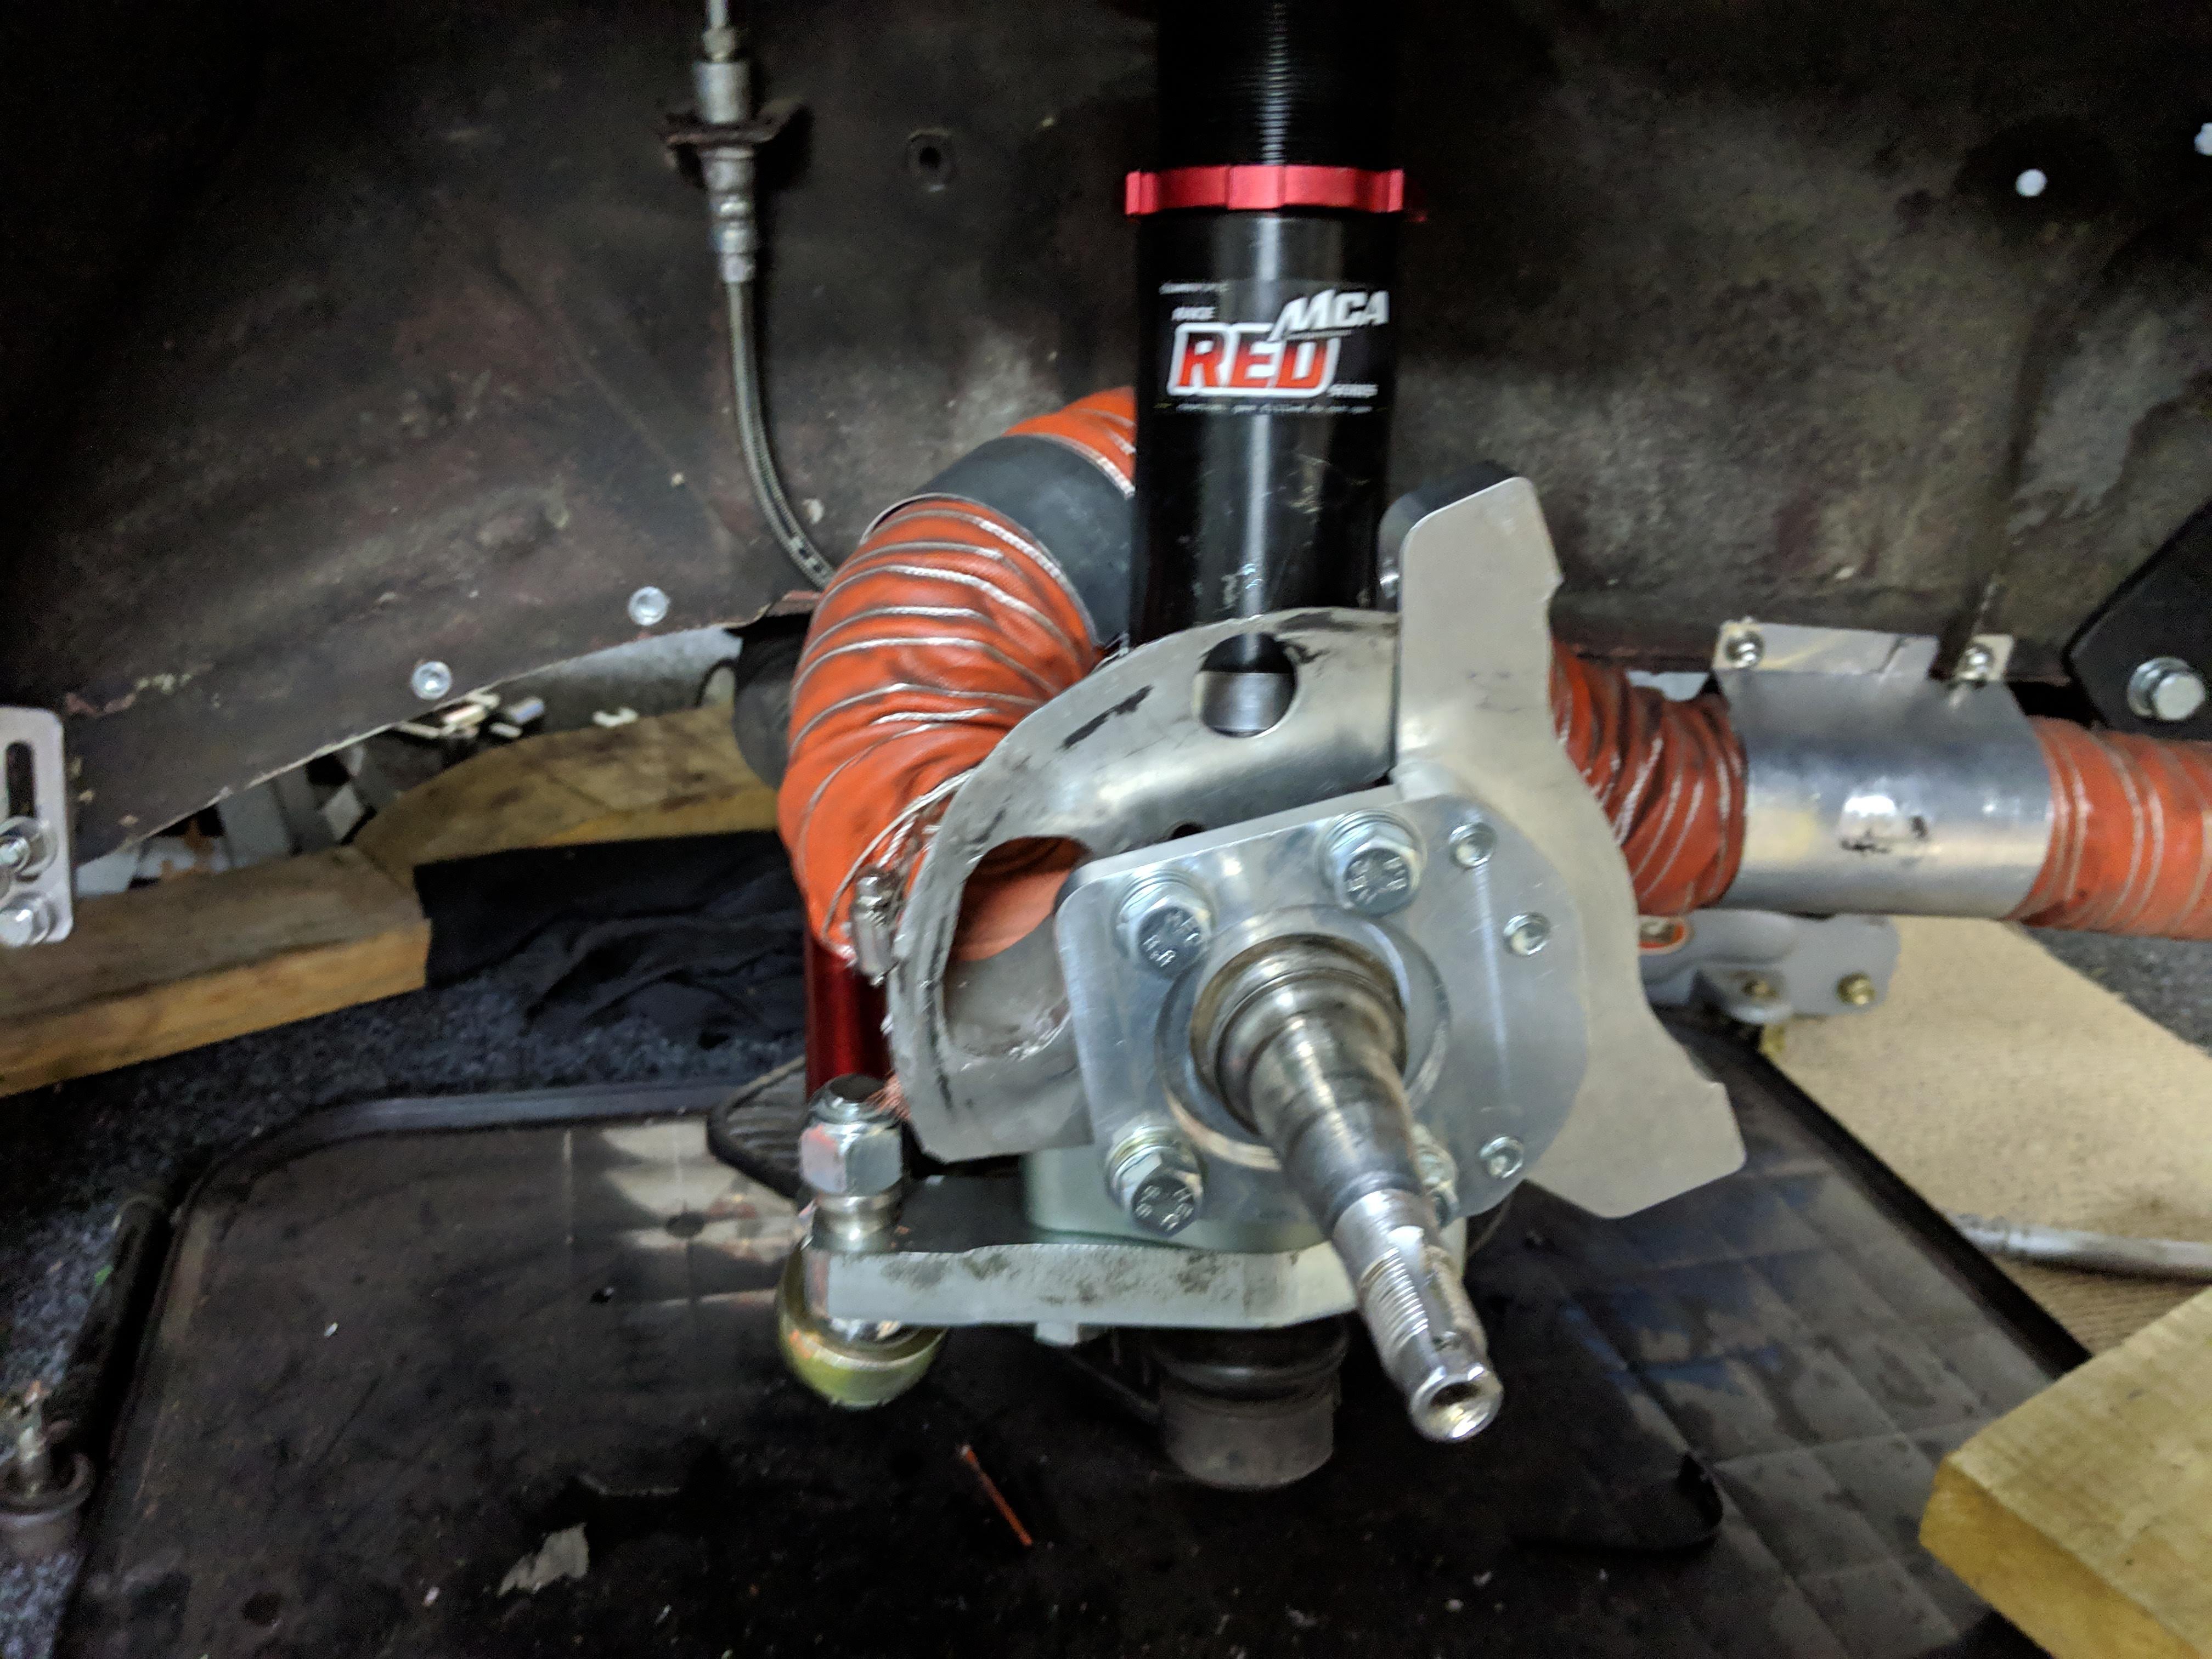
So in the vein of do it once do it properly. I chose a set of custom MCA Reds all round. Here they are fitted up with the brake mounting kit and cooling I adapted to fit. I went with T3 AE86 steering arms and used the T3 Adapter bushings from the standard Starlet Lower Control arms. A set of MRP RCA's finish it all off. The T3 steering arms are shit to be honest, they are far to heavy, far to large, and just over built all round, and I only got them as I couldn't get AE86 PS arms in time. Of course with 13 inch rims there was no way i could fit the steering arms on the outer hole, so I had to chop that hole off and move them in, just means slightly heavier steering, but more responsive which i'm fine with. However with the RCA's the angle of the steering rack ends meant the ball joint (or whatever it's called) hit the steering arm, so we had to do a fair big of clearancing to give a free range of motion. Of course I only got this all sorted just in time for a shakedown on the Friday before the new racing season started on the Sunday, nothing like leaving it to the last minute. Shakedown didn't go well either as I couldn't get the front/rear bias sorted, and flat spotted a set of front tyres. So Saturday I removed my original in line bias valve (supposedly can lock on when high fast pressure applied) I got out to the club day with a new pedal box, suspension and brakes. Took me a wee while to get comfortable with the car... They had discounted the entry fee, so there was a pretty big turn out of cars, which was good. First race I had a fairly good battle with what i believe was a WRX Second race I took advantage of a bit of carnage on the first corner to get a gap to an Integra which was faster then me and managed to hold him off. Handicap race for the last one, a lot of faster cars coming through (mainly porsches), got overtaken while behind traffic, then managed to get it back a few laps later when he got stuck behind traffic. Overall was a weird day with the wind, everyone was a second or two off their normal times, best I did was a 1.37:000 flat. Suspension was a lot more complaint with the bumps, still getting used to the grip, and the brakes were amazing, pedal box with the throttle pedal was a lot better for position.
- 72 replies
-
- 12
-

-
Hyperblade's KP61R - Toyota Starlet with Honda K20a
Hyperblade replied to Hyperblade's topic in Projects and Build Ups
Fitting a pedal box in a starlet is a bitch of a job at the best of times, but add in an existing roll cage to work around and it becomes a nightmare... Frankly I would not have attempted this without @Snoozin and @sheepers posting their detailed write up of what they had to do to create one for Snoozin's starlet. So a massive thank you to them for sharing their process! Rather then go the normal route of using a Wilwood box, I went for Tilton as I needed to be able to adjust the pedal positions vertically as I had very little room to move the pedal box around, I also wanted to replace the throttle pedal at the same time so I could eventually Heel and Toe if I wanted to. So start with working out the only position the pedal box can go in to clear the firewall, tunnel, steering shaft, bulkhead and cage (get oh so lucky it actually fits)... Get the position right for all 3 pedals: Lots of cutting and fiddling later and a bracket is tacked up: Realise you can't actually get it out now... so adjust slightly and you end up with this... Needed to hook up the brake lights, so used a micro switch which goes to a relay, nice and simple and allows adjustment if required. Since I was changing the throttle pedal, it was no longer a direct pull through the bulk head, so had to make a cam up to translate the movement, this took a bit of thinking to get the right movement in relation to the throttle bodies so it was linear the whole way. Work out that the reservoirs absolutely need to be remote mounted, start buying gold plated fittings to make it work: Reservoirs mounted and plumped in: -
Hyperblade's KP61R - Toyota Starlet with Honda K20a
Hyperblade replied to Hyperblade's topic in Projects and Build Ups
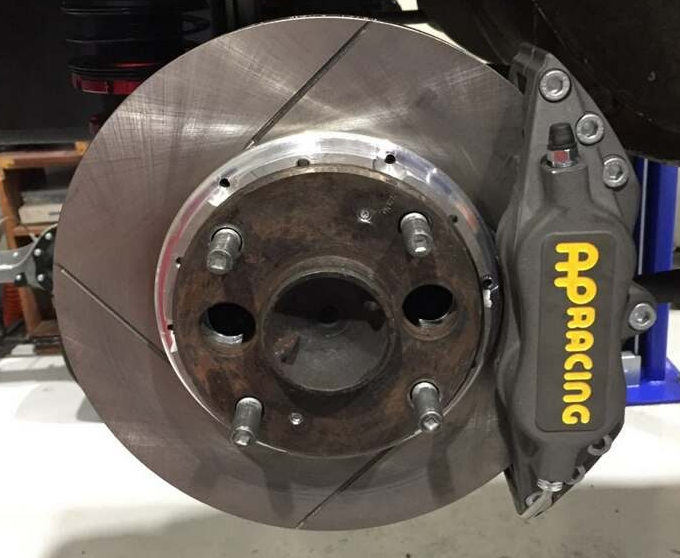
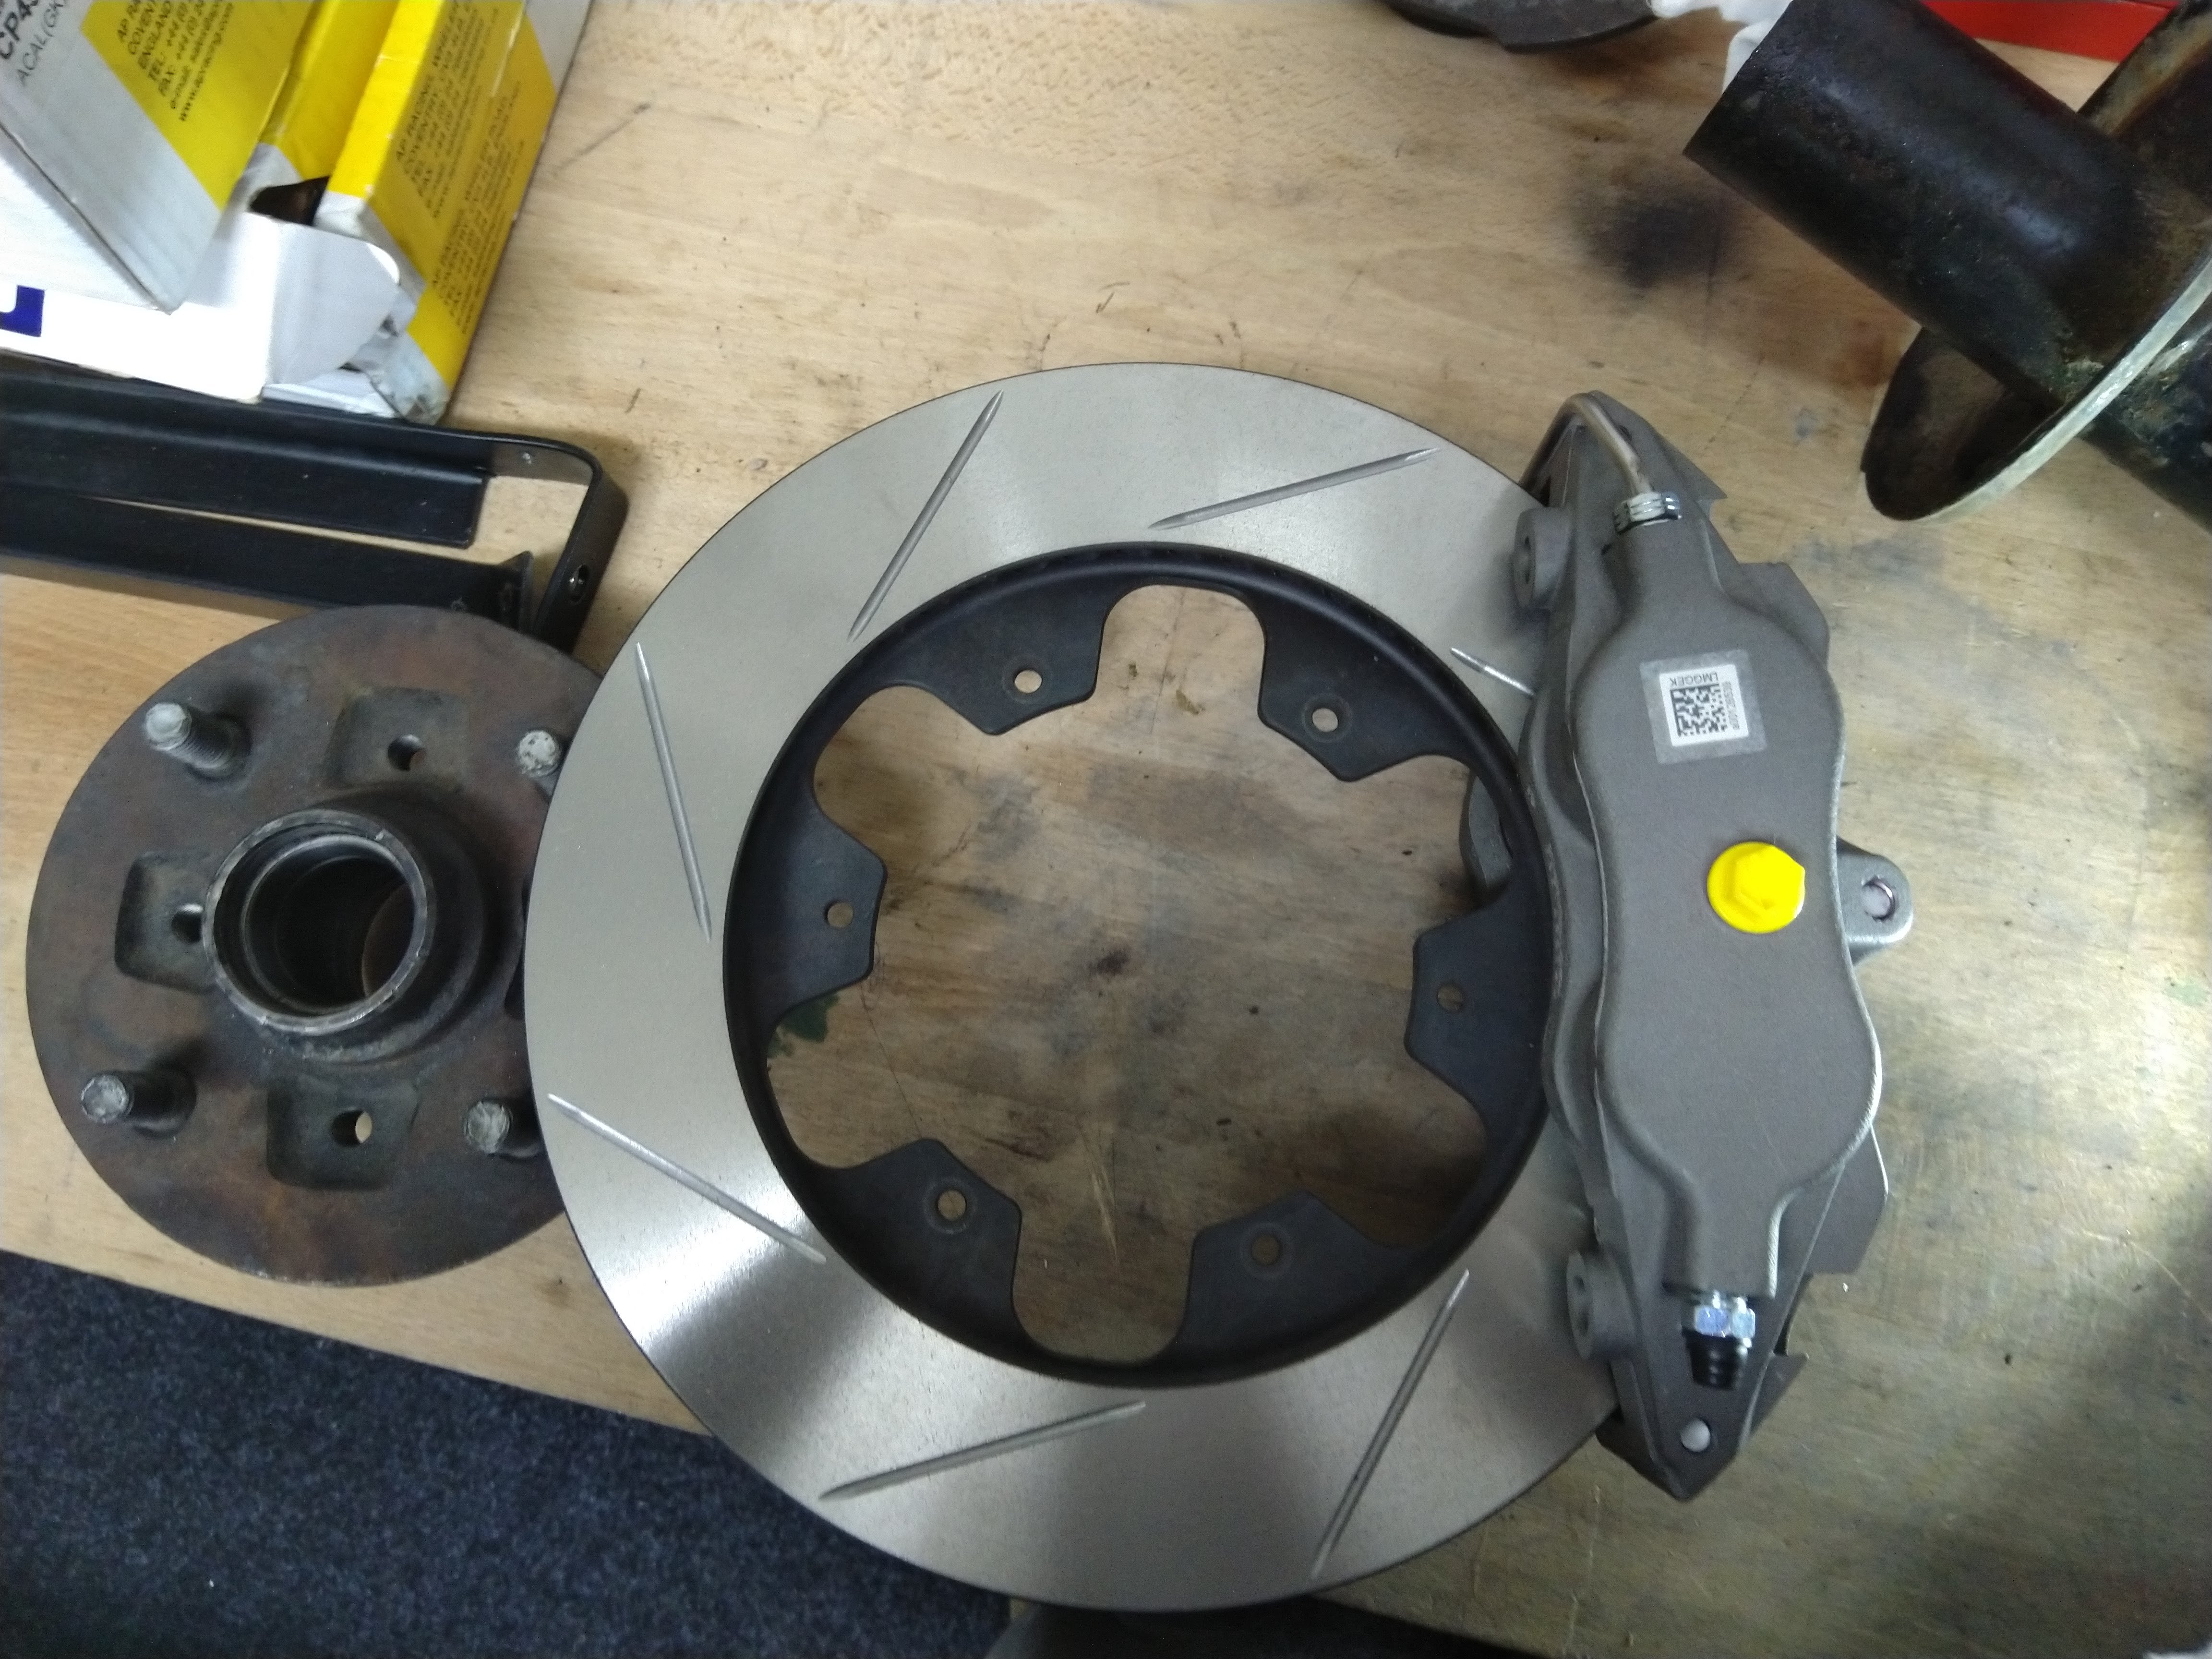
So I've been getting sick of rebuilding my front calipers regularly as they have been getting to hot. After the last club day of the season, the disks were again to hot and so had significant micro cracking and was only a matter of time before the cracked through again. I've also had major issues with pad knock back and stub axles cracking from the forces, also bearing life is an issue. So time to put a big upgrade into motion. I had decided to replace the front calipers and disks once and for all and to do it right. I was running Wilwood calipers with a Toyota Yaris disk (254 x 20mm) machined to fit. I went with AP CP4567 calipers with a 267 x 25.4mm ap disk on a bell (directionally vaned) which is pretty much the biggest i can get in 13" rims without going to another setup which is like twice as expensive. The setup is what's used on rally Escorts and is the Monte Carlo version rather then the forest version. The idea is the wider the disk the more heat capacity it has. Also bigger diameter helps the caliper leverage. I went with the AP's as I wanted a proper motorsport caliper with decent seals, knock back springs and pad availability. I could have made it fit the Starlet stubs axles, but i've had issues with them cracking and with the areo load i plan, i was even more worried about them. So I decided to upgrade to AE86 front stub axles, which meant new suspension, but did let me buy a "bolt on" kit for the brakes. Oh and also a new pedal box as I need different master cylinder sizes for front vs rear. So begins a long process...
-
Hyperblade's KP61R - Toyota Starlet with Honda K20a
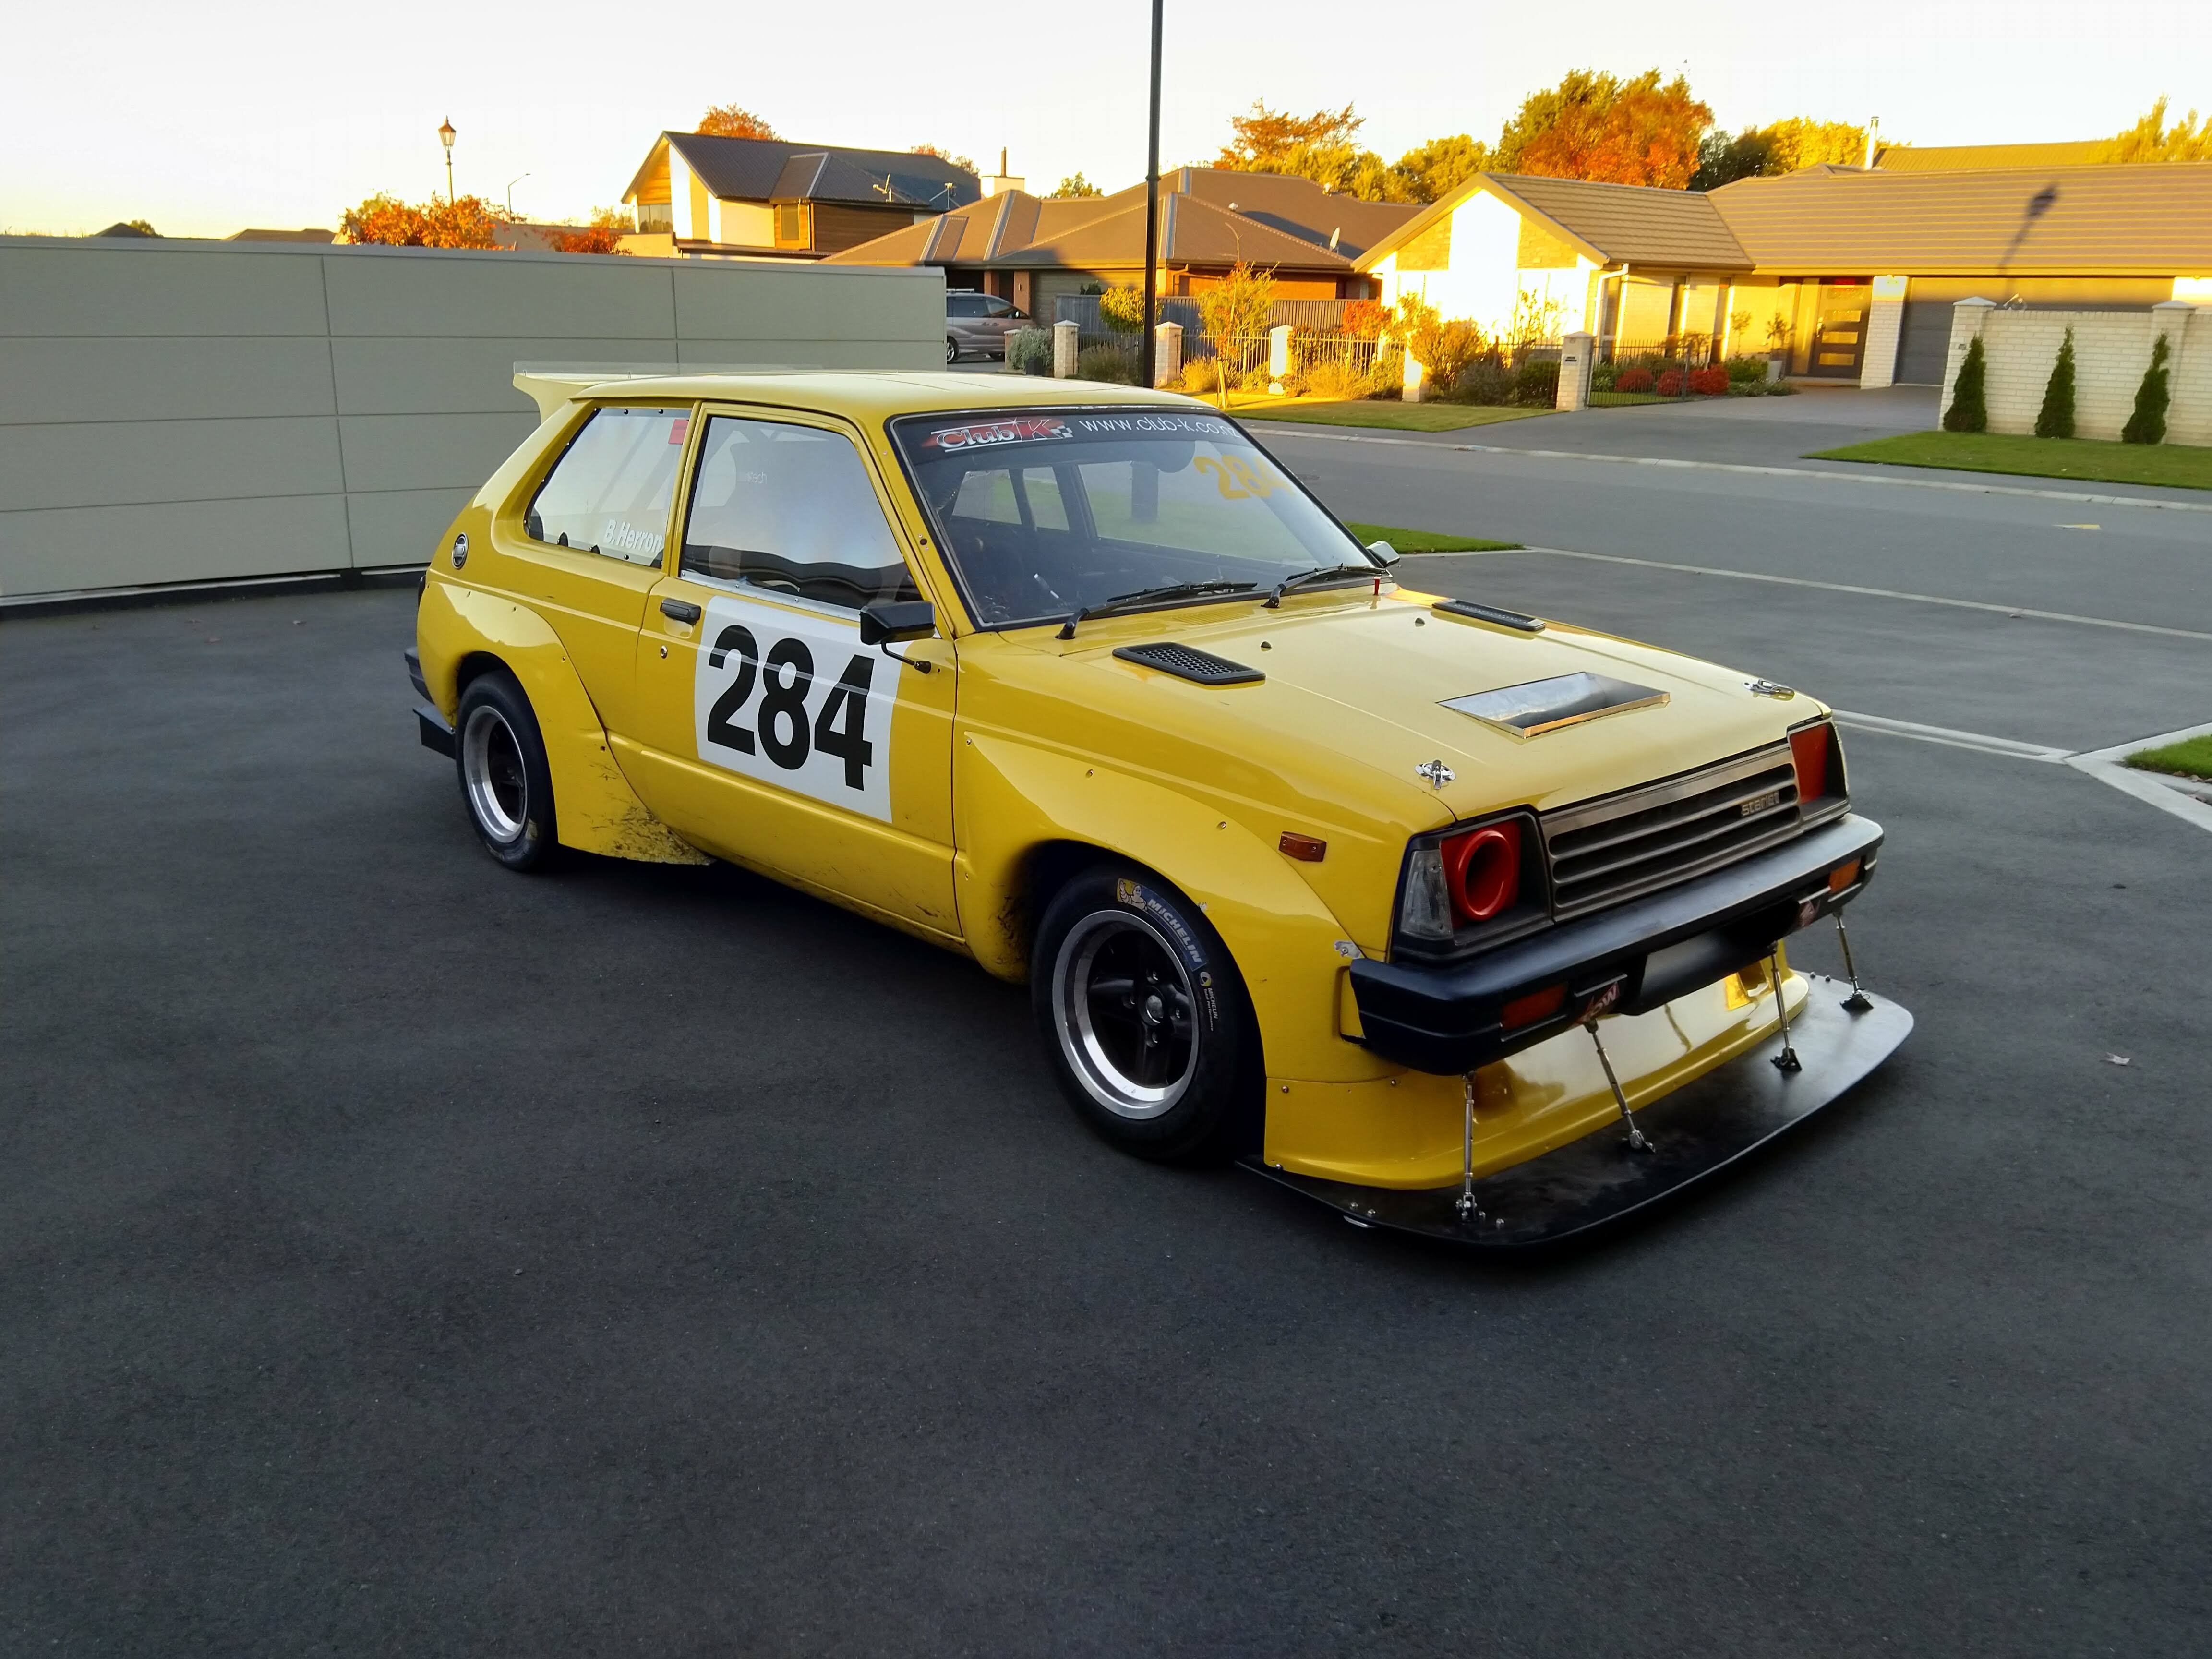
Hyperblade replied to Hyperblade's topic in Projects and Build Ups
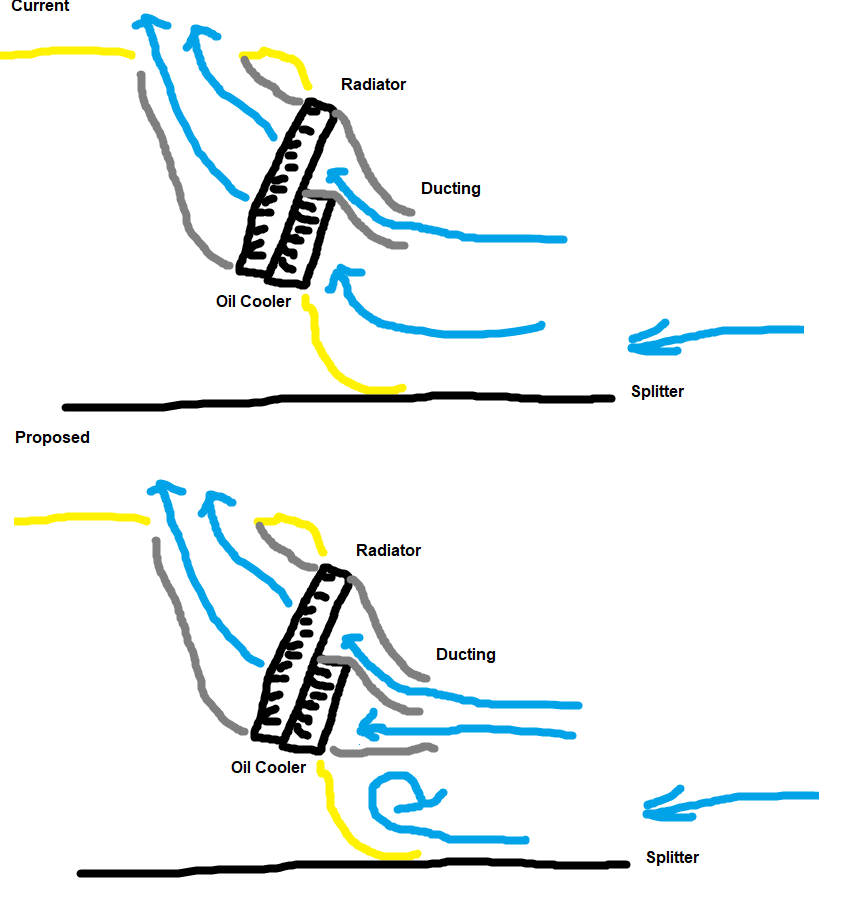
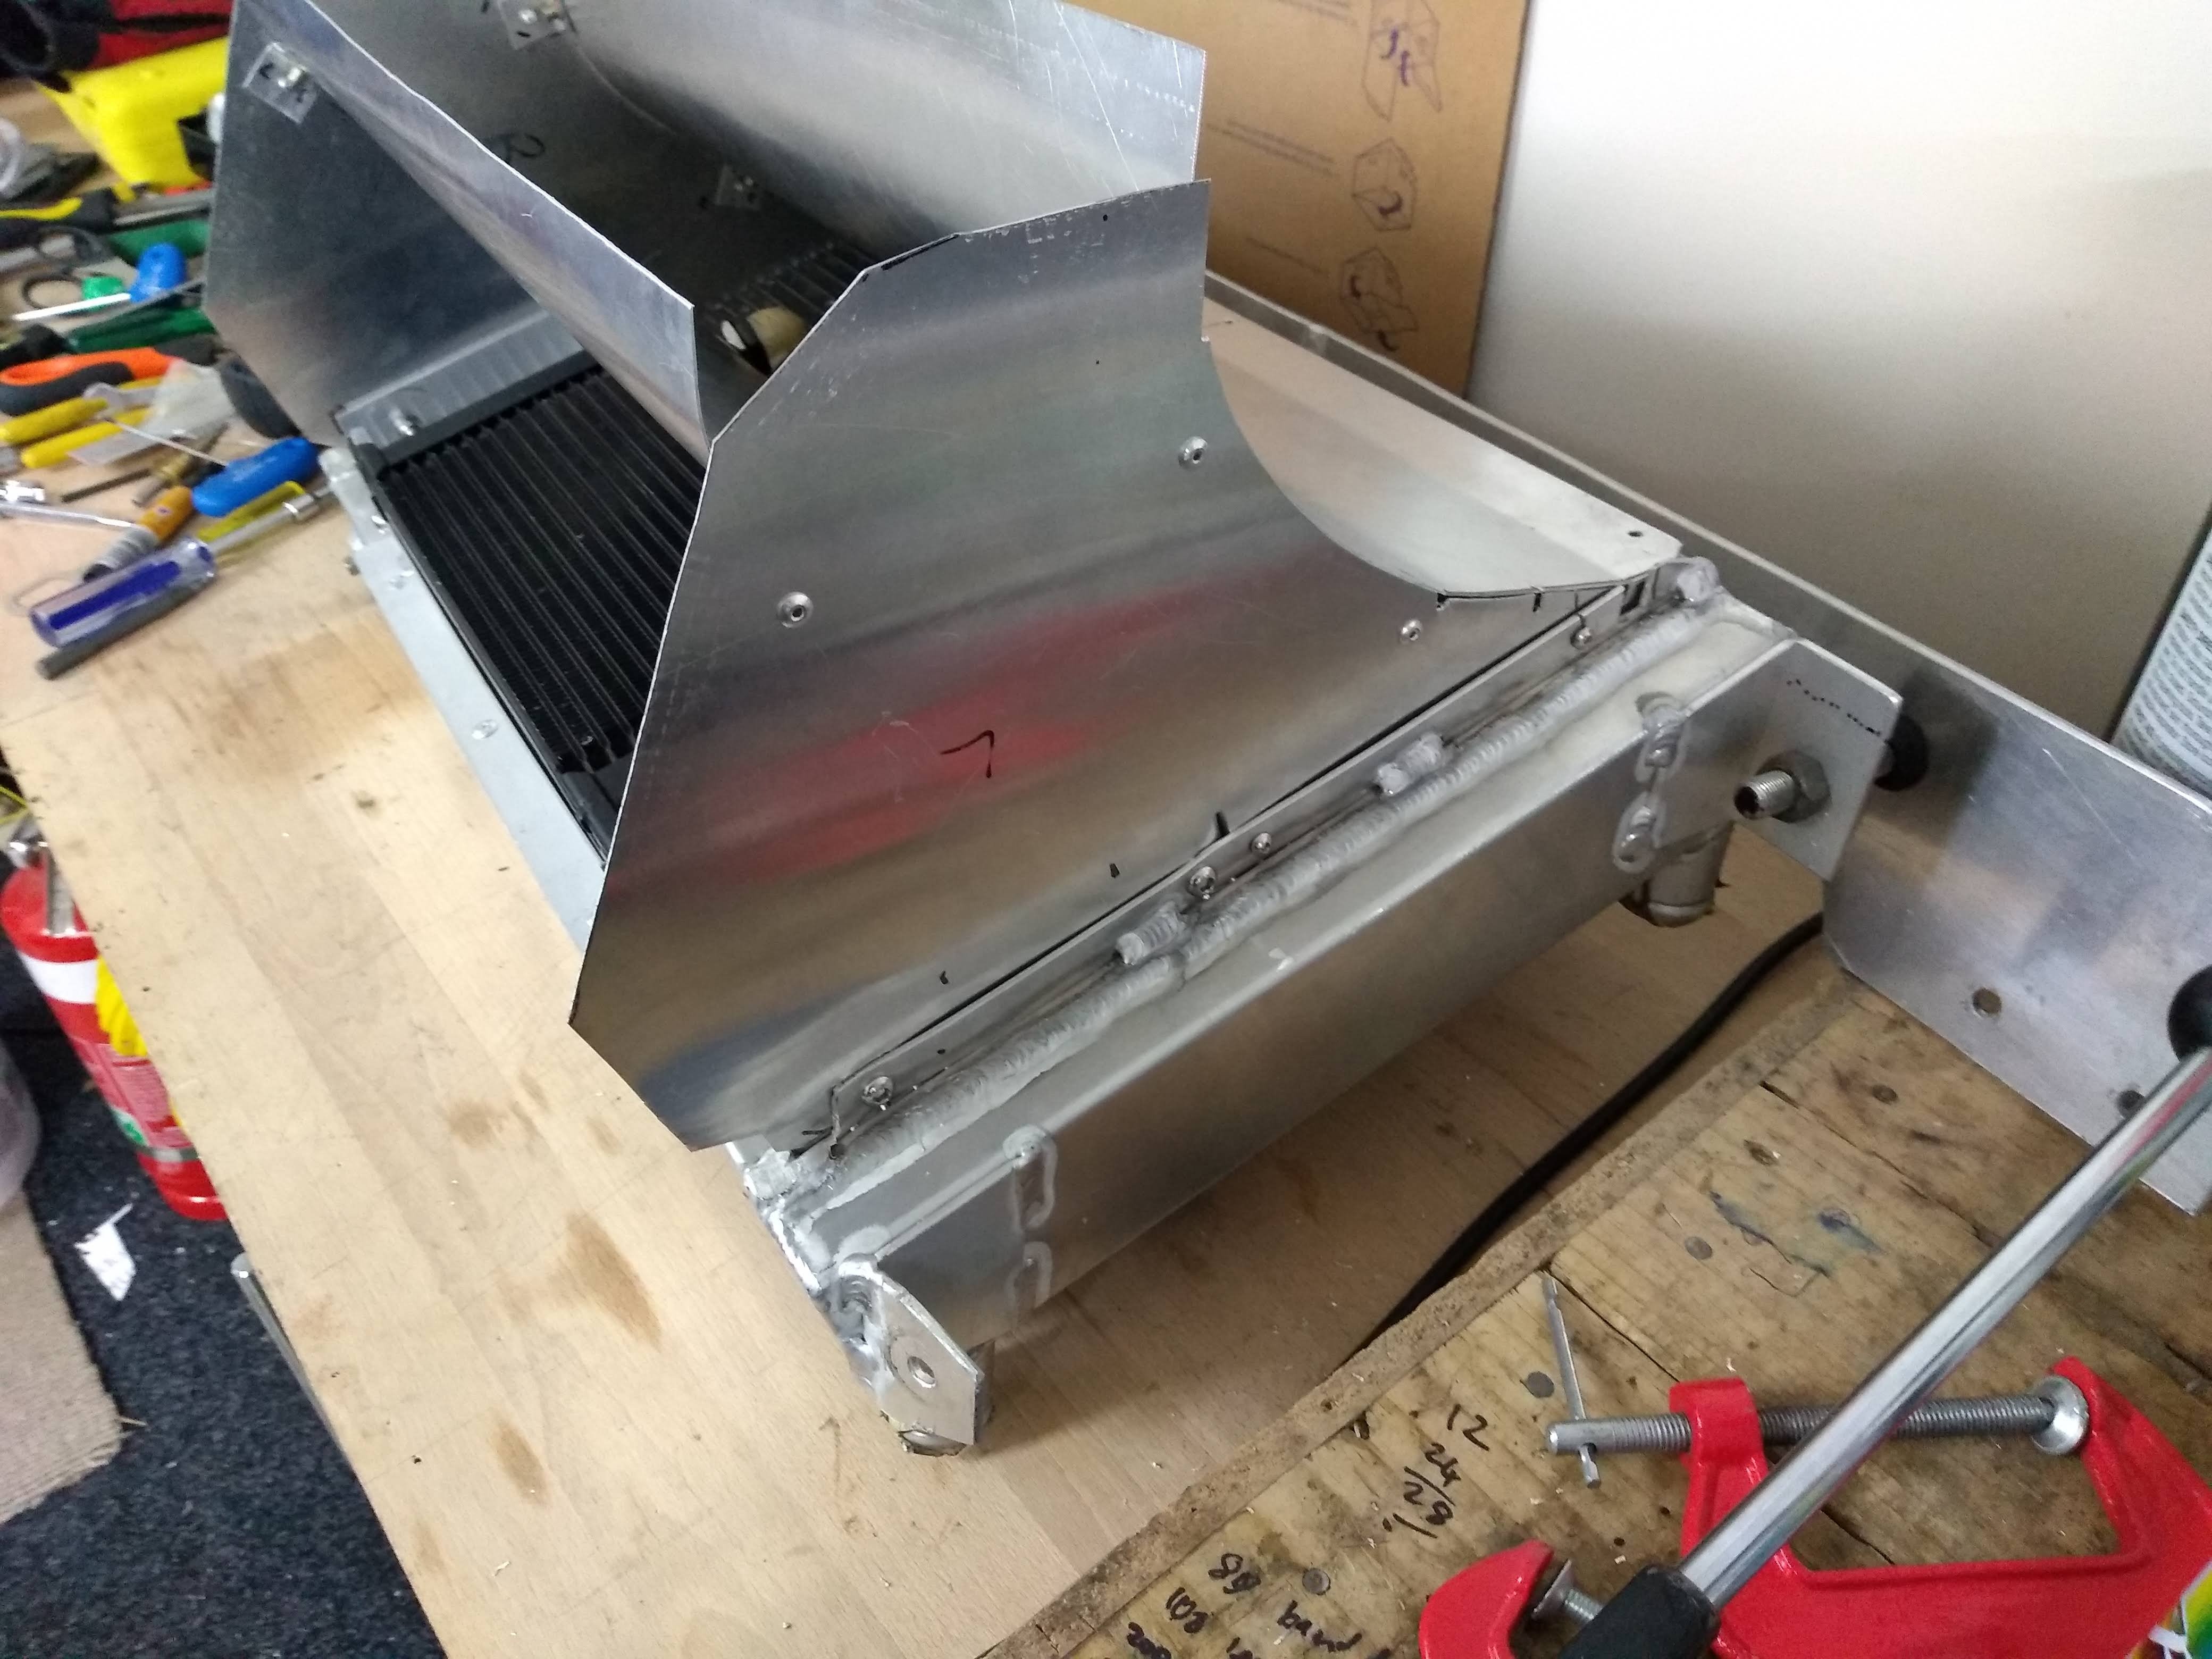
So went out for a shakedown with a new diff of 4.5 from 4.3 and the car looking like this: Some interesting results... It's all very well talking about PB's but in reality while I may hit a time, i'm far from consistent, and repeating it is often a matter of luck (bit between teeth chasing a car etc). So in the past i've always been around the 1.36:800 to 1.37:800 with the diffuser and splitter i was even more inconsistent and the laptimes were down, i just didn't feel comfortable with the car. I had a very unnerving experience going through pothole (fast left hand 150kish turn) where the whole car nearly under steered off the track, I've never ever felt the car like that before. So thinking being that the diffuser was working a little bit to well we pulled it off and just tried the splitter where i've felt I had an improvement in my times before. So so, nothing really different, less understeer but laptimes were about the same. I think where i previously thought it gained an improvement was just me driving better. So pulled off the splitter and just went back to basics, and did a 1.35.800, with consistent times between that and 1.36:500. The new diff made a massive difference, the car is just on song now, and still accelerating well at the end of the straight. So onto the last club day where i had a great day with my previous competition (Honda Integra DC5) unable to keep up: I took out the overall championship again and also won my class for the first time. So breaking it down, the diffuser is working really well, but the car isn't balanced with the diffuser on. I've always been told a splitter adds one second a lap, i've never really felt that with mine, i've actually never felt a major difference in the front end. So I don't think the splitter is doing it's job at the moment. I'm guessing the issue is the bonnet vent, I've now got a straight path from the top of the splitter through the radiator and out the bonnet. I think this is stopping a high pressure zone from forming on the top of the splitter. So i'm looking at changing the flow of air into the bottom of the radiators to create that high pressure zone. <
-
Thanks for posting up about the engine building, it's really interesting seeing the work involved!
-
Hyperblade's KP61 Racecar "KP61R" Discussion
Hyperblade replied to Hyperblade's topic in Project Discussion
My understanding is they are both your old parts! They are getting some good use now. -
Hyperblade's KP61 Racecar "KP61R" Discussion
Hyperblade replied to Hyperblade's topic in Project Discussion
Not allowed to mount aero to suspension, nice try -
Thanks @kpr and @Snoozin
-
Hyperblade's KP61R - Toyota Starlet with Honda K20a
Hyperblade replied to Hyperblade's topic in Projects and Build Ups
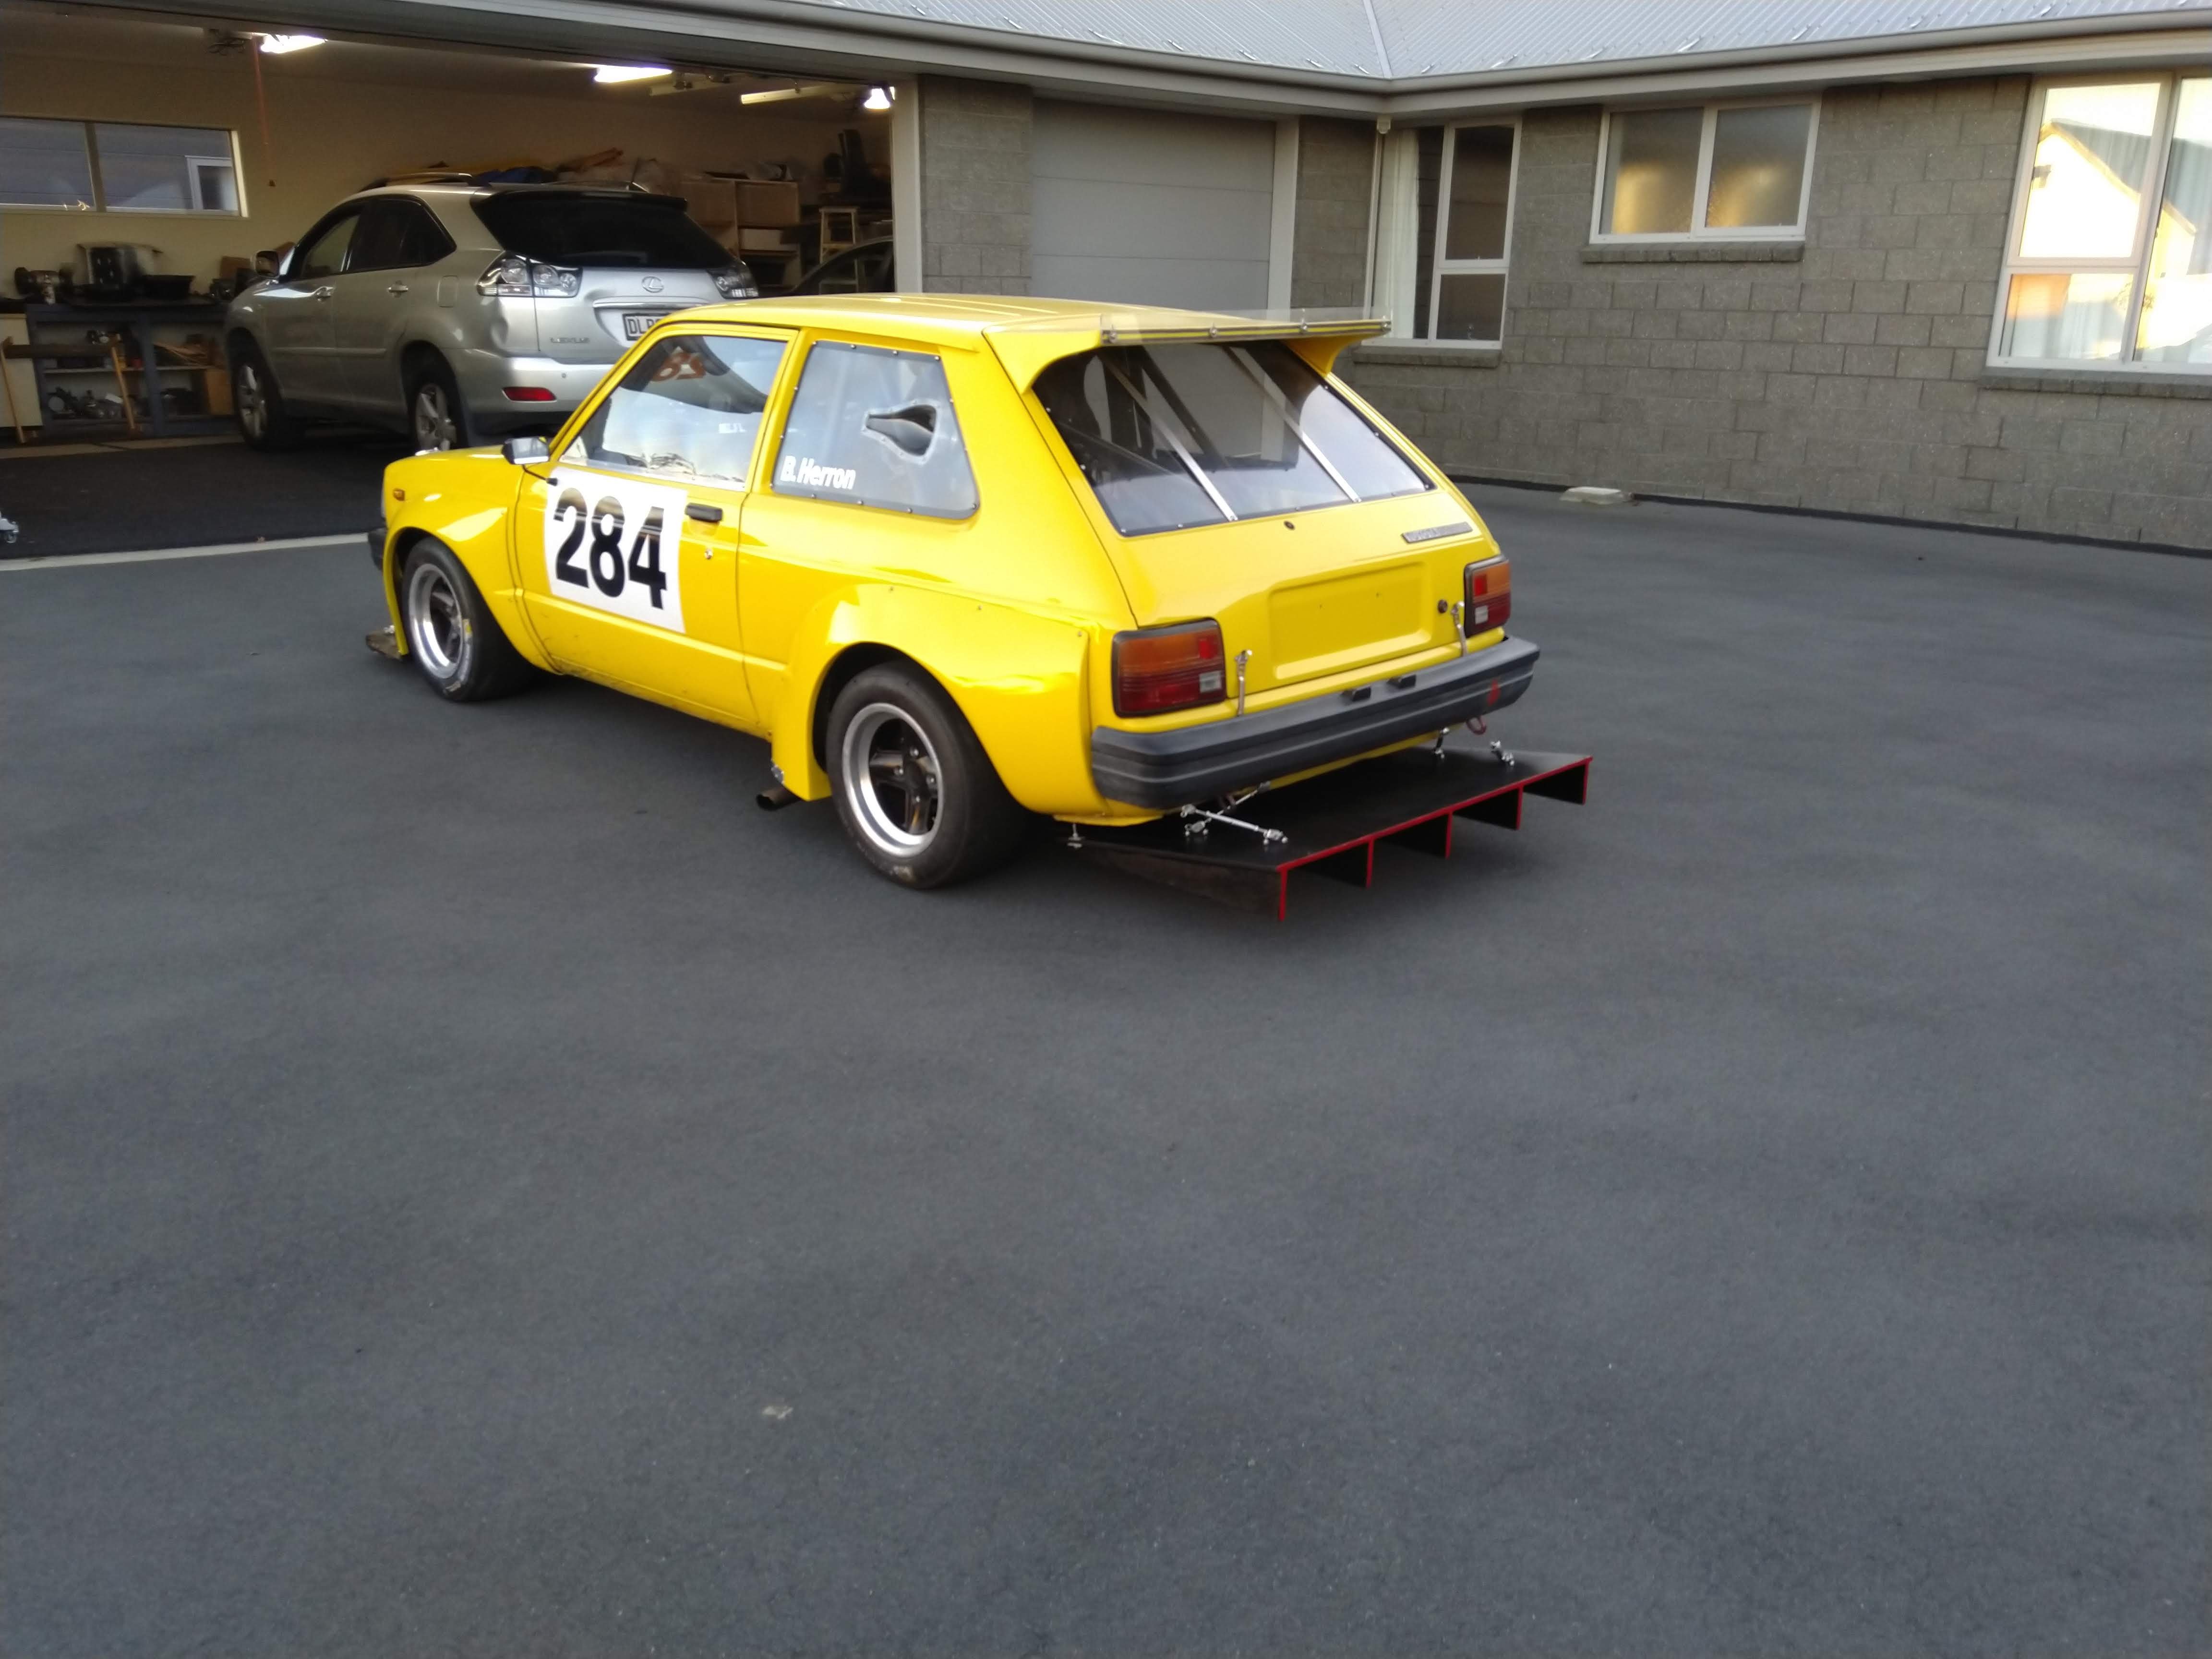
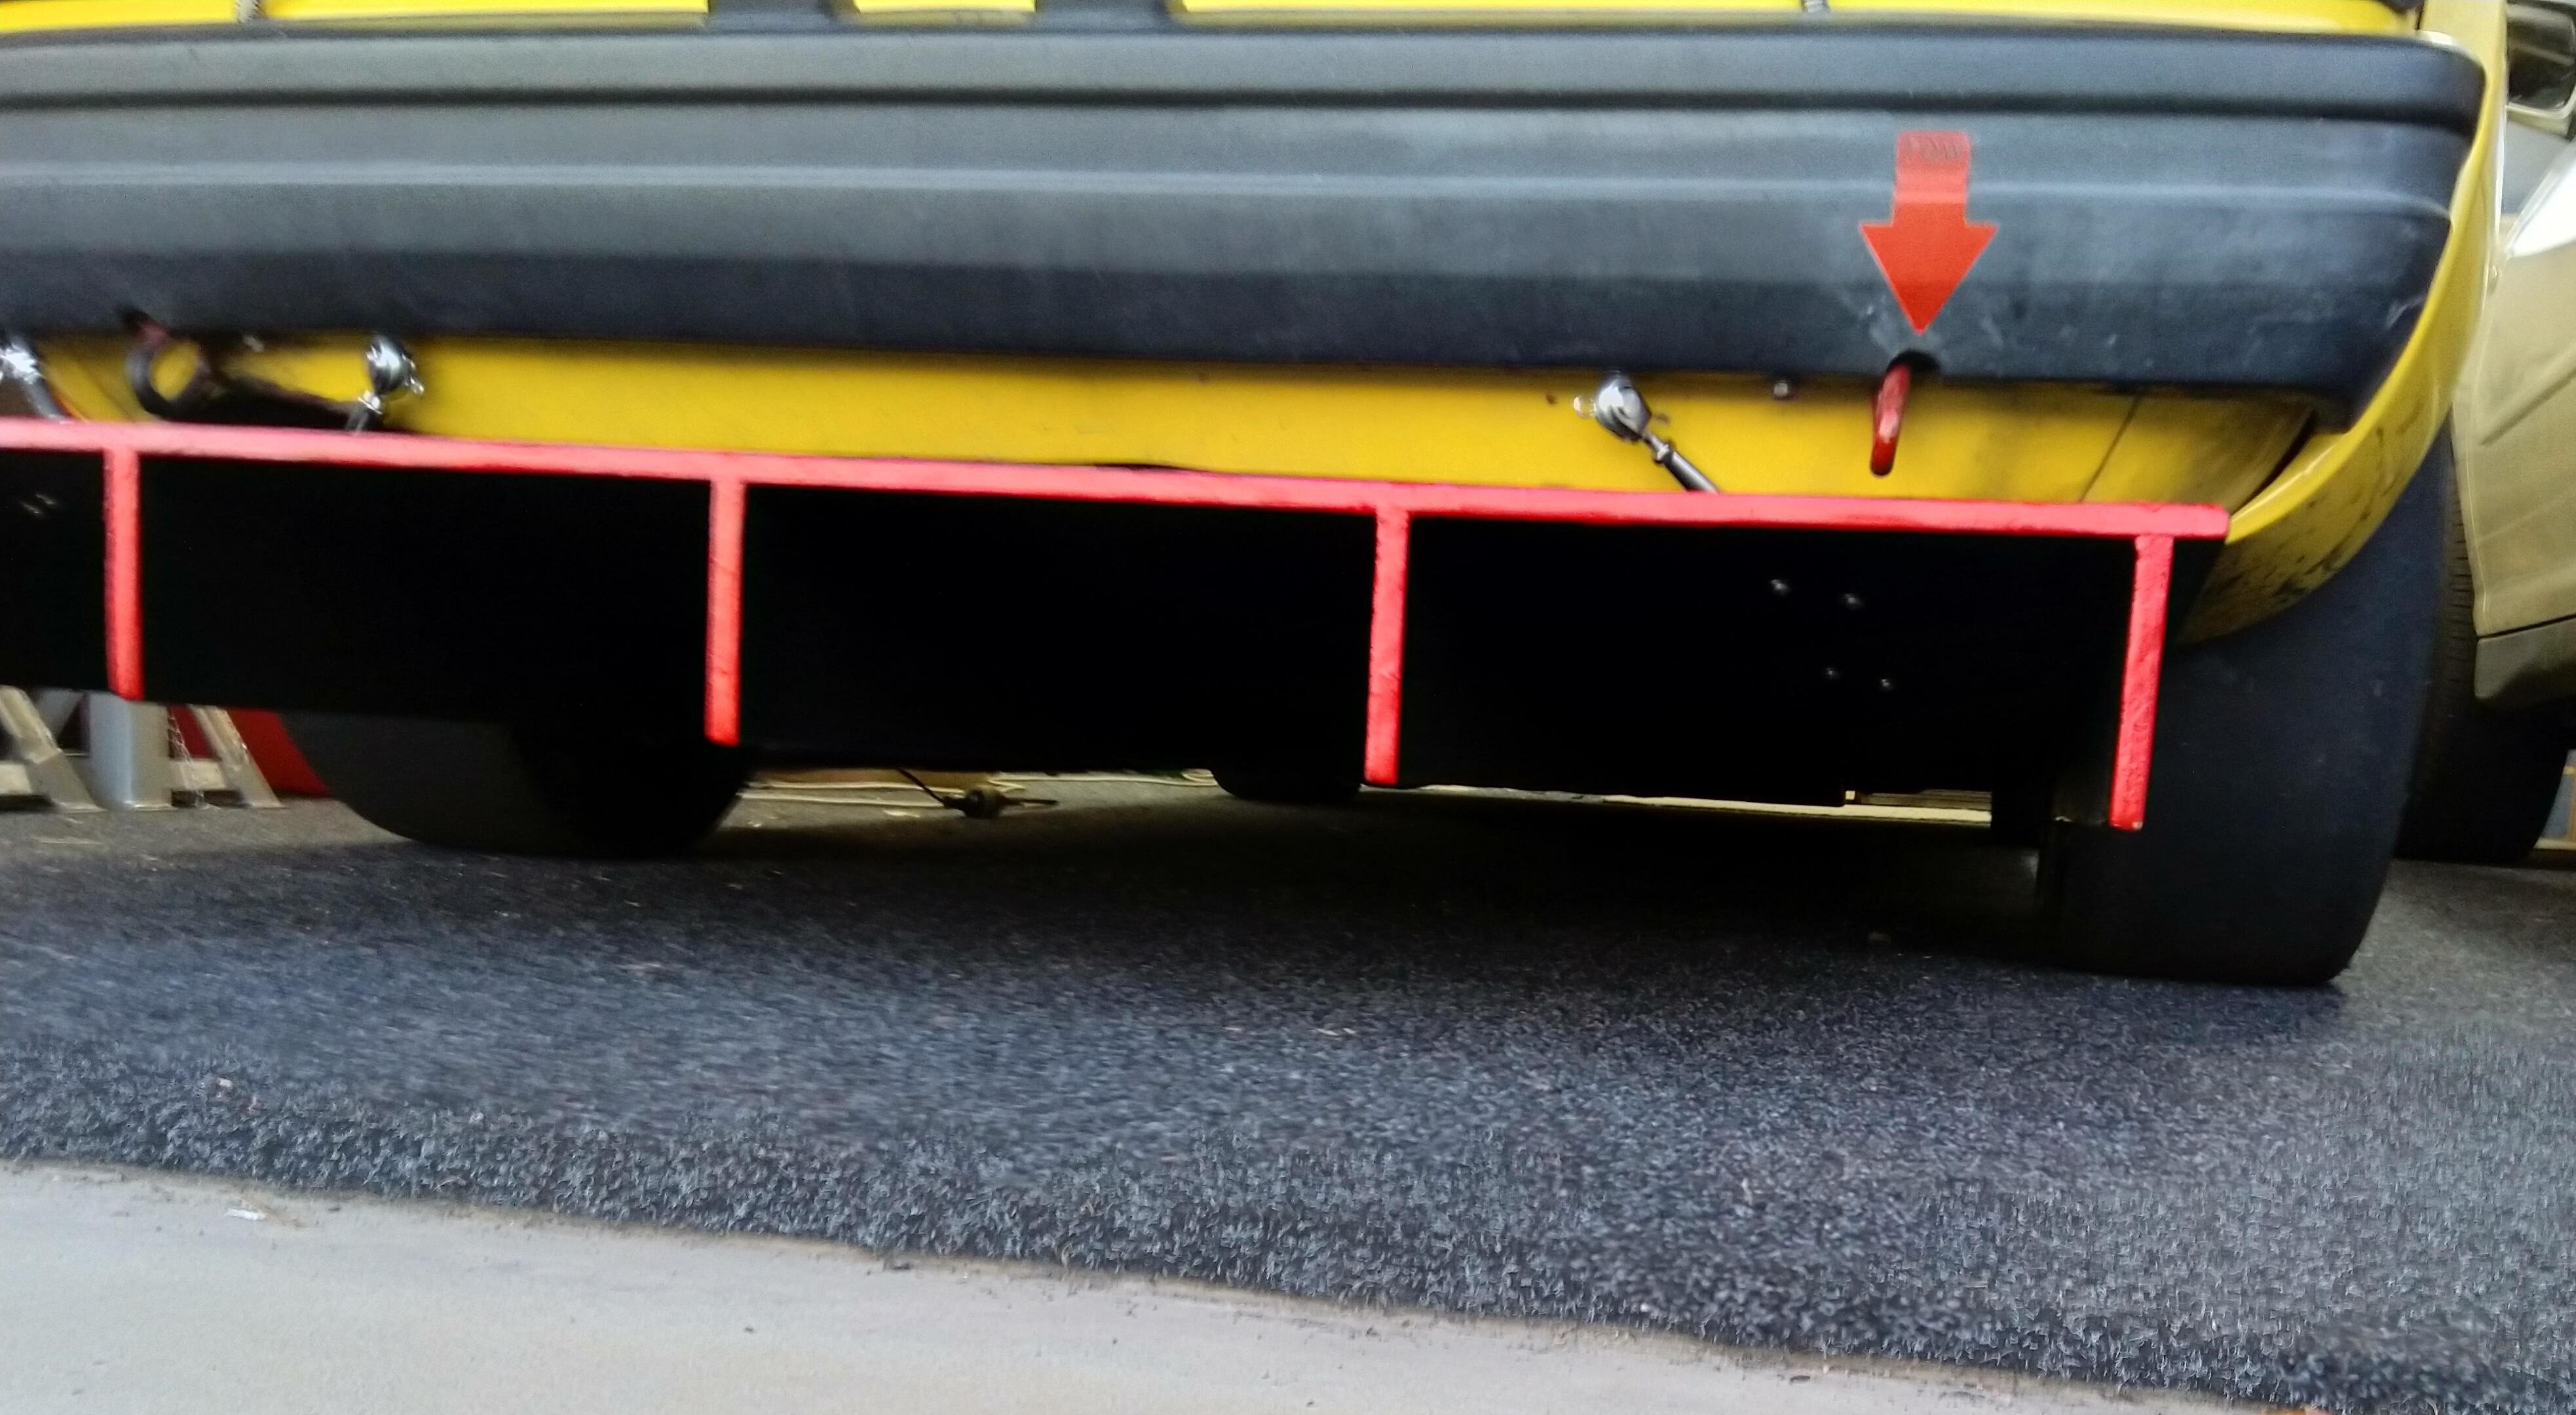
Finished Version, just waiting on one mounting point to arrive. Ended up sticking out further then what i was originally planning as I moved it back from the diff for clearance. But shouldn't have a negative affect on the aero (opposite probably), and could still go out another 200mm within the rules! Can always cut it down later if needed Only concern is it getting hit by another car, so painted the back red to stand out...
-
Hyperblade's KP61 Racecar "KP61R" Discussion
Hyperblade replied to Hyperblade's topic in Project Discussion
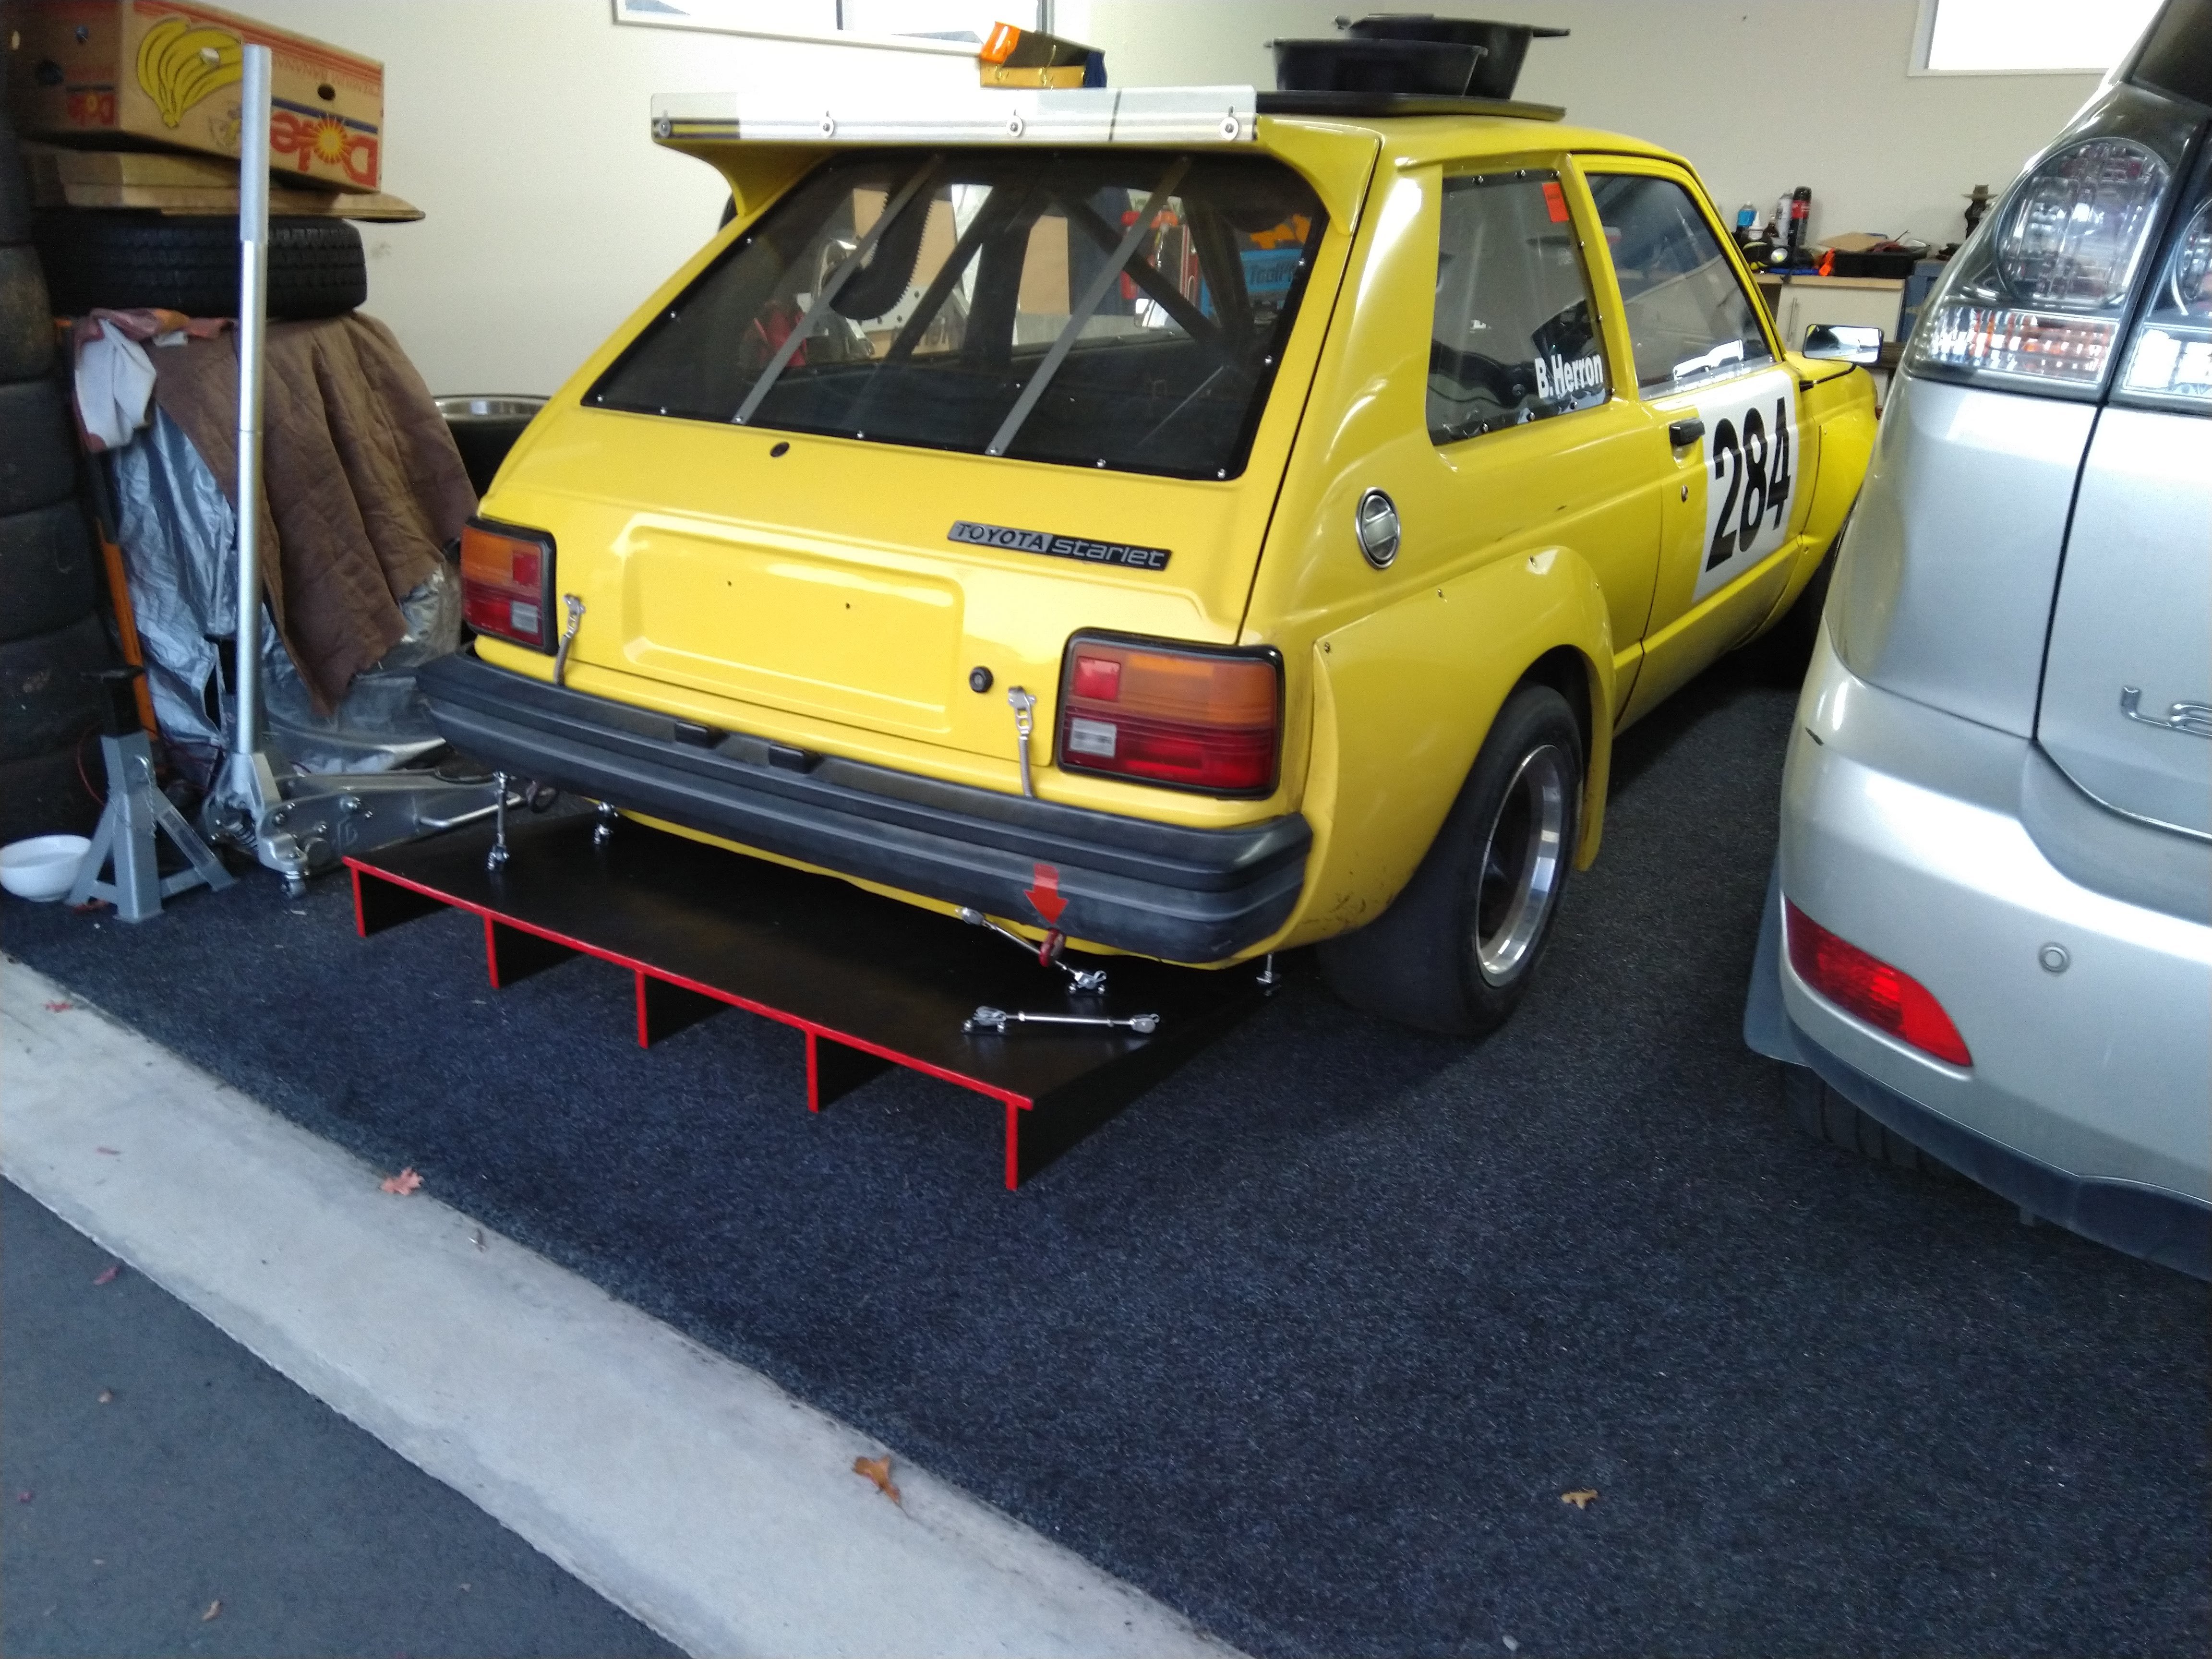
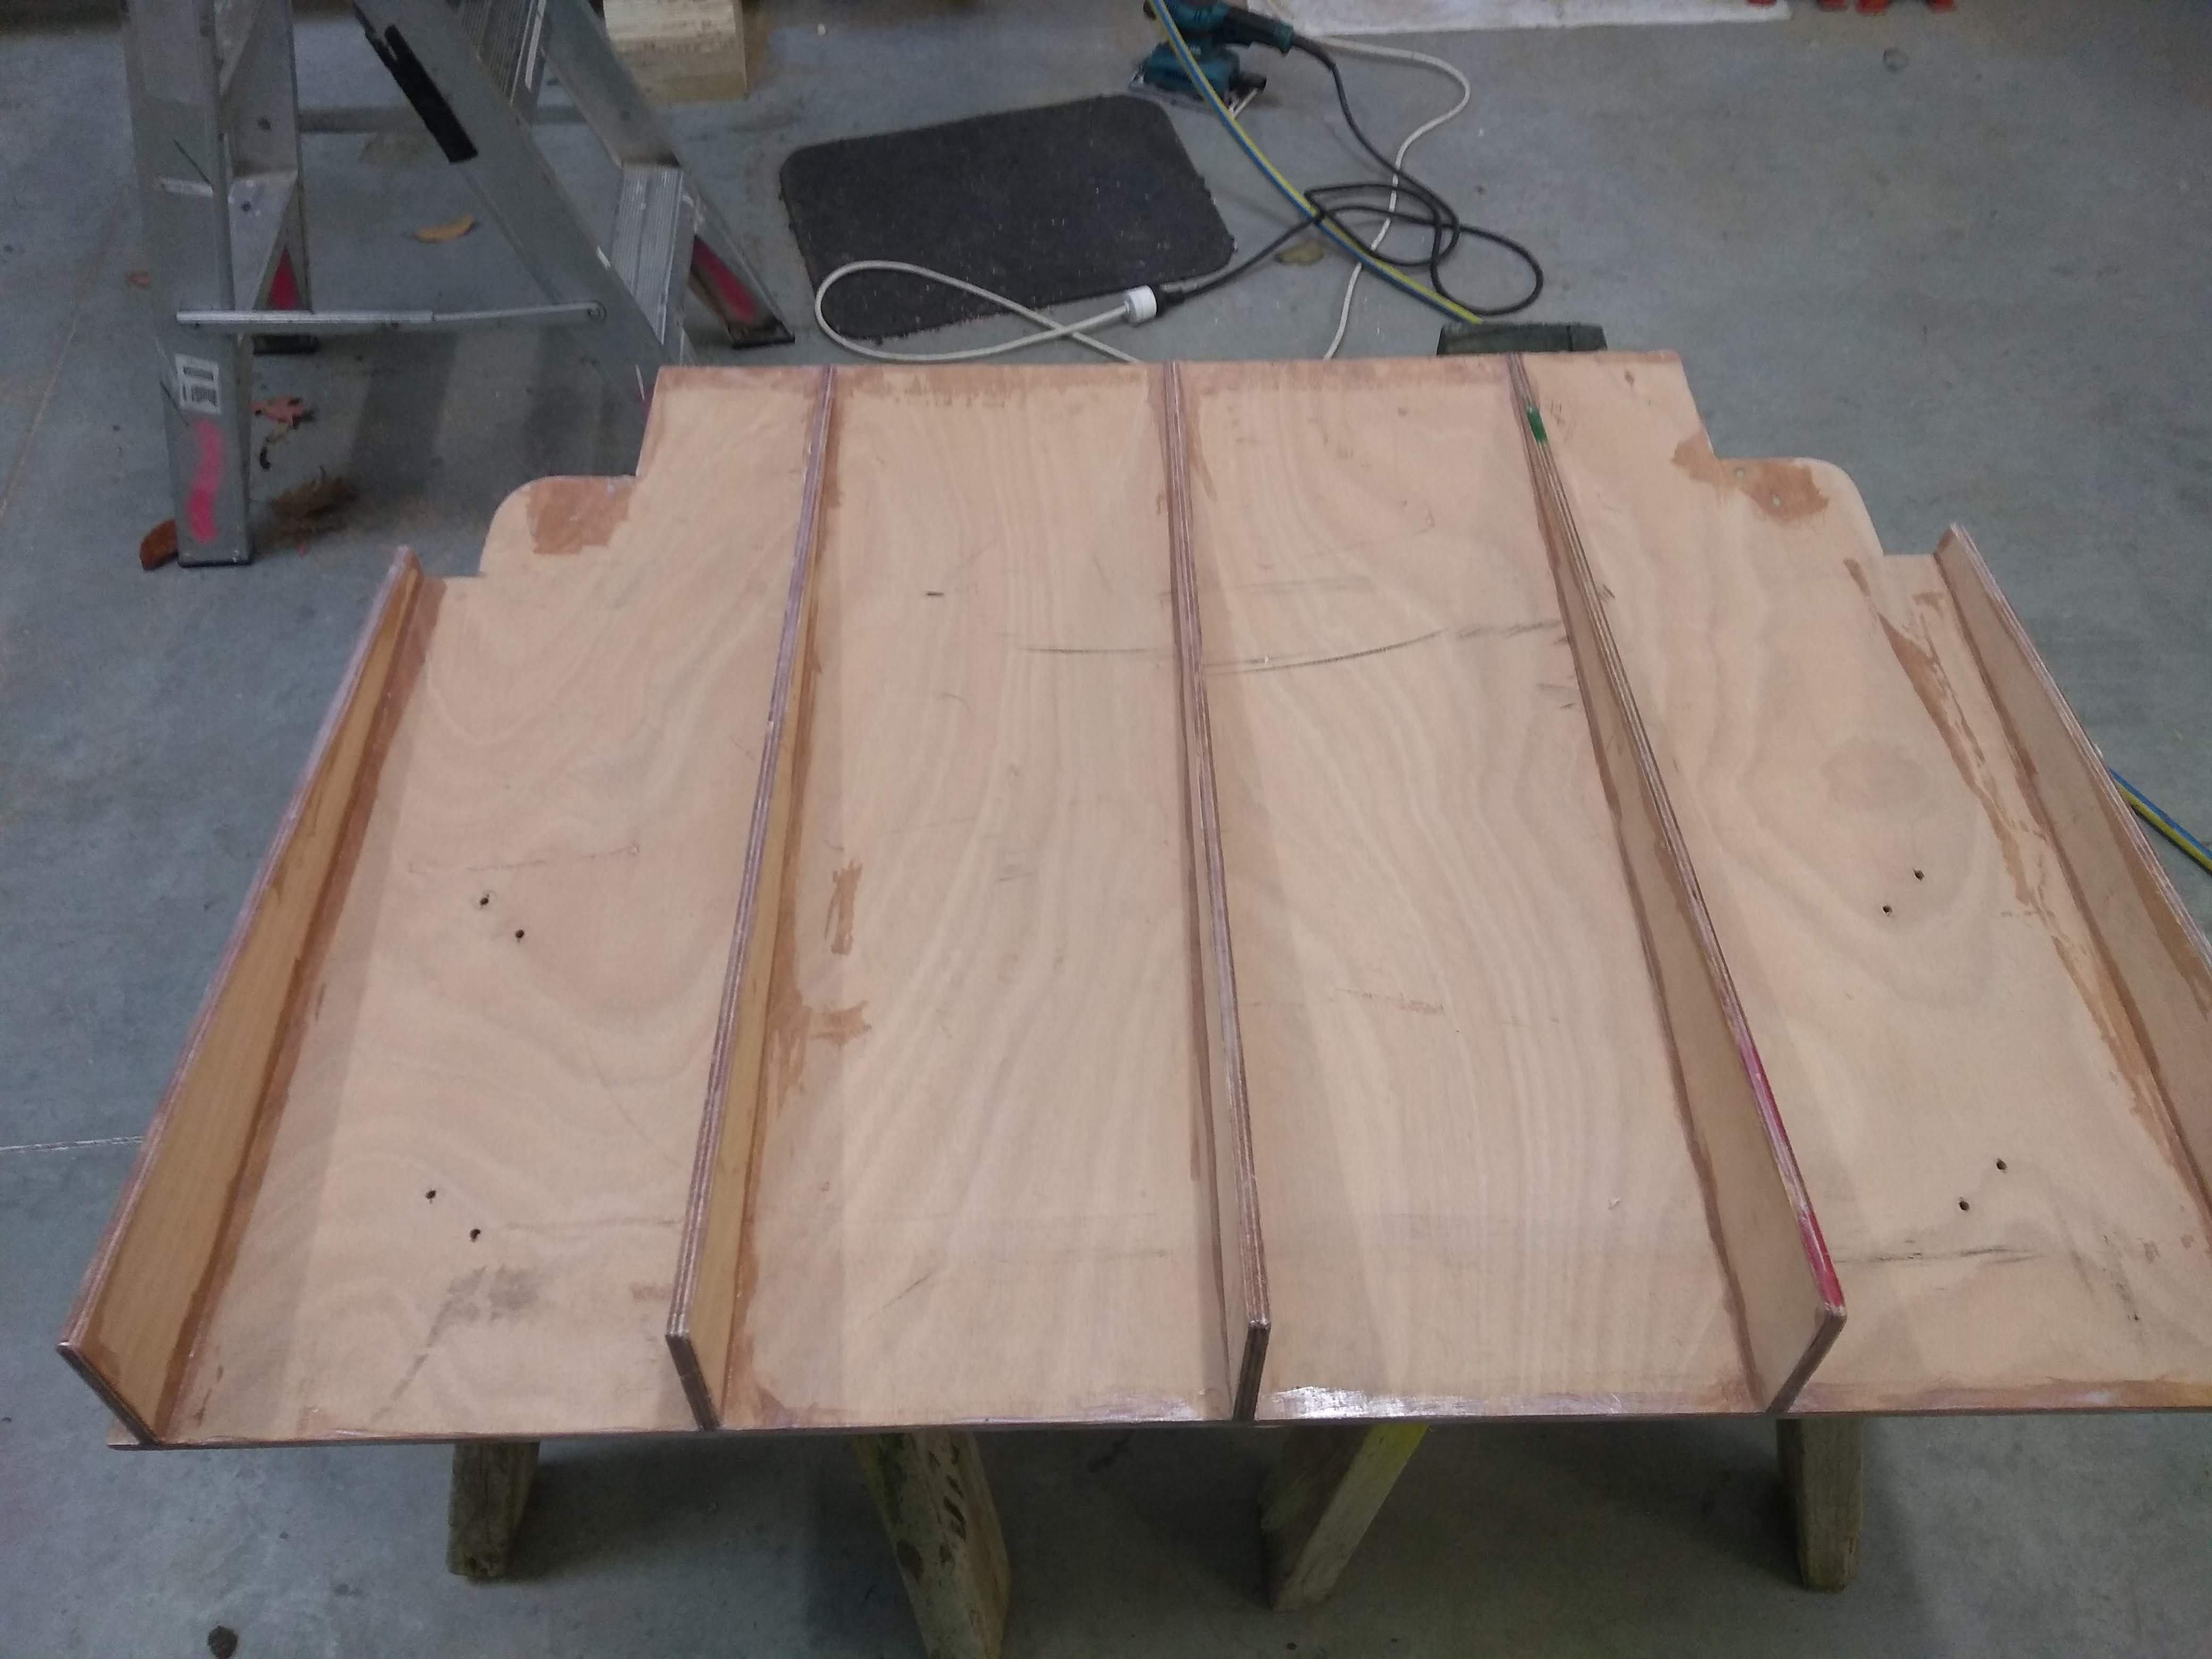
Here's a better pic of the diffuser., strakes have been glued and screwed
-
Hyperblade's KP61 Racecar "KP61R" Discussion
Hyperblade replied to Hyperblade's topic in Project Discussion
Hah! should have seen my splitter after going into the gravel, came out with a rock garden on top of it, when they pulled me out the car started to submarine further in, still finding gravel in odd places. I have a spare splitter ready to go if i break it, beauty of plywood was a simple pattern and just drilling a few holes. It's a good entry to the diffuser, wish i had it as simple! Rear wheel drive makes it a lot harder. Hard to tell too on a hill climb, as opposed to a circuit where you can push the limits a little more without major risk. -
Hyperblade's KP61 Racecar "KP61R" Discussion
Hyperblade replied to Hyperblade's topic in Project Discussion
I'm not a big fan of ali for a splitter, if you go off road it has tendancy to dig in and fold over on itself. The strength over a larger area means you have to put in a serious amount of support work, especially around the edges. (My splitter goes all the way back to the firewall) I think 4mm ACM might be better for this potentially, even 4mm plywood would be pretty good as you have a good structure for it and would be a bit more robust. That diffuser looks fairly aggressive! I've only gone for a 7degree angle (vertically only) as going for more really requires a good flow of air clean air to it (i.e flat floor) which i don't have. You might find if you made it less aggressive it will be more effective, also if you have a rear wing or gurney flap it can help it. Thanks for sharing, always good to see how others have done it!