Kiwibirdman
-
Posts
1002 -
Joined
-
Last visited
Everything posted by Kiwibirdman
-
All good. Glad the bits have gone to a good home. Looking forward to seeing this on the road.
-
Super cool wagon. I have a set of 14x7 and 14x8 widened steel wheels that would be the business. Send me a message if you are interested.
-
What I would do is wire the secondaries shut, half a 600 should be about right. Make sure the power valve is OK and set the float levels. Years ago a mate had a nasty 265 Hemi with a 600 on it and a really big spring in the secondaries (basically never opened), Changed the spring for a lighter one, it didn't go any faster but drank a heap more fuel.
-

Kiwibirdmans 1962 EJ Holden Wagon
Kiwibirdman replied to Kiwibirdman's topic in Projects and Build Ups
The Booster and master turned up pretty quickly from Oz. The shaft on the booster is shorter than the Gemini one, so it will mount directly to the firewall. All good except the wiring loom gets in the way. Found that there is a place near where I can put another hole and run everything through. I disconnected everything, felt very pleased that I had put plugs on anything that interconnects between the power train loom and the car loom. The challenge is that the plus on the relays are too big to go through the old hole in the firewall. Looks like having to separate out the connectors from the plugs, not difficult, just a pain. Also needed another hole saw, ordered on line with the Bunnings click and drive. Only 4 hours later to pick up a single 38mm hole saw. Fucking lock down!! The other challenge is the master cylinder I got from VPW was the one with outlets on both sides. I had made a point of ordering the GM LHS only type. The RHS outlets hit the bonnet springs. I might have to steal the master cylinder off my Firebird. It is a lot smaller and should be OK. -
Locost Bryan's 1972 Morris Marina TC Coupe
Kiwibirdman replied to locost_bryan's topic in Project Discussion
Good to see the update, looks like the car is getting close to finished. It wold look pretty cool with a set of Minilites on it. -
Kiwibirdmans 1962 EJ Holden Wagon
Kiwibirdman replied to Kiwibirdman's topic in Projects and Build Ups
Been working may way through the list. One of the things was the bracket for the brake booster had to come off and be checked, needs to be TIG'd and crack tested. That is OK. When I was pulling it apart there was brake fluid coming out the of the back end of the master cylinder into the booster. Also found that the booster had travel from when the brake pedal is pushed to when the master cylinder is engaged ( a gap somewhere in the booster). I had rung Sterling brake and clutch in Onehunga and Saturday and they were helpful and said bring it in we can pull it apart and have a look. This morning I went over there, via Zebra pick a part to get another master cylinder off a VZ commodore, cheaper to get another one than try and fix the leaky one. At sterling I got educated on boosters and new master cylinders. The VZ master will not work with the Gemini Booster. There goes Plan A. Plan B is now a new 7 inch Booster and new GM style Master cylinder. On order and has to come from Aus, there are non in the country that are at a reasonable price. I did get quite a few things sorted out on Saturday. Bolts changed for longer ones, Spring washers added, Lock nuts added. It all takes time. -
Third Wednesday would be 19 August
-
Kiwibirdmans 1962 EJ Holden Wagon
Kiwibirdman replied to Kiwibirdman's topic in Projects and Build Ups
I took the Holden down for the first inspection for the Low Volume Cert. Fundamentally the car is OK, still have a list of 30 things to fix, most of them are easy, bolts to change for longer ones, Fit spring washers, confirmation that things were put back in the factory location, minor adjustments to make. I'll print the list off and smash it out.- 129 replies
-
- 12
-

-
Being cheap I was looking at this. Might try the machinery house ones, not that much more expensive and consumer guarantees act applies
-
Also I had the master cylinder on the Firebird re-sleeved by Race Brakes in New North Rd. It was a long time ago but wasn't silly expensive.
-
There were some LHD EH utes that ended up in the states. I wouldn't be surprised if the wheel cylinders are a generic GM part. Lots of that sort of stuff was.
-
Hi I have a bunch of left over bits from the EJ build that would go in your EH. The brakes on the car were rebuilt before I got it and never used. No idea if the wheel cylinders are any good, you are welcome to try them for no dollars. Mike
-
Kiwibirdmans 1962 EJ Holden Wagon
Kiwibirdman replied to Kiwibirdman's topic in Projects and Build Ups
Dodging the rain showers today I went for a drive with my youngest son ans set the speedo. I bought a Dakota Digital electronic to mechanical converter box. It has a blue tooth interface and a simple app to stick on the phone. Drive along, compare the indicated speed with the GPS function on google maps, change the number of pulses per mile, rinse and repeat. Took about 10 mins and is bang on 30 miles or 50 klicks. I had bolted the SS cragars off the front of my Firebird onto the back of the Holden. With the black paint black wheels aren't going to cut it. 20 year old tires don't give much traction. Off to get it certed 4 August.- 129 replies
-
- 11
-
-
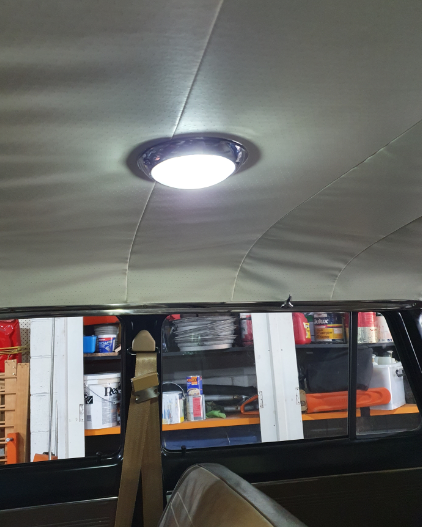
I lined the roof of my Holden with the sound deadener that Jay car have. The only problem was that it didn't stick that well to the original sound deadener that was on the roof. Made a big difference when giving the rood a slap. Will be doing the floors etc once the car is complied.
-
Kiwibirdmans 1962 EJ Holden Wagon
Kiwibirdman replied to Kiwibirdman's topic in Projects and Build Ups
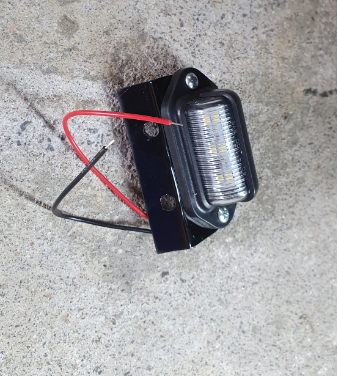
A bunch of stuff done Cross over pipe made for the exhaust, exhaust painted and fitted. I used pot belly black. The cross over pipe has taken the bark out of the exhaust and dropped the noise but not too much. Sounds like it should. New IAC valved fitted. Engine now idles Number light plate fitted. Here is the little LED I got and bracket made. Much brighter than the original. Replaced the leaking flare nut on the rear brakes, no more leaking there. Now have to fix the paint on the diff where the brake fluid ate it. One more leak on the front brakes to find and fix. I bought a new flaring tool that is much better than the old one which was pretty much stuffed. Note to self through out old tools that don't work properly any more.
-
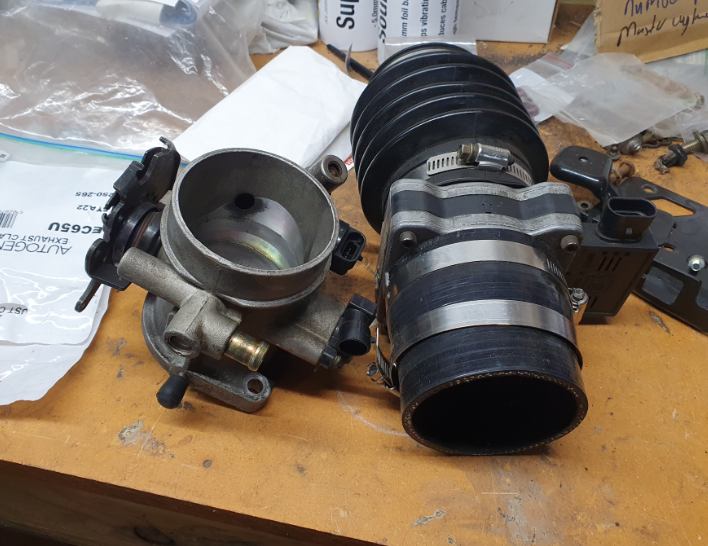
They usually point down so the fuel is sprayed onto the back of the inlet valve. This is the optimum position, spraying upwards is less than optimum but still better than a carby or throttle body injection.
-
See you there Dylan.
-
I'll be there.
-
Kiwibirdmans 1962 EJ Holden Wagon
Kiwibirdman replied to Kiwibirdman's topic in Projects and Build Ups
Got some more bits knocked off my list. Clearance created by the oil filter, a few minutes work with a power file did the trick. Wired up the interior light, complete with a flash LED bulb. Its way brighter than the original type bulb. Still killed a couple of hours by the time I soldered the wires together, fixed my multi meter so I could trouble shoot why it didn't work and finally fix both door switches. The other job that got done was making some clearance between the brake pads and the hub. I am using Torana stubs with HQ discs and HZ calipers. The discs were turned down 12 mm to fit and it all bolts together. It was a Peter Brock fix back in the day of XU1 Torana's using HQ calipers. I went round to a mates place to use his linisher. Half an hour catching up and bitching about the cold and useless Politicians, 5 mins on the linisher, then another half hour to sort out the mk1 Escort wiper mother that he was playing with.That all put a dent in the morning. It all went together and plenty of space. The pads had a lip on the bottom edge that went below the friction material, that is gone now so there wont be any probles as the pads wear. I also figured out during the week that the IAC valve had died. Tried to buy one on Friday with no luck. I'll get one ordered Monday. I have pulled the intake track apart so many times I can just about do it in my sleep. Hopefully this will be the last one for a while. Last one was buying some flanges and tube to make the balance pipe. I had to go to Pakuranga for work so easy to get to Auto Bend to pick up the bits. The flange will go in the middle so that the exhaust can be split and removed.
-
Kiwibirdmans 1962 EJ Holden Wagon
Kiwibirdman replied to Kiwibirdman's topic in Projects and Build Ups
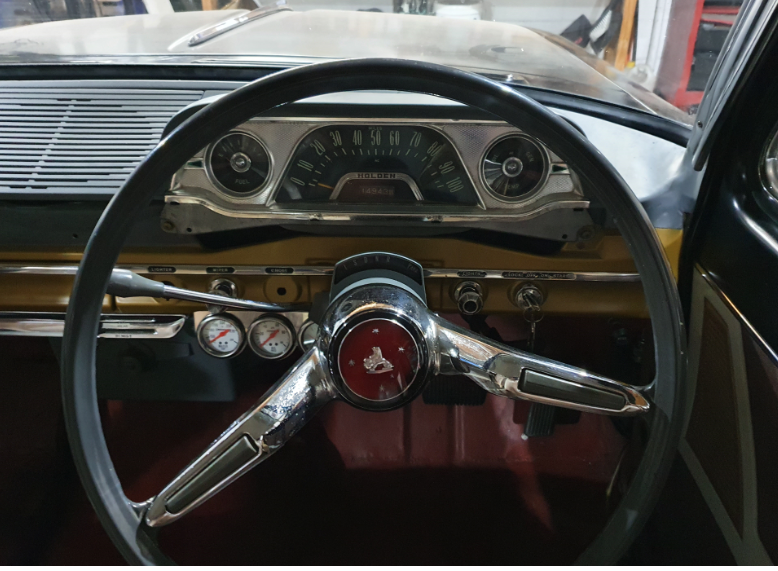
A fair bit has been done since the last update. I spoke to Trevor at Holden Diagnostics. We agreed that the tune was causing the issues, and he could sort it out. The guy who did the original tune has been known to have trouble with VT engines. I had a bunch of people coming round from work on Saturday night and wanted the car running. Trevor sent me a spare memcal and said send your old one back when all is good. Thursday night I fitted the new for the water pump. The old one looked pretty tired. I put the throttle body and everything else back together and fired it up. Then swapped out the Memcal and all good. I spend a lot of Saturday working on the car. a couple of hours went into getting the wiper motor fitted. I had made up an adapter plate ages ago which was fine. The challenge was getting clearance for the motor body on one side and the actuator arm in the plenum chamber on the other side. Using a couple of washers under one side of the adapter plate did the trick. Sorry no photos. I also put in my Dakota Digital interface box to make the speedo work. This is mounted behind where the kick panel will be. Hopefully it wont be annoyingly loud. To night, June 30, had been my goal date to have the car finished. I finished off the wiring for the wiper motor back to the switch, installed the instrument panel, and went for a drive. I consider this a win. It has got some real get up and go, the brakes actually work pretty good and the steering is OK. The exhaust is too loud, so a balance pipe will get made, the engine idles at about 1200 in drive, I'll have to work that out, and there are still lots of finishing off things to do. Not to mention registration and certification. Here is the view from the drivers seat
- 129 replies
-
- 15
-

-
-
Probably a dumb question but why not find the injected intake off a black 202, or better still the whole motor? They used to be around and not much money, of course that might have changed.
-
As long as you have the right bolt pattern on the block everything else is good to go.
-
MOTAT drive in movies 17th July?
Kiwibirdman replied to chris r's topic in Upper North Island Region
Wife and kids are away so I am free. Have plenty of extra seats in my truck. -
Kiwibirdmans 1962 EJ Holden Wagon
Kiwibirdman replied to Kiwibirdman's topic in Projects and Build Ups
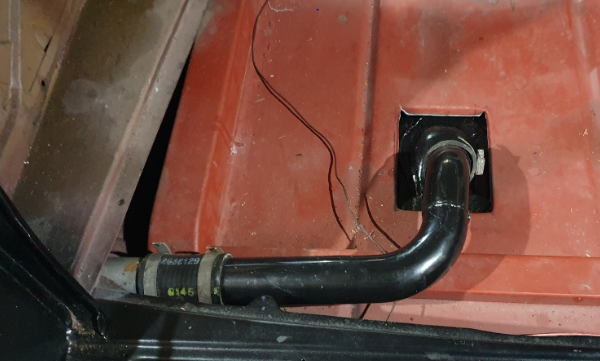
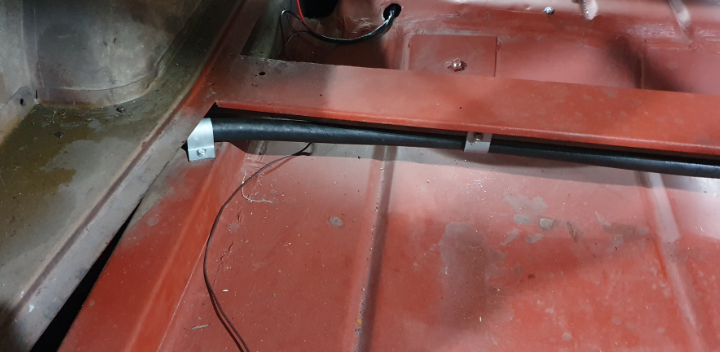
Here are a couple of photos from last weekend when I put the tank in Filler tube. It the original extended to meet the tank And the breather. The wiring at the top of the photo is the power and fuel sender to the tank. Reusing the original fuel line hole through the body.
-
Kiwibirdmans 1962 EJ Holden Wagon
Kiwibirdman replied to Kiwibirdman's topic in Projects and Build Ups
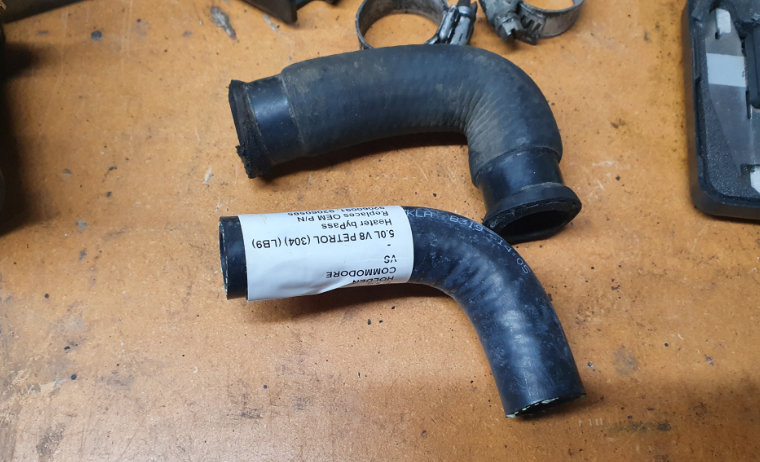
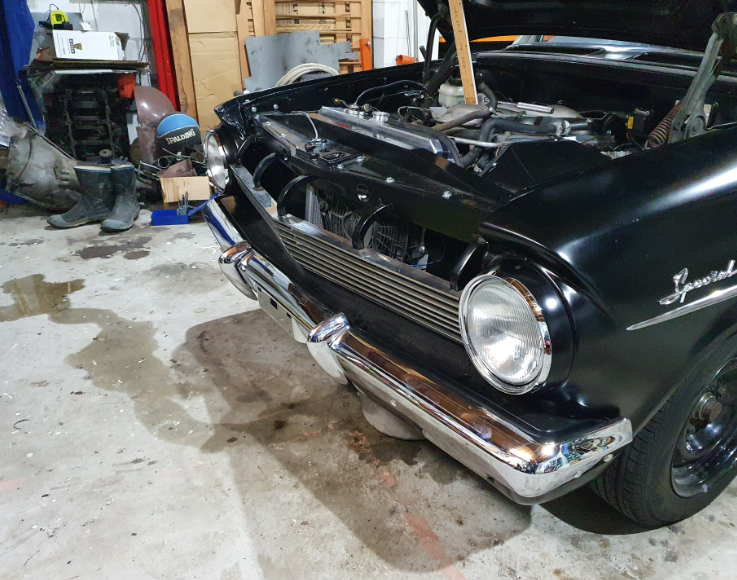
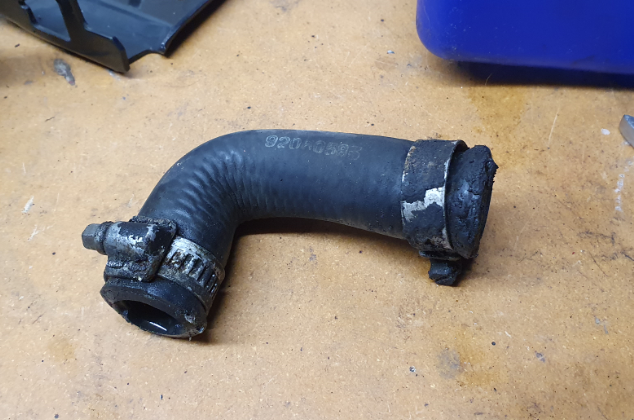
Here is a photo of the H4 Headlights, I'm happy with how they look I spent ages yesterday getting the front indicators working, the lower panel is a bolt on and all the flash paint acts as a really good insulator. An earth wire to the drivers side lights made the passengers ones go as well. One bulb in the back and I have tail lights and indicators. At the moment the indicators work back to front, indicating left gives right, should be right at home with all people on the north shore who don't have a clue. Next thing I learn't today is VT commodore alternators don't work unless there is a warning light connected. Another wiring job is done and we have 14 volts while running. The tiny battery has started the engine at least 7 or 8 times, driven up the road and had the lights on for about half an hour and still been good. I also pulled the throttle body to get to the temp sender which is buried under the intake. It isn't reading right according to my cheap Dick Smith multi meter but it doesn't look like it is the problem. After swapping a couple of messages with @vk327 it looks like the tune on the computer is the problem. It wasn't a wasted exercise because I found my water leak, th e little hose from the water pump to the intake was loose and well ready to be replaced. The throttle body got a good clean while I had it off