NickJ
-
Posts
3374 -
Joined
-
Last visited
-
Days Won
1
Everything posted by NickJ
-

Random slightly cool stuff you built but not worth its own thread, thread
NickJ replied to h4nd's topic in Other Projects
What controller are you running? Hopefully a tool table in there so XYZ offsets are simple to implement? Have dragknife blades on the way, plan to make a small holder that mounts in one of the 8mm subspindle chucks. If I get it right both the knife and pen will be just a tool change call away. Wonder if I can find some 50mm or less markers on Ali.... -
Random slightly cool stuff you built but not worth its own thread, thread
NickJ replied to h4nd's topic in Other Projects
Ideally I wouldn't have it in a tool holder but couldn't find any easy locations on my Z to mount it, bit lol for how big the machine is! Having 19mm collets kinda made the decision for me as a quick and easy to get running. Cos ER11 is tiny, could you mount it with P clips on the side of the spindle? -
Good excuse to put some form of heat exchanger in the system? A car AC condensor will be rated to ~250psi which would be an easy addition. Guess would be original was 1-1/4" tube? A std polymer hose won't be up to the temps unless it has some form of reinforcement, depending on the application, service temp can really drop the rating too. Almost any metallic tubing at that size range will be good for 100Bar and not care about temp. Metallic connection will also give at least some effort of dumping heat before the receiver, comes down to access to suitable bending gear and compression fittings can get spendy over 1" If you go for steel, make sure the bends are in such a way so that thermal expansion doesn't try to pull them apart, a big elbow usually does the trick.
-
Random slightly cool stuff you built but not worth its own thread, thread
NickJ replied to h4nd's topic in Other Projects
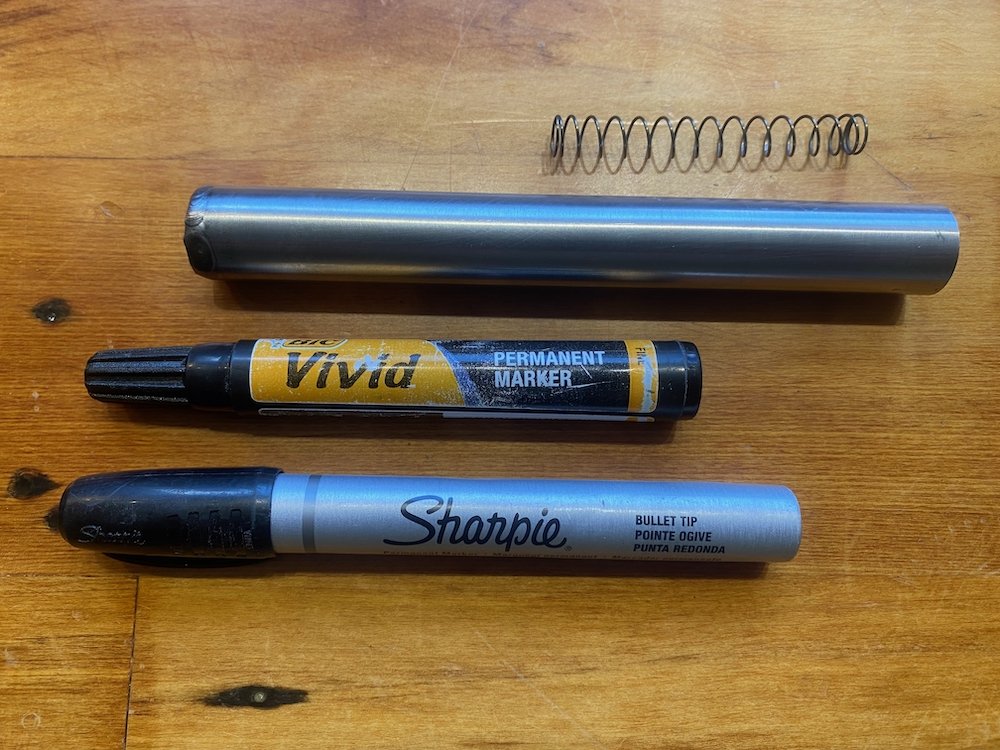
Had access to a large plotter table at my last job which was super handy for reverse engineering or taking prototypes from the computer to the real world, could print notes and datums to cardboard before cutting out for test fits or confirming bolt holes before longer/expensive processes. Today step one of bringing that capability home began, a vivid/sharpy holder for my cnc router. 3/4" mm seamless tube offcut has the same id as the markers, weld 1 stainless washer to the end completes the holder body, complex eh! All I needed was a suitable compression spring to ensure the marker holds a constant pressure without needing a perfect level bed. Awesomely, big green and big orange hold stocks of these things, sadly they are both closed today, buzzkill. Wanting to test NOW a full workshop search was initiated with a suitable donor found in an old BB gun, the slide spring happed to be 110% perfect for the job. Length is set to hold the two types of marker I usually have littering every corner.... Fitted up into a tool holder and good to go
- 1289 replies
-
- 15
-

-

-
He said it, Wednesday next week, spitfire square, print the flyers!
-
Sounds like only Italian cars can, well done!
-
yep, keen as, weekday evening i'm guessing?
-
Pity the access to cow stream hot pools is closed for winter, 4wd camping up there would be good fun and no one about to complain about noise
-
Discuss here about Yoeddynz's little Imp project...
NickJ replied to yoeddynz's topic in Project Discussion
Peak Engineering textbook and probably one of the best books ever written Shrink fit the axles is a brilliant idea, love it! -
Hell yes! Yours has the spot timers which mine doesn't but the article number has now given the right search term to finally get a wiring diagram, epic! Thanks heaps!
-
Oooh, I have the same Cebora, any chance the front panel writing is still visible, wouldn't be able to put up a picture if it is? Mine is all worn off. Good enough machine but now just a heavy trolley for the tig
-
Discuss here about Yoeddynz's little Imp project...
NickJ replied to yoeddynz's topic in Project Discussion
Is the crank offset to the bores? Could imagine that might be niggly. -
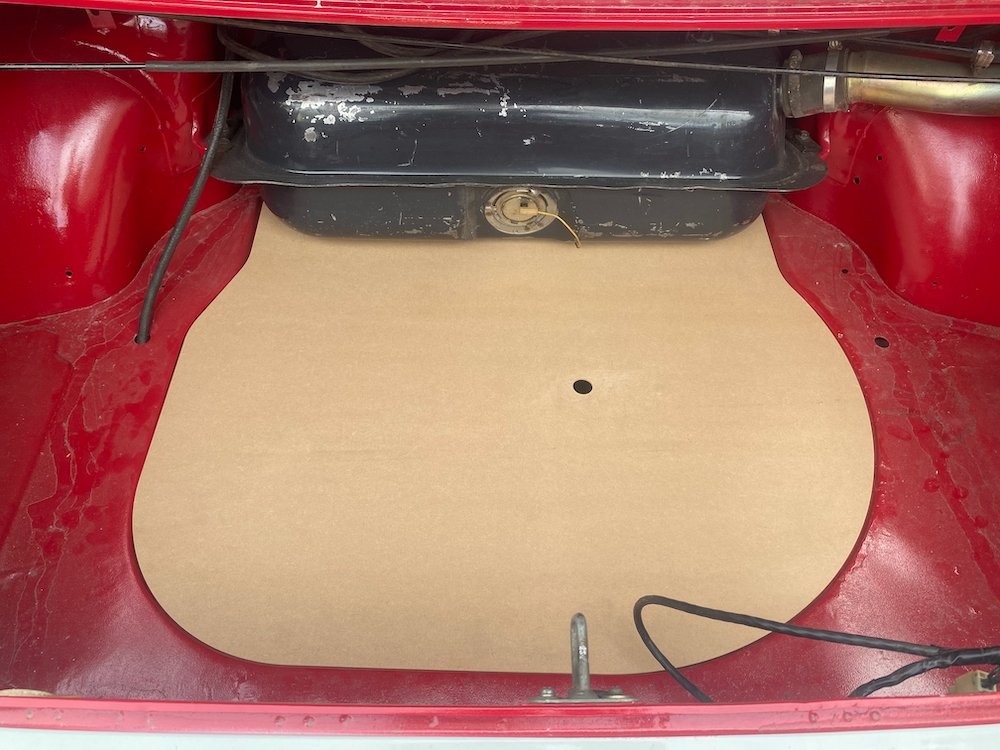
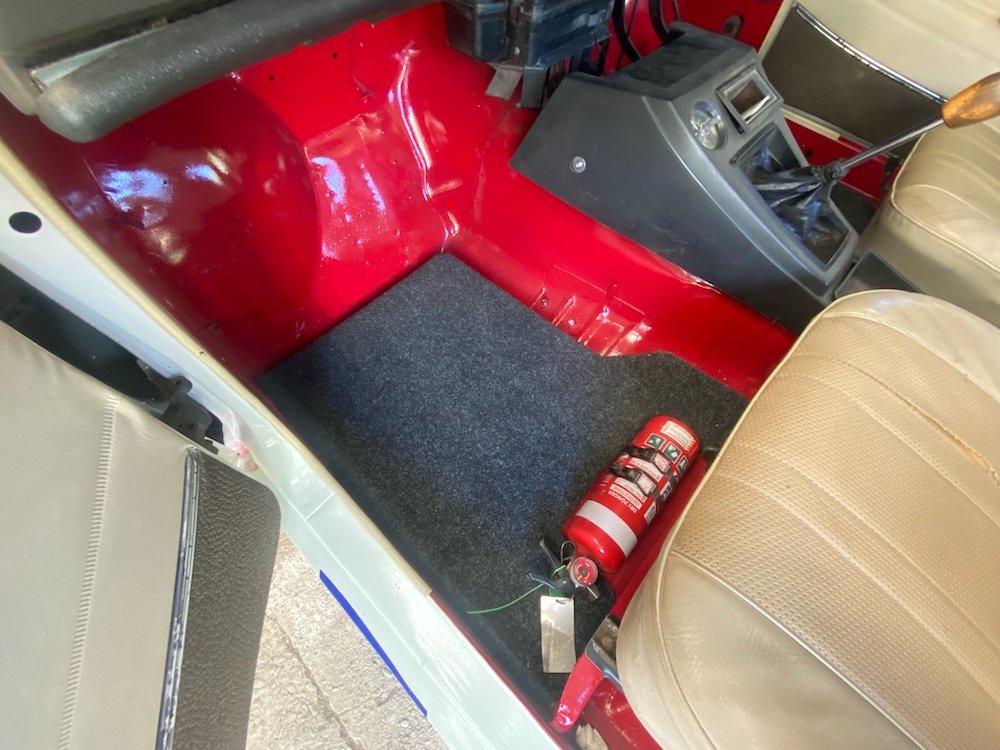
Was out in the shed again today so had a quick measure up and fed the cnc some mdf Quite happy with how much nicer the boot looks with the spare covered, motivates me a bit more to suss some carpet etc. From factory there were a few more trim panels in the boot, hopefully have a set on the way to copy, its something i've never seen before so looking forward to it!
- 53 replies
-
- 24
-
-
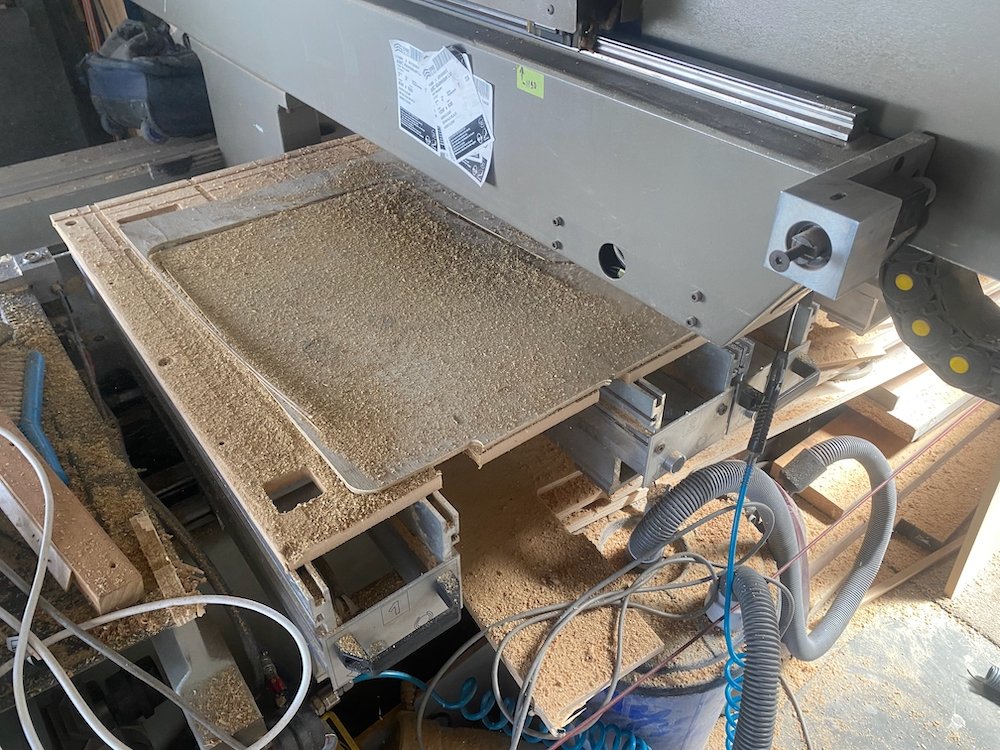
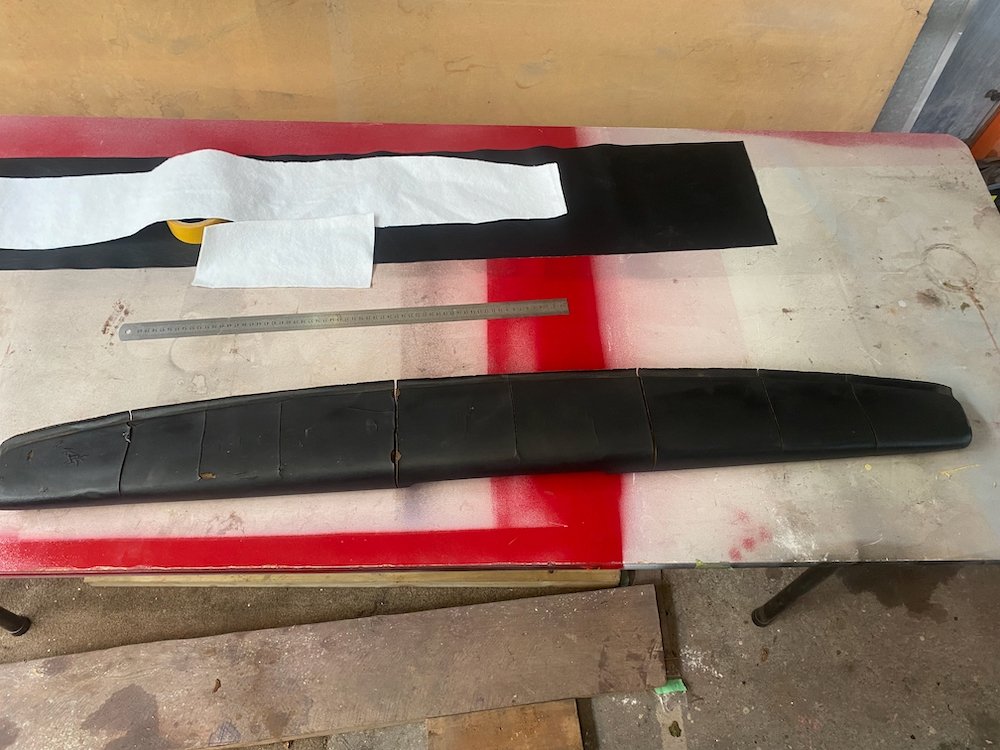
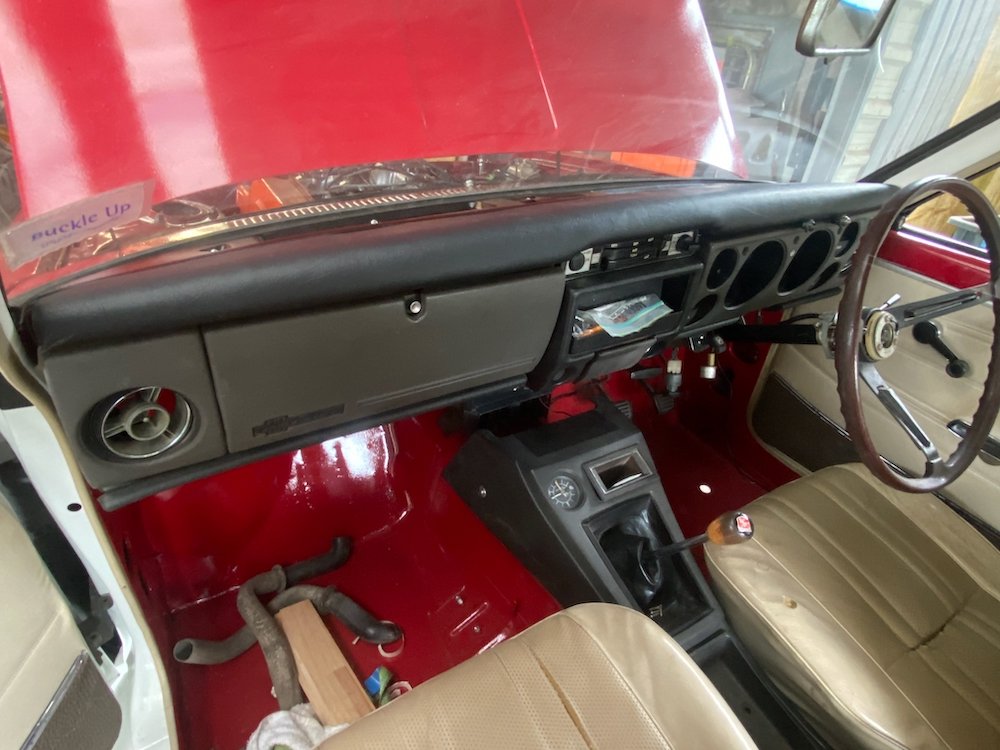
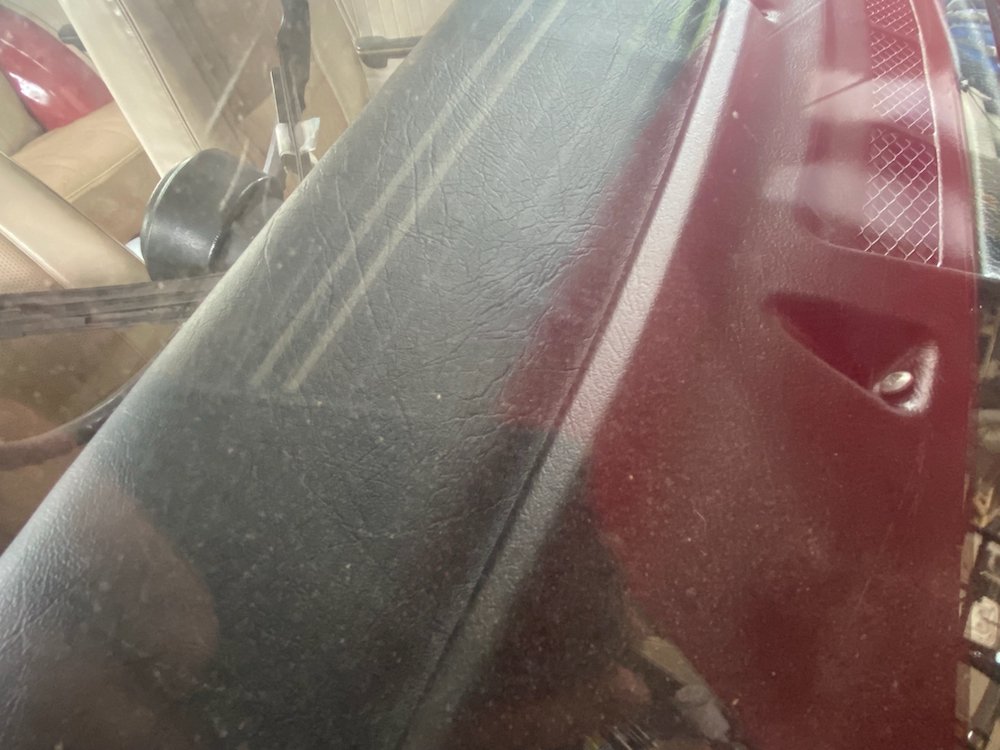
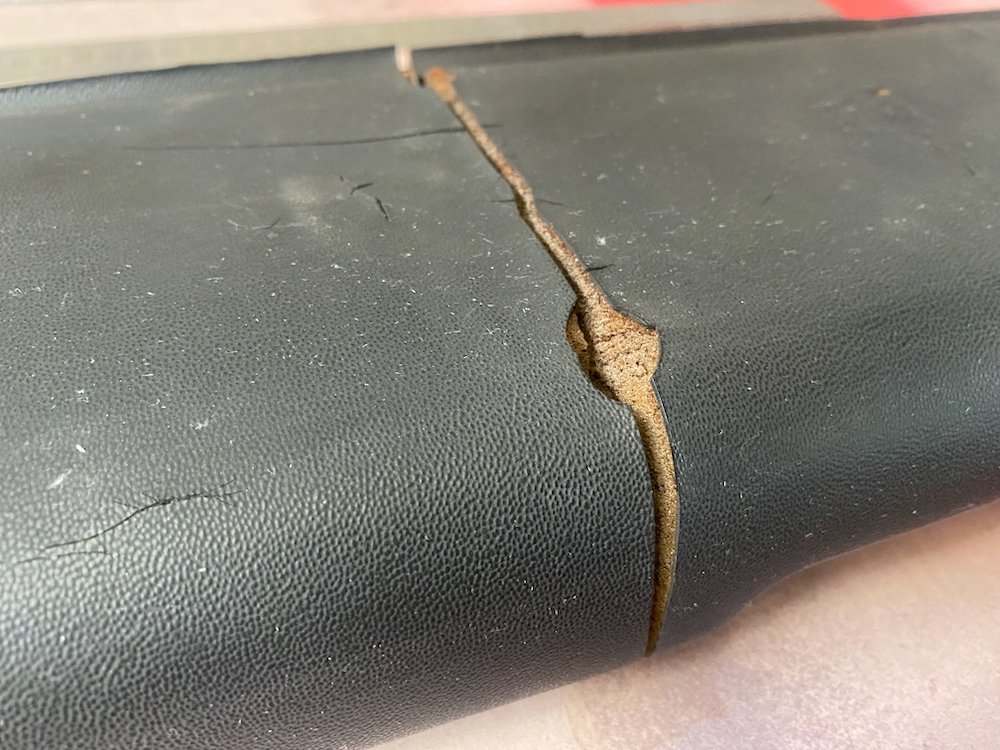
Interior polishing: Like most 50yo cars, the dashpad had cracked up pretty bad, long term i'd like to throw the check book at it, but in a budget friendly manner I called on my lovely GF and her knowledge of spotlight. We trimmed off the worst highpoints and double sided taped a layer of tablecloth liner to the pad, the idea here was the padding would hide the worst of the cracking once the vinyl leather was stretched over This was put on with the bare minimum of contact adhesive to keep the dashpad in close to original shape if needed for proper restoration further down the track. Finish result blends in well, of course the corners are a bit messy, but far nicer to look at than the old pad. Haven't been able to make a firm decision on the carpets but had an idea Chomp out some 7mm marine ply on the cnc, wrap in carpet offcuts from the 4wd.... Floormats that don't shuffle around.
- 53 replies
-
- 20
-
-
-
Nothing I can add but how gross! Quick look through the interwebs about what that "essential" little baggy costs to replace and I want crawl into a corner and cry. I hope that is an easy resolution.
-
Holy crap, now I see why non-dpf is listed as a selling point in Europe Is this the same as what you're faced with?
-
Random slightly cool stuff you built but not worth its own thread, thread
NickJ replied to h4nd's topic in Other Projects
You're a map person too? -
Random slightly cool stuff you built but not worth its own thread, thread
NickJ replied to h4nd's topic in Other Projects
Not really, i'd like to say I imported a topomap and draw many lines but thankfully I stumbled on this little project https://jthatch.com/Terrain2STL/ -
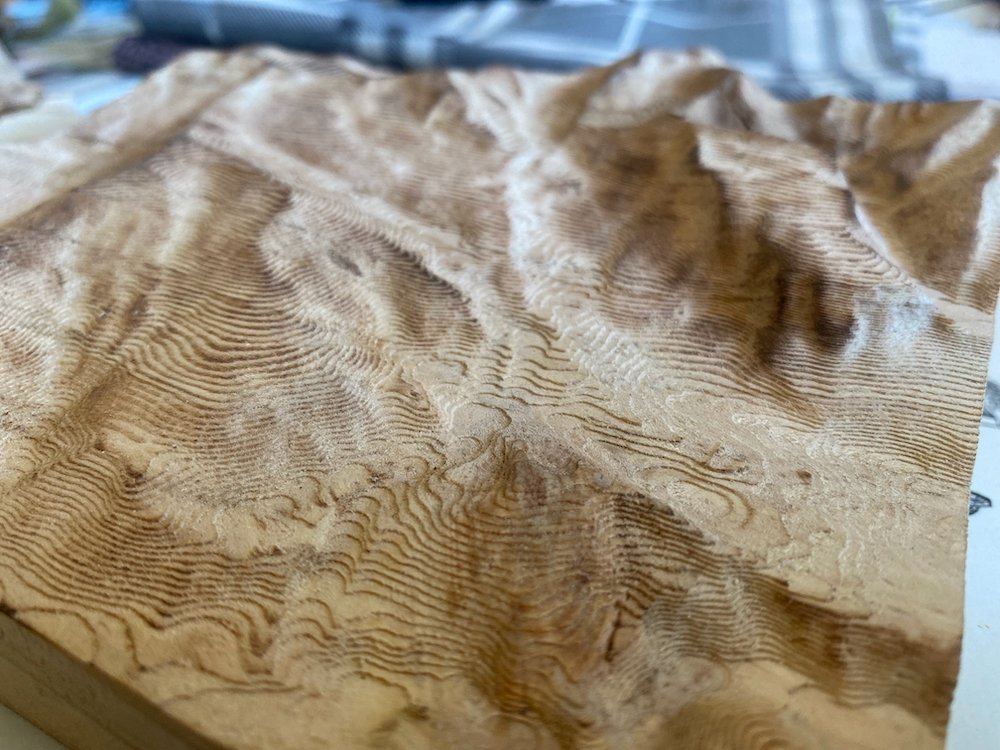
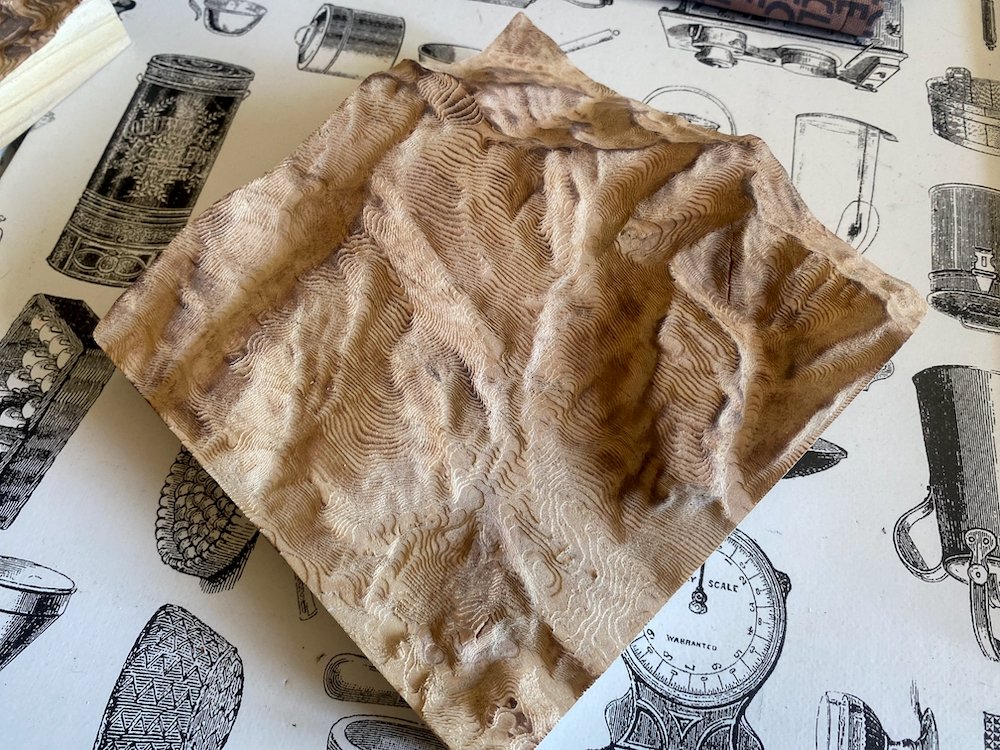
Random slightly cool stuff you built but not worth its own thread, thread
NickJ replied to h4nd's topic in Other Projects
Making some thank you gifts for friends that looked after us on our recent trip overseas, reliefs of the mountains they call home. Carved out with the cnc to replicate contour lines on a map then run over with the gas torch to highlight the ridges.
- 1289 replies
-
- 37
-
-
-
I've had a three piece do the same, right pain, eventually had to split them, throughly clean the join and put back together (sealant between the pieces was a disaster, i'd not do that again unless someone else has a technique?) 100% what Highlux said is what worked for me on the 3rd attempt. Pretty sure we just used window sealant cos thats what we had. Reliably sticking anything to aluminium is nearly impossible, the steps required to passivate are not easy for at home jobs but having it proper clean is most of the way there, clean off any scale and depending on the sealant, light scuffing with scotchbrite may also help.
-
Discuss here about Yoeddynz's little Imp project...
NickJ replied to yoeddynz's topic in Project Discussion
Motor looks pretty darn good, sounds even better! Congrats, just another weekend away from finished right? -
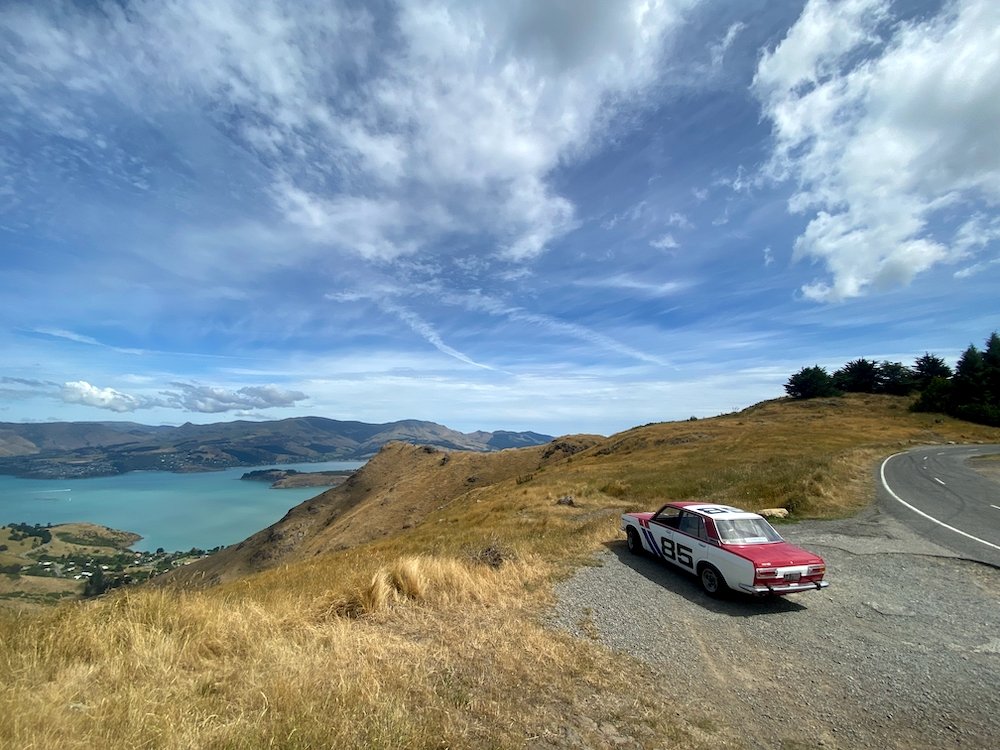
This thread needs a decent pic of the car right? Really want to go get some sunrise/sunset pics, but that will need to wait til daylight savings pulls the sun back to more gentlemanly times, for now, a not so potato pic
- 53 replies
-
- 37
-
-
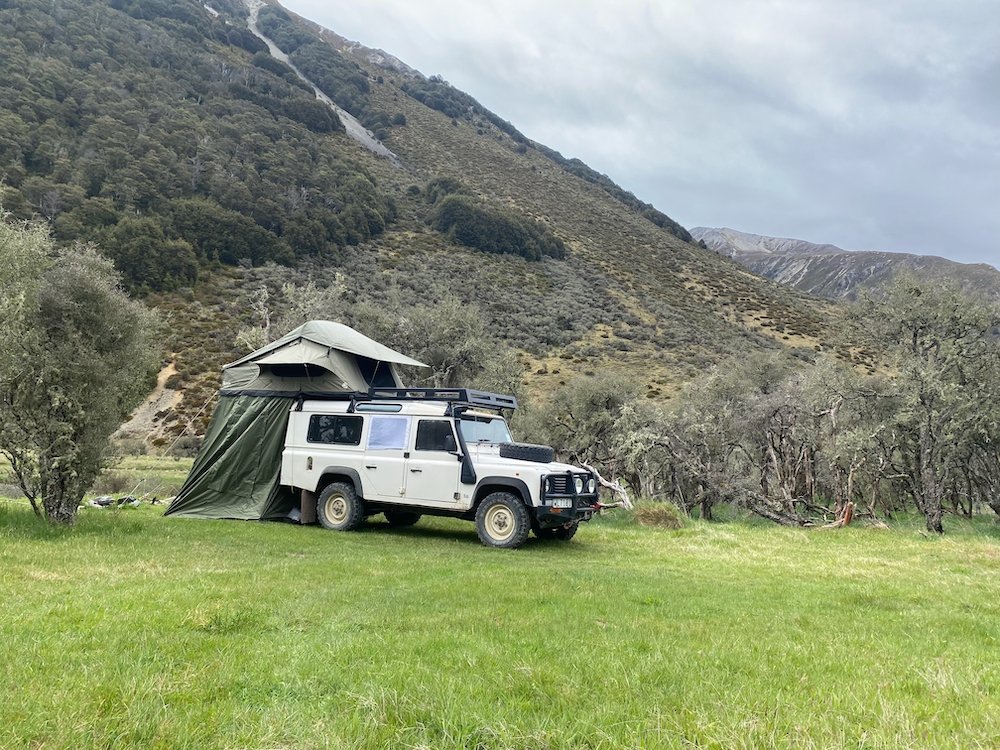
Keen to hear how you find the extension, we've found it as useful as it is annoying, ground ideally needs to be flat, quite bulky to pack in the truck nicely but all this balances out in sandfly country!
-
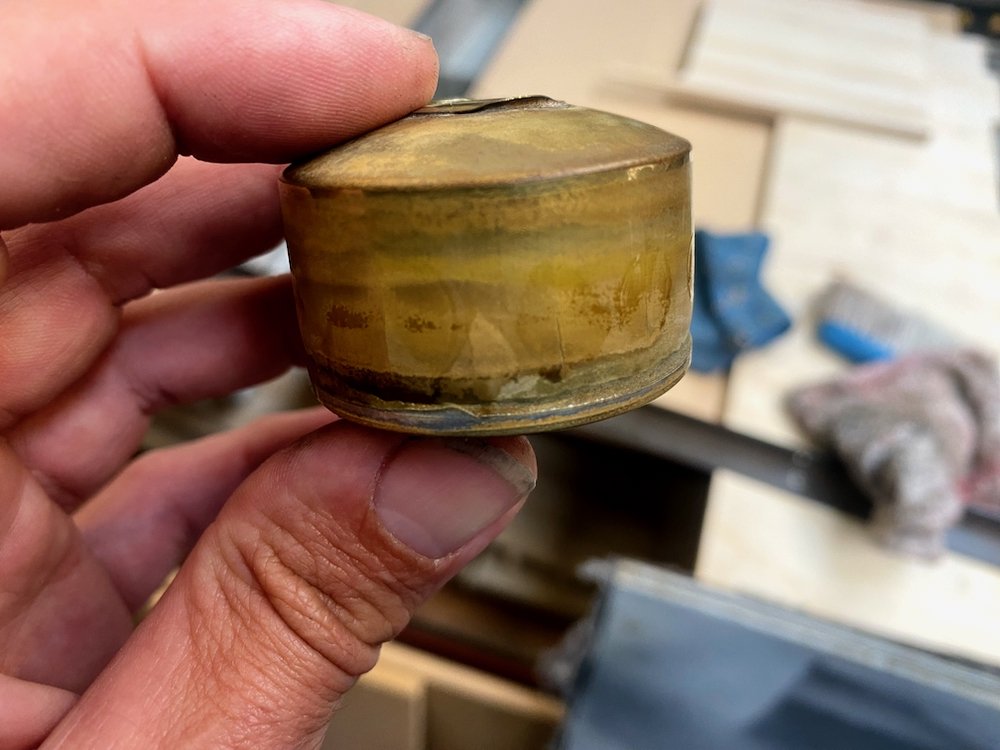
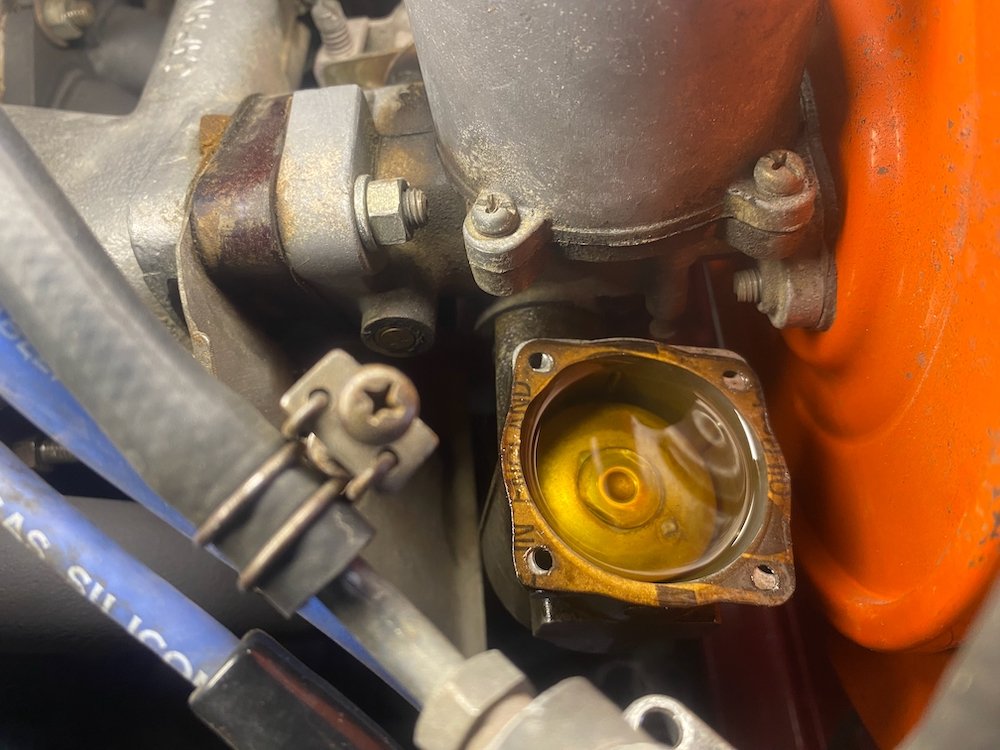
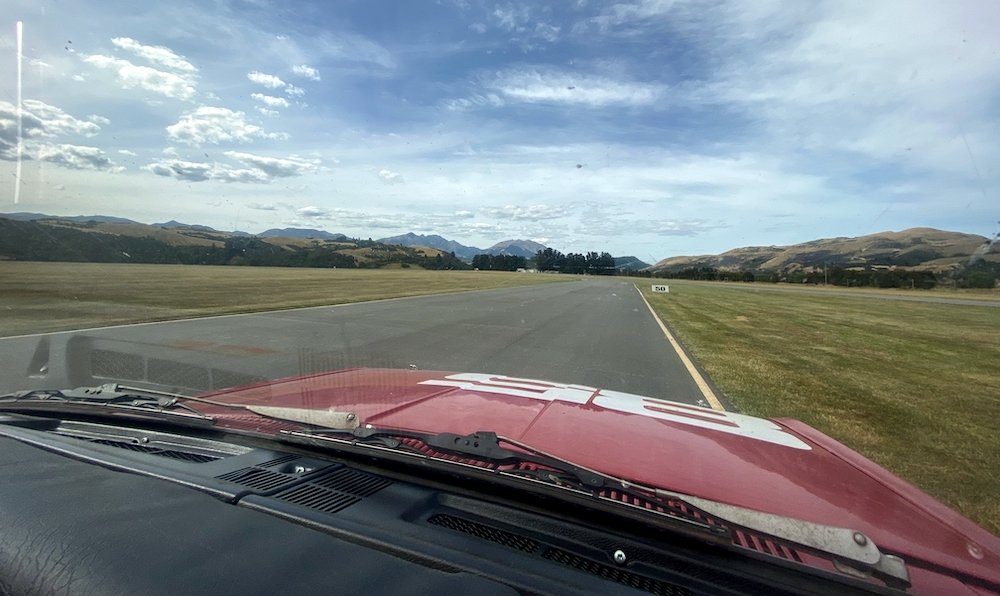
All running and driving, or so I thought Had a the plugs occasionally foul on start up and the engine now and then would start running super rough, running through the options didn't find much until after one drive I could definitely smell fuel, queue a case of the o shits etc. Leak was from the forward carb overflow, popping the lid off the float chamber was evident Seems we have a slight case of the oceangates.... Brass float had cracks all the way around. When I brought the car I also received a pretty good spares package so picked out the best looking float and threw it in. WOF man then failed the inspection on a number of minor issues, brake balance wasn't up to his expectation, small exhaust leak at a joint and rear brakes grabbing, managed to solve all in quick succession after work and sticker status returned! I haven't worked out the number of days but approx 3 years after taking the car off the road I can now legally drive again, while no where near finished in my mind, it is a giant relief to not have a pile of parts in the way! Still to go is interior re-trim, carpets, door seals, paint detailing, polishing, wheel refurb etc, mainly tidying up the cosmetics. But for now, lets go for a hoon around the neighbourhood
- 53 replies
-
- 40
-
-
-
yep, looks really similar to the 70s Datsun ones And Land Rover........ Both only have two levers though.


.jpeg.dc79046ad09d73b9fdc8de9e6e6d9c09.jpeg)