


Kimjon
-
Posts
2181 -
Joined
-
Last visited
-
Days Won
1
Posts posted by Kimjon
-
-
26 minutes ago, Valiant said:
Sweet.
Is it easy enough to put cart wheels on a quad axle?
Kind of. If you get a 110cc mini quad axle, you can cut the hubs down to fit and re drill the holes

I can't put my hands on a photo of the hub right now...but search under my name and I've done about 4 other drift trike builds on here with step by step how to...
In a nutshell the more money you try to save, the more work it creates.
-
 3
3
-
-
5 hours ago, Valiant said:
What axle do you use?
I have been toying with the idea of building one "for my kids"
Anything cheap on trademe.
My preference is quad bike axles as they're cheap and mostly good to go with brakes and provision to hold a sprocket.
This one uses an actual gokart axle. It's more expensive, but makes for an easy job, as you can buy any bolt on parts off the shelf to make it work. Of course, to keep the cost down I'm making/adapting stuff e.g. I'm using a wheel hub to hold a cheap sprocket, rather than buying an expensive sprocket carrier.
My ones are all lessons in doing shit ona budget. At best guess, they'd cost about $300 doing it this way V's about $1500 to buy the proper stuff all new.
-
1
-
-
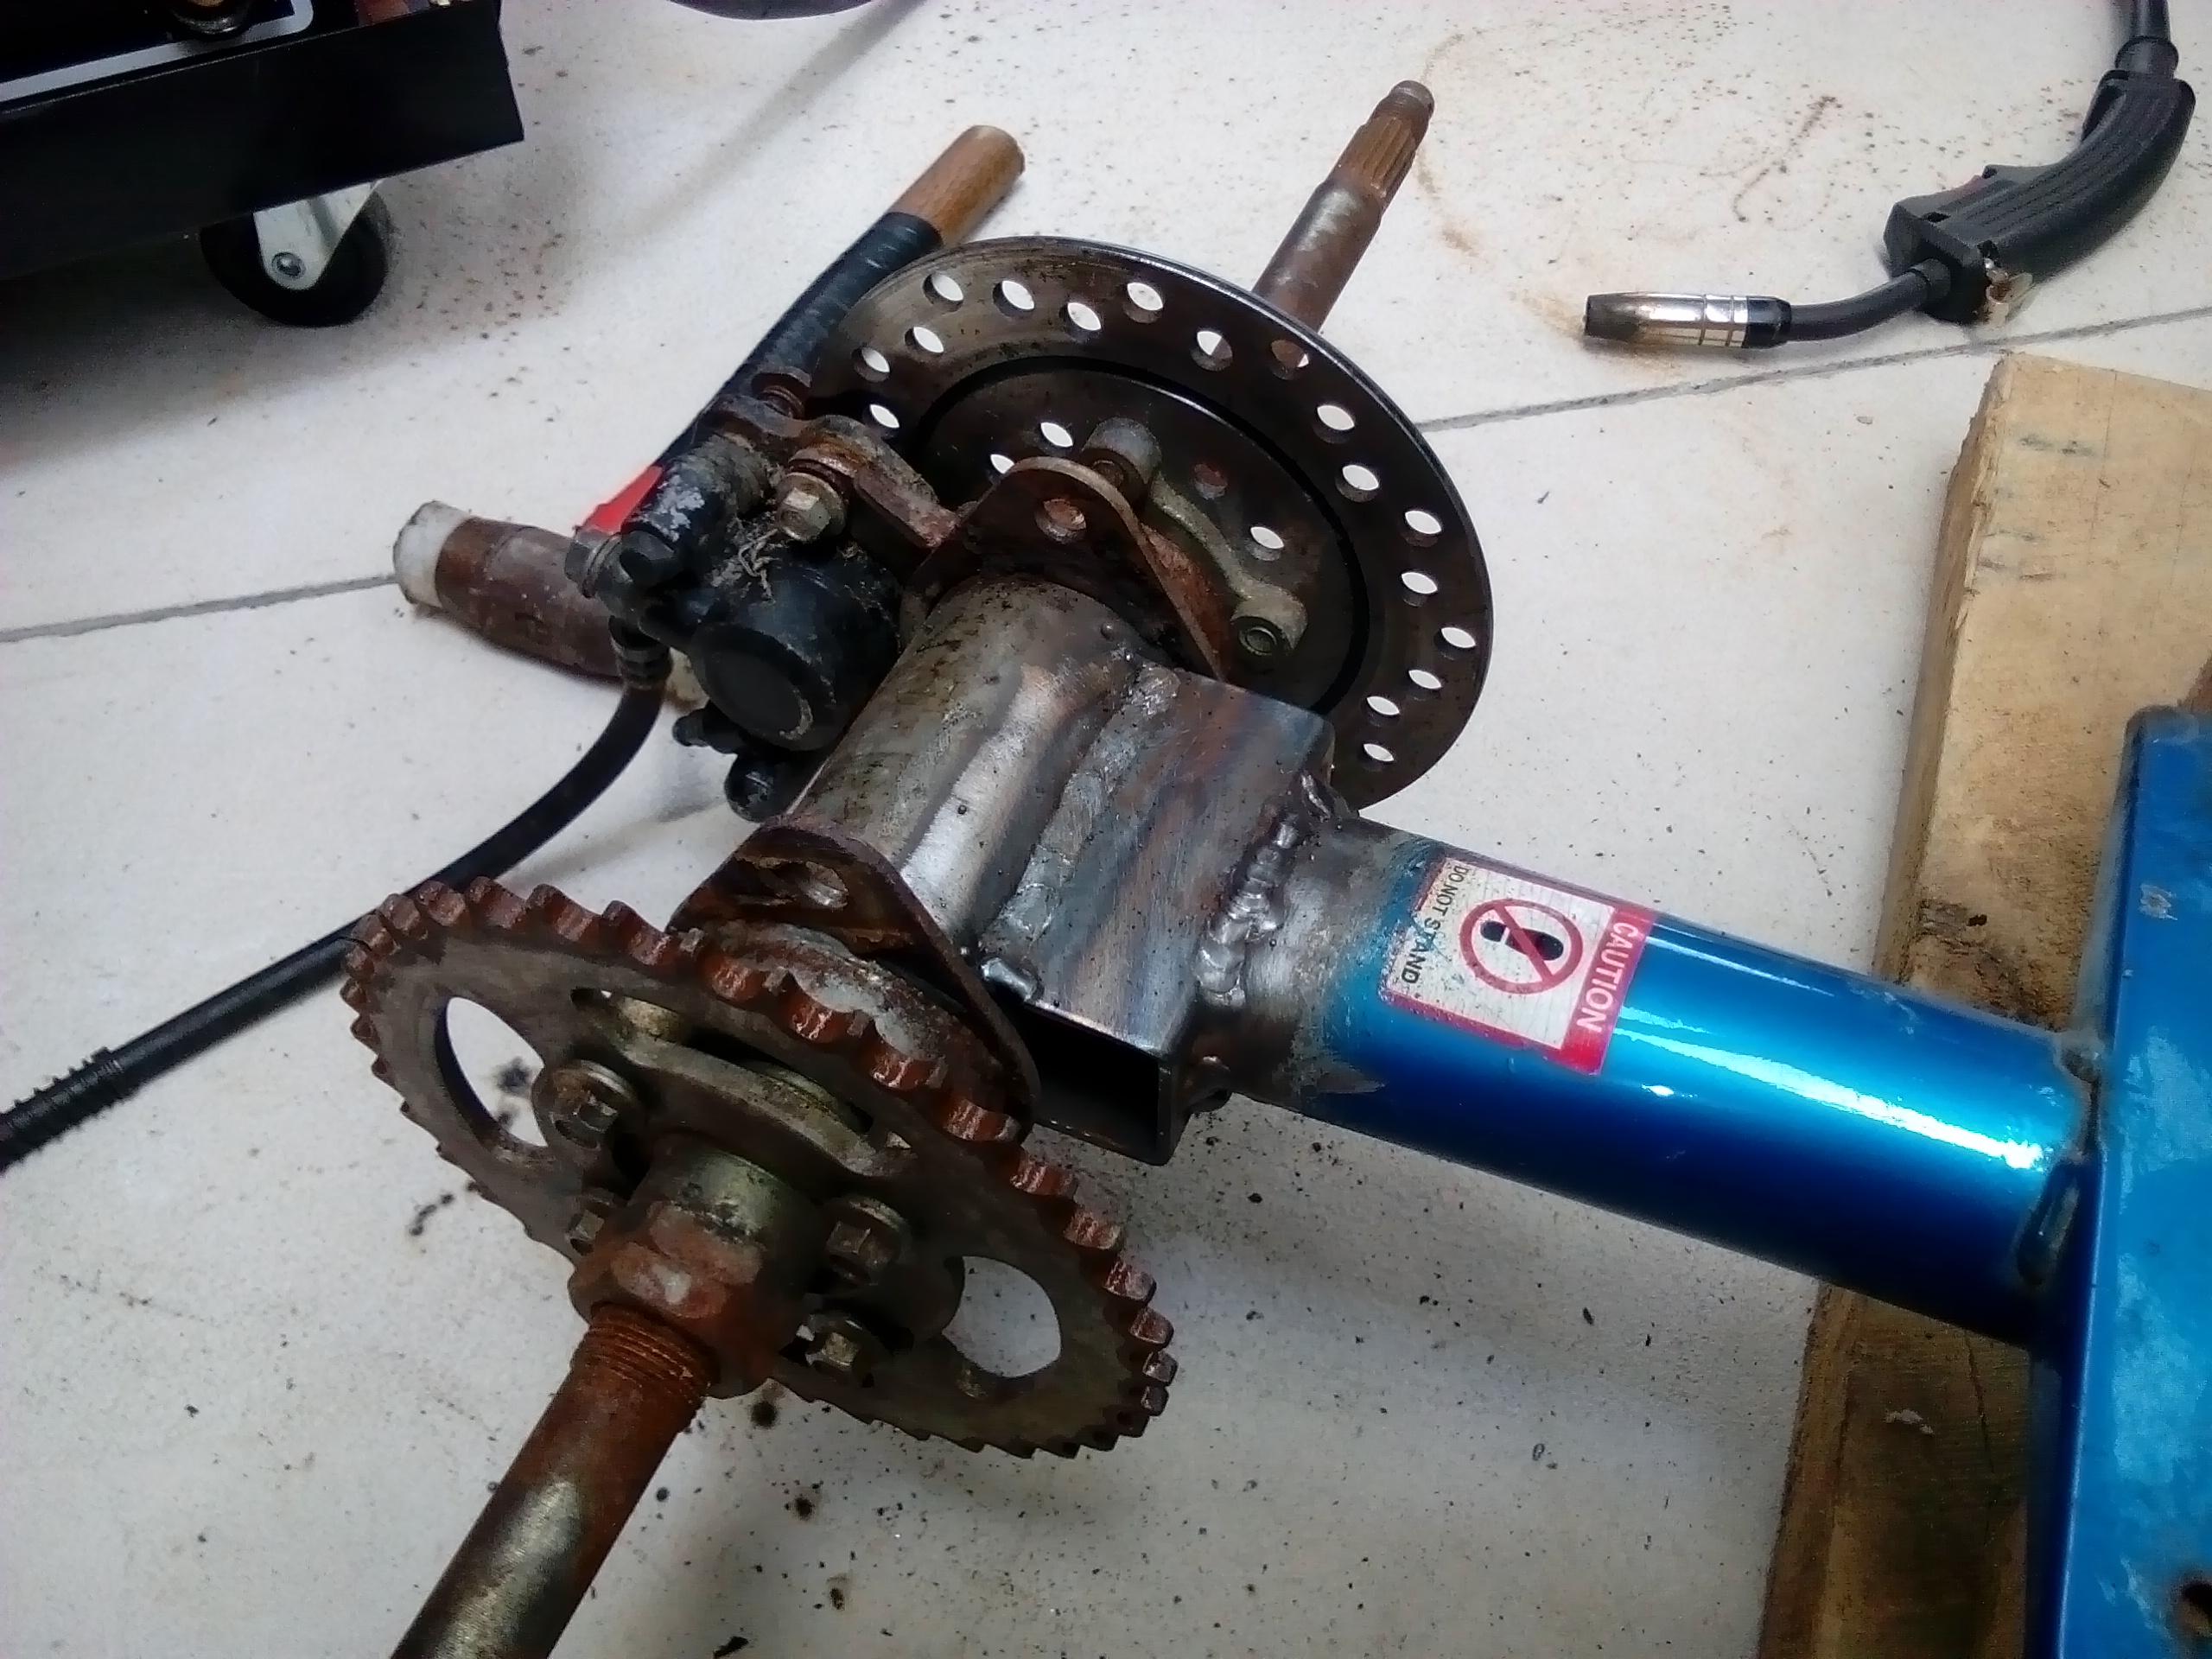
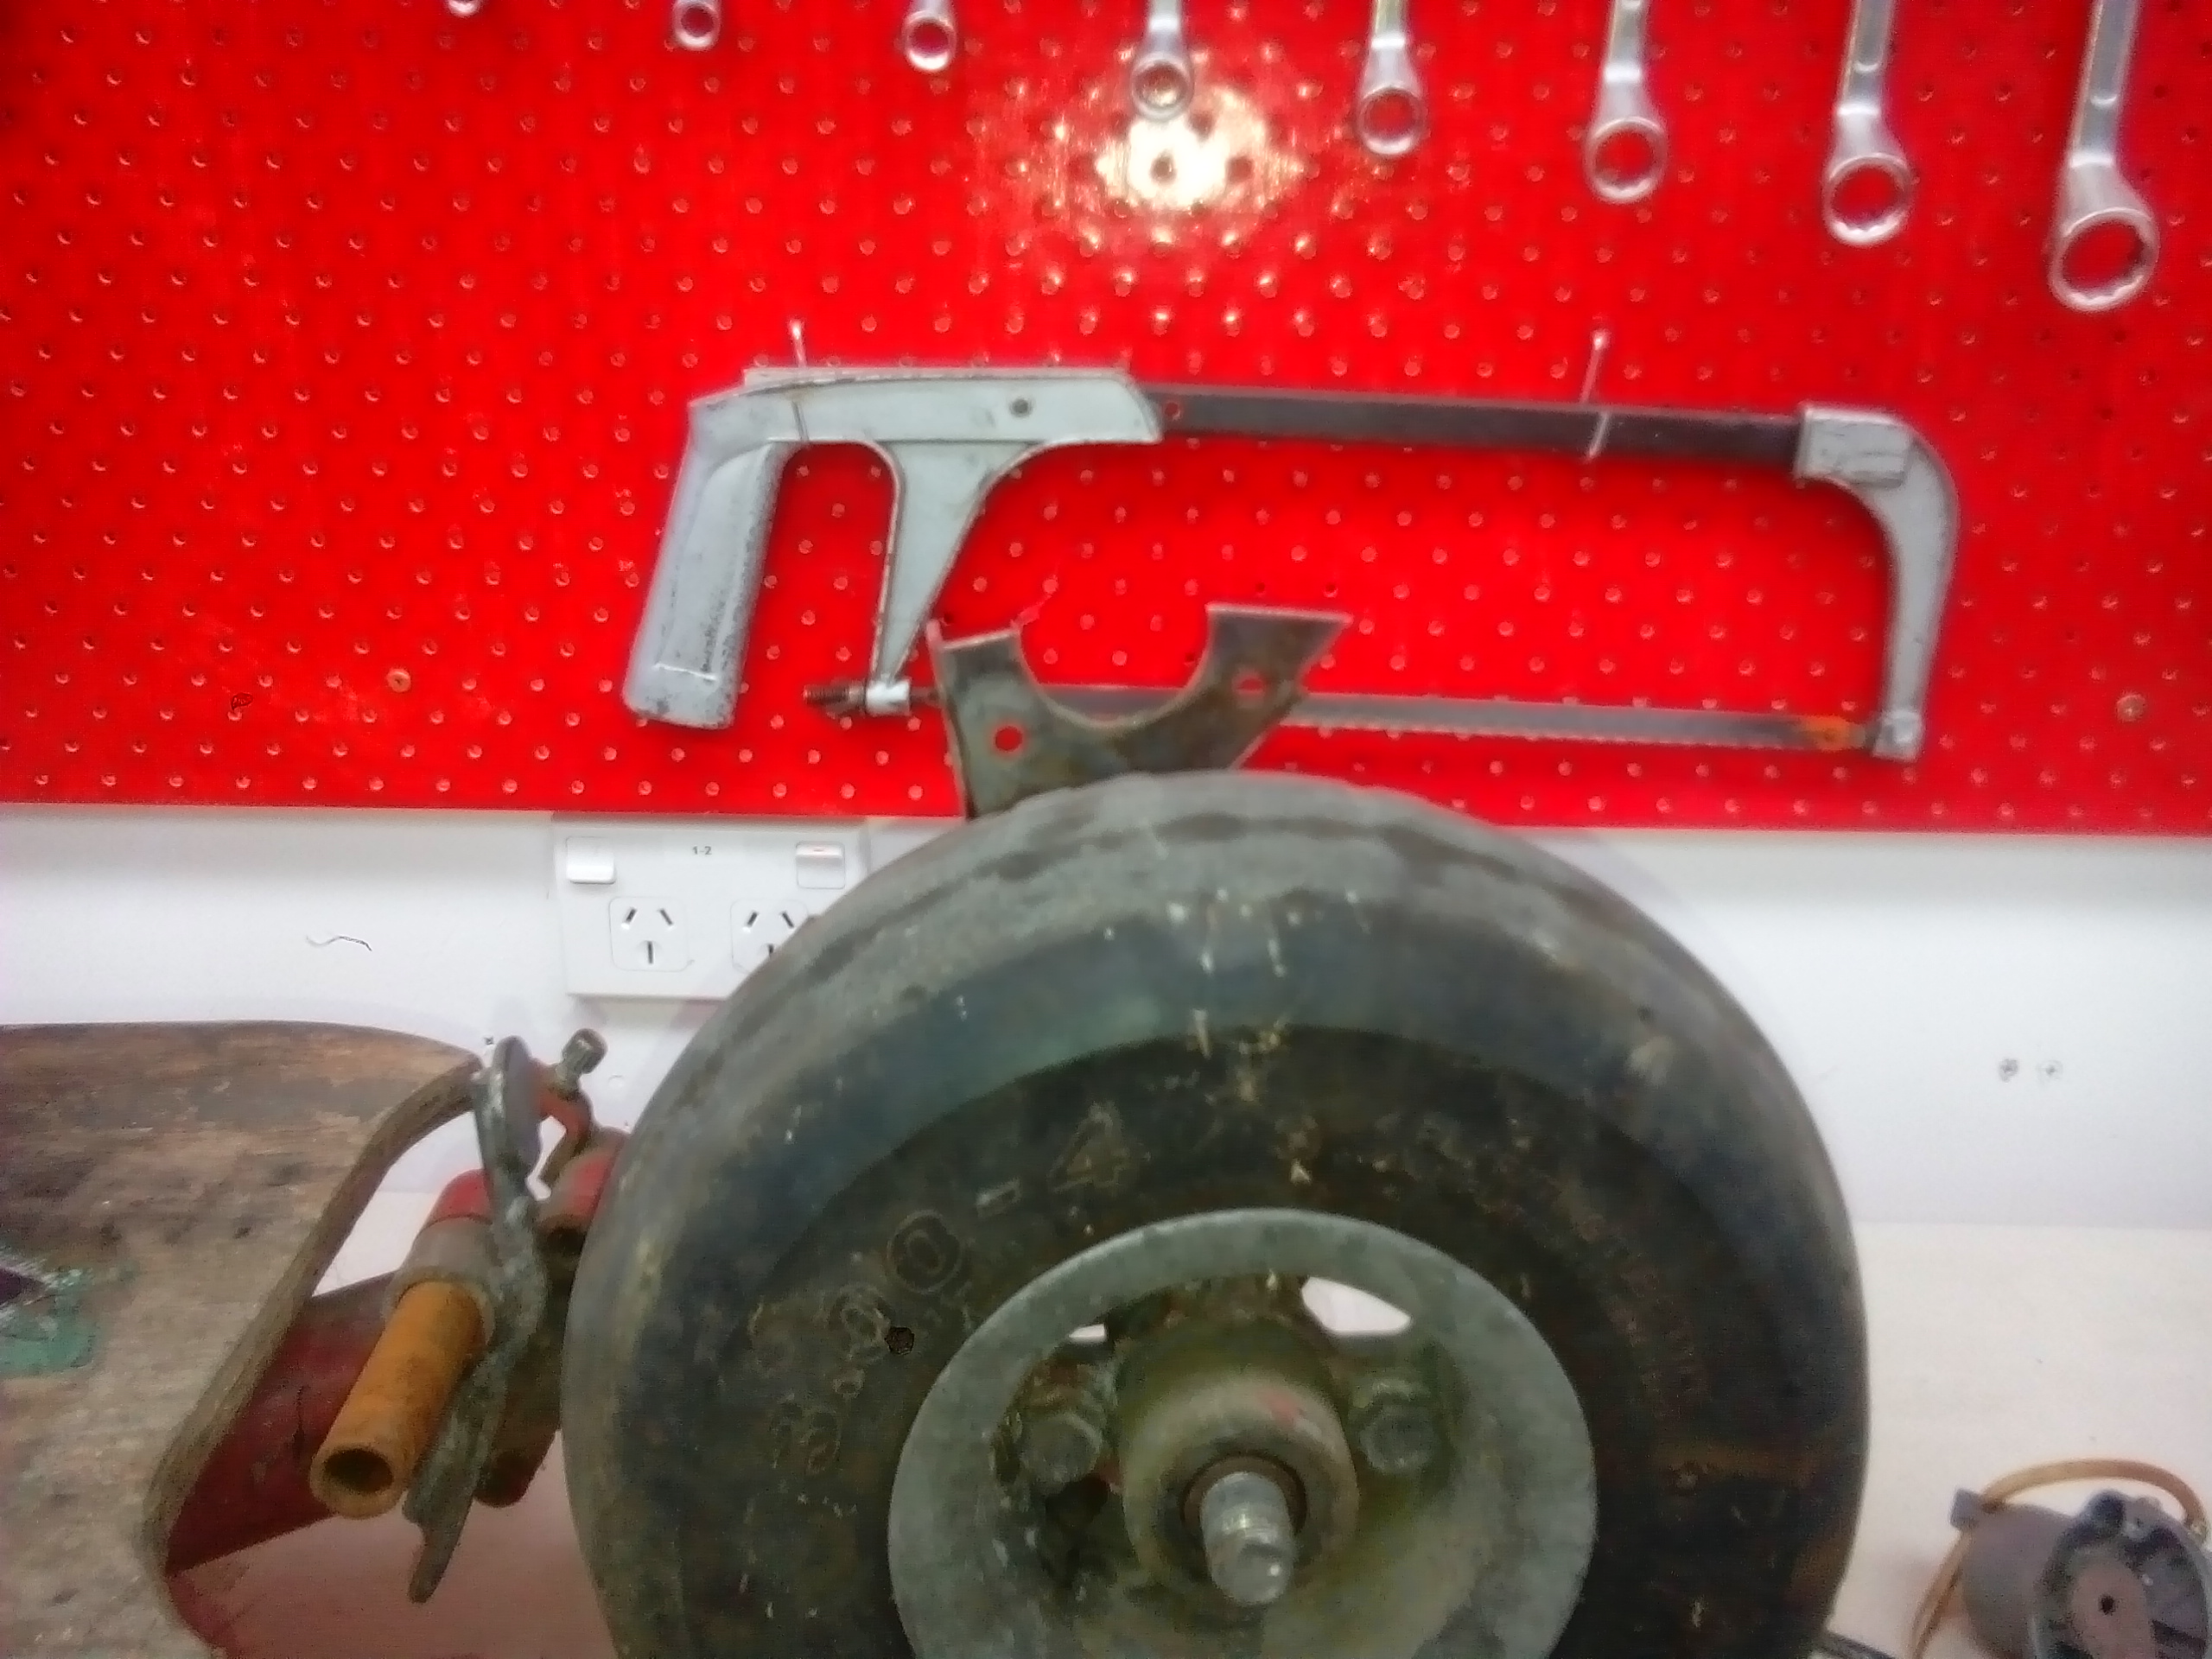
There was the remains of an old clutch still attached to the motors crankshaft.
Holy Moly!!! What a mission removing this became. I ended up making this "tool" in order to the job done:
It worked, but it didn't exactly lie down and take it. Bloody knuckles and lots of swearing...then pop! Got there in the end.
-
2
-
 1
1
-
-
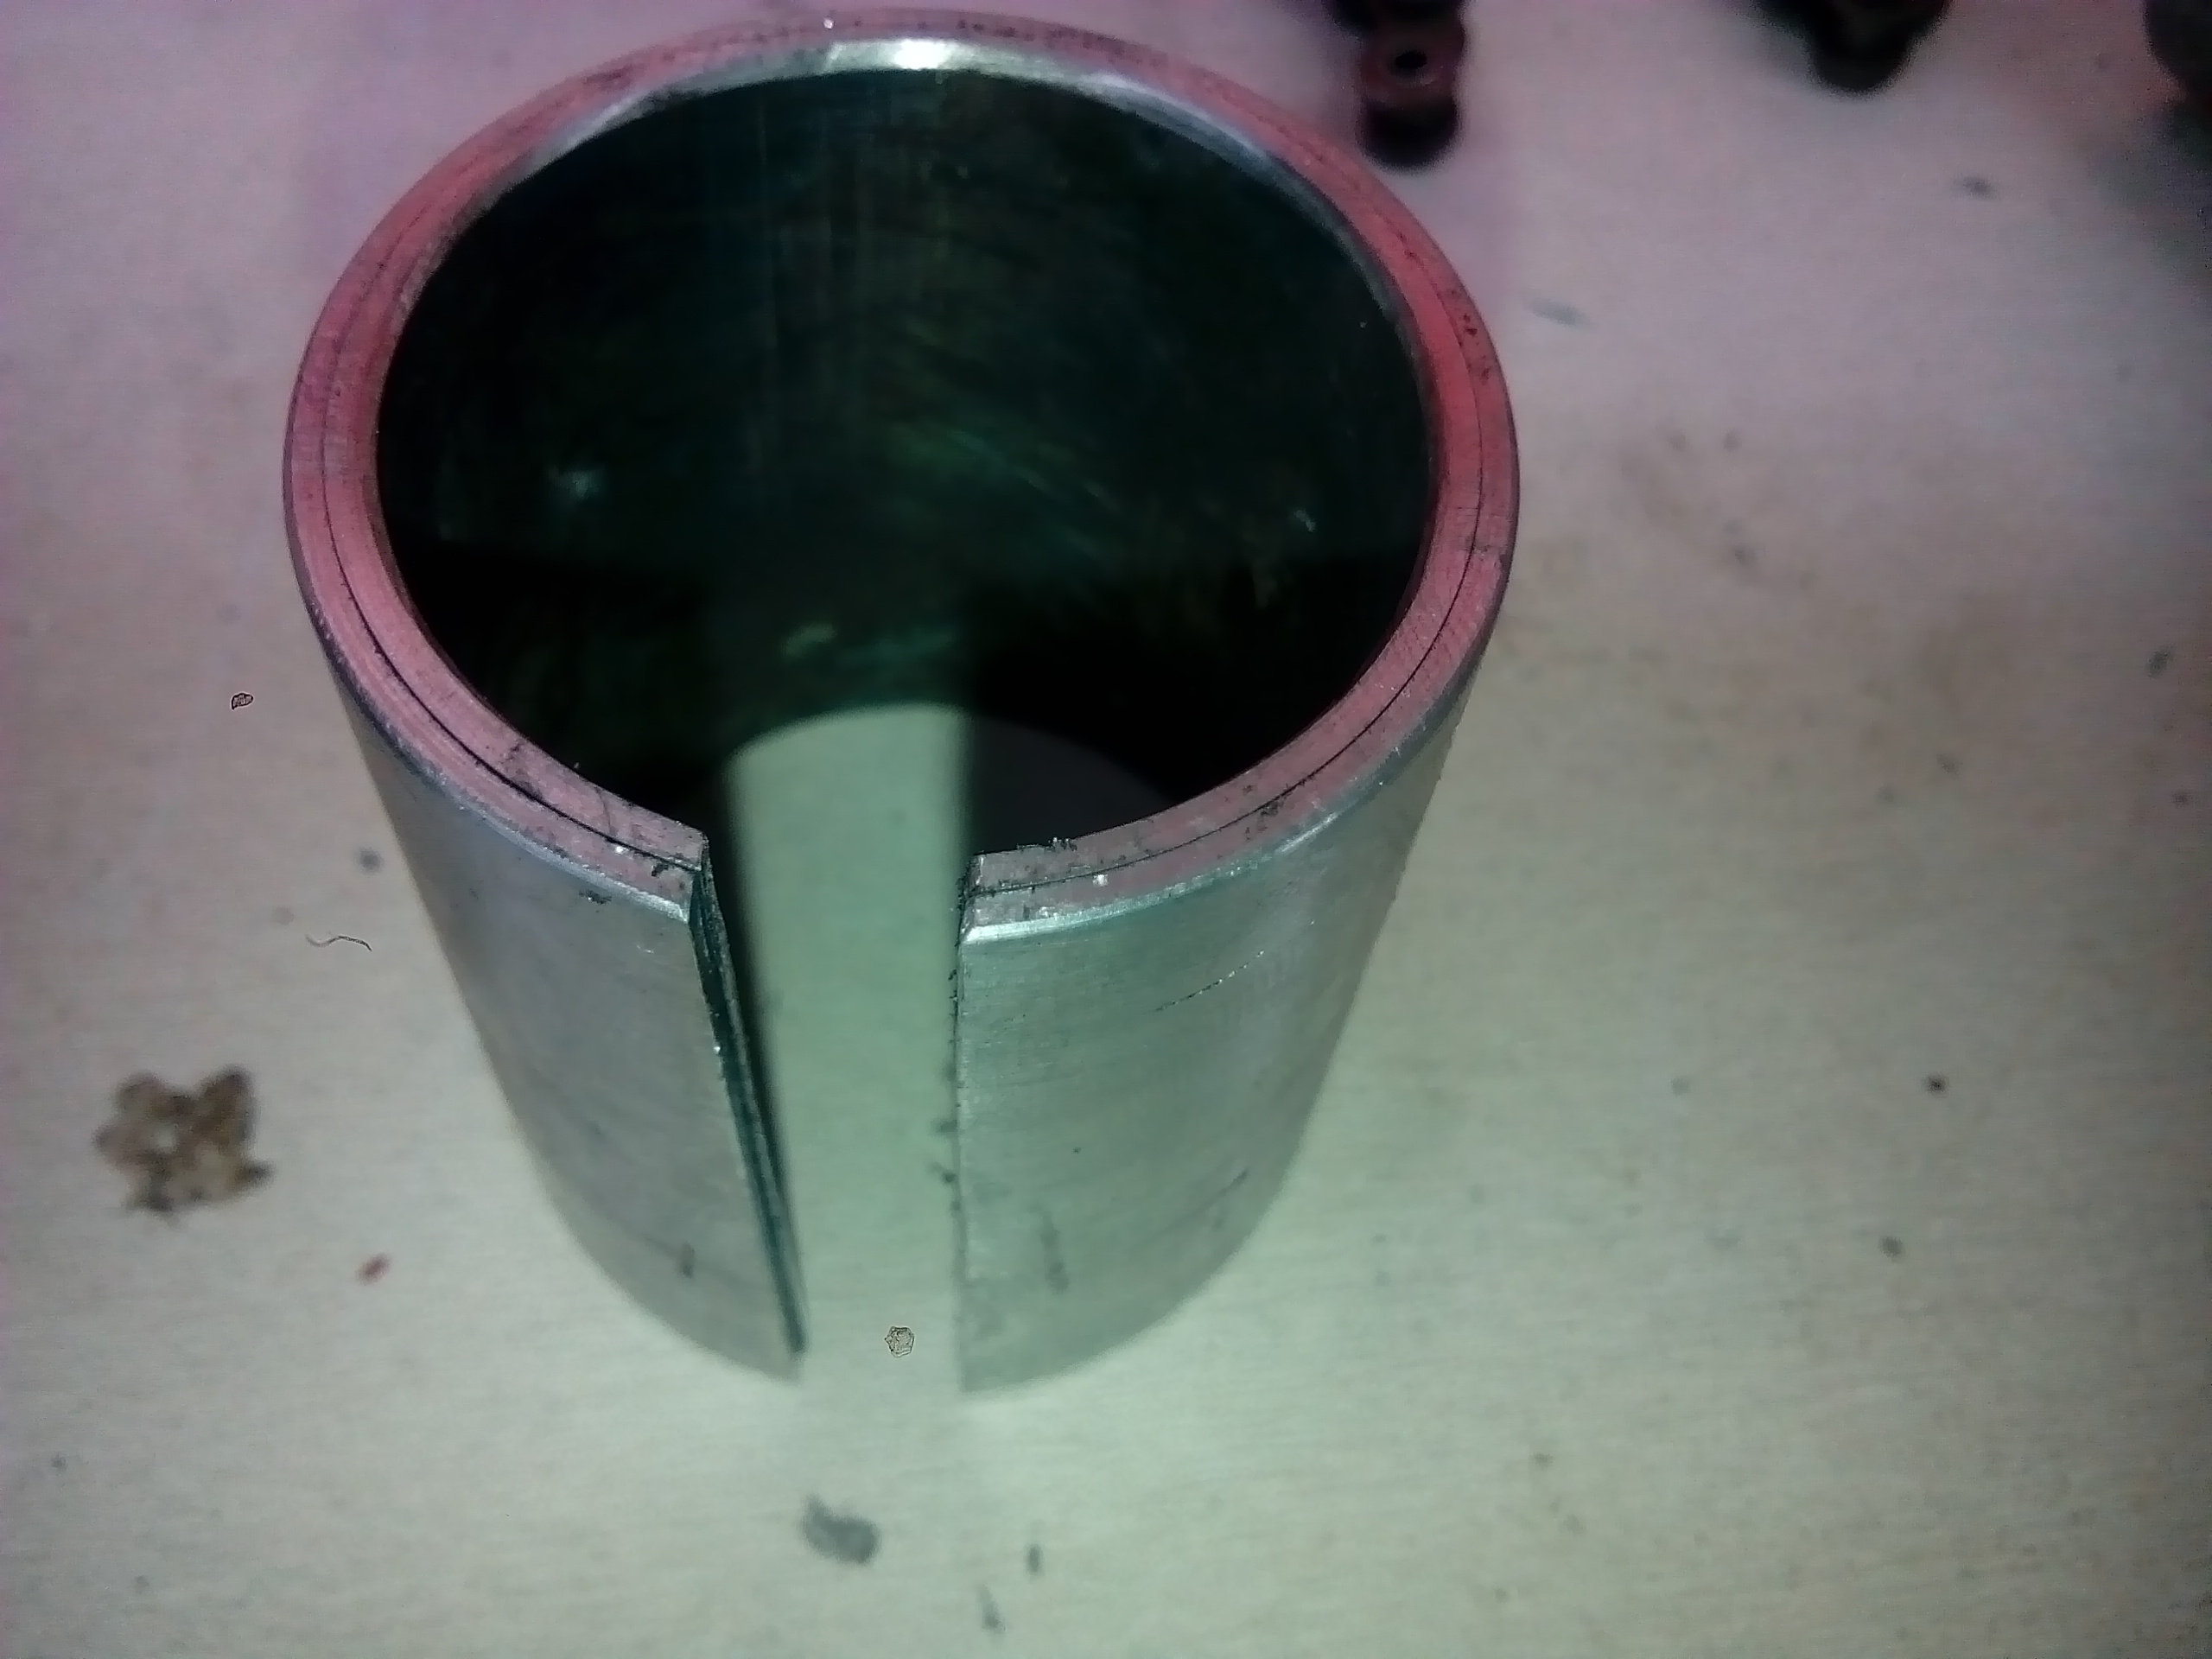
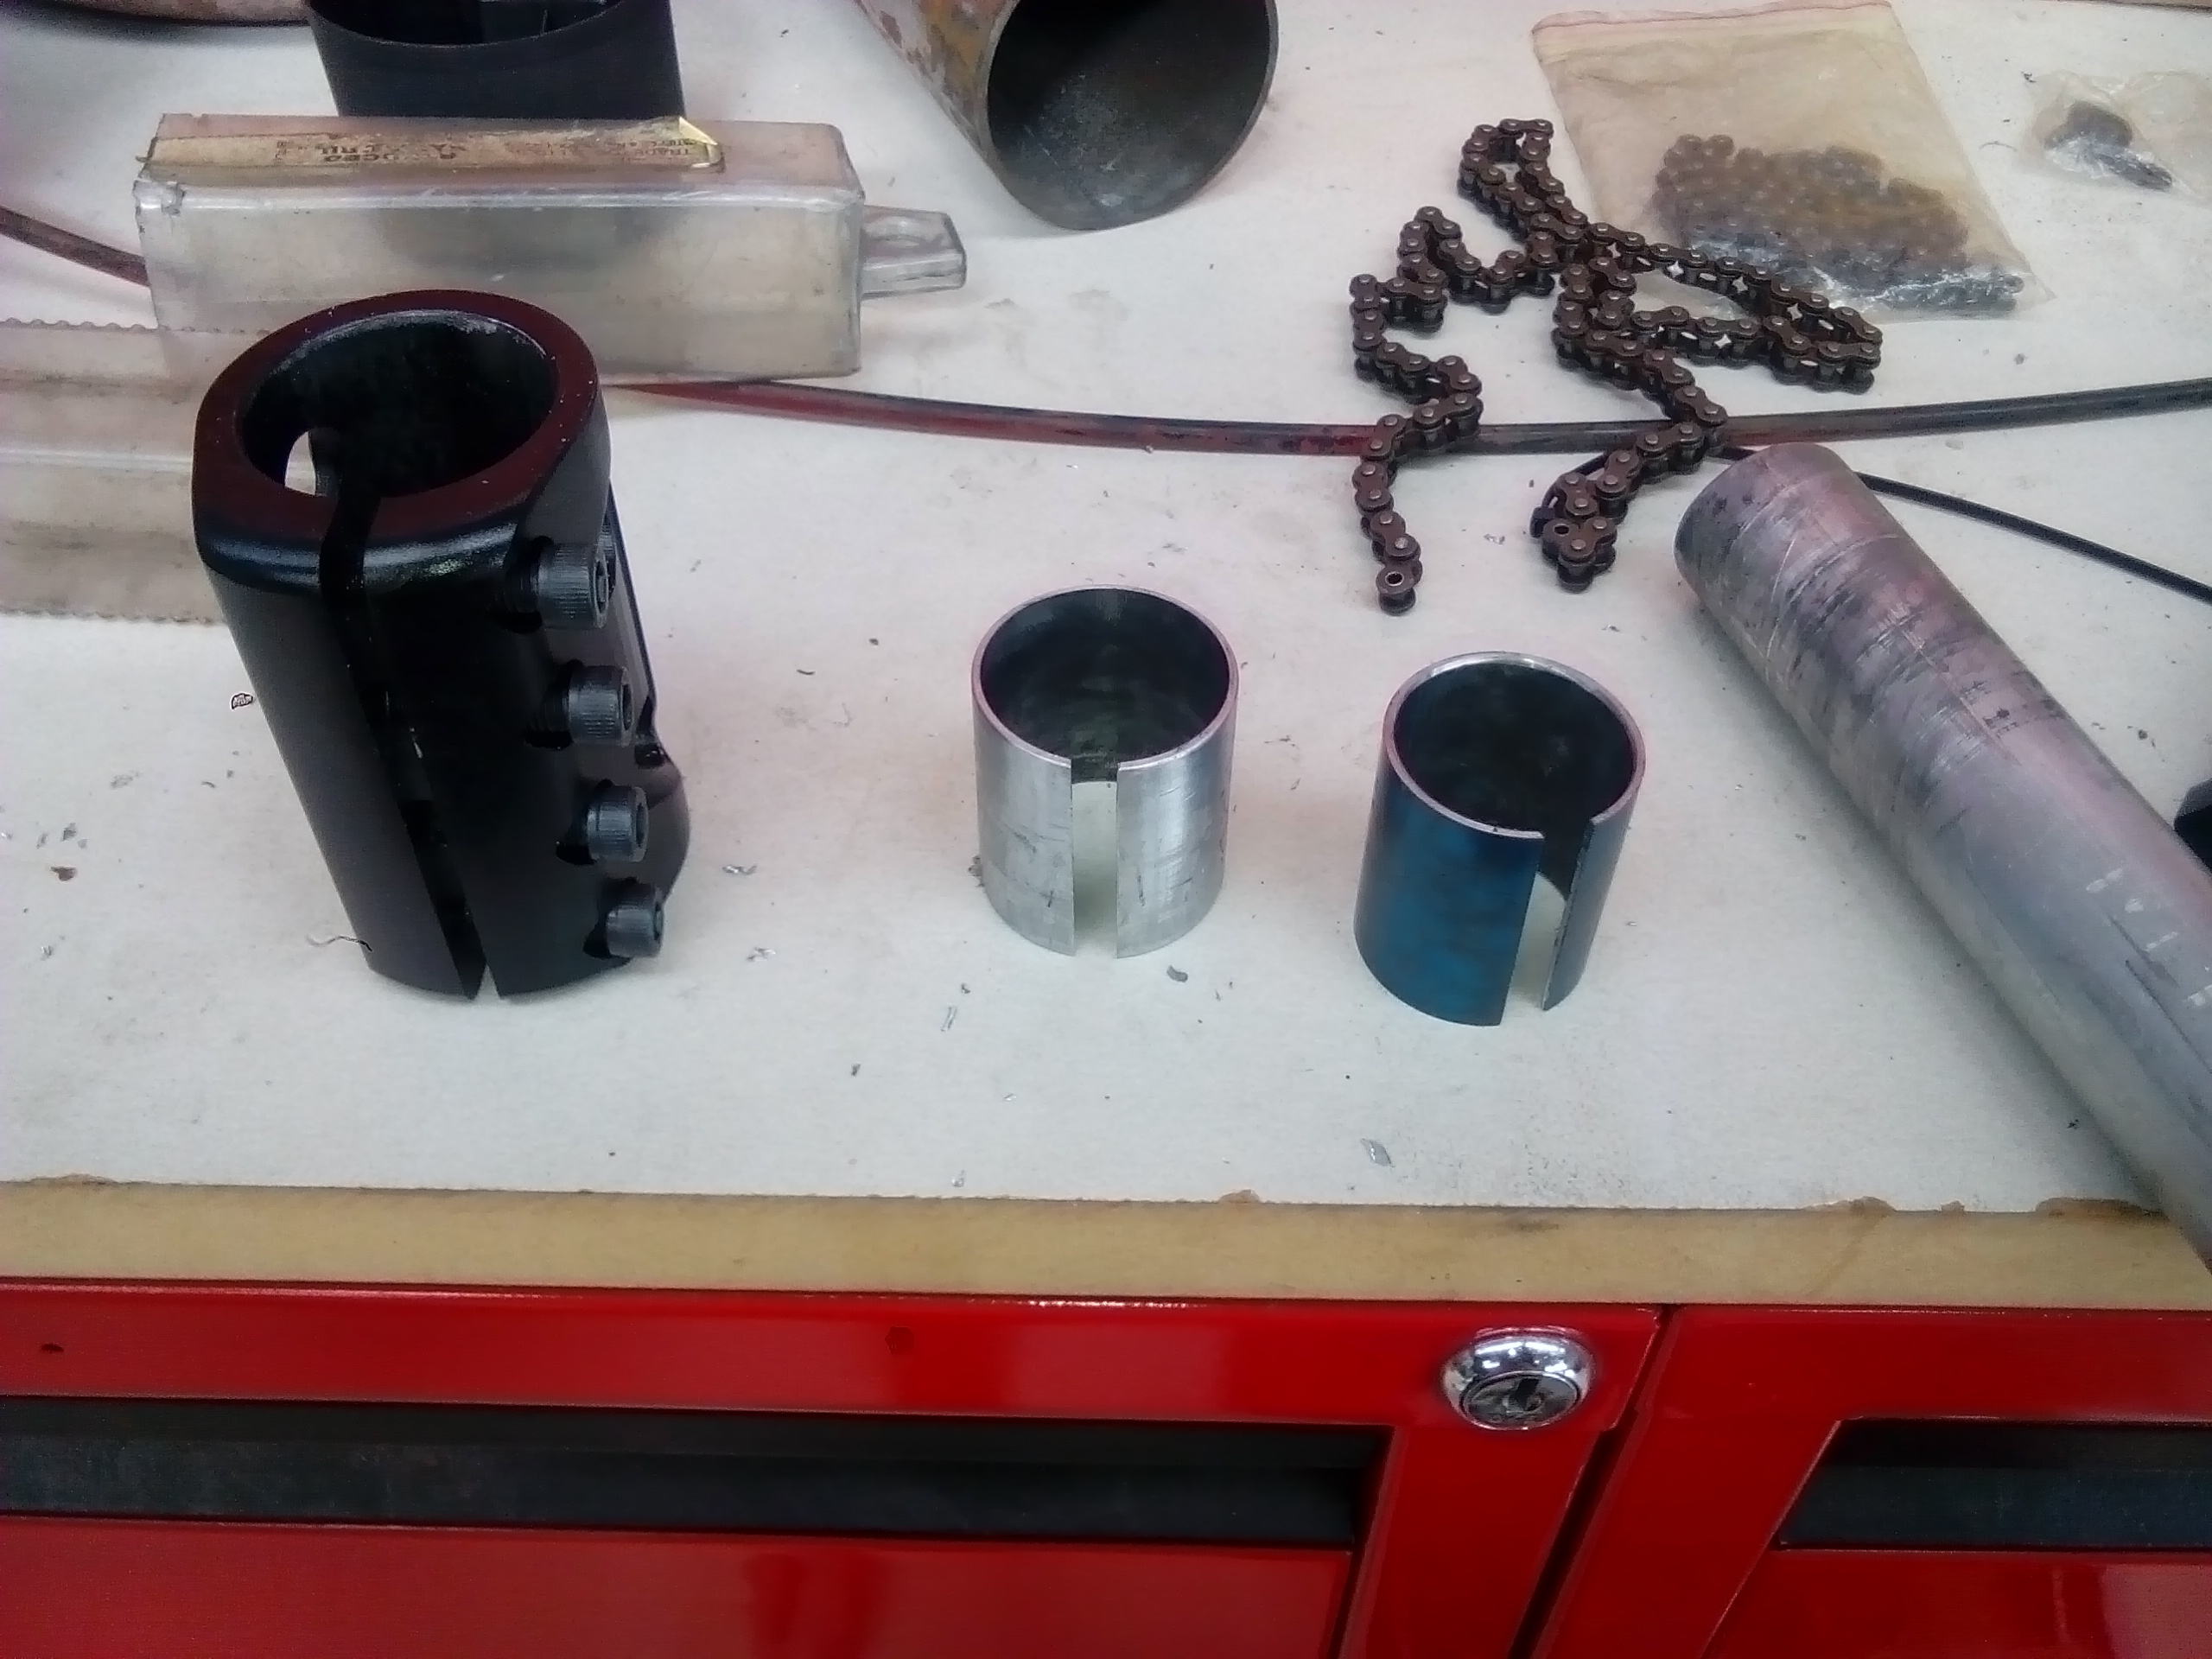
Here's the shims in place:
And a very tight test fit with a scrap bit of OD 30mm aluminium, same stuff the pole will be made from :
But it looks like everything is going to work out just fine.
-
1
-
-
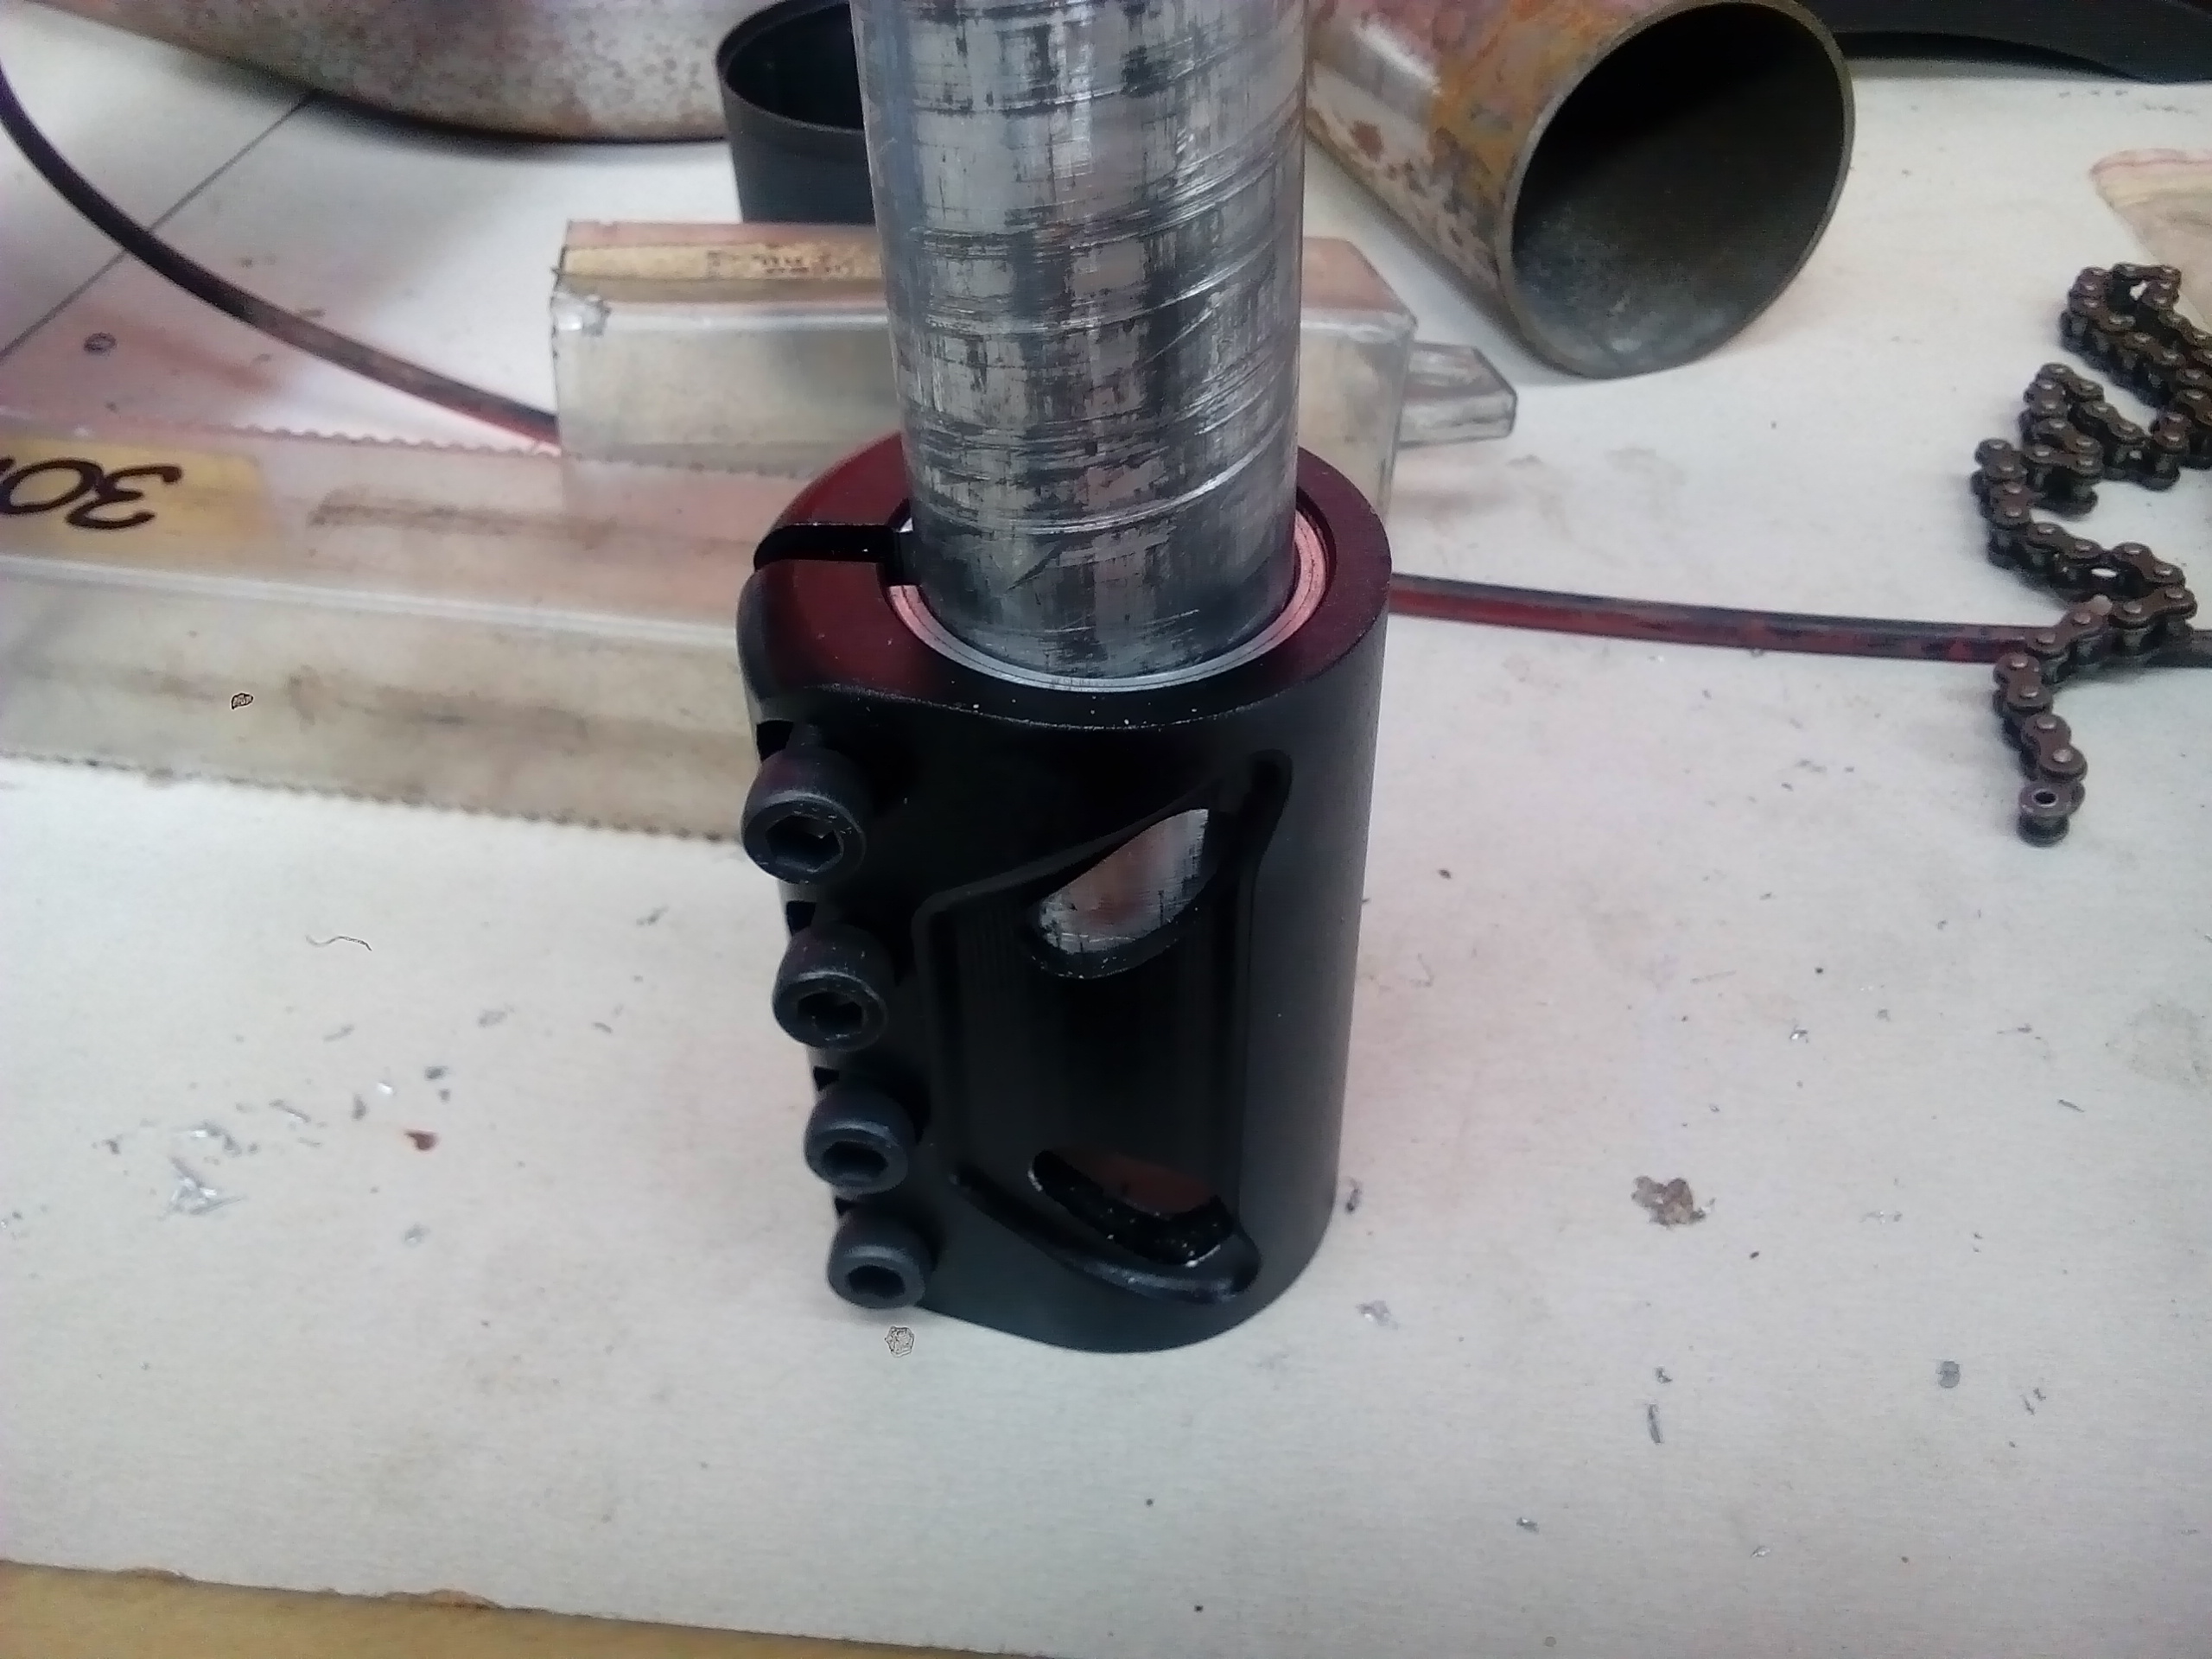
Goped's have a pretty trick handlebar system that folds down. However its also a bit of an Achilles heel, as it's most likely the first thing you'll break.
The race peds have fixed poles, much like modern kids scooters have. A race pole landed in nz is going to set you back about $400-$500. Once again, not really an option for me to throw a credit card at...so time to roll up the sleeves and hit the lathe/mill again:
I made this part...sexy eh! Fuck I love working with aluminum...it just does what you want it to.
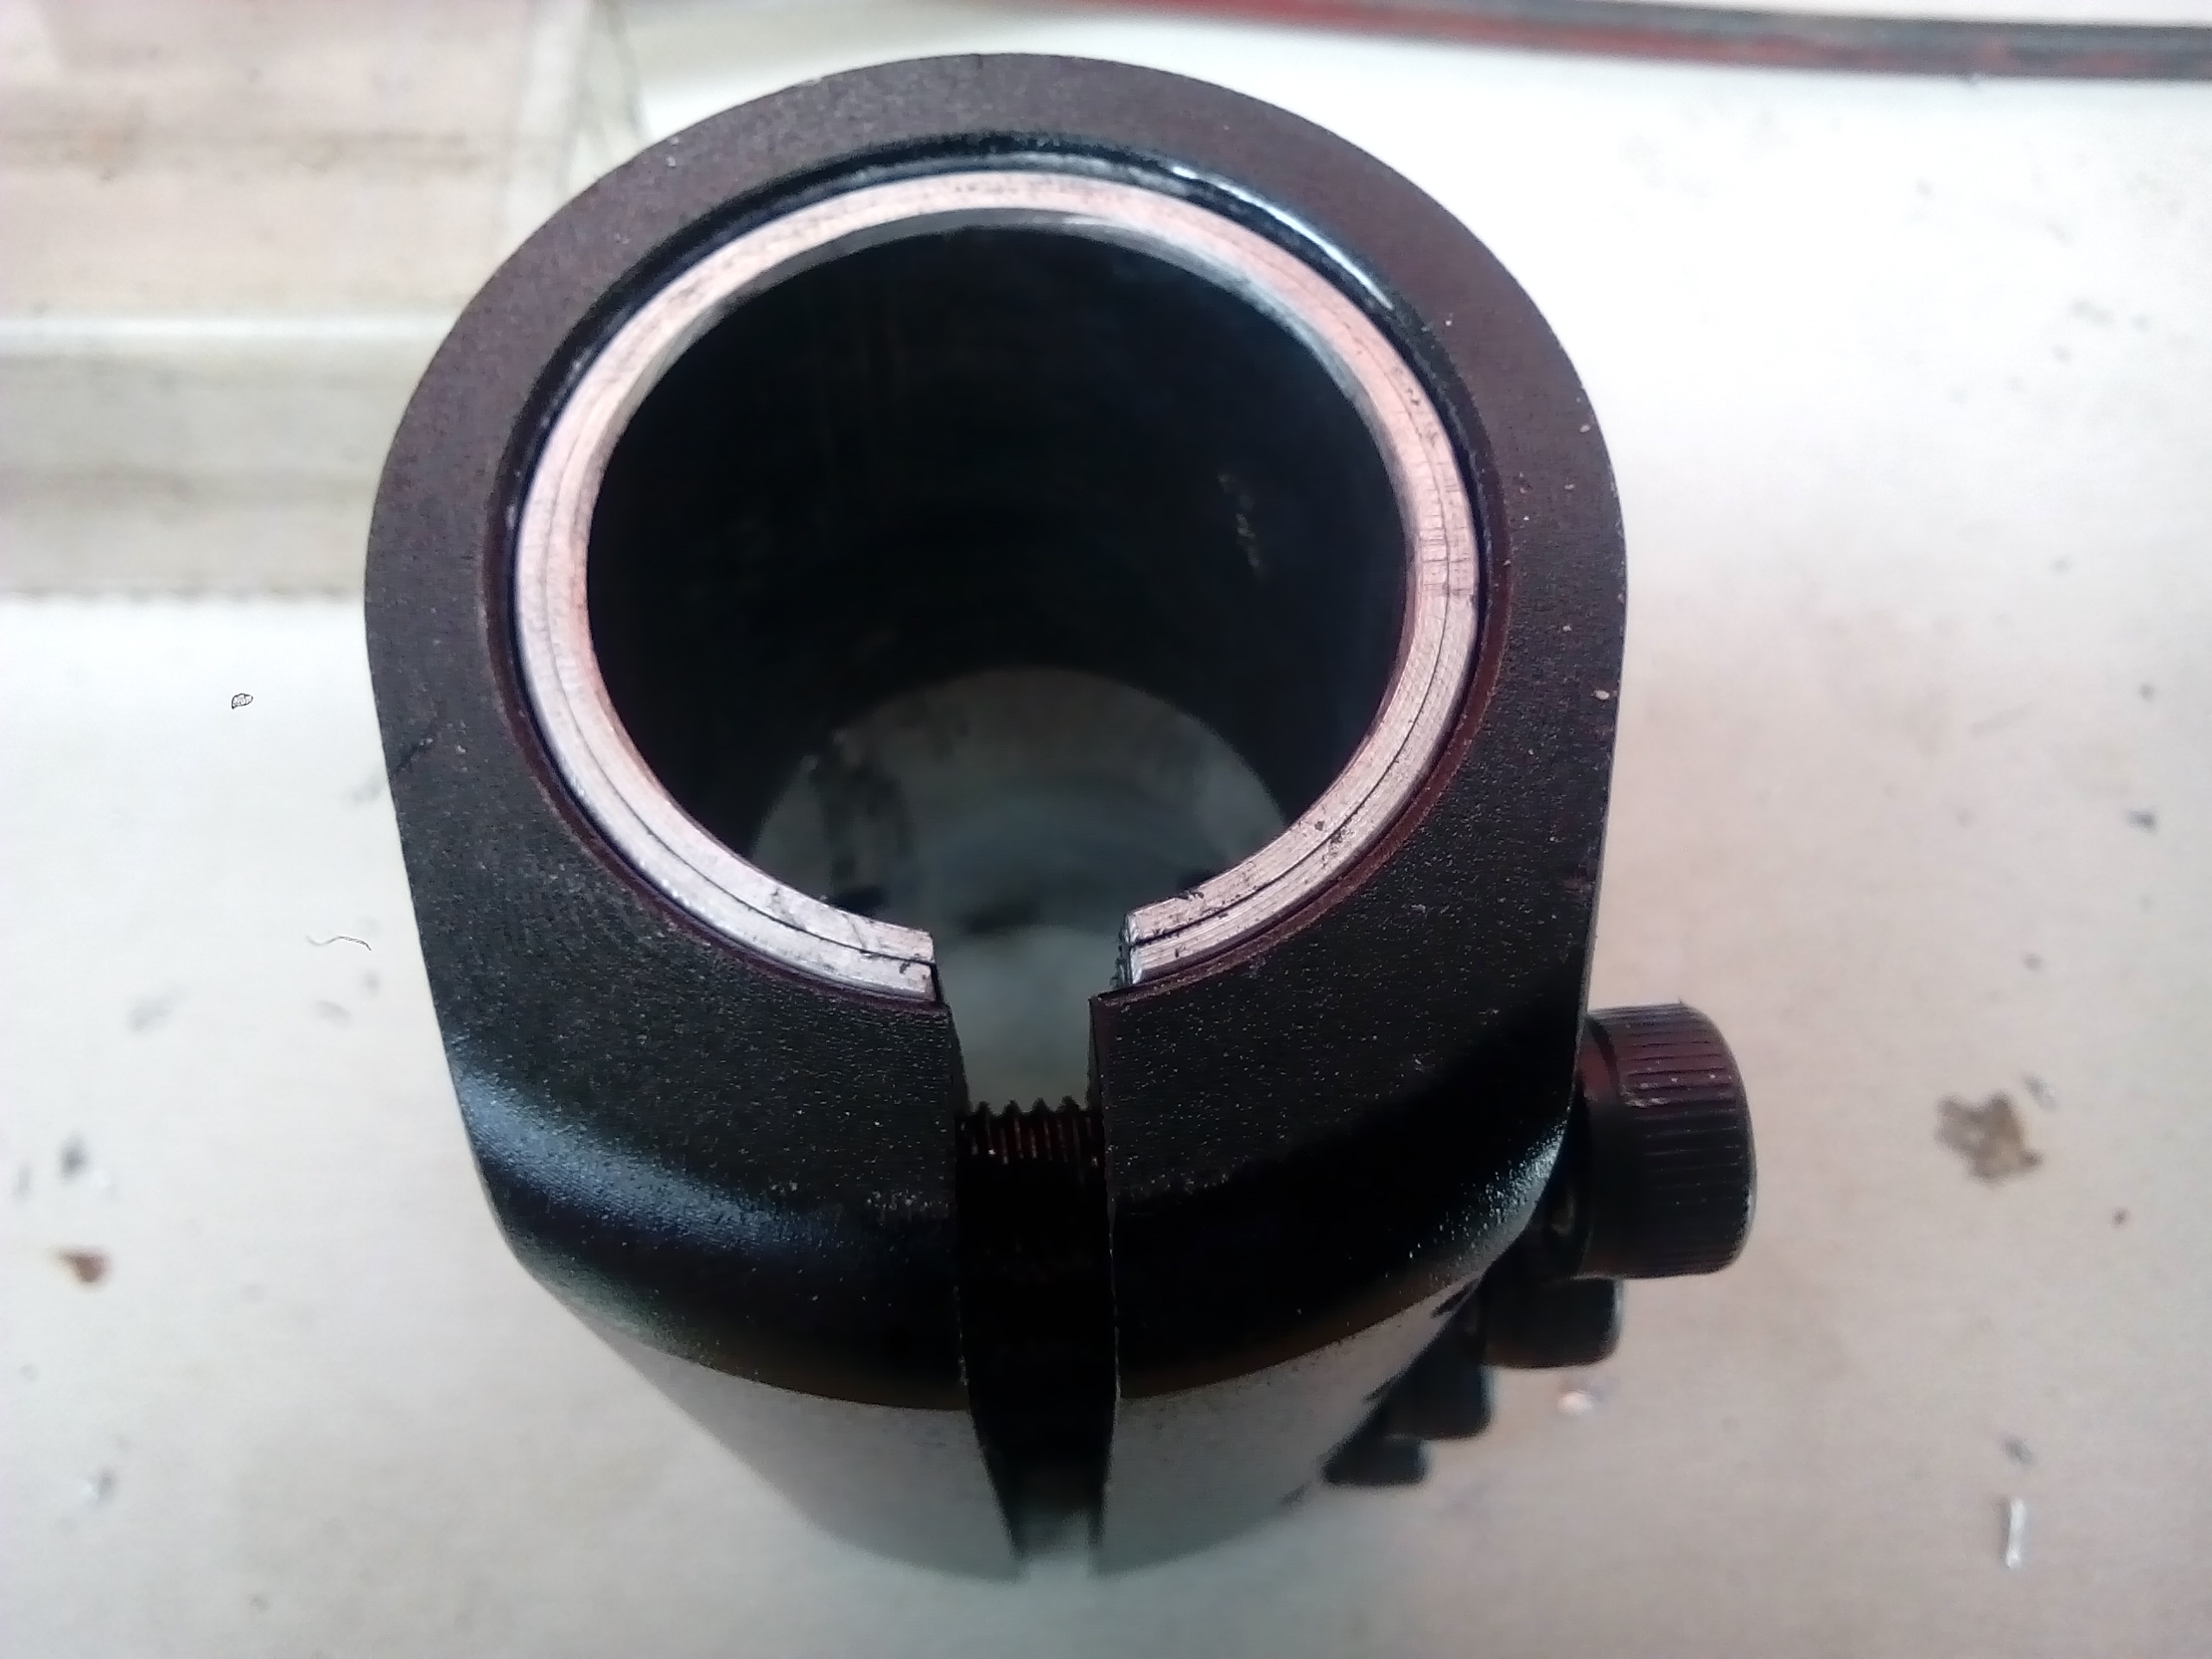
I then purchased the coolest of the cool scooter stem clamps. But this was knowingly purchased in the wrong size.
Now to make it the right size took more work than anticipated...but I'll just post some pretty pics that make it look simple:
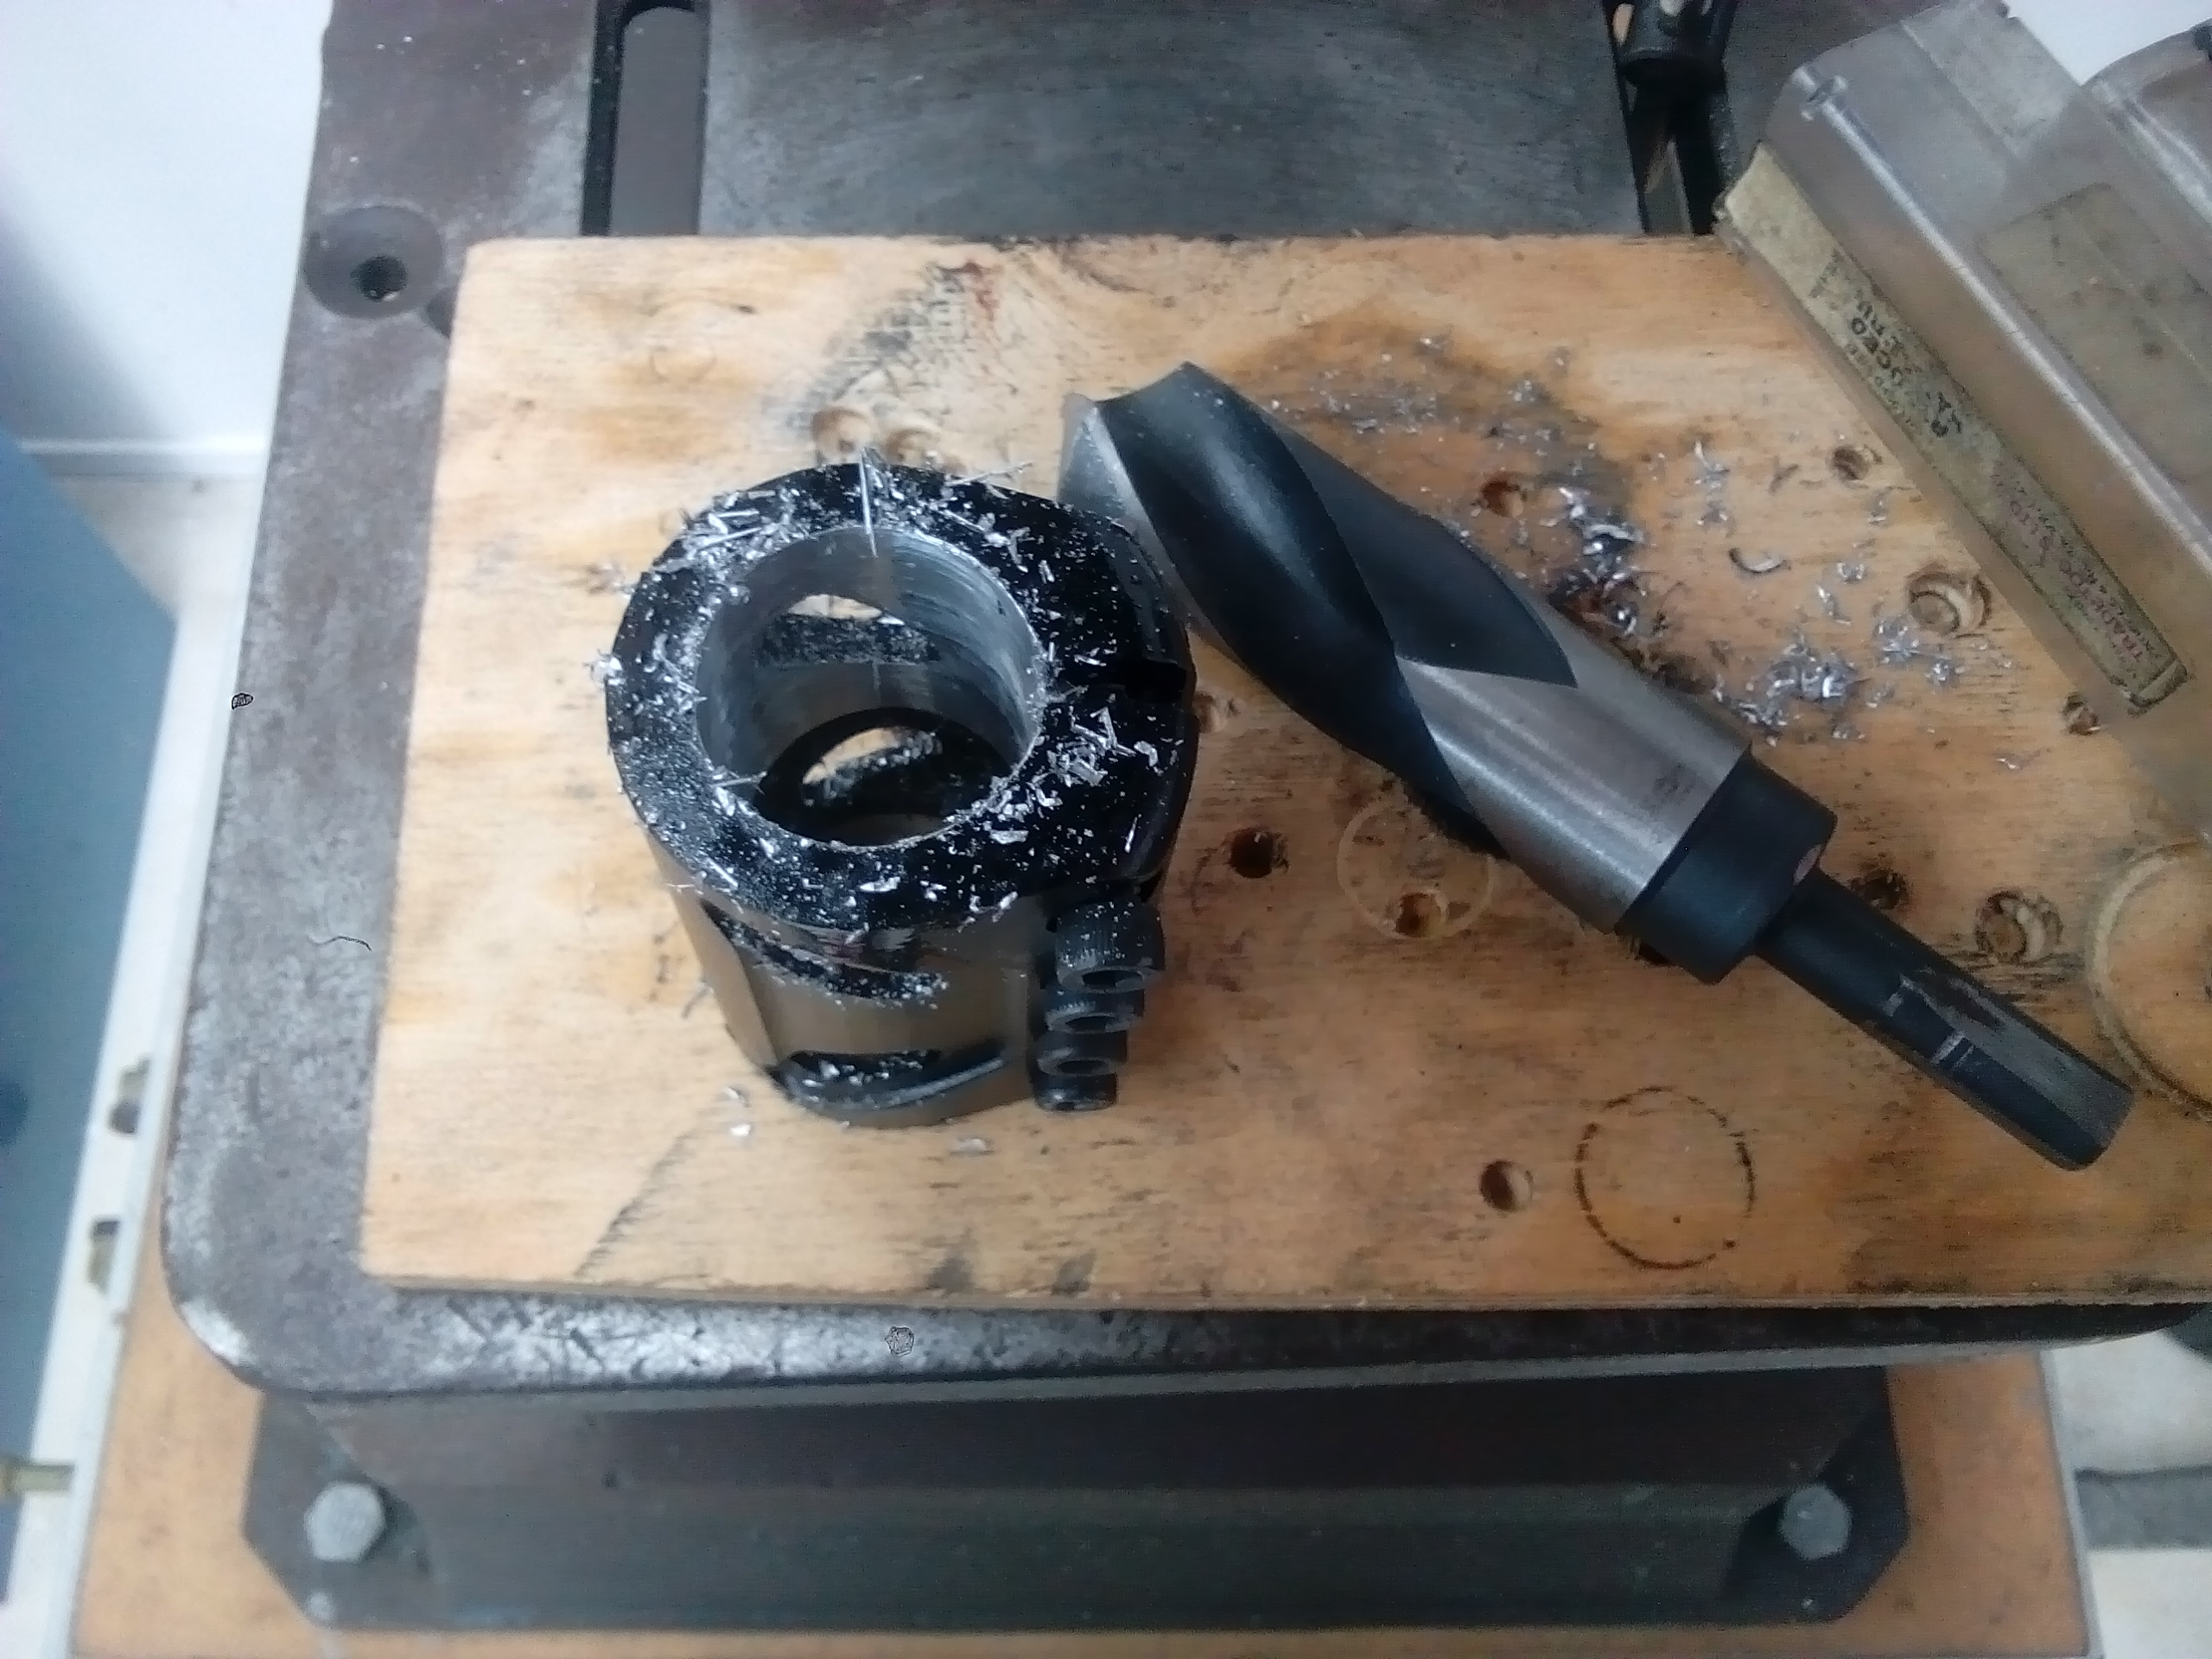
Drilled out to 30mm from 28mm. The other half has an ID of 35mm, so it will need shims to bring that down to 30mm...giving full length clamping surface of ID 30mm.
It took two shims, one inside the other to achieve what I wanted. I did this turning them down on the lathe, then slot milling them fitted one inside the other to end up with the perfect sized shims.
-
I'll do this in stages as I find time. But most of the big stuff is now done. Having made a few of these the hardest ways possible...I now know what not to do.
-
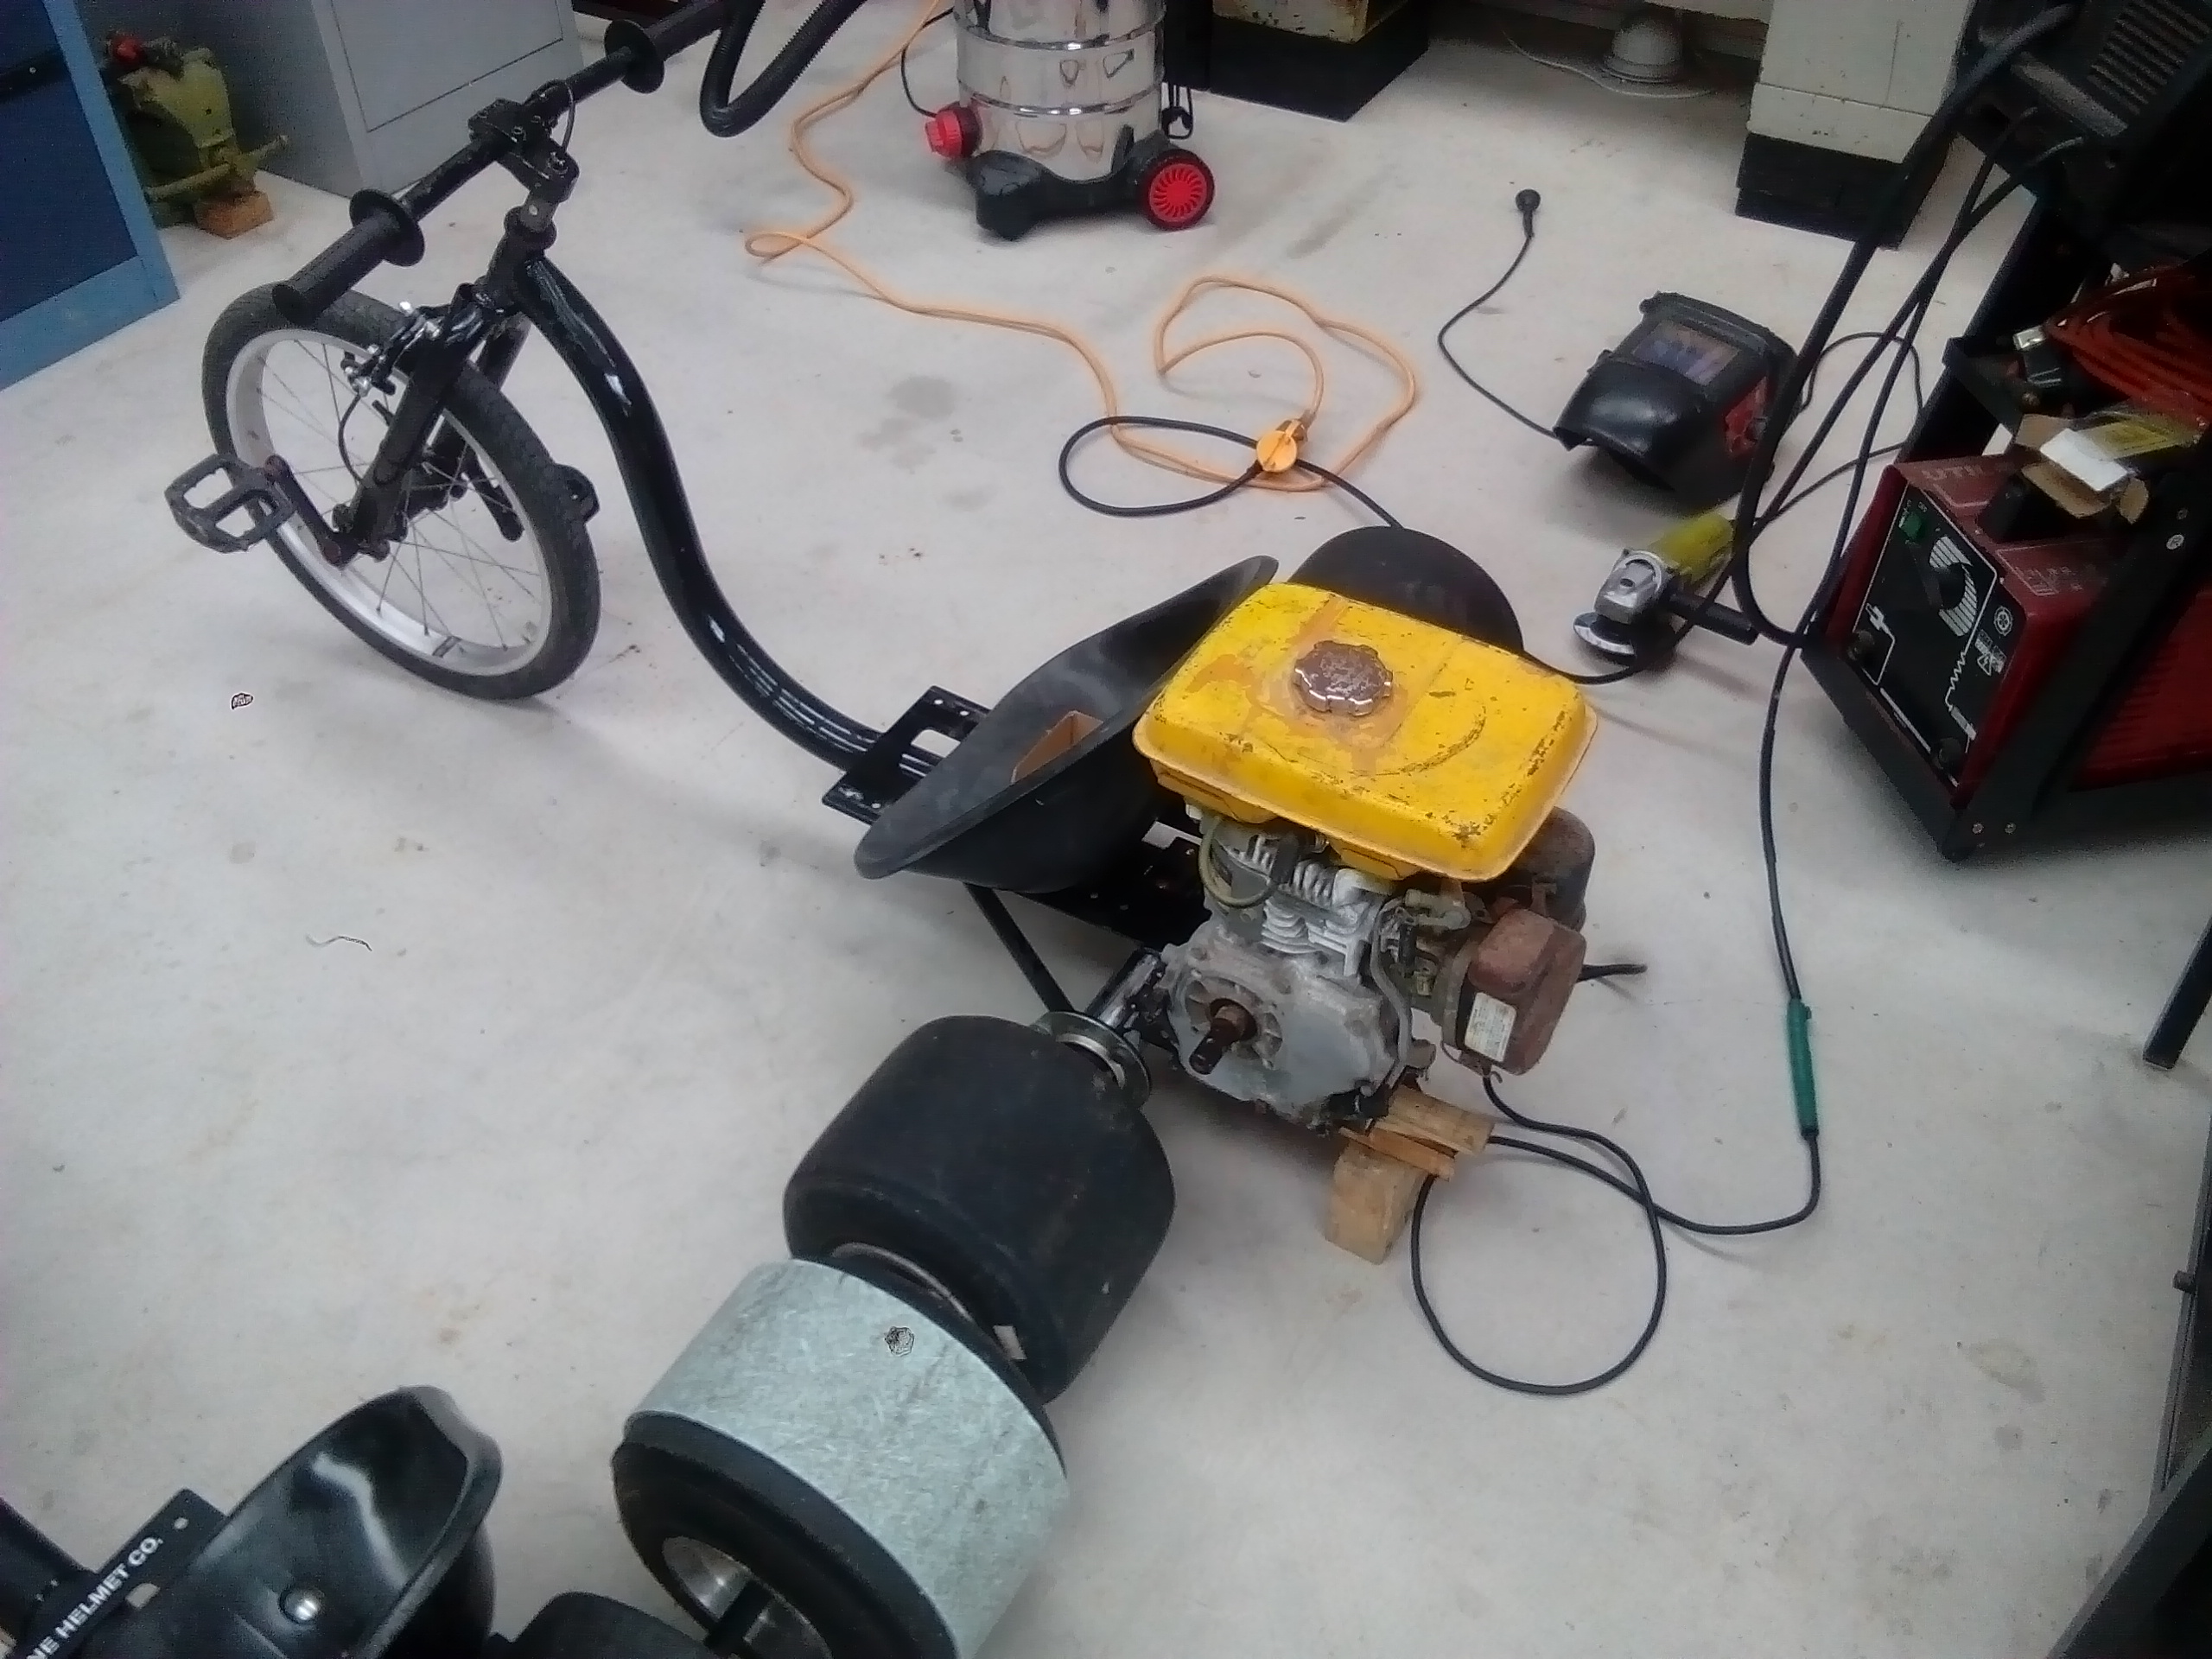
Title sounds cooler than it is, but Subaru make a line of small engines (Robin) for things like concrete vibrators, water pumps, generators etc...
One of these appeared on trademe for a price I couldn't resist, so logically another drift trike had to be made.
That's about as far as I've got today. More to come
-
5
-
-
Spent the day doing all the tedious stuff, cleaning rust off metal, replacing rusty bolts, springs, circlips...painting...cleaning rust off metal...painting...cleaning rust off metal...painting...
Lots and lots of little bits.
I did order some cool bike parts off eBay, that I'll use to make handlebars etc...those may take weeks to arrive. But pretty much just waiting on to arrive.
-
This dude has done something similar. Must admit it looks fun...
I can't find the link, but there's one with a mx 250cc motor like a YZ250 or such like, he's passing cars on the motorway pulling wheelies!!!
-
 2
2
-
-
Just dremel the 1 off that 140cm3, then sand blast it afterwards...easy as that, you now have a 40cc motor
-
3
-
 1
1
-
1
-
-
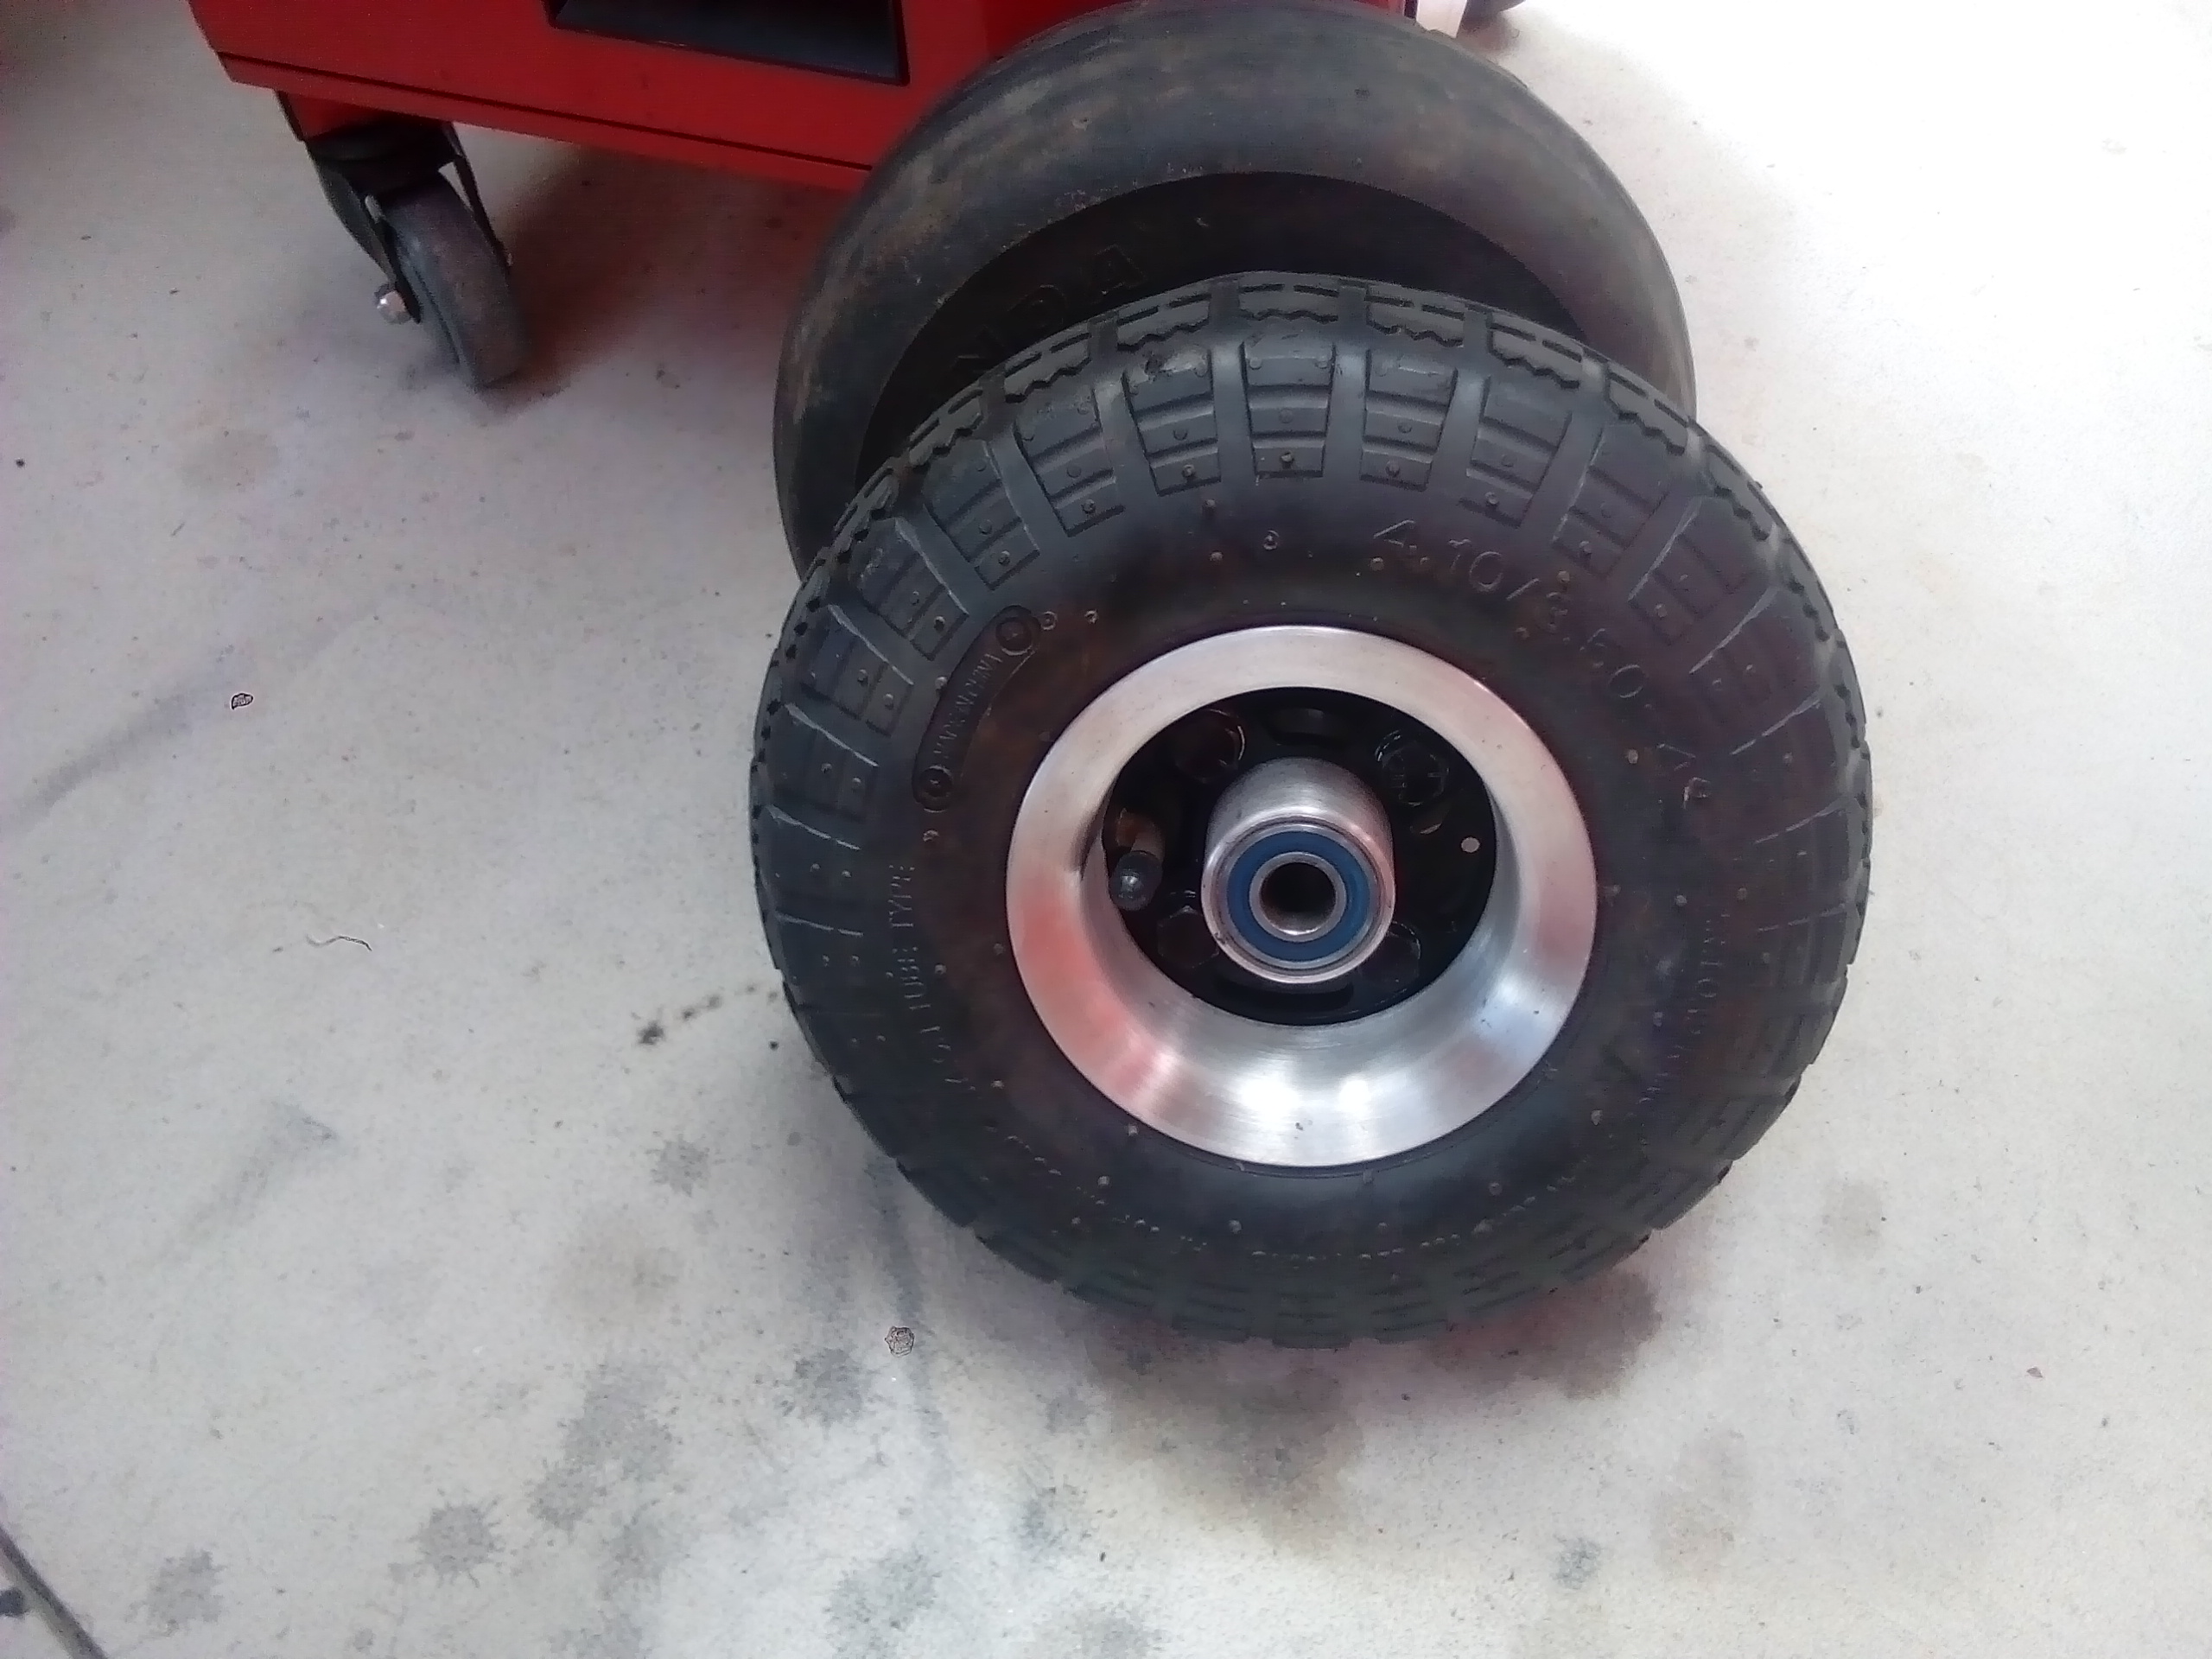
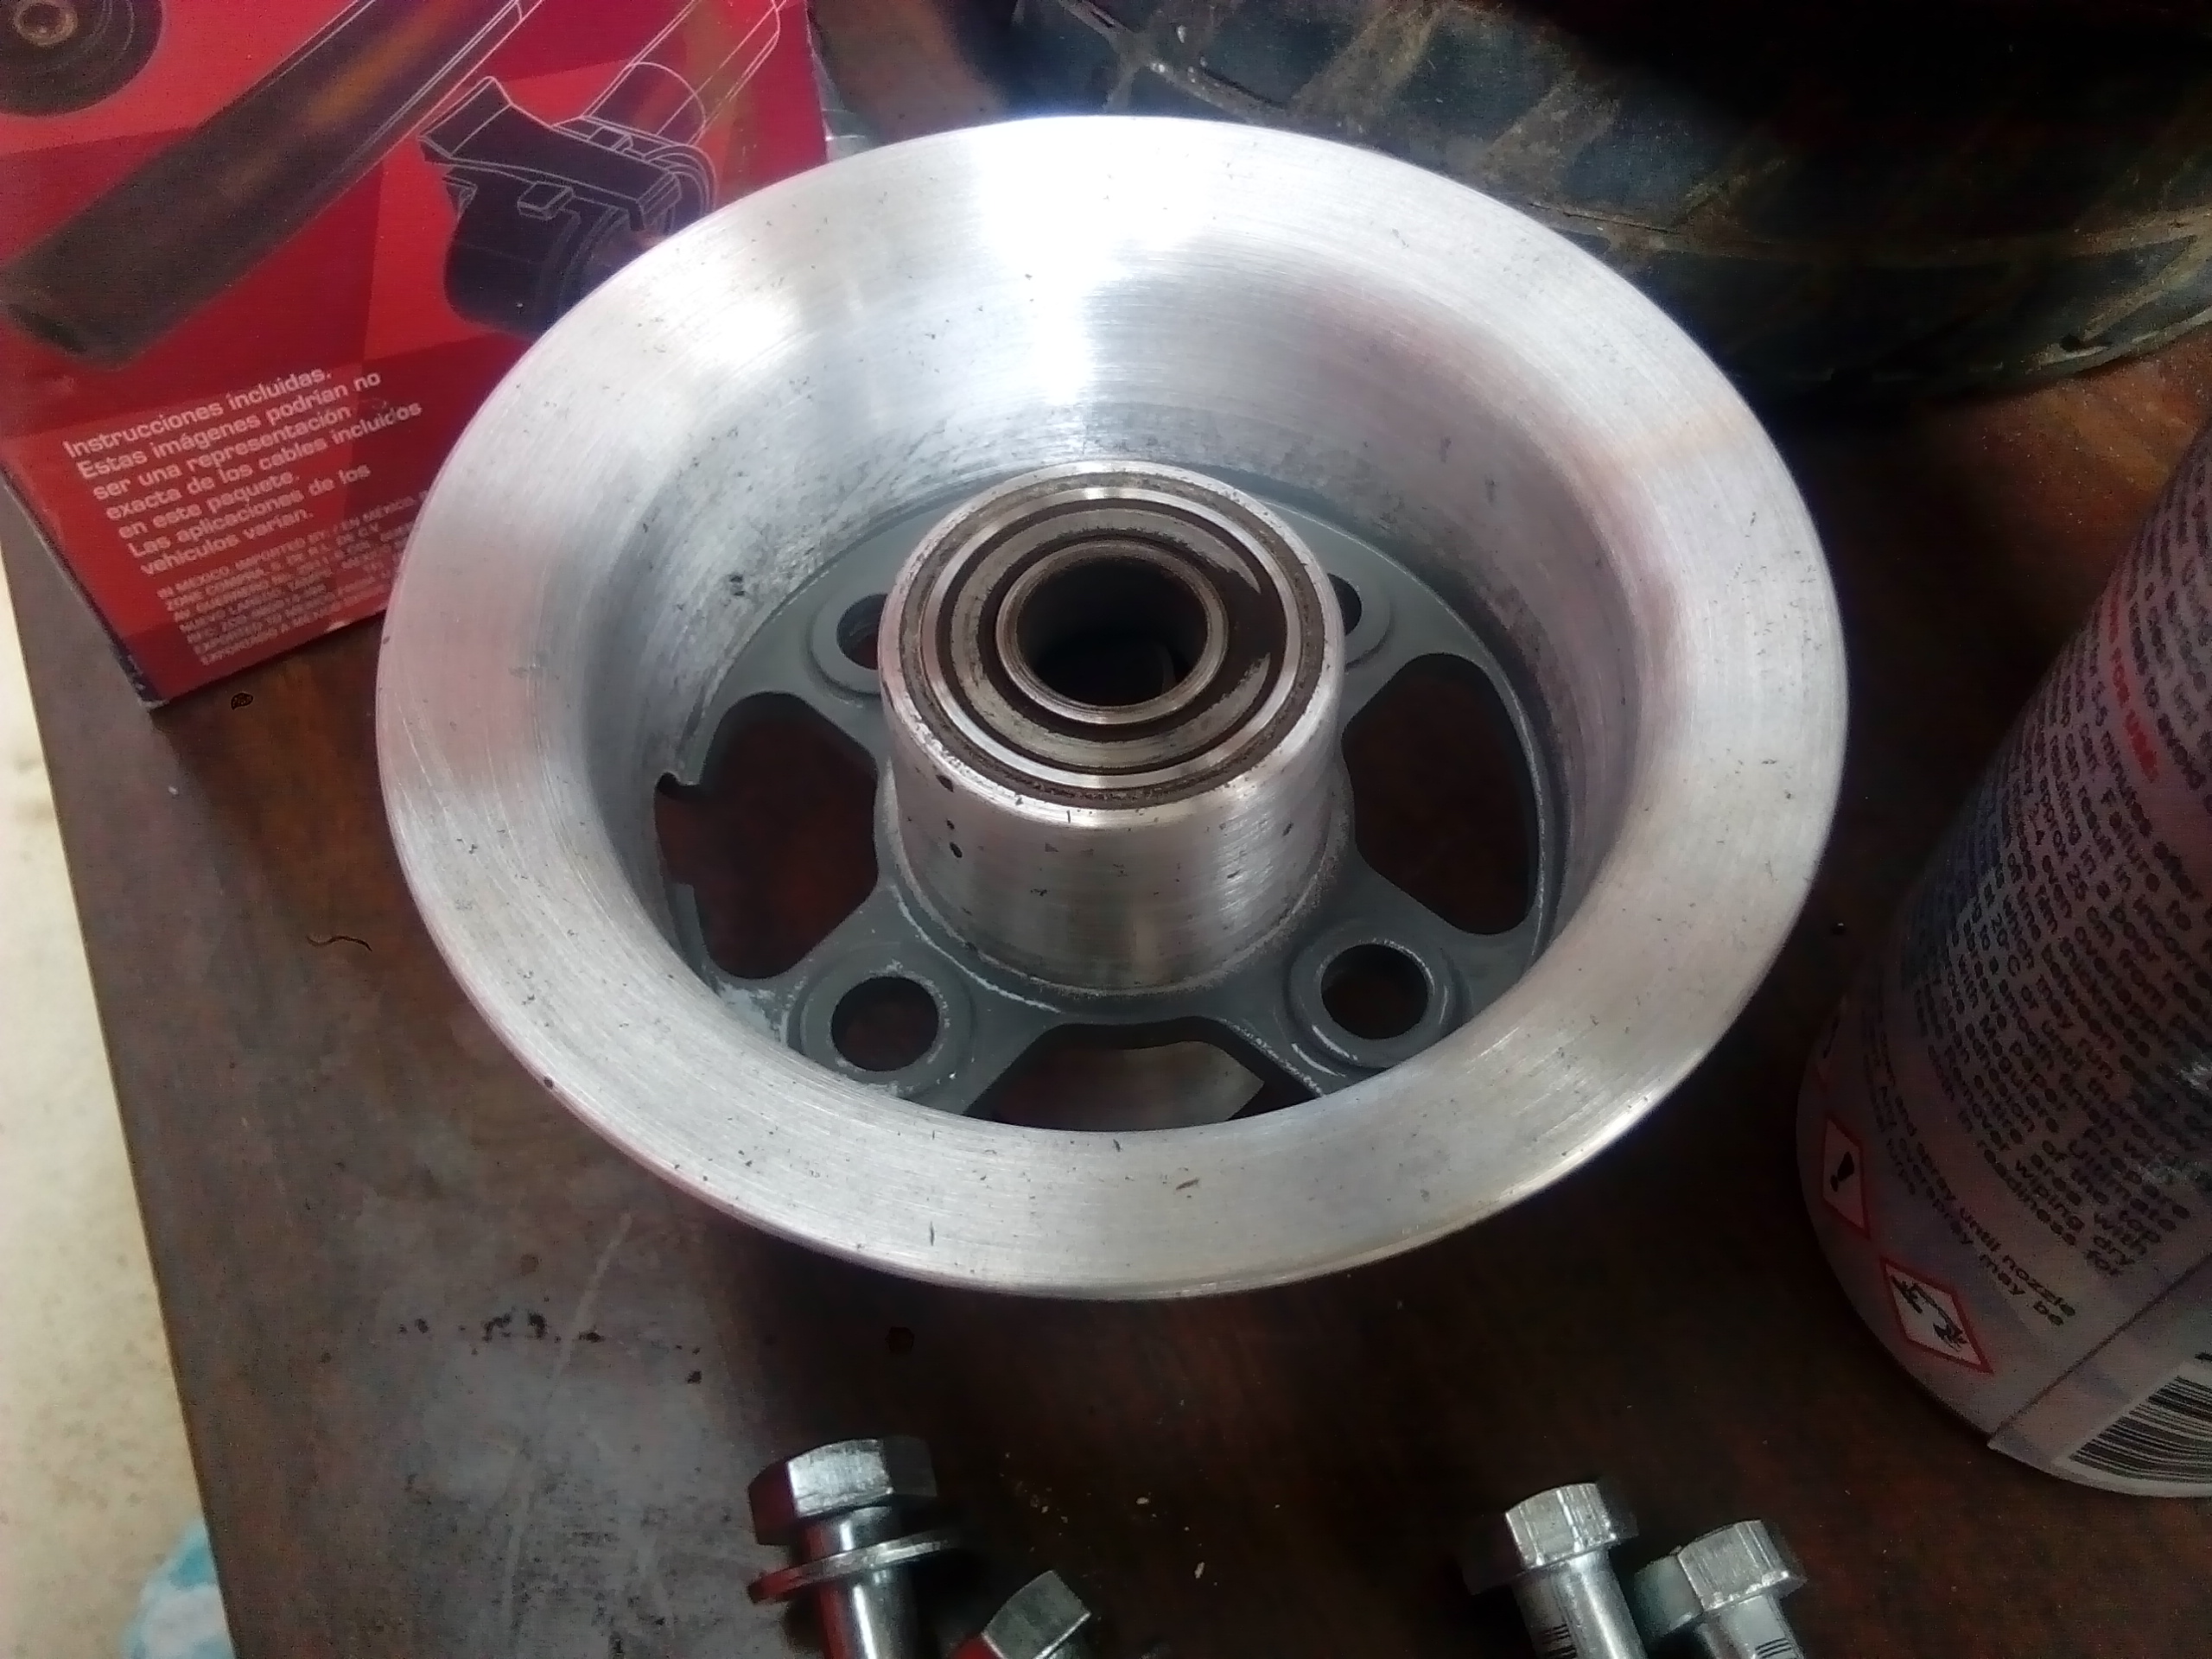
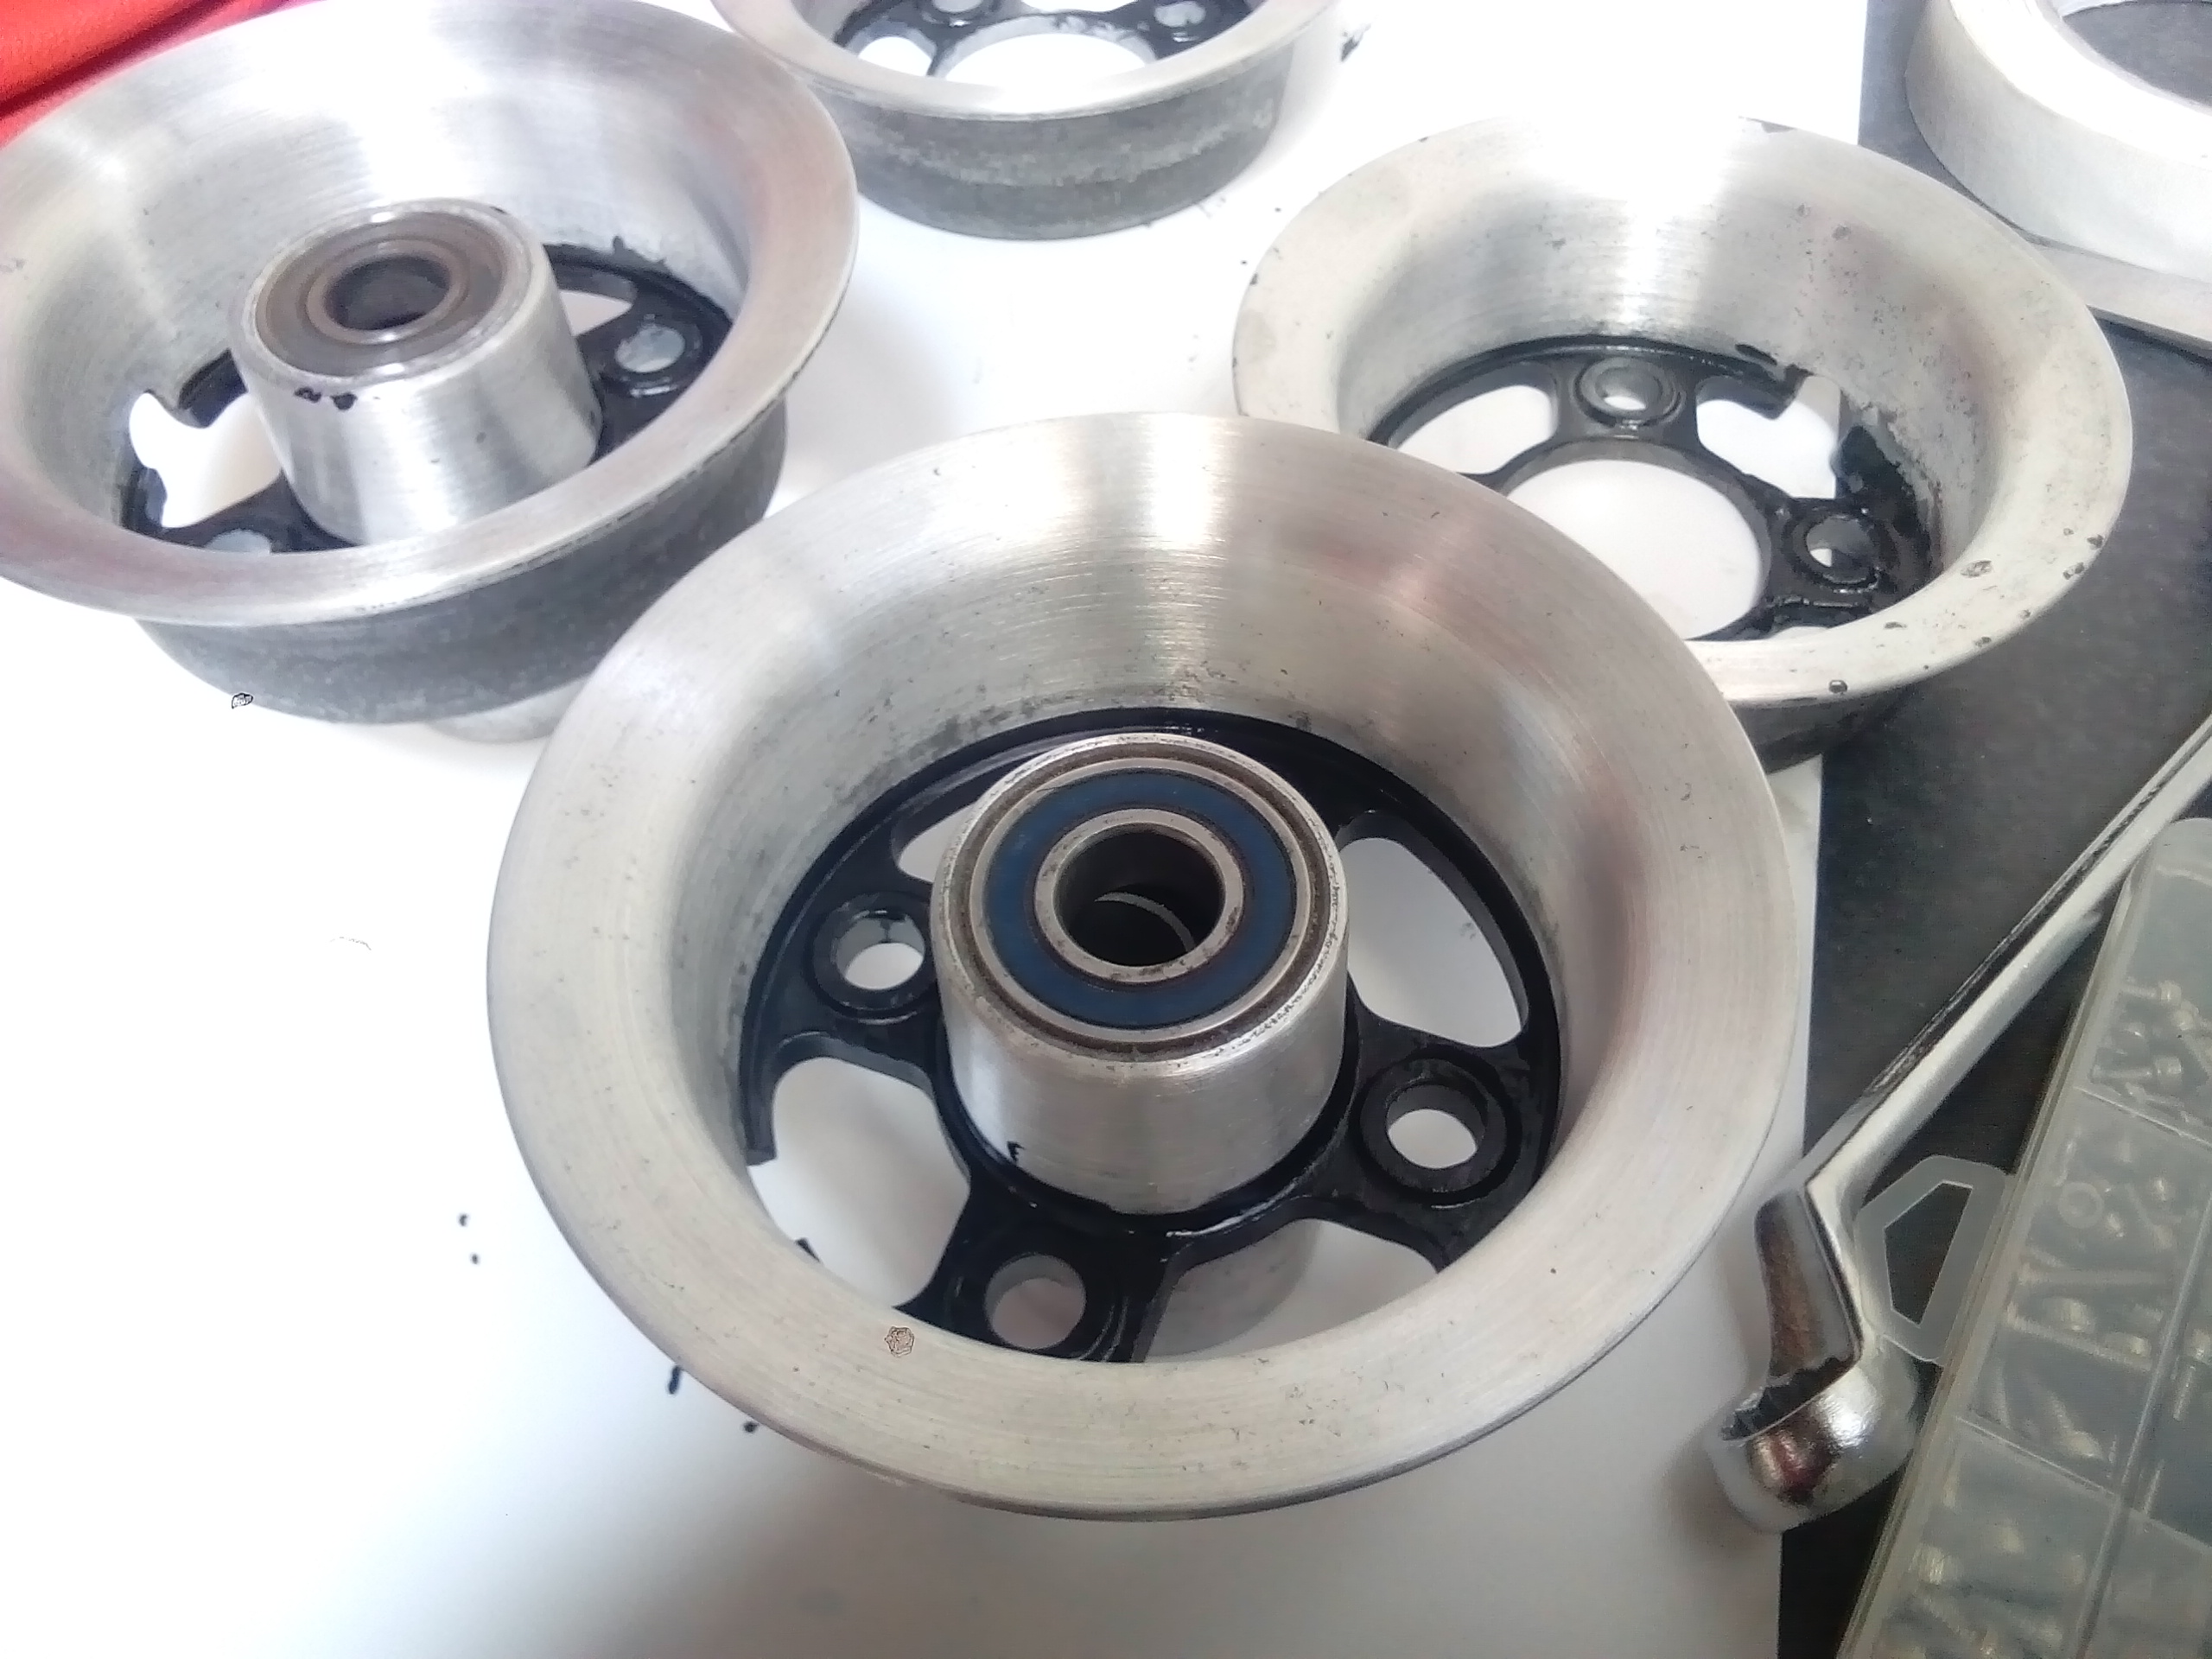
Found some before pics of the wheels:
And wheel completed:
The bearings in the other wheel are fucked, so I'll swap those out for fresh ones...then we're ready to roll!
-
2
-
-
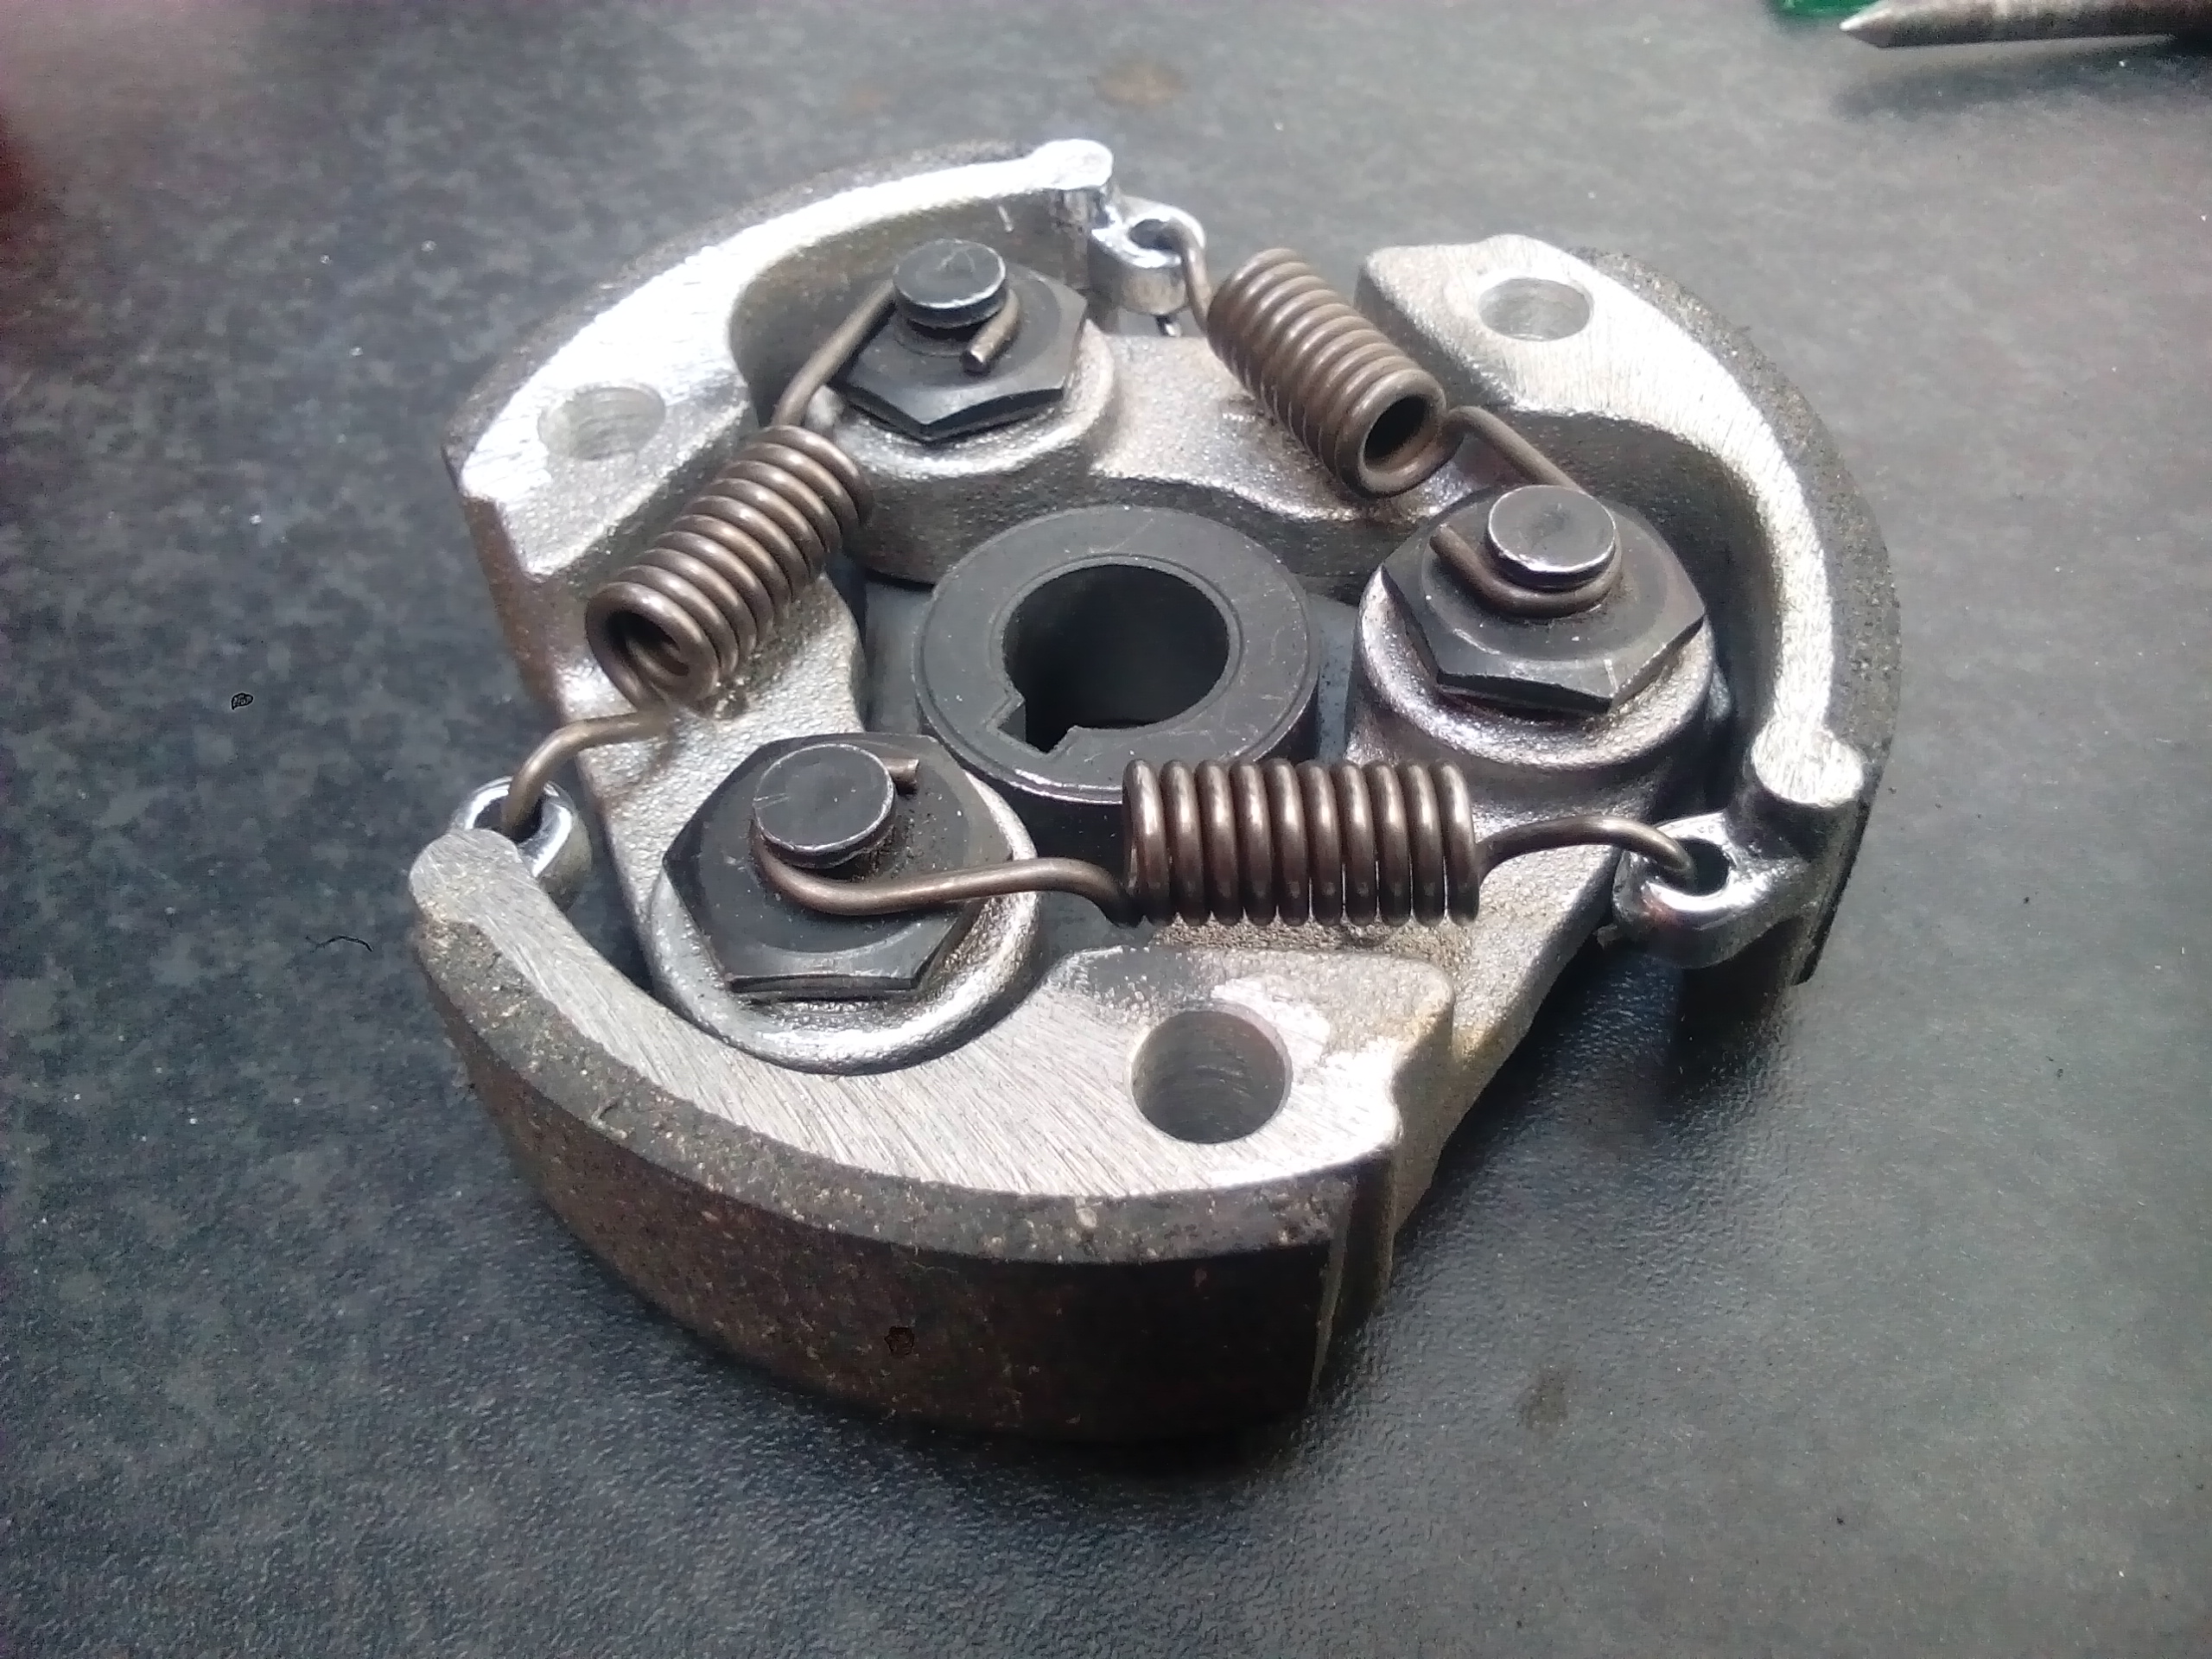
Clutch completed:
-
Next up, lightening up the clutch.
I want to adjust the engagement to occur at a higher a rpm. By going from steel to aluminum, this will help.
Drilling out some holes to remove weight from the arms will further help.
And while apart, I polished the ends where the springs rub to reduce spring fatigue.
This will be a bit of trial and error until I get what I want. It may see the drill again for more removal of metal.
-
1
-
-
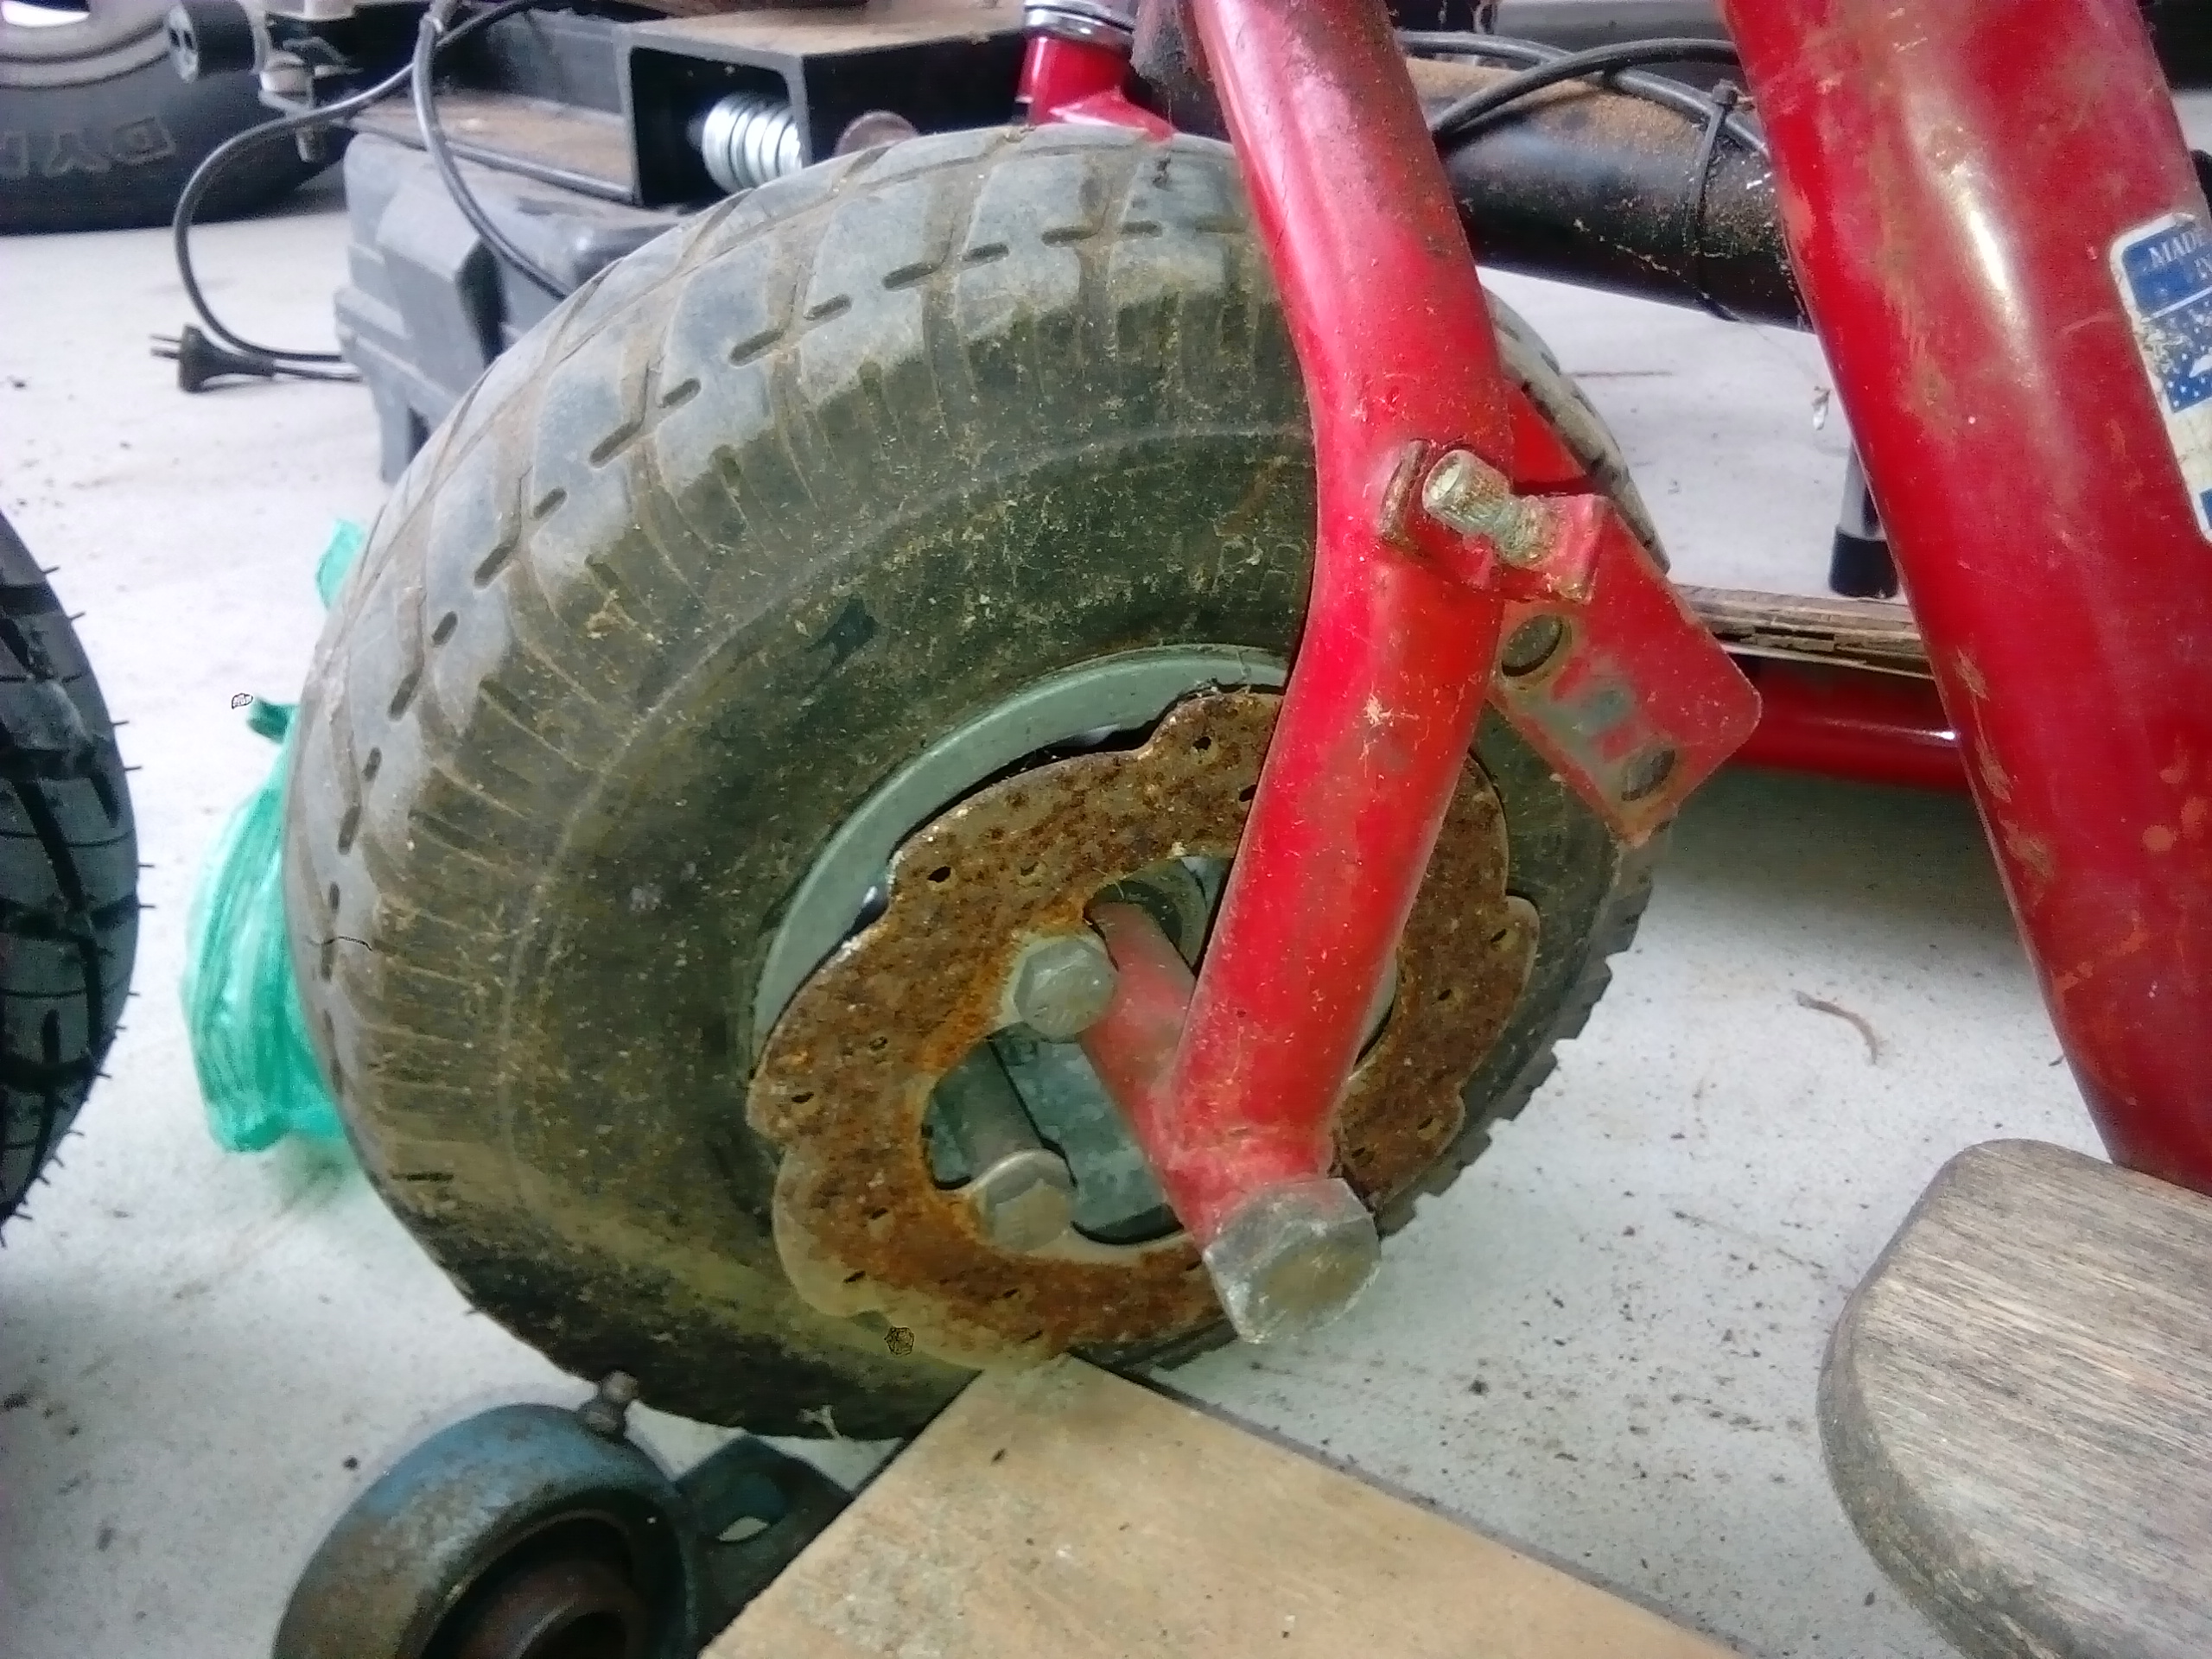
My wheels looked like something Jacques Cousteau found at the bottom of the sea. I forgot to take before photos, but they were near bin material...however new ones with tyres and tubes would be approximately $300 landed. So refurbishment was the only realistic choice to keep the cost down.
I stuck the rim halves in the lathe and used sand paper to knock them back into shape. Then etch primed the centre's.
Then I hand painted the spokes to try make them look like mini Simmons mags. I was going to go gold...but pussy'd out and took the safe road - black.
For tyres; the wheels on hand trolleys will work. My tyres were 3.0-4 and the sack trolley tyres are 4.10/3.50-4. Both are suitable for 4" rims, but the sack trolley tyres will be slightly taller and wider. But considering I have some already...free!
-
1
-
-
Really starting to look awesome! You have nailed the lines on that bike. It could be made of pure gold and still look like shit if the lines are wrong...but you've got it looking just right!
-
1
-
-
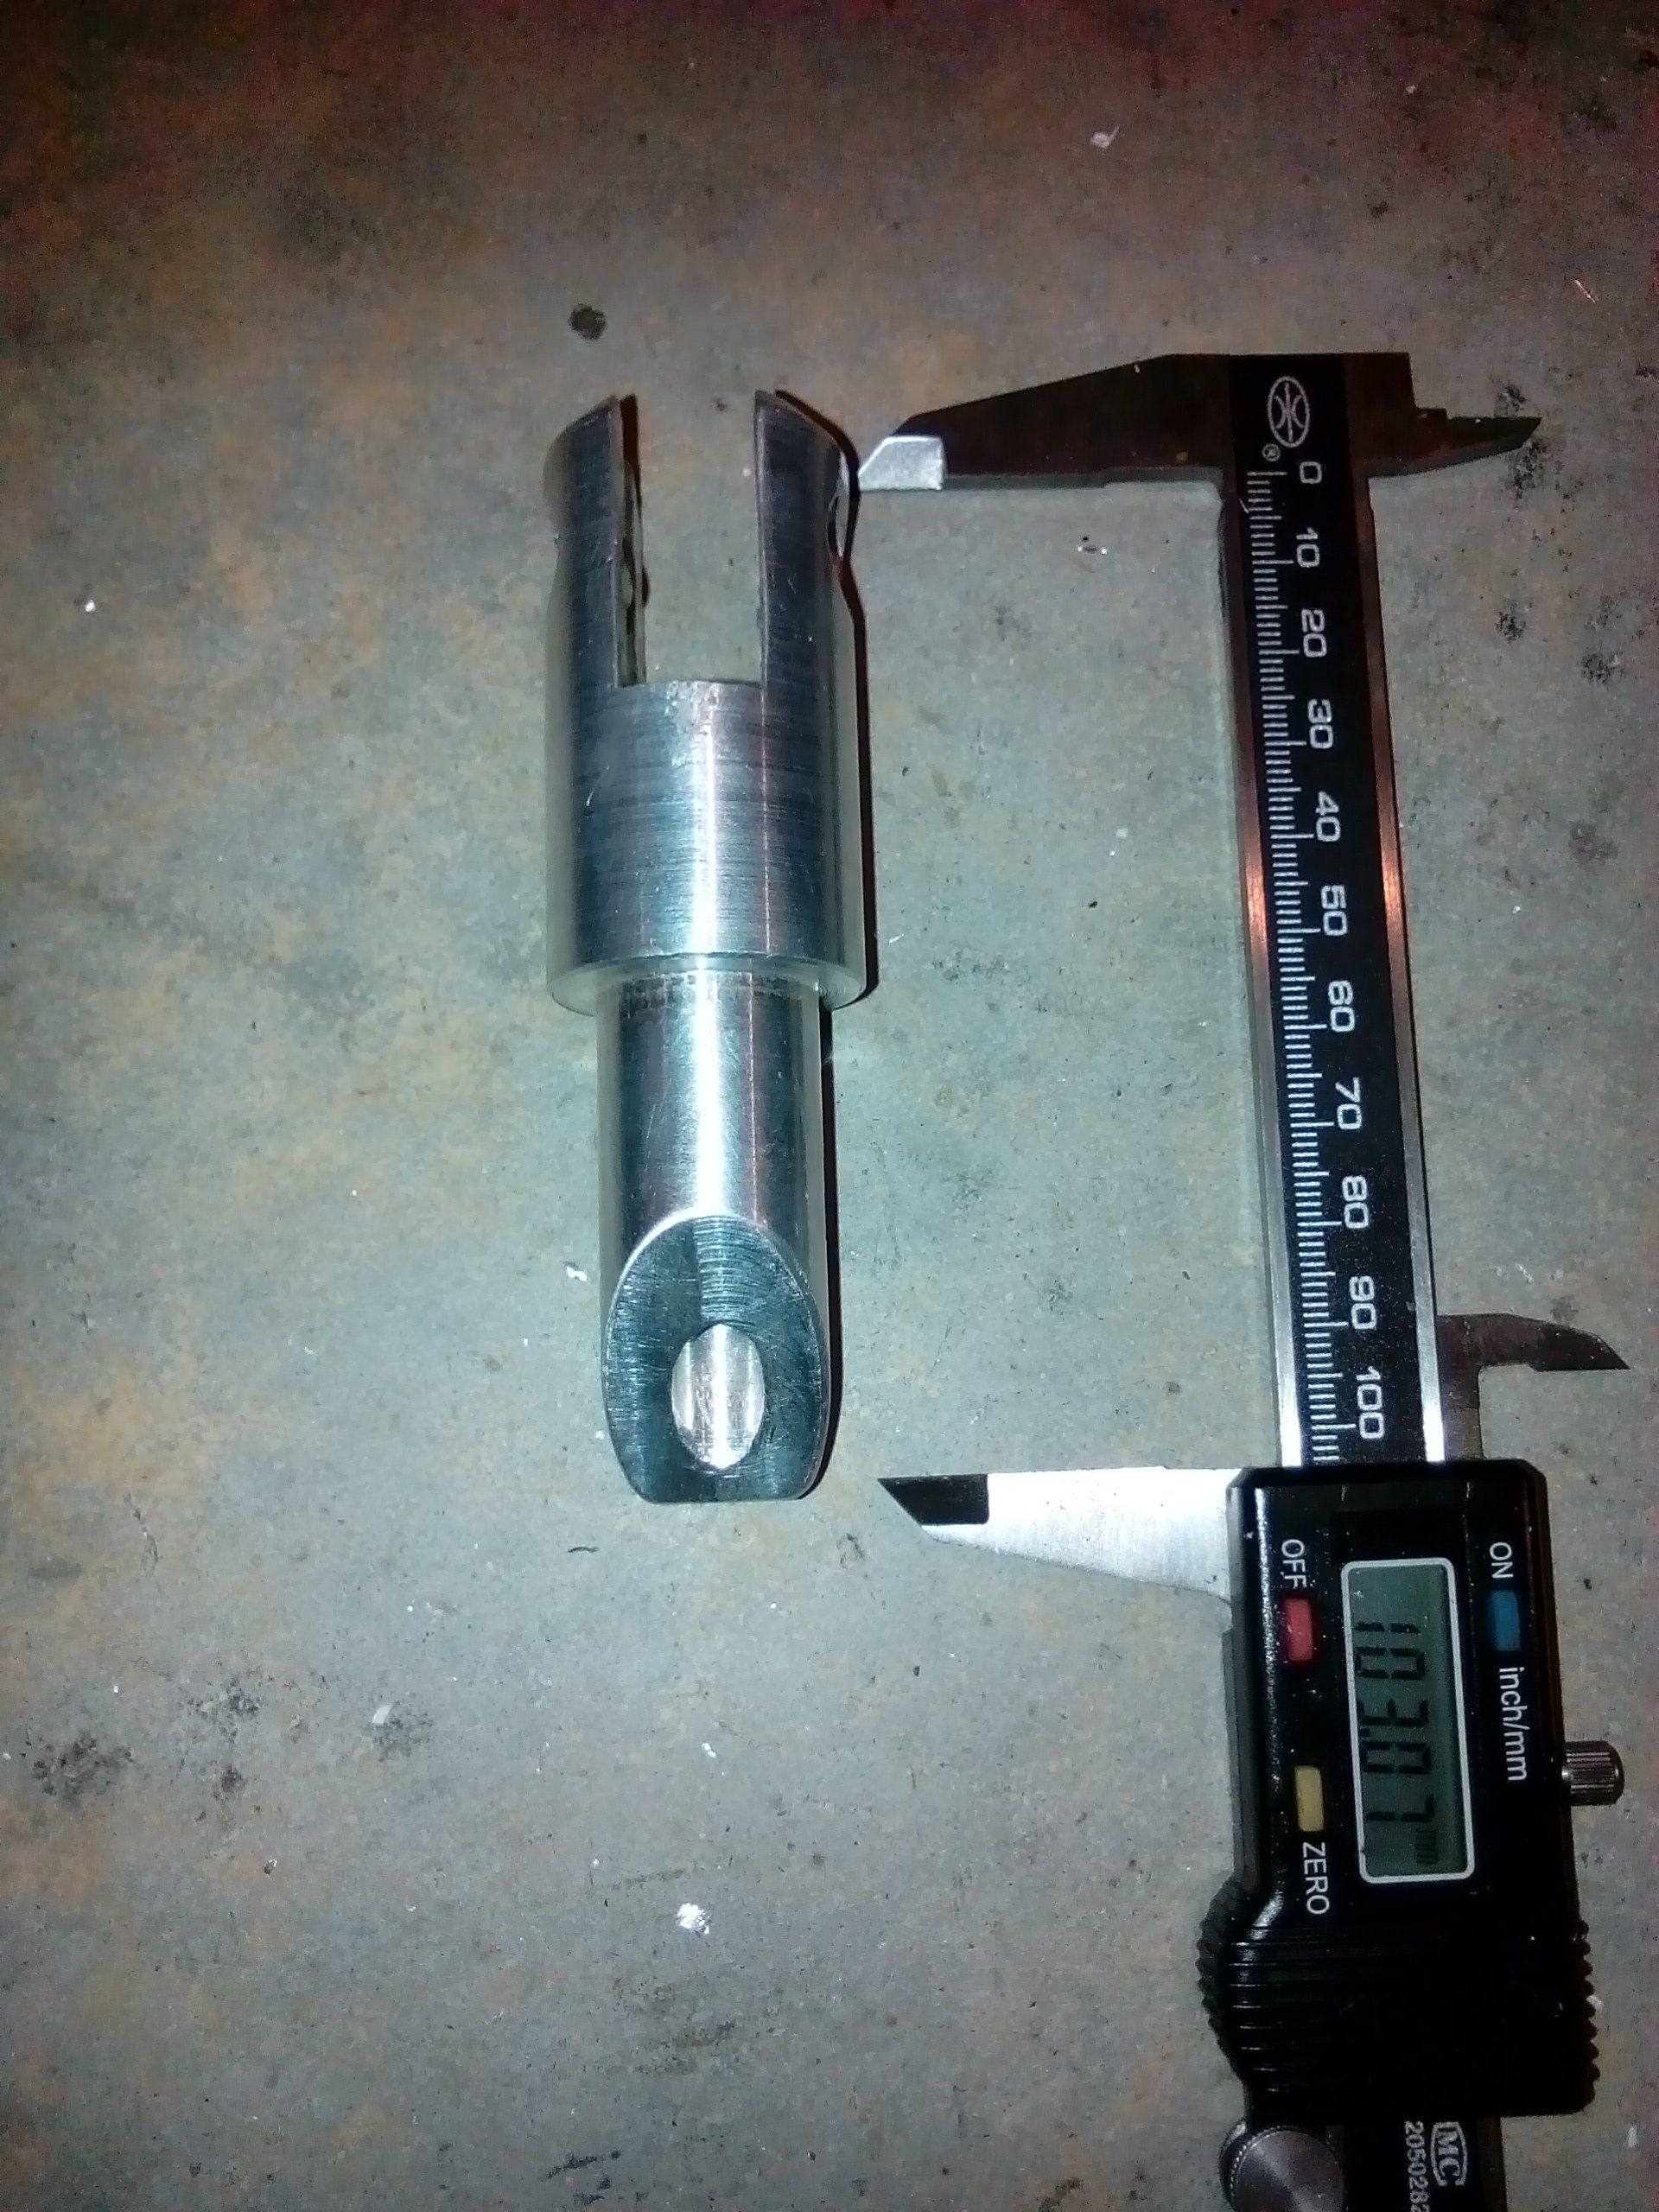
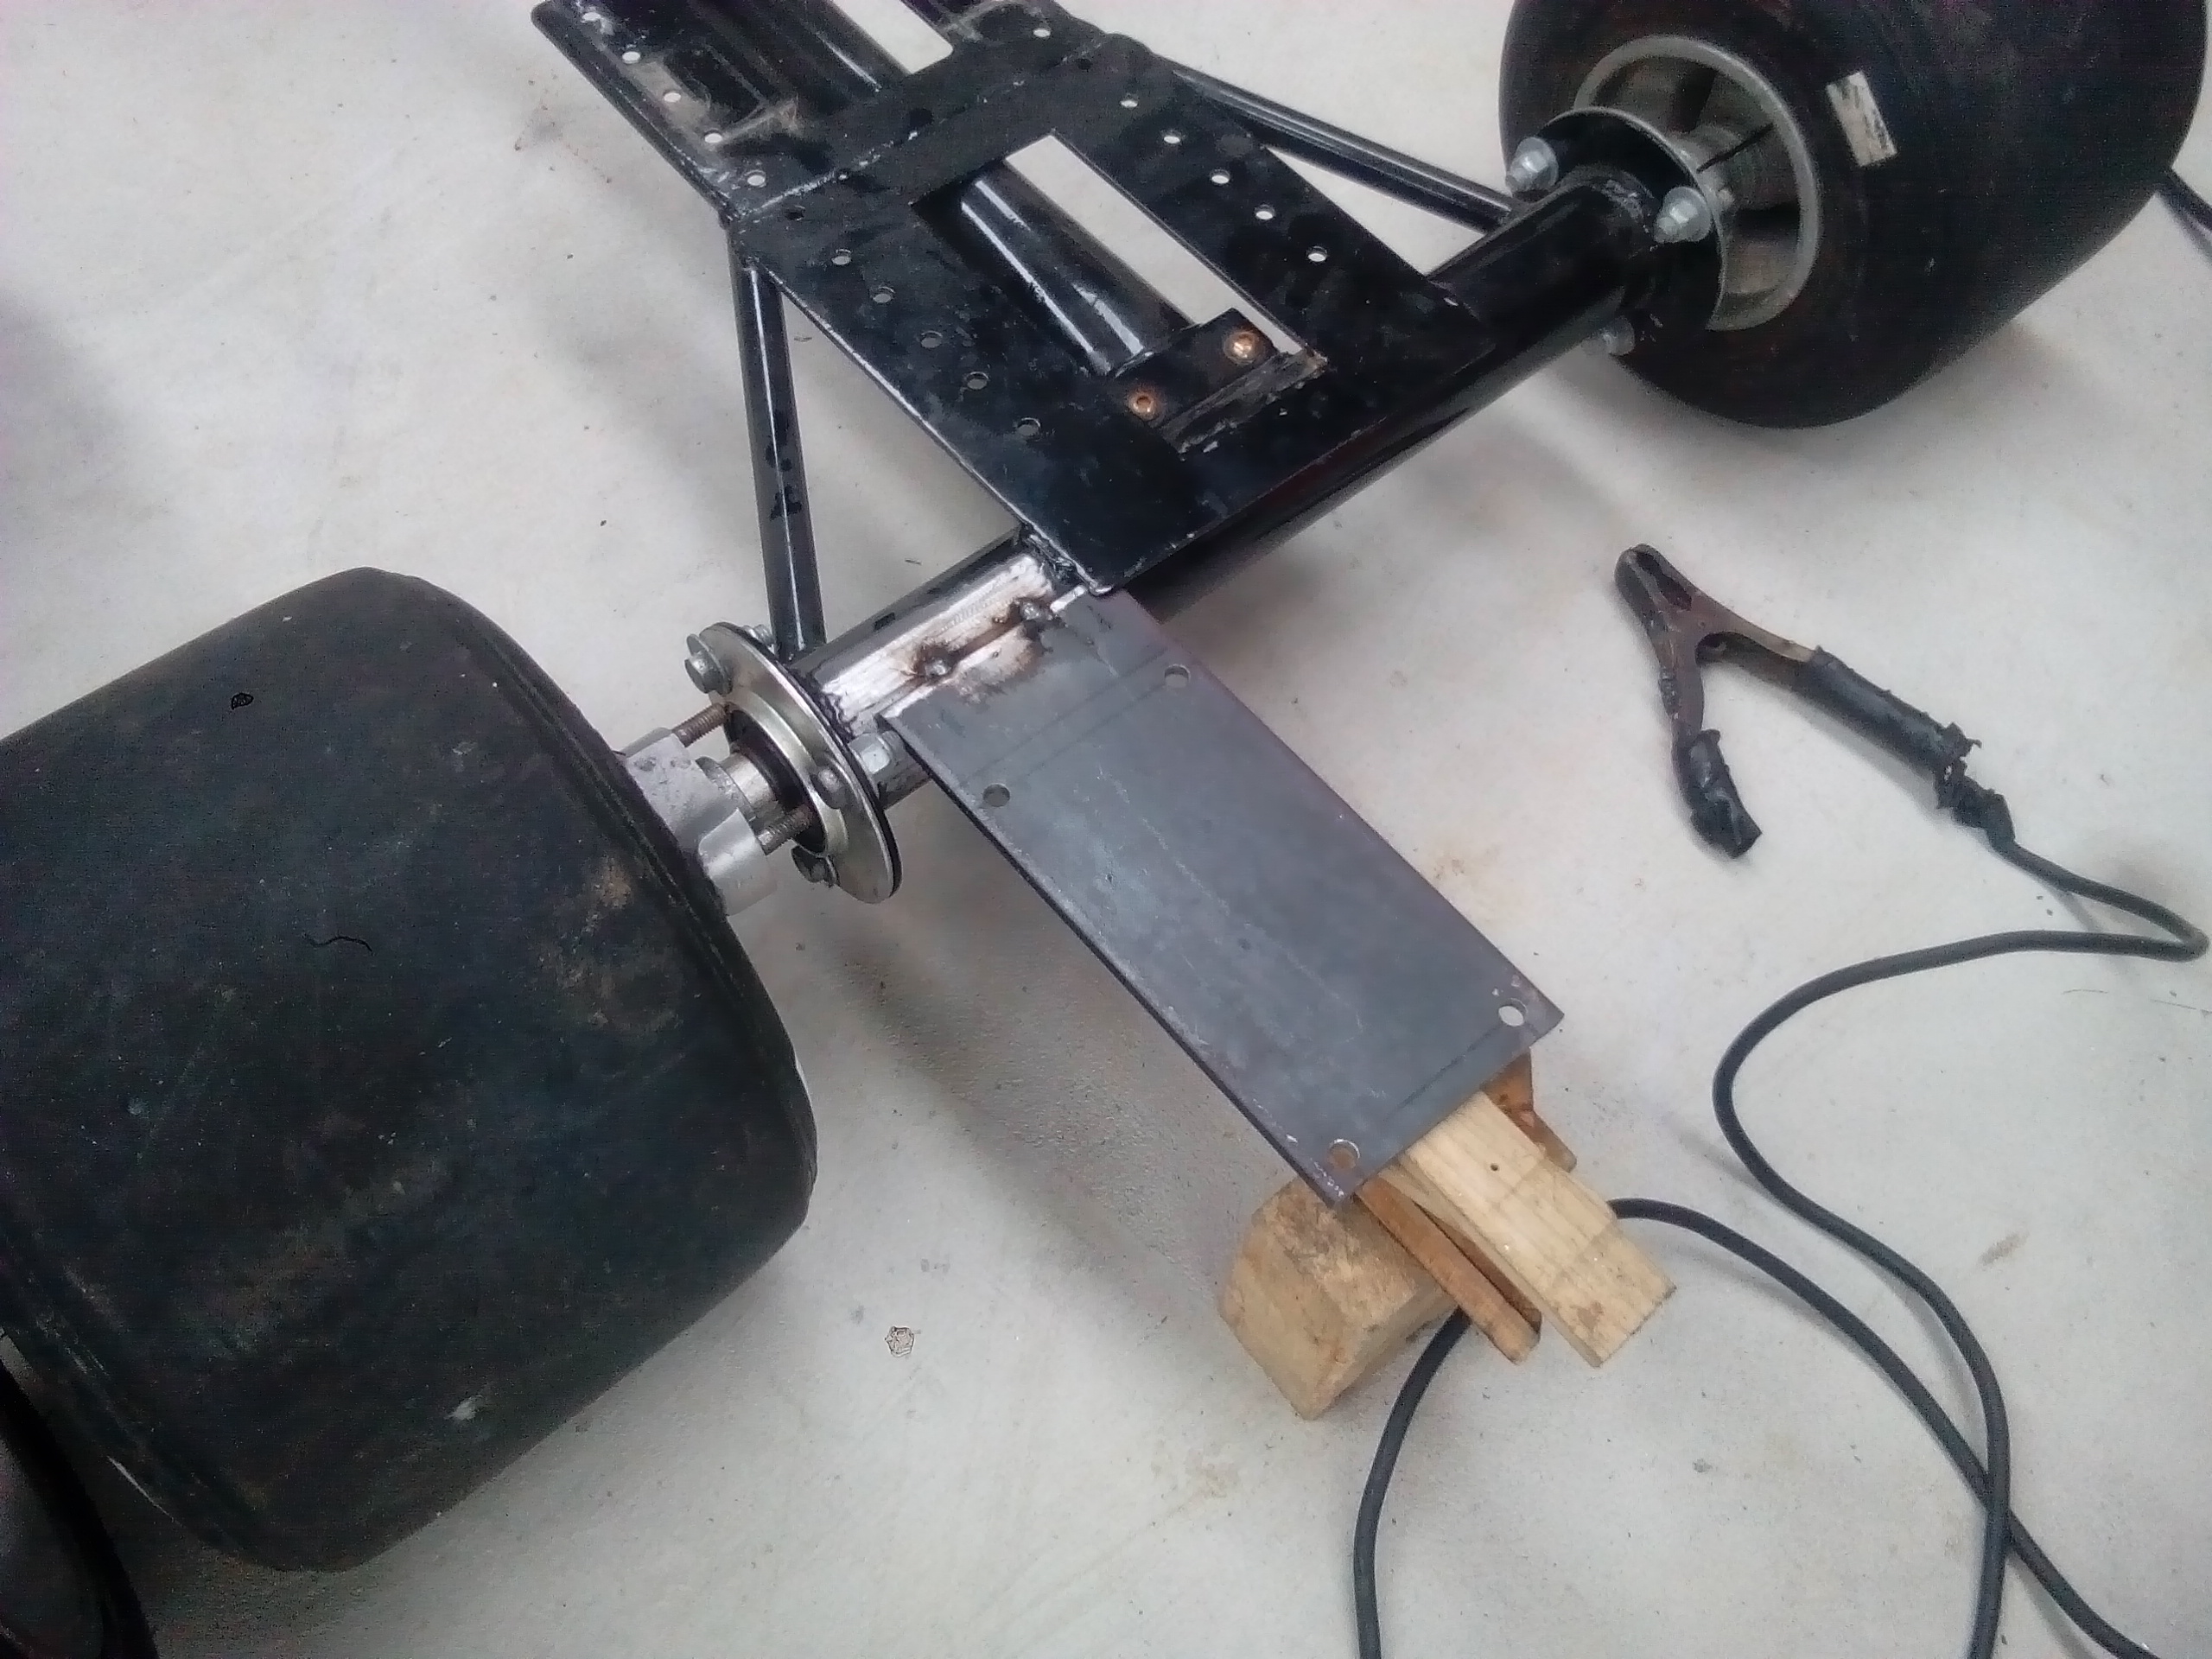
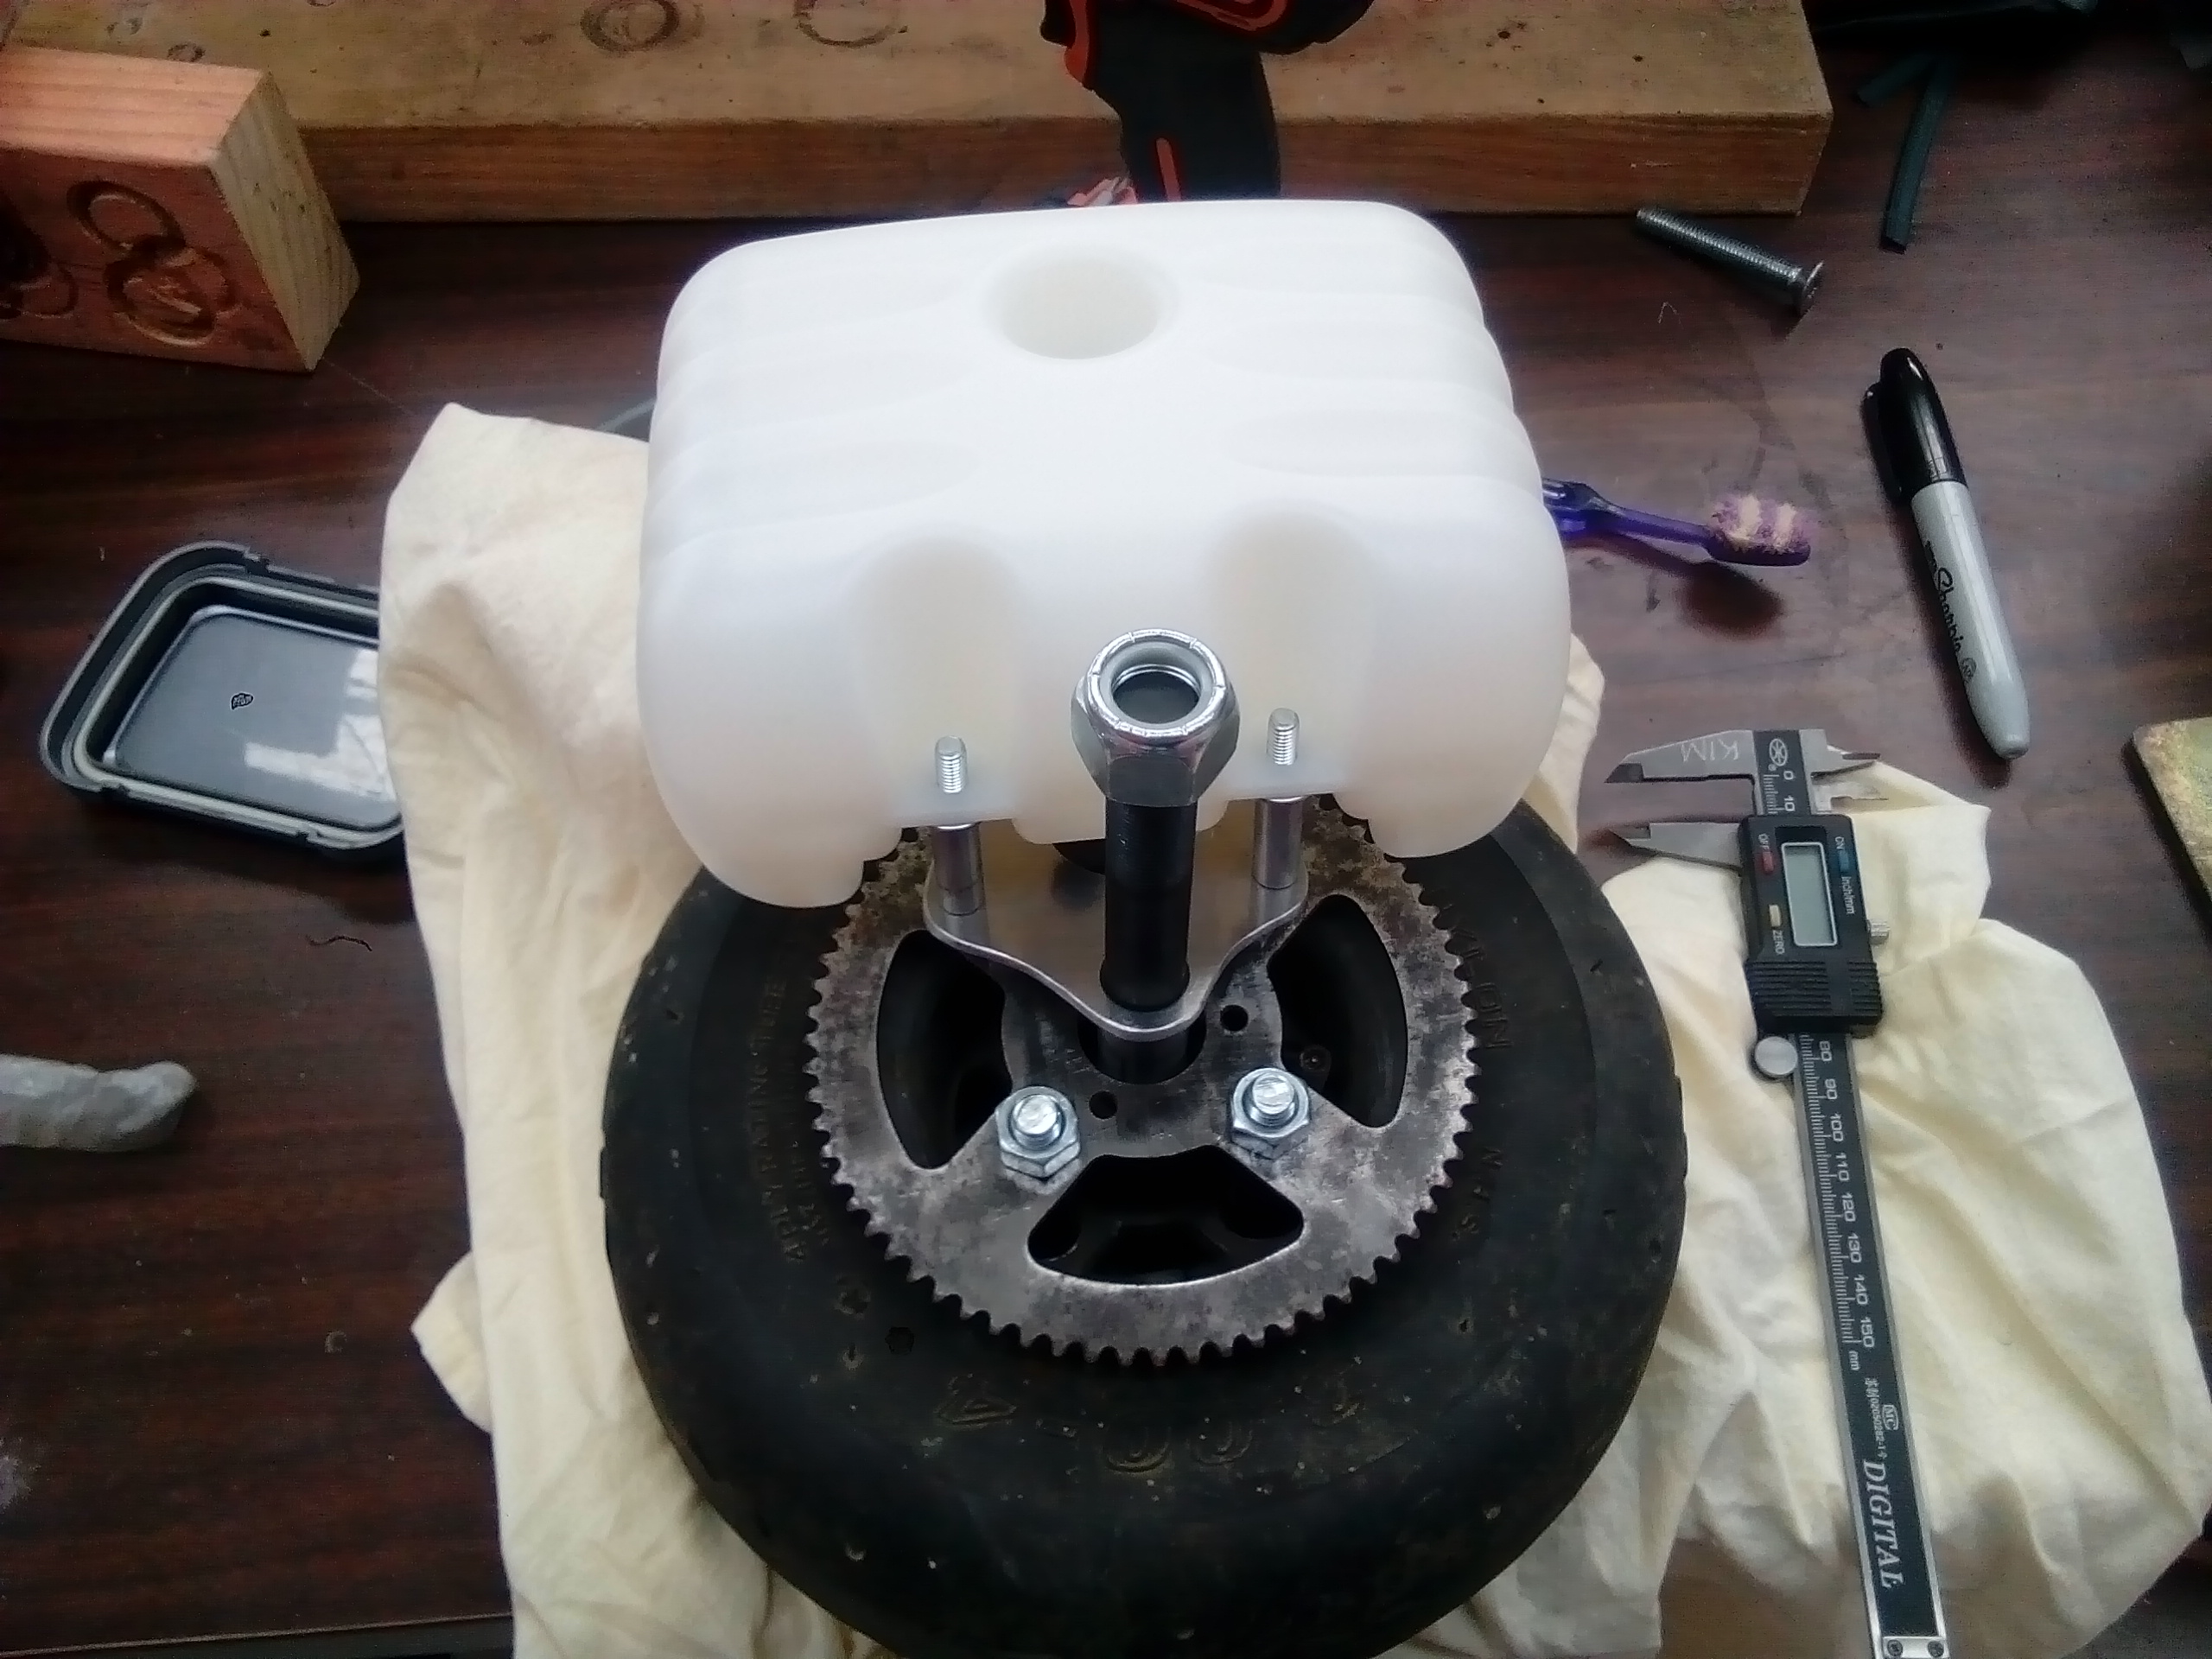
Here it is mocked up:
I've turned up some axle spacers to set the clearance. Looks like it should do the job.
-
1
-
-
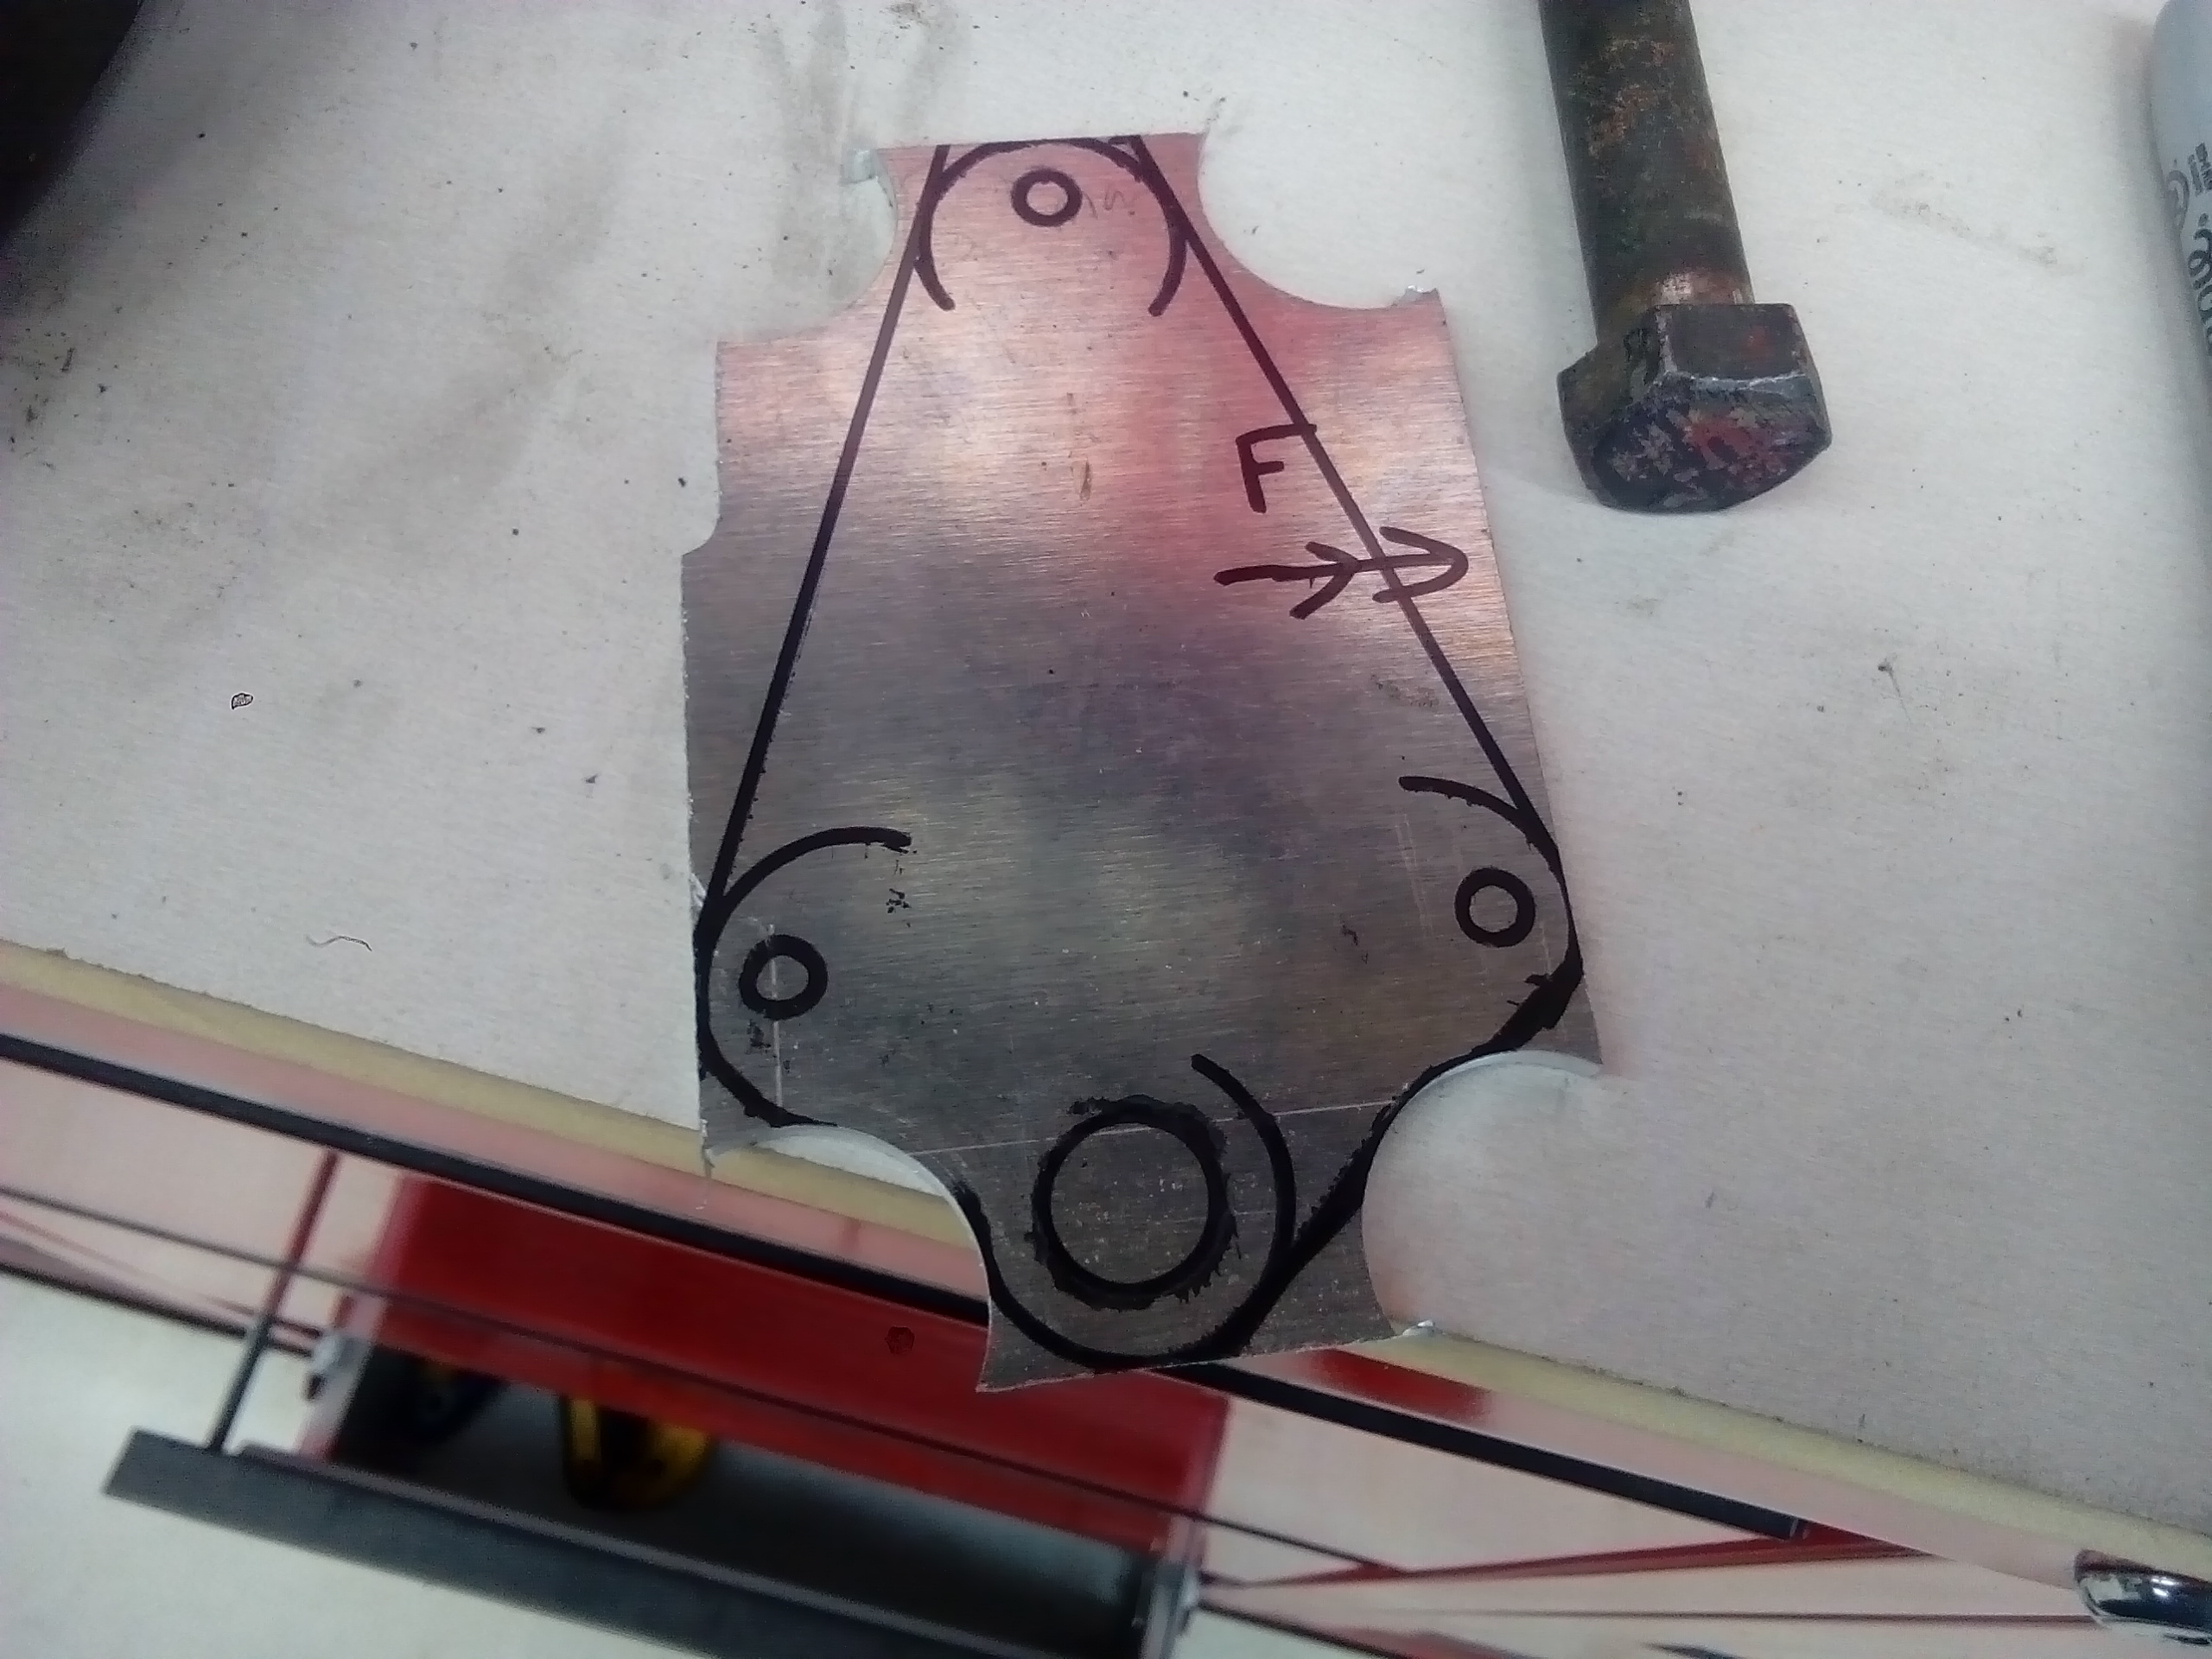
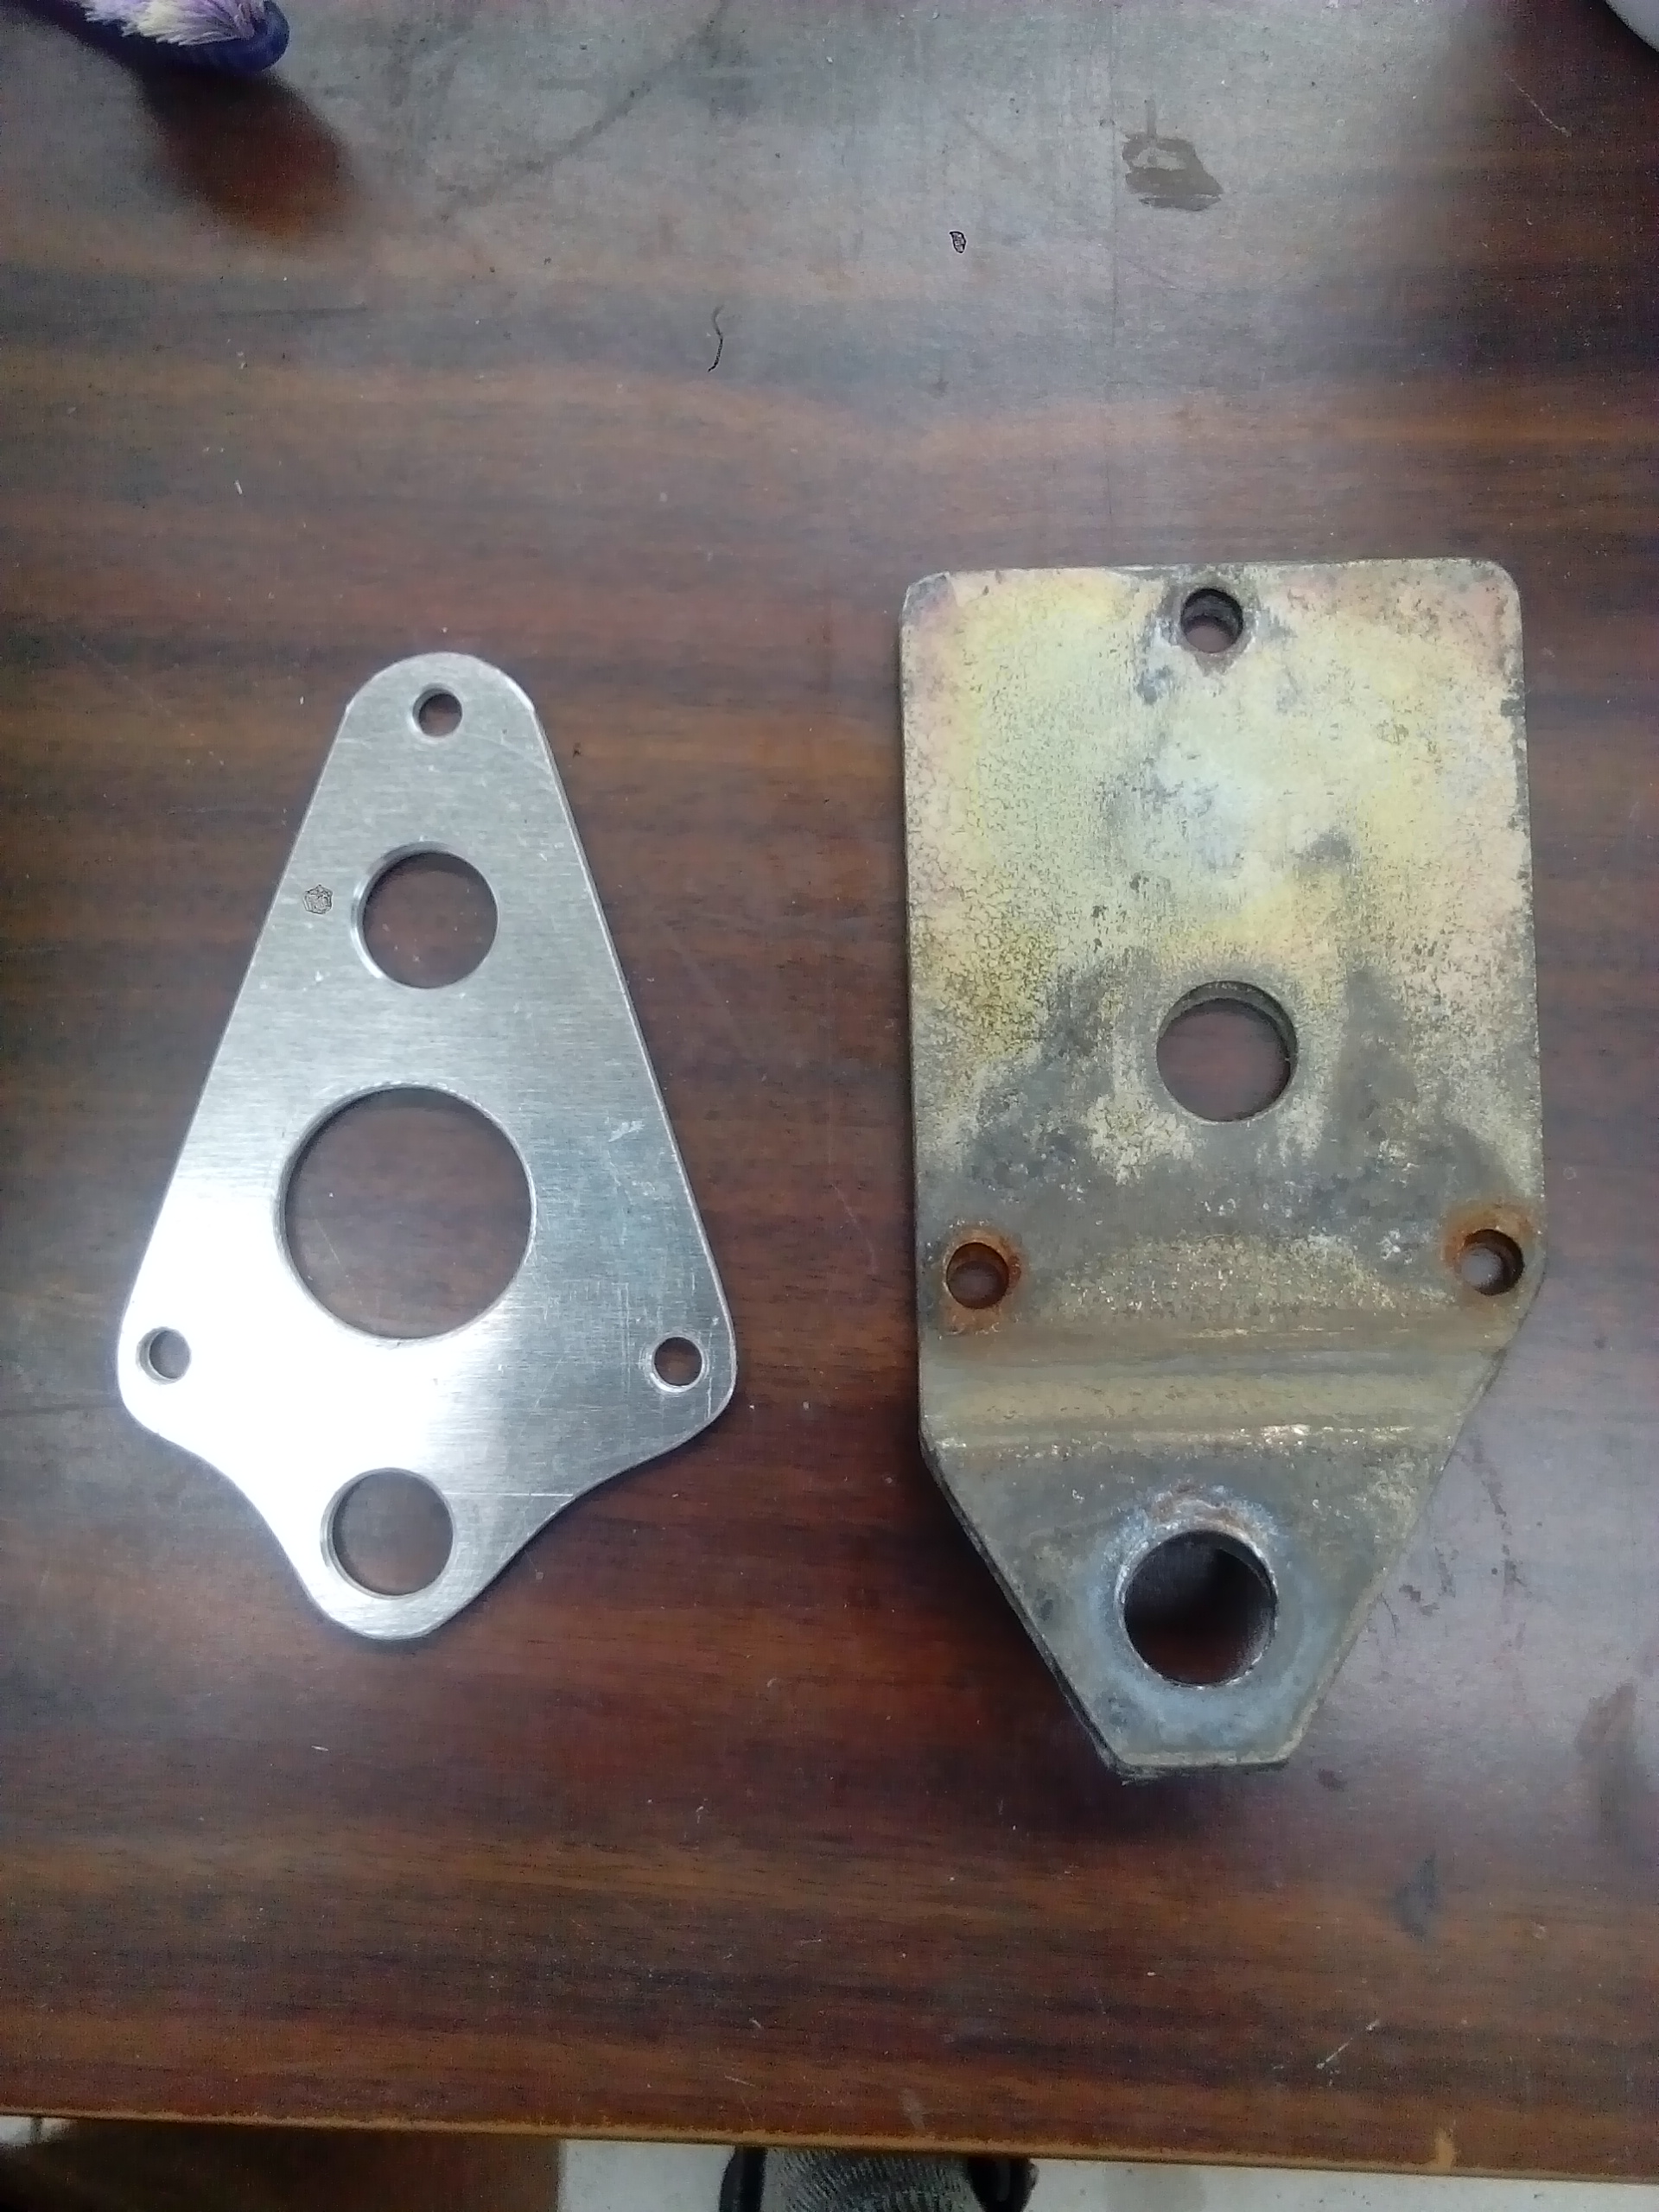
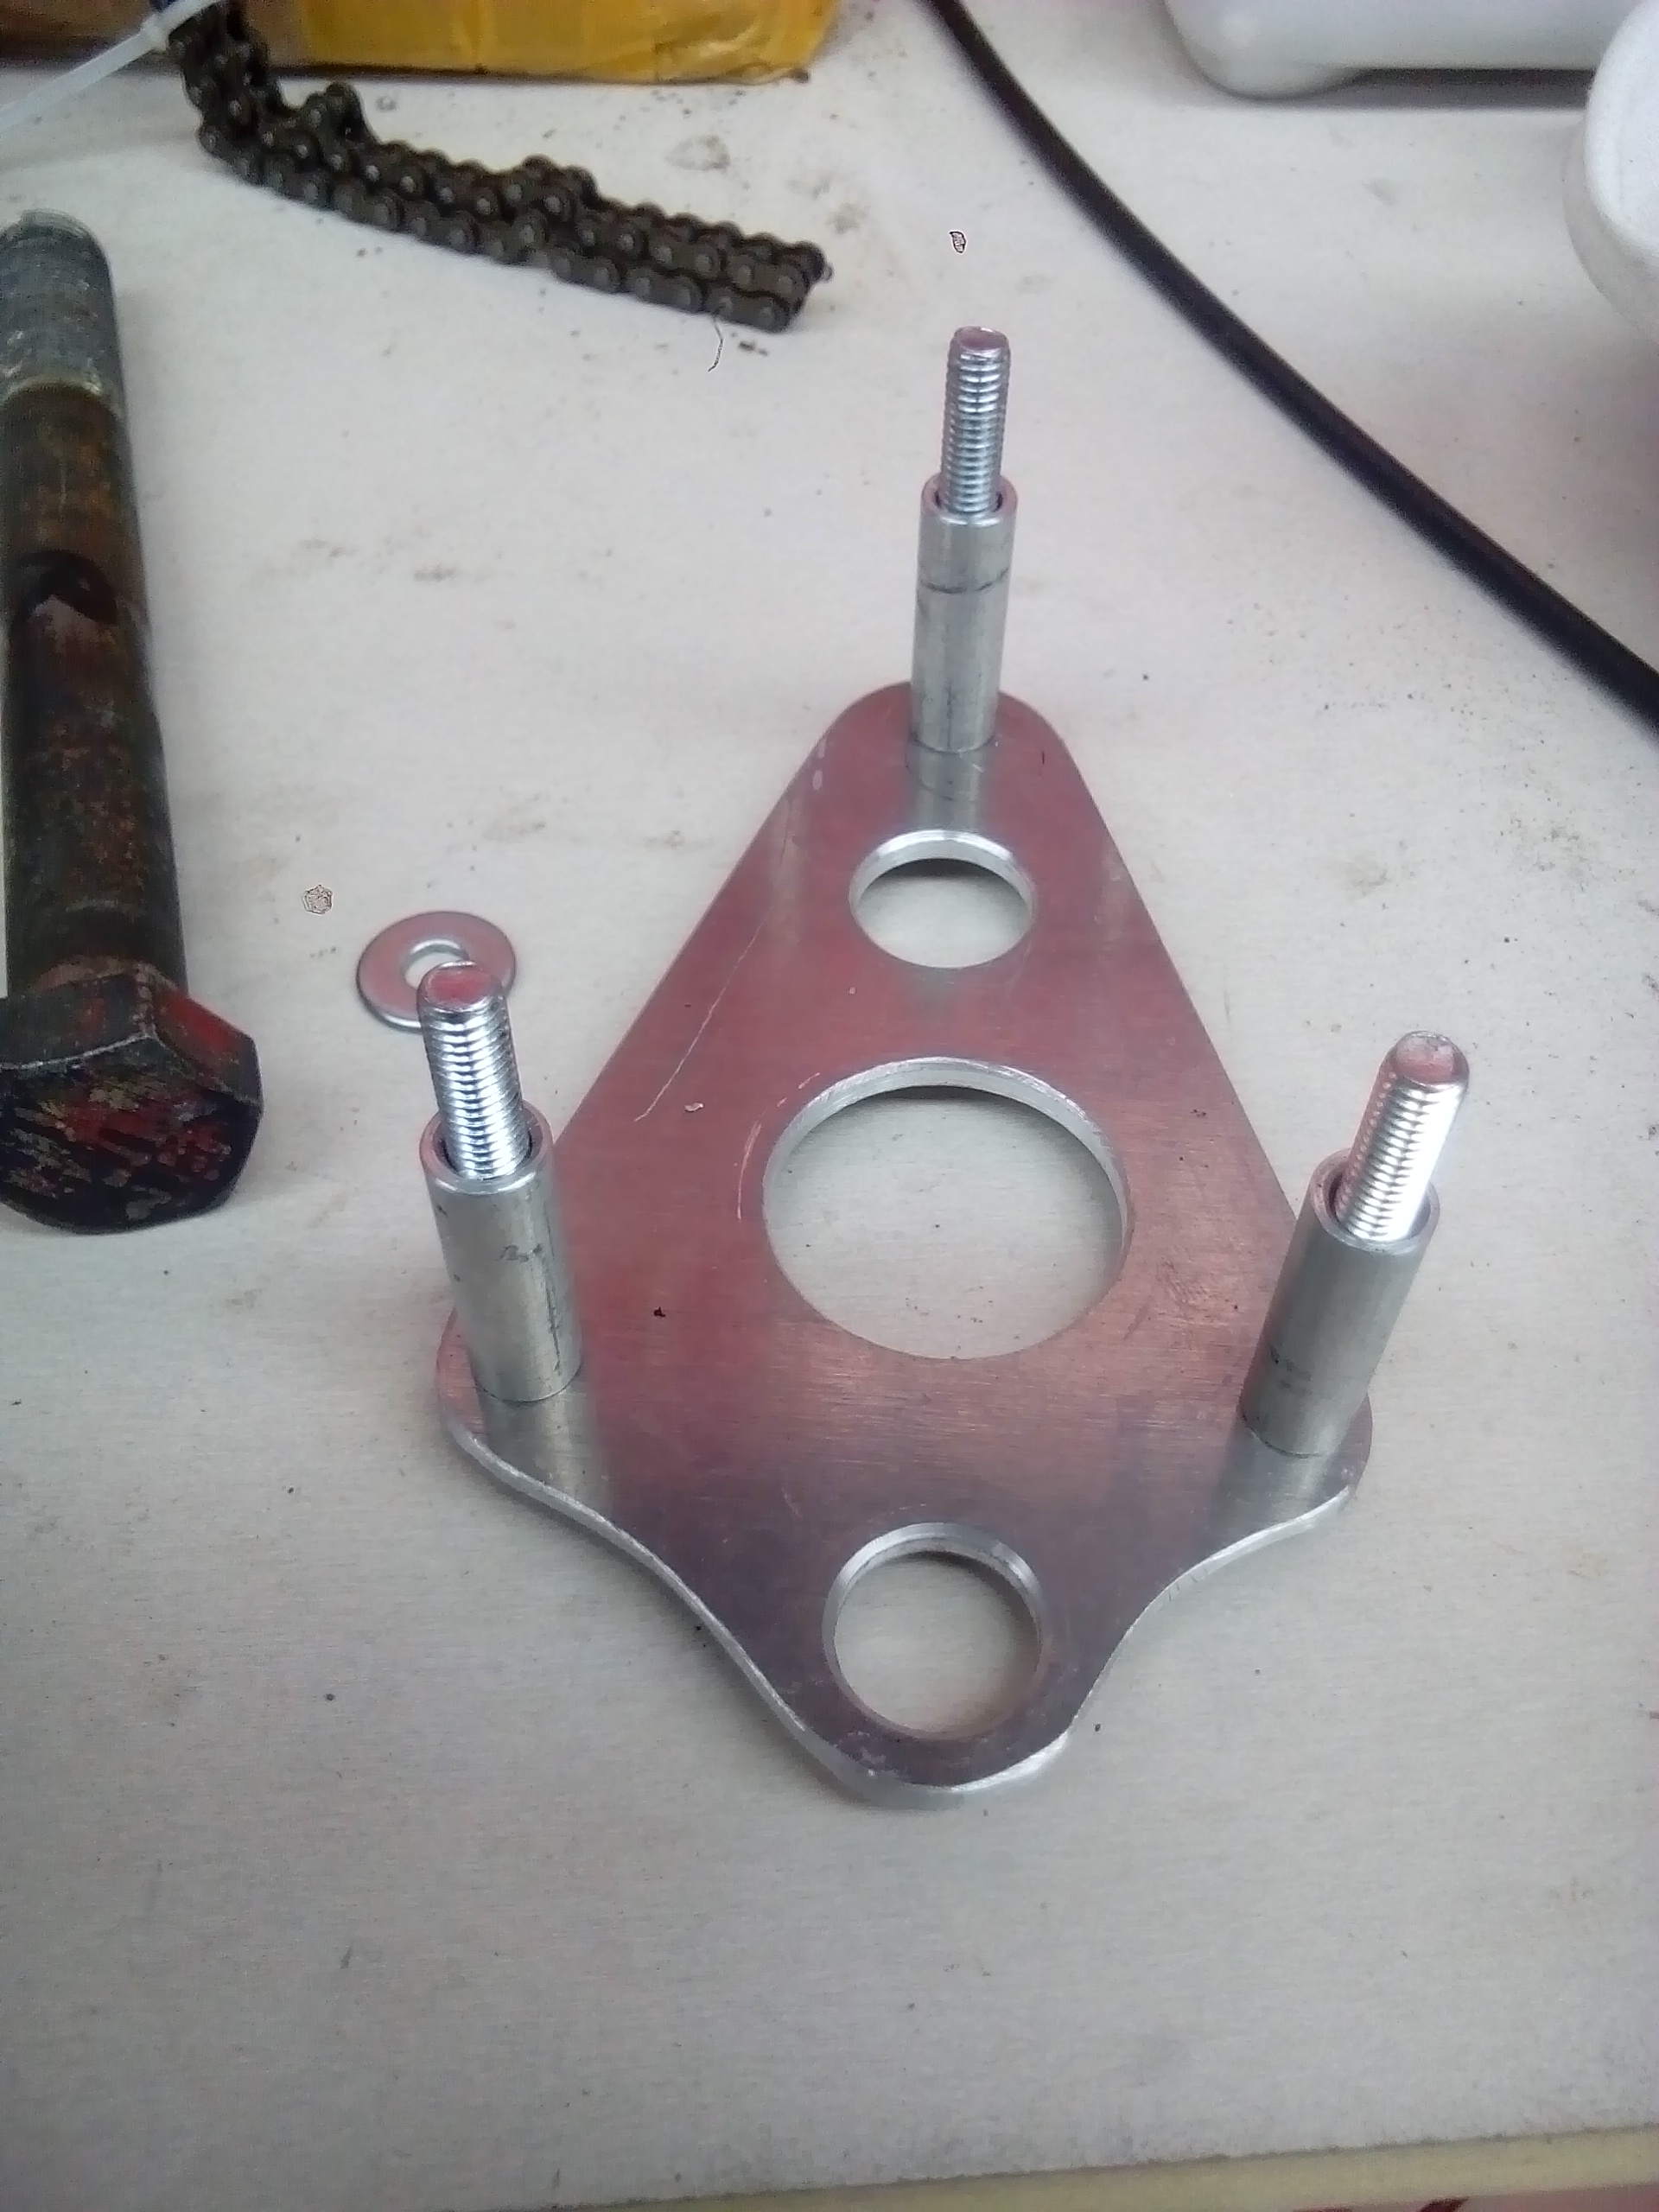
Waiting on frame, so trying to do all the little things. I brought a new gas tank, so made this sexy bracket to secure it to the goped:
Roughed out, and next to the old bracket. I want it to sit flat, bringing the tank closer in. The old bracket was bent to clear the wheel...but someone put a huge sprocket there
Finished.
-
What about one of those bicycle kayak things (2 kayaks with a bike sitting on them)...but V-twinned!!!
-
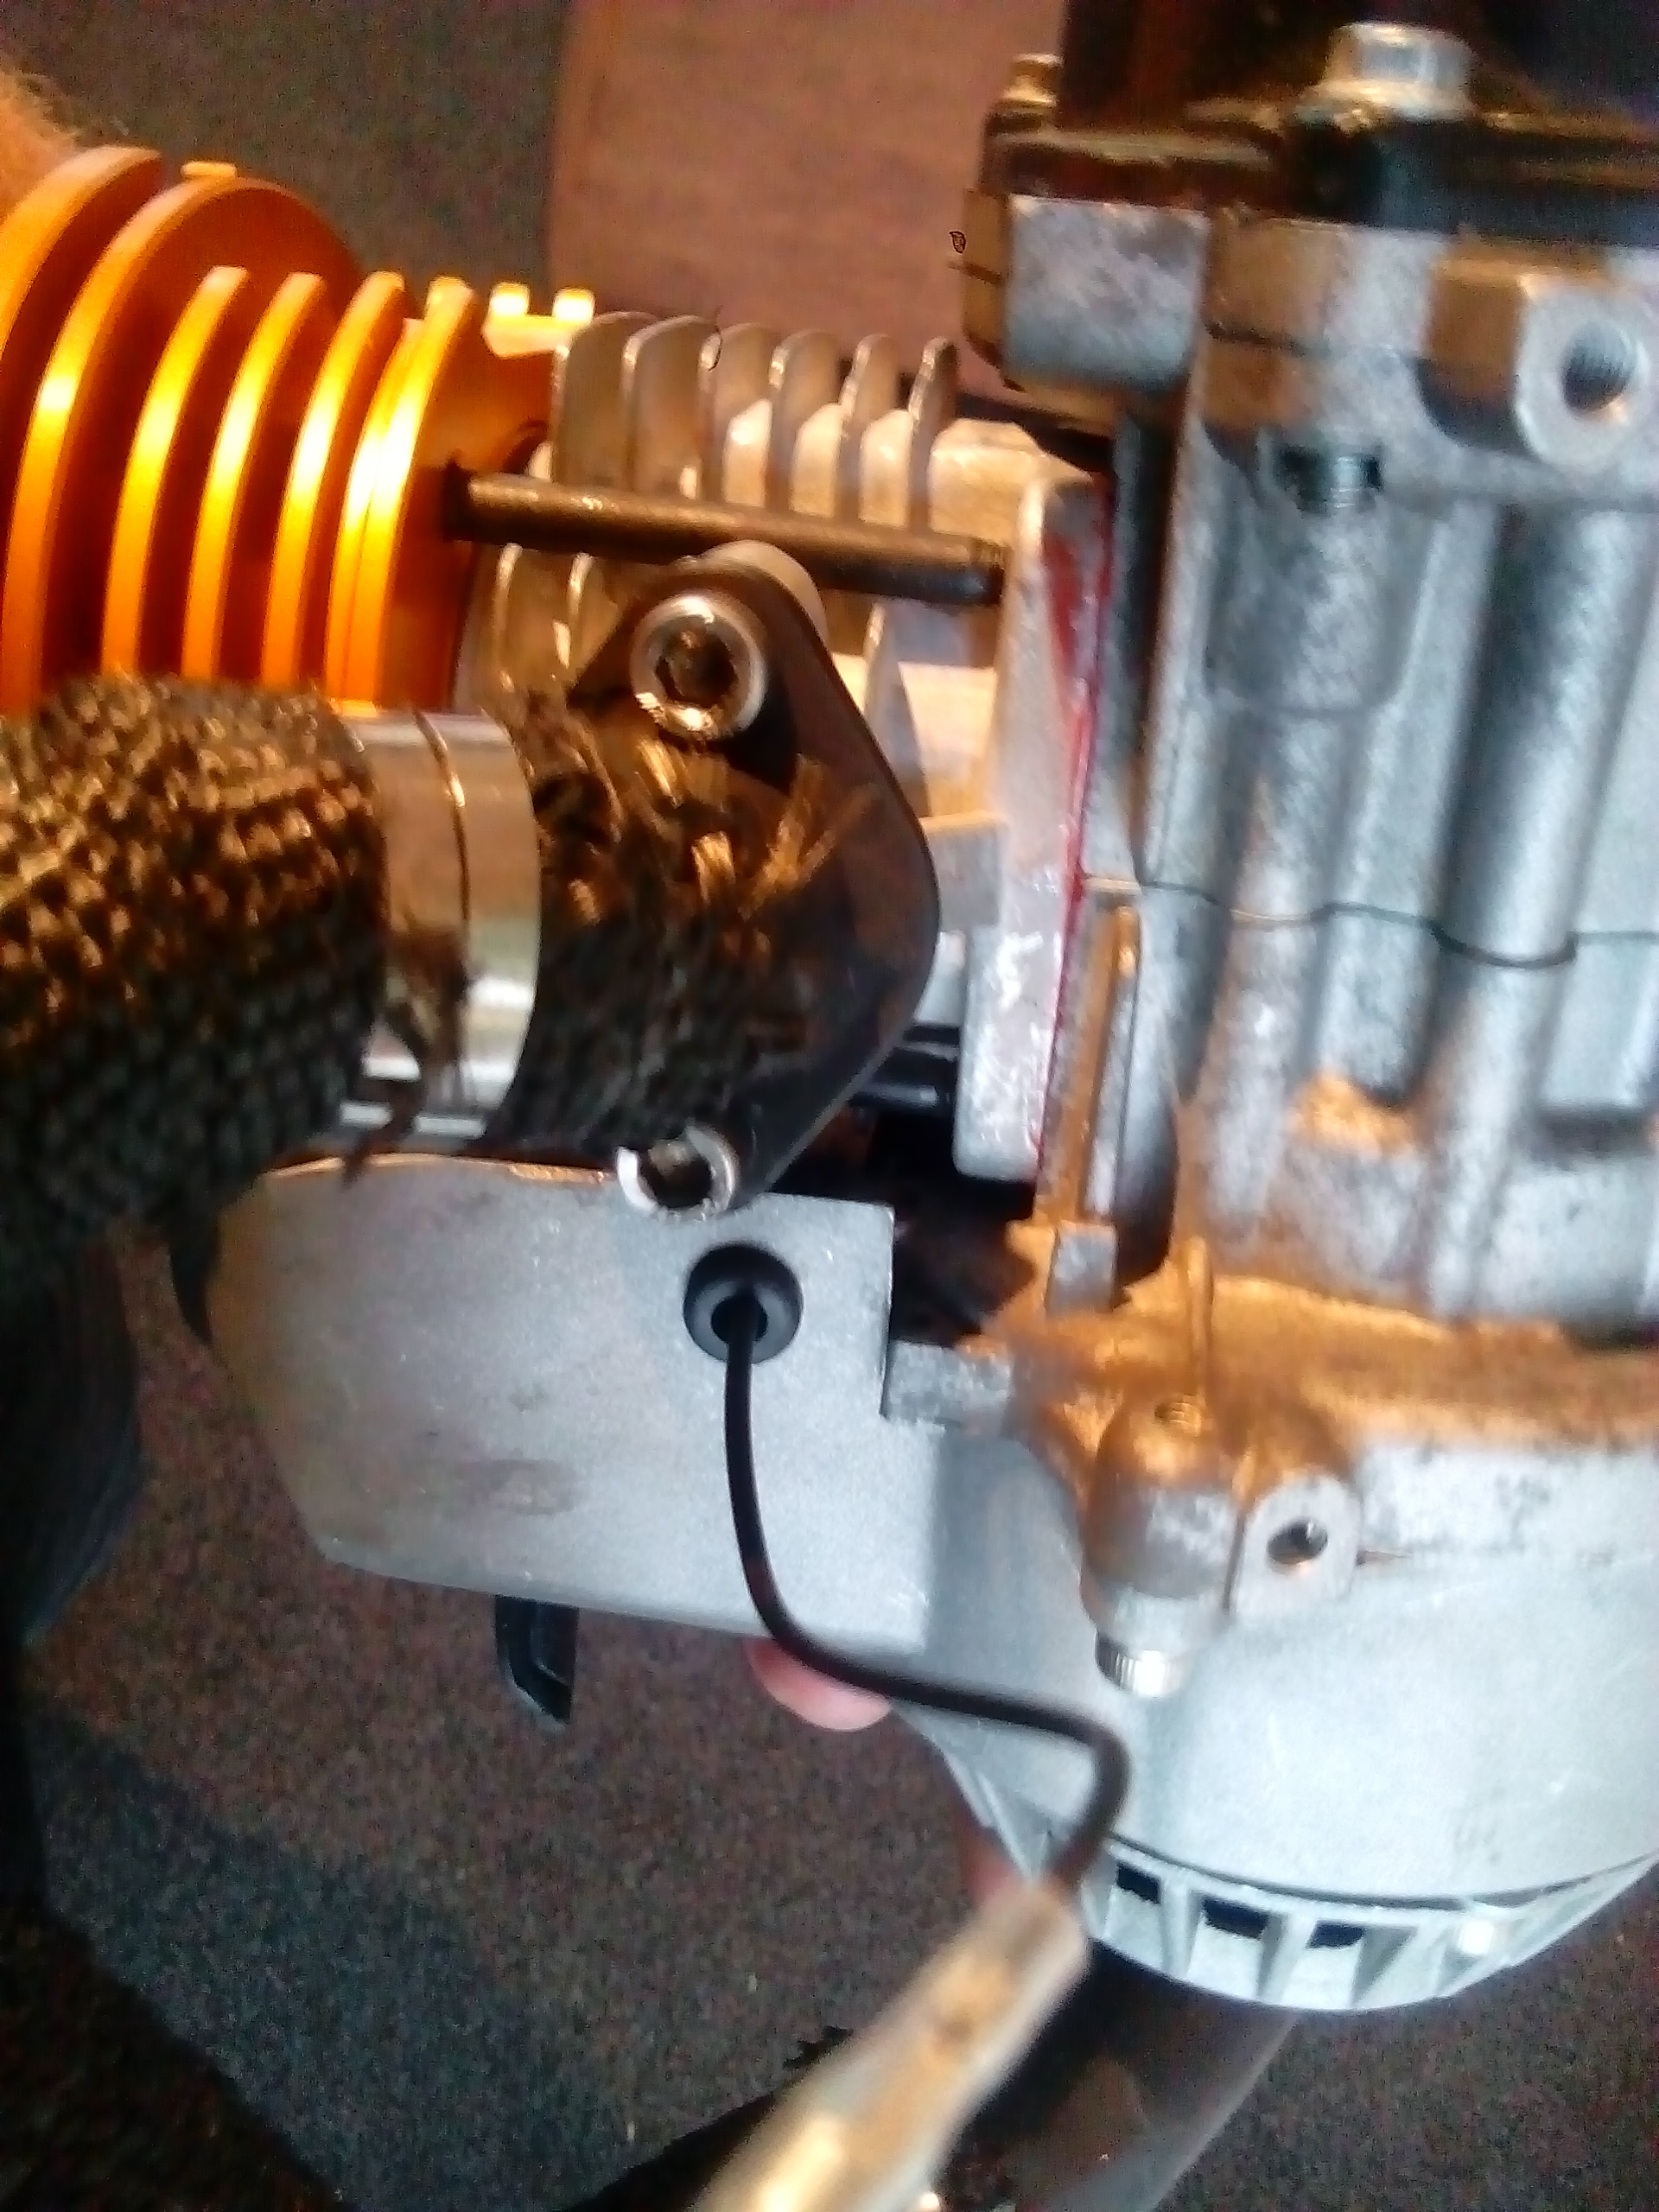
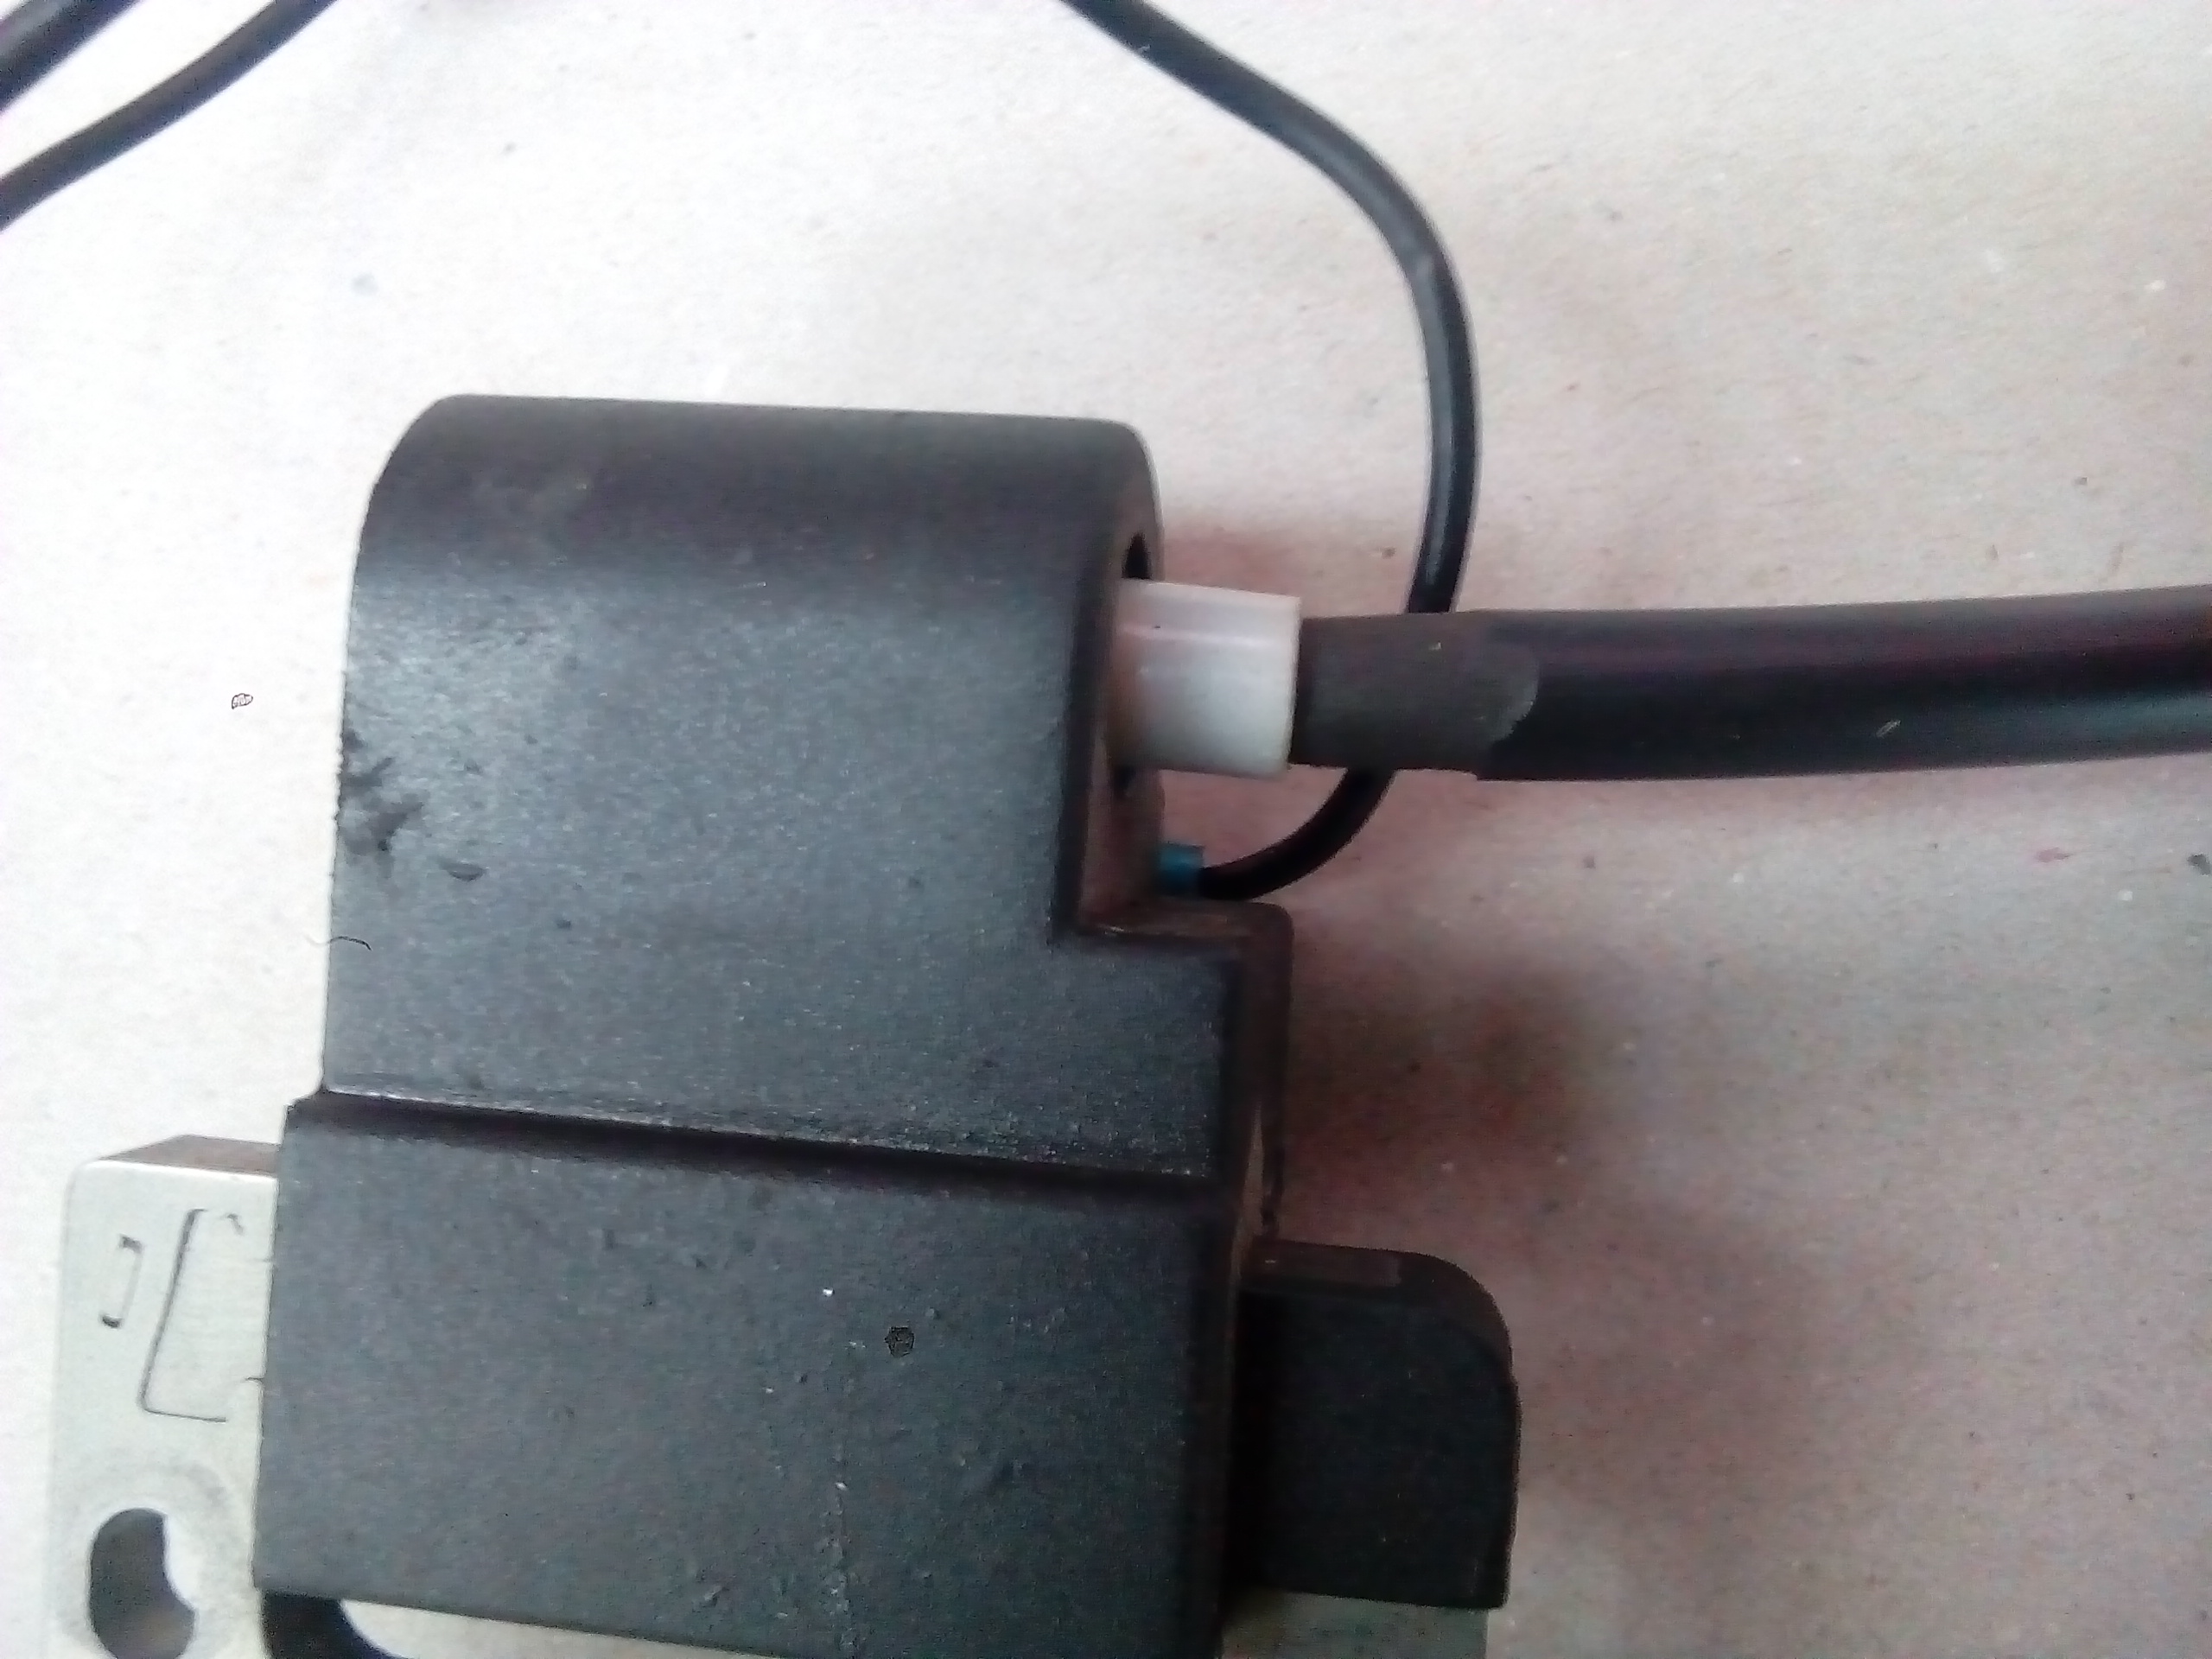
Here ít is finished. Gone from about a stock 5mm lead up to about an 8mm lead.
Also while I had it apart, I installed a grommet and re routed the kill switch (wire to ground the coil, to stop the motor).
This looks a lot tidier. You won't see it once motors back on the frame.
Pictured above with new modifications.
-
4
-
-
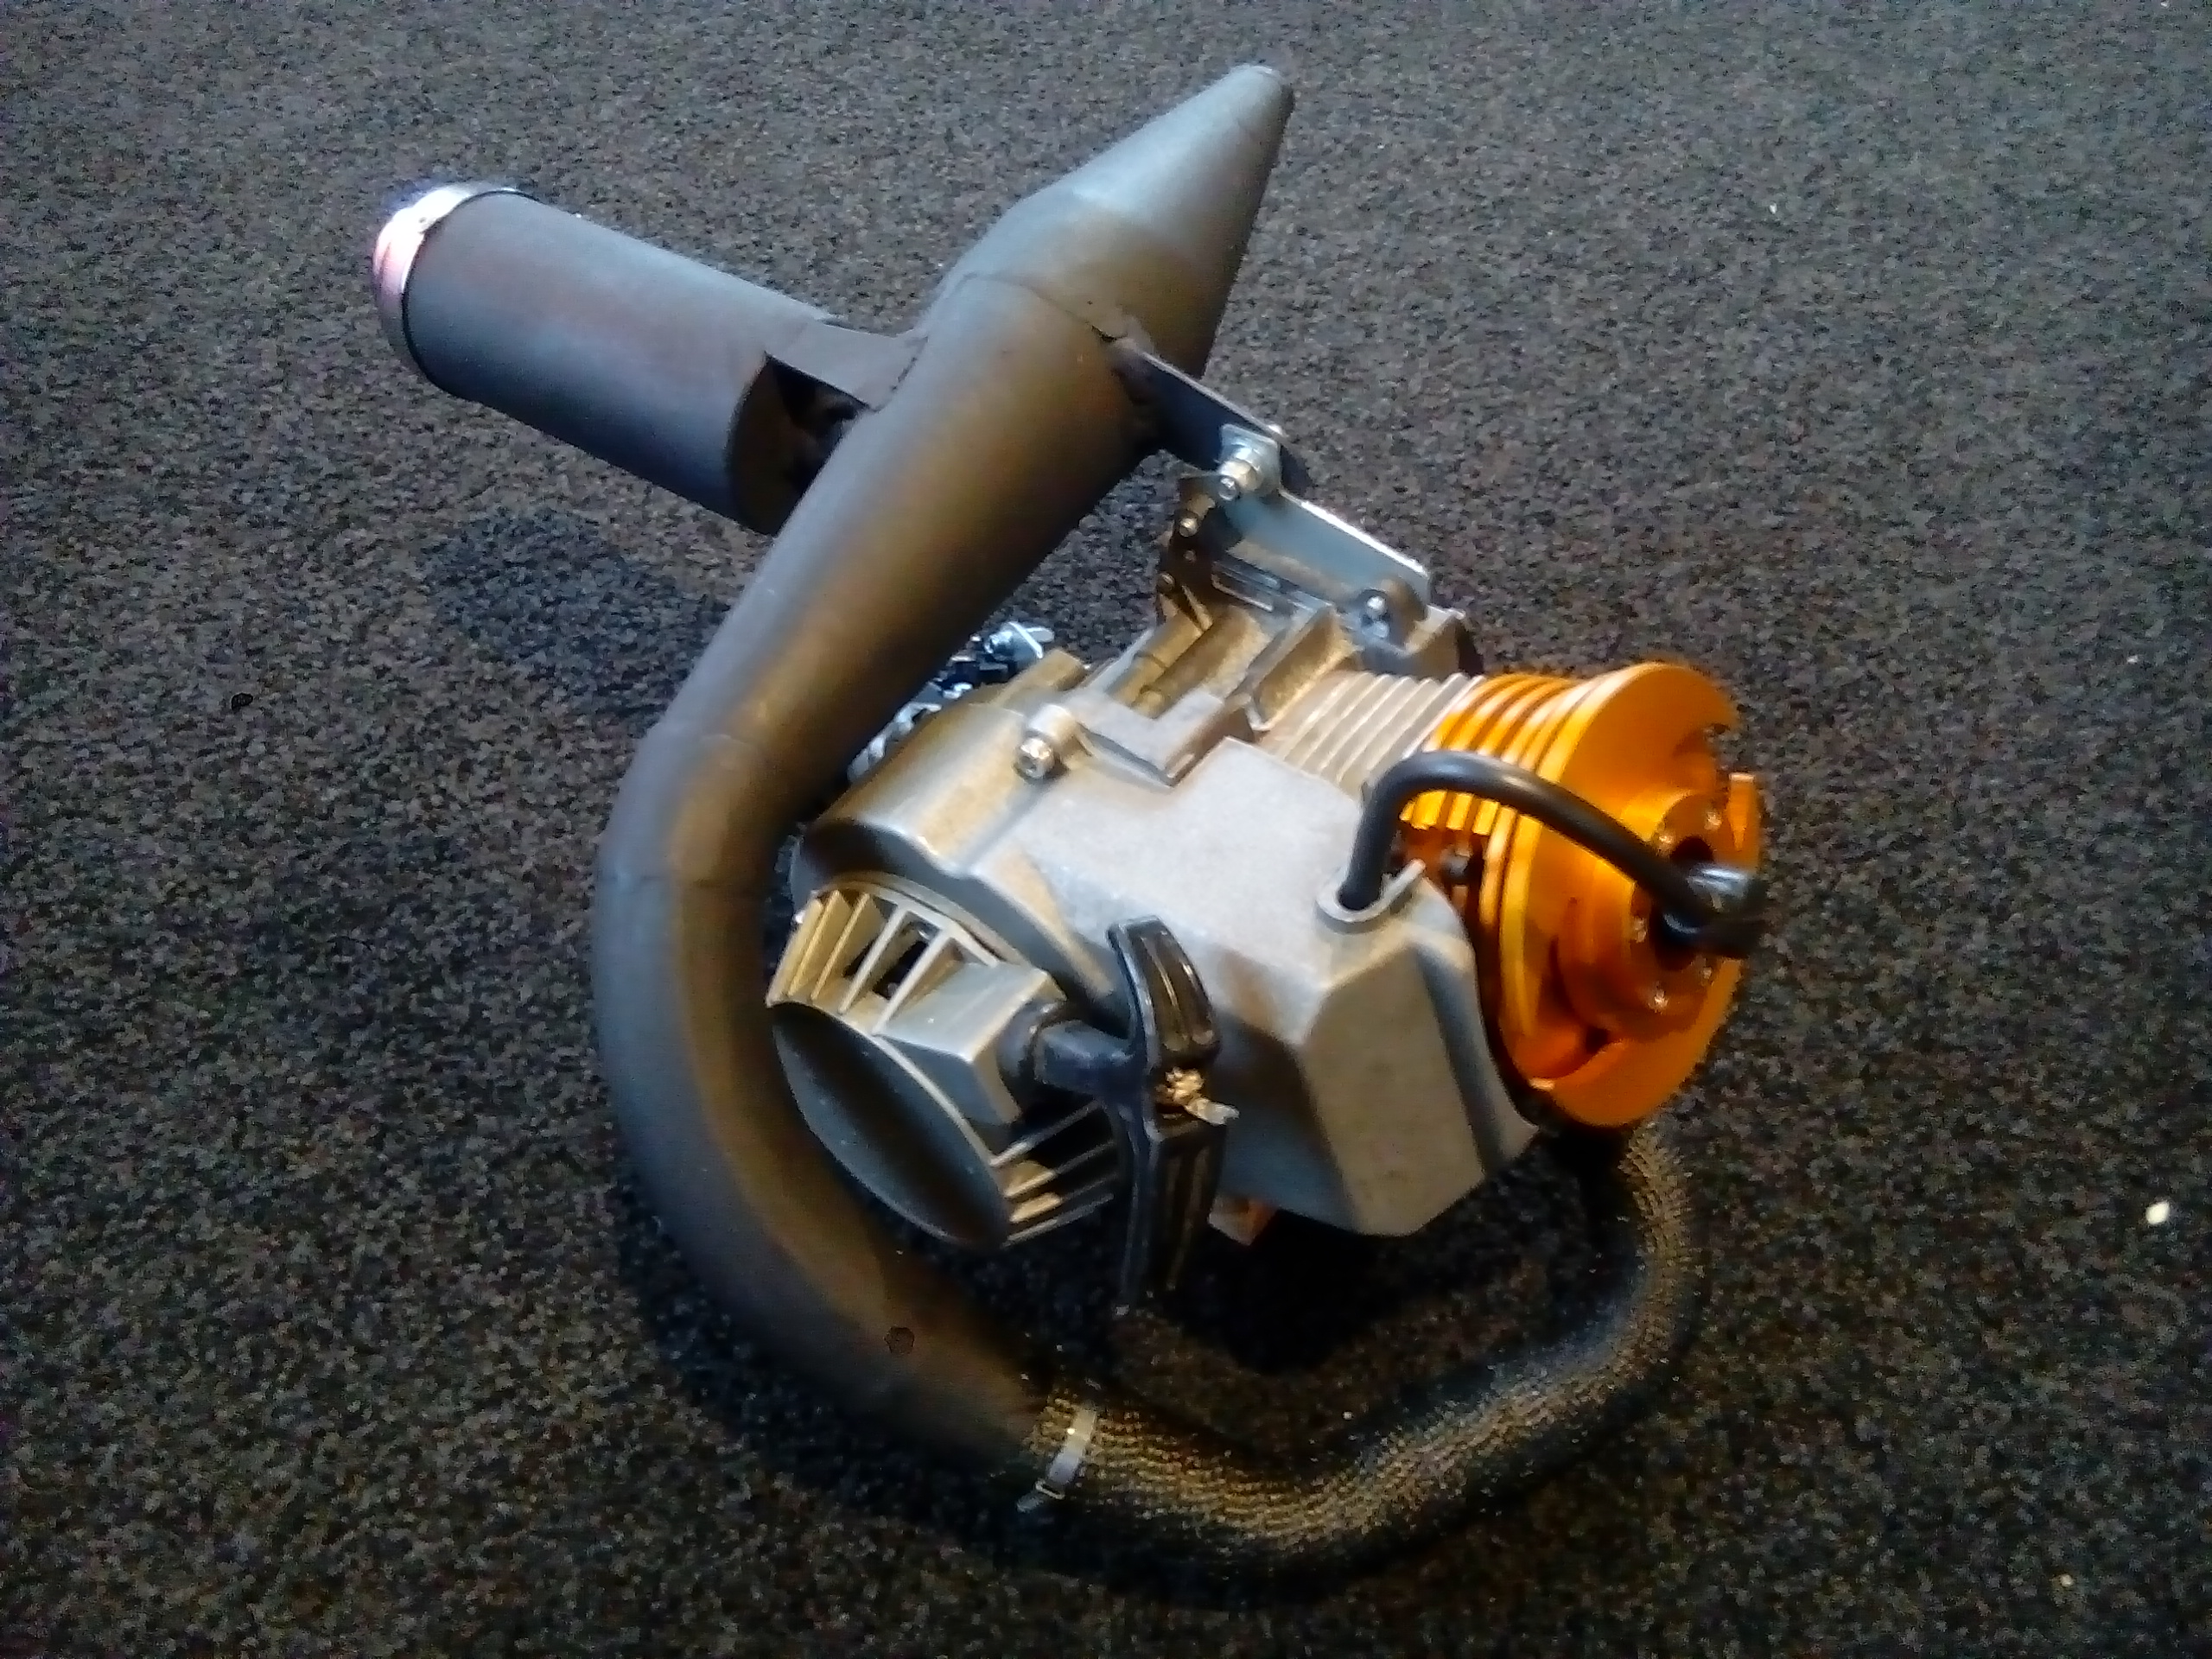
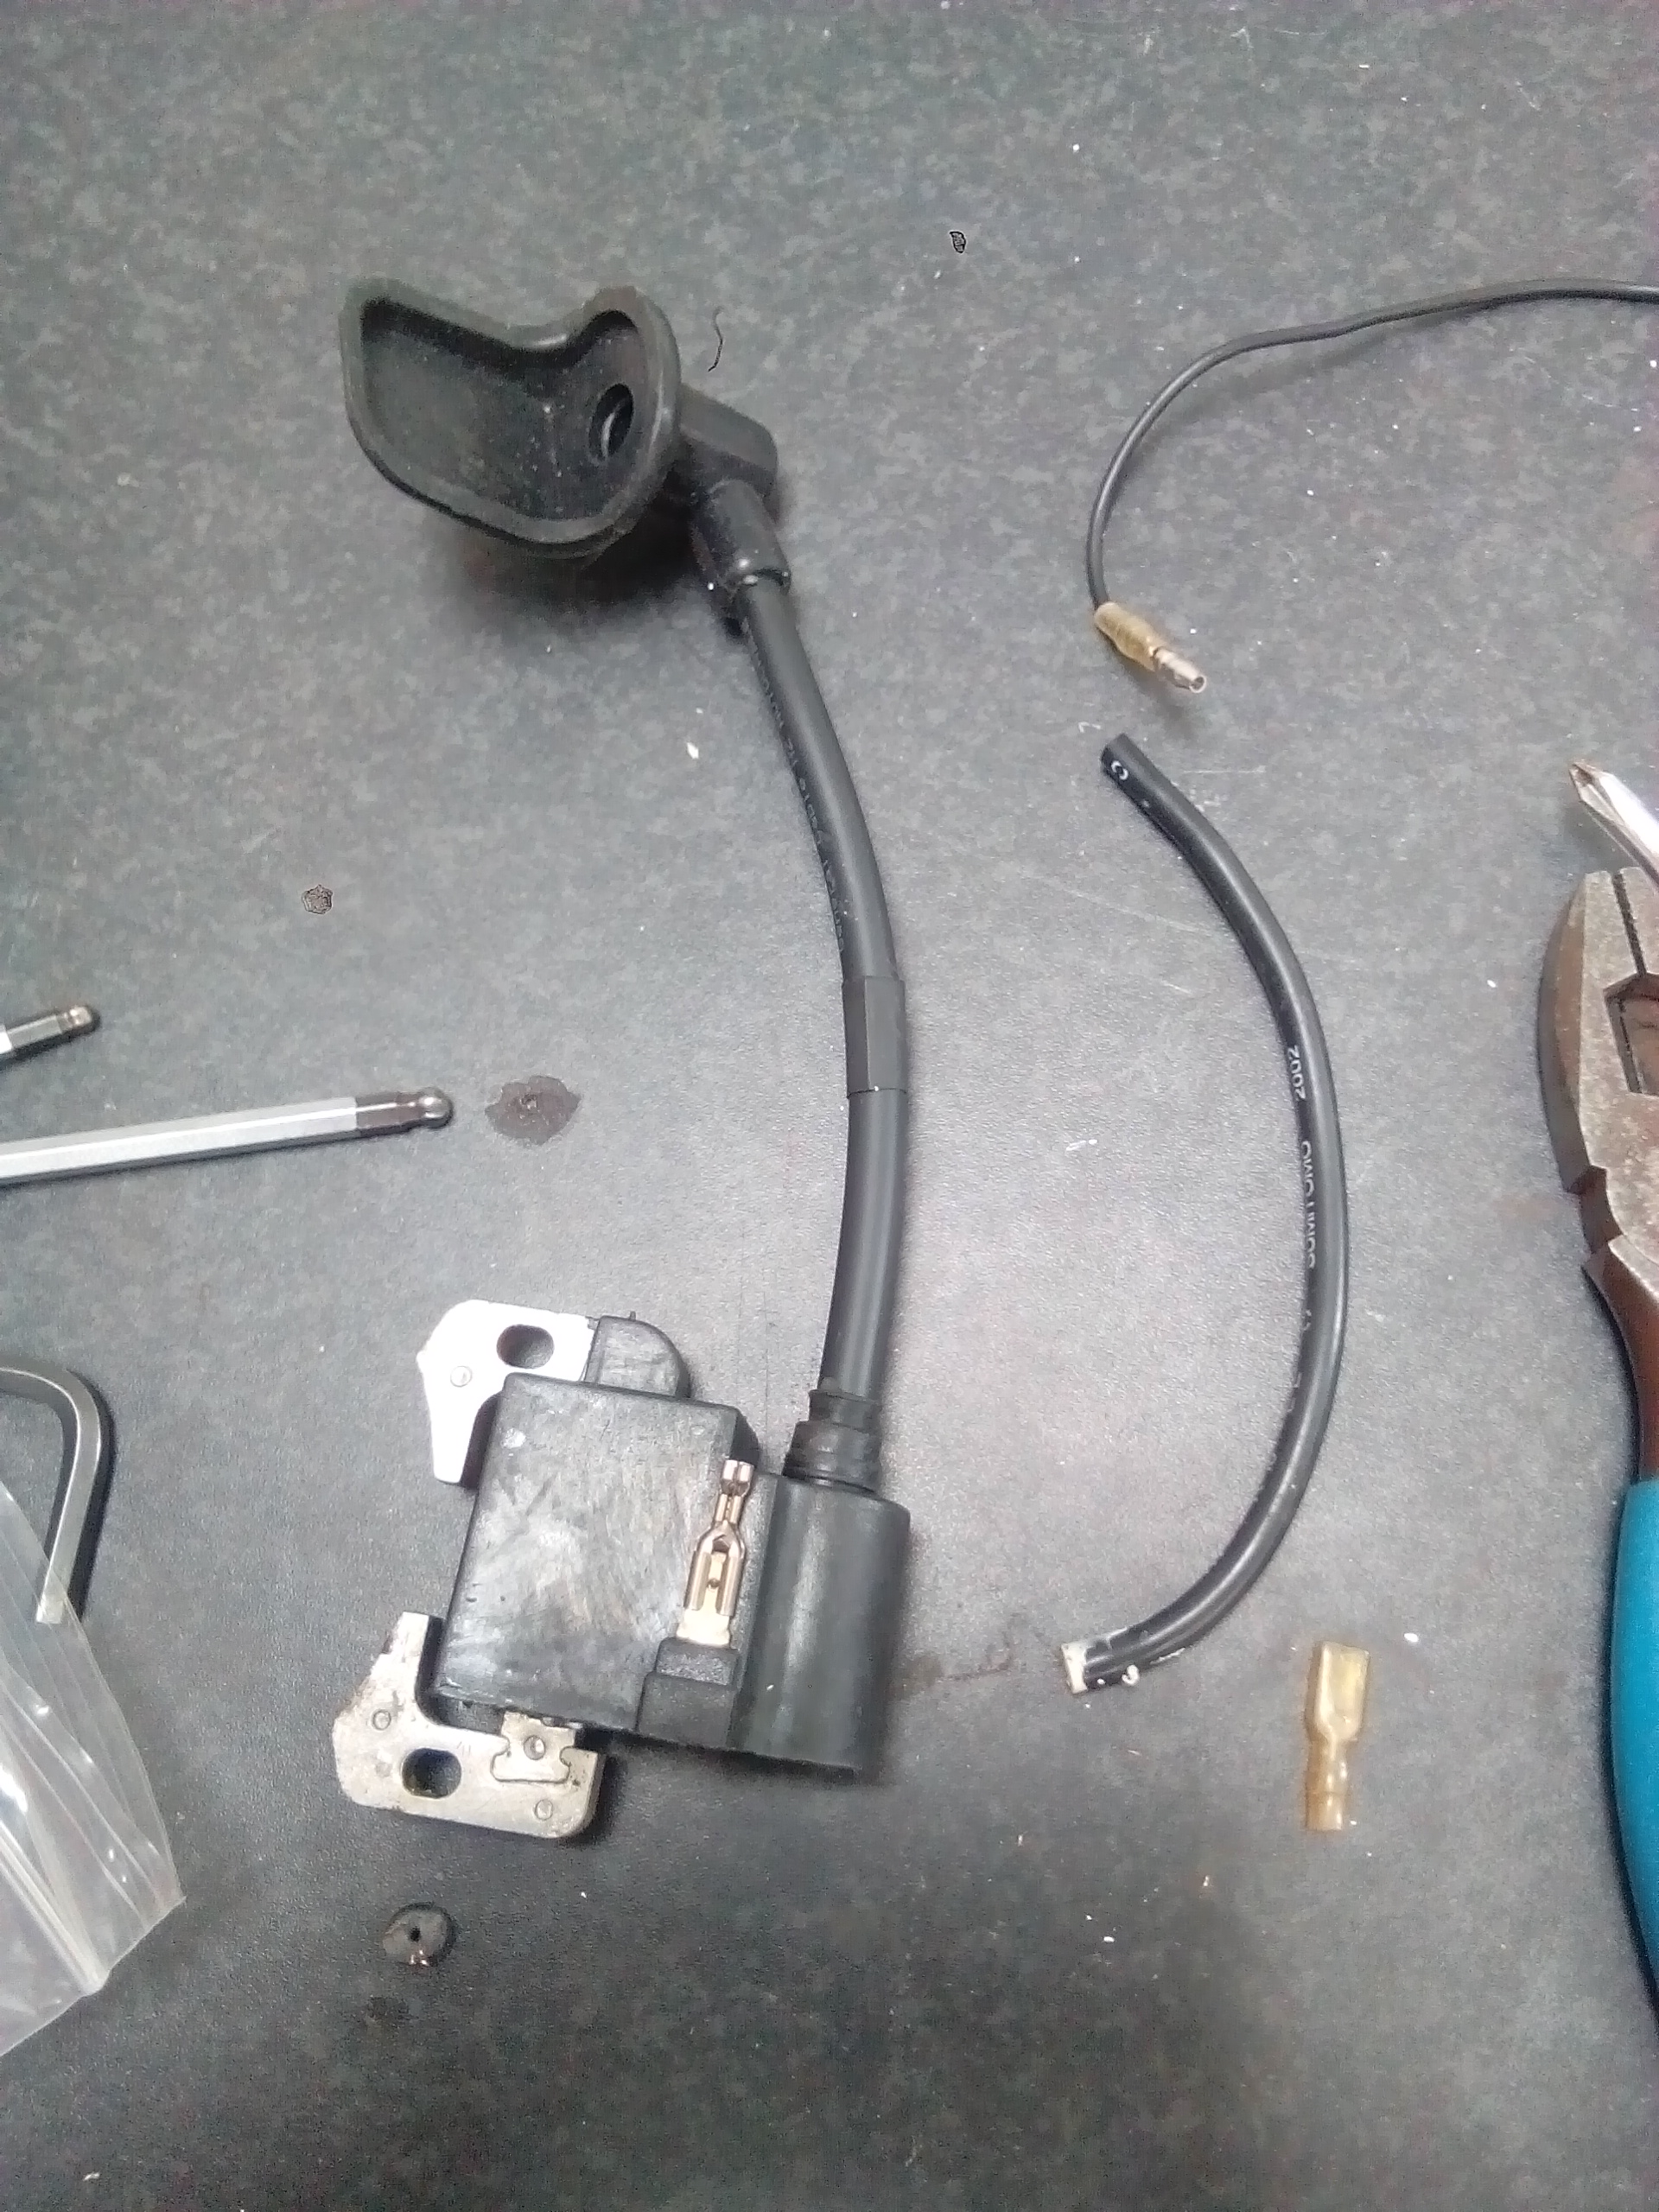
I was advised the stock tiny little HT lead (spark plug) doesn't transmit to well at higher rpm's.
The solution is to remove it, and replace it with a larger non suppressed lead.
This was a dummy fit on a dud coil to see if I could do it. I used a linisher to reduce the OD of the larger HT lead to fit into the white socket. On the real deal, there's a rubber boot covering it.
Spark plug connector installed. Once again there's a rubber boot to go over it.
Finished.
-
1
-
-
Im keen.
-
Oh i do like that tacho...more information please?
-
2 hours ago, Mof said:
Could you not do a heat shield rather than wrap?
Yes, but way more work
1 hour ago, Muncie said:There are advantages keeping heat in ya pipes I couldn't recall what they are right now. Heat wrap done done right looks sexy anyways.
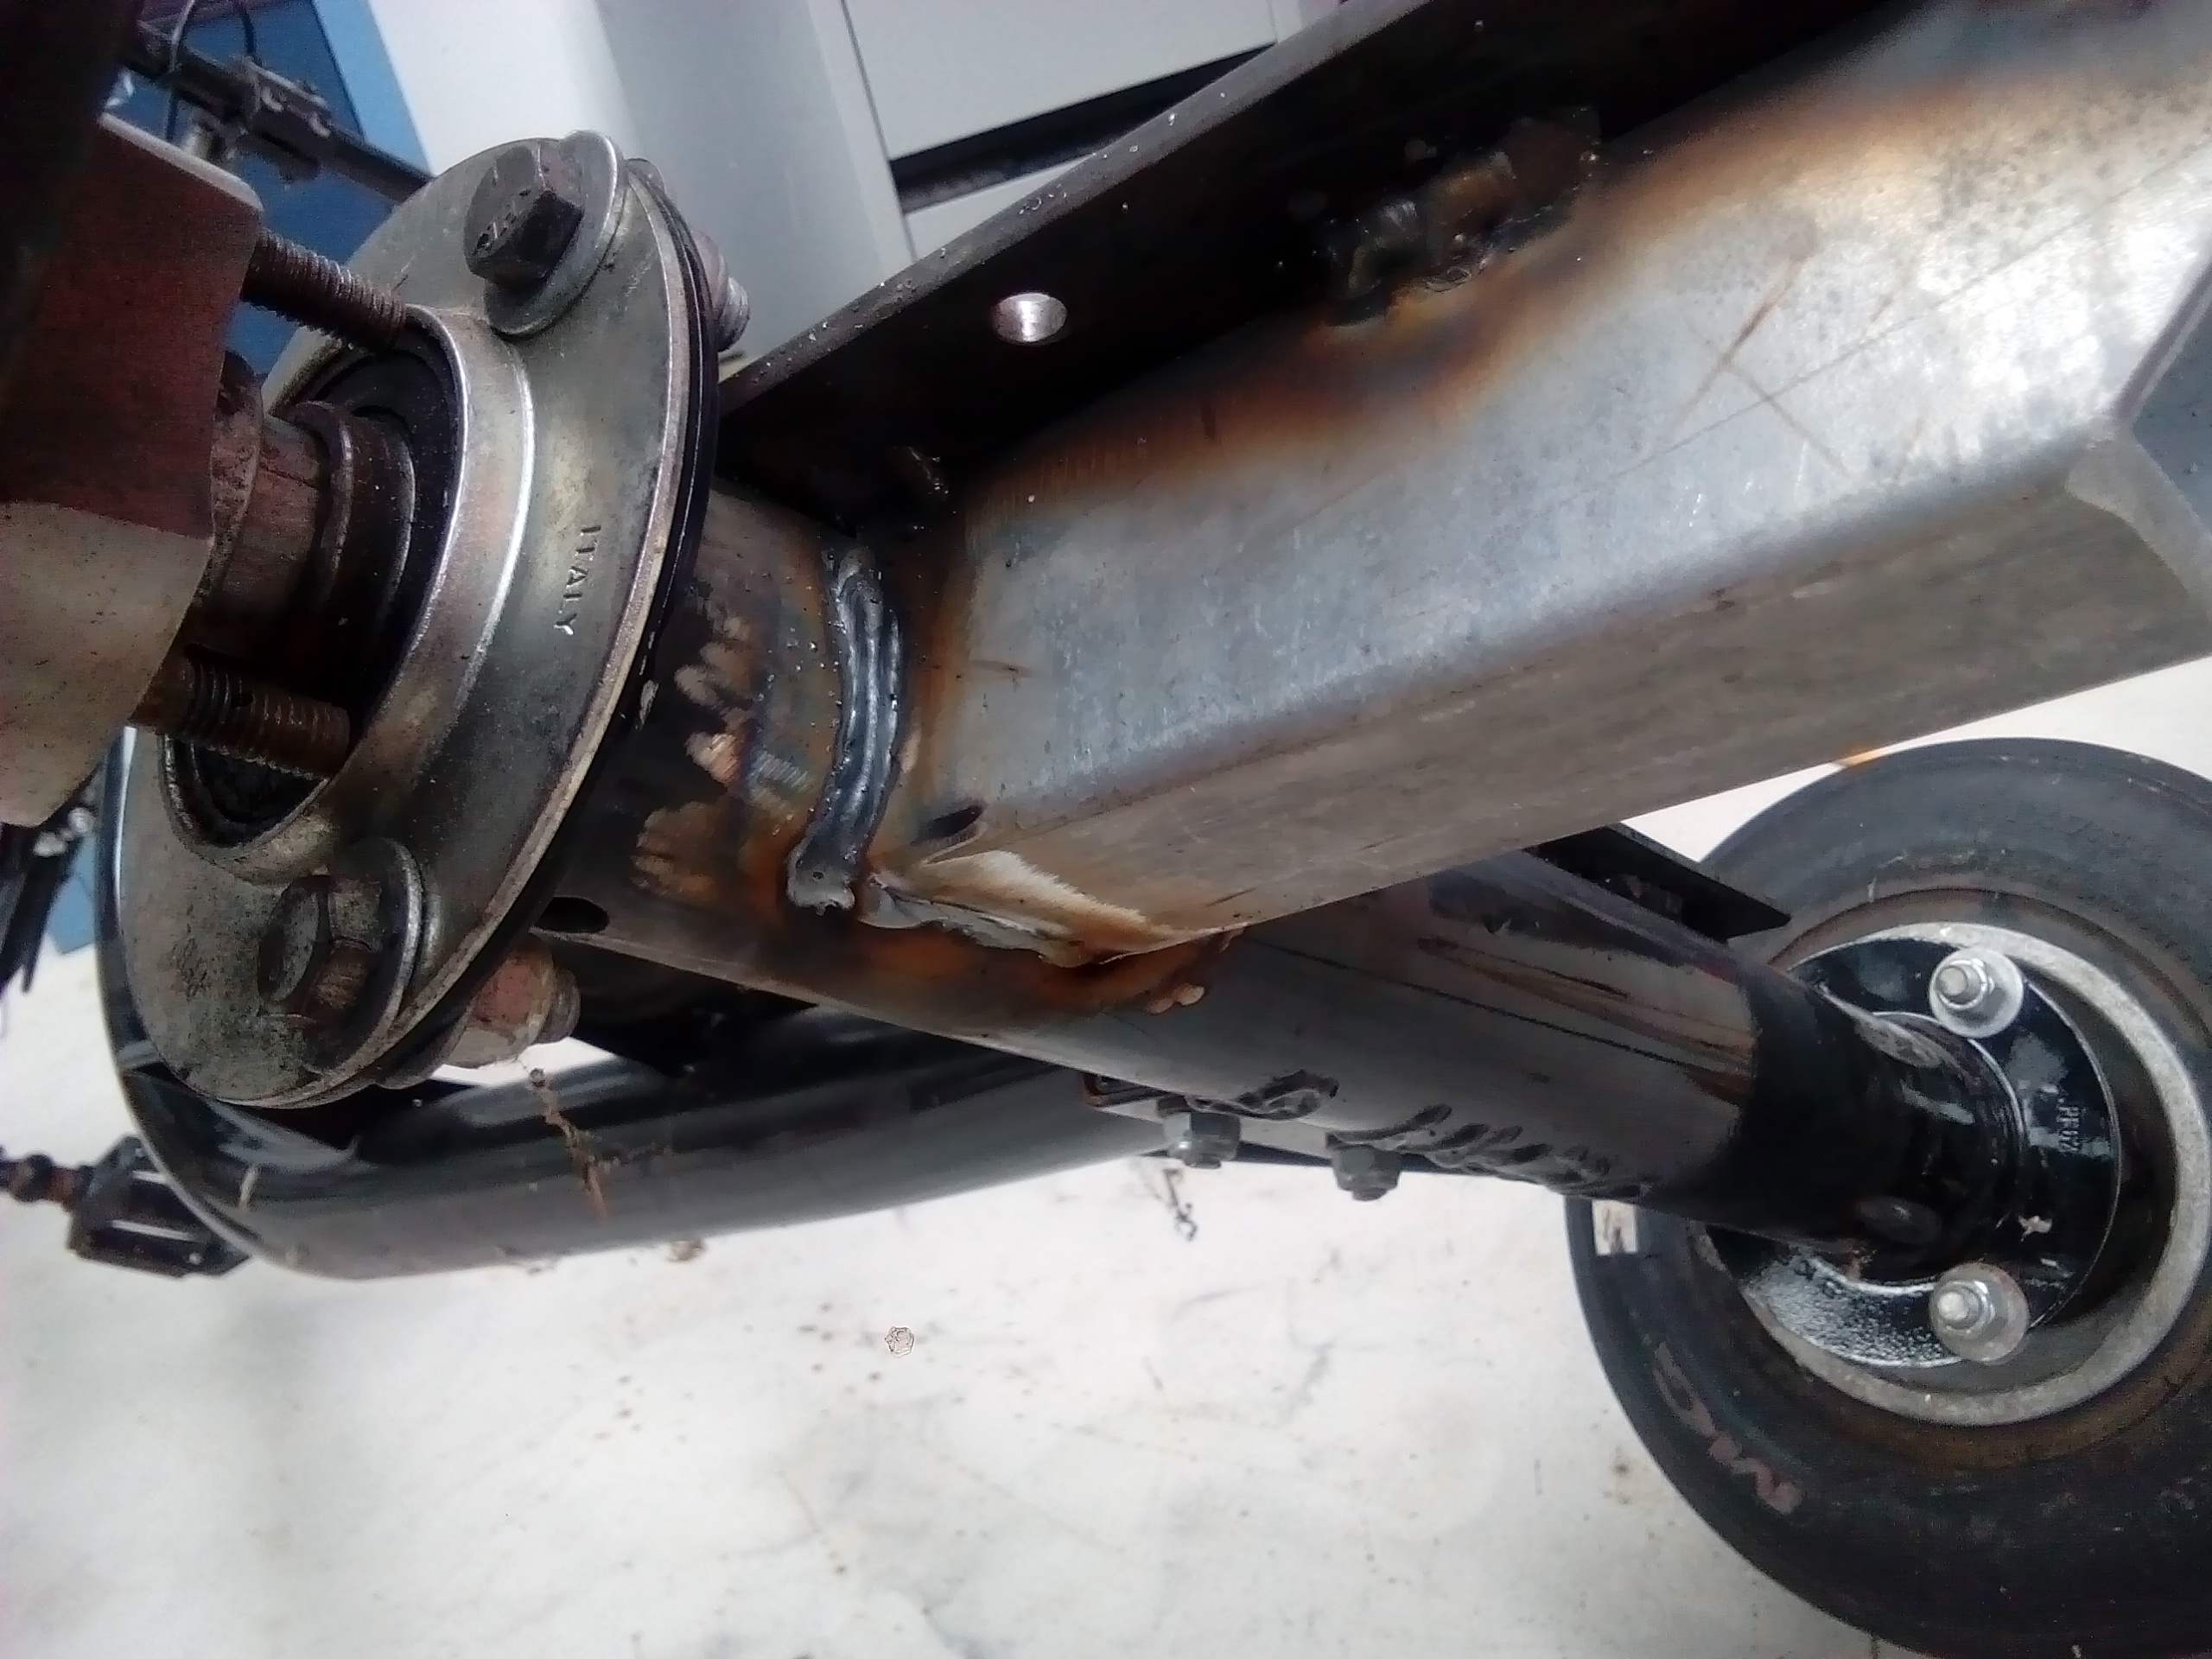
For 4 strokes, keeping heat in the pipes and out of the engine bay is a good thing. However for 2 strokes where you scavenge some of the air/fuel mix back from the exhaust system the cooler the better, as hotter air takes up more room (less dense) and therefore potentially losing power.
The amount I've wrapped won't really have a huge bearing on power (loss). And its going to prevent third degree burns to my leg...and it does look cool
So if coolness factor like stickers add +5hp, then that would surely offset real world loses?
-
2
-
-
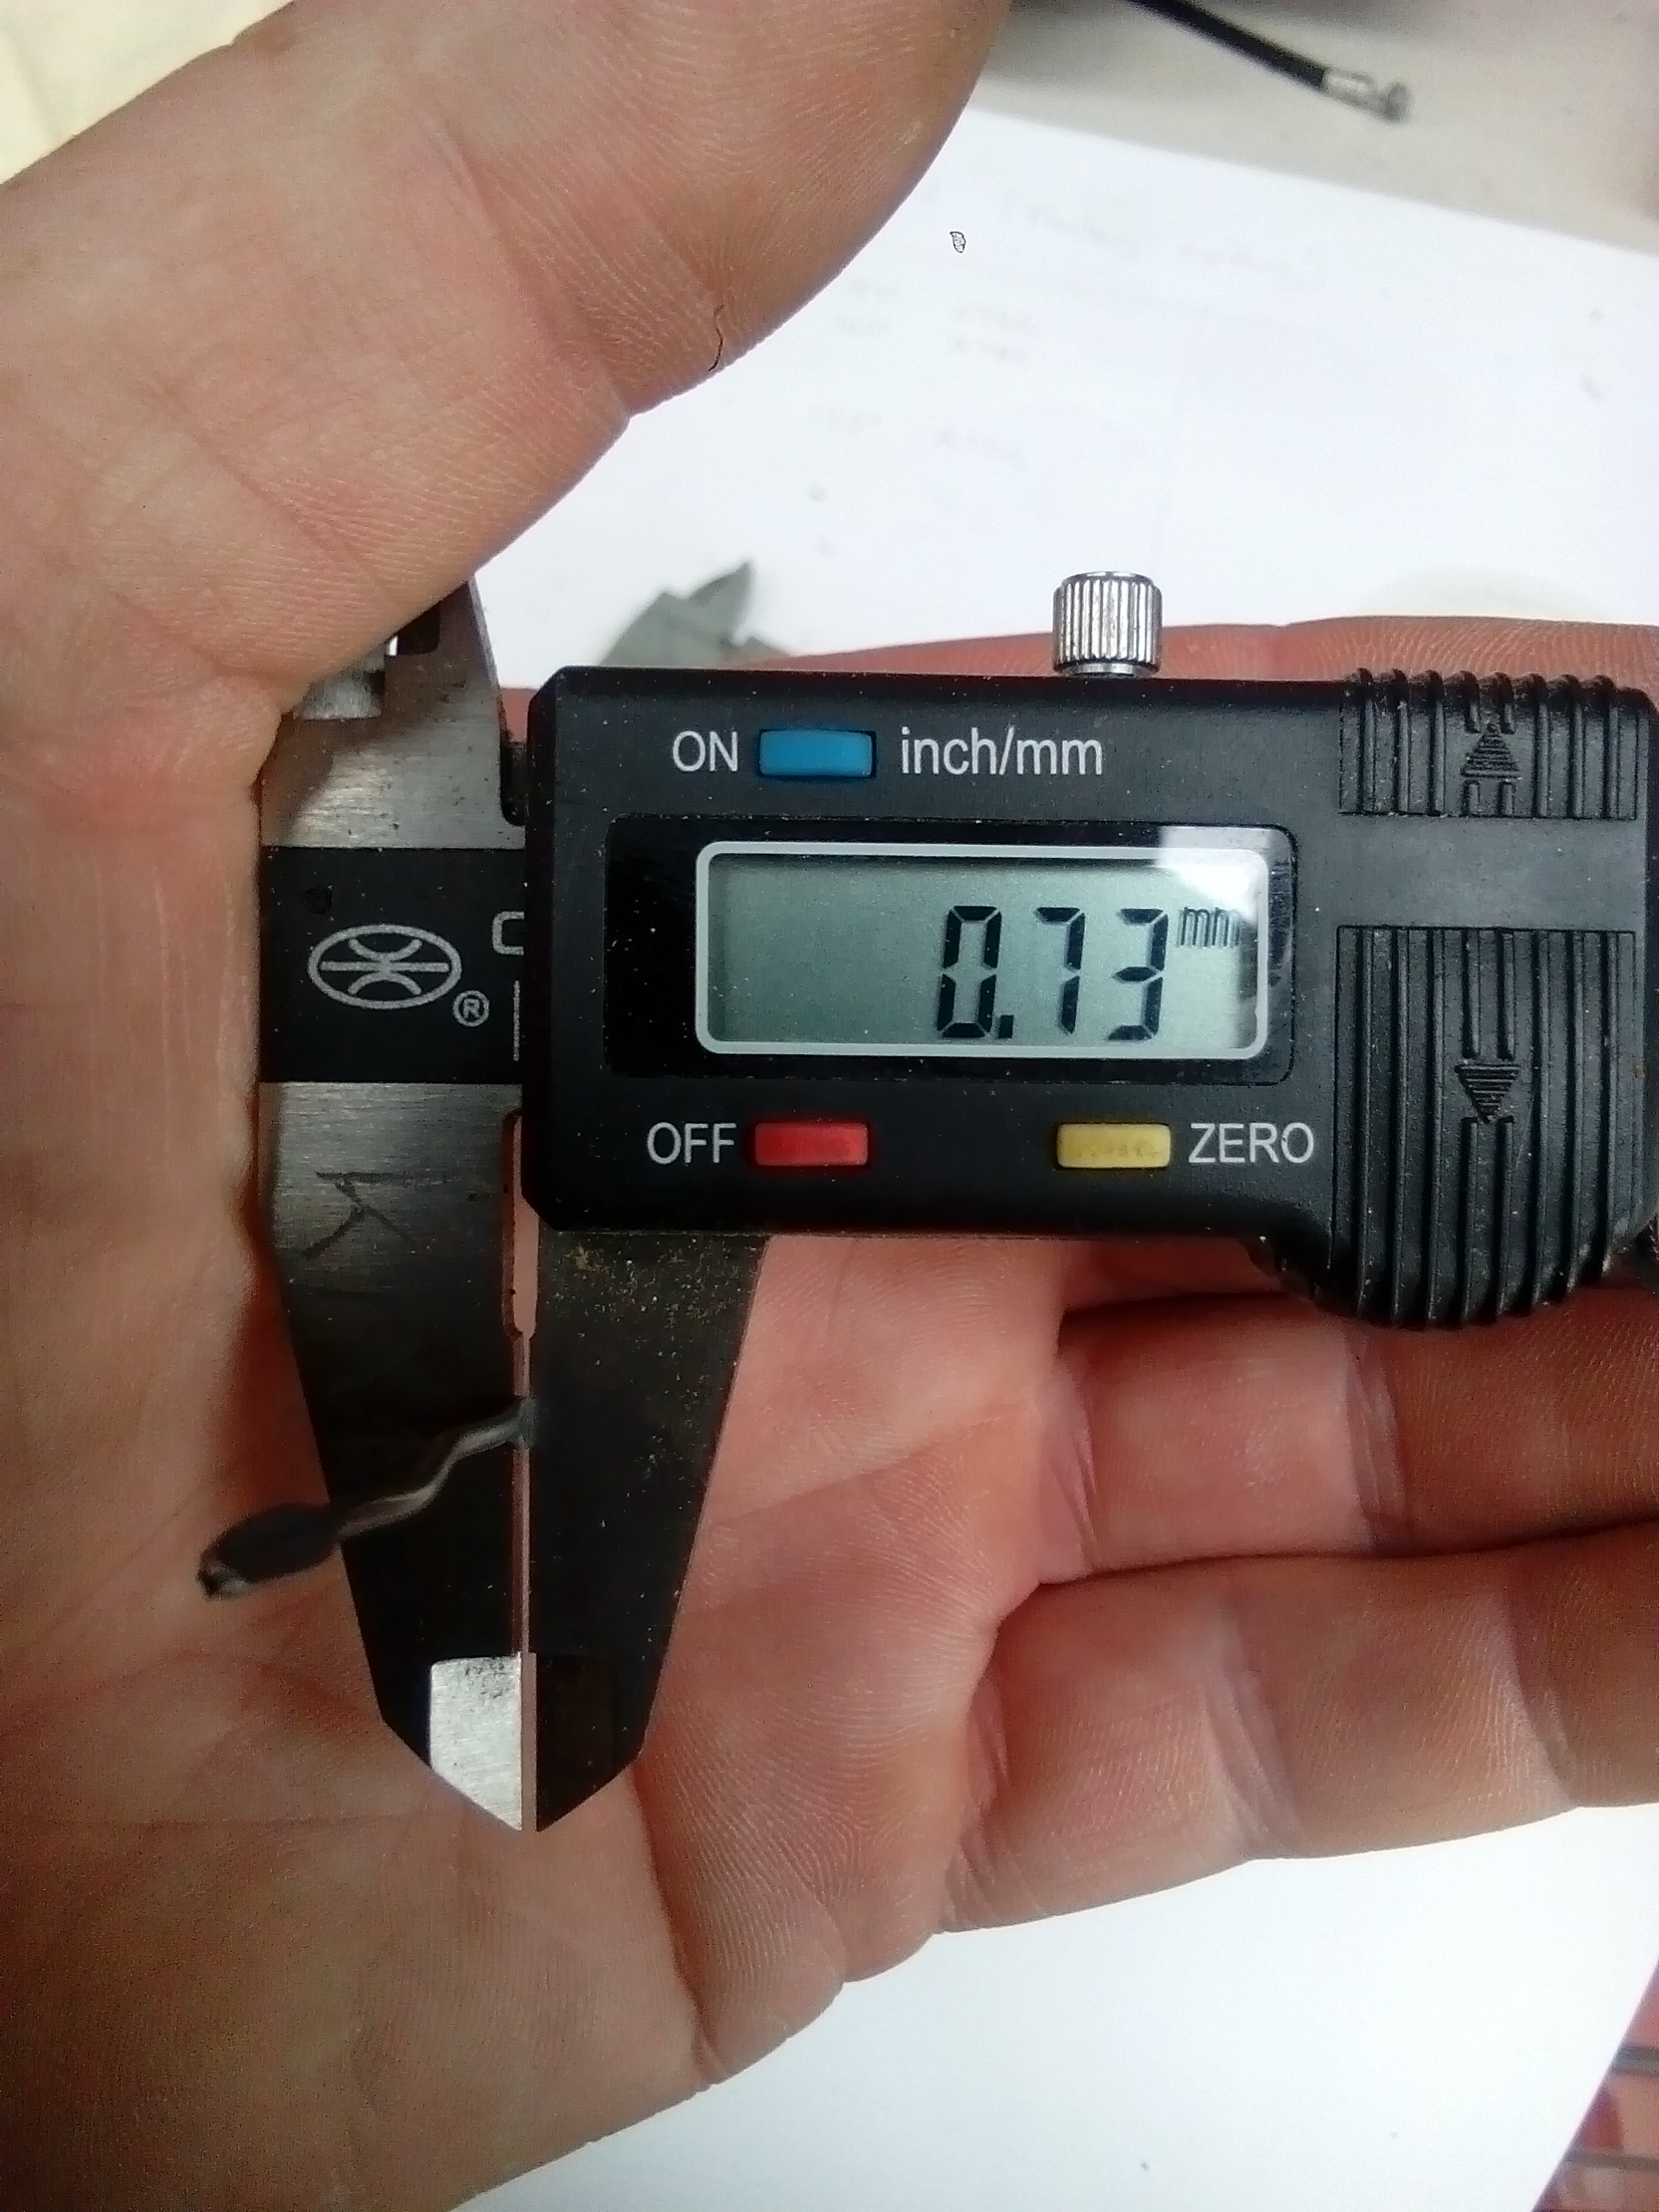
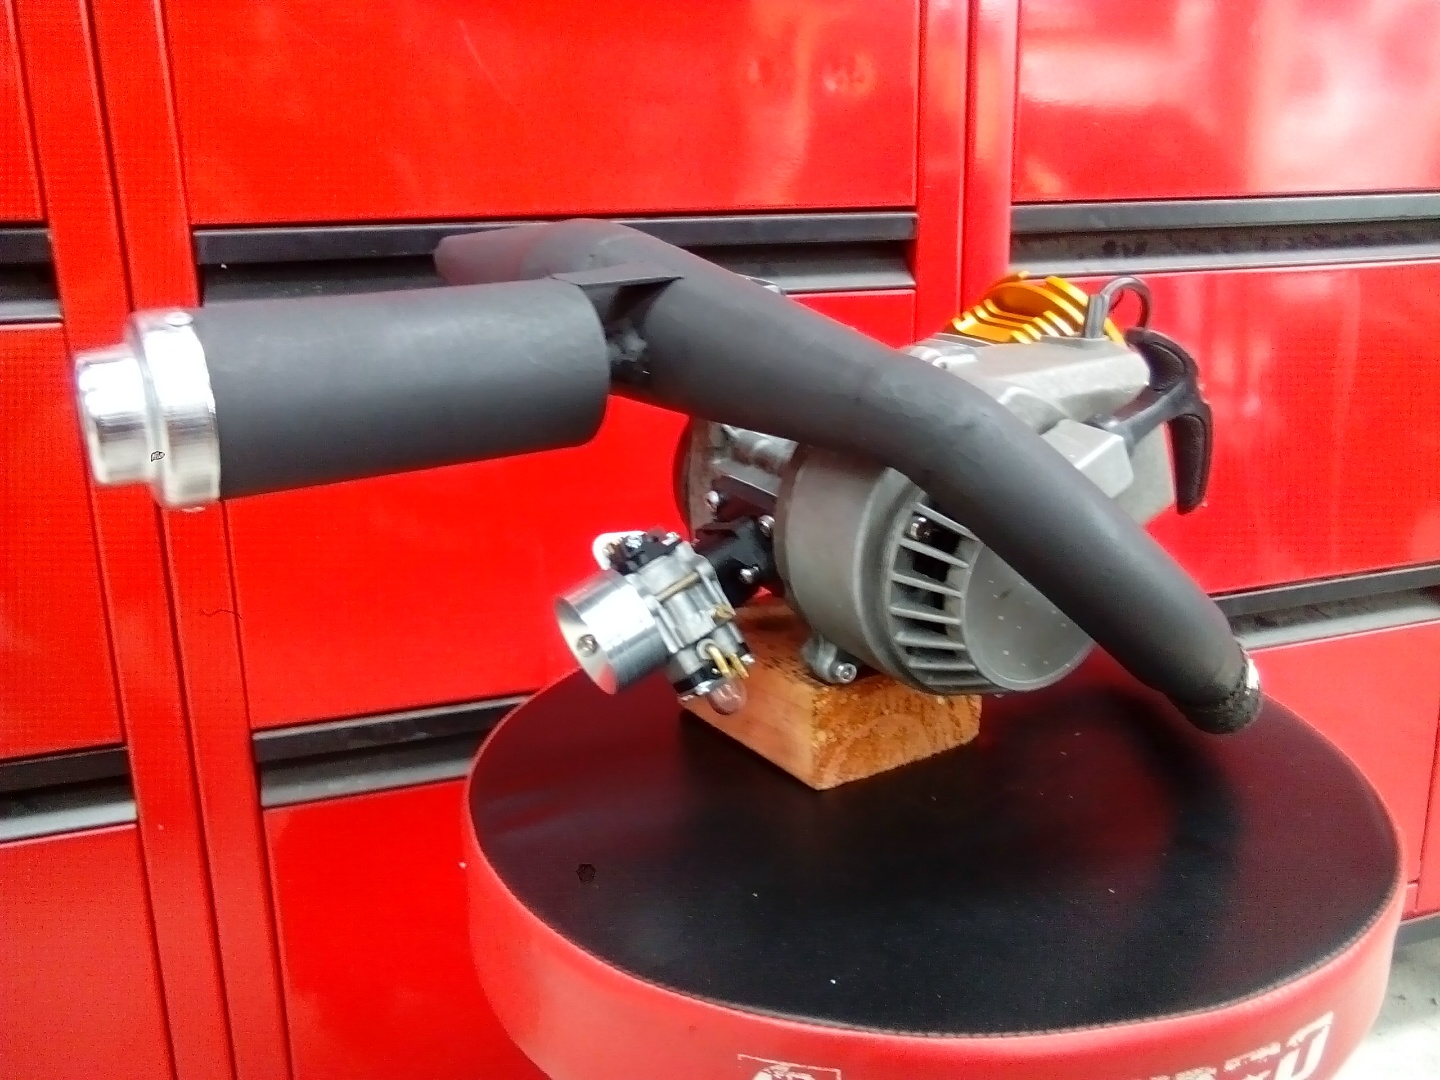
It the meantime I decided to machine the head for better squish. I found two slightly thicker copper gaskets, then shaved the tiniest amount off the top of the cylinder barrel. My OCD just couldn't rest knowing it wasn't right.
Then I fully assembled motor including exhaust, "torqued the head down" (i.e. turn hard until it felt about right ) measured squish... and got 0.73mm. So very close to the 0.762mm (or 0.030")... happy with that, so it's going to stay like that.
Then assembled the rest of the accessories and exhaust. Is now 100% ready to run/test. Boom!!!!
-
2
-

")


Daves Scooter thing (The Meth Ped)
in Two Wheels
Posted
I love it! It's just so dam ridiculous with all that motor...yet time so well spent doing it.
The fact that you can't go to the shop, buy one, then ride out an instant badass makes it a fantastic project.