Sunbeam
-
Posts
956 -
Joined
-
Last visited
-
Days Won
1
Everything posted by Sunbeam
-
Thermostat sorted. High beams have been found! It was an easy fix, another case of where did the panel beater tuck that earth wire… On the to-do list: Take the driveshaft somewhere for a balance, sort an electric fan, sort alternator wiring mod (from external regulator to internally regulated alternator) and gain more clearance for the back tyres. The tyres are clearing the lip on the guard but now touching the outboard skin of the wheel tub with kids in the back. Probably won’t get done for 6 weeks now as we’re off on holidays soon. PFT 2.5 years ago

-
Holy shitballs! Rather you than me with that spaghetti. Cool rig though, good luck getting it sorted.
-
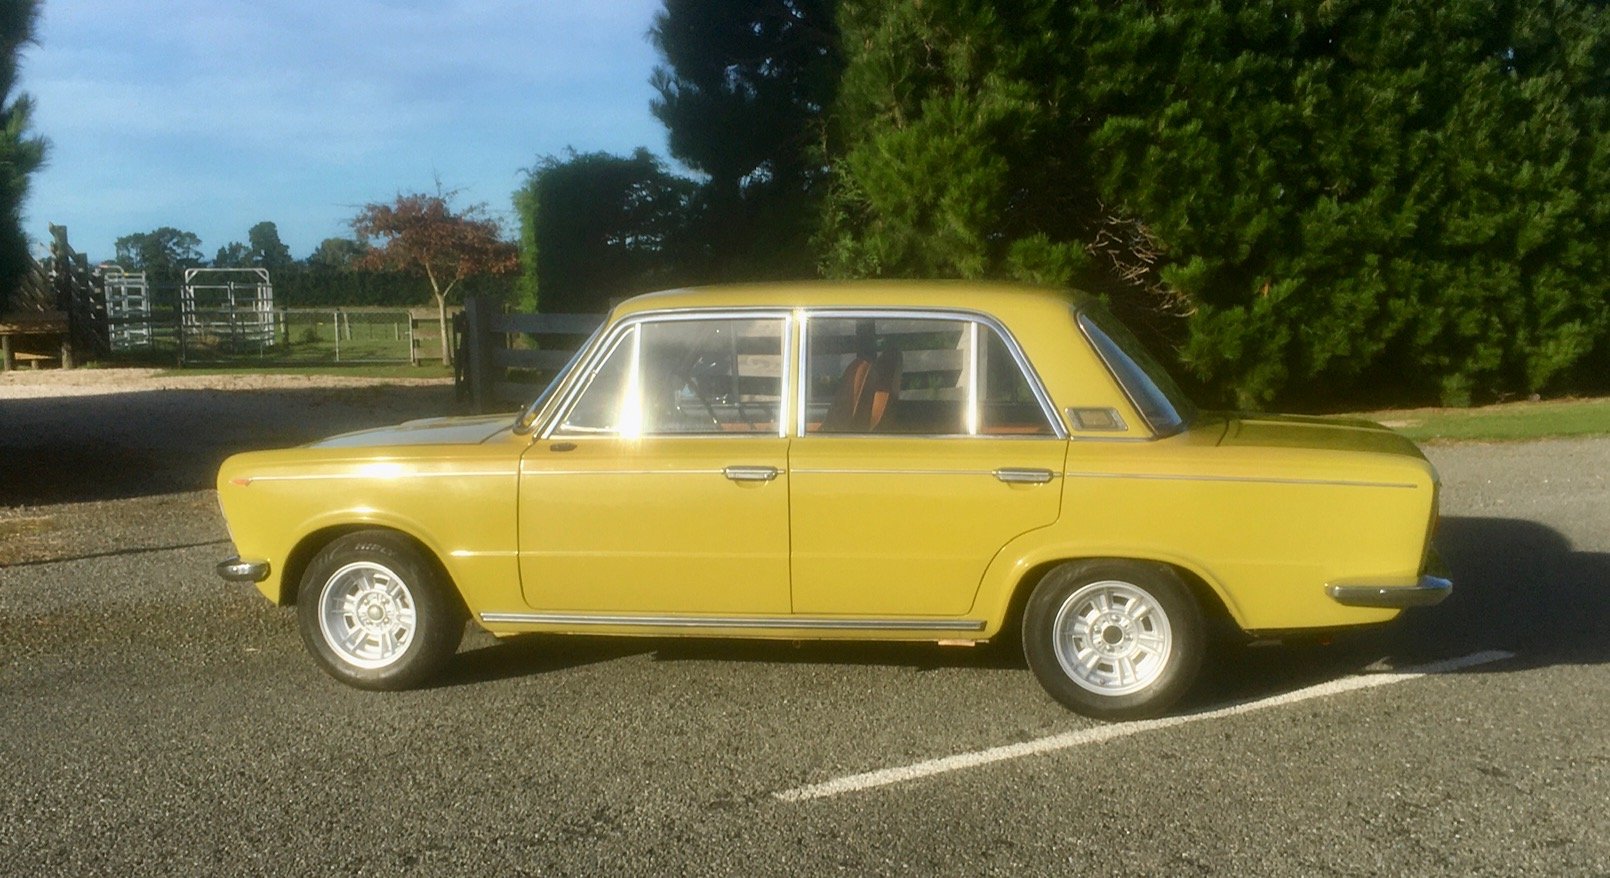
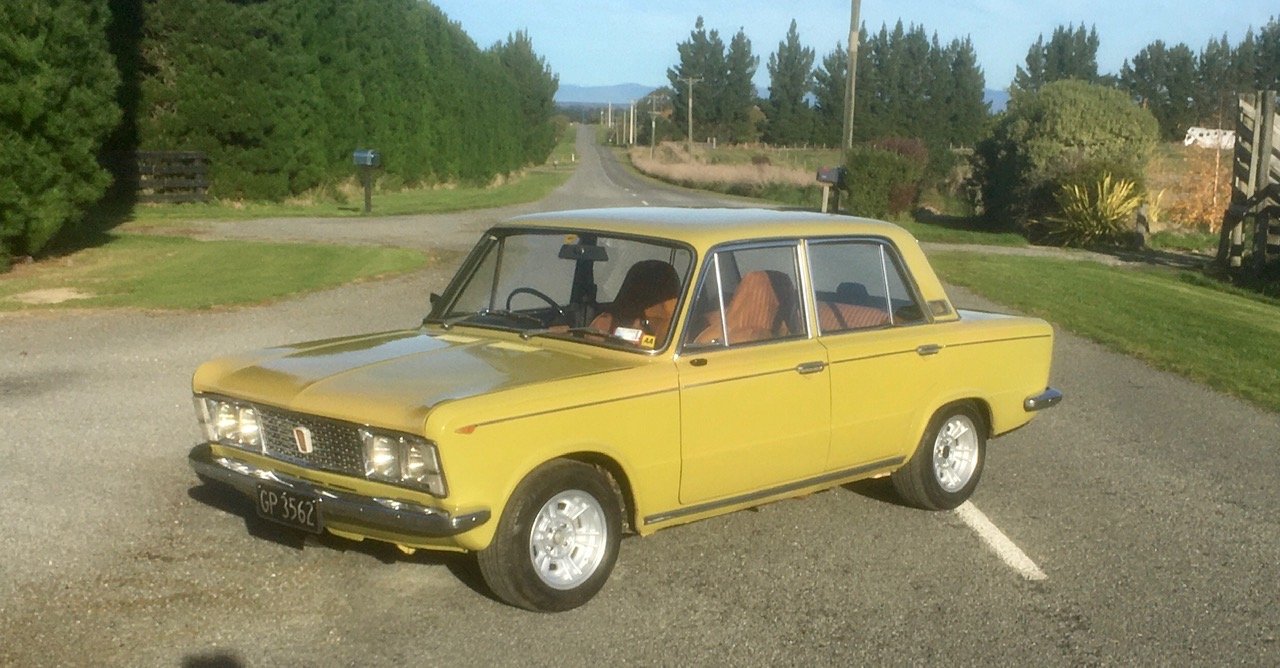
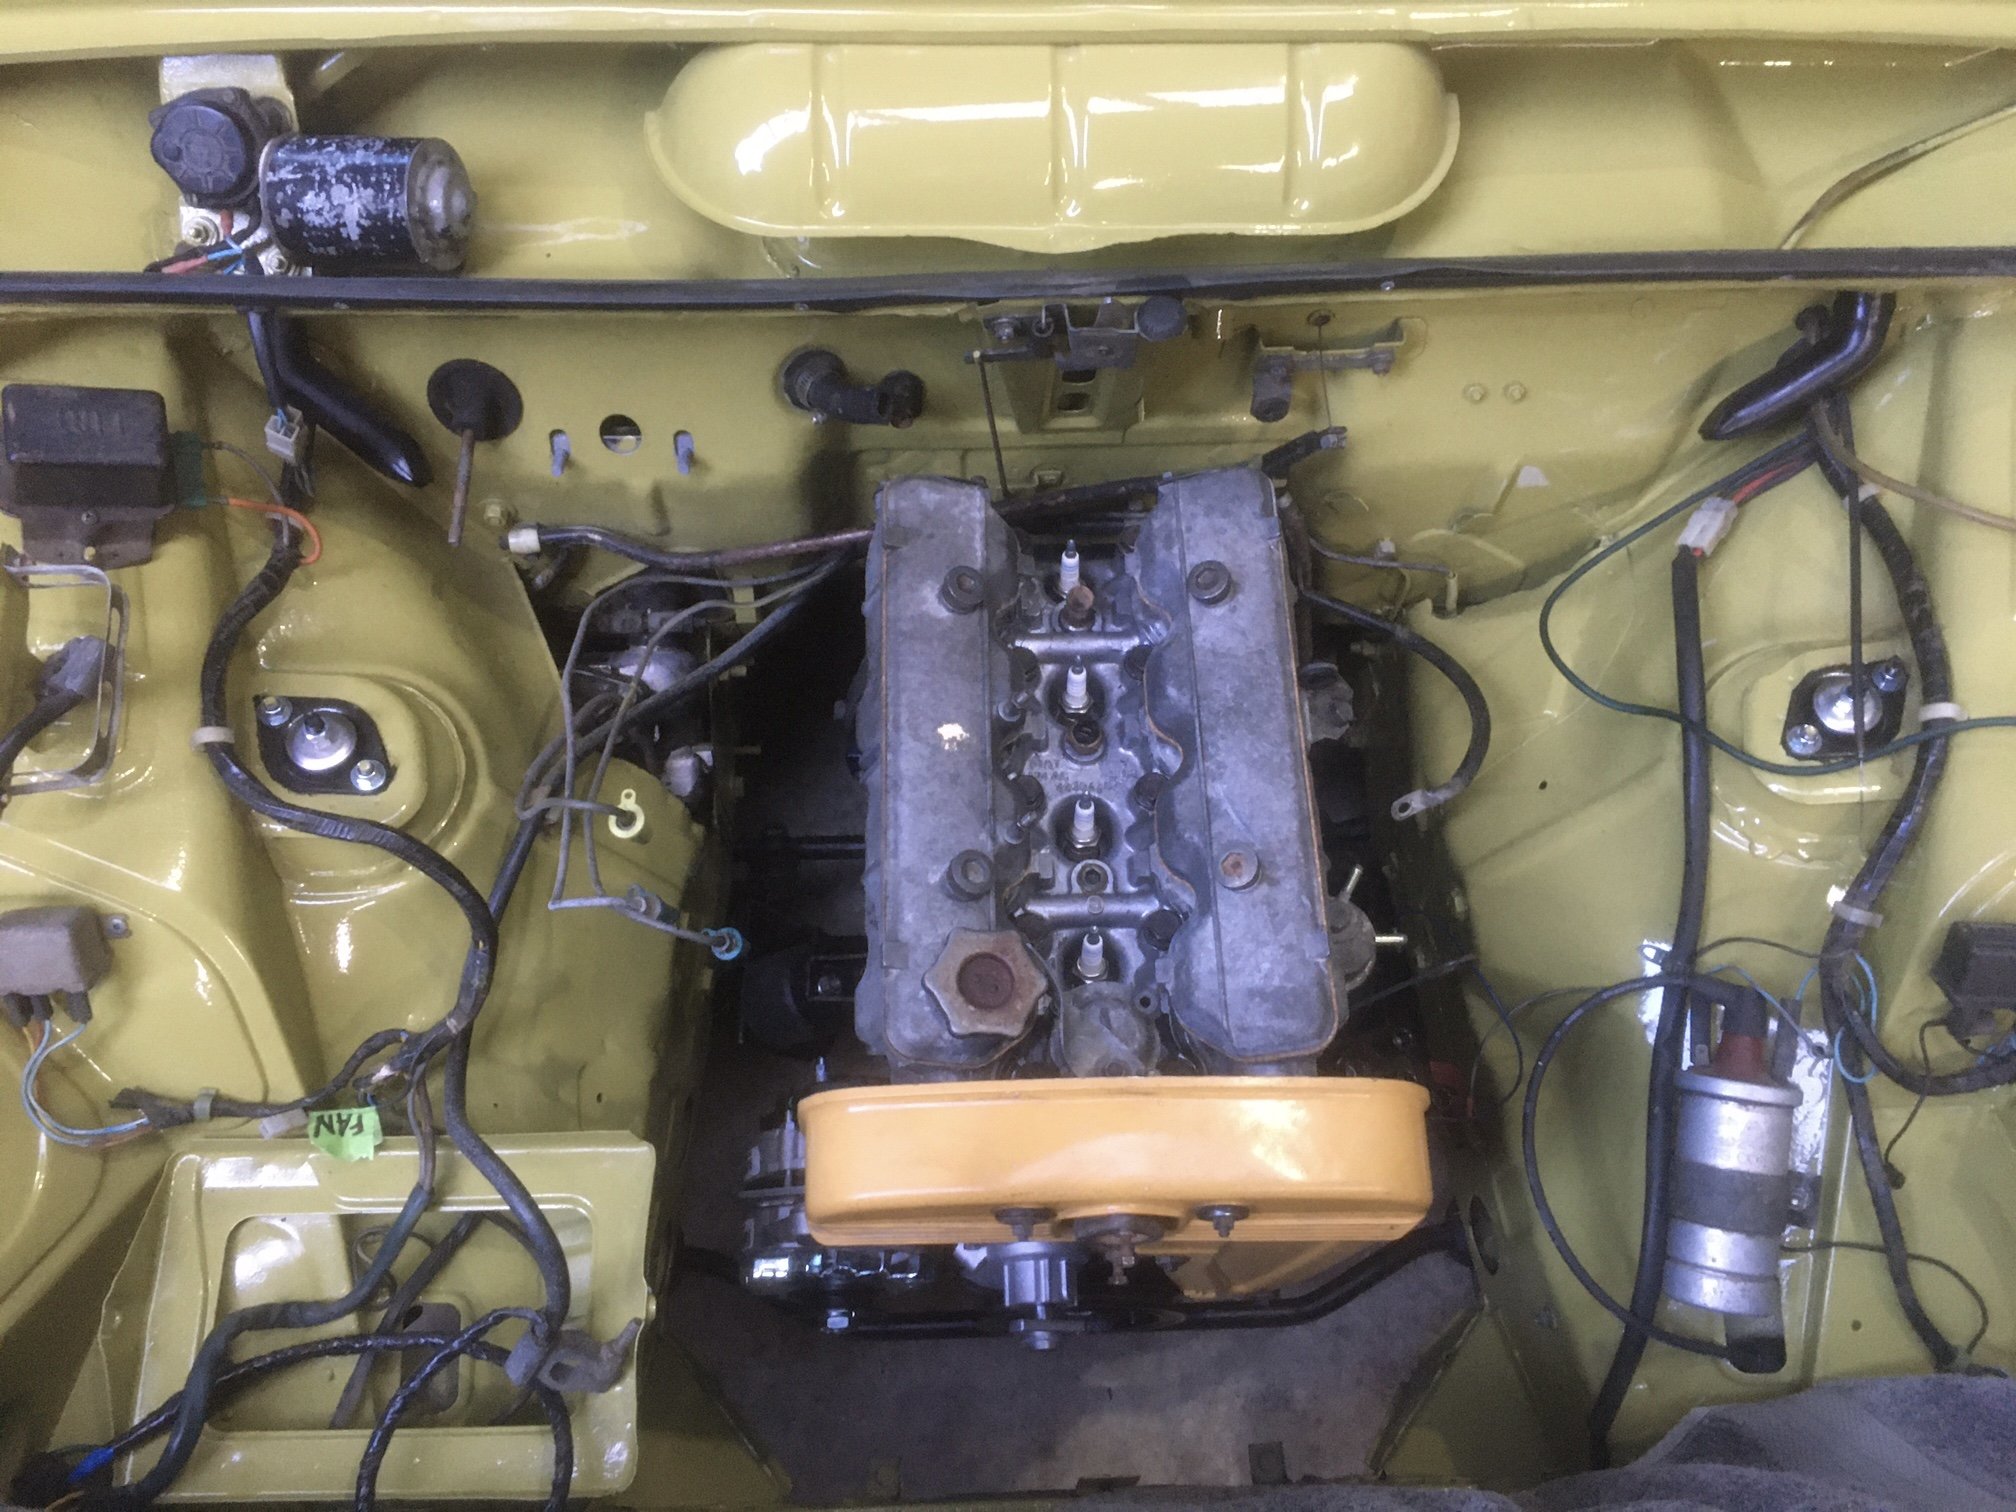
Re-torqued the head, re-did a ticky tappet (still ticks…grrr) and then put the bonnet back on. Looks like a proper car again. I need to sort the rear wheel clearance so I can go for a decent drive. Here’s some overexposed late afternoon potato pics. Front springs have settled well. What say you?
- 125 replies
-
- 20
-

-
Chair, but I already ordered another from ebay
-
Went for another drive this morning. Driveshaft vibration is still present despite carefully shimming the centre bearing. The thermostat is not opening so it made boiling noises and had a spew. The temp gauge didn’t go over half though…
-
Maybe. I’m prepared to try anyway.
-
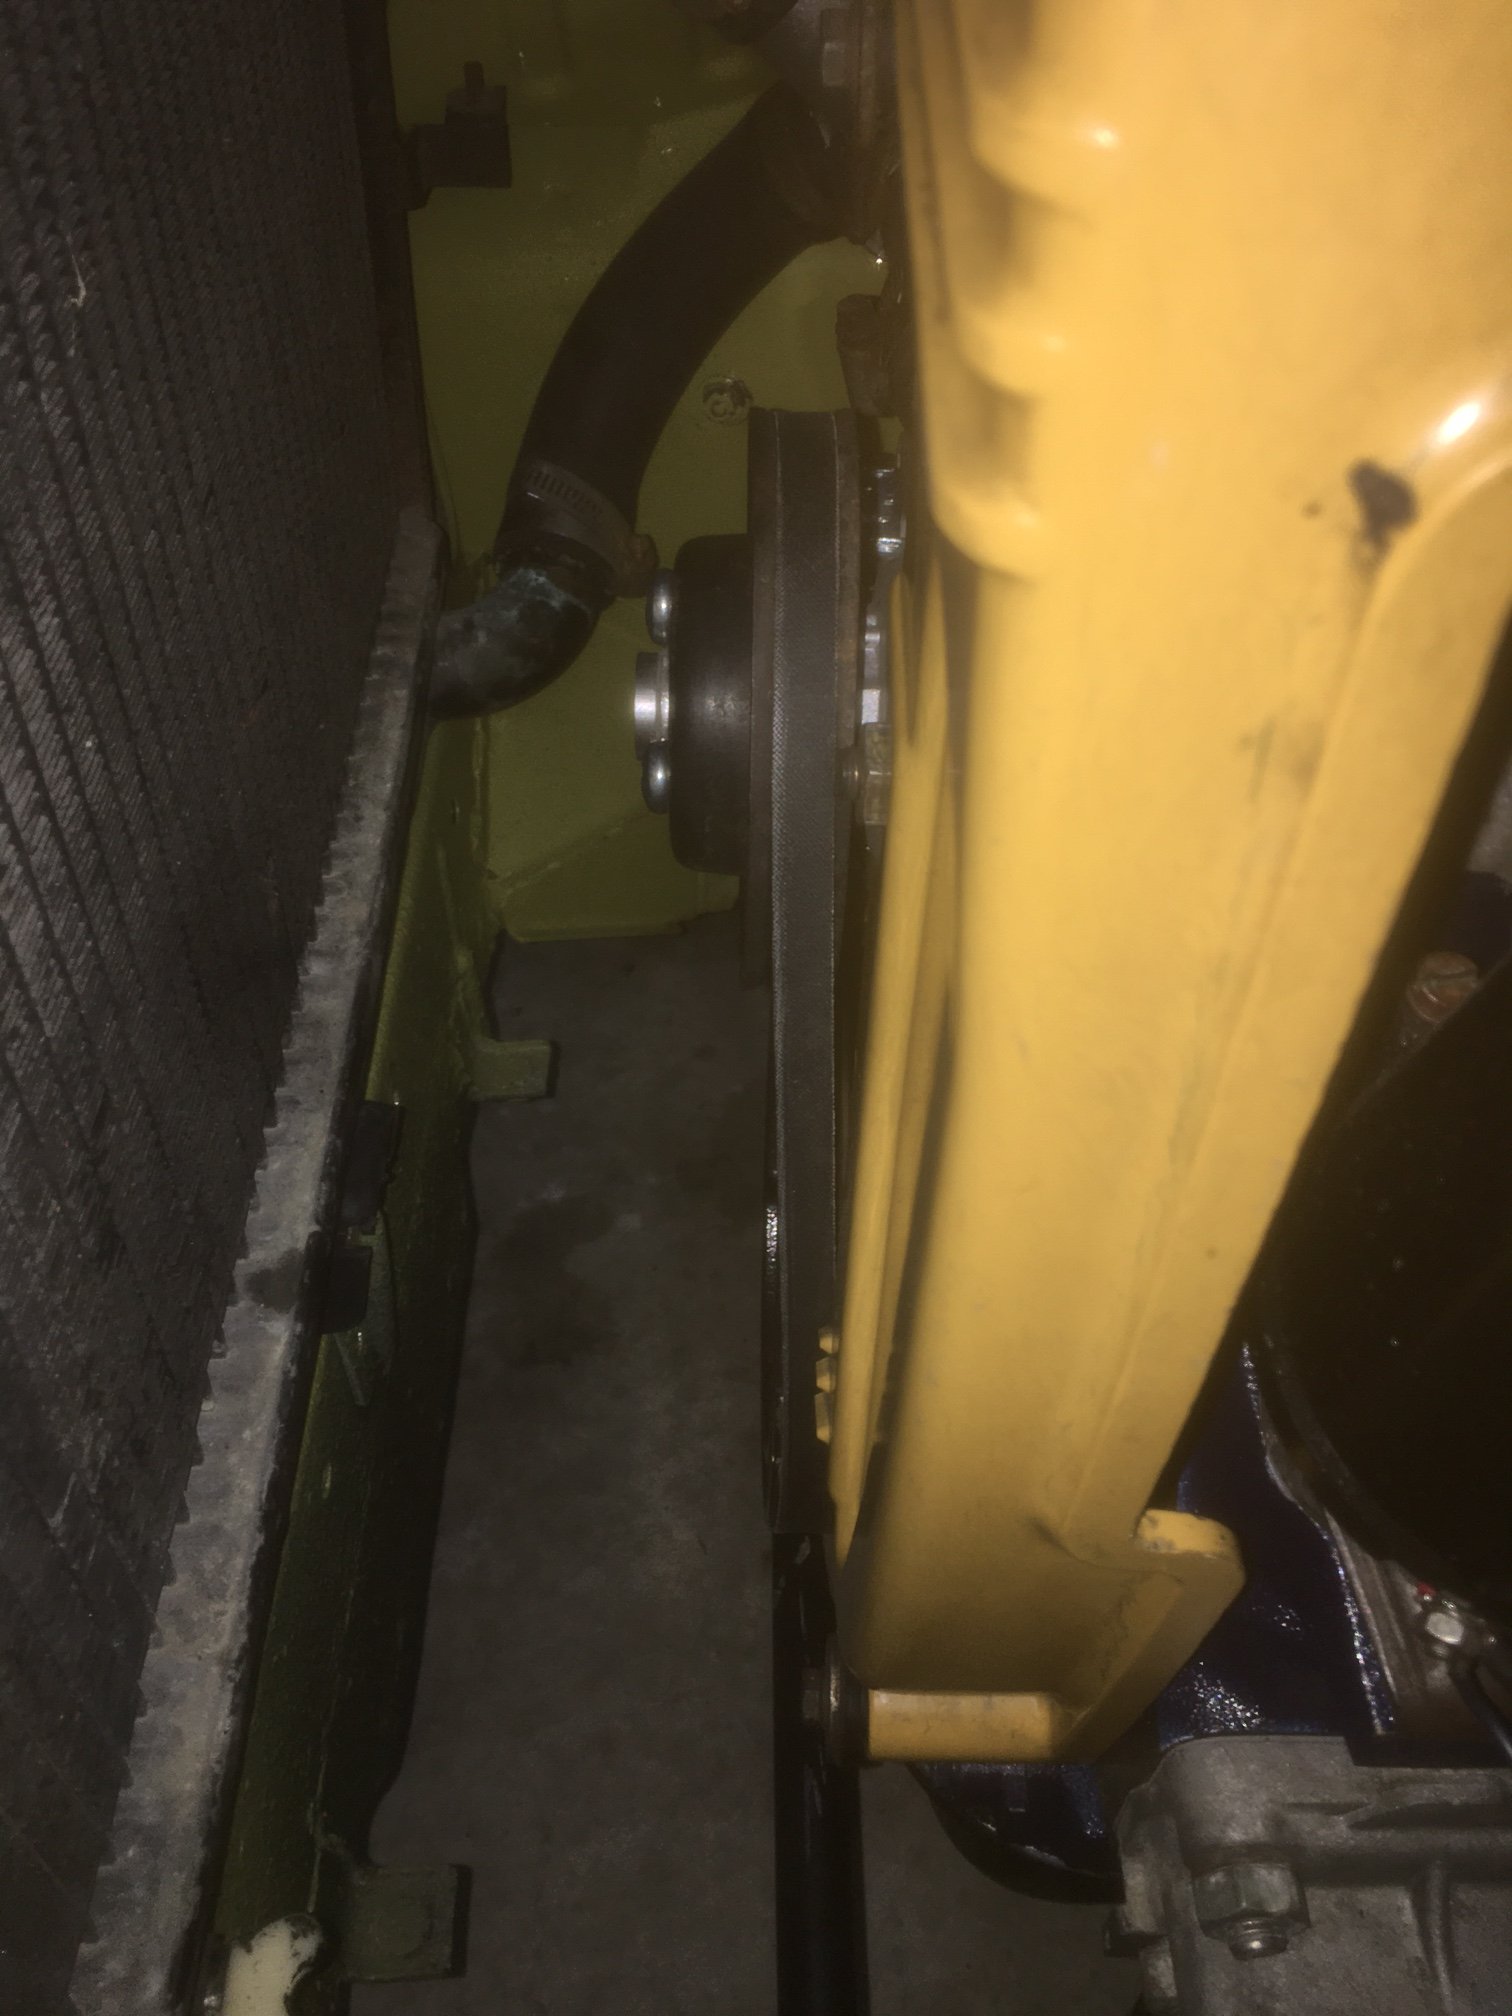
Right, I just got back from town. I dropped in at a club member’s place where he has his 1608 on an engine stand. The pulley from his engine is identical to the 2 I now have. However the stickout of the water pump on his engine is about 7mm less than the ones I was supplied which makes everything line up perfectly! So, the water pumps made by GMB for the 124 aren’t quite right. We did find a strange looking pulley in a box of bits in his garage that has a better offset but the centre hole didn’t fit over the snout of his pump by 0.5mm but I brought it home to try anyway.
-
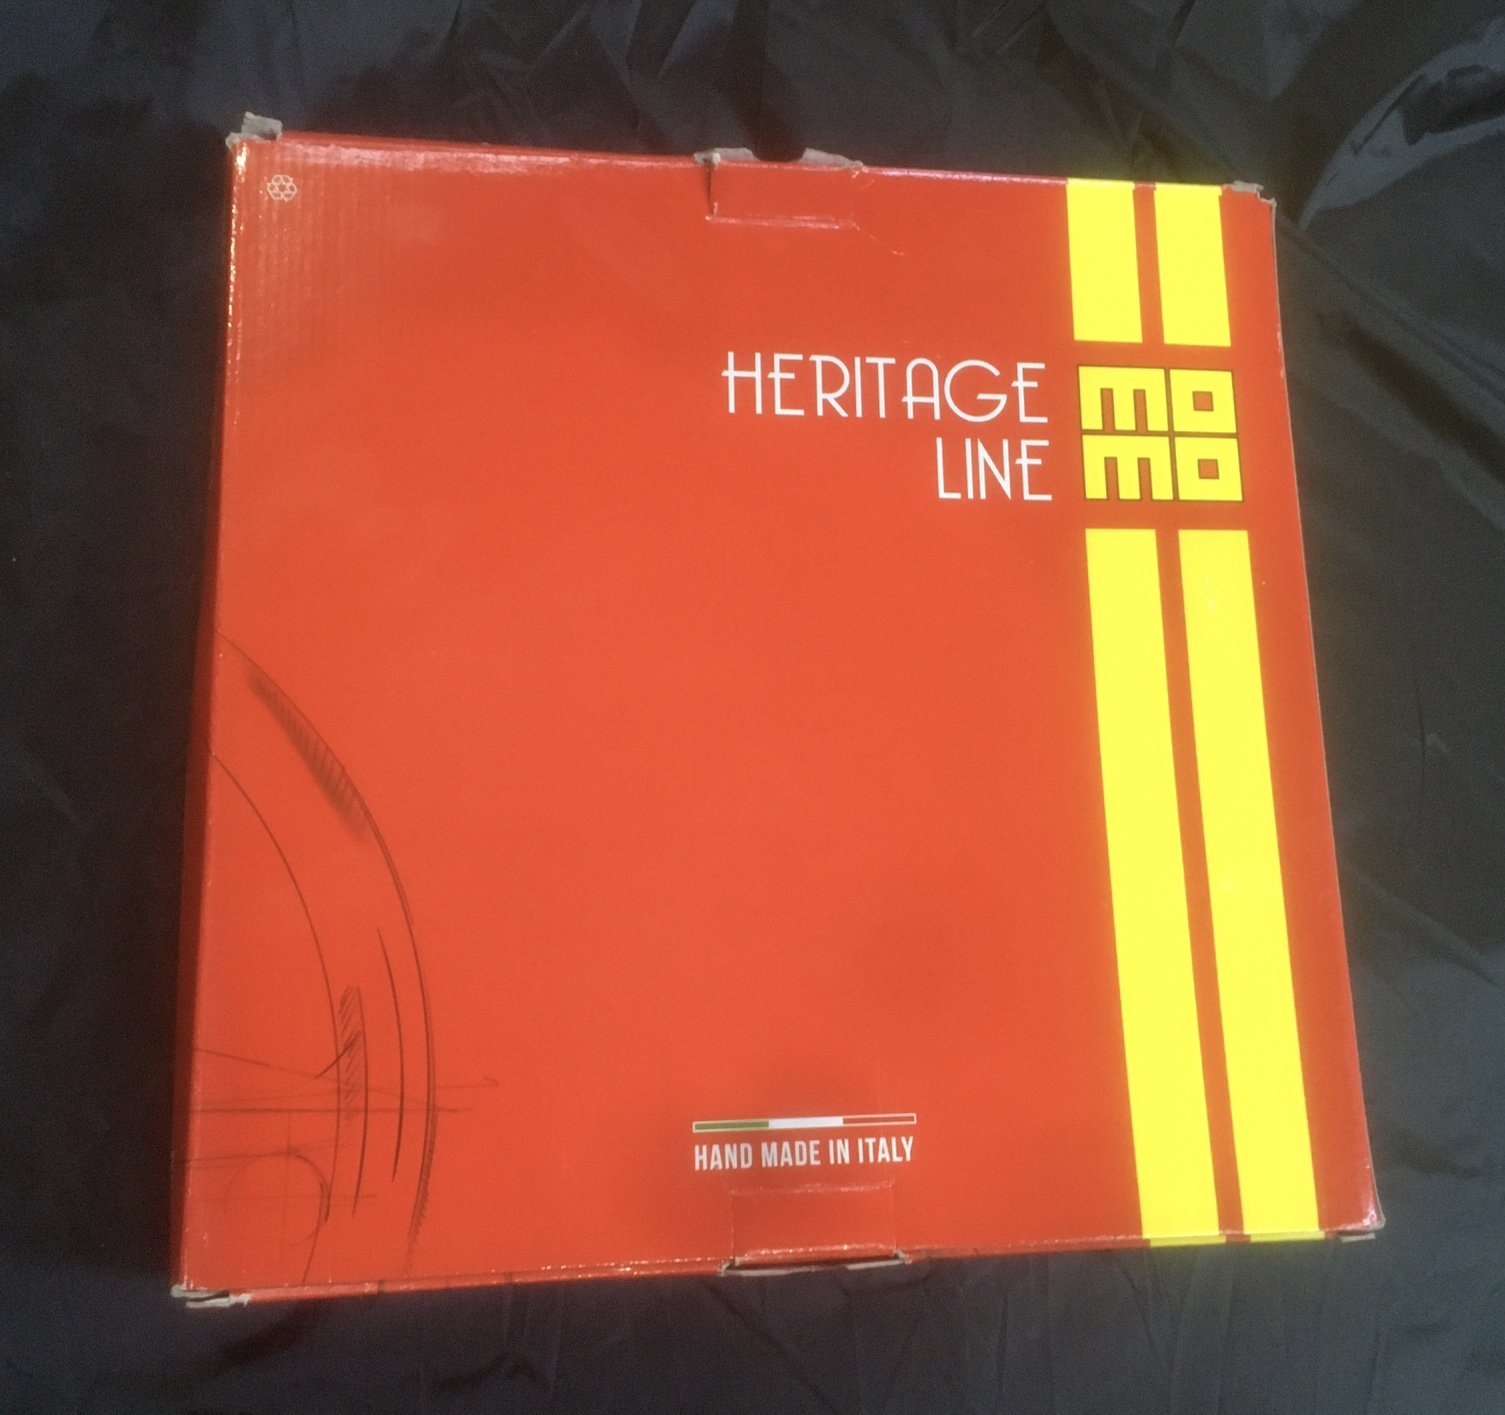
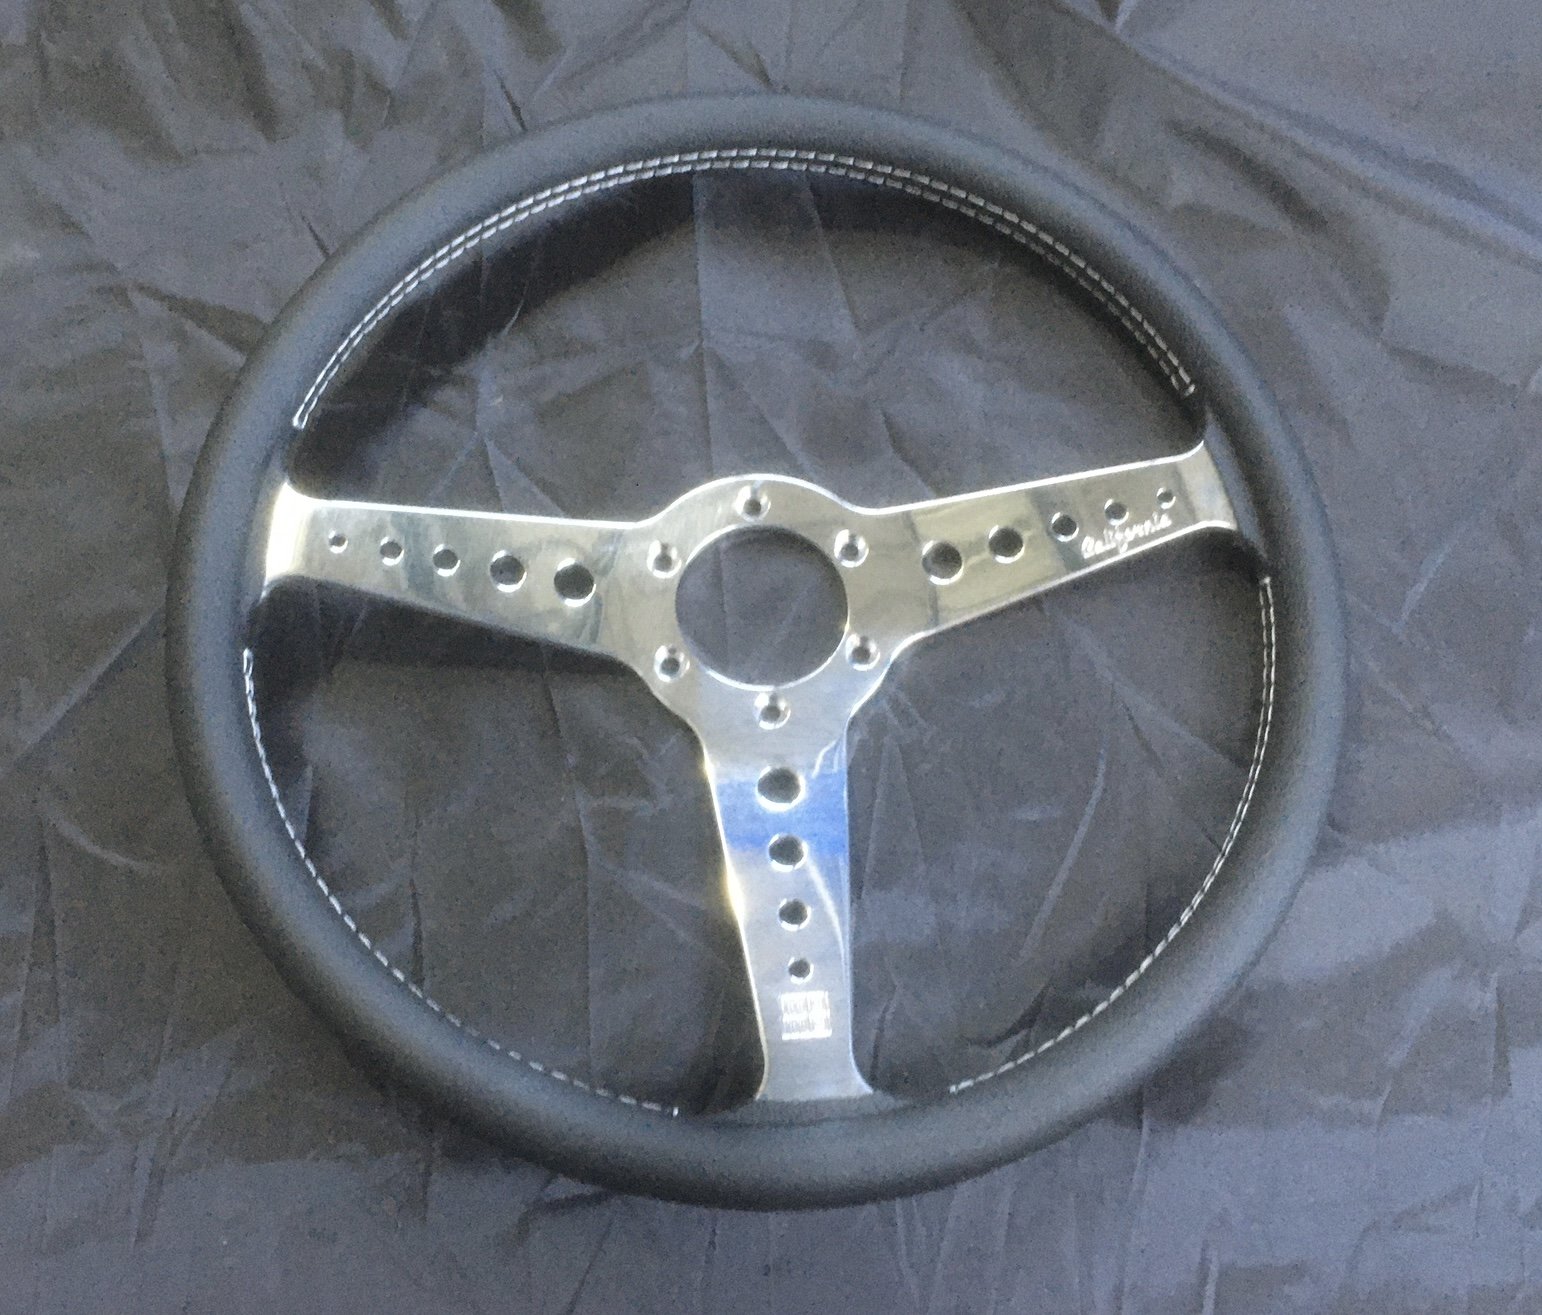
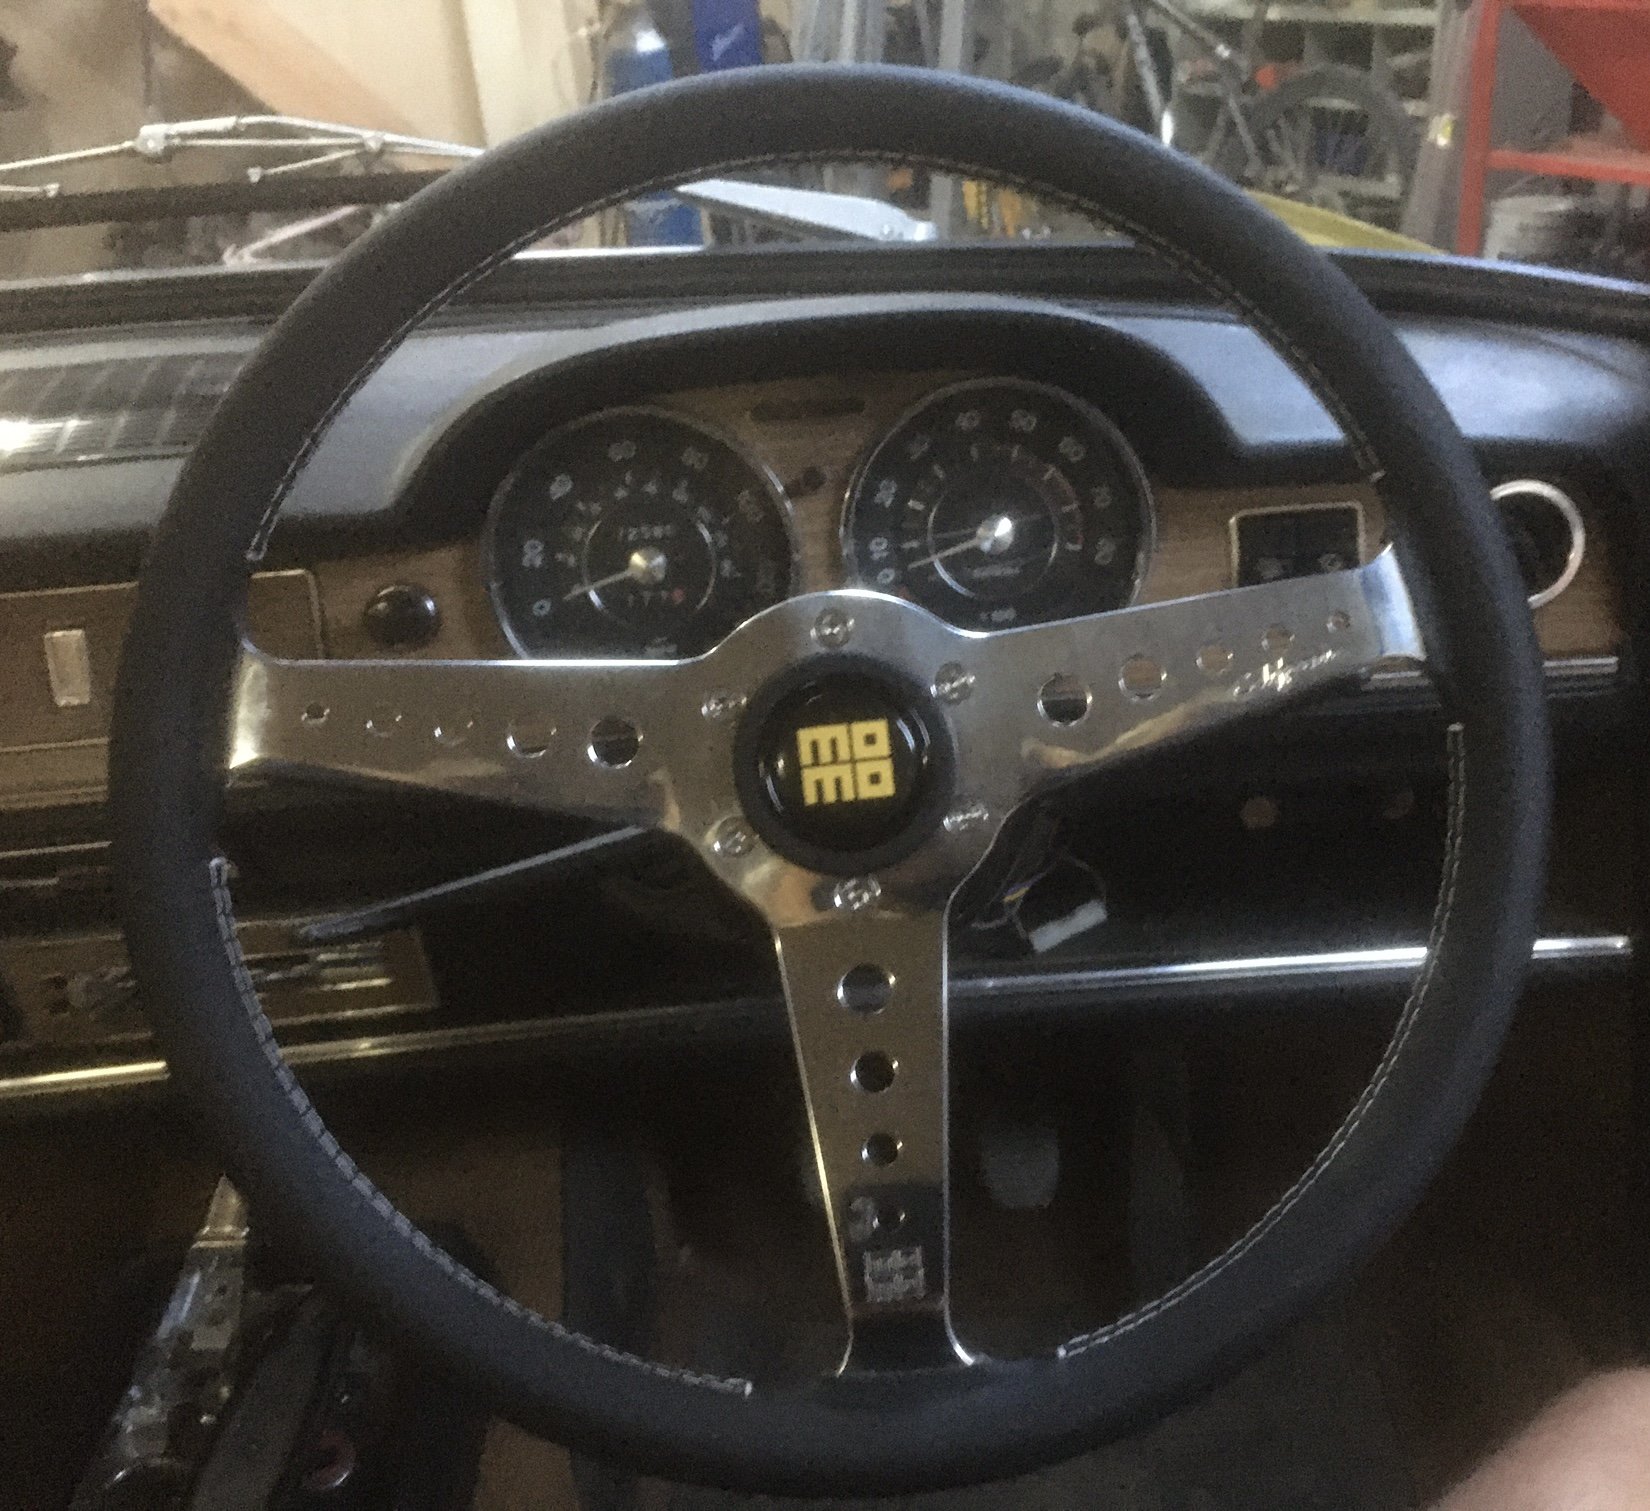
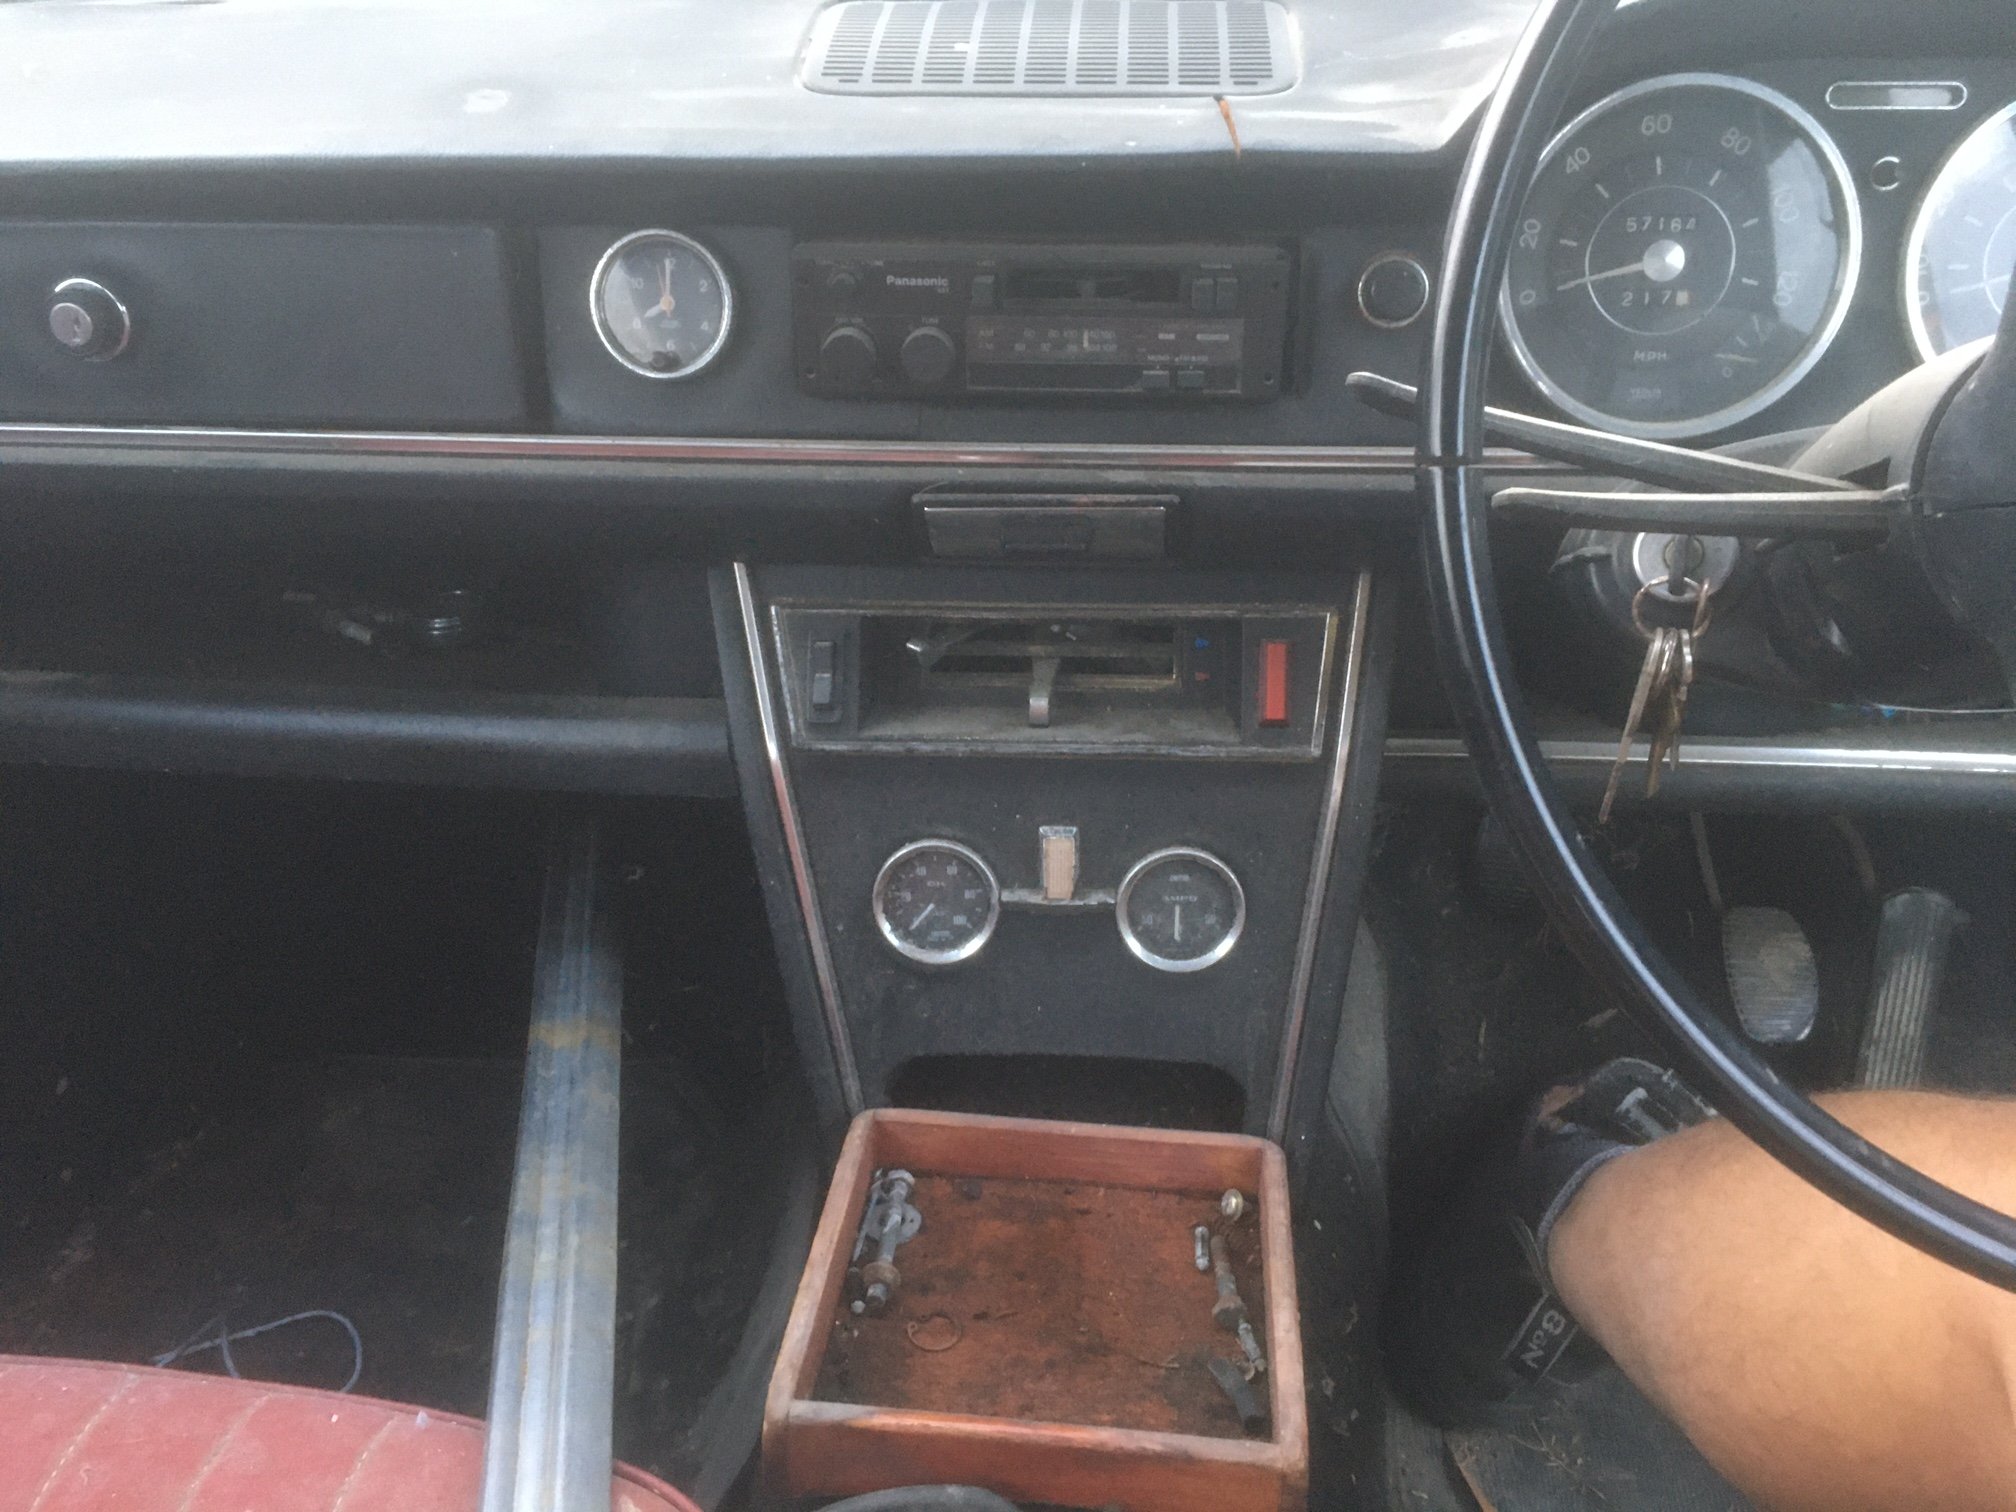
I’ve had some frustrating times trying to decipher why I have a misaligned water pump pulley As far as I can tell, the pulley seems to be correct for a 1608cc twin cam. So where does that leave me? The hub height of the water pump must be wrong? The only thing left for me to do is seek out a club member who is doing up a 124BC with the original 1608 and see if he’ll let me come over and measure/compare some things. In happier news after saving up for a few months this turned up in the post Wow, it’s so light and so small compared to the factory bus wheel! What I wasn’t prepared for was the highly polished almost chrome-like spokes. I swear in the pictures it looked like a satin finish, so it was almost a bit of a downer, but I think it’s fine. Sadly, what is NOT fine is the boss kit I bought ages ago. It will not engage with the self cancel mechanism, there is no way to fit the horn button, and the steering wheel nut will only engage half the threads before the hub bottoms out. The following picture is only an illusion… Sigh… more money to spend!!
- 125 replies
-
- 12
-
-

-
What the fork…
-
I concur with the above.
-
I got a good tip from one of the old blokes at club night. Since all the mounts and the centre bearing are new, it’s possible that the front section of the shaft is out of alignment. This is apparently made worse by the aftermarket centre bearings sitting at a slightly different height. He reckons alignment of the front half is crucial and explained a cunning way to check it. It involves removing the donut but makes it seem pretty straightforward, so I’ll check that for sure.
-
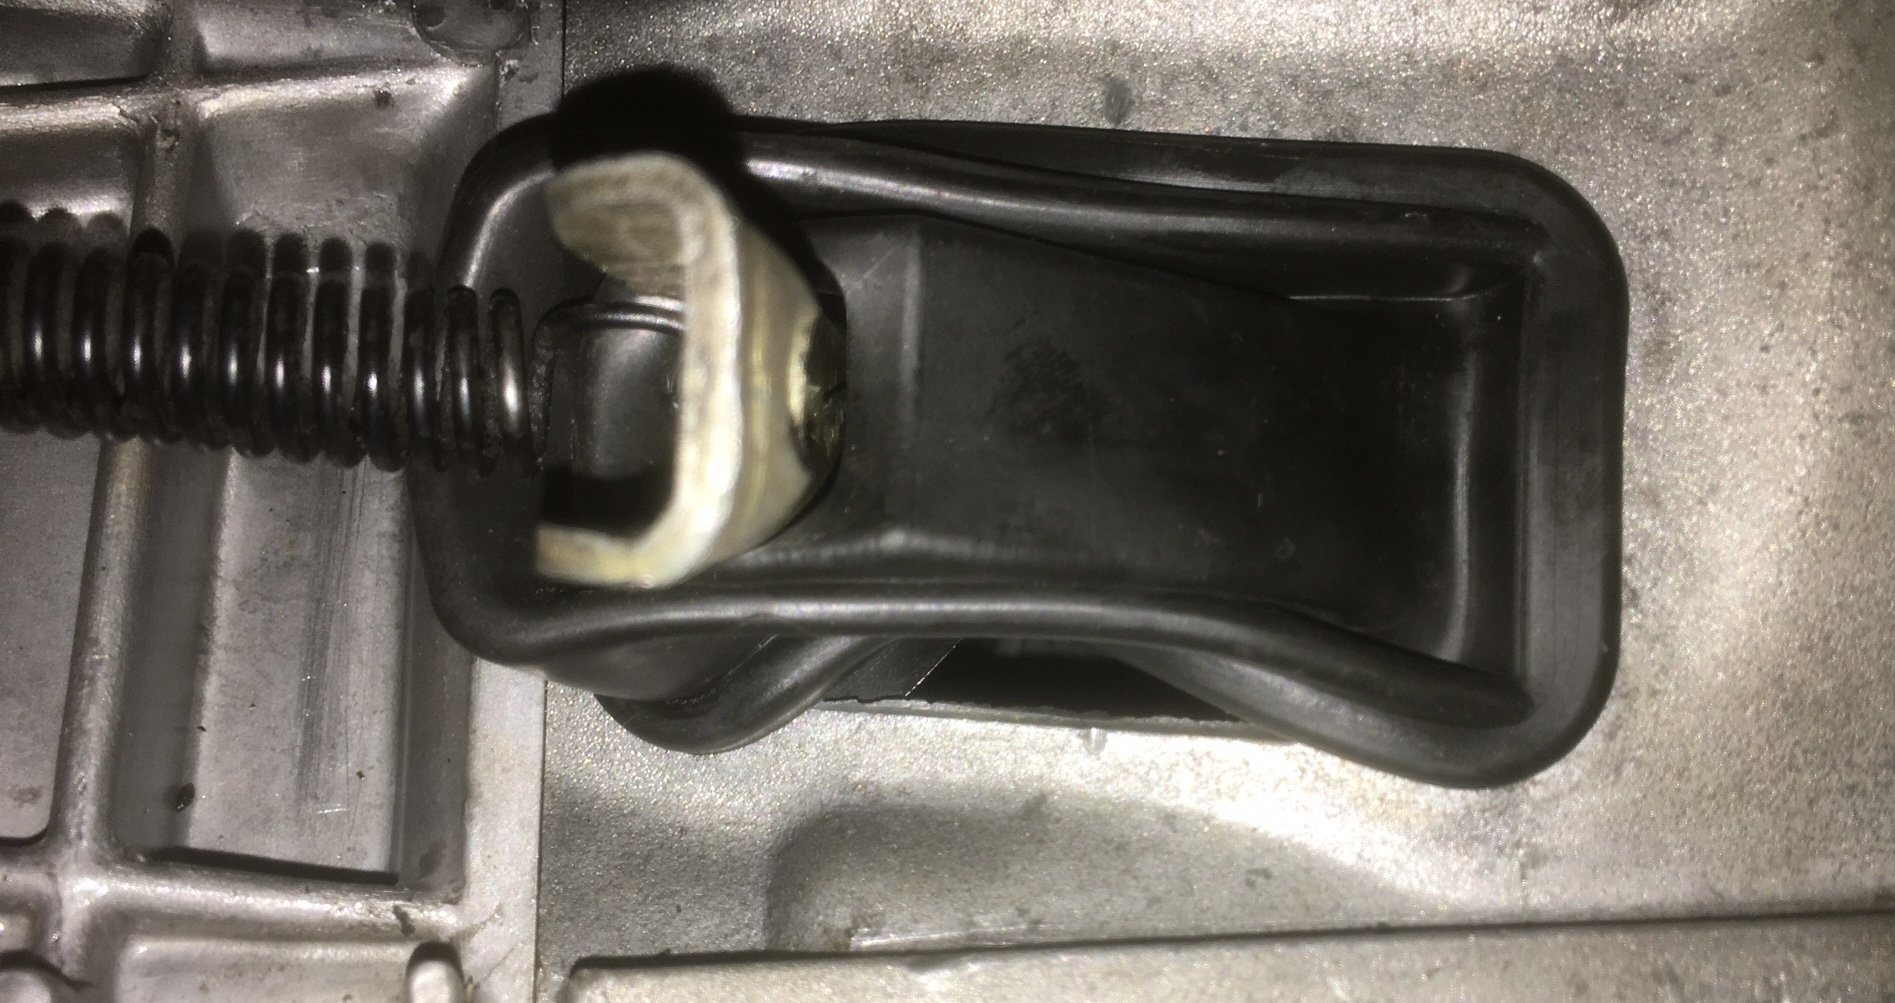
A water pump pulley turned up. It is the wrong one, made for an 1800. It fits well enough to run the engine, it just pushes the belt alignment out by about a belt width. Good enough for tutuing about with. The correct one is apparently on the way with a return courier bag for the wrong one, so can’t complain too hard. Anyway, noisy tappet was very apparent so while I still had the shim kit I went over them all again. Success! Quiet tappets, good oil flow etc. I got the boss to help me bleed the brakes which took ages. No end of air bubbles but we got there in the end using nearly a litre of fluid! One thing confused me though, it has a dual remote reservoir as it’s a dual circuit master. The fluid only went down in the rear reservoir for all 4 brakes?….They seem to be working well though. There was a horror moment when I walked into the shed this morning and found a large puddle of water under the car. It was dripping down the bell housing area so I immediately thought the worst and assumed the steel water jacket cover was leaking which is only accessible by splitting the engine and gearbox. Big whew when I saw it was the heater return line on the firewall! All fixed now. Then I took it for a hoon to get the fluids hot. Goes well, clutch is all good (higher pedal effort than I remember but it’s a new cable so might loosen up?) Brakes as I said work nicely, but there is a horrible driveline vibration that starts up at around 70k’s. Almost certainly the driveshaft which I have maybe put back on 180 degrees out…Finished the day by putting his face back on. I have no high beams and a blinker repeater is out, so plenty to sort yet.
- 125 replies
-
- 13
-
-
BMW M57. Would be like putting a Messerschmitt engine in a Spitfire in a way…
-
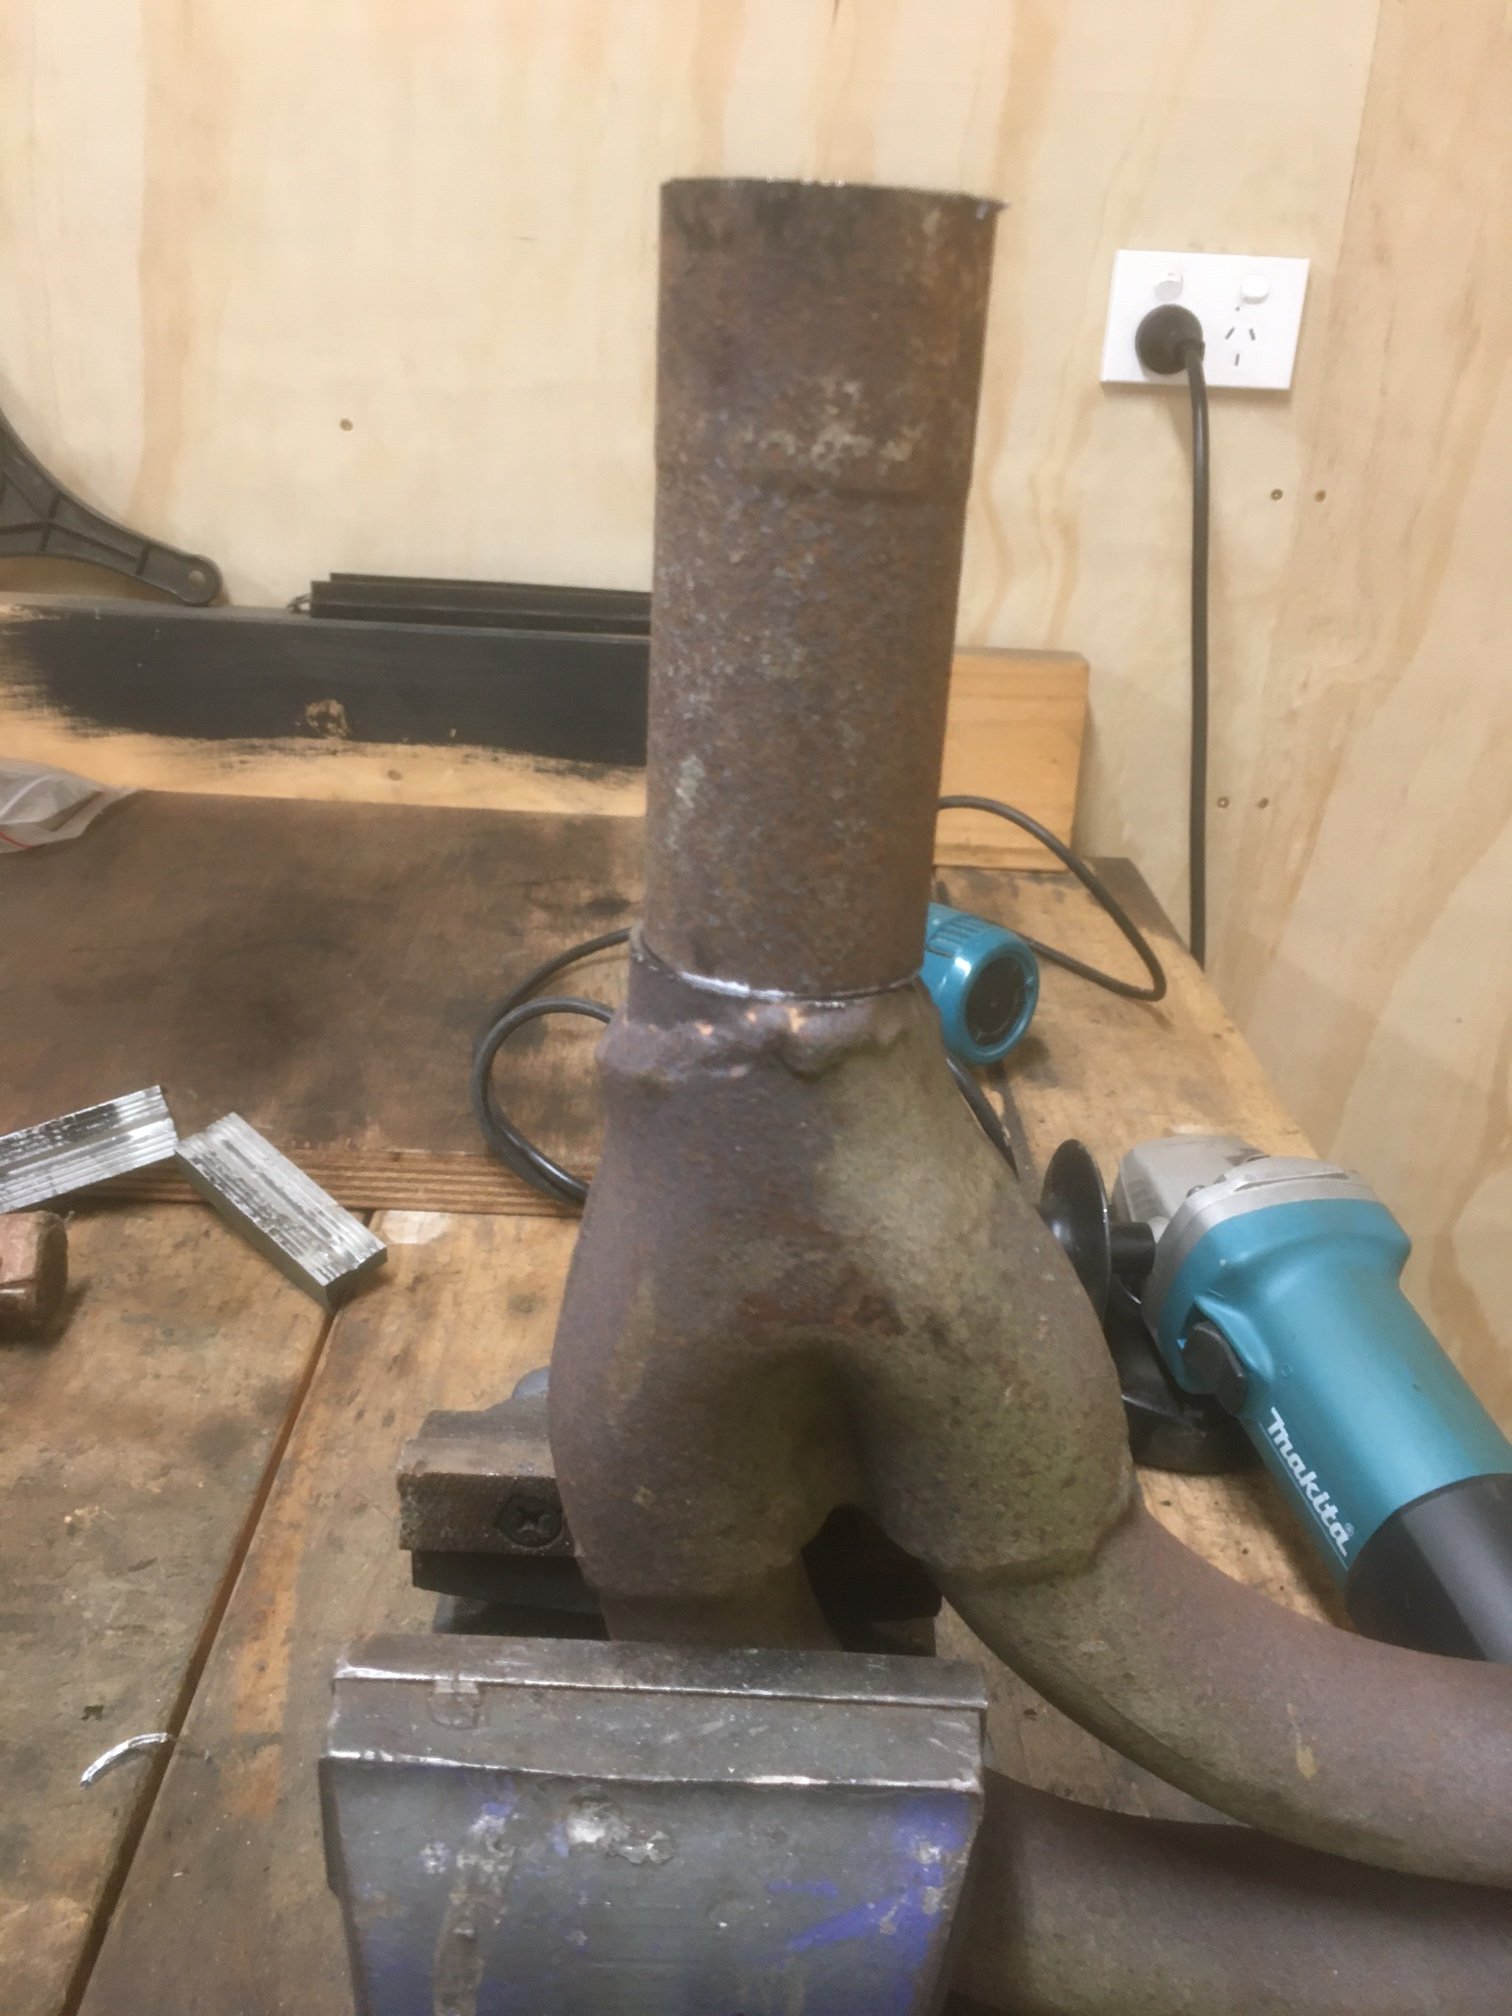
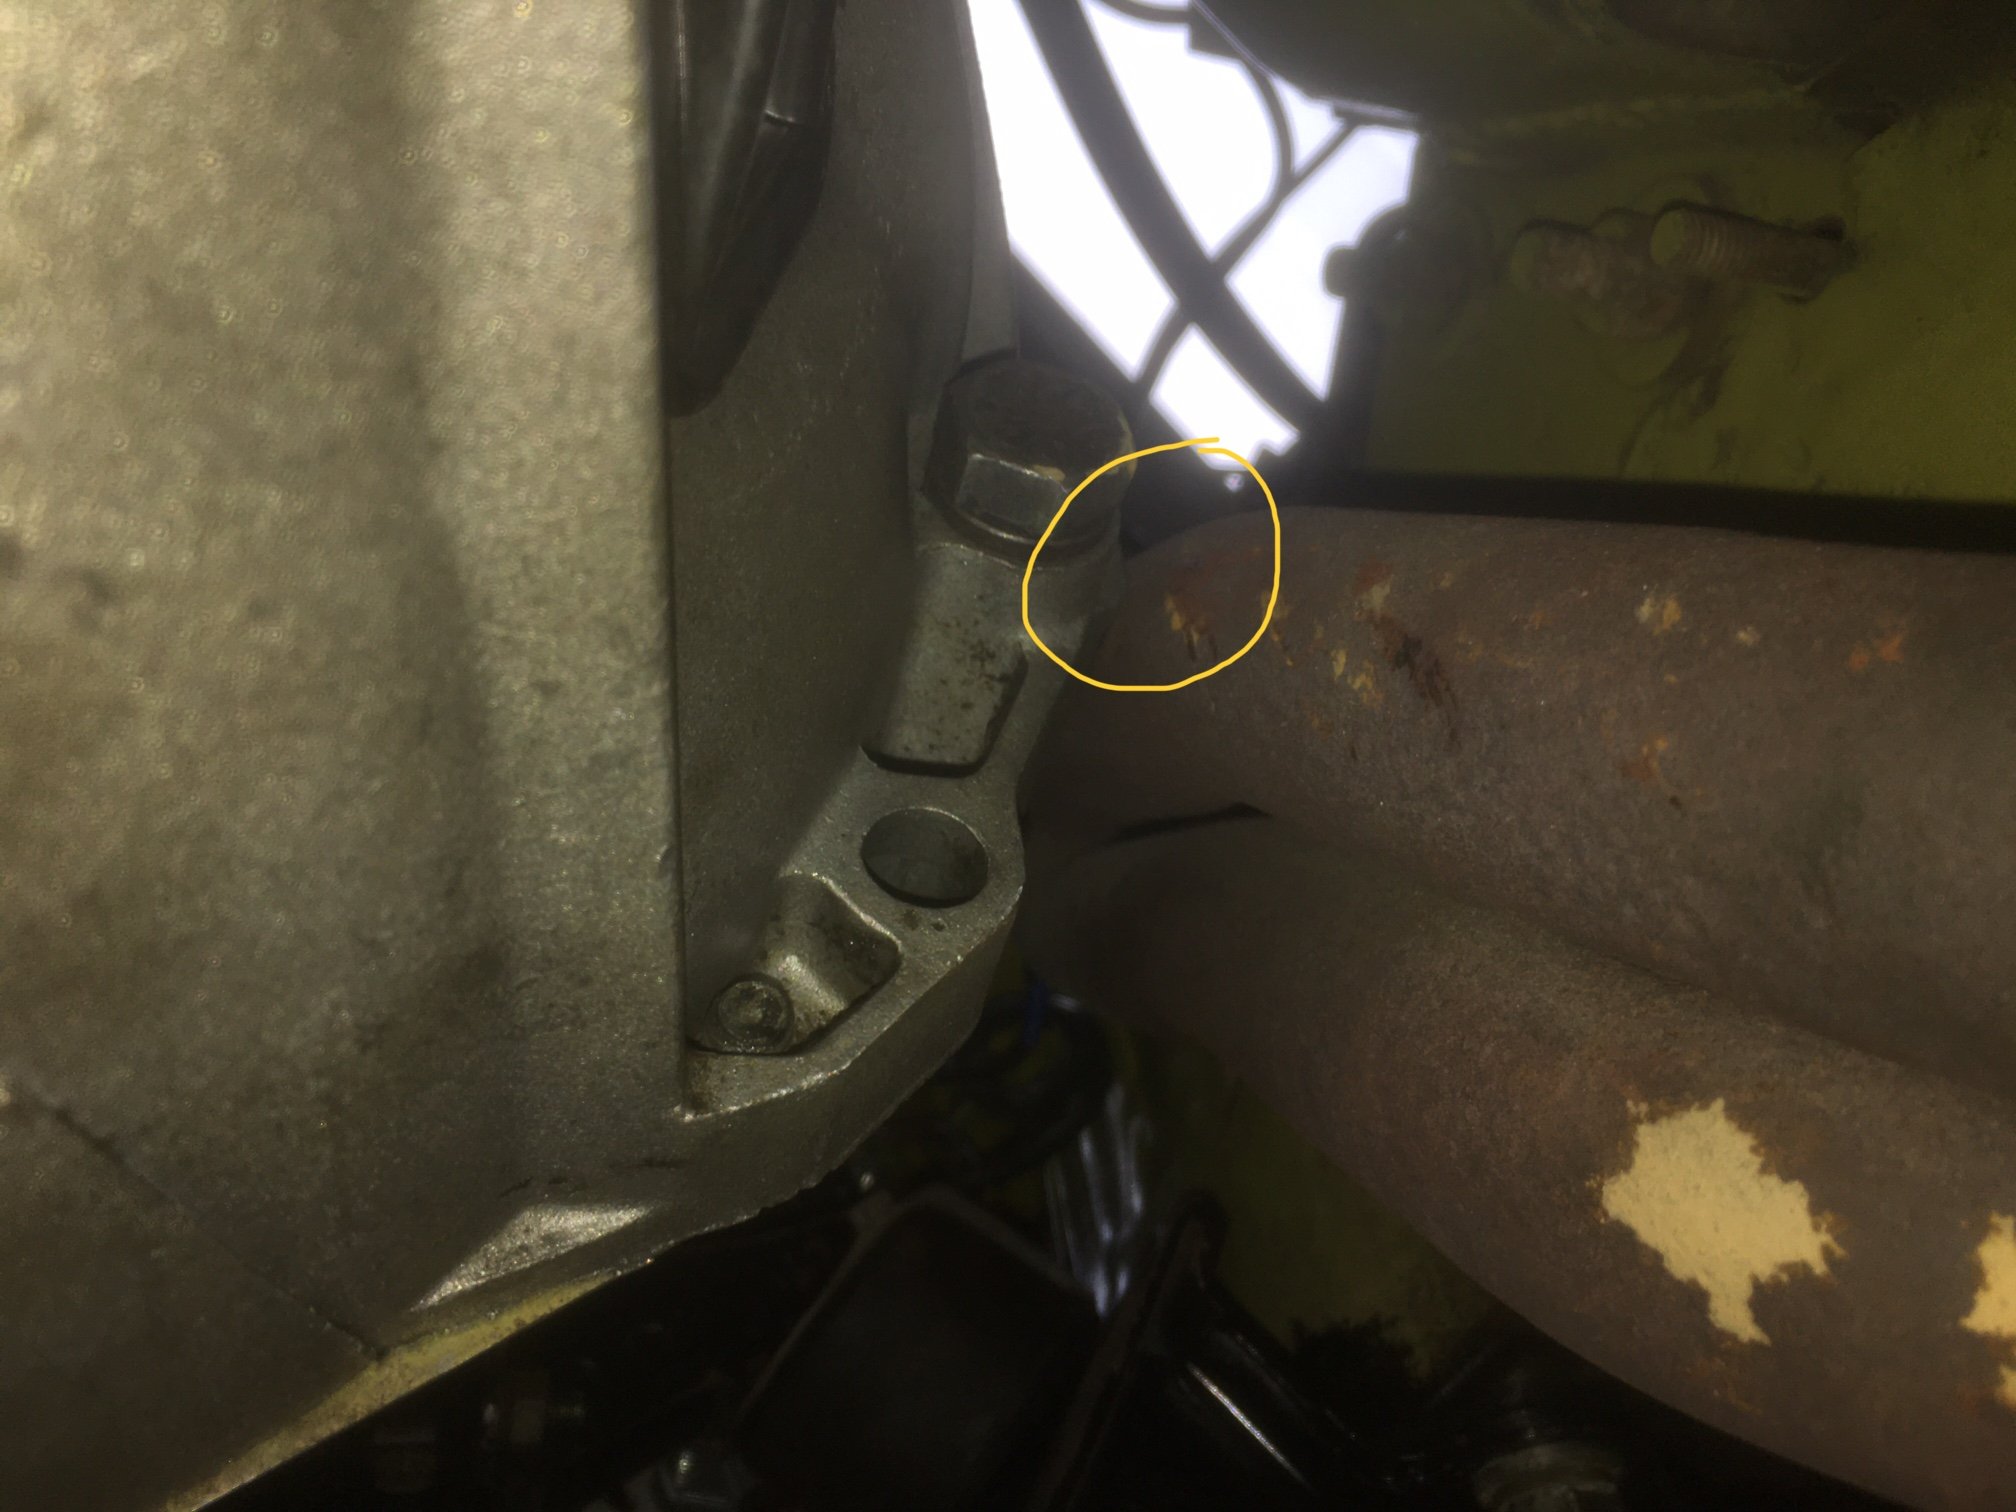
In the finest O.S. tradition I spent all day cobbling together a rubbish broken exhaust from bits of other rubbish broken exhausts. Step 1 was to trim the mangled collector back to sound, round steel. There was only just enough meat left. Then it needed a bit of pipe added which I chopped off another rotten downpipe that came with a spare engine. Fizz fizz fizz Next problem, the flange that bolts to the manifold was actually warped and also very thin. I addressed this by chopping the much thicker flange off the spare broken downpipe and welded it to the existing flange. This gives a nice thick flange that is hopefully less prone to distortion and also lowers the whole lot by 5mm which is winning. The biggest headache was extracting the mangled remains of the collector pipe out of the slip join in the main pipe. Took about an hour and a half but got there in the end. I’ve hung the whole system back on and hooray! it fits at least 3% better! Well worth half a day of work. Also, it now clears the bell housing by at least 1mm. I’ll check for leaks when (if) a waterpump pulley ever turns up.
- 125 replies
-
- 14
-
-

Discuss here about Yoeddynz's little Imp project...
Sunbeam replied to yoeddynz's topic in Project Discussion
That’s way too bling for a stinky old oil filler tube. I like it… -
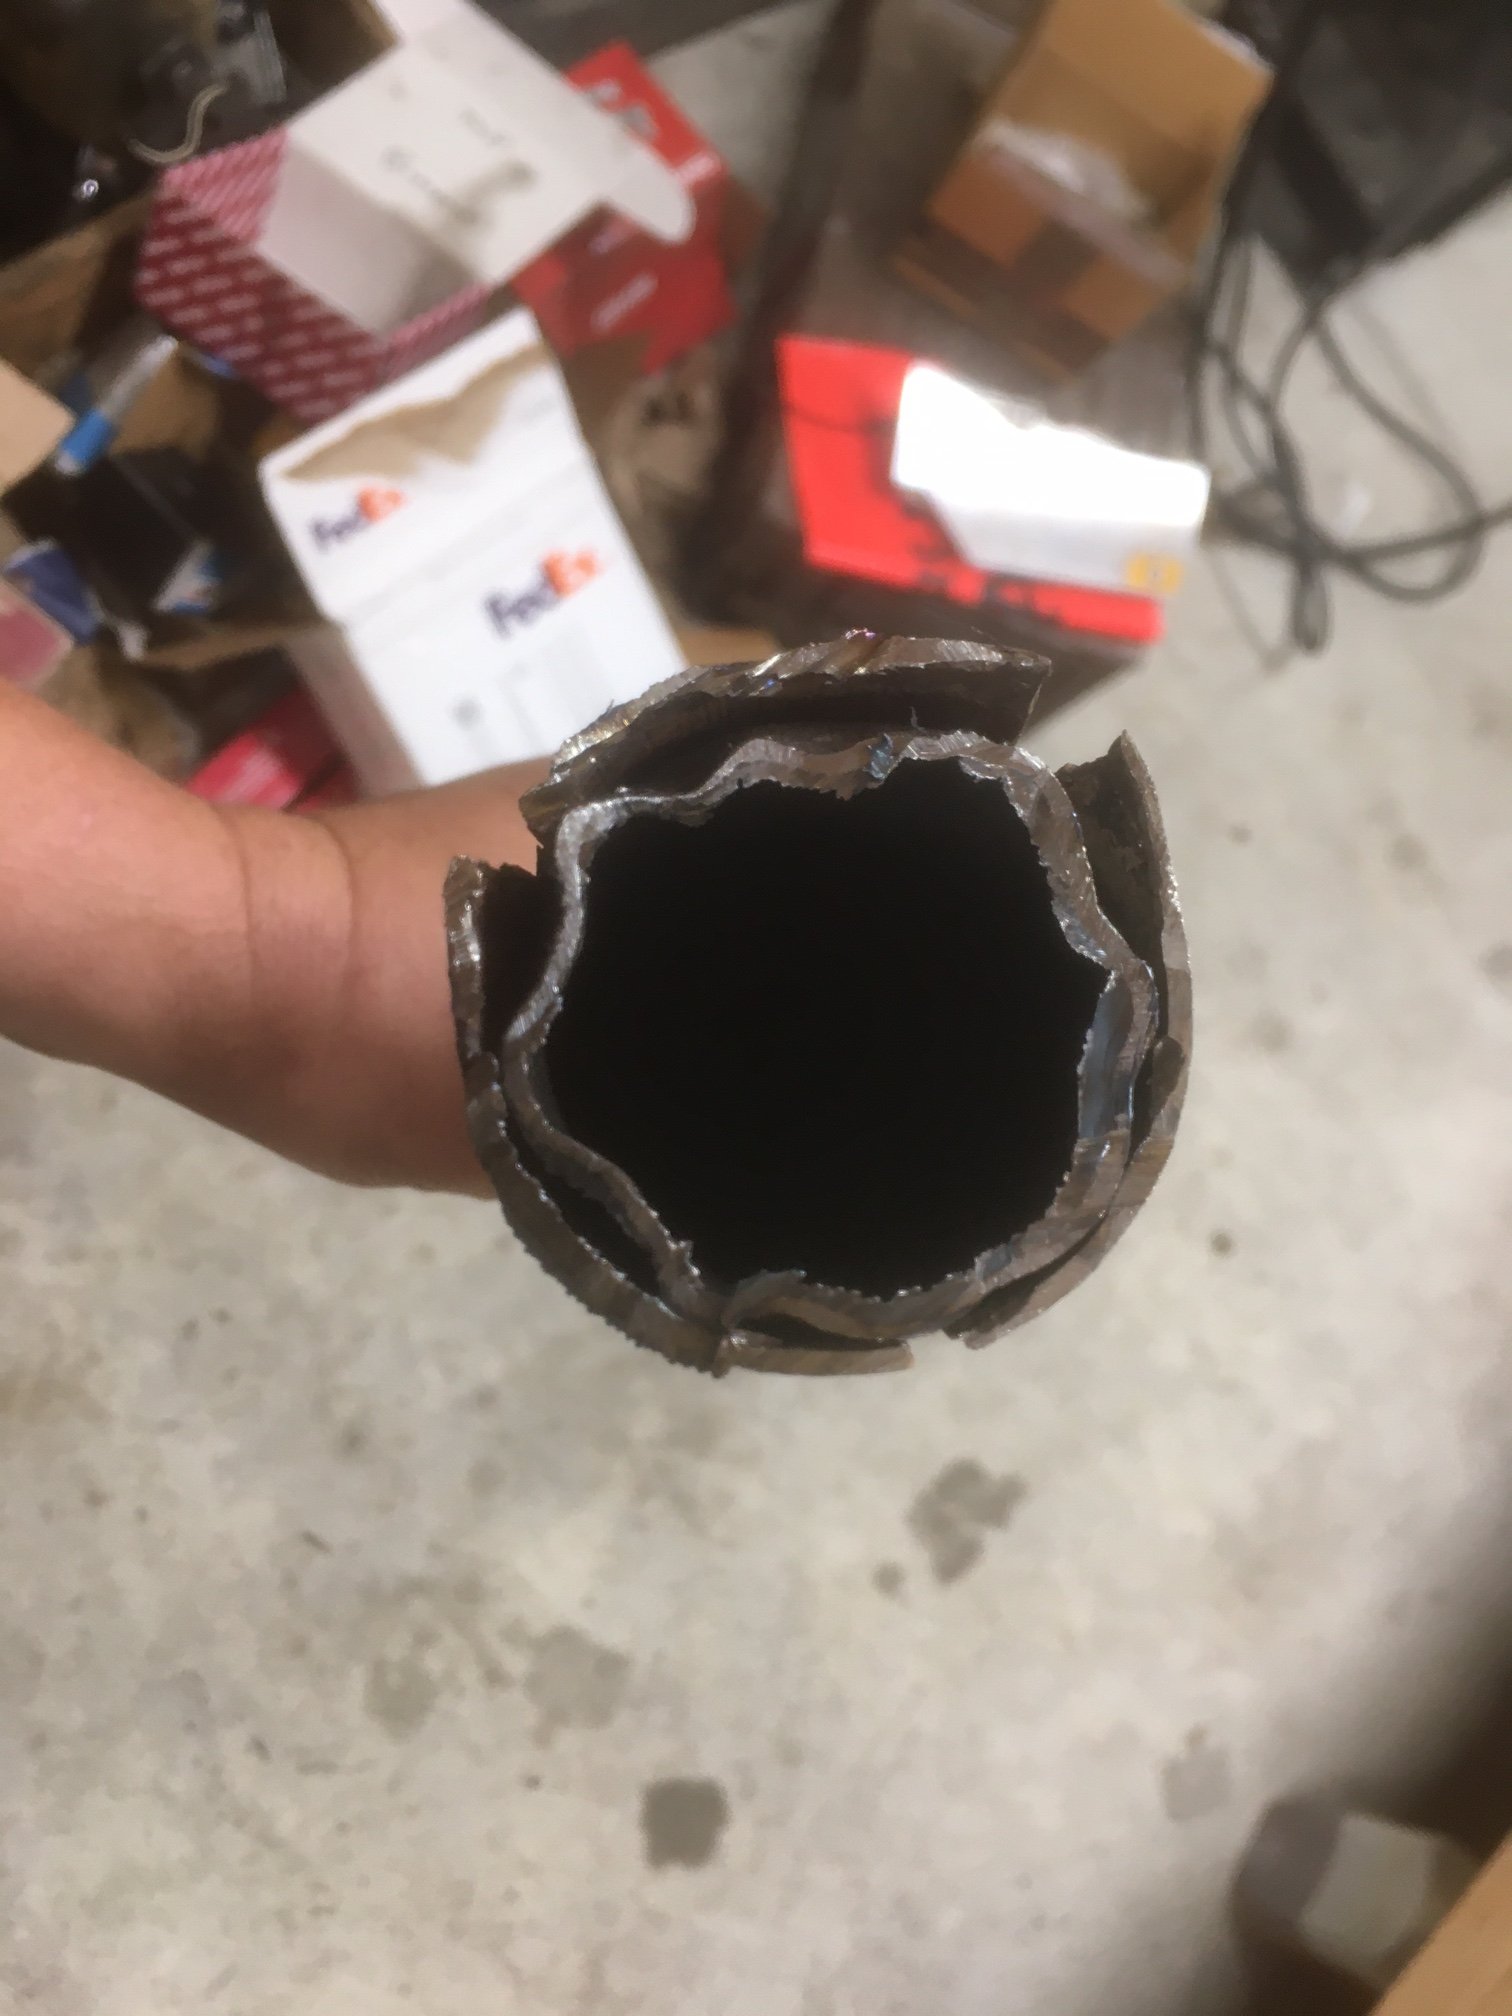
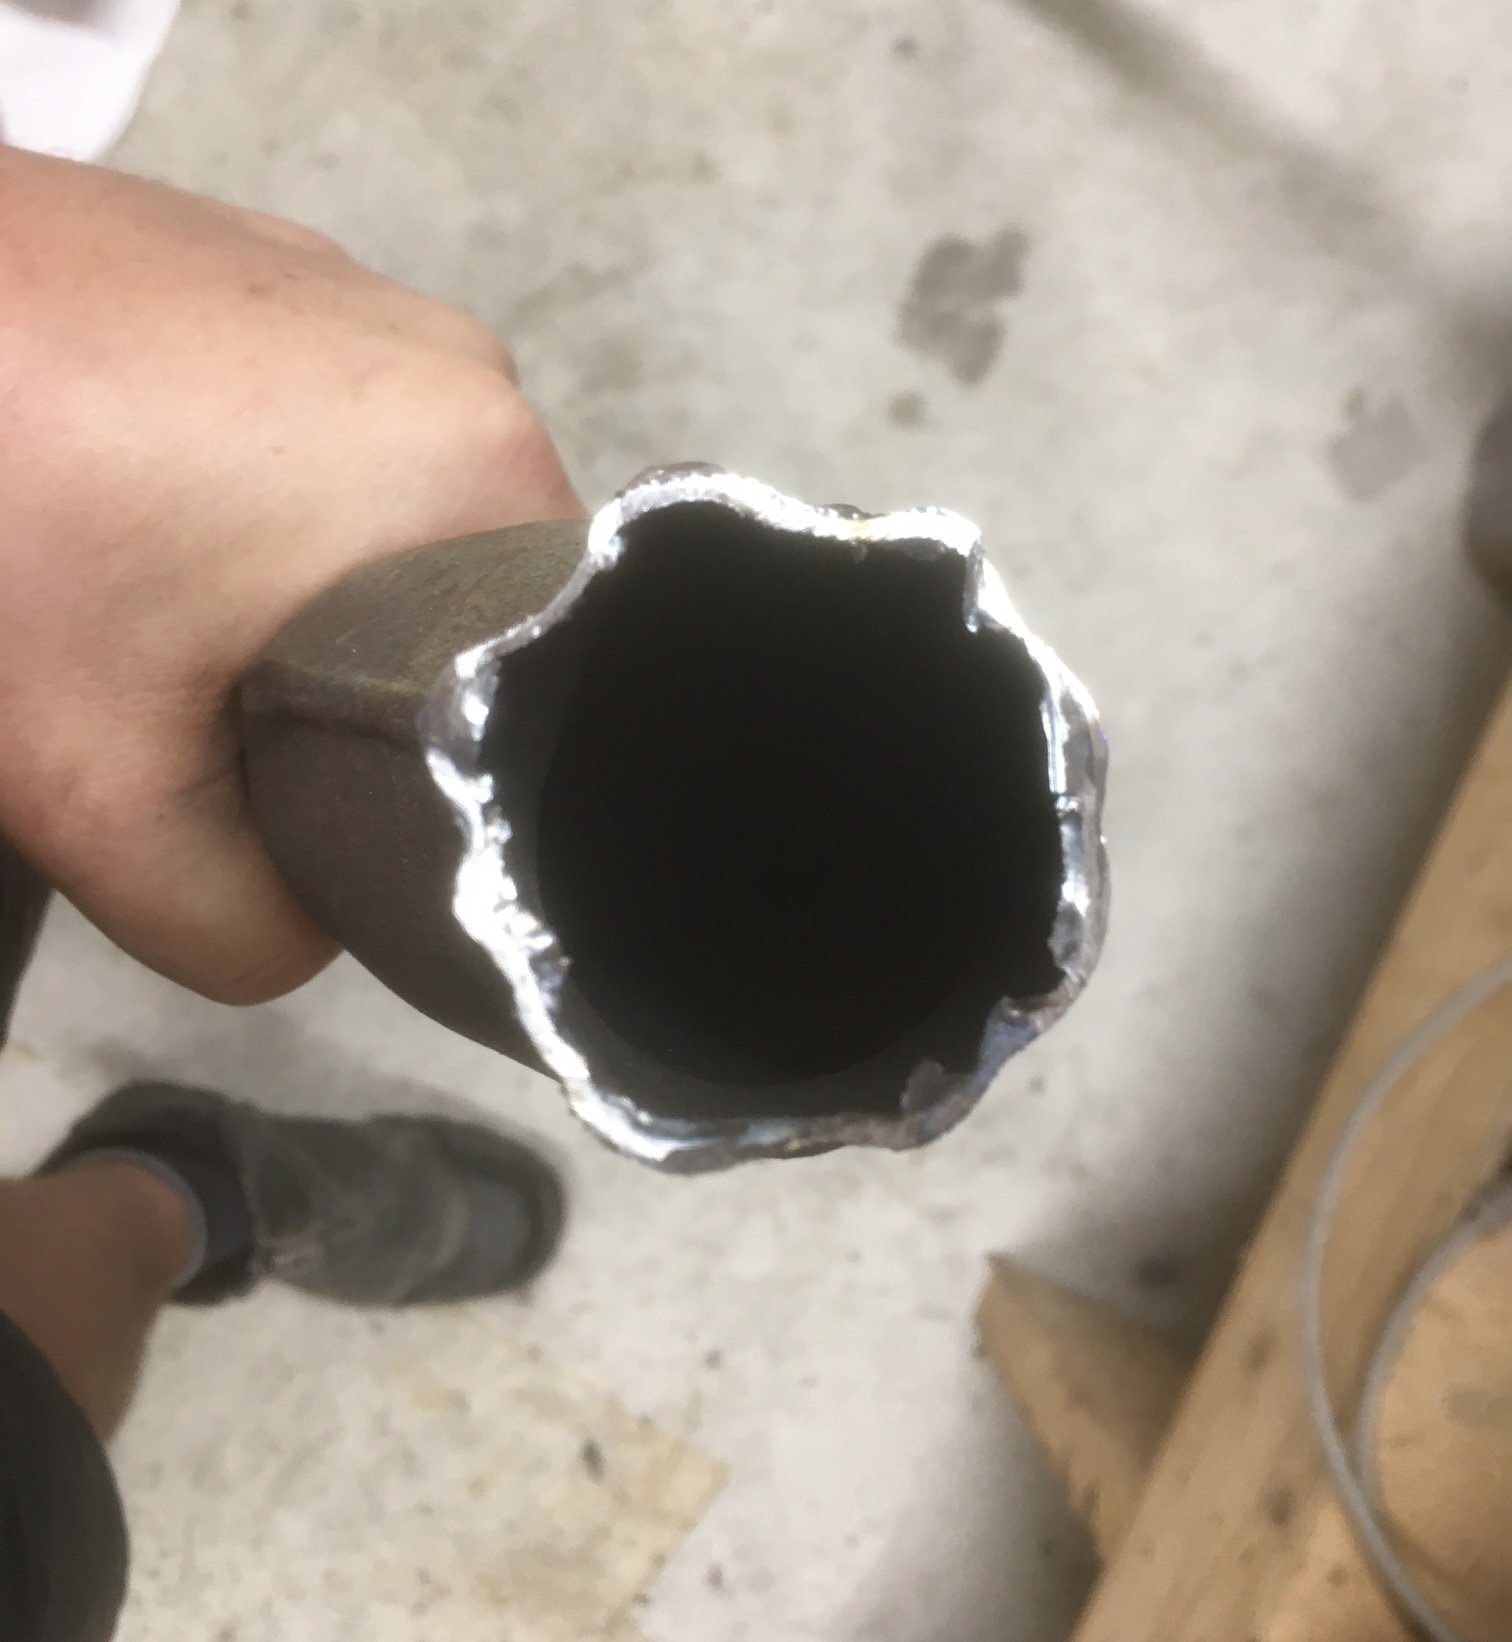
It sounded a bit noisy I think. I pulled the exhaust off again because I wasn’t super happy with how it was fitting. I noticed this. it’s touching the bellhousing. Not good, and it certainly didn’t touch there originally so I’m a bit baffled as to how this happened. There was clearly exhaust leaking from the engine block side of the flange. This makes sense because the fouling on the bellhousing will stop that side doing up tight. Remember how I said some moron had welded the front slip joint? I decided to unweld it. All the subsequent tricks in the book would not separate the join so I cut it and oh, looky here… collector side pipe side: Great. The exhaust pipe is puny 38mm i.d. pipe (stainless actually!) and this clearly would not fit over the collector. So, of course any sane person would smash the collector pipe into star shaped oblivion until it does fit. Aaaaargh! This will undoubtedly turn into a wallet-rending drama.
-
Yeeehaw. No cooling system yet, so a very short blat. Not doctored either, legitimately first crack.
-
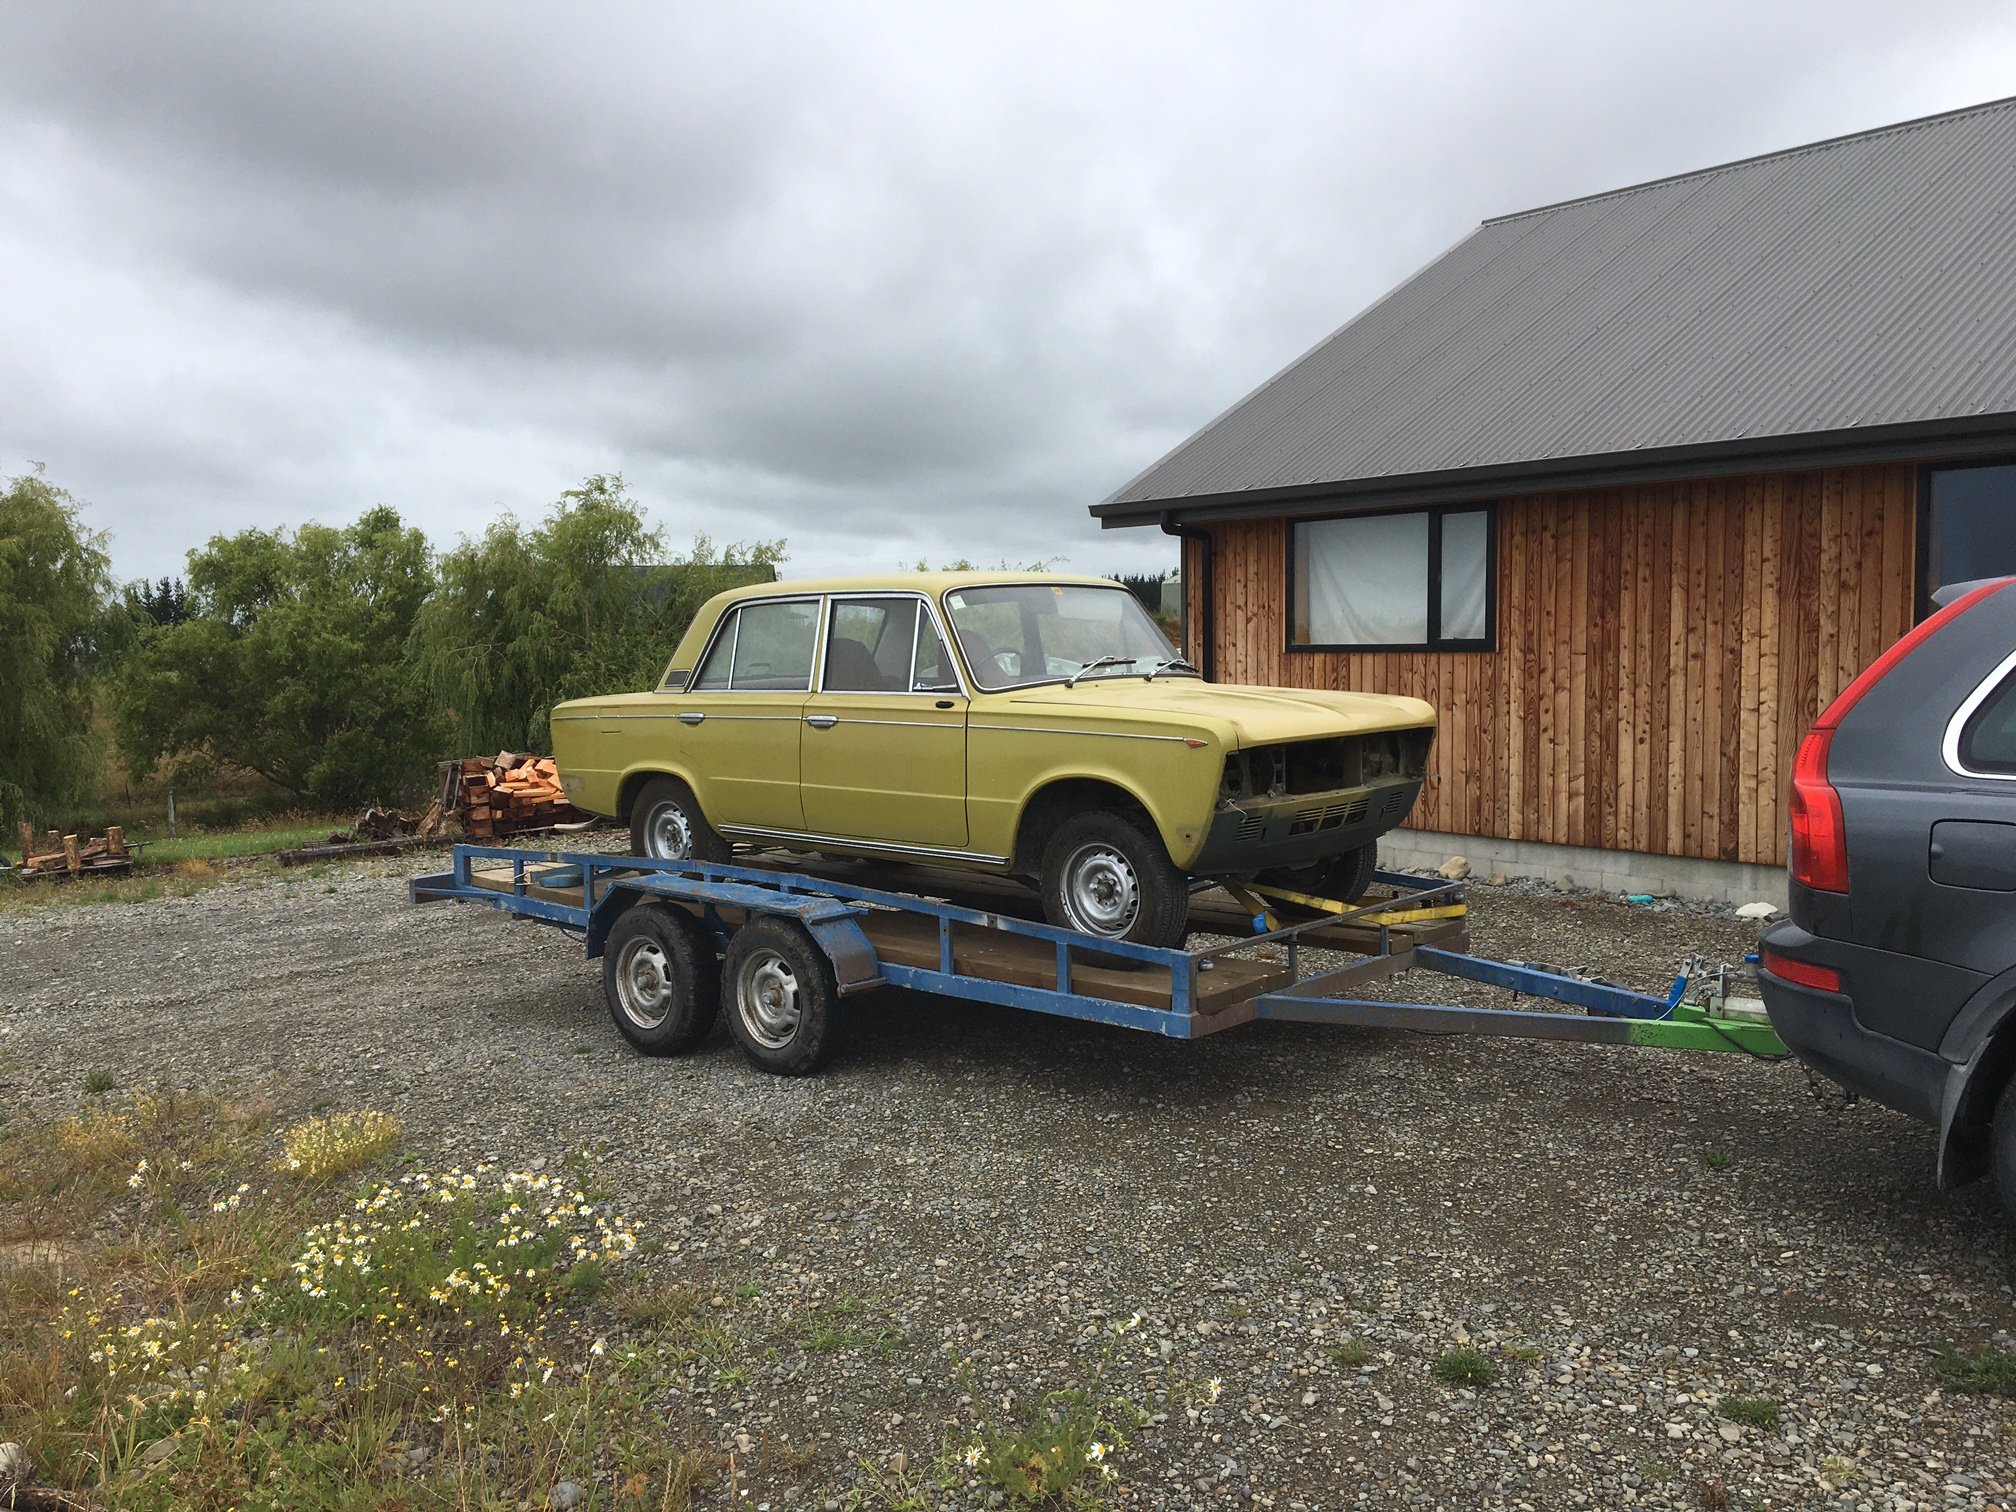
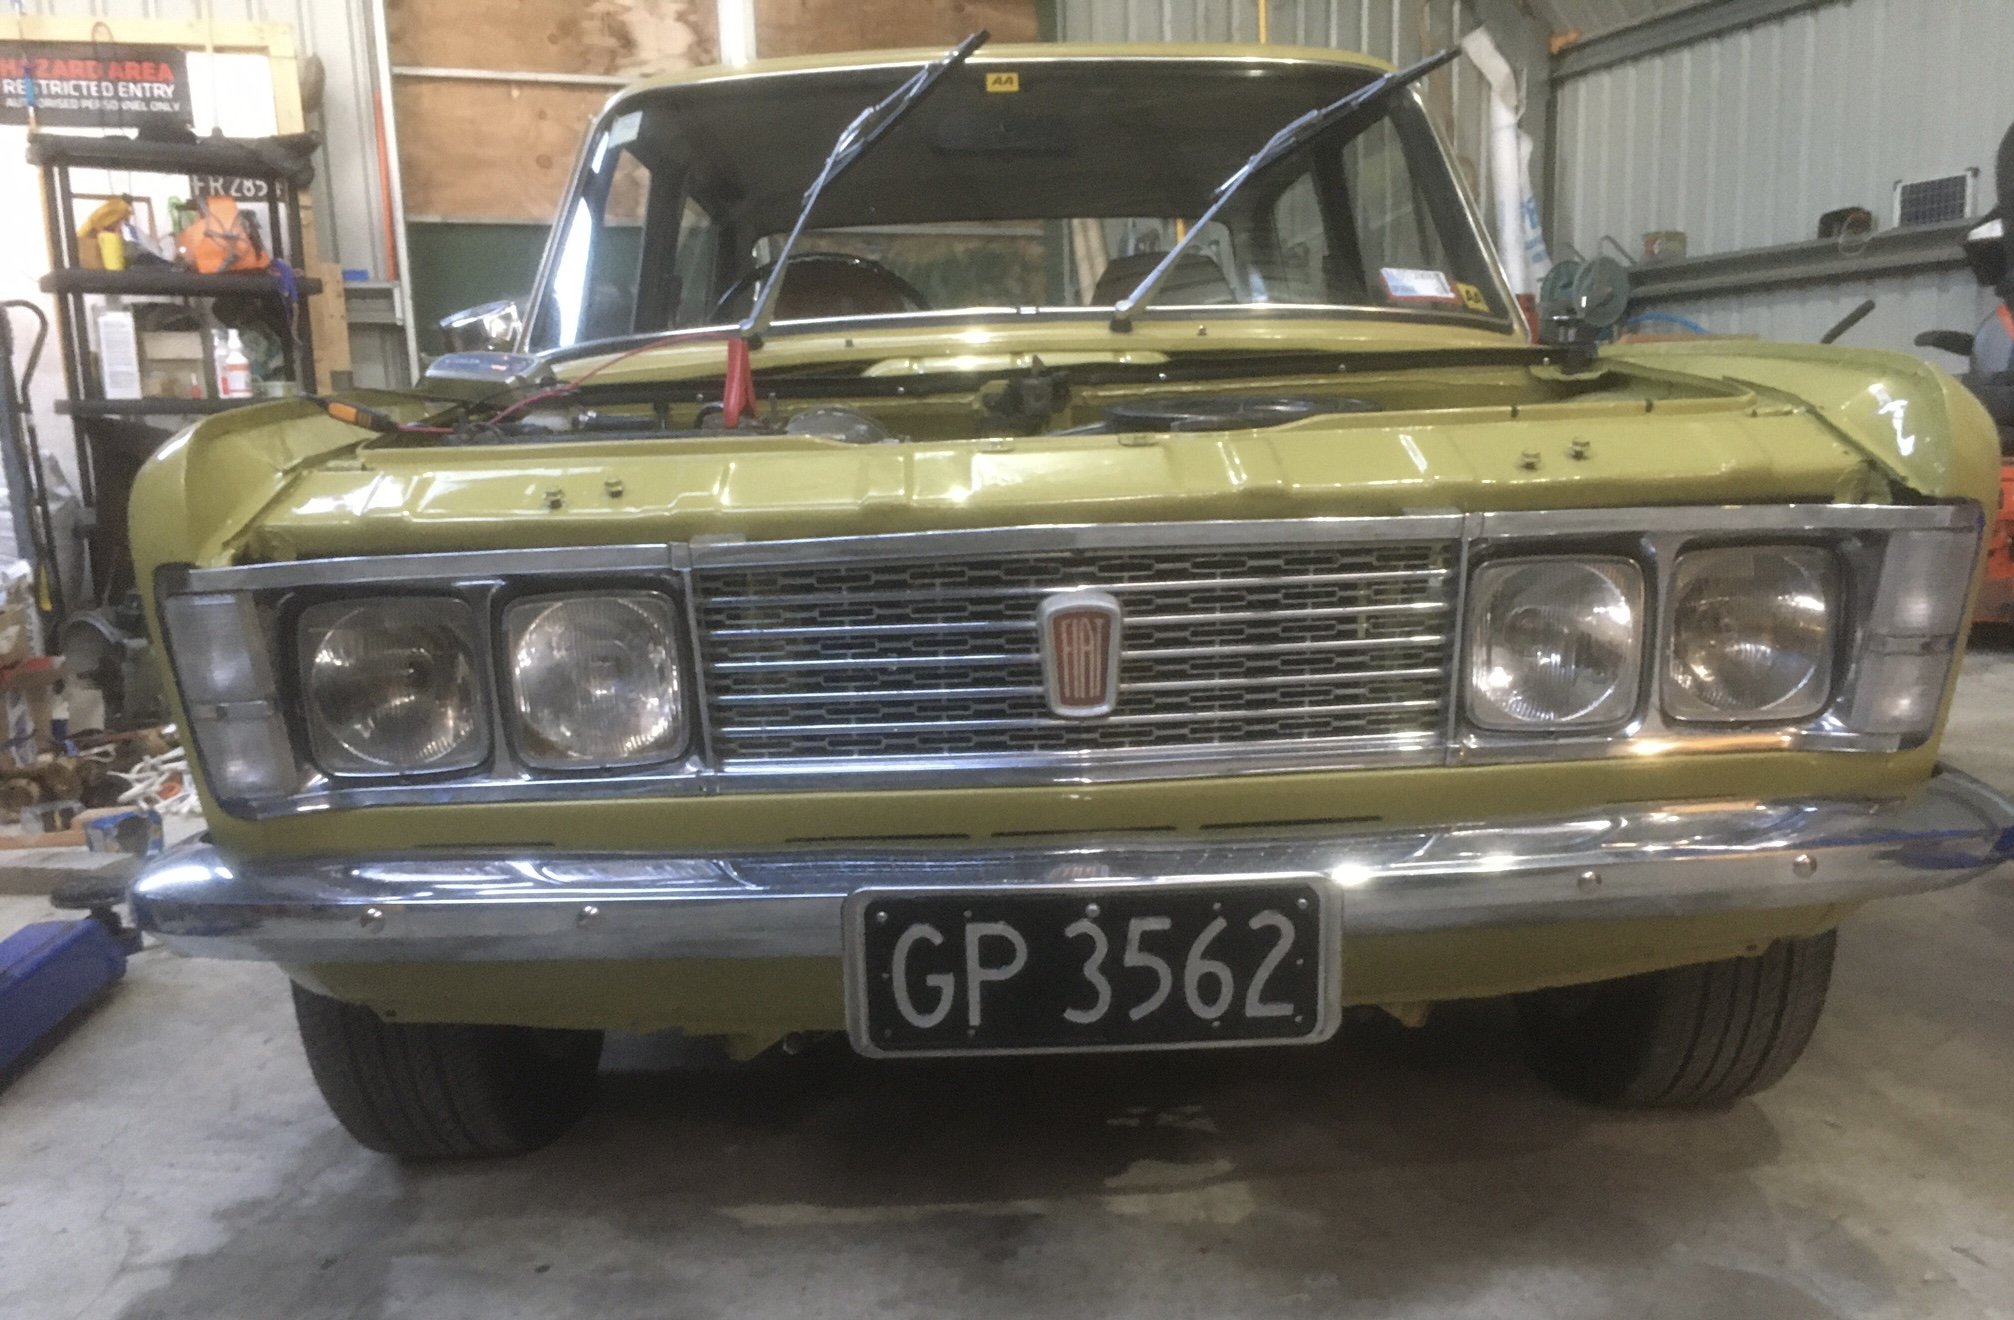
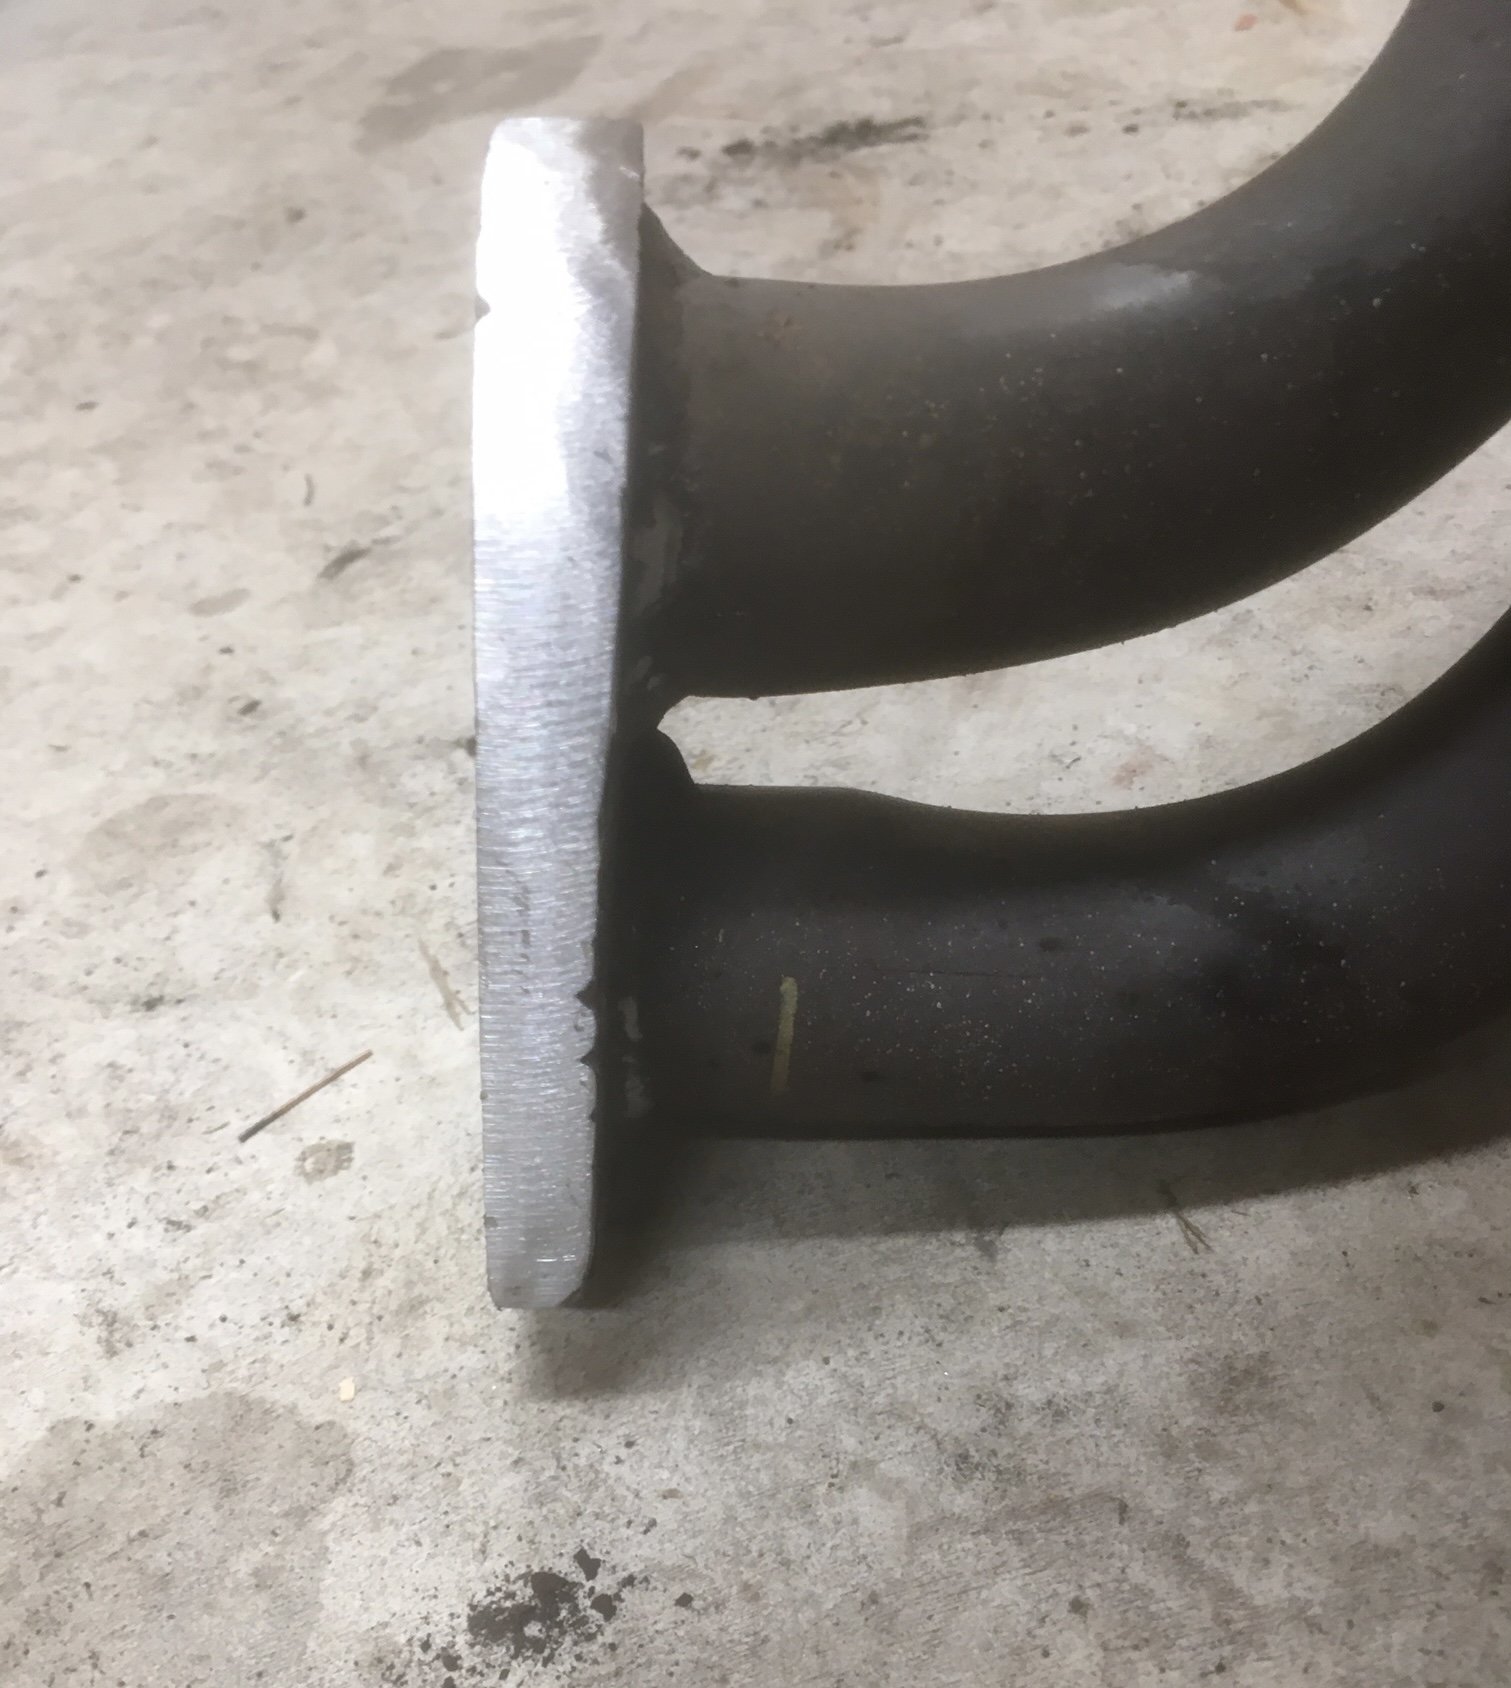
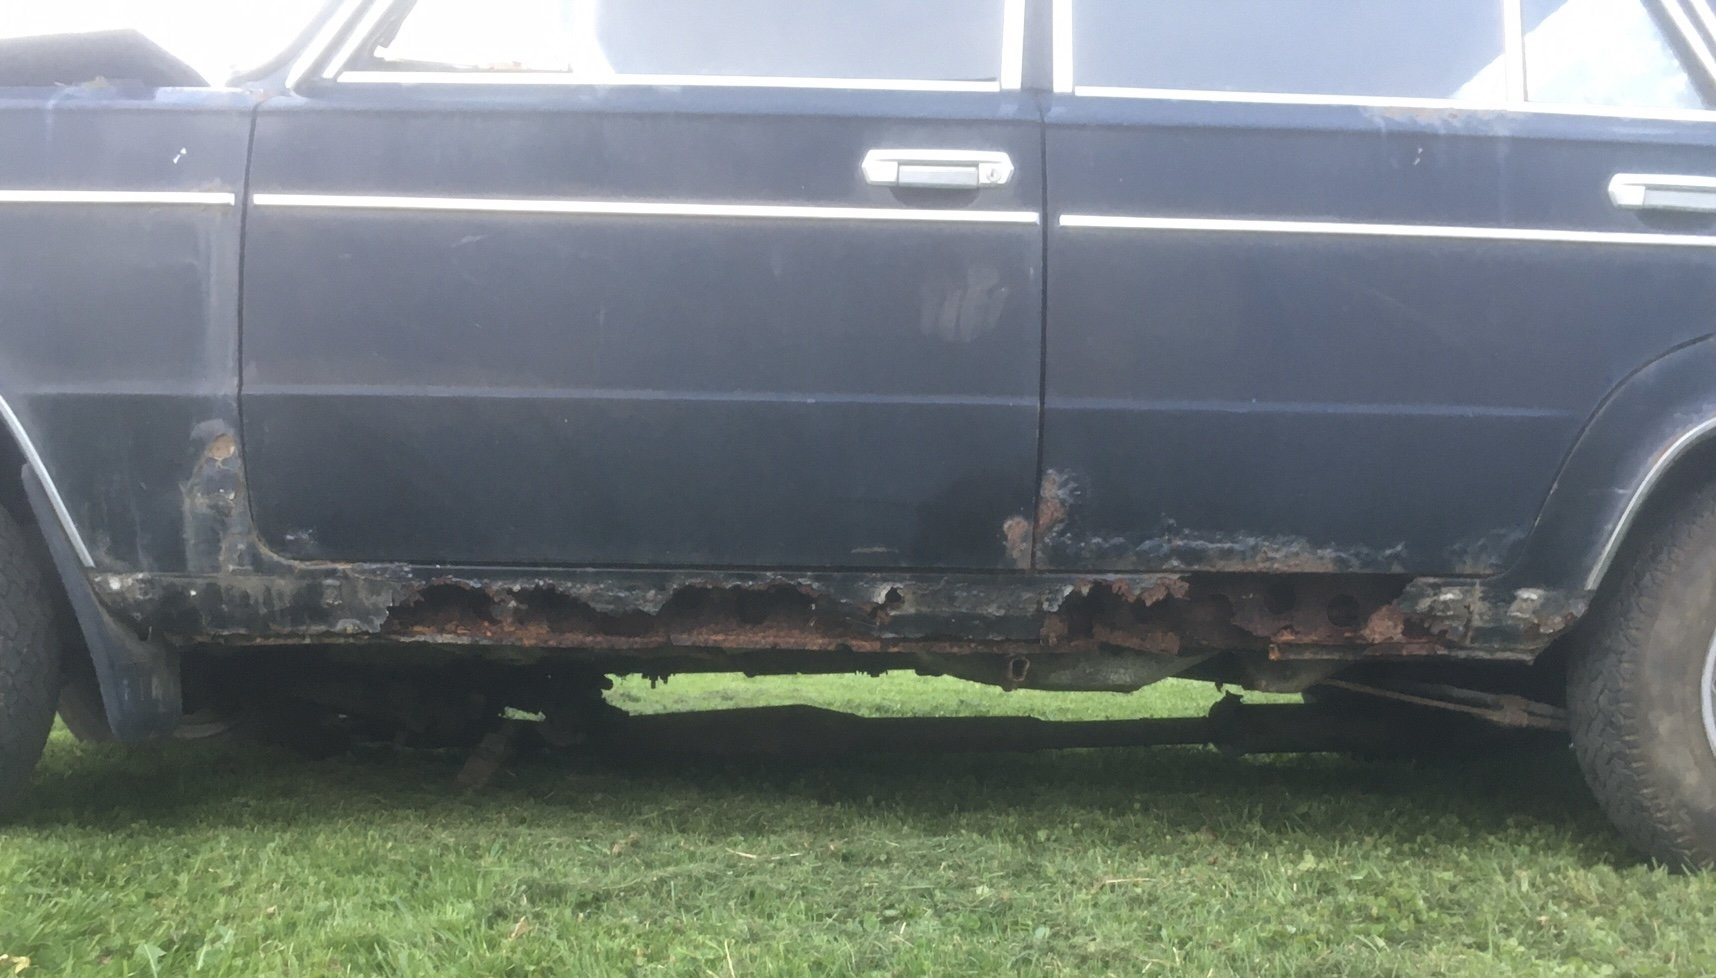
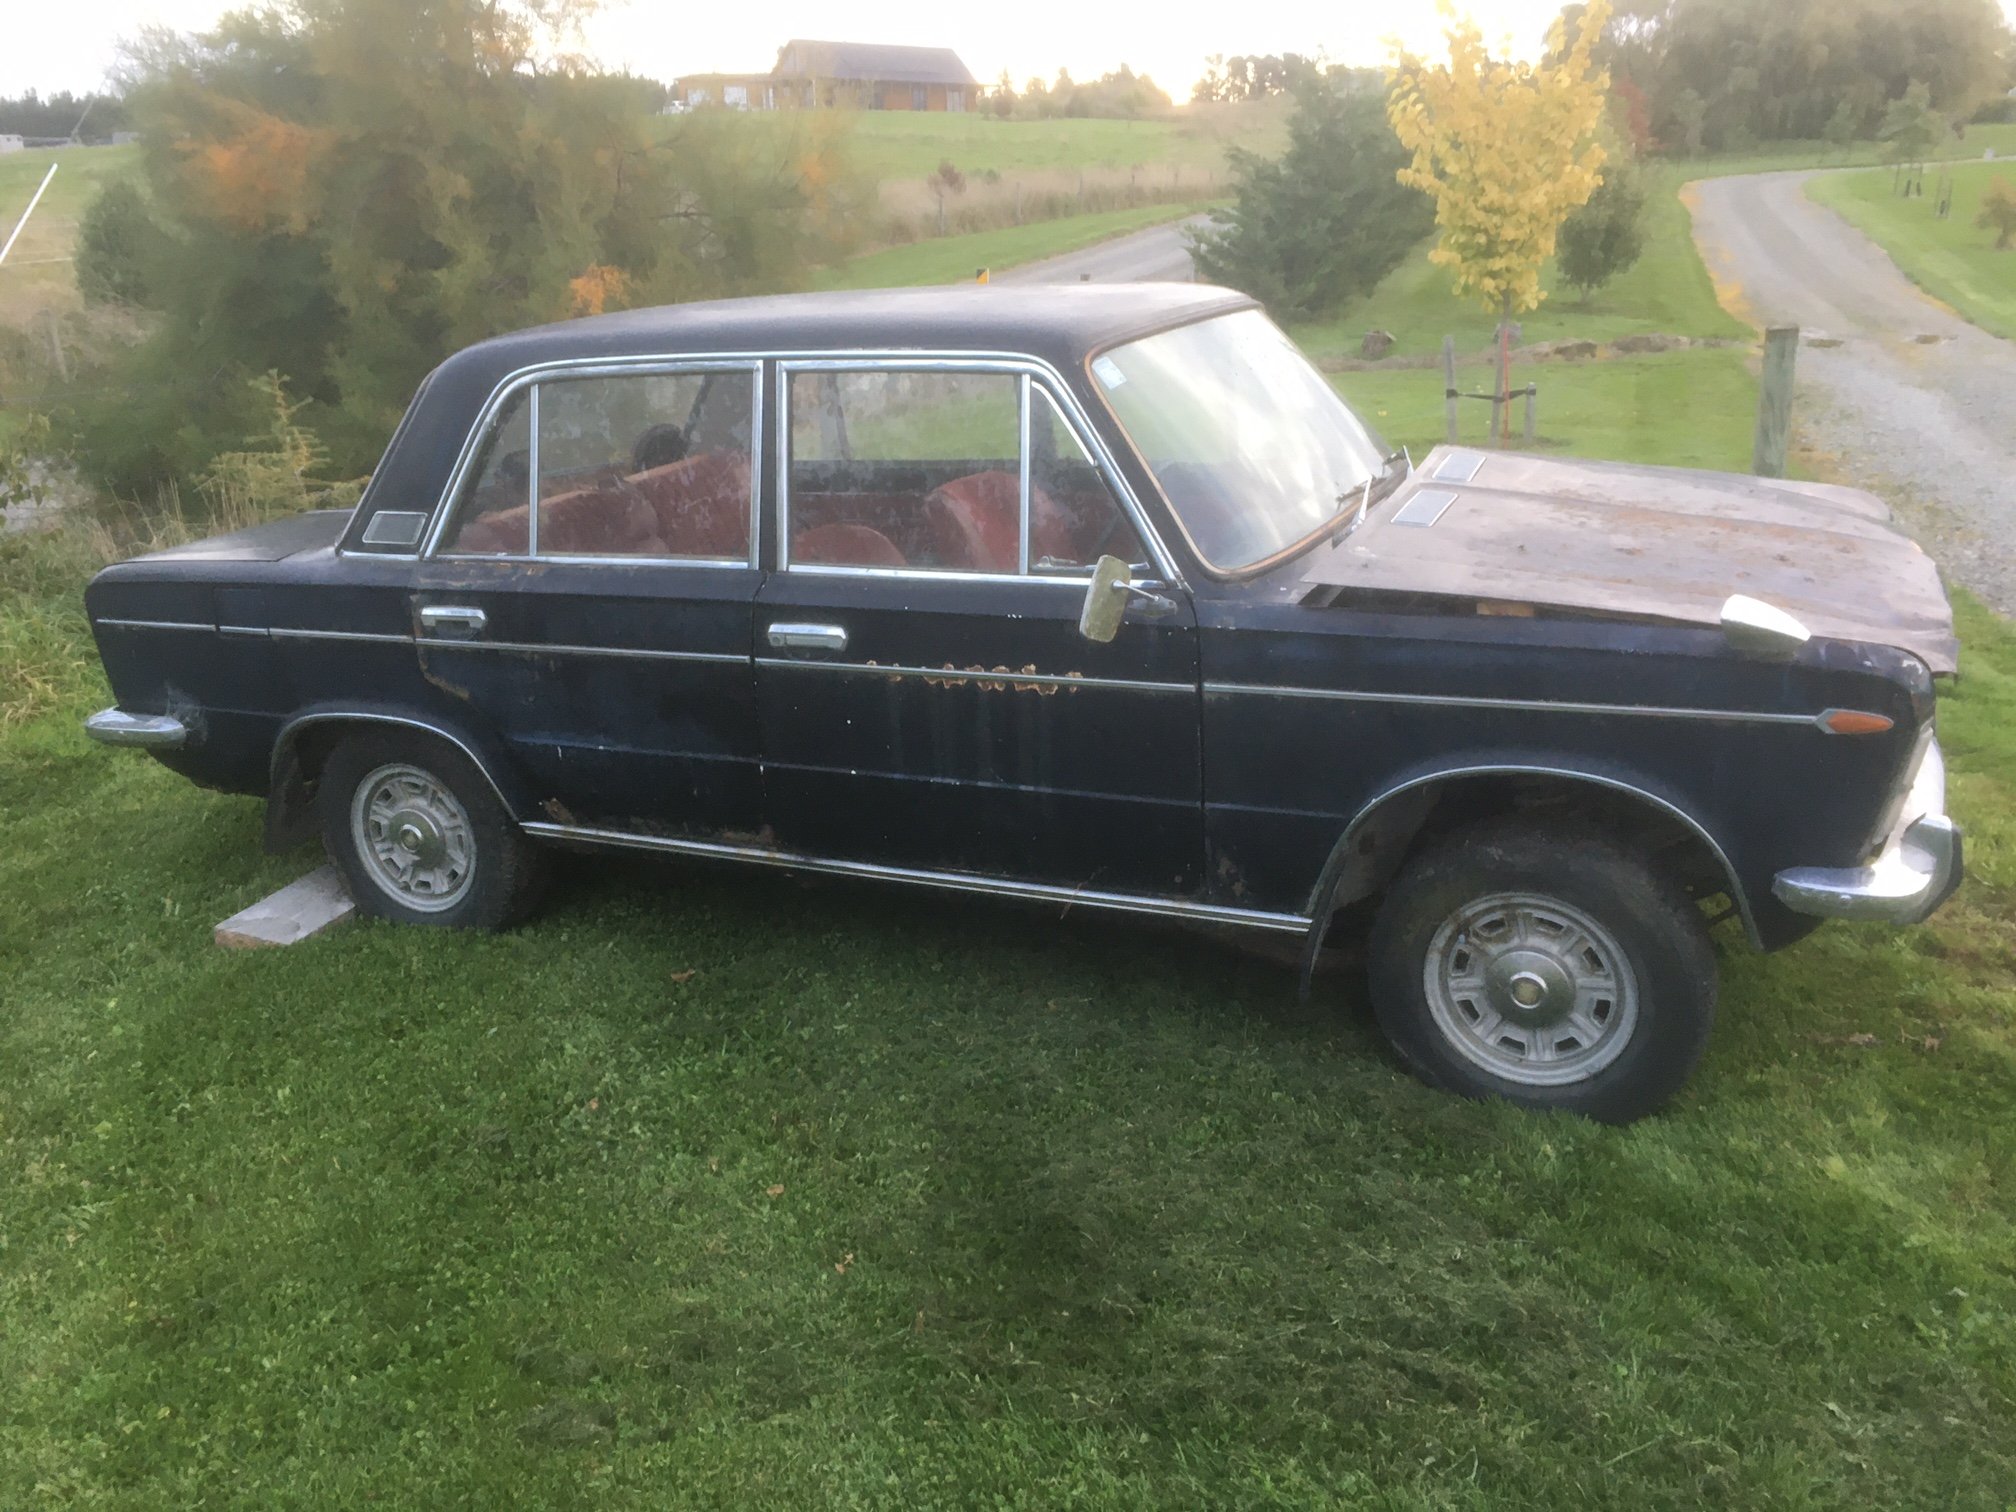
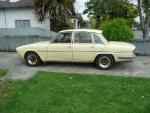
I worked hard towards firing it up the other day but this didn’t happen because the fuel pump started pissing fuel all over the floor. I’ve ordered another. In other installation related news, the exhaust suddenly doesn’t fit properly anymore. I blame the new engine and gearbox mounts for raising the whole lot up, but principally I blame a previous bodger for WELDING the front slip joint to the downpipe so adjustments are not possible. The whole exhaust wants replacing at some stage anyway because 38mm press bent pipe is not ok, OK? In other news, this follwed me home on a trailer. PARTS CAR! She’s a 1969 125 Special hence the stainless wheel arch trims and other bling. The above is its good side… bad side: There are basically no usable body panels. A buddy of mine wants the front cut to use as a pattern for fixing his (apparently really bad with some bits missing so needs a sample to build replacements) The interior is mouldy and yuck but has decent perforated head lining and a cool centre console thing with gauges that only seem to appear in mk1 Specials. Incredibly the dash top has fewer cracks than some road going 125’s I’ve seen which is some feat for having been parked in a paddock for 10 years. Plans are to harvest trim, bumpers, door handles and catches, dashboard, window regs, any undamaged glass. All suspension, diff, driveshaft and 5 speed box (there’s no engine) and importantly the transmission tunnel which will aid future 5 speed conversion. The rest minus front cut will be scrapped.
- 125 replies
-
- 15
-
-
I enjoy my Makita stuff. Brushless goes hard.
-
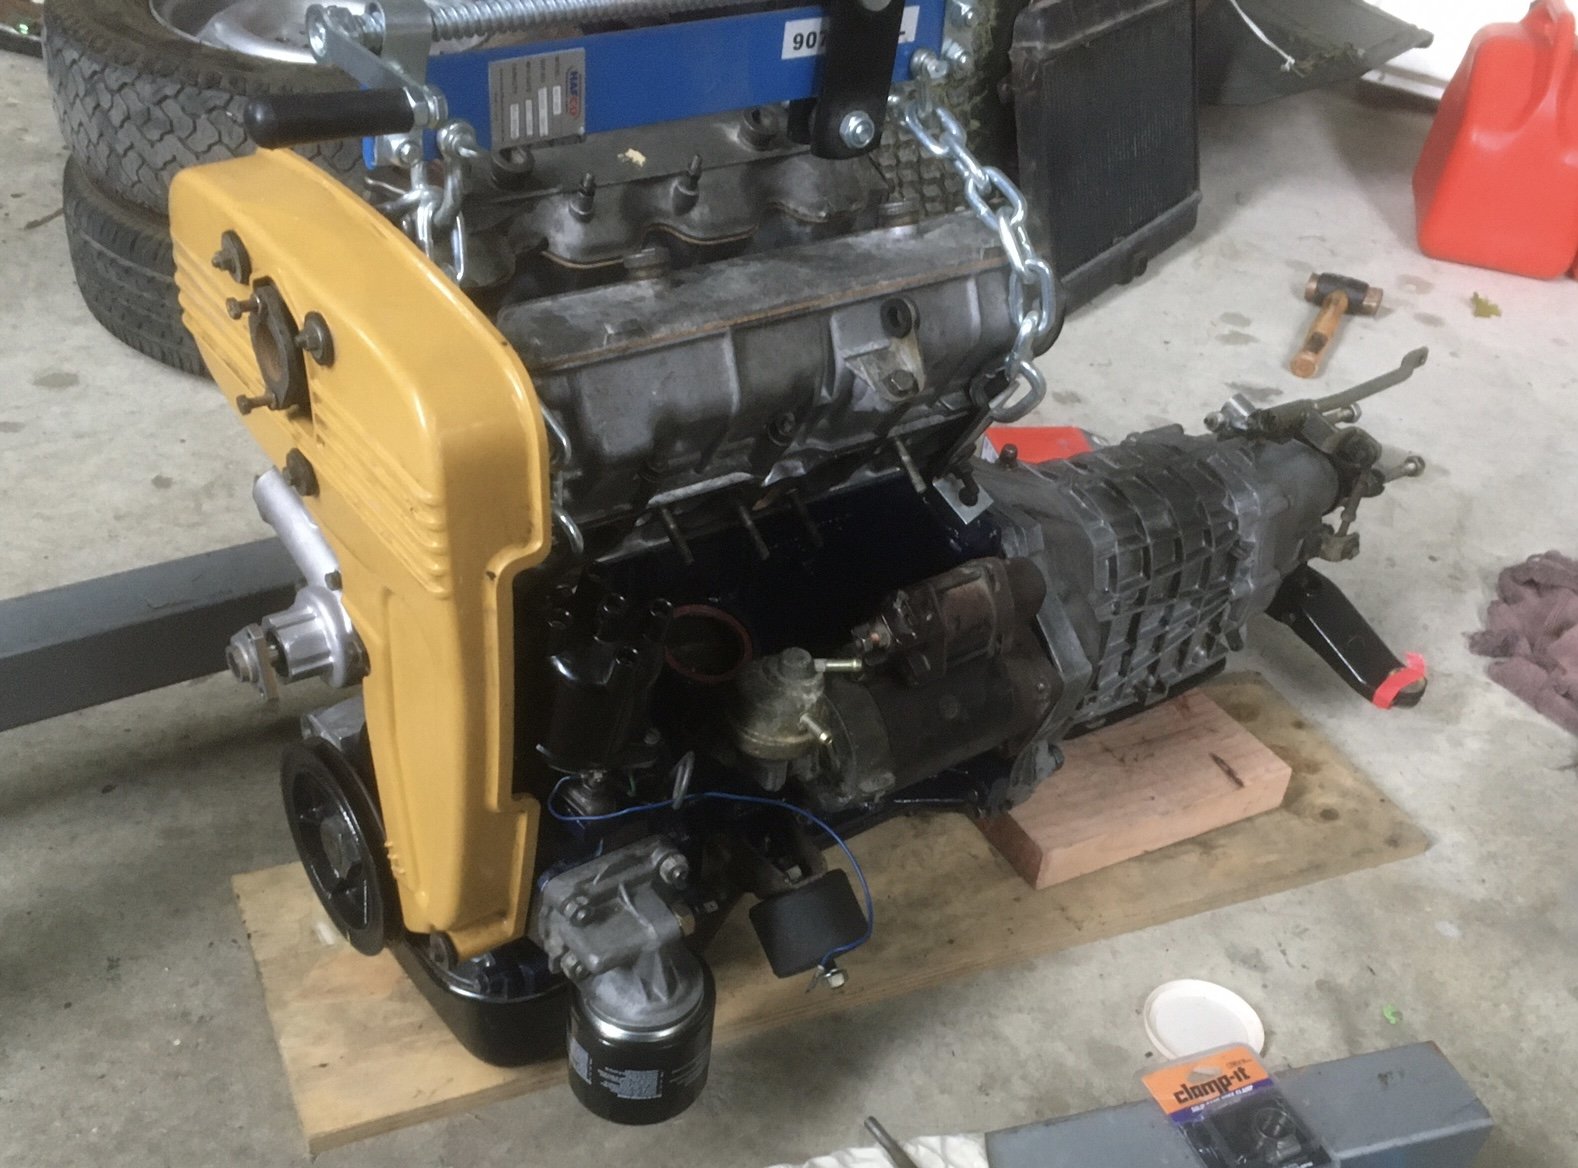
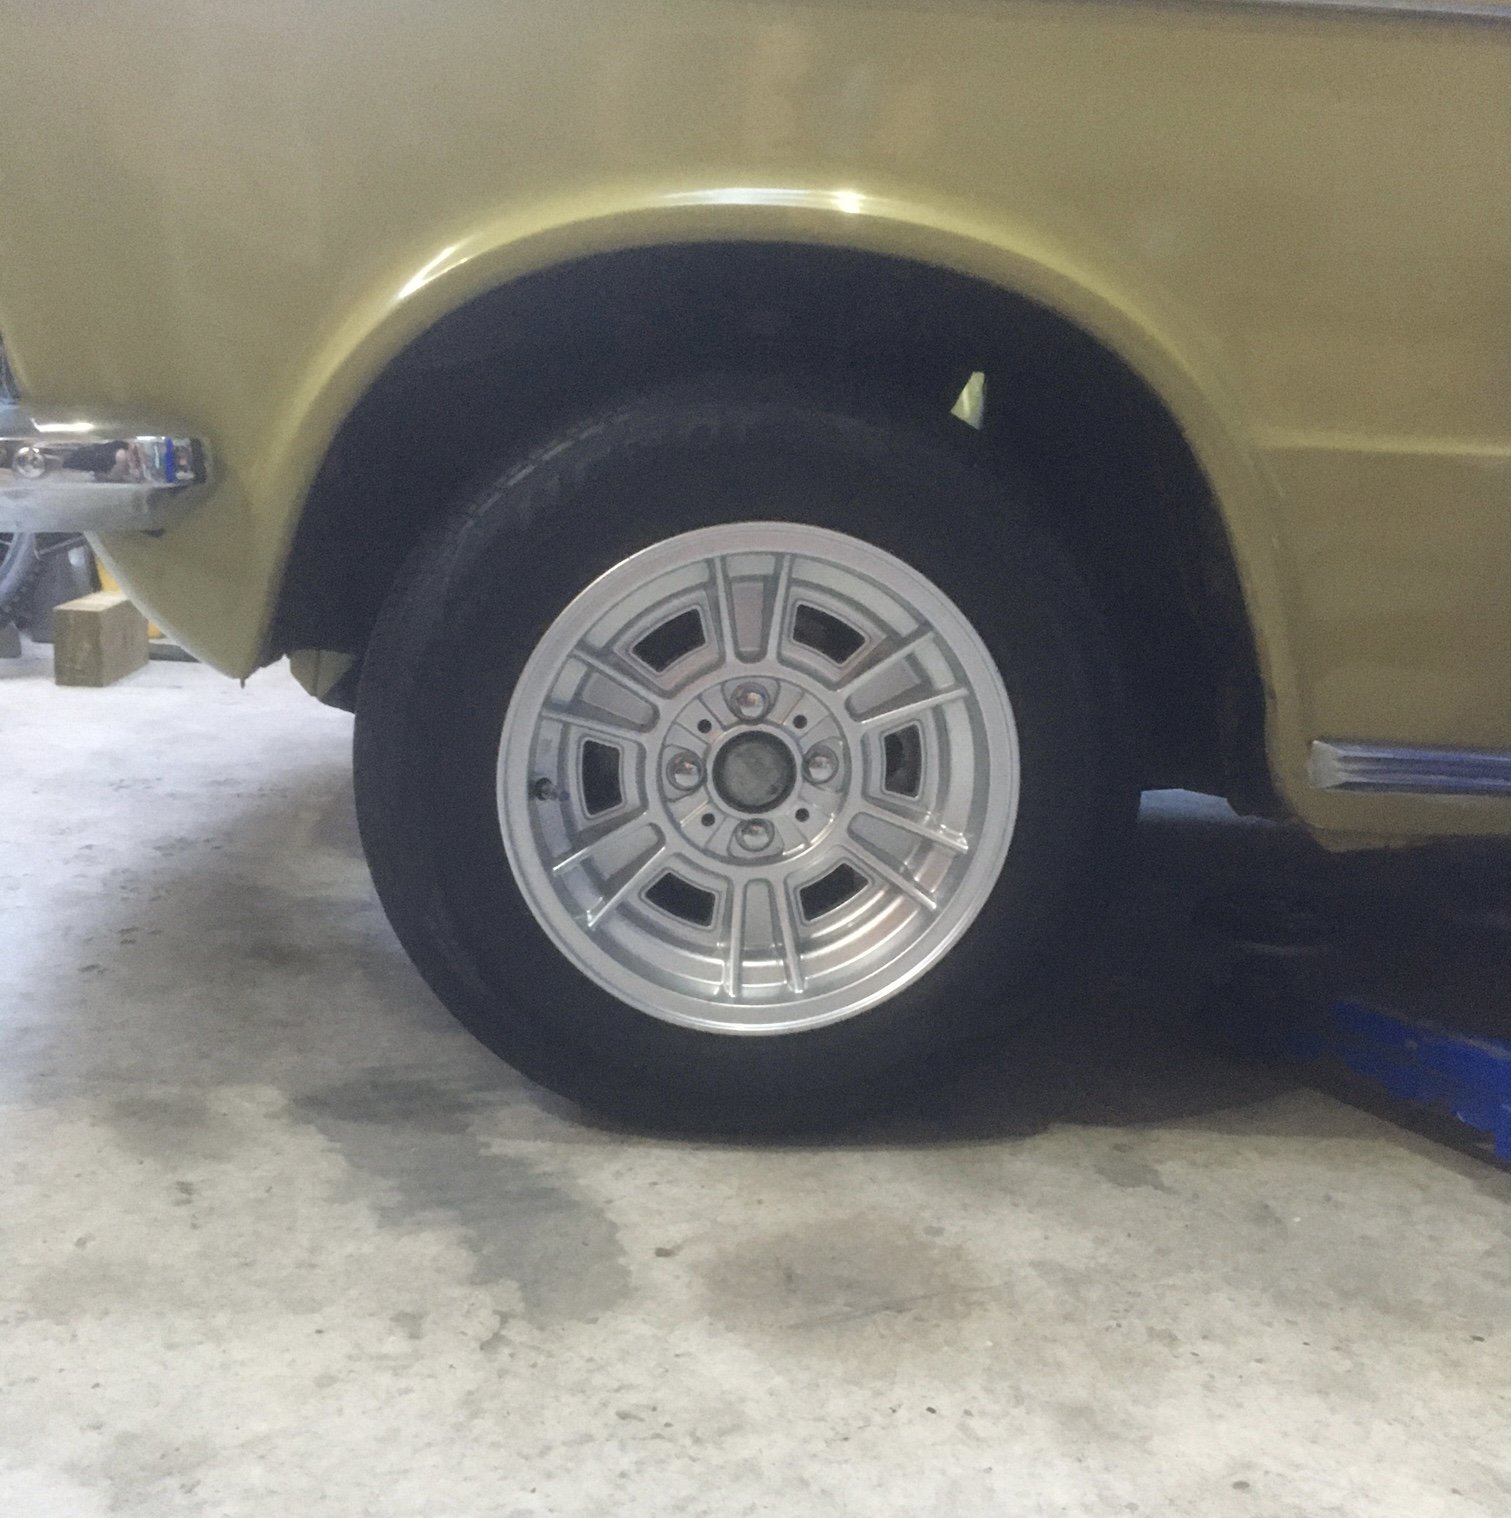
Today was a big day in the shed. I put the engine and box back together and I was going to sling them into the car. Fail.. I could not get sufficient tilt to feed them in. The car was on the hoist and I used a load leveler but I couldn’t get the angle steep enough. I have mentioned before these cars have a very short engine bay and while I am sure it’s theoretically possible, you need to tilt the combo beyond 45 degrees and this requires a lot of clearance under the car and also a high lift from your engine crane. My crane won’t lift high enough either I think. So I put it back on the floor, split the gearbox off and put the engine in. Easy peasy. Then I lifted the car and popped the gearbox on my super duper transmission jack, got it all lined up and FAIL! The bell housing jammed in the transmission tunnel with about 3mm to go. So the engine got lifted again, mounts removed, engine lowered gearbox slid on, engine lifted again, mounts reinstalled phew! I can’t fit the manifolds yet because the rubber elbow I ordered for the oil separator doesn’t fit (the joy of aftermarket parts). I need to find an oem one (edit: found several on ebay in Italy, waiting on a postage price) Speaking of garbage aftermarket parts, the new clutch fork boot also doesn’t fit worth a damn. I have refitted the starter and that’s as far as I got today. When I lowered the car back onto its wheels I was expecting to admire the awesome ride height but it only sagged 10mm! It has gasser spec rake going on. How much do new springs settle? The only weight yet to go back in is the radiator and maniflolds and battery etc and of course the bonnet. I’m not hopeful as my 100kg pushing on the front doesn’t do much either. eeeew Rear is spot on but the guards will need rolling. I loaded all my humans into the boot/back seat (almost on the bumps) and the sidewalls just graze the lip. This is without the factory spacer. BTW it’s wearing 205/60s now and they look great.
- 125 replies
-
- 13
-
-
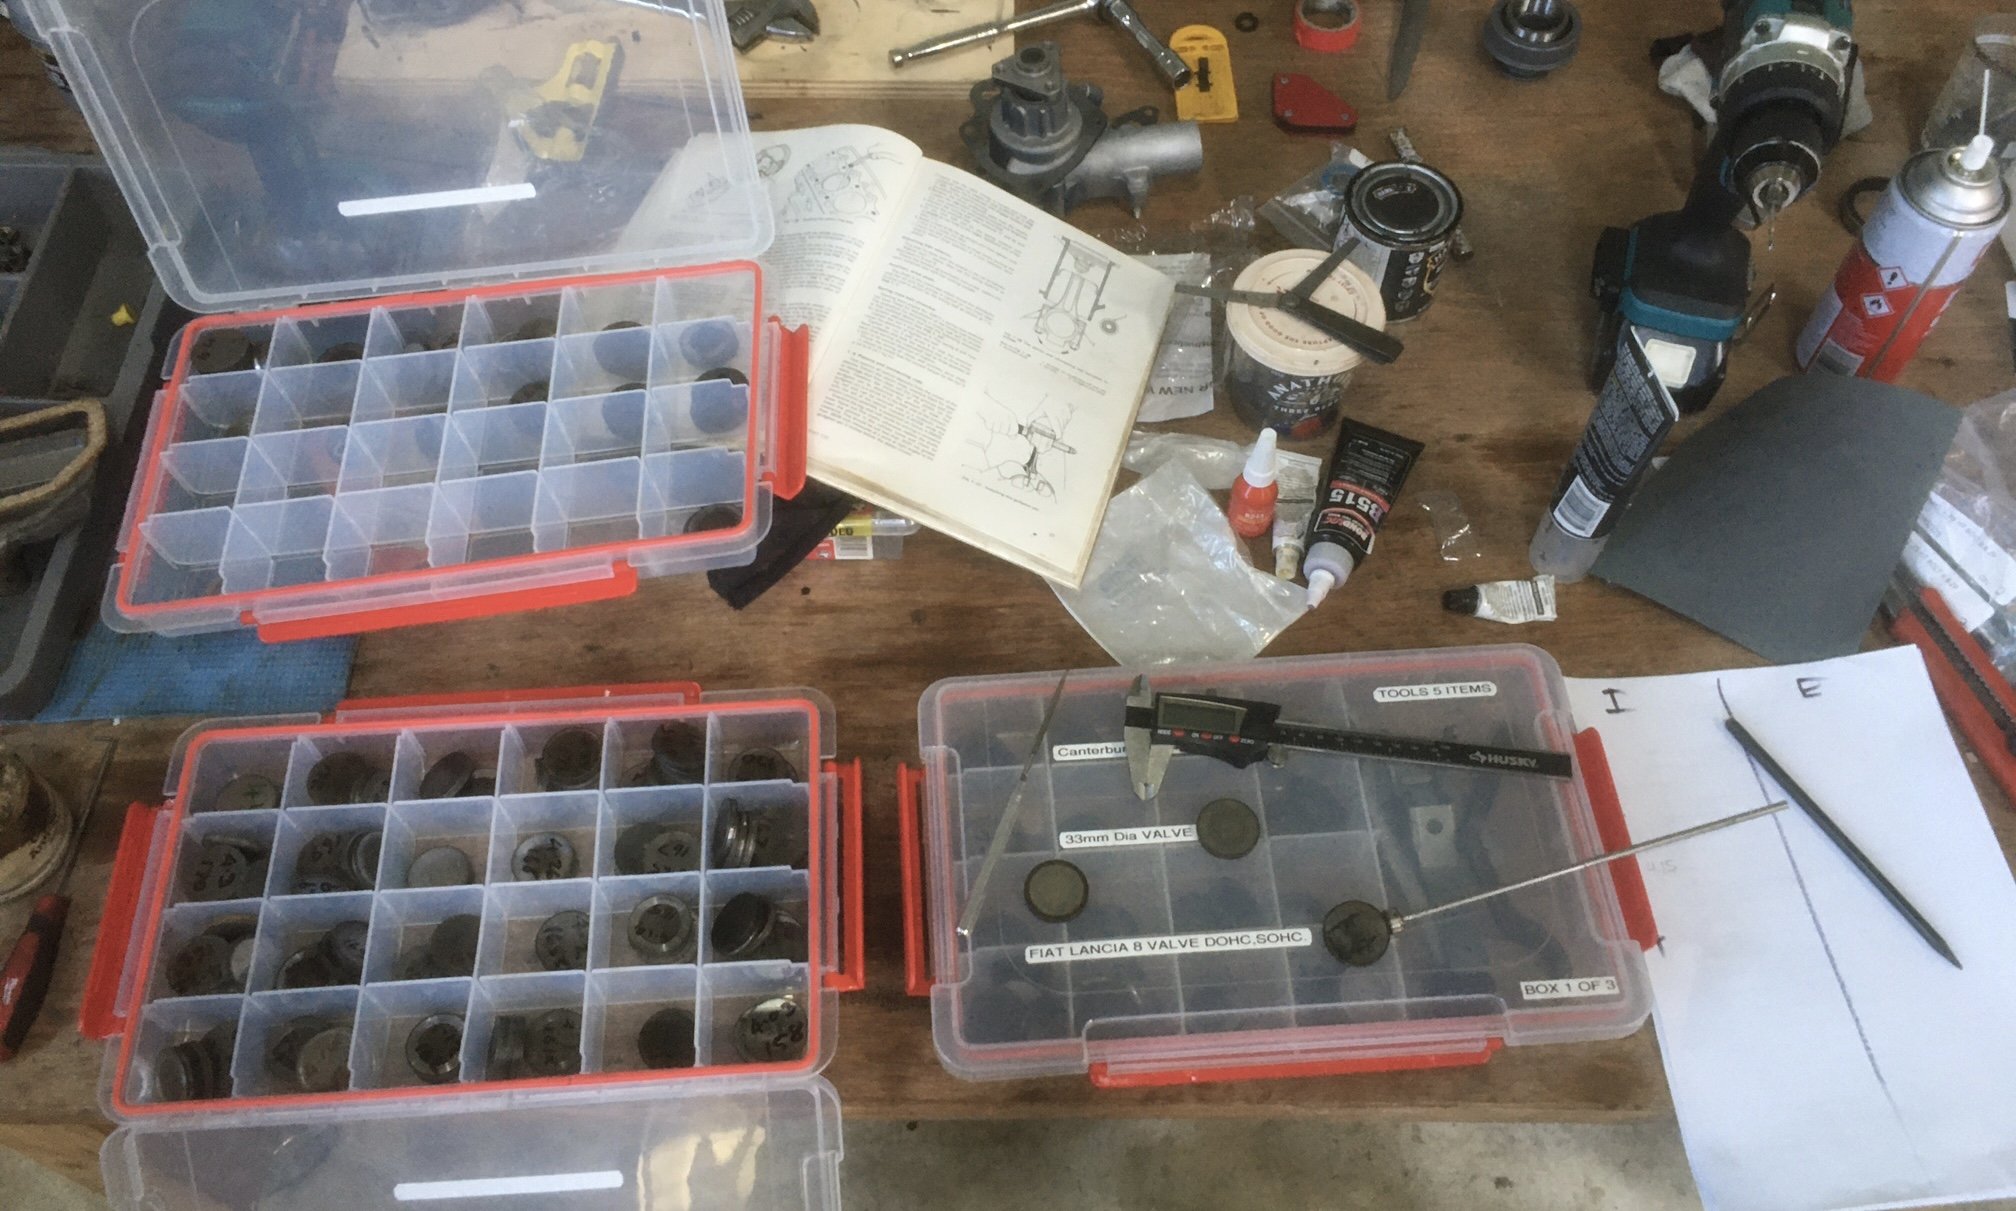
Shim time. A bit of trial and error since the initial clearances were so tight. I ended up having to do most of them twice.
-
I’m pretty sure for a petrol RUC vehicle you can claim the fuel excise back
-
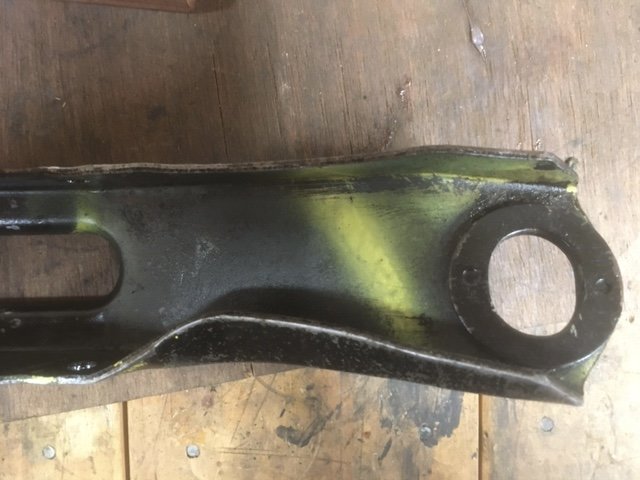
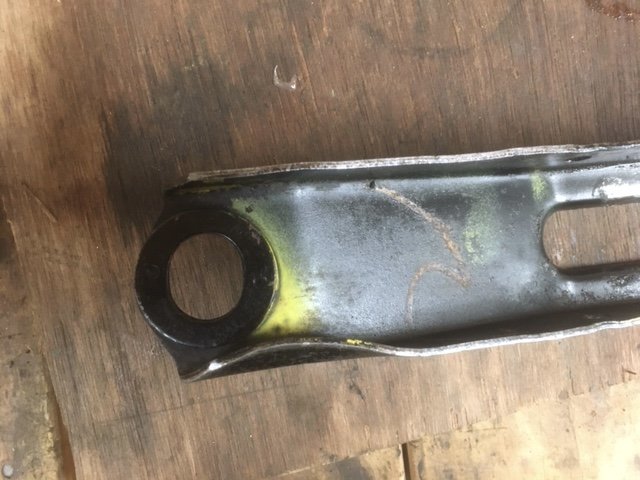
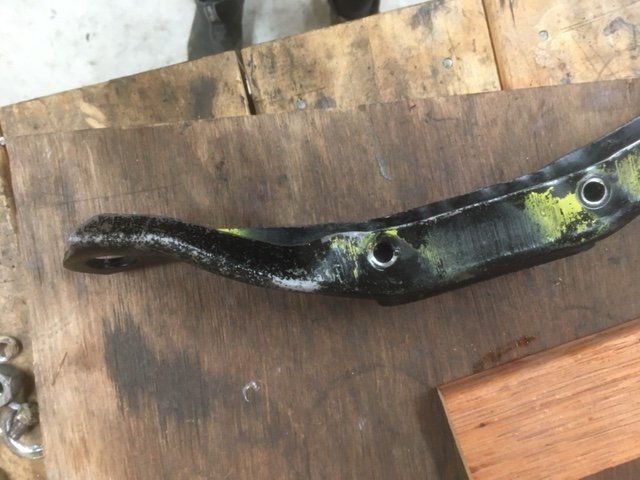
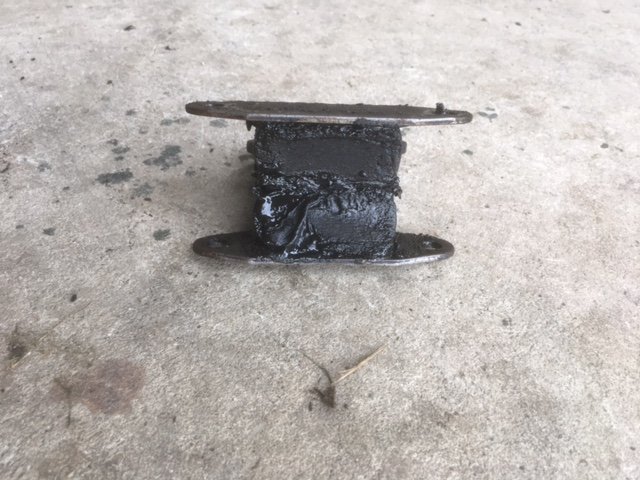
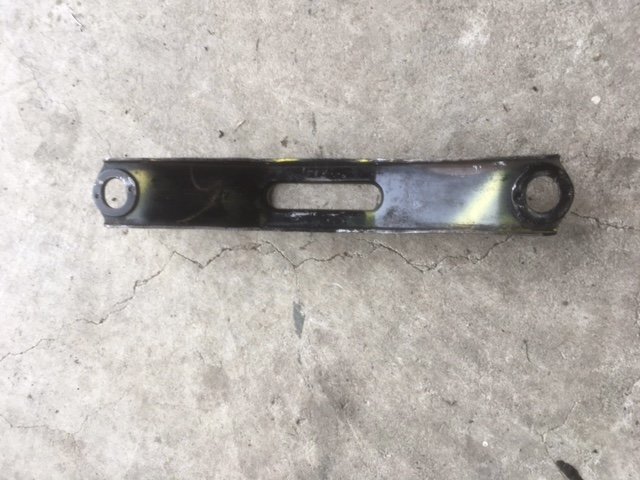
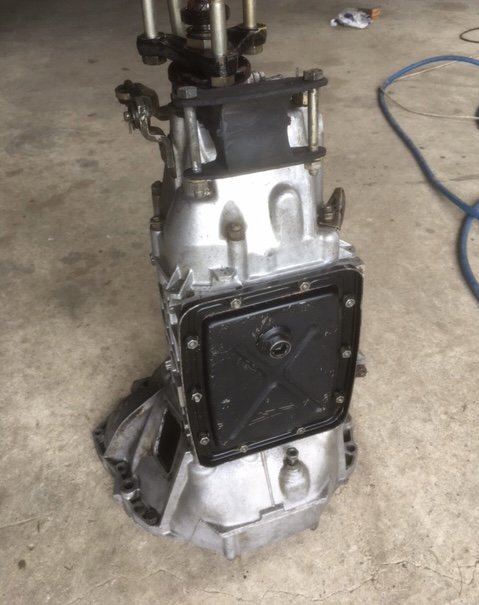
Today I thougt I might clean the gearbox so it’s ready to go when the time comes. This culminated in spending 3 hours with Exoff, various scrubbing tools and the water blaster. I guess I had forgotten how truly filthy it was, I mean it would have made a Land Rover blush… Readers may remember I had noticed the crossmember and corresponding point on the chassis were a bit bent. Er, more than a bit it turns out. It’s amazing what you can see when stuff isn’t covered in greasy filth. Yikes! Also check out the gearbox mount. It’s about the consistency of cheesecake. A combination of vice and large hammers got the crossmember straightened. It’s now in the acid bath for superduper cleaning. I made a tool for my slide hammer which in concert with my biggest ball pein carefully straightened the chassis rail. Great success. And check out my shiny box.
- 125 replies
-
- 11
-
-
Interesting. A turbo?