fletch
-
Posts
1578 -
Joined
-
Last visited
-
Days Won
1
Everything posted by fletch
-
Found some down at my local everything pipe and fitting related. They didn't even know they had it, but I recognized the bag up on the wall from a distance as the one Tori posted. I have used steel bundy previously, but I'm being a princess and want the shinier stuff. I had also heard the kunifer was easier to bend, but a quick test on the shit I have bought says otherwise. Now I need one of those wheely straightener things. I'll either buy a few sliding door rollers, or old m8 @Bistro reckons a bit of wood with a hole drilled in it. He can demonstrate on Wednesday for me.
-
Does anybody know where to buy kunifer/ cupro nickel tube 3/8 diameter? I have found 3/16 and 1/4 but not 3/8. Im off to visit an old barry about it shortly but i dont like my chances
-
You need to whip down the cemetery and dig up an old steam barry...... Can be really hard to tame. Steam/condensate is harder to deal with than hydrocarbons i think. How much are you allowed to delve into it? We had a troublesome vessel that we couldn't see or measure the oil/water interface with the existing nozzles and level measurement, so i made a probe that could be inserted with 3 different tappings to sample the liquid from 3 levels at once. Can you break the flange where the steam is coming in and insert a baffle/deflector into the vessel that changes the way the steam enters? It could be welded to a rod on a flange ring that is sandwiched in.
-
Potentially worse due to the possibility of having gas entrained in the liquid. We put vortex breakers inside our separators above the outlet pipework and it helps but not cures it.
-
Looks like it allows a pretty wild ramp on the cam. Maybe lighter and less friction than a bucket. Smaller valve stem/lighter spring?
-
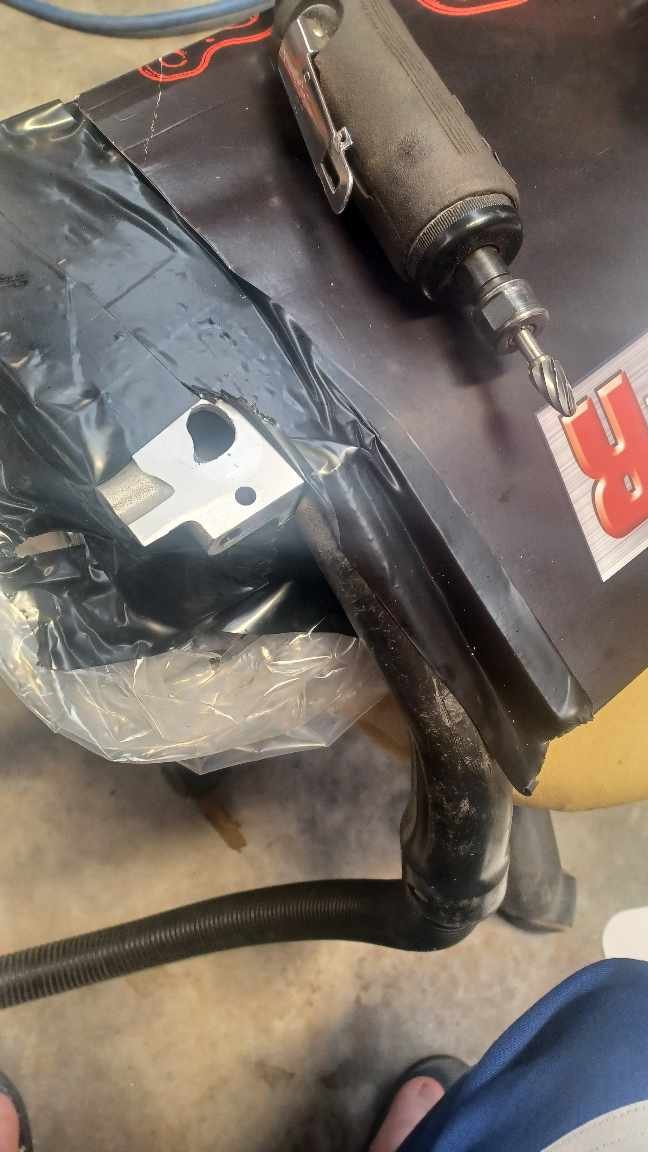
Installed my old swagelok tube I made up for the vct feed. Not sure if I'm going to keep it. It's tee'd into the oil pressure sensor. Then a quick tune up on the exhaust manifold as its hits the block in a few places on the rb30. Got the turbo and wastegate fitted for a measure up. Then another step backwards. In order to fit the oil drain fitting for the turbo, I need to take the sump off so I can wind it in. There is not enough room between the front axle flange and the block to get an elbow in. Hopefully I can get onto it this week.

- 44 replies
-
- 14
-

-

-
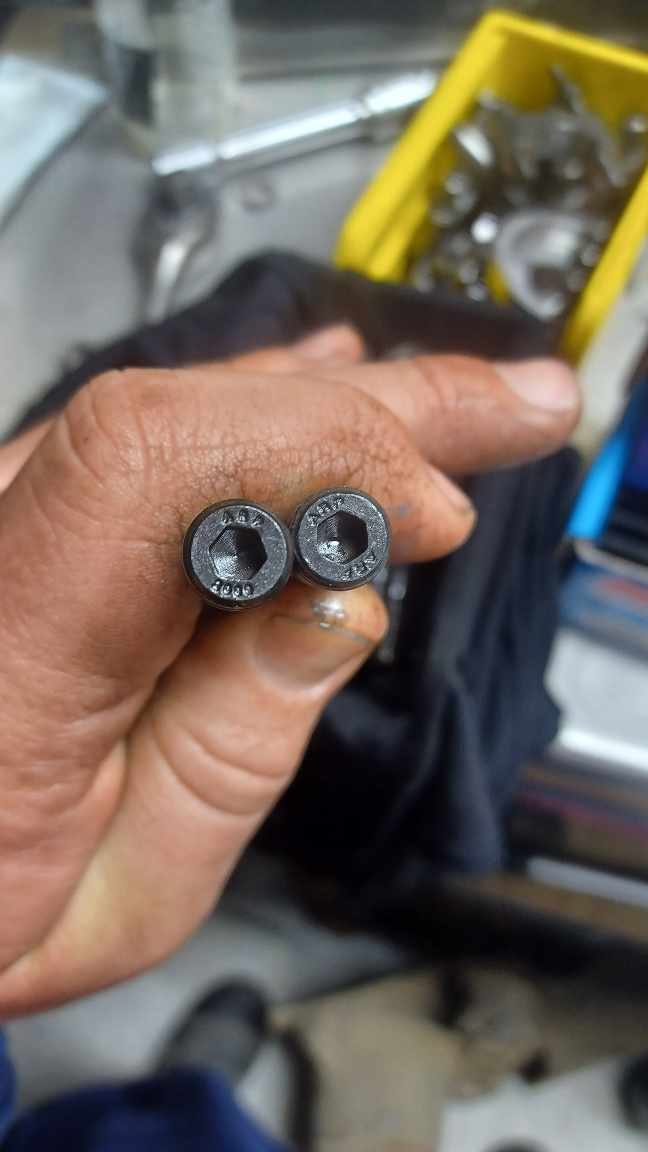
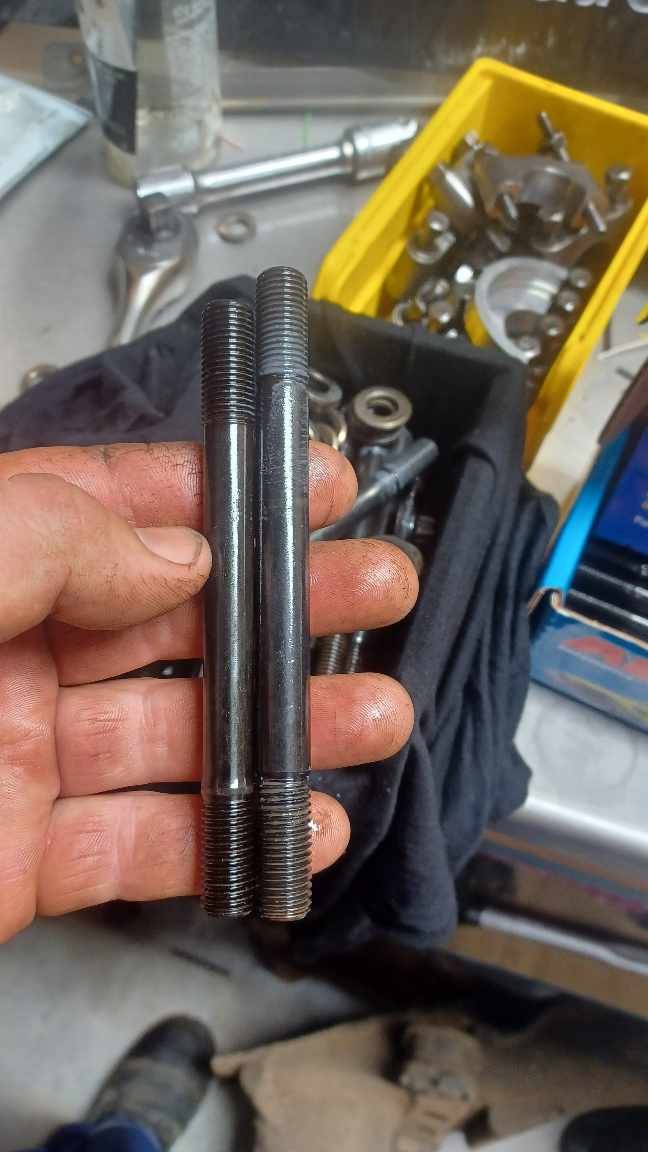
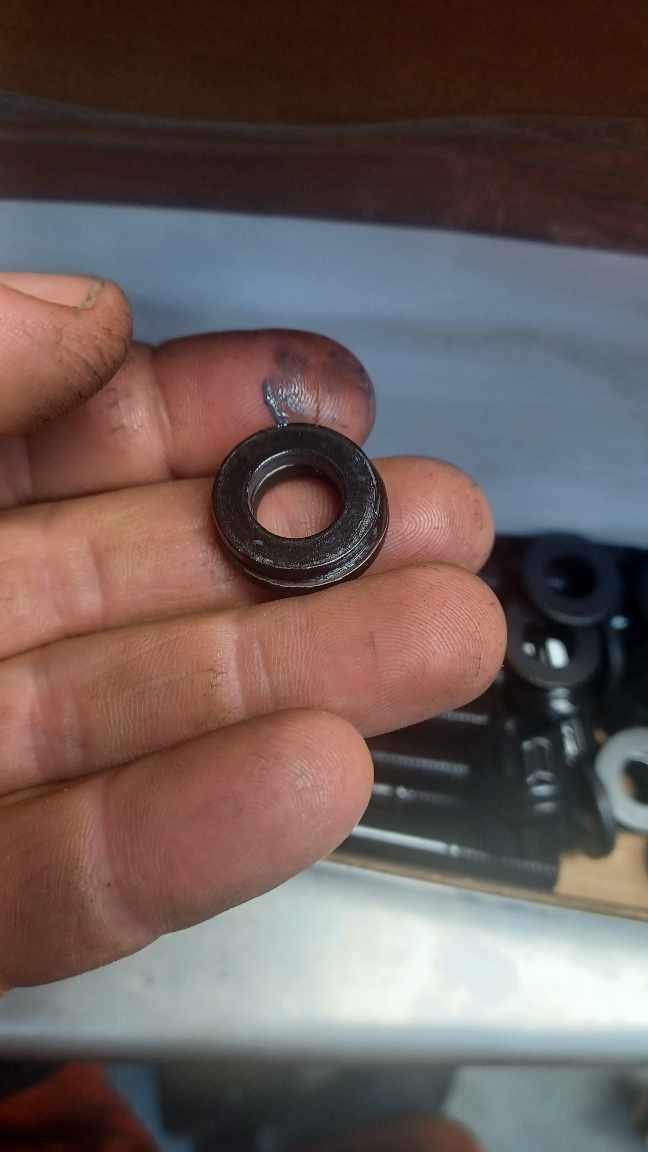
2 steps forward, some back. Turns out the arp studs I reused were not ideal. I bought them 15years ago when I first built the engine. I didn't know any better, but did notice when I stripped the motor the nuts were right down the thread and hitting the shank of the stud. When I put the head on I measured and did some quick research and the conclusion was to run a stock washer under the arp one. Some further research and it appears the studs are also no better than stock bolts. So some more $$ thrown on the bonfire and I got some arp2000 studs. Plain studs have ARP ARP on the ends and arp2000 studs have ARP 2000 on the ends. They are also the correct shorter length And come with the correct diameter larger washers to suit the head and bigger nuts to boot. Got some new studs for the exhaust and double nutted them in. Bonus photo of my modified bearing puller. Whoops, I guess I had a few more beers than I thought. Did the job tho. I was using a 1mm cutting disc...
- 44 replies
-
- 12
-
-

-
Would you not be better making/buying longer bottom arms? I would think longer arms are better for rear geometry?
-
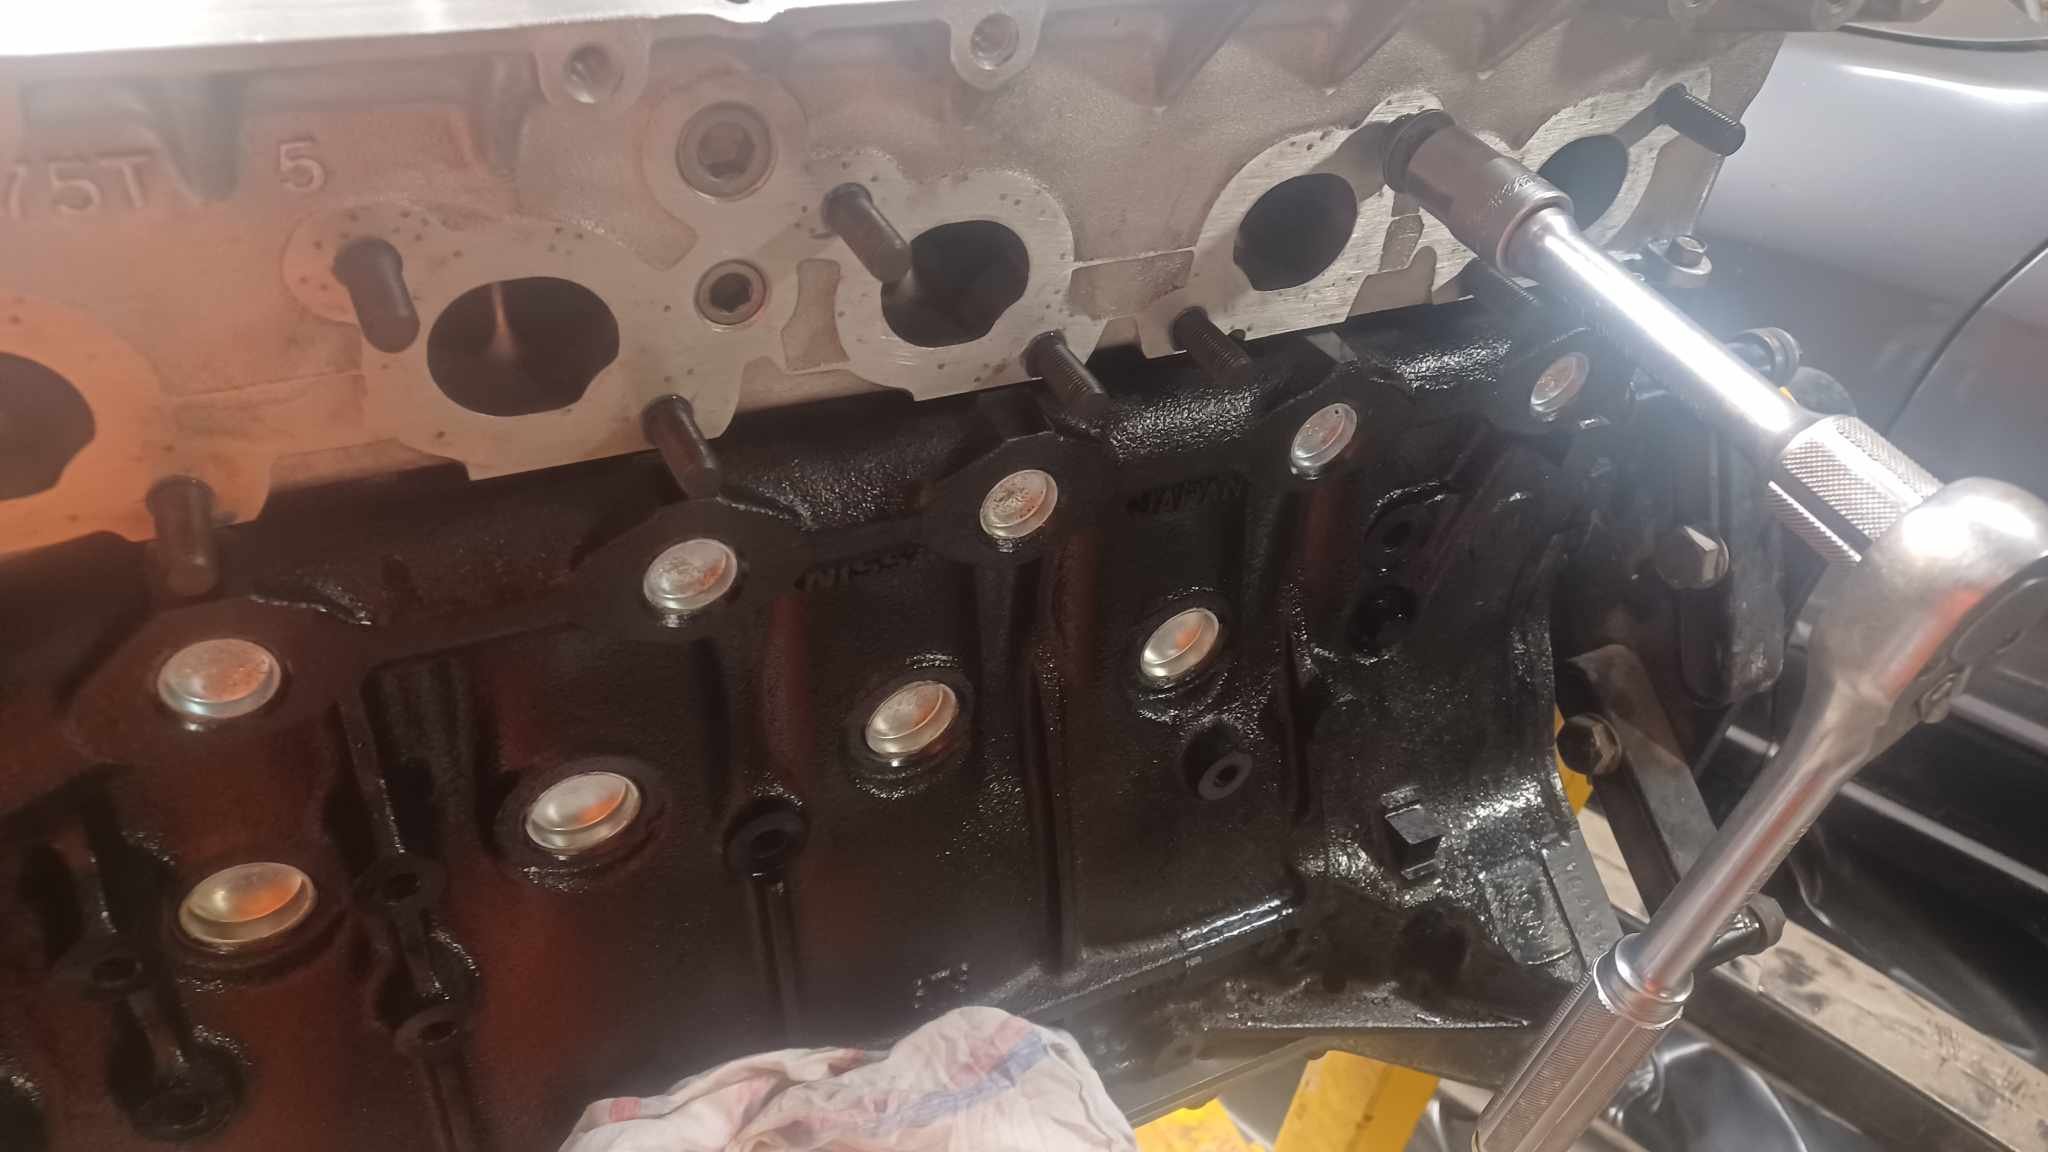
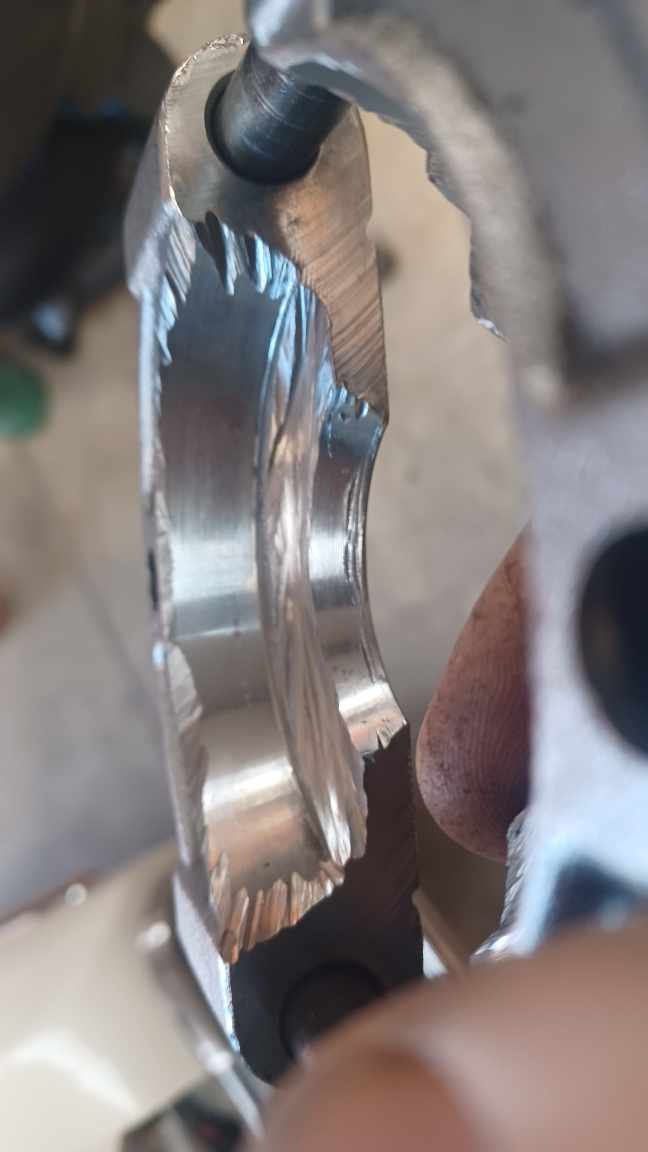
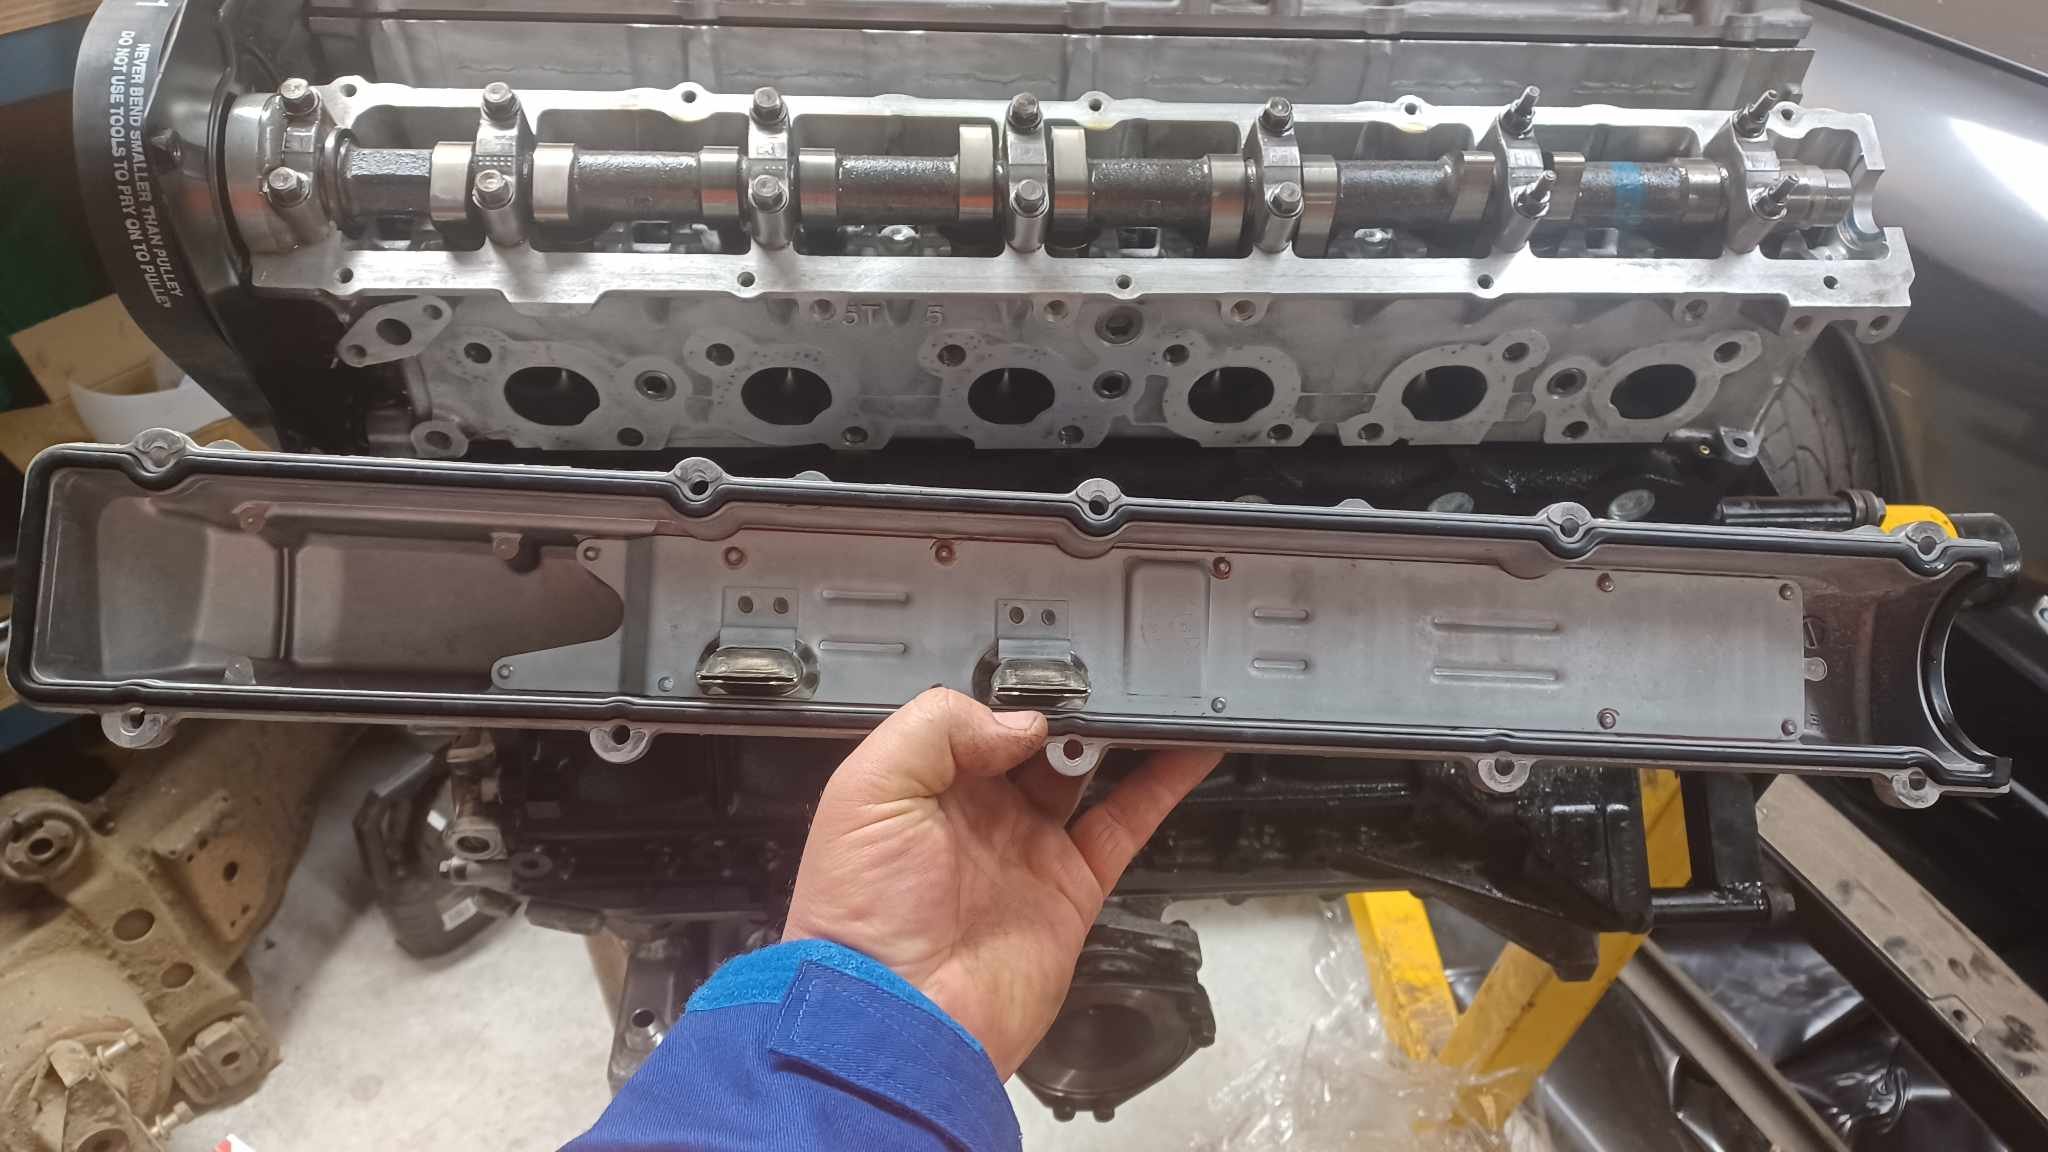
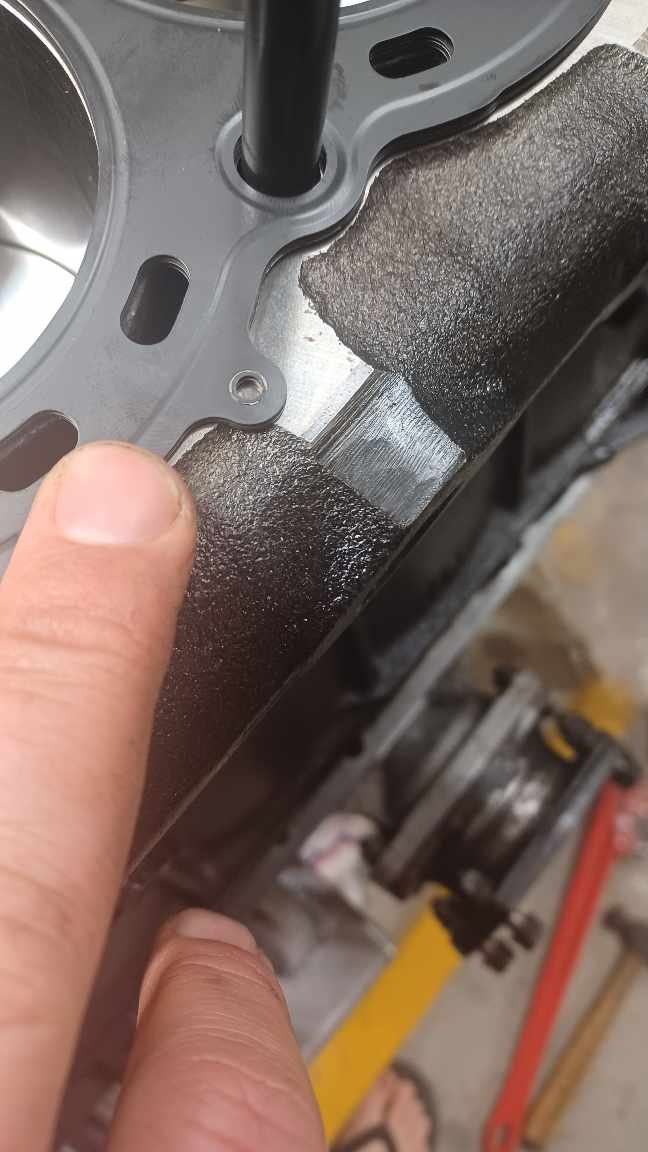
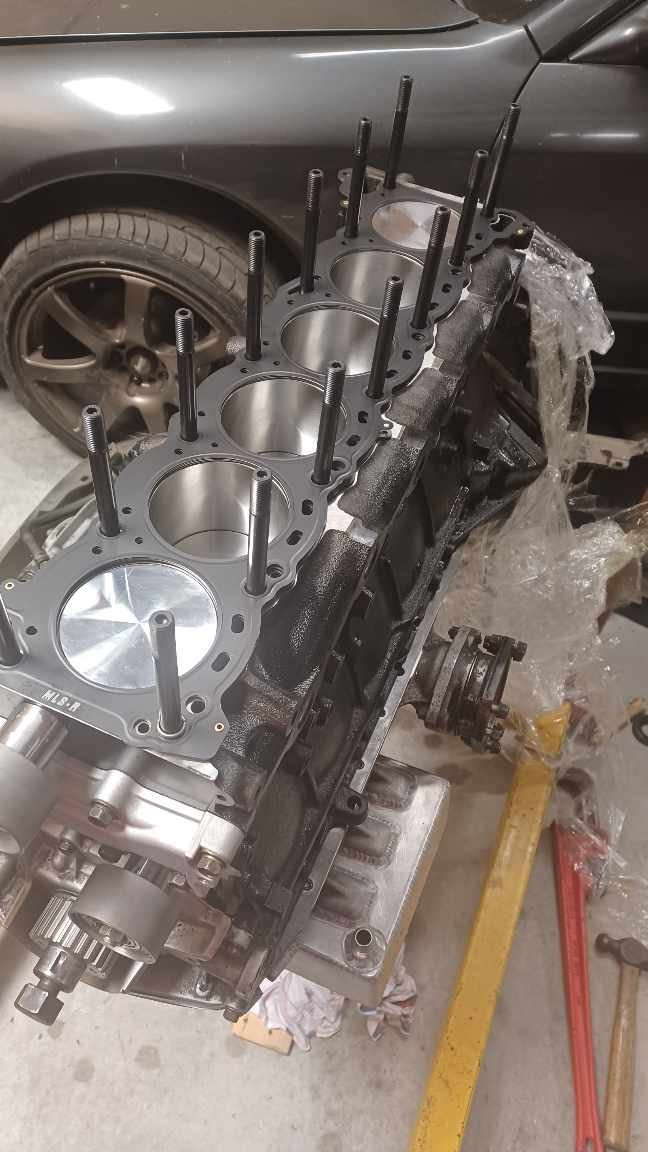
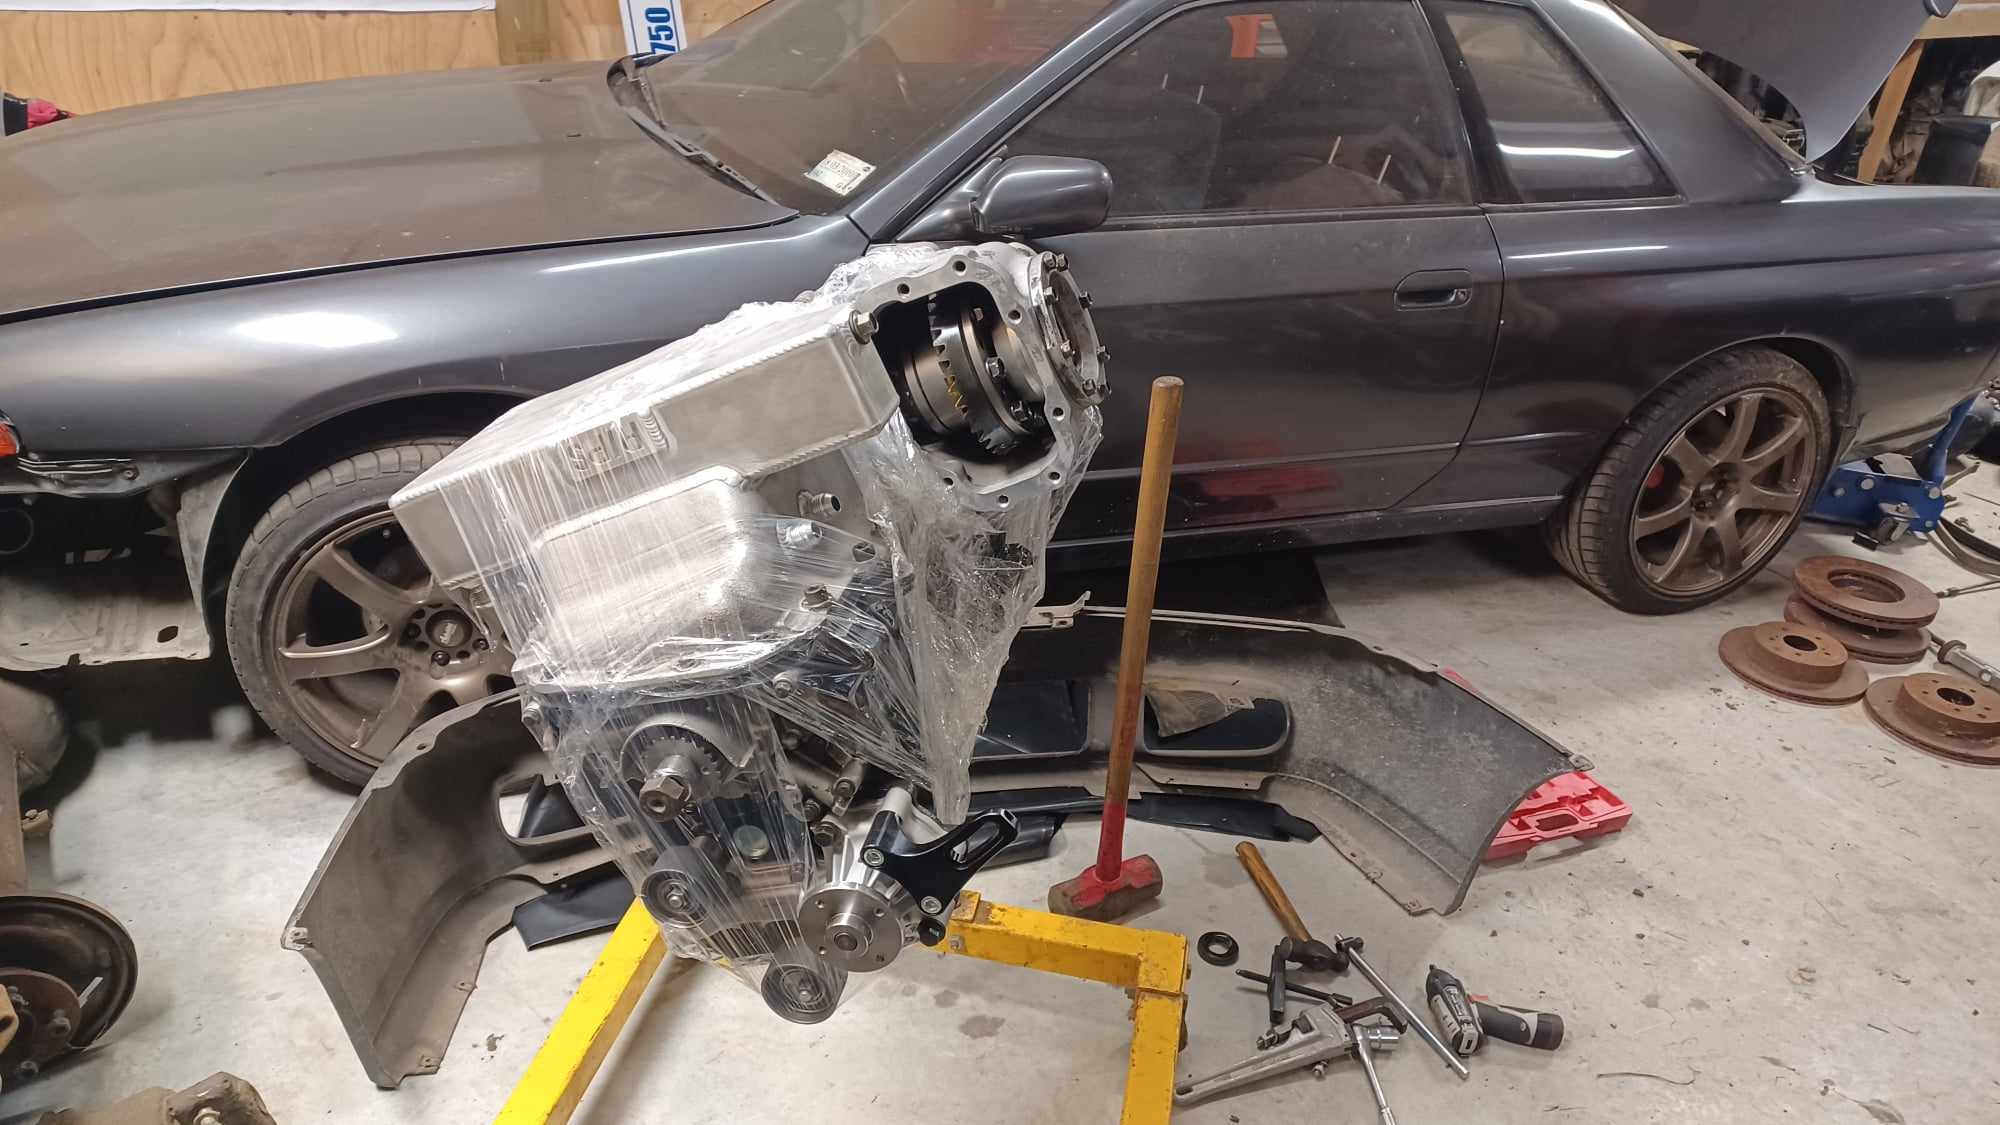
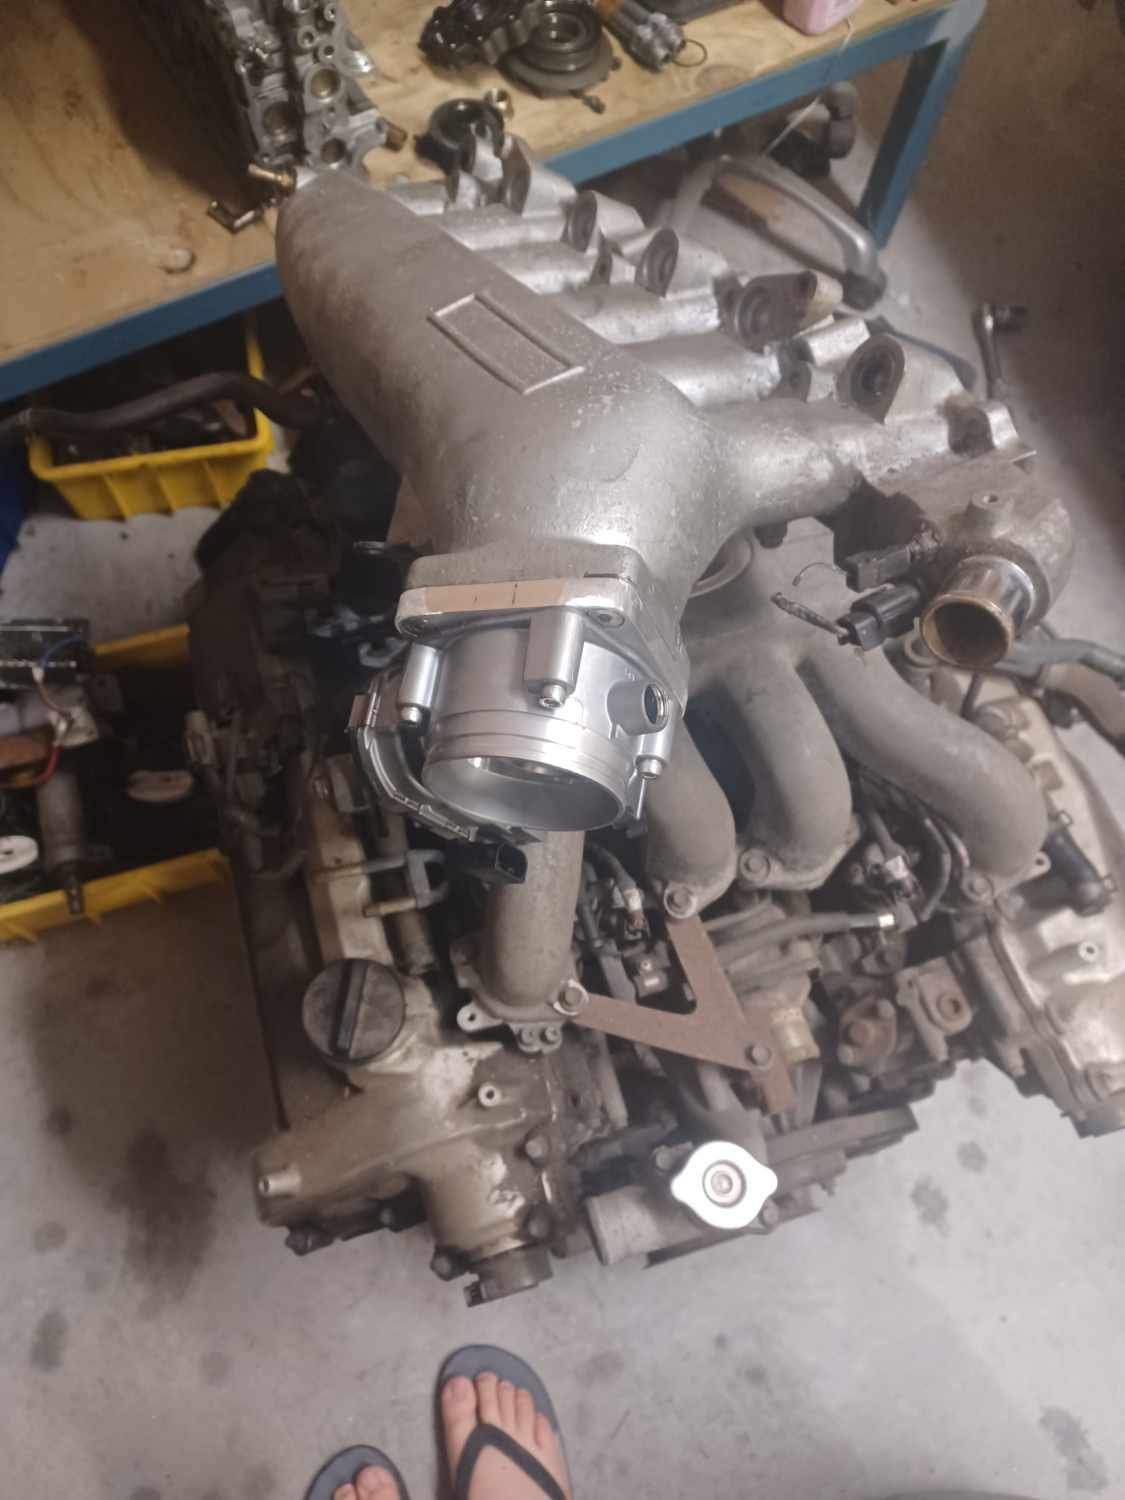
Diff went together ok. I'll have to do skid once I get it going to make sure it works. Got the head on tonight. Had to port out those water gallery as I welded up the vct oil feed to the head and built up the water port to move it closer to the rb30 block port. Vacuum taped onto the port outlet and I got no swarf off the grinder which was a first for me. Then head gasket needed to be modified. One of the brass crimps was going to get squashed between the block and the head. I drilled it out. Seems ok still.. It looked like this. But then it was gone. The block already has some clearancing from my last build. The exhaust manifold hits on these ribs I got the machinist to hot tank the rocker covers. Im stoked with the work he did. They came out brand new. Just need a bunch of little things then I can put the engine in the car and waste more money in hoses and fittings.
- 44 replies
-
- 27
-
-
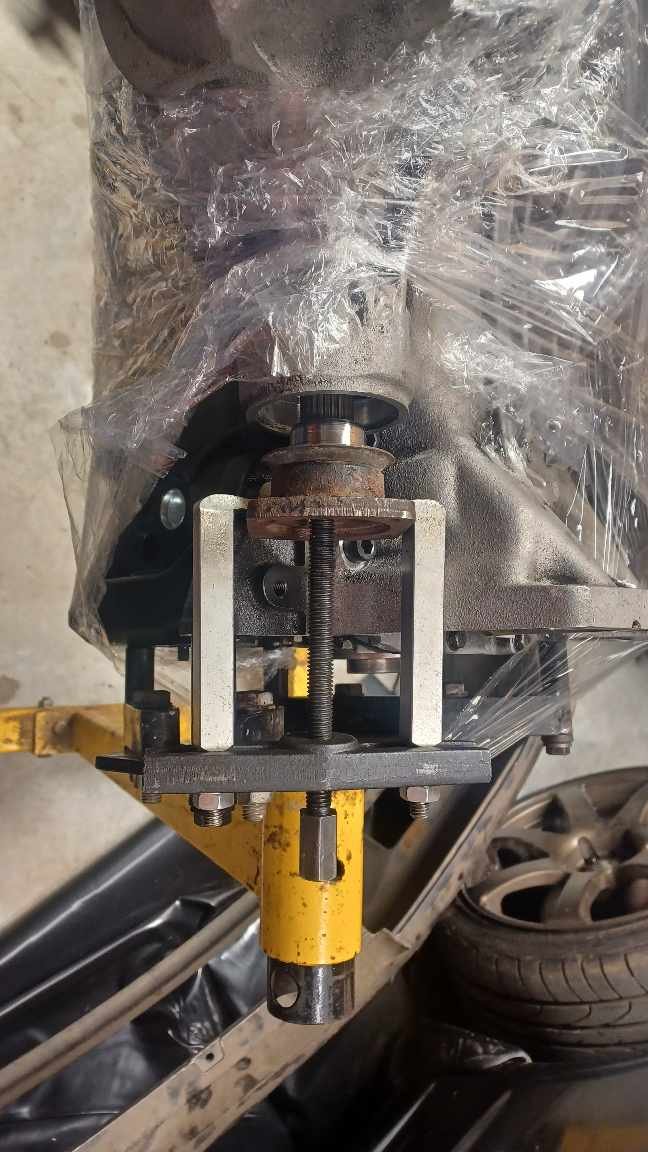
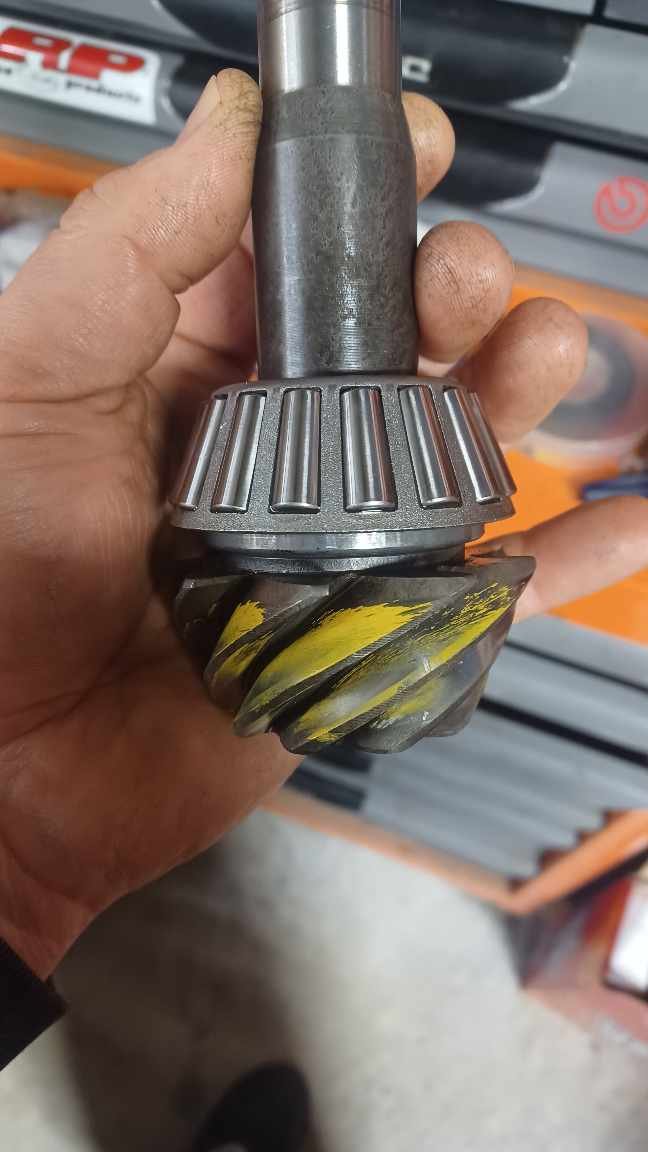
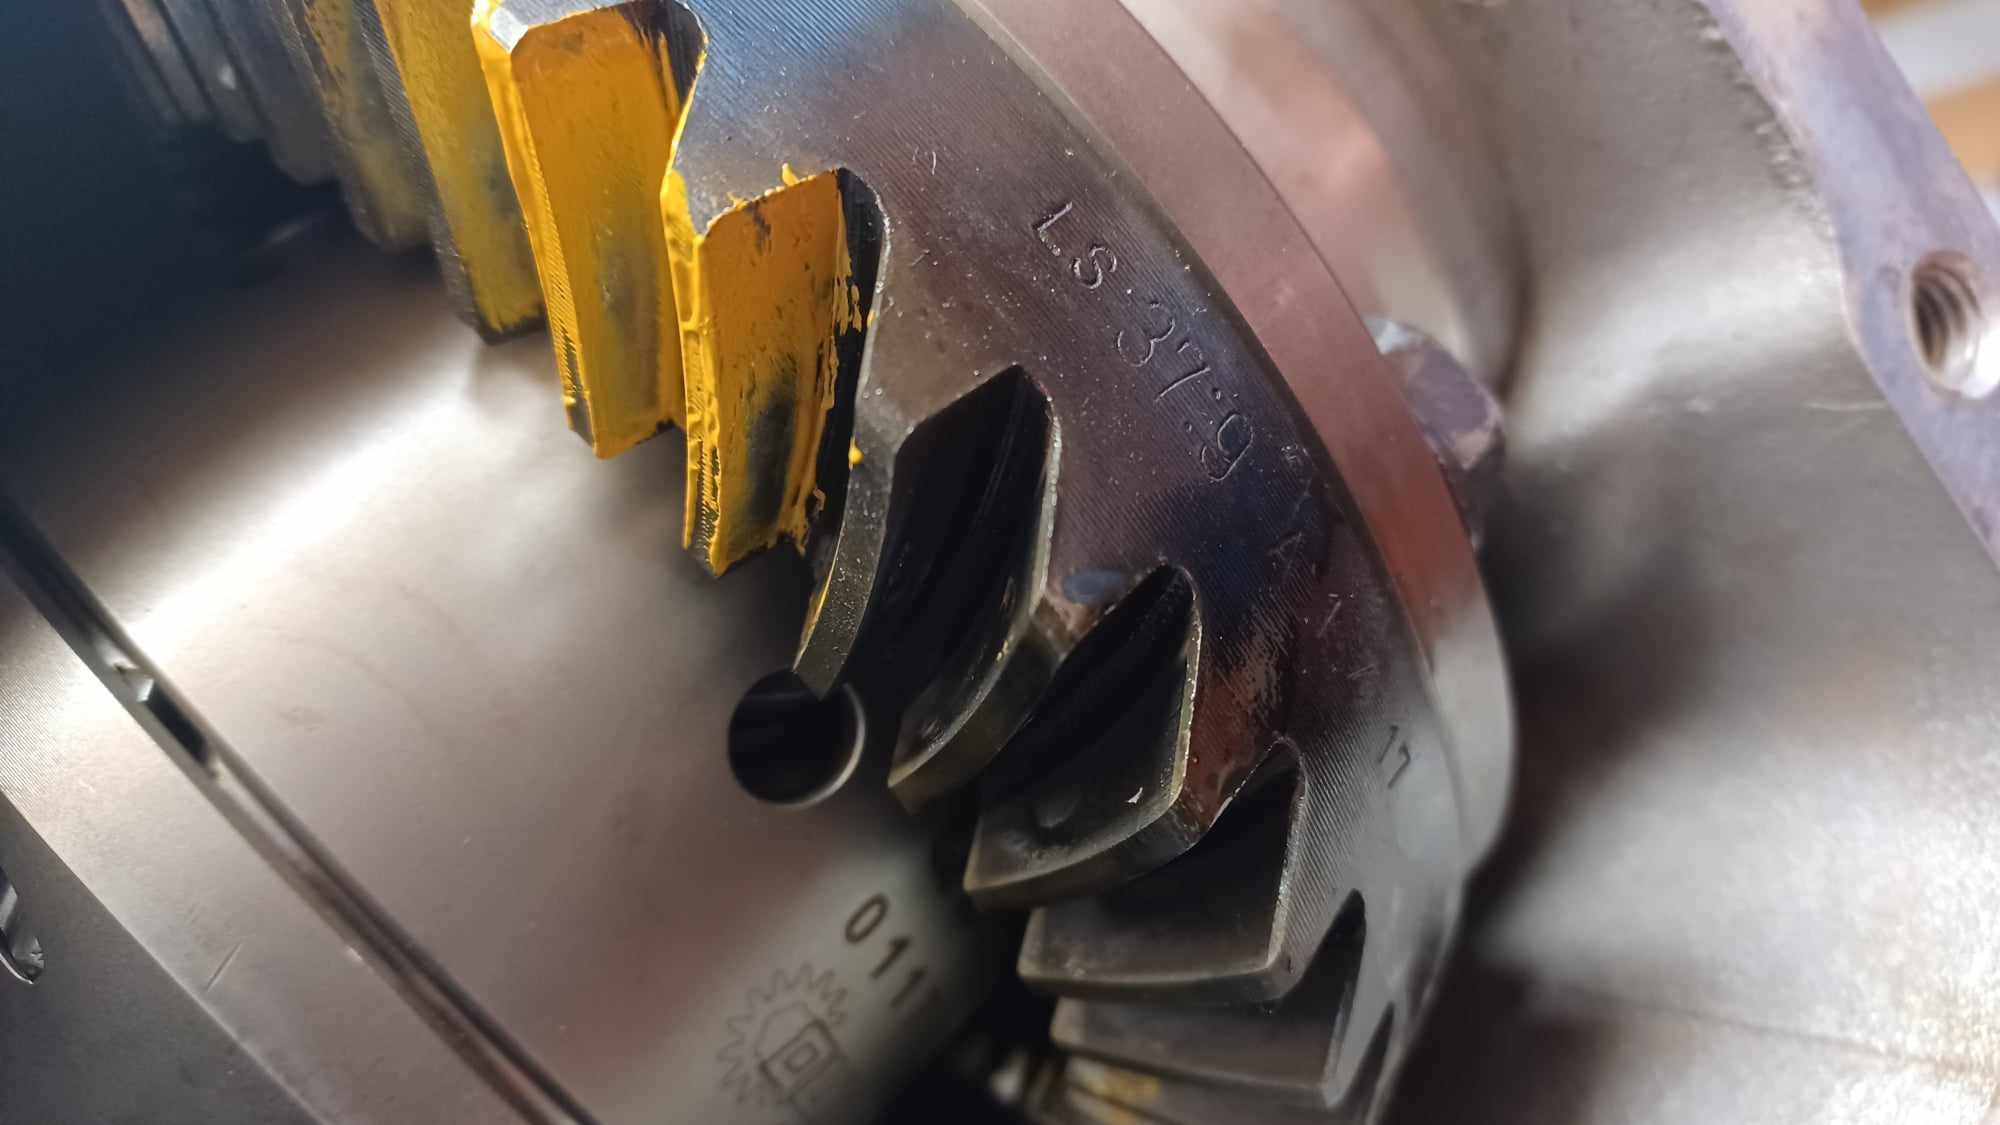
Overnight parts turned up after a month yesterday so snuck out to the shed for a few hours. One of the reasons for waiting on the parts was is that pulling the pinion bearing off to get to the shim wrecks the bearing. Turns out, if you have the correct tool it doesn't. I didn't have the correct tool, but after a few beers and some time staring at it, I realized I just needed to remodel my gear puller with the grinder and I could get it under the bearing cage without damaging it. The spacer and washer needed to be the correct length between the bearings. The spacer is not a crush type so it took a heap of assembly and disassembly and swapping parts to get it right. Many times on and off with this flange. Backlash mint. Then I realized it was 1.30am and there were empty bottles everywhere. Today sucked, haha. Hopefully box it up this weekend, then the head can go on and the engine can go in. Much excitement
- 44 replies
-
- 22
-
-
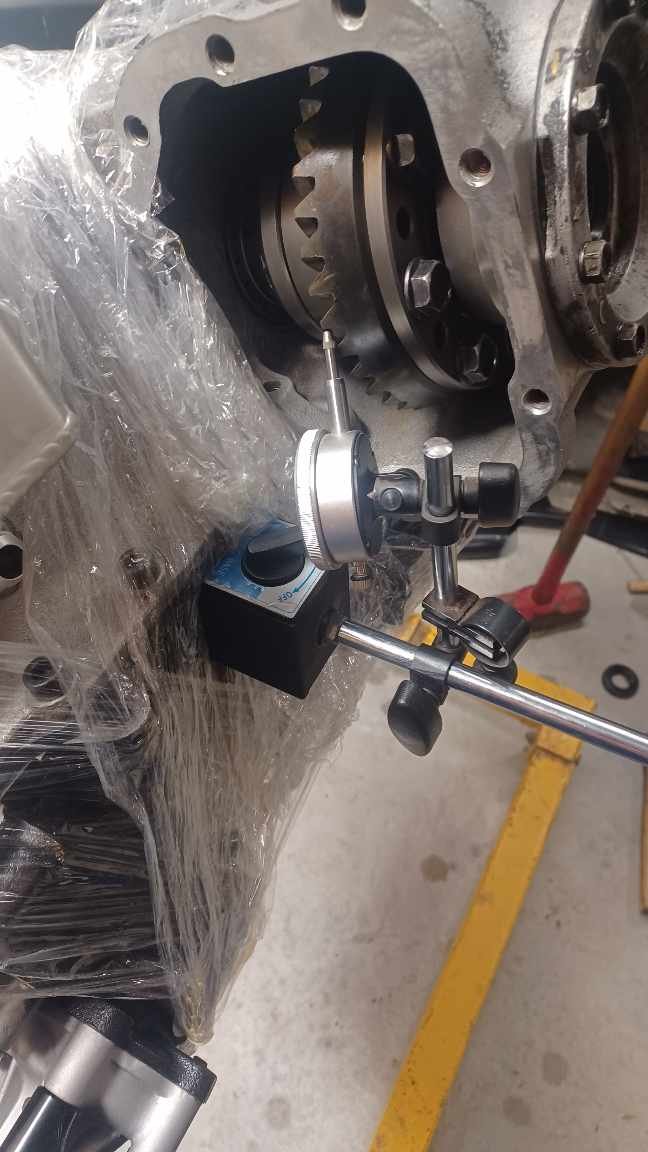
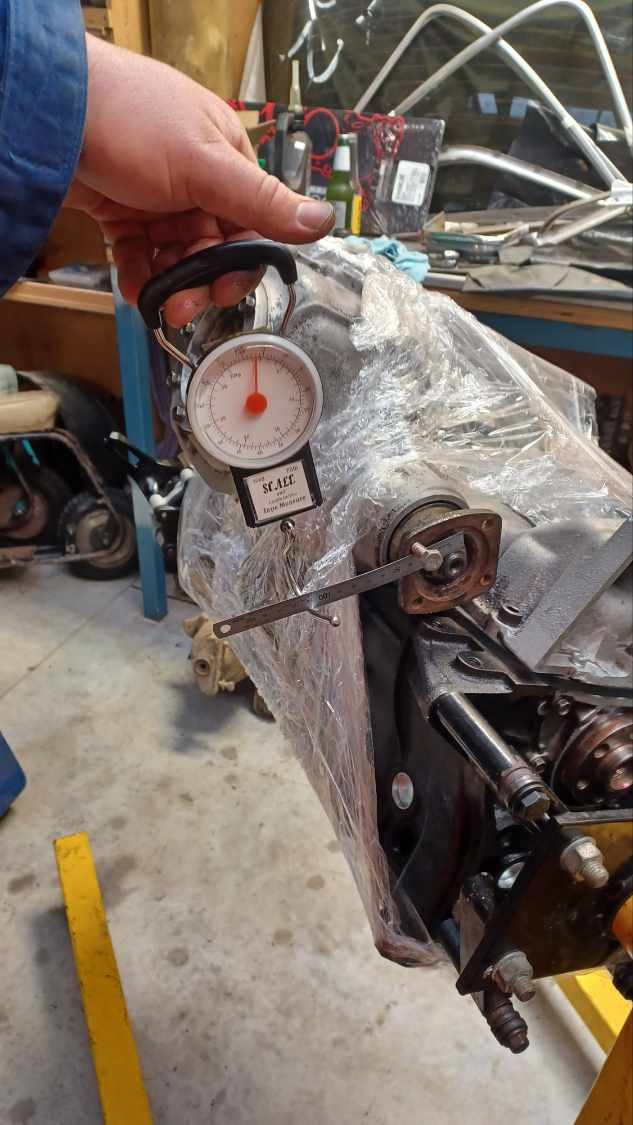
Current job is the front diff. I should have done it before bolting it to the engine but I was waiting on overnight parts from Japan. Here's my pinion preload gauge Got the pattern nearly there, but it's not perfect and the backlash it too tight so I'm waiting on more overnight parts from Japan. Currently sitting at 32 nights, but could arrive tomorrow. Fingers crossed As it sits now. Head gasket had arrived, but can't put the head on or it will be too hard to turn on the stand. Also found another sump, front diff, and transfer down the road for cheap so thought I better hoard them...... Hopefully an update in a week. I would like to get it going before Xmas and on the road in Feb
- 44 replies
-
- 23
-
-
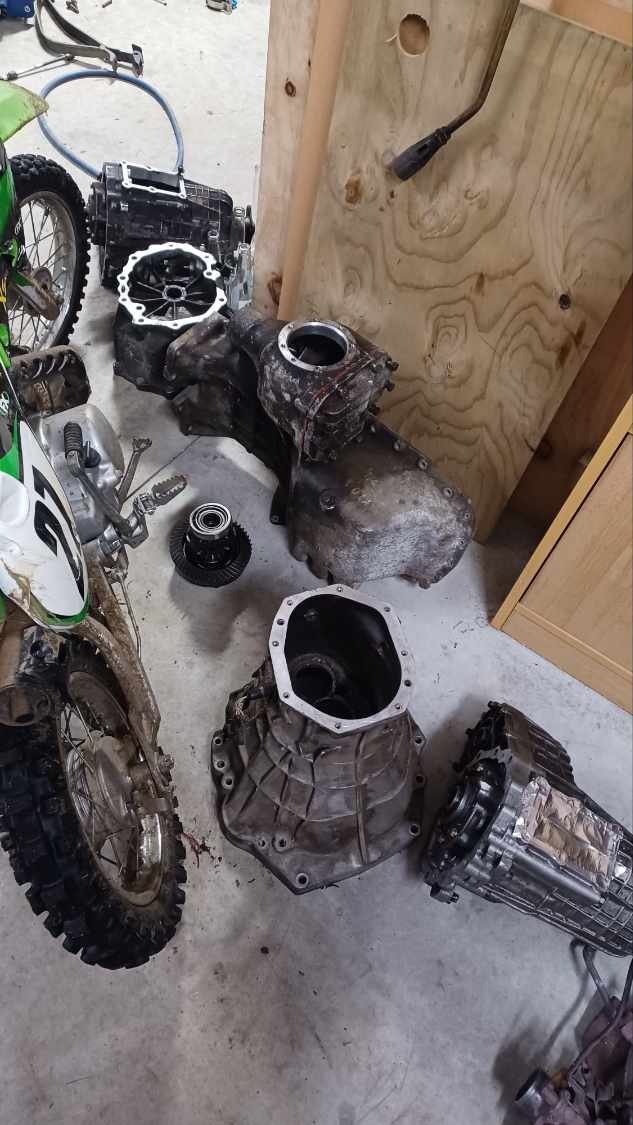
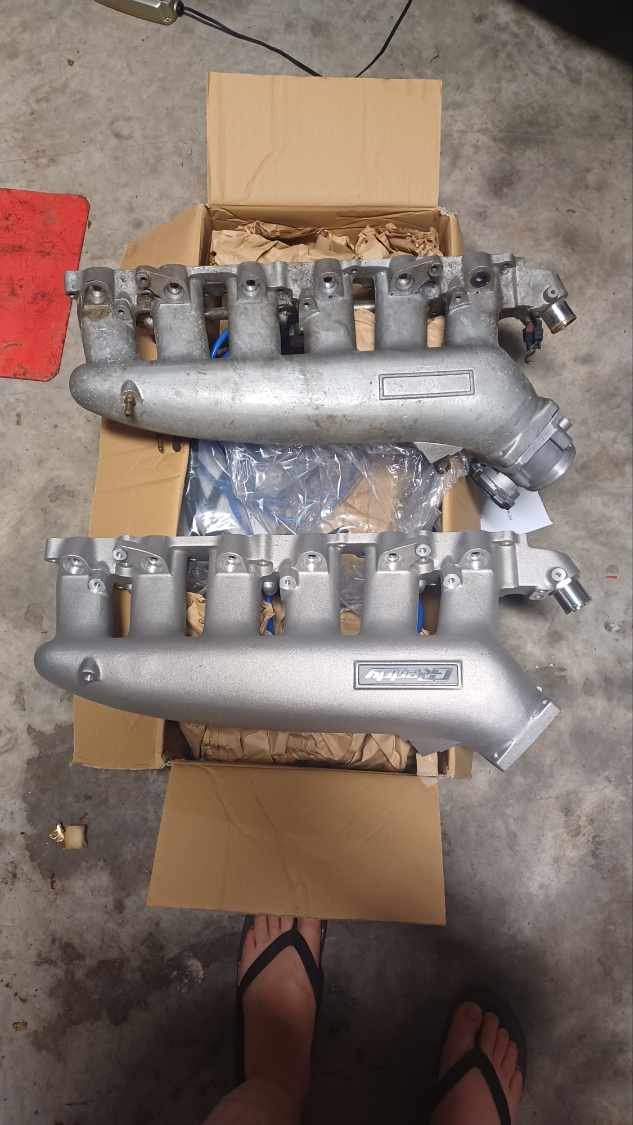
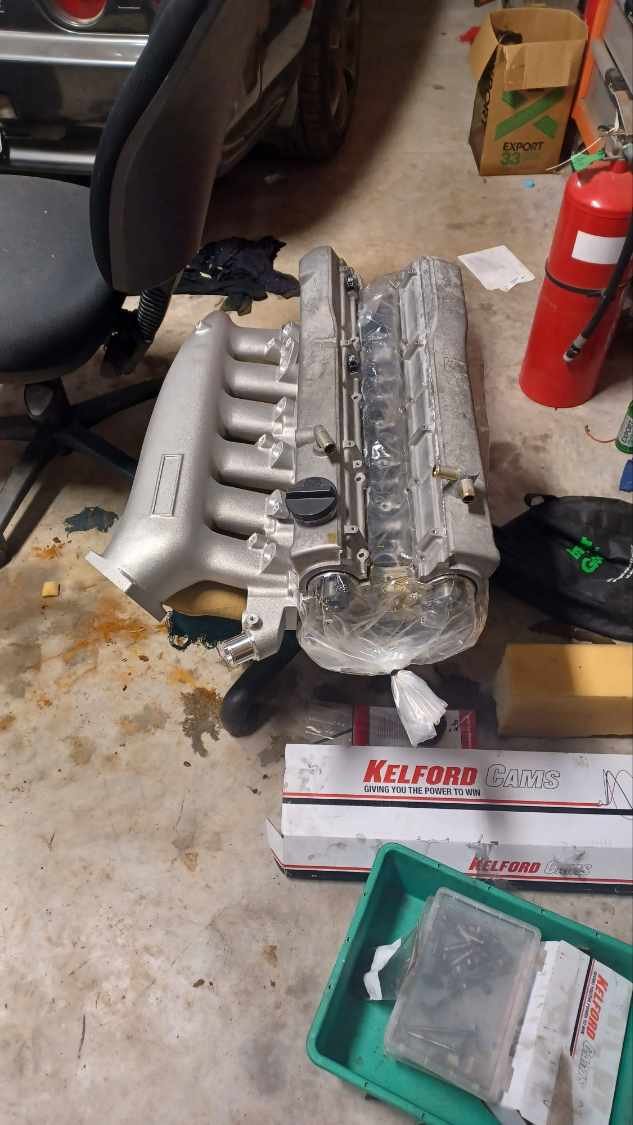
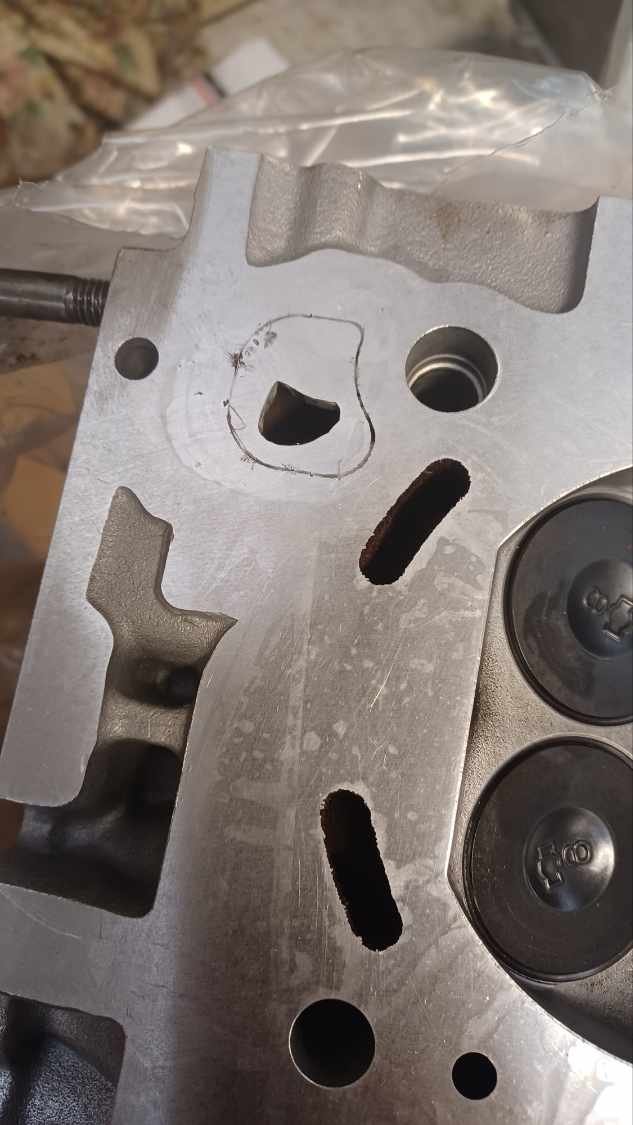
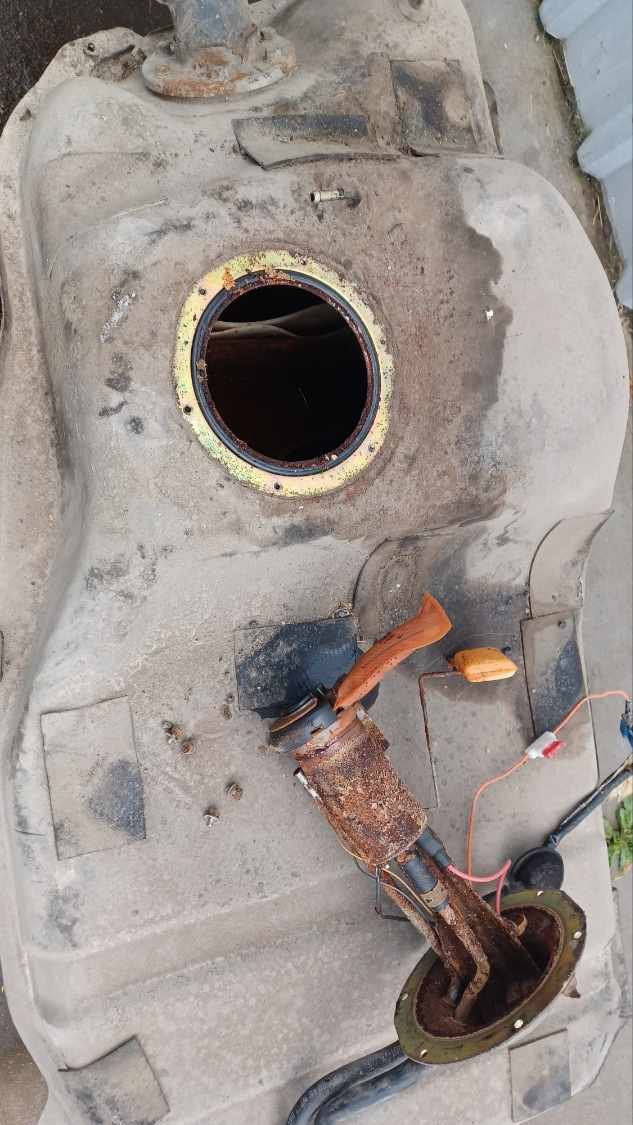
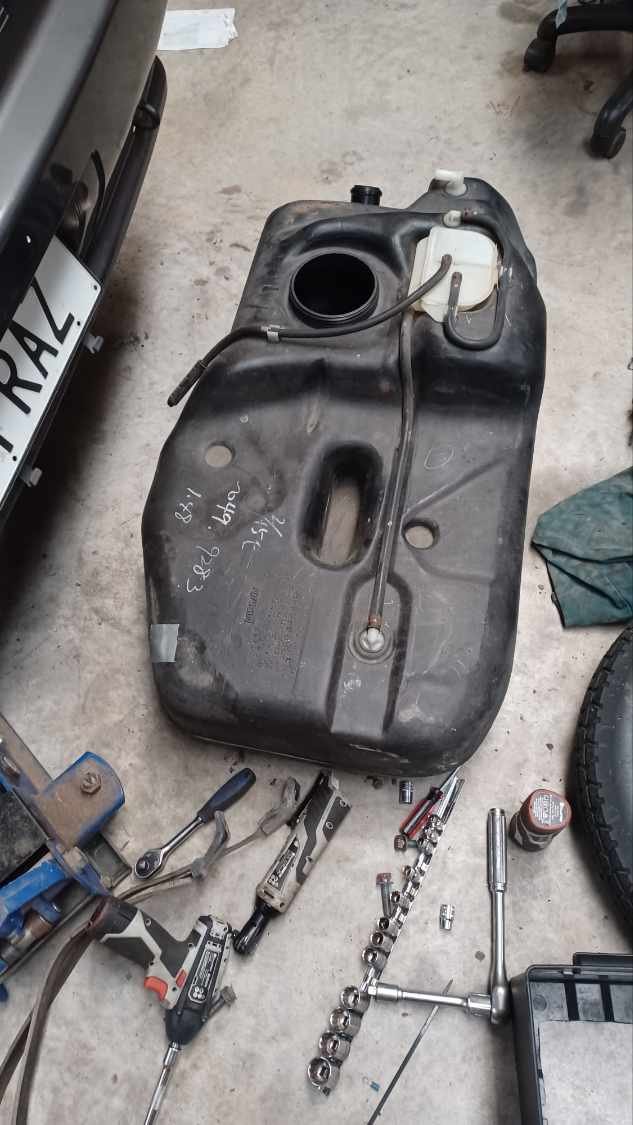
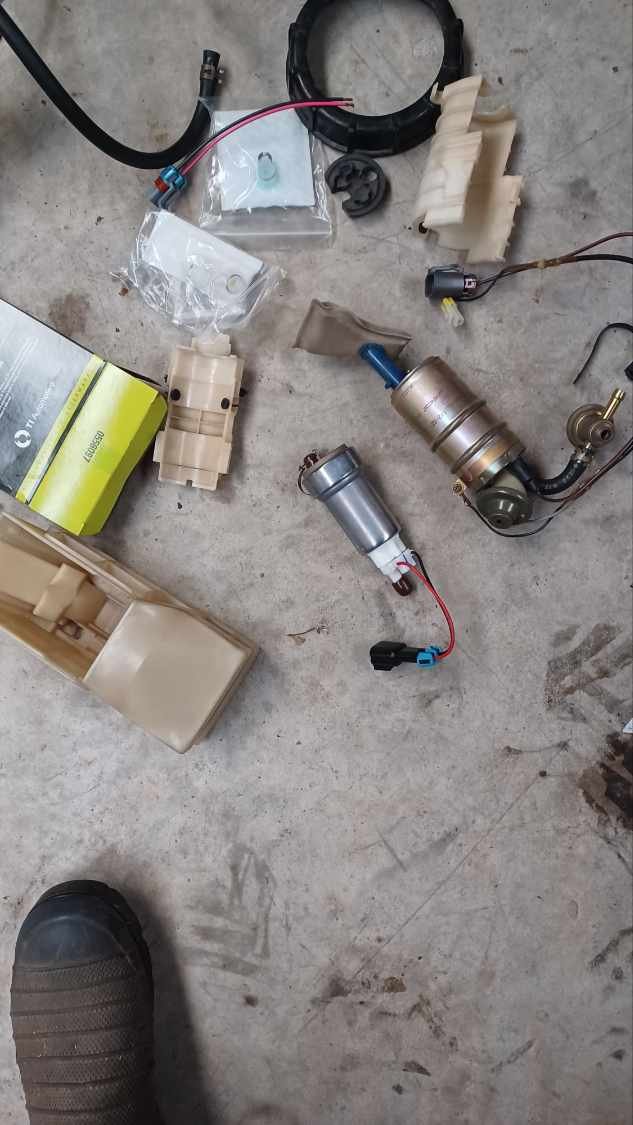
Wow, time flies when you're on OS. So I got the transfer back together and put it on the back of the box ready to go in. I'm suspicious of the gearbox, but don't want to open another can of worms right now so I'll ignore it. Next job was to adapt the 74mm ethrottle body to the inlet manifold. Adapters are not common (=expensive) for this application as most people run the bigger throttle so i got a bit of Ali plate and a holesaw and some backyard machining later Just needs a polish and it's done. While doing this I remembered that my China plenum was actually a dog and I did some shitty things to make it fit and also not leak coolant through the casting. I found a genuine one online for a good price and the quality is far superior. Got the head back recently so it's waiting to go on. Just need to port the water bypass port in the head as I welded it up to suit the rb30 block. You can see the weld where the water port was. I think I'll get in here with a die grinder and vacuum cleaner to catch the swarf. Hopefully it will work out. I dropped the fuel tank and it was fucked. Has been sitting for maybe 12 years and was maybe 1/2 full when parked. Fortunately I had found a gtr plastic tank a few years back. 72L vs 55 or 60 so a good improvement. Picked up a walbro 525 L/hr fuel pump to go in. Hindsight says I probably could have gone for a 460 but now I can run e85 if the opportunity arises without needing more pump. Surprising how much smaller it is than the stock pump. Got some more goodies for the fuel system too but no photos yet
- 44 replies
-
- 14
-
-
-
I'm surprised your favorite method of combustion chamber pressurisation has not entered the chat...
-
When I was living in Oz they were building box trailers with this honeycomb kind of plastic stuff that looks similar to that stuff you have. It was strong as shit and they were just gluing and pip riveting aluminum angle to the joins. I forget what it was called but could be a good weight saver and more resistant to denting? I forget the name of it, but the camper trailer crowd were all over it
-
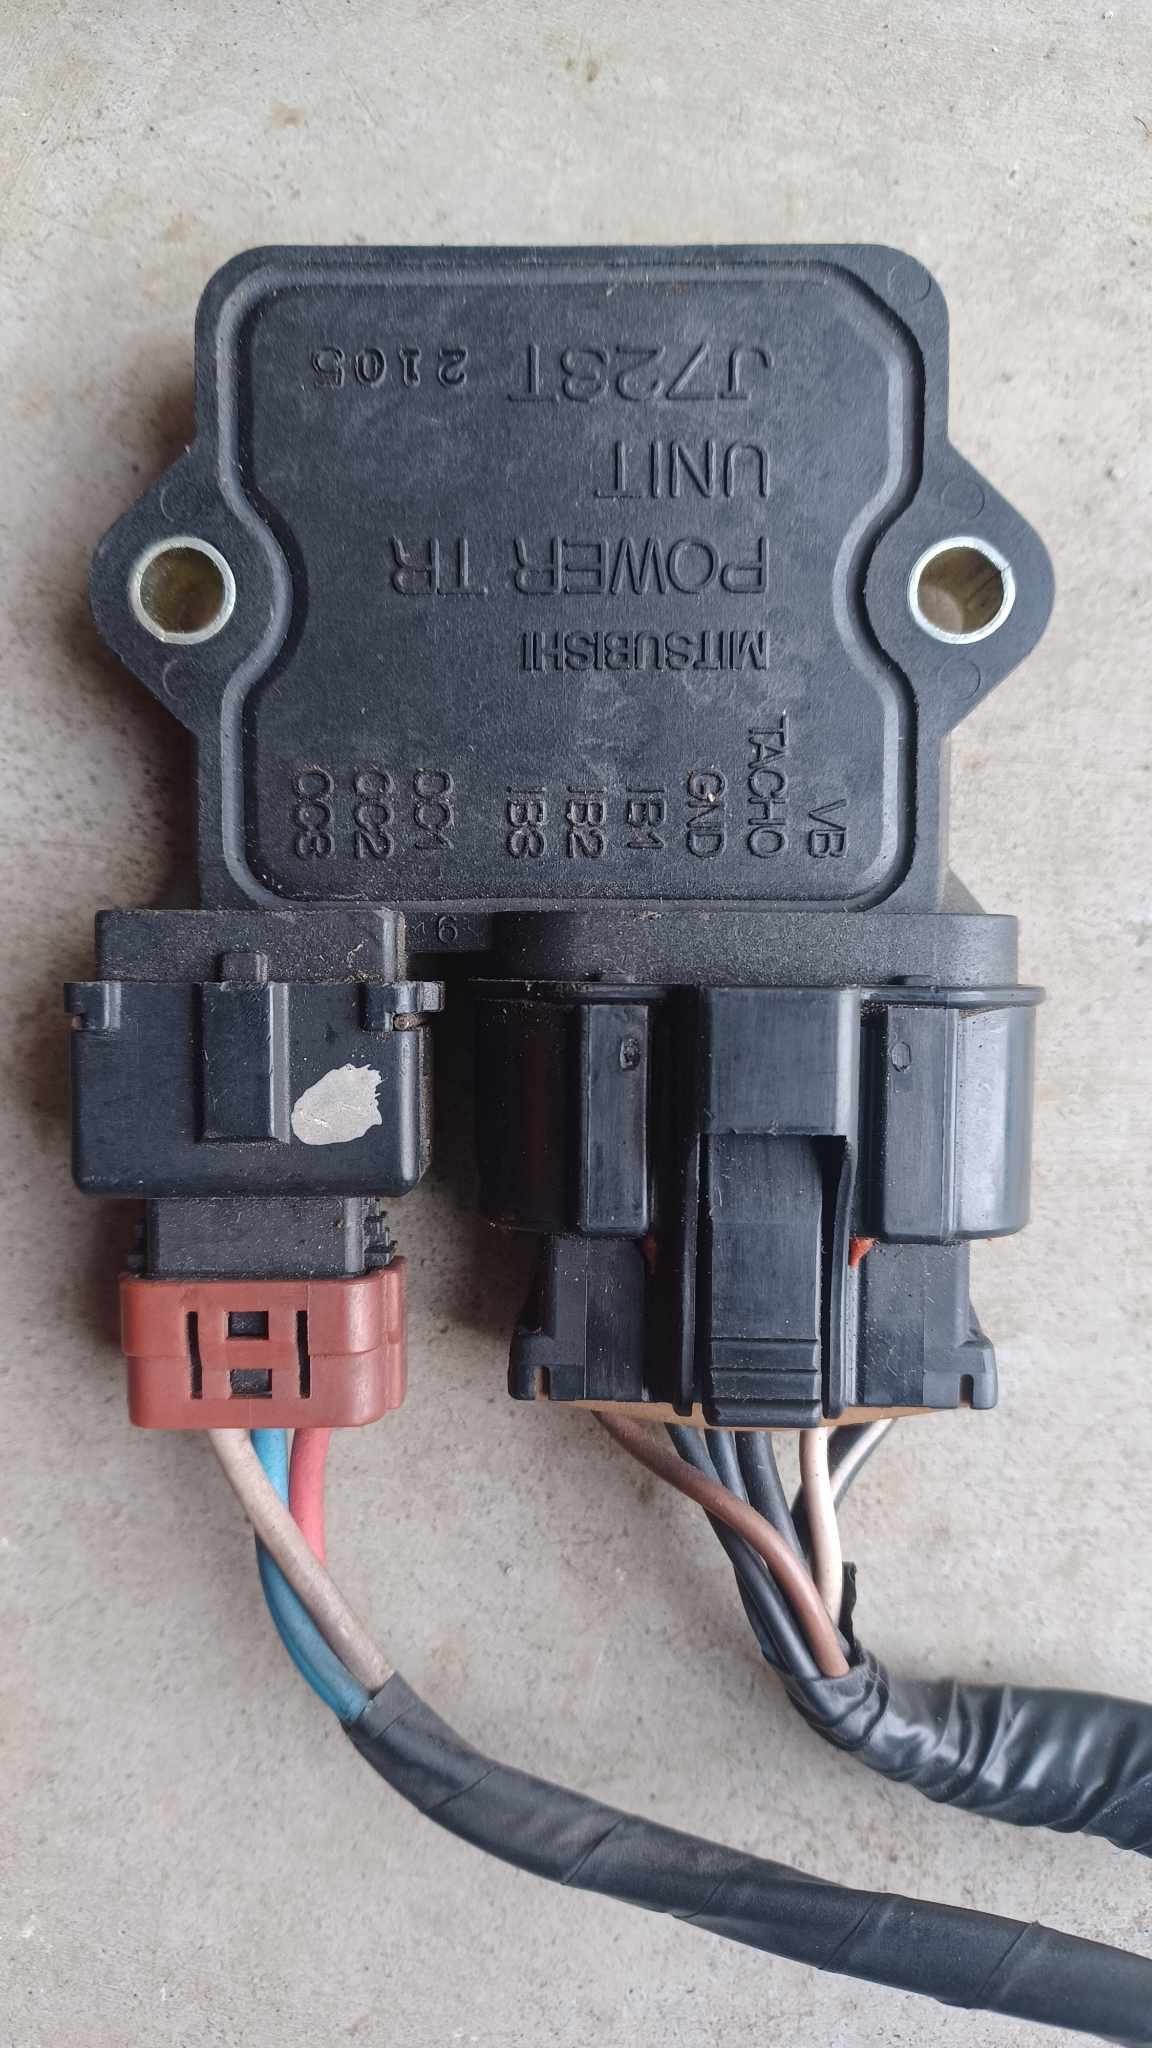
How about this 3 channel ignitor from a Mitsubishi Galant v6. They run a 3 coil setup. My mate used one with mitsi coils on his rb30det with good results. You can have this one if you want it. I hoarded it 15 yrs ago to do the same but never got round to it.
-
18436472 injector wiring, one of those 4s is a 5 but not sure which one, you should go 1 and 6, 8 and 4, 4 and 7, 3 and 2. Then you set it to squirt twice per cycle and you will get the most even distribution
-
Saw one of these at pick a part in a crown. I would say you have a bit of port work to do on the exhaust
- 652 replies
-
- 10
-
-
-
I'll have a look. I drive past nearly every day and haven't had a reason to go for a nosey
-
Want me to have a look for you?
-

Random slightly cool stuff you built but not worth its own thread, thread
fletch replied to h4nd's topic in Other Projects
Yea, I have seen 'other people' poke a longer bit of box section in the top to get some more reach, and an old engine block on the back to uprate it some more -
Another vote for plugs followed by a good Italian tune up. Maybe an oil change to some decent synthetic
-
When it's running, the oil level drops as its all up in the head and block walls etc. Then it can run out of the tube and be all ghost oil level etc
-
Plz do the 3kw 48v hub motor and use a 72v battery pack.
-
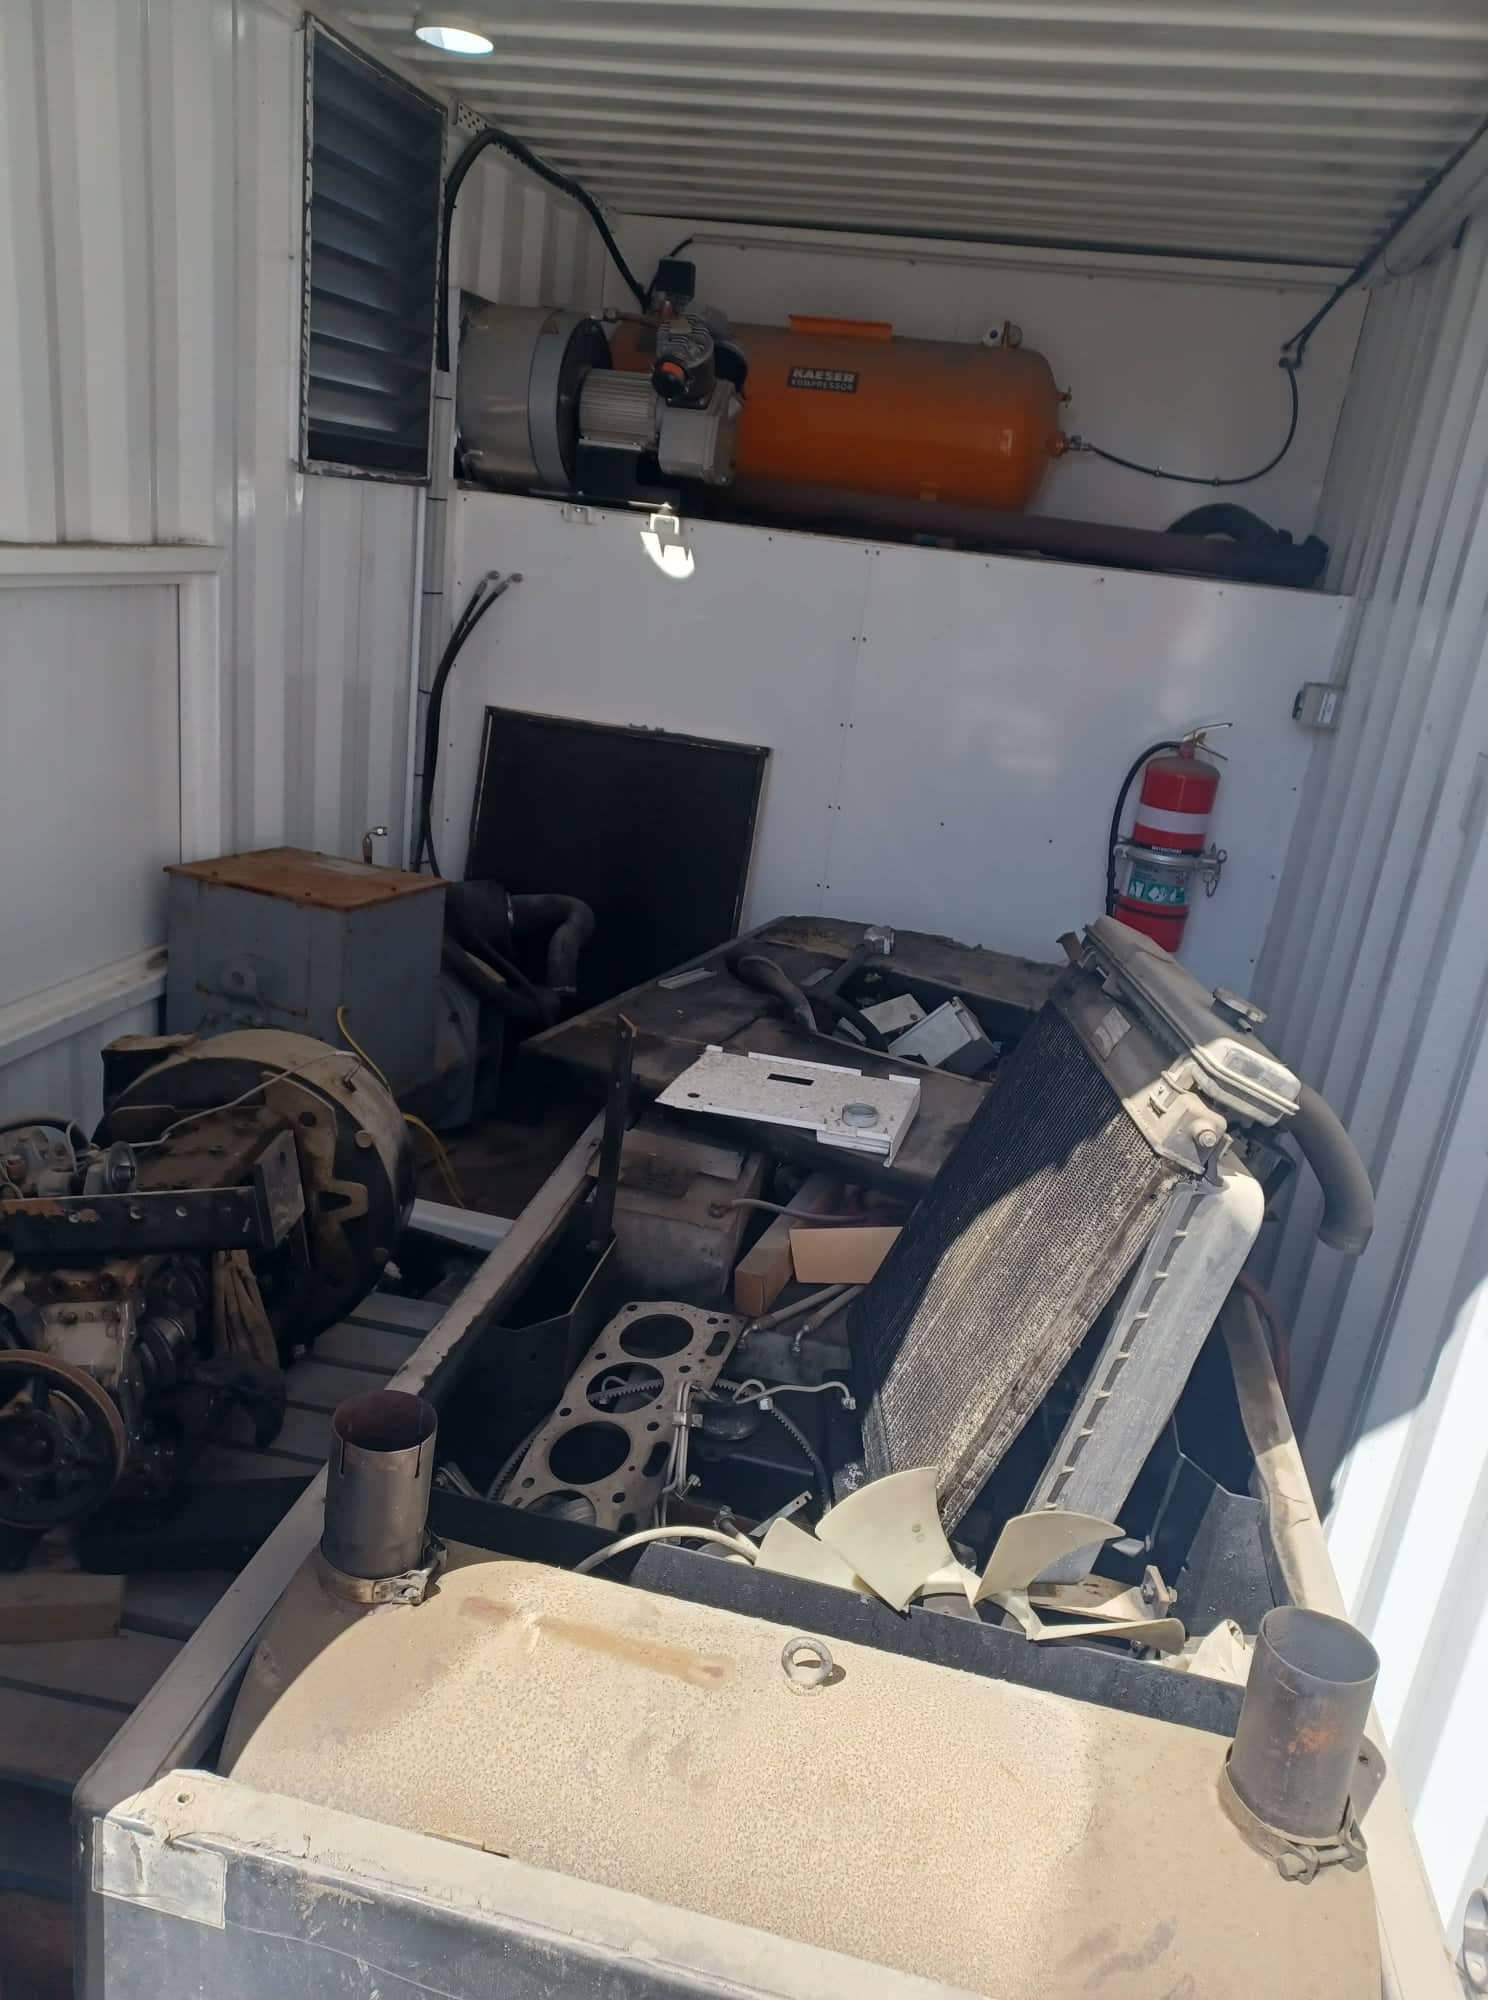
Lol that's a big dog. Yes they do coke up if they are not loaded. Can take a while to happen but does happen. Example was a camp generator. Nice 4cyl perkins turbo. Ran for a couple of years 50% of the time it had no load really. Ate itself and nearly ran away. Was a bit exciting. Mechanic pulled it apart to have a look and it was curtains. Then he left and the container door got shut.... Starter motor and alternator fitted my tractor tho
-
We have a few of them at work for small site backups. Heavy little fuckers. Have been very reliable. Will start a 2.5hp single phase air compressor.