bmxnz11
-
Posts
1157 -
Joined
-
Last visited
Everything posted by bmxnz11
-
Changed the pilot jets in the carbs from 38 to 35 and played with the fuel mixture. Remove an air hose I had blocked and This time on start up, the choke increased rpm and didnt kill the motor. Heading in the right direction. Went for a drive and it struggled under load at mid range and had the odd backfire through the carb. Idles fine so I'm picking it's time to play with the slides.
-
Wired in an electric bike fuel pump which fixed the over fueling issues. Tuned them with a vaccum gauge but had trouble so resorted to a hose to my ear. Threw a colortune at it and it was running rich all through the range. Wound in the pilot jet all the way and it was still rich at idle. Have ordered some jets from aliexpress and will play with them. Have driven it around the block a few times and it certainly comes on song. I had to horey up a return spring, ended up using an old matchbox chassis. Have yet to rectify this.

- 37 replies
-
- 19
-

-

-
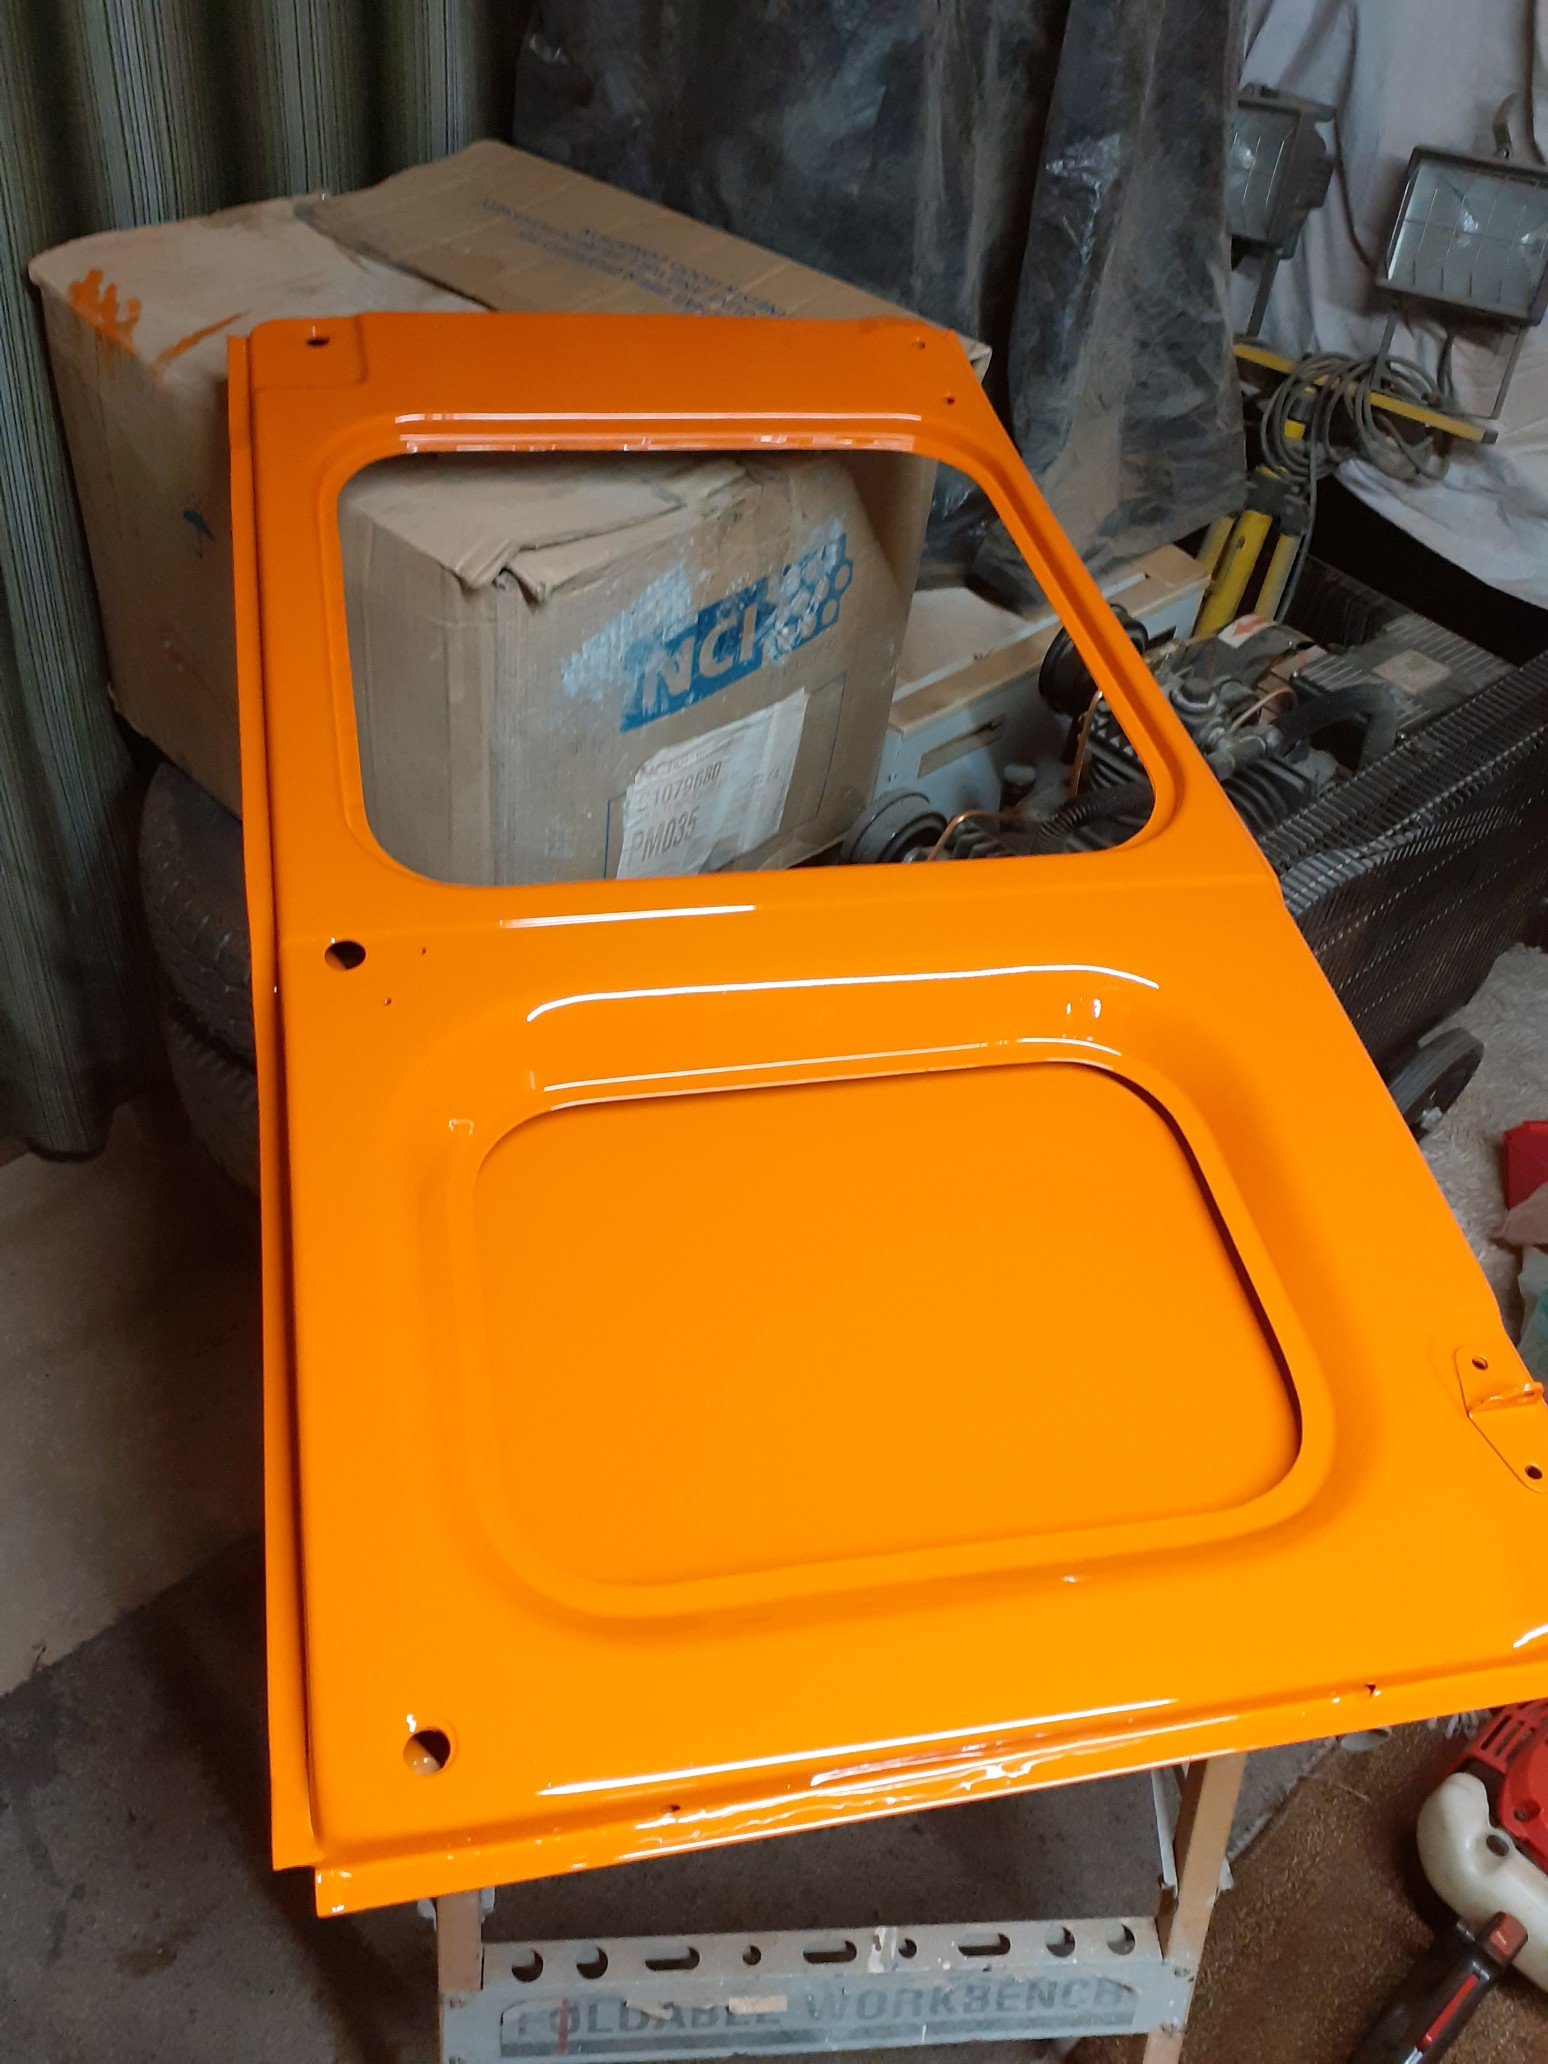
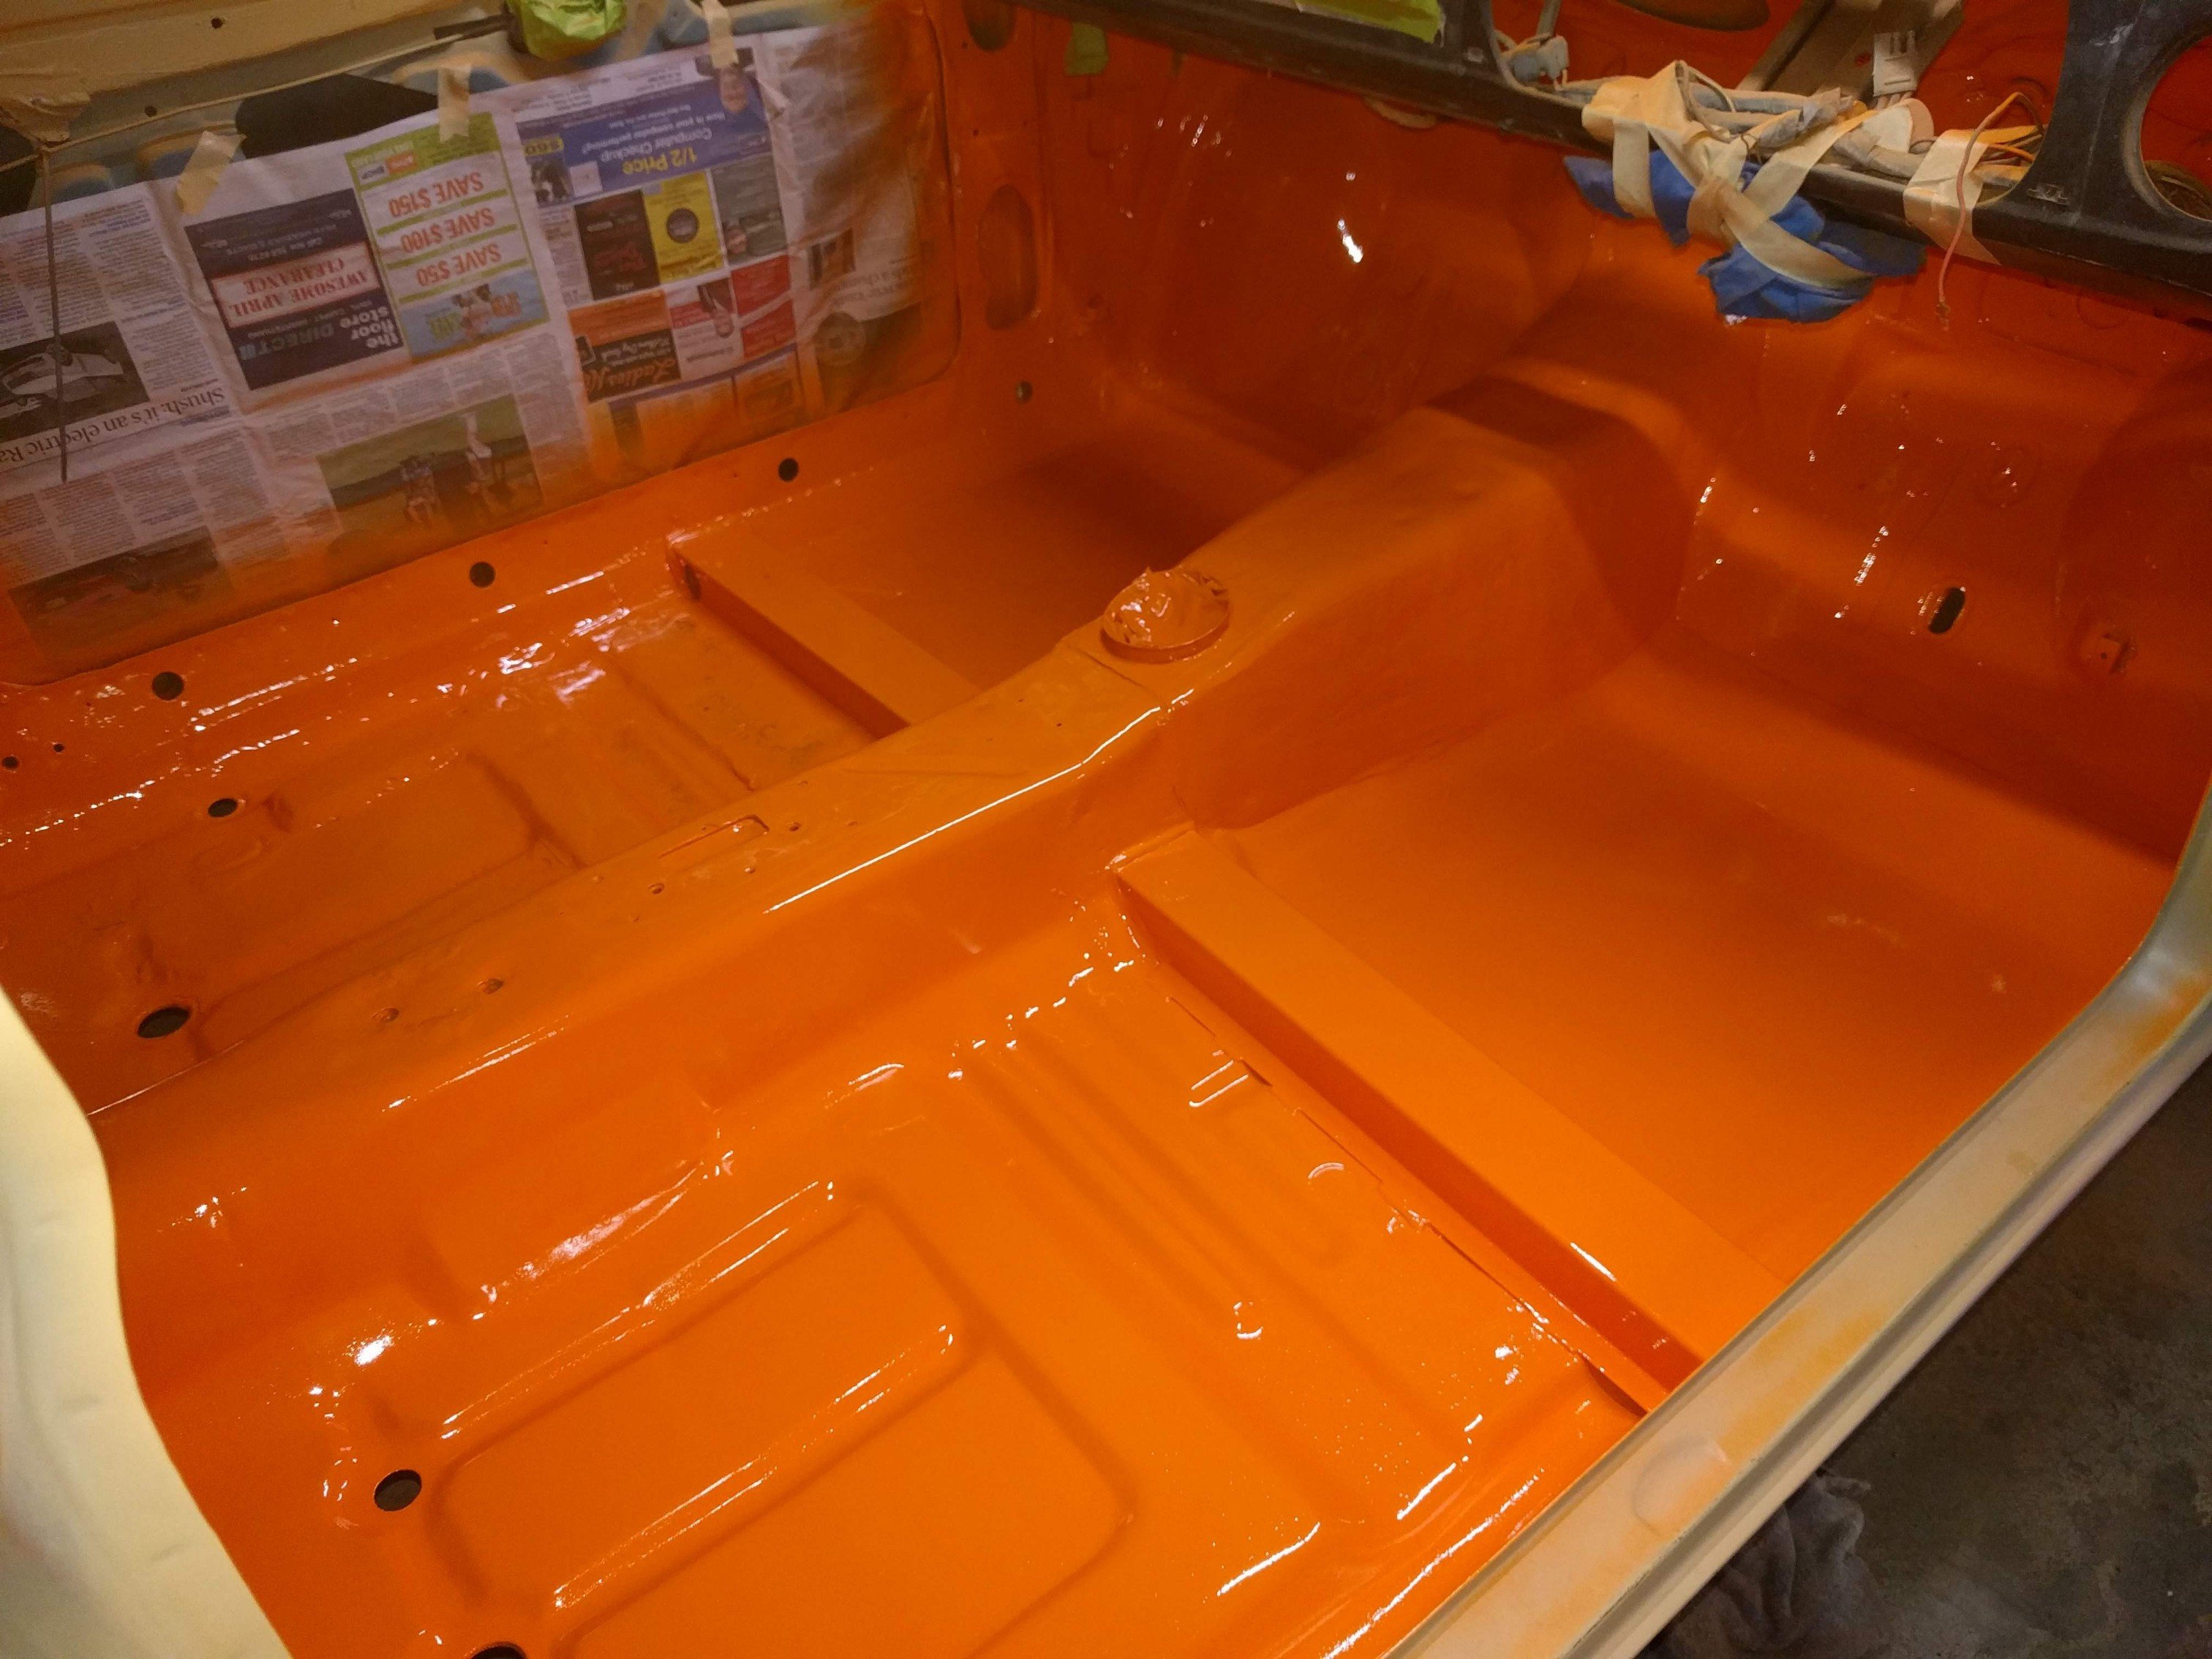
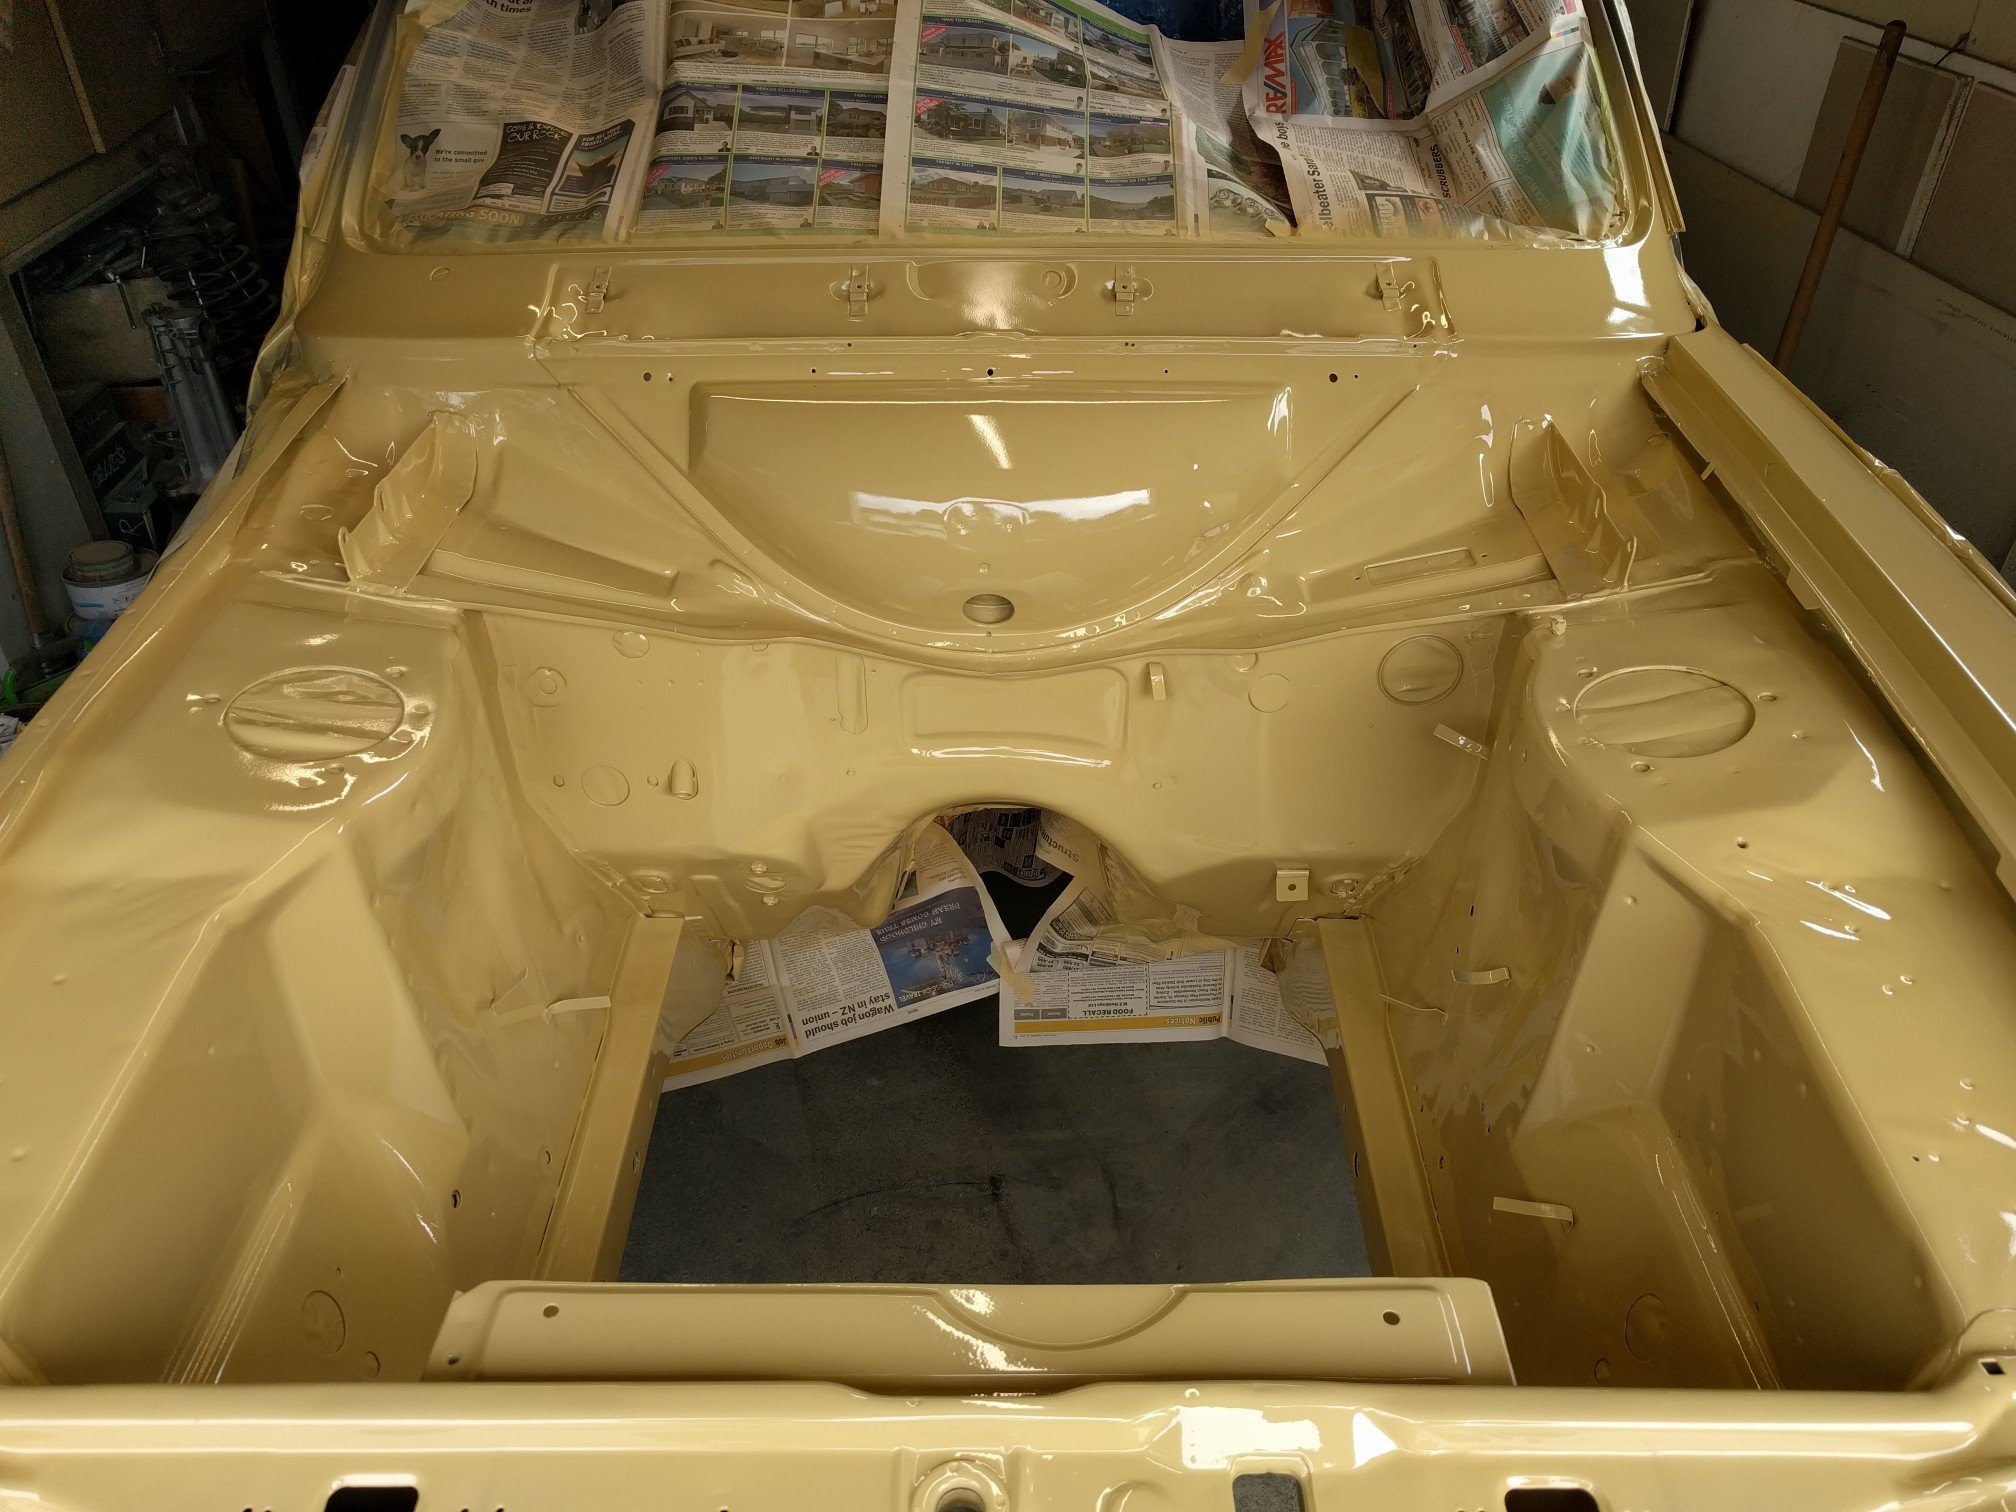
Ended up going with signal orange 79. It's an original color for an escort, but not this van. Sampled a blue and a different signal 77 orange but settled on this. Have been spraying it in sections. Engine bay, interior and inside of the doors. Still a while to go before I can spray the outside but its certainly progress!
- 104 replies
-
- 31
-
-

-

Wellington Monthly Meet - Discussion thread
bmxnz11 replied to KKtrips's topic in Lower North Island Region
I'll come check these ribs out. Will have to leave about 8.30 but shouldn't be a problem. -
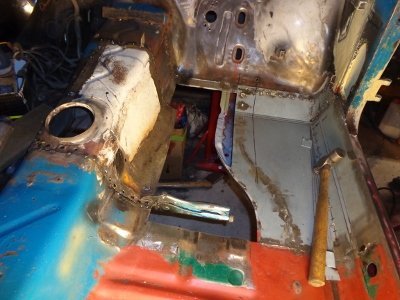
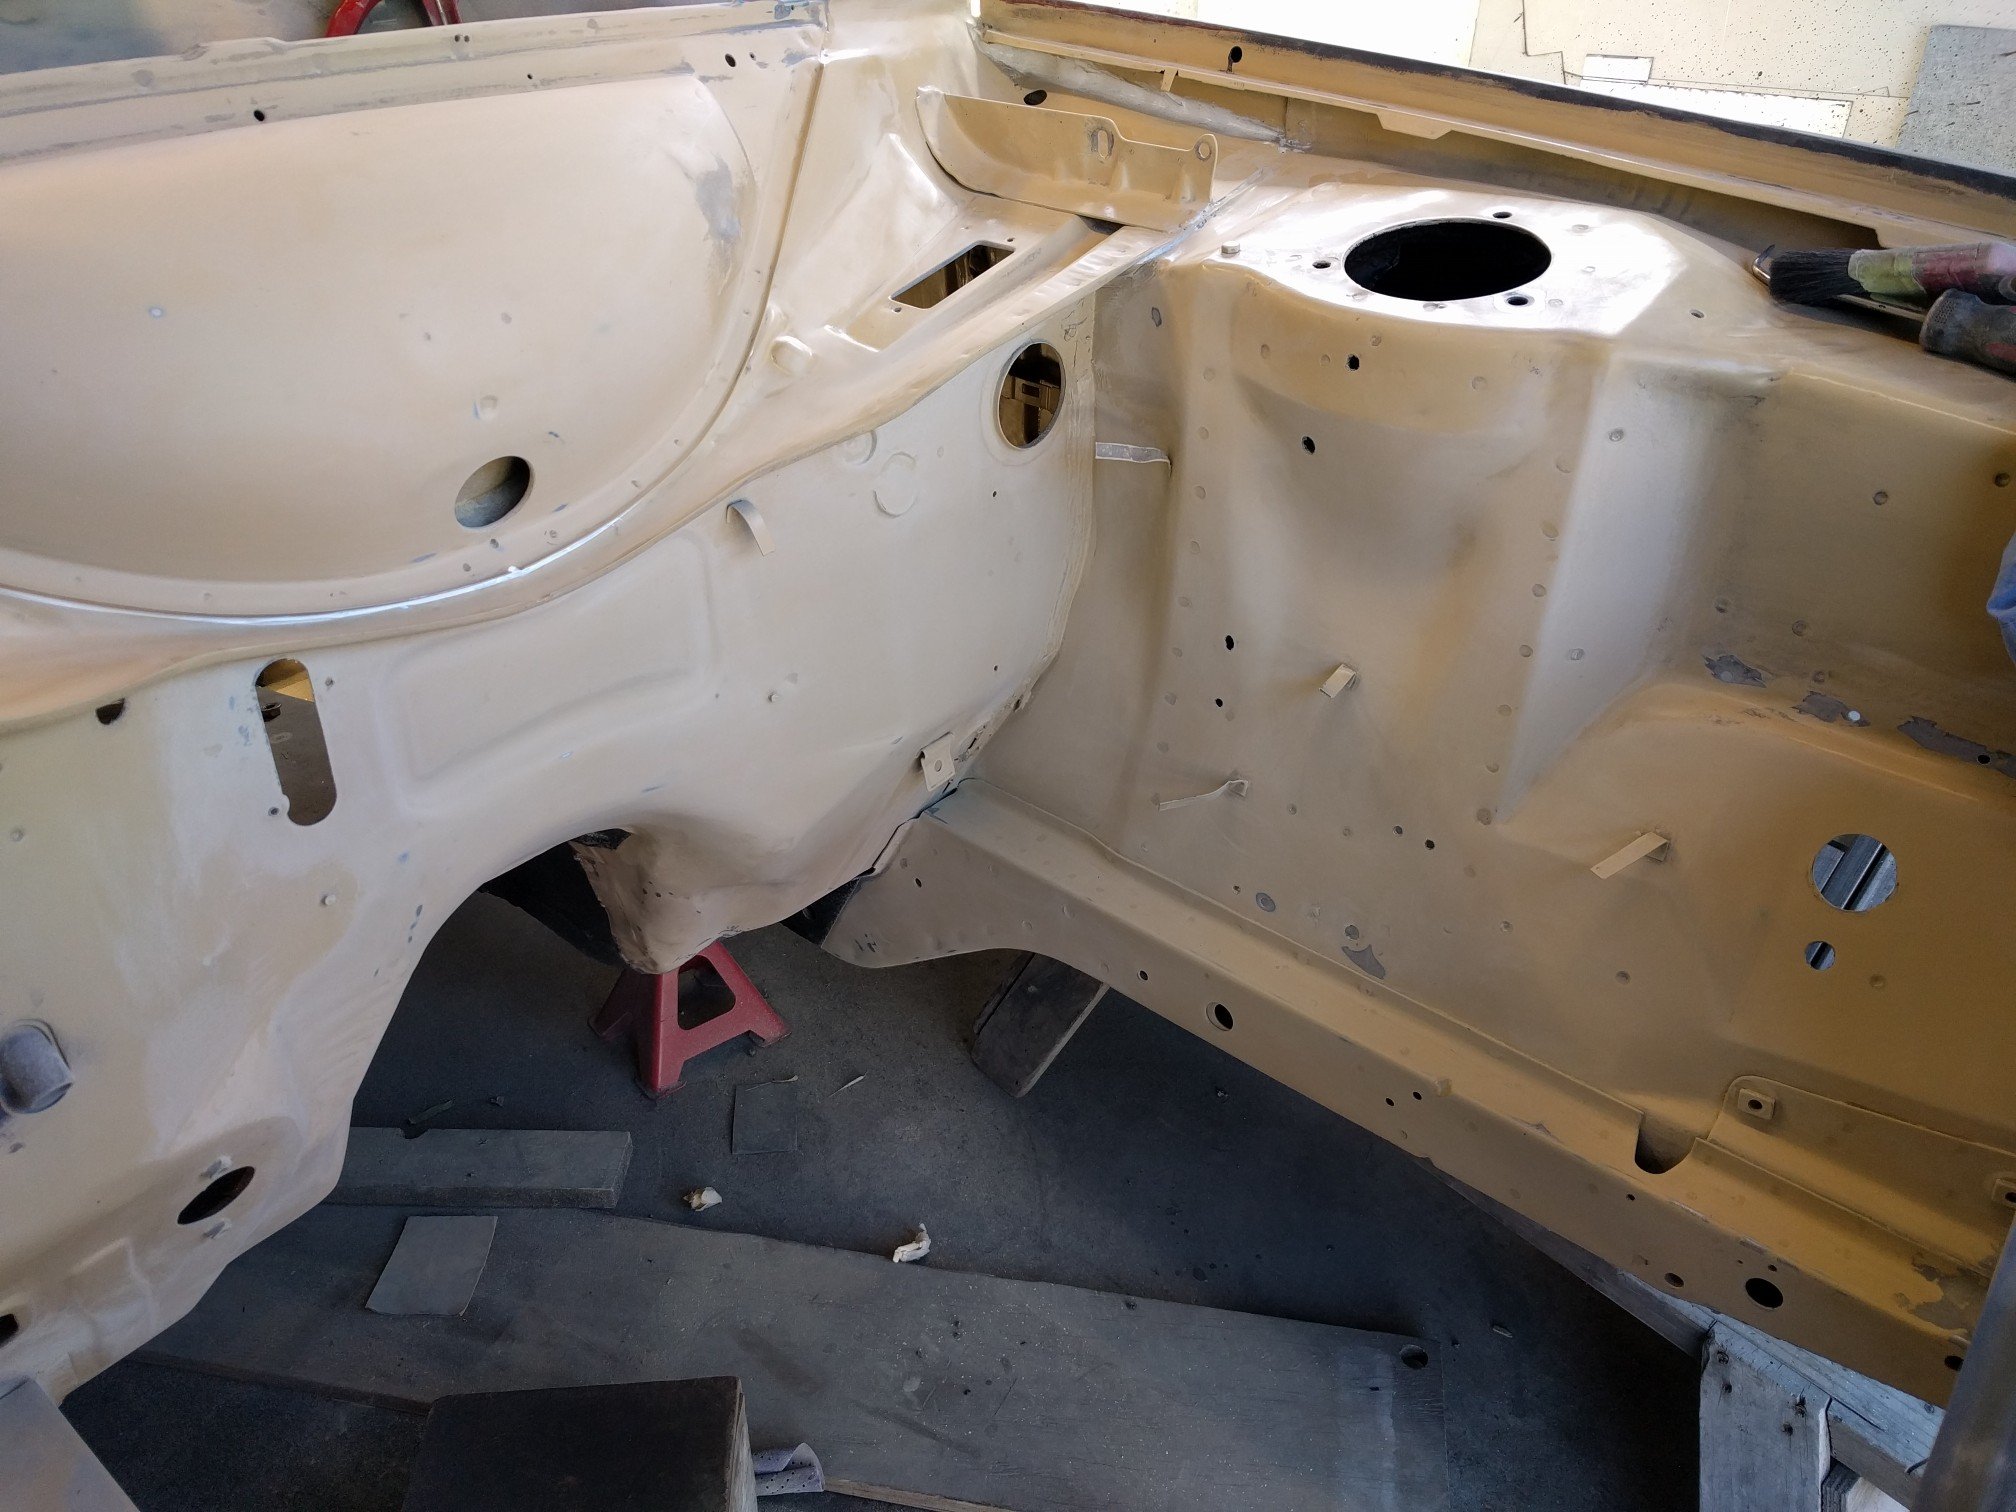
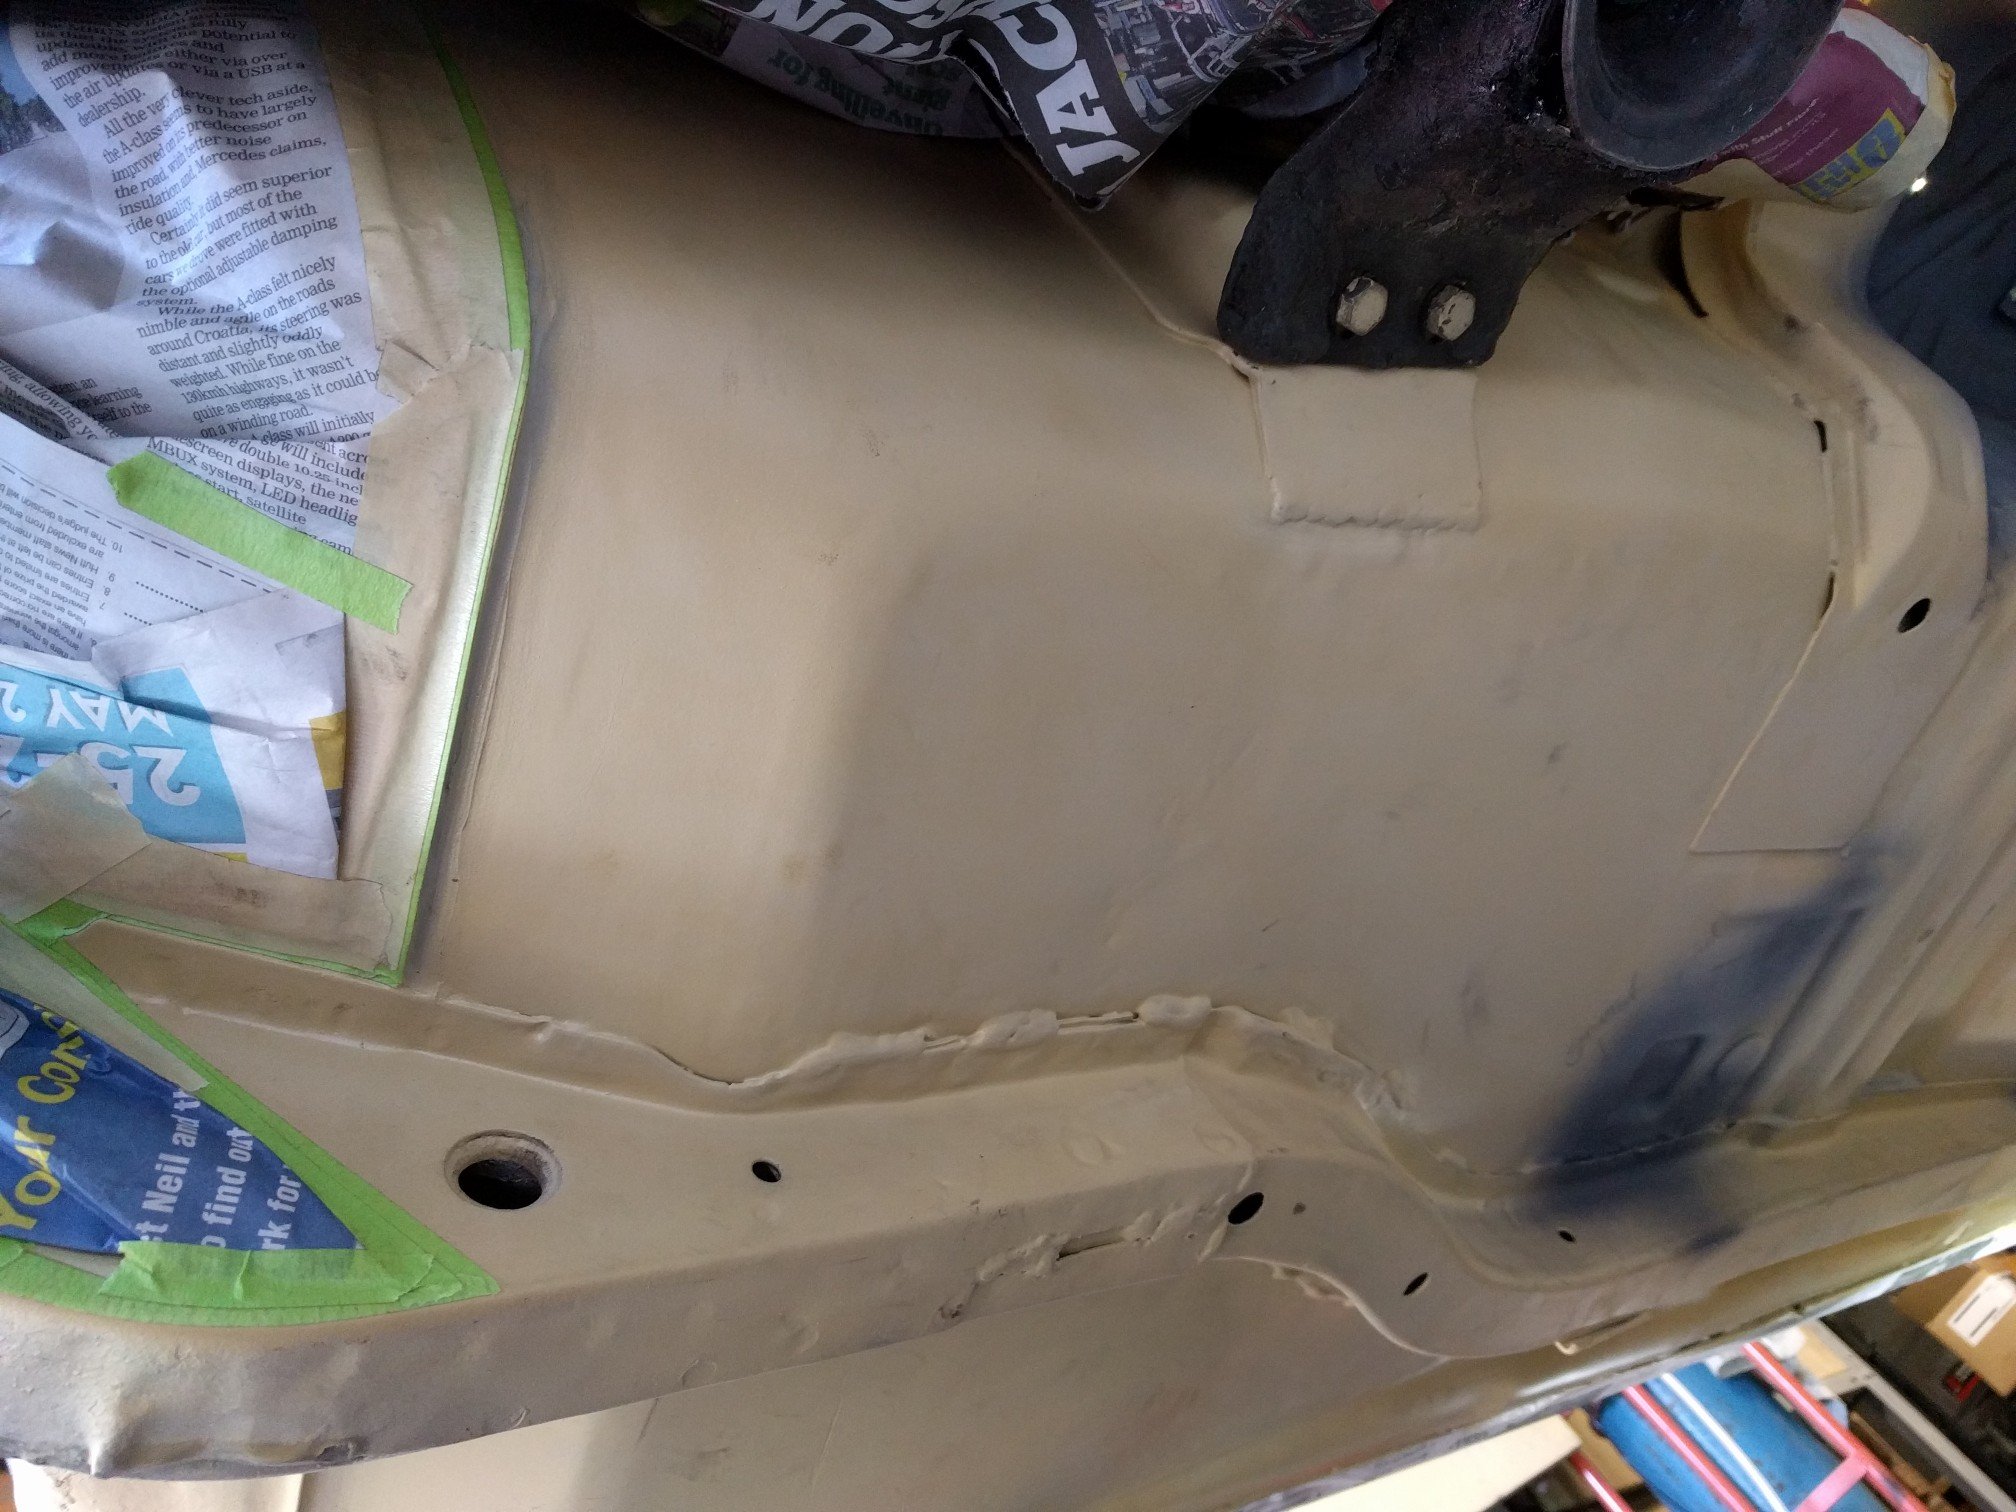
I've done both floors and sills in my mk2 vans and did them a little differently each time. But each time I built them from the inside out. Ie, built the floor and inner sill so it sits flush against the original sections and outer sill. Cut out the outer sill and pillar, and repair them. Lapped and plug welded were the factory joins were, and butt welded the other. Another suggestion would be to cut your floor out even further towards the gearbox tunnel. Slice the floor where it runs along the middle of the chassis so half the original floor is covering the chassis and the other half needs new metal. This is a very strong area to weld because it will also be plug welded to the chassis and it means your join going north south wont be seen from underneath due to the chassis being in the way. Keeps WOF man happy. Keeping it in factory placement and less joins, I would also suggest cutting out more of the floor going towards the firewall. The floor overlaps the floor slightly and is plug welded. Take that out and replace. You will only need to lap and plug weld this section of the floor on. Again, it saves making another join. If you did it this way, you will only have the one join showing going from the sill to the gbox tunnel Hopefully the above makes sense. The photo below will show you what I mean.
-
Wellington Monthly Meet - Discussion thread
bmxnz11 replied to KKtrips's topic in Lower North Island Region
Sounds good. Count me in! -
Mucked around with the carbs a bit more, turned up the idle adjustment and started first pop. Idles pretty well. Have ordered a throttle cable from Burton as I don't have a lot of time to make something else work. Does anyone have a bike carb balancing tool I could borrow? Once the cable is hooked up then I can go test driving and tuning. Hoping to use the color tune for most of it.
-
Wellington Monthly Meet - Discussion thread
bmxnz11 replied to KKtrips's topic in Lower North Island Region
Thanks but unfortunately I wont be able to attend this one. -
Bought and wired in a bike pump. Makes all the right noises and fuels getting to the fuel filter, sitting in the engine bay, so i assume its made its way into the bowls. Cranked it over but it wouldn't fire. Poured a bit of fuel down the carbs and still no dice. Pretty sure I just fouled my plugs. Will look at them another night. What have people use for a throttle cable?
-
Have sent them a message. Cheers!
-
On the look out for a carb seal kit and a fuel pump for a cbr600f1 if anyone knows of any for sale.
-
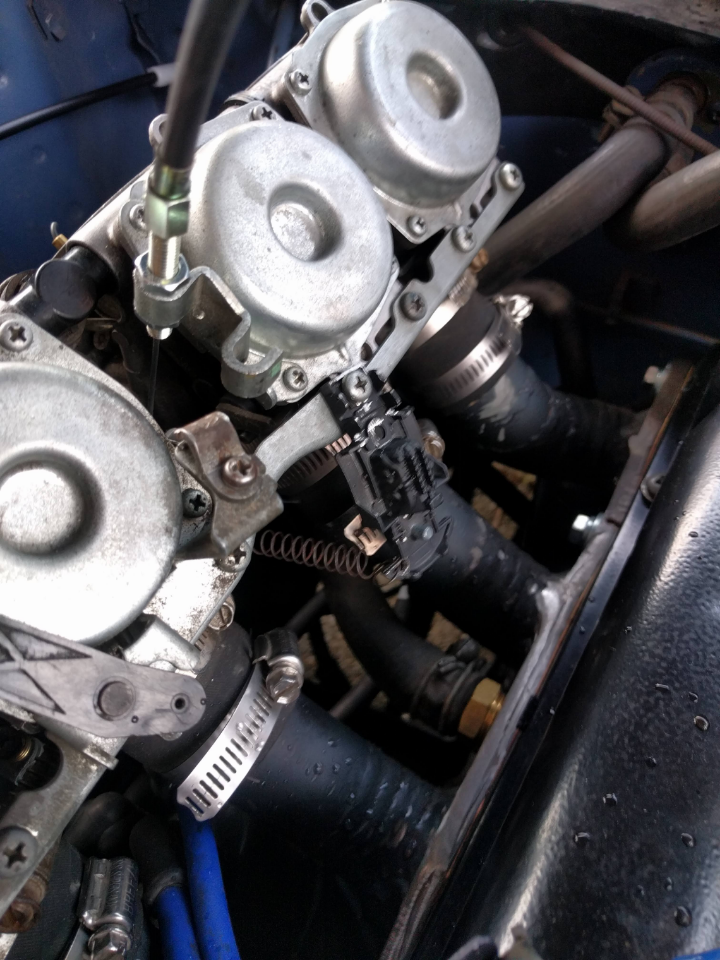
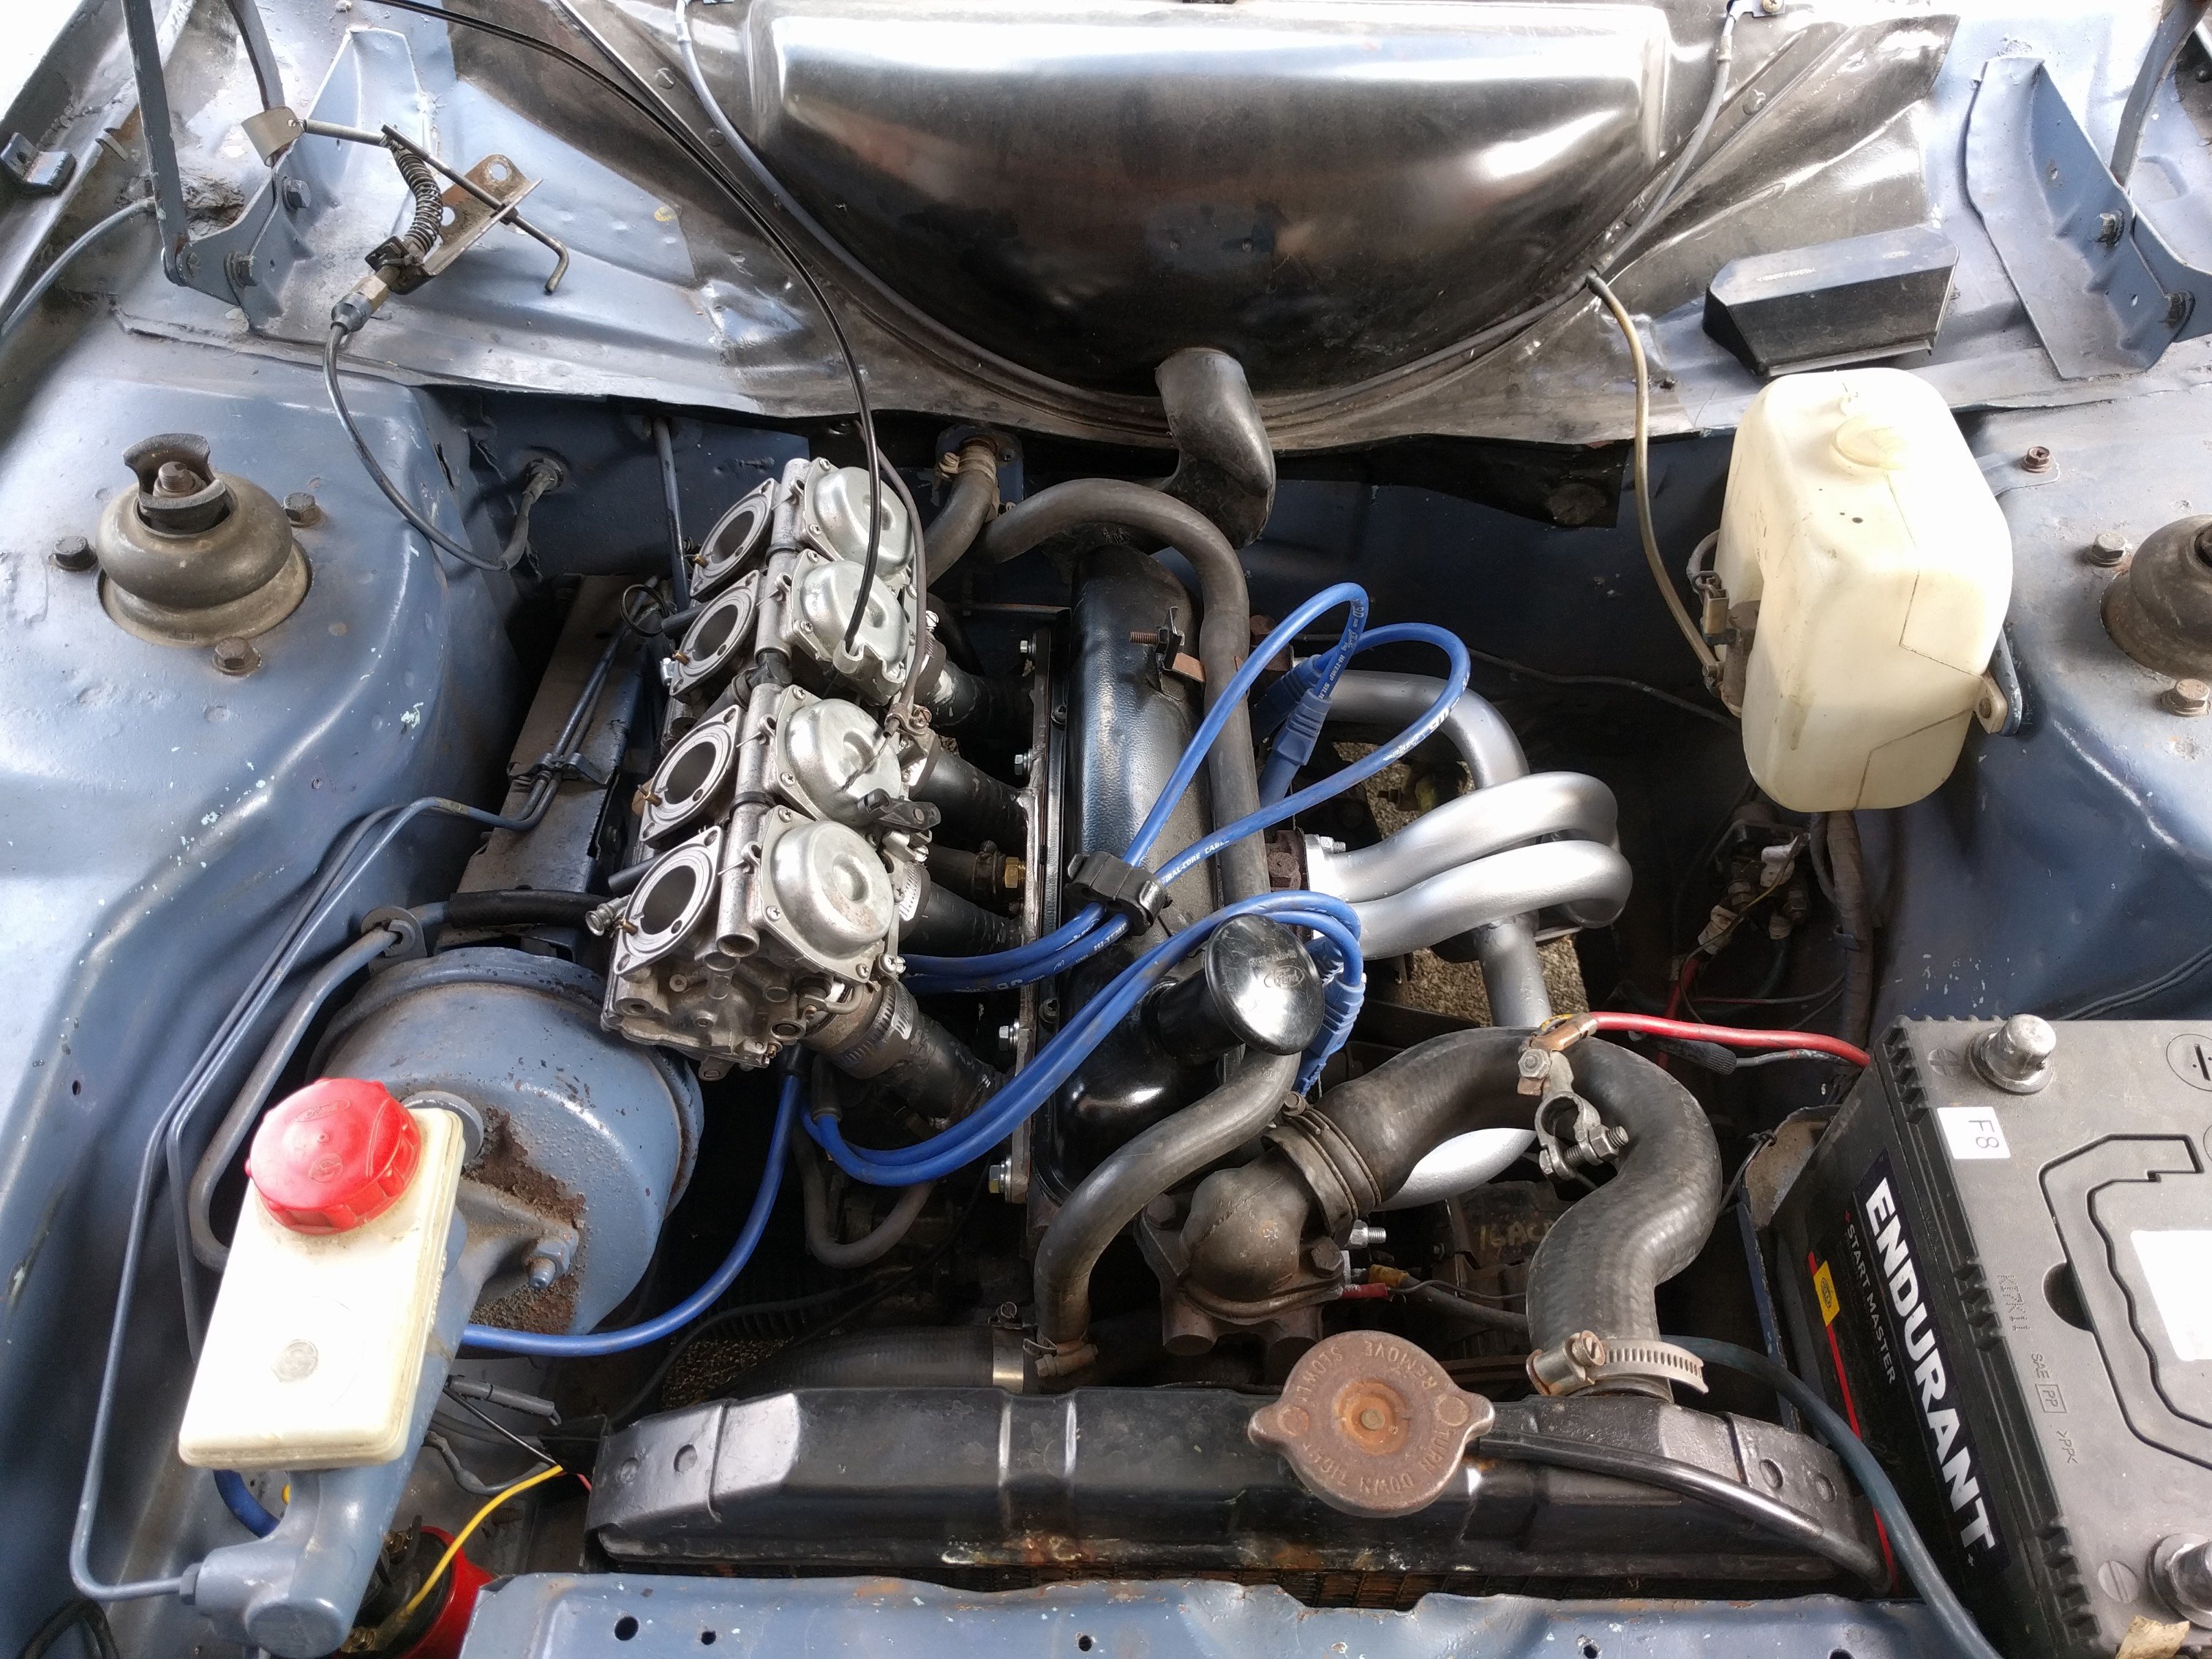
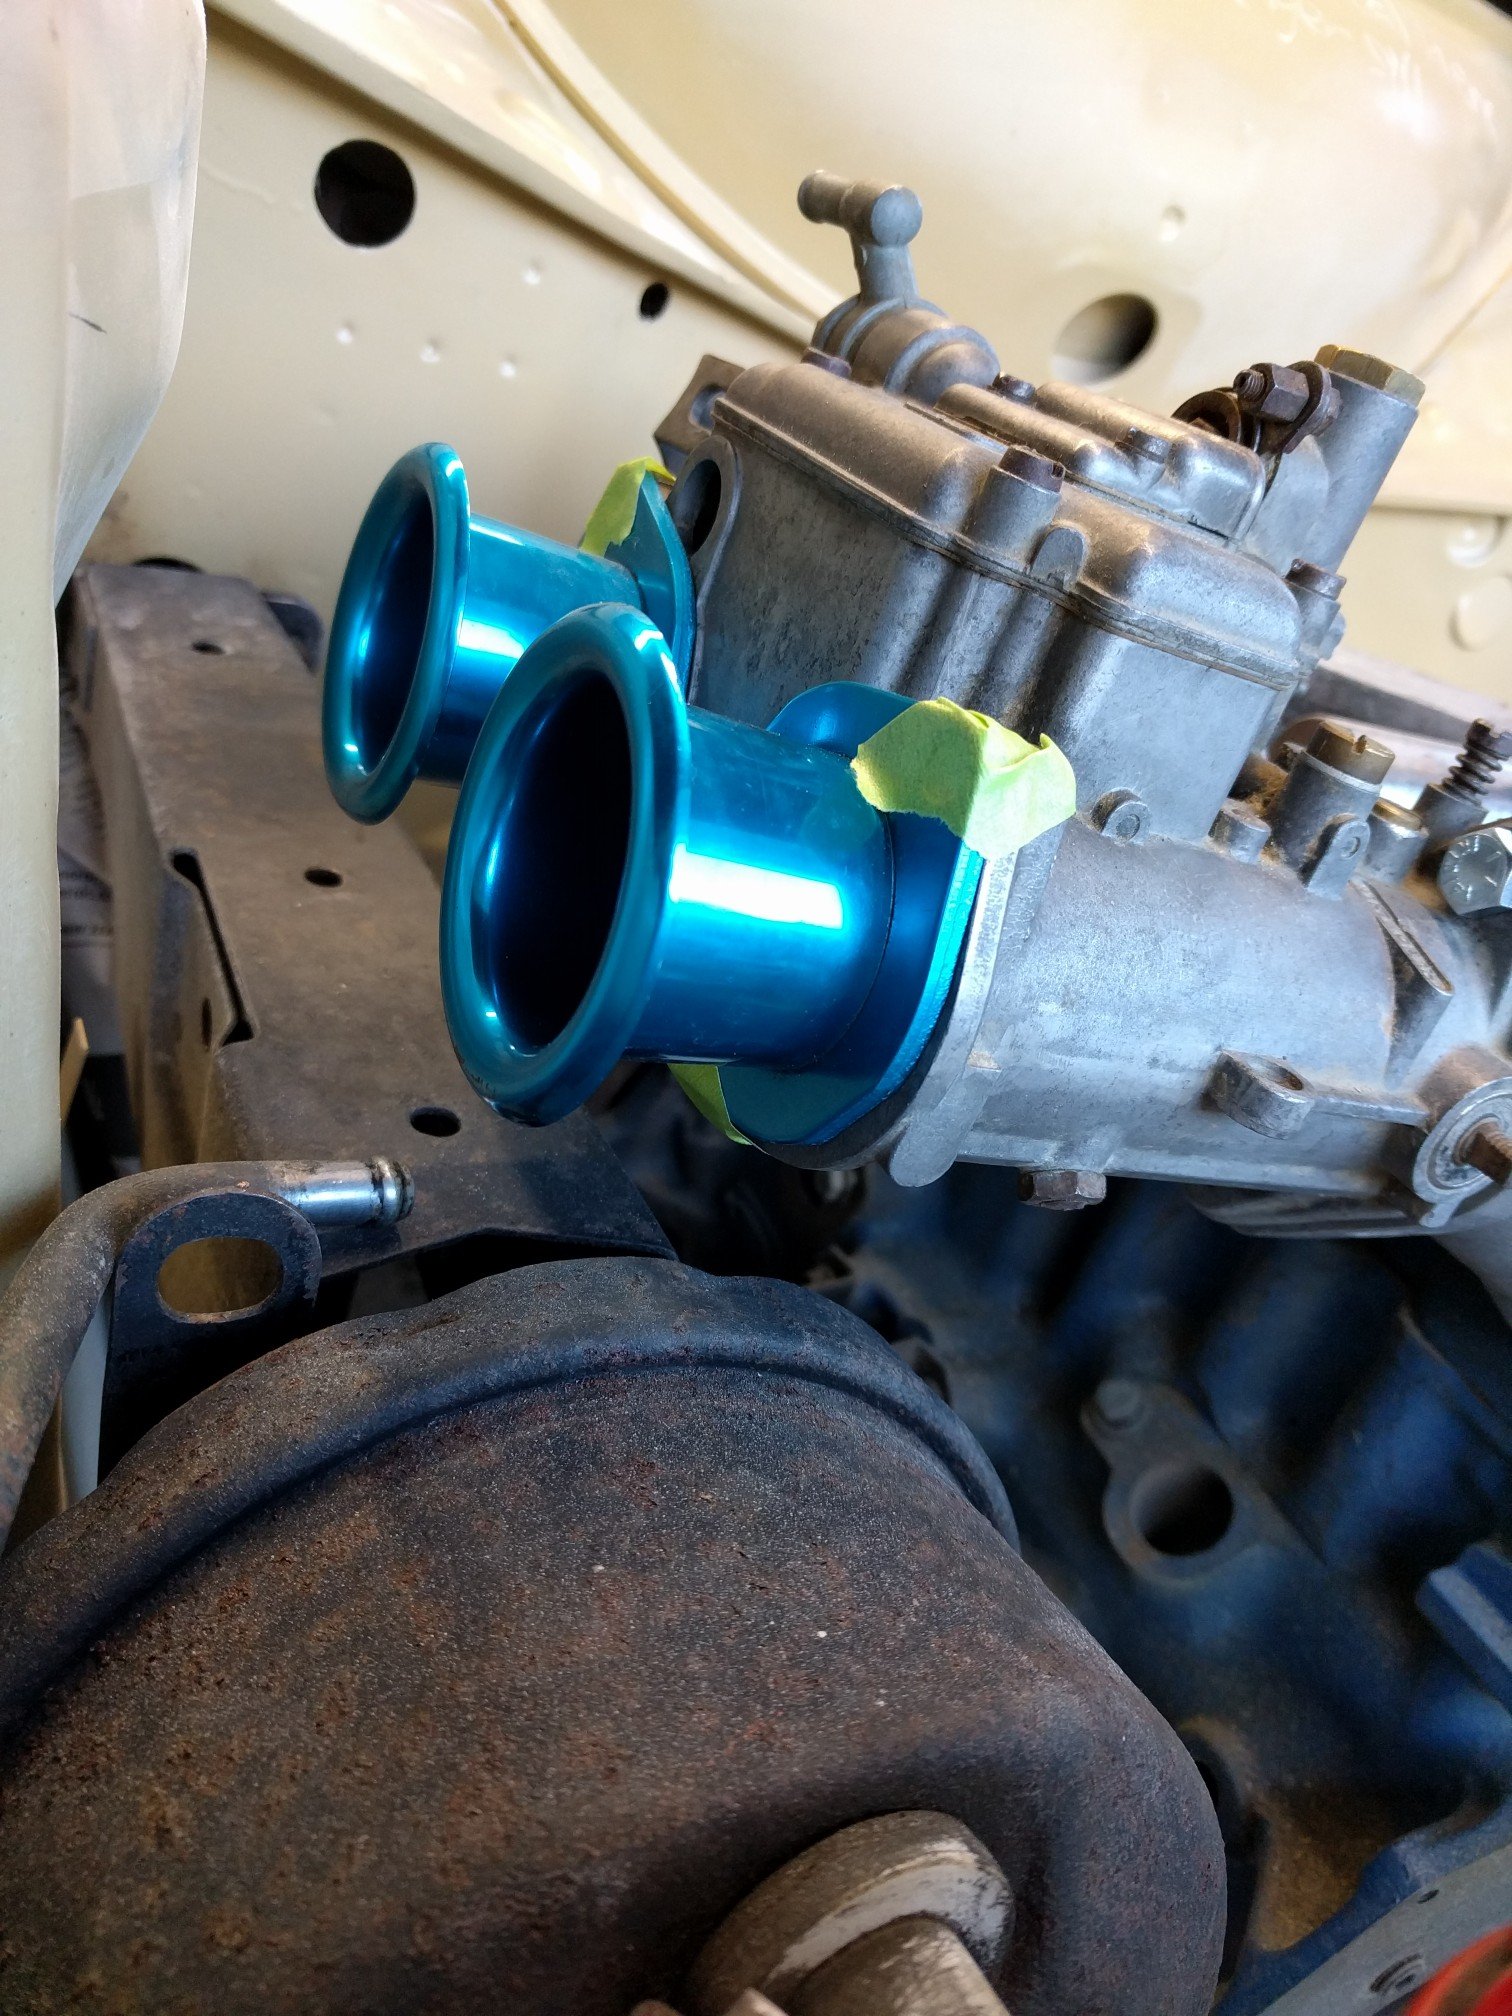
So I've been driving this around as normal. Failed the latest wof on an exhaust leak and a driveshaft uj. I ended up replacing most of the exhaust with extractors and a copy resonator. Pulled the gearbox, replaced the rear seal, changed the clutch plate and release bearing. Replaced the driveshaft with a spare . With that done I took it up to Napier over New year's. Got a bit warm on the way up,l. On the way home it developed a vacuum leak which I couldn't find. Wouldn't idle and would only run at high revs. Made for some frustrating driving. After a few hours of this it miraculously fixed itself. Still not sure what that was about. With it running so well I decided to do this.. ... Cbr600 carbs. I made up a manifold last year and this weekend thought I'd man up and actually have a go at installing it. Got all my vacuum, water and fuel lines sorted. Drilled mains to 1.3mm and blocked off the air correctors. Took vaccum lines off all four runners that run to a common line and go to the dizzy and brake booster. Running a mechanical fuel pump and currently have the pcv valve venting to the atmosphere, will fix this later. Got it installed this evening, crossed my fingers and turned the key. Once the fuel came through, it started and idled. Immediately fuel starting pissing out of a few places of the carbs, so I turned it off before I could give it some revs. I'm thinking a seal kit through the carbs. My other thought are the float bowls aren't sitting quite horizontal so I'll need to look at adjusting the float, or the other obvious fault could be non regulated fuel pressure. Will take the carbs of this week and see what's what before trying again.
- 37 replies
-
- 11
-
-
Interested
-
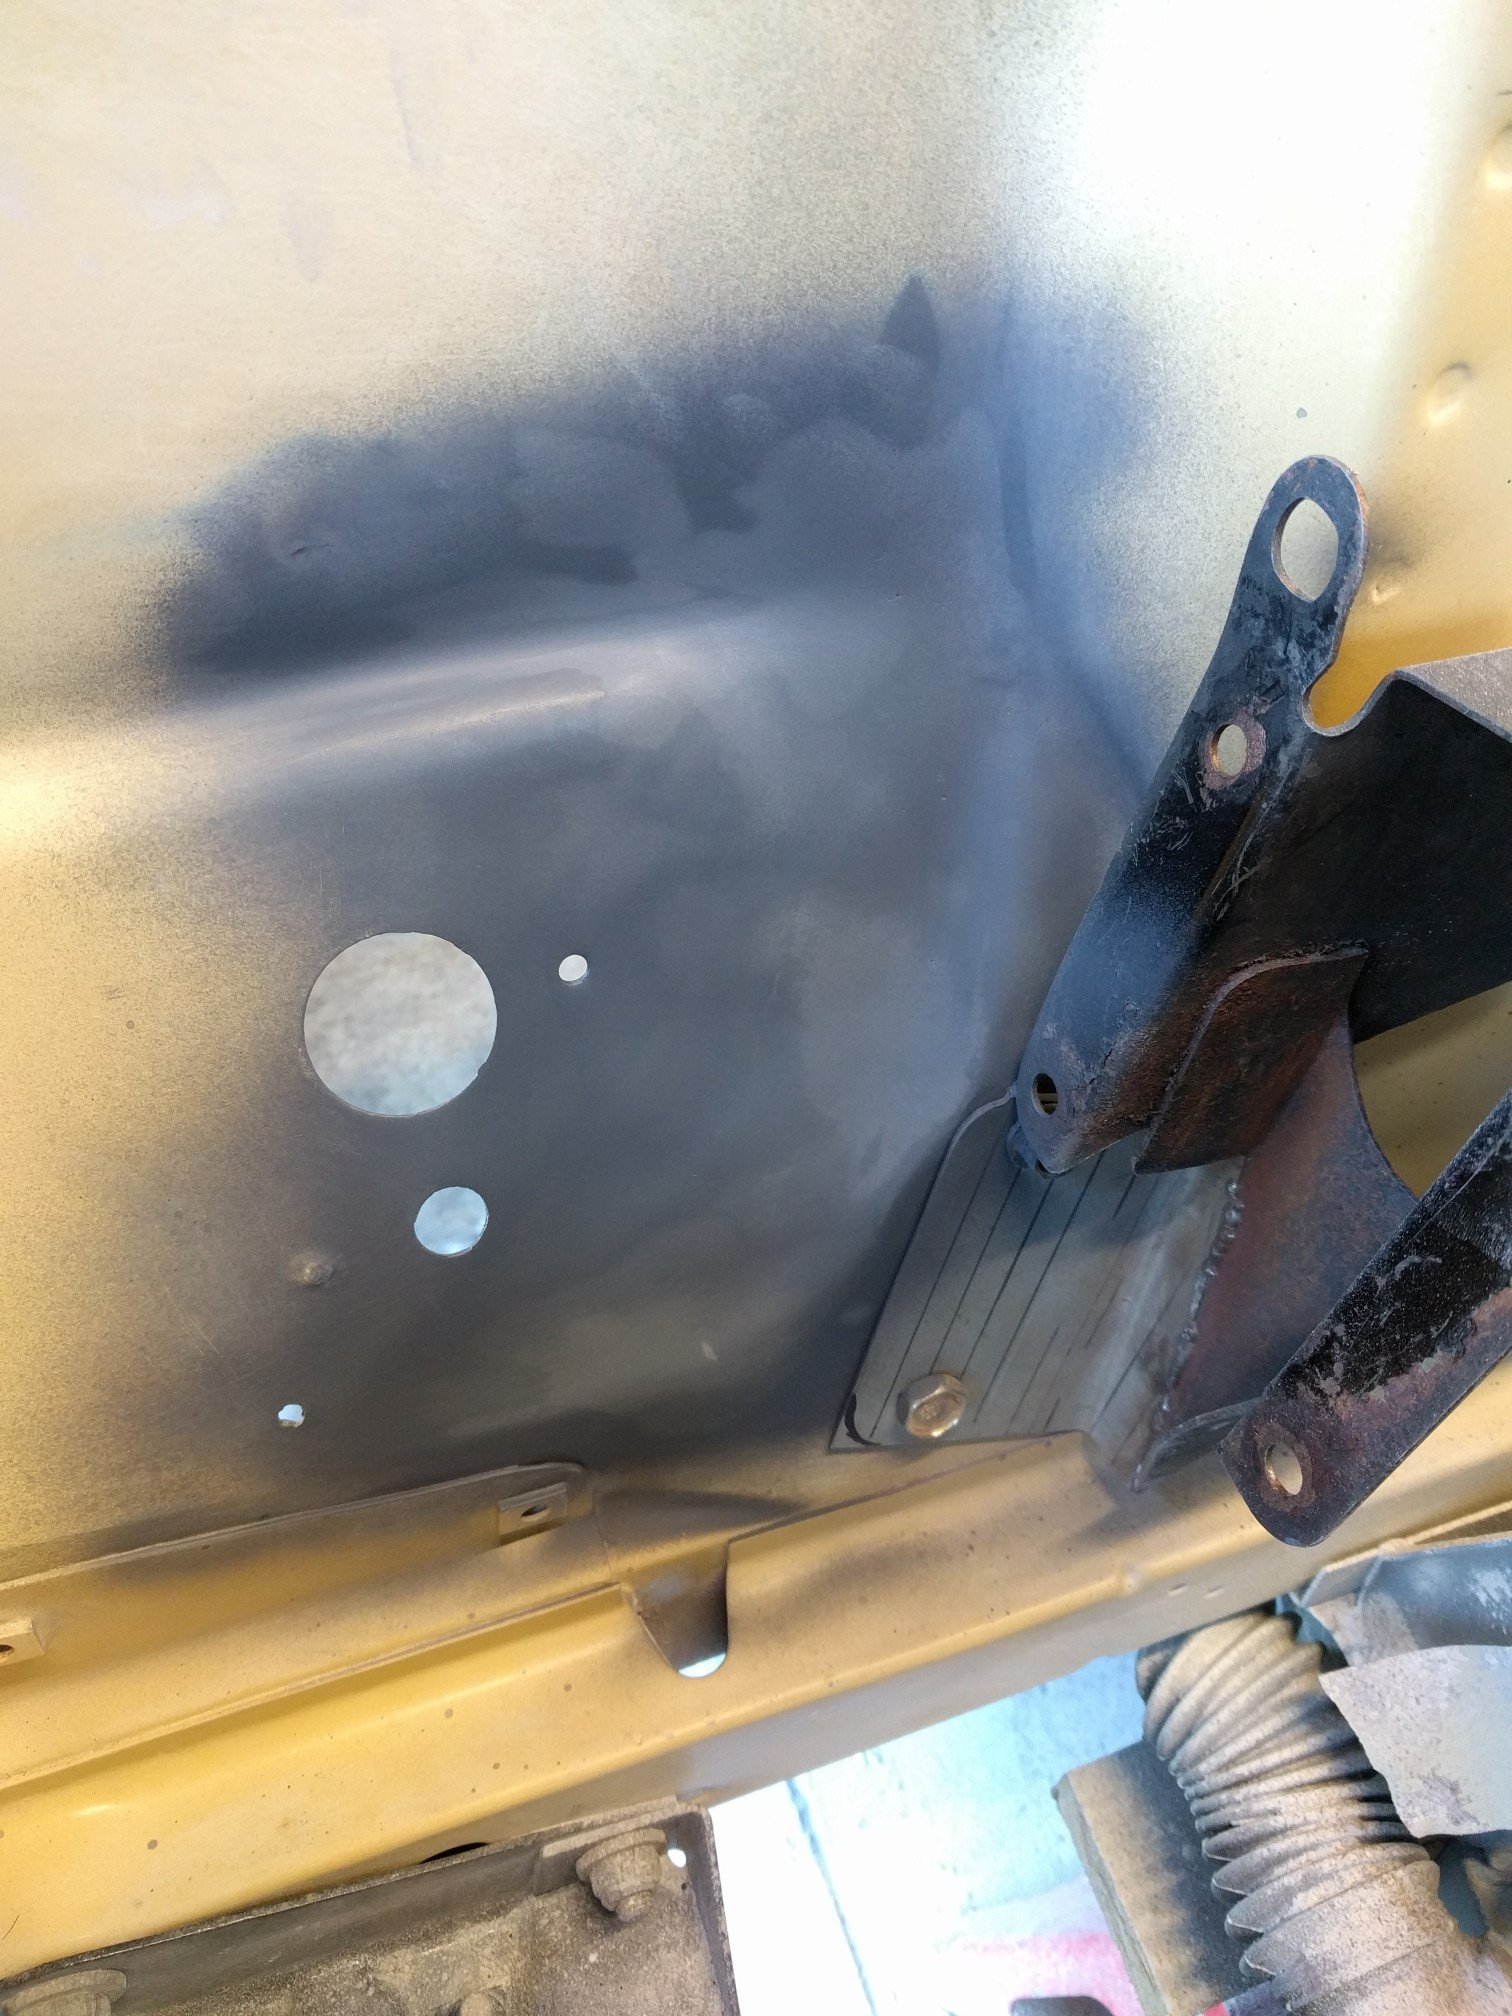
Finished all the mods to the engine bay for the brake booster and the bolt in battery tray. Seam sealed and reprimed. Have done a few more small jobs such as sand blasting and painting the pedal box and battery tray. Just need to get some paint samples now.
-
Wellington Monthly Meet - Discussion thread
bmxnz11 replied to KKtrips's topic in Lower North Island Region
Will be unable to attend sorry. Will make the next one though, keen to make the most of the light evenings. -
Random slightly cool stuff you built but not worth its own thread, thread
bmxnz11 replied to h4nd's topic in Other Projects
I did keep the cardboard template for awhile for that very reason. Was lush for hooning the smaller city turbo on. -
Random slightly cool stuff you built but not worth its own thread, thread
bmxnz11 replied to h4nd's topic in Other Projects
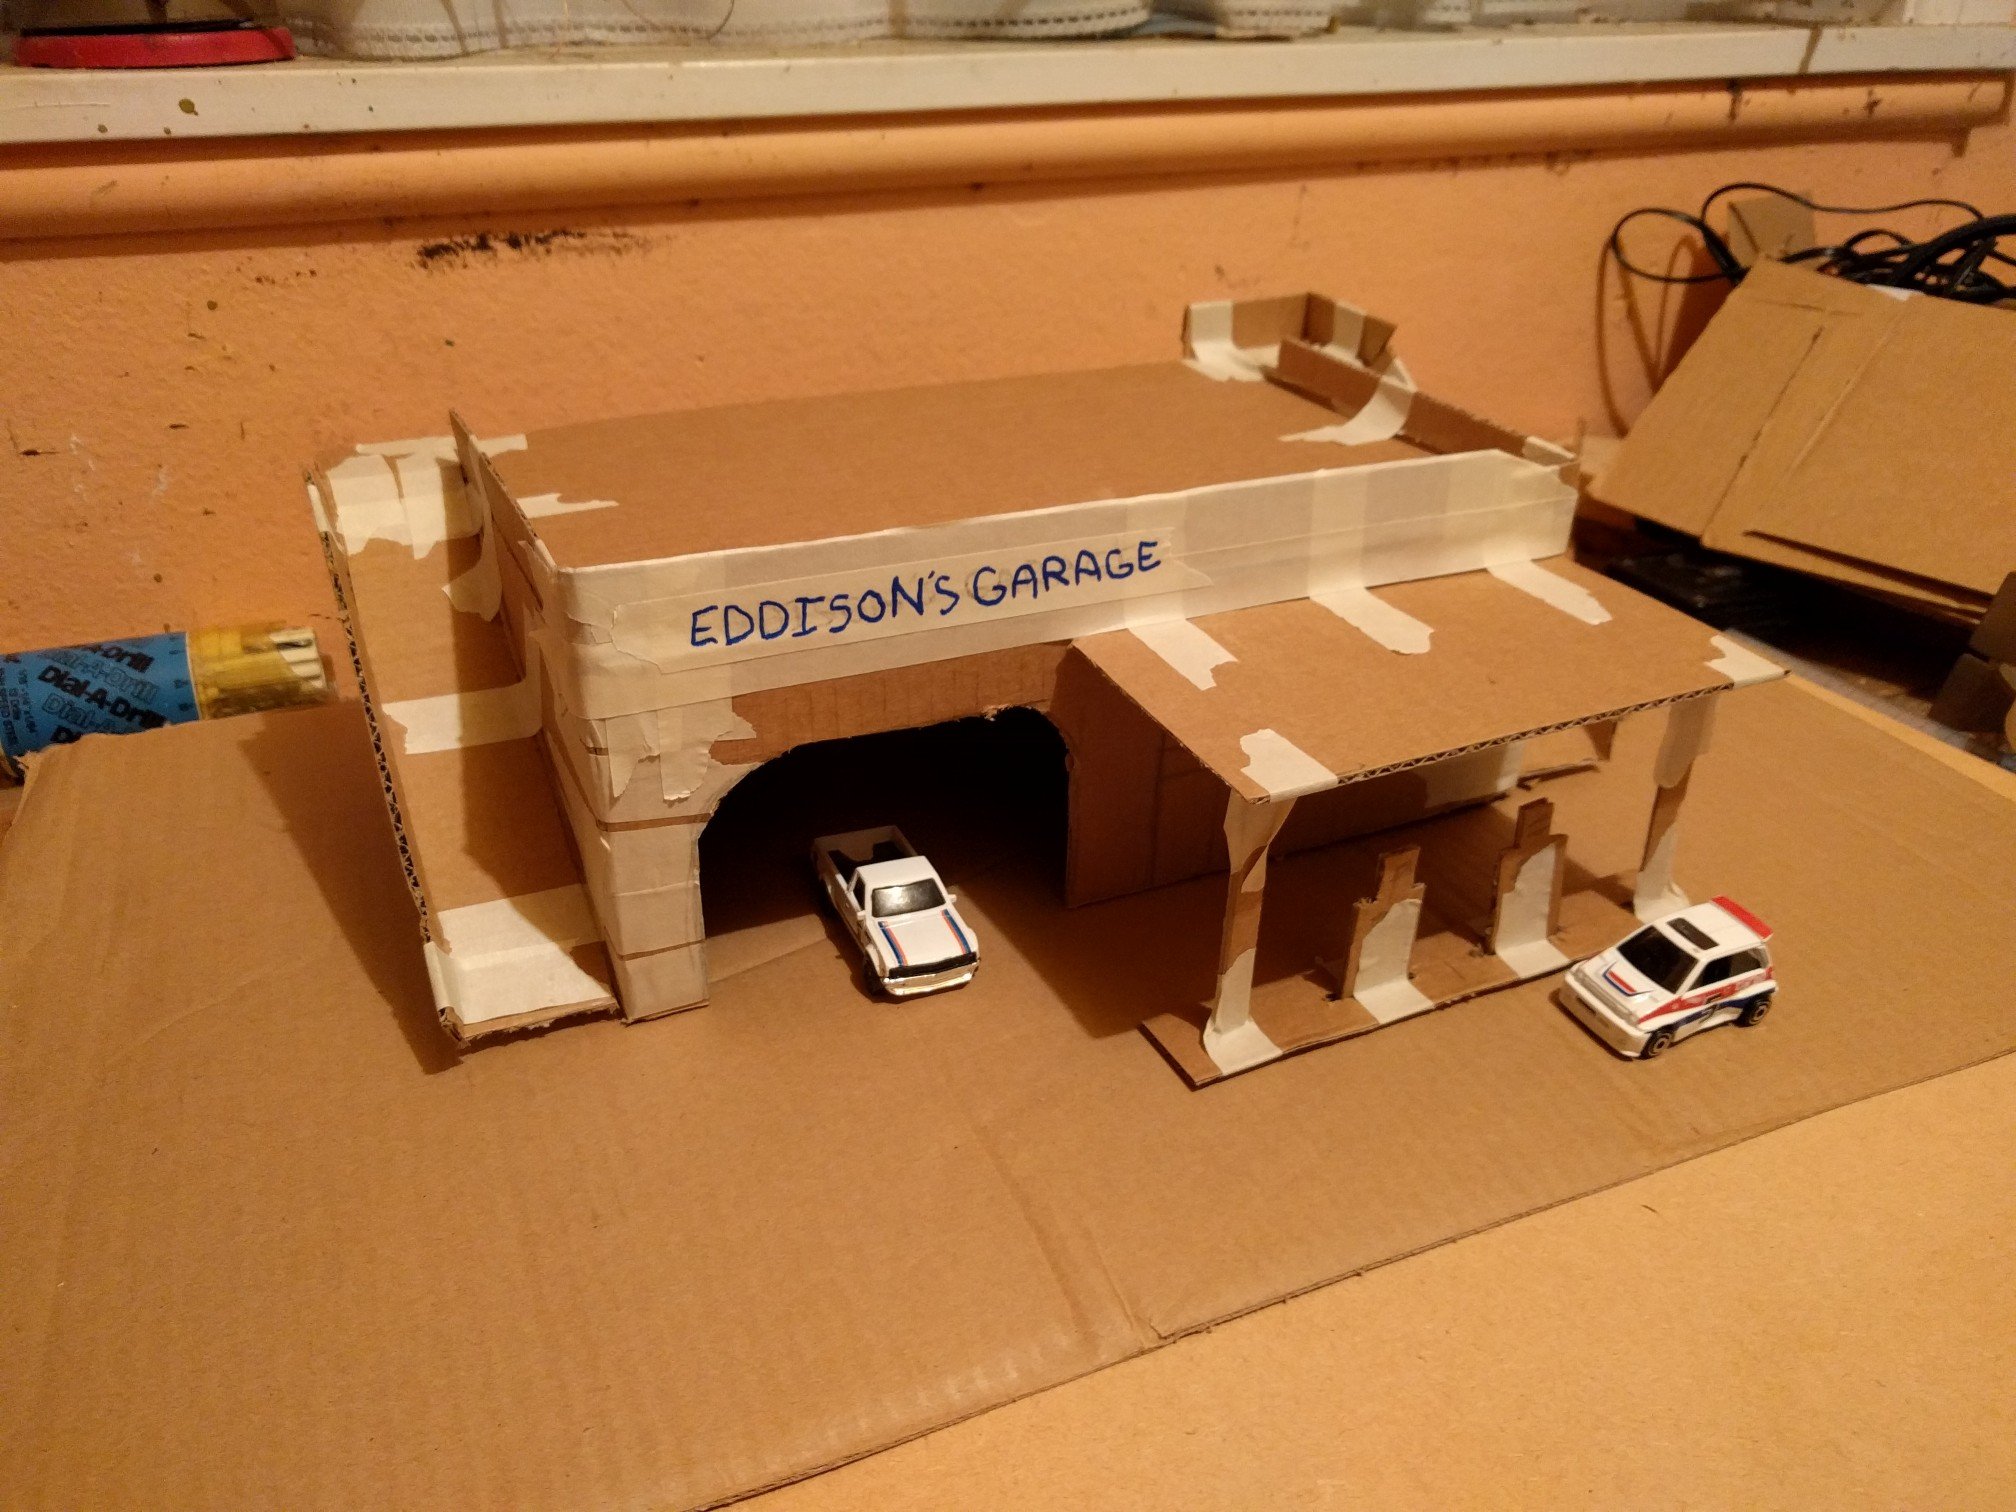
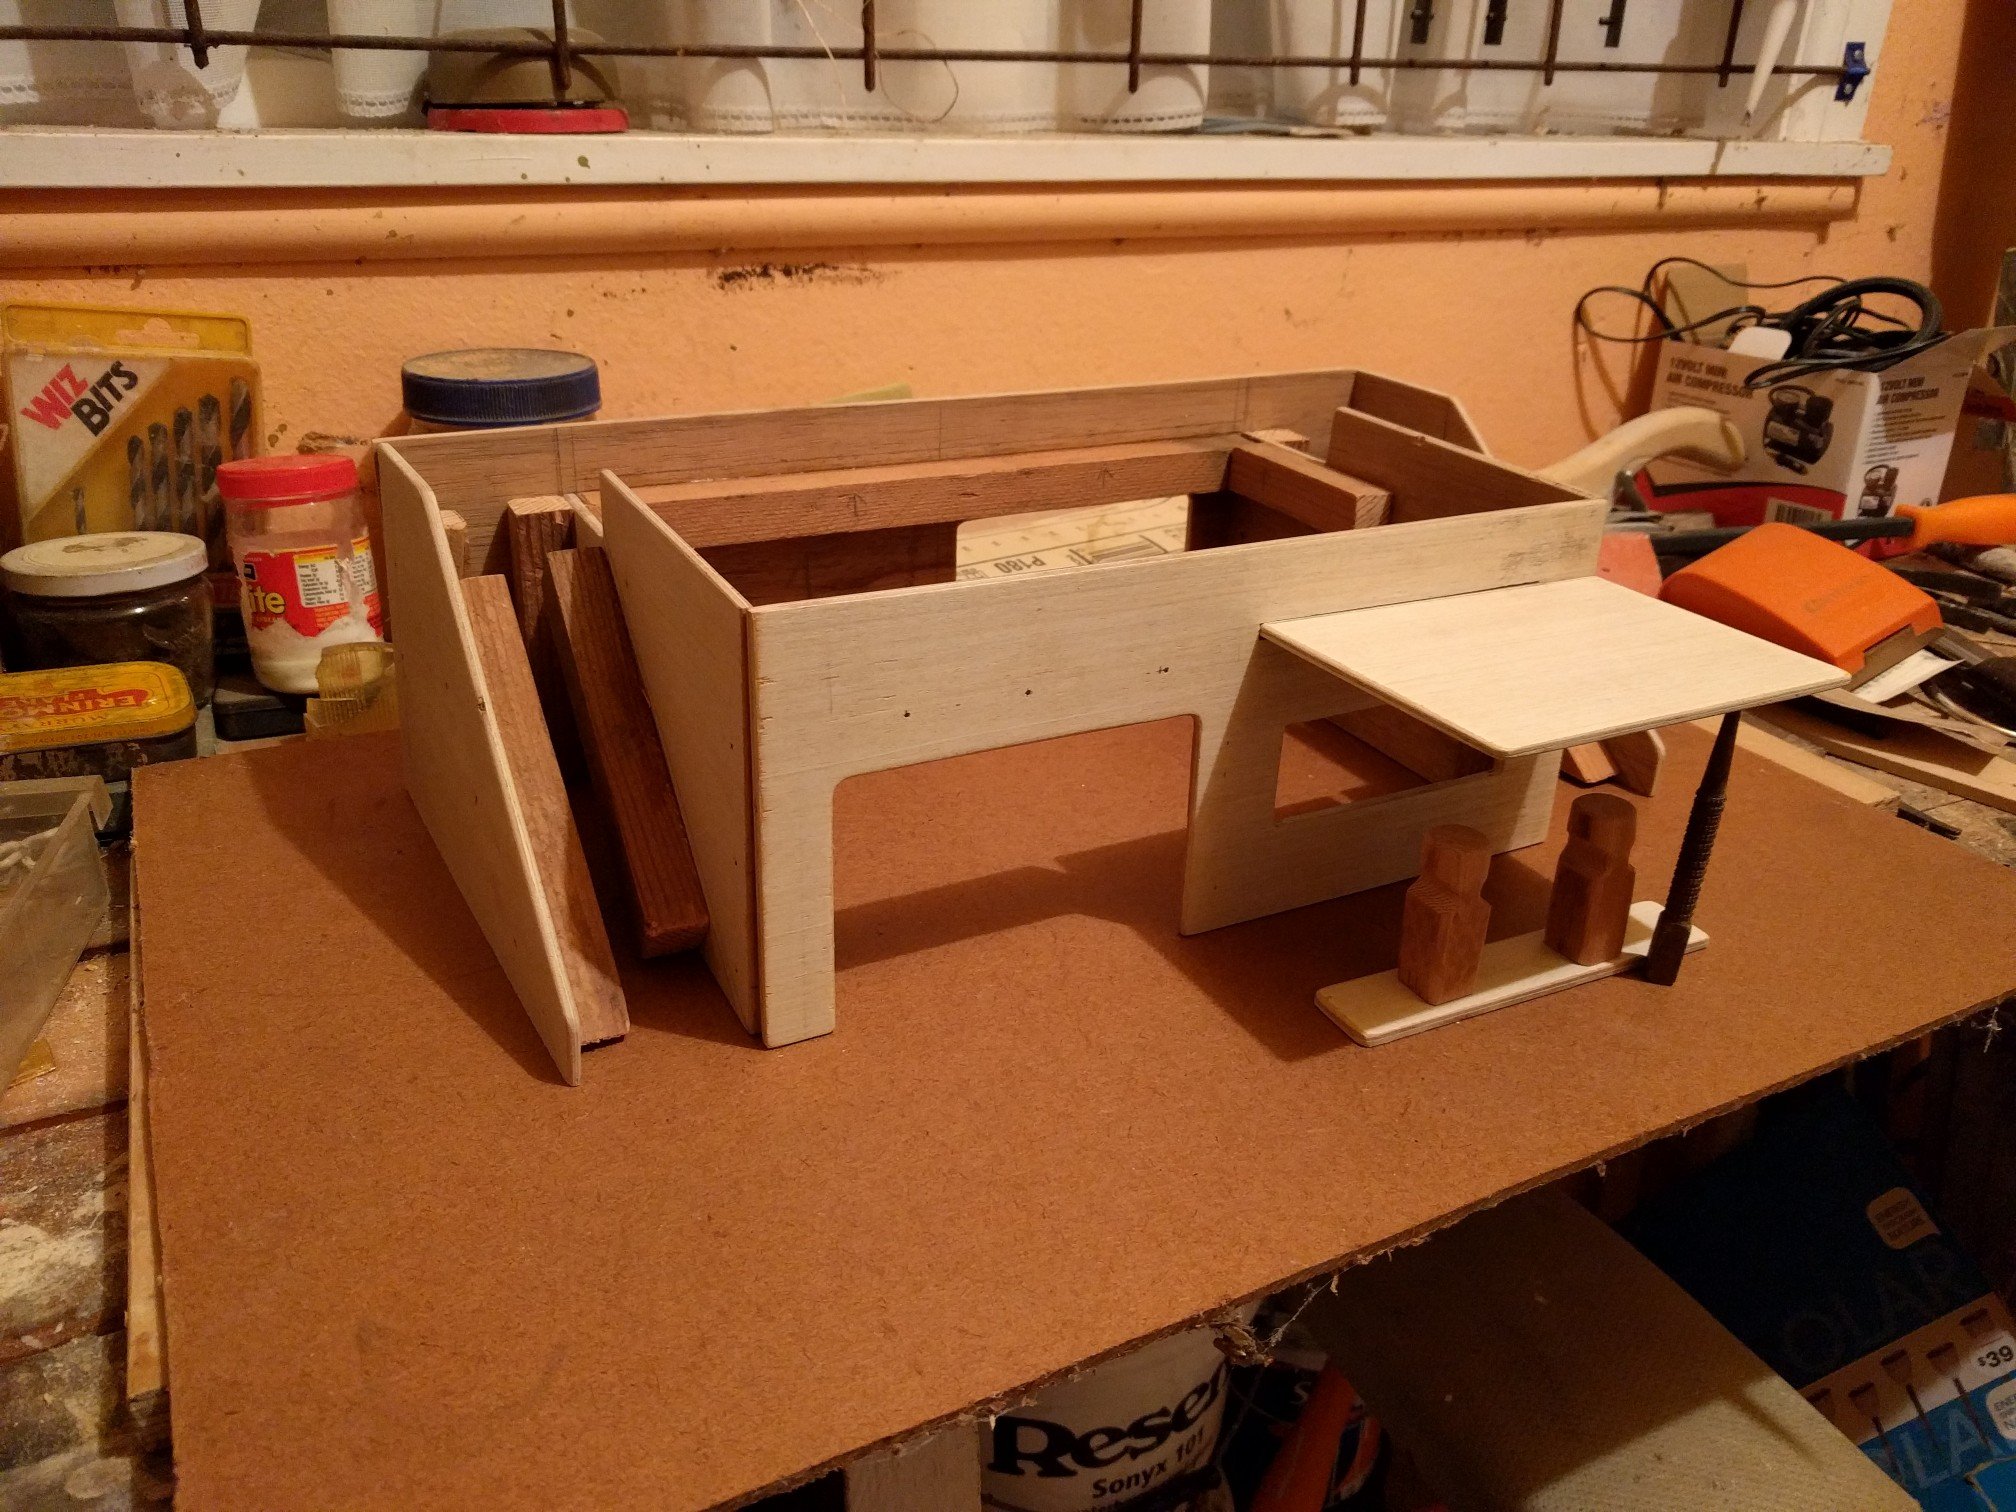
I wanted to get my nephew a toy garage for his birthday as he was starting to play with toy cars. I used to have one as a kid and thought it was the bees knees. Had a look around but everything was plastic. So I decided to make one myself. CAD Strengthened everything so if the little guy wants to jump on it then he can. Final product. I painted on some toilets and an exit sign on the side. It also has another garage door on the back, like the front, for easy exit.
- 1289 replies
-
- 63
-
-
This was good. Hot, but good.
-
Still convoying up from the weigh station?
-
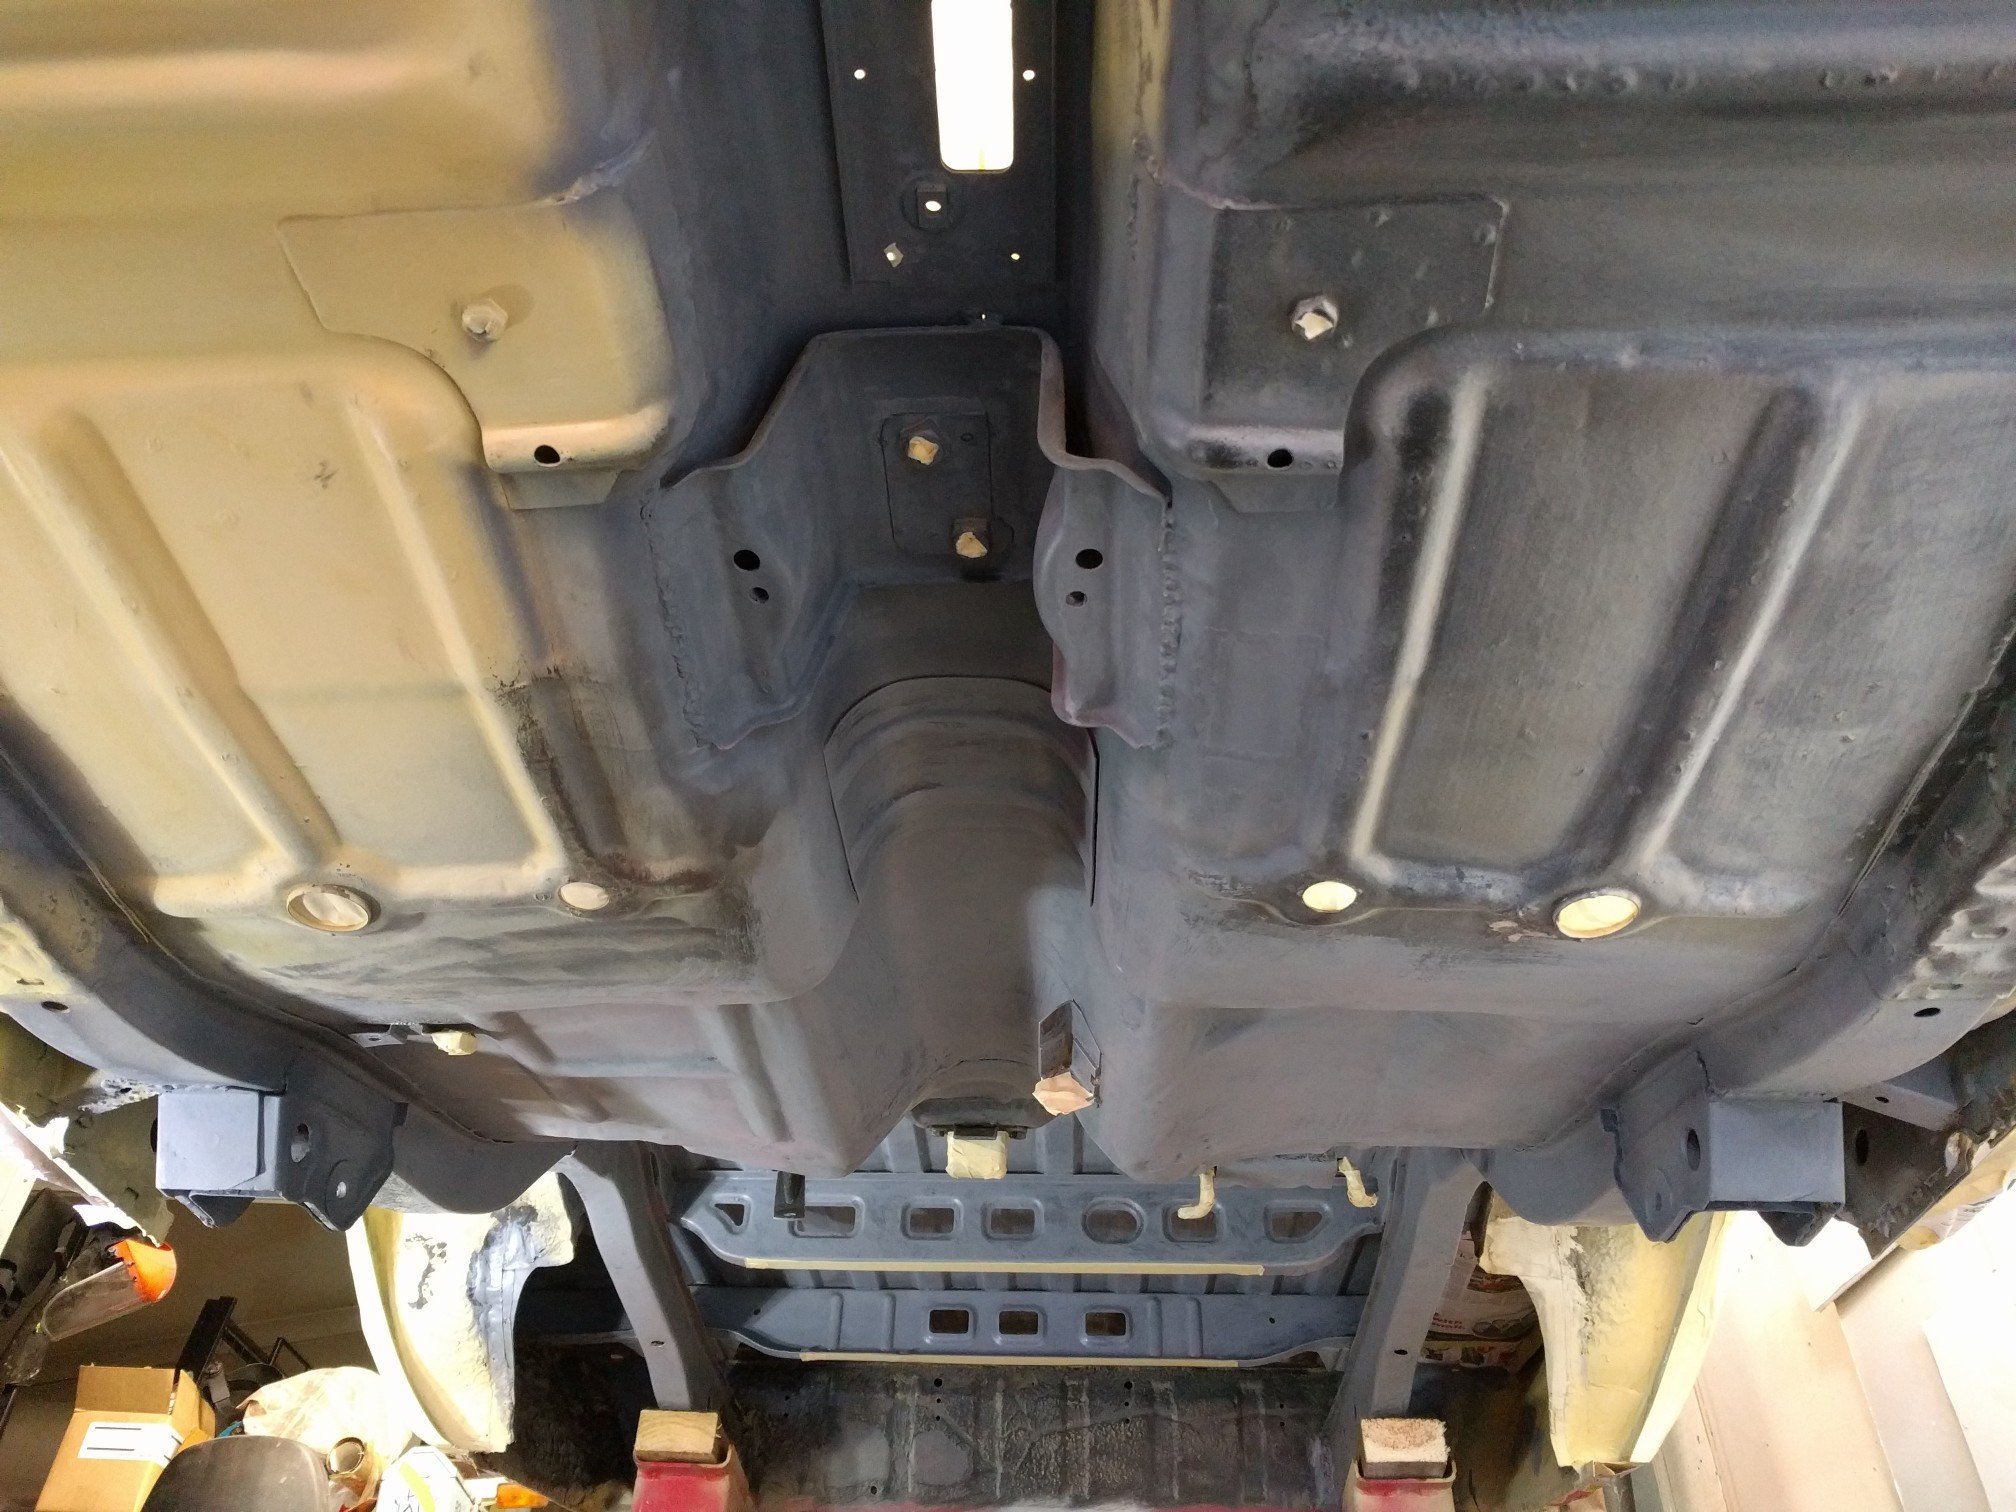
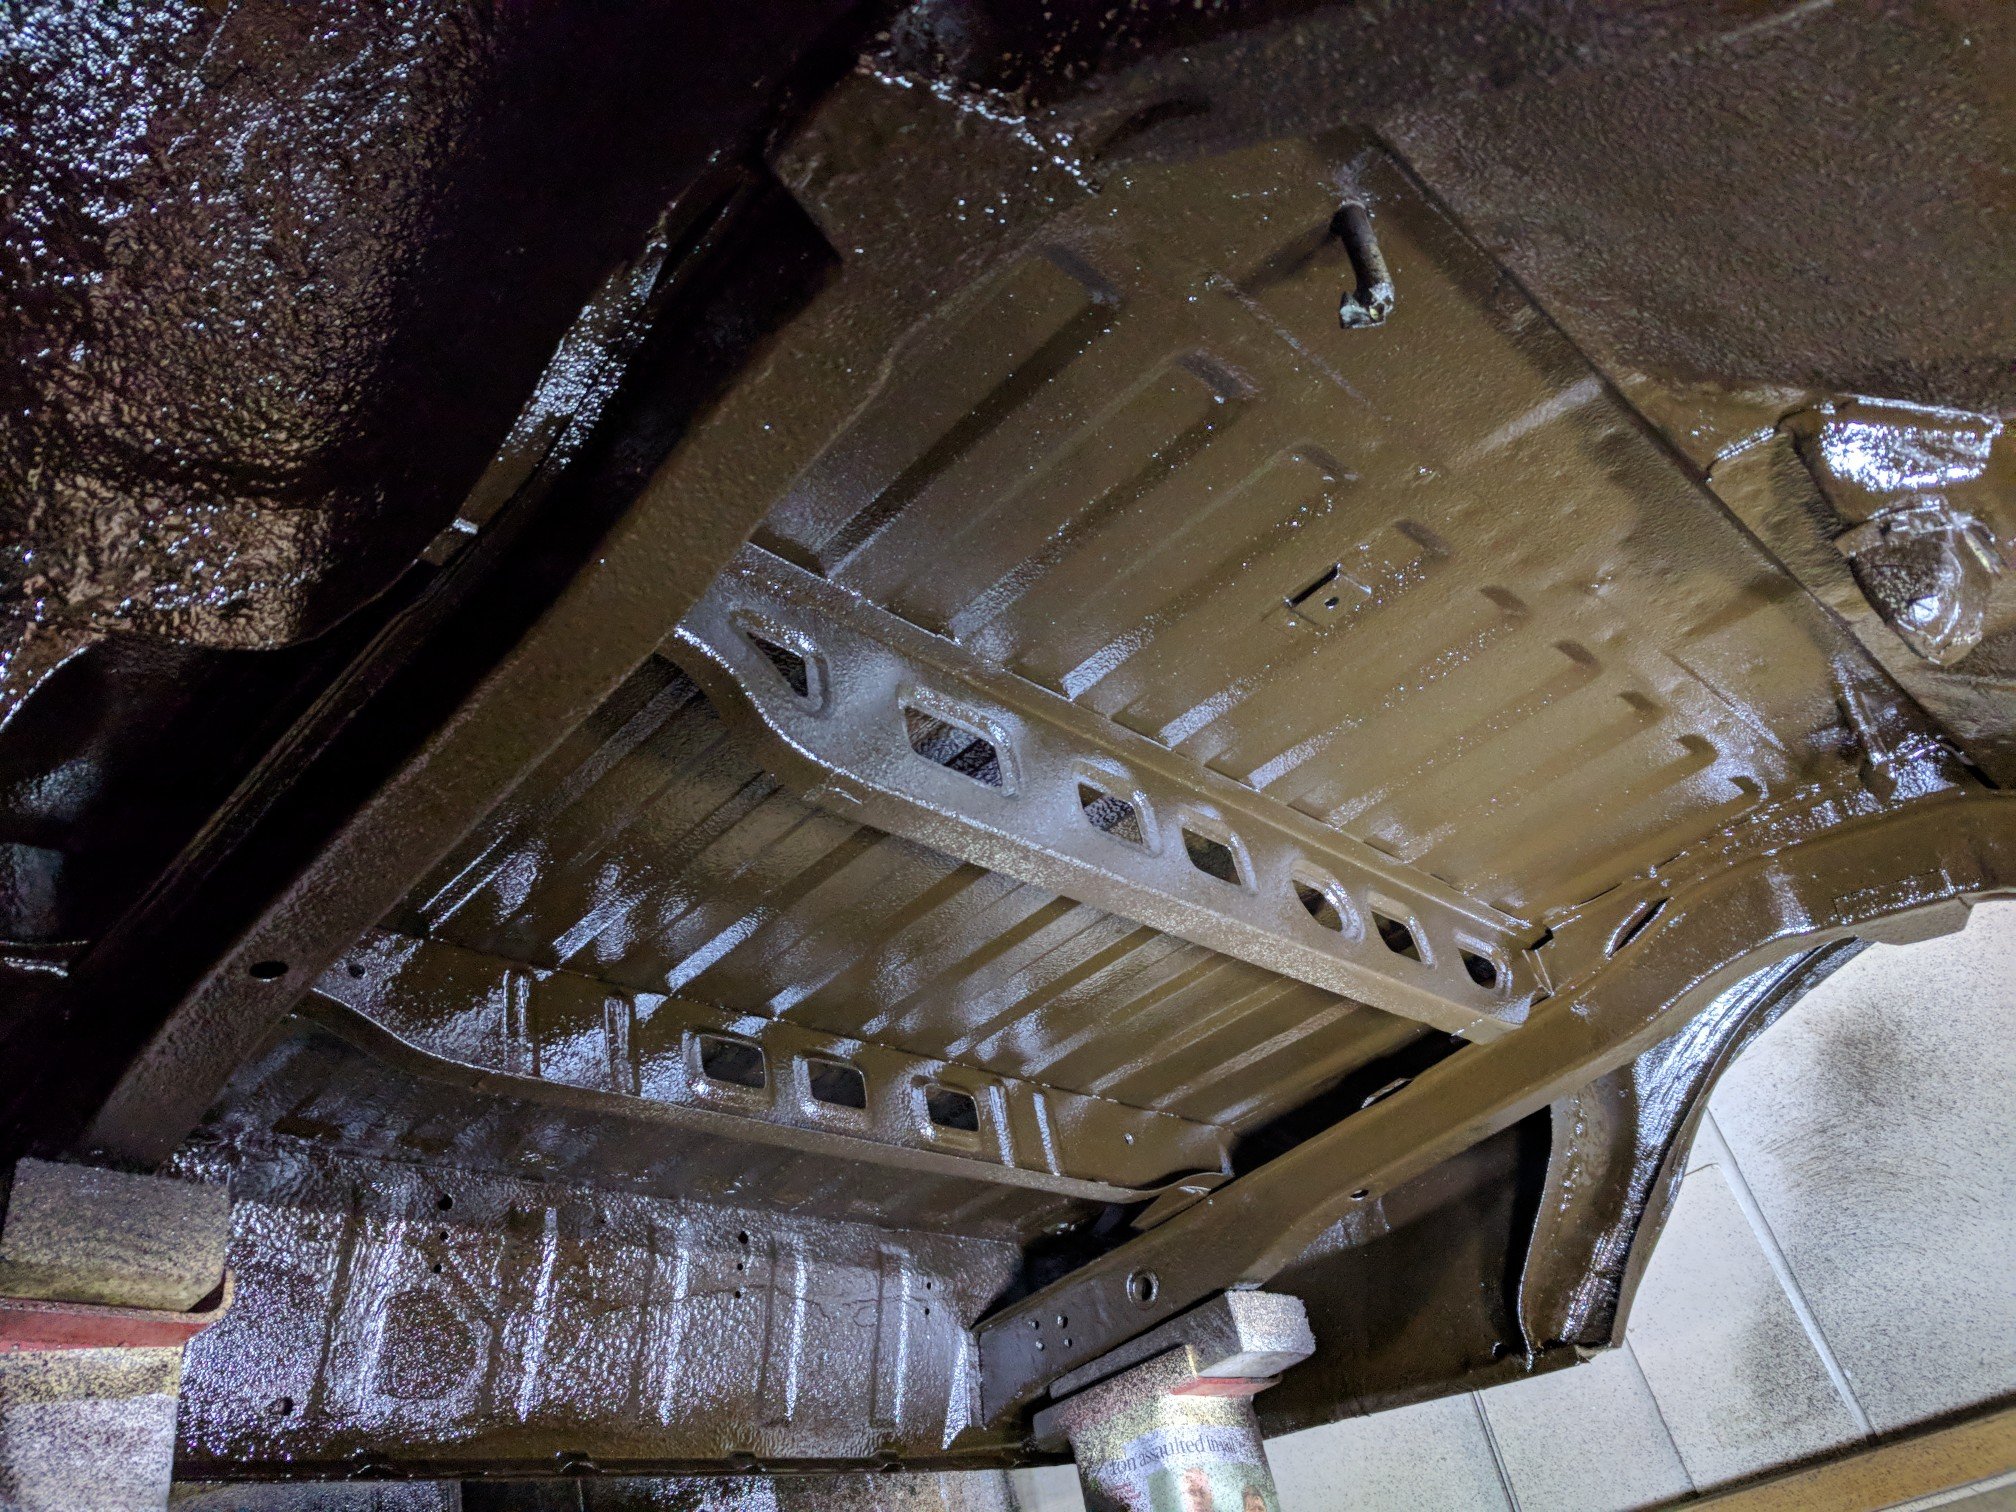
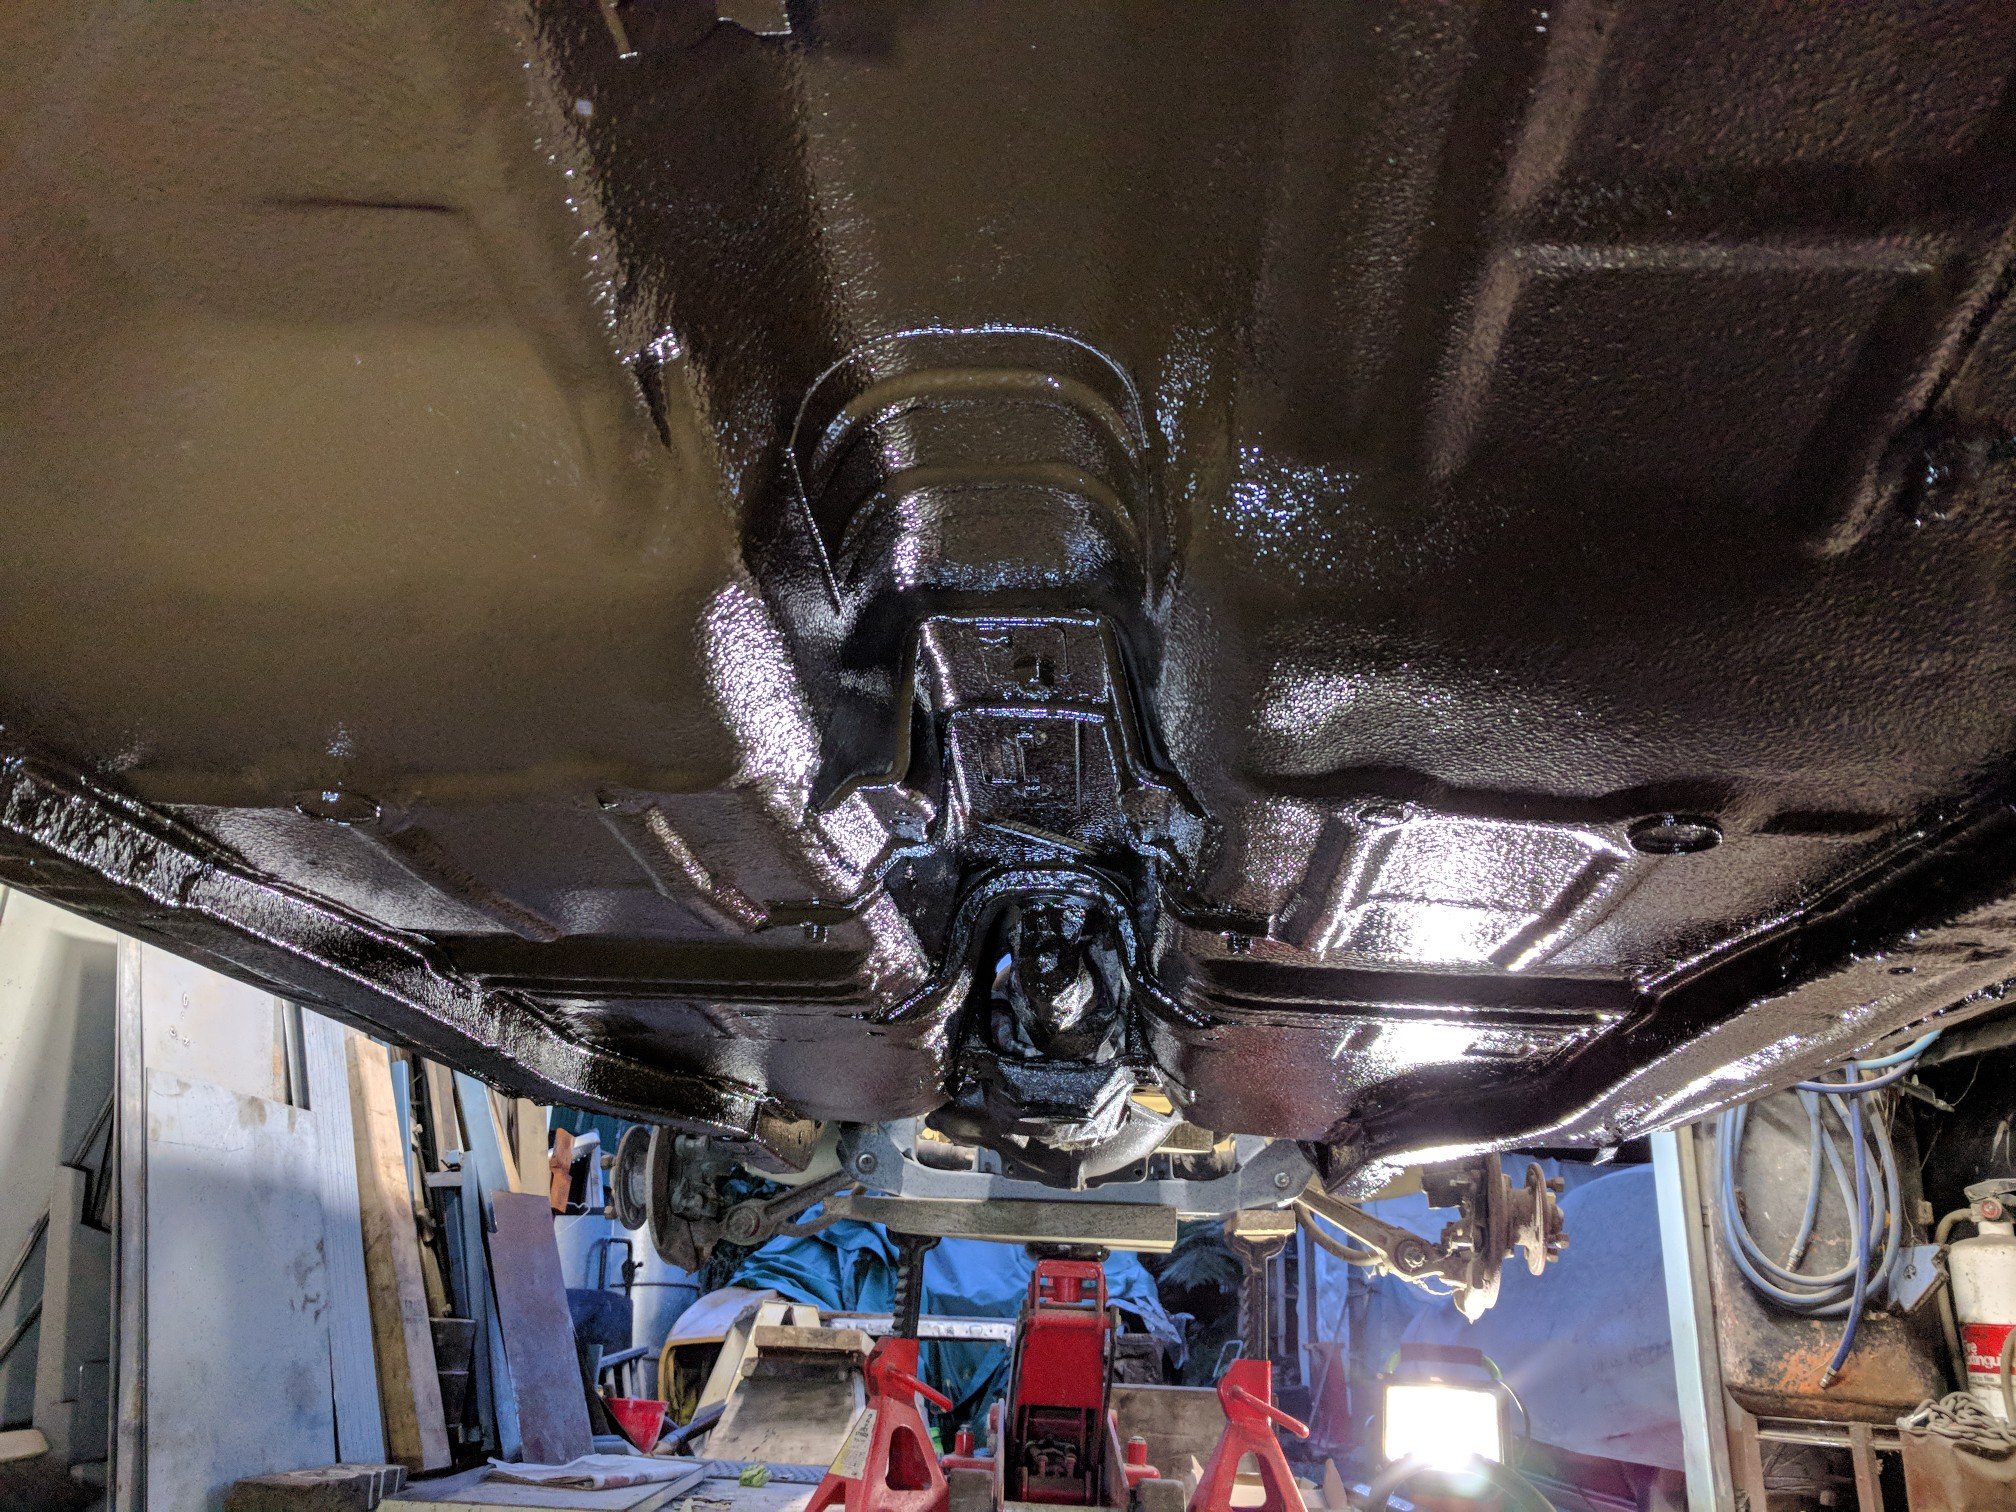
I wasn't too happy on the finish on the first underseal. It came out a bit smooth. Admittedly I thinned the product down to put through the gun. The product was normally used to brush on. I tried a different product and left it a bit thicker to give it that true rough underseal look. Chassis rails and inner gaurds got a thick coating, then I gave the previous areas a quick flick. Came out heaps better this time. Was probably laying it on a bit heavy because I went through 6L's. Ha. I learned my lesson of not wearing a face mask the first time round. That shit sprayed everywhere. Last night I was looking around for something to cover my face. Glasses? not enough coverage. Full saftey shield? Bit tricker in small areas. Stockings and masking tape? Bingo.
- 104 replies
-
- 24
-
-
-
I hear there may be a log hauler worth seeing around the corner from camp...
-
Weather looks good for this weekend! I've been on the hunt for a cheap gayzebo but haven't had much luck. Better fix my cooker tonight too. Keen for a convoy.
-
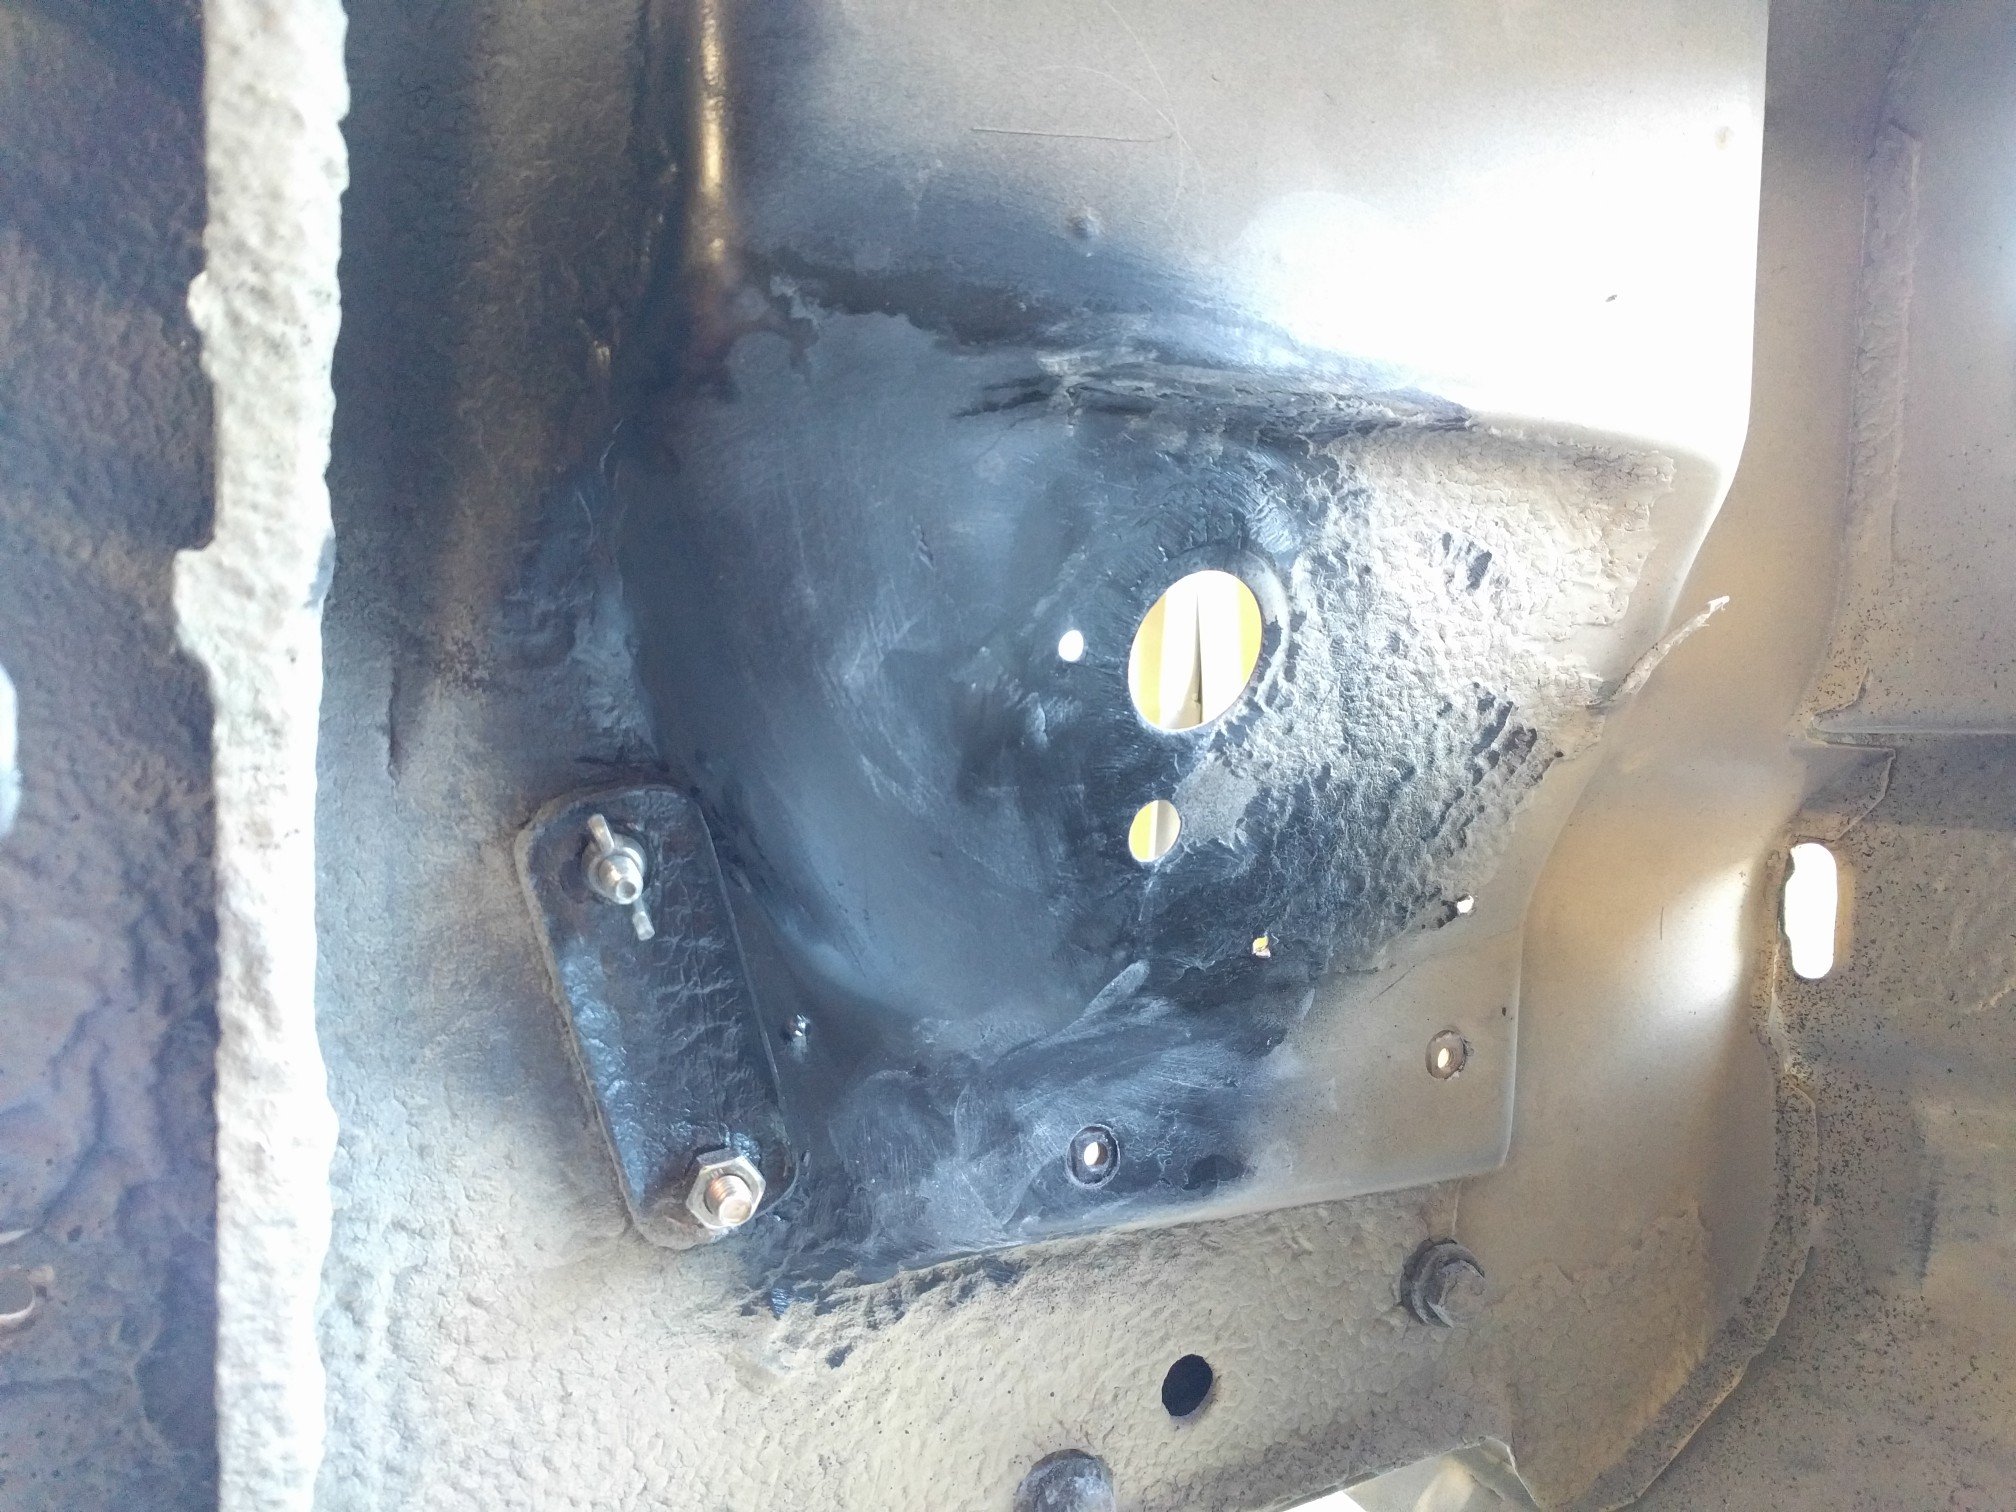
Finished the brake booster mod in the engine bay. Plenty of room for the side drafts. Will clean up fine with some underseal and another coat of primer in the engine bay.
-
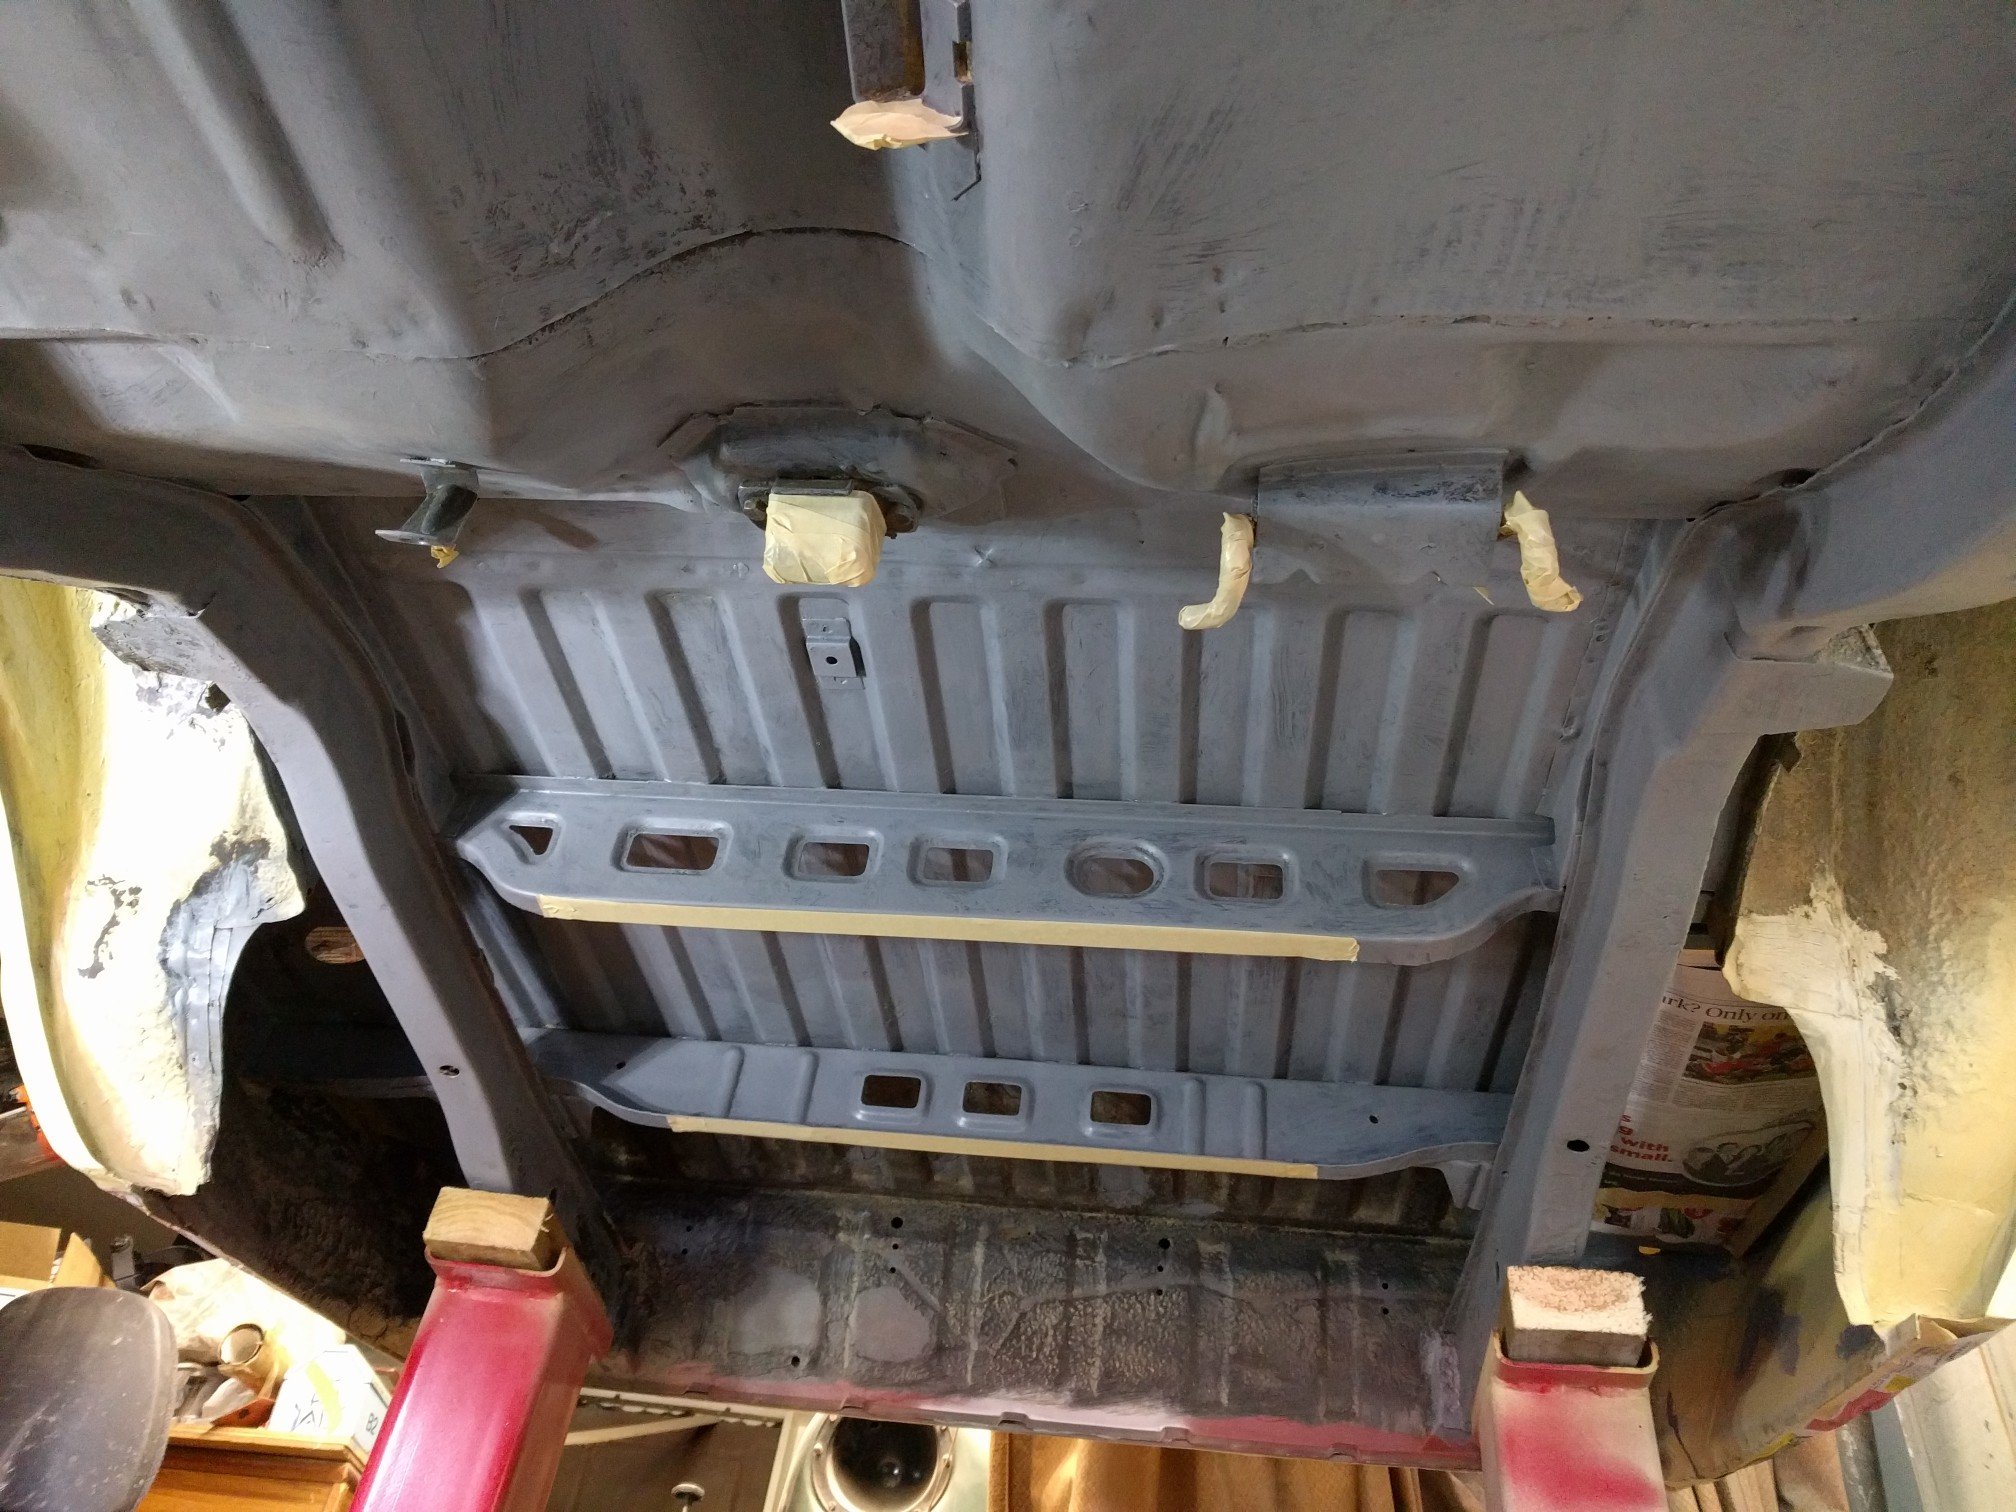
I scrubbed the underside, etched the bare metal and 2k primed the keyed areas a couple months ago. Managed to underseal 90% of it last night. Once I have finished making the appropriate alterations to the inner guard, I'll spray those and the front chassis. Not much fun with only axle stands for height. Mentally it's a good step towards getting finished. I'll fix up any bare areas later on though.
- 104 replies
-
- 18
-
-
Was pretty good last year. Keen to go again.