bmxnz11
-
Posts
1157 -
Joined
-
Last visited
Everything posted by bmxnz11
-
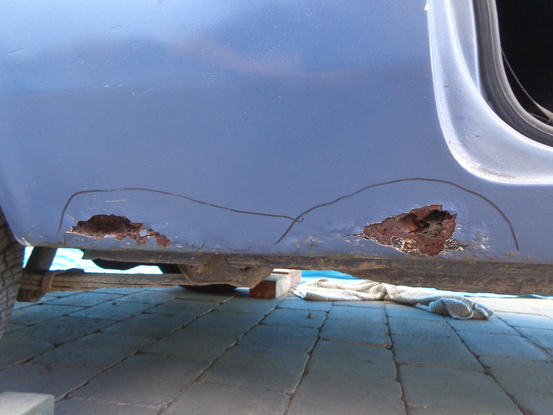
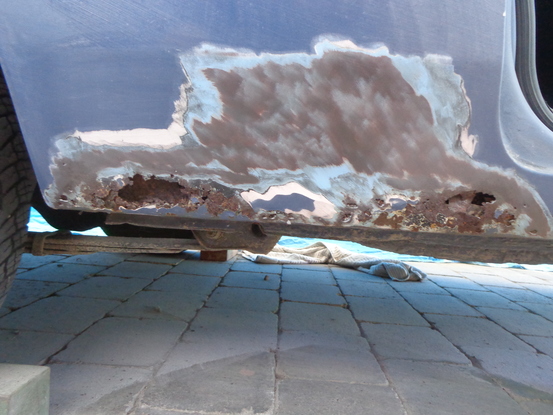
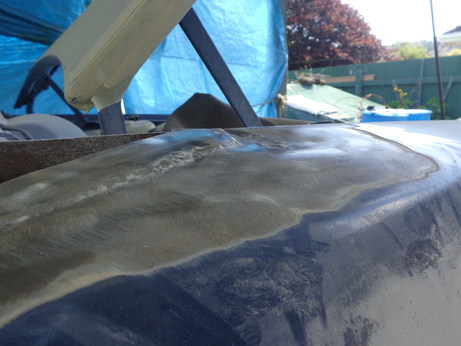
The rear sill was next. No surprises here. A new sill was made in the folder. Weldy weldy. Grindy grindy Because of the slope of the carport I wasn't able to jack the back up and made it a c*** to weld and grind underneath. Oh well, it ended up pretty good anyway. Again all this was primed and had epoxy sprayed in the sill once it was welded shut.

-
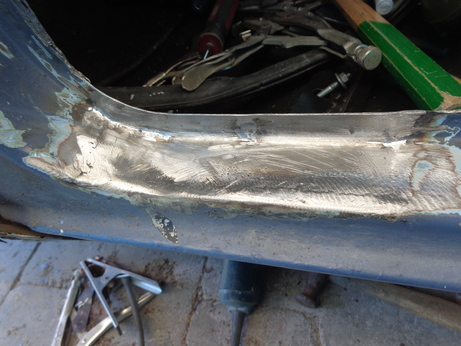
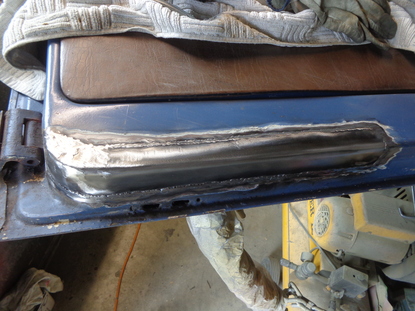
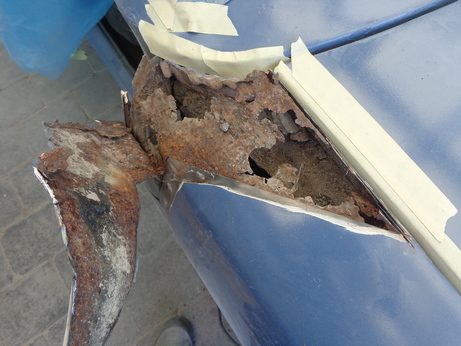
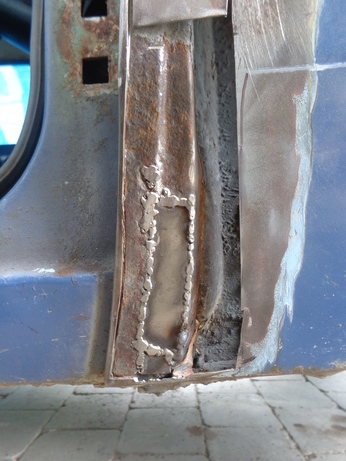
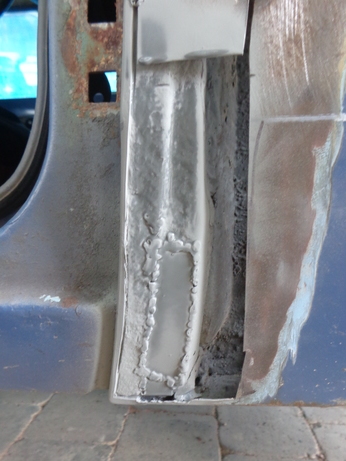
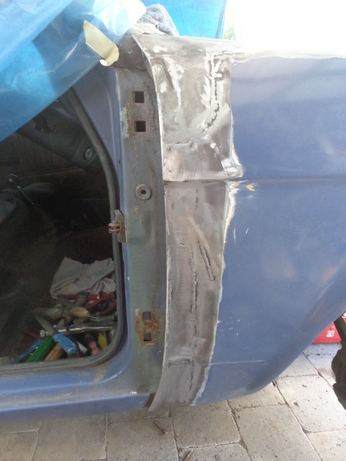
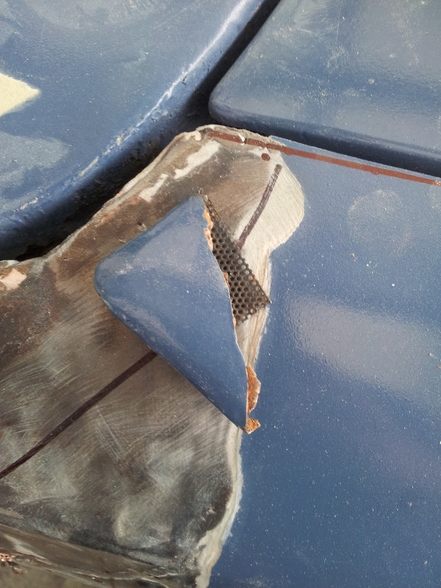
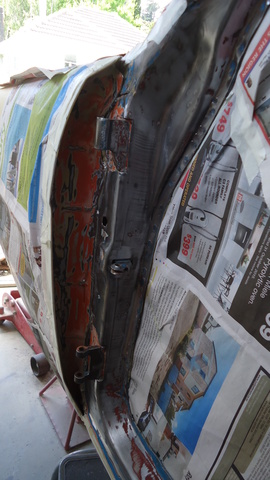
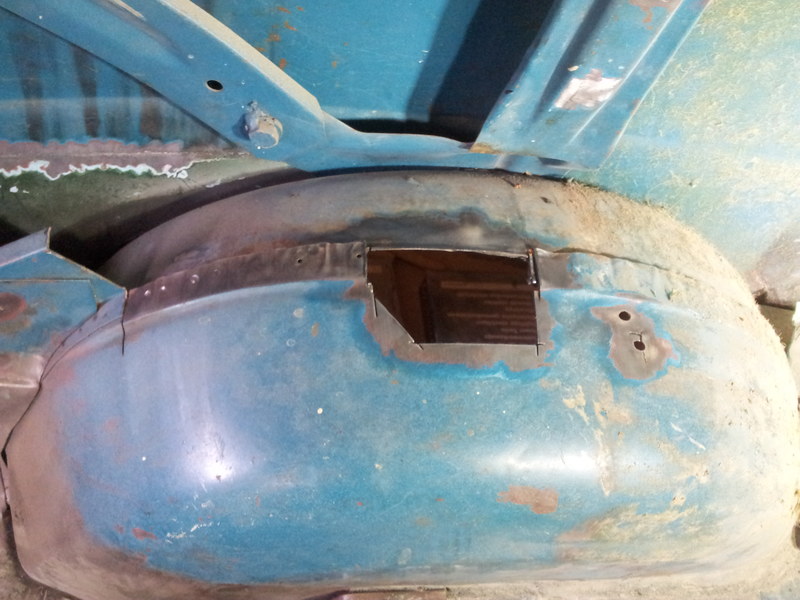
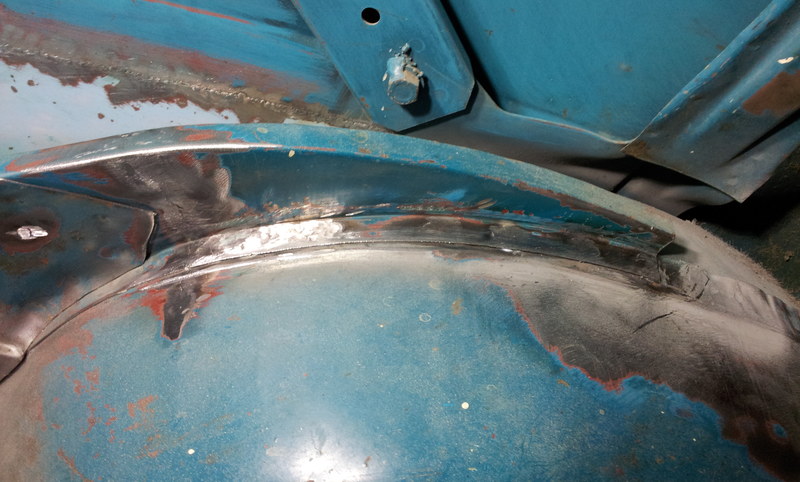
The above was all cut out, only to discover another surprise. They had welded (I use the term loosely here) a patch over top of the original guard. You can even see where the aerial hole is. I wire wheeled it further back to find the end of the patch. This was all filled with bog and explains why the guard sat so high up near the window. I cut away all the old repairs (More than what you see in the top photos) and rot on the top of the guard and started making patches. Luckily I had a damaged but rust free guard so I was able to cut the top corner off and graft this on. I don't have any photos of that patch, even though it was the trickiest. The lower section of the guard was cut out and new patches made up. Everything was wire wheeled, primed and sprayed with epoxy to really seal it shut. Finished product. Should have taken a photo of the top.
-
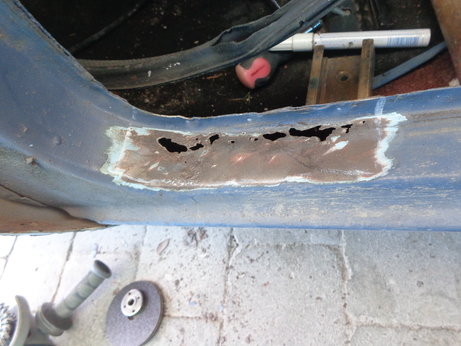
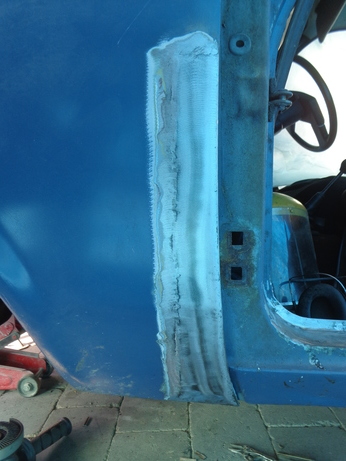
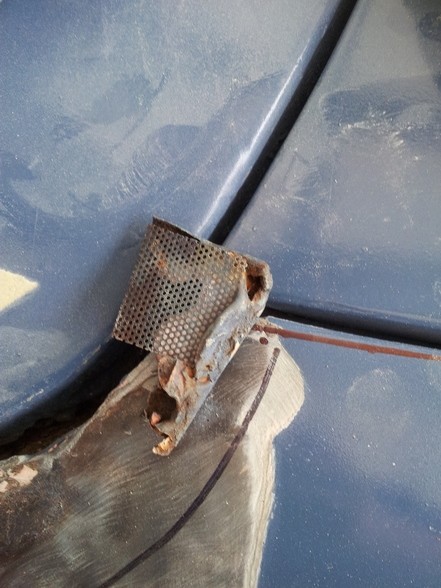
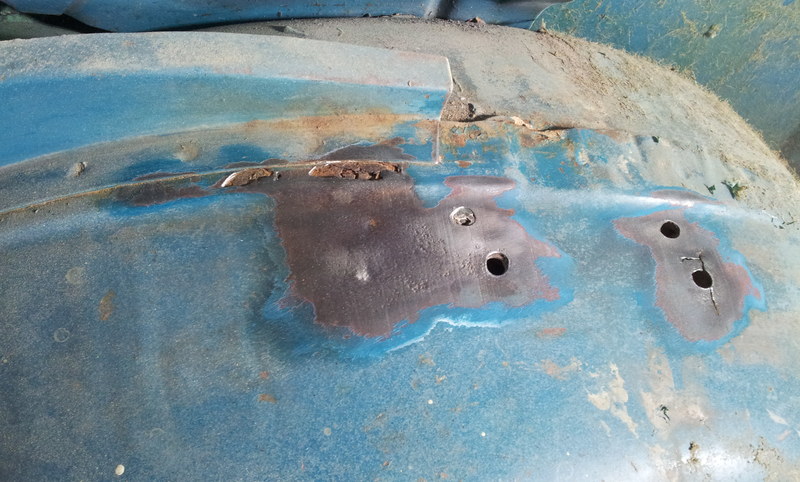
I was never working on this van because I wanted to spend all my time working on the other one trying to get it finished. But over new years I got sick of seeing all the old cars out and not being able to do that myself. So on the way home it got me thinking and a plan was hatched. Take 1 week off and see how much rust work I can get done. Towed it home on the Sunday, got into it on the Monday. The drivers guard was bubbling on the top and bottom by the door. I knew it had a bit of bog too. Wire wheeled these areas and revealed a few things. In that ^^^ photo you'll see the top corner is missing. Well here it is.. Everyones favourite fix. Bog and mesh.
-
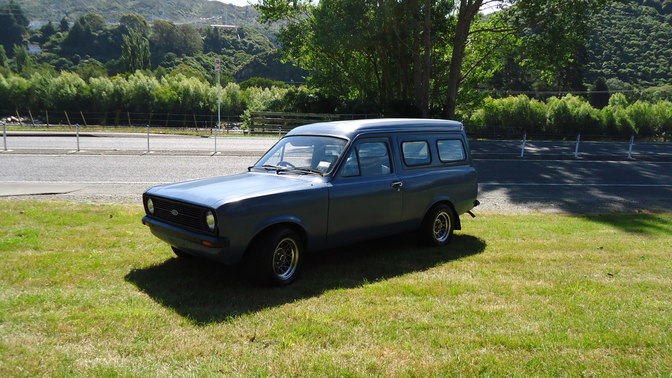
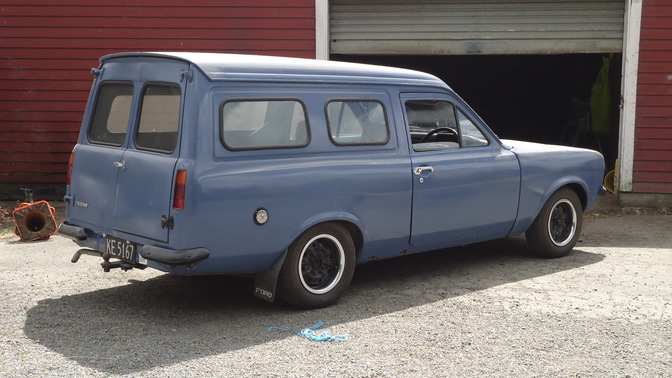
Being an escort, the first choice of wheels were always going to be hotties. I also mucked around with the height with some blocks and springs I had. Treated it as a test van for parts which would end up on my other. Other then that it sat dormant for 2 and half years because of rust issues. Plan was always to finish the other one, then play with this blue one. That was until earlier this year when I decided I wanted this thing on the road again....
-
Just playing catch up, will get it up to date tonight or tomorrow.
-
//oldschool.co.nz/index.php?/topic/52064-bmxnz11s-81-escort-van/
-
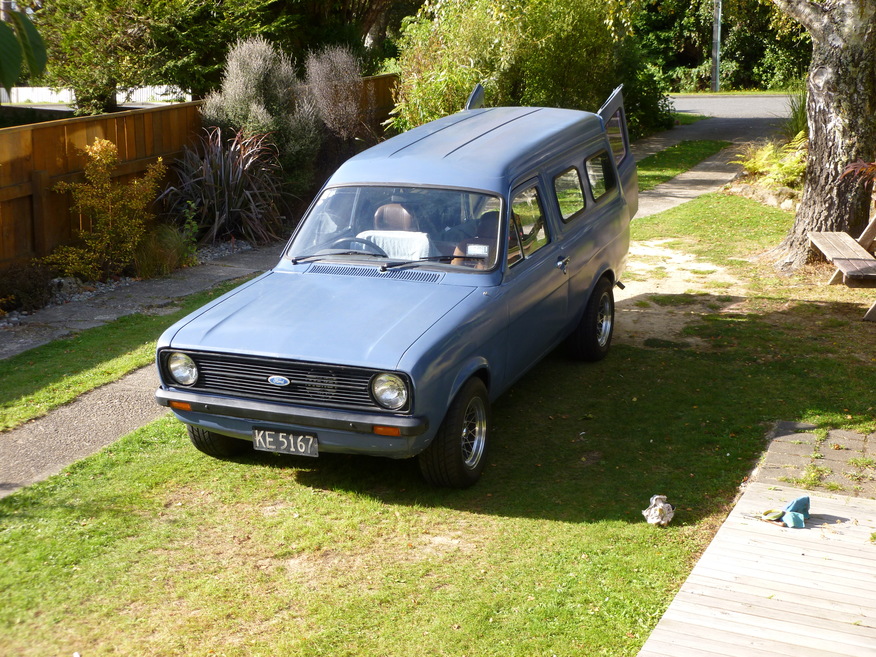
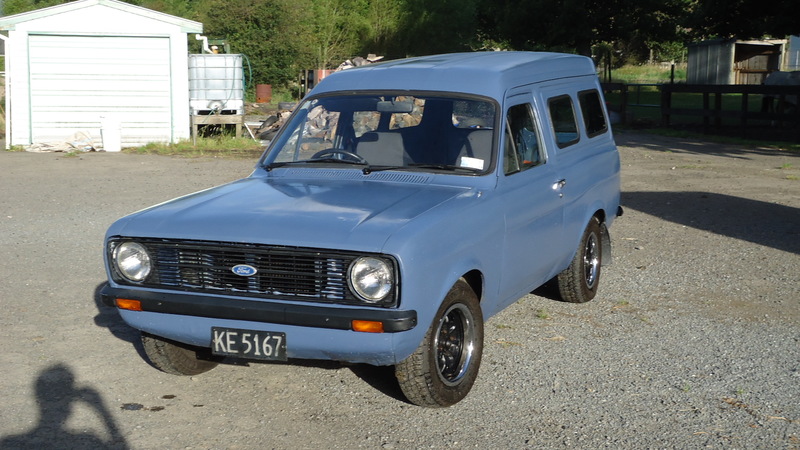
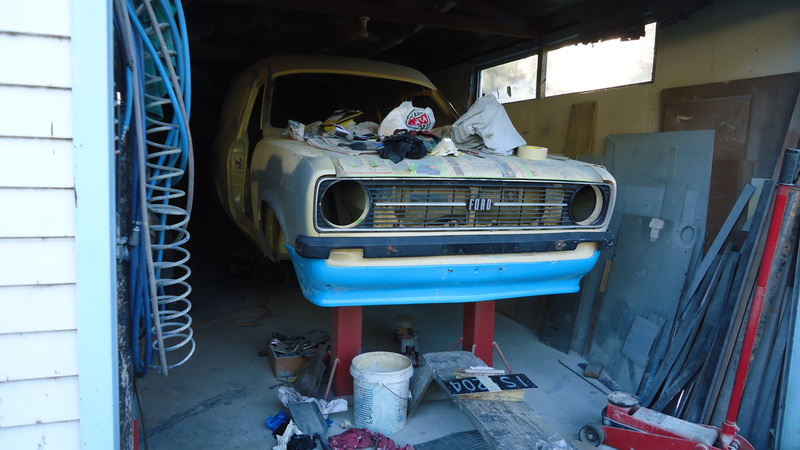
One day in 08/09 when we were headed up north for a ride we saw this van on the side of the road in Sanson for sale, rego on hold. Went to check it out, thought fuck thats yuck and carried on our way. The next day over the course of the ride the sun stroke must have really hit me because I started thinking maybe it wasn't so bad after all. Couple days later on the drive back we stop and have a second look. Threw our lowest offer on the table and it was mine. What would normally take a 2hr drive home ended up being a 5 hour drive getting flat towed. So what did we have then? This was after I repainted the bumpers black. When this was resprayed blue, EVERYTHING was resprayed blue. Bumpers, wiring, brake booster, the lot. Was tidyish but just gross. Did the important things like changed a few of the bushes, control arms etc etc and got it a WOF. It even had new windows cut for the sides with new rubber. Sandblasted the wheels, primed and painted them with 2k, new tyres, put on the chrome wheel trims and rolled like this for awhile. //oldschool.co.nz/index.php?/topic/52065-bmxnz11s-81-escort-van/
-
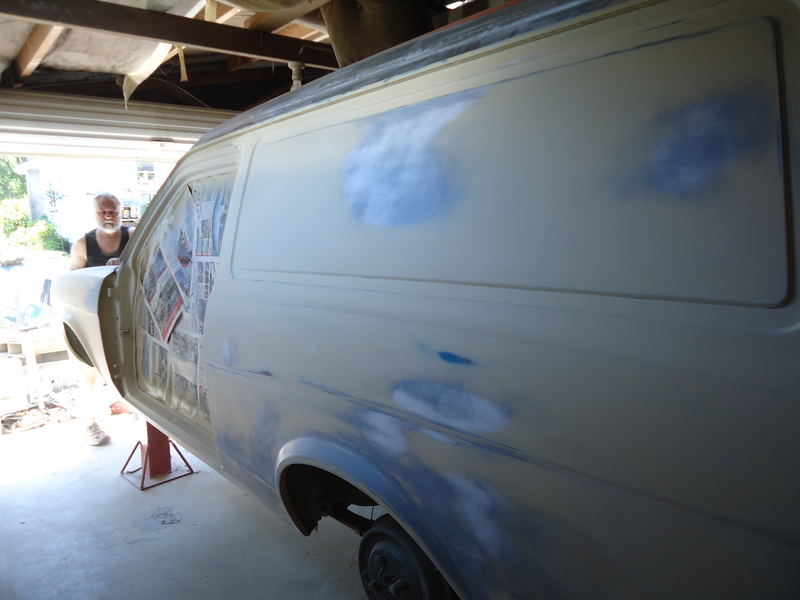
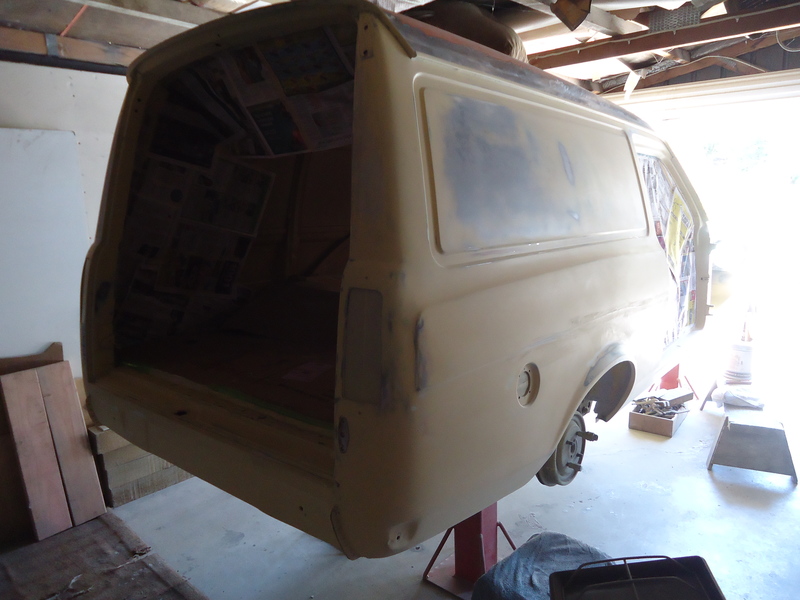
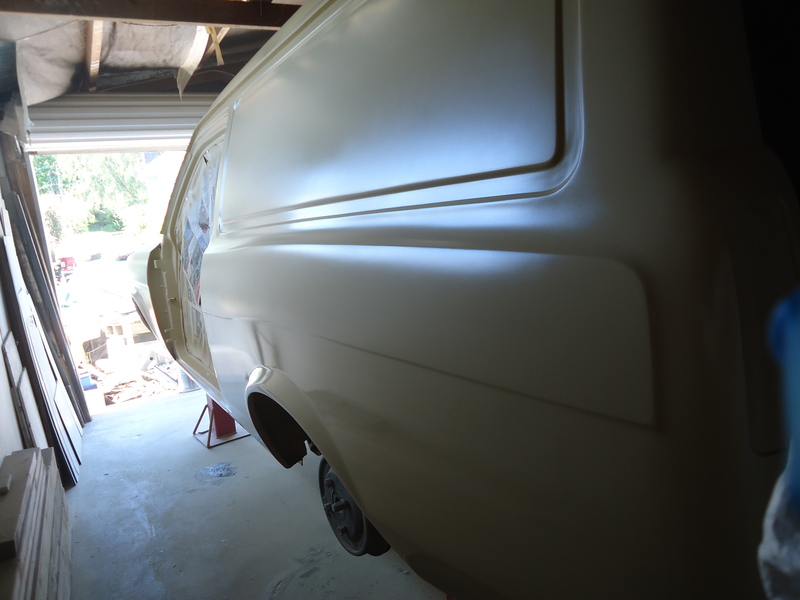
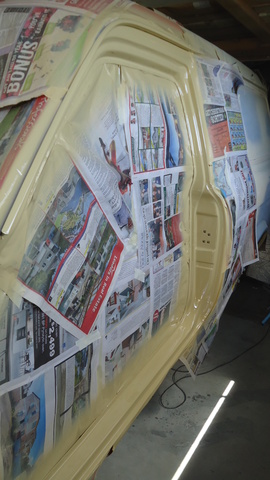
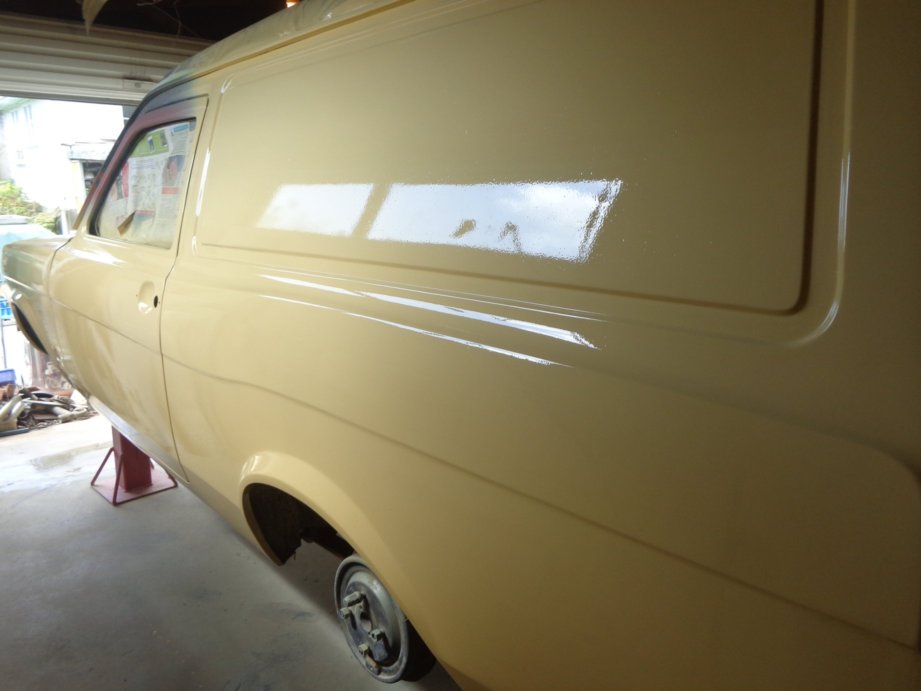
Final coat of primer was applied this morning to the outside. Very hot day, dried up pretty quick and made it difficult to keep glossy but i got the hang of it. Before After The front and back were also sprayed but the pictures were a bit shit. Looks exactly like the pictures futher back in this thread anyway. Next time these areas get sprayed, it'l be with color (Finally!). Should really pick one then. Hmm...
-
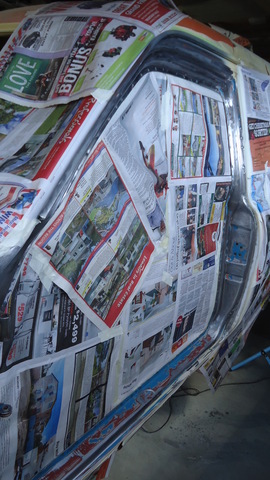
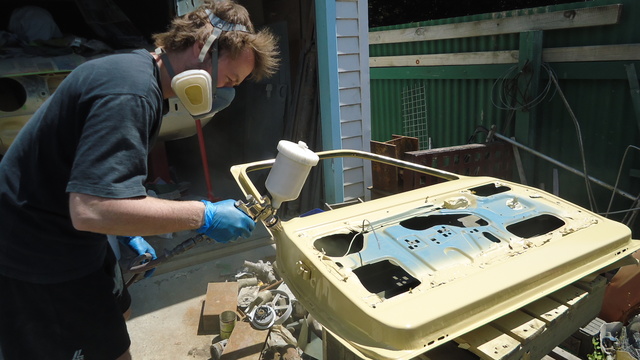
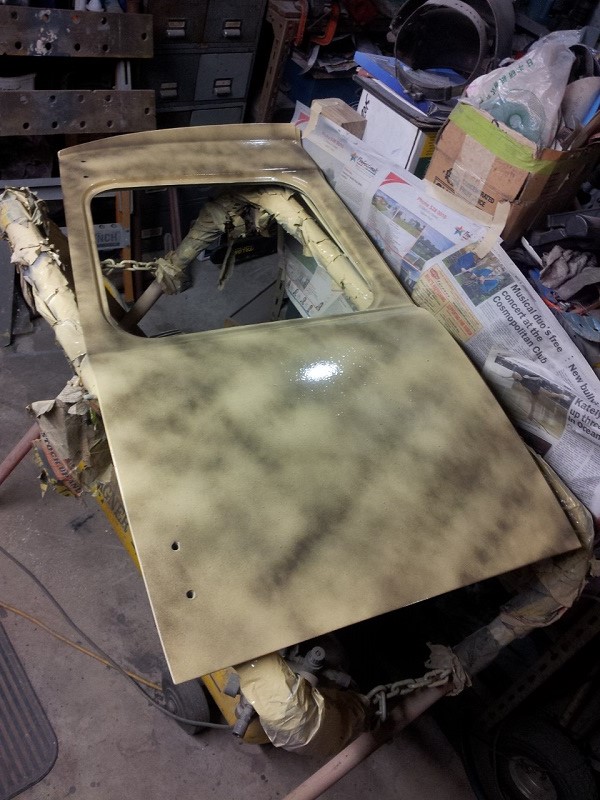
Finally got around to taking off the passenger door. Not as easy as undoing 4 bolts, hinges are welded on. Had to use a special tool to punch out the 2 pins and separate the hinges. Stripped and sanded back the door frame area, the side of guard where it attaches to the guard and inside of the door. The passenger guard was a replacement and put on when the van was painted orange so absolutely rust free around this area (Bonus). Primed the door outside because it was a hot day. Dried up really quick, easy to spray. But then when i sprayed the van door jam area i forgot to tell myself this wasn't going to dry as quick and ended up with a sag on top. Shit happens
-
Also purchased this a while ago, an original rubber sport spoiler. Was trying to find where to put the number plate holes so it was time to get the spoiler out and try it. Thoughts? Obviously would be colour matched to the body. Also have the other type of grill, and chrome and sport bumpers to play with as well. //oldschool.co.nz/index.php?/topic/43995-bmxnz11s-mk2-escort-van/
- 104 replies
-
- 12
-

-
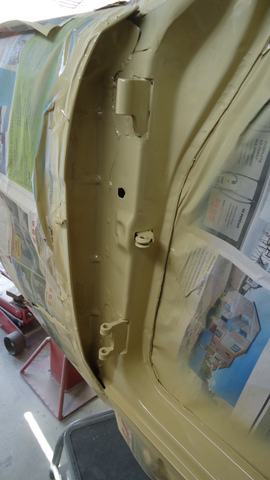
One of the small jobs ive been putting off was fixing the window wiper holes. These were flogged, the hole wiper system was flogged. There were stress cracks and the holes were no longer round. Opened up the cracks, drilled a few plug holes and welded underneath a backing plate to give it a bit more strength. Did the same to the other wiper hole. All cleaned up.
-
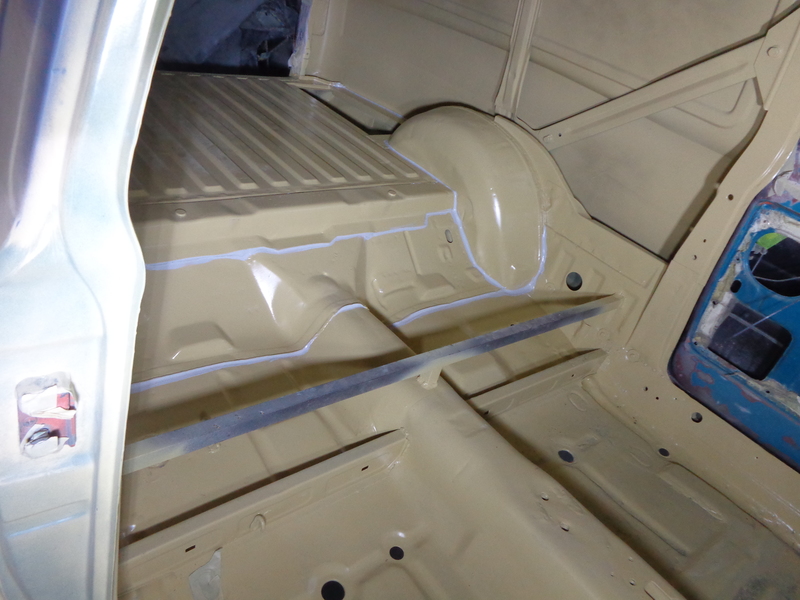
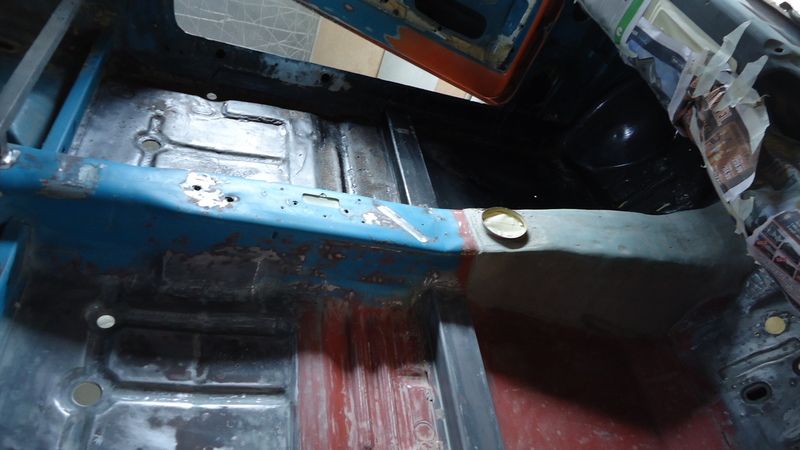
Threw down some seam sealer, glued the floor to the sides (Yes this is how it was done in the factory) and also put some on the under side of the rear flares/lip. Shit job to get under there and do it, especially with the diff still in. If the clear 2k sealer I sprayed throughout the van last week didnt get it, this seam sealer sure will.
-
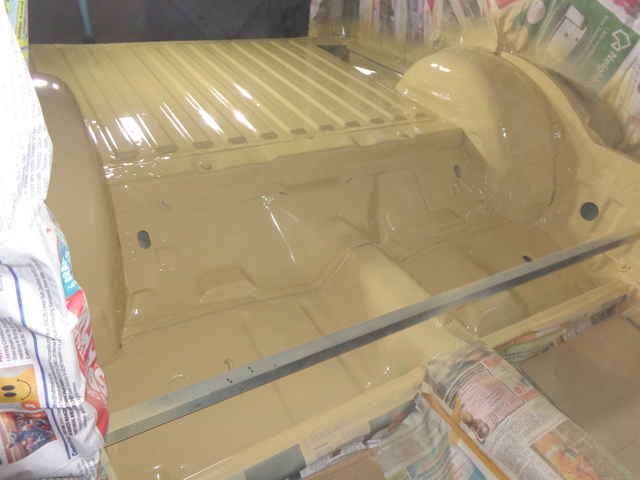
Was able to wire wheel the rear floor on Wednesday night and sand below the back seat. Panel beated out the 30+ years of abuse the floor and wheel acrhes had from commercial duties. There were a lot of dents alon the floors ridges. No point getting These dead flat with filler because A ) I couldnt be bothered, B ) They'l probably be covered anyway and C ) I couldnt be bothered. Its a million times straighter than before. Also chipped out all the old seam sealer and will replace it this week. Prepped and sprayed Thursday night. Put a few more coates on then i normally would because the inside always gets knocked around a bit. Now its time to make the outside match the inside.
- 104 replies
-
- 10
-
-
So nice, loving the engine bay! Pretty much what i'm going for in my van. If you need spare side windows and rubber for the sides, i've got 4 spare which i took out from mine/probably different shape or size.
-
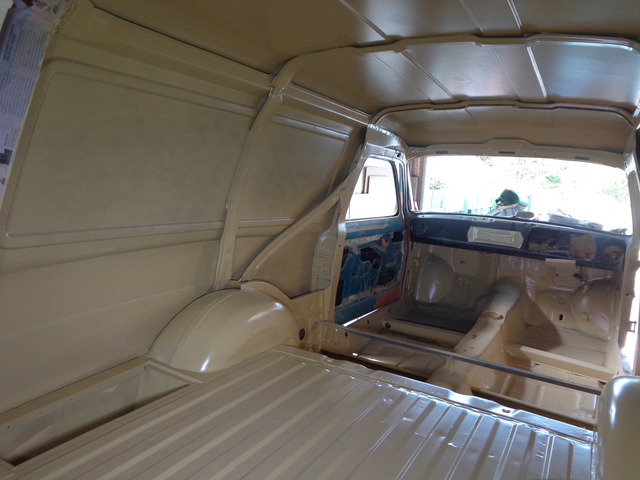
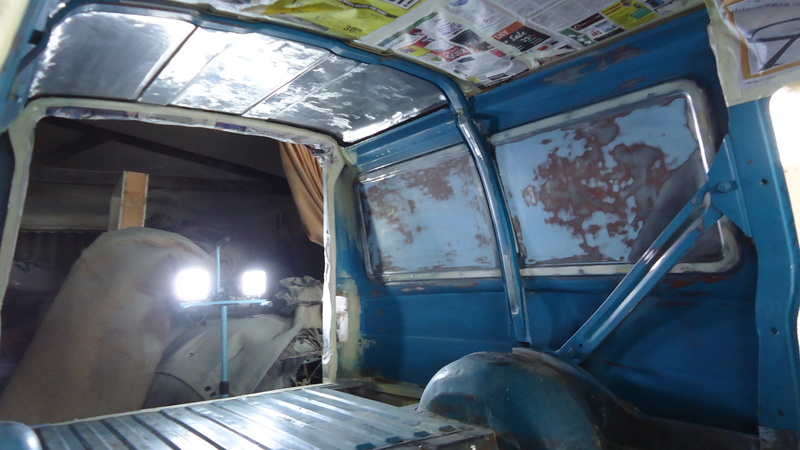
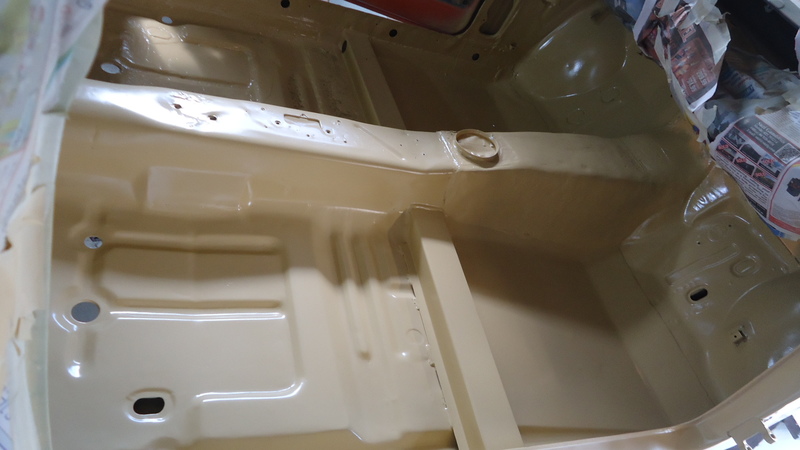
Another long week spent sanding and prepping the inside. This time round did the remainder of the roof, the rear sides, the front floor pan, firewall and under the dash etc. Before After Under the dash looking clean. Went on real nice, couple runs but thankfully not in any obvious places, will sand these out later on. Have started bare metalling the floor in the back and will hopefully be able to prime it this weekend.
-
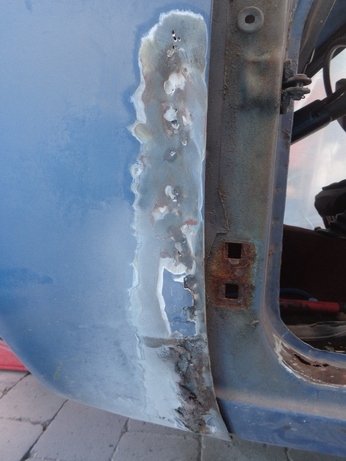
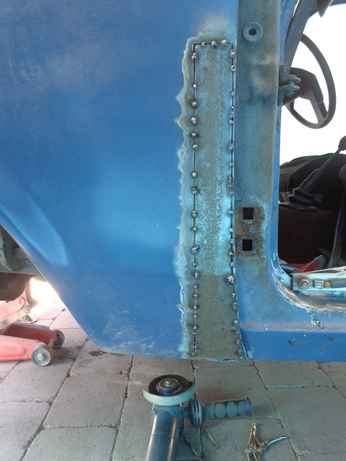
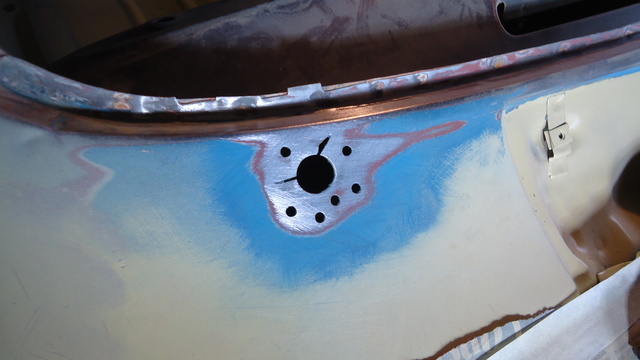
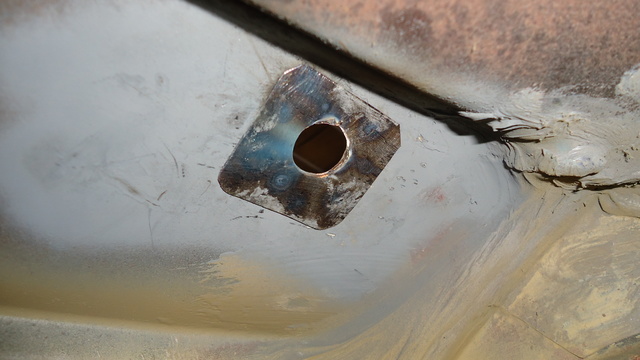
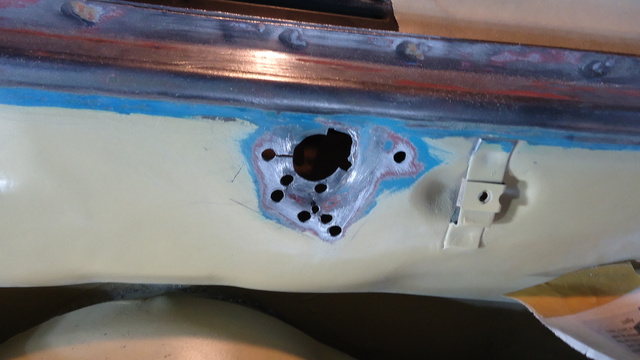
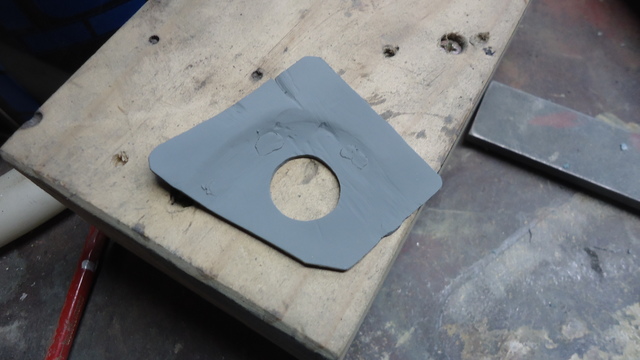
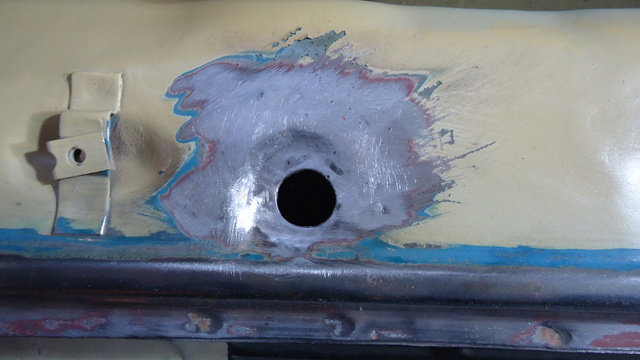
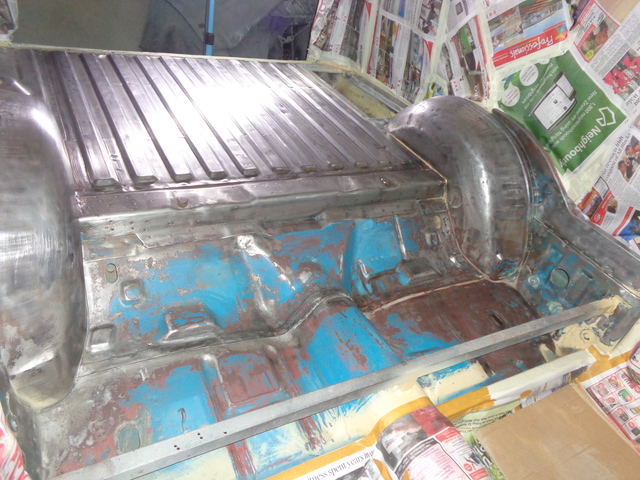
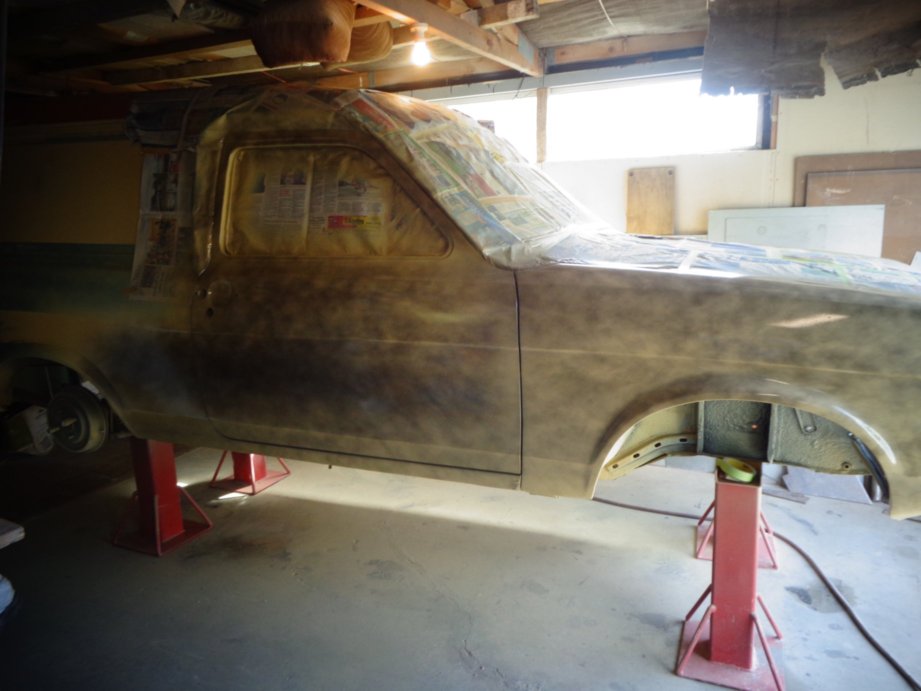
...Fuck. So dug a little deeper and got to this point before finding good steal. This is directly above the rear wheel. Effectivetly its 3 layers. The bottom two fold over each other to create a seam over the wheel arch, all spot welded together. The rust was between these two layers. Not sure how it started because it was covered in underseal and doesnt seem like a prone area. Anyway, i made up patches for these two, primed and welded the top piece back on which was rust free. The holes on the right were patched up too. These were for the poorly made back seat bracing which i'll remake later on. Decided to check the other side, same story, rust between the 2 bottom layers. Cant work out why. So i gave it the same treatment. This knocked me back a bit. Before the day was done we were able to blow the whole van down, prep it and spray 2k epoxy metal sealer through the seams, chassis, sides, anywhere paint cant be sprayed. Finds its way into every seam and hole throughout, messy job chasing the drips. This stuff is great, similar idea to cavity wax or fish oil but this stuff sets and can be sanded and then painted. Busy 3 days. //oldschool.co.nz/index.php?/topic/43995-bmxnz11s-mk2-escort-van/
- 104 replies
-
- 13
-
-
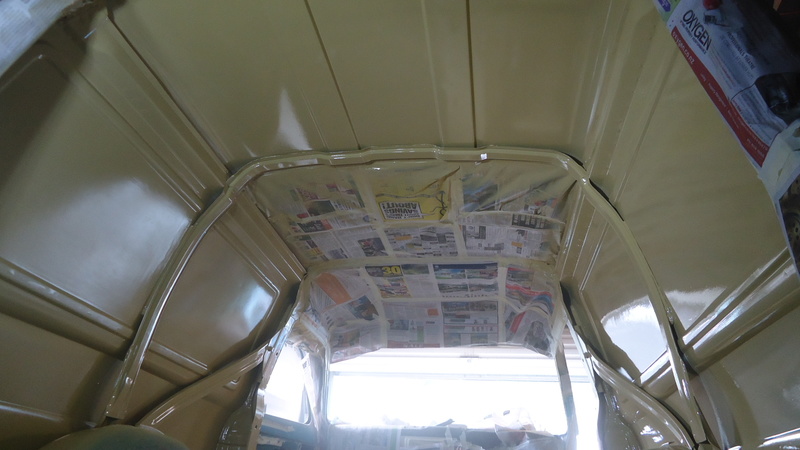
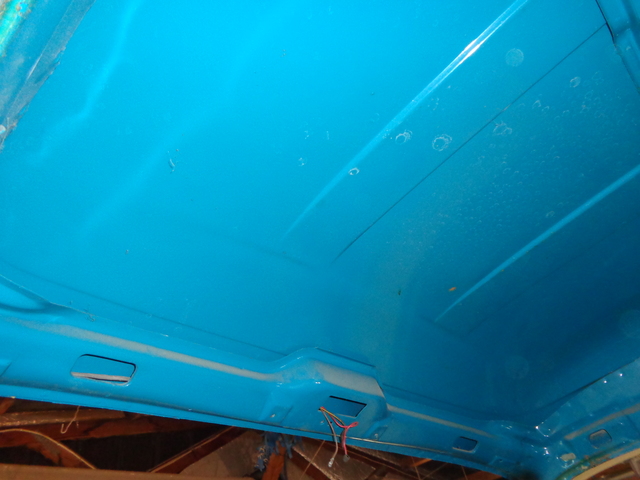
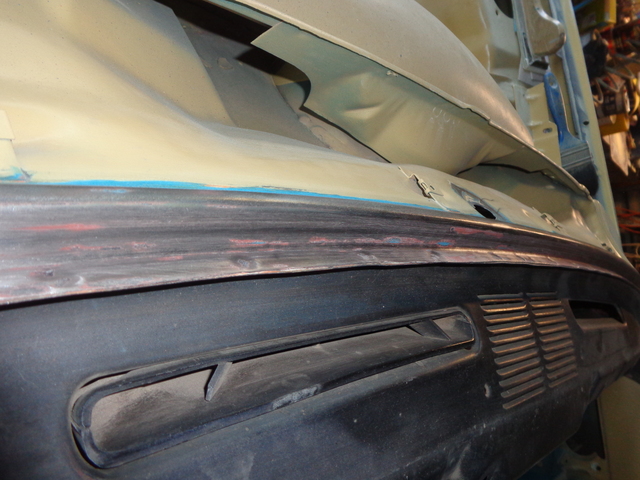
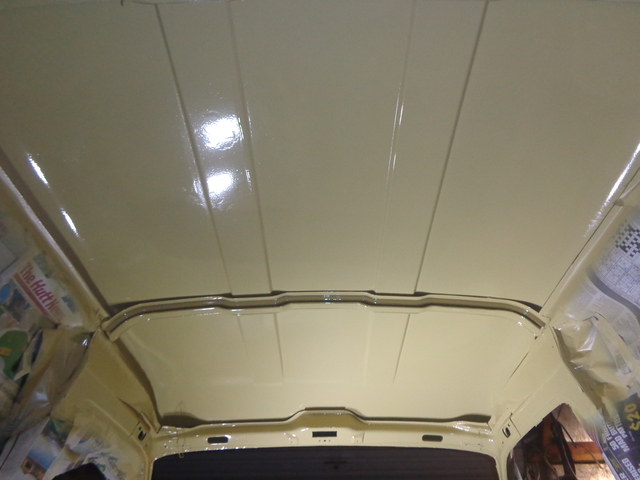
Have been busy sanding the guide coat for the last few weeks. That shit takes for ever, even when its not clogging up the sandpaper. Still have a few areas to finish but 99% of its done. Then its onto final primer. This last week has seen a few late nights in the garage. The idea was to get the inside prepped and primed. Took the window and headlining out, very happy to see NO RUST. The person who last sprayed the van took the window out before painting on a million layers of orange, which probably saved this area. Under the headlining was the same story, original color this time but no rust, not even surface. Decided to do the inside in sections to make it easier. Started with the roof, only took it to bare metal where it needed it, keyed up everywhere else. Sprayed on nice, few runs but wont be seen when the lining goes back in. Next night was prepping the sides and floor..
-
86 with a formula motor http://www.turbosport.co.uk/showthread.php?t=545039
-
http://www.stuff.co.nz/motoring/customs-classics/73885207/five-models-that-make-the-aussie-car-muster
-
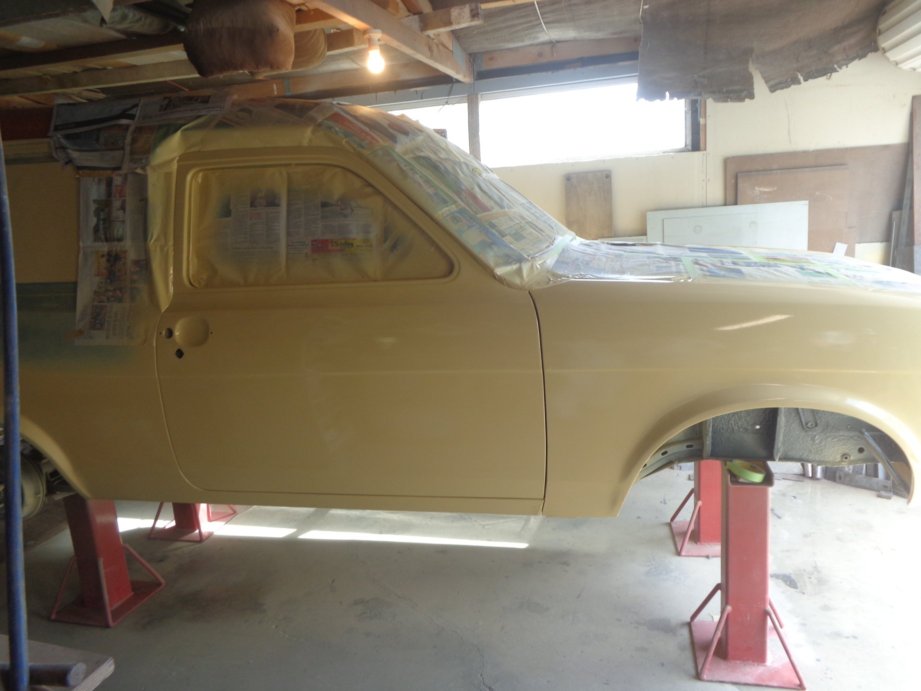
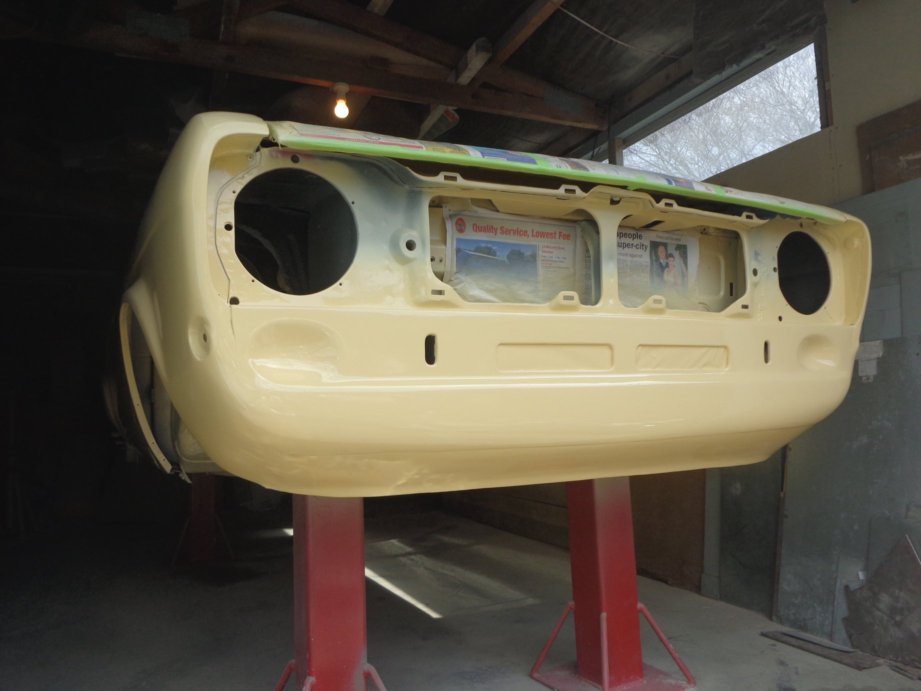
Have been going pretty hard the last month. Last panel to line up was the drivers guard. Once we were happy with this we were able to shape the drivers side, along with the passenger side, front valance and rear panel below the doors. A really long week finishing bits and pieces so i could splash some primer on it in the weekend. Started Sunday morning looking like so 3 or so coats of high build epoxy primer later Really happy with how it went, no runs or sags etc. Looks pretty straight. Few things to fix up but stoked with how it looks. Nice and glossy. Put some guide coat through the gun to finish it.
-
Passed my 81 van with no wing mirrors, even though it had the holes for them. Will be putting them on anyway as visibility is pretty poor in it.
-
Only time i had this weekend was a few hours on Sunday night so i quickly prepared and sprayed the rear doors with high build primer and a bit of black for guide coating. Sprayed using a top coat gun and it came out a bit lumpy, i'm hoping its just the gun and not hardner because i know i stirred the shit out of it. Most of it will be sanded off so ill find out then. Next job is to get the rear end in guide coat then start shaping the passenger side again.
-
Not sure any upgraded (thinking twin throat) carbs will be able to bolt straight onto the original manifold. As above, get the original carb fixed, they're cheap as to buy a few and make a good one. Otherwise it'l have to be a new manifold to suit what ever upgrade you go for.
-
Luckily its still got the ID tag but hasn't come up trumps. Not this one sorry, will need all the help to push my heavy van around! If you are keen i could ask a mate of mine. Hes getting rid of a lot of escort gear at the moment.