piazzanoob
-
Posts
1247 -
Joined
-
Last visited
-
Days Won
1
Everything posted by piazzanoob
-

piazzanoob's 1964 Ford Galaxie 500 seeeedaaan
piazzanoob replied to piazzanoob's topic in Projects and Build Ups
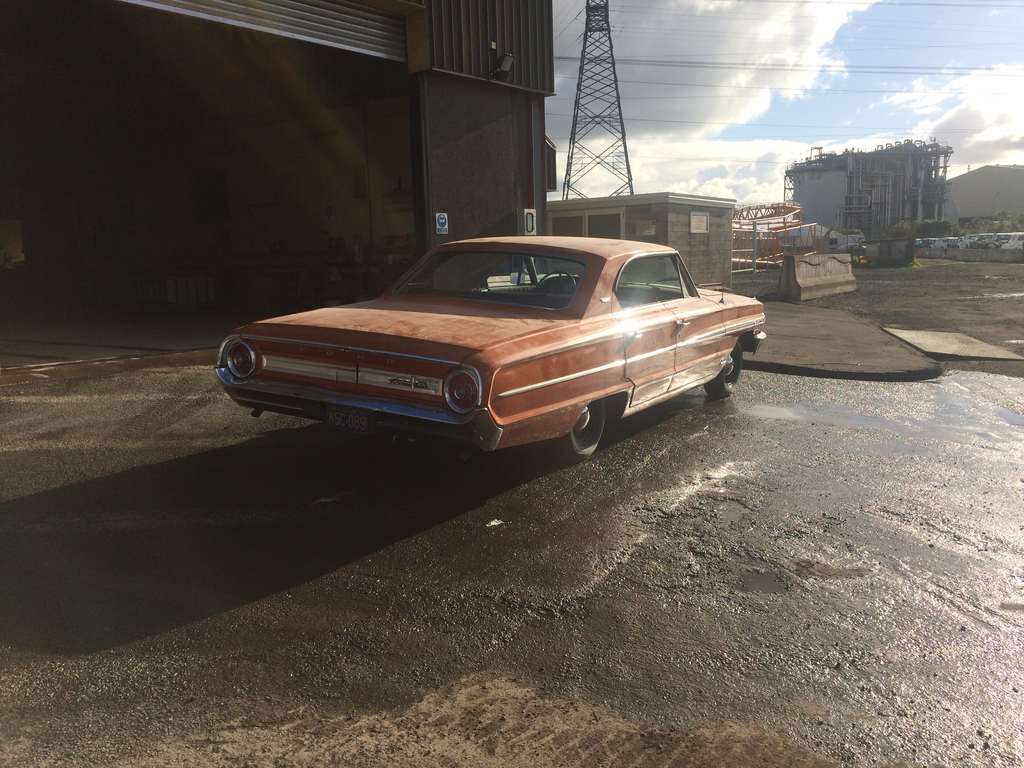
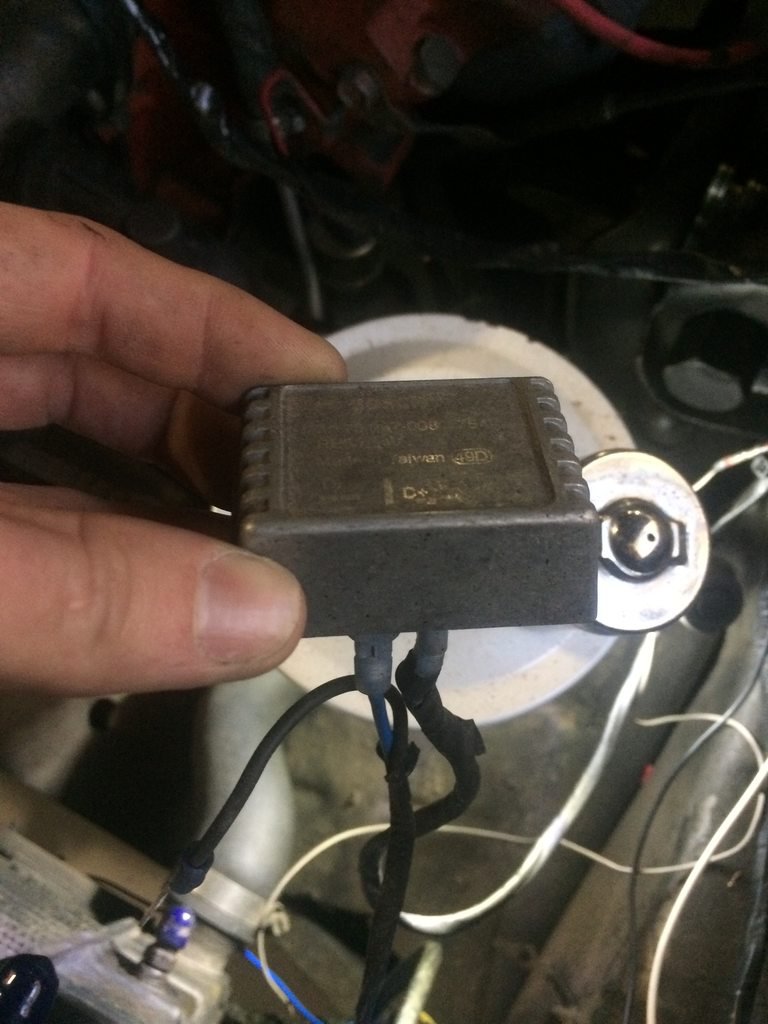
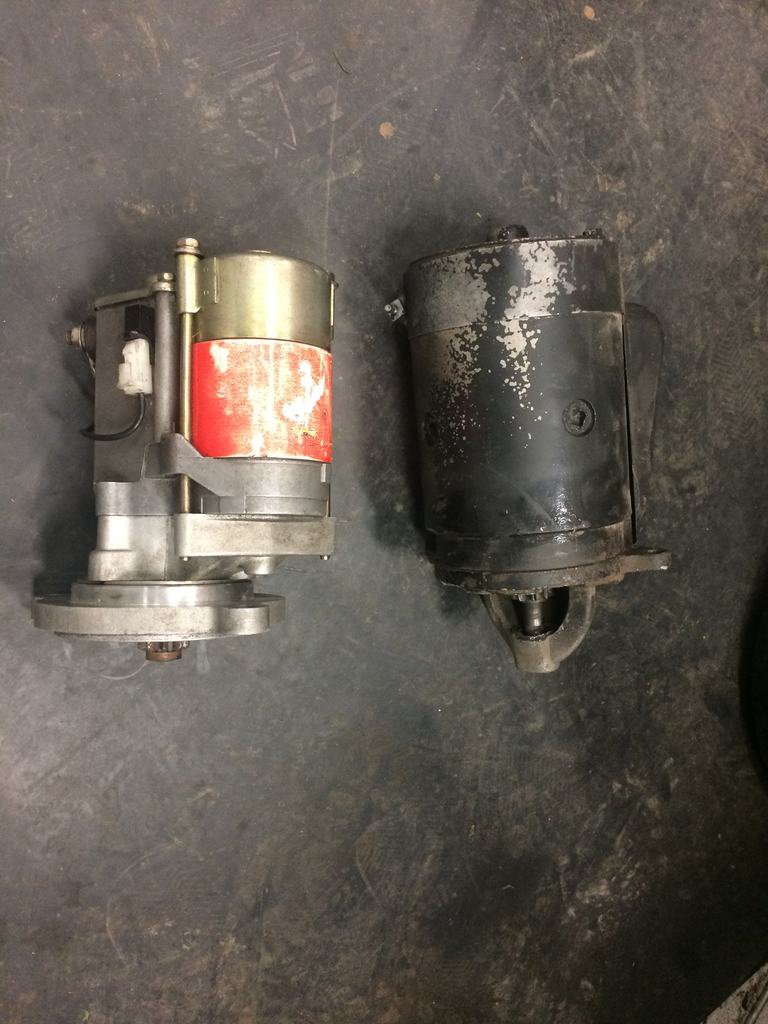
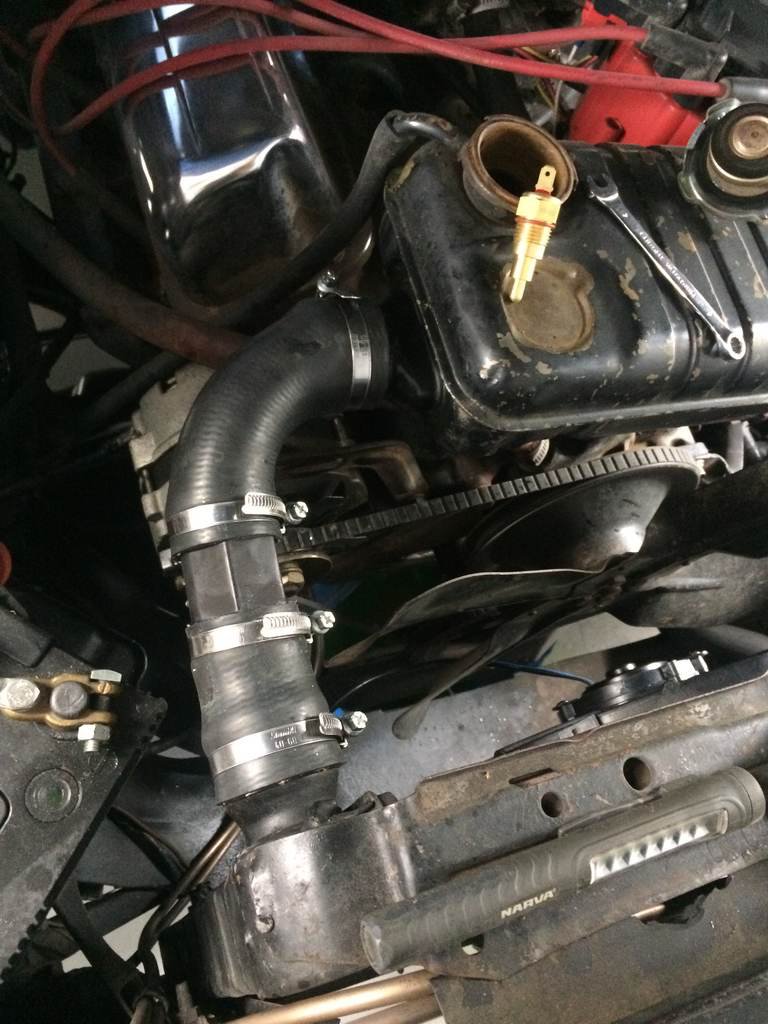
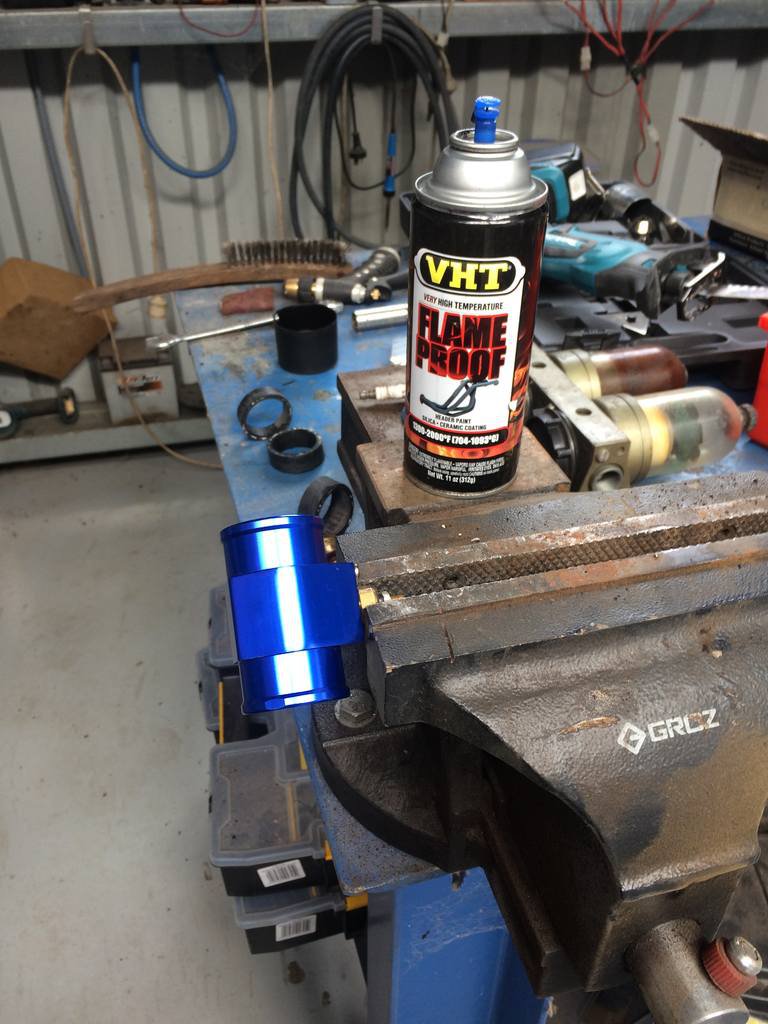
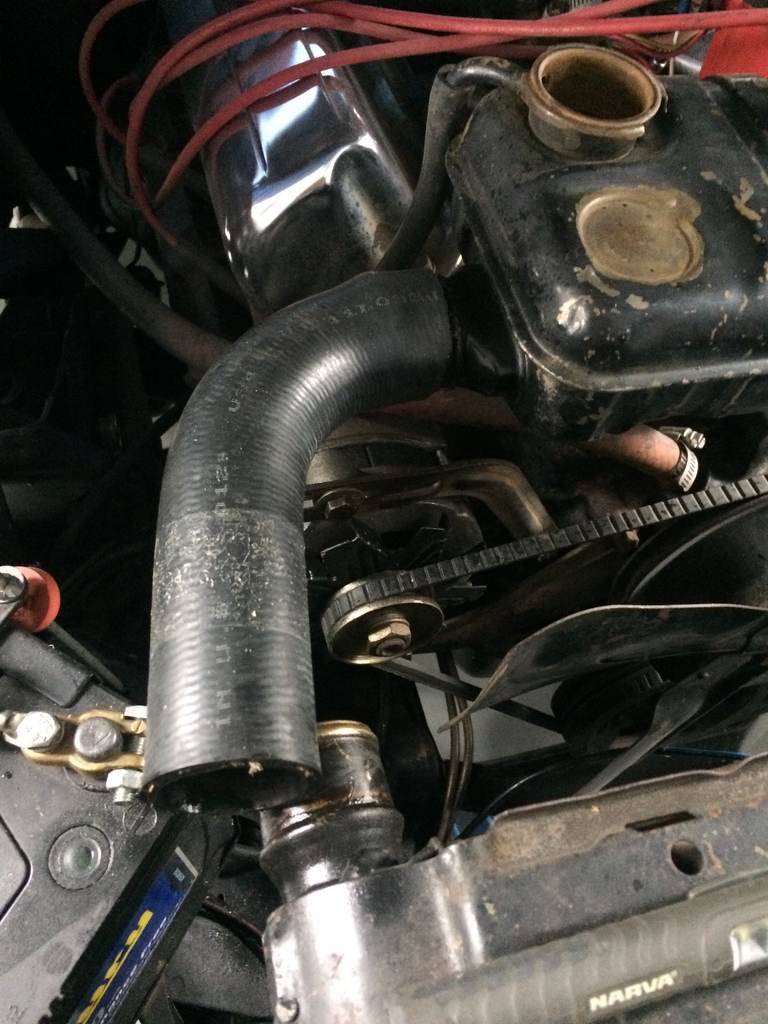
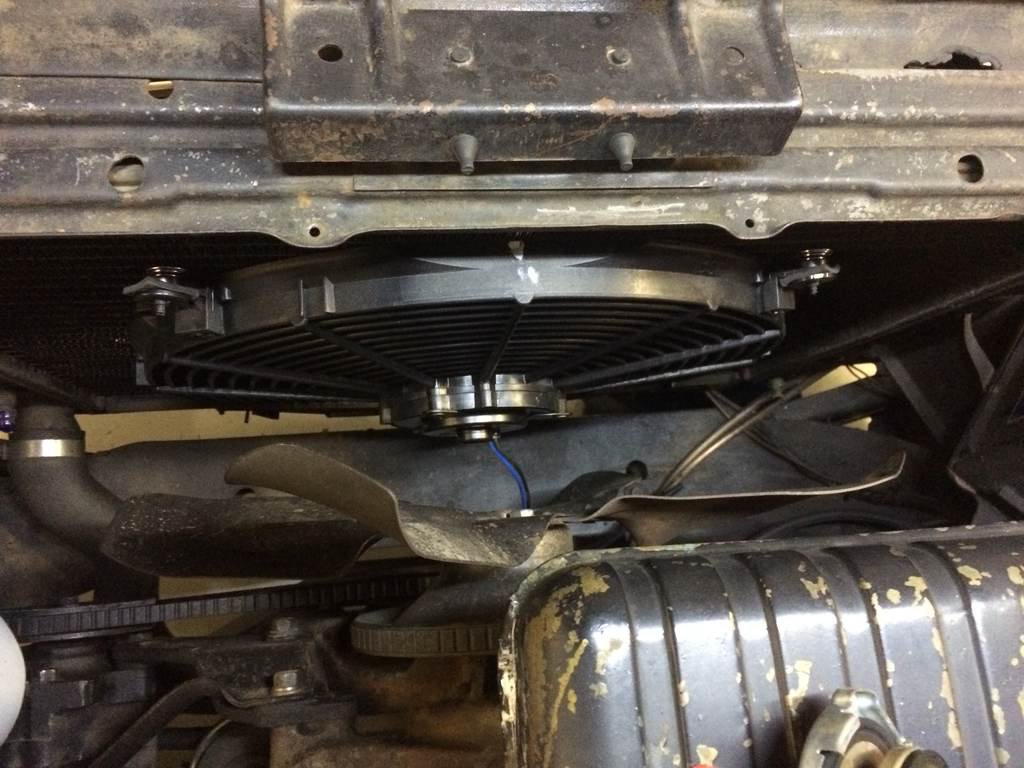
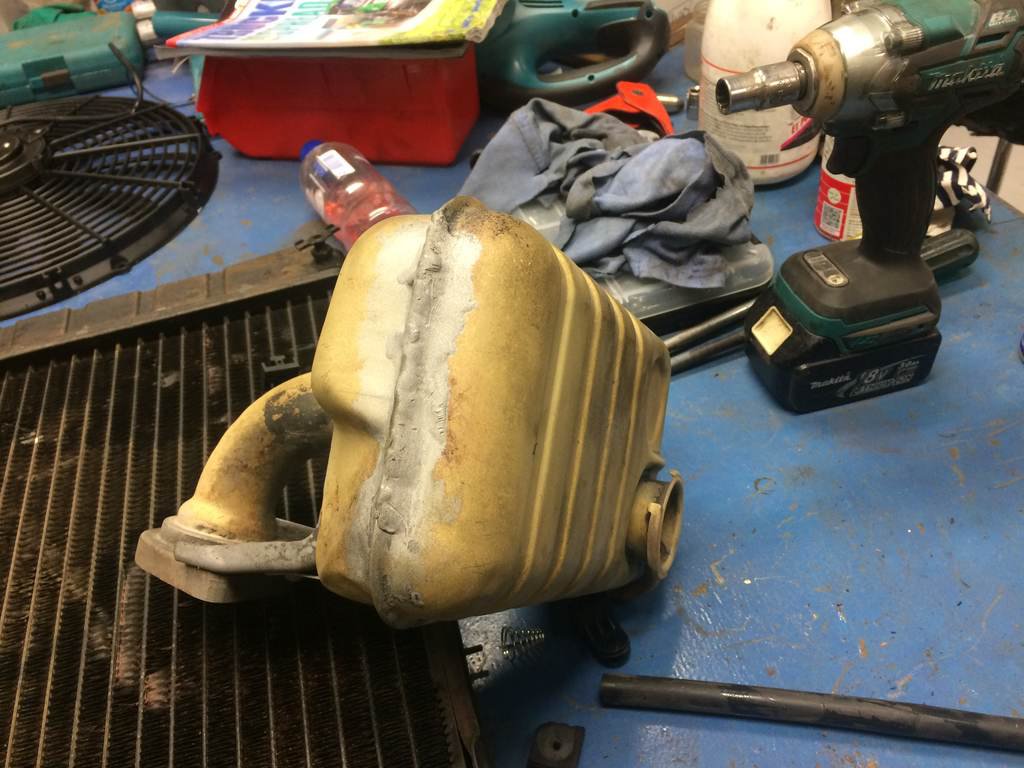
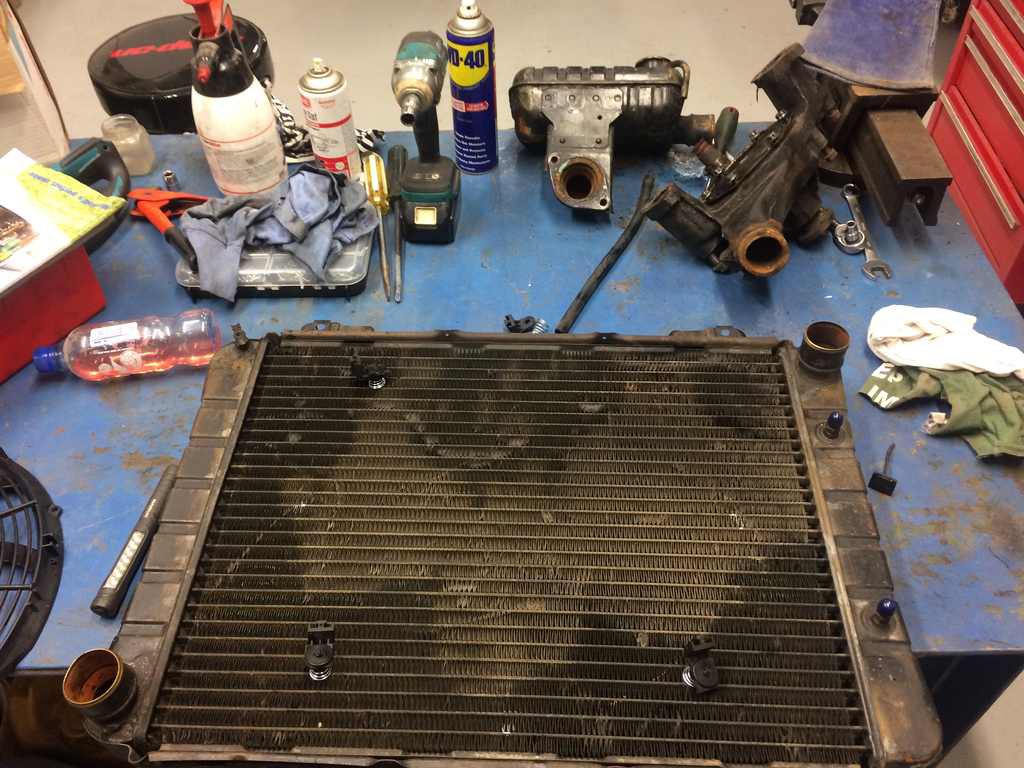
so since this car has been legal its been out on the road twice one the day it got legal which it went okay And the next time was a night time cruise through town with it blowing the low beam headlamp fuse in town and not having a replacement i ended up driving round with hi beam going. then she ran abit hot and ran like a bag of shit having to hold the brake and accelerator at the lights which wasn't so ideal so parked her up for a feed and went to leave and she only just started due to the battery being low in charge. then stopped for a leak and turned it off due to it being hot then it wouldn't start as battery was now too flat. so waited and got a jumpstart from my AA cover and drove straight home and parked her up. wasn't super impressed at this point as everytime i drive it something fucks out or plays up. so took a look at the reason why the battery had gone flat and found that the external alternator voltage regulator had shit itself It had already been replaced with a new bosch unit 8 months prior as the original one fucked out. so out it went and back for a warranty with surprise surprise it only seems to be me that has had one fail yet oh and i bought a bosch one as i figured they were good.... time will tell with this replacement one And with the starting issue too i found a second hand reduction starter cheap so chucked that in with some good sharns to the old owner who also had a 64 but a two door so now cranks abit quicker and easier so next job was to make this thing run cooler i had removed the old mechanical fan as it was shit and had no shroud and fitted an electric one instead then hooked it up on a switch for when needed and fitted a thermo switch for it to kick in when it reaches the right temp but have not wired that up yet. which meant that the temp sensor had to be moved to a different postion due to only one water port. so bought one of these things and painted it black but before fitting it i had to fit a replacement top rad hose being a 40mm hose to 45mm fittings on the radiator and expansion tank so plenty of heat lube and hand action and stretched it on. had to do this due to the water temp adapters local only went upto 40mm but got there in the end And yes after this i unbolted the mechanical fan. i then stripped the radiator off to be checked and found it was 30% blocked And the expansion tank was also sent off to have a pinhole leak repaired. then waterpump off to be checked too so gave it a quick sandblast to look at the old previous repair. and you can see that it was a pretty average repair. the waterpump ended up being in good condition but bought a new one due to them being cheap and not wanting any cooling issues again anyway. so yeah plenty of work has been going into it to get it ready for summer use!
- 77 replies
-
- 11
-

-

-
fuck man that wheel and colour combo should look good! now stop teasing us and show a pic of them on the car. i would also of thought a brown similar to the shade and gloss that you picked would've also of looked great in my opinion. keep the progress up!
-
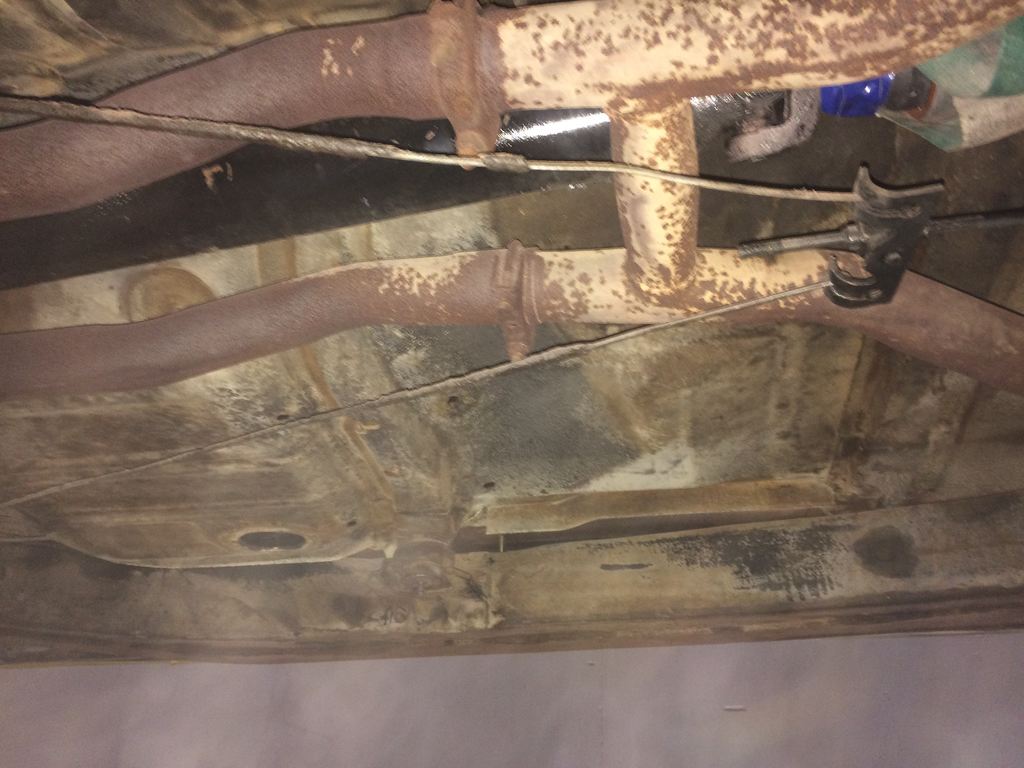
cool build man! keep the progress rolling in if the top of the floors are in that condition in the photo and need patches wouldn't it be worthwhile to have the underneath sand blasted then primered? that tar underseal stuff hides rust underneath it and you dont know its there once its removed
-
piazzanoob's 1964 Ford Galaxie 500 seeeedaaan
piazzanoob replied to piazzanoob's topic in Projects and Build Ups
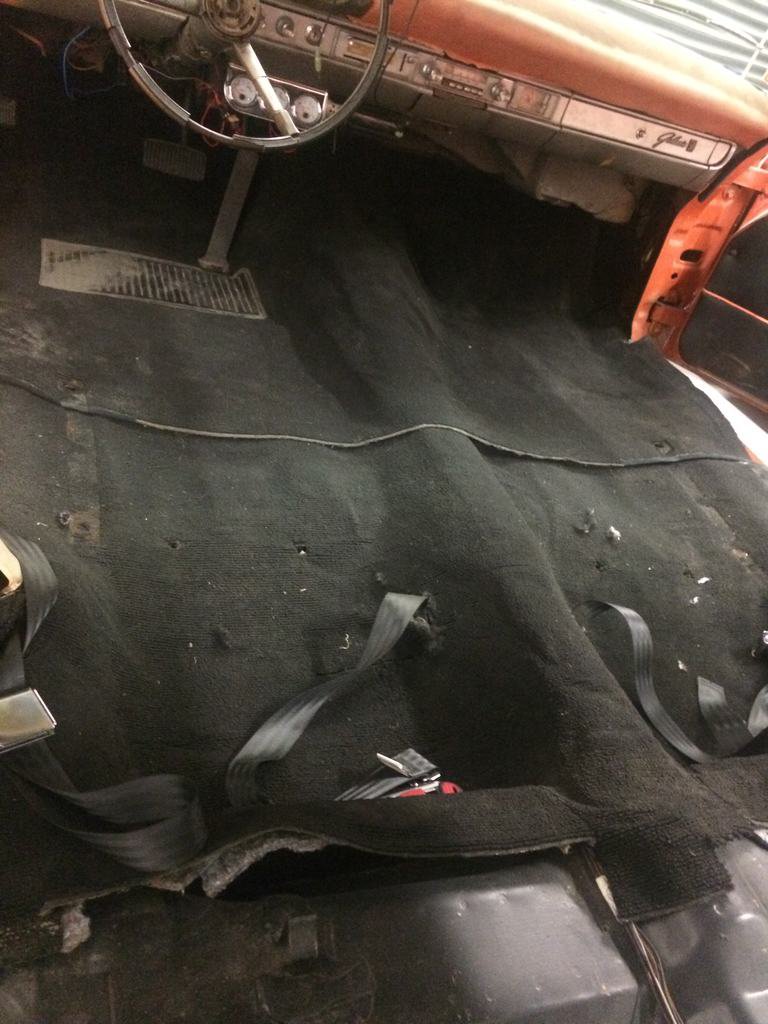
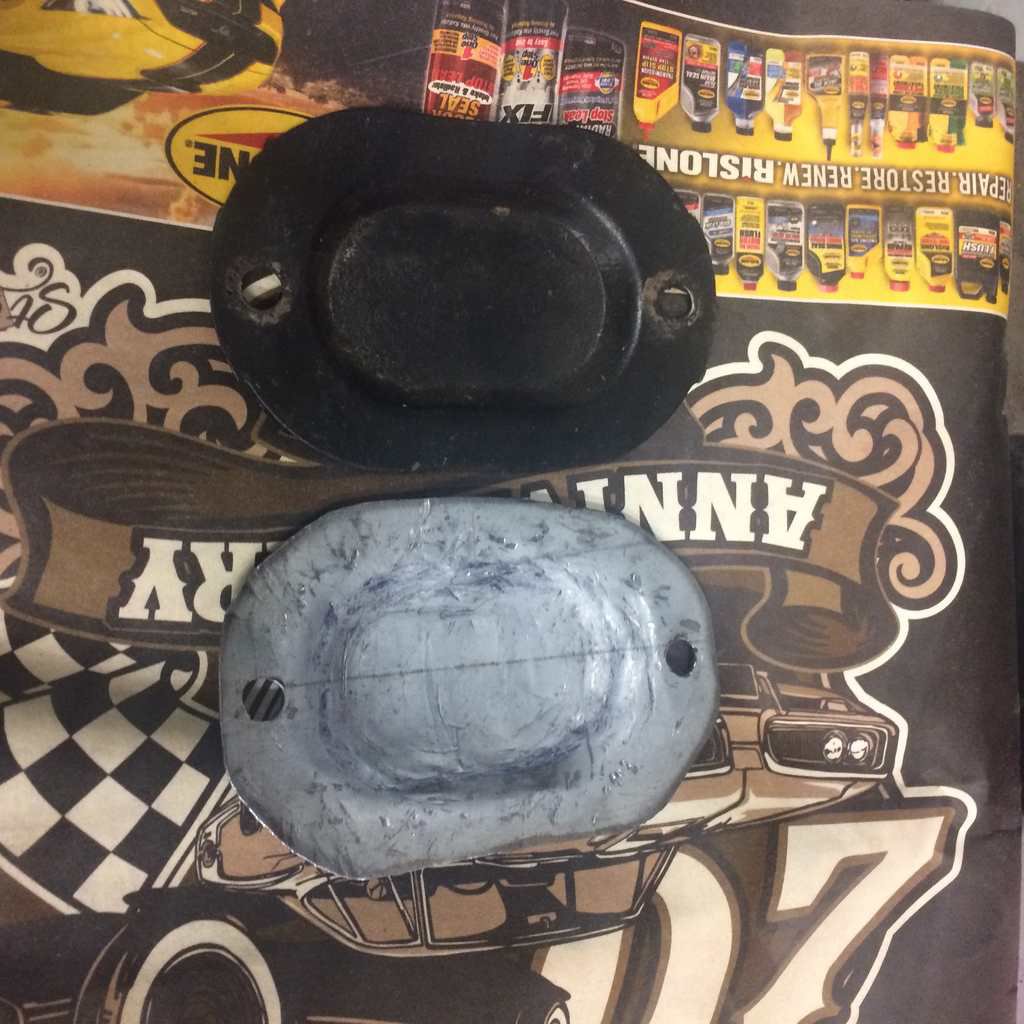
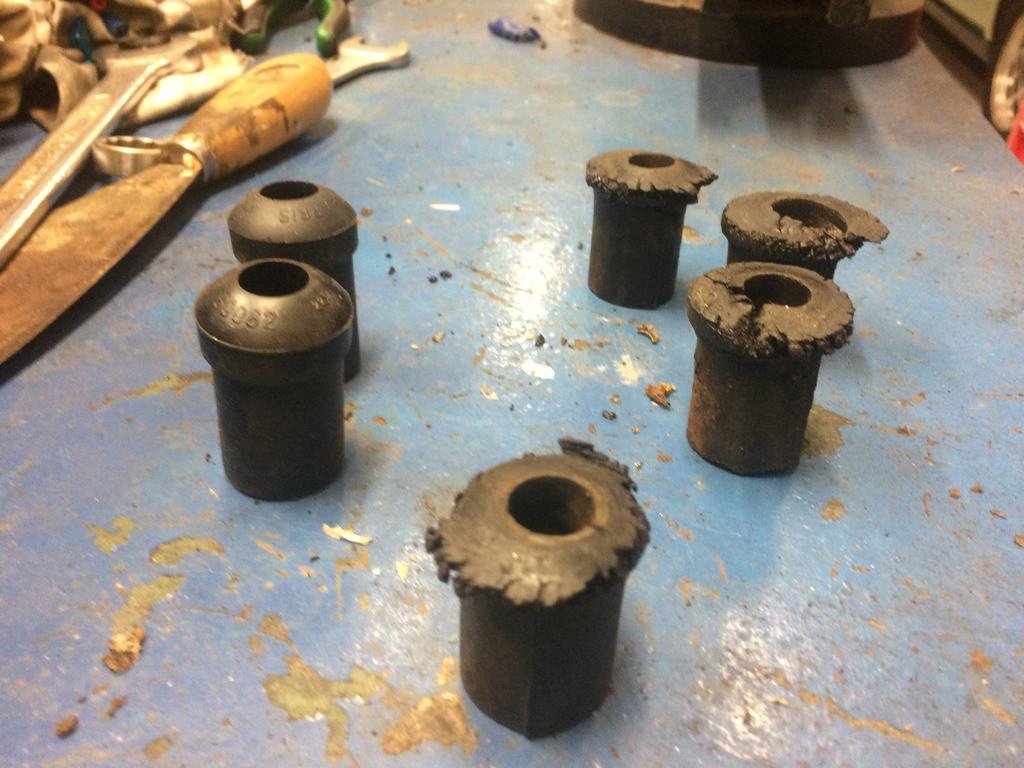
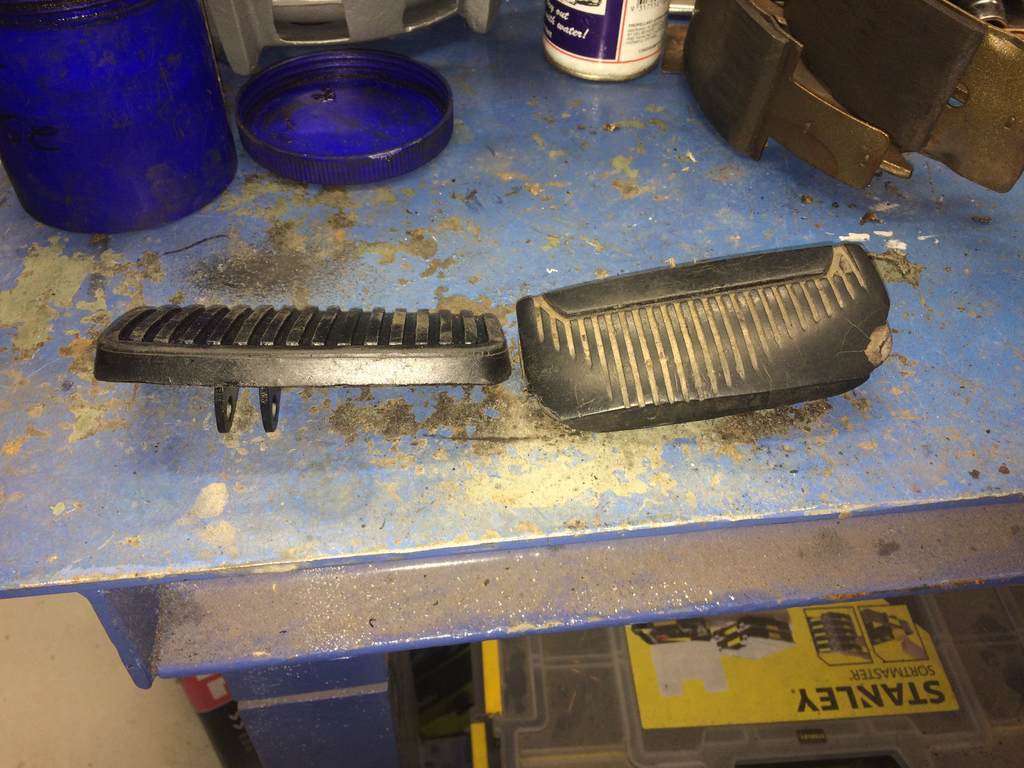
looooong overdue update. got the old girl all legal in August a week before going away on holiday last month. so with the steering joint done i did some of the other failed items which was the brake pedal rubber being worn on the edge so new one of those got put on and rear shock bottom thread bent. so out came a socket and hammer and job done and they also failed all of the rear spring bushes incl the rubber spring pads so replaced the rear shackle ones as had them in stock already but as you can see the bushes are more perished than worn due to the Arizona heat and the spring pads and front bushes on the rear springs i pulled out and showed the compliance inspector that they are cracked from age and Arizona heat. so politely showed him and told him that he doesn't really know what hes doing. Not bloody worn and as you can expect i was not impressed being a mechanic myself and them inspecting the car twice before. so lubed the bushes and spring pads and put them back in. and that fixed the rear end squeak too! took the car back and got the wof label on the window. then took a old girl home after a bit of a drive and made a floor bung and placed the carpet and other trims back in.
- 77 replies
-
- 15
-
-
hey man your making great progress with this! do you know much about the motorex hoists? was thinking about them but not sure on the quality and how long it will last etc
-
piazzanoob's 1964 Ford Galaxie 500 seeeedaaan
piazzanoob replied to piazzanoob's topic in Projects and Build Ups
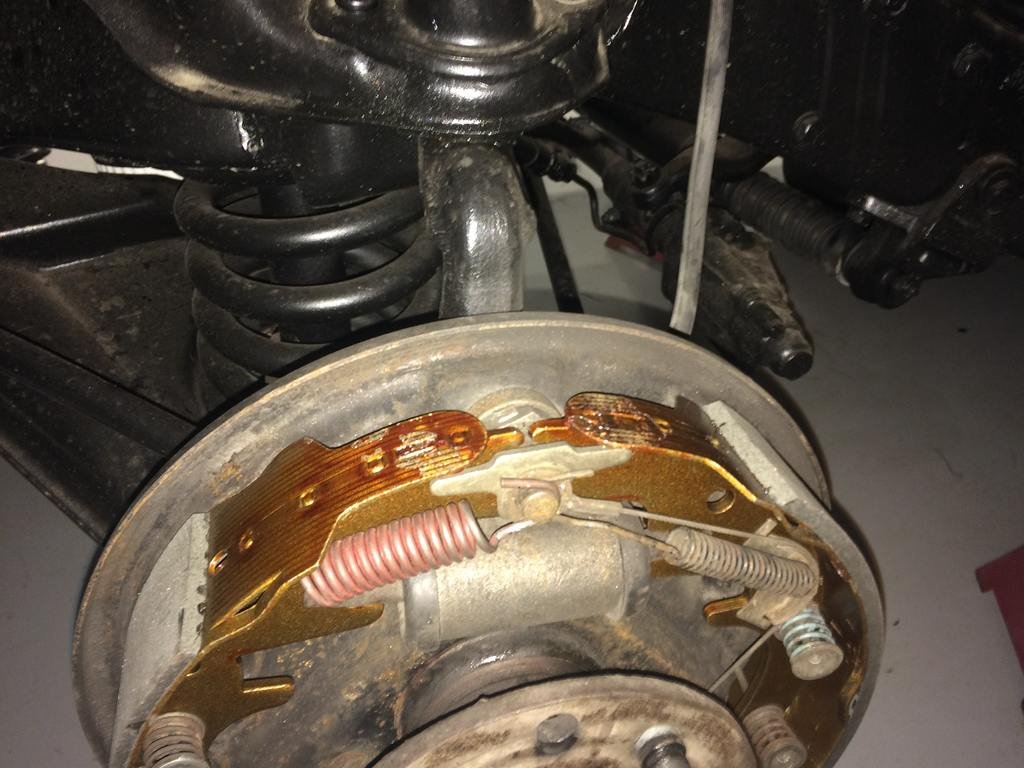
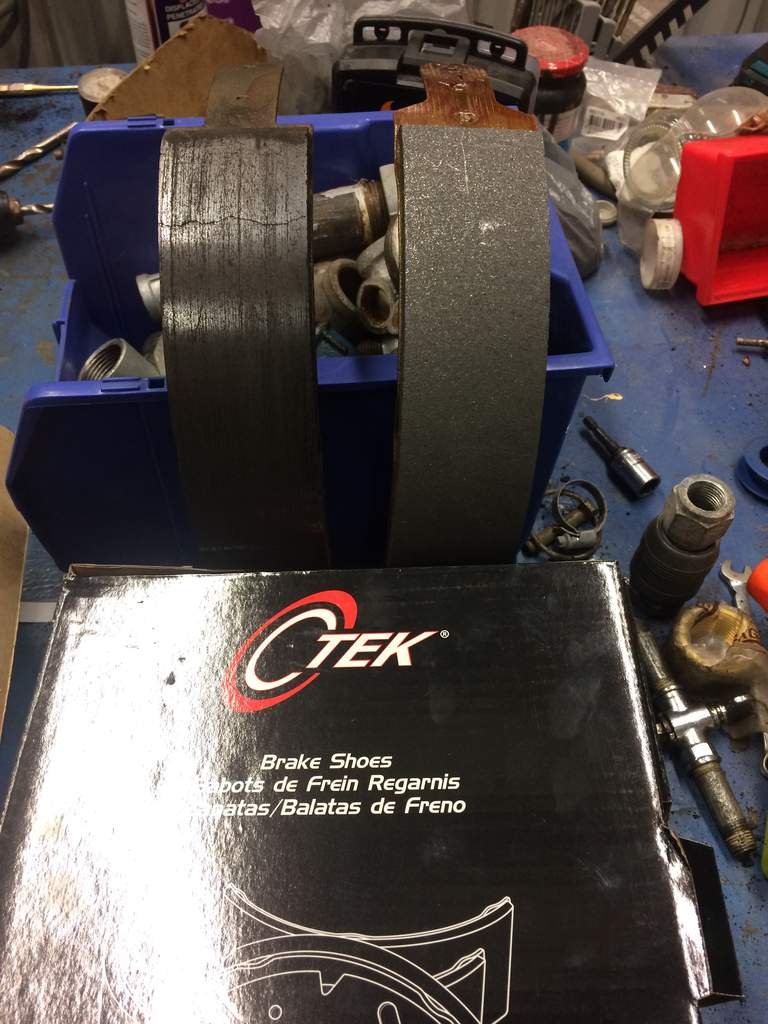
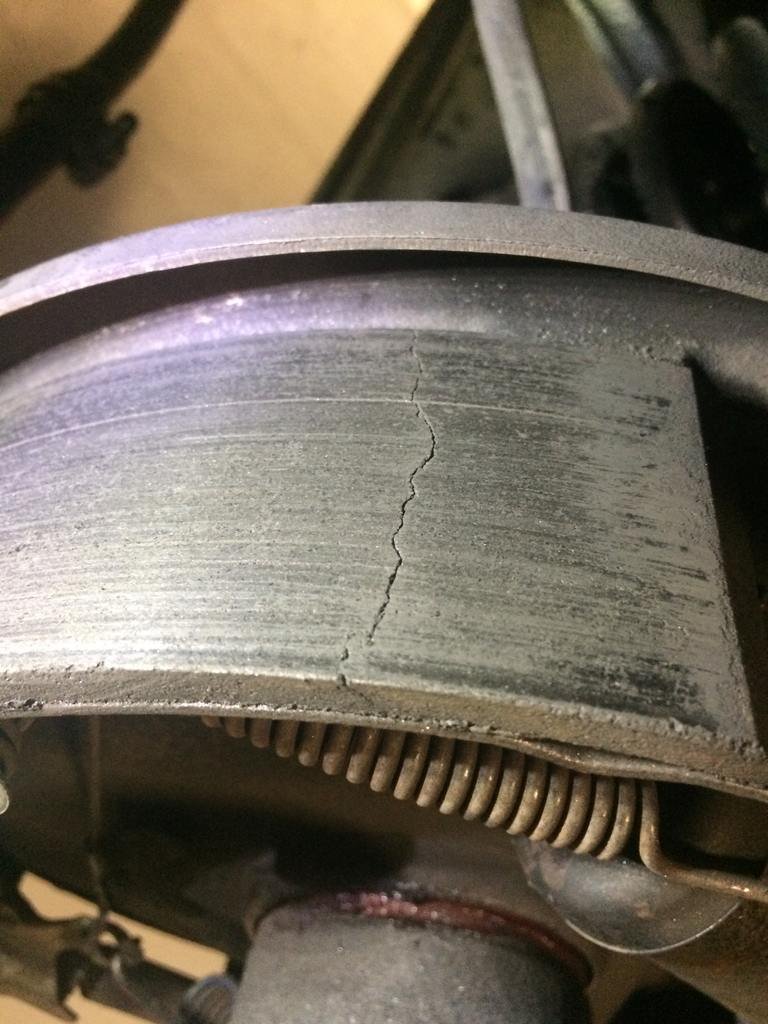
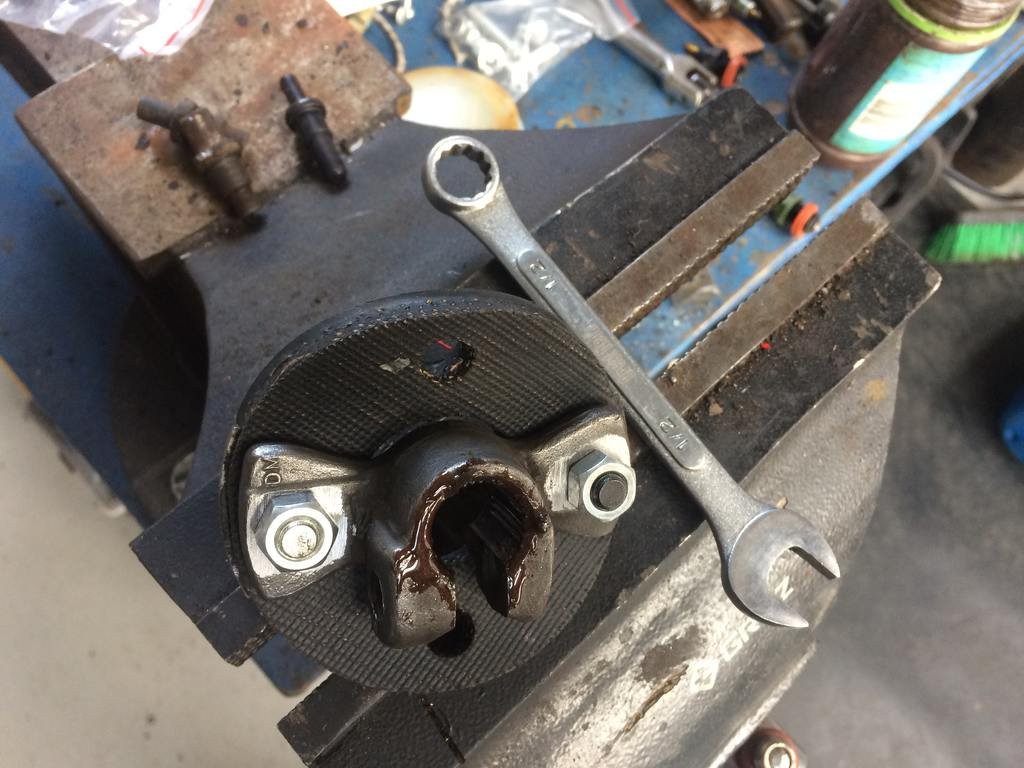
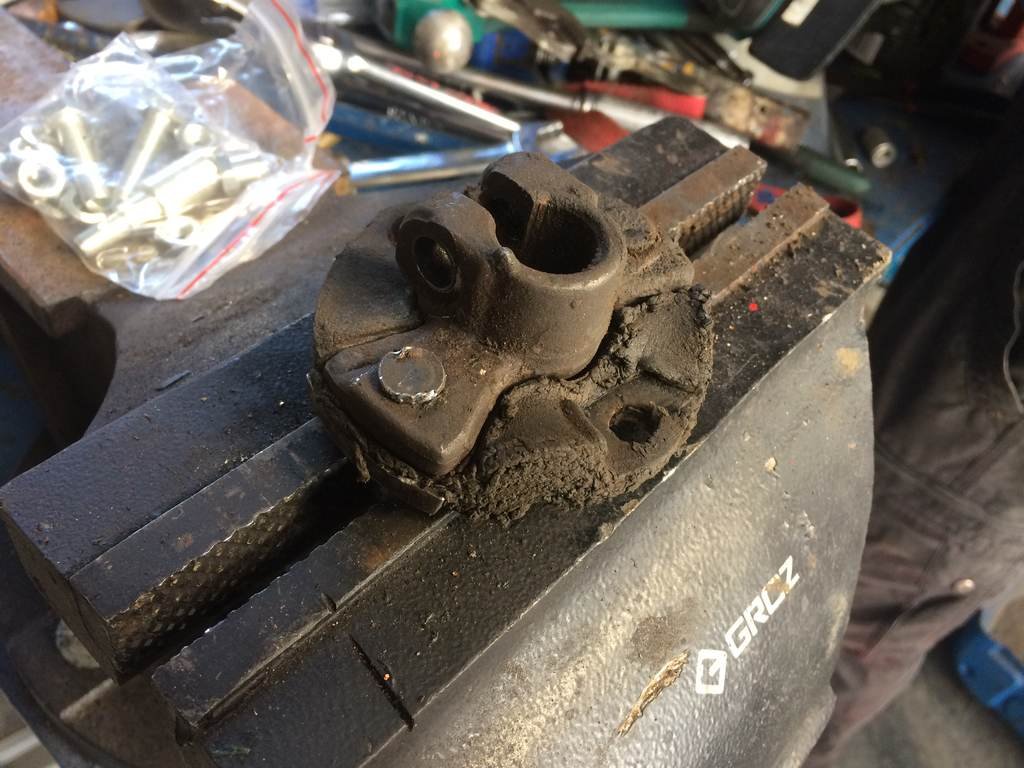
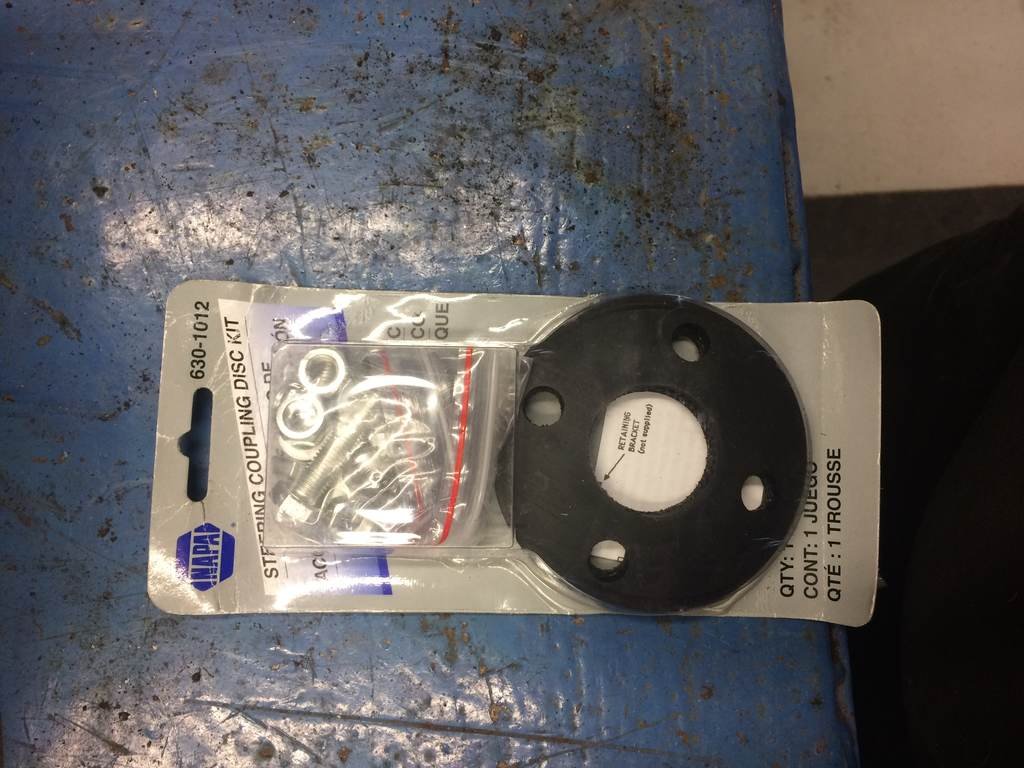
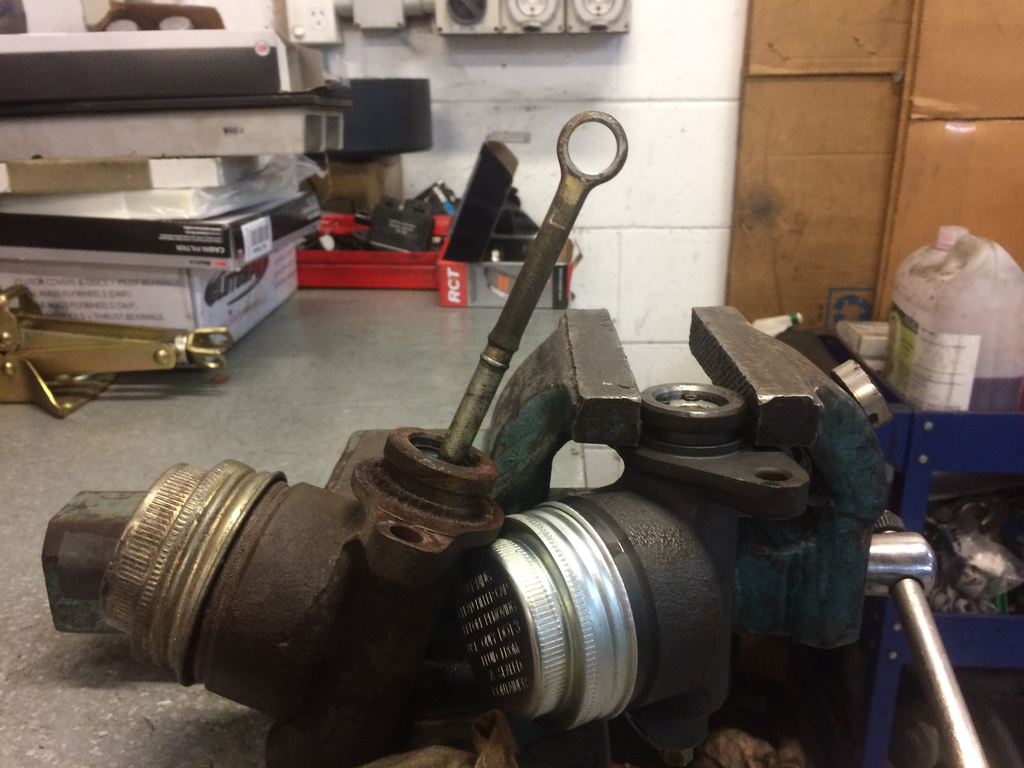
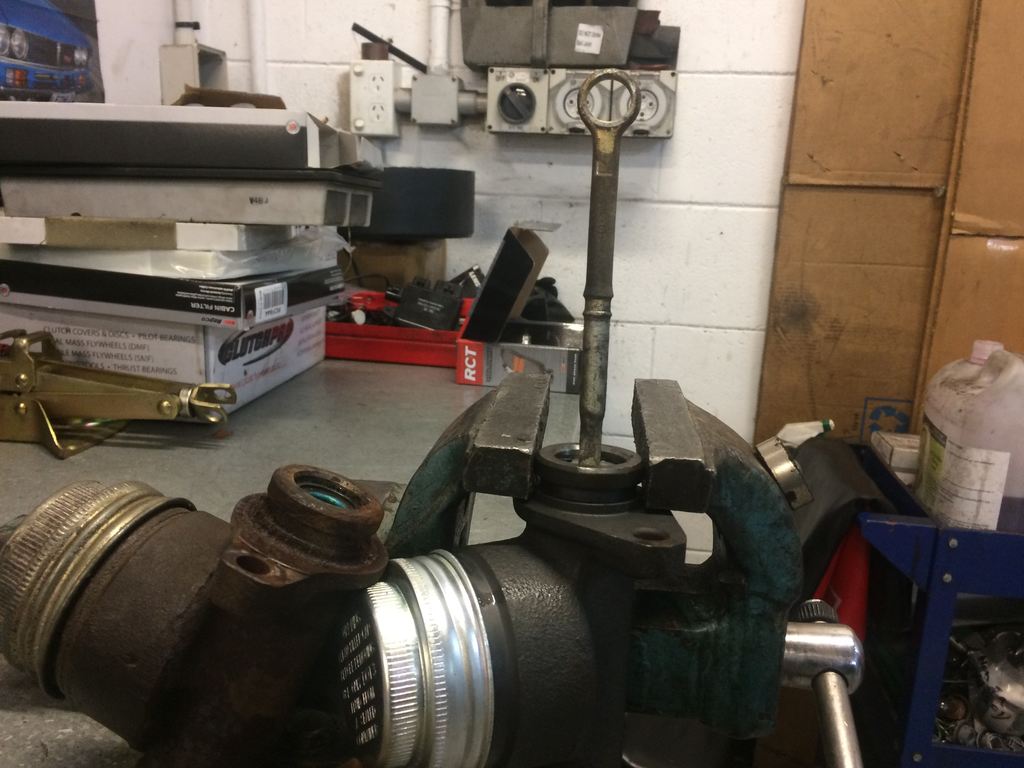
so with the car failing its compliance check i only agreed with two of the items that were failed on the list. one being that the rear shoes on the front brake shoes having a crack through them. they had done less than 800km and every brake part being new apart from the hard lines . so pulled the cracked ones off and got a replacement set under warranty due to no heat spots or any signs of user error. also those dam brake springs in these are not so fun to put in. and the other thing i agreed with them failing was the rag joint which is the joint between the steer column and steering box so ordered a new one from northwestern ford and received it the next day then pulled the joint out then disassembled the rubber joint and placed the new rubber joint onto the steel housing And now the old rubber joint as you can see is well past its use by date And now with those major bits fixed its now onto the silly bits they failed.
- 77 replies
-
- 11
-
-
piazzanoob's 1964 ford Galaxie 500 seeedaan
piazzanoob replied to piazzanoob's topic in Project Discussion
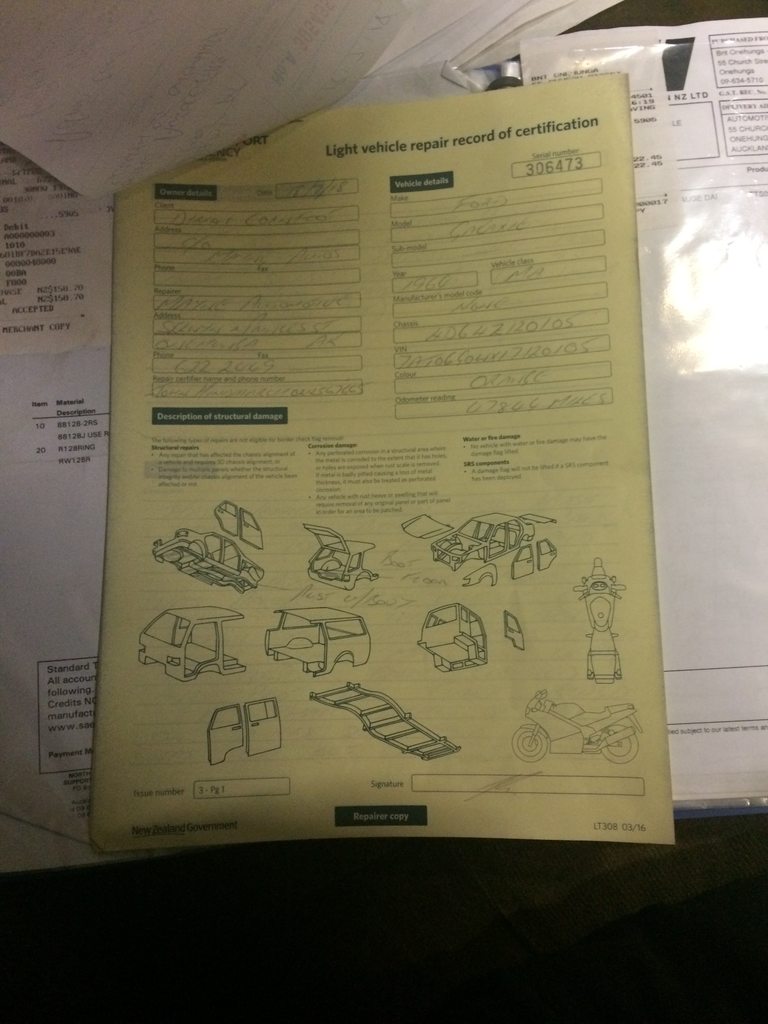
just the repair cert? or the panel work that was done in the boot? -
piazzanoob's 1964 ford Galaxie 500 seeedaan
piazzanoob replied to piazzanoob's topic in Project Discussion
Yep tell me about it there is a couple of things on the list that i agree about but one in particular shoudve failed on the last two inspections i did know that part required replacing but didnt know it was that fucked. but the other items were just over the top not knowing how to properly do their job. but will update the thread with the stuff to fix -
piazzanoob's 1964 Ford Galaxie 500 seeeedaaan
piazzanoob replied to piazzanoob's topic in Projects and Build Ups
took the car back in for its compliance only to have another fail list of stuff to do which is all new stuff that wasn't mentioned on the last two inspections that were done by the same compliance company so time to do some more spannering so close to legal yet soo far from legal -
we also use frances at work and he is generally good to deal with. would recommend him if you cant find any online. but if you want chris pull the belts out and ill get him to take a look at them.
-
piazzanoob's 1964 Ford Galaxie 500 seeeedaaan
piazzanoob replied to piazzanoob's topic in Projects and Build Ups
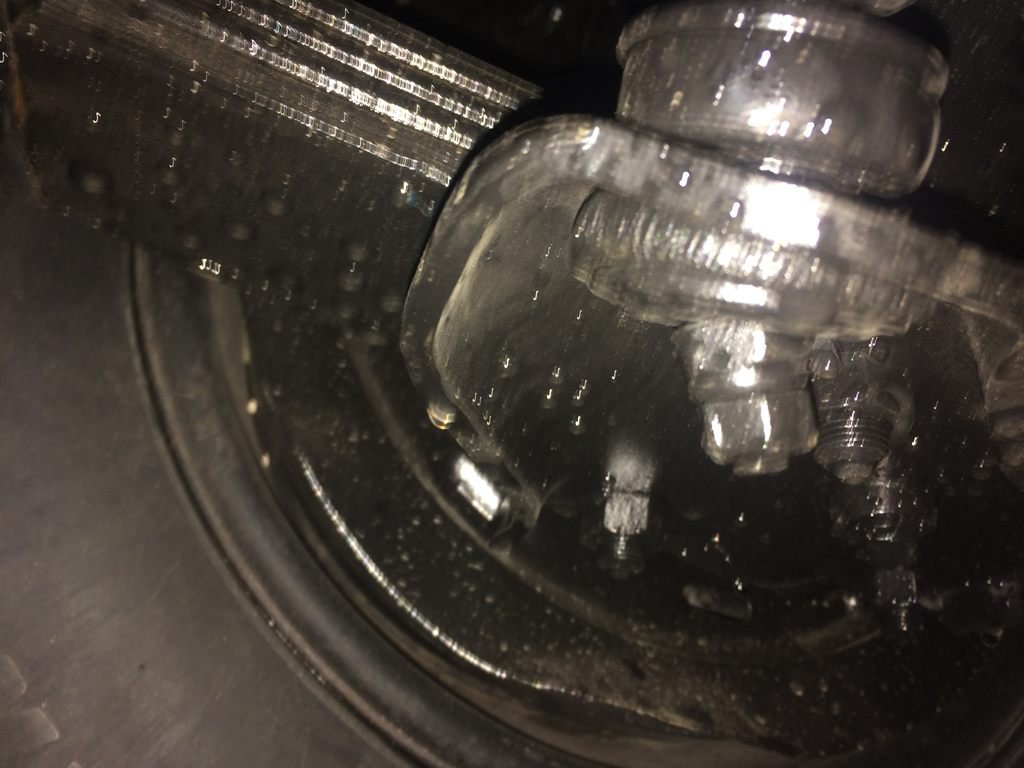
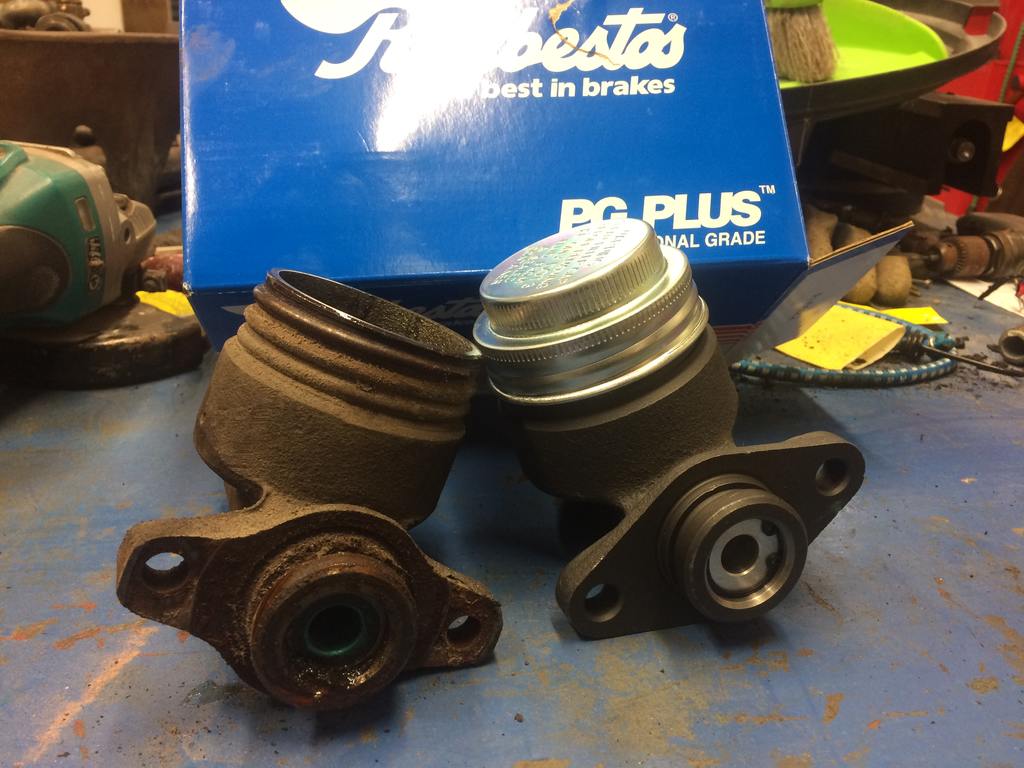
with all the paintwork all tidyish now it was time for the engineer to sign off the repairs. so booked it in for him to look at it on the hoist at work so drove it to work that morning and with the feeling of it going to rain i decided i would park it in the workshop. so parked it outside to pull the door up and move some cars out of the way then when to start it to place it in the workshop and the brakes are jammed on so moved it back a few meters then went to go forwards up a slight hill with the concrete wet and it ended up just wheel spinning so ended up jacking the front up with a trolley jack and driving it up till it reached the edge of the workshop concrete. but then i decided i would crack the brake pressure off the master cylinder by undoing the line to it. but when i did that i hadn't placed the car in park but had left it in drive and it began to start rolling down the incline so with the help of a workmate we tried to hold it with him telling me to get in and me telling him to get in but he couldn't due to a ciggy in the mouth and a clipboard in one hand. so i quickly jumped in and placed it into park. then fired it up and drove it into the workshop. by this time i was not a happy camper and did follow through with swearing and carrying on at the car. then when the engineer turned up i explained that the brakes were locked but we organised that he would come back the next day with the paperwork signed off and i would just need to place it on the hoist for him. so pulled the master cylinder out to see what was going on. so this here is the height at which the push rod relax position is on the new master. And the position on the old master. so by looking at the photos you can see the lengths are different. although you cant see this when installing the master due to leaving the push rod in place and it being a blind hole. so i fixed this by disassembling the master and drilling out the hole bigger where the push rod sits in the master. then reassembled and fitted and bled back on the car. And the reason why the brakes locked was because the brake pedal had no free play so brakes were always applied to the point of lock up. \ then boom all panel repairs signed off and now ready to go back for compliance again
- 77 replies
-
- 13
-
-
piazzanoob's 1964 Ford Galaxie 500 seeeedaaan
piazzanoob replied to piazzanoob's topic in Projects and Build Ups
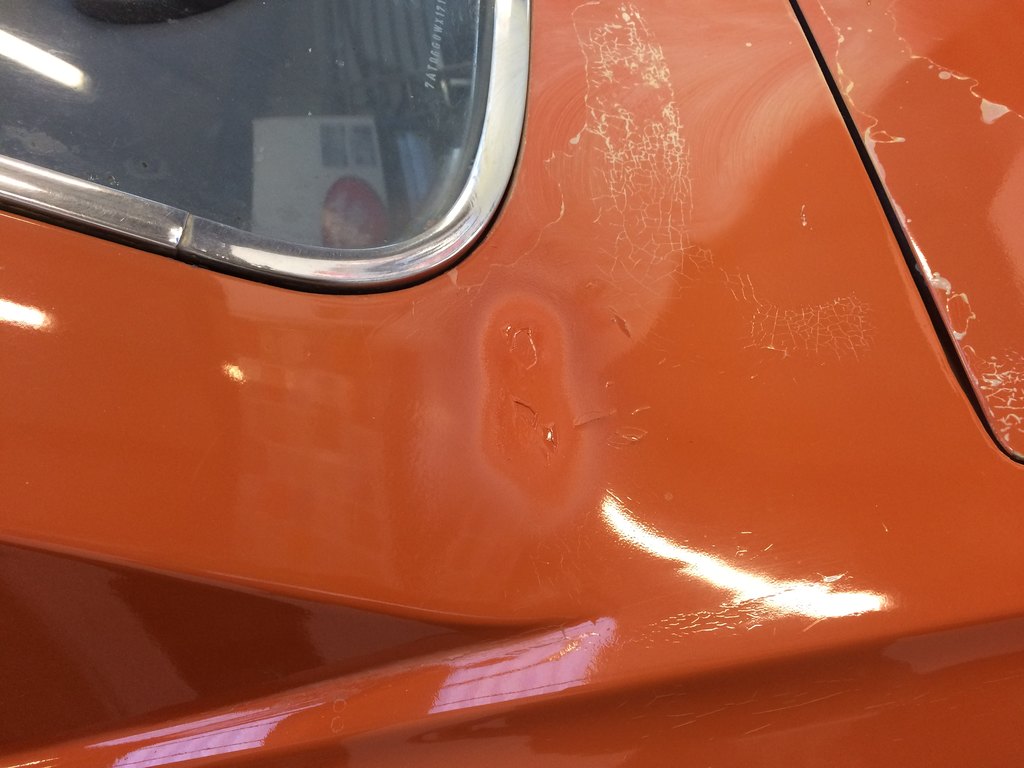
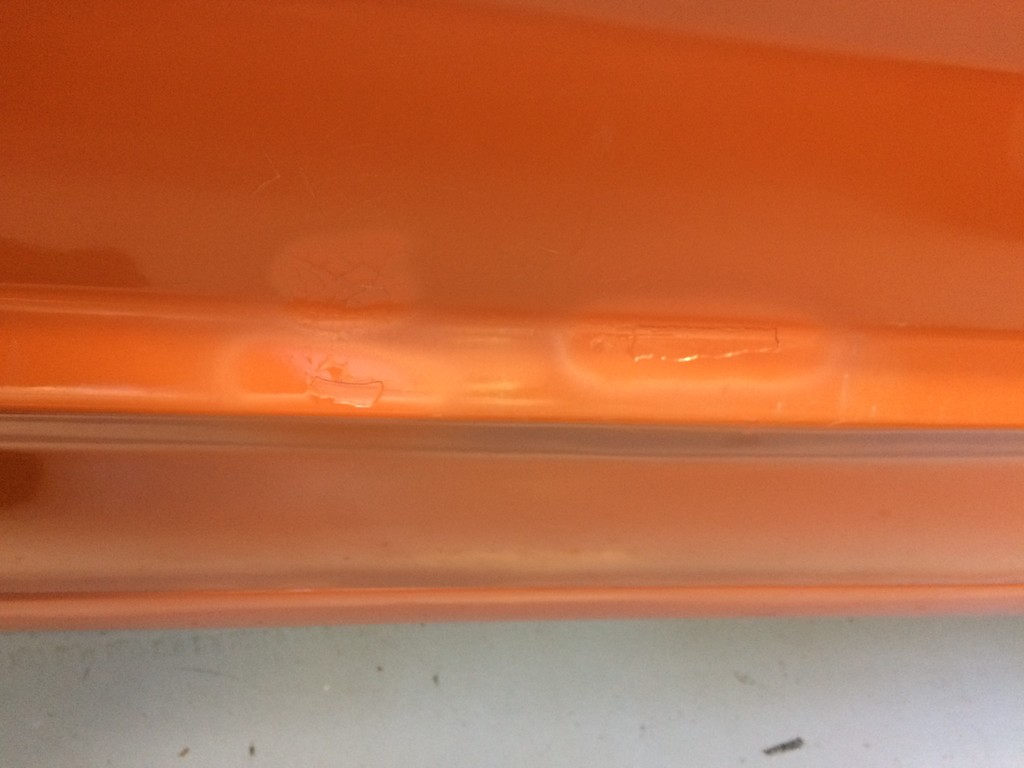
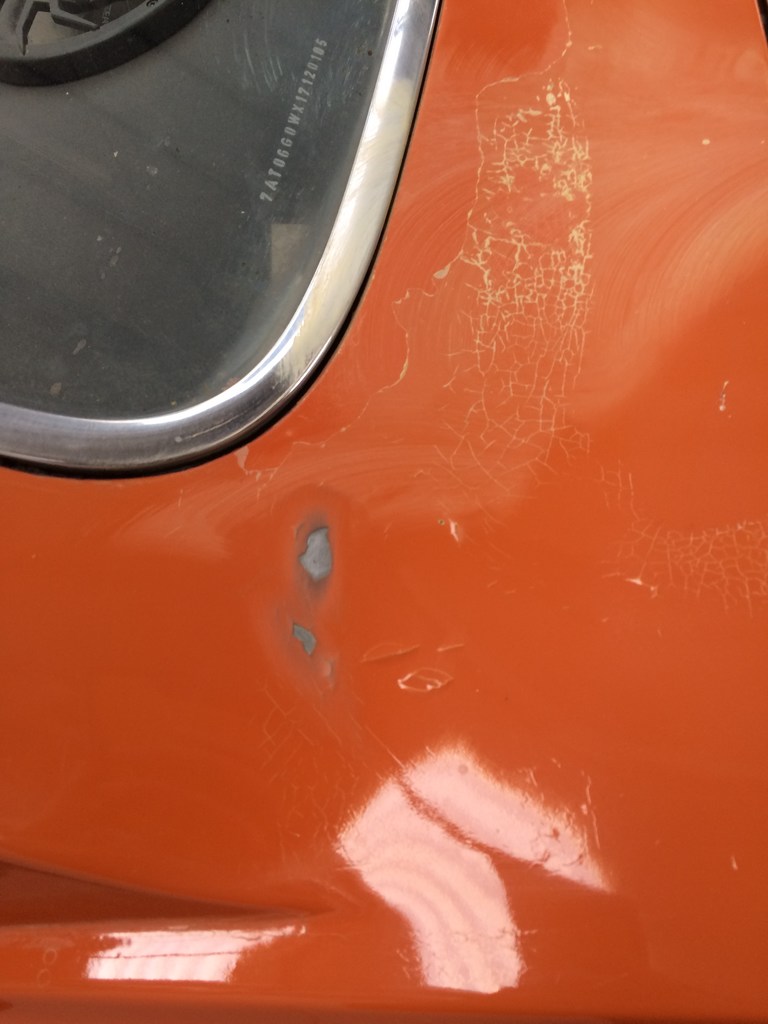
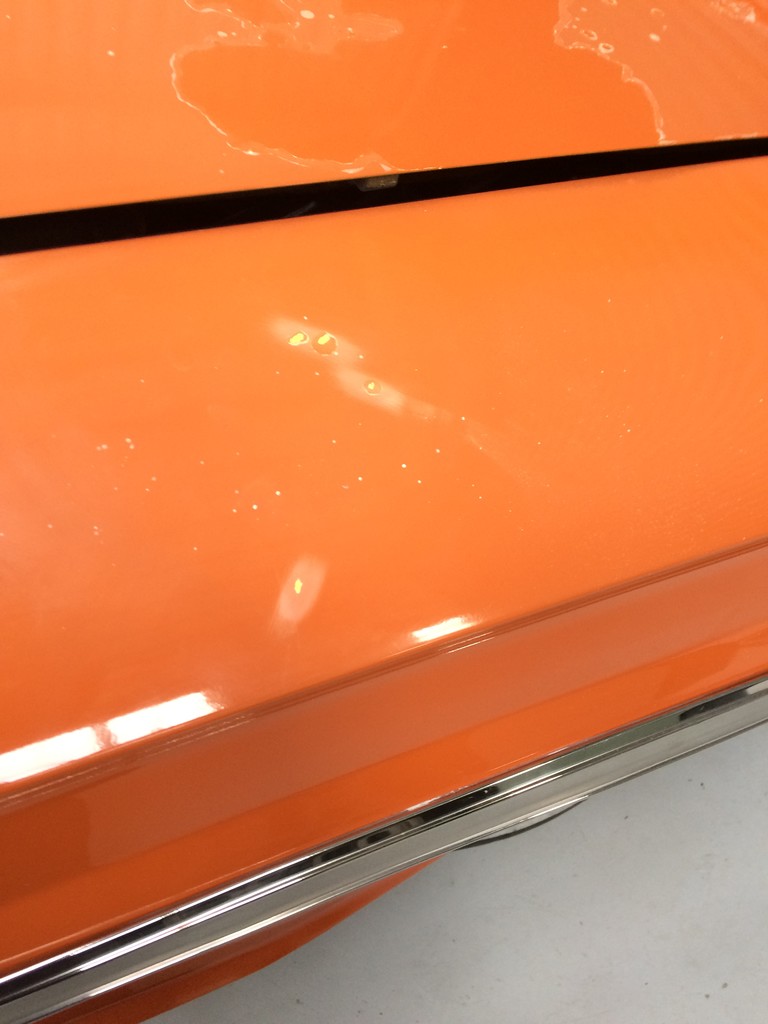
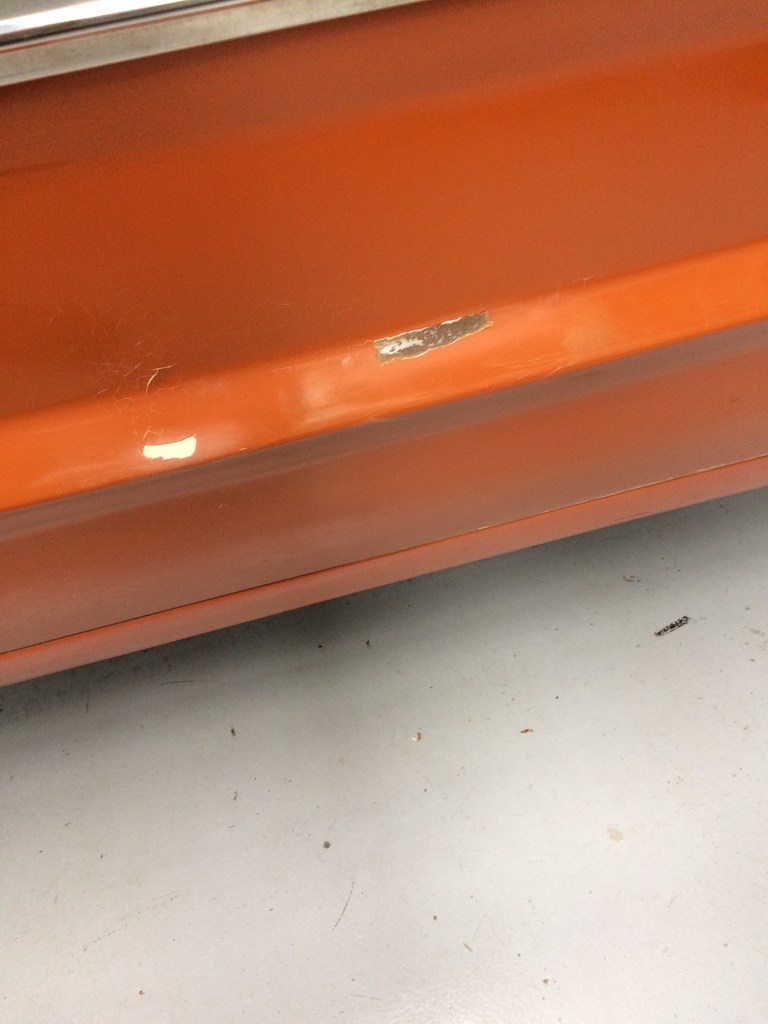
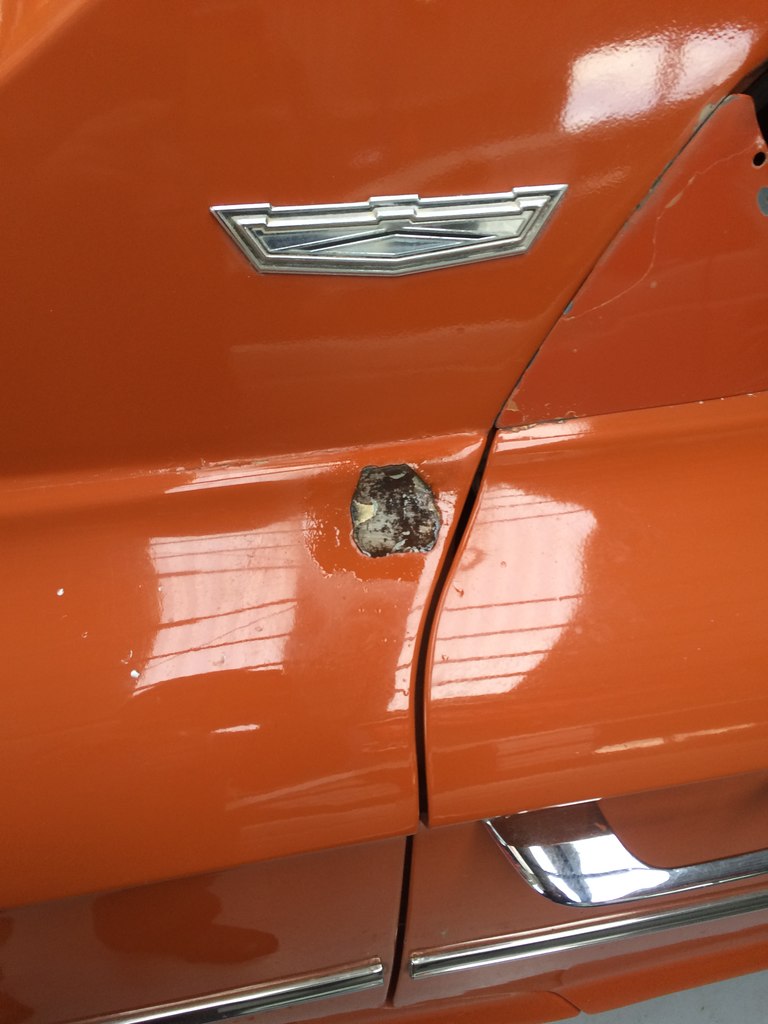
So with all of the engineer's remaining list down the next was to get him to inspect it and sign it off. but before that was done unfortunately when the car got blasted and painted a rookie error was done by me and them that the order i did the sills inside and underneath was done backwards so now i have sills that have patches in bare metal due to been hit with the blaster and the inside being covered in sand and water due to the weather on the way to the blasters. And some overspray of black in places on the car where we didn't mask between the inside of the back and front bumpers round the drivers door And the engine bay as i didn't cover any of that was in too much of a hurry of them blasting it that didn't even think about it. so gave the inside a good vacuum and blow out and wipe with a wet cloth then went over the car with thinners getting the black off then sanded some of the stone chips aswell this was a bad one by the rear passengers door front passengers door drivers side by the rear screen and these ones on the gaurd. plus the bits on the sills and a whole lot of other bits around the car. so used my fathers model spray gun from when he was a young lad to paint all these bits using the orange i had mixed up for the sills. also did all the gaurd edges to tidy them up. also didn't bother about adding any clear on it. then after that was done i gave the car a full cut and polish again. so now the paint is good from afar but far from good oh and i also installed my new master cylinder i bought a few months back
-
piazzanoob's 1964 ford Galaxie 500 seeedaan
piazzanoob replied to piazzanoob's topic in Project Discussion
Haha i know the feeling old labour of love so I guess it's not going to chrome then? Also ive got a compressor you could borrow if you want too it's just our old one as we upgraded to a bigger one. -
piazzanoob's 1964 ford Galaxie 500 seeedaan
piazzanoob replied to piazzanoob's topic in Project Discussion
Yeah definitely makes it so much harder keeping it on trying to paint on it and around it. Probably would pull engine + trans if I did it again too. Also wheres your update mate! -
piazzanoob's 1964 ford Galaxie 500 seeedaan
piazzanoob replied to piazzanoob's topic in Project Discussion
yeah im pretty happy with it. only advice i can give you is remove anything you don't want blasted and pay someone else to paint it as its a cunt of a job getting the paint in all the small places -
K-Trips 1982 Holden Commodore VH Discussion
piazzanoob replied to KKtrips's topic in Project Discussion
just lug it out haha then paint the whole engine bay and give the motor a spray can rebuild and job done its much more time consuming than that though -
piazzanoob's 1964 Ford Galaxie 500 seeeedaaan
piazzanoob replied to piazzanoob's topic in Projects and Build Ups
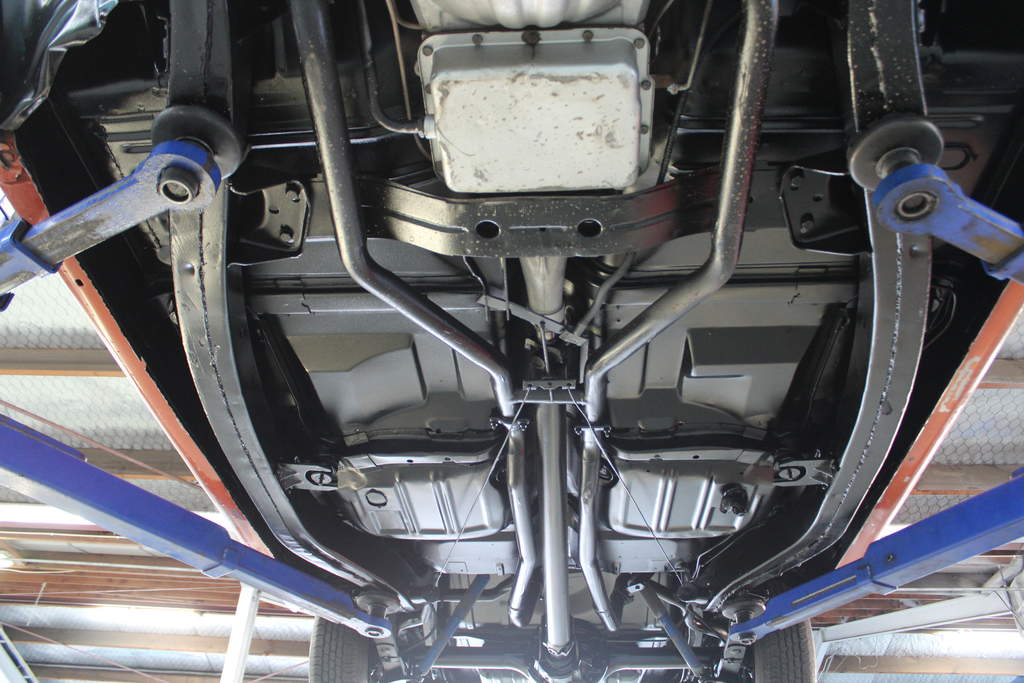
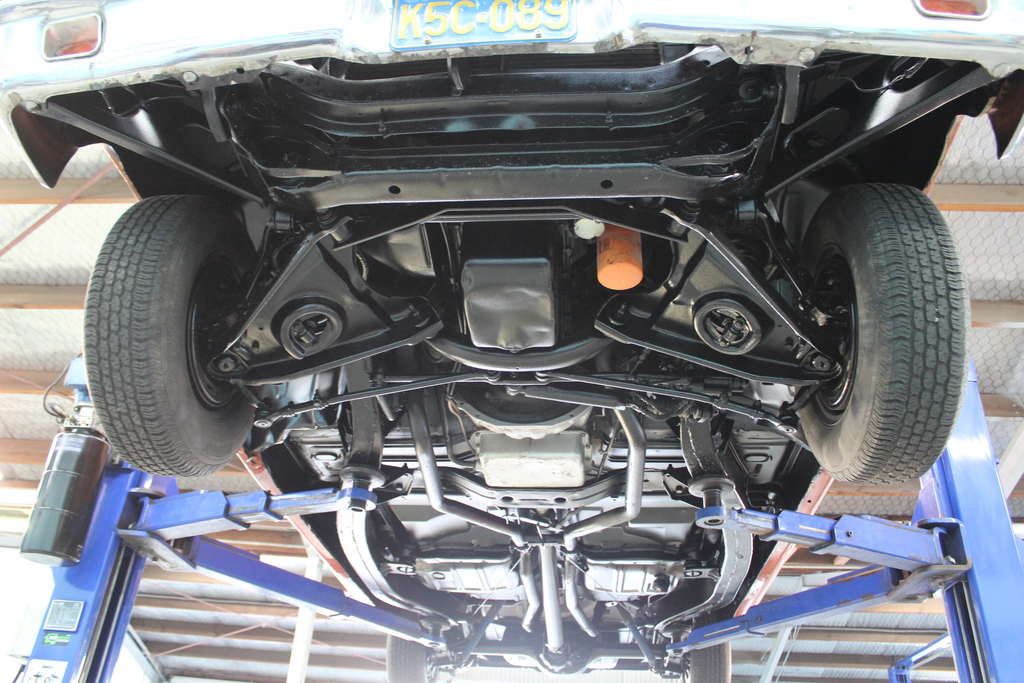
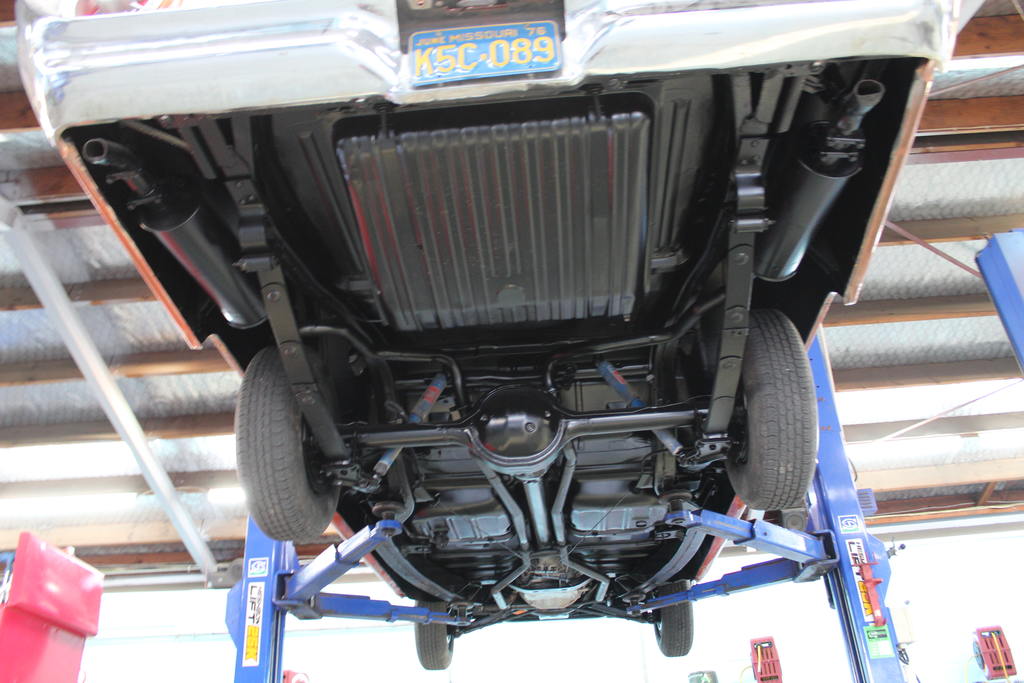
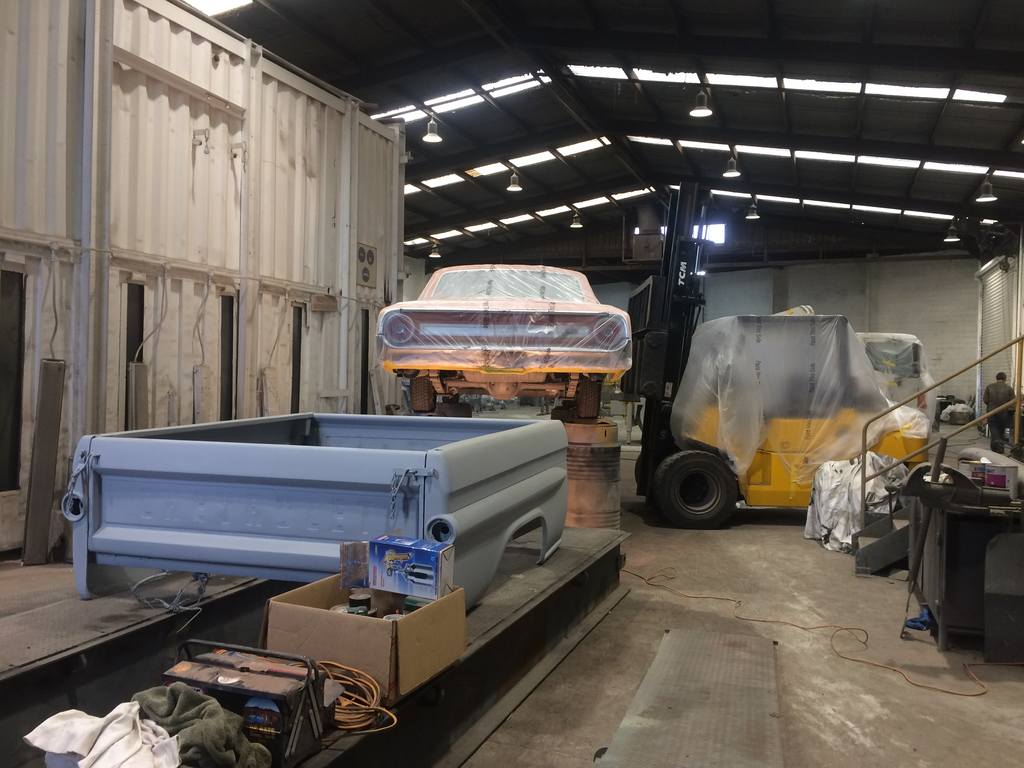
blast time! pulled the wet car cover off the car and drove it first thing in the morning to the blasters And much to the guys surprise i turned up as he figured due to the rain i was going to can it so before long i helped the boys put the car in the booth and set it on some stands so they could blast underneath and gave it a good mask up prior to it being blasted then this unfortunately this is a photo after blasting but you get the picture also masked up the trans so the nice newish paint on it wouldn't get blasted off also if i had of known that there stands were this low i would've bought down the ones i used when i painted the sills. but when i organised to bring it in he said he had some ramps that they used for vehicles but it turned out they were quite low so after about 3 hours of blasting we pulled it out of the booth. he did blast for about 2 hours then we gave it an inspection and found some areas missed. Im glad i didn't have to blast it myself with having a heavy amount of head protection and a breathing hose with a big hose with huge amount of air pressure and on your knees blasting with fuck all lighting. we then double team it to get it off the stands All of this was done with the supervision and coordination from me being that i didn't want the car damaged and knowing a thing or two about lifting and holding the car on stands. then once we got it off the stands and put the wheels back on so we could get it out of the blast booth i then set it back up on the forklift to paint underneath The plan was to have the car painted by me on his two post car hoist but due to it raining and being freshly blasted and clean we couldn't put it on it due to it being in a another workshop 50 meters away. and would get wet and dirty underneath. so forklift and 205 litre drums to make it look safe it was! I then set to work myself to save some money on the job by painting underneath myself took me about 3.5 hours to get a full cover of etch primer underneath due to using a standard bottom feed spray gun and so many areas to get into. everything pretty much underneath was blasted what a big job! oh and they painted a concrete pump truck (just not the truck cab) one of these quicker than i did the underneath haha but they had a big pressure pot sprayer. by this time it was the end of the day and he was happy enough to get his boys to put the top coat underneath which i supplied the paint for them to do tomorrow. so i left the old girl like this but on the ground overnight And those are the ramps they were going to use under the chevy truck bed so yeah there not high. I then collected the car two days later after them finishing it off one full day of painting it and half day of removing the masking. and a few hours of him running it on and off due to the paint on the exhaust smoking haha with it being coated with a total of 12 litres of paint to do the job with the finish product being this put it on the hoist and couldn't find anyway they had missed which is ace! also stinks real bad of the paint baking on the exhaust and underbody much like the inside after running it for a bit. And now i know for a next time just to get them to do the full job. such a physical and tiring and cunt of a job to do. best leave that one to the pros
- 77 replies
-
- 26
-
-
K-Trips 1982 Holden Commodore VH Discussion
piazzanoob replied to KKtrips's topic in Project Discussion
With getting it sandblasted make sure you give the the engine bay a good waterblast or clean prior to blasting as it tends to just spread it around causing not sticking paint issues later on oh and i would be inclined to pull those door cards off. me personally would pull the trans and engine out and they can brush blast the rest of the engine bay as it isn't much more work. just doing areas you want is quite hard if stuff is in the way and much more time consuming than just a nice easy full area blast. just my 2c but im sure the company you use will tell you all of this already. -
perhaps some center caps? I think they look great on the van just think its missing center caps
-
still waiting for a update...
-
piazzanoob's 1964 Ford Galaxie 500 seeeedaaan
piazzanoob replied to piazzanoob's topic in Projects and Build Ups
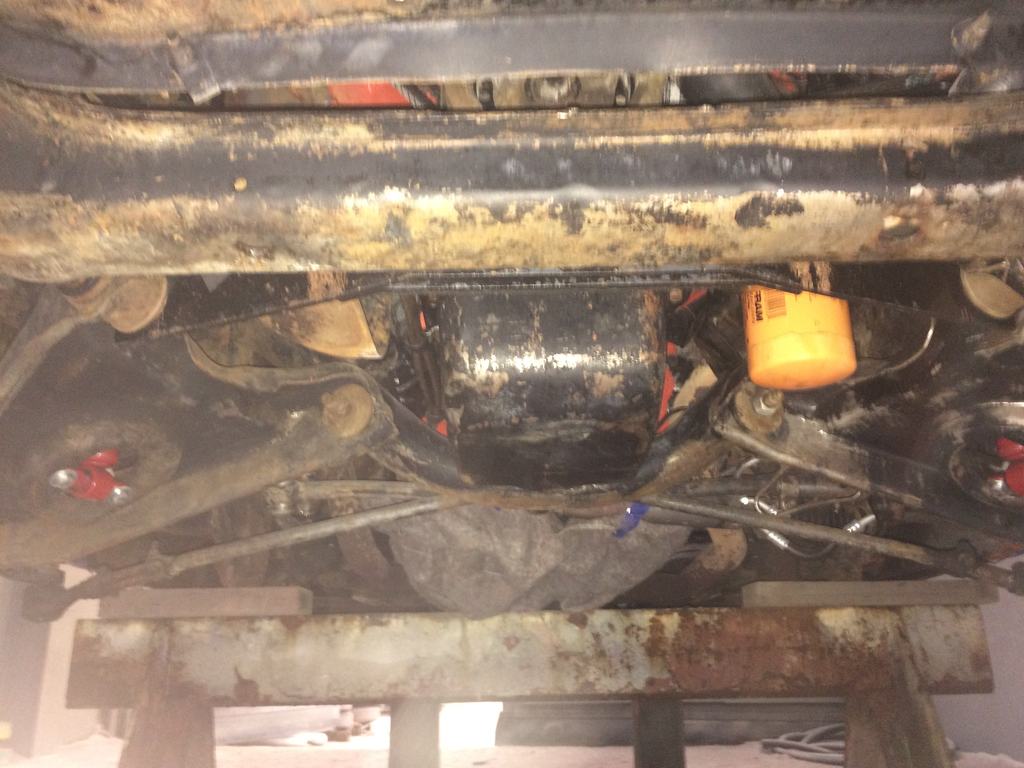
Before the car could be sent off for sand blasting and coating the underside. It needed to be clean underneath of any grease or oil due to the sandblaster spreading it around and causing the paint not to stick. so off i went for a drive to where i had access to a steam cleaner. oh wait and a forklift too so before any steam cleaning was done i put a steel i beam under the forklift mast so that if the forklift happen to lower itself it would rest on the steel beam. then sprayed some degreaser on the underside then steam cleaned it off the underside was actually still quite clean as i had already cleaned the underside last year for compliance. but still had some grease around the steering box which i removed as much as i could. now on its own wheels to be driven home. then once i got it home i put a waterproof car cover i had over it due to it staying outside for the night as it was going to the blasters first thing in the morning. And plus i knew it was going to rain that night. wasn't so keen on a swimming pool inside the car. so this cover is an extra large one. well not an american spec big one oh and yes it did rain quite heavy that night/morning.
- 77 replies
-
- 11
-
-
piazzanoob's 1964 ford Galaxie 500 seeedaan
piazzanoob replied to piazzanoob's topic in Project Discussion
cheers The battery that is in mine isnt old and have tested it. even mint on cold starts also volt gauge is same when hot or cold. and starter has been checked over and all cables new. so i know that side is okay but the carb in this thing is still shit and due for the bin and doesn't run all that well. plus ignition timing might need tweaking with but was waiting till setting up with new carb. also runs waay to hot gets up at 100 degrees when in traffic as factory finger cutting fan with no shroud doesn't do anything. got electric fan to fit plus @The Bronze put a reduction starter in his and said it helped alot. -
piazzanoob's 1964 ford Galaxie 500 seeedaan
piazzanoob replied to piazzanoob's topic in Project Discussion
yeah just painting that floor gave the inside a big night and day difference to what it was. mostly noticeable in the boot space. also the inside smell is night and day difference too -
Avenga's 1UZ V8 powered 1980 Avenger Wagon
piazzanoob replied to Avenga's topic in Project Discussion
hope your recovery is all going well. personally think painting the engine stuff the same colour as the body could look too much of the same colour like overdone but could also look great like alot of show cars have done. take a look at this build and see what you think of the red also wrinkle black or red could work or get the aluminum components vapour blasted. but whatever you end up doing will still look great as the current build is! -
I think they need to go around the full arch. as is it looks ATM as if there not made for that car etc personally not a fan of black flares on your car but i see the big wheel gap issue. Perhaps go up a profile in tyre size? also are these separate body and chassis? could possibly drop the body down some more with lower made body mounts.


.jpg.2a286b179d15a3d964d9c54968466ff7.jpg)
.jpg.728bb39bd7f6b4b1695857cbfc391e31.jpg)
.jpg.fd12b589c9eda16ac1435dbc239eaf62.jpg)
.jpg.1001291b37c49843dc003b271e131841.jpg)

.jpg.13917bdecf1b5994f7ad2e82a99541fa.jpg)
.jpg.6d0efcd0f9755dfe8b0ad03d32874527.jpg)
.jpg.ff0514eab506571891e6bbde2f76427b.jpg)
.jpg.3884999d1ff6f4b15171b52c3ea1a728.jpg)