
Leaderboard



Popular Content
Showing content with the highest reputation on 07/07/26 in all areas
-
The handle on the $26 knife I bought in 2014 on @h4nd recommendation cracked over the years so I finally got around to repairing it. It took way more time than the knife is worth but should last a good long time
 16 points
-
Completed a couple of engine sets of cam finger followers Theyre EN36A. Copper plated to mask. Remove the coating on the running surfaces, heat treat and carburize, then ream and hone the pivot bore. They have a small oil gallery up the middle of them that lines up the oil feed tube that theyre pivoting on to intermittently oil the cam lobe. Note: Im testing out Google Cloud 'Buckets' for image hosting. Hopefully that works in the UK. I havnt figured out how to size the images yet though.15 points
-
I Have been trundling up and down the road a bit to see what falls off / what sucks / etc. What falls off: Exhaust off the one hanger at the moment. So will add a few more. What sucks: Getting a cramp in my leg because the ethrottle pedal is on a stupid angle. So I shortened that, and now its mint. I'm getting a general idea of fuel economy now that it's driving nicely. Including cold start, I'm getting around 10.9 liters per 100km when leaving my driveway and doing a few laps up and down the road driving gently. Not great, not hugely awful I guess. Will probably see some improvements diddling the VVT, afr target and ignition timing a bit. I could probably get it to mid or low 9s with some effort... But then I'm gonna jam in a 5.3 final drive ratio so it's all going to turn to crap anyway haha. I'm a bit better prepared for the dyno this time, I've got a full set of each of these to try out: doing some testing where I'm just looking at air fuel ratios though, it looks like the absolute shortest ones might be the winner. I keep getting sidetracked from finishing my airboxes, but a big milestone is having proper baseplates finished, and figuring out how it can go together and still be easy to put together. I have finalized something where there will be two alloy base plates that sandwich together. One half will be fixed onto the throttles, which will help make the whole assembly rigid which is good. Then the other half will be bonded to the airbox. Both made out of 6mm plate but milled down so that the perimieter profile locates the box correctly, then it only needs a few studs and cap screws to hold the halves together. Big thanks to Stu who is cutting these for me, much appreciated. Fusion 360 is looking preeeeetty fancy with its rendering these days! Unfortunately the real life versions are unlikely to look quite as pretty. But I'll do my best. Also I've been working on some branding for my products
12 points
-
5 points
-
Could do a weekend meet / house warming mid August if people are keen? Likely a daytime thing with a BBQ followed by a cruise to Governor's Bay or similar.5 points
-
This is something I had wanted to do for a while, but only got around to it now. An on-car string rig. I hate paying for wheel alignments. It's expensive, and they always only ever do toe (as most cars only have toe adjustment), and at that it's a "good enough" within spec adjustment, never actually bang on. I've spent hundreds on alignments over the years. Ages ago I checked the alignment of the Marina using string lines, set up on axle stands. It worked, but it was a bit of a pain to work around, and needed to be reset if I made any adjustments. After all the work on the Alto, I wanted to check the alignment. I knew it was out; when I first put it together, it was hugely toed in, so with a quick eye-lignment I got it somewhat OK so it wasn't fighting me down the road now, but the steering wheel was off center. So with my 3D printer in hand, and using these Thingiverse files, I got printing. It did use more filament than expected, so I started to feed it scraps, hence the sweet multicolours. I also pressed in some generic M6 heat inserts, and after using a tap to clear any excess plastic pushed down under them, they worked great. I grabbed a bunch of 19mm square tube from Bunnings, along with a pair of 12mm 2m long tubes. After much cutting and drilling, I assembled it all One crucial thing that is needed is to have notches for the string lines in both of the horizontal tubes. These notches need to be in exactly the same place on both tubes, front and rear, so that the string creates a box and not a parallelogram To cut the notches, I used a pipe cutter, being careful not to actually cut the tube in half... To get the notches in the same place, I did all the notches on one tube first, measuring in from the end in three steps and then making the notches. I then placed the other tube on top of this one and used this to line up the pipe cutter tool. The black tape is only on one end of the tubes; this is so I know which way around they are a matching pair. I used some fishing line, with a loop on one end and weighed down with a nut on the other end. The string must be in the same notches front and rear. Once the string line height is set to run through the center of each wheel, it's time to measure side to side from each center cap to the string line and slide the tube side to side until it's even (The following photos were taken purely for demonstration; they may not be perfect) Once the strings are all even and everything is locked down (this will take a few goes around the car as one adjustment will upset another), then it's time to make the actual measurements from the front and rear edges of the wheels. Get the ruler as close as you can to the line without touching it, keep the ruler flat, and you know the string is straight when it goes through the same number on both edges of the ruler. Take note of these measurements. Do this for each wheel, and then you should have an idea of what's going on. In my case, I had 0.9mm toe-in (rear edge of wheel is closer to the string line than the front edge) on the LH side and 0.3mm toe-in on the RH side. Thankfully, despite the banana for a rear trailing arm before, the rear toe is bang on perfect, so the rear beam isn't bent or anything. As you can see above, I adjusted the front toe so that it's currently set at zero, which is within spec (-1 to +1mm). I'm going to see how it feels; I might go close to the recommended spec of -1mm total toe (0.5mm toe out per side) before trackday. I'm quite lucky with the current ride height in the front that I can adjust the toe with the car on the ground by reaching around the tyre After adjusting it, I can roll the car back and forth, with the string lines still attached, and I'm able to quickly check and adjust further if needed. I took the car for a quick road test after the alignment, and it's bang on now. The steering is straight, and the car tracks down the road nicely. $50-ish spent on filament, $65 on the tubes, some string and screws... to save me $100. It wouldn't make sense normally, but each car I use this on saves me $100, and I have two other cars here that I want to check the alignment on, so that's already $300 total. Plus, any tweaks I want to make for the Alto would be $100 each time. It pays for itself quickly.4 points
-
Typically, poking around got me into more trouble than expected. Now I had broken brakes on my plate too. Of course, ages ago, I rebuilt the front brakes, so they were all flashy and new, but the rears I decided to leave because at the time I didn't have new wheel bearings, and kinda didn't feel like opening that can of worms. Well, as it turns out, I had no rear brakes at all on my test drive the other day. Oops. The rear drums on these are a pain as the wheel bearings are pressed into the drum and you need to remove them from the spindle to remove the drum. I removed the cap, split pin and nut, but the drum was stuck fast This means the big slidey boy needs to come out again A couple of good firm tugs and off it came Revealing a very dirty, slightly damp-looking rear brake assembly. I gave it a quick hose down with brake cleaner to see what I was working with Between the dampness and the peeling paint on the backing plate, it led me to believe the cylinder has probably been leaking, although it didn't seem to be now. This little bit of metal also fell out when the drum came off. I had no idea what it was until later After taking plenty of reference shots, I removed the backing plate pins and unhooked the shoes from the wheel cylinder The wheel cylinder wasn't looking that hot once the boots were removed Unfortunately, the cylinder was completely seized. In my efforts to free it up, I actually broke one of the tabs off the end of the piston that locates the shoes. That's when I knew this was not going well. I had pre-emptively ordered a rebuild kit for the wheel cylinders anyway, so I wasn't worried if they needed that, but having broken that location tab off, it was back to the drawing board. I removed the cylinder, and with some bashing on the bench, it came apart Inside the bore was looking... not great. So I needed a new cylinder. Before ordering anything, I decided to whip the drum off the other side and check the cylinder there... This is what a nice dry brake assembly should look like Nope, no better; this one was completely seized too So, I had two useless cylinders and one set of shoes that were probably contaminated. Great. After much searching, I found that you can still order brand-new wheel cylinders and shoe-fitting kits from Europe. I ordered a pair, with some springs, and awaited their arrival. Whilst waiting for them to arrive, I replaced the wheel bearings in the drums. There is an inner and outer bearing, with a spacer between the two. You can see in that last photo that the inner spacer has been knocked out of place. This is needed so that you can actually hammer the bearings out. A couple of gentle taps with a punch generally pushes it aside. And then it's a case of just bashing on the bearing inner race with a punch. I start with the outer bearing first. When the bearing comes out, the inner sleeve usually will too. Keep track of which way it was fitted, as there is a flange in it. This gives heaps of space to bash out the inner bearing These are the inner bearings They do have a lip seal on both sides, so one side needs to be removed (the inner side). I was also annoyed to note there was almost no grease in it (I’ve since been told this is normal for a sealed bearing; it’s only meant to have about 30% grease in it – Mine aren’t sealed anymore, so should force out any grease they don’t need) I packed it with wheel bearing grease before fitting Using my press tools, with a handheld swing press (hammer), I knocked the bearing into place The outer bearing, a genuine Suzuki part, had no seals and barely any grease in it too Using the percussive press again, after fitting the spacer (surrounded in grease) and filling the bearing with grease, this bearing was fitted too I did this for both sides, and by this time, the new cylinders had been flung all the way from Europe to my doorstep, so on we continue. Because I'm that kind of weirdo, I had already ordered a new brake pipe to replace one I rounded off when I did the brake hoses, so that got fitted I gave the backing plate a quick tidy up, and fitted a new wheel cylinder The shoe fitting kit seems to fit similar models around the time This is what the shoe assembly looks like off the car, less the spring across the bottom. Up top is the auto adjuster, and down the left side is the hand brake lever These are the new springs needed Another thing I bought from Japan a while ago was a set of nice new Project µ drum shoes I started to strip the shoes The auto adjuster. The quadrant on the right is held against the toothed "wheel" by the spring, but can slide backwards, which allows it to ratchet into place I cleaned the handbrake lever up, and found where that little disc of metal that fell out of the drum came from It's meant to be pressed onto the stud to retain the lever. I used a small socket and hammer to tap this into place, leaving enough space for the lever to freely pivot. The new shoes came with a new pair of discs. I also cleaned up the adjuster and fitted that, with a new spring. I set this to its least expanded setting This spring fits one way, and they are different left to right. The big hook goes in the adjuster, the small hook in the shoe Mostly ready to fit. This was pointless though, as it was much easier to assemble the whole thing on the car, not the bench I started with the shoe that has the handbrake lever on it, and hooked it back on to the cable (with much pain; this part of the job sucks) And then it was a case of fitting the other shoe, and hooking the springs into place On the other side, evidence of someone else's bodges were present... Instead of the retaining disc, there were not one, but two E clips fitted I cleaned the lever up and moved it to the new shoe, with a proper retainer Which was then all refitted to the other side, along with a new cylinder. The drums went on next, with the new bearings and torqued to spec. It's a shame this is all you see of the new brakes now. I bled the system, checked for leaks, and that was the job done. A quick test drive shows the car pulls up straight, and honestly doesn't feel any different, but I guess working rear brakes would be more important at speed, particularly with a track day looming in a couple of months. I'm glad it's done now. On the plus side, the handbrake holds real well now. Parts Used Rear Wheel Bearing Inner - NSK 6205DDUC3 x2 Rear Wheel Bearing Outer - Suzuki 09262-20069 x2 Rear Wheel Cylinder - Delphi LW62099 x2 Rear Wheel Shoe Kit - TRW SFK242 Rear Shoe Set - Project Mu S881 Please note these parts are specific to my car and may vary. Please check before ordering.4 points
-
I think its only a problem if the driveshaft comes within 2 feet of the ground4 points
-
Got this going yesterday, after spending way too long making a new throttle linkage /pull this is the most ive made on stock cams - 125kw, the 129kw blue is uncorrected. the dyno over corrects a bit. so on a cold day the corrected power is lower than the corrected power on a hot day. so probably around the 127kw mark. which is pretty silly on the little stock cams. head also has pretty much stock exhaust side, i just zing'd a couple bumps off. still has the og toyota valve job. So looking good to do the same to big valve head
4 points
-
All fixed. The new clappers came with some sort of silver coating that looked a bit shit so I painted them then stuck them on. a day's fucking around with old calipers negated in about 10 minutes. Great.
3 points
-
Obviously you always find more rust as you dig, which is why most people won't dig because their car is "rust free" Yeah, right...... Anywho some of which I knew about, some I had suspicions, nothing too surprising though. Understand that I'm not going through this process twice, do it once so I can drive this for years to come Had my helper? If you call him that? Benefits of having a hoist at work Few late nights after work while the young fulla was with his mum trying to get shit done Stripped to bare naked chassis and waterblasted multiple times trying to get it clean
3 points
-
Bit of maintenance that has snowballed a bit. Went to put new seals in the front calipers, pistons are a bit fucked so now I'm buying new front brake calipers. Also had to make a new brake hard line. and the radiator is showing signs that it may be about to leak so it's getting a new radiator too. In other news, these parallel jaw pliers are the absolute undefeated champion of getting flare nuts undone. Fuck your snapon flare nut spanner, these bastards NEVER fail.
3 points
-
Ah soooo maybe I should do this to make myself accountable to see it through Here's my L200 I held out to find one worth buying This popped up on bookface I was like nah i won't get it some twat will beat me to it Stuff it sent the lady my number, "ring me, I'm seriously interested " Well hot diggity dang, it was some back n forth talking cause on bookface no one and I mean NO ONE is a genuine buyer on old mitsis unless you're some sick person like myself Eventually they realized bookface is full of f**kwits and rang me, "come and get it" And here we have it.... Deregistered 1983 L200 sport with a welside, one owner [local business] for one year then the second owner till he deceased around 2006 and it falls to my hands. Paid more then it's worth but I challenge anyone to find a better one I found the canopy locally off another tidy green one that had sold recently and buyer didn't want it. Rookie
2 points
-
If they killed 50% of the volume, but kept same sort of sound it would be good. The exhaust is fairly good now, but the intake is still ear bleedingly loud.2 points
-
Technically Riverside was a rental too.......2 points
-
Came out good. I did the exact same to a putty knife that i hammered into a seam and split thr plastic handle off, luuuuuuvly 120year old native wood handle on it now lol2 points
-
2 points
-
Immediately after the first drive, in typical fashion, it was time to pull the car to bits again. This time it was to replace the perished and torn rear trailing arm bushes. These needed to be replaced for the upcoming WOF. I had ordered a set of Monster Sport bushes for just this occasion. To make my life easier, I lucked out and managed to grab a pair of decent-looking arms from a pretty sad-looking HA11S at Pick A Part, This allowed me to refurbish the arms without having to remove them from the car first. This, as it turns out, was very fortuitous - More so since I actually intended to swap these stock arms into the car as they are and then refurbish the original ones once removed... I ended up deciding against that idea and just refurbishing these arms, as the bushes in them weren't looking too hot anyway. Strangely, I noticed that the forward bush was different between the two arms. Not sure if this means one was replaced in the past The Monster Sport kit comes with three new bushes per arm I got sick of pressing bushes in and out using various old bits of scrap, so finally opened my wallet and bought a press tool set, and I'll tell you what, it made this job a doddle. You pick the right inner and outer cups and out the bush comes The slightly bigger bushes on the other end of the arm required a different pair Which left me with a nice empty arm, ready to press some bushes into The new bushes are meant to be a firmer rubber compound, and they look very similar to the stock bushes. The rear bushes seem to be pretty universal for orientation, but I put the red marking to the top, just as a matter of course. The front bushes need to be fitted in the same orientation as they are removed A little CRC on the outside of the bush to help it slip in, and with the new tools, once again, it all went smoothly Nice new bushes Once all the bushes were replaced, I wire-brushed the arms and scuffed them up for a quick paint Once the arms were dry, it was time to remove the old ones on the car and swap them over. I jacked the back of the car up and supported it on axle stands, making sure to give myself enough space on the front trailing arm mount to actually be able to remove the bolt/arm safely. And as a reminder, this is why I'm doing this The first step is to support the rear beam and remove the lower shock bolt, as this blocks access to the forward, rear bushing bolt And then it's just a case of simply removing the three bolts, and the arm comes right out. Not much to see, so here it is after I have done the reverse, and installed the arm and bolts again Because the bolts go through rubber bushes, it's important to jack the beam up as close to ride height as possible, before torquing the nuts. So, why was it fortuitous that I didn't reuse the arms off the car? Because the RH side one is a banana So that's good, I have nice upgraded bushes, and an arm that's actually straight. No wonder the bushes were torn; they were doing their best in a bad situation. Of course, because it's me, this wasn't the end of it... I made the mistake of noticing that one of my rear drums was sticking. So I decided to have a "quick look". I wish I didn't (but I'm glad I did) To be continued.2 points
-
Is there gonna be DRATS? We could go on a cruise to the Auckland CBD and get fined for accidentally driving in a lane that's only open at certain times.
2 points
-
@Truenotchgive this man a sponsership2 points
-
I did a little more adjusting today and have got it running really nicely now. It’s got a nice smooth idle and pulls away really clean. stoked. Here are some photos of it in various carparks today displaying how badly the front end needs to meet my grinder.
2 points
-
So being that the rego lapsed it obviously needs a revin and repair cert for the rust patches This is where the rabbit hole begins ..... To do the rust in the cab it's easier to pull the cab off chassis so off with the panels, tray, glass, doors etc. Even had the young fulla on the tools Took it down to work to continue with the strip down and waterblast
2 points
-
Few pics from when I got it. Did spot a few areas of rust as these all have it , but this was not bad for one of these
2 points
-
I have snuck an hour or so here and there to fiddle a wee bit, ie removed and labelled all of the loom stuff still attached and took off the massive intake. This morning I printed a plate to bolt onto the intake ports and cover the holes. Forgot to take a pic tho. Also today I modded the shift tower to be 90 deg rotated, and now points to the front of the engine. This was pretty trivial IRL, the forwards/backwards lever was held on the shaft by a roll pin inside another roll pin, so all I had to do was knock those out and drill another hole 90deg around. Then I chopped off the pivot for the left/right lever and fabricated a new one that is held by the tower bolts; Ill obviously need to set up a new cable holder bracket but that should be easy. Some mental gymnastics took place for all this and one part of that is that now the lever directions are flipped, which means the shifter will work as per the normal pattern but spun 180deg with the cables poking out what will now be the back, so it can go in the cabin probably unmodified. It will probably still need some loving but in principle that is sorted.
2 points
-
Oh yeah the oil filter manifold thingy. This holds the oil filter as well as the lines to the oil cooler. I gave that a proper clean out too of all its gross old oil and gasket'd it into its happy home. It probably makes sense to protect that oil filter connection too... with an oil filter. And I might as well get some other bits while I'm out... I also had a sparky mate drop by with a bunch of old office LED lighting It's soo much better and brighter than those old fluorescents! Really lights up how messy everything is, though... Something that caught my eye during disassembly is a coolant pipe that didn't look so great at first glance. I wanted to get a better idea of things though, so I gave it a clean and put it in evaporust. Yeaah.... it's toast... there's no just building up some weld or moving the bead further down. It seems like a simple part to source/build though. A problem for another day. On to the rocker cover. It's a little manky and a fair amount of the paint has flaked off towards the rear of it, so I'd like to zhuzh it up. The SIRIUS sticker is not in amazing condition, and it doesn't really spark joy in me, but I decided to gently lift it just in case... maybe I'll stick it somewhere out of the way. The area behind it is flat, fortunately, so there won't be a strange divot. I briefly attacked the cover with mechanical means to remove the paint before busting out the stripper. It took 2 and a bit coatings to remove the bulk of the paint. It turns out that heat-resistant enamel paint is really good at resisting heat from a hot air gun, who knew? Then it's just a bit of light sanding to get rid of the straggling bits. I'm probably being a bit anal here as it doesn't have to be a perfect strip. I'm going to be wrinkle painting it. The instructions (when you find them) are funny about whether it wants primer or not. I decided to use some engine enamel primer just in case... I can always strip it again if things suck. Figuring it's probably easiest to remove the paint now rather than later, I bristle'd the paint off the lettering when it had become touch dry, then attacked it the next day with sandpaper from 320 through to 5000 grit. I also polished it with a wheel but I don't think it's actually noticable, won't bother again. Unfortunately this is when I remembered that uncured engine enamel is chemical sensitive to wax and grease remover... But it's okay, I'll be using wrinkle paint ;). I just touched up the primer and sent it. The wrinkle paint I got has mixed reviews on SCA, as many things do. Most people are super happy with the effect it gives. Quite a few, however, report that it sucks and doesn't wrinkle. Some people attack it with a heat gun to get it started... not just this product, but others I found online, too. And if you search DIY wrinkle paint you can see some horrible jobs from people who took this path. The instructions are utterly unprovided for the product, you have to search for the data sheet online. I decided to stick to them once I found them, and they say 1. lay it super thicc 2. it won't start wrinkling for hours 3. it can take up to a full day to finish wrinkling 4. you can use a heat gun if you absolutely must So I laid three thicc coats to the rocker cover, and laid thicc sweet words to girlface to help offset any potential anger once she realised I'd moved it inside the warm house to dry while we were out. You can see there's no wrinkling going on, maybe some orange peel at best. Fortunately, a few hours later when we got home... The rocker cover and I were then kicked out of the house and into the garage. I razor bladed off the lettering (first with a metal one, then realised my error and moved to plastic) and let it finish its journey in that cold (but not dark) place. At the same time, I was preparing my 'new' oil pan. The original was quite beat up and had some worryingly sharp bends, and the pickup was also oddly bent at the bottom, so I'd put out the call for a new set. I think I should have asked for more photos though as what I received was marginally better. But still better. Forgot to take pix but the pickup mesh holder was also bent slightly; I used gentle vise movements to get it back into a more reasonable shape, and cleaned the absolute heck out of it. Here's the new pan after scuffing and W&G remover, which also indicated that the paint is also uncured engine enamel. Makes things easier, I guess. This one dried in the garage, with the first few hours babysat by a heater. Then back inside for curing... :3 Technically this doesn't have to happen, engine operation should cure the part as well, but I'd like to have some level of hardness during reassembly. I just had to keep moving it around every 5-10 minutes with a careful eye on my temperature gun. I think it worked. I then (picturelessly) enfitted the pickup tube and its permatex'd gasket, cleaned the sump bolts in ultrasonic petrol, and got the sump on the engine. It came with a paper gasket but there seems to be mixed information about how to seal the sump. Some sources say just to use gasket maker, others to use gasket maker with the paper gasket (including mitsi). I could have used the liquid permatex but ended up just applying a thin smear of permatex ultra grey to both sides of the paper gasket like one version of the manual said. If this was a bad move and it fails, it doesn't seem like it'd be hard to redo using another method. I then got all excited and re-polished the rocker cover lettering (the wrinkle came up fantastic), attached the new rubber gasket, applied ultra grey in the corners, got the final piece of the front cover attached and made me a long block <32 points
-
So a couple of weeks before christmas i was having a yarn with a guy who lives down the road from me, he had just bought a new bike, a very nice m109r, and i asked what was the gameplan for his old bike. I hadn't seen his old bike in ages and was convinced it was an early 2000s 750 katana, but all i really remembered was a yellow suzuki. I didn't go any further with it than expressing some interest, until he saw my neighbour and passed on the message i need to go see him. So i did. And i was met with this. Well yeah ok lets talk. Turns out has had cluth issues which started with it slipping, then he replaced the clutch but it would never fully engage and would creep forward at idle with the clutch in. Tyres are old and borderline, but the funniest bit, is that we couldn't start it because last time he tried, the fuel tap started leaking everywhere. Reg on hold since 2022. So we had a beer and a yarn, i offered a lowball price and he accepted. Then came 2 weeks of trying to sell random falcon parts to fund the idea. Long story short i ended up selling a full set of seats to one guy yesterday, and got over double of what the bike was gonna cost. So that makes the bike free. Wife does not understand basic maths when i explained this fact this morning... as i walked down the road to pay for and bring bike home. 350 meters is a long way to push a 240kg bike apparently, at least for my lazy arse. But pushed it home and looked over the bike again. Old mate had found the box and the broken part of the mount so that will be an easy fix. Will drill some holes and put a rod inside it, plugweld and repaint. Nice and easy fix.
1 point
-
Rad pic! Thanks Markku.1 point
-
just incase you haven't seen this yet @Roman1 point
-
Wonder if it's an age thing as Suzuki still fitted a grease cap to them, the later stuff I've worked on just has the bearing seal and the axle nut without any extra covers or anything. Either way, keep the updates coming, it's a sweet little car!1 point
-
What's more interesting is that the manual says both bearings should be open to the center, but both should have seals on the outside. Yet the genuine Suzuki bearing didn't have any seals. The old bearing had open plastic cages and no seals too.
1 point
-
That's the deal with taper roller too, they yeet excess grease into the centre of the hub and into the grease cap, if you fully pack the hub and cap you'll likely have a bad time. It's interesting to me that yours doesn't run the seals in the middle, last few I've done have been fully sealed (Mercedes rear and Polaris UTV)1 point
-
Interesting, so why do you pack wheel bearings? Regardless, the bearings aren't sealed, so I'm sure they will yeet any grease they don't need1 point
-
Only meant to be like 25-30% full if it's going to be turned fast, it's to stop the grease being churned which adds friction and heat leading to early failure. SKF etc have guides and calculators etc online.1 point
-
Nah the tuner could definitely done better 3 years ago. My mistake was slapping that engine together knowing nothing about it I just wanted to be there on day even if it smoked heaps..... it just smoked its bearings instead. I appear to be able to screw a new engine together better than a free one and can tune way better thanks to "HP Academy" * 😁 ive got a bit of coin in this engine. *non sponsored plug. Seriously its helped heaps1 point
-
Sorry guys been a bit MIA - thanks everyone for the advice, @RUNAMUCK I'll flick you a message1 point
-
Bracing for the top end is all done ready to bolt in place and should tighten it all up. On to the pivot points.
1 point
-
FG Barra has a factory rear sump. FYI.1 point
-
I would start by draining the oil, and replacing it with fresh stuff. After sitting so long, any impurities in the oil will have dropped put of suspension. (As may have some of the additives) Dump the oil, and replace it with new. As said above, you could crank it with the plugs out, However, if it's a Small block mopar (313/318 poly engine) you can remove the distributor, slide out the oil pump drive, and drive the pump with a drill using a special hex drive tool. (You're in Christchurch no? I can land you one if you like) If it's a B series engine, you can do the same, but the oil pump spindle backwards, so you need to run the drill backwards. Run the pump with the rocker covers off, and see that there's oil getting to the valve gear. Once your oil light is off, (those pumps move an unholy amount of oil even at drill soeed) Then refit the oil pump drive, and the dizzy. While the valve covers are off, you can find TDC. It pays to reinstall the dizzy about 10° advanced for a faster first fire. I would Run a hose from the fuel pump to a gas can. The fuel in the tank will be mud now. Clean the plugs, and check the points. Flick me a message if you wanna grab that tool.1 point
-
Chipping away at this. Had picked up some sort of cold/bug so that was an excuse enough to stay indoors and tinker on the bike. I wanted to sort the impeller out first. If my repair idea didn't work out I could order a new alloy impeller from Ralf. I took photos as I went through the process and instead of posting them all up I made a montage on the tablet instead. Hopefully this works. Excuse my messy handwriting... So I'm happy to have sorted that out and have a working 650 impeller again! I've since fitted it up on the cam and although the camshaft thread is a bit messy it holds the required torque. I'll use a little blue locktite on the nut just to be sure and give it a whirl. Next job was the fuel tanks. I have two to suit the bike, three if I include the rustier looking (but actually very very solid inside) one from the cx400. The white 650 tank and the black one both have broken off tabs that locate the front edge of the seat. First job was to purge out any remaining traces of petrol fumes. We had to pop to town that morning for shopping and pick up some engine paint so the Imp got chosen. This meant its exhaust was hot and free from water vapour when we got back. I fitted some old stainless tube bends into its turned down exhaust tips and it was ideal for purging two tanks at once. Honda Goldwing purging Honda cxs... I cut some 3mm stainless to shape, cleaned off the paint from the tanks and welded the new tabs in place. Nice and solid but can still be tweaked if needed. The white tank had been replaced for use by the black tank because it was leaking through some tiny rust holes at the lowest point. It has been 'sealed' at some point in its life but here we are. I gave it a prod with the Dremel... While I was working on this tank Hannah was attending her CM200T tank... Cut the rust out and exposed the yuckiness from tank sealer that had down a good job of creating a little rusty cave. The problem with using tank sealer without getting all the loose rust out. Cleaned it out.. Painted with KBS rust seal (por15 clone) Following day I welded in new steel. Mig welds on thin steel never instagram sexy.. But who cares when its getting flap disked back.. So the tanks are repaired. I need to get some colour matched paint at some point. For now the repairs are painted black. Speaking of black paint. The starter motor looked a bit rusty and messy so I thought I'd just quickly pop it out.. I'll just quickly clean it, paint it then pop it back in. A couple of hours later... So that escalated a bit then. But i did paint the starter and it looks much prettier.. To be fair to myself I knew that cleaning up and painting the engine whilst still in the frame was never going to be the easiest way or give a good result. I'd picked up a load of VHT engine paint currently going out on clearance at Repco. $10 a can! Cheaper than budget spec paint from the Warehouse! So the bike got smaller and the frame was lightly sanded back where it mattered. Its in excellent condition with no rust. Here it is ready for paint. Epoxy zinc paint for protection and make it all a bit neater was the plan. Now much nicer. I chose satin black as its my go to shade for dusty summers. I've been having fun reassembling it, cleaning and painting various bits as I go. The engines original black paint was in fairly good condition but for the light corrosion on the sides and top. I've cleaned and wired brushed it back. It's now masked it and ready for a tarting up with 'new engine in a can'...1 point
-
Has been too cold and miserable out in the shed lately so yesterday i brought my trays of parts inside and got back into the carbs. All back together as a set now, no major issues, and only one minor one. Well two really as 2 of the 4 float needles had stuck springs. Managed to grab the pin with 'definitely not the wives' toenail clippers, and with a bit of twisting back and forth eventually cleaned all the rust and smout out of them. Set the floats to 15mm as per the jet kit instructions. Used the 120 jets from the kit and set the jet needles on the second slot to start with like the cheatsheet suggests as a starting point.
1 point
-
So we went back to look at the local cx sports on offer. When we arrived he made us some lovely strong coffee. Then we wheeled the 650 out into the sun and I had a better look over it. I asked him how set he was on prices and he told me he'd been thinking about this for while since we last visited. He'd decided he was going to give me the bikes on the basis that he could see I was going to be the ideal person to fix the potential tricky camshaft/water pump/weak oil control ring issues/anything else from being laid up since 2017. I was blown away by this and told him I would do the 650 proud. I still insisted we pay him some money anyway and that we did. He's since been around to visit us for coffee and is a true gentleman. He's now keeping and fixing up the GL500 Silverwing he'd been thinking of selling. I'll be more than happy to help him if needed. So we loaded the two sports onto my cousins trailer we still had use of, filled the van with boxes of spare parts he'd stashed away and carefully drove home - elated with the exciting prospect of having both a lovely original cx650E to restore and a cx400s to potentially use as the basis of a custom build. A lovely sunny afternoon to arrive home with new projects.. Unloaded them inside and that evening I could not resist but spend a few hours cleaning the 650 before snapping some pics. Its come up lovely and I'm looking forward to spending more time detailing it once its fixed and running ok. These models have a great proportions and fantastic 80's Honda style. It come with a black tank that he'd bought because the original white tank has some holes along the seam. He'd got the side panels too. Fork stanchions came up good after a polish.. Some books he gave us which will come in very handy!... A few bikinis.. There's a full set of panels on the rusty cx400 that I could re-paint for the 650. I have some colour schemes in mind. The 400 is complete but he'd stripped many of the parts off and boxed them up. The rust is localised to one area and luckily there's enough solid metal on the back that I wont lose any datum points when it comes to repairing it. The workshop was getting a bit 'bikey'.... So the 650 will be left alone until I clear out the other bikes. Starting with the 400 which I preceded to strip right down. But before removing the engine/forks/wheels I had to get these pics for future brain storming. Its really easy to see why these bikes, especially the single shock prolink models are so popular for customising. Such a neat clean powertrain setup, especially with the shaft drive. The 400 was stripped bare, parts given a quick clean as I went, then labelled and boxed up. We now had so many boxed up bike parts scattered about, along with many tanks etc that new storage was needed. So we bought some timber and built shelves into the beach bike/lawnmower shed... That original cx500 was robbed of a few more parts and I'll now pass it on to whoever might need it. So now I'm working at stripping the 400 engine down. I need the camshaft for the 500 engine and there's other bits that will be saved as spares. It appears to be in good condition inside.. I've made a few tools as I needed them plus Graham had brought around a clutch lock ring tool when he visited for coffee. Once I have finished stripping and boxing the 400 engine I'll get started on the 650 repairs. What I do know so far is that the water pump impeller splines have seen better days... Here's a good 500 impeller for comparison.. I can't just simply swap in a 500 impeller because the 650 unit is taller to move more water.. Sadly replacements are hard to come by. Before I commit to buying one the the beautifully machined alloy jobs available from Ralf in Germany I'll have a go at a repair I have in mind. I have yet to check the state of the camshaft but Graham had told me he thinks the thread is iffy. Again, I have some ideas about fixing that if needed. Its all part of the fun and I'll certainly post up how I get on, better or worse.1 point
-
Oh no. However did that happen....
1 point
-
Can fit 2 carb bodies in a 3l bath. Just. Should have got one of these years ago.... Only using a bit of dishwashing liquid and set at 45c. Seems to be working.
1 point
-
Old mate just rang me. 'Hey are you home? I am outside the gate with another packrack i found in the shed for bike'. You are damned right i am home! Had a couple of beers and showed him the progress so far. What a good way to end the day.1 point
-
First up lets look at the fuel leak. Turned fuel on, started dripping out the front of the tap. Cool as. Turn tap off, shit now it is really leaking. Quickly took the tank off and drained it into the lawnmower. Pulled the petcock apart and poos, no orings, it is a proper seal. Tank is in pretty good nic though. Ok next problem. The clutch. Can't test its operation with no fuel and a flat battery. But lets have a look at what we can see. Nearly no fluid, and a perished line, not a good start. Lets add some dot4 and see how it feels.... NO. I am not touching that screw today!
1 point
-
1 point
-
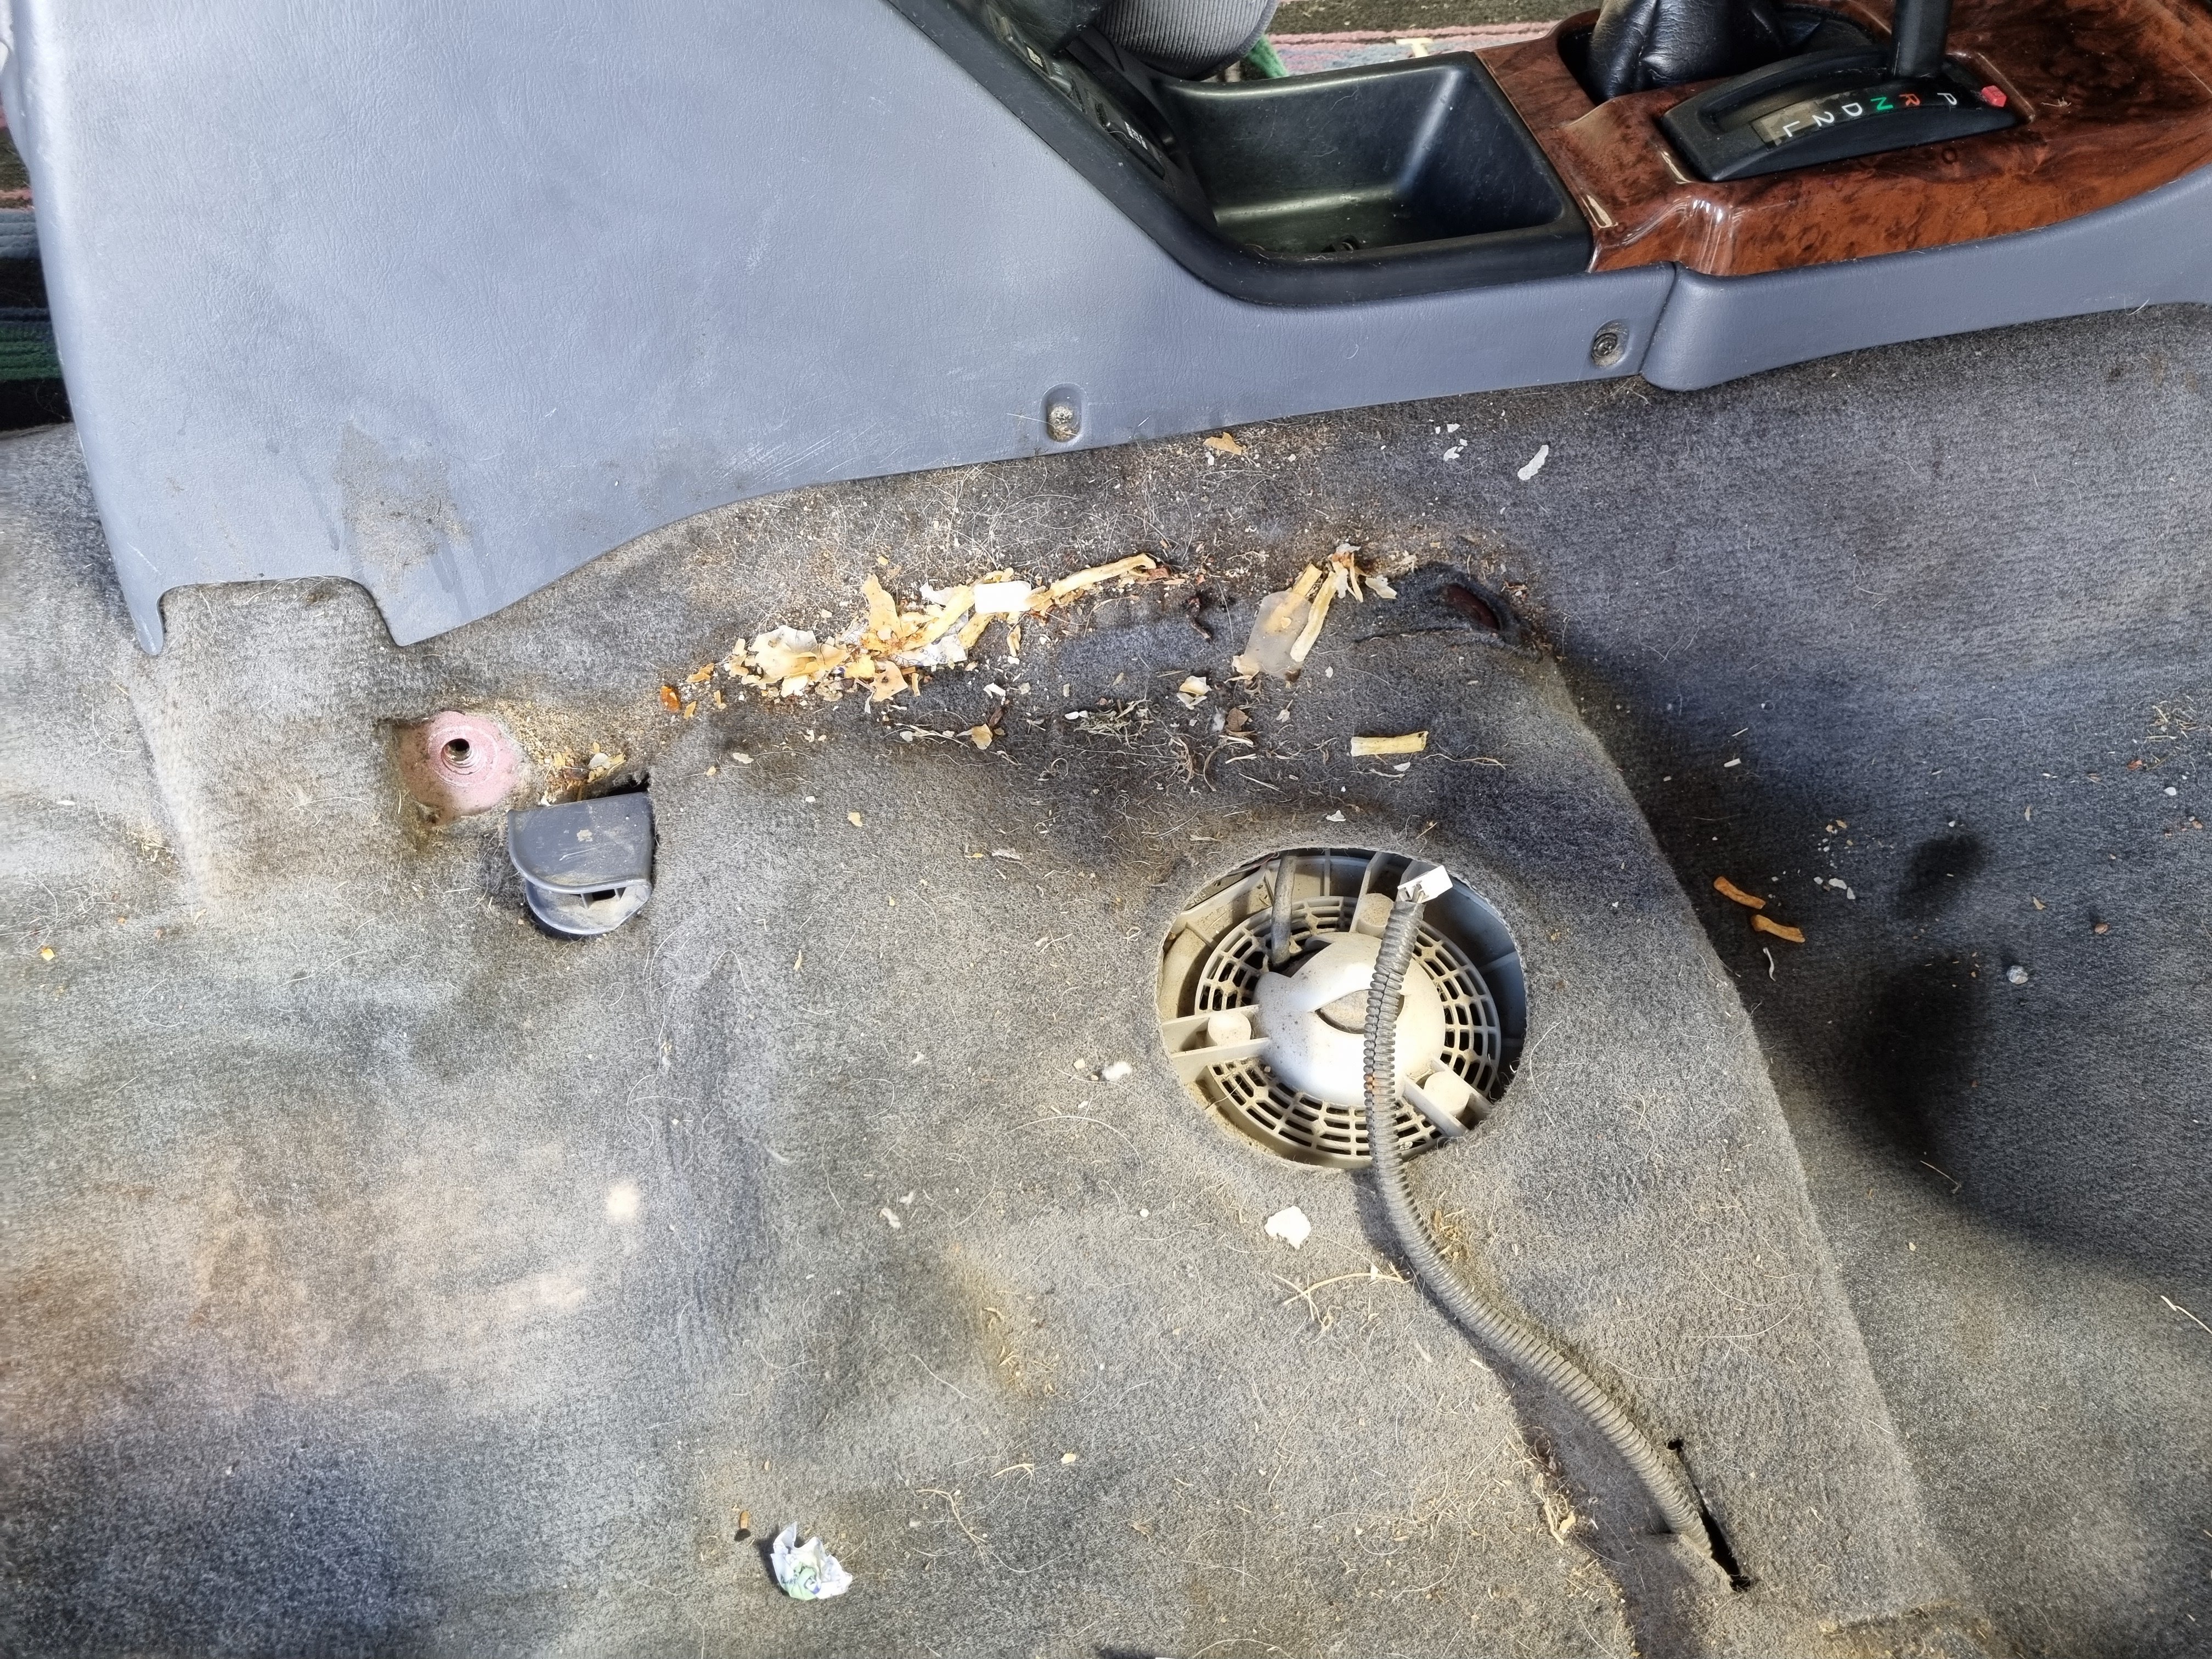
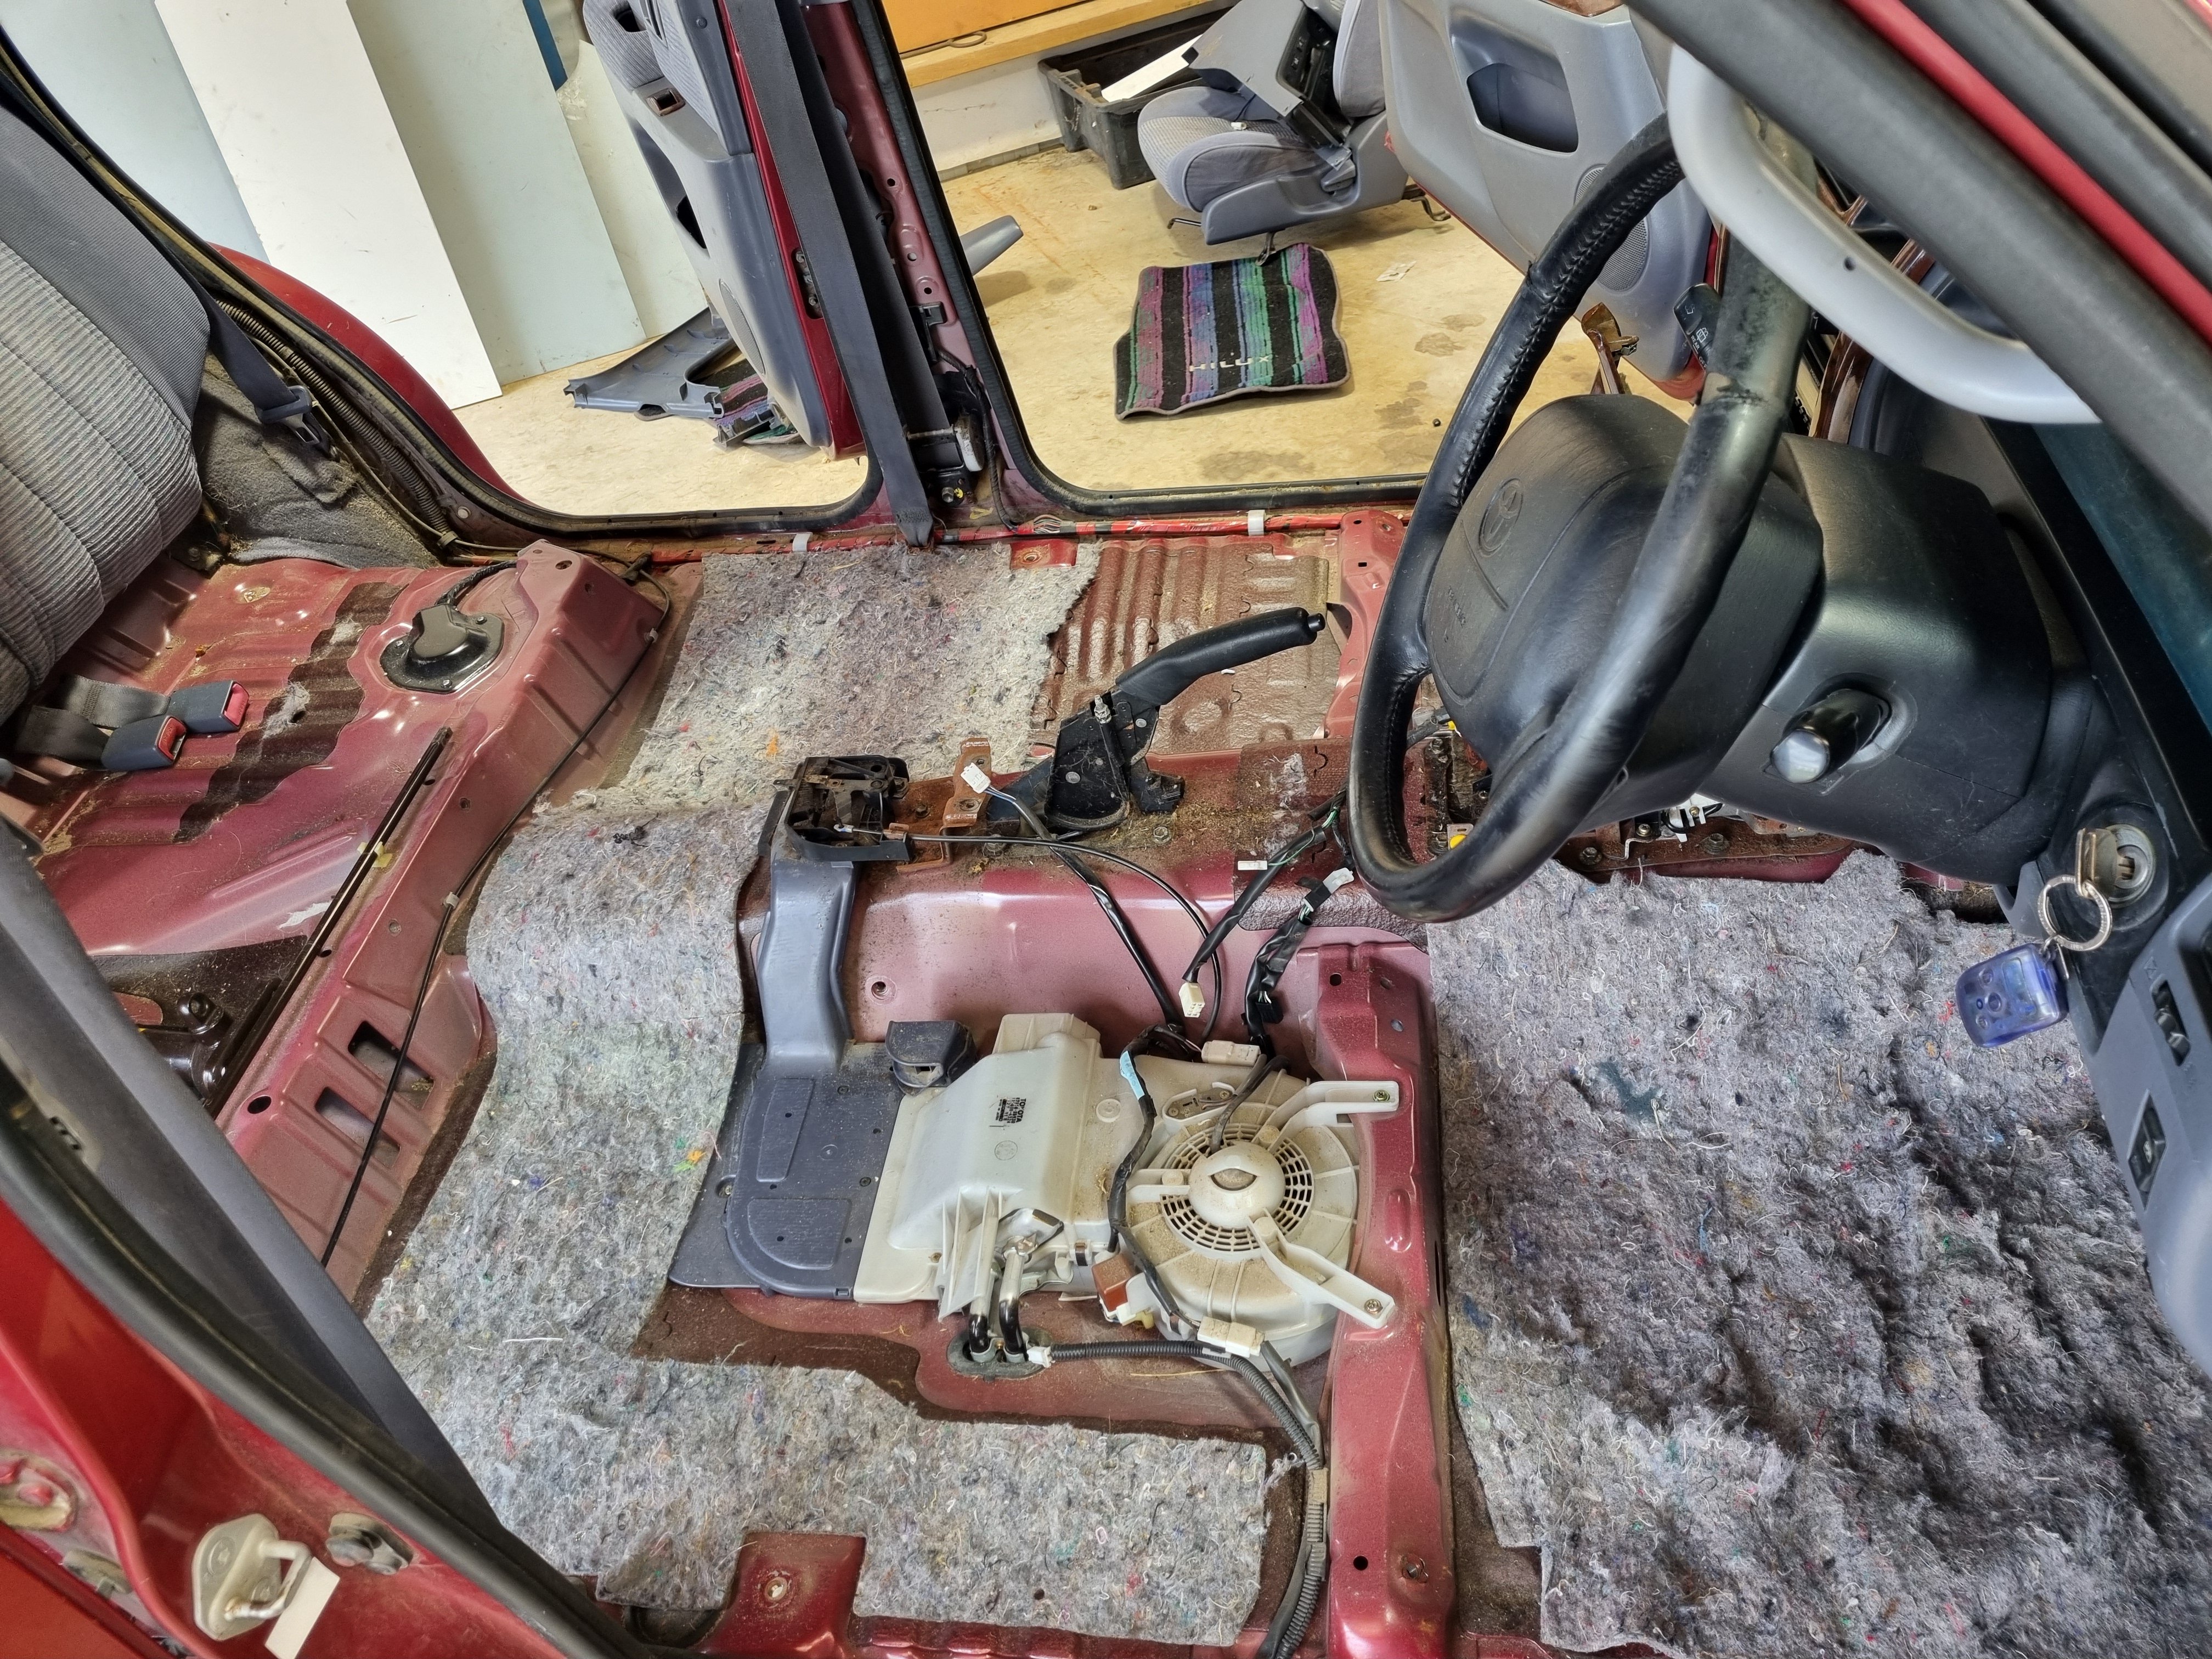
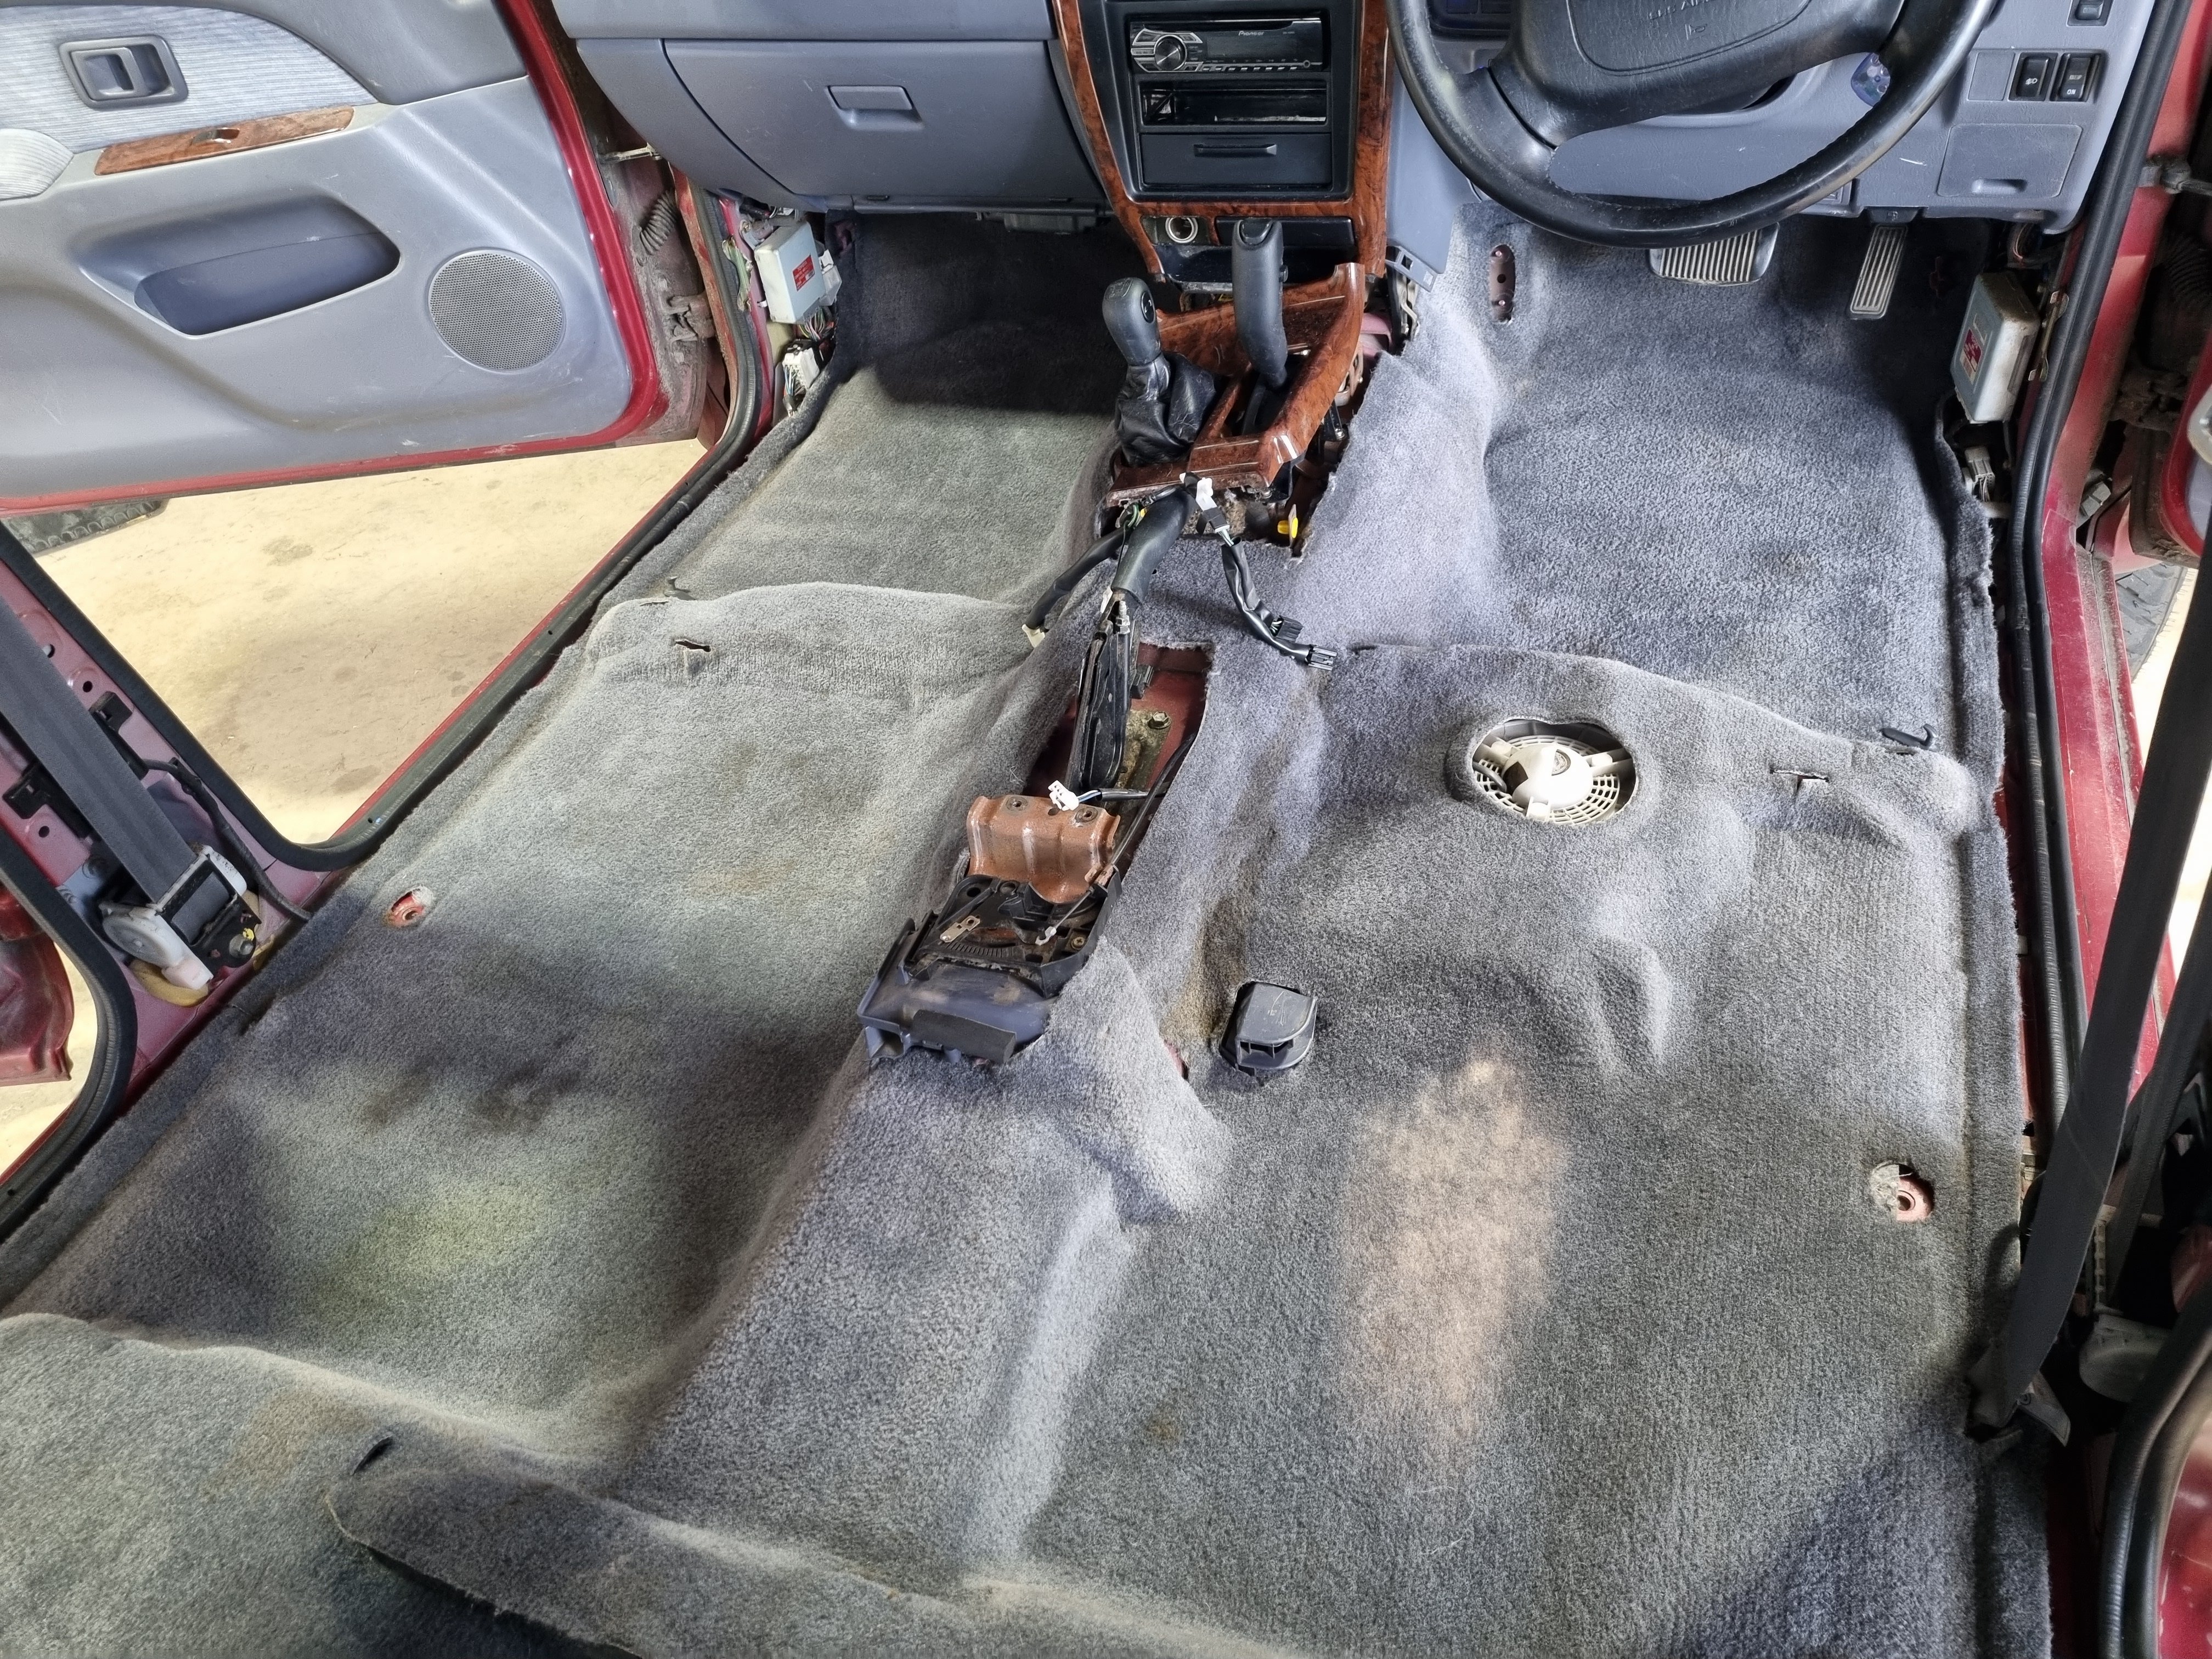
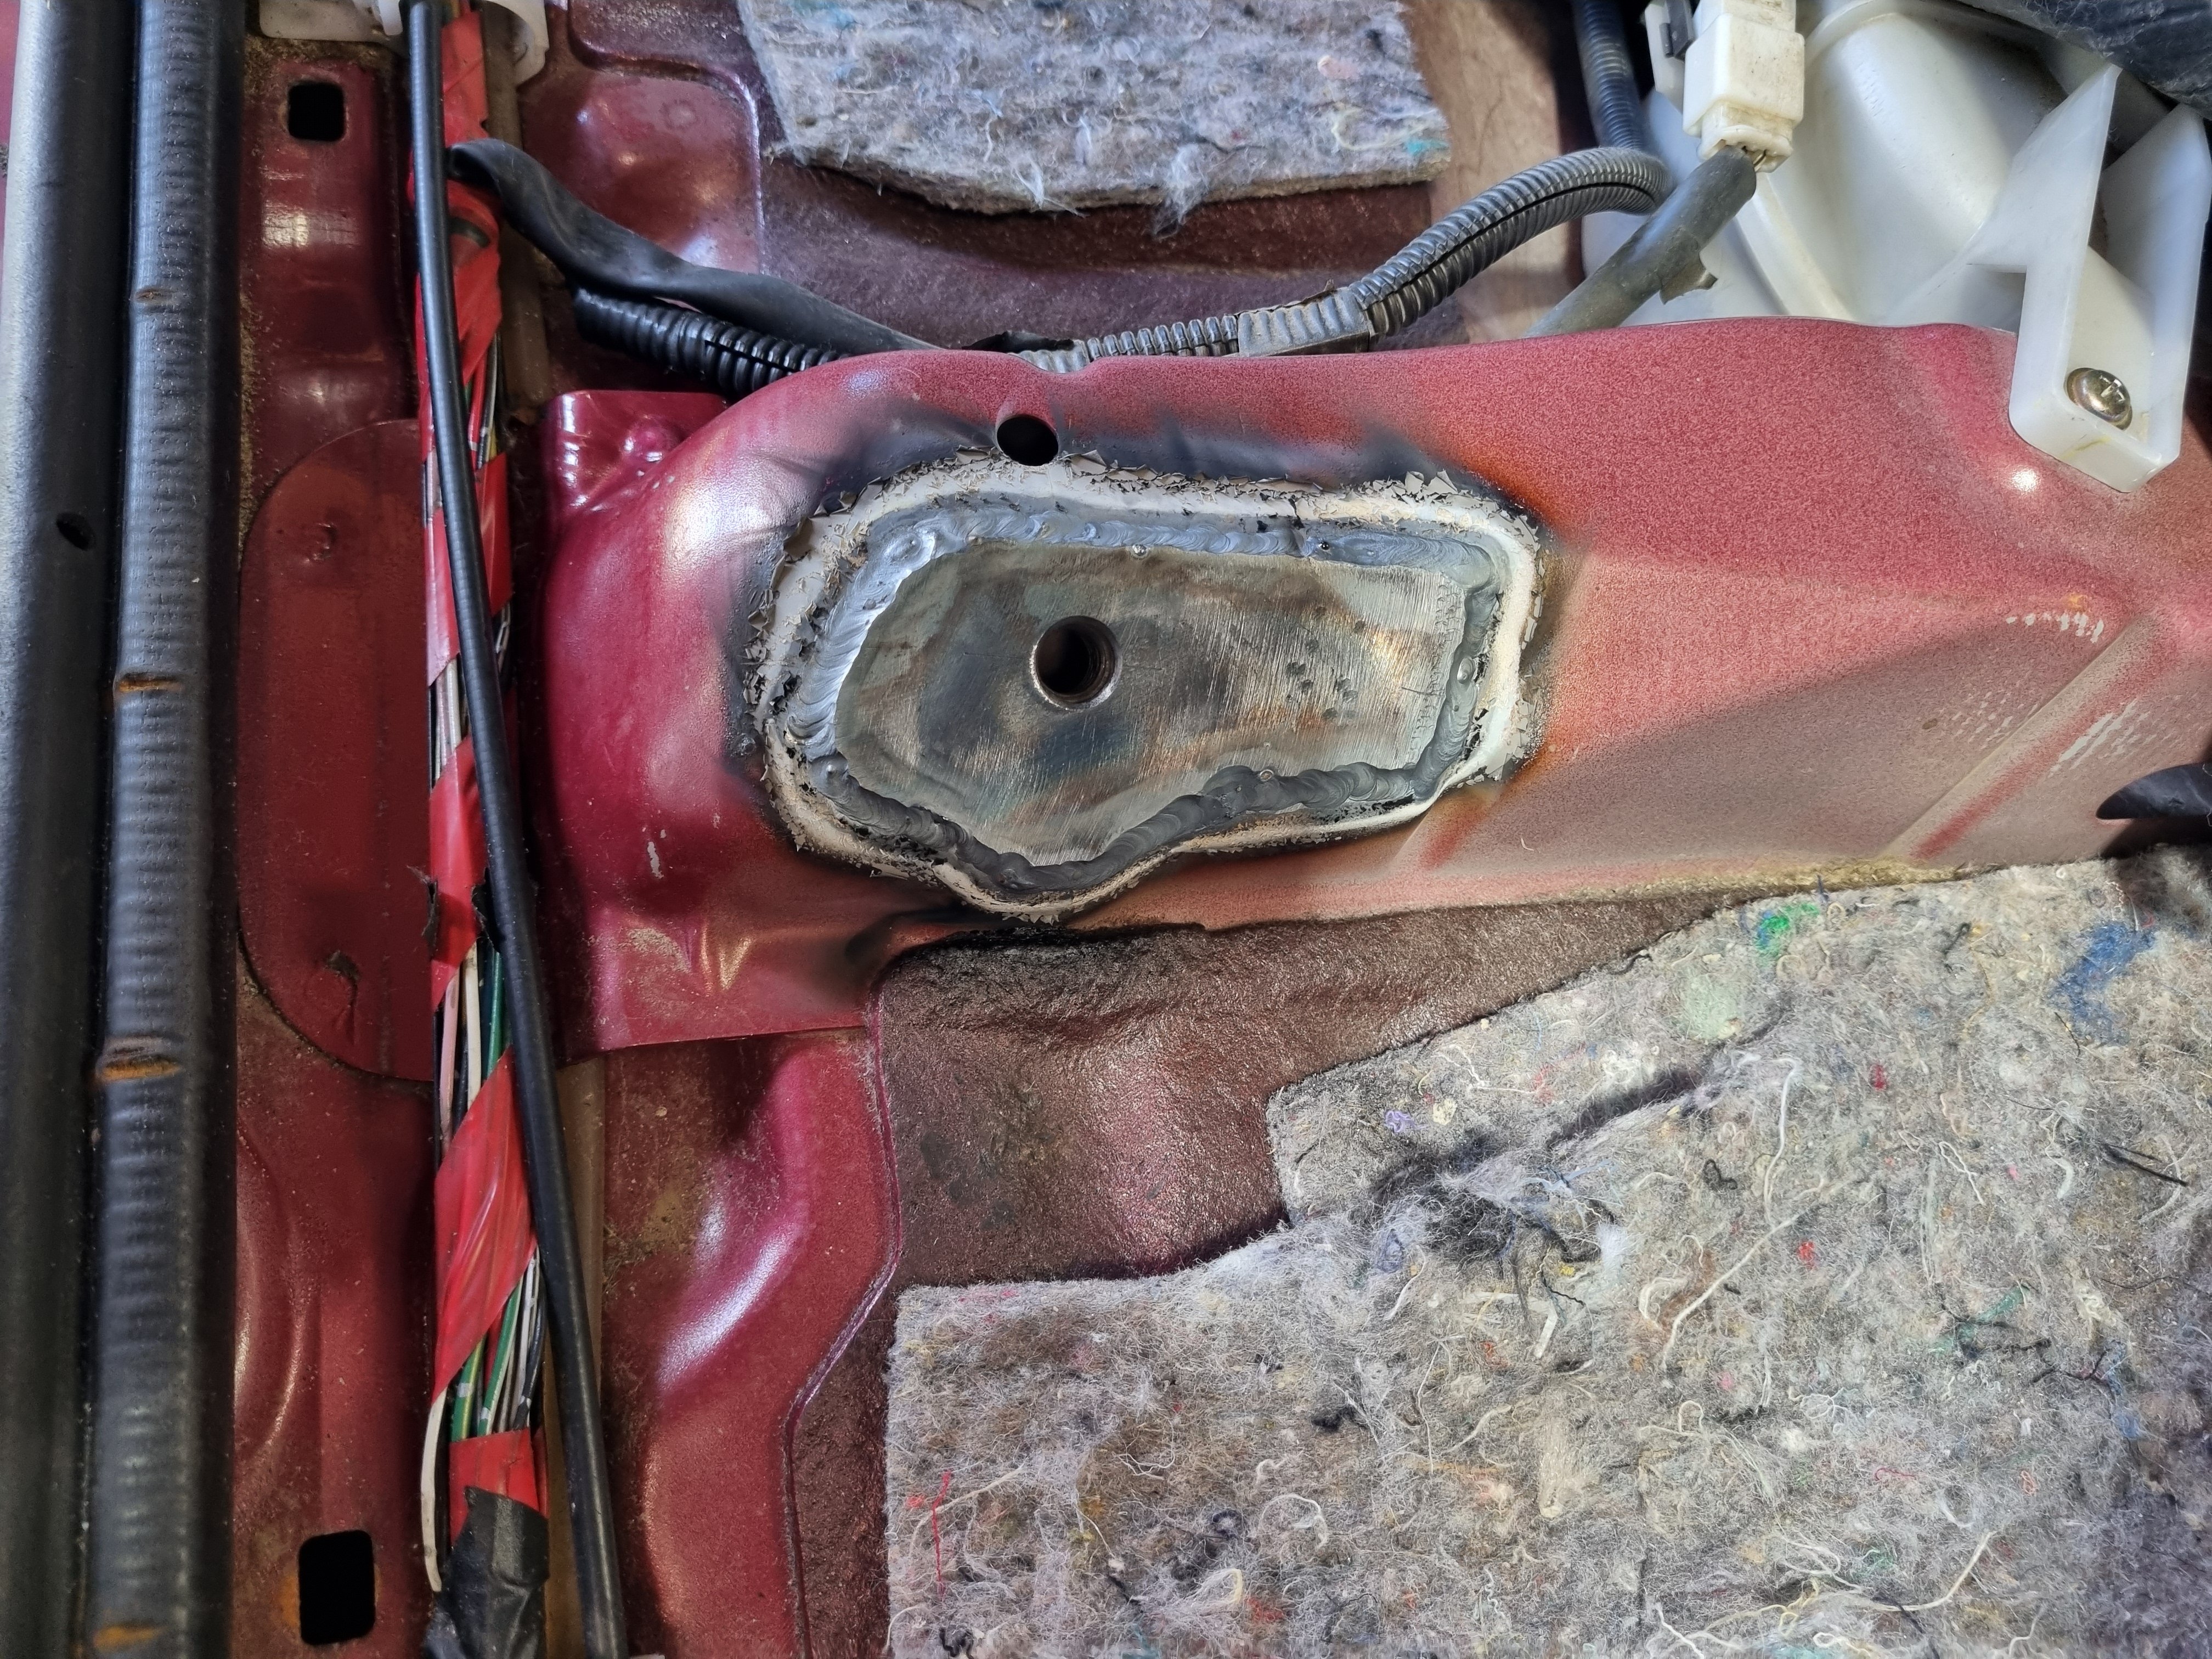
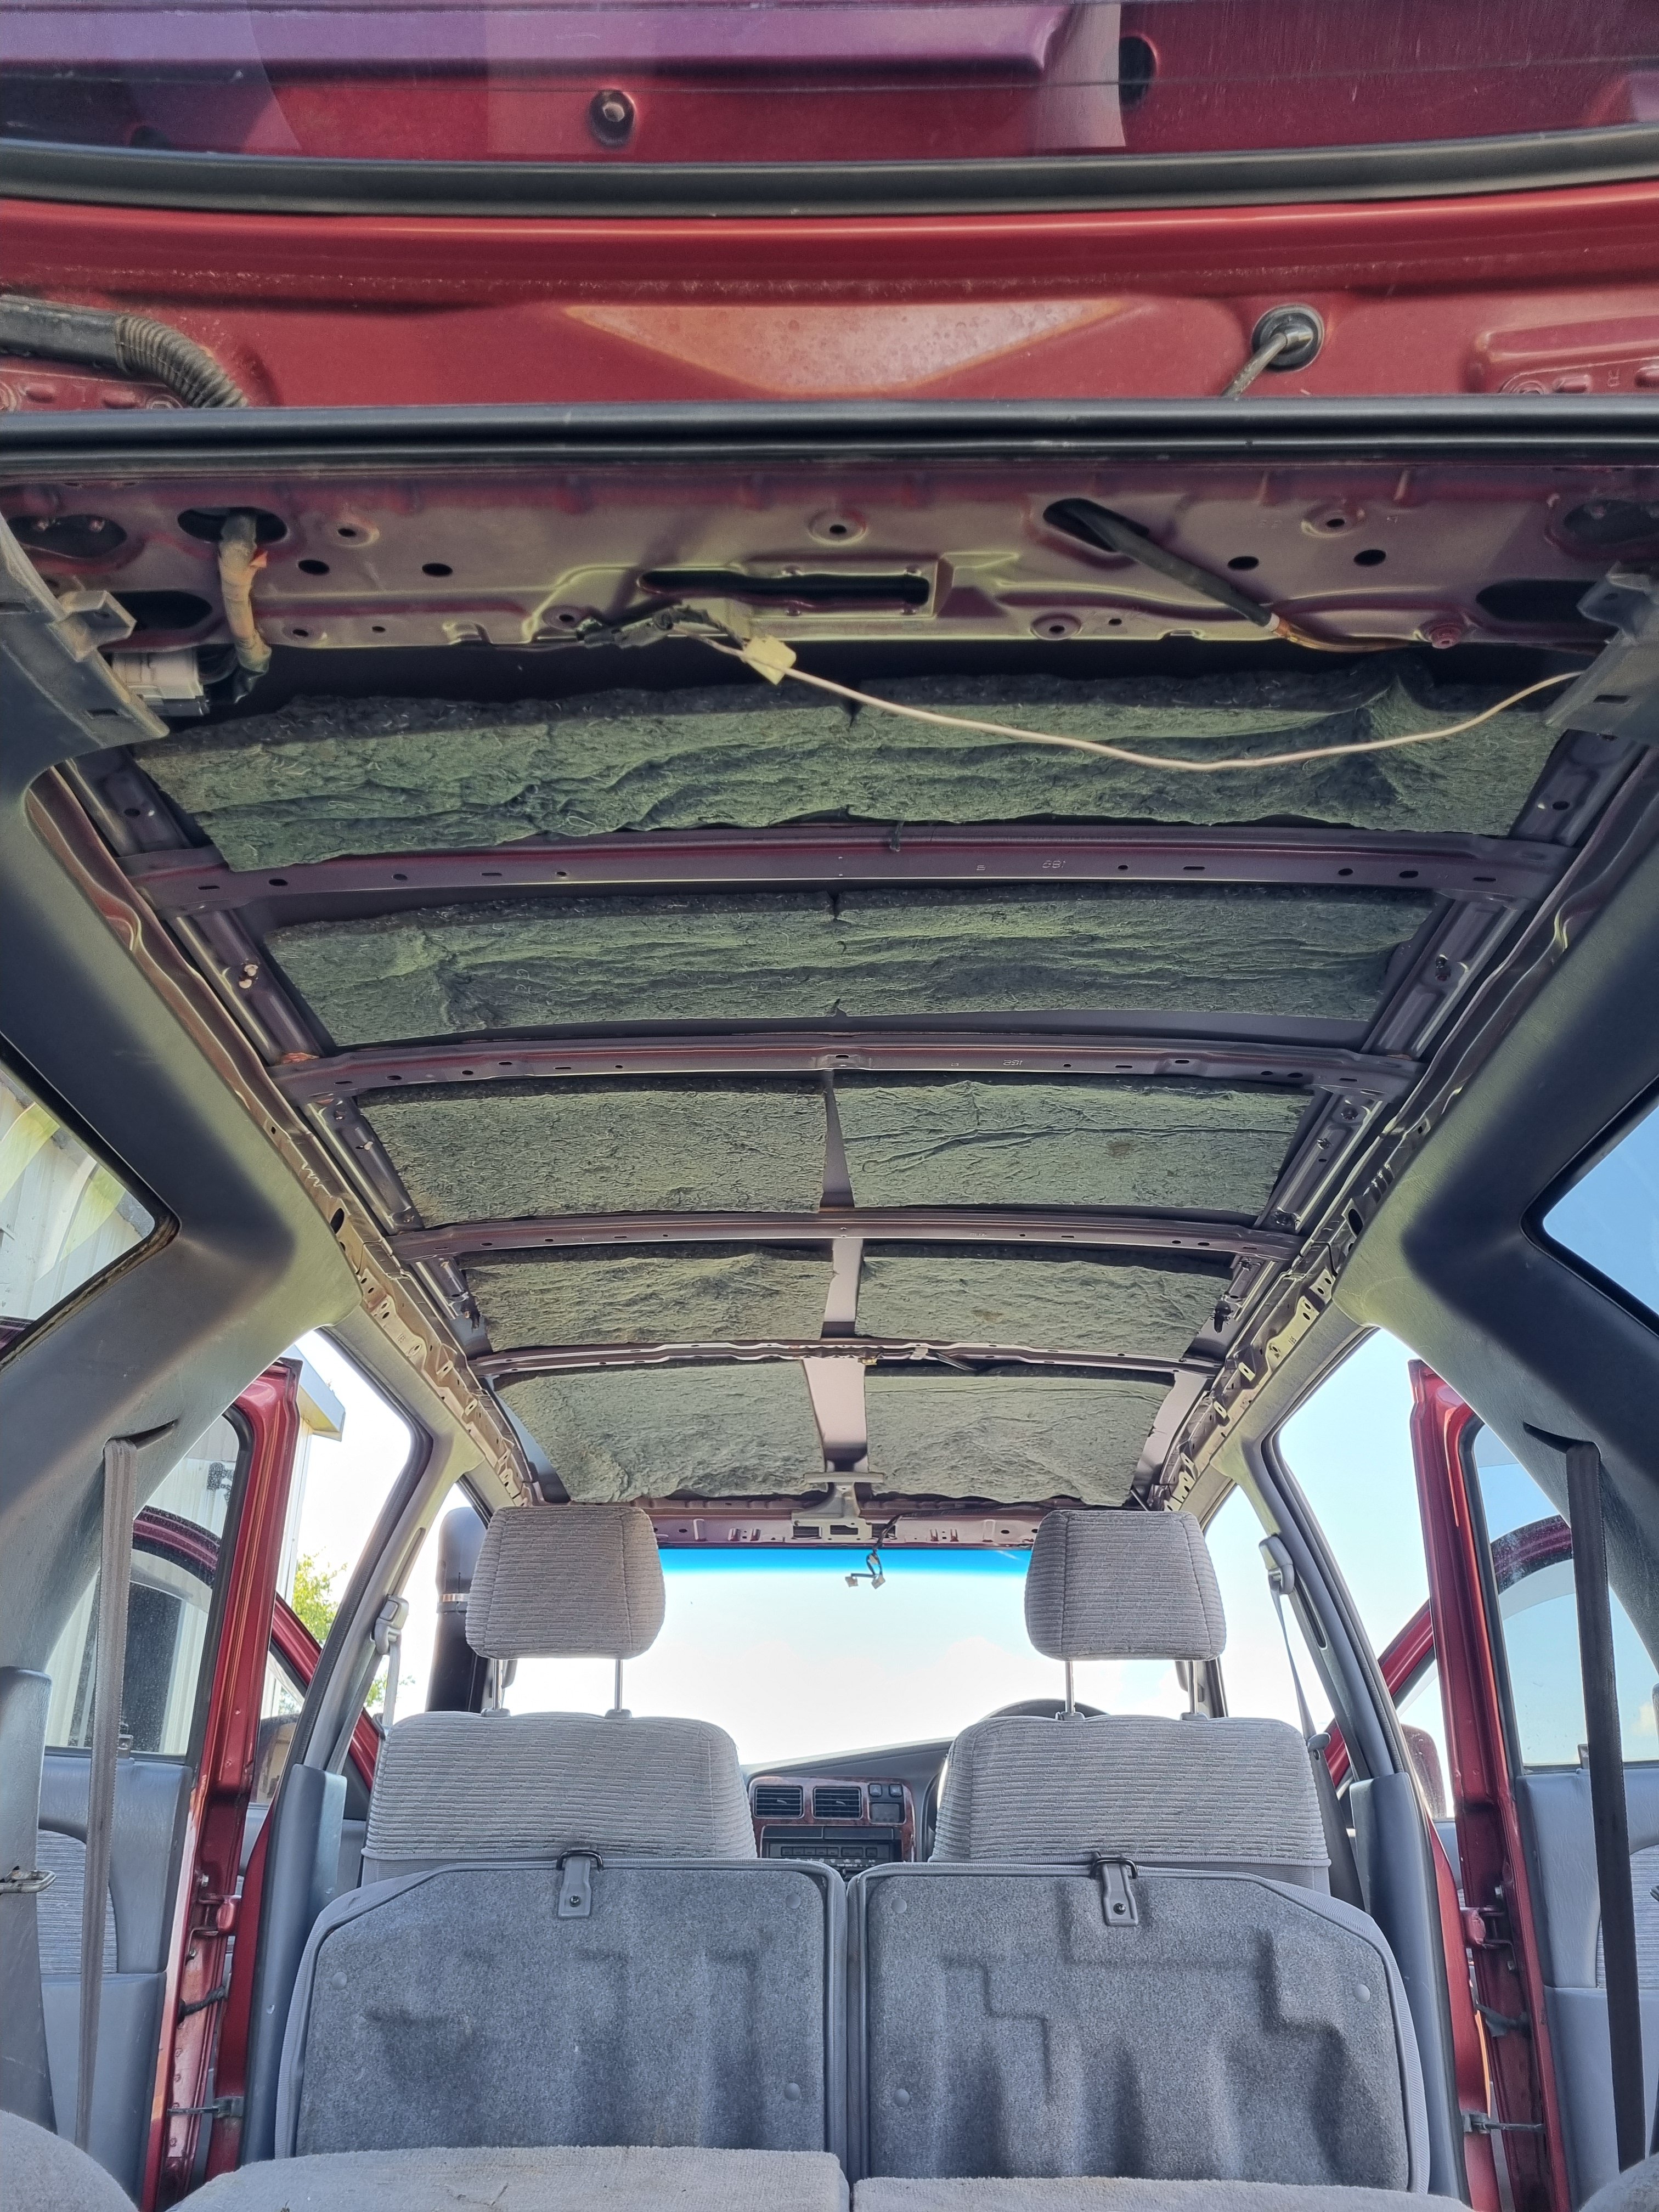
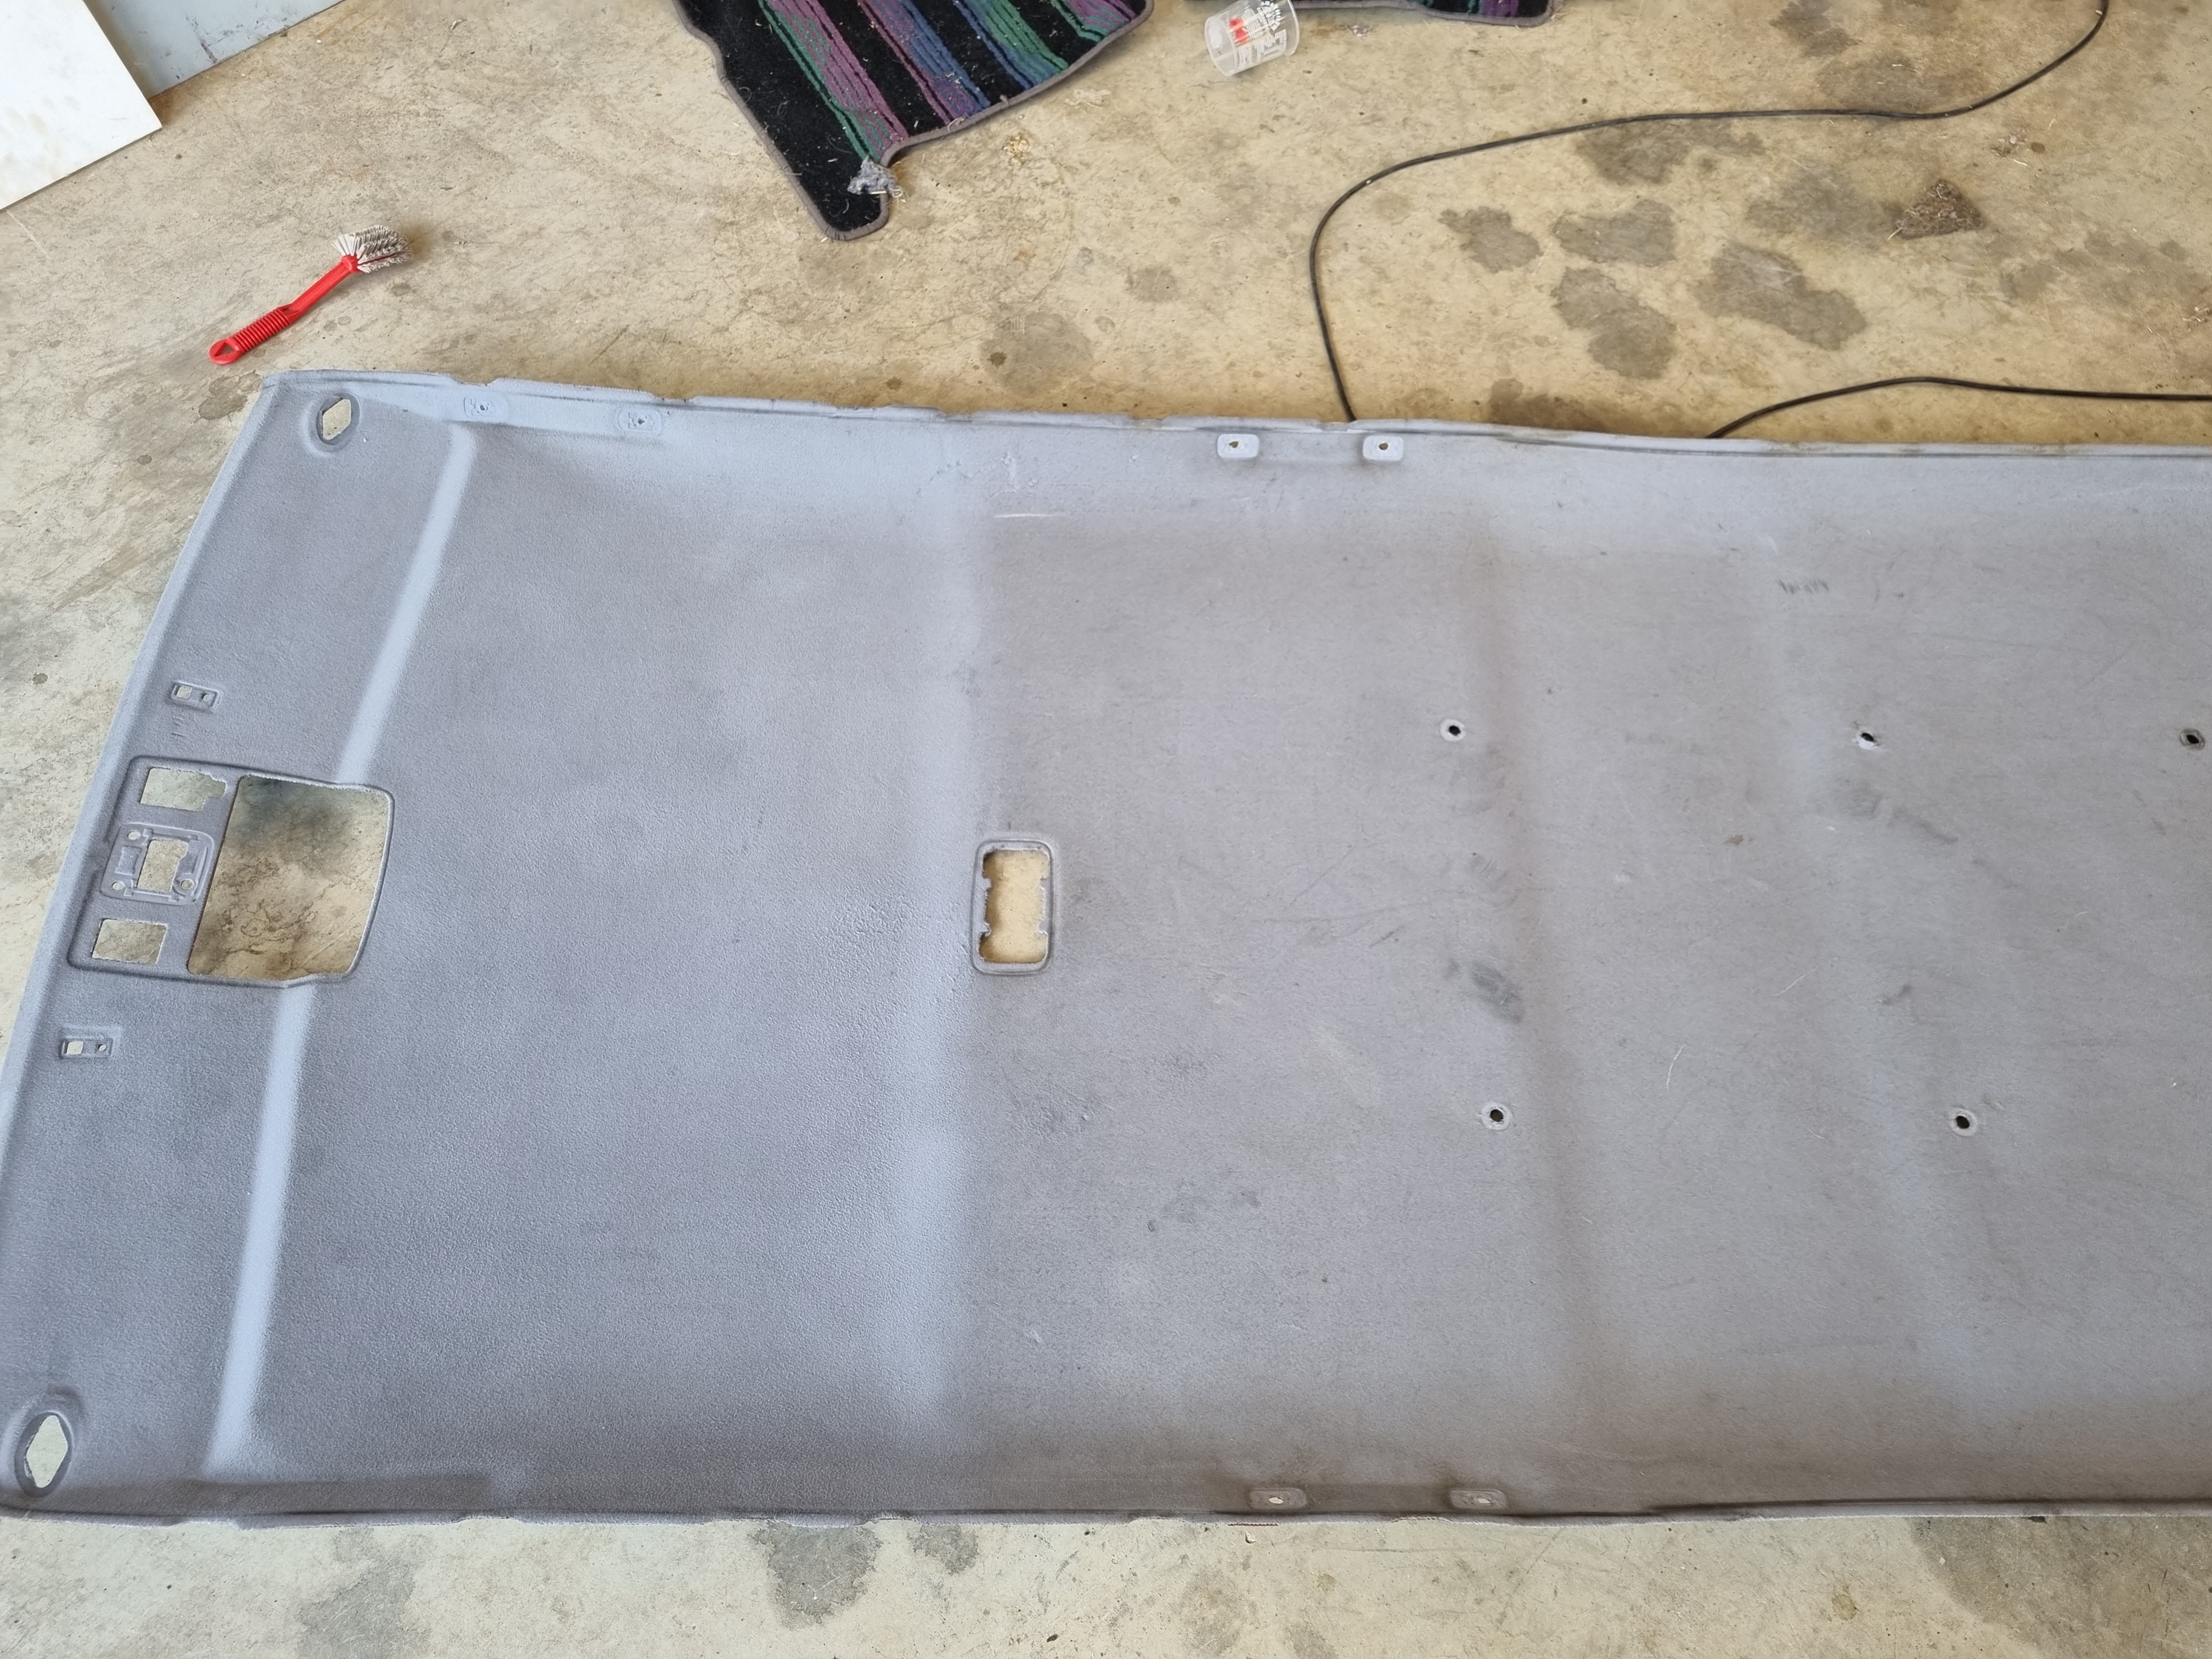
So, what am I going to do to it? First thing I did was clean it because it was fucking gross. Think used chewing gum in the door pockets, center console full of dried moldy coke, at least a full medium fries down the side of the seat and LOTS of dog fur. I took the whole interior out, including the headliner, and scrubbed it. The front seats are pretty bad and I'm trying to buy some others because they're so gross I don't think cleaning them will do much. One of the seat mount captive nuts was broken so I made up a plate with a nut and welded it in.
1 point
-
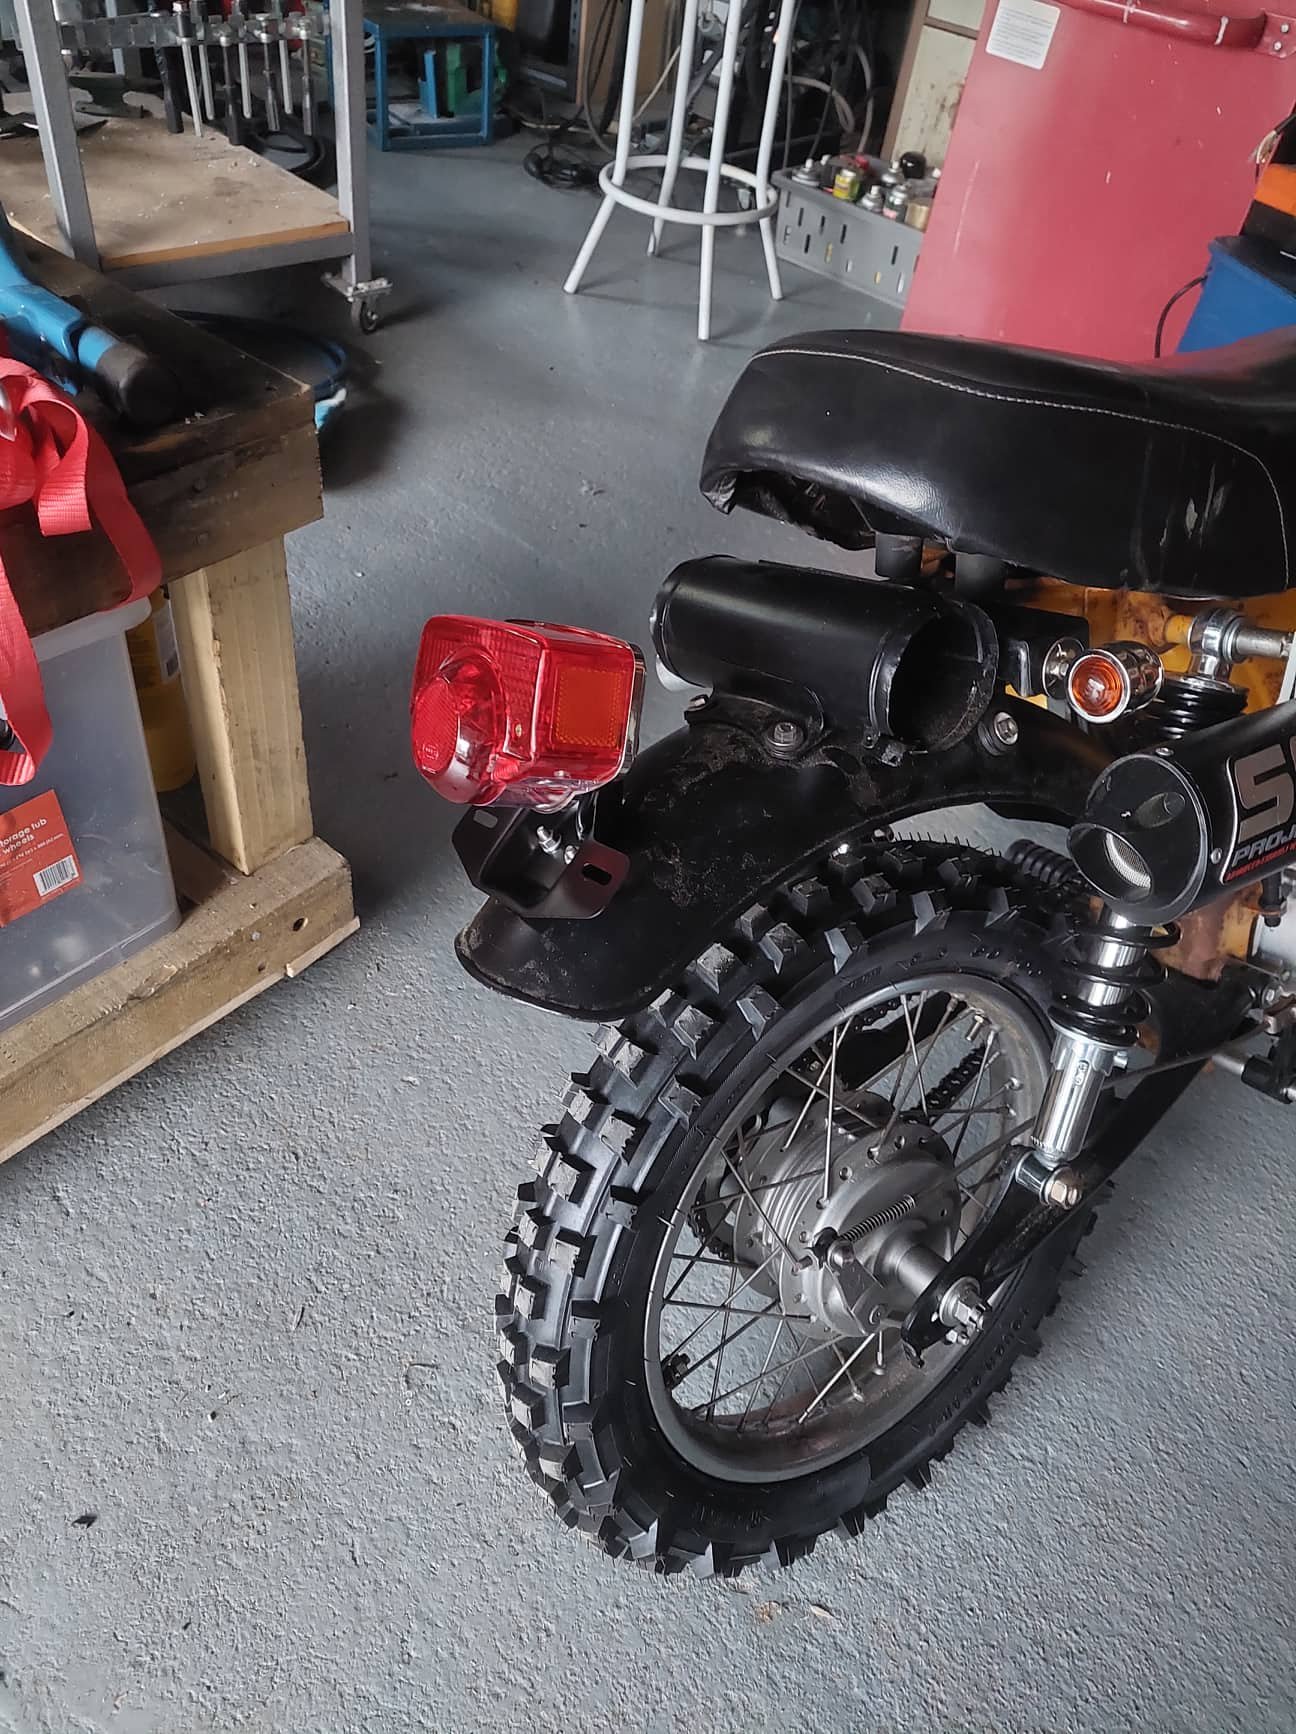
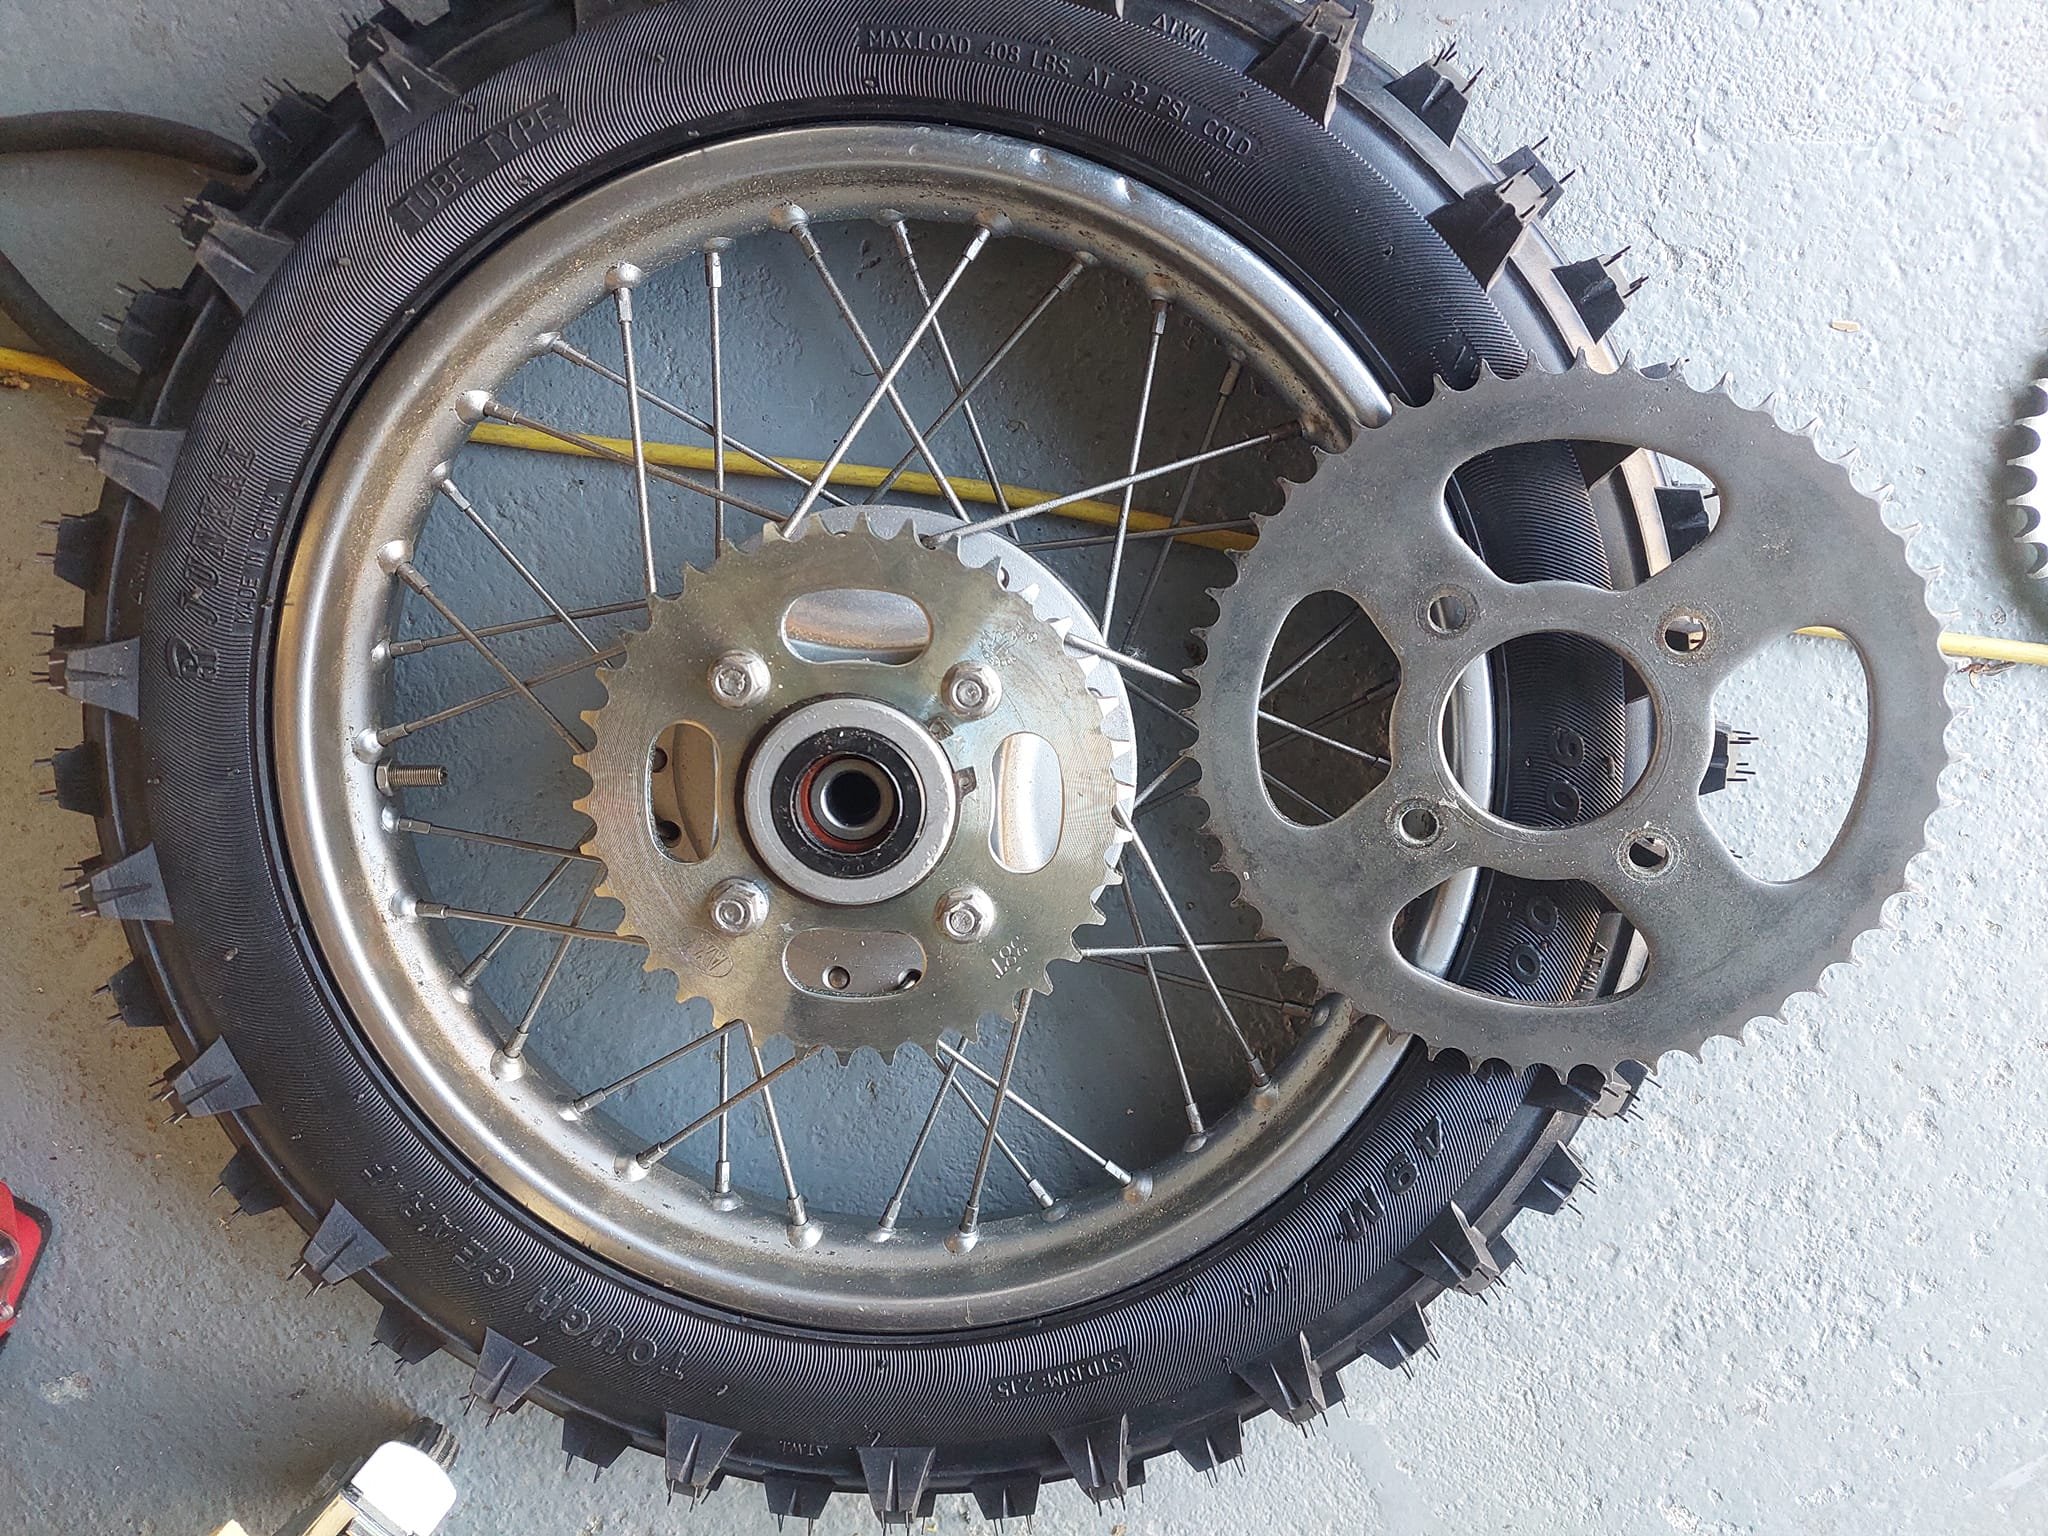
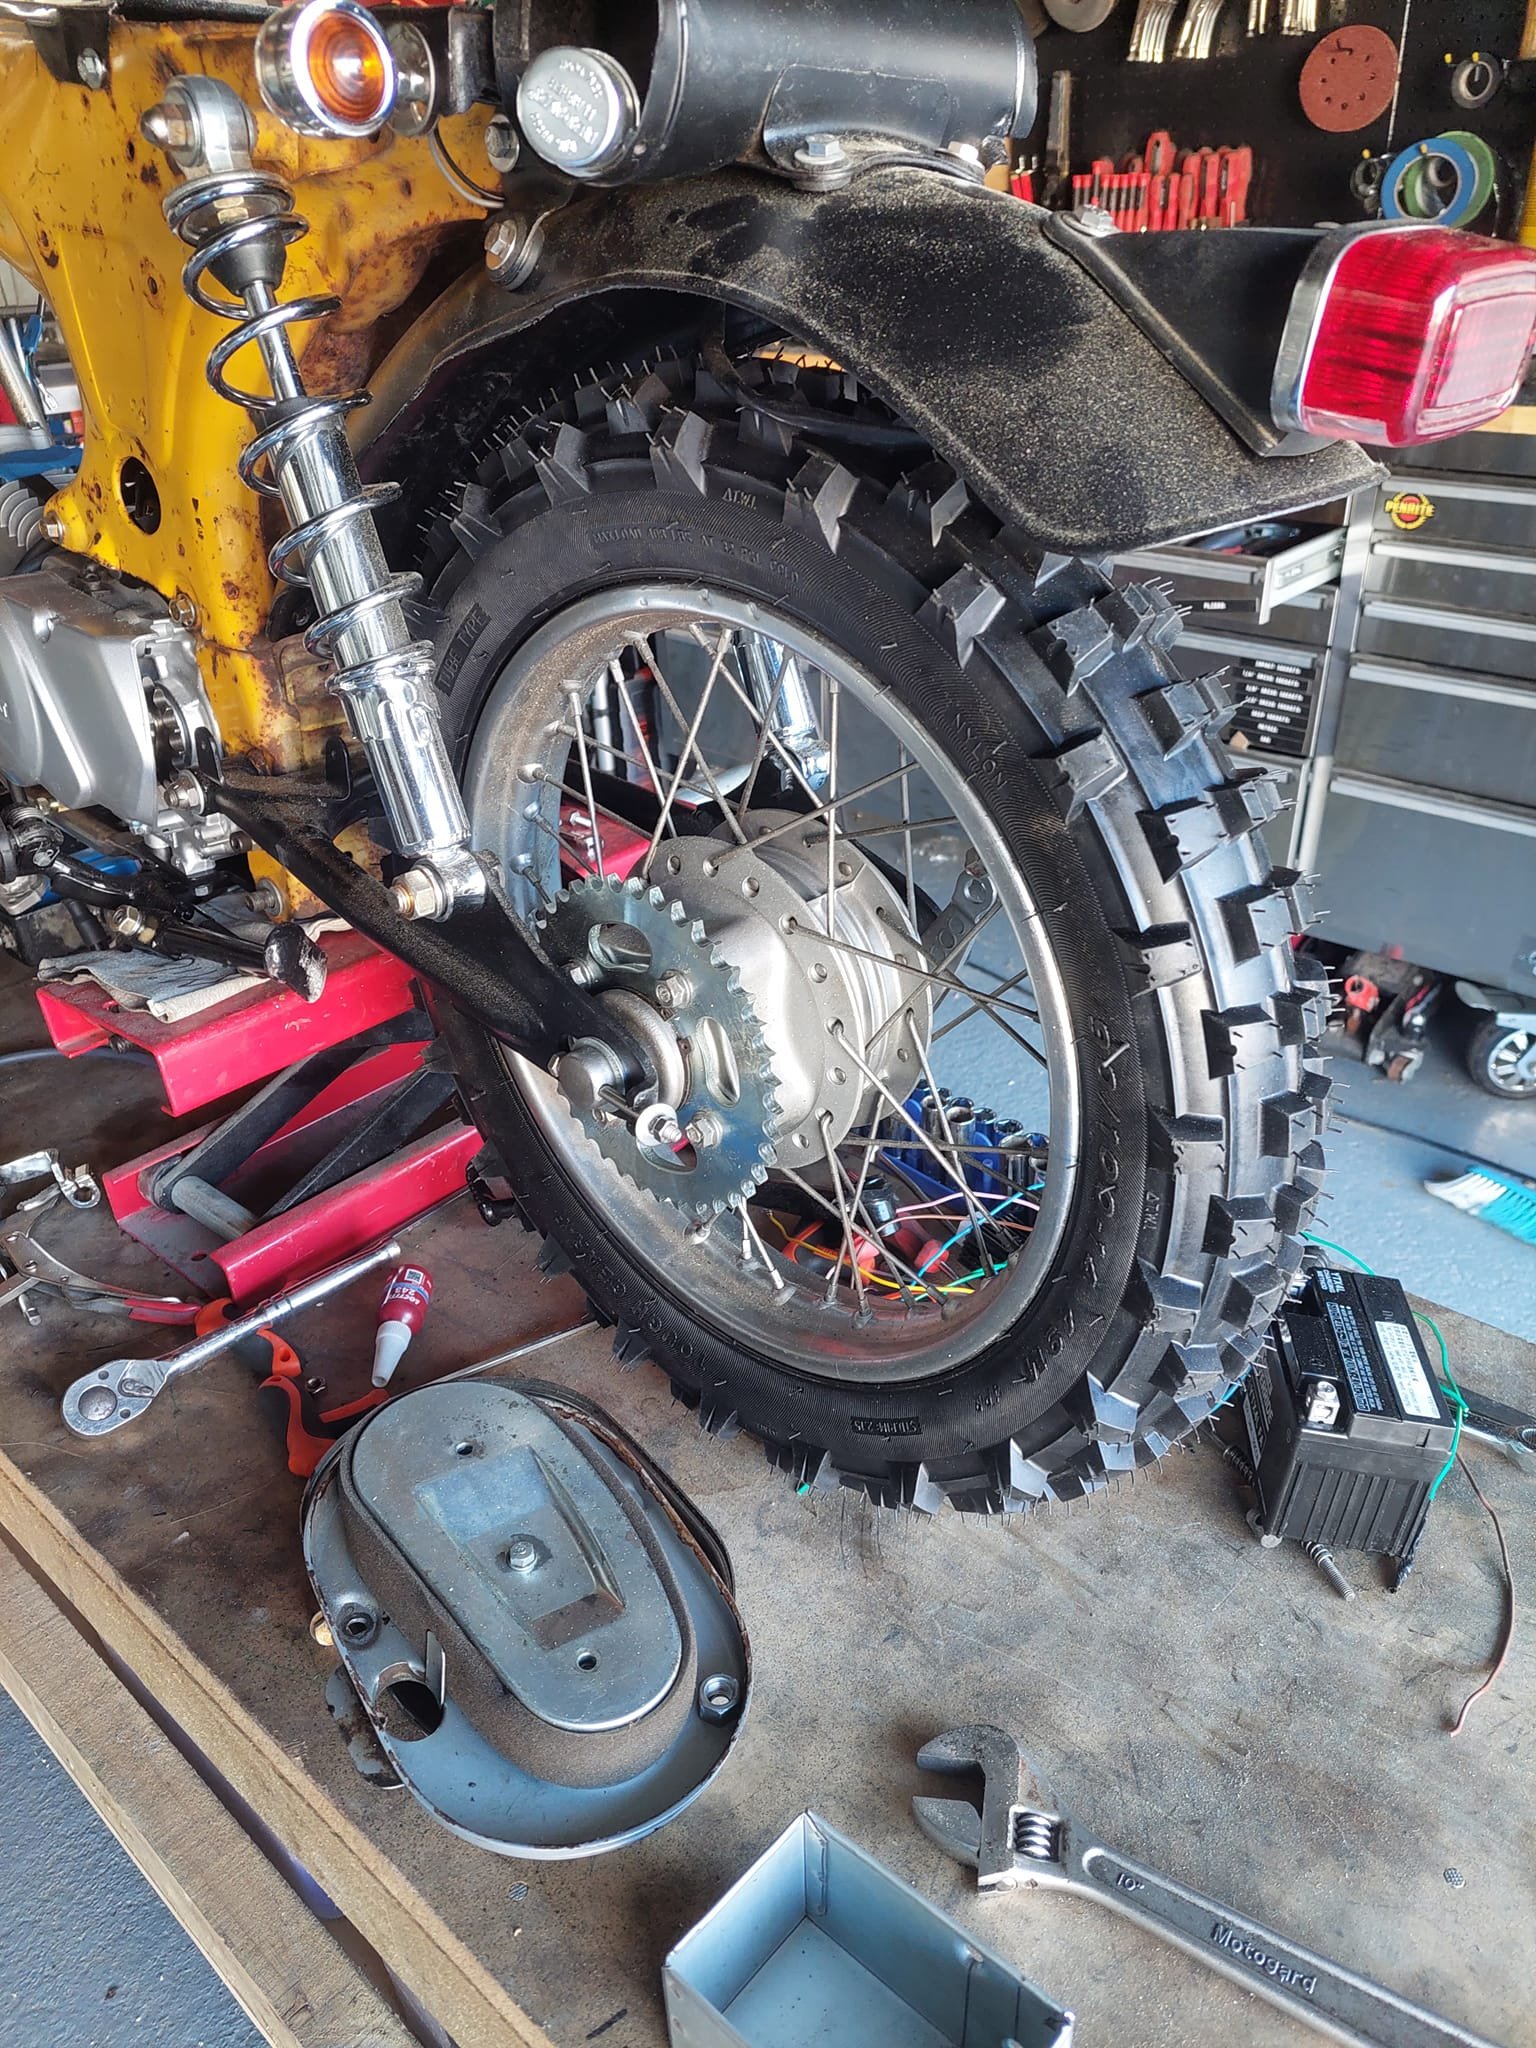
Over the weekend in between fitting a kitchen to my new house I gave a big push to trying to get it started. The 1st step was dropping the shipping oil that the engine came with, there was next to fuck all in there to be honest, not even 100ml. after filling it up with the required amount of oil, some fuel and messed around with the carb it fired up. I still need to tidy up the front end of the electrics and get the wiring stashed away in the headlight bucket. I grabbed some more goodies from Andy and Wei from mbike like taller shocks, rear tail light and rear sprocket, you might notice a new tyre which is from trademe.
1 point
-
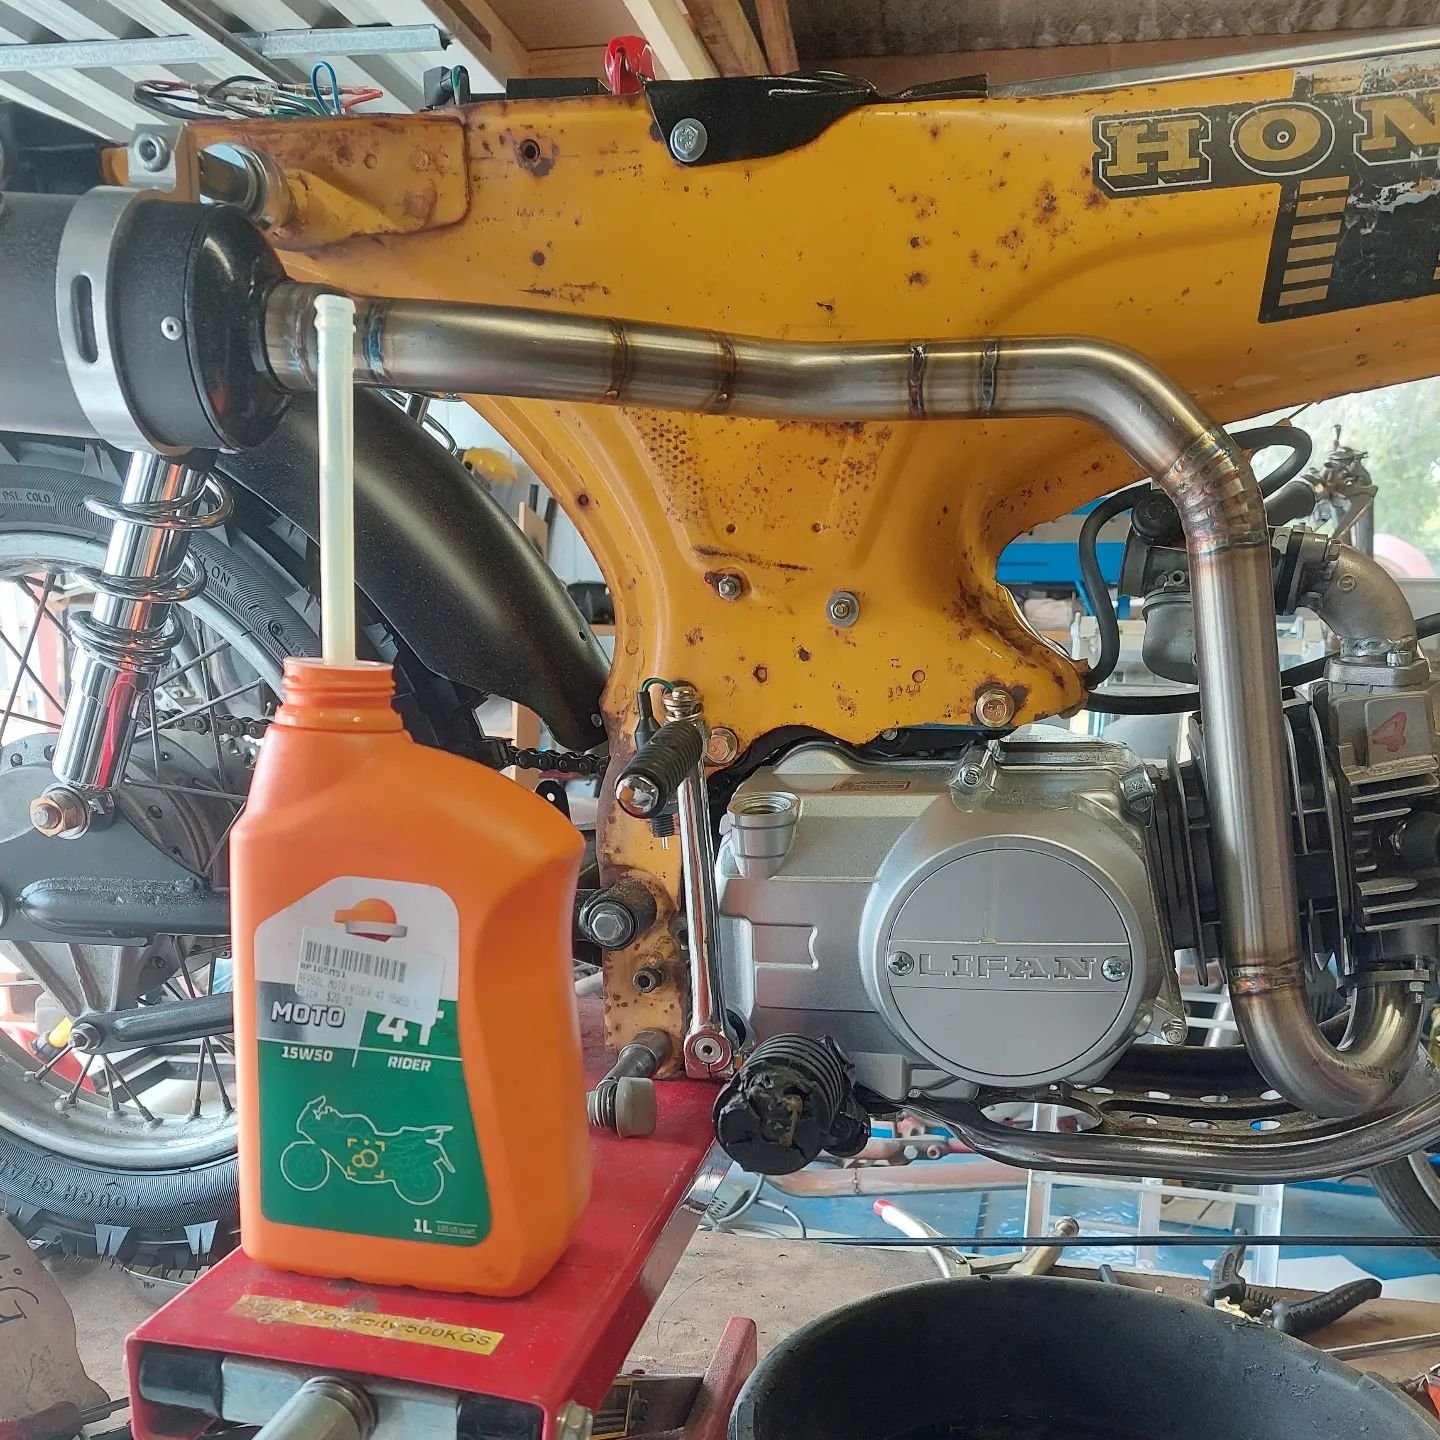
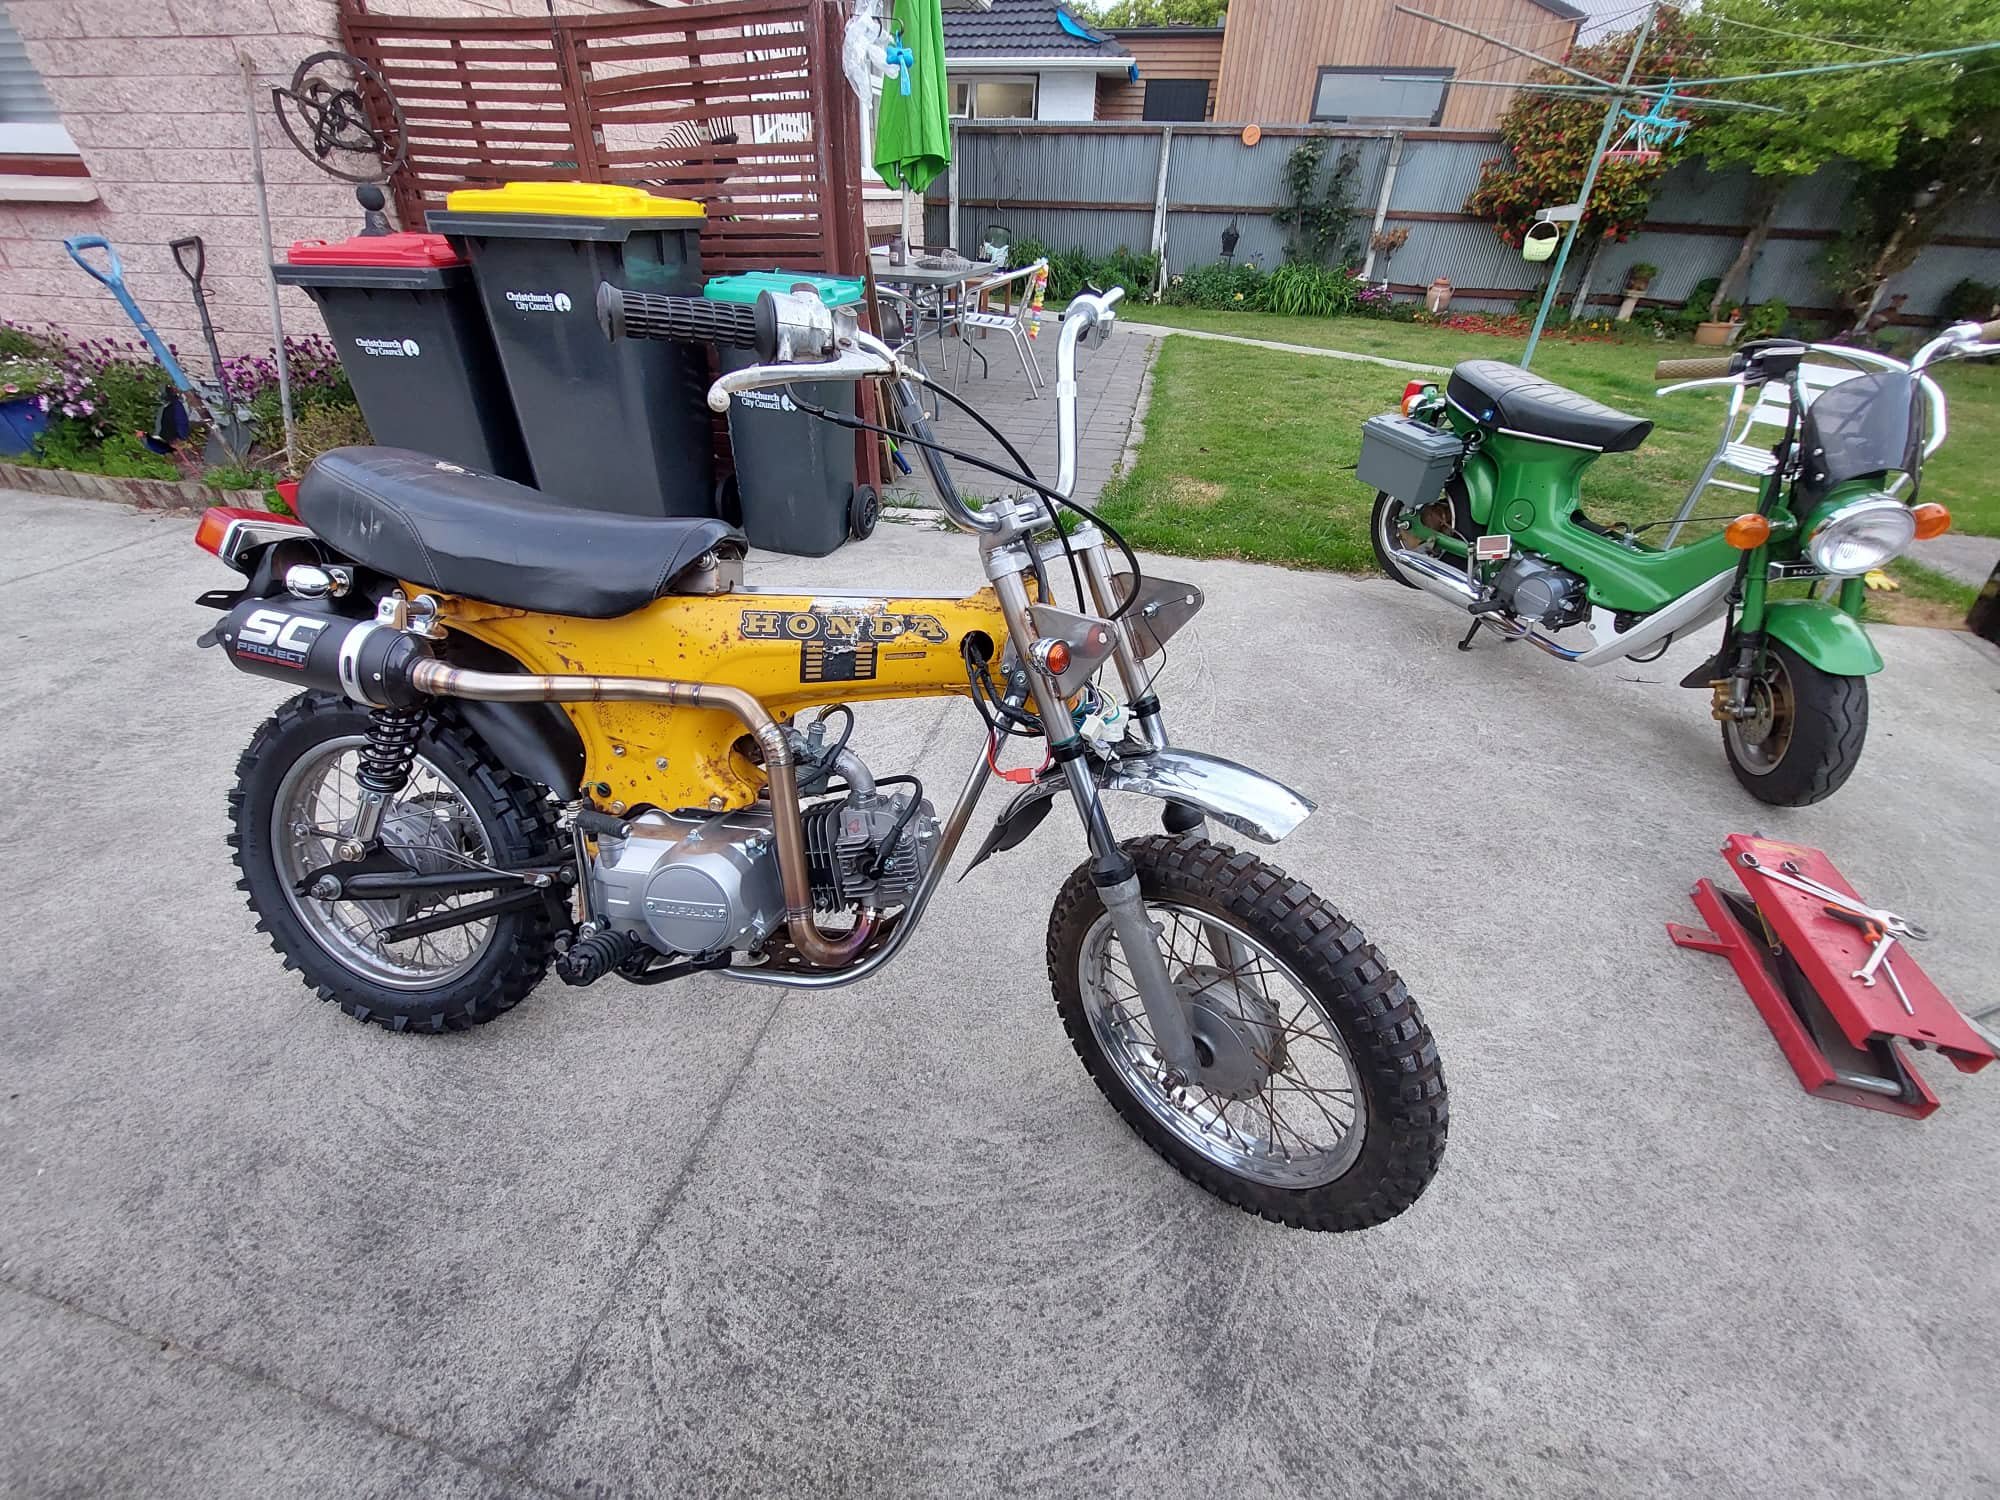
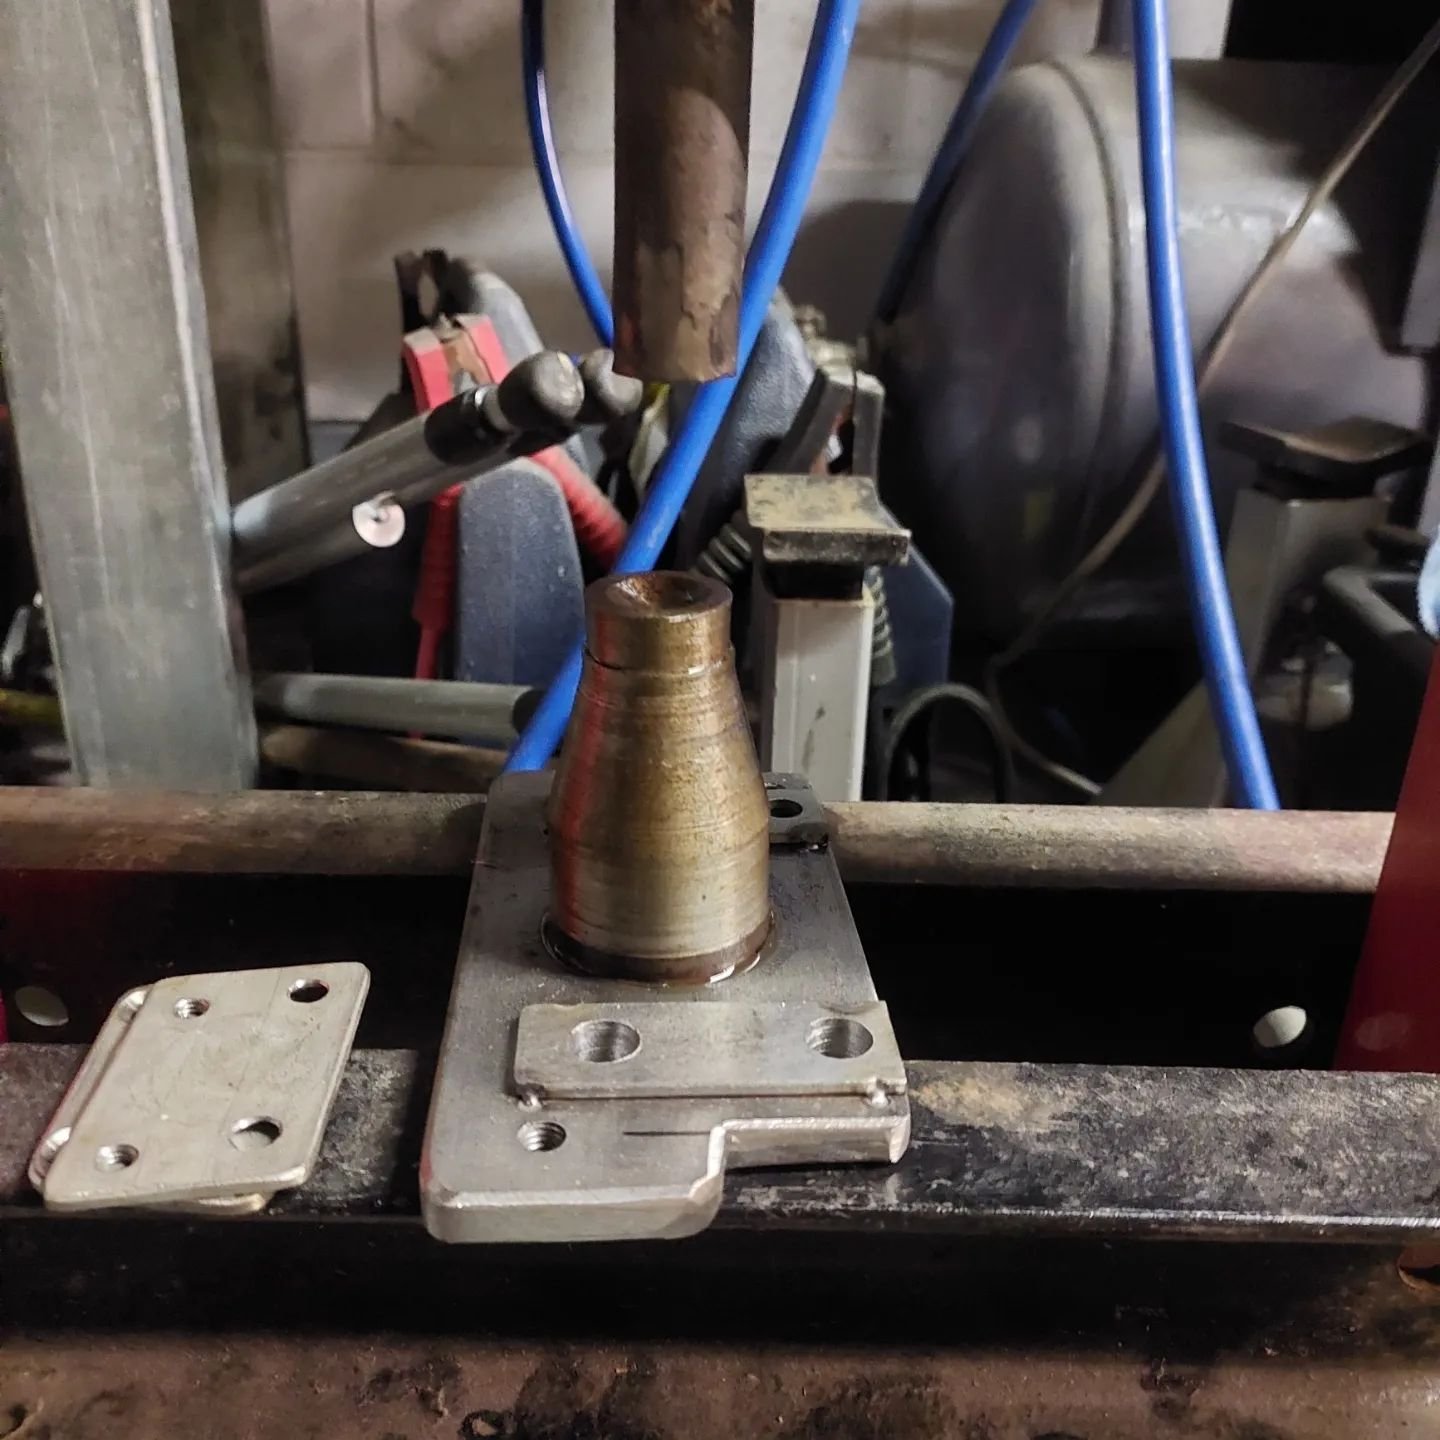
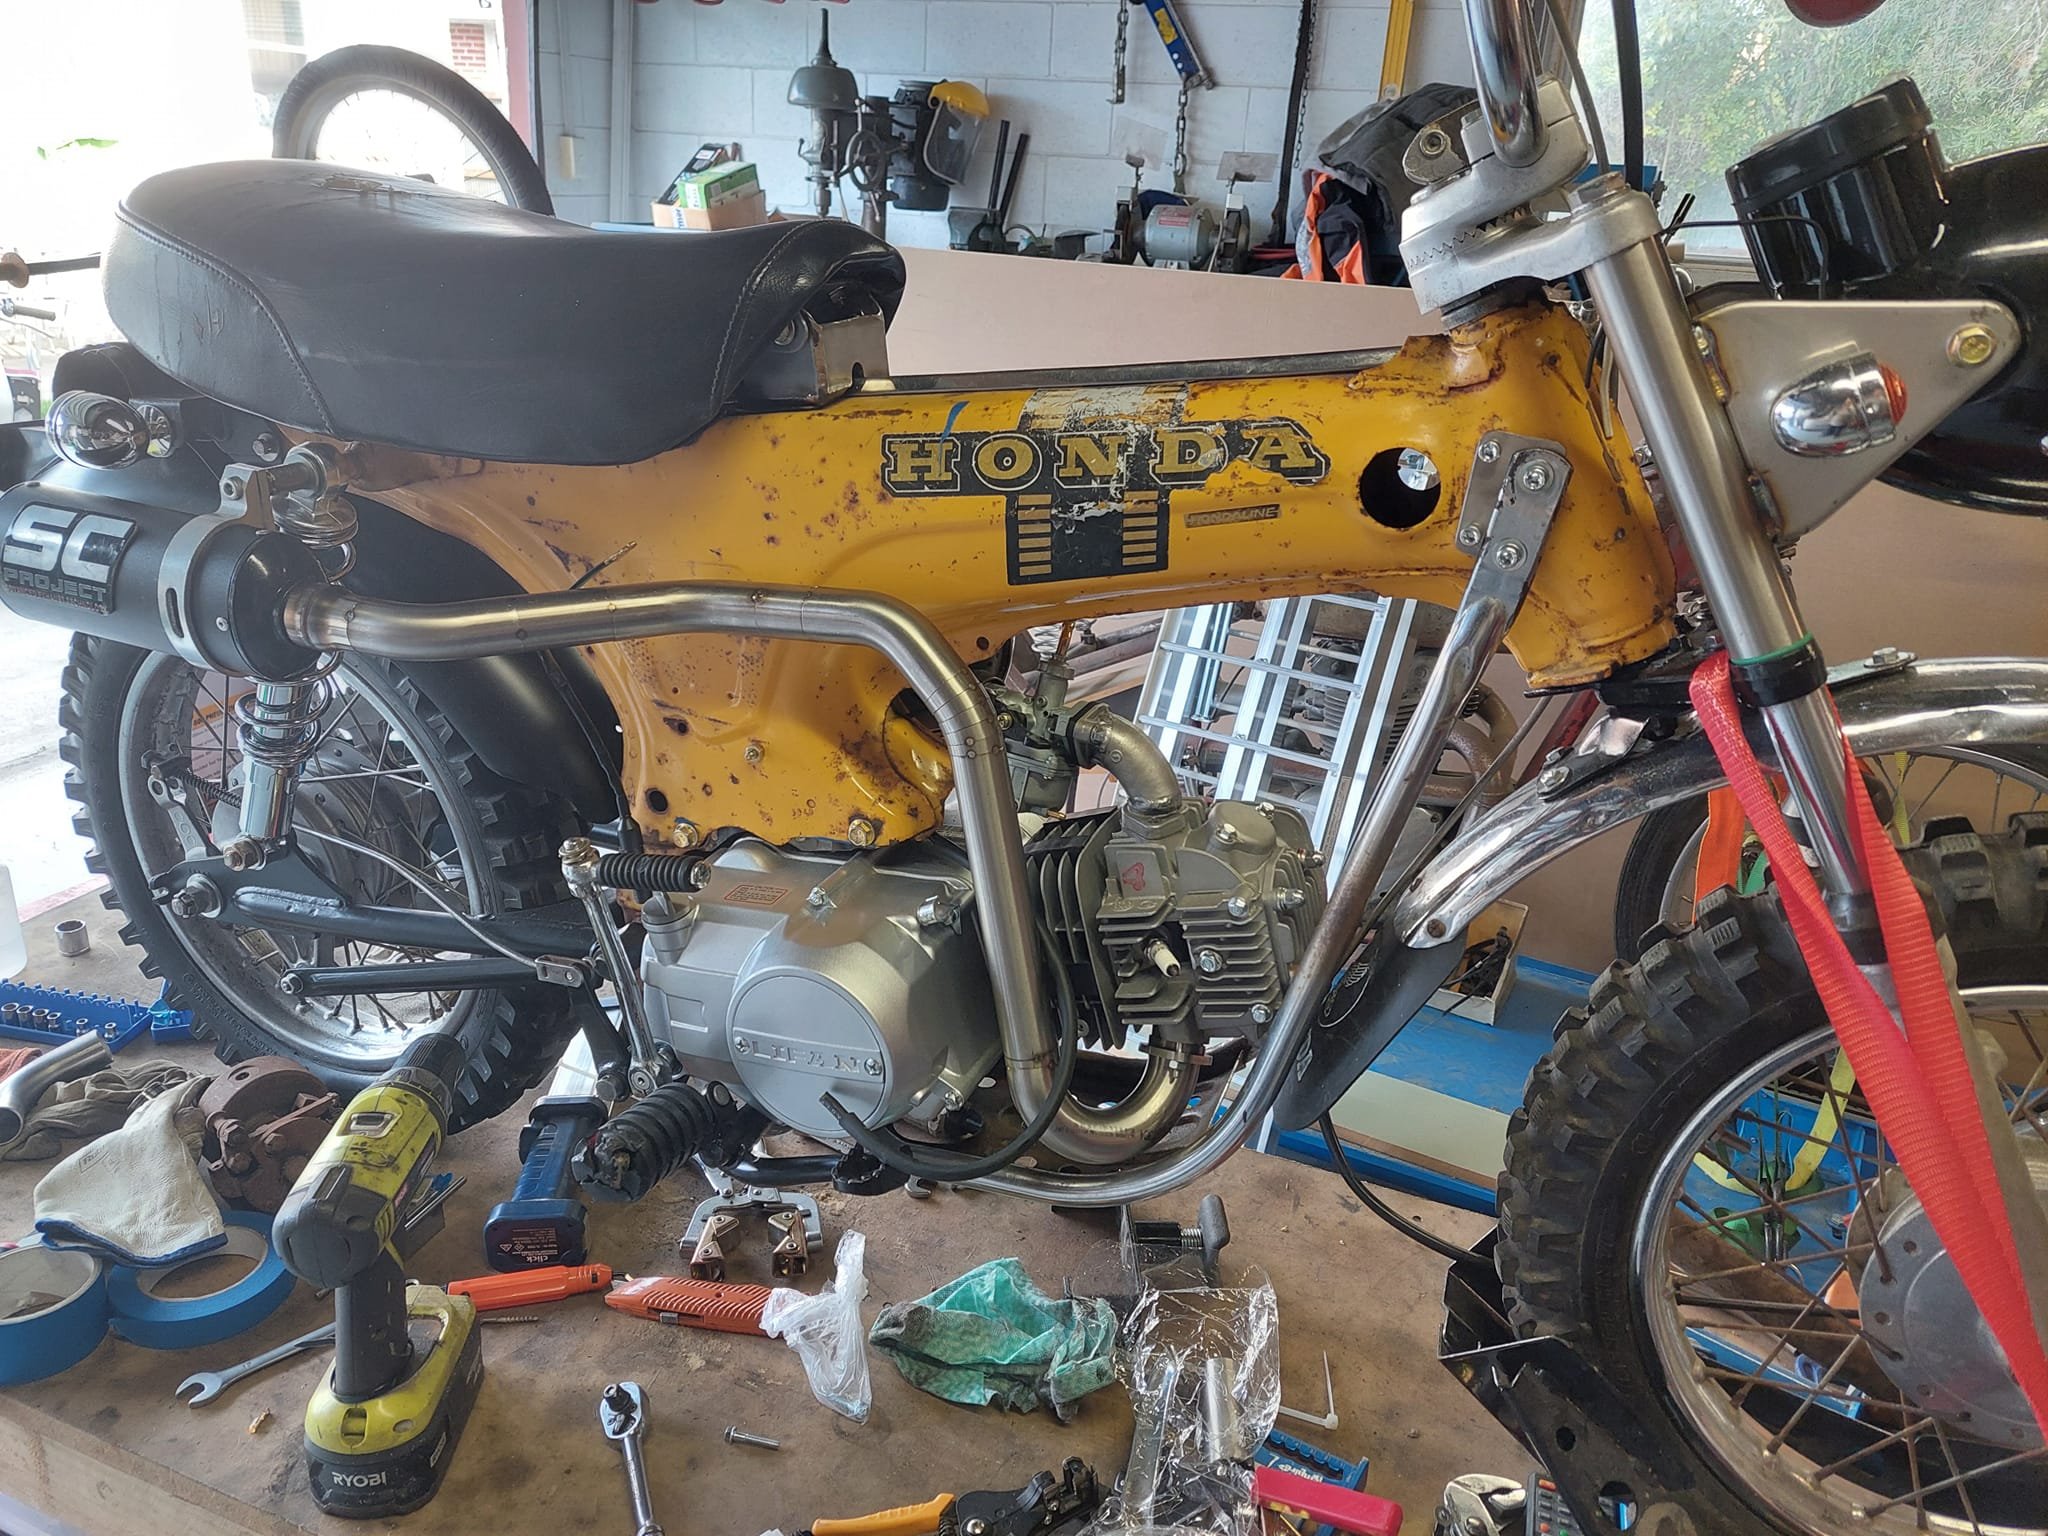
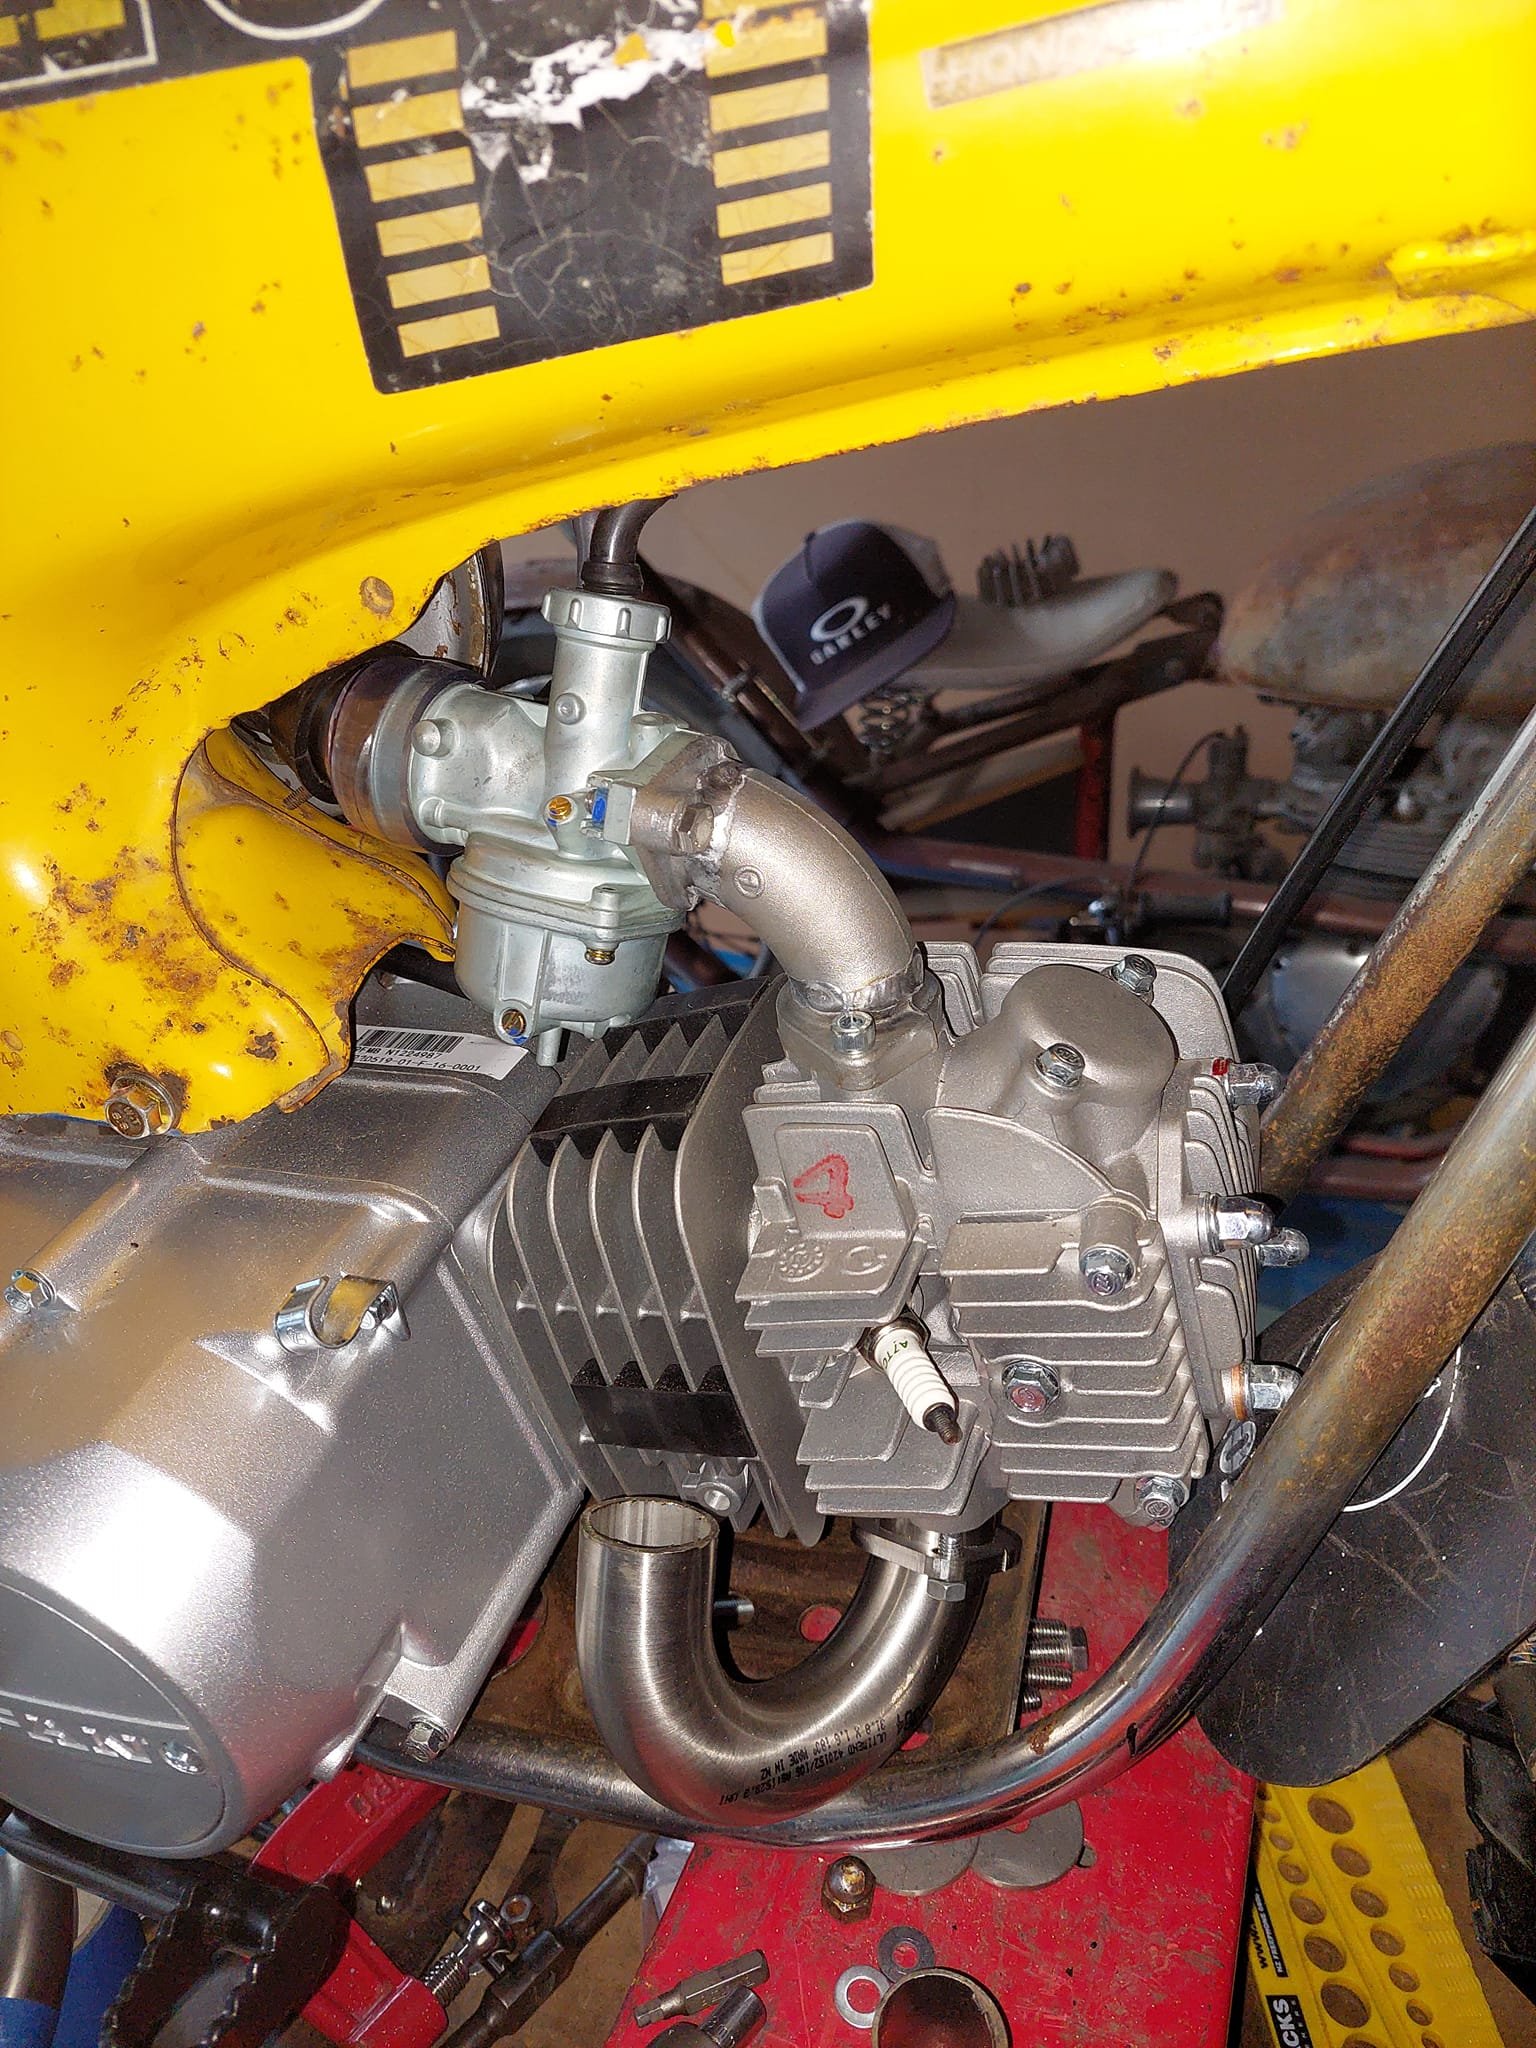
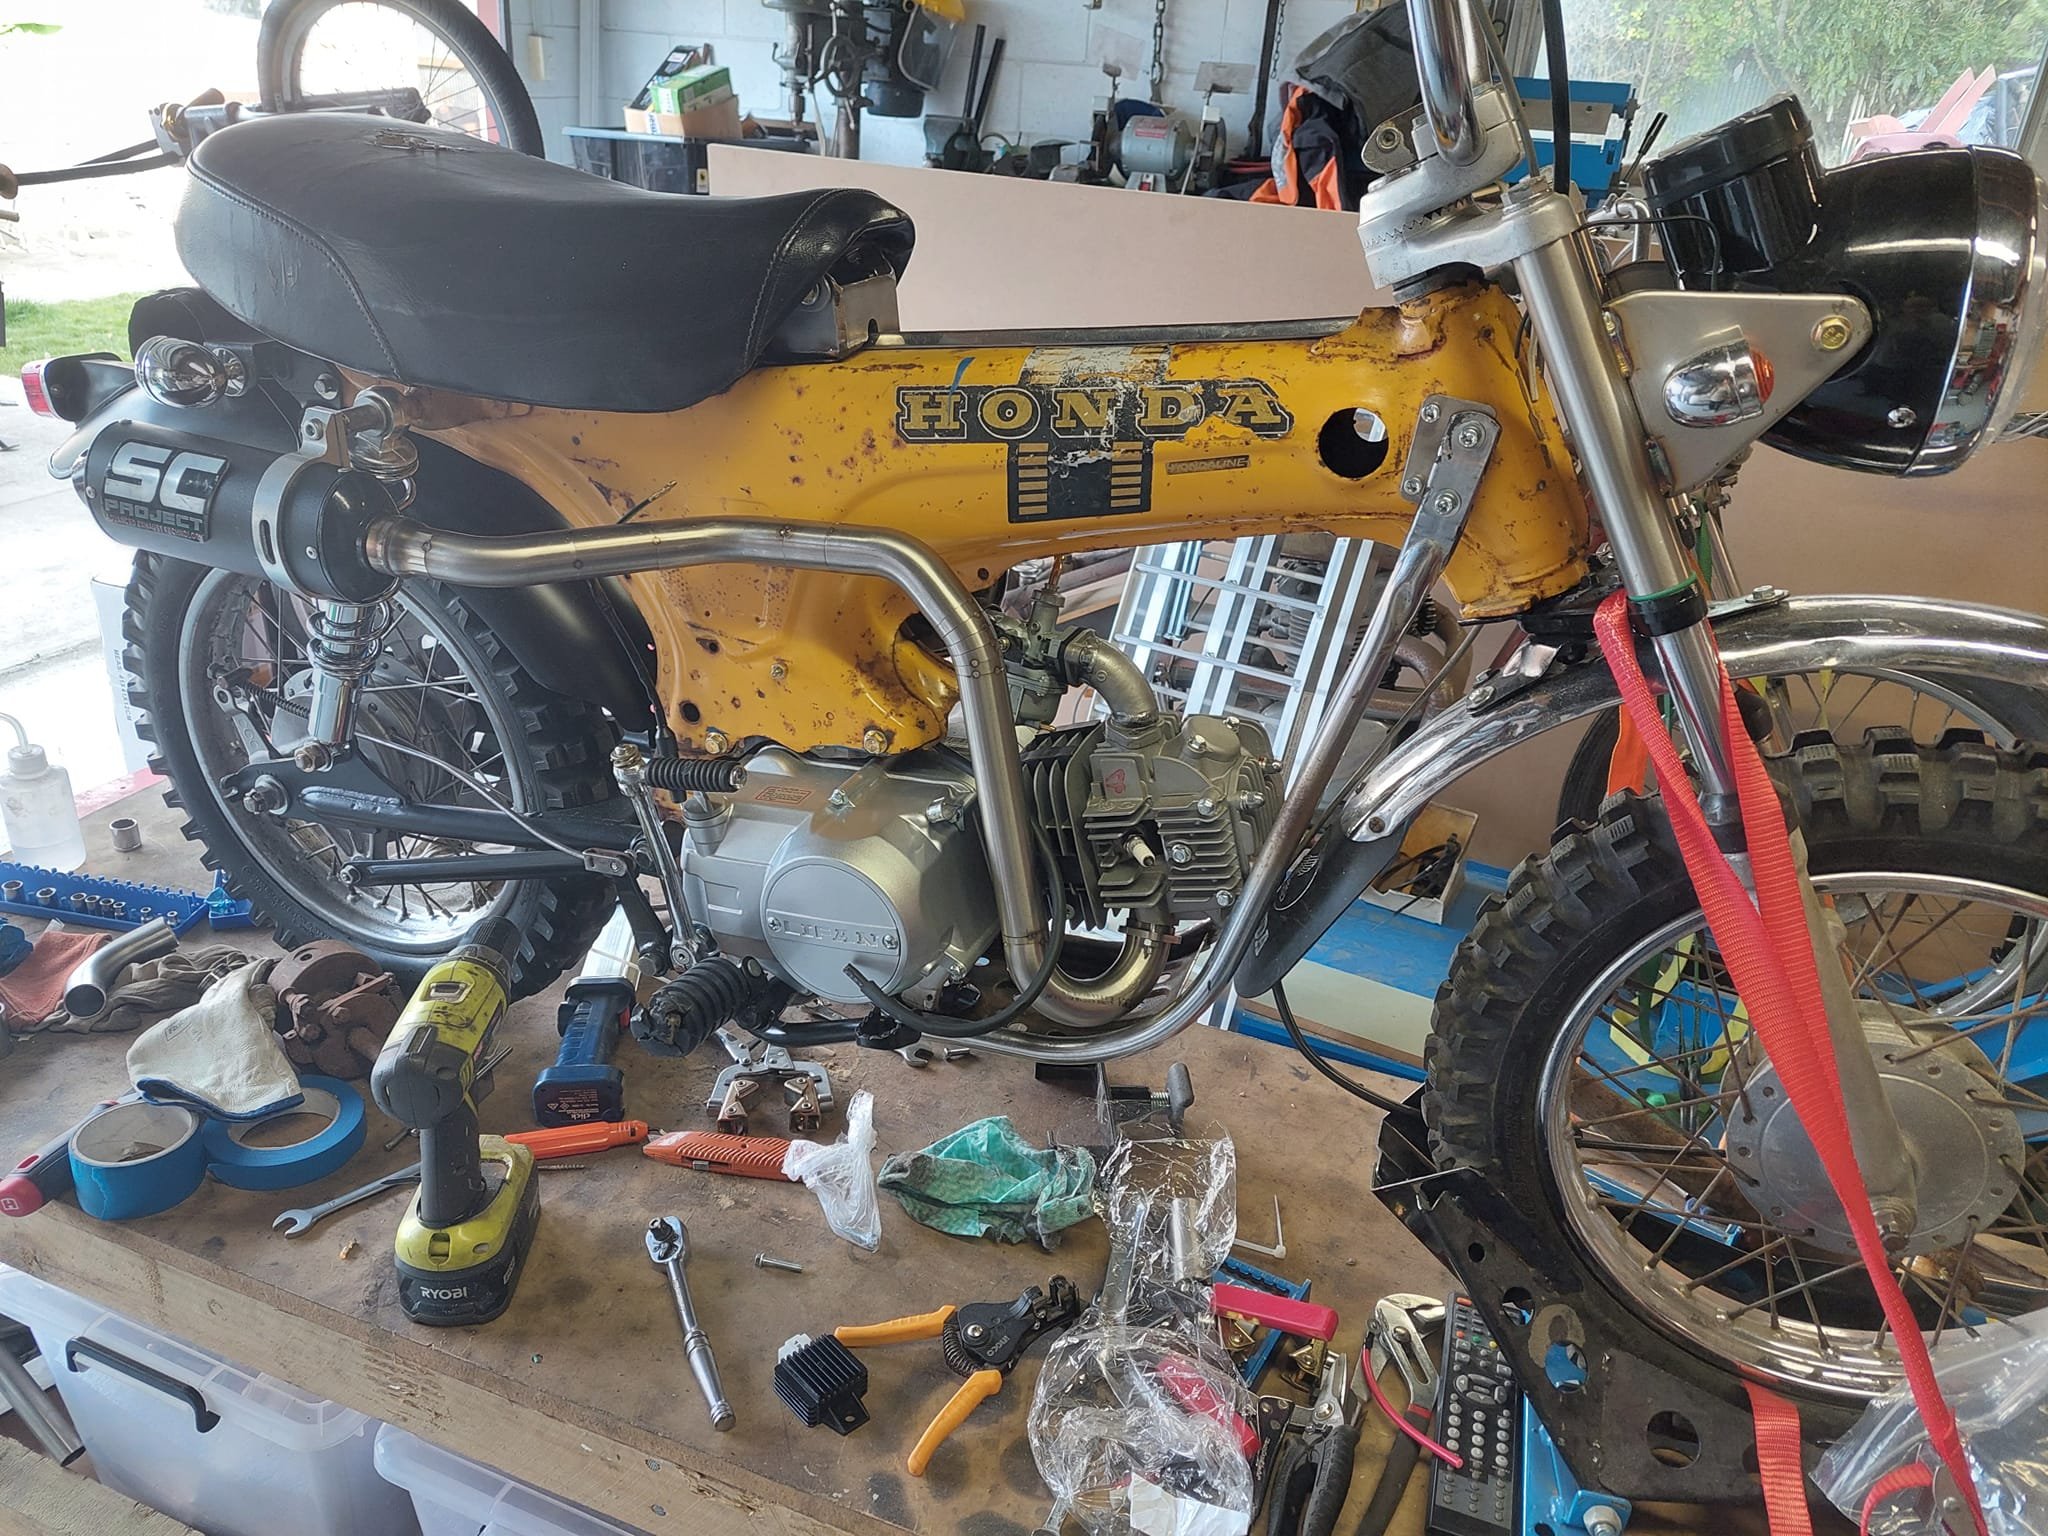
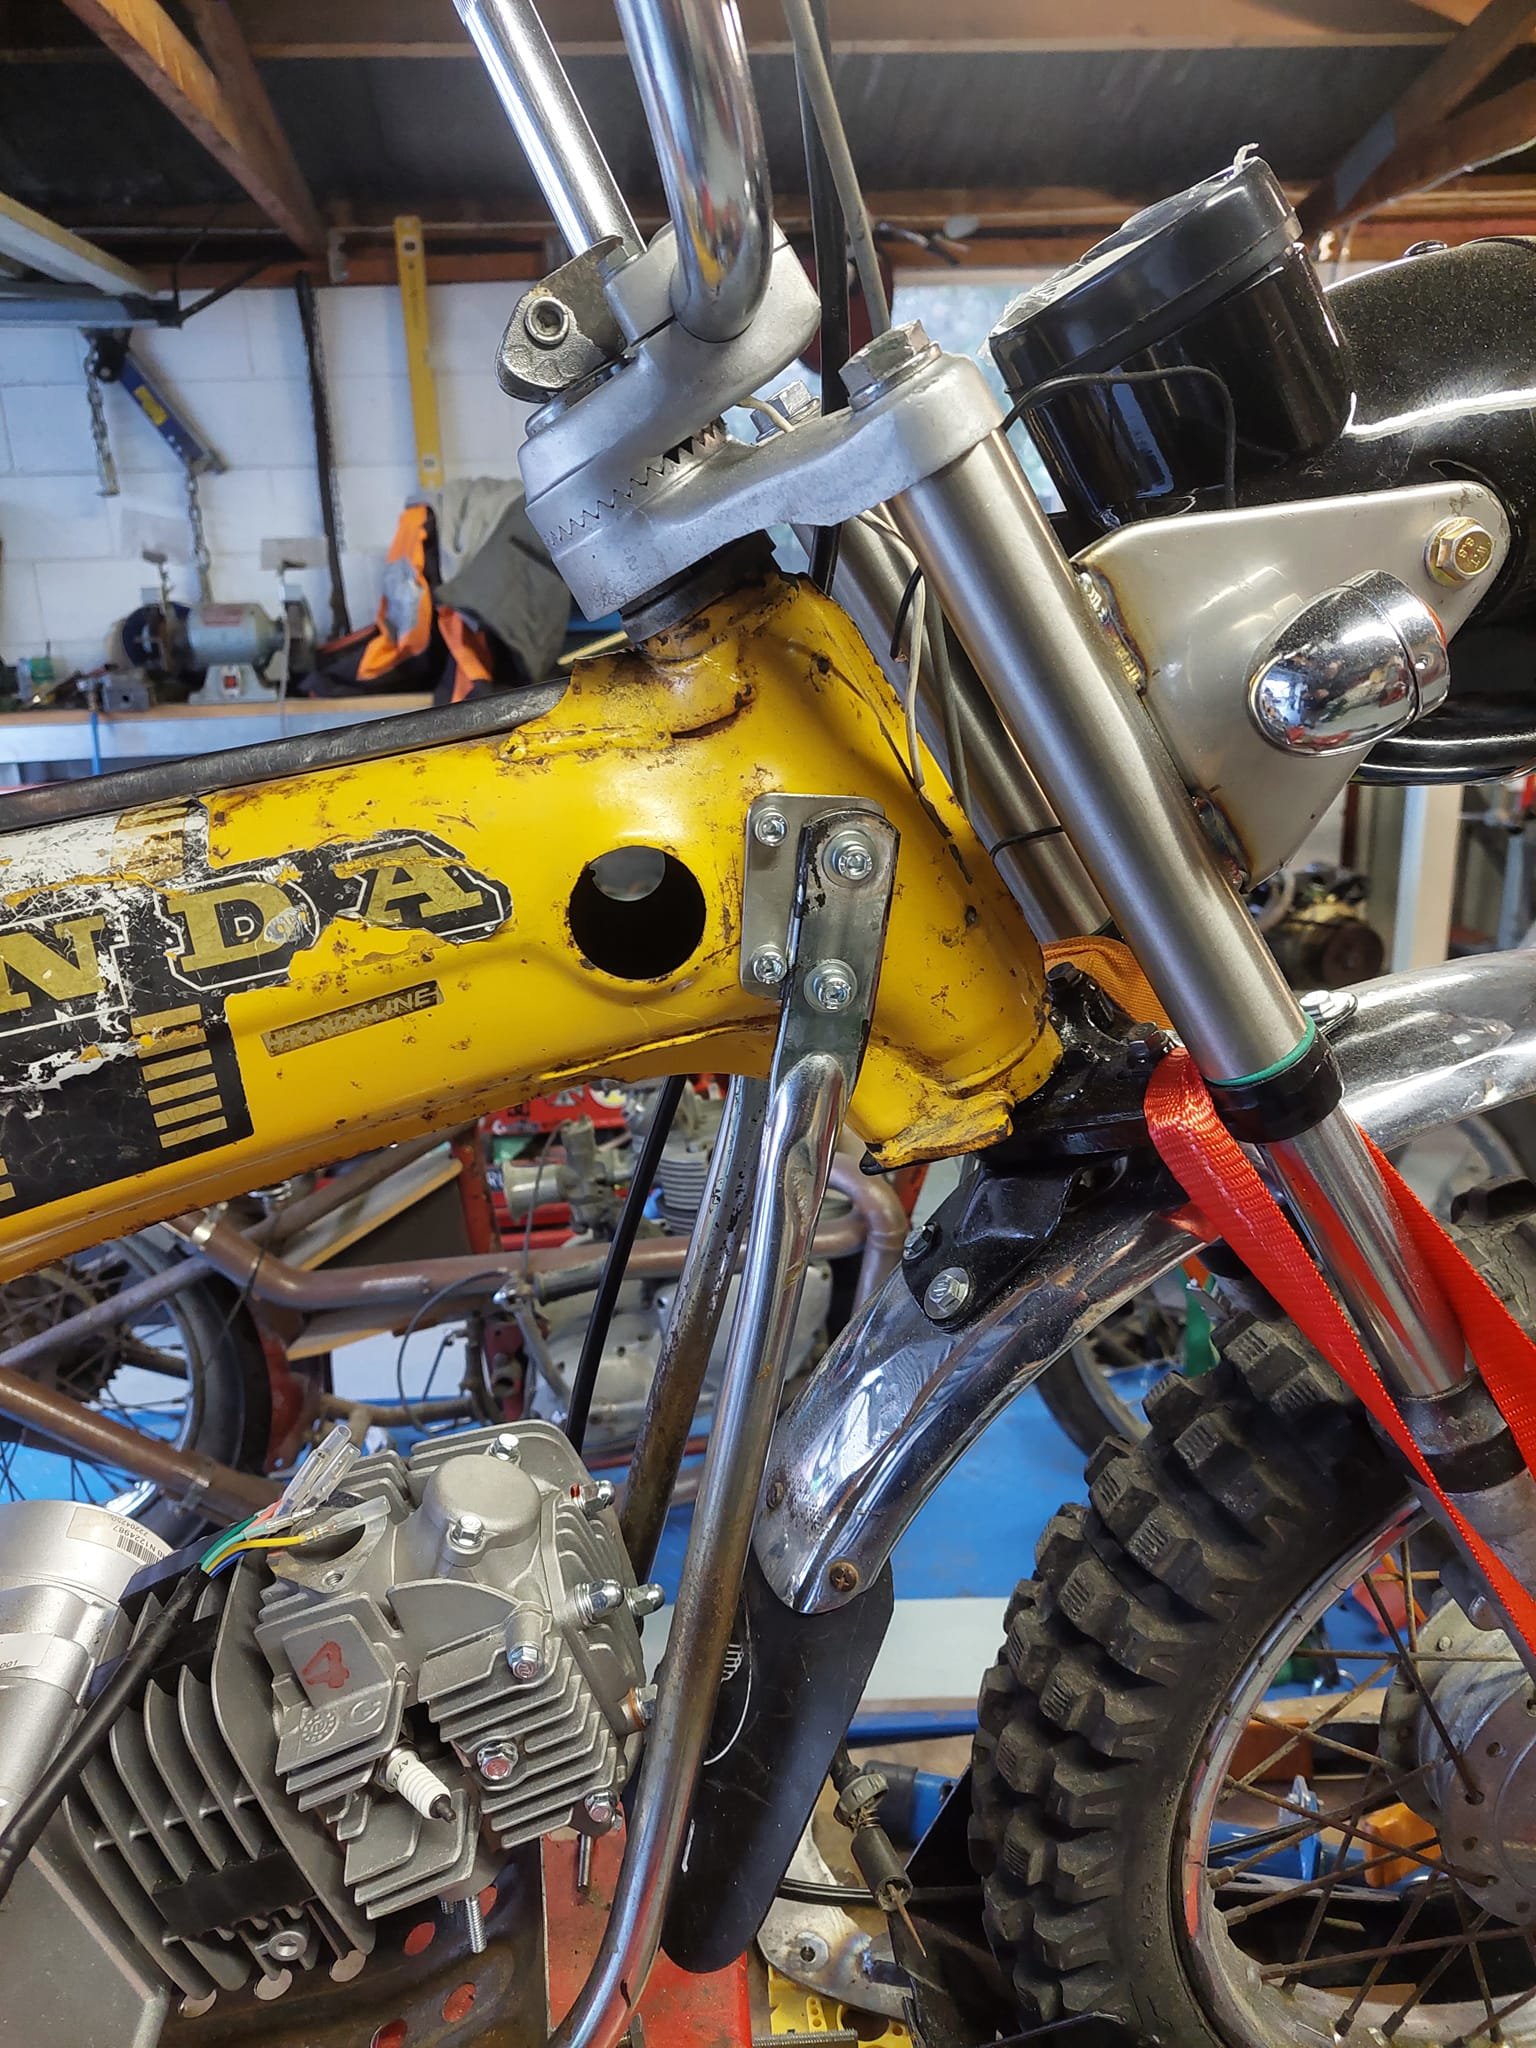
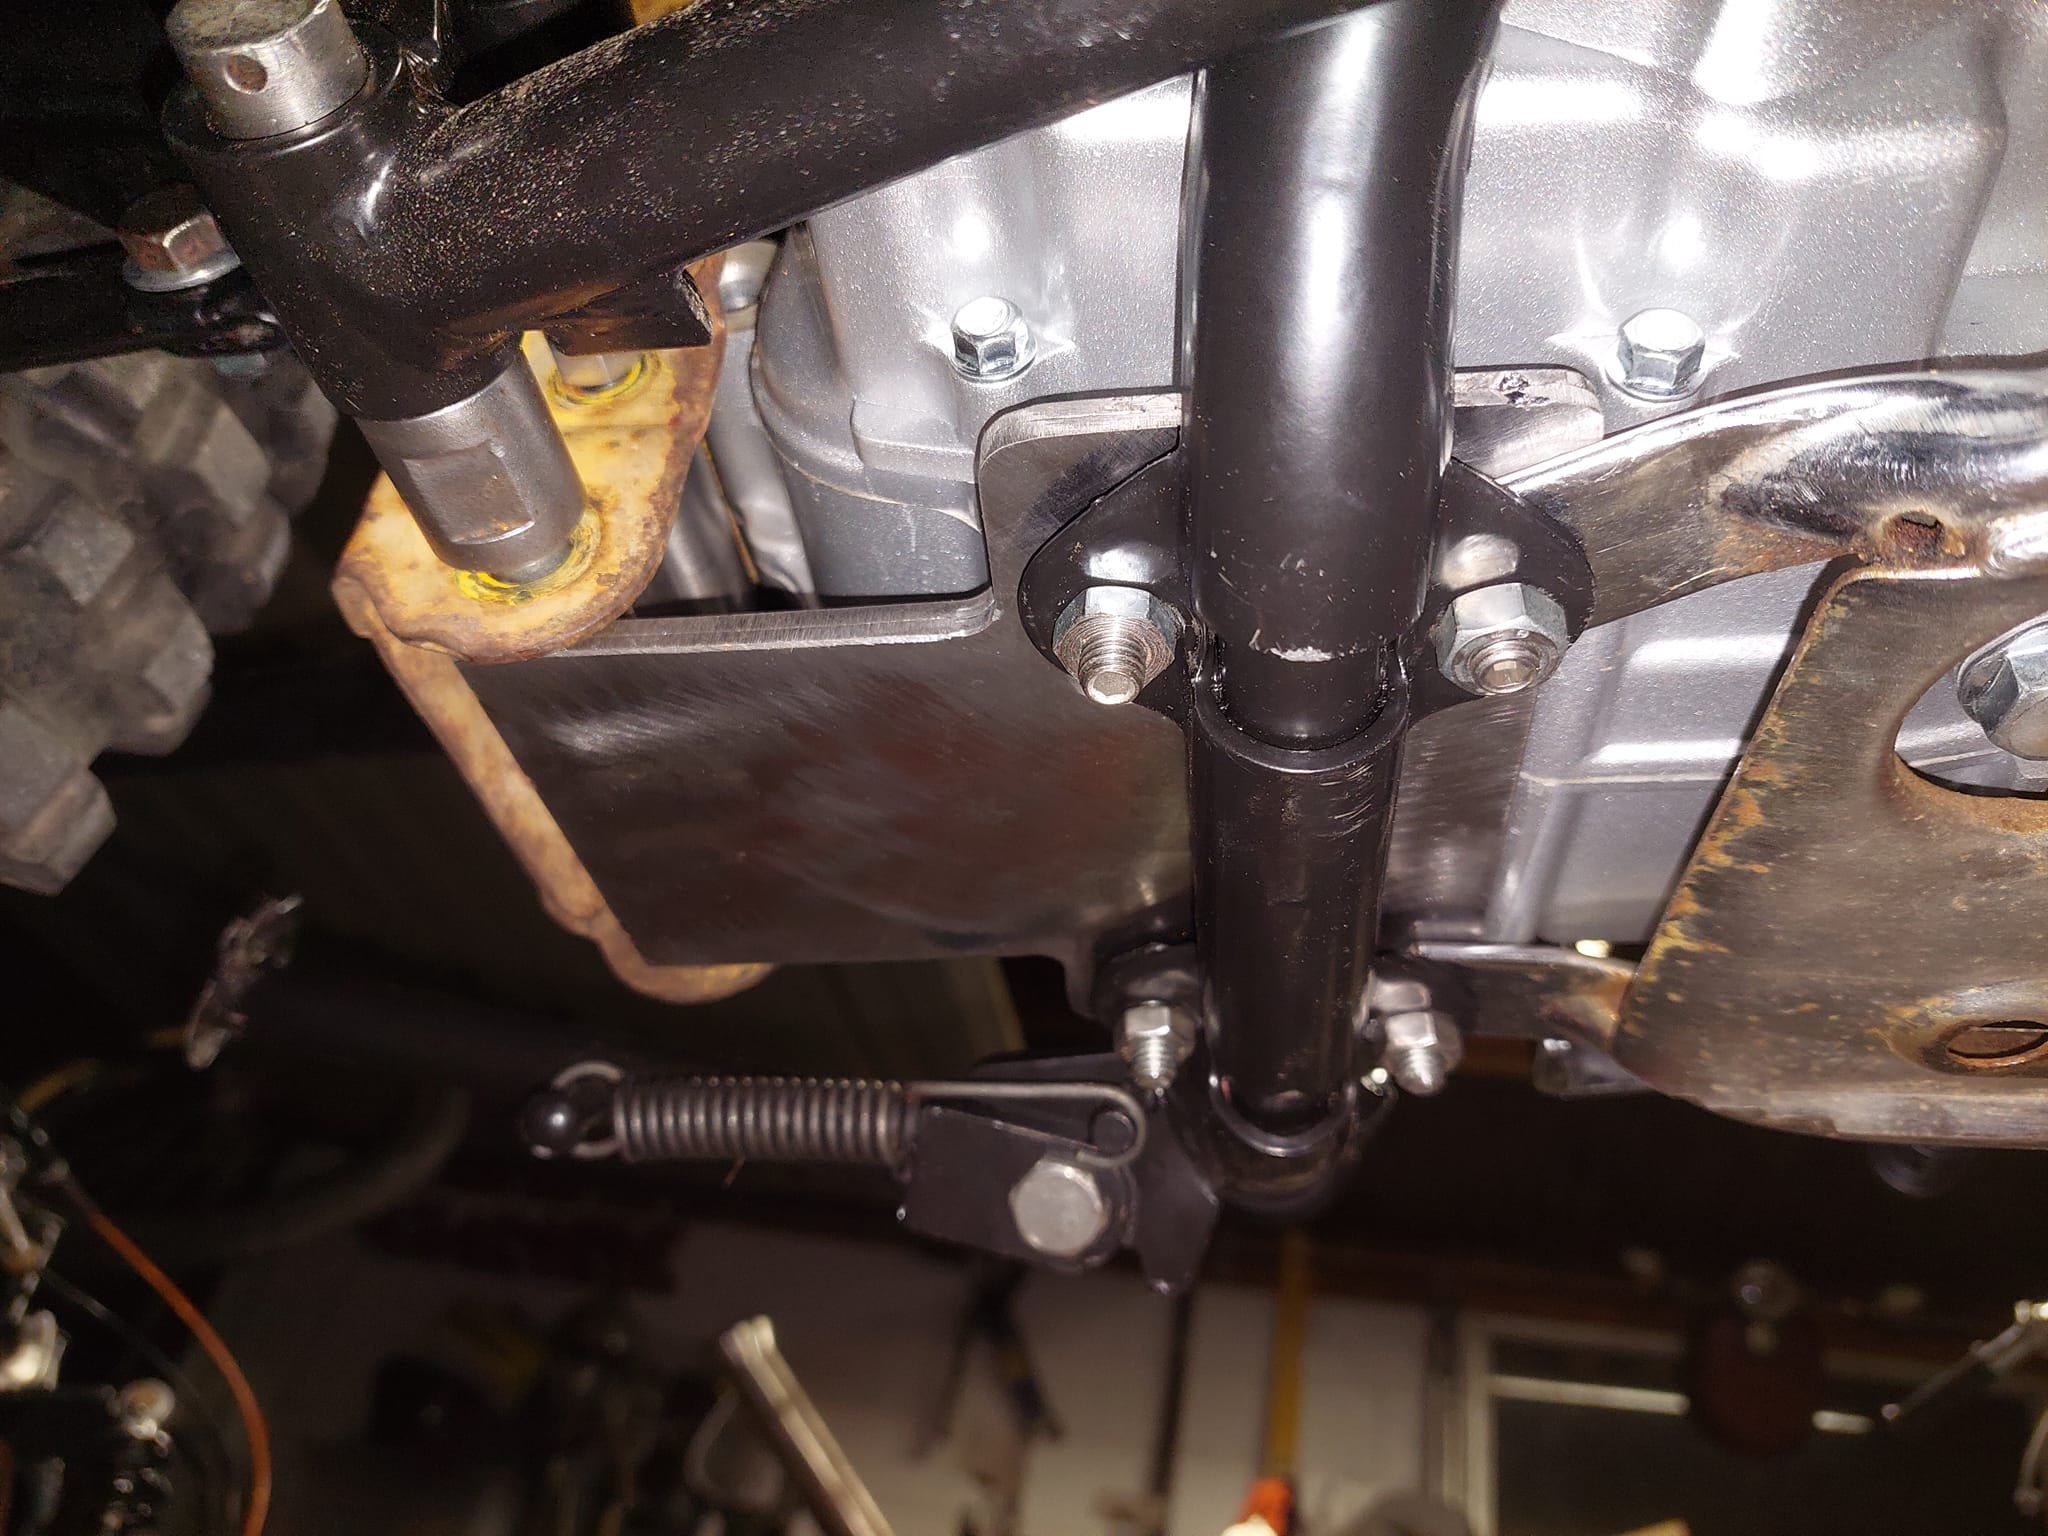
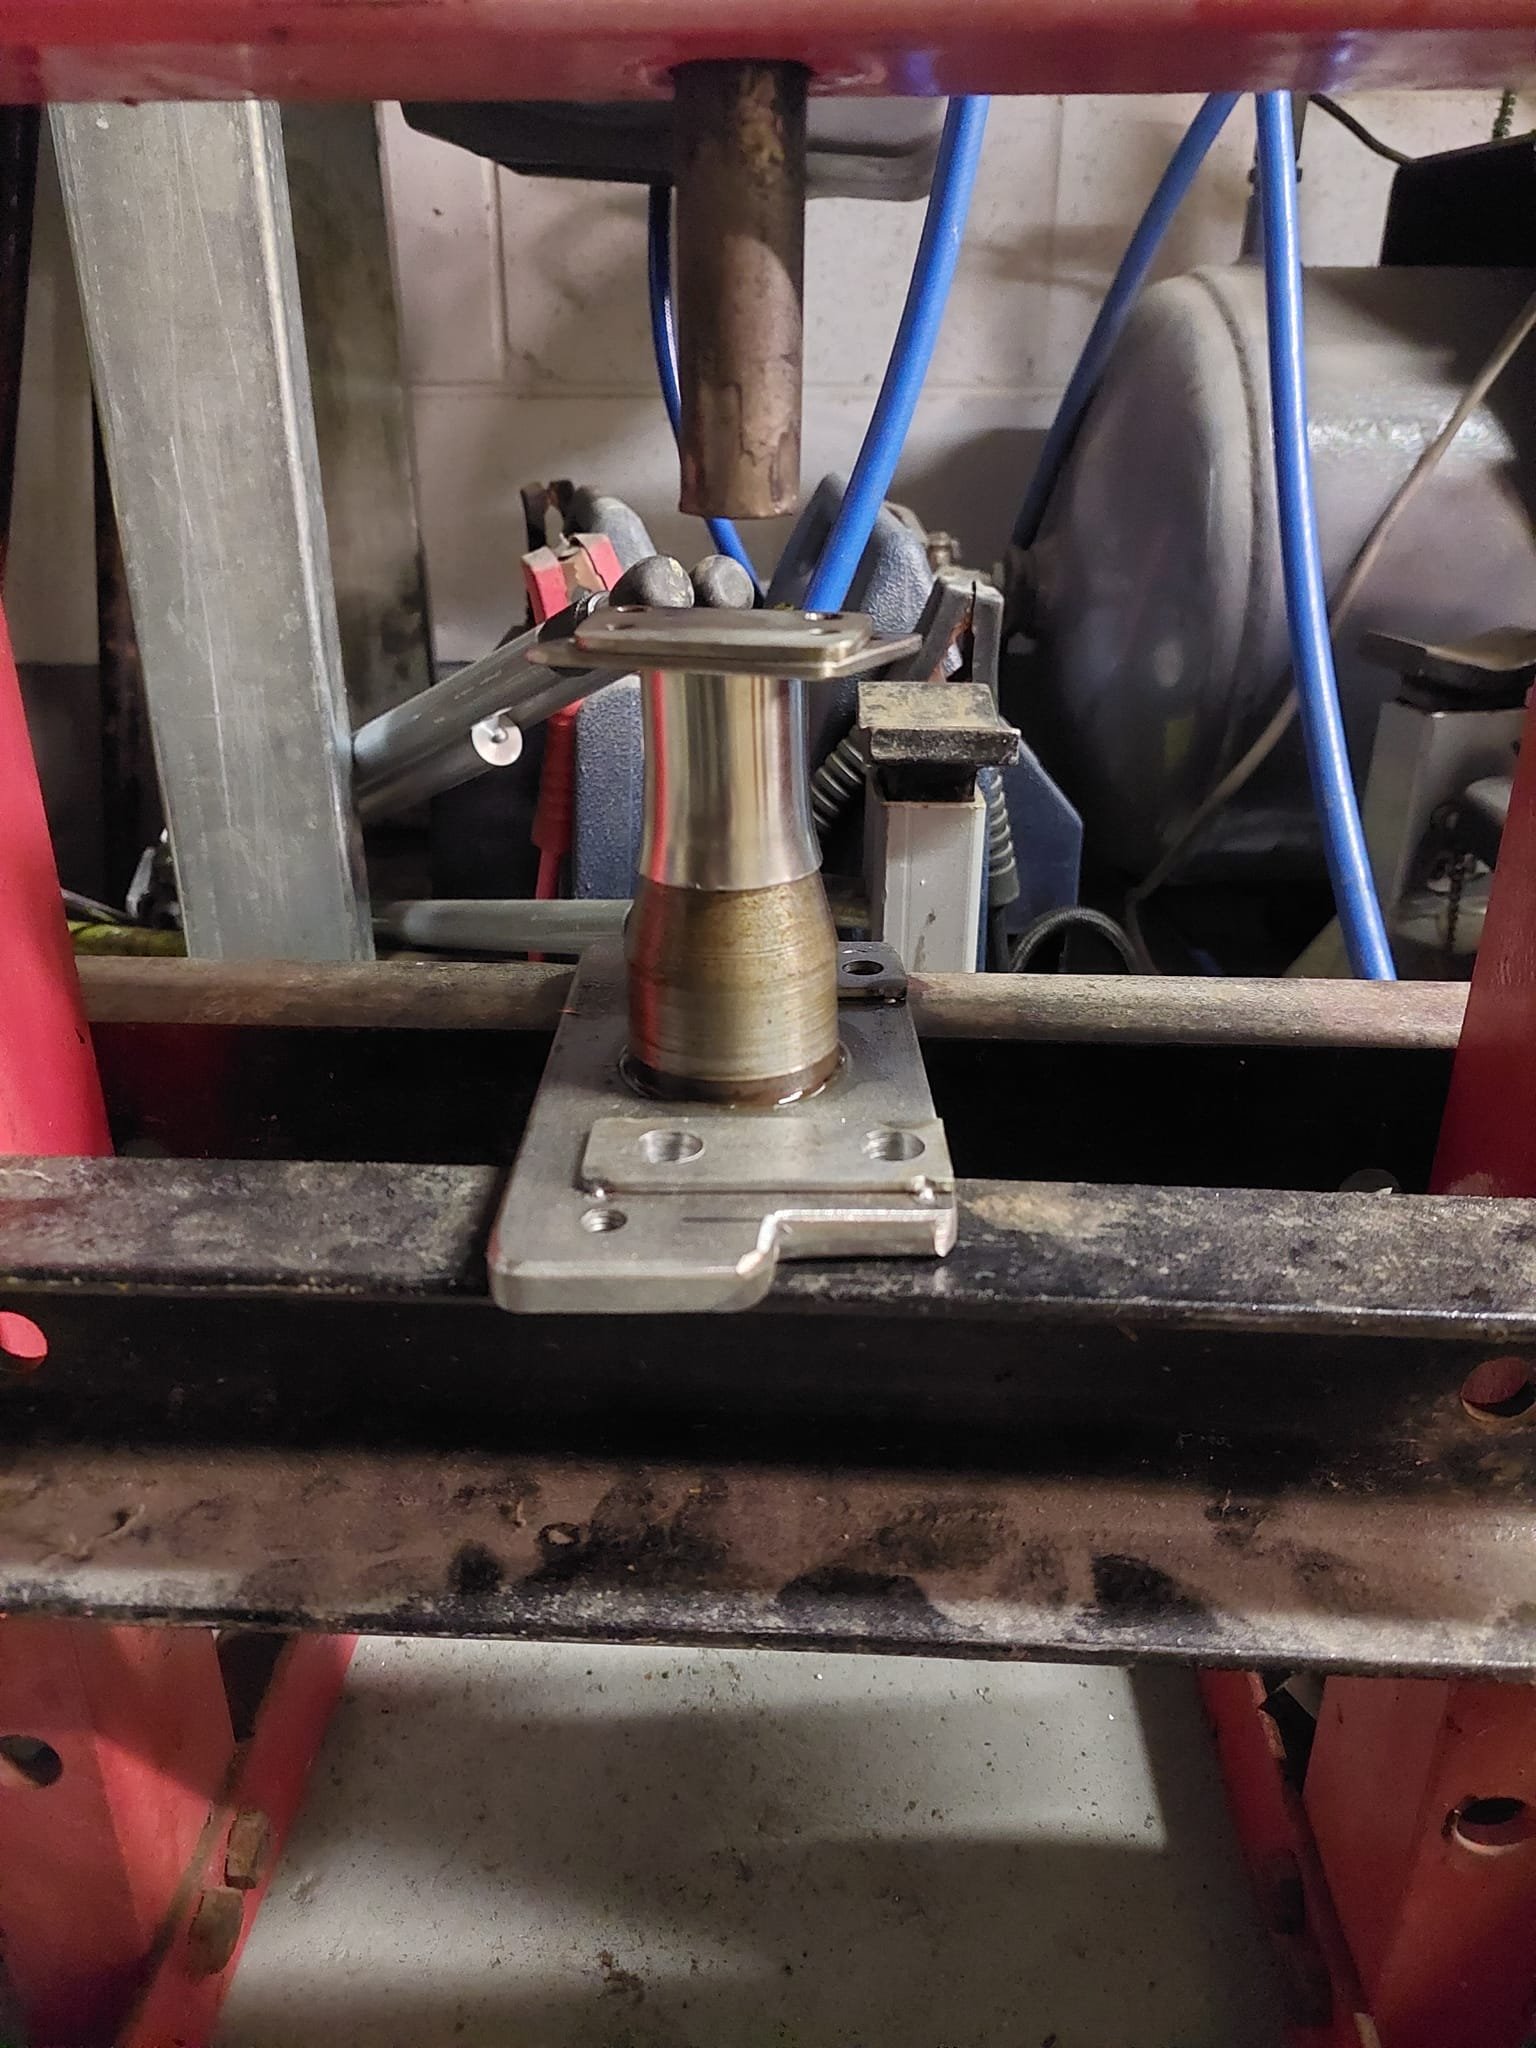
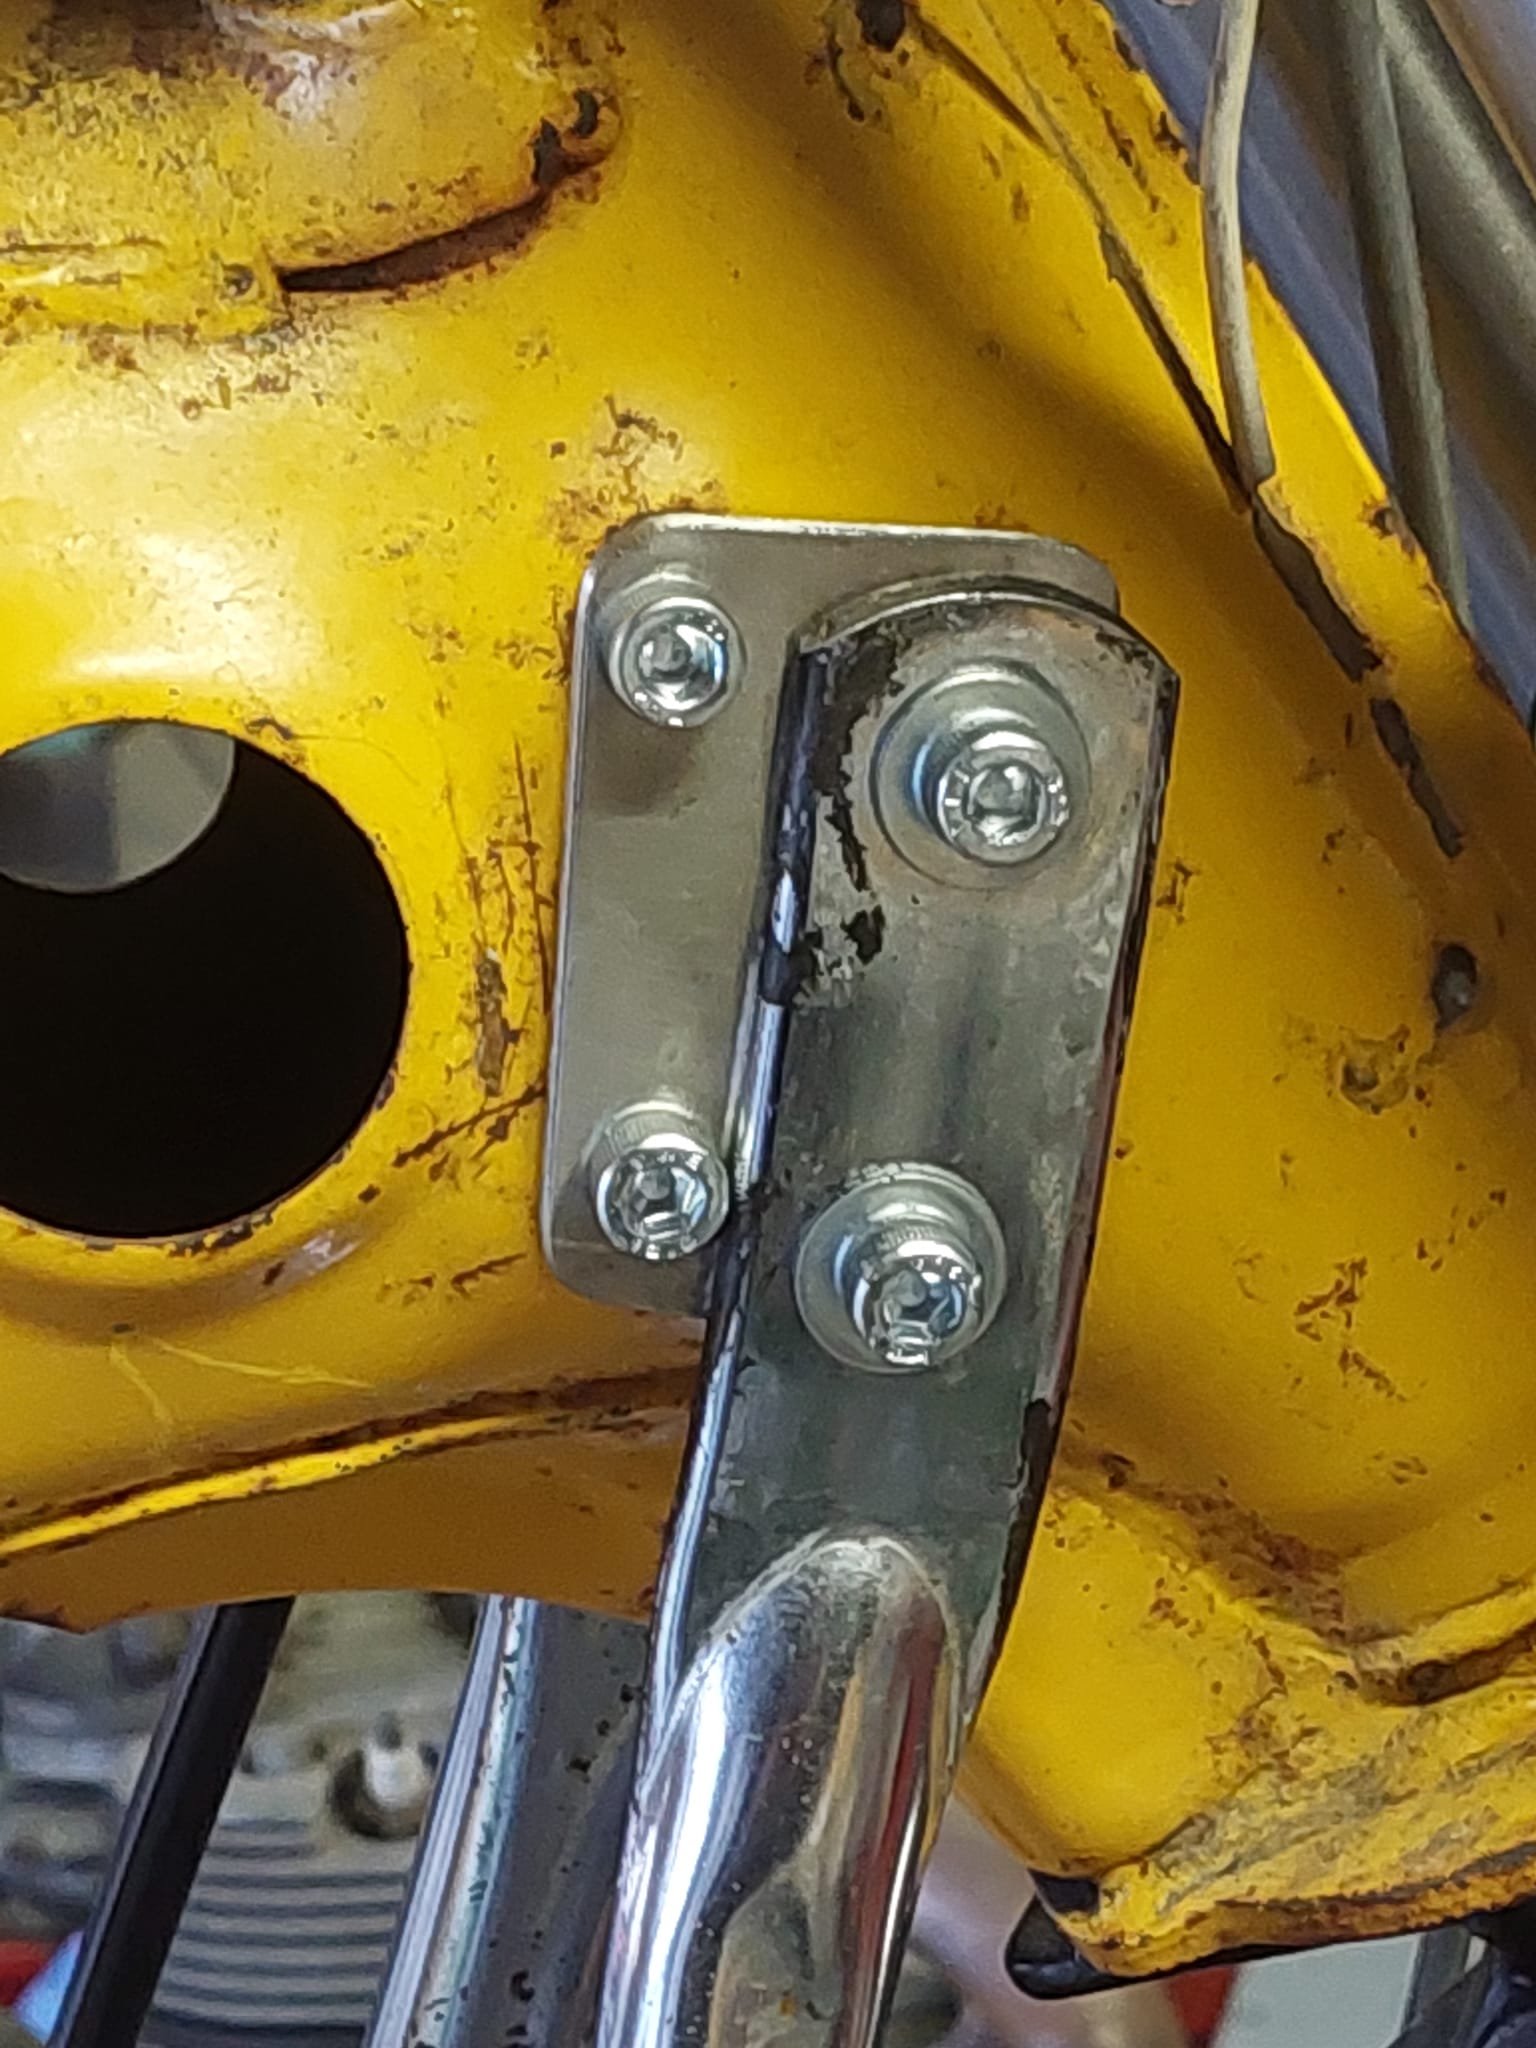
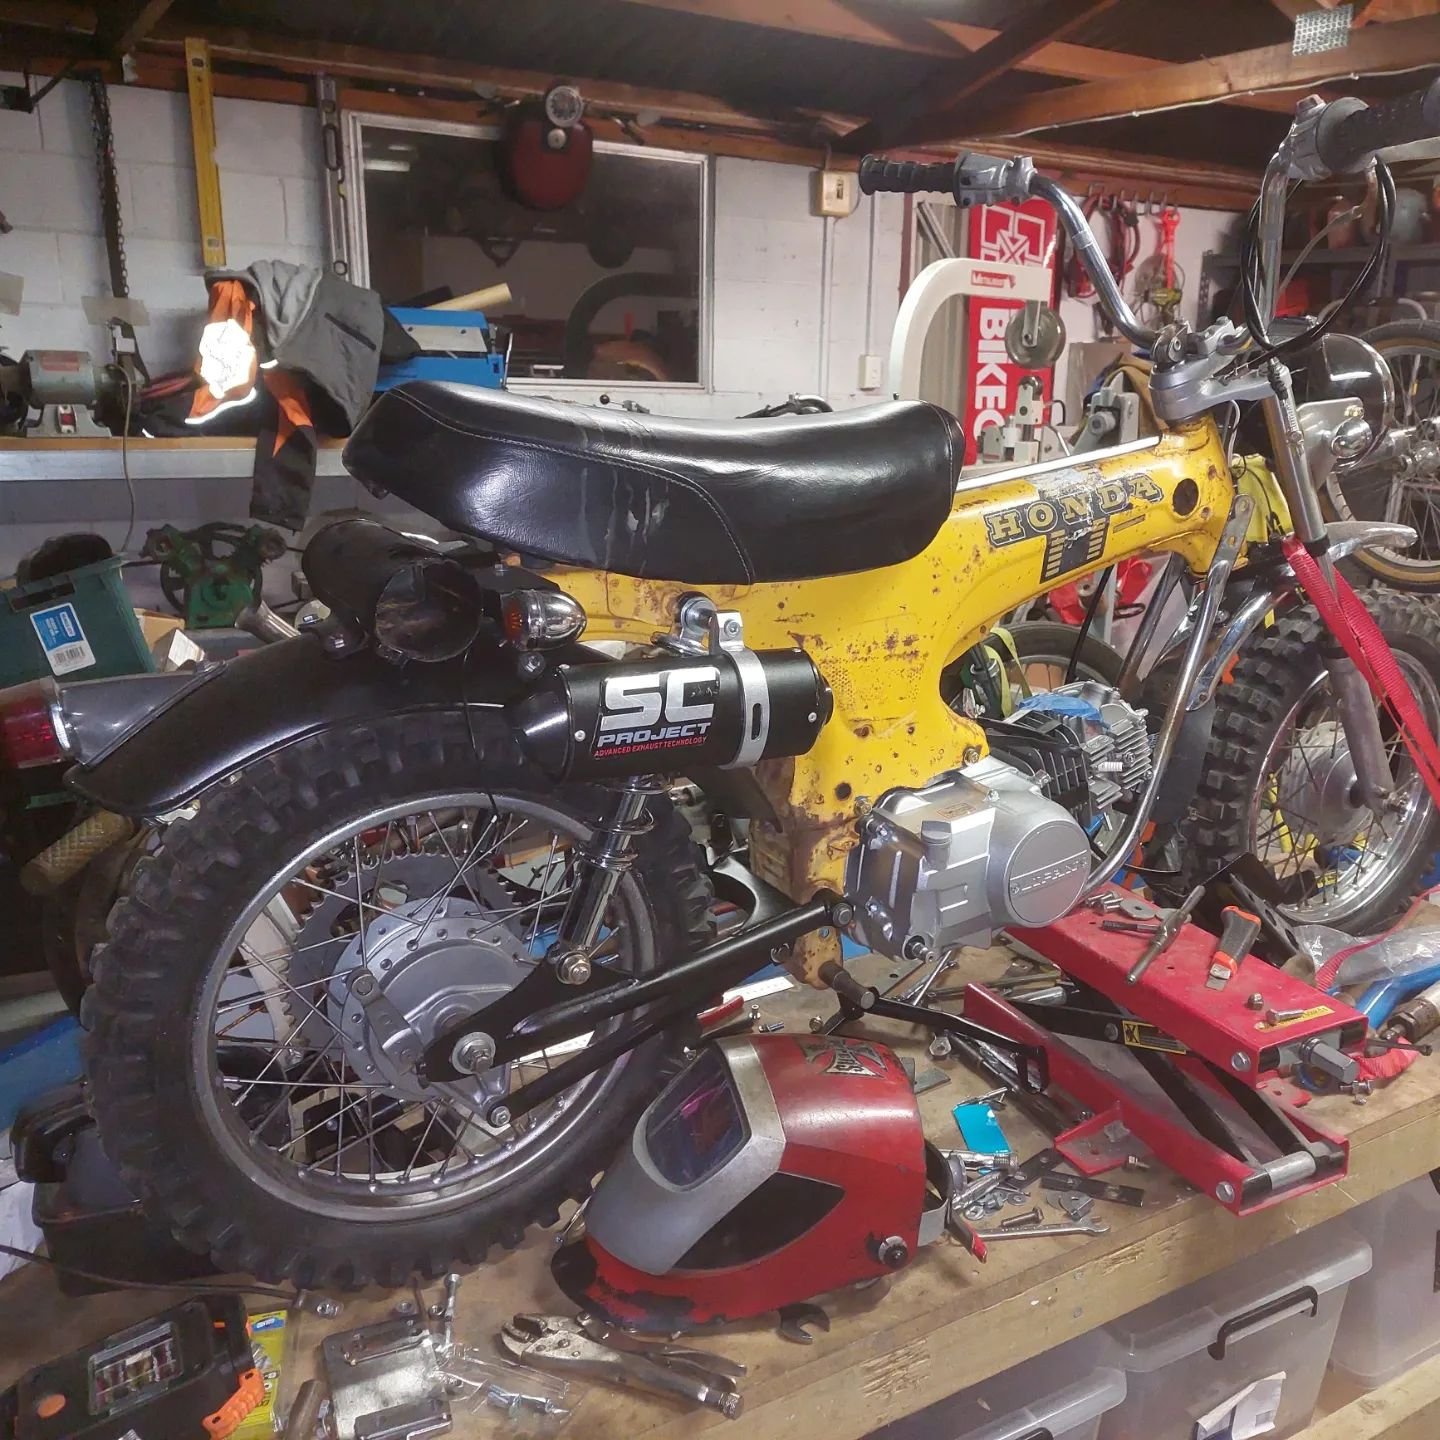
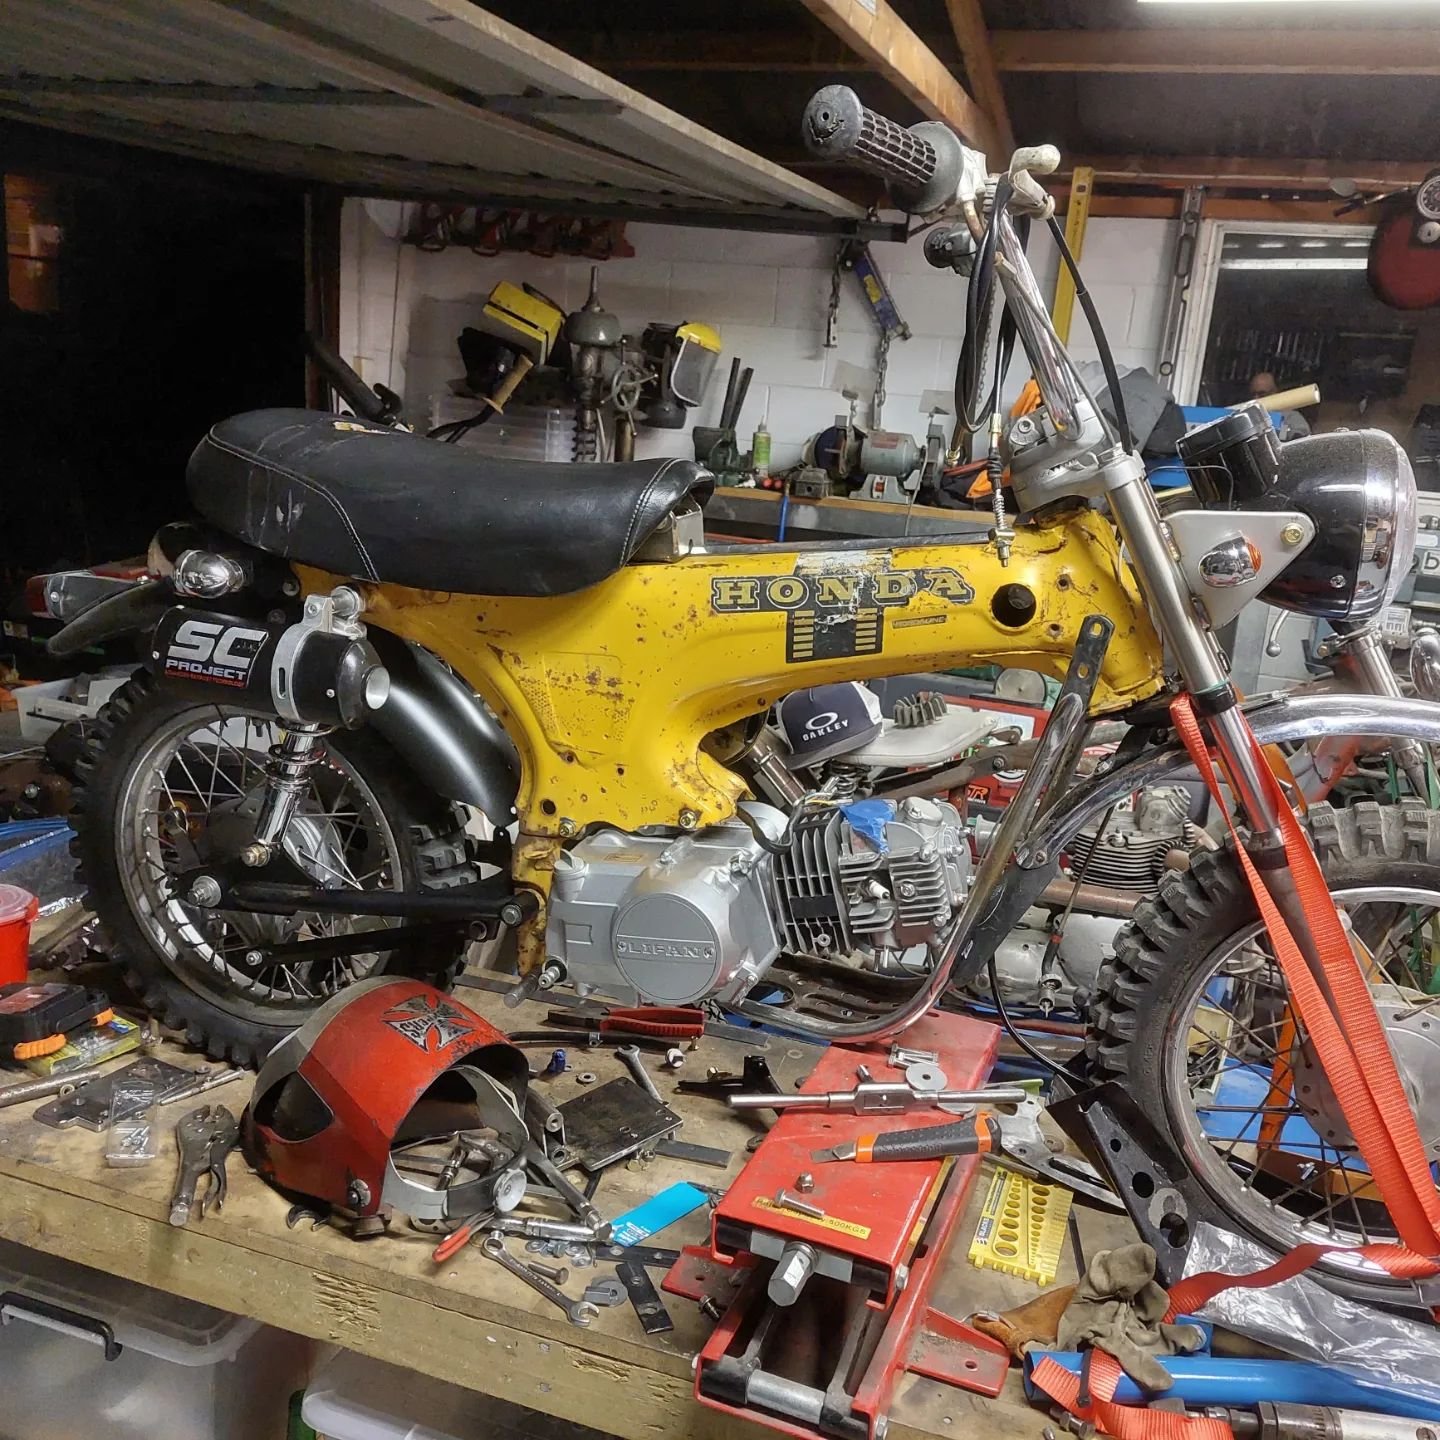
I wanted to keep the original air filter and box as it looks really cool and adds to the appeal of the ST, but the inlet manifold that came with the Lifan motor was clocked wrong, was too long and too tall. So I cut the flanges off and shortened and narrowed it. I made a start on the exhaust too so I ordered some 32mm stainless bend and started piecing them together. The diameter of the muffler is 38mm so I had to make and adapter. Ive just got the bends and pie cuts tacked into place and will fully weld it at the weekend. I tried to get the bends and tubes to match the lines of the engine and frame as best I could. Here's the adapter plates I made for the support brace . I didnt want to drill or weld anything to the frame incase I want to put the bike back to original, so I made some plates from 3mm stainless and offset and tapped the 6mm holes Here's a quick shot of the adapter plate for the engine mount which includes the mounts for the original footpegs and support brace. It bolts to the footrest mounts of the lifan and is welded to the tube that the brake pivot passes through
1 point
-
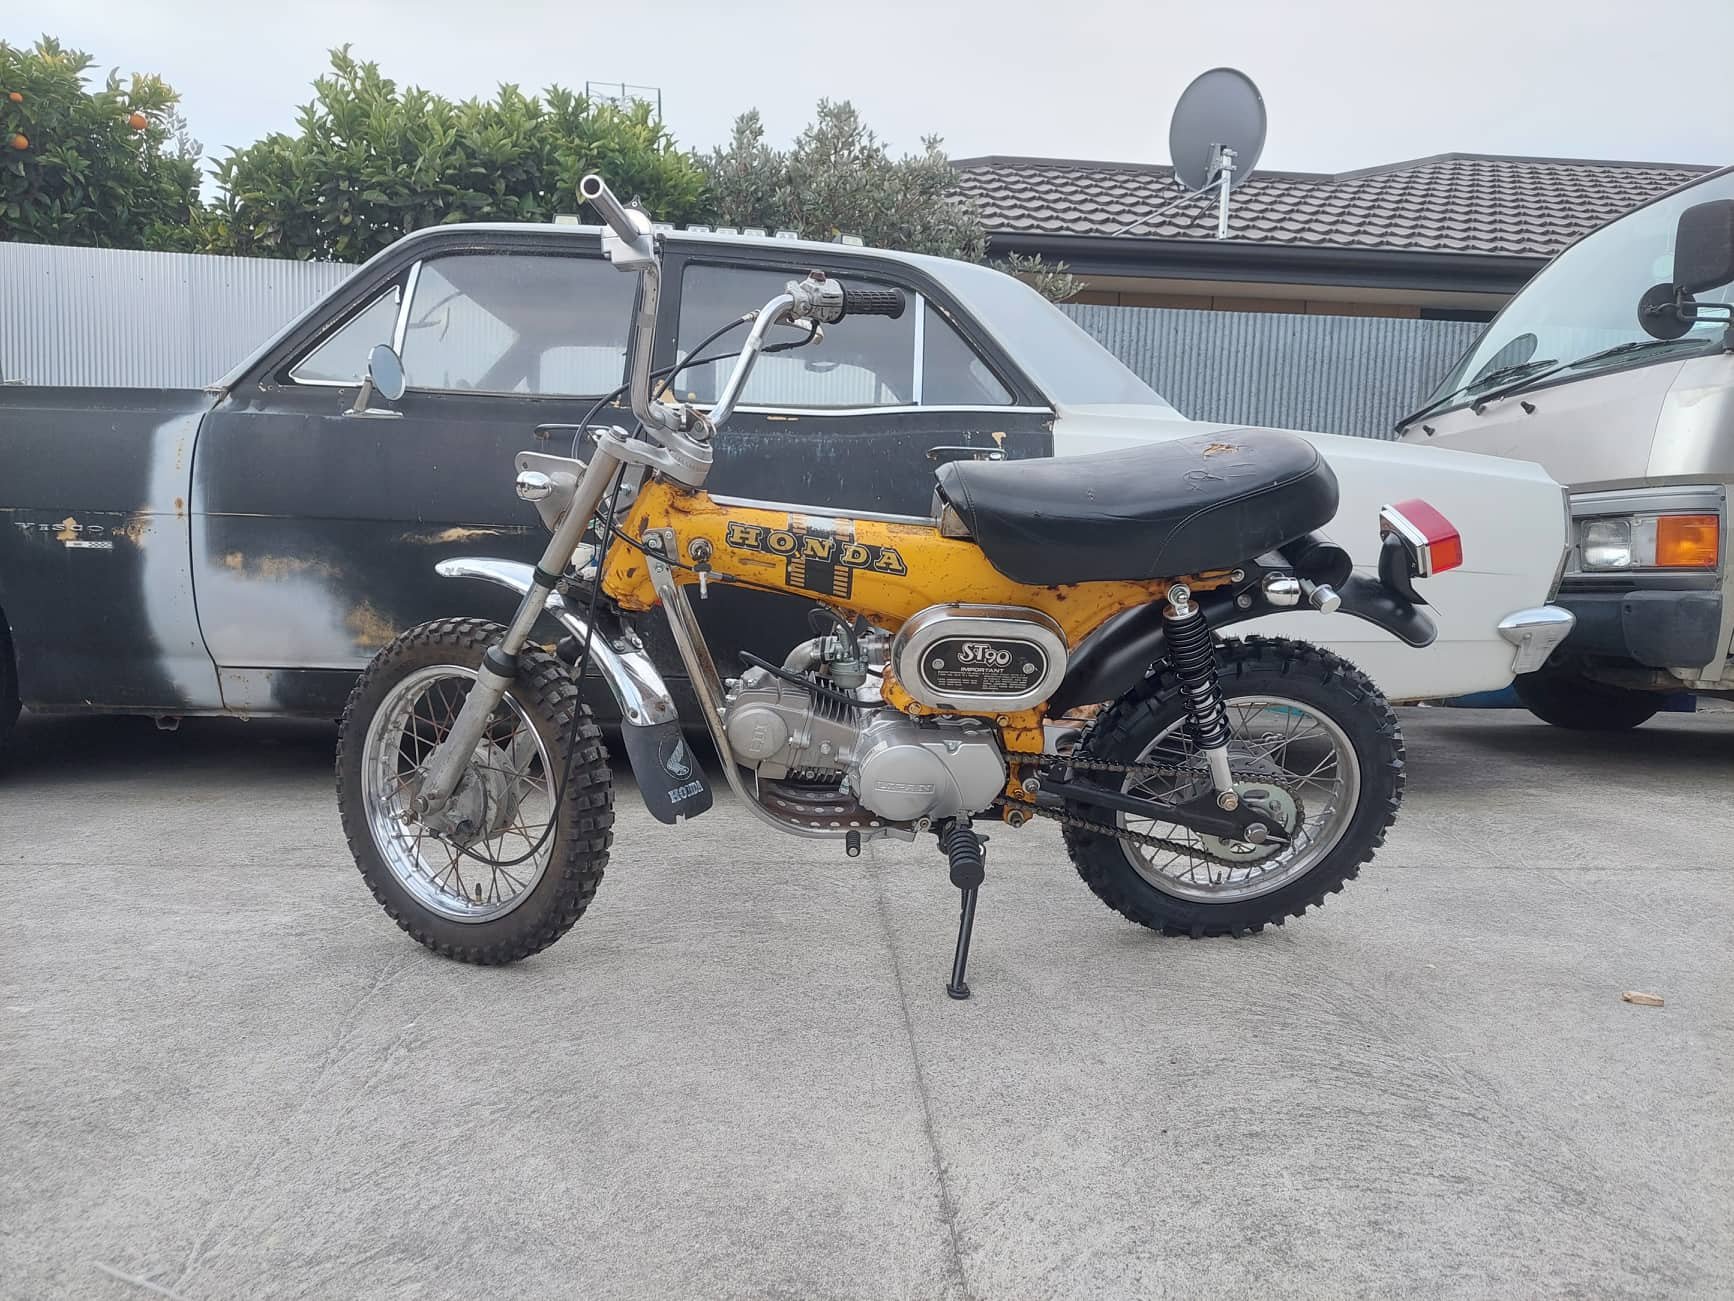
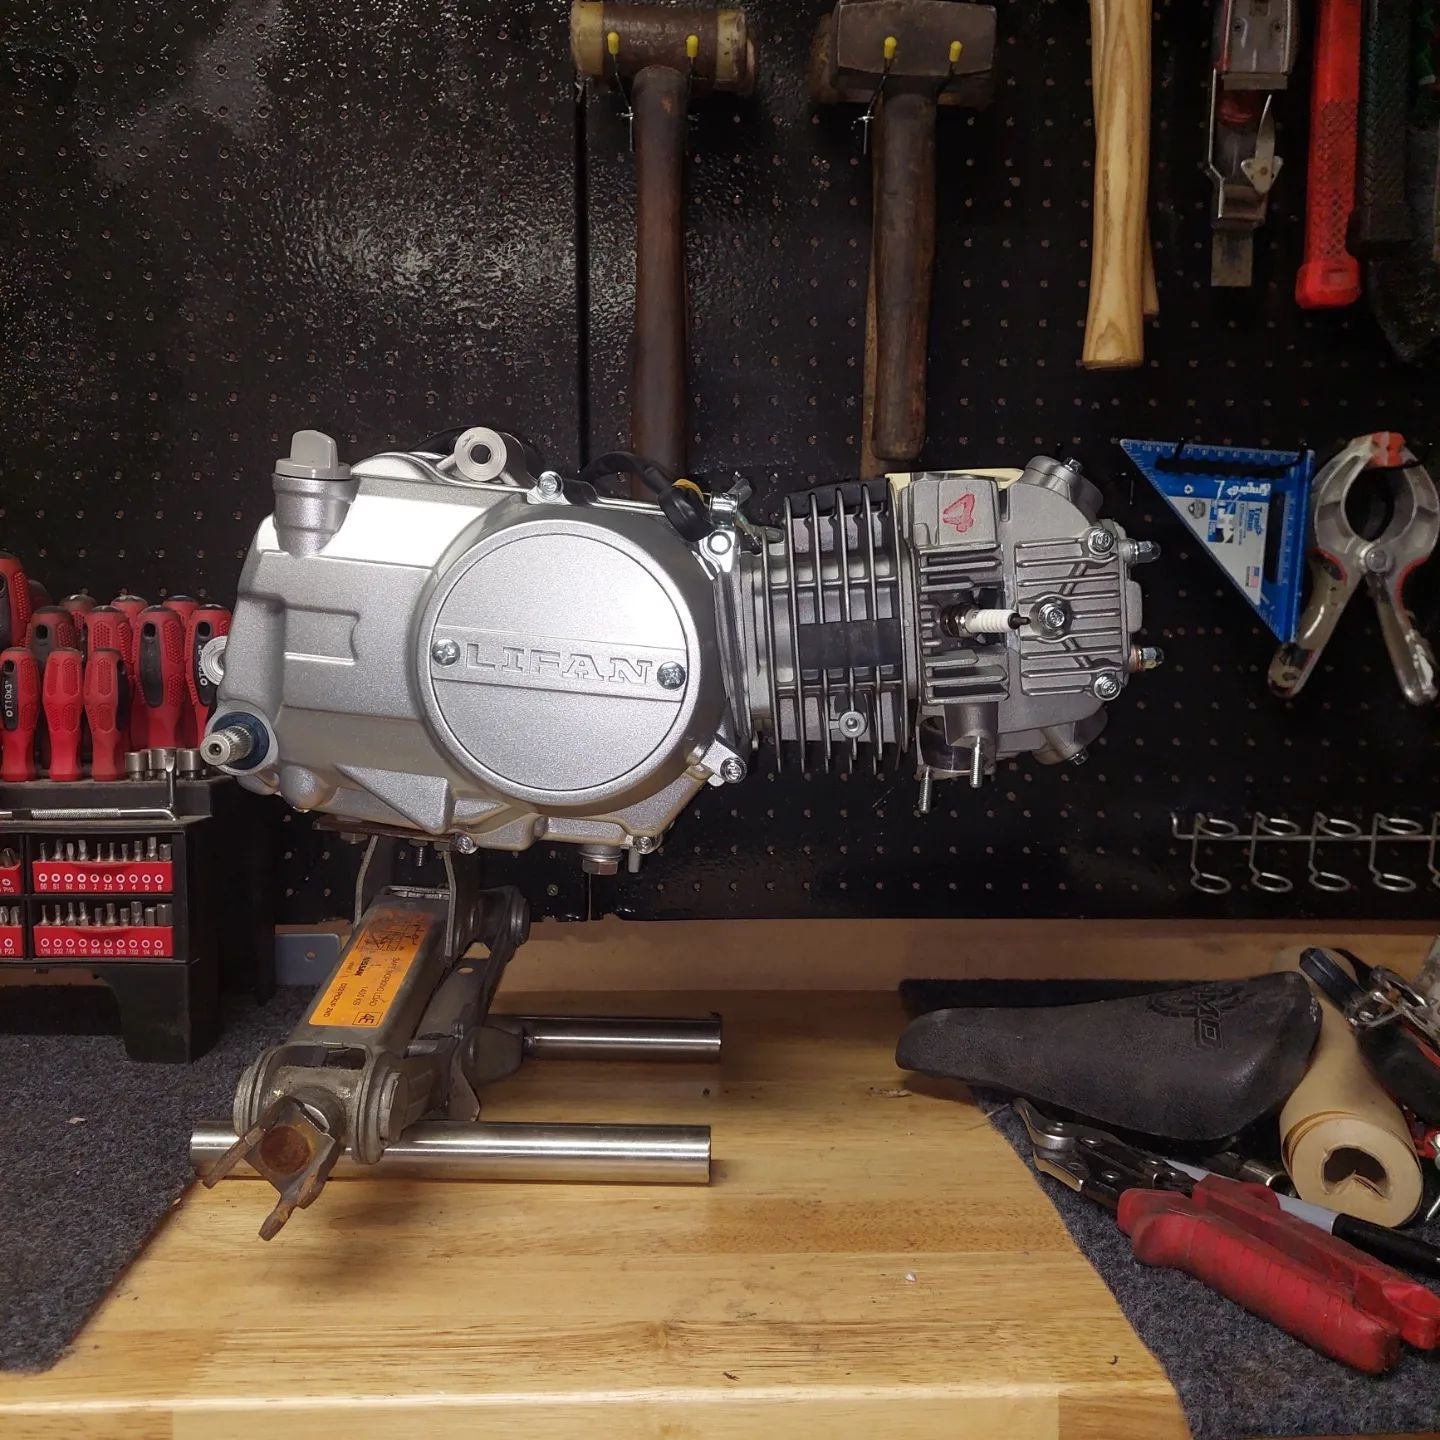
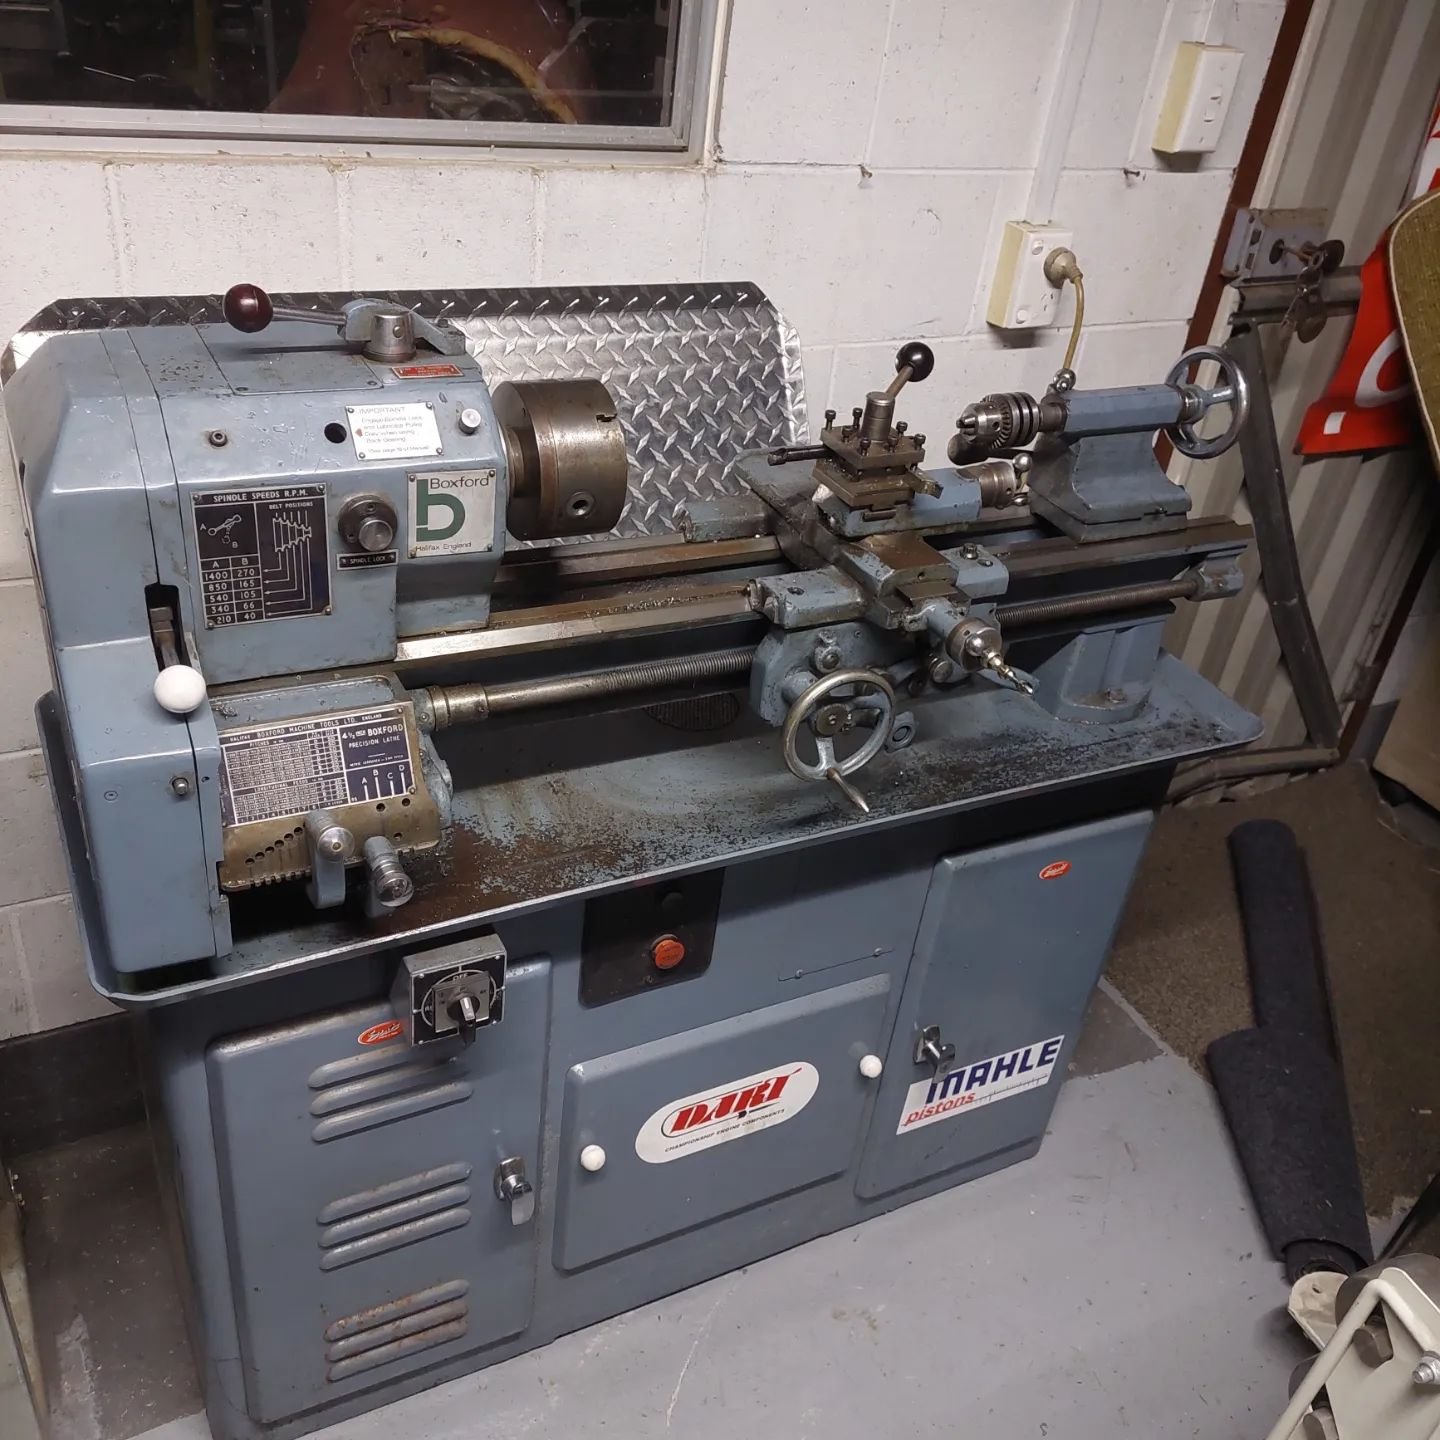
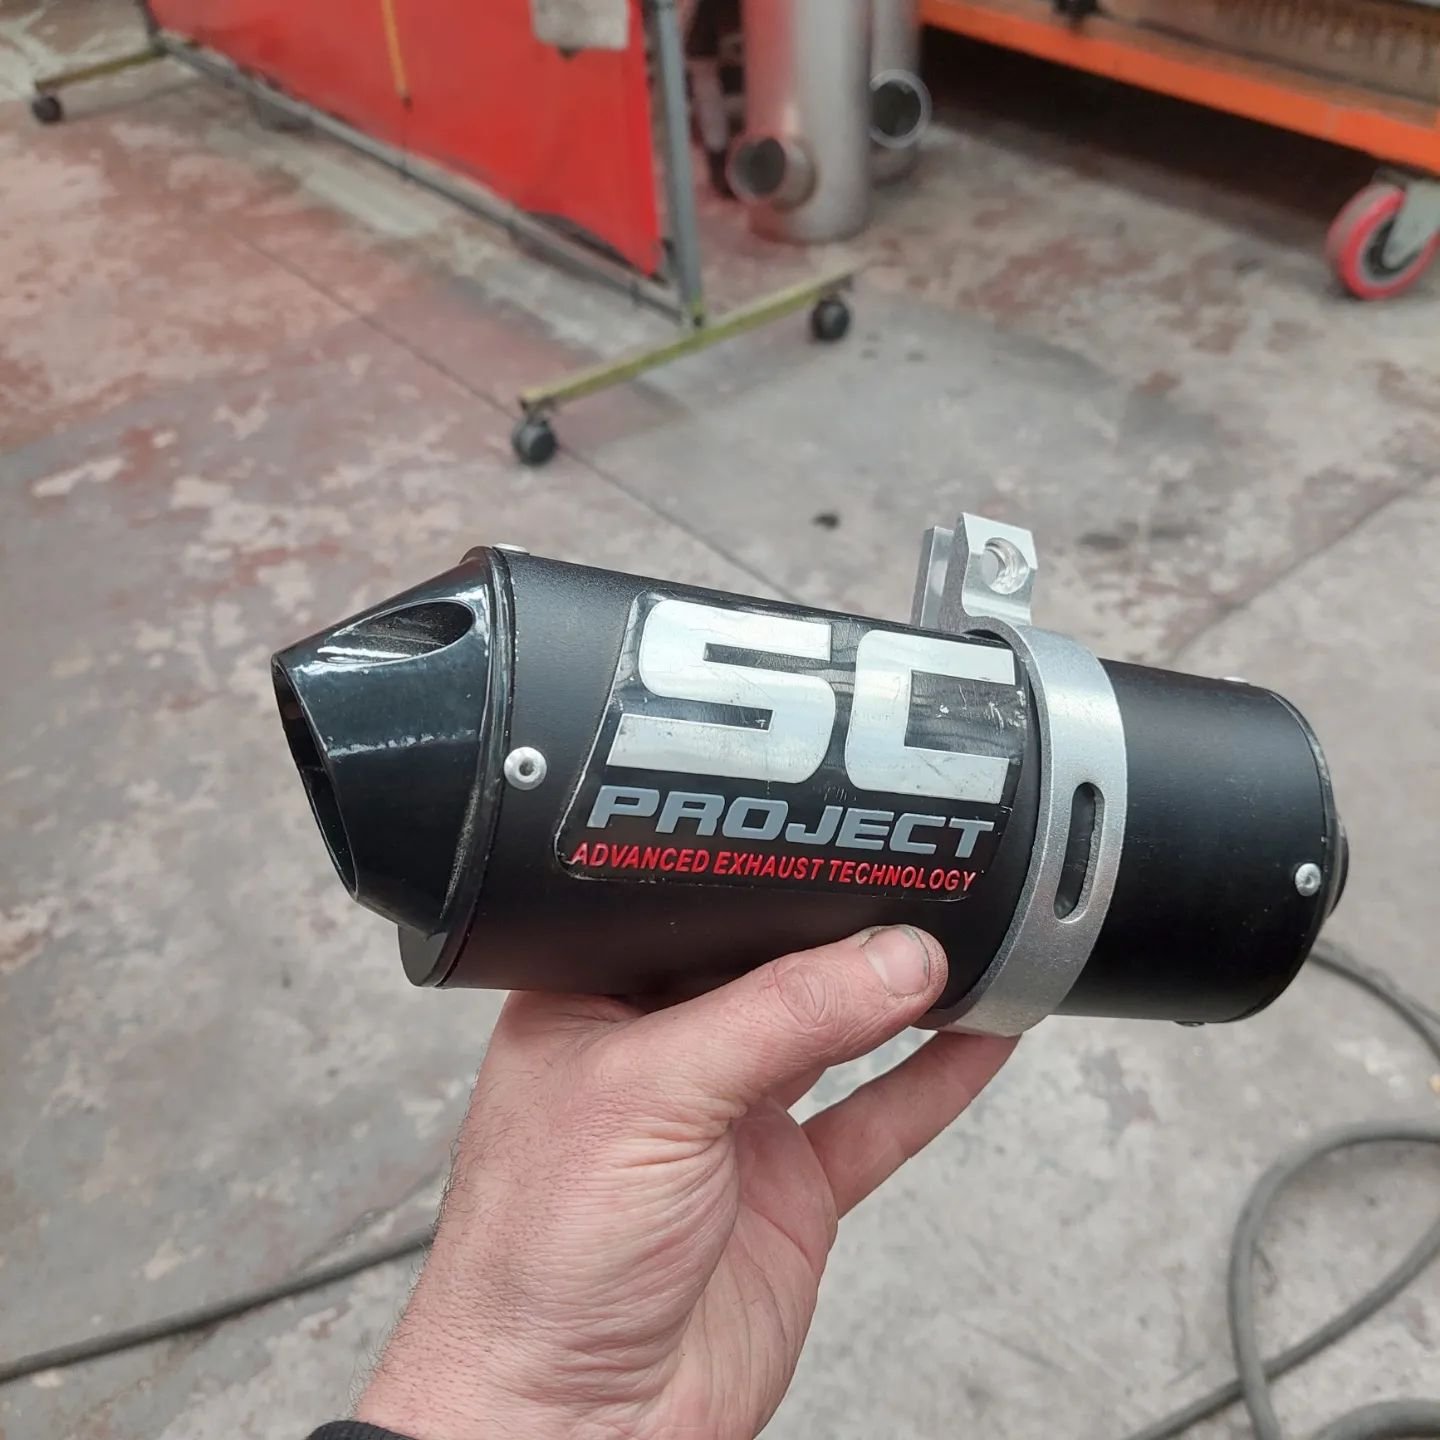
I recently bought a new place at the end of July and after a few weeks of unpacking and organising I thought I'd get stuck in to dads ST90 again The engine turned up from mBike so I adapted an old scissor jack to help raise and lower the engine whilst I make new engine mounts as I wasnt happy with how much lower and forward the adapter plates I made the engine sit. I'll take some photos of my design one I'm happy with how it looks and works. Along with buying a new house a treat myself to a new to me lathe for my birthday. Its a Boxford AUD 4 1/2''. It suits me perfect for what I need in my workshop, anything bigger I'll use the Colchester Triumph 2000 at work I swapped an old hot dog muffler and a small welding job for a mate for the delivery of the lathe and this small black muffler. I'll get some stainless bends at some point and start making the header pipe for it Next job is to make some small offset plates to bolt the support brace to the frame so they're not under constant tension from being in its unnatural position
1 point

































This leaderboard is set to Auckland/GMT+13:00