
Leaderboard




Popular Content
Showing content with the highest reputation on 13/08/25 in all areas
-
The BMW throttles, I'm definitely not going to be able to get them bored out enough to be worth the trouble. Even if I do, they wont fit on my manifold anymore. So either way I'm remaking stuff. So probably end up hanging on the wall of shame and/or onselling just the throttles etc. Anyone want some? Good for a smaller CC motor with a more normal port shape. Anyway, I'm back to the same old same old. Trying to solve throttle situation. Looking on ebay, aliexpress, where ever else. Seeing if there are any good solutions for a decent throttle size I've not thought of yet. Doesnt look like it, just circling the drain again... Until! Holy shit! How absolutely perfect is this. It turns out that OBX has apparently shut up shop. So they've got a bunch of stuff on ebay for half price. Their full 350Z kit is fairly garbage because the cast lower manifold part doesnt fit properly, and so on. But they obviously have a whole bunch of the throttles on their own to sell. Sweet! 51mm throttle set! For fairly decent price for brand new stuff. (about $700 landed) I'm perilously broke in terms of car budget right now, but this seemed too good to miss. So I've borrowed some $$$ to make sure I didnt miss out on getting a set. As I've not found or seen anything else that was going to work very well. I've started modelling up a new pair of manifolds which will fit these, and cross them over running flat. This is so far working out really well. -The angle of the runner into the port can now be absolutely excellent, with no horrible transitions or shape changes. -Bonnet height is not going to be an issue at all anymore, not even close. -I can have as much room as I could dream for, for runner length, outer injectors, dual stage runners, or whatever other obnoxiously unnecessary crap I can come up with. Awesome! -I've wanted to look at the idea of fitting small, well atomizing injectors in pairs per cylinder. Having one spray down each separated port. So now I can easily fit a fuel rail in the right place to do that. I was running to 79% duty cycle with the 302cc BMW injectors. So fitting a pair of injectors from a prius or similar which are around 220cc. But have zillions of tiny holes (16 I think) means atomization should be incredibly better. Which will likely be a helpful attribute when the injectors are still a fair distance from the valves. Instead of 4 injector holes per cylinder, it will have 32. Bloody good. Haha. This solves an incredible number of my problems all at once. Still a few things to sort out. But should be good! Will be exciting to see the difference on the dyno from last time. Will get a variety of trumpet lengths printed before the next trip up. Wont be any time too soon though. New manifolds and fuel rails (again...) is a fair bit of pocket money. But this feels like its heading in the right direction.
 38 points
-
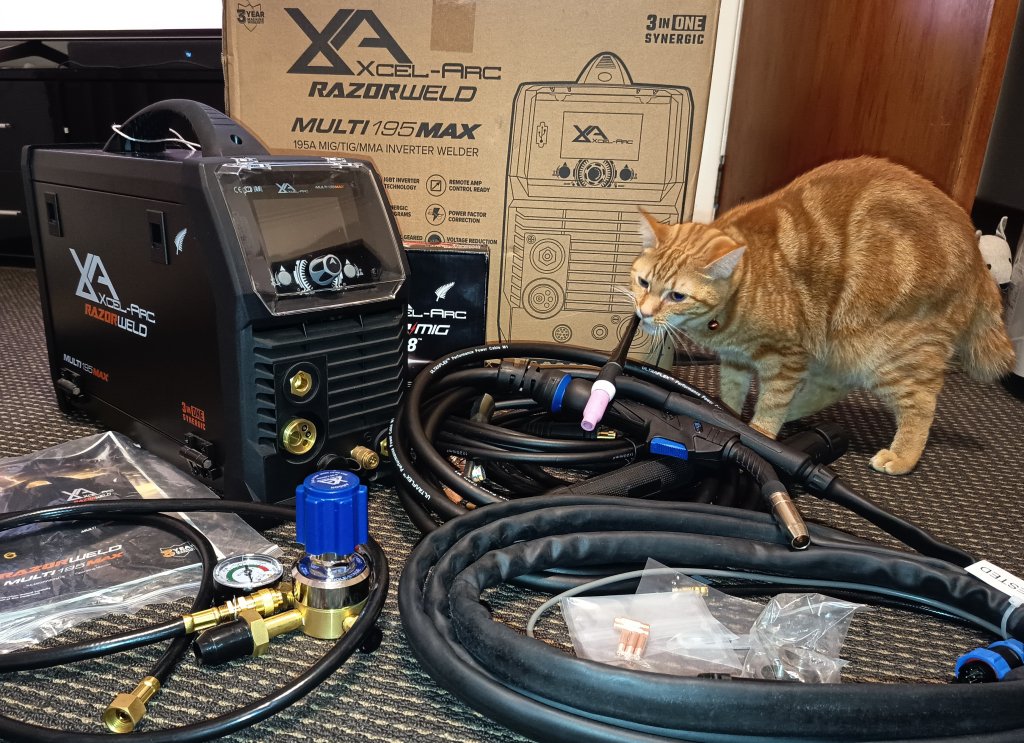
Finally got around to setting it up today, fuck I am absolutely blown away with it! I've always kinda sucked at MIG, so kinda tried to avoid it even though I want to get better at it lol Played with the program auto setting menus then just point and shoot without even a test bead
6 points
-
Health is getting better now after a month of flu-induced suffering. Ticking some jobs off and realising there aren't that many on the list. Nice feeling. Reid now 5months old, loves sitting in the racecar a lot more than his older sister. Trying on co-driver seat for size Last of sheetmetal parts fitted and dropped off to powercoaters. Designed some cool 3d printed window switch holder things that are currently on their way from China. Re-printed strut brace bracket on drivers side for 11mm of extra rocker cover clearance. Can notice if you look hard for the difference in height, but looks fine. Good to get roid of my bodgy washer-spacer setup. Now time to glue it together! Had an issue with bonnet vent silicone coming apart, caused by having bonnet pins set too low meaning I needed to flex the bonnet skin to close the bonnet. So pulled them off, tediously scraped all the silicone off and re-prepped for reinstallation. Did it slightly different this time, not using tie-downs to force the vent into the shape of the bonnet, but instead just siliconing them on flat. Also, I added a bead to the inside flange to provide a bit more hold. Not a super important job, but since I'm trailering it back up to KPR dyno tomorrow I wanted these in place securely. In other news, got concrete pad down for new carport next to shed. Increasing the size (and quality) of garden shed at the same time. Should be able to store 3 cars under here and clear lots of kids clothes etc out of the shed. Jobs list is getting shorter. Goal is to tick off scrutineering/safety items so I can be in a position to enter an event sometime soon hopefully? Re-plumbing oil cooler in -12AN lines and Fire extinguisher plumbing is painful, but next on the hit-list. Will be interested to see how the dyno goes (no oil cooler so hopefully no leaks!!)
6 points
-
The day finally came, it was the BRZs turn on the track. I've been holding out for this trackday, since it was the first one in the BRZ and I wanted to keep it as stock as possible (except for driveline bushes and things to freshen it up), to experience the car "as it should be" from the factory. This was meant to be in June, to give me ample time before the WOF expires, but thanks to some bad weather it got called off and shifted to July instead, giving me literally a couple of days before the WOF expires. We drove up to Feilding the day before, and the next morning we emerged into a very chilly subzero morning, warmed the car up, melted the ice off the screen and cruised around to the track to get the usual pit. The blue car squad was completed by my friends in their mostly stock ZC33S Swift Sport (which is still faster than me in the BRZ). A stunning, albeit cold, morning After the driver briefing, we did a few laps of the track to warm the cars up and familiarise ourselves with the conditions and layout, and then we were unleashed in groups of either "slow" or "fast". I feel there should've been a "mid" range group, as there were some fast cars/drivers hanging out in the slow class, causing some grief. The first session was BUSY It was hard to string a good lap together with all the traffic, but the car was showing some promise. It gripped well, and hung on in the corners, but it did quickly show up one issue; the brakes sucked. Coming down the front straight on the third lap of the first session, I get hard on the brakes for turn one and suddenly the pedal feels... weird. It's not soft, it doesn't go to the floor, but it feels wooden, like I'm pressing on a block of wood instead of a brake pedal. I've cooked the pads. Damn. I was pulling decent laps already though, my second lap, before the brakes turns bad, was a 1:36.55, already faster than the fastest I went in the Alto at 1:36.91 The next laps were slower, as I wasn't sure at this point what was going on, so I was feeling out the brakes to see if they were still going to work or not. I found there was almost no pedal feel, and it was taking a lot more pressure on the pedal to actually slow the car, and it was a fine line from having that stopping force, to kicking in ABS. You can see from this video the first couple of corners I really have to jump on the pedal to cut the speed. Coming into the pits after the session and it was immediately obvious what had happened, from all the smoke pouring off the front brakes The smell of fried brakes was the smell of the day, for sure. Every session was followed by plumes of smoke like that, from both sides. I was pretty disheartened from that. The brakes were rubbish, and the car felt underpowered. It turned and handled pretty well, considering it's still on stock suspension, but it was leaving me feeling a bit cold compared to how much fun the Alto was. Not to be deterred, I pushed on and went out for another session. After the first flying lap, I decided the brakes weren't going to completely fail, and I just had to work with what I had. So on the second lap, I did this The fastest lap of the day, a 1:32.21. Even though it was the fastest I went all day, I was very consistent in my times, hovering around the 1:32 mark most of the day. BRZ Comparing that to the fastest I went in the Alto, even though the BRZ never really felt "fast", it smashed the Altos corner speeds in most corners, plus some added speed on the straights. You can really see in the BRZ how early I was braking though by the red shading before the corner. Alto 1:36.91 Unfortunately later in the day I decided to go out without the camera running, and did something a bit silly I had been getting a bit cocky with the car, pushing it more and more and getting some little slides out of it here and there. I had been running it in "sport" mode, which reduces the interference from the traction and stability control systems, but for this session I wanted to see if I could reduce it a little more. What I didnt realise, was that in trying to turn off traction control, but leave stability on, I had actually turned the whole lot off. I was on my own. I went into the hairpin fine, carrying a bit of speed, got on the throttle to exit and suddenly in a cloud of tyre smoke I was A: looking at the front of the car that was behind me, through my windscreen, and B: being flung from one side of the track, to the other. Thankfully the car avoided me, and other than my rear wheels just going on the grass, I wasn't stuck and didn't hit anything. It was an impressive 360 though. The car fired back into life after a bit of cranking (I forgot to clutch in) and I sheepishly cruised back to the pits, no harm, no foul. After that excitement I sat out the next session, but the last one for the day I went out and ended up having some fun with an old Holden Commodore race car. I could get right up his backside in the corners, but just didnt have the straight line grunt to catch him. In the end, I backed off a bit for a lap to give myself some clean space later on, as he was actually holding me up and killing my lap times. It was a good battle though, even if he had no idea I was there. It's quite apparent to me in the videos that the traction and stability control are really fighting me on exit speeds. You can see I go 100% throttle but the speed doesnt increase until I straighten the car (and sometimes you can just catch the little yellow lights flashing their heads off). I have a future mod that will hopefully fix this, without me having to turn the whole lot off and end up going backwards again. Because this trackday was run by a different group, there was a pro photographer there, so enjoy some nice looking speedy shots Blue car squad Over all, other than user error, the car behaved well. The oil temps were getting a tad high later in the day after some of the harder sessions, but generally stayed below 120c and cooled off quick when I backed off. Oil pressure was good even with the higher temps, generally holding the recommended 10psi/1000rpm. I would love to get rid of the mid-range torque dip, as that really dulls the feel of the engine. It reminds me a lot of the old twin turbo Legacy and the Valley Of Death between the turbos, where if you shift into a specific RPM range, there is just nothing there, and it falls flat on its face. To fix that though means spending more money, and to be honest in not sure how much of a Kelvinator car this is. I love how it looks, but it's not as fun to drive as I wanted. It's a damn nice car to drive, though. Next track day will tell. Before the next track day, which is late next month, I have a bunch of things to go into the car to hopefully sharpen up the handling, and some new Endless front pads to get rid of the shite Dixcel ones.6 points
-
Onshape is browser based so should be Win 10 friendly. I teach a few ultra geeks that run Fusion on Linux, they also do HAM radio, have walkie talkies at school and pick locks for the sport of it...3 points
-
This will be a last post for a while since I’m 1000km away from the car with no future plans to pick up, tho part shopping is on the cards, any suggestions for improvements and best priced suppliers. also on Saturday I replaced the window seal on drivers side, after 50years it has become a little brittle
3 points
-
Decided to use push rods and rockers from other engine as they appear mint! No slop known good. Basically need to put rocker covers on but am bit over wrenching, so........ why not tidy up the rocker covers and paint them some mental colour i have in my cabinet. Green to Purple chameleon haha I love this stuff it would make dogshit interesting. Might fall off but better then stock beige. Im on hunt for some VN covers as they aren't composite so i can weld some big vents on for catch can. Its coming together now just need a engine lift and a bit of time with no rain to yoink out swap remaining bits over and swing back in.
3 points
-
Got the kit, assembled it all, bled the brakes. Jobs a goodun. Then as I was wasting my Sunday on trivial car shite I thought I would waste some more of it installing these boys that had arrived sometime mid June and had been languishing on my desk ever since; Those replace a fiber washer/top hat type thing that is supposed to be the main rotaty bit, but in my case wasn't as this job was being performed by the rubber bushing. Fortunately he magnificent @Willdat? has never asked for his spring compressors back so due to the rule of elapsed time I own them now, and used them to install the boys; In a probably misguided attempt to make sure the rubber does not rotate I centerpunched the various mating faces of the contact components to give a bit more grip, as well as giving them a thorough degreasing. I took it for a spin around the block and no more than the expected quantity of fluid had fallen out of the car and the steering felt good so I called that done.3 points
-
Alright so whats next? With the Echo, I tried a whole bunch of different intake runners, and found that the motor was fairly insensitive to it. Like you could change the runner length and see differences, but then once you move the cam timing to suit. It was like you're 99% back to normal. I was kinda figuring it would be the same deal here, and this is part of how I've shot myself in the foot with the overall design of my intake. As I've committed multiple sins to try and get the throttles sitting below the bonnet height. But there's no point in this anymore, as the runner length it needs is stupidly longer than that. I was so surprised to see a 15kw jump from runner length! It was so cool to see. One of the issues that I caused for myself, by trying to fit everything under the bonnet height. Was trying to get the BWM throttles mounted as low down as possible. So my intake manifold transitions from a very oval shape, into two separate almost rectangle shapes. In only a very short vertical space (about 22-25mm ish) So I've actually got a fairly gross transition happening here, which is I'm guessing part of what is limiting the high rpm situation at the moment. The throttles acutally have a 48mm or 50mm throttle plate, which is fine. But then taper down quite hard towards the exit. 48mm throttle should be okay, but not a 42mm circle area at the exit. As well as a bunch of gross transitions in multiple planes. This is the shape inside my manifold: So I guess my options are to see if I can bore out the bottom side of the throttles to a larger shape, or, bin them and try something else. Not sure yet. Some other interesting things noticed while sifting through the logs. Exhaust VVT doing pooz One of my exhaust VVT pulleys has a spaz at low rpm, and comes right when there's enough oil pressure. I can probably get it to work by further tweaking PID values on that pulley, but, the fact it's so different makes me think it's probably hosing more oil out than the others. (They naturally leak oil during operation) The motor was fairly insensitive to exhaust cam timing, and we found what was about the best spot for it overall. So I'll probably just put some fixed timing pulleys on it, as this eases my headache of piston to valve clearance on that side, for an amount of advance that it doesnt use anyway. The other three were tracking nicely, but this one was a bit dumb. Battery Voltage My battery voltage is doing weird stuff, seems to nosedive at 6700ish. Maybe it hates spinning faster? Could make an underdrive pulley for it I guess. Although I'm not sure if I can get the diameter too much smaller without causing belt slip. Some of the 2GR guys have said they dont see their alternator doing the same, when doing more than factory RPM. So could be a wiring issue or something. Oil Pressure With the 2ZZ engines, there's been a history of oil pump issues (sort of, sometimes) So it makes sense to fit an aftermarket billet pump and I'm all for that. Good investment as it's cheaper than a new engine, and solves a known issue. What I'm not sold on though, is just throwing money at parts when there's no case to justify it. I dont think there are any documented cases of the GR engine oil pumps having issues like cracking. There's no pressure drop either. All of the 2GR people in FB land are in a big fizz currently about fitting an aftermarket oil pump. Now that one has been recently released. But I'm not seeing a good reason for it. And most of the 2GR people are worried about doing 7500rpm or something Haha. Maybe if my pump gear eventually fractures, I'll get one. But stock looks fine to me so far. Hydraulic lifter situation It's very hard to diagnose issues with hydraulic lifters squashing down from the force of stiffer valve springs and/or more rpm. I'm not sure what I can do to check it apart from watching it with a camera perhaps. But that's not going to be very practical. The GR motors have an almost identical valvetrain layout to the Coyote 5 litre DOHC V8 engines. Which are popular in America for tuning up, and some guys are running big rpm with them. Which is great because a lot of their testing might be relevant information here. The Coyote hydraulic lifters are a direct swap fit into the GR motor. So any of their solutions for solid lifters or whatever is likely the same deal. I'll do a bit of internet sleuthing to see if I can find any articles about before/after for those guys switching to solid lifters. Then maybe there's a product I can just buy that will work straight away too. If they cost zillions though, maybe I'll just try make some or look into making solid ones out of the dozens of hydraulic ones I've got sitting around. Standard heads this time On the first motor I spent ages porting the heads, and it seemed like it would be very worthwhile. As the cut to the port / seat is absolutely shocking: But with this 2nd motor, I didnt want to reuse the old heads, and decided too much work right now to port them. But I'll do that at some point, at least around the bowl area. Probably only bother with that gross stuff on the intake side this time. The rest wasnt so bad. Overall there's still a lot of scope for improvement here, so I'm not super disheartened about ~220 whp. In saying this though, since the motor plateaus at 220 over several thousand rpm. It will be pretty much bang on that for an entire gear shift. But it will be better when its a bit pointier up towards peak rpm. Haha. It's still about 40hp better off than with the 2 litre motor in the car, and average power will already be considerably higher as it doesnt lose power on gear shift. Will keep working on ramping these numbers up though!
3 points
-
I have had good luck using painters tape for serpentine belts and just doubling up on itself by a few inches and cutting it off to be able to measure.2 points
-
Good progress all round! If the noodle cups makes 10kw more than trumpets, do you think you'll revise your airbox?2 points
-
Race report - Open series round 7 Shipping strikes again! As we were lining up for the start, a container ship was leaving port. We had run away from the start line a timed distance to make a run back for the start. The container ship passed us as we turned for the line and blocked the wind. So we started 2 minutes late. Partly bad luck, mostly my fault for continuing to put the boat in stupid positions before the start. So we set off close hauled up the harbor and slowly made up some ground. On the return leg, we closed up on the fleet as we approached the West Otumoetai cardinal mark. Some carnage was going on in front. One race yacht was limping away with shredded sails, another had dropped sails to assist - and the new boat immediately in front of us ran aground (shown in purple). This new boat has a 2.9 meter draft so needs more water than us. Now I've rounded this mark many many times and know there's enough water for us even at low tide to sail around it with no worries. So we shot the gap between the aground boat and the mark. I saw a meter under the keel on the depth gauge and was chatting to the crew about how weird the whole situation was...WHUMP the boat almost stops. Before anyone's had time to process the situation, we're building speed again and continued on course with over a meter under the keel. At the bottom of the course, the whole fleet had compressed and we started tacking into the wind. The extra speed through the tacks and better performance with our harbor racing jib got us past Bondi Tram, then Rimfire, then Synergy, then a Spinnaker launch and we had La Vida in sight. The crew did a great job to keep the boat speed up. I haven't seen any pics of the finish but it was a banger. La Vida was chasing Howzat and having some Spinnaker trouble. We were running a gennaker which meant we could turn the boat more across the wind and power it right up. 1km to the line, La Vida is still having trouble 200m ahead. We're fully powered up at 8.2kts and hit the finish line 2 seconds behind them! Howzat and Nauti Monster had a time penalty added so we ended up in 2nd place. At the after race prize giving, someone mentioned that west Otumoetai mark has been moved which explains the drama there. Had some mechanical issues on Thursday but that's going to be a separate post2 points
-
I had a look underneath on Saturday and was surprised how tidy and rust free it is. Just needs most the rubber parts replaced, slight leak from the oil cooler and some slack in the diff remediation some locals came over to help
2 points
-
Howzit! We're back up and running!! I wouldn't say finished but, 41 years old and English, it's never going to be finished I'd say. Sneaky vid as proof also https://streamable.com/50dq19 I "found" this wad of wires that also needs removing as it doesn't appear to do anything anymore, I think it's the OG injector ballast resistor box maybe😮 car still runs with the box unplugged and there is already a bunch of wires looped. More investigation required. Cheers2 points
-
Data sheet says DIP, so must just be a stock image CH metal can would be sweeeeet. You could probably even stuff them in the DIP socket, if you had the nice ones with the round machined receptacles.
1 point
-
is that an smd variant or just a stock image?1 point
-
T bars, club style. Nothing says gang like a honda dax monkey bike.
1 point
-
Was givin this skyteam 50cc awhile back from a mate which did about 100k in his monkey before swaping it for a 125 so she's new. New loom cdi coil ignition new front tyer just need to sort a chain carb ive gotn is to big but ive sorted a new carb so hopefully she will be riding soon. Was wanting to paint ect but more I look at it more I like it asis I'll definitely change head light and make alil nicer
1 point
-
The Patton Machine setup looks real tidy, albeit not as hidden as some others as it removes the dashpot. https://fiddlingwithzcars.wordpress.com/fuel-injection-patton-machine/1 point
-
i completely forgot to get those preamp bits out for @Metalhead96 will do that asap. OG opamp was an which is NLA though can be had from ebay, there are probably suitable cheap alternatives additional bits required would be the 100k log pot for bass, 1M reverse log pot for treble and 25k log pot for volume. I went to great lengths to get these pots with center detents just like original which are NLA and required me to buy about 9 pots and disassemble and built up with various parts. however im pretty sure you can buy the required values if you arnt fussy. https://www.digikey.co.nz/en/products/detail/texas-instruments/LM4250CN/36952311 point
-
It could happen! After this testing I'll be printing some revised trumpets (maybe based on noodle cups) to get length and diameter fine-tuned. Will also refine the airbox mounting to get it 100%1 point
-
The E throttles are awesome! If I'm ever feeling a bit too smart I love to come and read your updates to put me back in my place.1 point
-
Doing a DigiKey order in a day or 3. Any of you (Chch or nearby) nerds need particular shit not avail on AliEx, wanna bypass the shipping fee? @EpochNZ @Metalhead96 @BlownCorona? Tag any nerds I've missed. edit: Shit I love DigiKey - select the part parameters: Sorts by cheapest first Check the part, yeah, it's good. Go to order 5x That'll be NZ$2.95, but if you click here for this alt number for the same part, you can get 10x for $2.50 It's like they want you to come back, or something. Weird.1 point
-
Normally if so, there have been threaded holes that you can bolt them in to there specifically for them. But otherwise they are just a body line to seperate the roof to the side pillar structure.1 point
-
Yeah, that sort of thing is easy in Fusion too. I'm lucky enough to have ~120 students doing things in weird and wonderful ways that you get the hang of spotting the balls ups quicker. But also you get a range of perspectives to help solidify your understanding. The magic trick of all things CAD (which I've probably said before.) is that the sunk cost fallacy is even more true of any CAD model you make. Starting from scratch a second time you'll do it 10 times as fast as the first. Perseverance is for suckers. Fail fast and give it another go.1 point
-
Had to start somewhere so tackled driver’s side as was least bad. First tackled around the vent: Then the bottom of the pillar: Fair amount of faff fettling various patches - was remarkable how a couple of hours couple slip by gently tapping something to the right shape, probably the closest I’ve been to being in a flow state. Anyway, pretty happy with the end result, not a final photo but the bulk repair is done on this side:
1 point
-
Krugar has finished up the refurbishments on the Lilliput! Very pleased with the results! Pretty much ready for summer!
1 point
-
This is just as cool as @ThePog building the dynafari imho!1 point
-
Engine and auto are out and goooone Now to clean up the engine bay and prep that for a blast of yellow ochre it so deserves. Painting the Simmons FR17 centres in a week or so and that side of things can begin too. The block will need a clean and a hone soon too then buy the rings and bearings and balance the assembly. Game on1 point
-
Oh and the clutch pedal and new brake pedal are in
1 point
-
So this happened - the 6 cylinder and auto is out. The engine bay needs a scrub and then I will give it a coat of yellow ochre as it is now. last pic - v8 factory mounts to the right vs the 6 cylinder mounts on the left.
1 point
-
So I finally sorted out getting a wheel alignment! Back from being rope towed up the road. I had got it pretty damn close, said the alignment guy. Within 1 degree After adjusting the rear camber, it was obviously a little closer to the right side. Only 10mm difference though. So I user some card and tape to mark the location of the temporary clamping bolts for the mounts. Then carefully tapped it over 5mm. Then welded each mount in, one at a time. ...forgot to take photos of the last two. I'm happy with the welds, I got the settings just right, it would have been a real ballache to try grind out a bad weld. Then I filled in the access holes.
1 point
-
It took some time to make the adjustment arm bit. I made it in sections due to available material sizes. It had to be all curvy to avoid stuff. It fits. It doesn't hit anything. It has plenty of adjustment, without hitting the bonnet. It feels solid. I still want to grind some of those curves for a more consistent width. And to figure out what belt length I need.
1 point
-
Driveshaft uni's i ordered were wrong size. so resorted to doing more on exhaust got the front half all welded and mounted up. "insert picture" none of the factory mounts were of any use, so made some from scratch. in the above picture are the ones i made for front half. below for rear the trash can muffler getting everything to sit nice with the limited space / clearance takes most of the time. the pipes between are walk in the park. Triangles because strongest shape and stops shit flopping side to side So yeah you dont actually see much of the rear muffler, which is why not to worried about it looking like a trash can. will paint it black also. may change the tips also, they need to be cut down yet at least. will do for now Got one one the 2" tubes tacked up, other will be basically identical, so easy. once get those zing'd on will see if need anymore hangers or "clearancing" the aliexpress rubber hangers are a bit squishy. so doubling them up
1 point
-
Dyno day was great! TL;DR: 220 whp with a few issues, lots of 9000rpm runs, needs a few changes made The day started out with investigating a bank to bank AFR imbalance, which turns out was caused by me not plugging an injector on properly. Woops... Then we tried to do some VVTI timing sweeps, starting from zero degrees advance and run it in 5 degree increments. Nope. Absolutely not. Haha. The cam timing at 0 degrees advance is so bad, that the car can barely even spin the rollers. So we put in a starting point cam advance map and went from there trimming it up and down. As expected, once the ideal exhaust cam angle was found, it was pretty pointless moving it around any further. But now I know what sort of angle works for that. We did a bunch of runs getting the fuel and VVT dialled in, and was stuck around 200whp without the ignition timing optimized. Then added some timing, and was up to around 220. Which is still a fair bit short of expectations. But it was revving out nicely to 9000. No point going out past that (yet?) One of the issues that I was somewhat expecting, but not this bad. Is that the intake cam timing is pinged right to maximum advance right up to 6000rpm. So everywhere below that, it's losing power currently. So I'll need to retime the gears and put some stoppers in. But it's an absolute prick of a thing to do. Thankfully KPR has a absolute plethora of intake trumpets lying around so we bodged some stuff together. Haha. Some amazing results with the long trumpets! Gained 15kw at around 6500and some gains through most of the powerband. I suspect part of the reason it picked up so much though is that 6000-6500ish and below is where we cant advance the cam far enough. So with a little bit shorter runner it would probably/maybe be starting out from less of a bad spot. So you wouldnt necessarily see that 15kw jump as the worst result improves. The longest trumpets were 195mm, and next size down was 100. So it looks like a 140-150mm trumpet will plonk that big torque blob right onto the 7000-9000rpm region which will be great. But we didnt have anything to test at that length. So it's on the to-do list. It's really good to now know what it likes for overall runner length. As now I can plan around that if I need to make any major revisions to my intake situation. I've got some gross transitions from ITB to the head, which I suspect is possibly also a limiting factor at the moment. There's been so many different elements to get this motor in the car and running, that it was honestly great to have a full day of wailing on it and nothing go wrong. Even if power was not quite to expectation yet. That's how it goes with NA motors though, needs testing and sometimes lots of revisions to get things right. But this is coming right into the fun part of the project for me. Bloody good! All of the tuning was done in 4th gear, but 5th is 1:1 ratio where you have a bit less drivetrain loss. So it had a final run in 5th gear, but the roller speed got too high near the end and dyno didnt like it. But makes the numbers look a little better. Haha.
1 point
-
Have done a bit of disassembly, parts ordering and even some reassembly this week, lucky I had the week off between jobs! There was some mandarory replacement parts (Dizzy Cap & injector hoses etc) and some "while you're in there's" Spark plugs, cab cover gaskets, dizzy rotor and ignition leads. I have received everything apart form the leads which should hopefully arrive tomorrow / Friday I had hoped to do the cam cover gaskets "while I was in there, but I didnt think about the inlet manifold gaskets that I would likely need (cant get cam covers off without removing the inlet manifolds) and am struggling to find a supplier currently so they might have to go in the too hard basket currently unfortunately. Im not upset about it really to be honest, there is a fuckton of hoses etc involved in getting them off and Ive already had to do more wiring work than I bargained for with this as some of it got a bit crispier than what I deemed acceptable so had to re do it. Anyways, Pics Injectors, rail, dizzy cap and plugs out, still a bloody mess, I gave it a good scrub as there was 40 years if schmutz in the valley, its not perfect but infinitely better than it was the plugs were developing a new type of crystal type stuff on them today while i have been waiting to hear back about the inlet gaskets i did the injectors today, they are dumb and have barbed fittings on the injector and rail and about 50mm of hose between, the kit also came with new hose clamps, pintle caps and inlet filters. Step 1, disassembly Step 2, individual disassembly via screw step 3 reassembly, new pintle cap and inlet filter step 4, finished As cool as V12s are, doing 12 sparkplugs and 12 injectors is a huge pain and seems very unnecessary while actually doing it! Hopefully more progress tomorrow1 point
-
Progress on the Marina has been a slow burn, but it's been ticking away in the background, around the work on the other cars. Last WOF I was given an advisory for the rear axle radius rod bushes being perished. It wouldn't pass another WOF like that, so I was forced to look at options. I knew the OE bushes were long since unavailable, as they were only used on the Aus spec cars, were local content and the factory that made them back in 1970 has probably been turned into a housing estate. There are the odd ones out there in the hands of owners, but people aren't selling them since they're impossible to replace now and they might need it for their car. My initial thought was to replace the arm completely. OE arms are also NLA, so it would have to be custom-made, or something off the shelf adapted to fit. I went through days/weeks of searching through the options for different bushes, arms, and anything that would work, and came back with little to nothing. If I tried, I could've made something work, but it was turning into a bigger job than I liked. The next option was to replace the bushes with something off the shelf. No one makes replacement OE bushes, there are no poly options, and allegedly if you press a firm polybush into the alloy arm, when it twists going over bumps it can actually break the arm since the bush can't twist and the arm tries to instead. That's an absolutely no go, I can't risk the arm as I can't get another. To add to the frustration of finding a bush to fit, there are two locating bumps in the arm to stop the bush from rotating and the tube is tapered, so a standard sleeved bush won't fit without grinding it out So, what's left then? Make new replacement OE bushes myself then, I guess. I had thought of 3D printing the bushes in TPU (Thermoplastic Polyurethane) but that only comes in harder shore ratings, which means I would risk breaking the arm. The answer was to cast the bushes in a polyurethane that has a similar hardness (shore) rating to standard rubber. I did some research, and settled on a 65A shore rating castable polyurethane. But the poly is useless without a mould to pour it into... So, I pushed one of the old perished bushes out of the arm, grabbed my callipers, fired up Fusion and set about first modelling the bush After a couple of tweaks, I turned that into a mould Which I then fired through to my new Bambu A1 3D printer and suddenly, I had a mould to make a proof of concept with I measured how much water a standard bush displaces in order to work out roughly how much poly I would need to mix up, and then sprayed the mould in mould release Then the scary bit, I mixed up some poly according to the ratio on the bottles And carefully poured it into the mould Since I'm doing this in the middle of winter, and it recommends not to cure it at less than 15c, I employed my filament dryer to keep it warm for a few hours in the garage Once I was confident it was set enough to move and not risk getting it on the carpet, I moved it upstairs into the much warmer house for the rest of the 24-hour cure. After the 24 hours had passed, it was time to see if A: I could get the mould off B: I had something that resembled a bush It was a real pain to split the parts of the mould, but eventually I got the first part off and got my first look at the bush. It kinda looked like a bush! After much fighting, I got the rest of the mould off and the bush out Compared to a stock bush. Unfortunately one of the walls around a void didn't survive the demoulding process and tore, but otherwise I was impressed with my first attempt I pressed the bush into the arm to see what it looked like in place and how the fit was. The fit was more or less perfect The other issue was that the bush was full of tiny little air bubbles. This was from mixing the resin since it's two parts, and I'm not using a vacuum chamber or pressure pot. The concept was proven. With that success under my belt, I went back and did some tweaks to the bush model and mould, making the voids in the bush smaller and shallower, so the walls are thicker and easier to get out (this will also stiffen the bush a little) and also making the mould physically smaller I altered it so I could run some long screws through from bottom to top and clamp the mould together, this also allowed me to add a top and bottom plate, with an integrated funnel to make it easier to pour and keep the sections located in place The other thing I tried was degassing the resin in my ultrasonic cleaner. This basically pummels the resin with ultrasonic waves, which shakes the bubbles to the top and they pop. I wasn't sure this would work, and certainly there isn't a lot of positive information about it, but maybe because I'm using such small volumes of resin it's different, because I found it quite effective. I also got some black pigment as I didn't really want translucent yellow bushes. A very small amount of this gets added to the resin (it's like 0.5% by weight) I degassed this one in the ultrasonic and poured it in my new mould And after the 24-hour cure, this horror show is what emerged This knocked me back a little, it was so bad. Some of it was still liquid, all of it was sticky. My suspicion was that since the instructions say to add the black pigment to Part B before mixing with Part A, it was impossible to see the two parts of the poly mix as it was all black (normally you can see the yellow mix with the clear), I didn't completely mix it 100%. I may have also used too much pigment, as I didn't realise how little I needed. With some little tweaks to the mould, and my process (adding the pigment once A and B were already mixed), I set up another mould and let it cure. This time, I had more success. Completely demoulded, and I'll be damned, that is actually a bush Compared to the first bush. You can see the smaller voids in the new one After lubing it with some leftover polybush lube, it's a perfect fit in the arm too The other side is a little uglier since I had to trim off the excess around the tube from where the filler holes were, but that's a 100% usable polyurethane bush for a Morris Marina. Now all I had to do was make another one just as good. Easy, right? I mixed the resin, degassed it, poured it and waited It's not as perfect as the first one, I think I used too much mould release this time in my efforts to make it easier to demould, hence the surface bubbles, but otherwise it's also very usable. Once again, a perfect fit in the arm, which also had the wire brush and rattle can rebuild at some point in this process Interestingly, because I only measured the one bush and its tube, and both bushes are the same part number, I never noticed that the tube on the front end of the arm is actually longer than the rear one (as also mentioned in the workshop manual). It wouldn't matter, since the standard bushes were obviously designed for the shorter tube, but when they aren't cut shorter, my new bushes actually cover the whole tube with some minimal trimming. For record, these are the old bushes from the arm. Sitting around for 25+ years doing nothing did them no favours Before I could refit the arm with the flash new bushes, I also wanted to replace the rear shocks. Ages ago, after much research, A fellow Marina weirdo (thanks Bryan) came across some KYB shocks from a Toyota LiteAce van that were very similar in spec to what the Marina takes, so I took a punt and bought a pair. I tried to remove the old shocks when I took the arm out of the car, but got stuck at rusted nuts on the lower fitting Having been able to remove the top mount though, I could see what difference the top mount on the KYBs had. It turns out, the only difference is that the bush is too wide. The sleeve from the original shocks transferred over fine. I searched high and low for a replacement bush that would meet my needs, but nothing was available off the shelf. So, with a new razor blade I carefully cut the bush down, taking the same amount off each side It ain't pretty, but it's functional. The shock now fits the top mount perfectly. I gave up asking the nuts nicely if they would please undo, and got out the nut splitter instead Did the job The old shocks offer zero resistance when compressed. Both totally blown. The new shocks came with some generic bushes, but I opted to use some Triumph ones that were recommended on the Marina group The Triumph ones are wider, and have that little step in the middle to help locate in the lower mount The new shock went in place with minimal effort Since the new shock was in place, I could install the radius rod One of my new bushes, doing bush things Pretty chuffed with that. Fits like a bought one. I jacked the axle up and down to check articulation of the bushes and all seems good, the bushes didn't twist in the arm, and they flexed fine as the axle twisted. Moving to the other side, it was the same deal for the shock, with the added bonus of having the exhaust and handbrake cable in the way. Some monster installed the top shock bolt this way around though, forcing me to remove the whole mount to remove that bolt Bonus lens finger Otherwise, it was a straight forward install Bonus ugly exhaust joint I need to fix Once the wheels were back on, I could finally take the car off the axle stands it's been sitting on for a couple of months. I hate having cars up on stands, it really takes it from a "car" to being a "project". A quick bounce test on the rear quarter immediately shows the car controls rebound significantly better. Since the car has no WOF currently (although with the new WOF changes just announced, since the Marina is a "vintage" car, from Sept it'll now get 12 month WOFs, which I look forward to), I couldn't take it for a decent drive to test everything, but I did quickly visit the NZ version of Mexico and could tell the rear feels more planted, less wayward, and handles bumps better. No idea how much of that is the new shocks (most of it, I suspect) or the new bushes in the arm, but either way, it's a success. I want to test the bushes for a couple hundred Ks to see how they fare, but once I'm confident they are going to last I will make a couple more sets and offer them out to fellow Marina owners to buy. Since they are still only 65A shore, they wont be a huge "performance" upgrade, but should still be better than old perished rubber bushes. Next is to test fit the front telescopic shock prototype mounts and see how all that fits, and if it's good, get some steel laser cut. I really want the front to feel as good as the rear does now, and currently it's far too soft. Parts Used KYB 343267 - Rear Shocks 2x Triumph 21A860 - Rear Shocks Lower Bush 4x Please note these parts are specific to my car and may vary. Please check before ordering.1 point
-
Well certainly all bloody go at the moment. Had a bit of an adventure with the motor but more on that in next post. Body work on exterior all done and has had final prime over the weekend. Final block next week then thats outside ready for colour! Engine bay, interior and underneath prep underway now. Hoping wont be toooo far away and the shell will be painted. Sent the bounty diff away to get rebuilt/regeared to 4.8 ratio. B1600 gears i had wouldnt work with the 2000 era courier diff so ended up building a freshie. Mitsi LSD centre rebuilt, new 6mm wall tubes, 9 inch ford axle flanges/bearing housings, the mitsi head was 31 spline like a 9 inch ford so able to run 9 inch ford off the shelf axles. Ended up narrowing it another 25mm either side so can run another inch of lip on rear wheels. All powder coated nicely ready to go in. Should be a nice little setup. Then been chipping away at getting other parts sorted. One of these being the reservoirs for pedal box. Rocket custom mounted them in the windscreen cowl so they nicely hidden away RKM gave them a quick prepolish before anodizing black and then got Reece in the Mount to engrave a letter to identify Clutch, Front brake, rear brake as something different to a sticker on top!
1 point
-
I have used Solidworks since 1997, so may have a valid opinion.... Its a steep learning curve but extremely capable once you get there. However the cost and licencing stuff is a real arse, ie you pay real money for it, then a licence fee every year, but basically you don't own it and cannot sell the seat without shenanigans. They have added a lot of capability over the years but to the point where there are so many options and ways to do a thing that shit gets untidy or confusing or unstable, or all of them. And there are a number of quite annoying bugs that cost me time and money and don't seem to ever get resolved. This year I have transitioned to Onshape, which is in many ways a superior program, if only cos they have culled a lot of SW dross and made it pretty simple and easy to use, plus structurally it is a much better environment for complicated design. The learning curve is shallow for simple stuff, steep for complicated stuff, but very good once you get there. Unfortunately it is cloud based and if the net goes away you can't work. Also the stuff I am working on is so complicated that I often hit Onshape server limits. But there is a free fully functional version, the limitation being that your stuff is all public unless you pay a sub. There are a shit ton more vids and tutorials for Onshape vs SW, this is the main blockage to learning a CAD program I have looked a bit at fusion and fucking hate it, it seems like a toy TBH. This could be decades old bias against the original 2d Autocad though. If you are going to try SW I would just be sailing the high seas with a pegleg, eyepatch and parrot, this will tell you if you can deal with it. If Onshape just sign up and use the free version to see what its like. If fusion then lay your hands out on a sturdy bench and get a hefty chap to smash your fingers with a hammer.1 point
-
Yeah thats the one. Have been real patient and good to deal with. Might save some extra pennies and get 2 made. Sell off one to offset the one i keep. Back on topic. Fusion beats the shit out of freecad.1 point
-
^^^^..... so i fucked it up.... The crowd i am dealing with seem to be ok with the fact i have no idea what i am doing and have sent me a list of measurement requests. Appreciate all the help so far fellas.1 point
-
After not using it for a few months then needing to design something i fired fusion up on the weekend and tried to nut some things out. All the learning vids have yankee accents which grates my ears something fierce. So gave up on them and just started playing around a bit. Took a few hours but i turned this.... To this.... Then i decided i wanted the fairlead to be higher, got a bit cocky, which evolved into...... Sending the file to a local sheetmetal shop for a quote tomorrow. No doubt they will let let me know if i cocked it up. Otherwise, i highly recommend fusion non commercial for a pretty straightfoward CAD system that even i can learn.
1 point
-
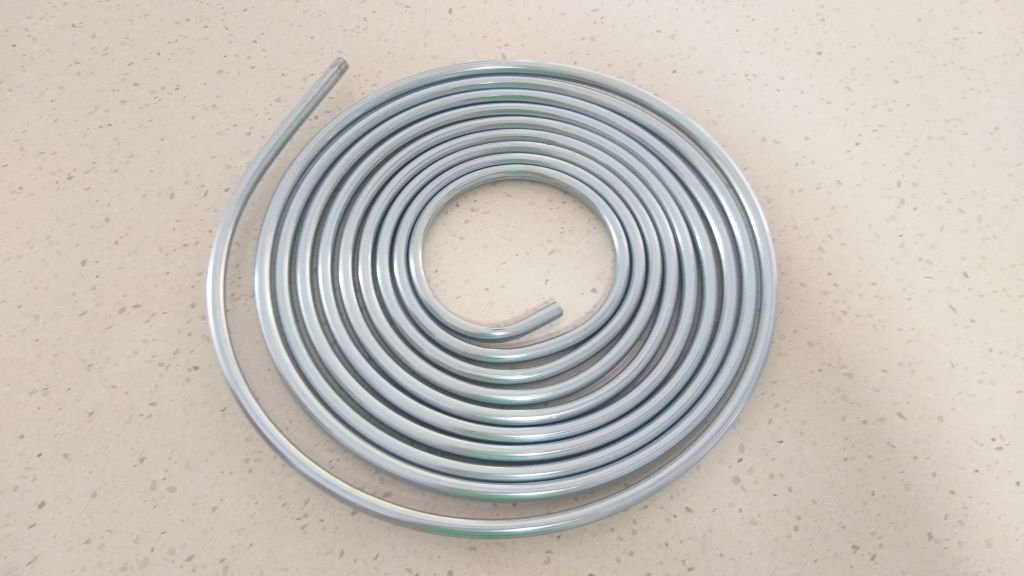
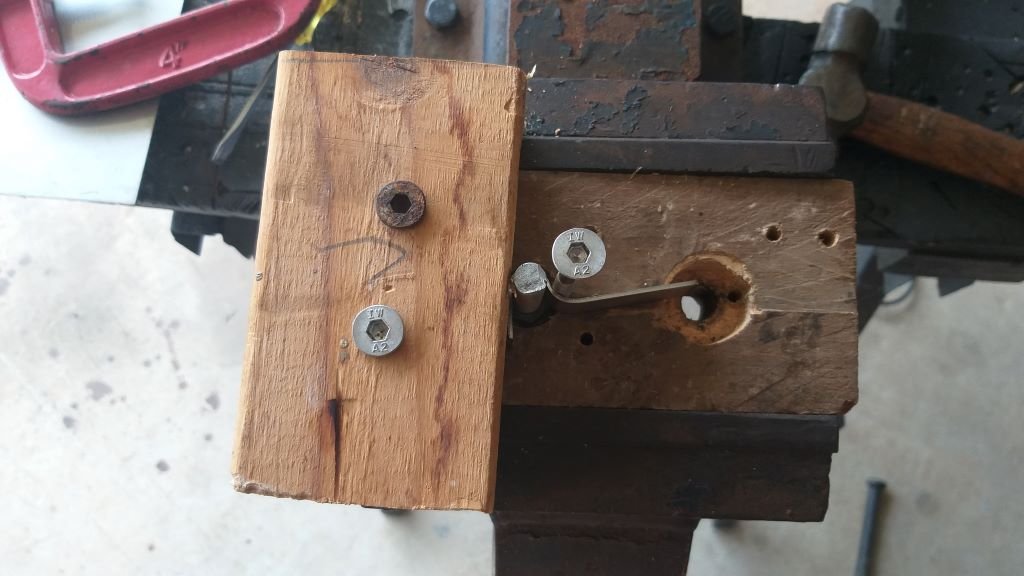
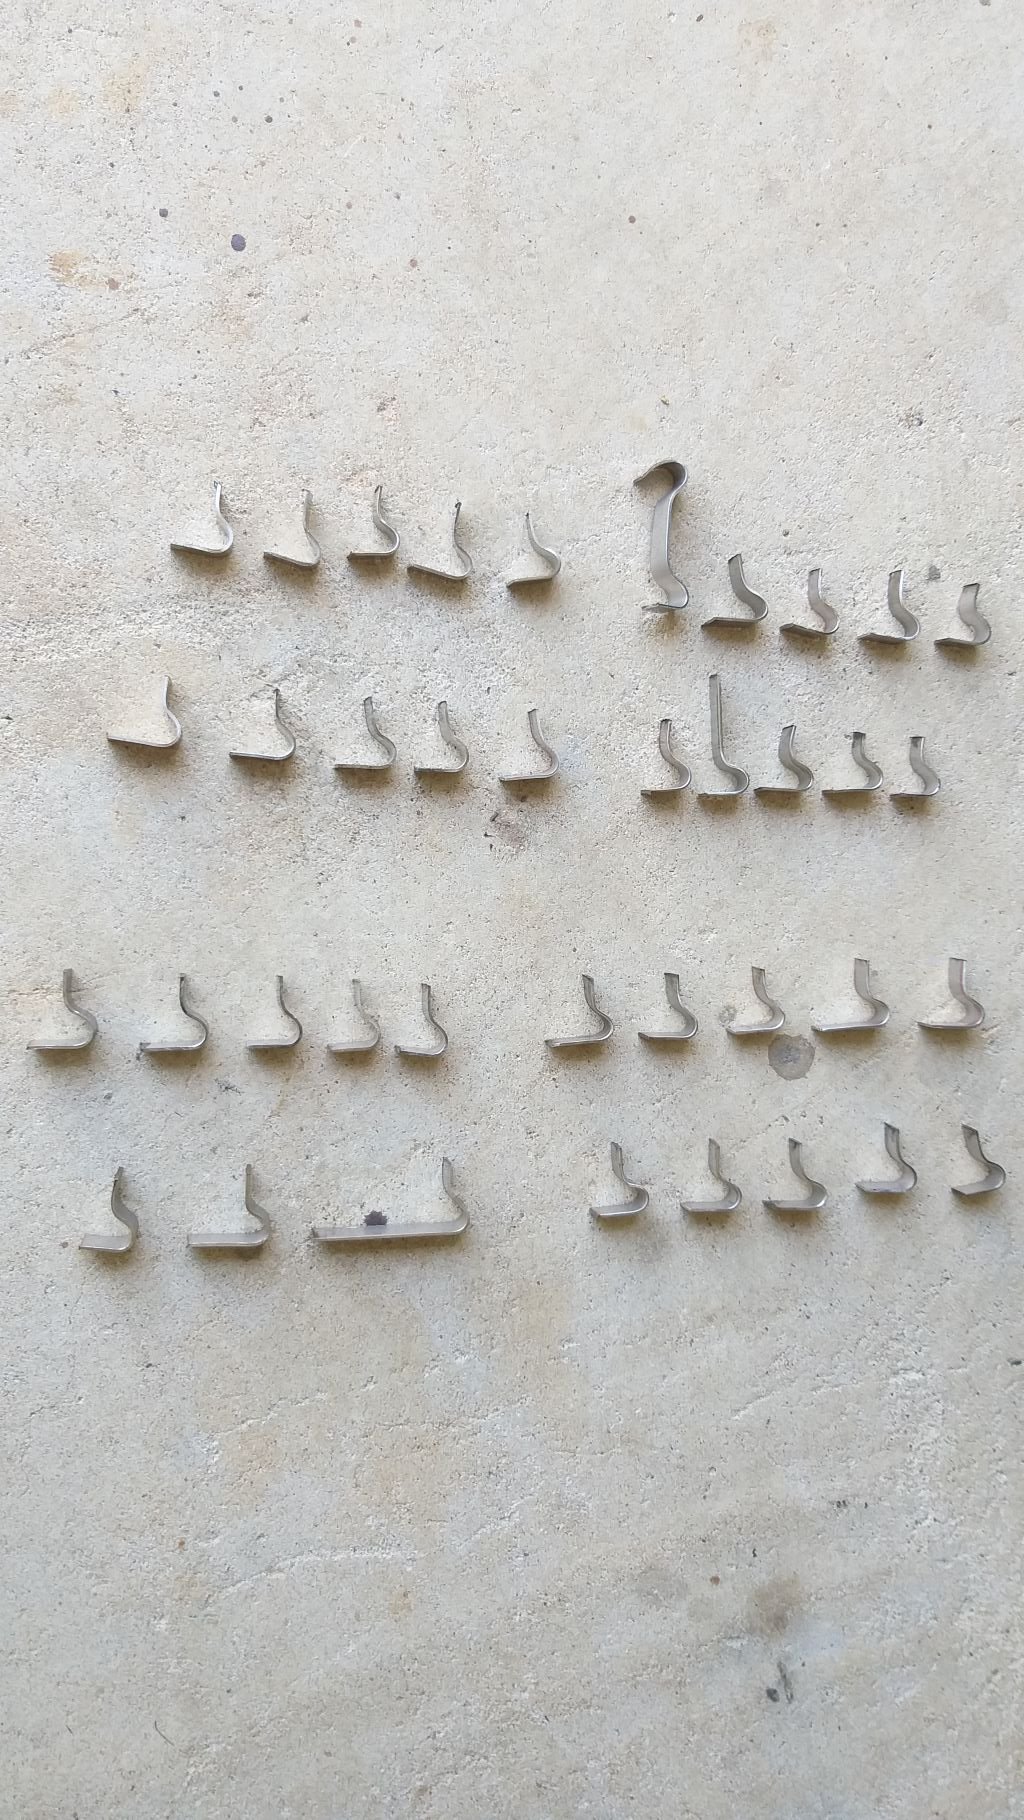
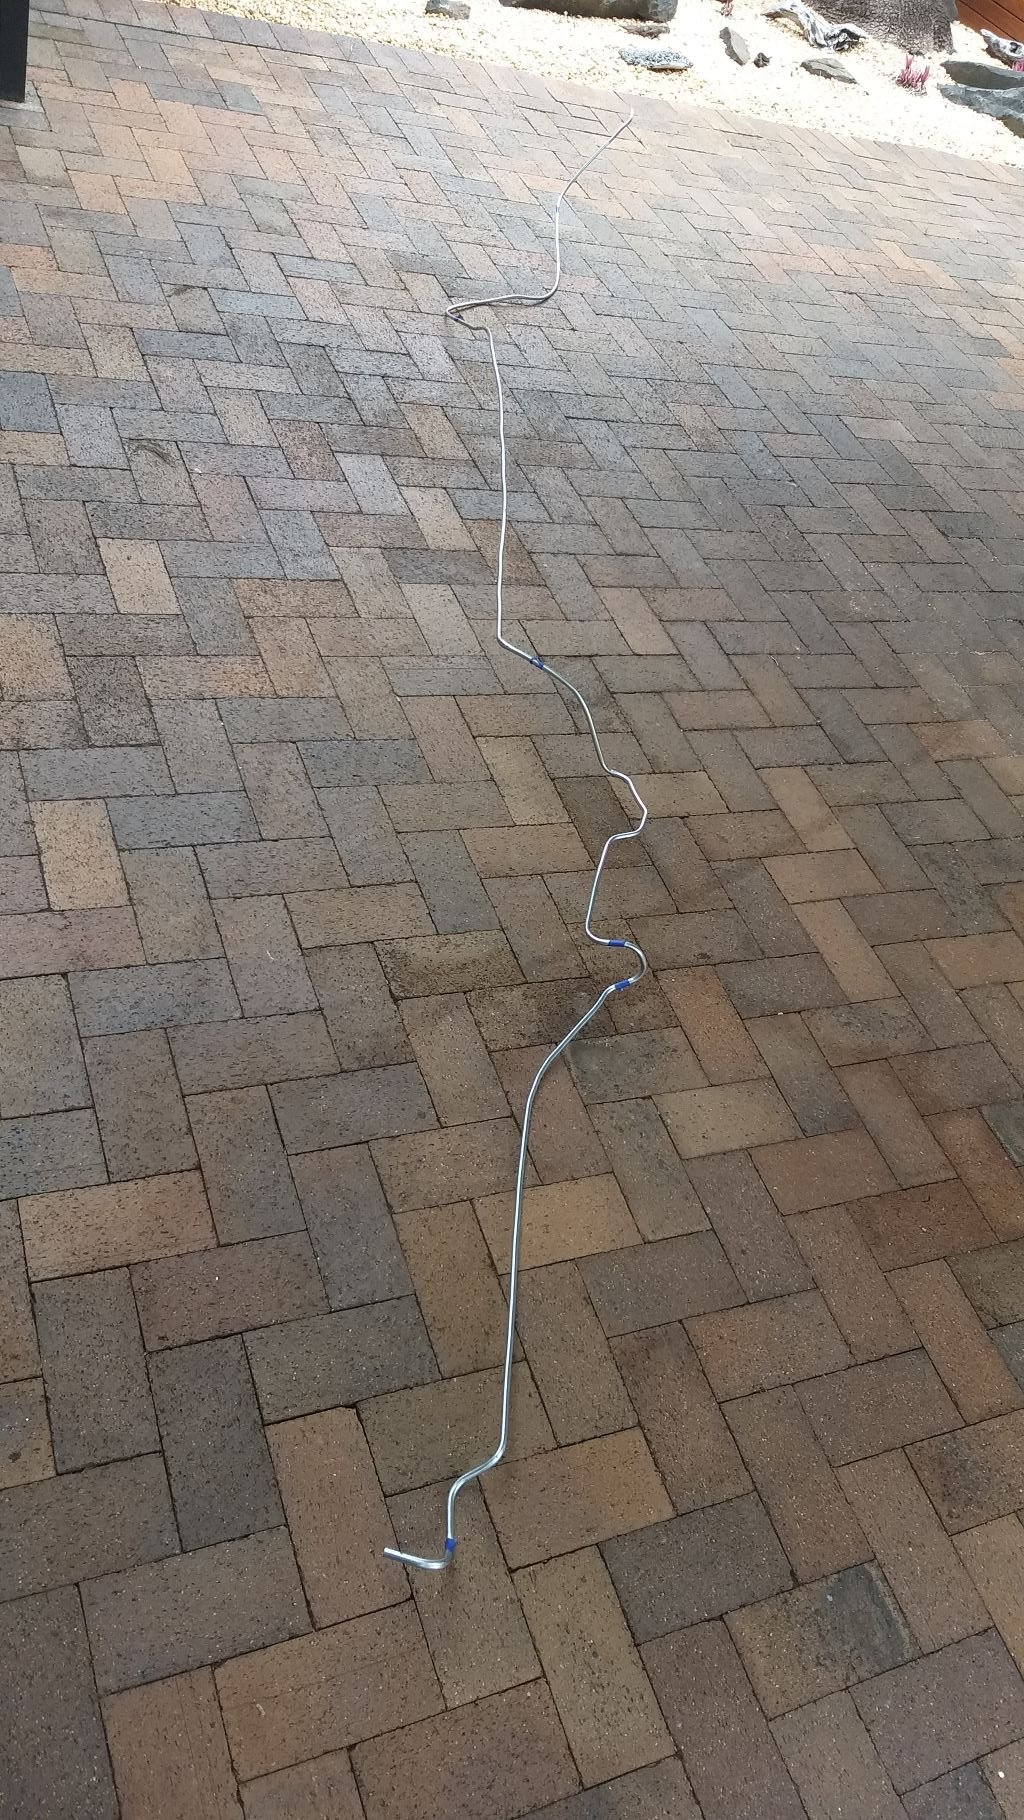
Two rolls of fresh 3/8" bundy tube arrived early last week, so I've been steadily plugging away at installing the new fuel return line. I started off by creating a mock-up out of some discarded brake lines that I had in my scrap pile. Looked pretty good until I realised that I was creating a headache for myself further down the line. Sometime in the not-too-distant future I plan to install a set of sub frame connectors to stiffen up the chassis and by running the return line as I had planned, would have clashed with the right-hand connector. So, it was a case of going back to the drawing board. For my second iteration I ended up mirroring the factory fuel line that runs down the left-hand side of the chassis and now have the return line running down the right. I was determined to get the line completed in one solid length from front to back which turned out to be a mission and a half. Ended up having to remove the right-hand exhaust, drive shaft and half of the front suspension to get the pipe in. Then spent hours and hours fitting, checking, pulling it out, fine tuning the bends and refitting until I got what I was hoping for. I ended up making a little "rough as guts" jig out of some wood scraps and fabricated a batch of holding brackets out of some stainless-steel plate that I had lying around. I suppose I could have bought some brackets, but where is the fun in that. Anyway a few "in progress" pics of the various components including a candid shot of the newly bent return line just to whet your appetite:
1 point
-
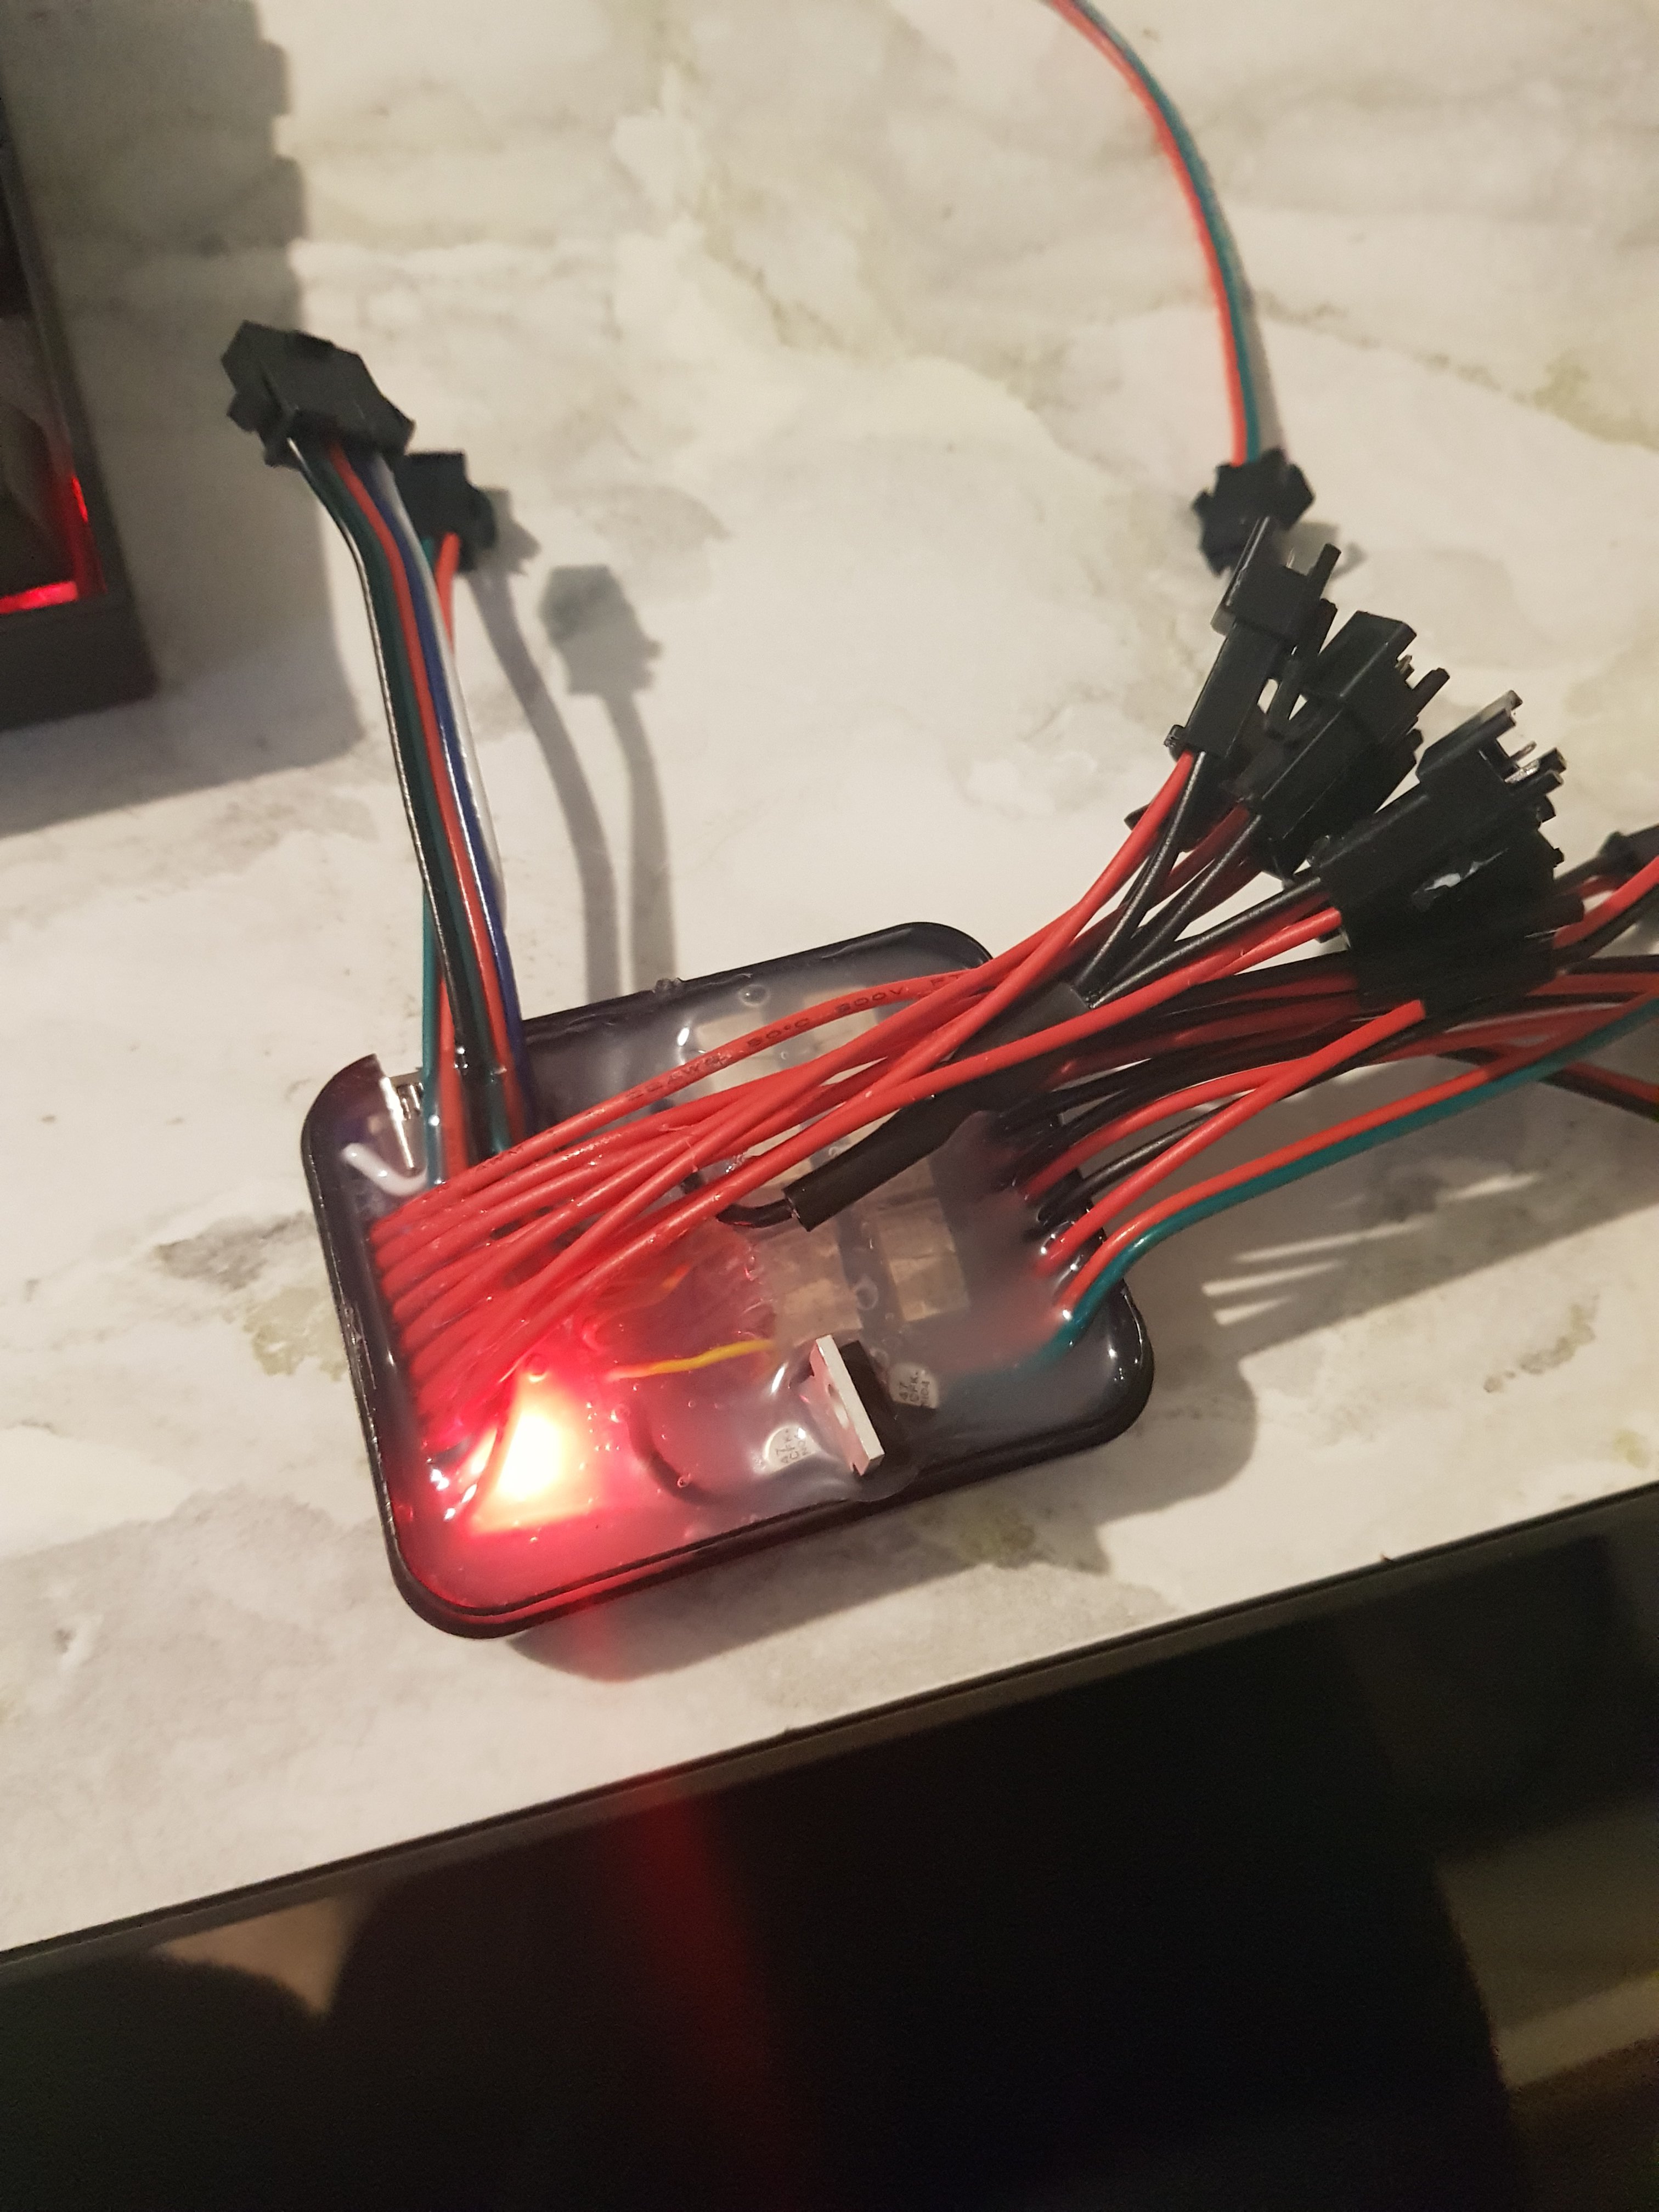
I am REALLY happy with how this has turned out. MY PCB/little relays work as they should and its all been potted in hot glue and tests A+. I ended up using a little LM1084 voltage regulator and some little capacitors and tiny prototype board to get down to 5v. The relay PCB is wired to the arduino using little wires salvaged from a broken USB cable Basically- the wires coming out of the left just get connected to switches in the vehicle (like the handbrake or gear indicator switches) and the wires on the right get fed 12v to close the relays switch (eg, 12v from the headlights ) I used hot melt glue because it was cheap, fast and easy (pretty much my life motto). It looked like shit until baked in the oven for 10 minutes at a low temp. Its an awesome thing to do on electrical shit like this and its turned from being a fragile heap of shit to a robust heap of shit.
1 point
-
Have you had a look at this guy? He seems to know what he's doing1 point
-
Thats a funny looking puddle
0 points
-
Ya wouldn't believe it, an hour or so after my above post I was taking it out for a spin, waiting in line at the servo, the bloody thing goes BANG and has a bloody engine bay fire 🔥. Luckily I had a extinguisher in the boot!! All I can see is the dizzy cap is blown to bits. Car still runs tho 😮 Edit: towed the car home and ripped the bonnet off for better access and sprayed the majority of the fire extinguisher powder off, can see the split dizzy cap Bloody english!!!0 points

































This leaderboard is set to Auckland/GMT+13:00