
Leaderboard


Popular Content
Showing content with the highest reputation on 06/29/22 in all areas
-
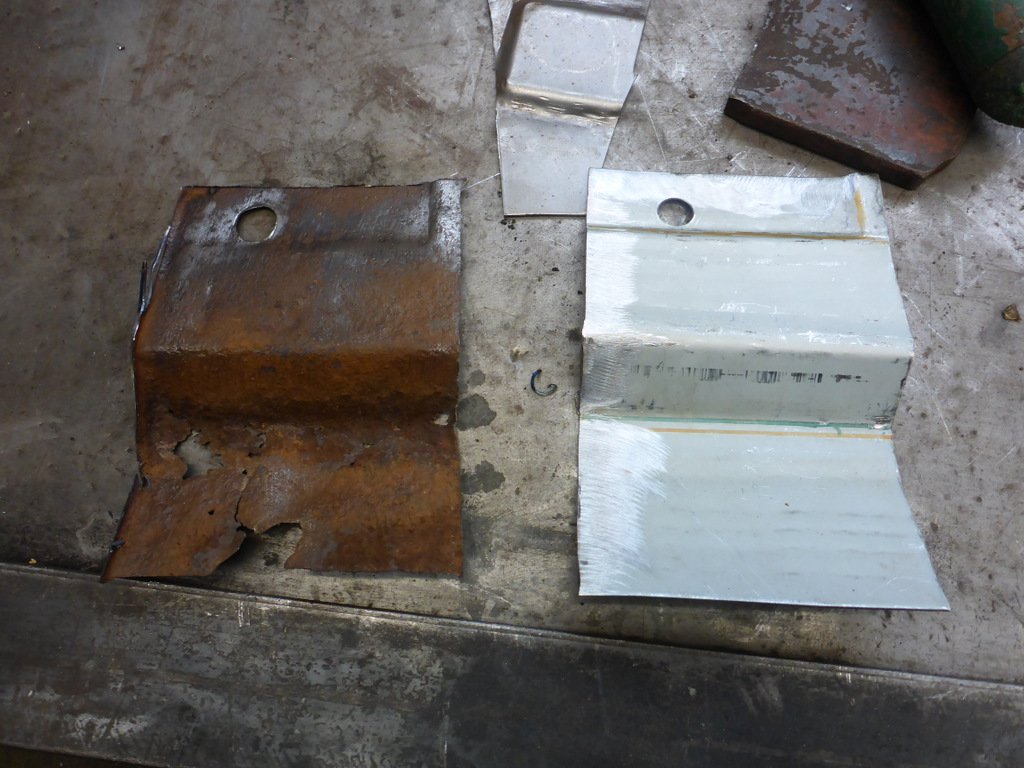
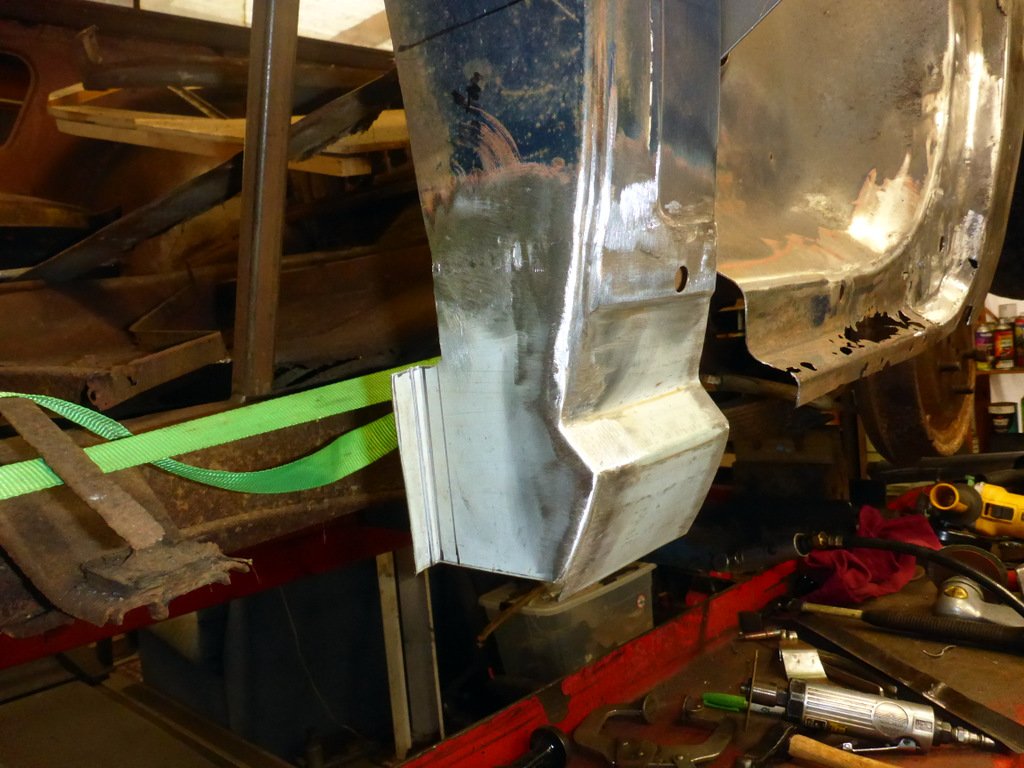
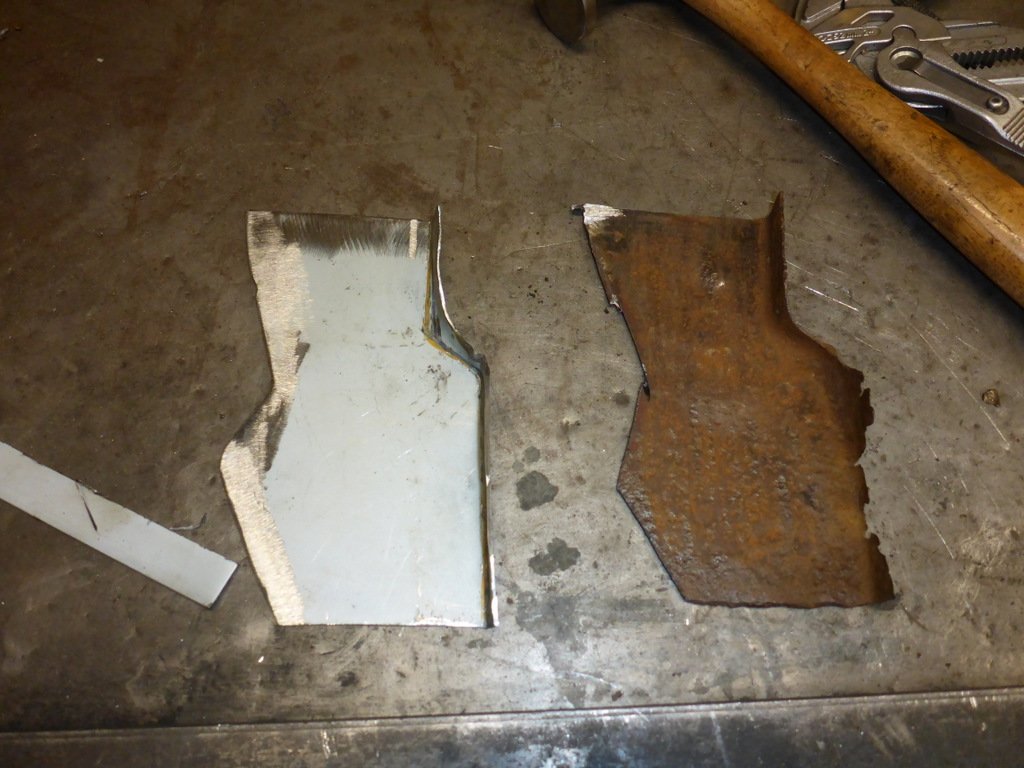
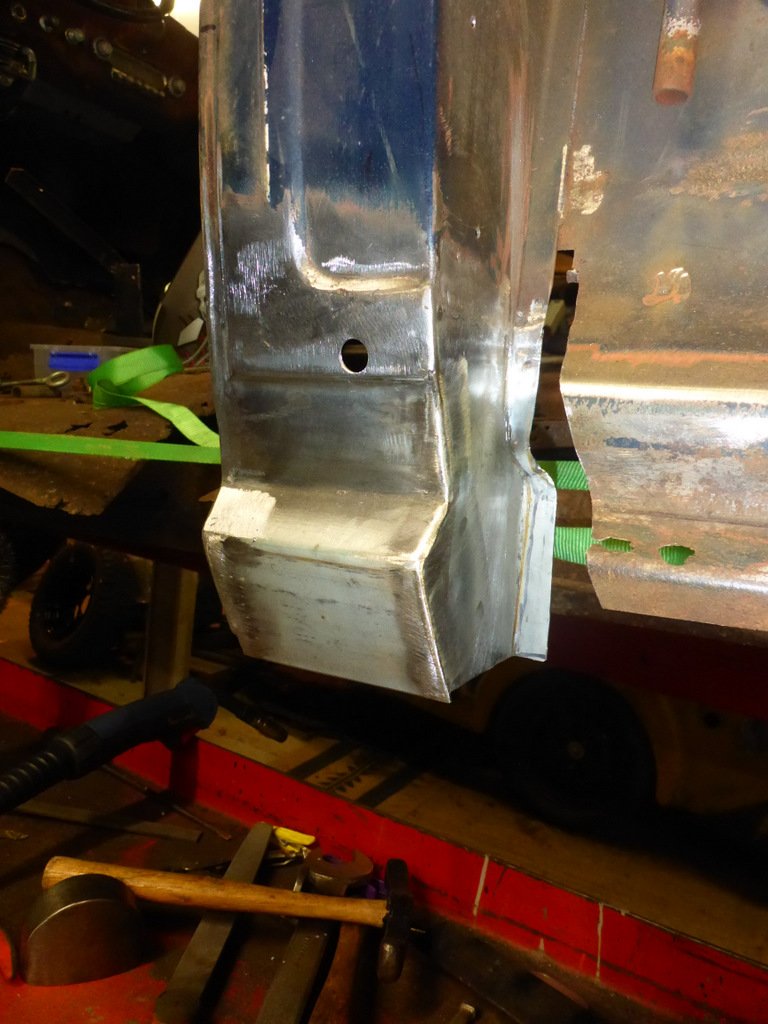
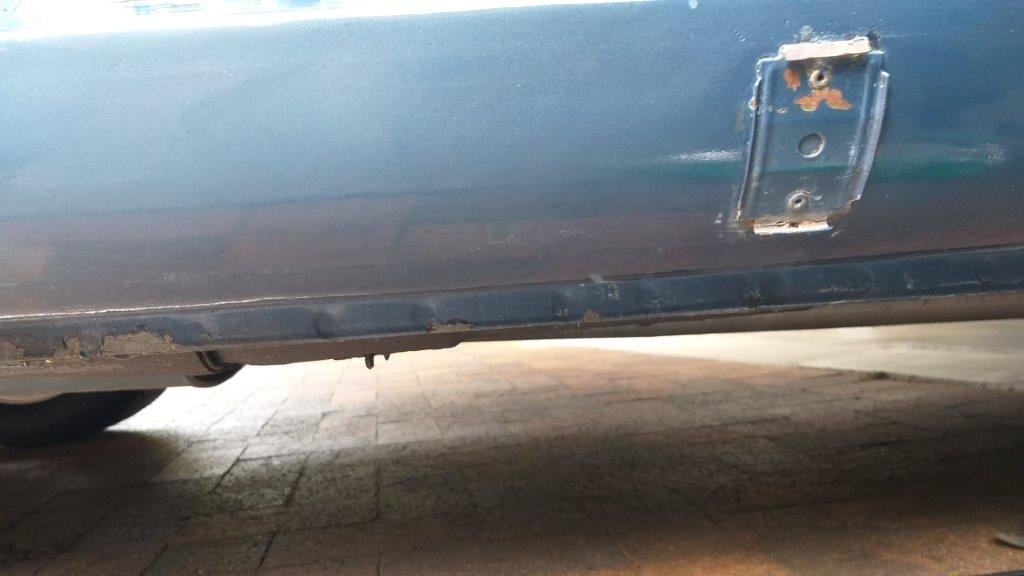
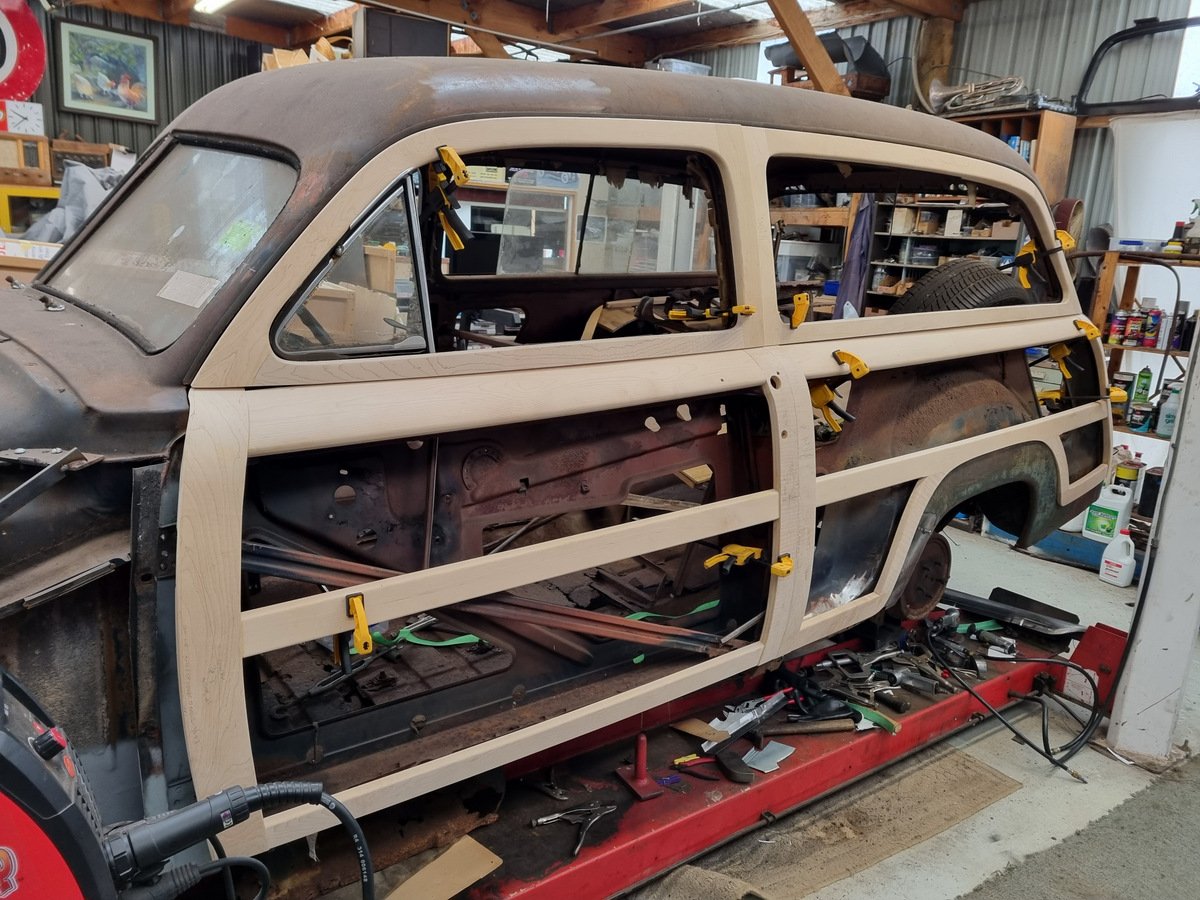
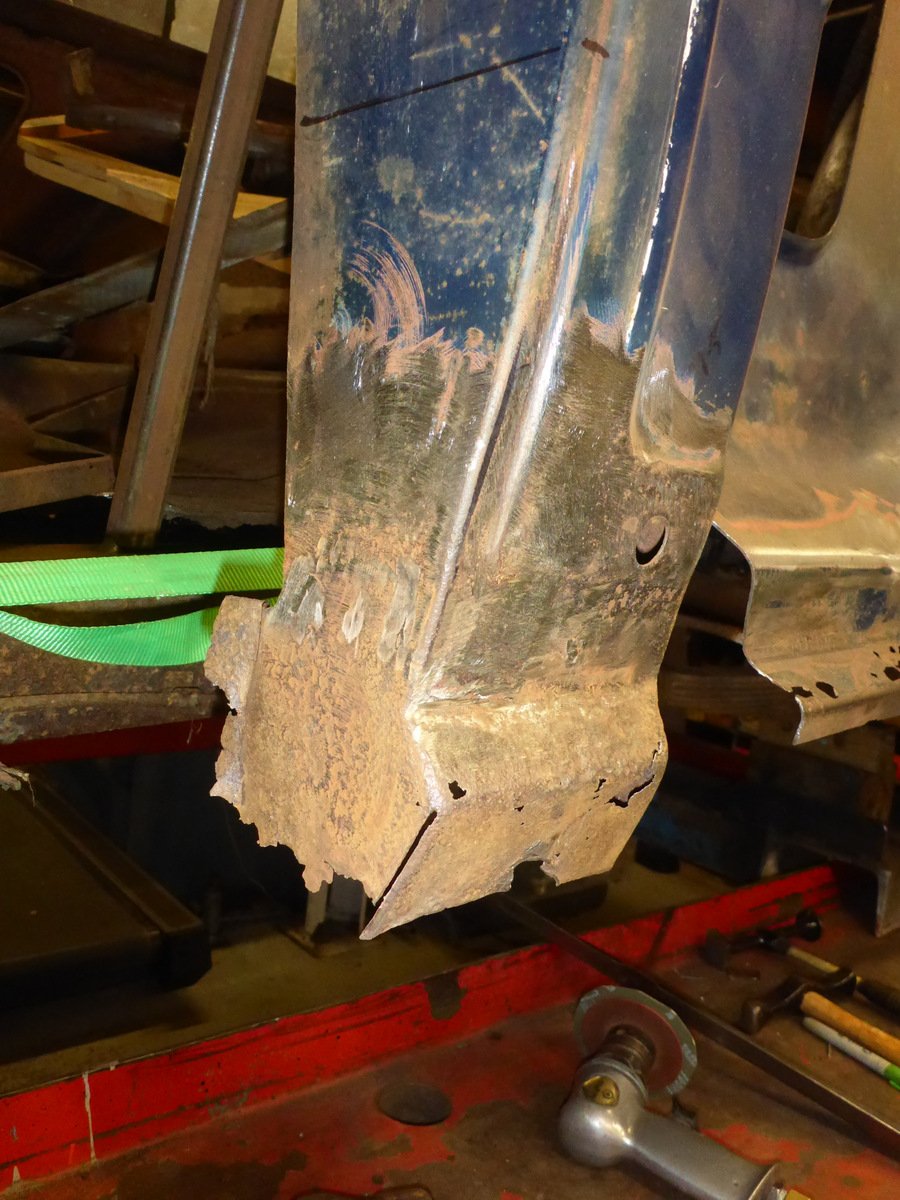
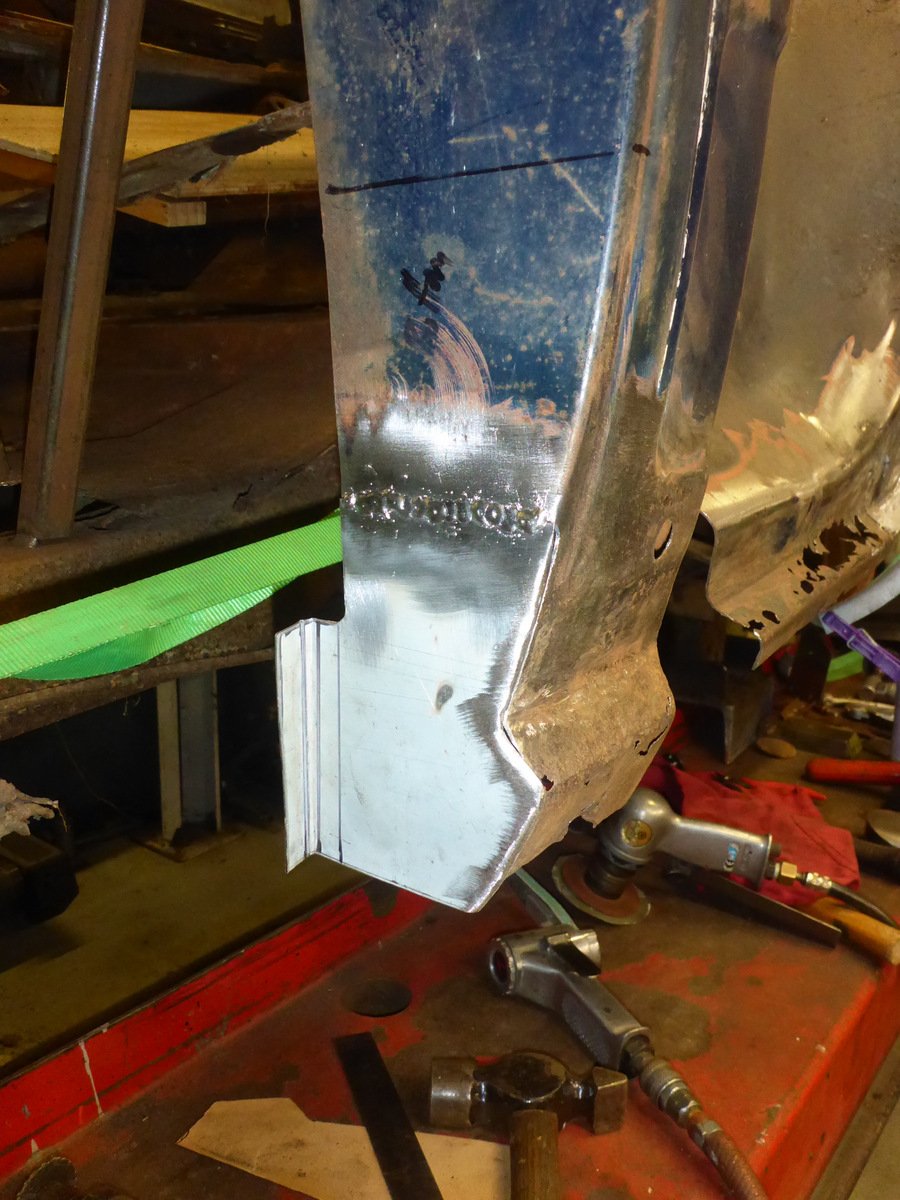
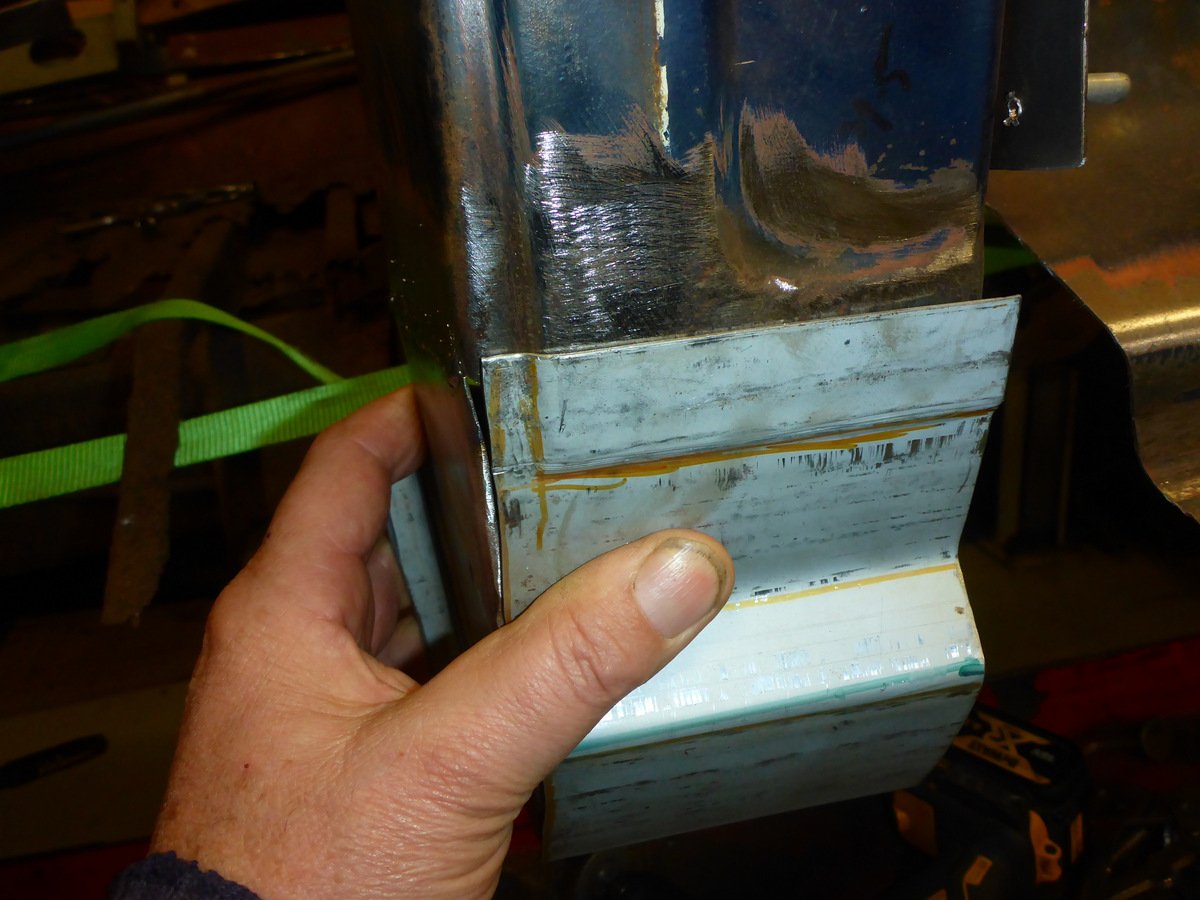
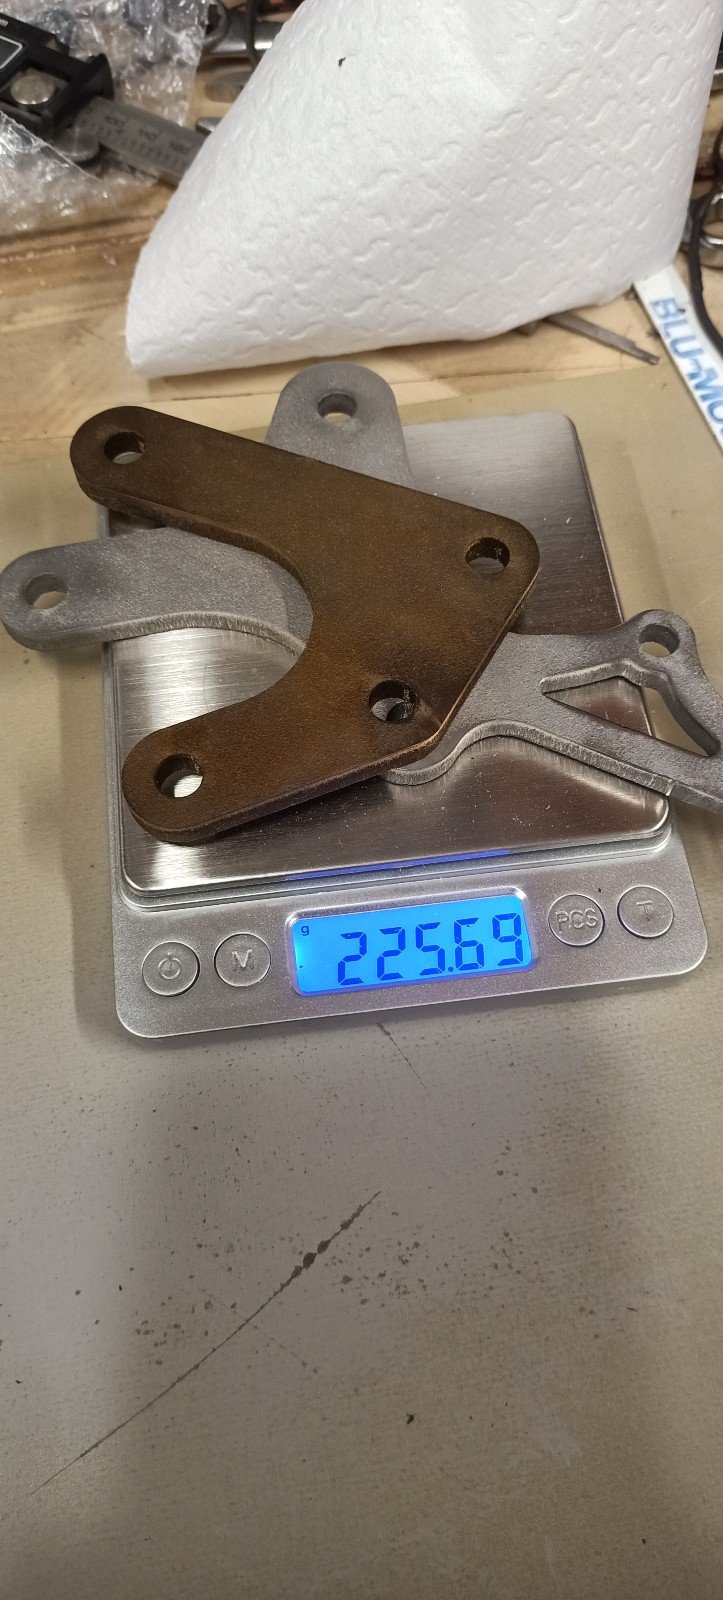
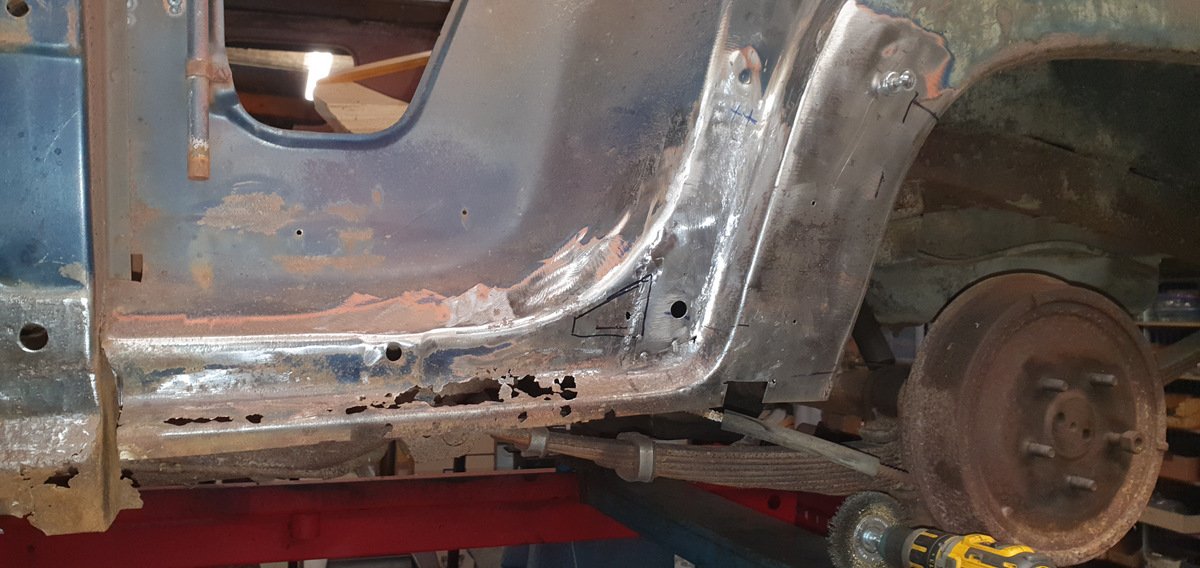
The continuing process of remaking the bottom of the B-pillar. I've been doing it in smaller pieces to keep the shape references. This area is almost all hidden when the wood and sills go on anyway.
 14 points
 -
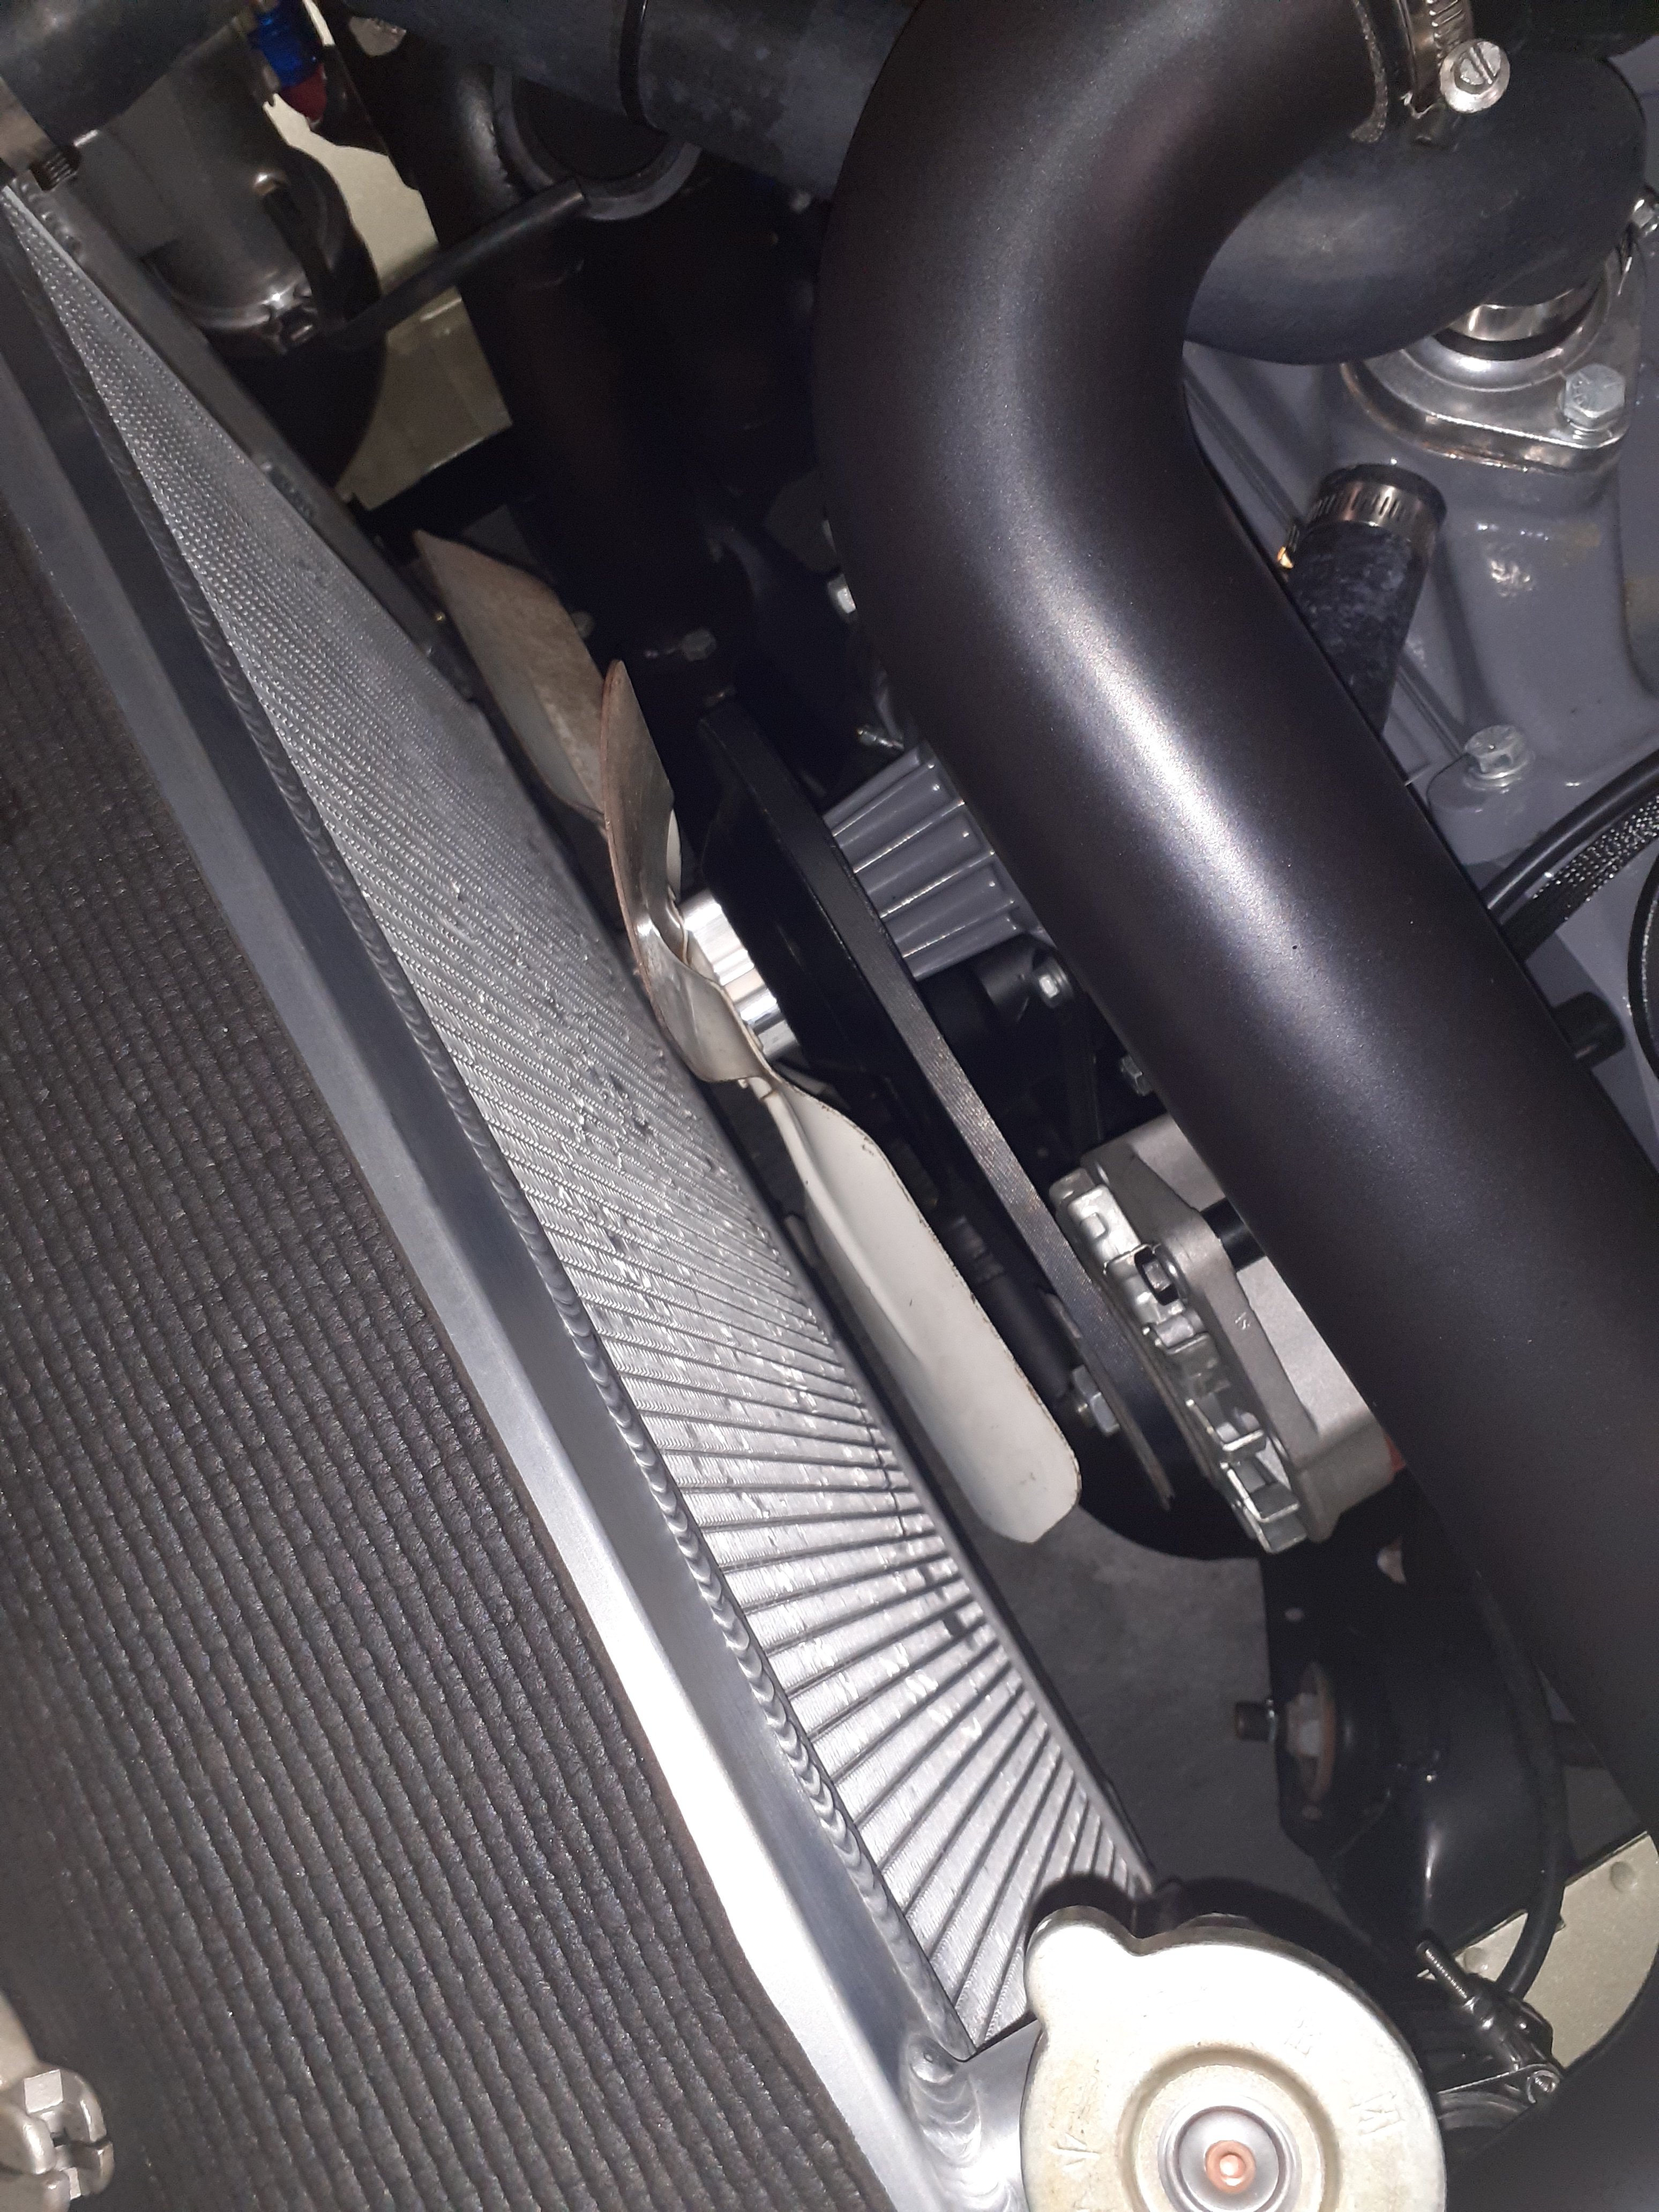
The 2 tight spots are where the water pump and alternator are, there are other areas where a motor could go but they are not really areas where you could fit a big fan in I have gone in a different direction for now, a mate is making a fan shroud and I'll use some sort of engine driven fan, either this stock steel fan or a alloy/steel flex fan, they are both 17" I wanted to stick with electric because Hp- but no use making another 10hp if I can't drive it because it goes chernobyl Noise, it's not that bad anyway, can't hear shit over all the whizz psh noises Efficiency, it's carb and turbo so I'm a wanker if I think a fan makes any difference I'd done fancy wiring to the fans, well now I have 2 spare 15a potential accessories at the front, maybe a light bar and a winch? If it's still no good maybe a small auxiliary radiator and fan. Even with no shroud it's better than the electric fans, fingers crossed a shroud fixes it completely
9 points
-
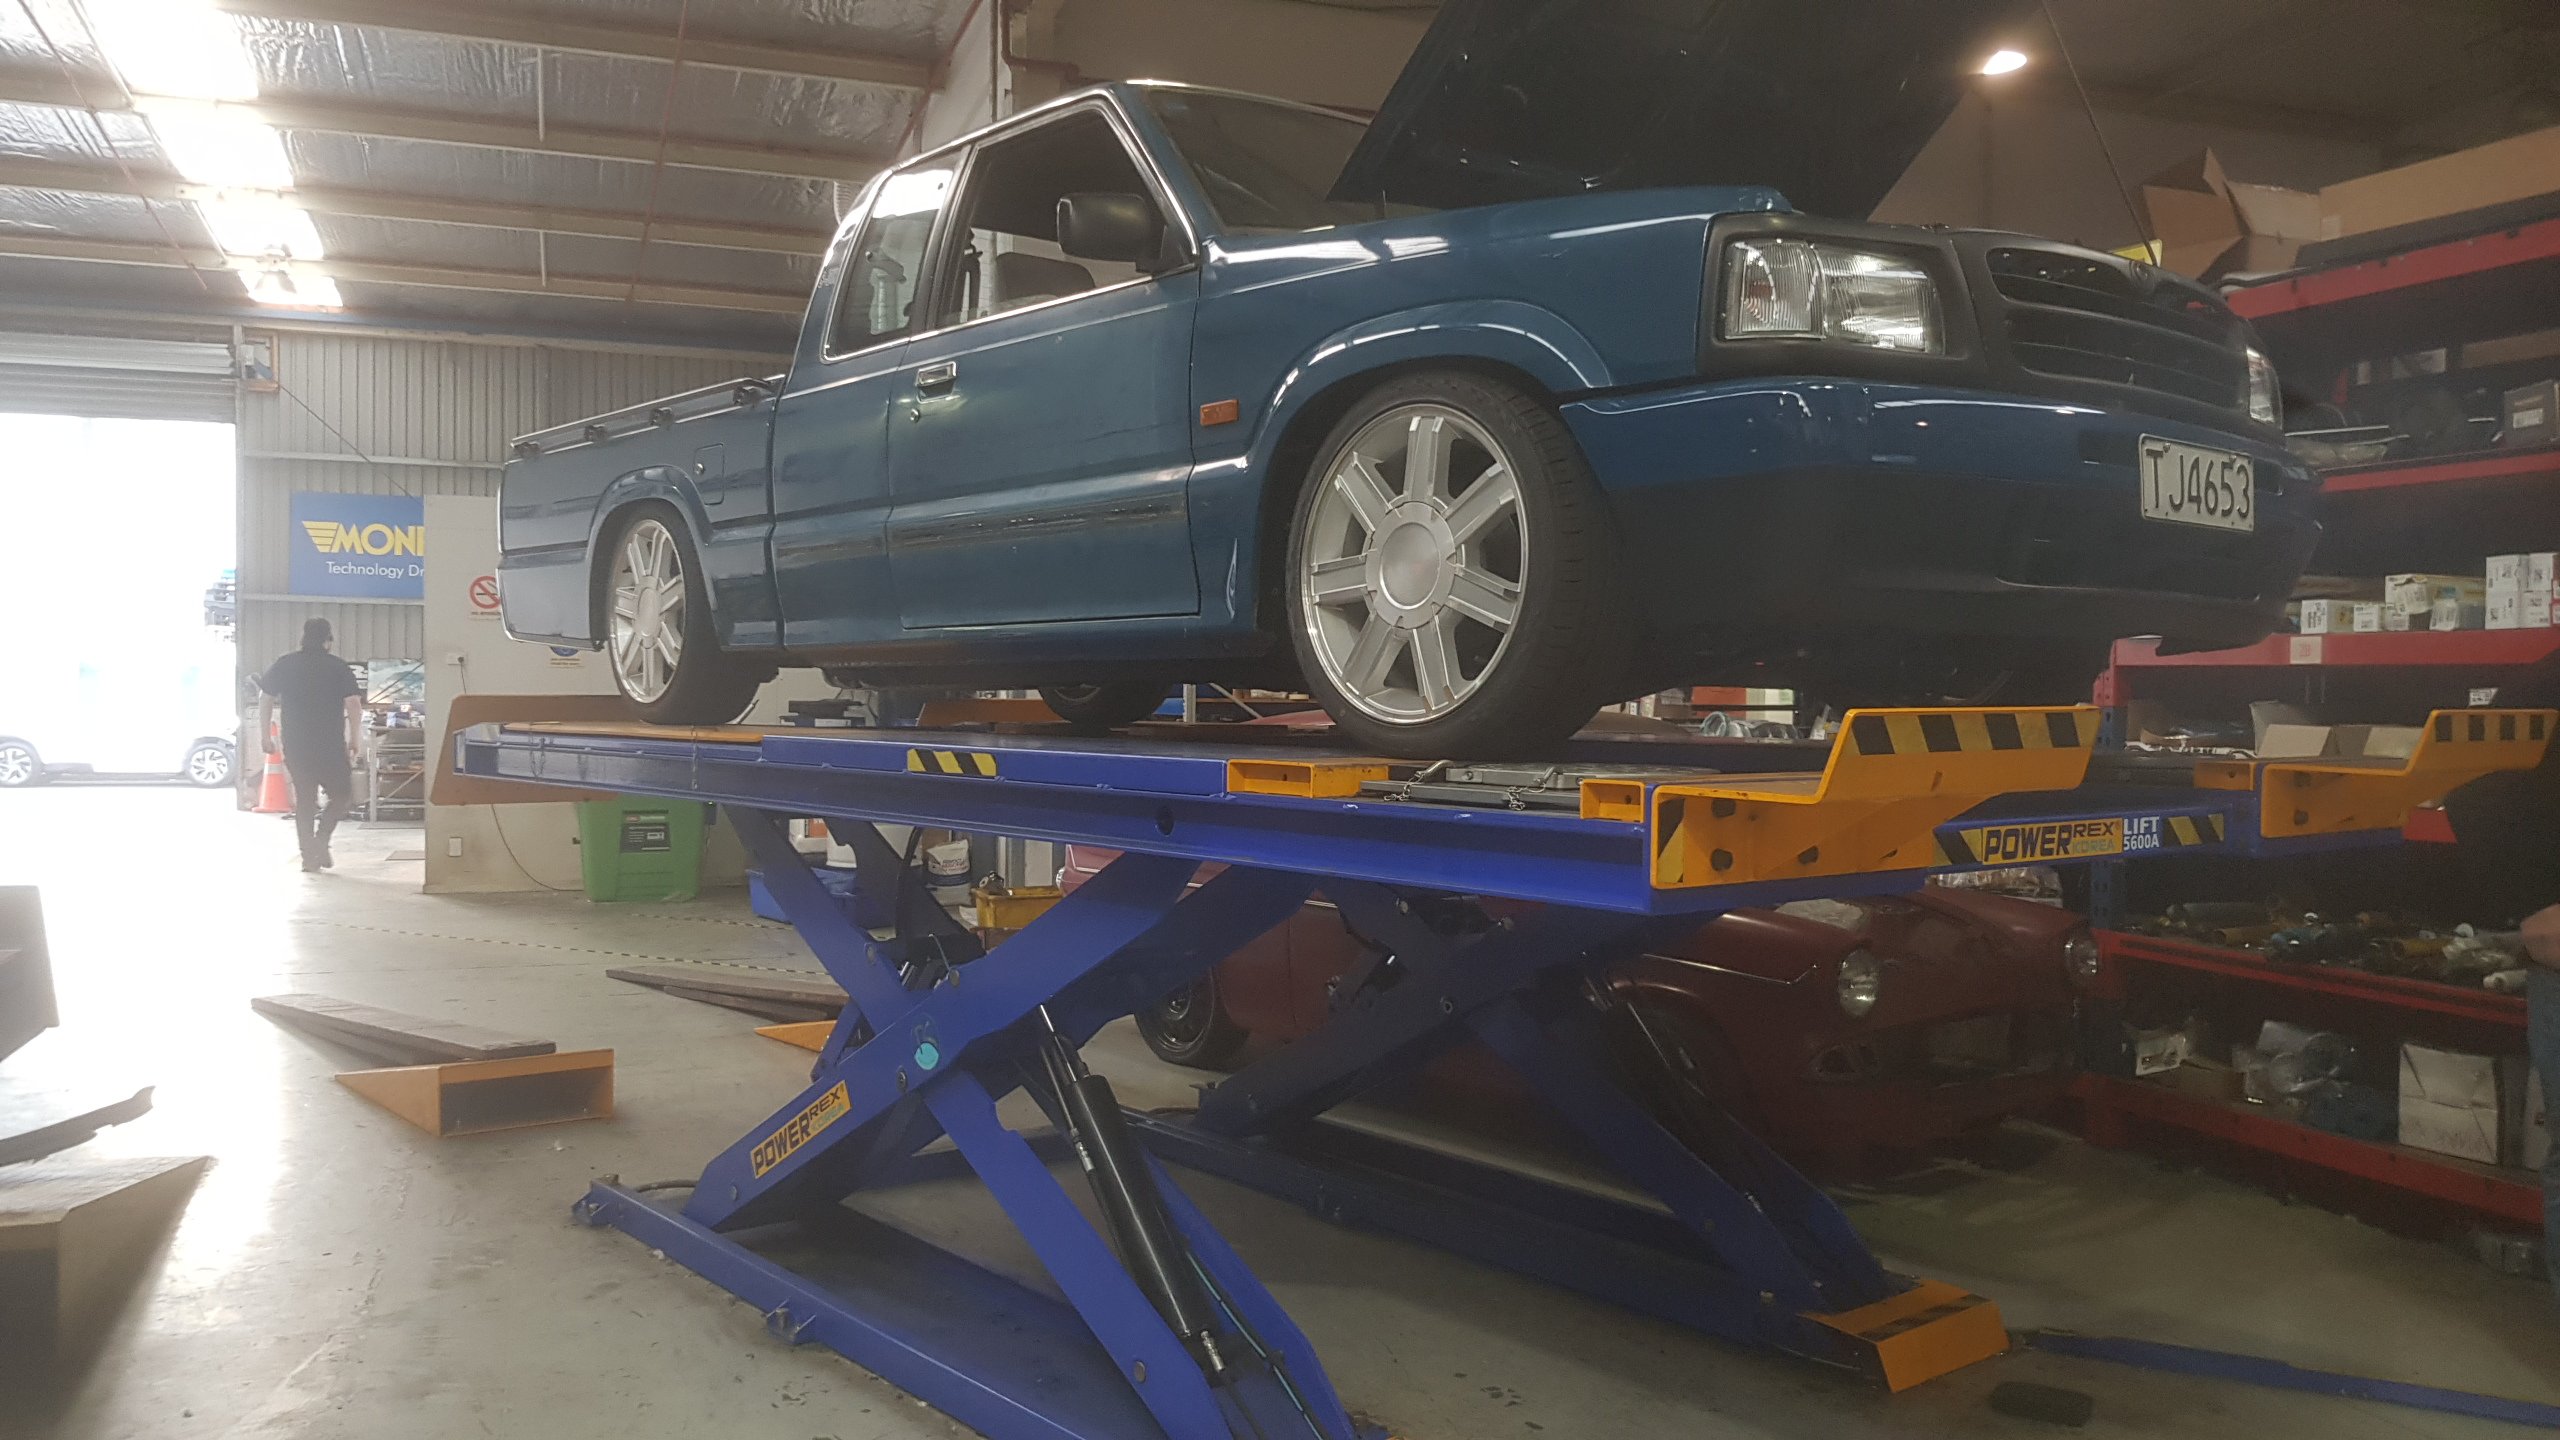
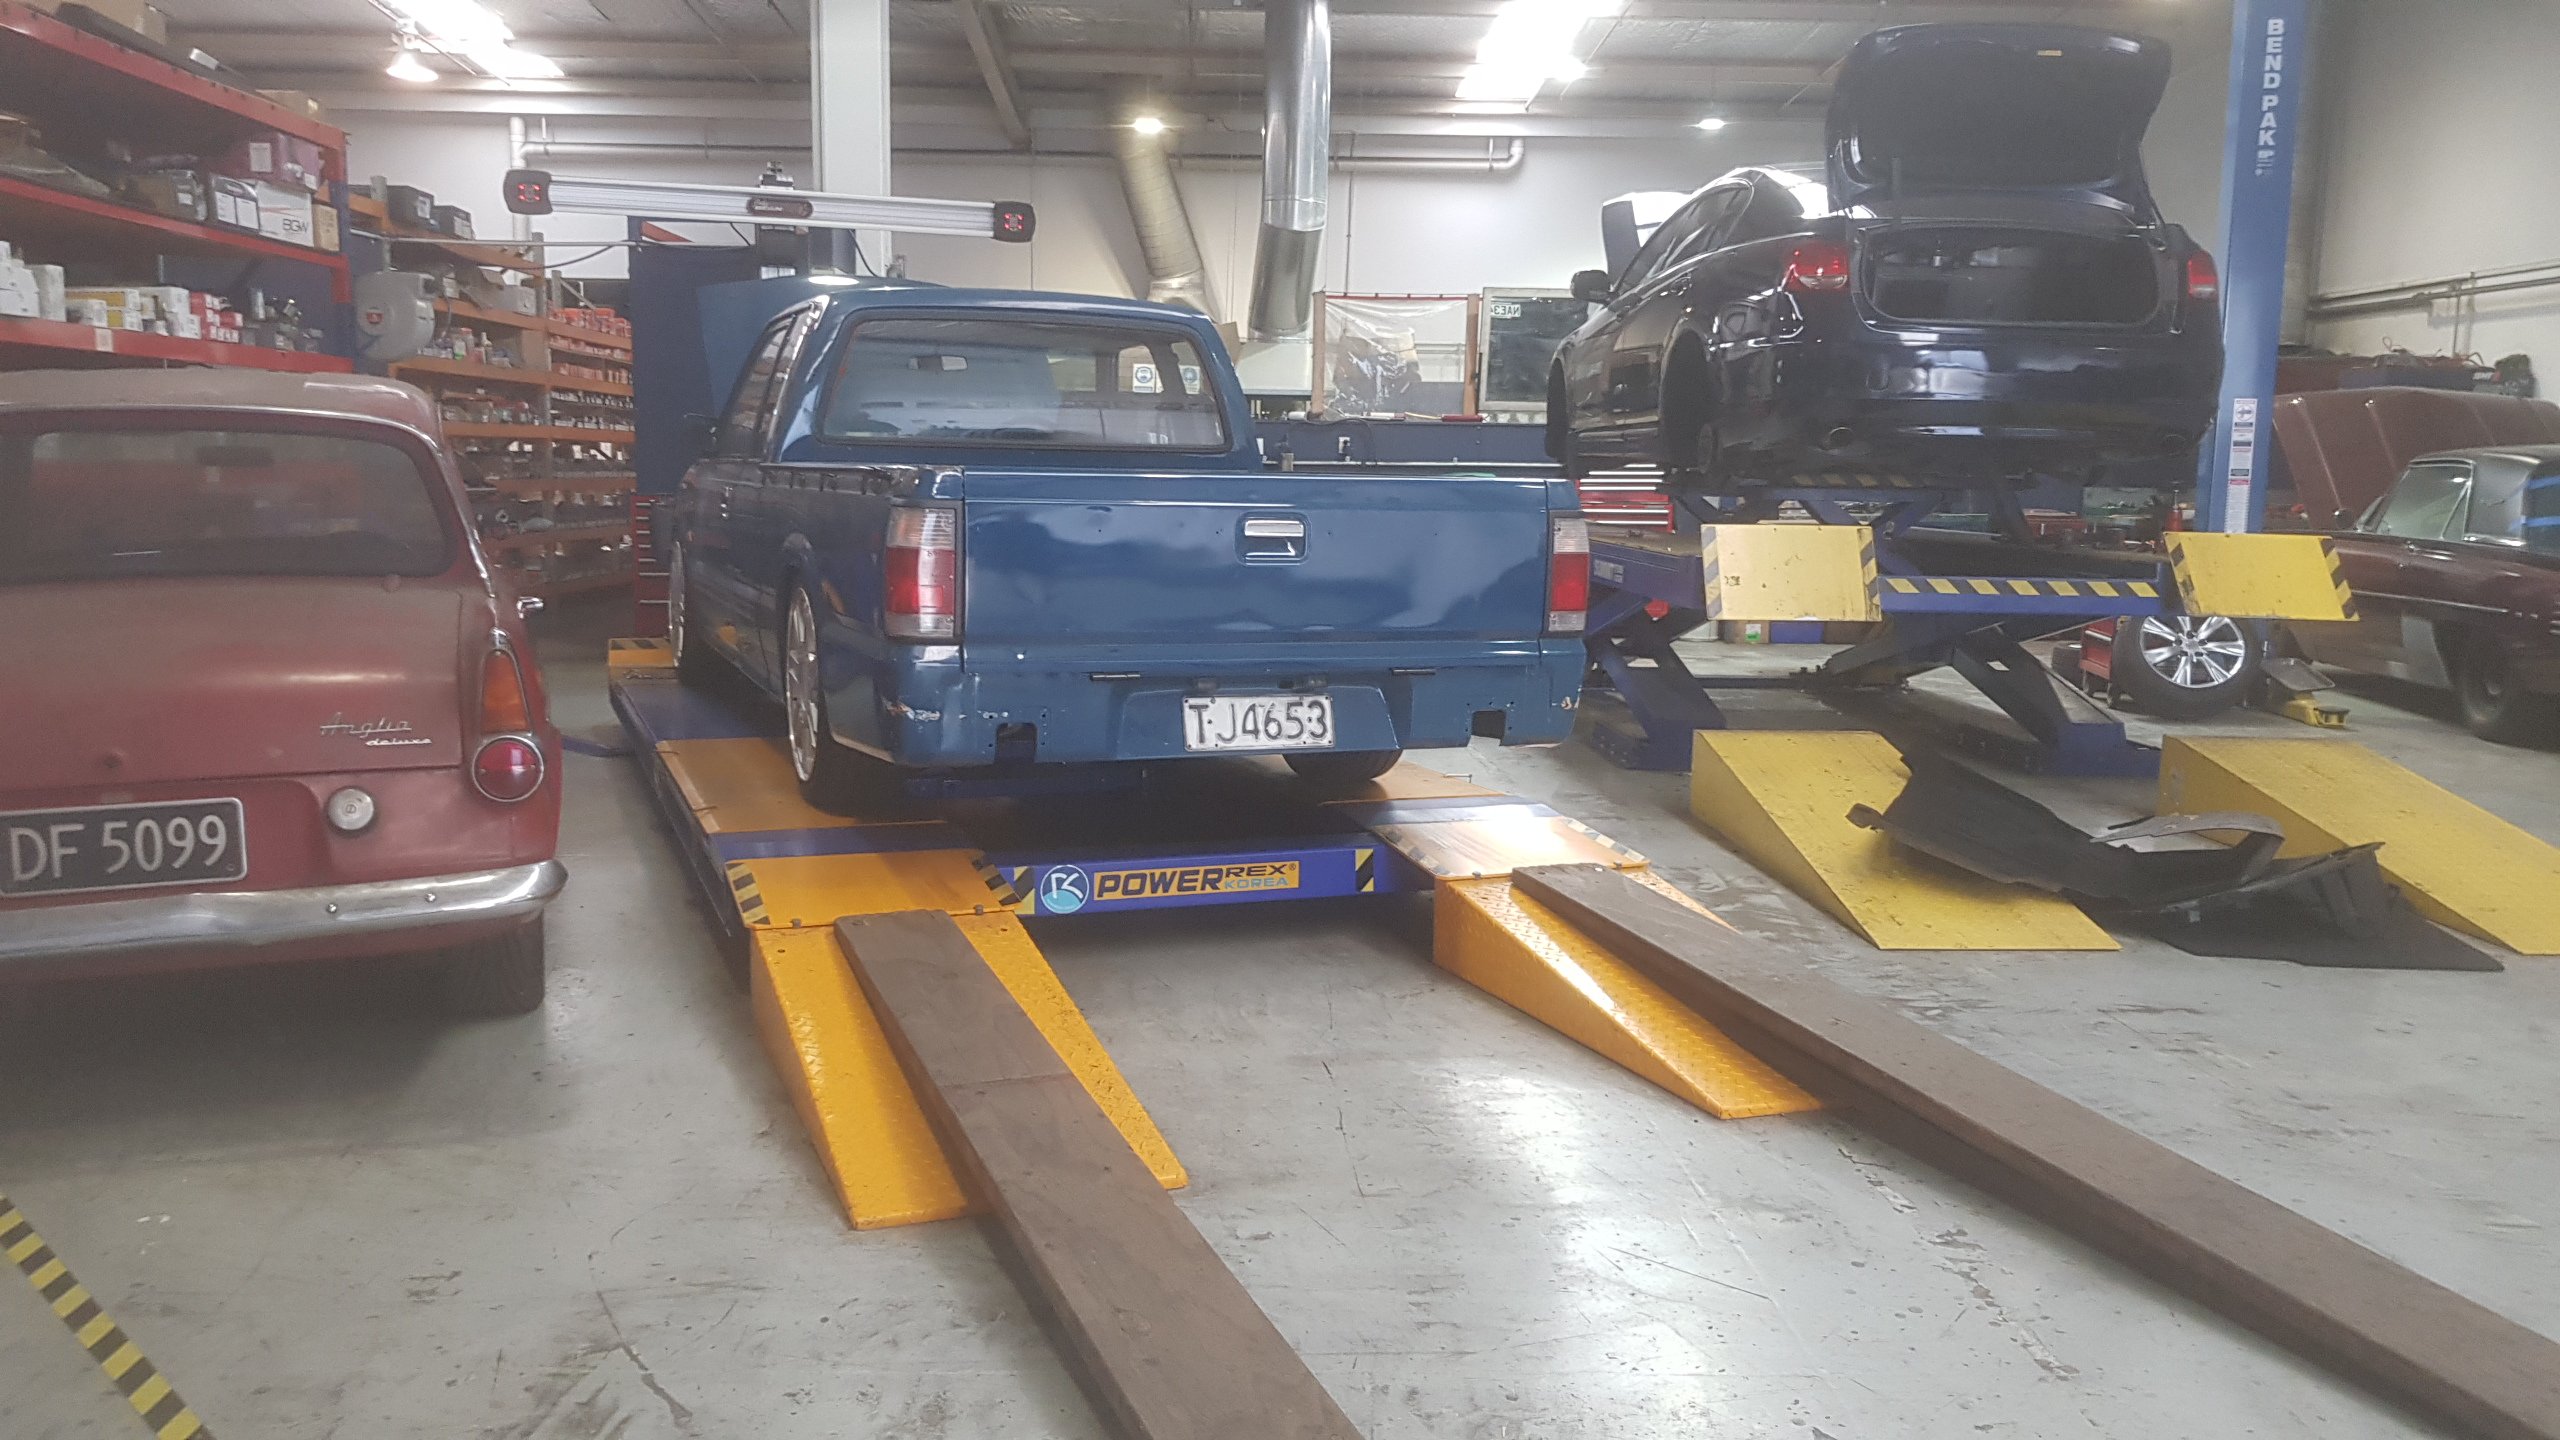
Truck went on a hot date with Iain at Racelign Tuesday and he dialled it in a bit more. Turns out my eyes are pretty well calibrated. All my eyeball front caster/camber/toe settings were within spec. Almost ready to take this thing for a hoon around the neighbourhood. 1 week til Cert day with @cletus. Still got a bit to button up but I'l make it happen.
5 points
-
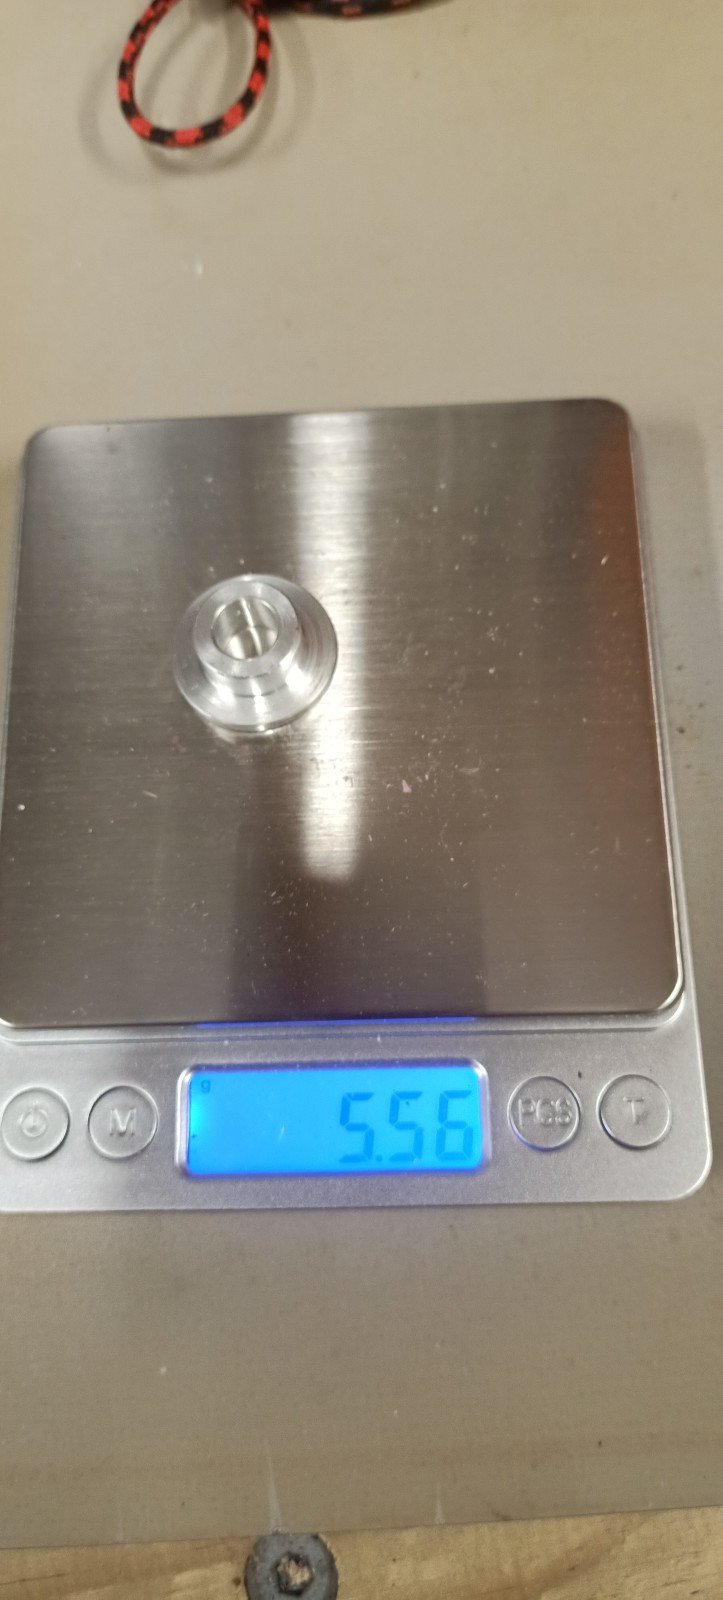
And I replaced all of the bikes steel tophat bushes with aluminum items, made in NZ this time.
5 points
-
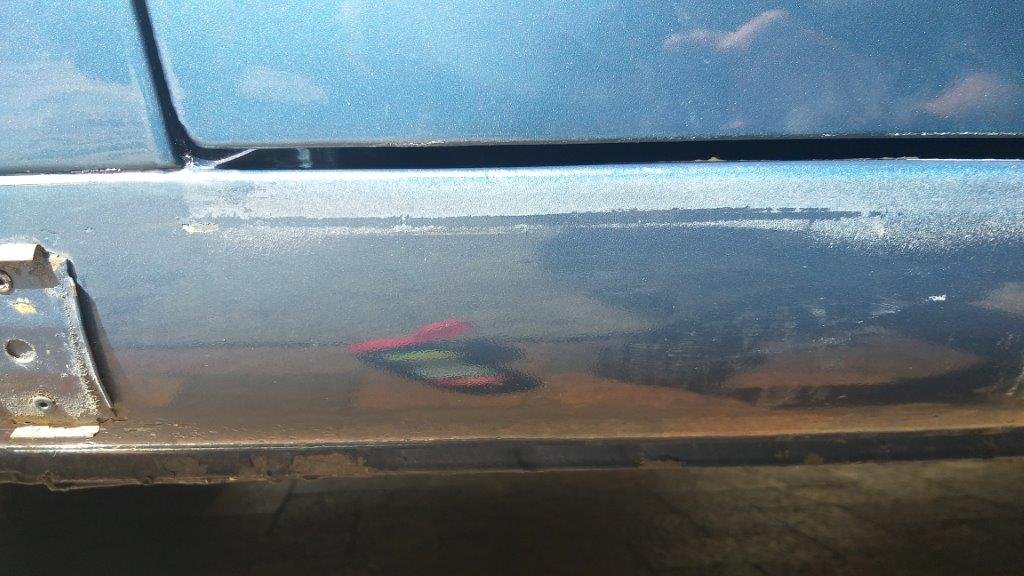
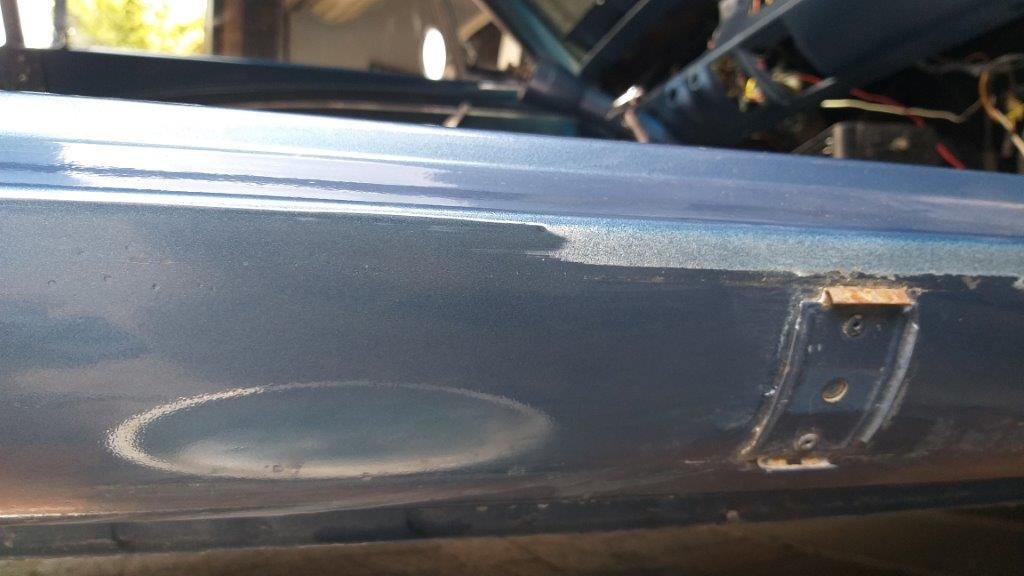
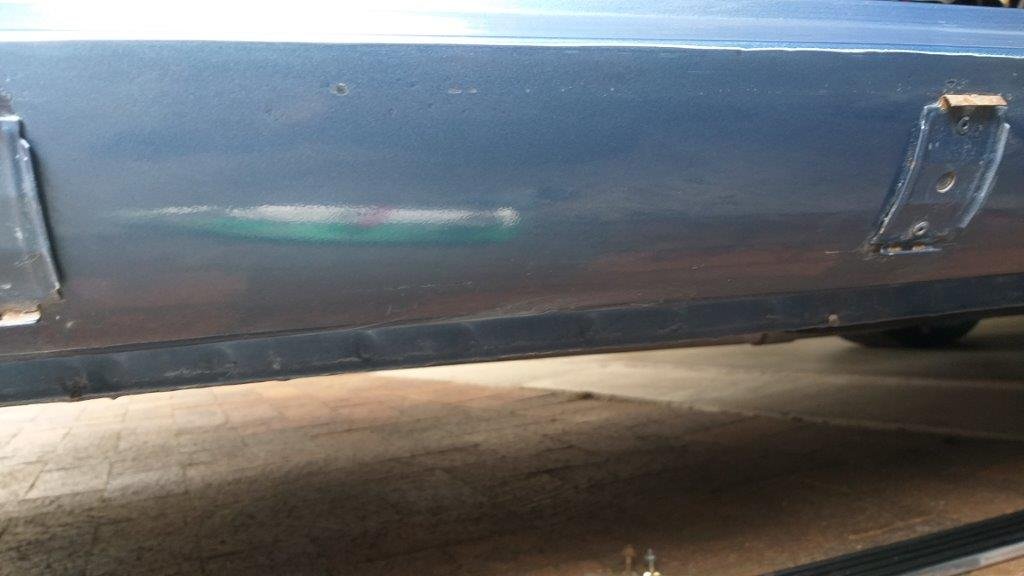
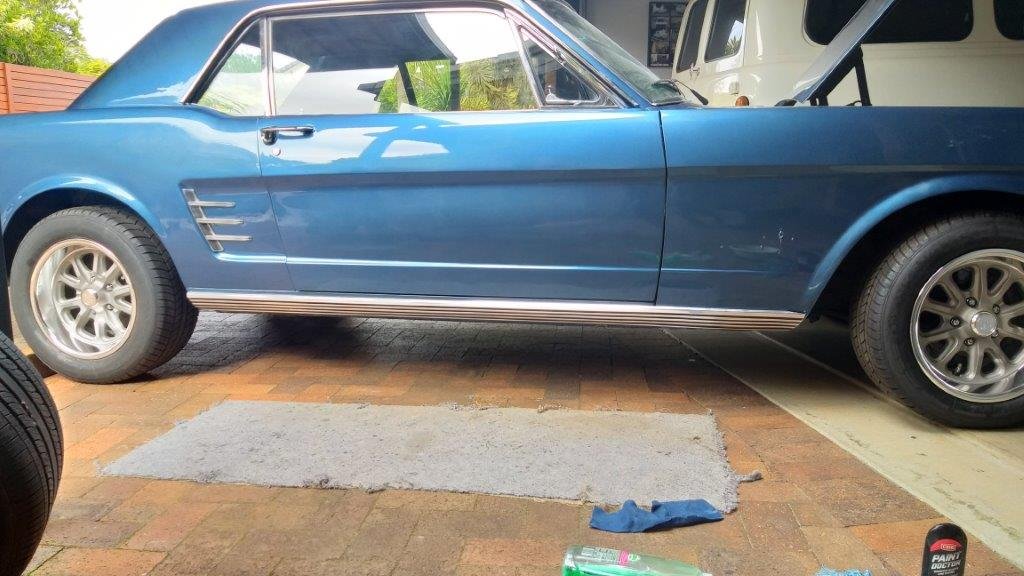
Thought I'd quickly chuck the side trim on this morning before moving on to other things. Err....... no ..... The $1,000 USA respray from 2010 comes back to haunt me once again. Looks like the door jambs must have been painted after the lower side valance and I only noticed the ugly over spray when I got down and personal. If it was just colour that would have been okay, but it's bloody primer too. If I'd have noticed it earlier we could have painted it at the same time as the doors, but oh well. Managed to ease most of it off with a piece of 1200 grit water paper followed by a bit of rubbing compound. It's not perfect, but it's a lot better than it was. Thanks for looking.
5 points
-
As far as I know, lvvta is absolutely flat out busy trying to keep up with updating standards and the CCM etc etc So they do try to stay on top of stuff that is important To be fair, stuff like previously mentioned honda struts comes up not very often, I would have certed 1 car in the last 3 years that it affected, and there is already a process in place for someone who wanted to cert a car with aftermarket struts with welded arms . So it is very unlikely that LVVTA would spend any more time on it There are some situations that can never suit everyone unfortunately, or there would have to be 200 people working at LVVTA and the rule book would have to be 4 billion pages long and a cert would cost many many times more Also there isn't a group that represents 'modern' car owners. There was talk of a group being started but I'm not sure what's happening there5 points
-
No 3.9 or 4.6 has magically come up for sale locally, which sucks and all the good engines are either crazy money or miles away (like the one above). On the plus side, the previous owner is apparently shipping down a crate with the original engine in it, or something that might resemble parts of the original engine. Not sure what I will end up with yet, we will see. If there is enough to rebuild, and its not completely ruined, that might become the plan.5 points
-
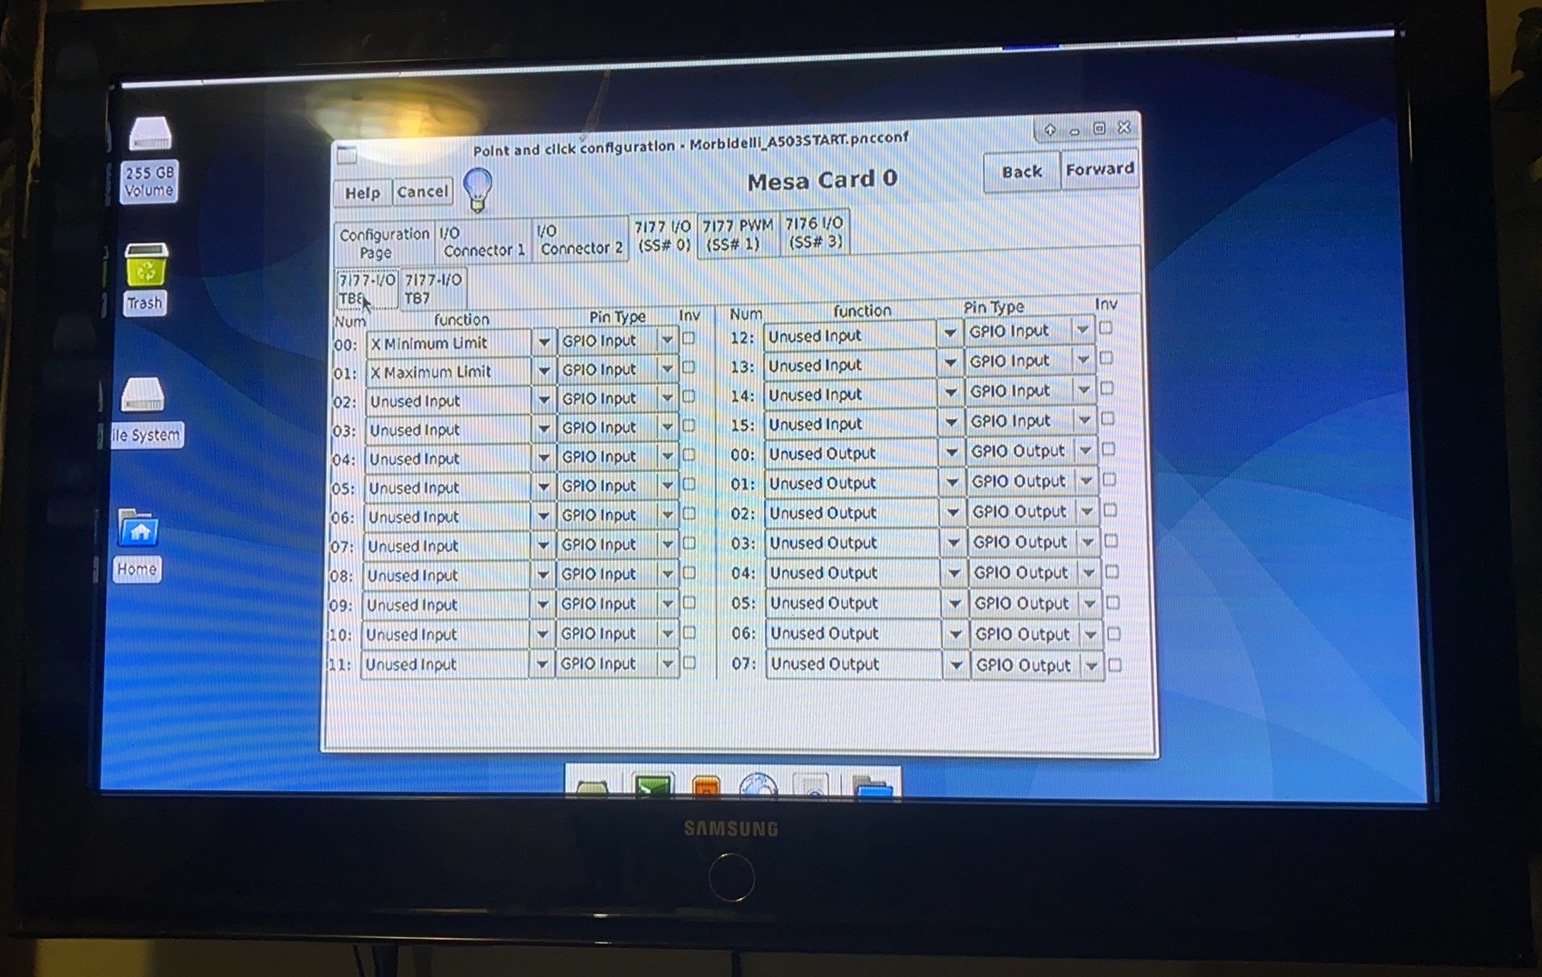
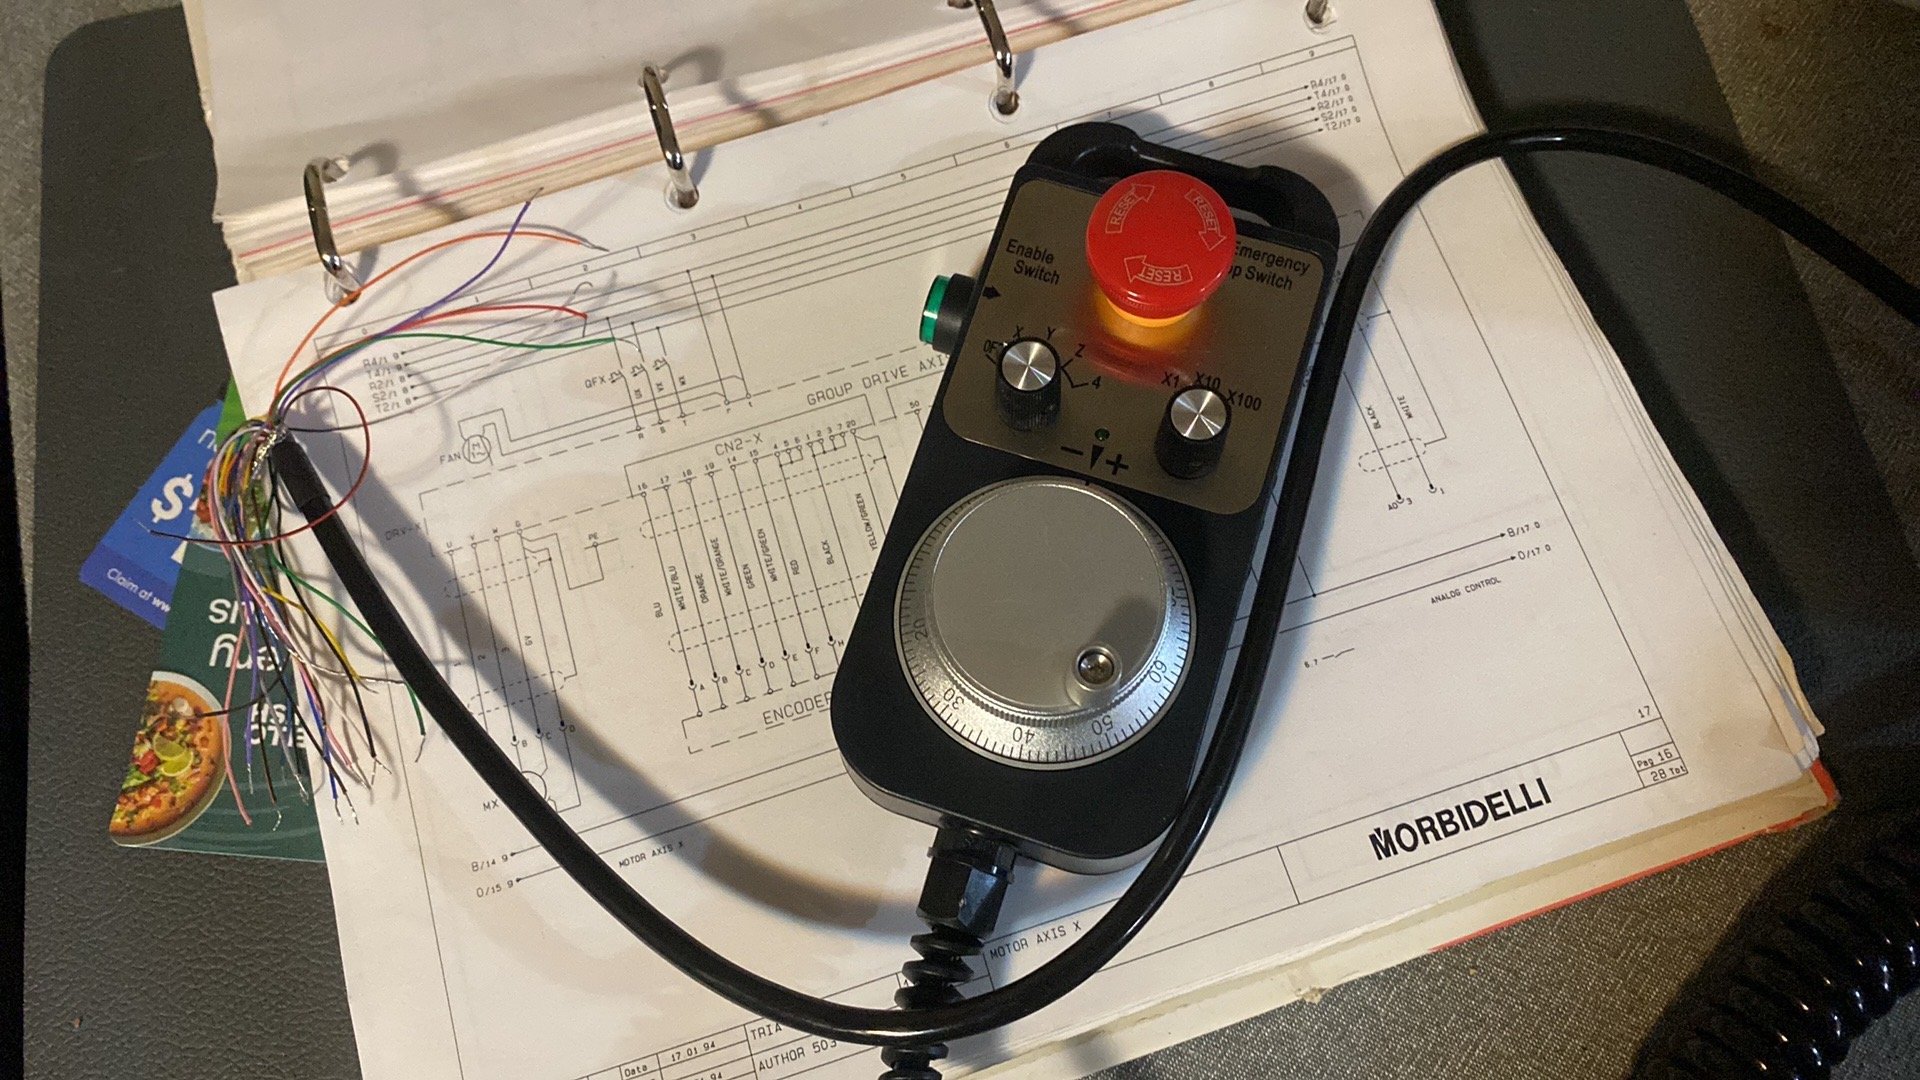
Fun hands on stuff is beginning! Cheers to @- i5oogt - for sorting me a PC, unfortunately my ancient screen didn't have hdmi/dvi so the TV took over. Standby for noob problems, this is my first ever PC, fumbling through BIOS and formatting bootable USB drives somehow happened (Credit youtube/google) and we have linuxcnc loaded up, running latency tests was square in the 'not suitable' window ~1,000,000ns but for now I will ignore it, as my confidence grows i'll work through diagnosis and checking suspects off the list. Its a massive steep learning curve, but happy to have booted linux and loaded up a mock machine, most of it makes sense and the few questions that arose were easily researched and answered if the "help" tab top left couldn't assist. A few weeks back I was informed to buy a certain MPG from our dear friend Ali, in record time it arrived, decent quality and heavy in the hand, hopefully it performs as expected. The MESA boards should be on the way, might be some long nights when they turn up! All for now, stay tuned!
4 points
-
Block of timber to go over the intake just incase3 points
-
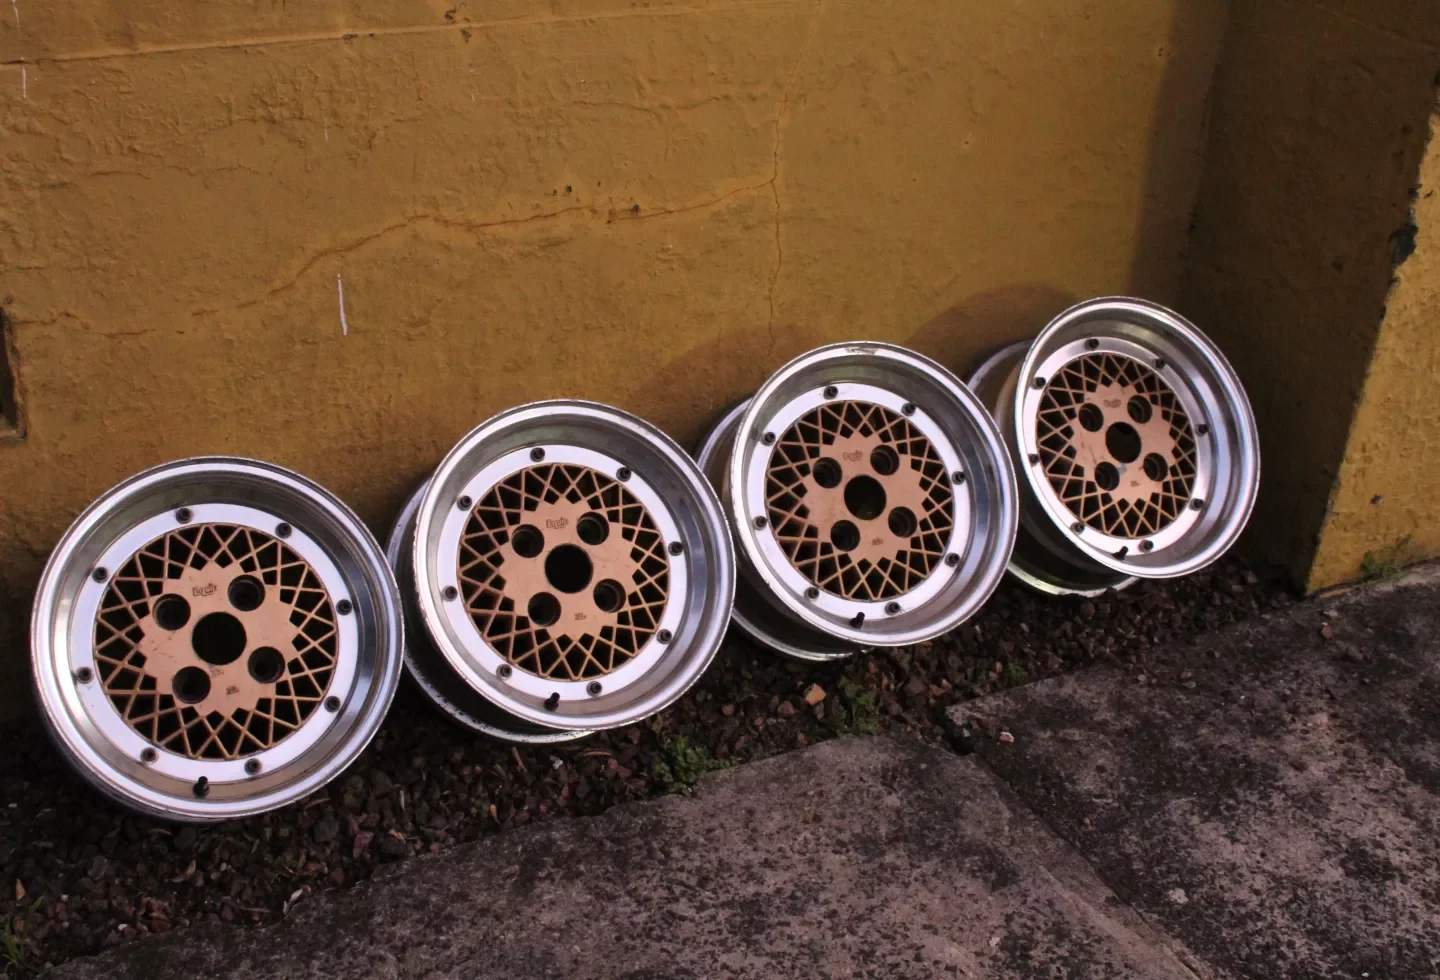
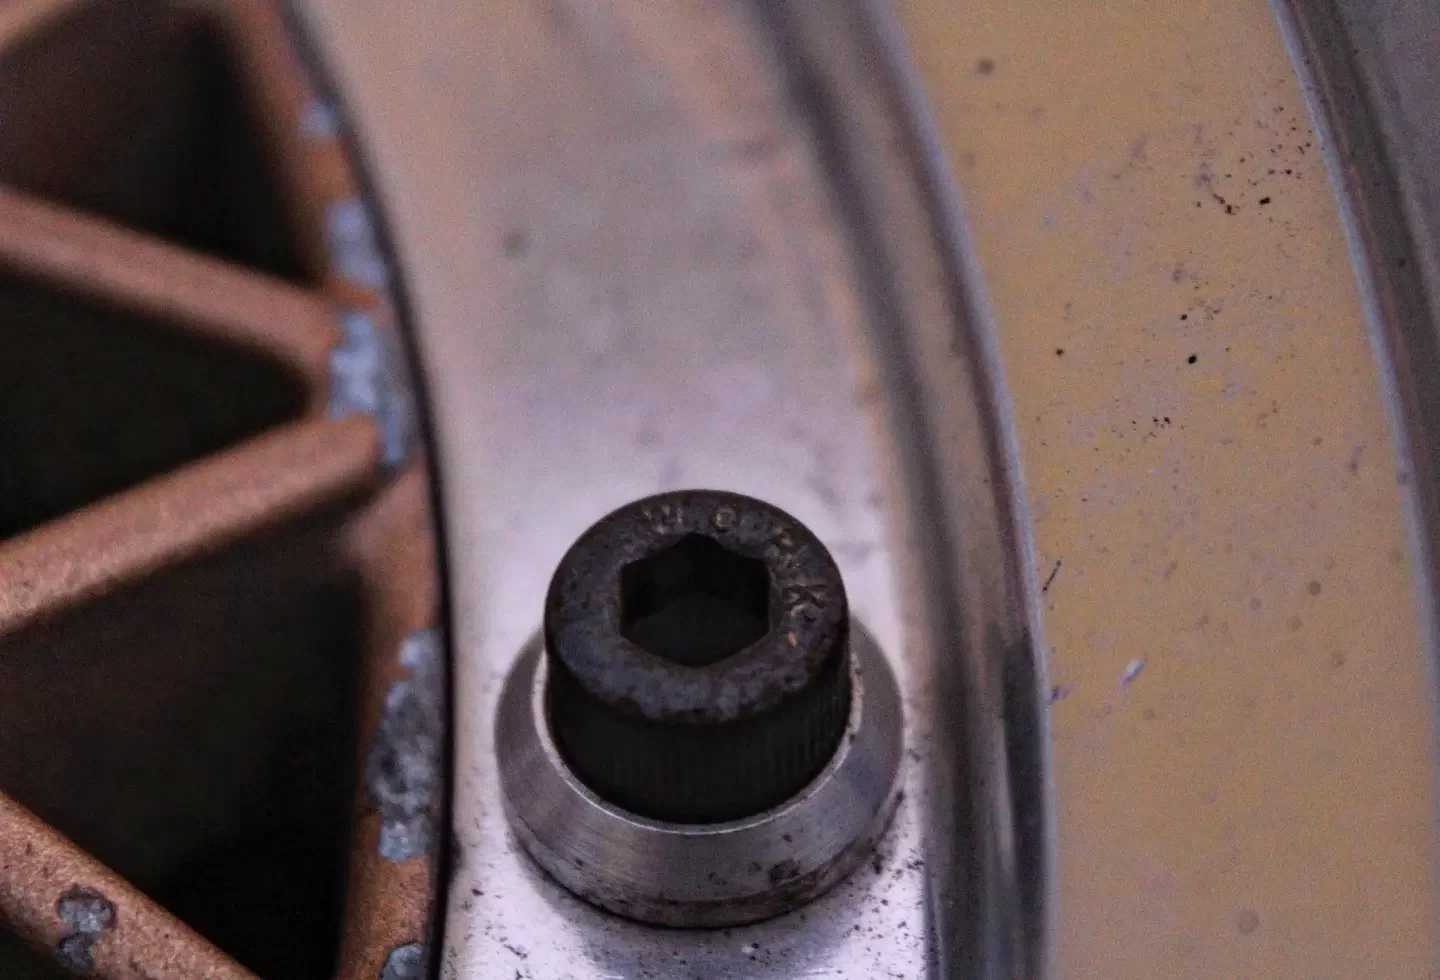
Tried them with another 14" A type wheel and they will work as long as tyre isn't bulging past the rim. Saw these pop up and grabbed them since I haven't seen them before. They are an uncommon 14" work equip mesh Each of the hex head bolts are engraved with 'work' And they have pretty cool black valve stems/caps. These will be widened to a 9/10J stagger as the potenza tr-3 were. I've managed to get a pair of 225/40 toyo t1r to try on and see how they work with the rear flares.
3 points
-
Took the working one away to Ohakune. Went well even after the frost so took a spin up to Whakapapa. Annoyingly left the petrol cap at National Park g.a.s and it wasn't there when I went back 90 minutes later so who knows what happened to it. Managed to find a substitute at Horopito Motors after sneaking entry on a Sunday when they were sort-of closed.
3 points
-
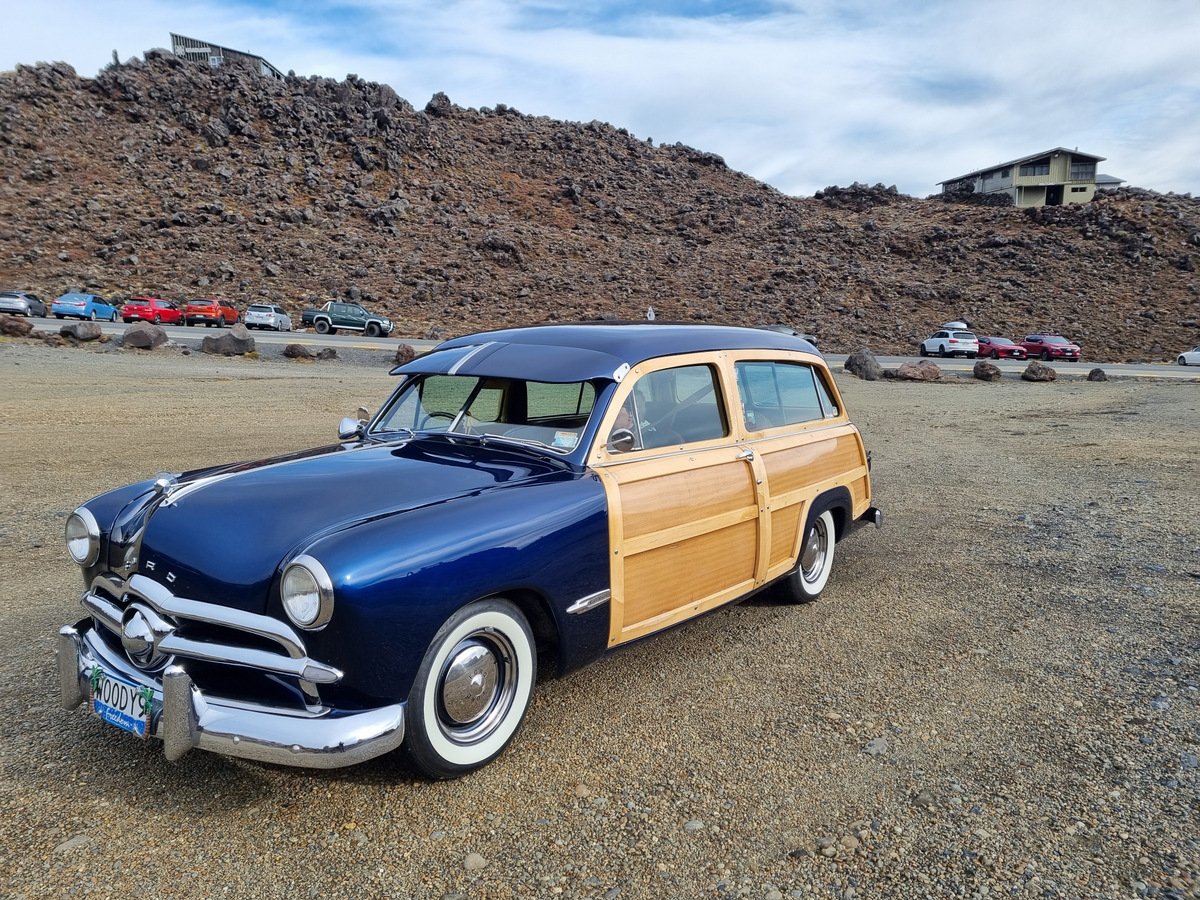
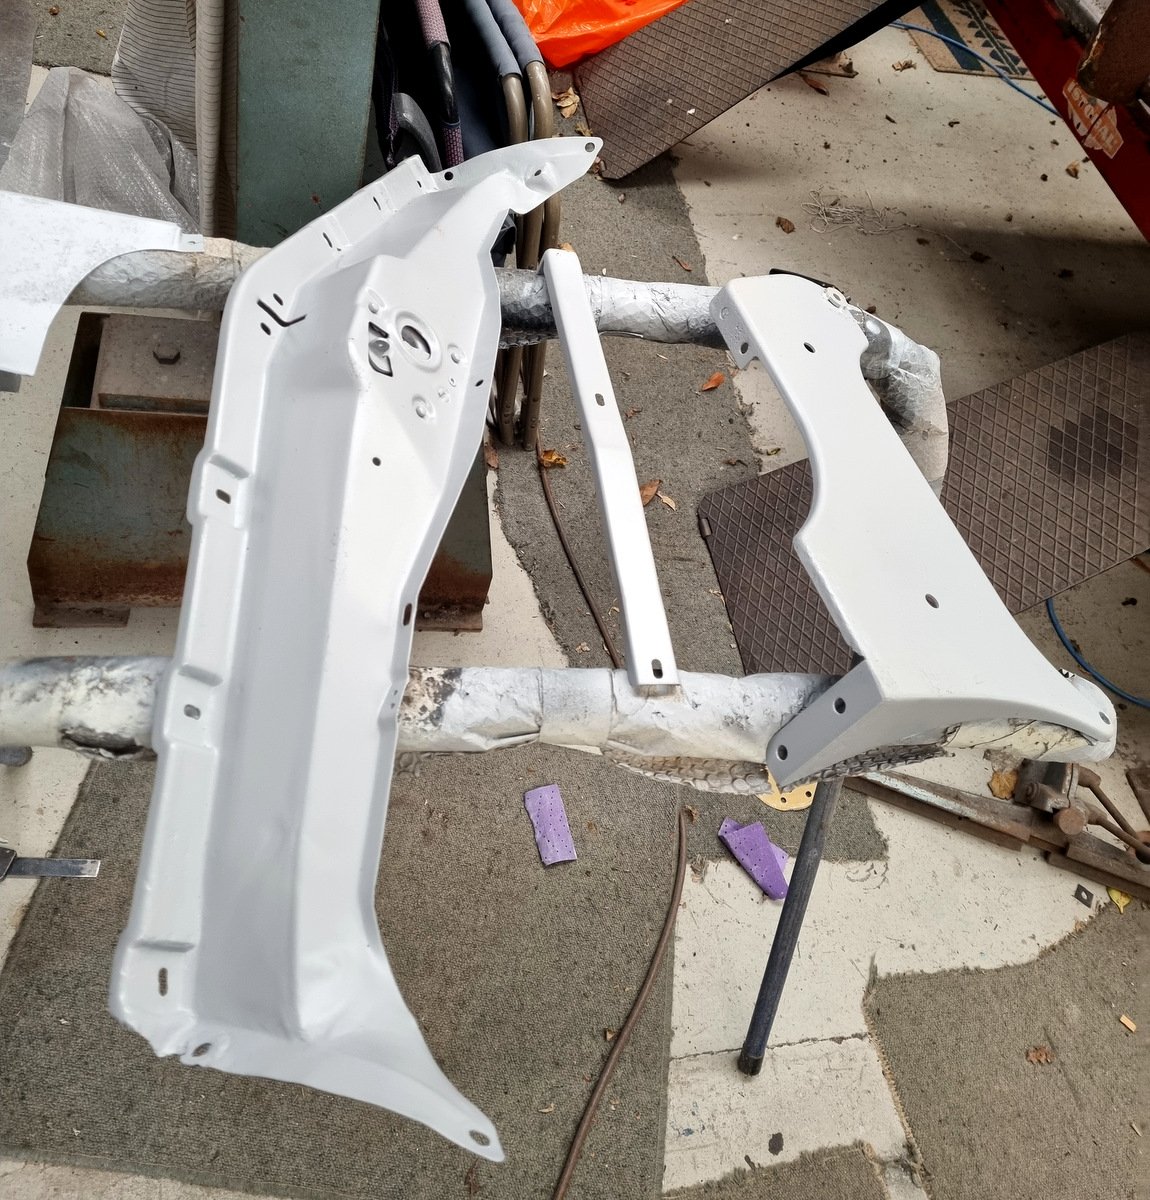
Another month already? Hot Rod club came for a visit so pulled some wood out to make it look like I've been making progress After getting some more steel I made a start on the bottom of the B-pillar
3 points
-
Well Monday/Tuesday didn't suck. Spent some time Monday buttoning up a few things to be able to drive it. Hammered up the inner lip on front guards and adjusted the toe a little more. Wired the elec fan and tested its effectiveness. Connected Amp wiring to tick off the Audio side. Sounds great, all I need now is a bumper mounted siren. And got it loaded on the trailer ready to drop to Racelign on Tuesday morning.
2 points
-
That "FUCK!" he seez at the end - hahaha... I so know that feeling. When something mechanical goes wrong, I'm not sure what but I know its bad.2 points
-
AE101: first priority to be sold. I just need to get a wof, do the timing belt and water pump (297km) and I want to repaint the roof/bumpers because rust coming through and bumpers bit tatty. Then a recent acquisition I'll sell, more on this later. GF8: will sell after, a bit of a bigger job, but no doubt doable! SW20: an even bigger job, with some work needing to be outsourced to a panel shop. After I've sold the first two, I'll buy a tow wagon and trailer the projects and contents of my storage to a new storage unit local to me.2 points
-
I've decided to sell my cars and do something different. Left job, moved to a new town 5 hours away. My Mrs plan was to get a caravan and tow it with her Outlander. Finance issues and it being CVT put a quick end to that. Still did some work with it, thinking it would be our daily. Got a roof box from Wanganui that was worse in real life than the pics, plus smelt like dog and was unclean Halfords UK spec 470l approx. GHFWII. No way I'm putting that on a relatively clean car Not pictured but I also filled a crack with baking soda and super glue and then body filled it, plus rubber blocked+sanded it down. Also did the wheels: Also wiper Cowl, wipers, badges etc The end result Trademe "warewell" roof accessories, not keen on rhino rack/thule/etc prices2 points
-
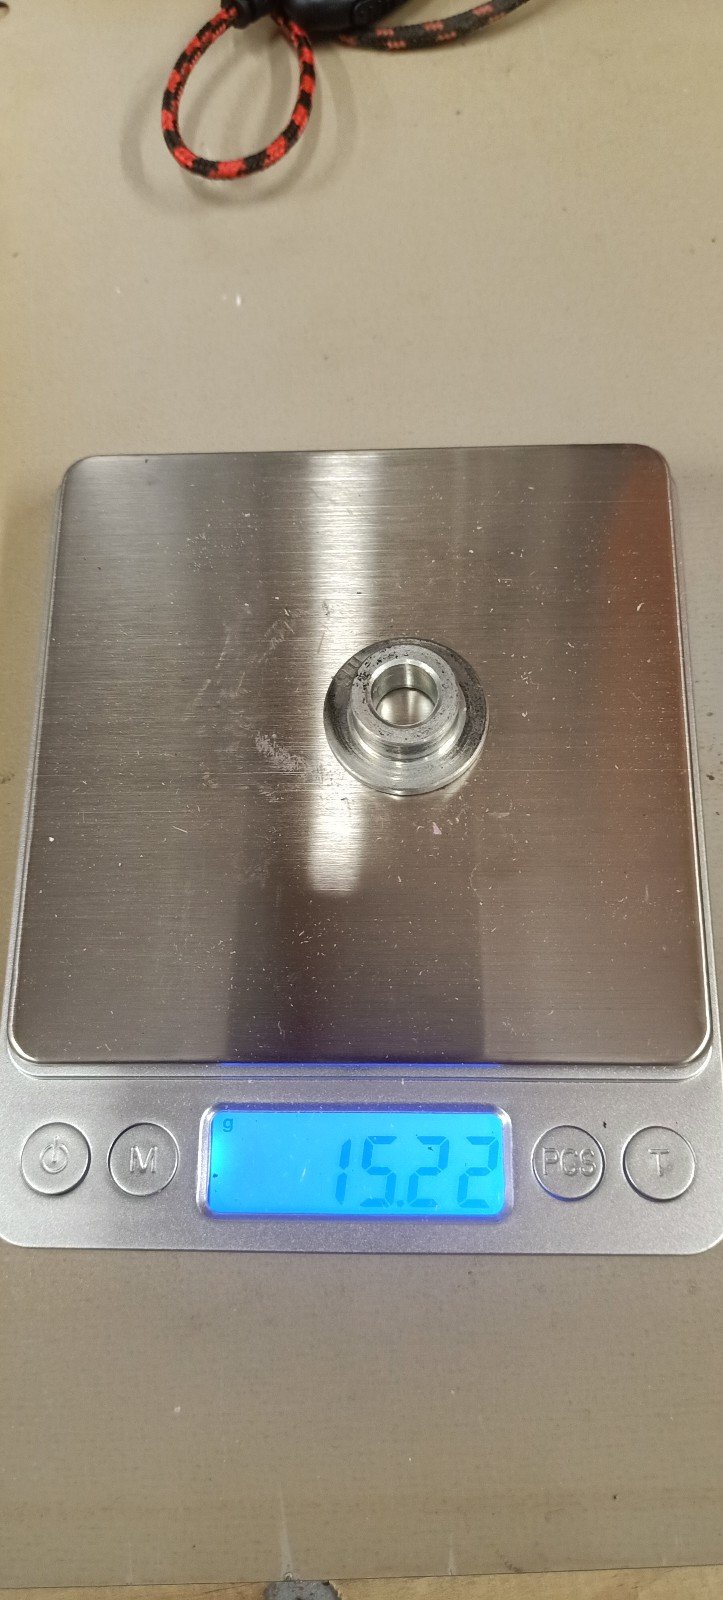
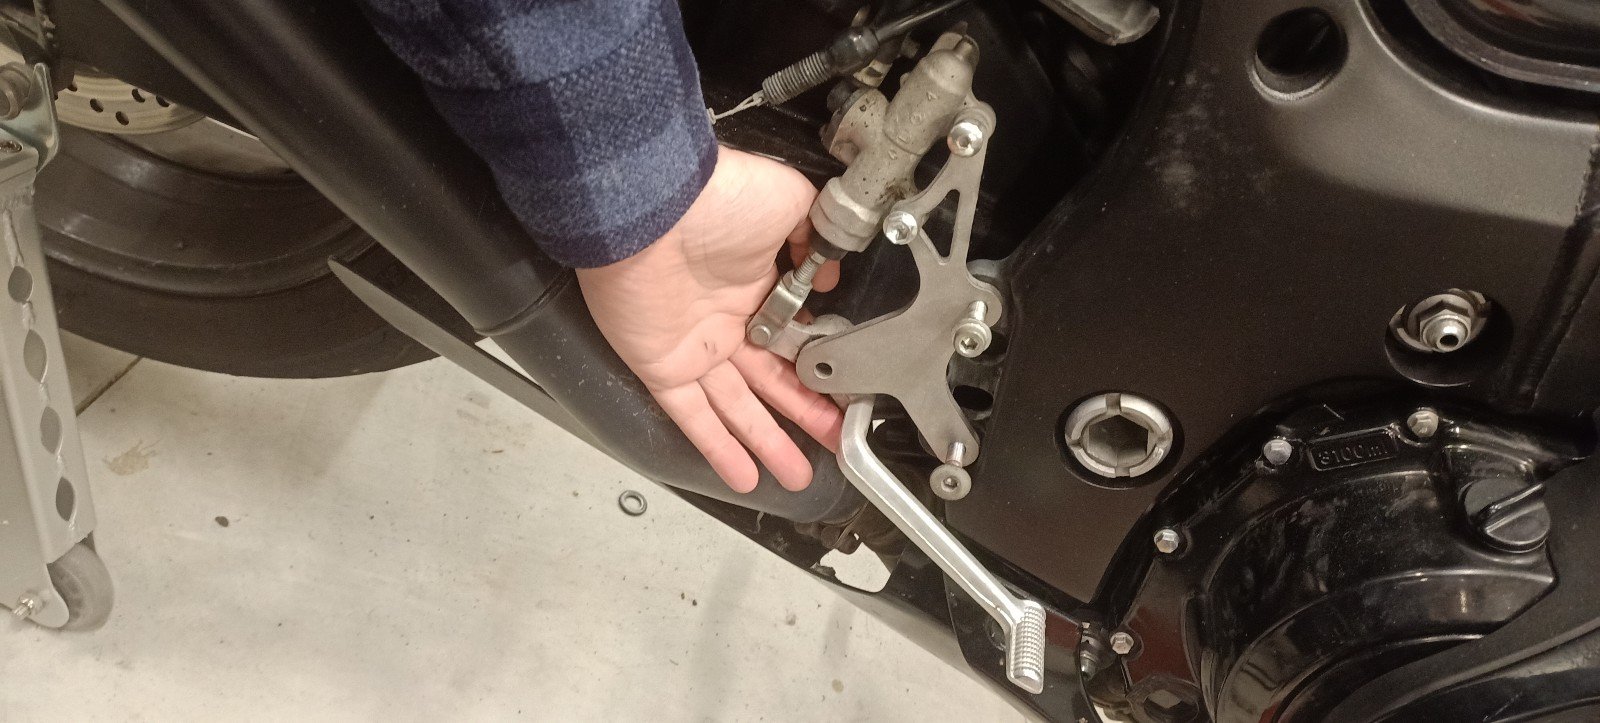
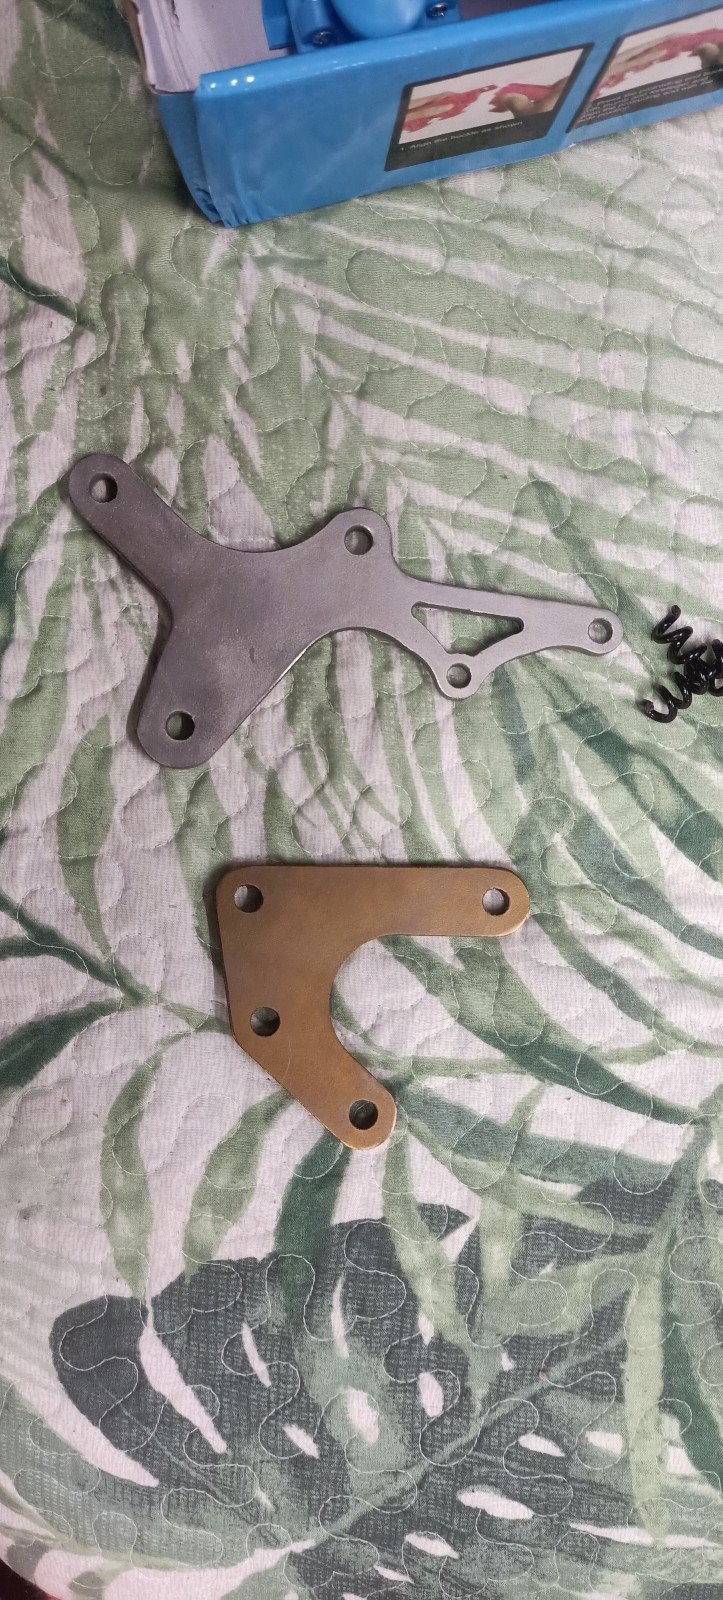
So I started again with grade 5 titanium. By this stage I'd stopped taking photos as I'd run so many simulations it was getting a bit old, but the results were good, the anticipated weight of each component was great, and I'd never played with titanium before so seemed like a good time. I sent some emails out within NZ and China. Its sad because companies in NZ really can't be fucked with smaller jobs and the associated admin. I got a few replies after waiting a few days and these replies ranged from not being able to secure the material (they couldn't be bothered) to having a minimum cut fee which made this only economically viable if I got three sets cut (I ain't paying for enough material to make that happen). China made me feel like a king with absolutely great customer service, though I was still not 100% that I wasnt getting scammed... But after a few weeks my titanium rearset plates arrived! I haven't had much time for filling around but need to tap some holes and buy some pegs, then they are good to go on permanently. Weight saving from the change to these Ti plates is 500g, however when I include the change to the associated light weight pegs, nicer bolts etc will be well over 1kg. Colour change is due to some DIY anodising- super easy with titanium!!
2 points
-
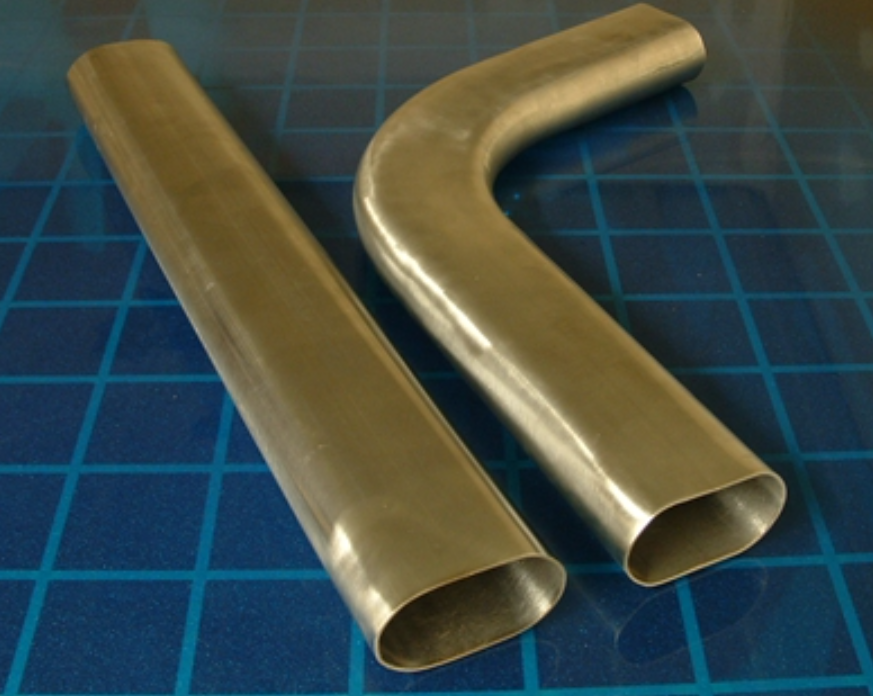
yeah some thing like that may help drastically if can find it with the right sizings. just had a quick google looks like can get premade bends or pie cuts or straight tube in 3.5" oval in NZ so thatll be ideal2 points
-
The switch is the fuel solenoid. It should be closed when no power, so needs volts to open the fuel supply The line on the banjo fitting is the return2 points
-
Shouldn't touch. you wouldn't need much clearance at full suspension extension though2 points
-
Is on the cards at this stage. depends on funds and how the progress goes.2 points
-
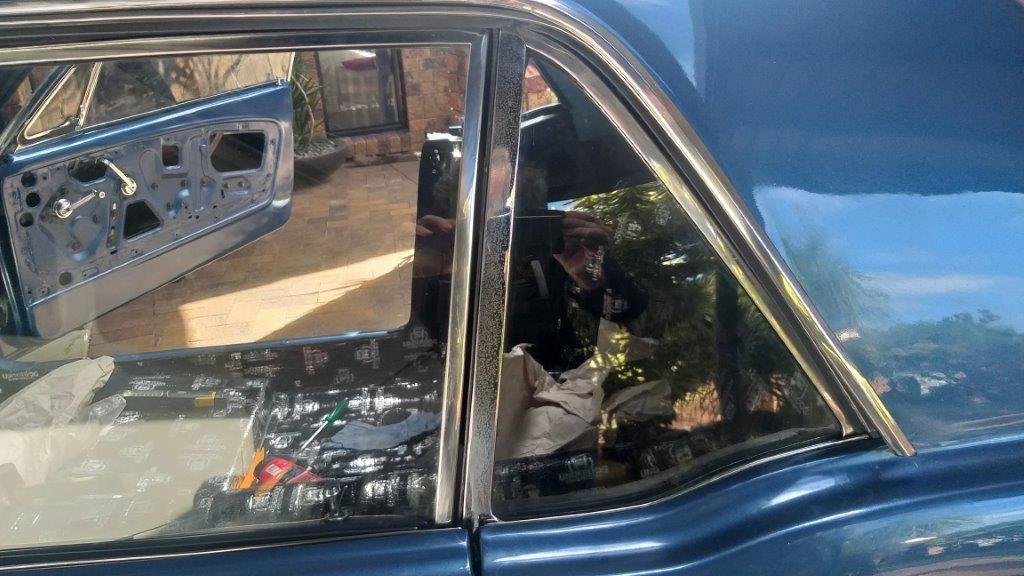
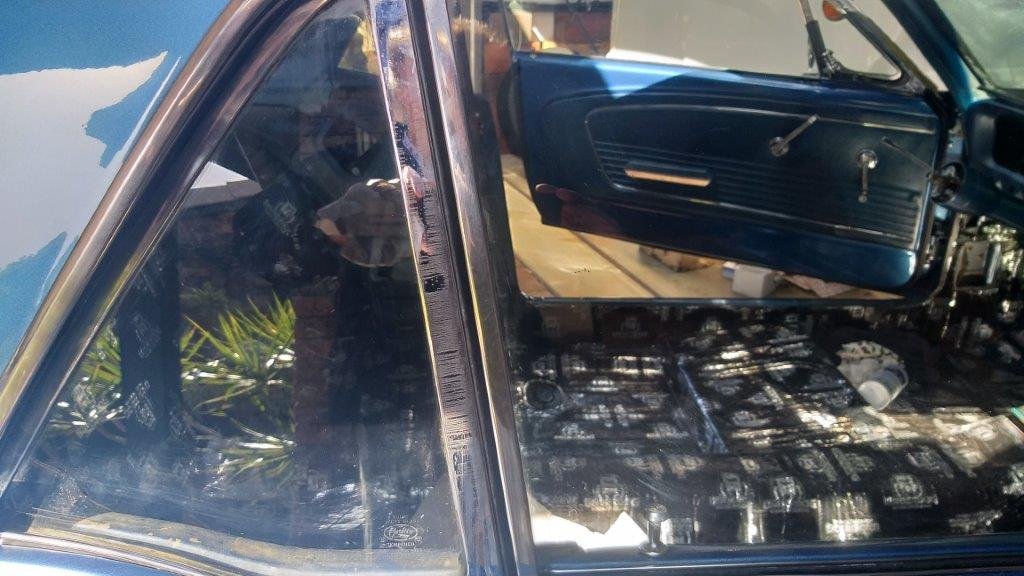
It's a bit of a feeble update today. Doesn't look like much but it took me a good while to align the rear quarter window frames with the door window frames. Gaps are almost spot on now. Just need to clean my dirty paw prints off the chrome. With this out of the way I can now install the rear quarter inside panels and then the parcel shelf and back seat.
2 points
-
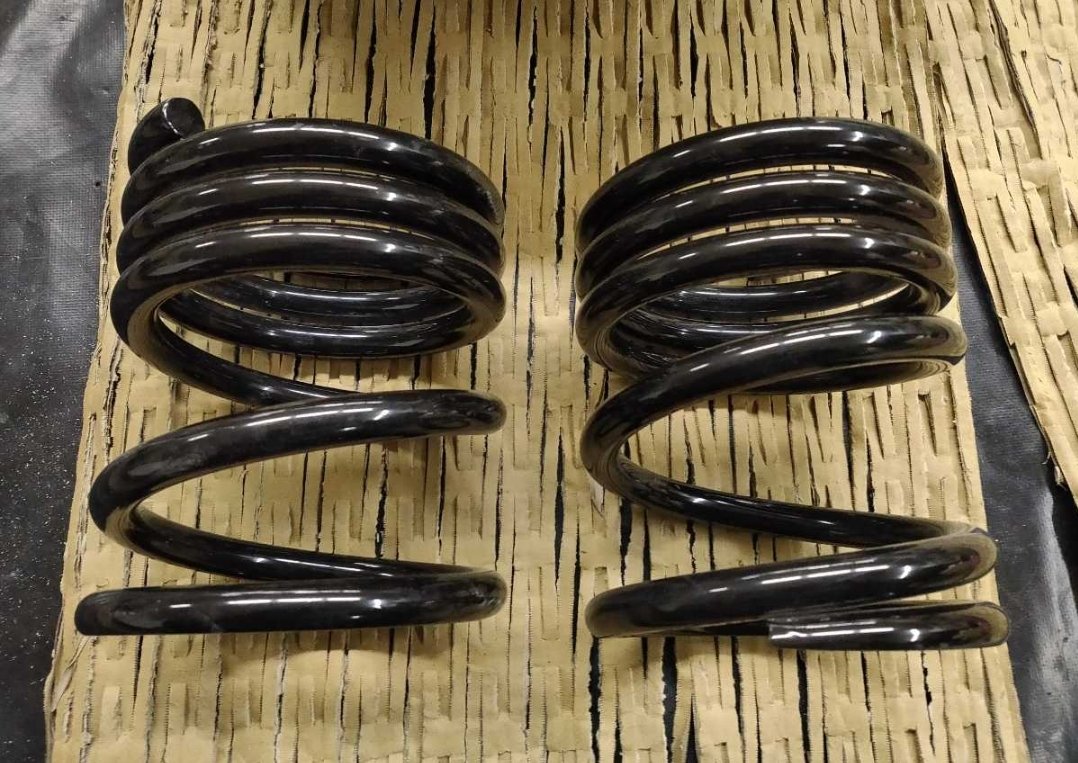
In further suspension fiddling I sourced a pair of these rear springs that are 20mm shorter than the current mx73 bc short ones and a dual spring rate.
2 points
-
When I was a kid, my Mum taught me that it was rude to take basically anything offered to us kids when we went somewhere. So we go to someone's house, and they're expecting us, so they've made some chocolate biscuits especially for us to eat. Which are the best thing ever because I'm like 8 years old. Fucking delicious! However. I'd been conditioned to say "No thank you" because doing otherwise was rude. For the person who baked something especially for us arriving, it's was disappointing that no one wanted their food. "How could kids not want delicious my biscuits?" "Are they especially bad?" "What did I do wrong?" How could my Mum not understand how mutually disappointing this situation was? It didnt make any sense to me then, and I've still no idea who profited from this situation. The people were happy to give me a biscuit, and I was happy to eat it. Surely this is the worlds simplest situation to keep everyone happy. I fucking love biscuits, and it tears me up thinking how many I missed out on, at the stage of my life when they were the most delicious. God damn. For some reason, tonight I have had a revelation that refusing willing help from people here draws parallels to this situation. I have been conditioned to feel shameful about accepting assistance that's willingly offered. Why? So for anyone who's willing to chip in a few bucks, I can promise you this: I'll spend any contributions towards a Prius motor, and maybe exhaust parts. I will not spend any contributed money on psychological counselling for my unresolved childhood trauma about missing out on biscuits. I also promise I will come to your house and eat your biscuits if you invite me over. https://givealittle.co.nz/cause/finding-a-cure-for-the-atkinson-cycle Thanks to anyone that wants to help, and by all means dont anyone feel obligated.2 points
-
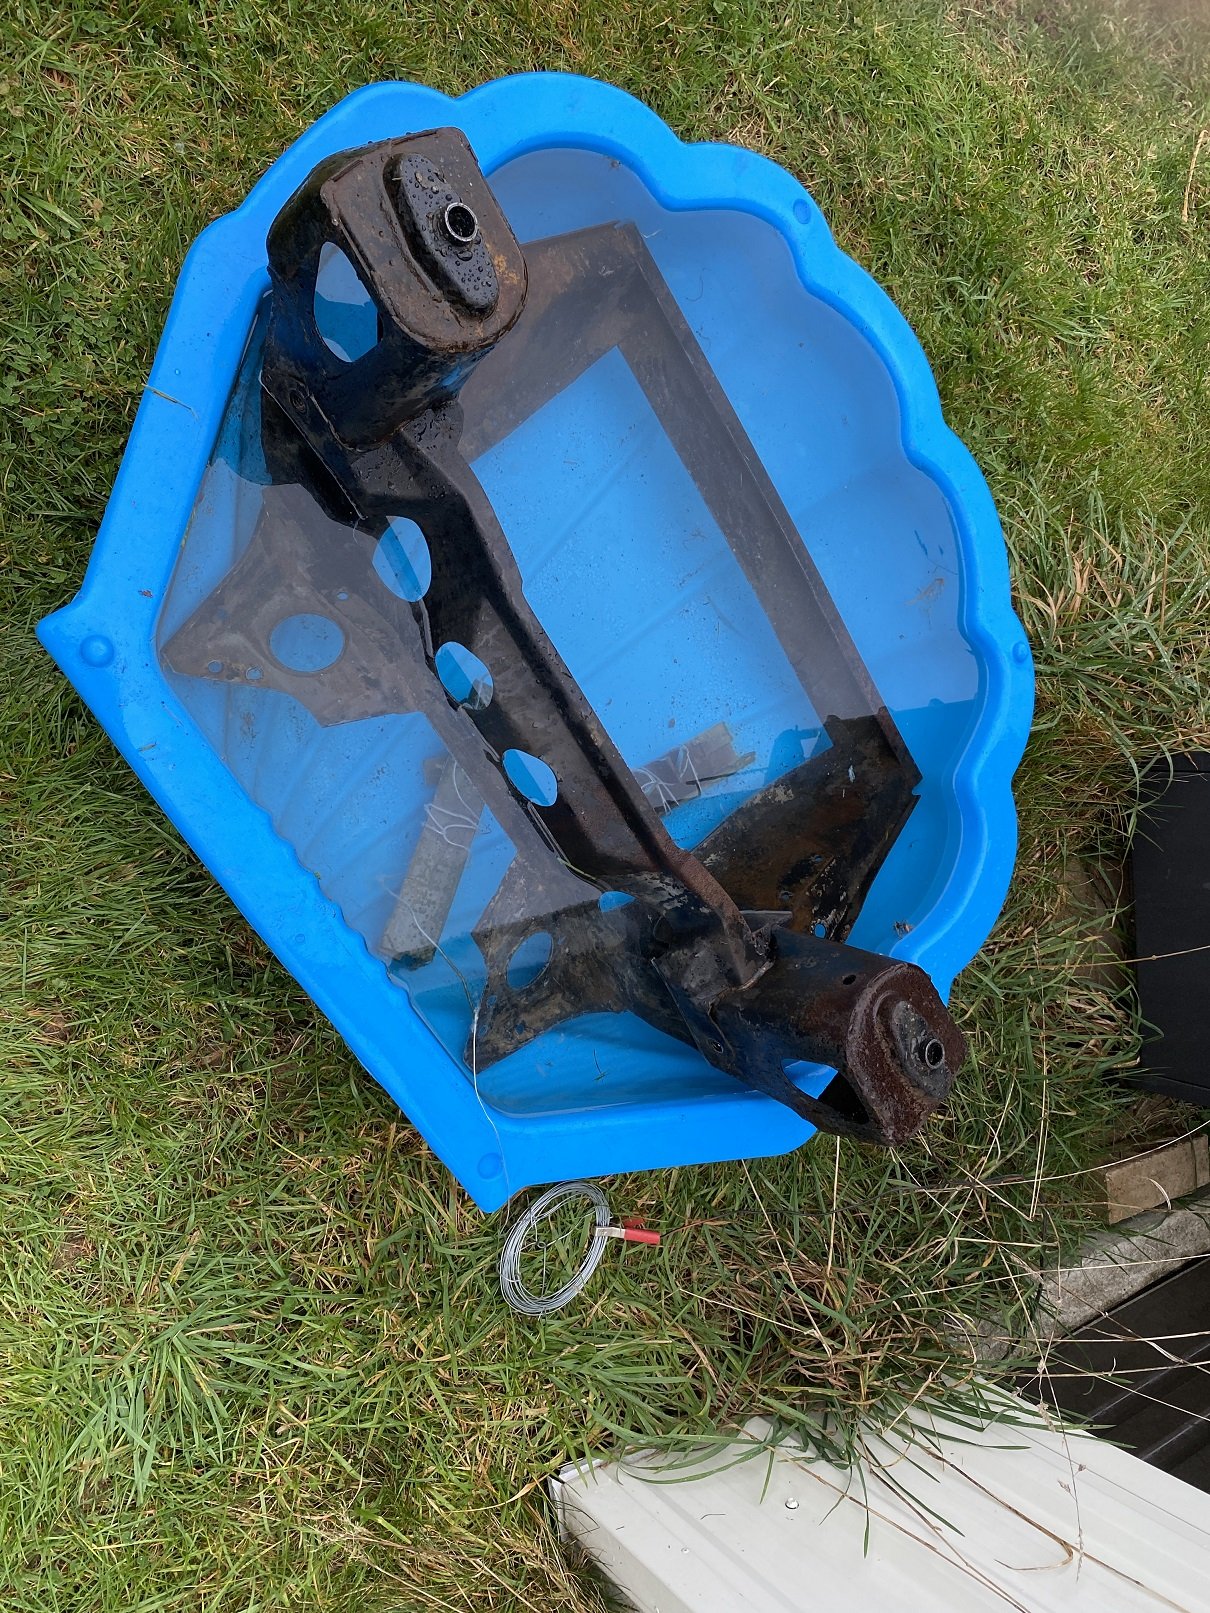
The subframe has a bit of surface rust. And some oily greasy stuff that the water blaster didn't shift. This is a bit of a no-effort experiment. I know the electrolysis will remove the rust and after a few days it may lift some of the paint(from previous experience). But I want to see if it will lift any of the oily stuff. I could do with a deeper container... but where can I get one that's as cheap as a $18 warehouse paddling pool? An IBC tank with the top cut off would be good, but I can't find anything nearby and I also don't want to spend ~$100
2 points
-
Thanks to the replies in the tech spam thread which basically reinforced what I was thinking, which is it doesn't have enough air flow and needs a better fan I thought I'll live with the fan noise if that means I can actually drive it So I embarked on the mission of finding an engine driven fan that fits Found the one I wanted on an NZ website , sweet, ordered it. Nope, " no stock sorry" Bugger. Found a different supplier who had one, ordered off their website "Sorry, no stock, they might be here in 3 weeks? " Poos. Local guy had a plastic flex fan , I didn't want one of those as they are a lot deeper but meh I'll give it a shot , chucked it on, needed a bigger spacer so the blade cleared the alternator. spent ages rummaging around for some bolts Started it, ran for a bit, moves heaps of air, good Gave it a rev to about 2500, the inch or so clearance at the bottom became 0 clearance and the fan hit the tank and broke the tip off one blade Ah yes that's why I hate these fans Luckily no damage to the radiator apart from some dinged fins Found a stock 245 steel fan I had in a box under the house, chucked that on, it will do for now and I'll find the one I want I think with a shroud on it should be OK, the mechanical fans move heaps more air. It still creeps up at idle in the shed but no shroud and a slower fan speed than stock due to pulley sizes are the reasons I think
2 points
-
Fuckin dick, no wonder it did surprise wheelspins
2 points
-
I decided to replace the front seats with something that gives some lateral support. The original bucket seats didn't provide much more than a bench seat and one had been reupholstered in a different green so I thought these would do the job nicely. These seats have detachable head rests. I will need to get the rear seat redone to match and spraying the door cards with black vinyl spray should do as they are in good condition. Just working out how to mount them. The original seats were held in with two bolts at the front and the rear of the seats were on slides. The bits that were bolted to the seats and engaged the slides were only made of plastic.
2 points
-
Ya need to wear this jacket to drive that one, with matching cap and smoking some Peter Stuyvesants .
2 points
-
What about one with tweed seats?
2 points
-
So while I plan out what my induction and exhaust setup with consist of I thought it best to get the alternator sorted. The goldwing engine originally had its alternator mounted off the back of the engine on a seperate casing now removed and driven via one of the many gears that resided within this casing between the engine and the clutch area. That area is now taken up by the bellhousing I have built and the alternator has to go on the front of the engine (which now the back ? of the engine as it sits in the imp..) and be driven off a crankshaft pulley that does not exist. This is what it looks like .. That little round cover hides the main cambelt drive pulleys and has a belt guide plate marked with various timing marks for setting up the ignition.. Under that pressed steel disc resides the first of the pulleys. Sandwiched between the pulleys is a 12 tooth trigger wheel - handy for my planned engine management on a six. I'll replace it with a 36-1 wheel though. So I need to machine up a few bits to allow the crank to run a mini v belt pulley and drive the Honda alternator which I had picked up at the local wreckers will sit about here... At another wreckers I found a pressed steel 5pk pulley from a power steering pump that was about the right diameter, had a flat mounting face and bolted in place with 4 little bolts. Ideal for my plan. I cut it down to suit a 3pk belt.. Then I popped a big lump of steel bar I luckily had left over from some other job into the lathe and machined up a hub with a locating extension on one side to match the inside of the cambelt pulley, of which which extends beyond the crankshaft nose by about 3mm. It drives , via a pin pushed into hub, off the hole in the cambelt pulley, which is there to locate the original timing plate.. The other side of this hub I bored out as far as I could whilst still allowing enough meat to bolt the pulley on. This hub then bolts onto the crankshaft, eccentrically located by the camshaft pulley and held fast by the crankbolt.. Then I machined an alloy 'plug' that fits snug into the bored out hub, machined on the end to centrally locate the steel pulley, rather then rely on the bolts.. And all lined up... So now I have a front drive pulley. Yay. Next up is making some sort of way to mount the alternator securely and not too ugly considering its going to be right there, centrally on view. Starting the mount by making lots of little tiny bits of alloy to tread about the workshop with this tool... I cut some strong alloy plate and mounted it to the top of the engine using several of the conveniently placed cast in mounting points scattered about the place on top of the engine. Thanks Honda I had to add a support on the front, easily bolted to the cambelt housing. Now I had a place that the alternator brackets could be bolted to. I just made it up as I went along and machined bits and pieces until I had what I was looking for. I wanted it to look a mix of between sort of factory and sort of 'race car'. I had lots of fun making more alloy swarf.. Of course I cut my plate too narrow... Eventually I ended up with all these bits to piece together... Together they made this.. But before I plonked the alternator in place I had to clean it. It looked horrid and had obviously resided in a Honda of some ilk with some serious oil leaks. It was also a bit corroded and things didn't want to pull apart too easily. I made a bespoke little bearing puller.. The filthy alloy castings came up nice with a petrol bath.. and even nicer with some wire brushing... While it was apart I cleaned up the slip rings... Painted the centre black. It will possibly be repainted in Imp blue at a later date, as a treat if the engine swap works out ok. Its just a look I quite like - call me 90s boy. Bolted it all back together, complete with a new main bearing that I happened to have in stock (must be one of the most common bearings ever -35/15/10) Then excitedly bolted it in place. My Honda goldwing now has a standard alternator mounted in a pretty normal fashion and it looks nice and neat... With that sorted I can move onto making the cooling pipes and induction setup. I have still not fully made my mind up on what route I'll be taking here but I'll probably to bite the bullet and click buy now on a set of itbs so at least I have something to play with and go from there. I need to find a set of suitable top feed injectors. Something around 200cc at a guess. The standard Honda goldwing 1800 items look like they'd be ok and pretty compact. I'll be making the mounting seats to suit, which I'll then weld in place on the stock intake runners. Fuel rail made to suit.2 points
-
Sprayed some durepox on the cleaned up bits Pulled a window winder out of the molasses tank and cleaned it up. Might take it up to the electroplaters and see how it goes as an assembly. Started picking away at the rust again tonight. Also fixed the headlights on the other one. High beam light was always on, and lights were dim too. WOF man said last time to sort it out so finally had a look. Don't really drive at night anyway. Turned out that the PO has some Hella H4 lights fitted but whoever did the job (I don't think it was him) didn't know that you need to swamp the ground and low beam wires in the plug for the new lights. So basically there was mess where both filaments were always on in various combinations. Works mint now though (even the high beam light) and new WOF acquired.
2 points
-
Couple of photos from the Trademe listing. 1981 Toyota Cressida RX60 It's had a full panel and paint with all the door jambs and everything done as well as underside. JZX81 steering rack mounts and engine mount towers have been grafted onto GX60 engine crossmember and 81 rack fitted. S13 front coilovers, hubs and castor rods have been fitted up front, I'm just having some brackets made up to locate castor rods onto factory cressida body mounts Ae86 coilovers have been fitted to the rear with the E series solid rear still there. It's had a late model chaser sedan front installed and late model mark II tail lights have been grafted on. There's a 2JZGE VVTI with the gte covers fitted, W55 and a flywheel has been located to manual convert the motor.
2 points
-
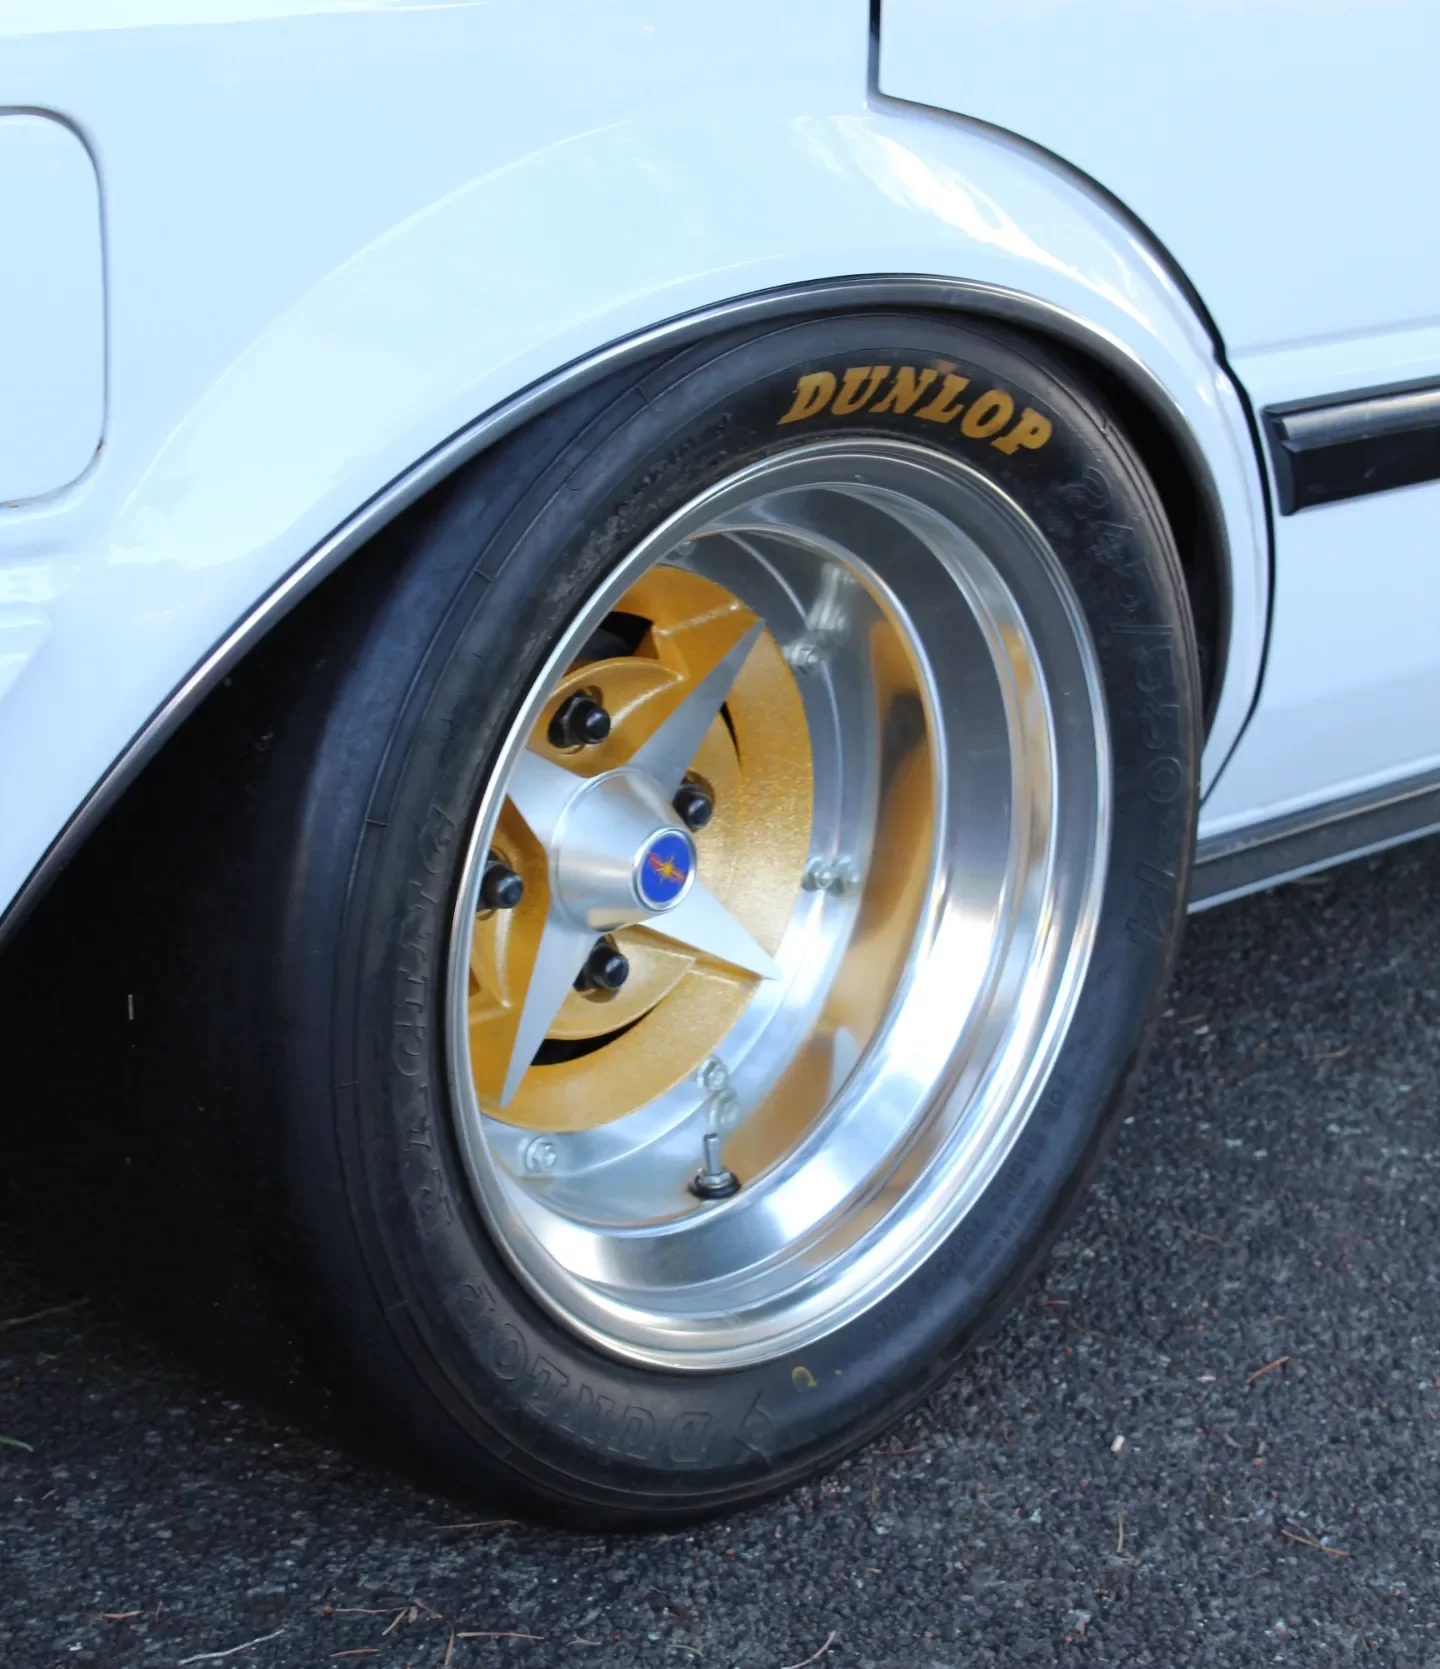
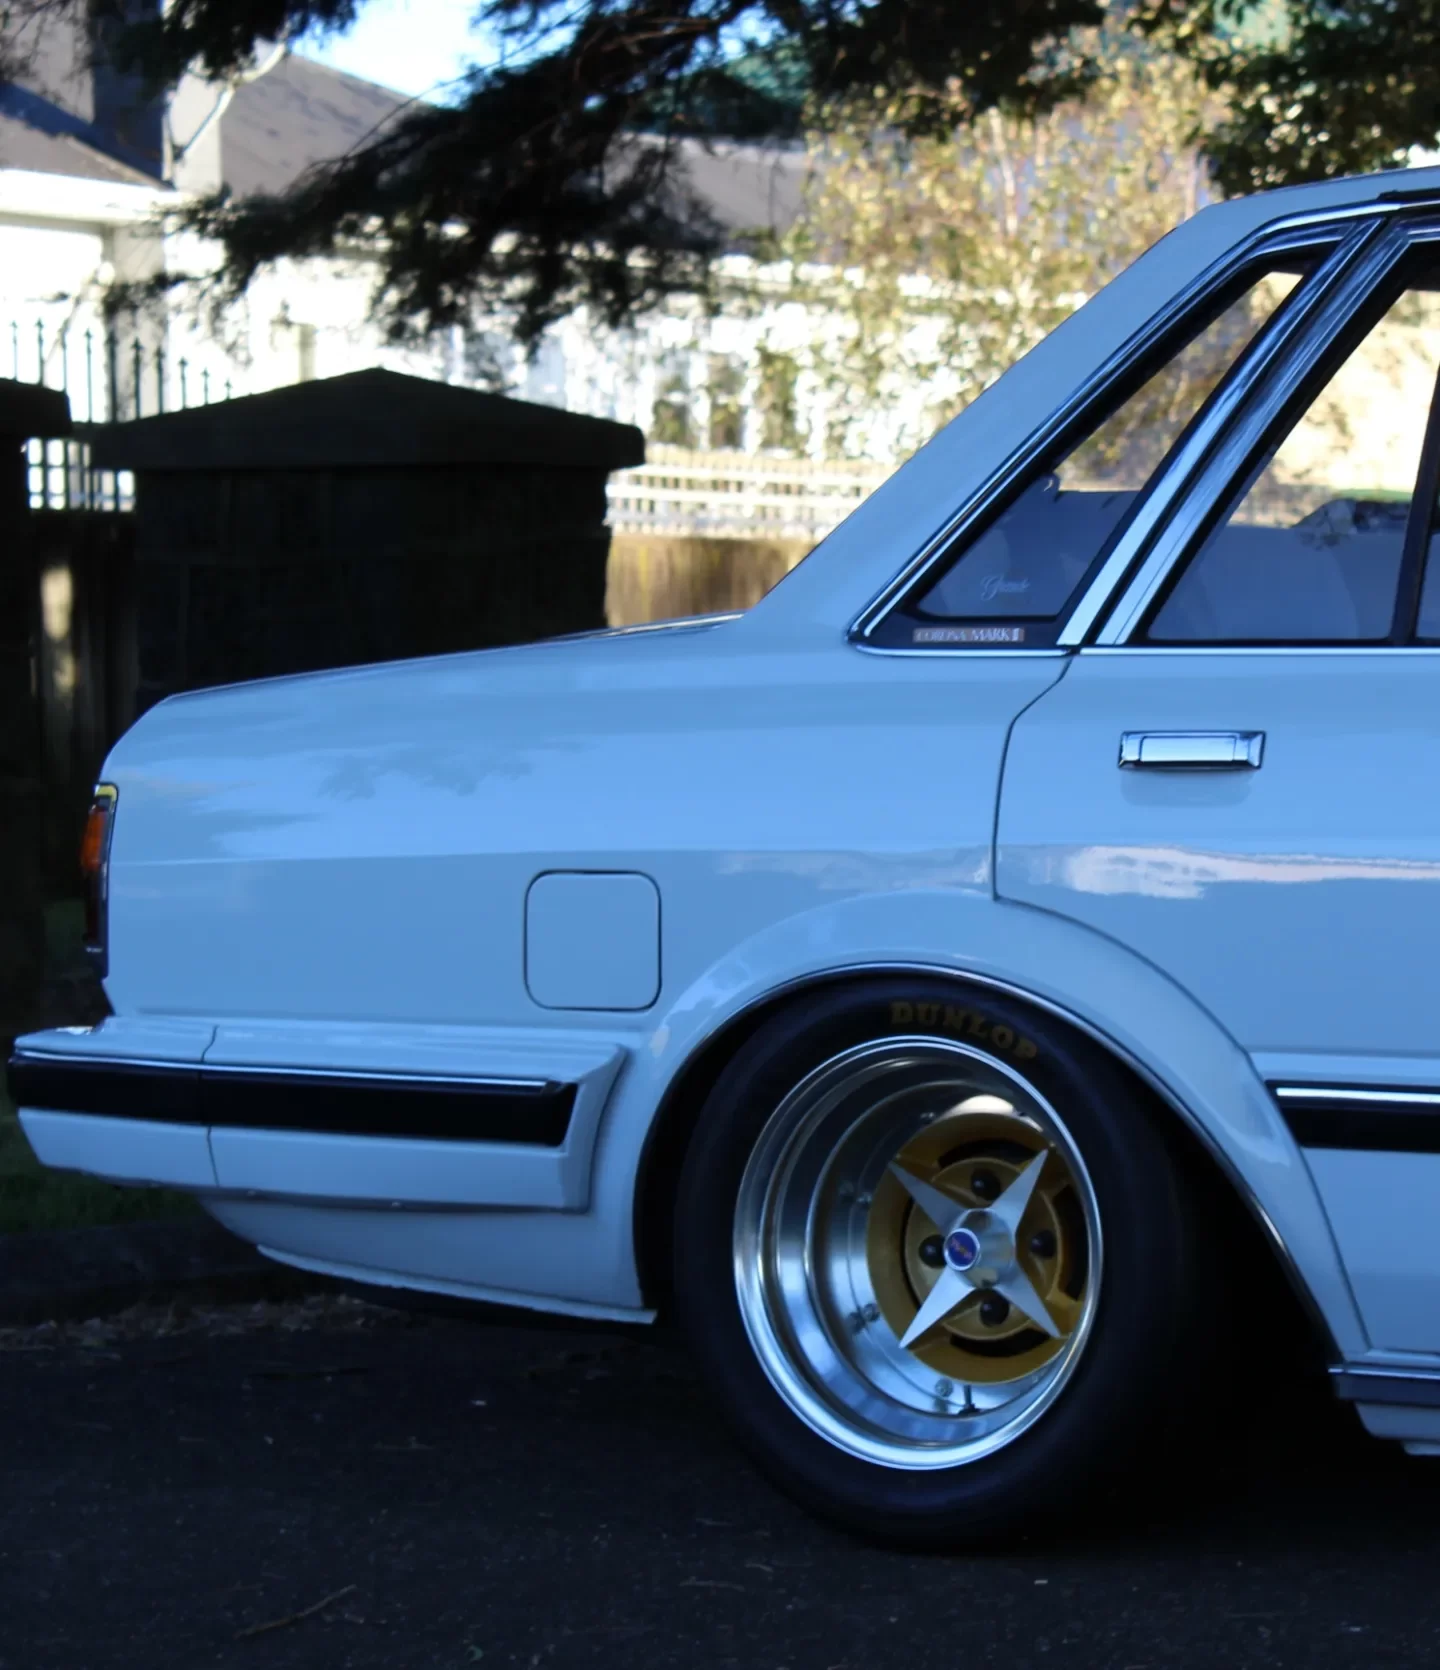
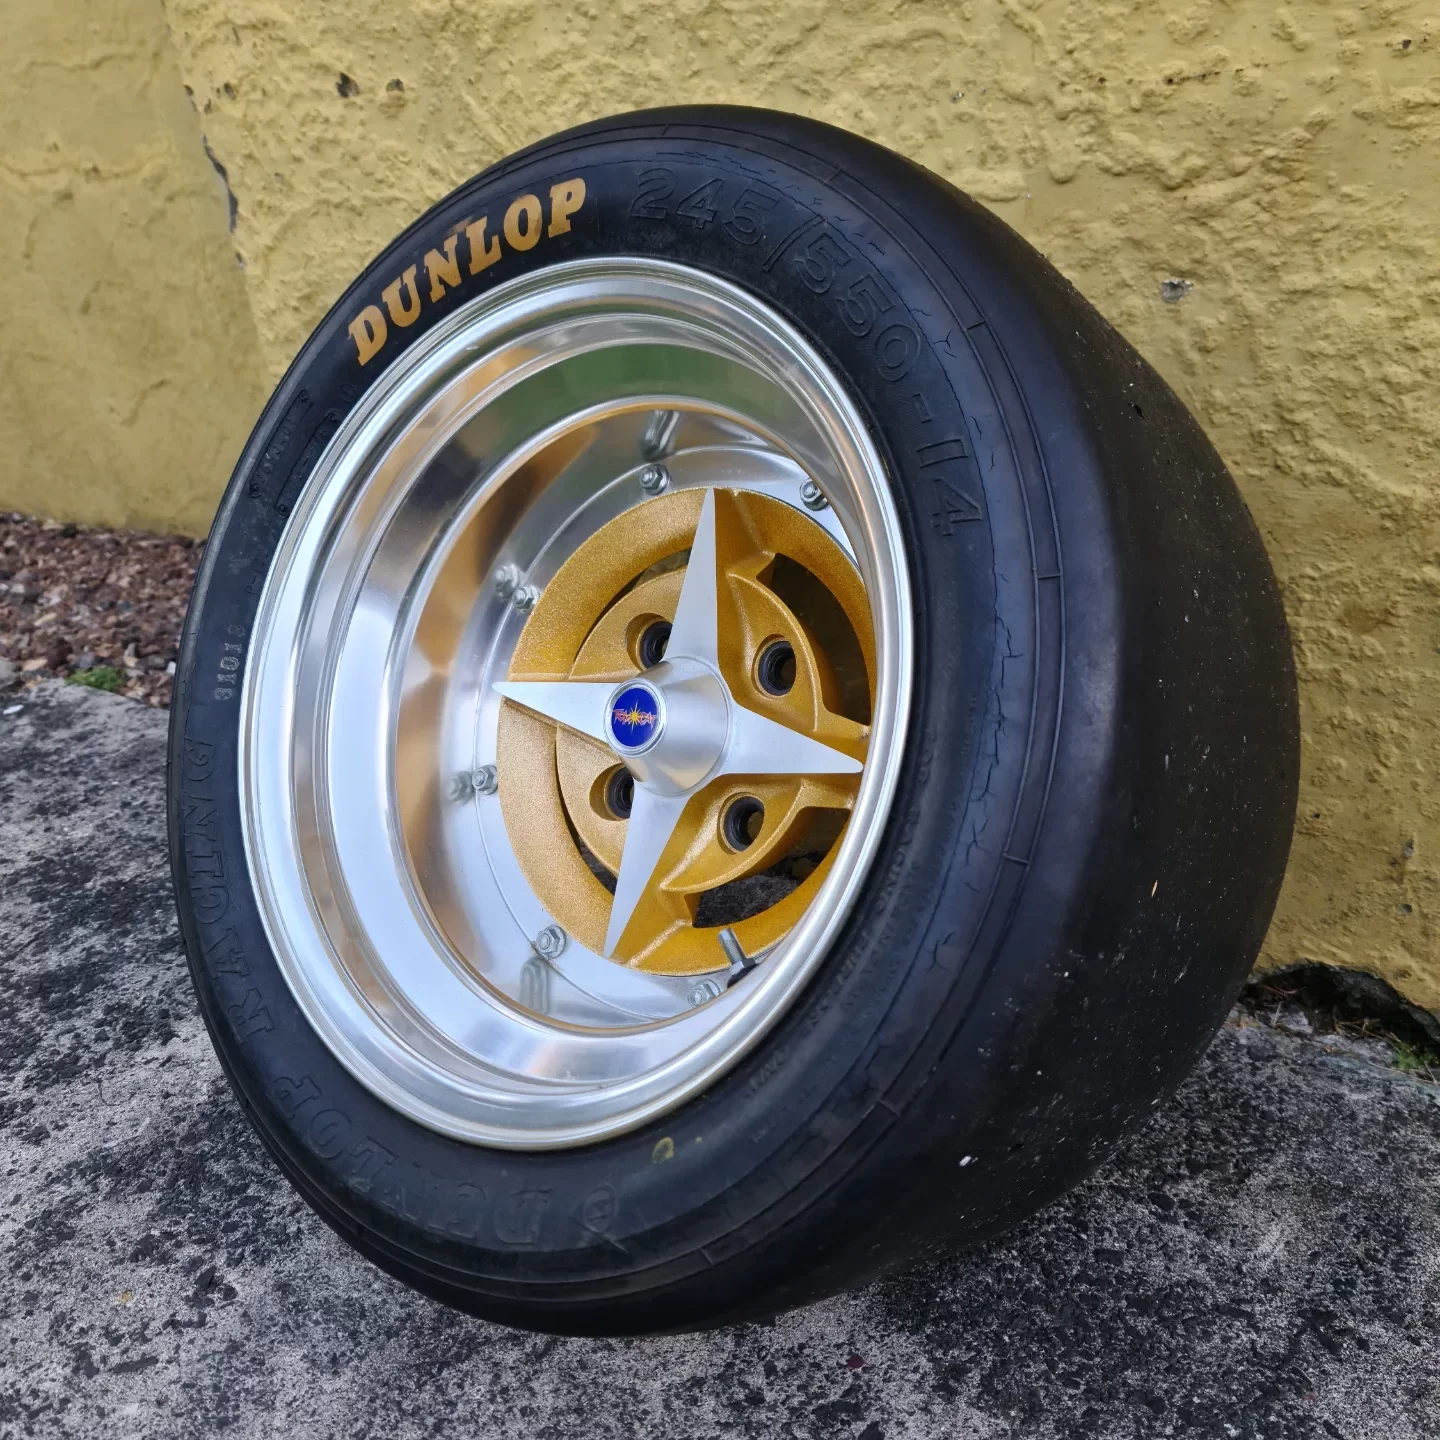
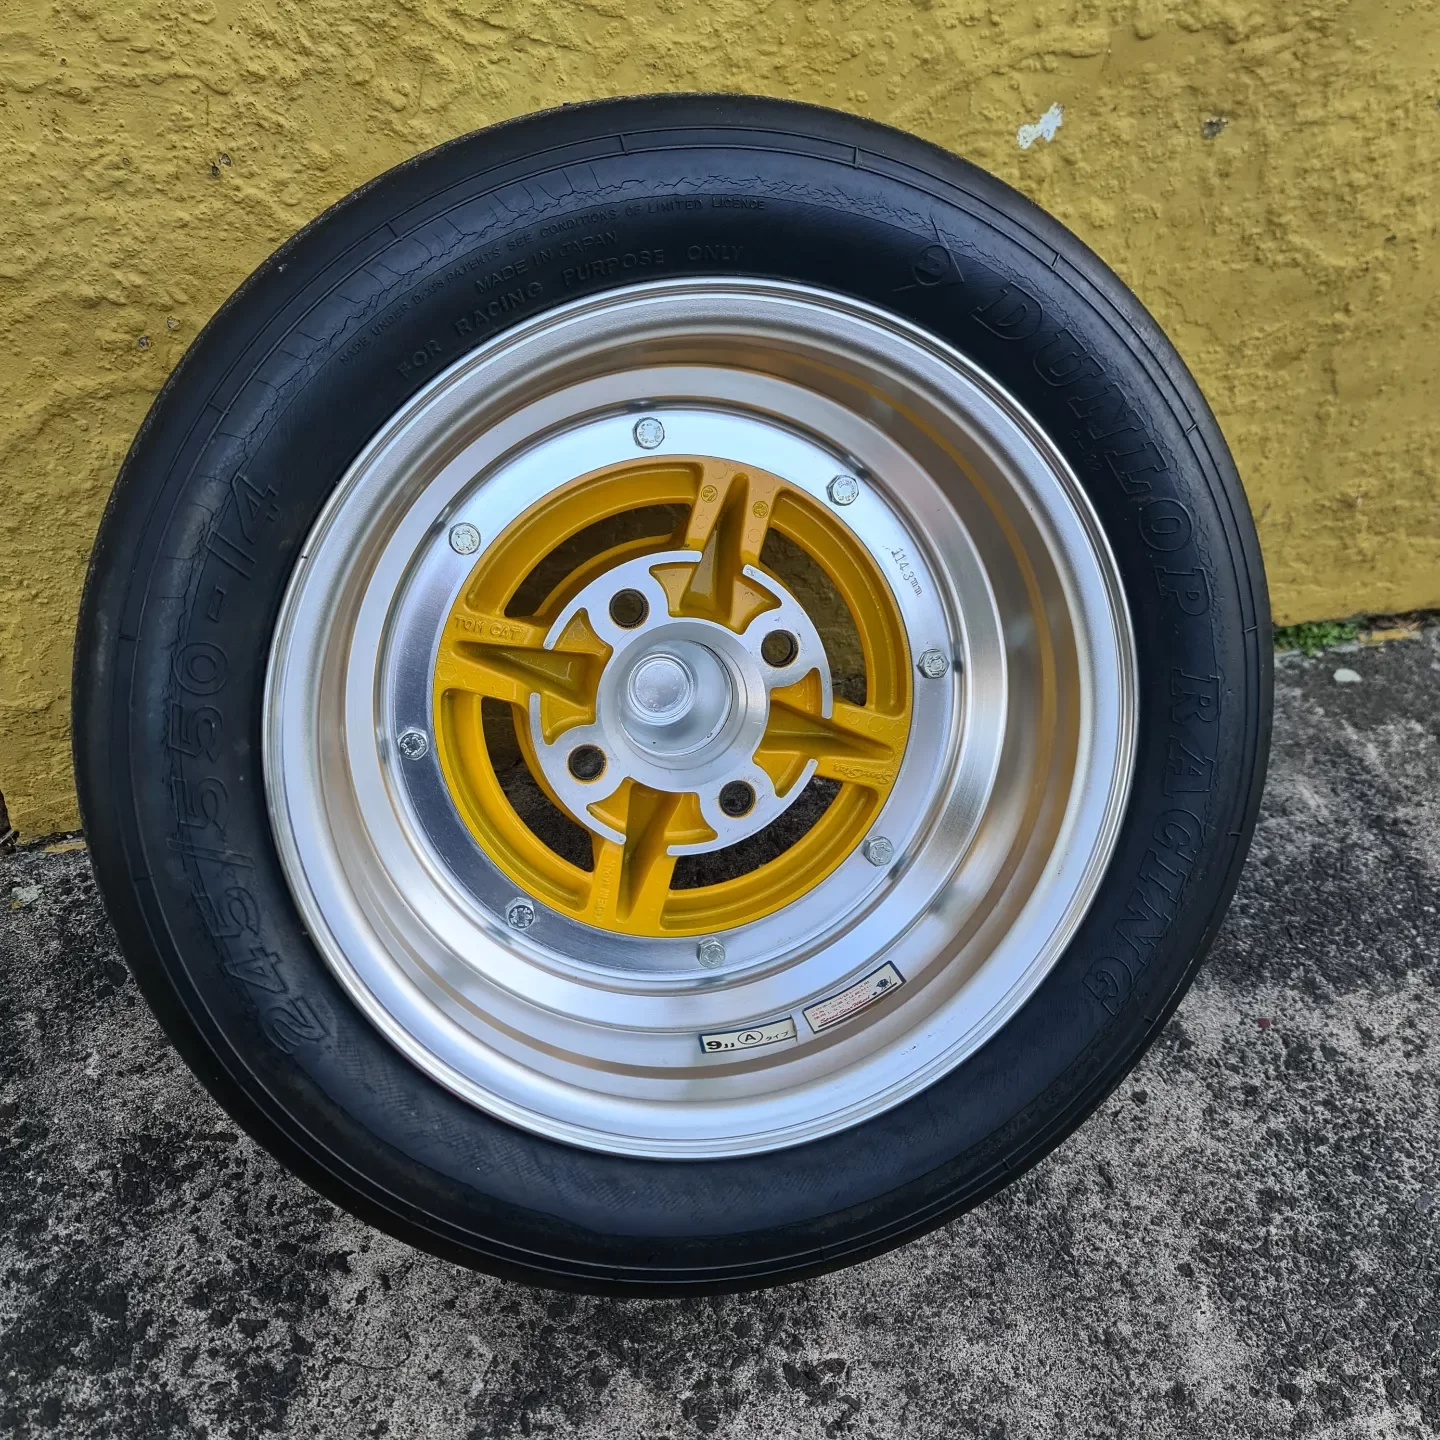
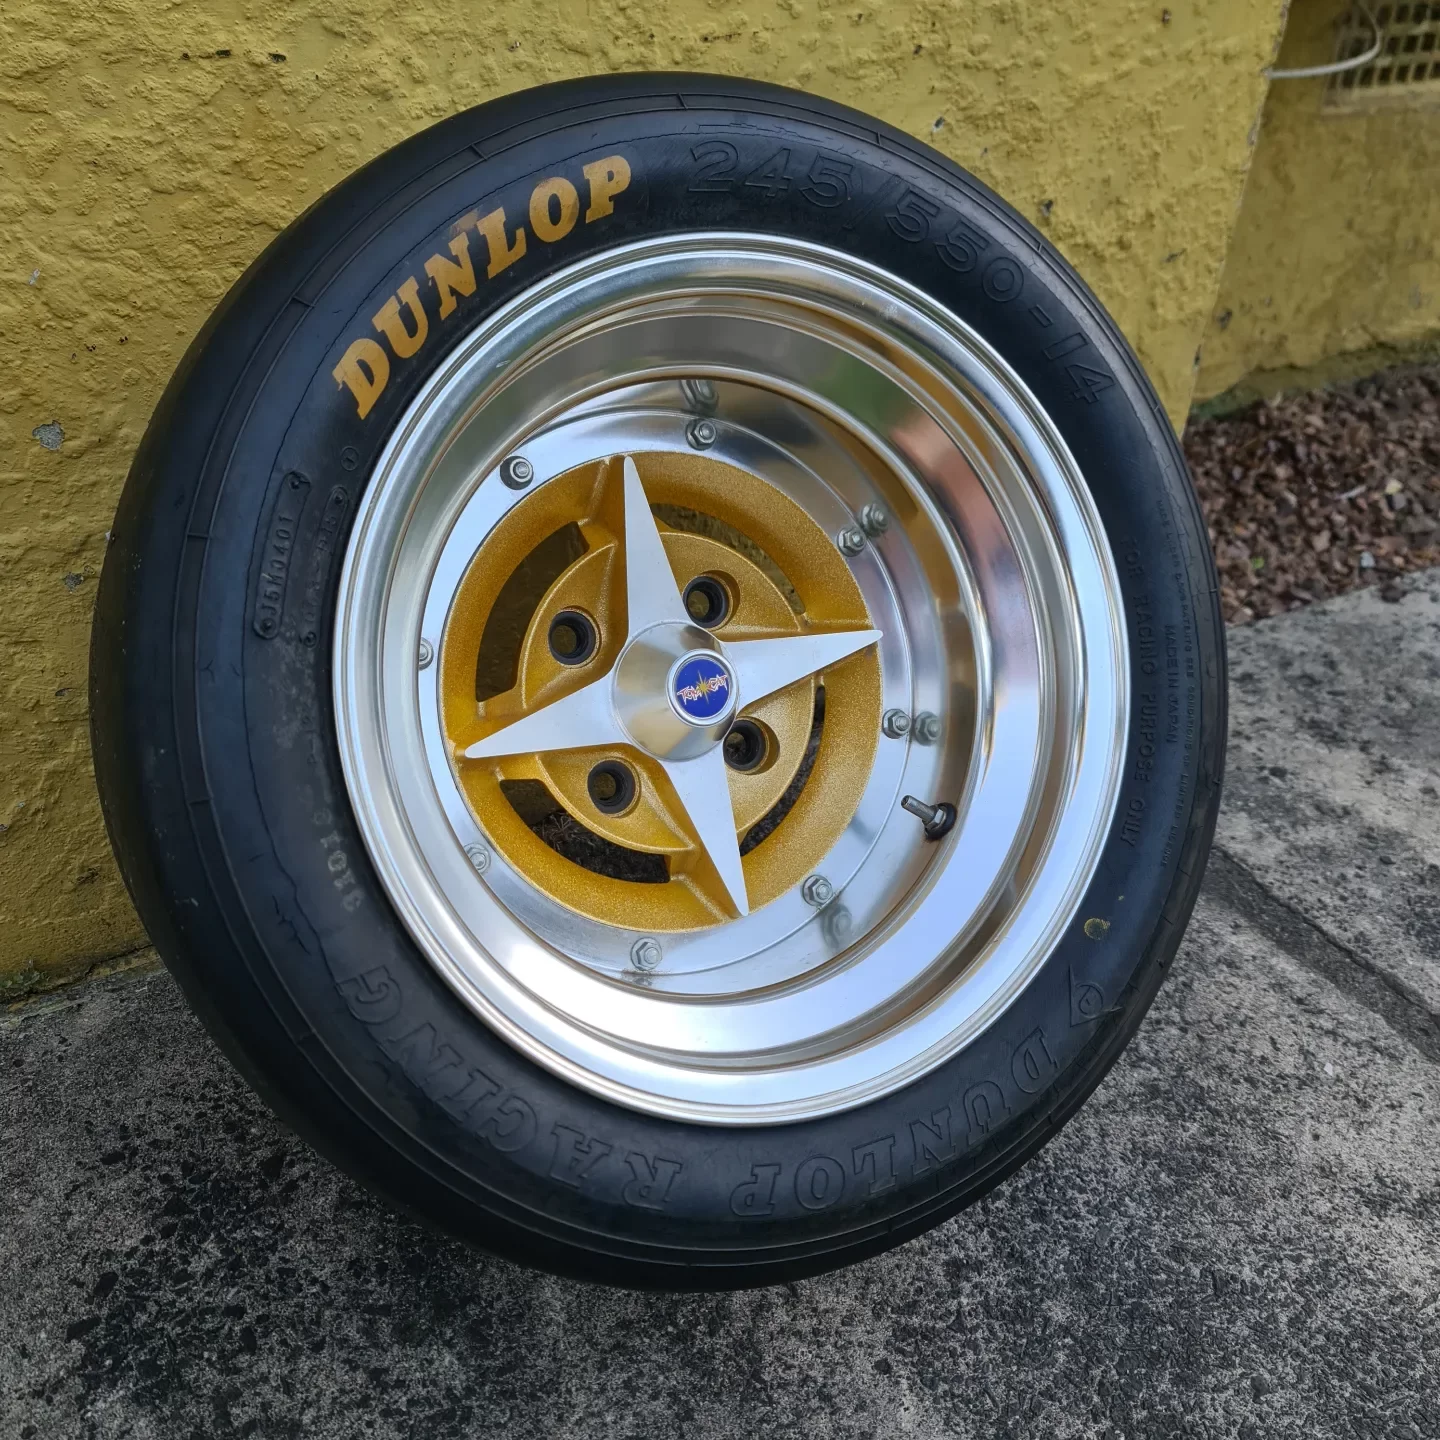
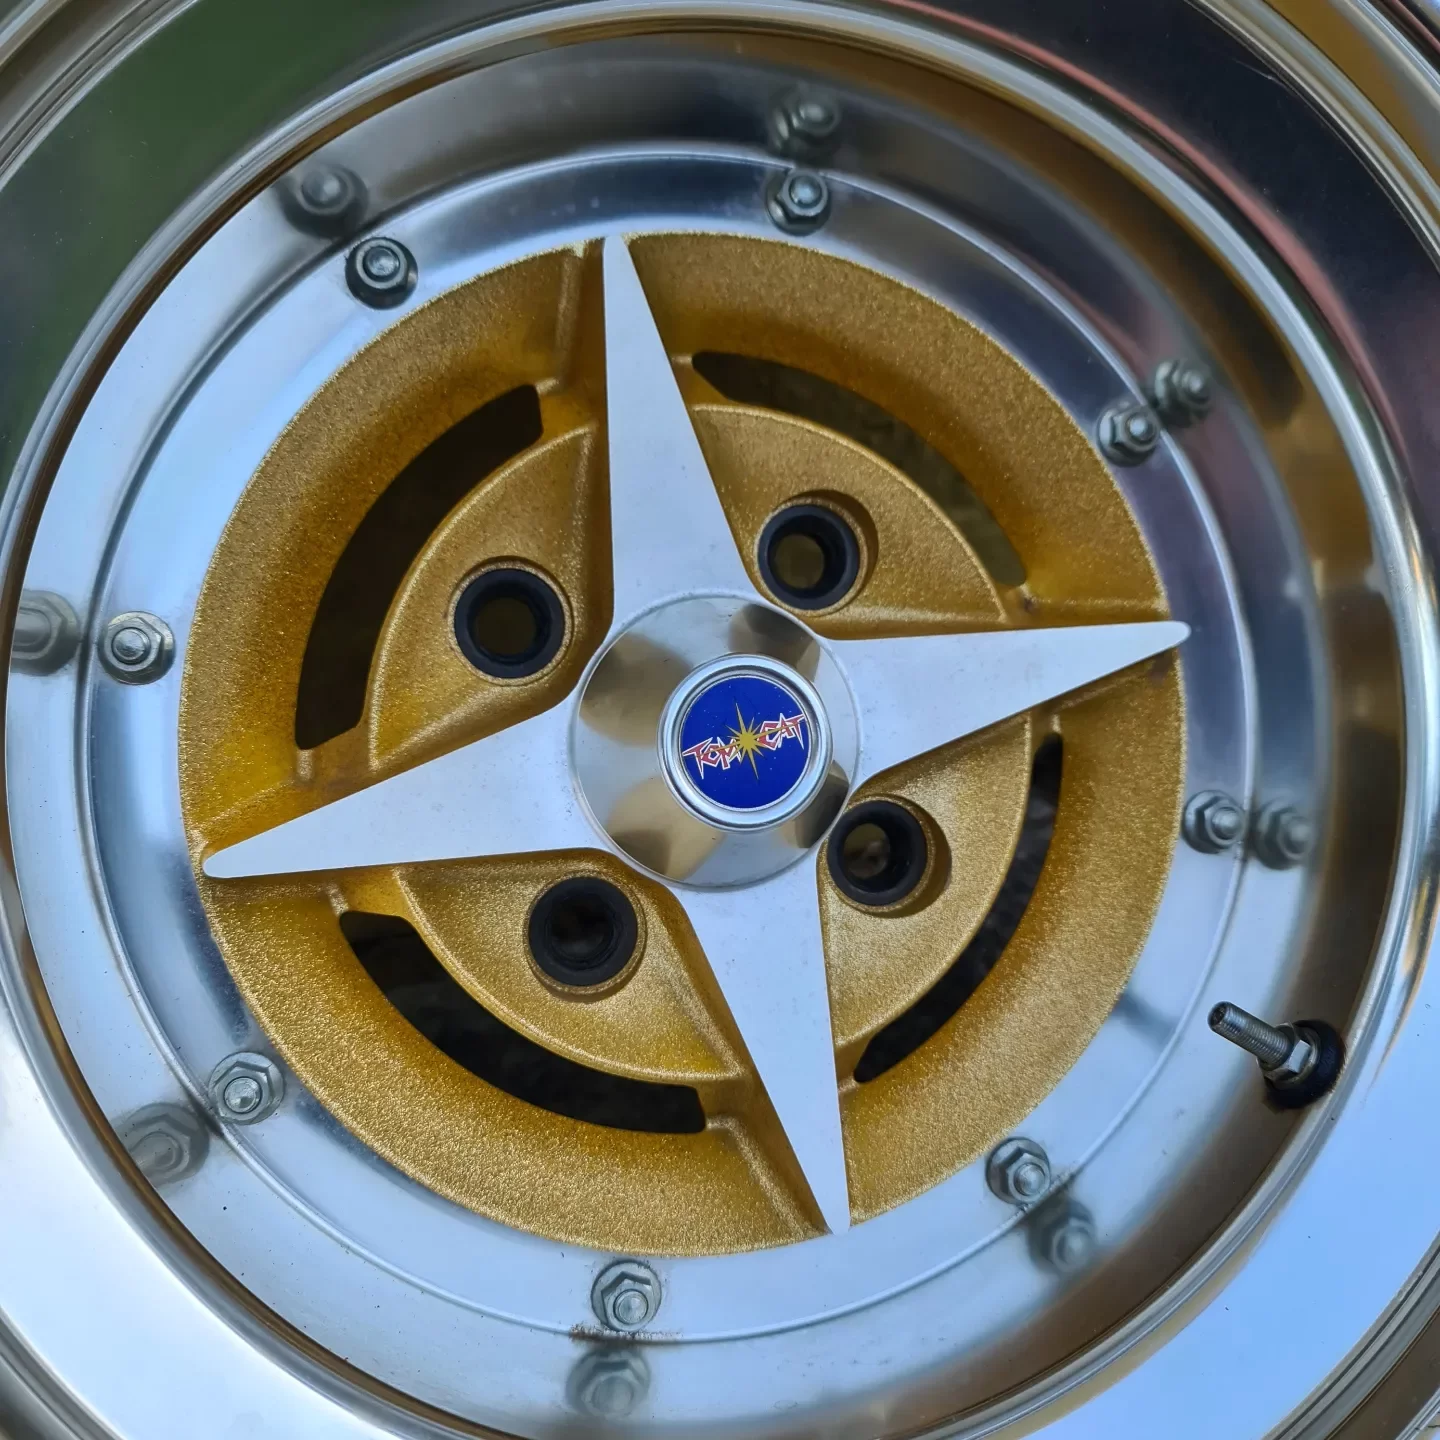
Some tom cat spam for your viewing pleasure December 1982 wheel that up until yesterday hadn't been on a vehicle as far as I can tell. This brings the collection to three wheels, the other two are with Aidan at Pine engineering currently.
2 points
-
Contact justin@lvvta.org.nz I was under the impression that it could be made to fit a standard arm and taper and you base the maximum pin length from that, ie a smaller major diameter would permit a shorter pin than a bigger one would but the wording in one part suggests otherwise, that 16mm is the minimum1 point
-
In sure that the oldschool freight service might be able to help. It seems to be a totally fair price for a sub 200k engine eh? (with apparently no issues..... Hmmmm)1 point
-
https://www.trademe.co.nz/36590179771 point
-
"In a high performance application 3500 FPM can be used since the burst at that speed will be short in duration" 9000RPM 1NZ is 5000fpm hahaha I know it's probably a different kettle of fish for tiny pistons compared to V8 stuff, but... yeah. It's getting up there.1 point
-
Take give a little donations to build a 1500cc motor that wont pop. (After the 1300 lark)1 point
-
Haha, done deal.1 point
-
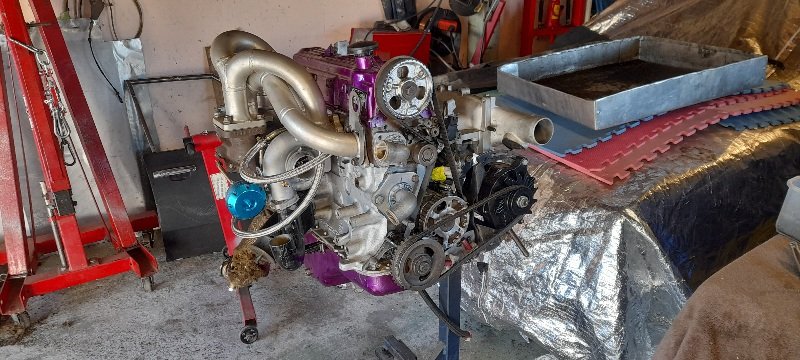
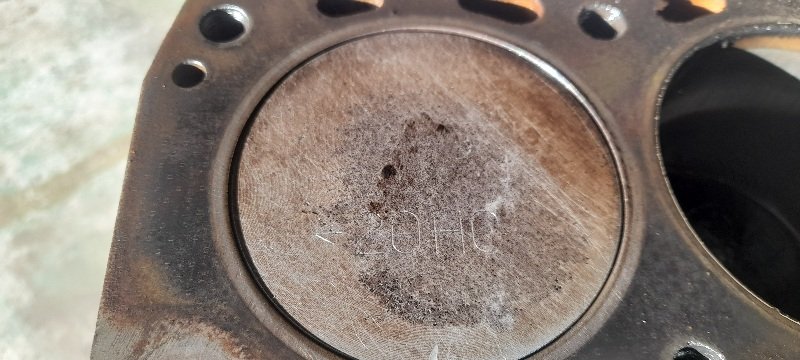
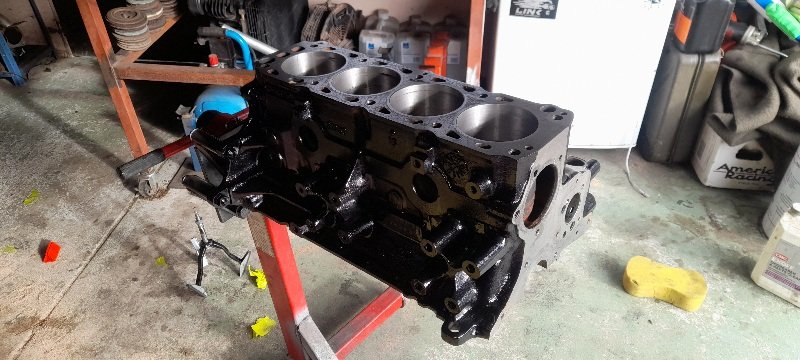
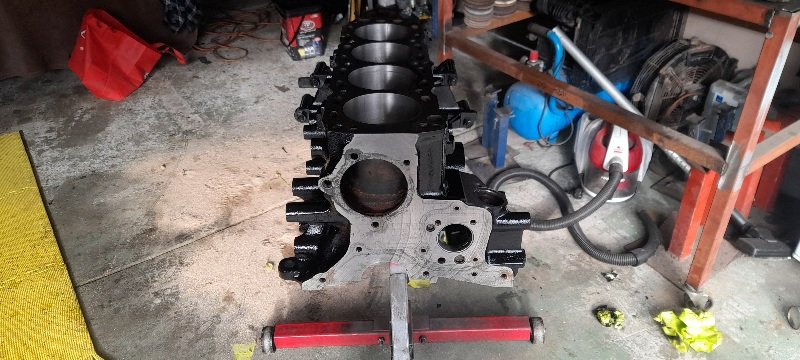
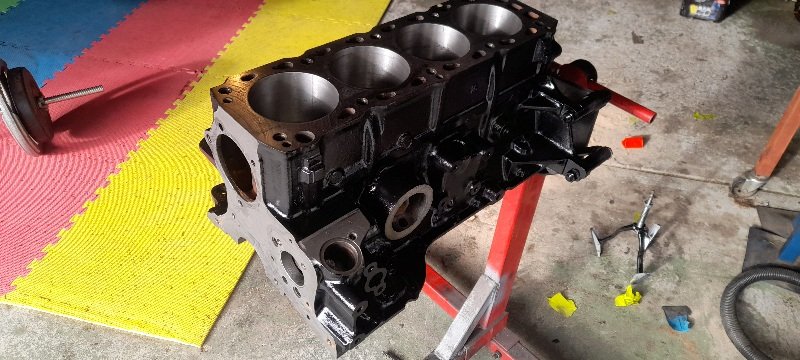
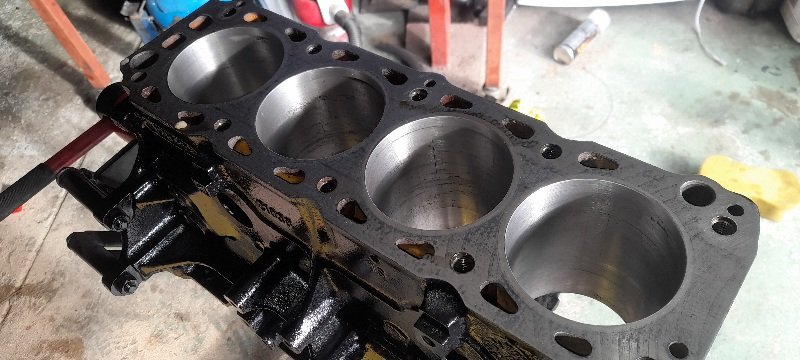
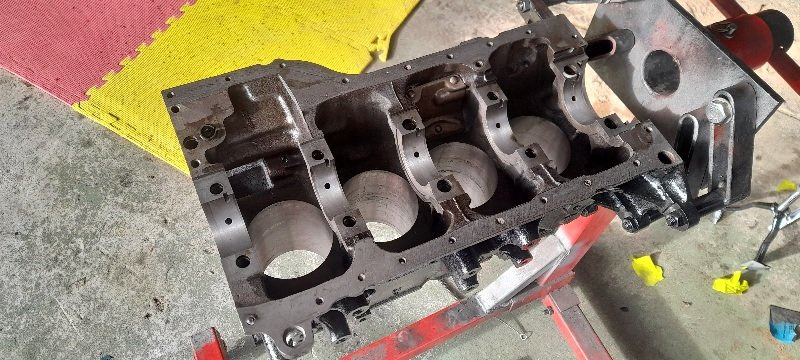
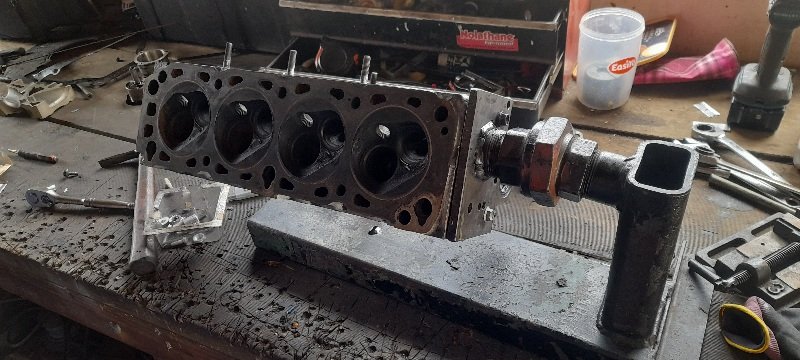
so things have slowed down a bit now. was trying to get it all drivable for end of October but I was also hoping the motor I was using to set it all up ......would last .. so wasn't factoring in a motor build . I could have found another running motor but I would have had swap the head over anyway (this one is matched to adapter plate for inlet).. and it would probably need a gasket set ... so I may as well build one....... and then I thought if I'm building one I may aswell build the one I want.. I wanted one with standard bore to start with.. and out of the other 3 motors I have I have 1x 2.1 bottom end 1x .50 over bottom end and 1 that will need crank ground as run bearing had fucked it .... so the last motor was the one in the car ......out it came pulled it apart and pulled the head off...so far so good .. original size SOHC pistons . (what a great sight). so at the moment I'm just doing a whole bunch of waiting ...for funds and parts. but in the mean time I have stripped and cleaned the block and it looks good (gave it a paint ) but all in all damage was only to big end bearings. gave the block a quick hone and it looks good ..will give it a better one once the postions arrive and I can put a rod and piston together and see if I need the block decked. I'm also going to have a go at porting a head myself ... I have a few heads and it turns out the best casting and condition is the head off that motor .. so I stripped it and bolted it to a mates stand (just waiting on some carbide burrs and I'll get into it). so the plan is standard bore and stroke bottom end ,forged rods,YB cosworth pistions ,under pistion oil squiters (still researching that).higher pressure oil pump, cosworth 1.3mm head gasket , ported polished head ,bigger valves, and I'll have a talk to mate PK at kennelly cams to see if he can work some magic for me... so just waiting on parts , money and researching
1 point
-
Chassis update: I managed to make it back to NZ for a bit, a couple of months ago, to have a go at this chassis building thing my Dads been raving about! Turns out it is actually hard work! Hes just finished both rails! I just got a bunch of machined parts done. Spring mounts and braces that go between the rails. Just have two sheetmetal braces to figure out then all of it can be bolted/riveted together (with a few more holes and some tweaking I'm sure!)1 point
-
hi everybody. just to let you know where I'm at... I've looked at the motors I have here.. and I have a plan so cunning...you could put a tail on it and call it a weasel . just waiting on part1 point
-
1 point
-
@kws it will help your oil pressure issue. Engines loose pressure due to excessive clearance. Top end noise is probably the lifters bleeding down due to low oil pressure. I'd give it a try if it was mine. Thankfully it's yours though. Edit. Fair enough though if you want to upside. It's the perfect excuse.1 point
-
Obviously you would use a buick V6 to keep the purity1 point
-
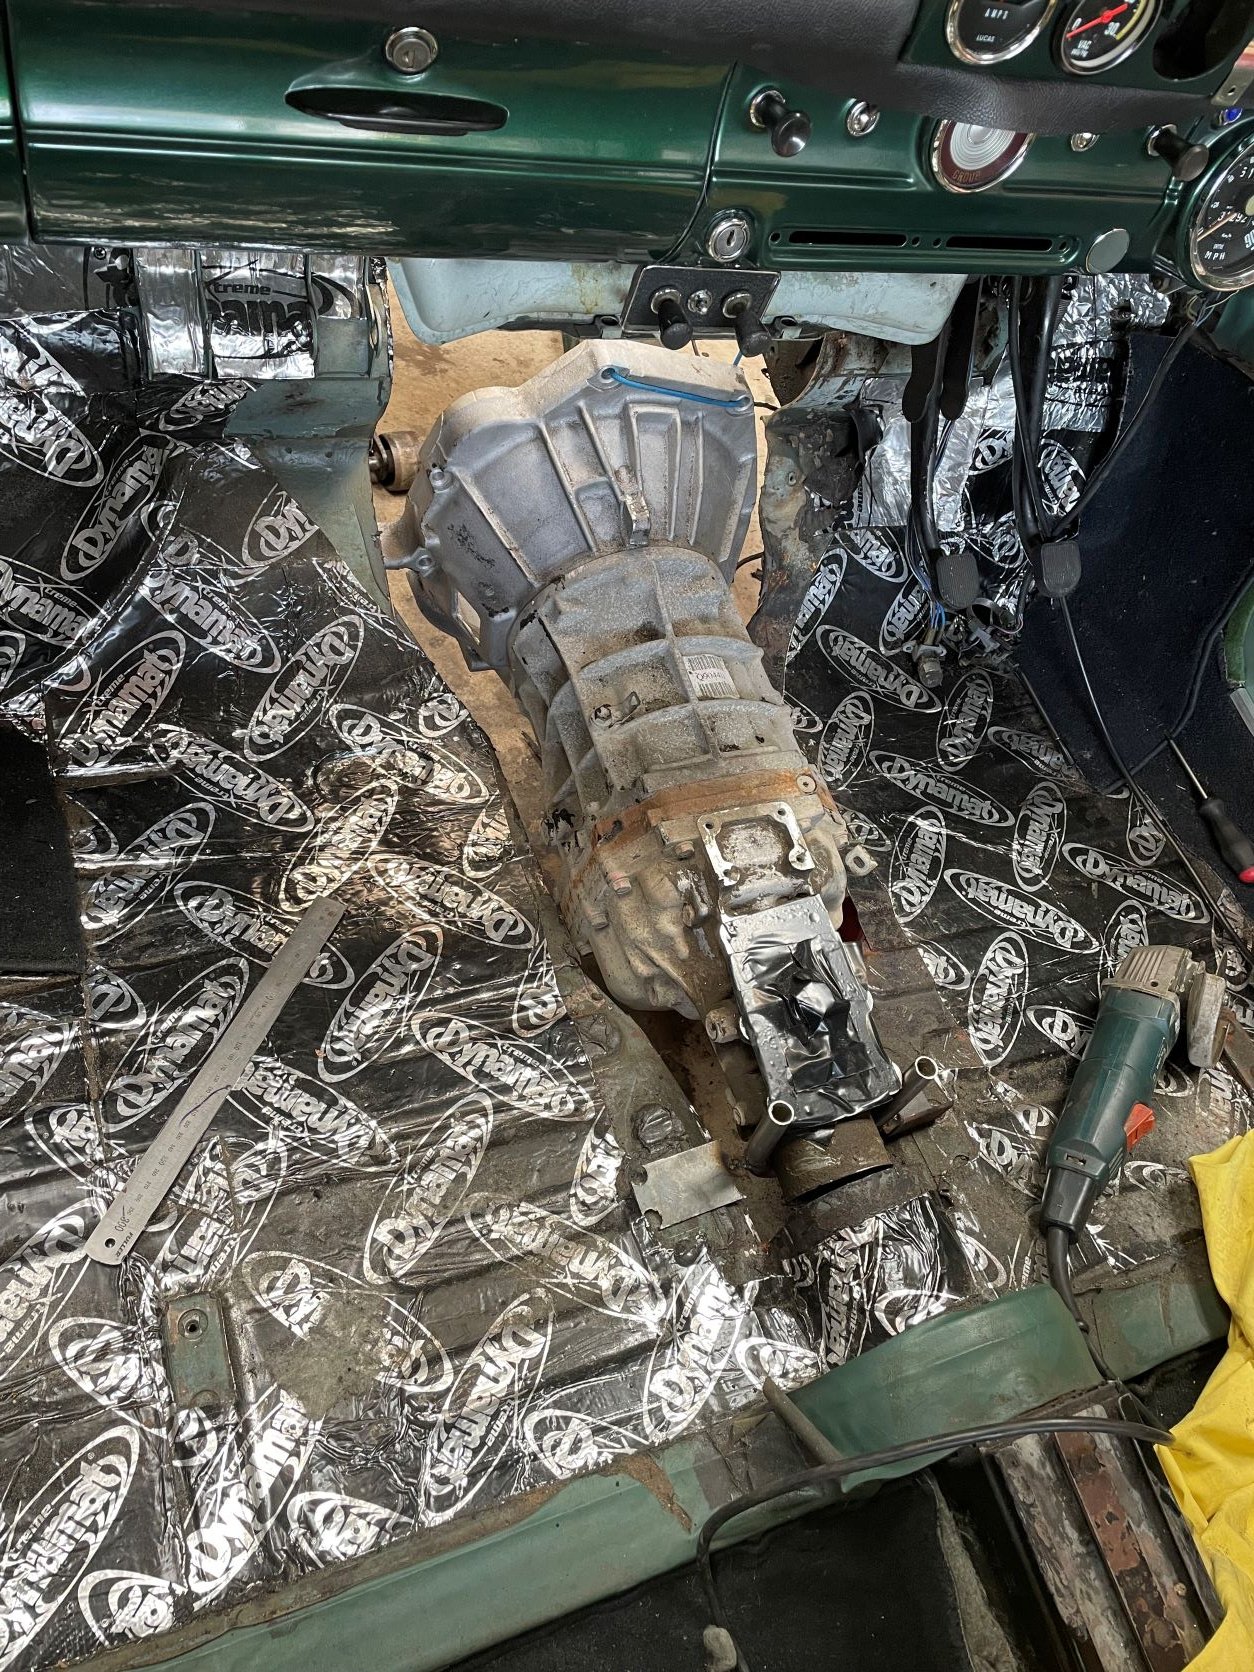
Decided to set the engine back as far as I can. I will now need to go front steer steering rack. I had a little trimming to do to get the trans tunnel wide enough for the additional width of the Toyota box. Glad it wasn't to much LOL.
1 point
-
The second drop in to see how much room I have and to figure out what I will need to alter. It can go back about another 25mm but I will have to cut into the firewall a bit as these engines have their water outlet at the now the rear of the head. I will need to replace that with one that doesn't have the hose connection going rearward into the firewall. The front cross member will not fit as is. I will need to see if it can be modified or remake it using the original A arms etc and geometry.
1 point
-
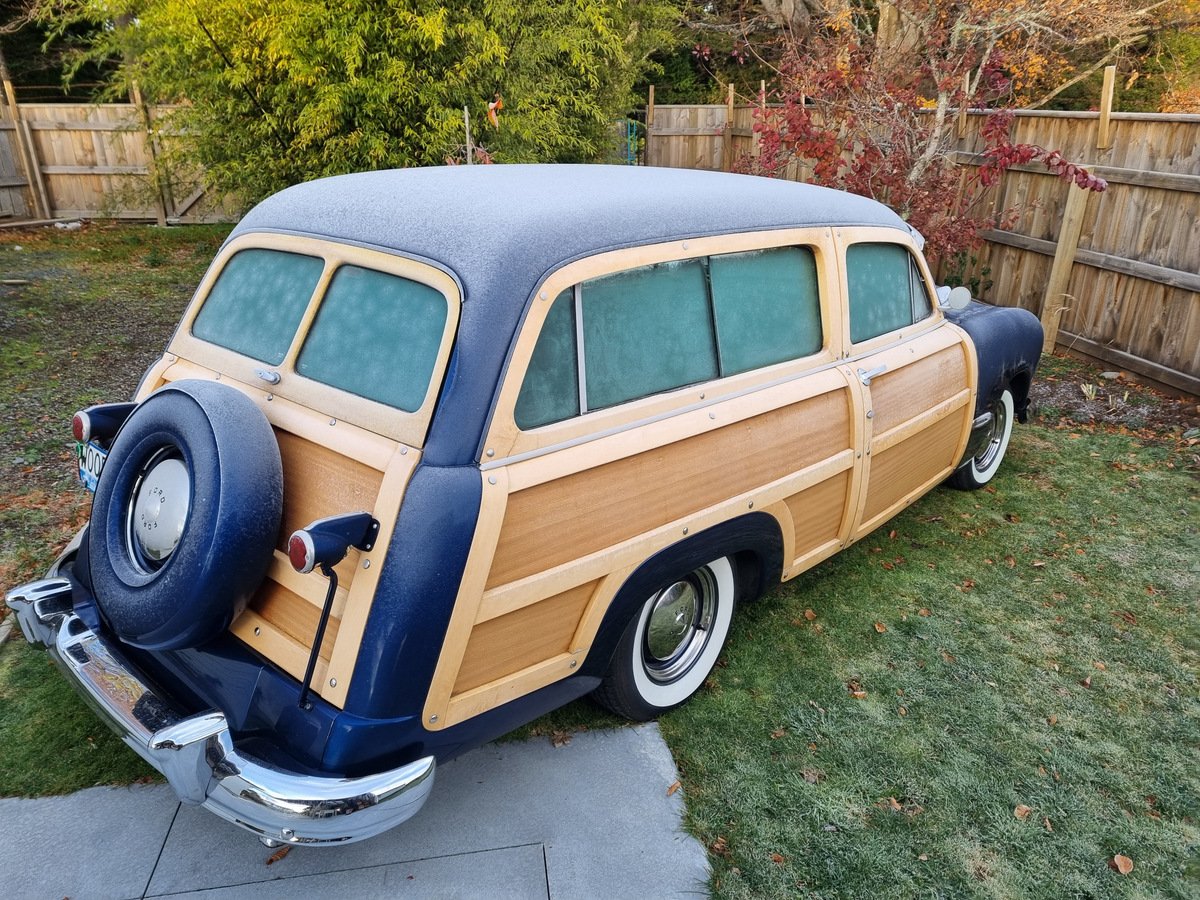
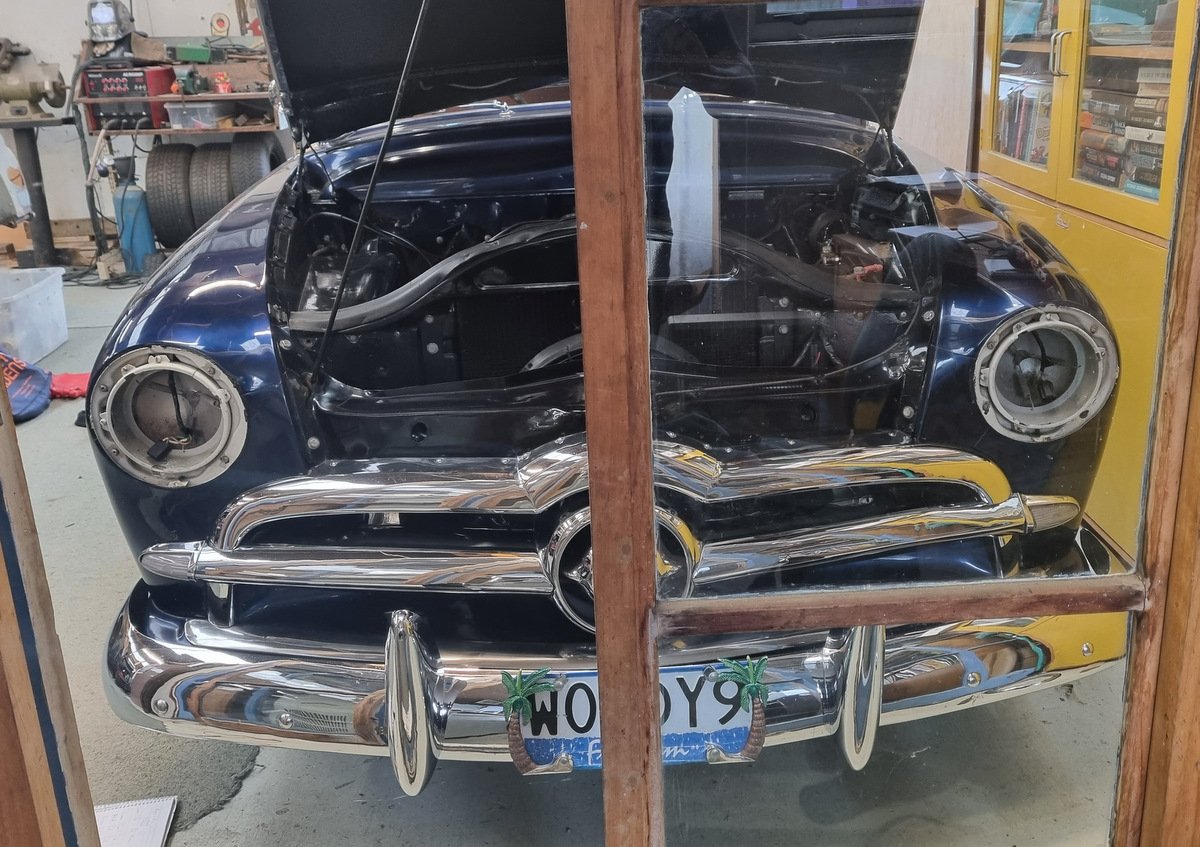
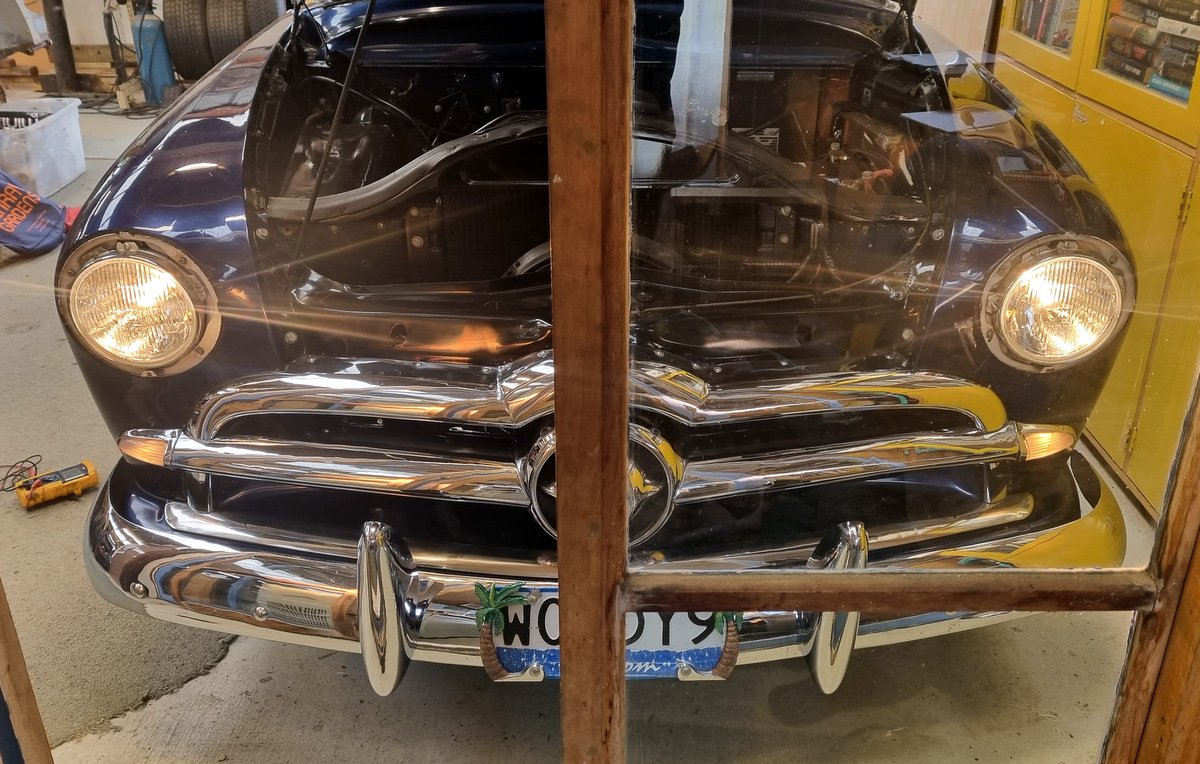
Another yearly update on the old girl. I've had her out of storage since the 28TH December. And since then, she has pretty much been my daily driver. I've done nearly 1200KM's in her. With a big 700KM trip of the motorway system from West AK to Westgate then upto Albany, back down to Manukau, where I joined the motorway upto Puhoi. Visited my mate in Omaha. Then drove to Hamilton and down to Matamata. Being it's first road trip in my ownership in nearly 4 years, she did extremely well.1 point


.thumb.jpg.570970b401ac8d26ce9af7c1bf2bd8cd.jpg)


This leaderboard is set to Auckland/GMT+12:00