
Leaderboard


Popular Content
Showing content with the highest reputation on 06/26/22 in all areas
-
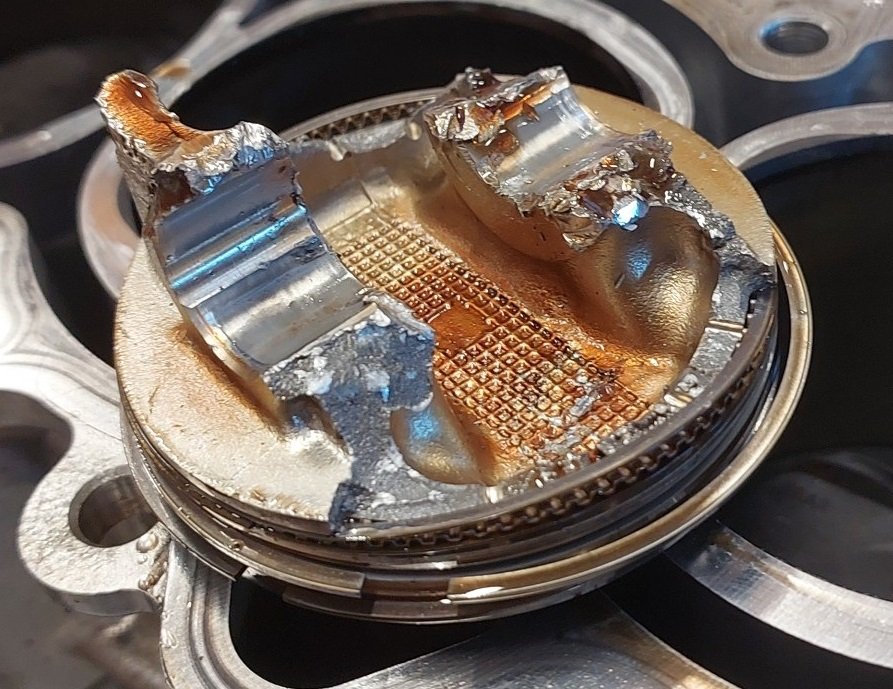
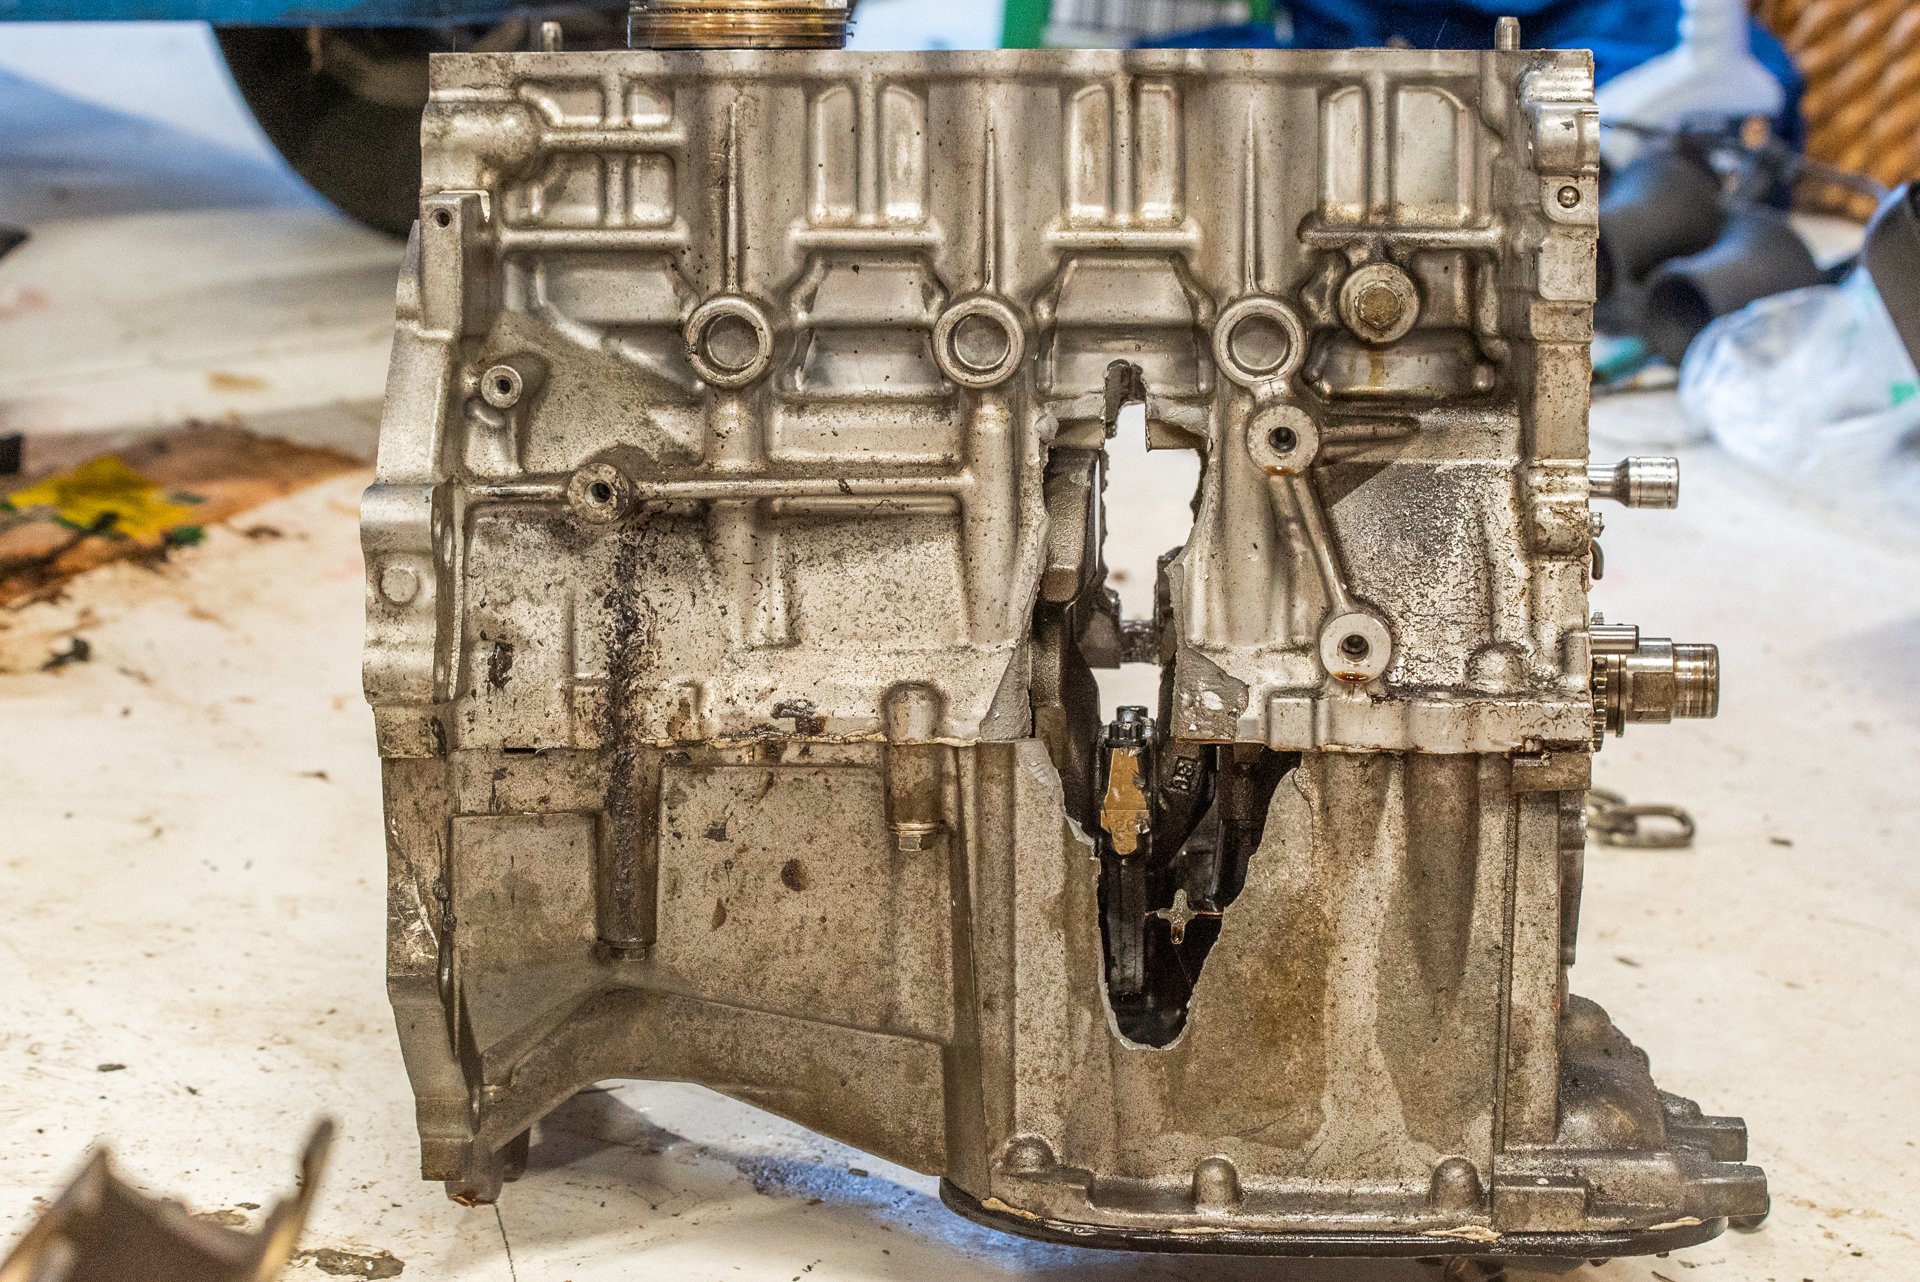
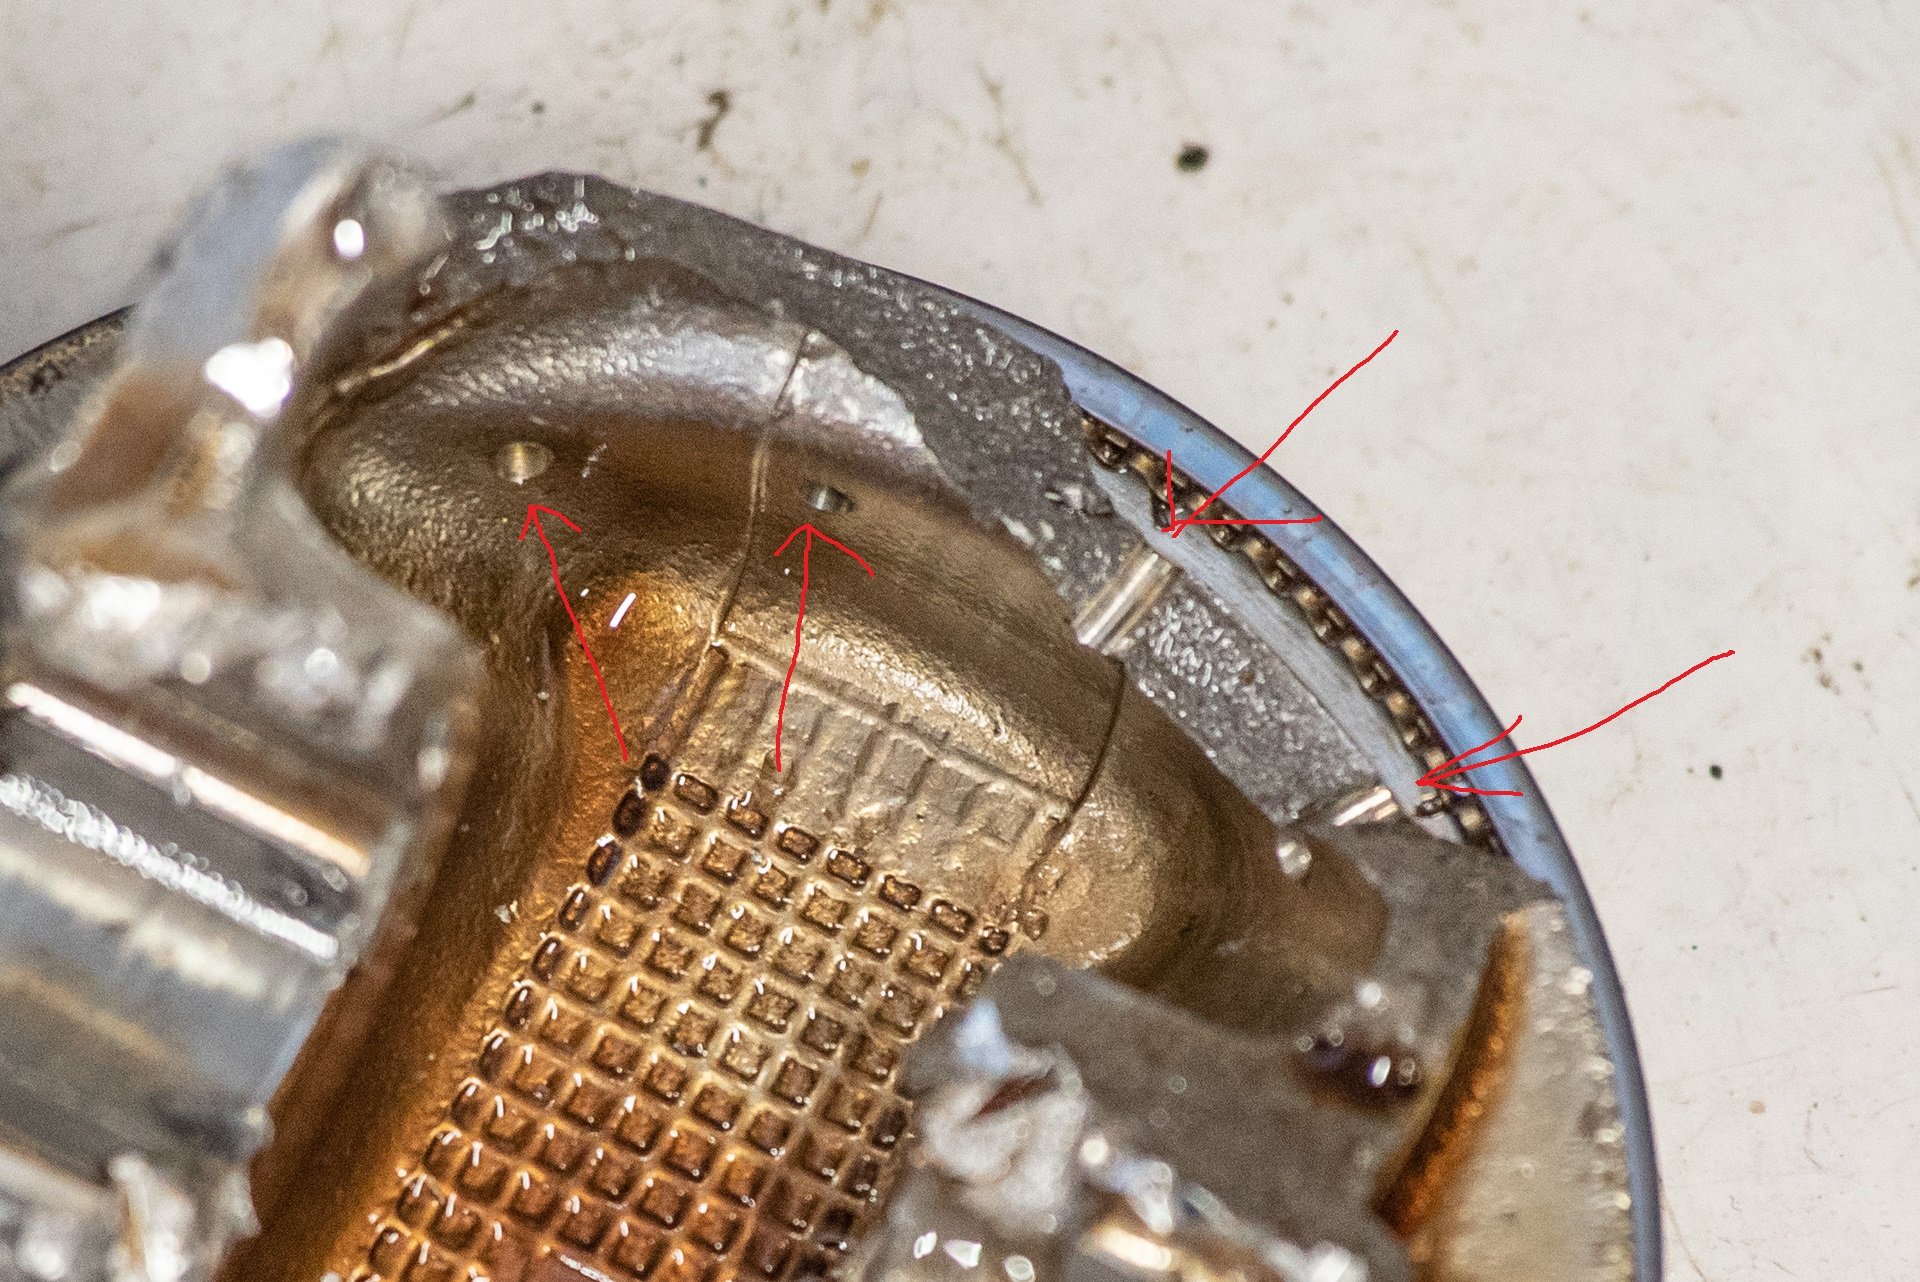
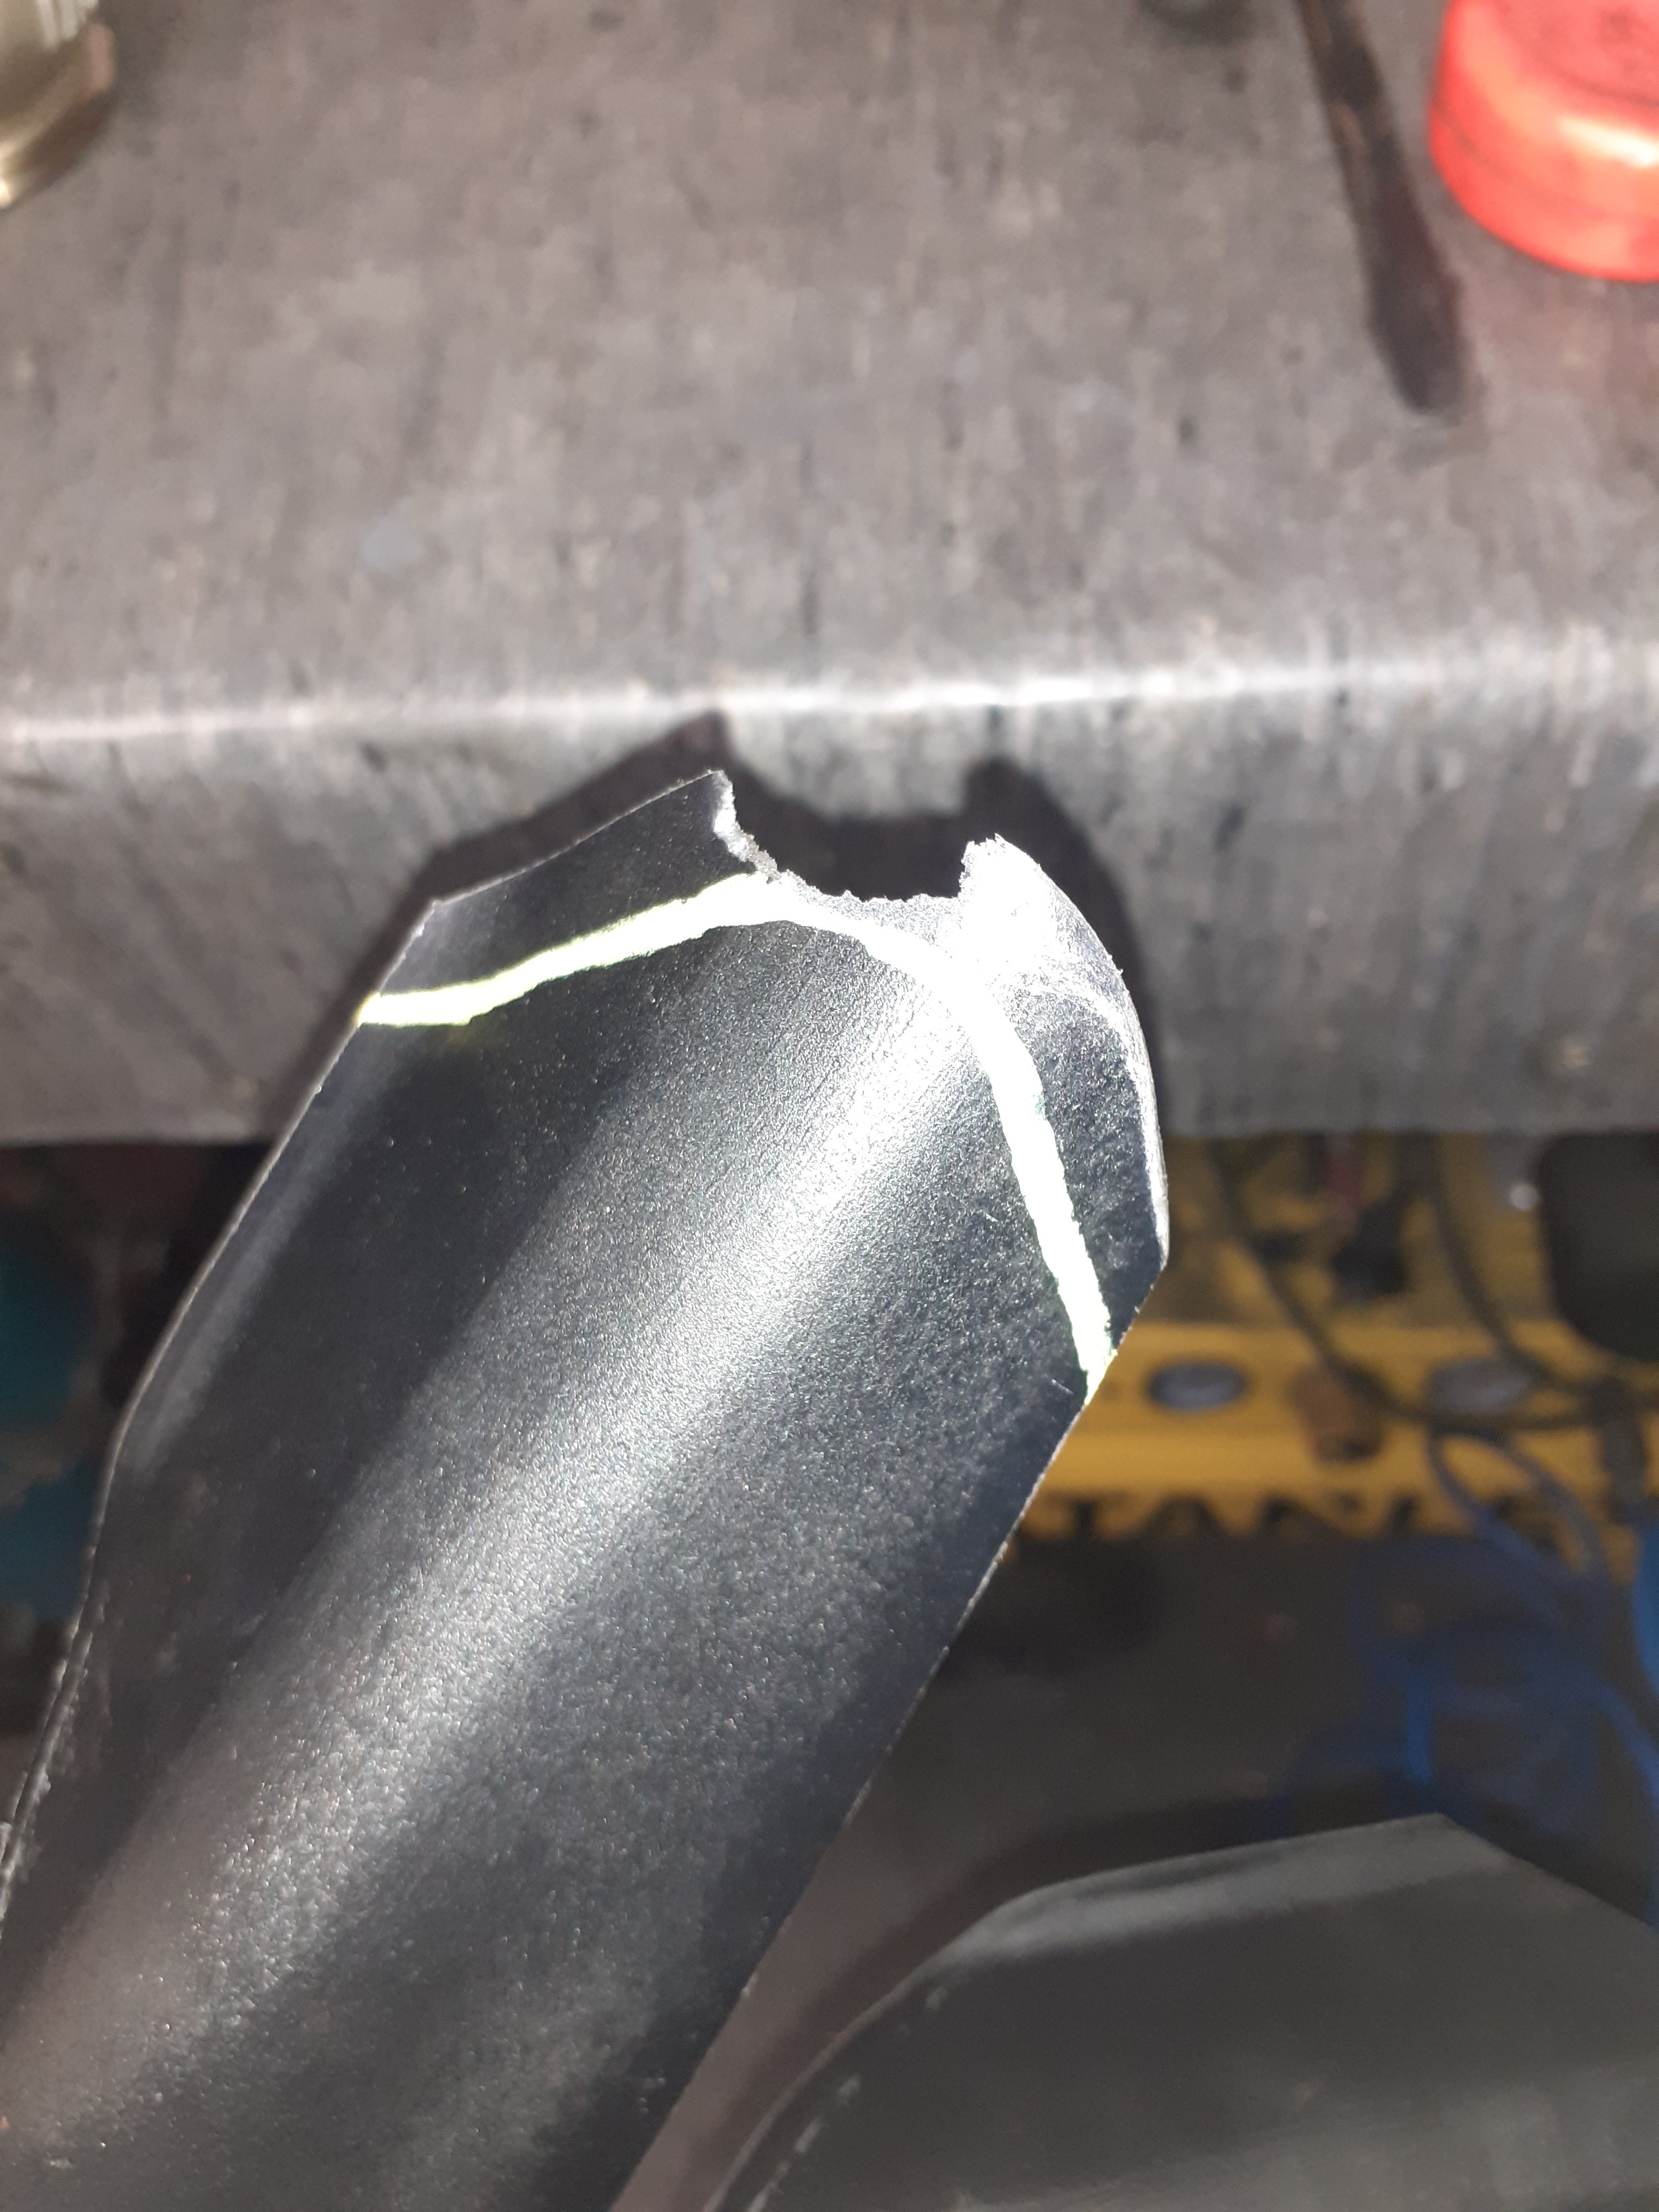
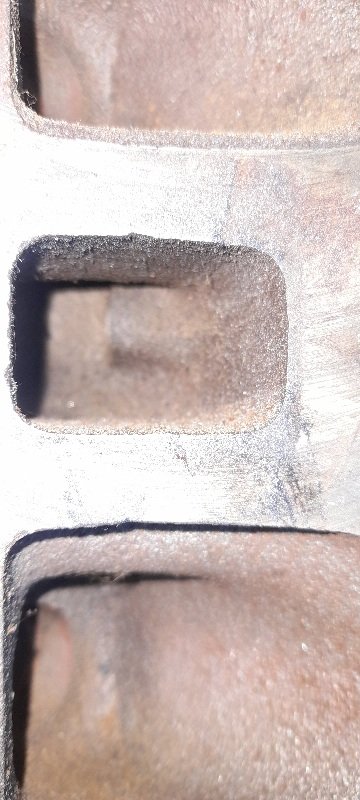
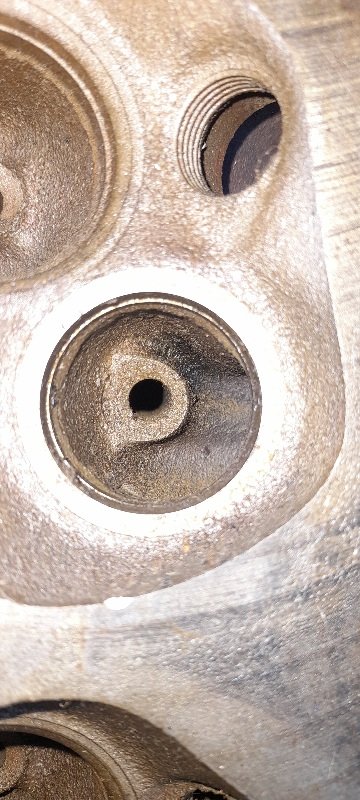
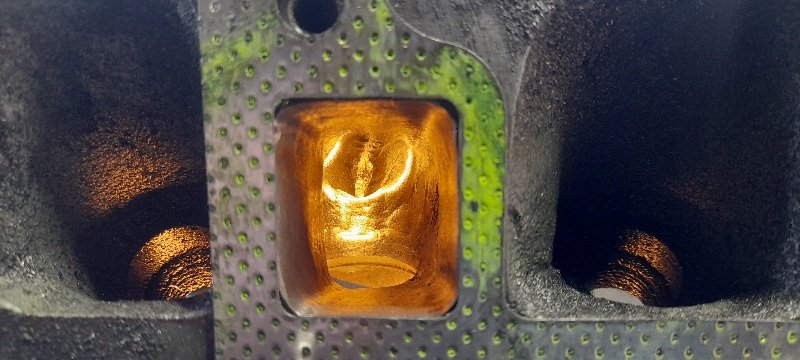
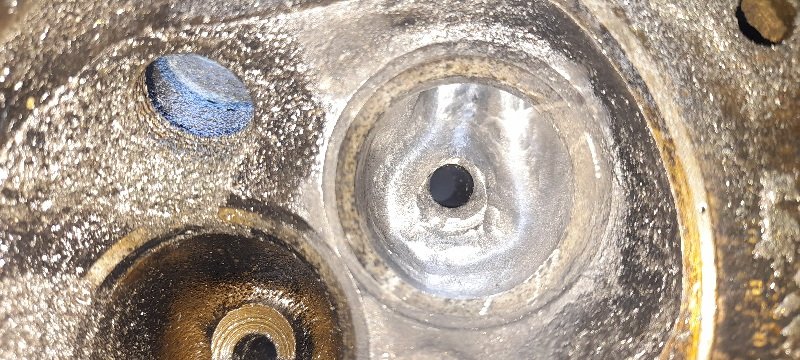
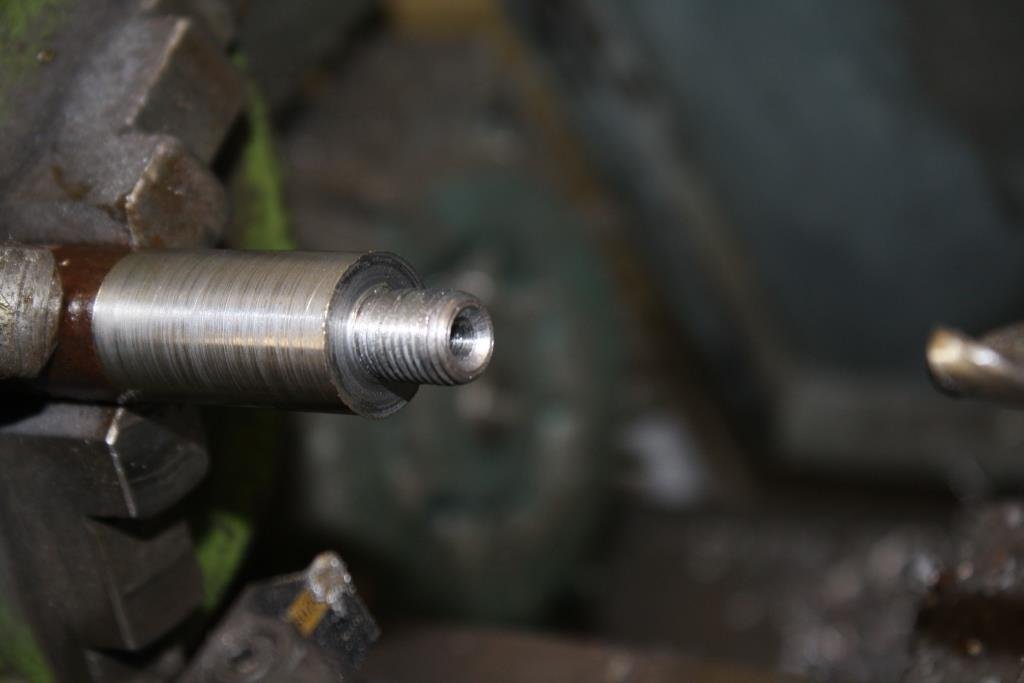
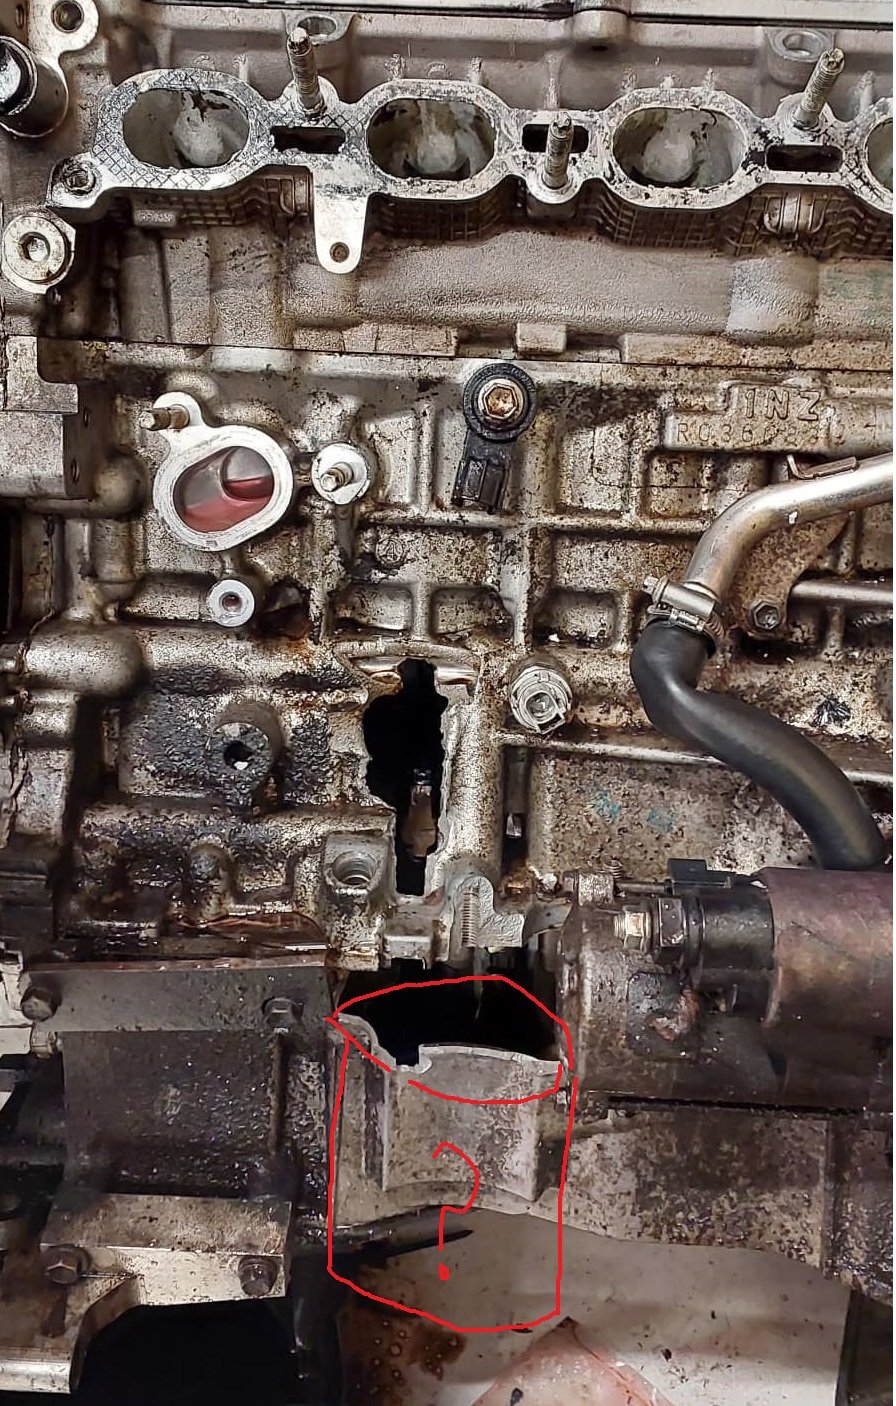
Finally had some time to get the old motor out. I was busy just dealing with the nuts and bolts of the situation, undoing things etc... It wasnt until the motor was completely out, that I had a look at the back side of the block and had a hearty chuckle So I got the motor and gearbox out, split the gearbox off. Then I wanted to get the piston and the top half of the rod out, to see if there's any evidence of how/why the rod broke. So I used an extension bar and tapped the piston up until it popped out. Well, part of it anyway... And then I laughed some more, oh man, I wasnt expecting that carnage! I cant find the wrist pin or the top of the rod anywhere. I suspect I might have to go for a long walk up the road to go find it. So one concerning thing about this, is now I'm not sure what broke first. If the rod broke and caused the damage, that's fine. Easy, just put stronger rods in. But it looks like the piston broke along the line of the oil return holes from the oil control rings: Which maybe makes me think that the piston sorta... fell in half. Then caused rod carnage. However I'm thinking this is less likely, based on the lack of damage to the cylinder head. Either way, it might be a good idea to drill some tiny chamfers on the oil holes next time for stress relief. But I'm not sure if you can get a drill anywhere near it while the piston is intact. So, hopefully the rods are the problem and not this haha. Maybe the remaining 3 pistons and rods might show some extra clues.
 16 points
 -
"In a high performance application 3500 FPM can be used since the burst at that speed will be short in duration" 9000RPM 1NZ is 5000fpm hahaha I know it's probably a different kettle of fish for tiny pistons compared to V8 stuff, but... yeah. It's getting up there.8 points
-
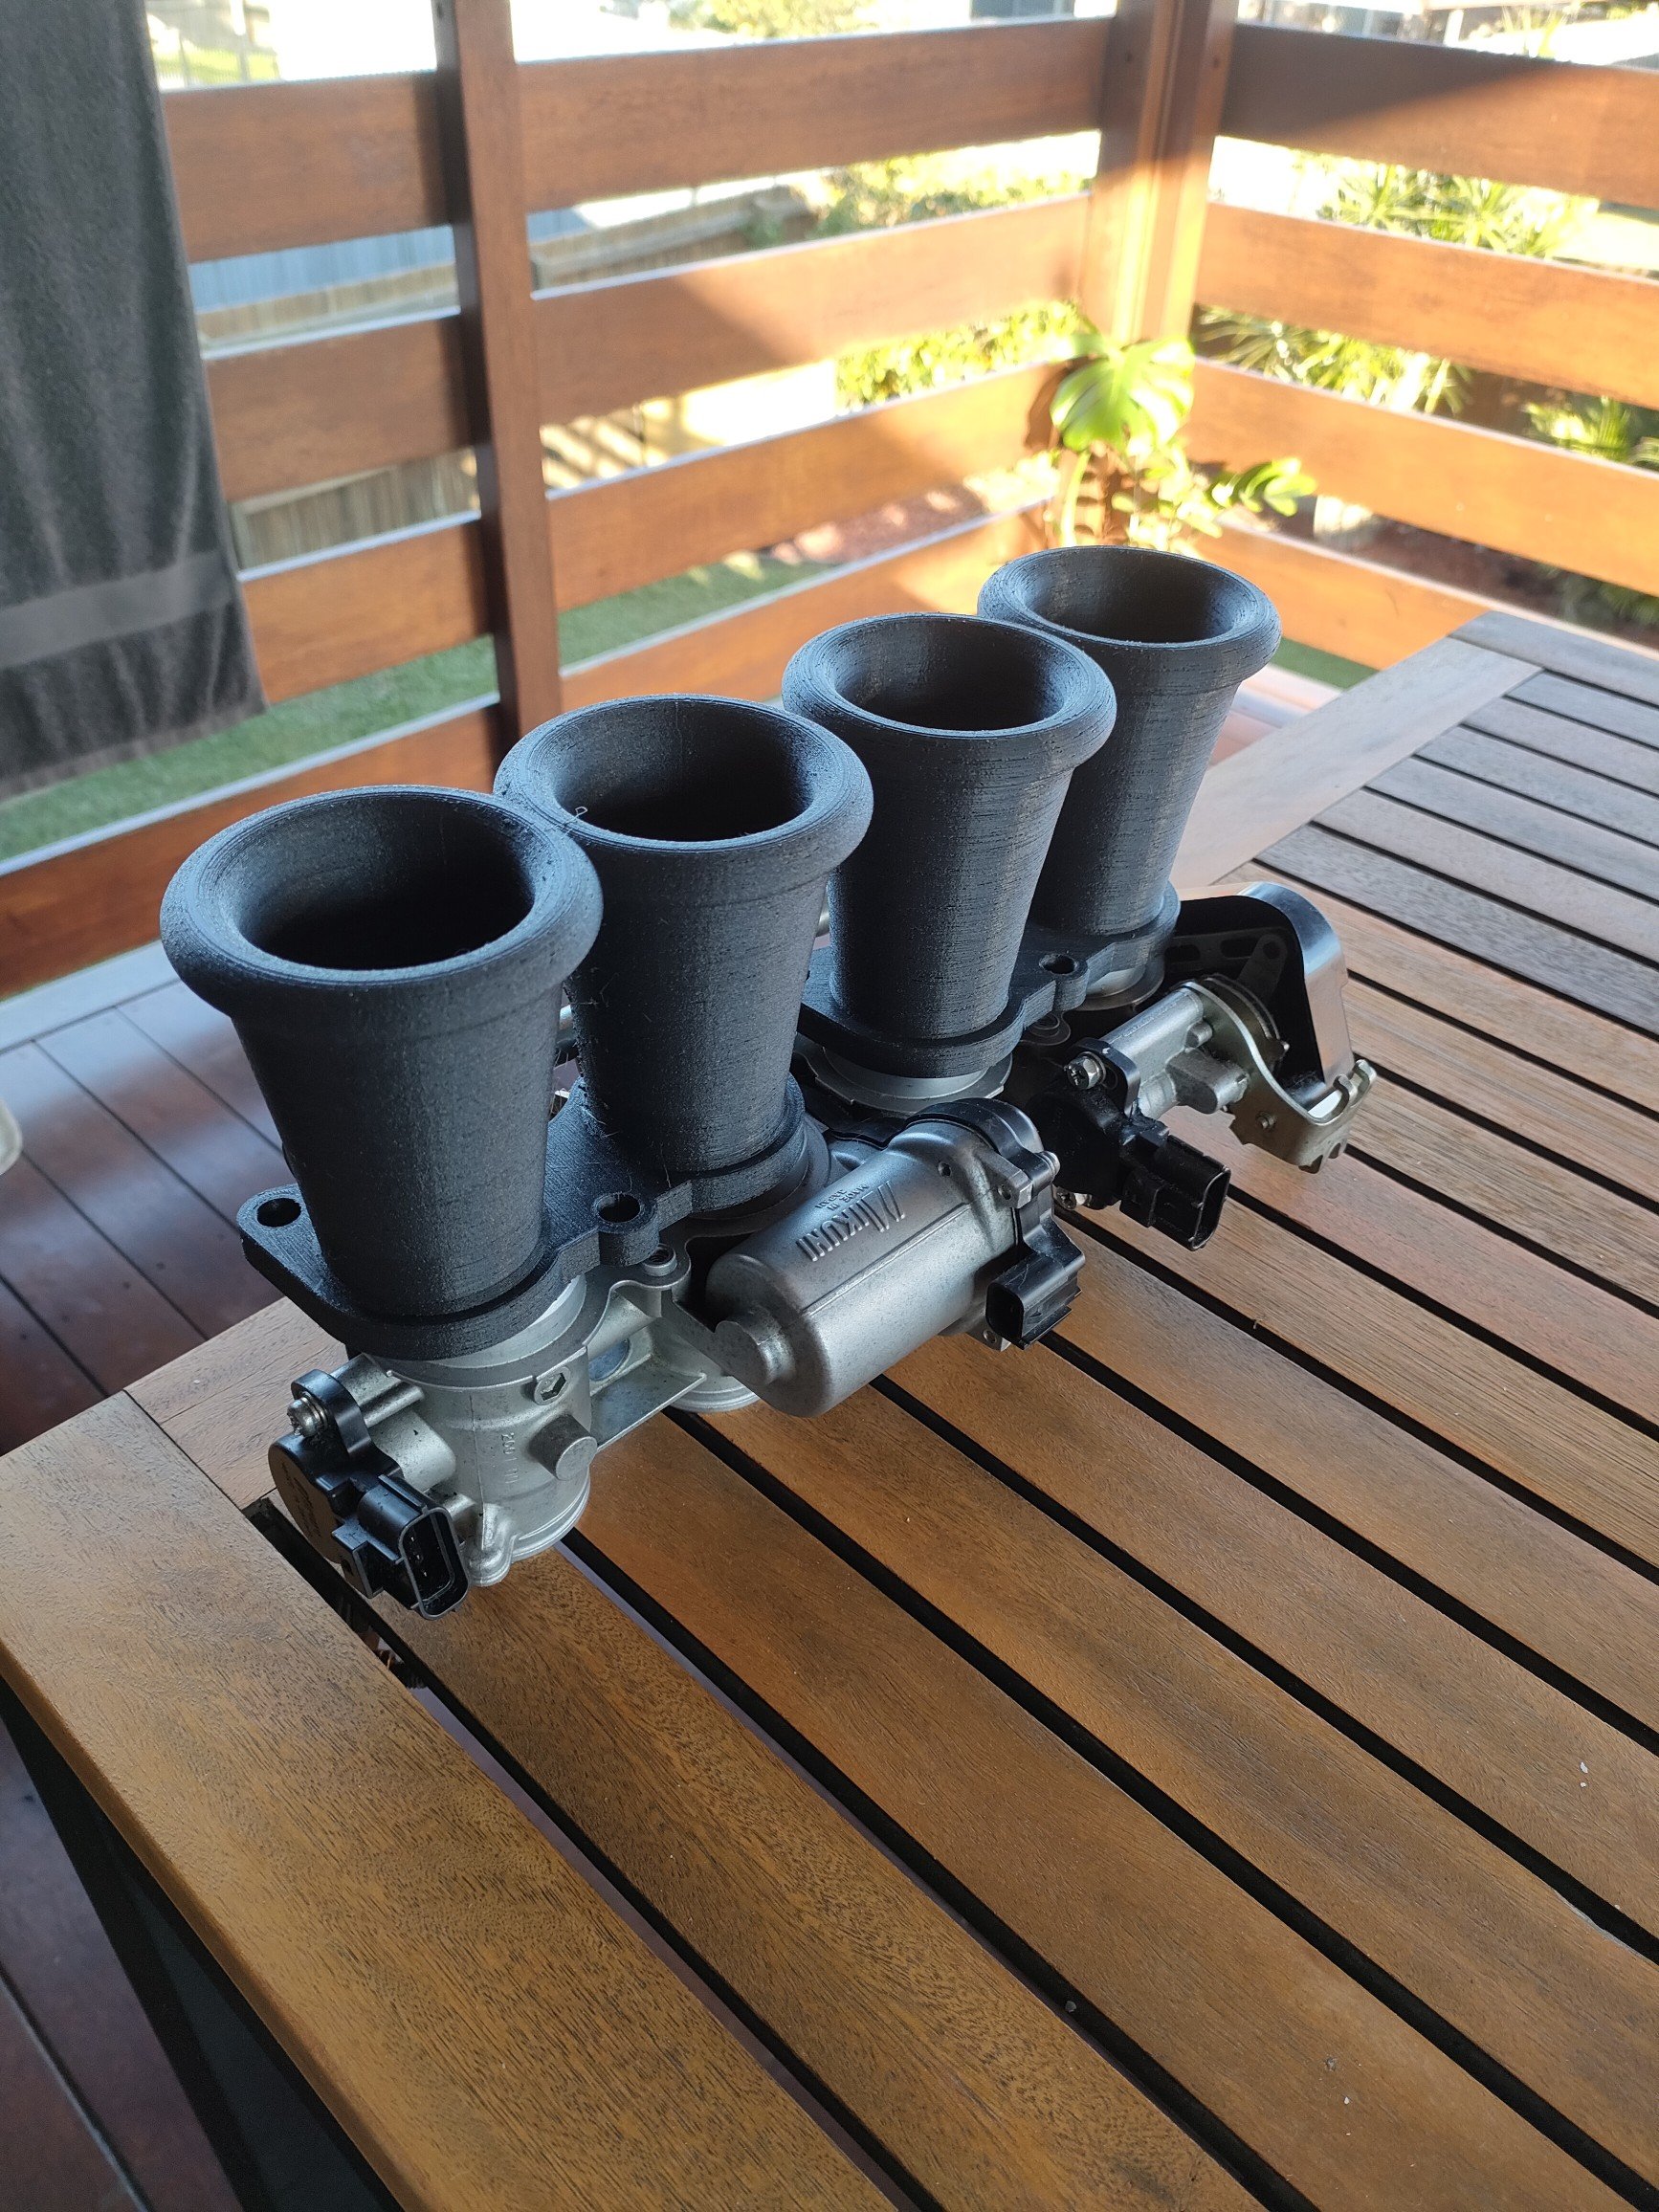
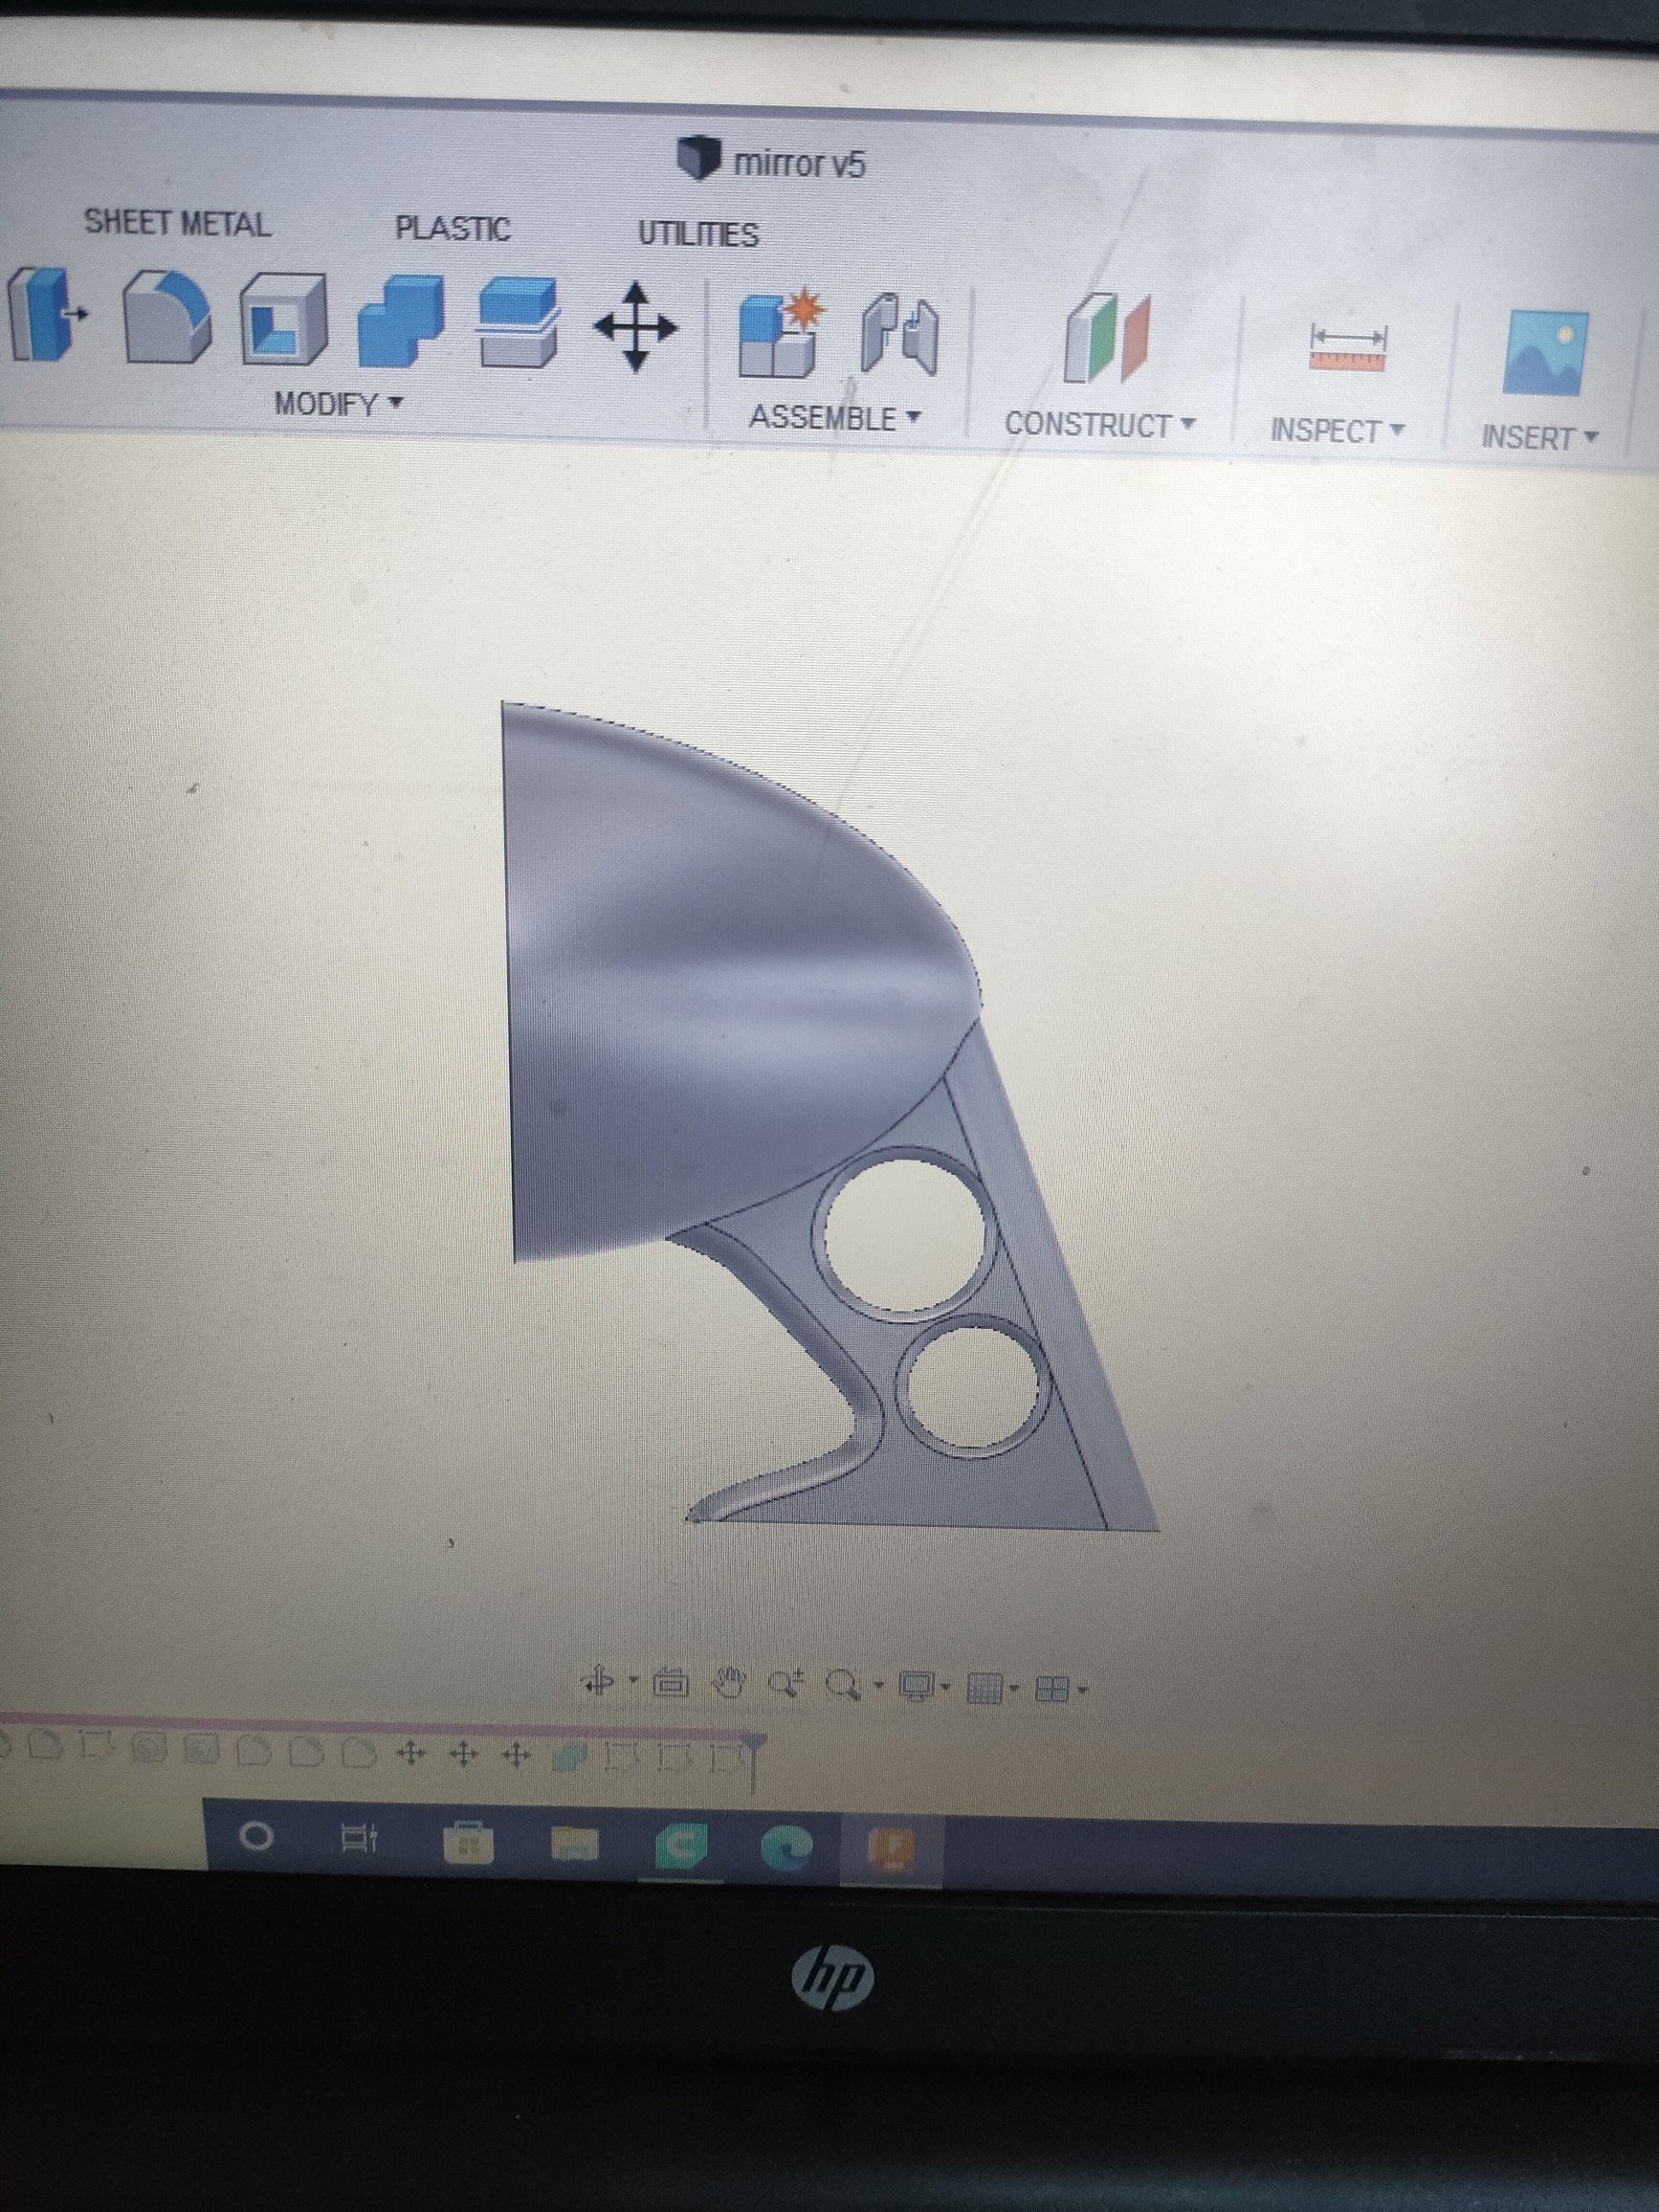
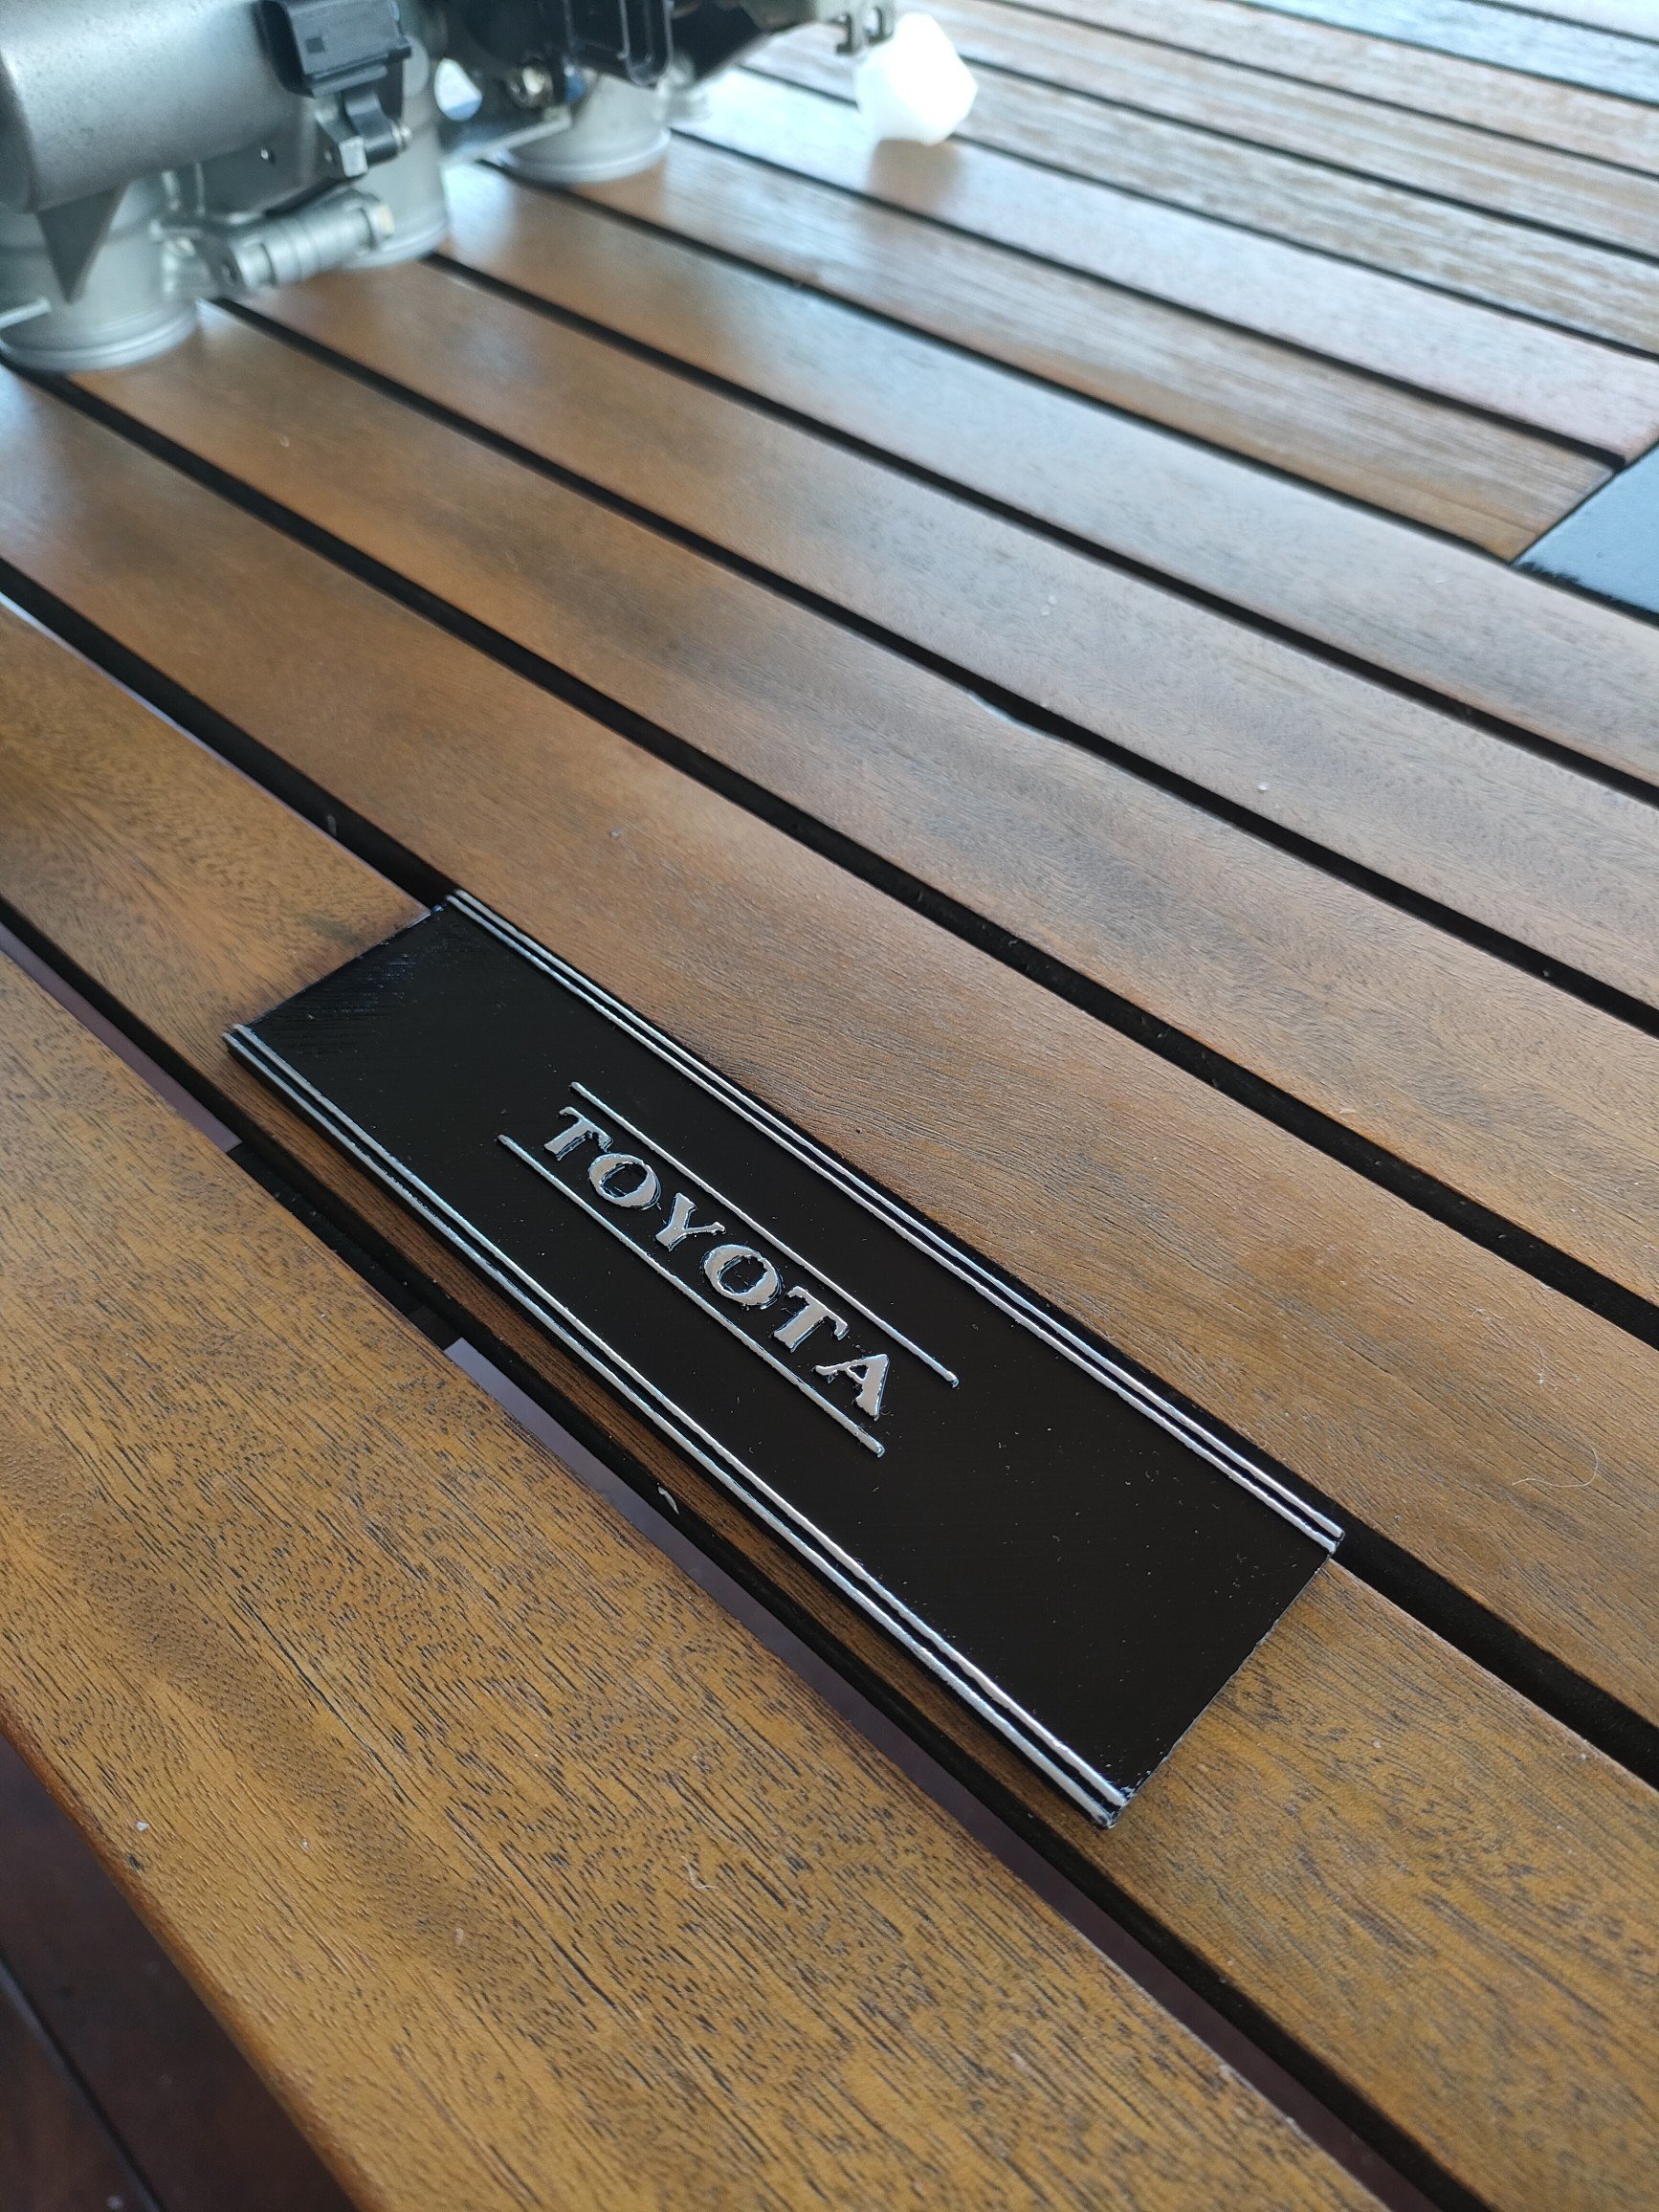
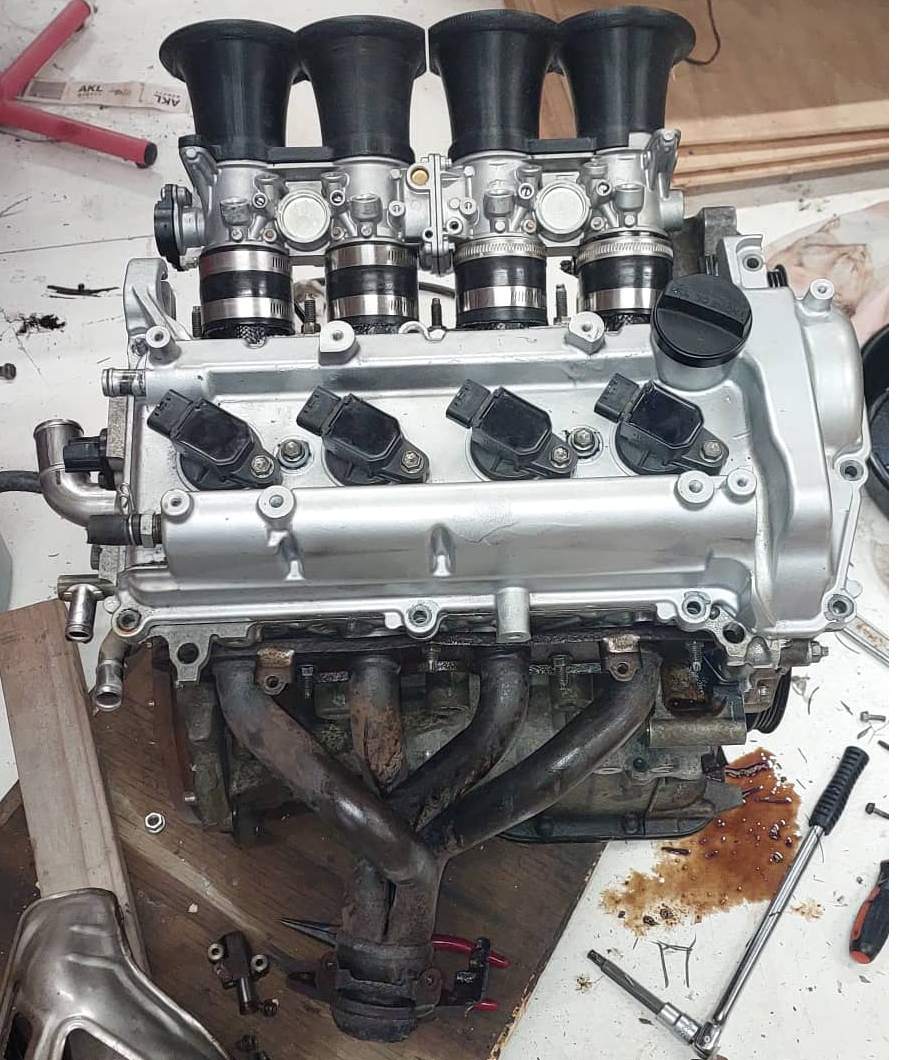
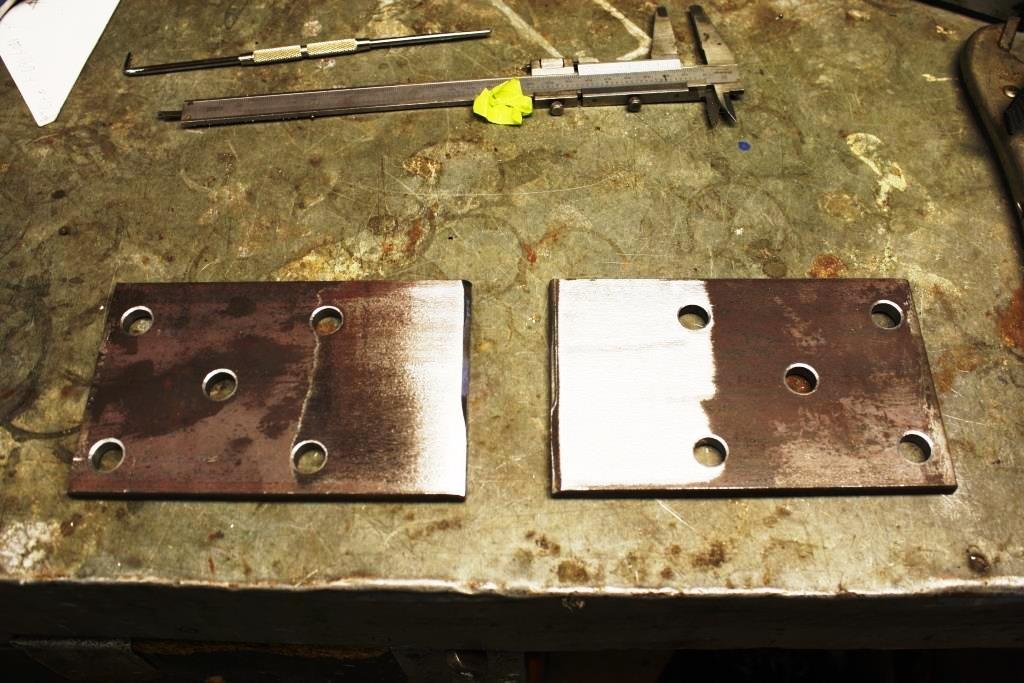
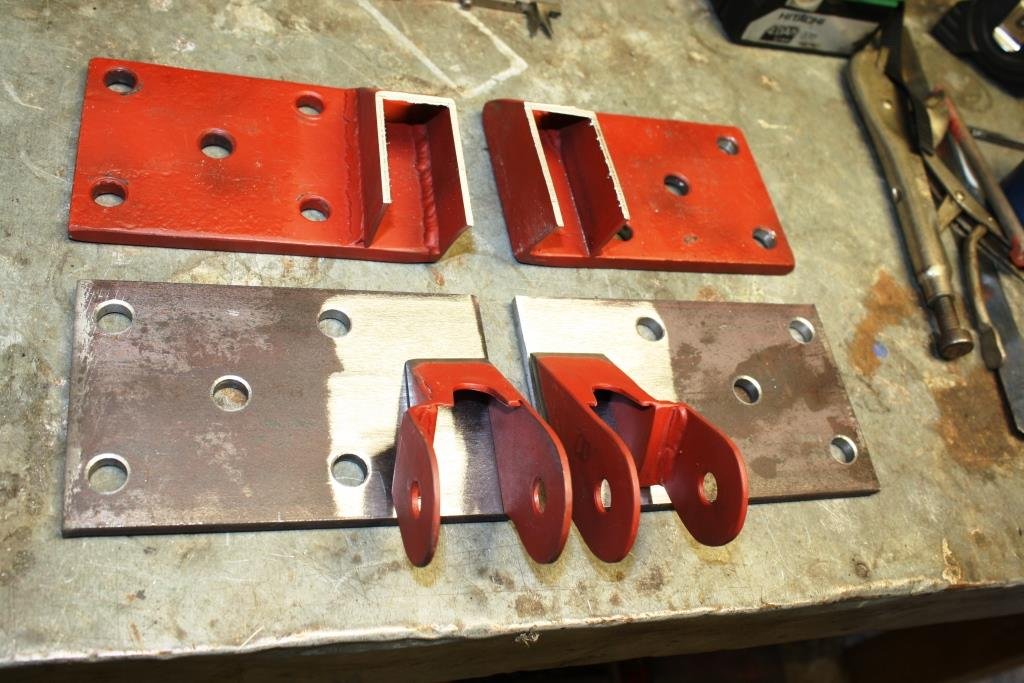
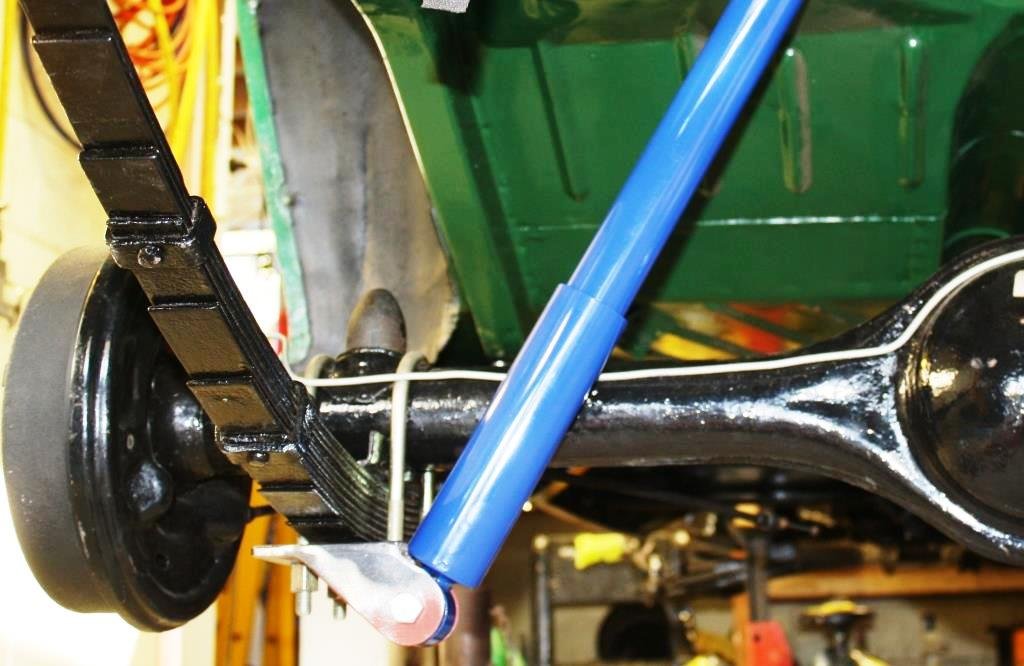
Not much progress on this lately, unfortunately. Looks like I'll be changing plans to a different style IRS rear end. If I use the MX5 one, I can't run a rear seat. I did however buy a 3d printer. So been learning how to use fusion 360. So far made some velocity stacks for some R1 itbs, and a radio delete plate for the wagon. Will try a flatter paint next time. Was supposed to be satin, but looks too glossy for for my liking. Some guard mirrors are next. If anyone has dimensions for either the mirrors, or radio plate, that would be amazing.
6 points
-
Lolol Shit cranks.4 points
-
Most of the smaller superchargers just run PK belts. They're all that's needed tbh. Also, Have you considered supercharging it? An SC14 on a 1500cc engine yielded ~11psi for my bad self. With EFI and an Intercooler (water to air would go good) your little imp would embarrass some much heftier cars....4 points
-
Top one is clearly a Lexus, bottom one is a A32 Maxima?4 points
-
Lols at the comparisons being drawn between this and other high performance engines of the ilk, such as K series, A series, and Holden 6.3 points
-
Sort of/not really relevant but I've heard stories of holden 6 pistons breaking in a similar fashion except the skirt and wrist pin part comes off , the top of the piston stays there and the rod keeps going up and down as the skirts keep it located correctly3 points
-
4K pistons always crack from the stress relief holes drilled at the ends of the oil return grooves. Results in rods chewing up the bore. Time to get yourself some expensive swedish pistons, that sort of thing is your bag.
3 points
-
I reckon a man of dylans talents could make it happen. Set it to start on a timer. 7am and the ld28 starts up, waking up the valley. The shed warms up as he eats his porridge. A dog barks in the distance. Valley life.3 points
-
OK, normally I'd say k swap is cool, but I think we all know turbo Barra is the answer here..3 points
-
3 points
-
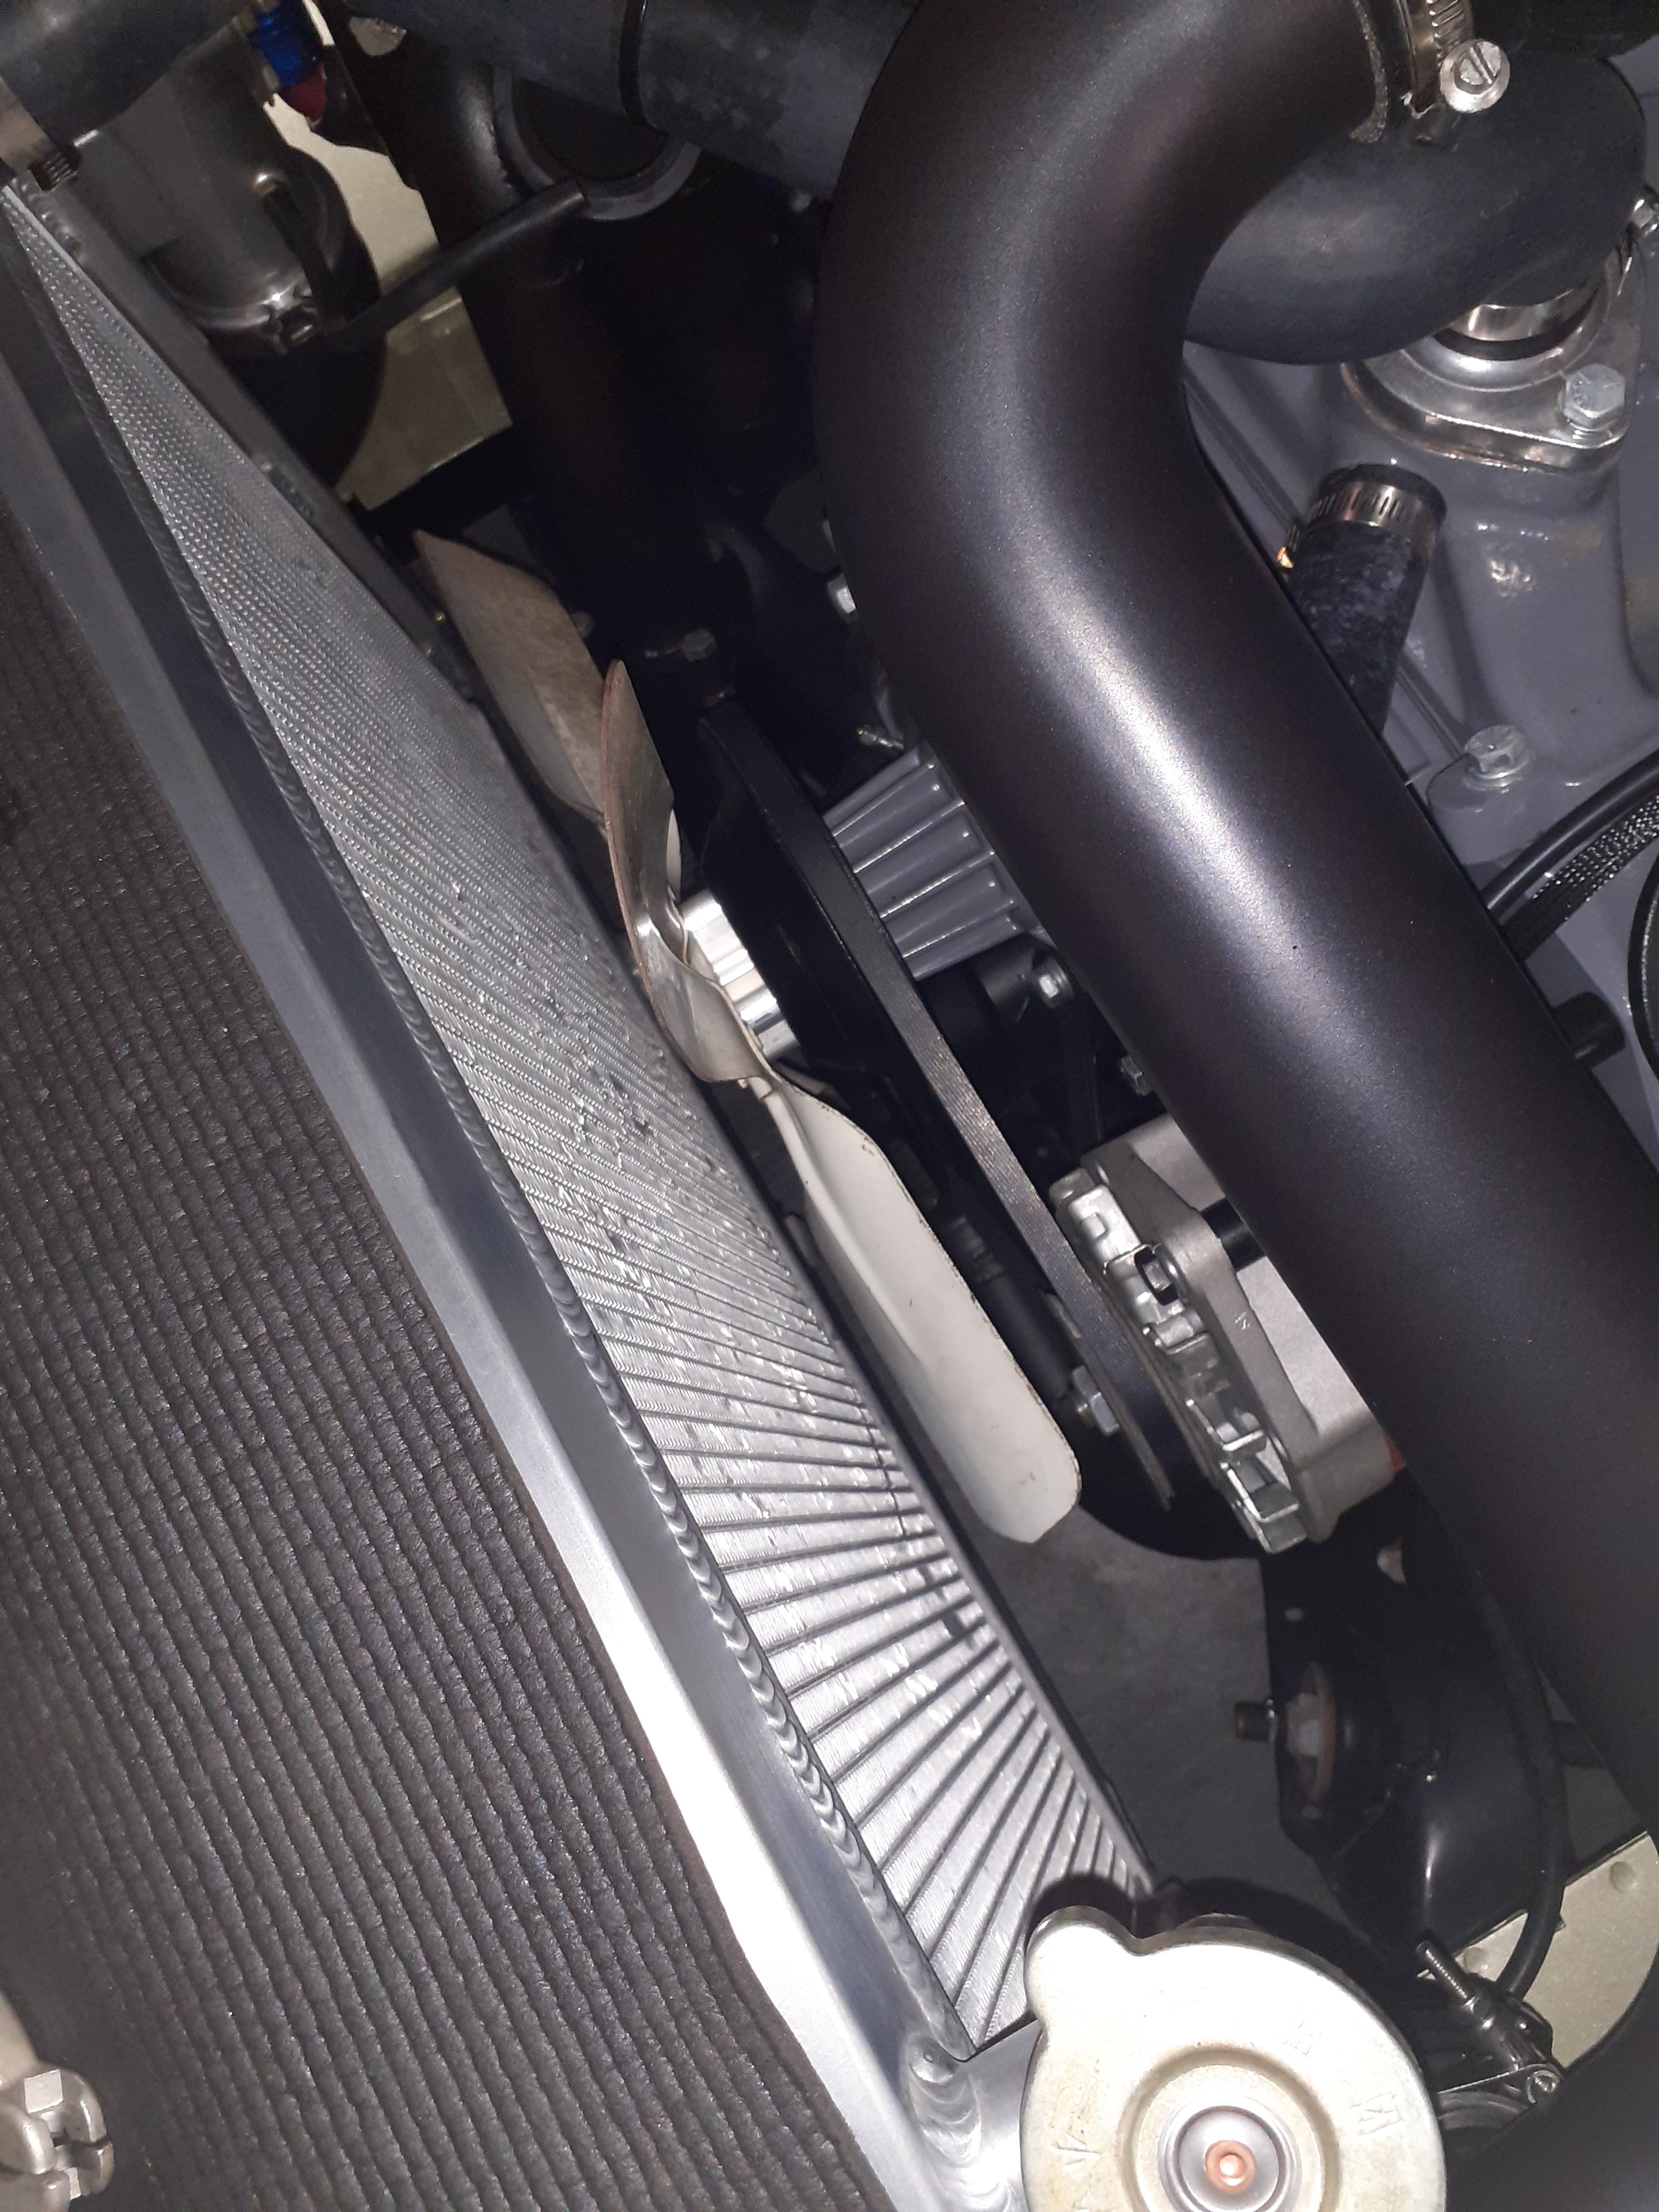
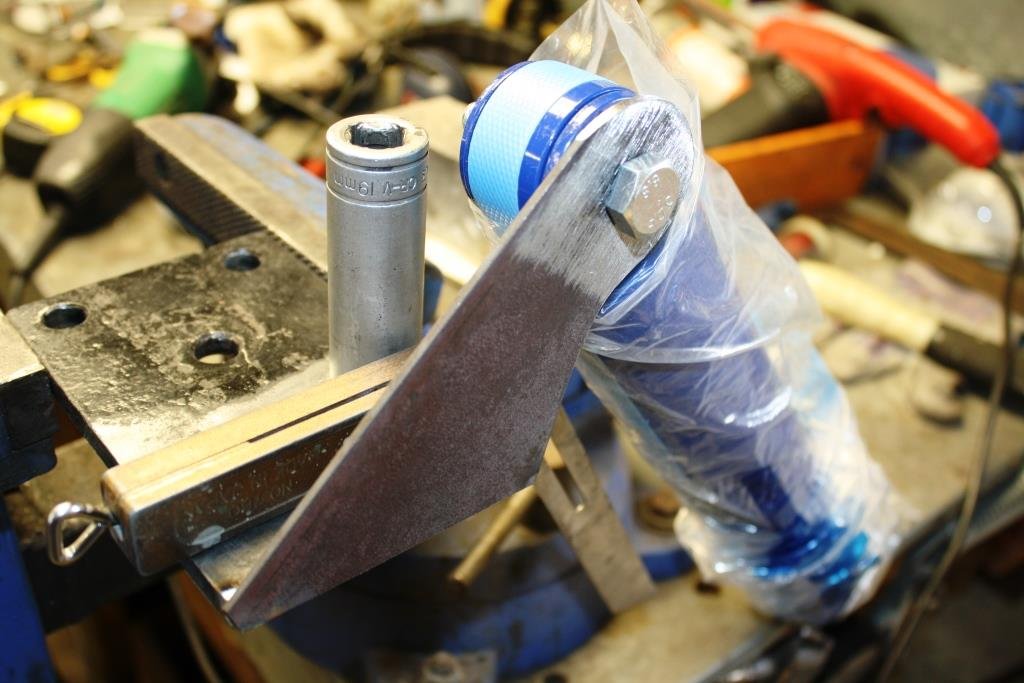
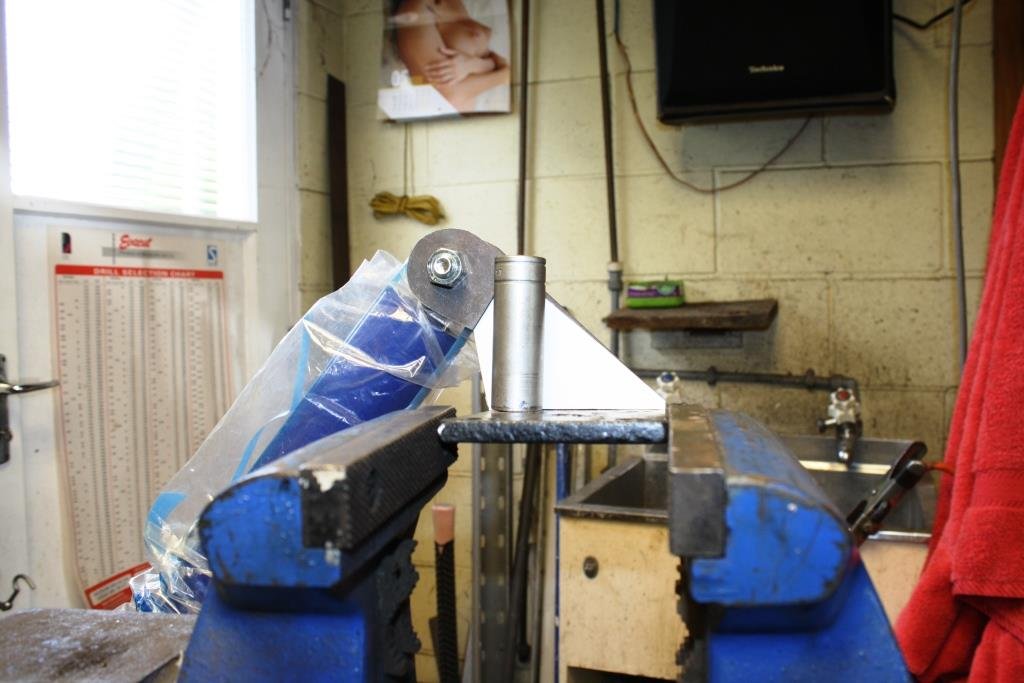
Thanks to the replies in the tech spam thread which basically reinforced what I was thinking, which is it doesn't have enough air flow and needs a better fan I thought I'll live with the fan noise if that means I can actually drive it So I embarked on the mission of finding an engine driven fan that fits Found the one I wanted on an NZ website , sweet, ordered it. Nope, " no stock sorry" Bugger. Found a different supplier who had one, ordered off their website "Sorry, no stock, they might be here in 3 weeks? " Poos. Local guy had a plastic flex fan , I didn't want one of those as they are a lot deeper but meh I'll give it a shot , chucked it on, needed a bigger spacer so the blade cleared the alternator. spent ages rummaging around for some bolts Started it, ran for a bit, moves heaps of air, good Gave it a rev to about 2500, the inch or so clearance at the bottom became 0 clearance and the fan hit the tank and broke the tip off one blade Ah yes that's why I hate these fans Luckily no damage to the radiator apart from some dinged fins Found a stock 245 steel fan I had in a box under the house, chucked that on, it will do for now and I'll find the one I want I think with a shroud on it should be OK, the mechanical fans move heaps more air. It still creeps up at idle in the shed but no shroud and a slower fan speed than stock due to pulley sizes are the reasons I think
3 points
-
3 points
-
Not bad for a 17yr old kid. told him to carry on and do the whole car. got a couple of spare bikes to sell to fund it. stoked.
3 points
-
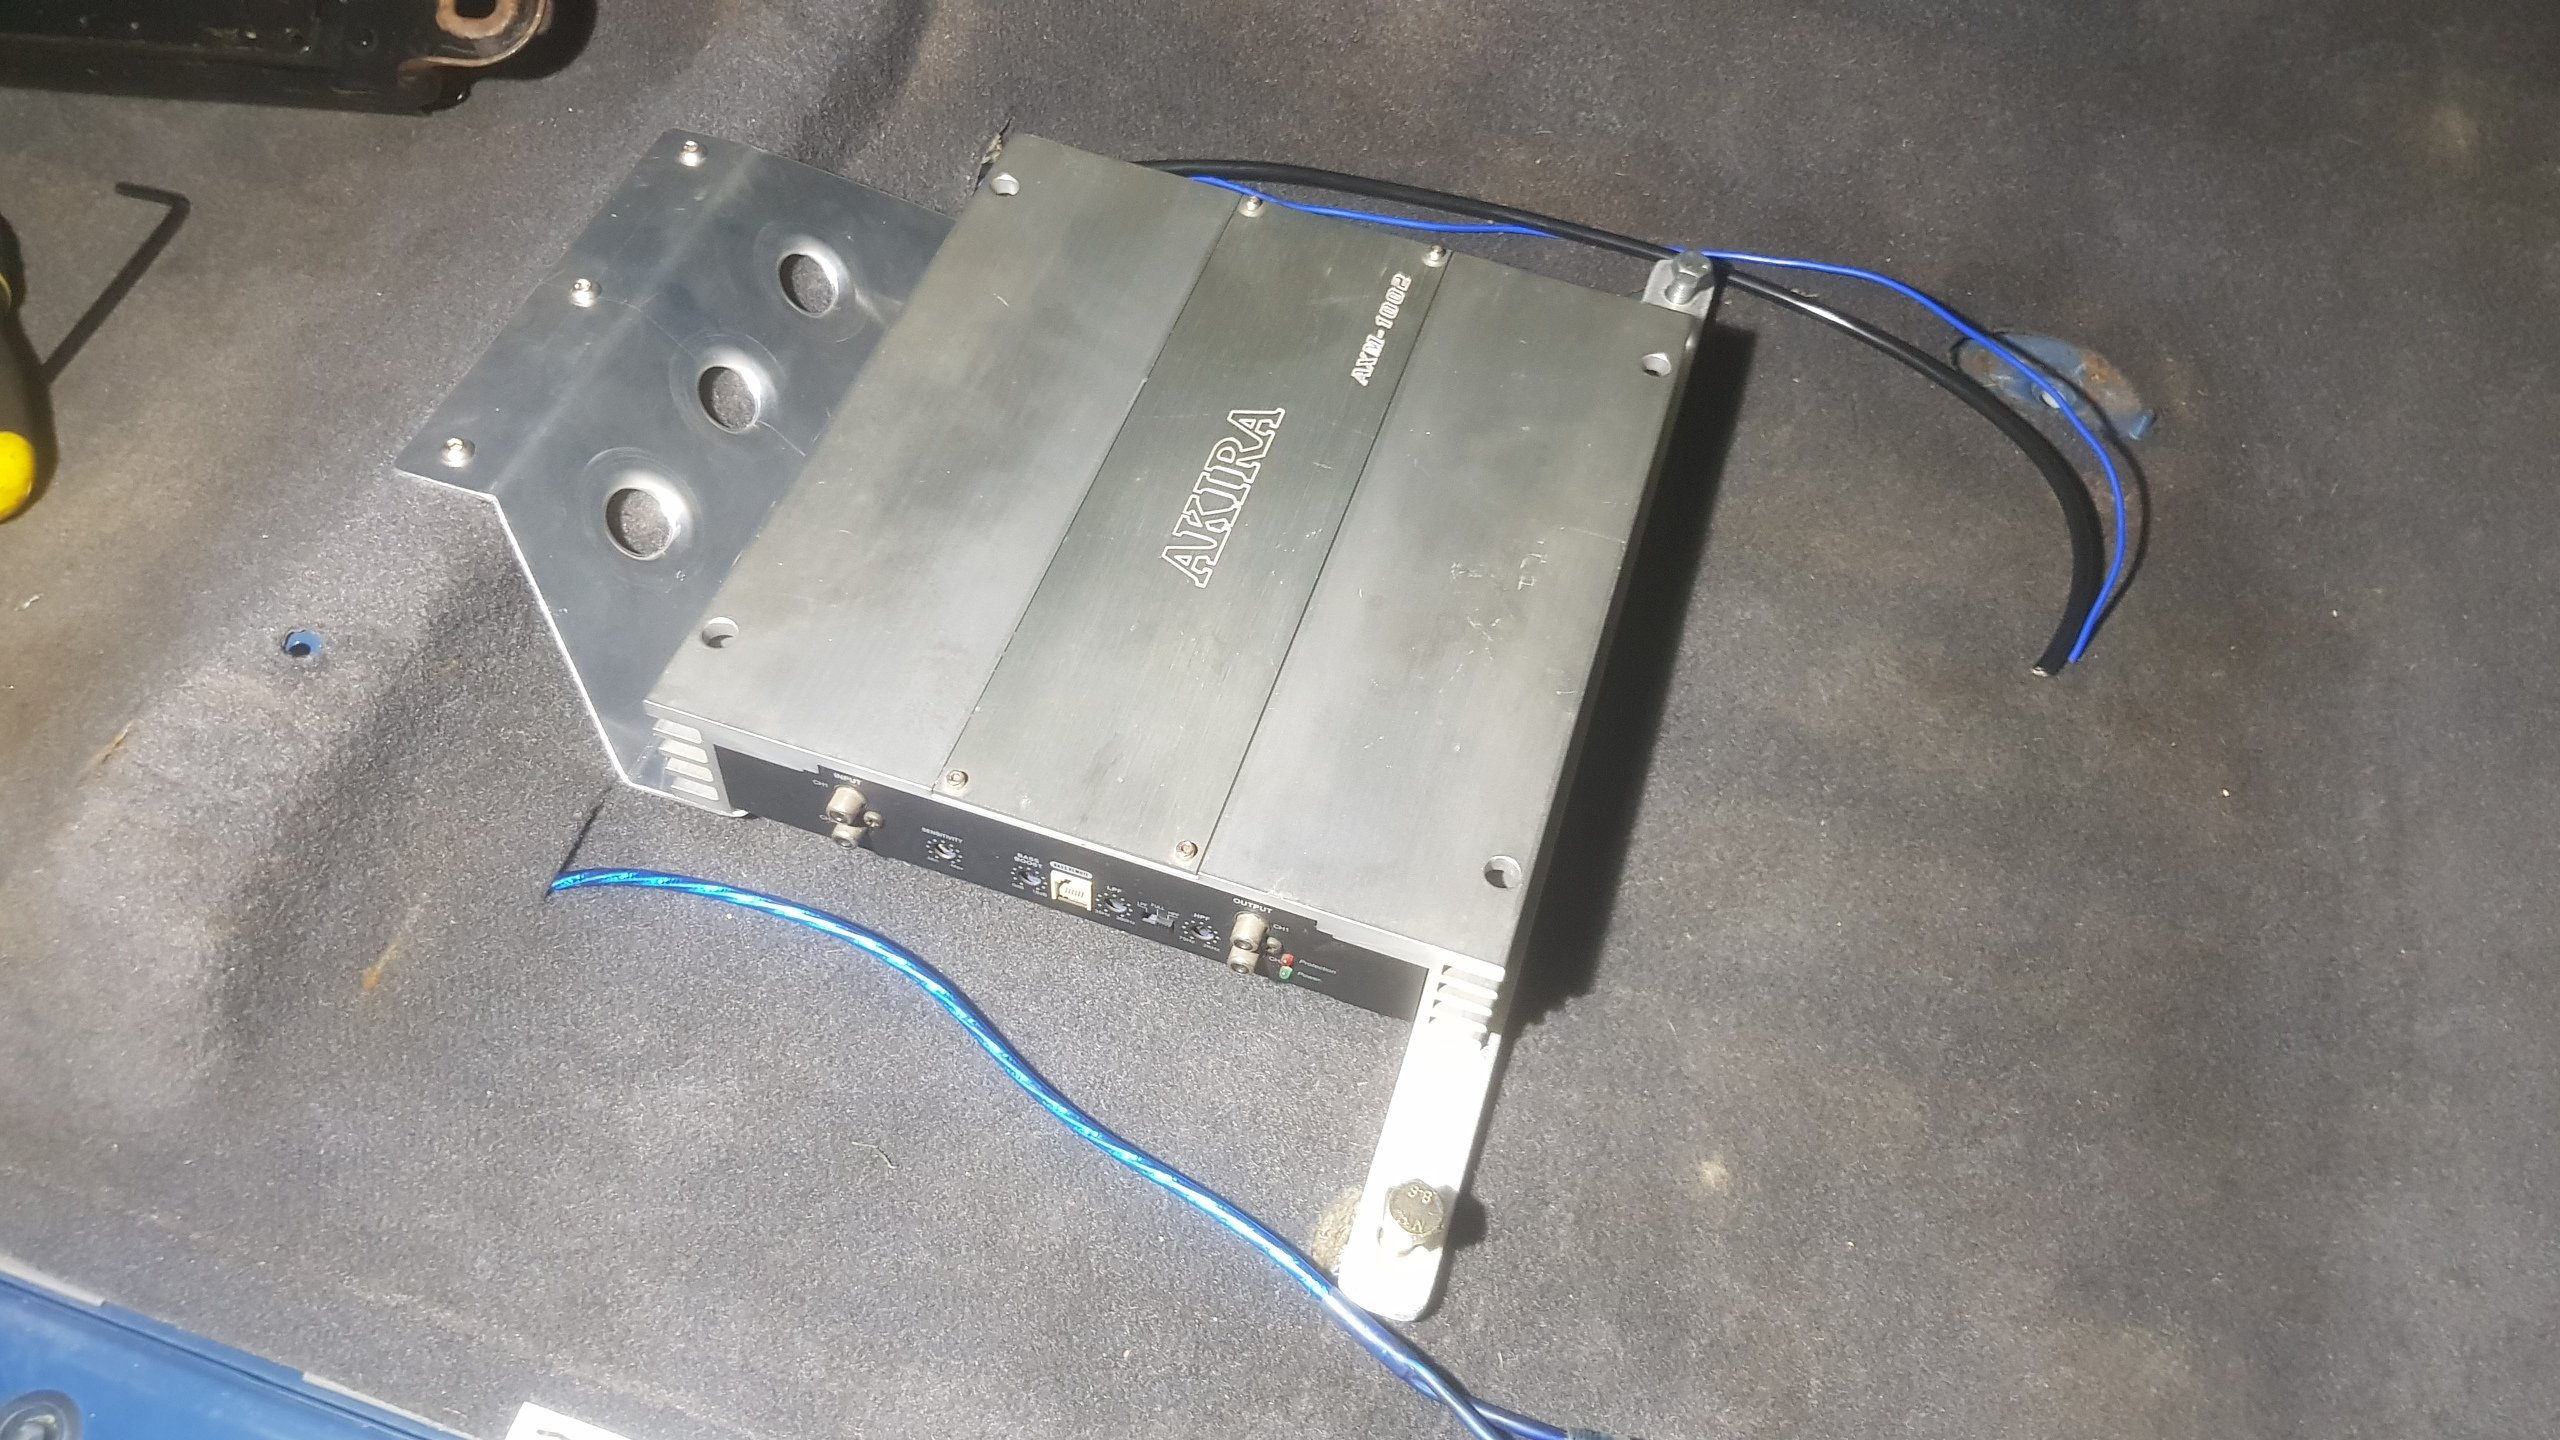
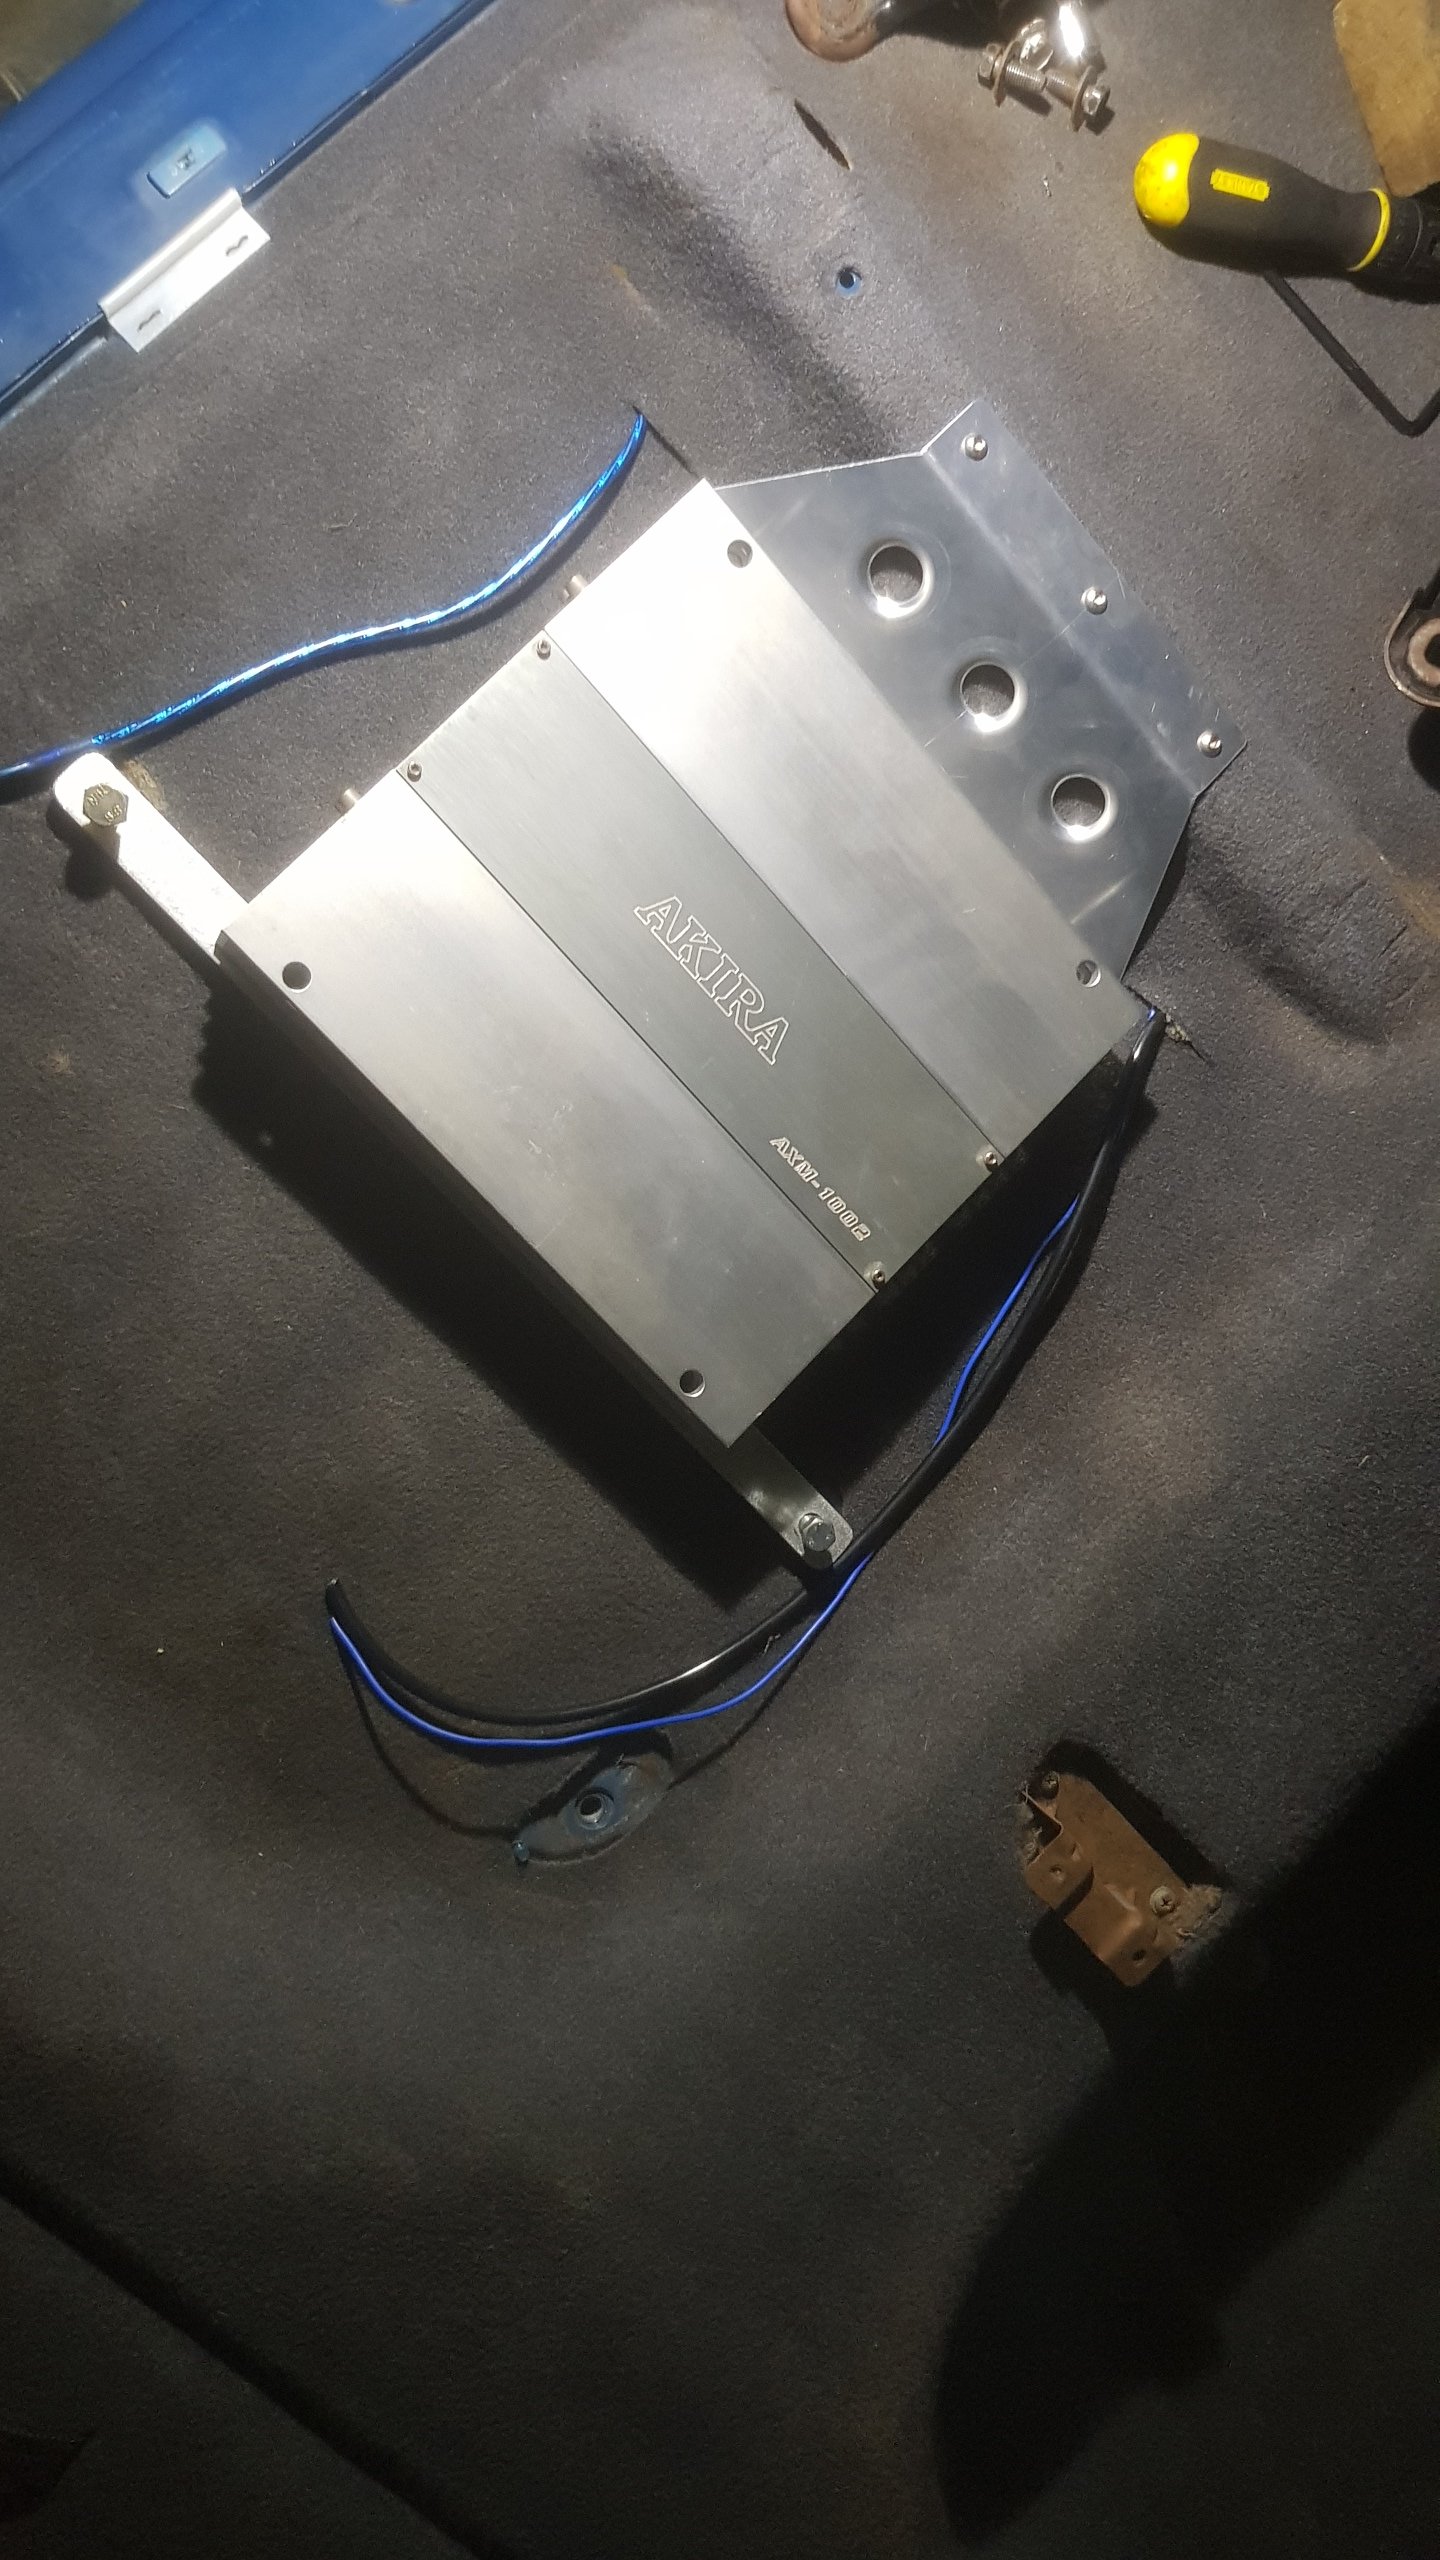
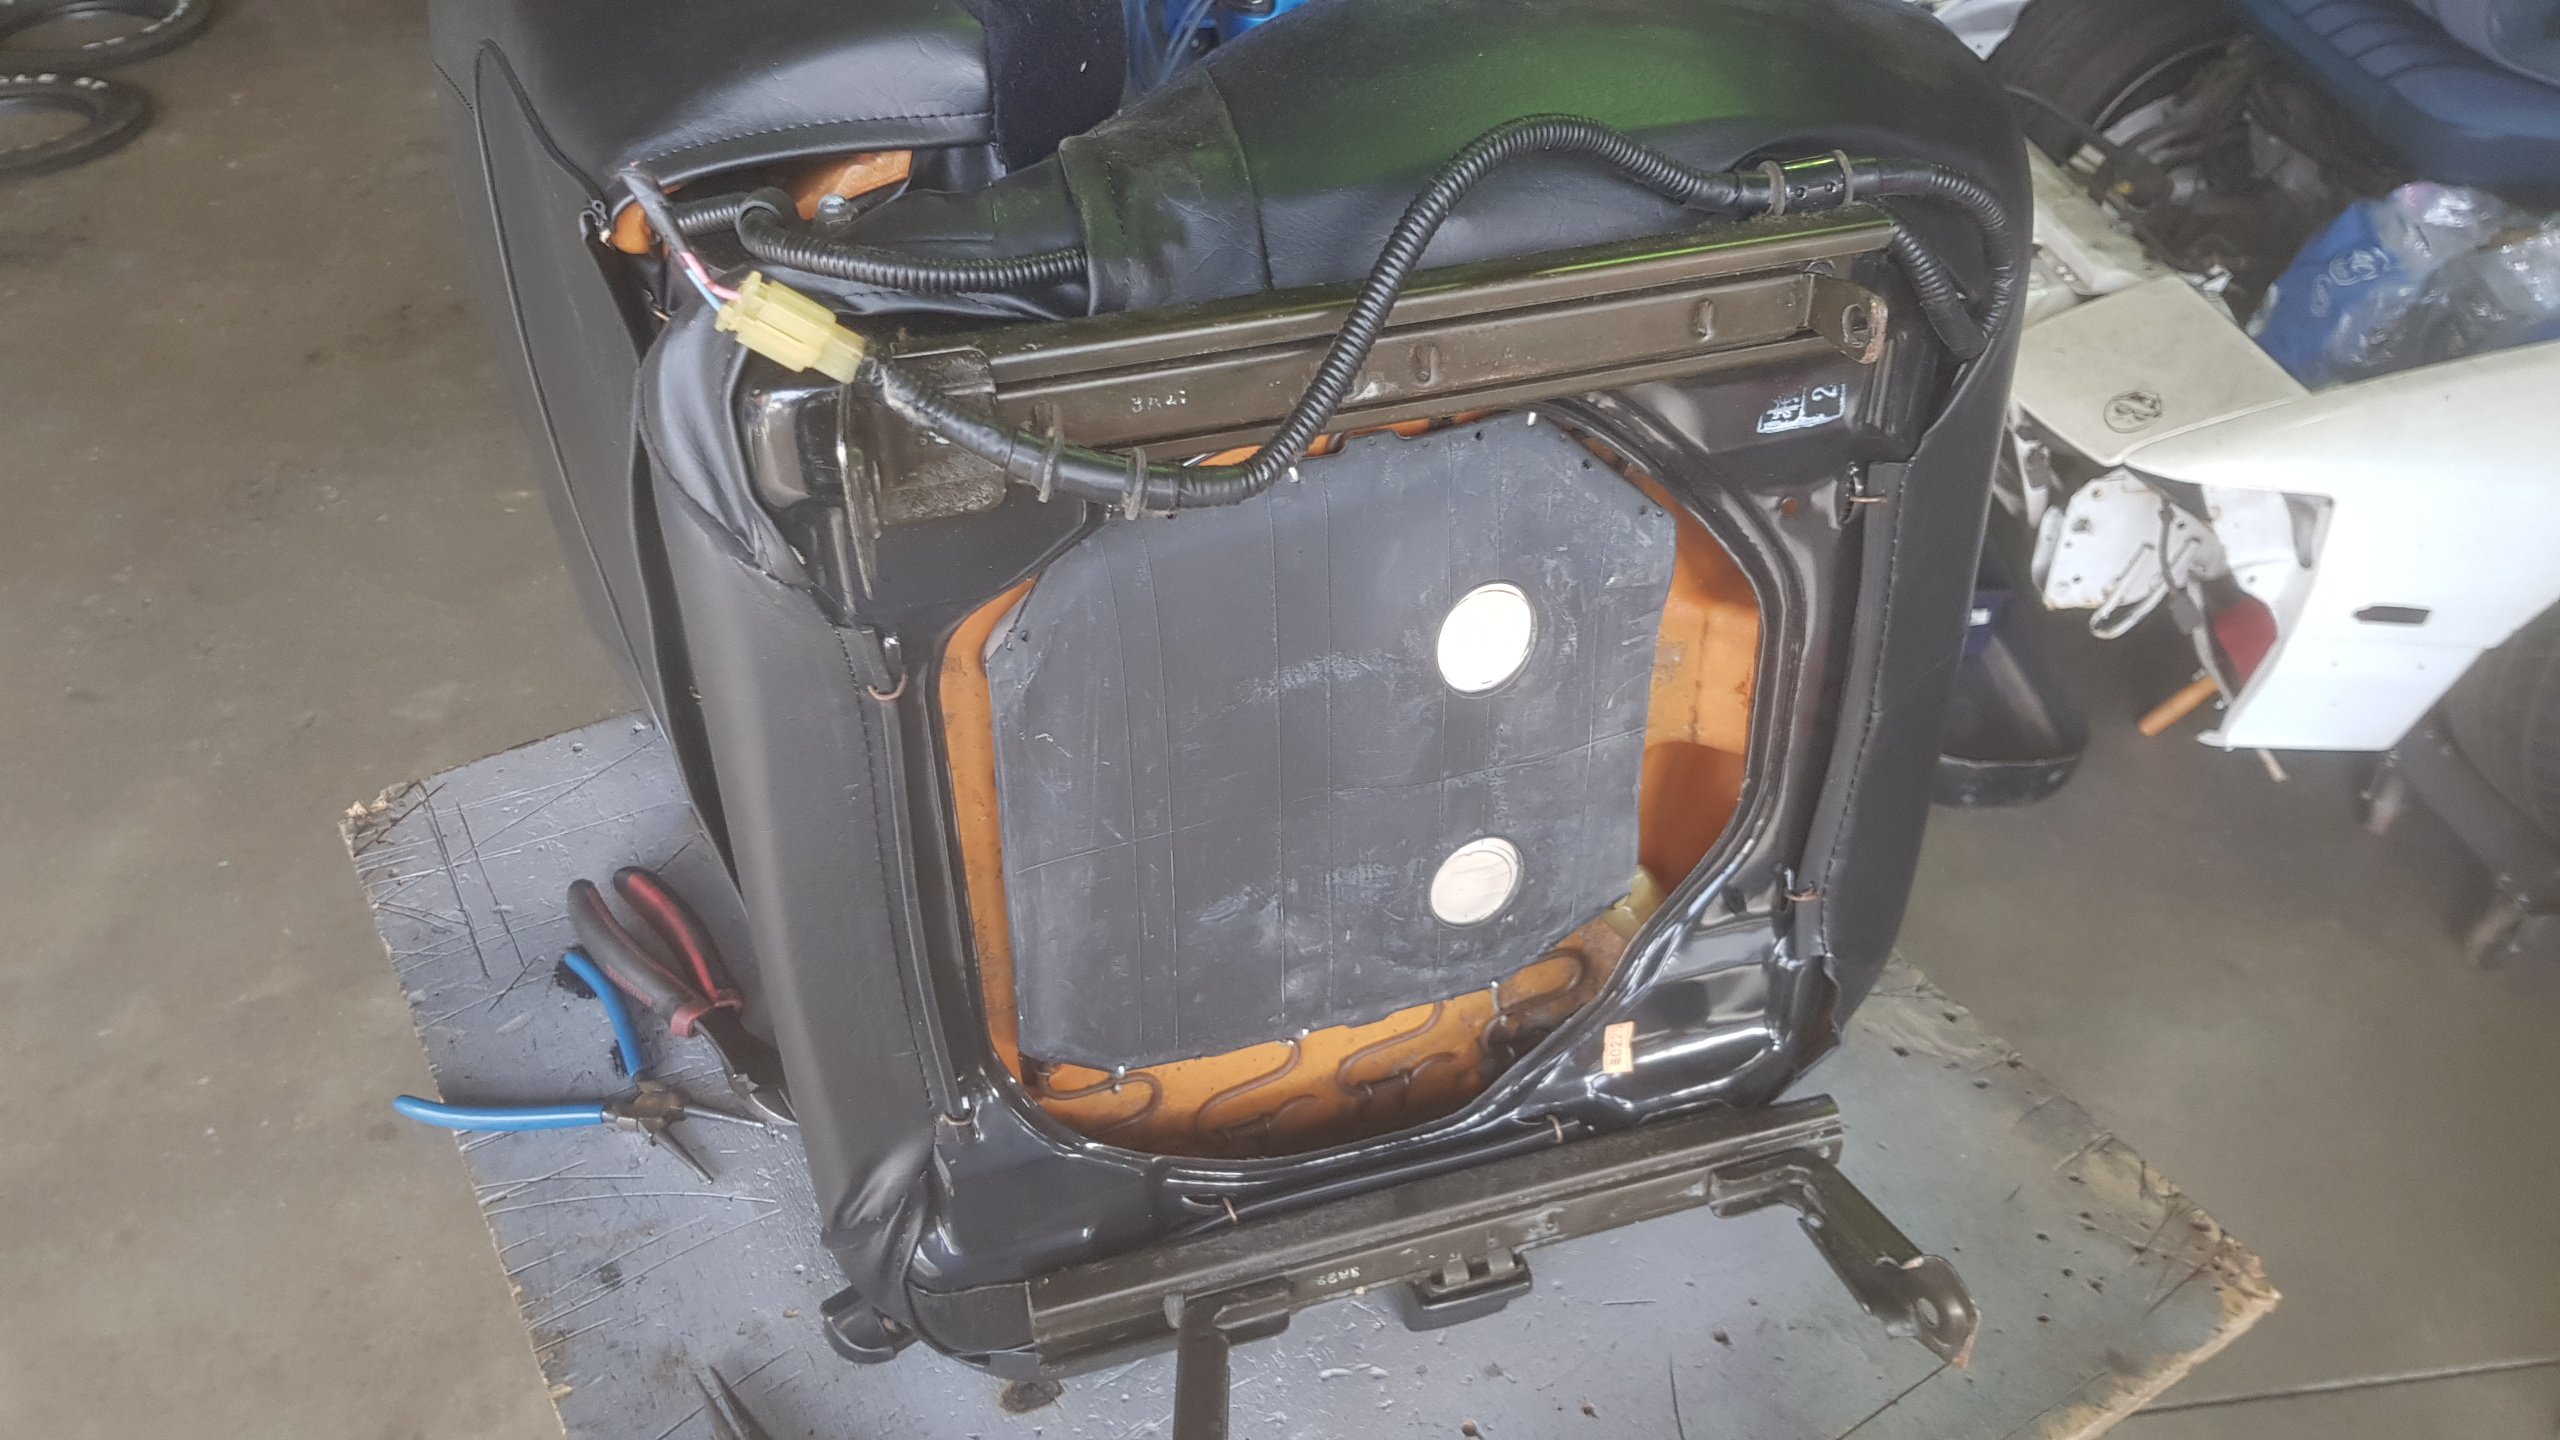
It was a tight fit, but I managed to fit the Amp under the passengers seat. I lifted it up off the carpet a little incase it gets warm from bulk doof doof. Whipped up some simple mounts this afternoon that allow the amp to be removed with taking the seat out if need be. Not that its hard to take seat out. I'l finish wiring the Amp tomorrow, hook the Sub up and see if I can rattle any bog out.
2 points
-
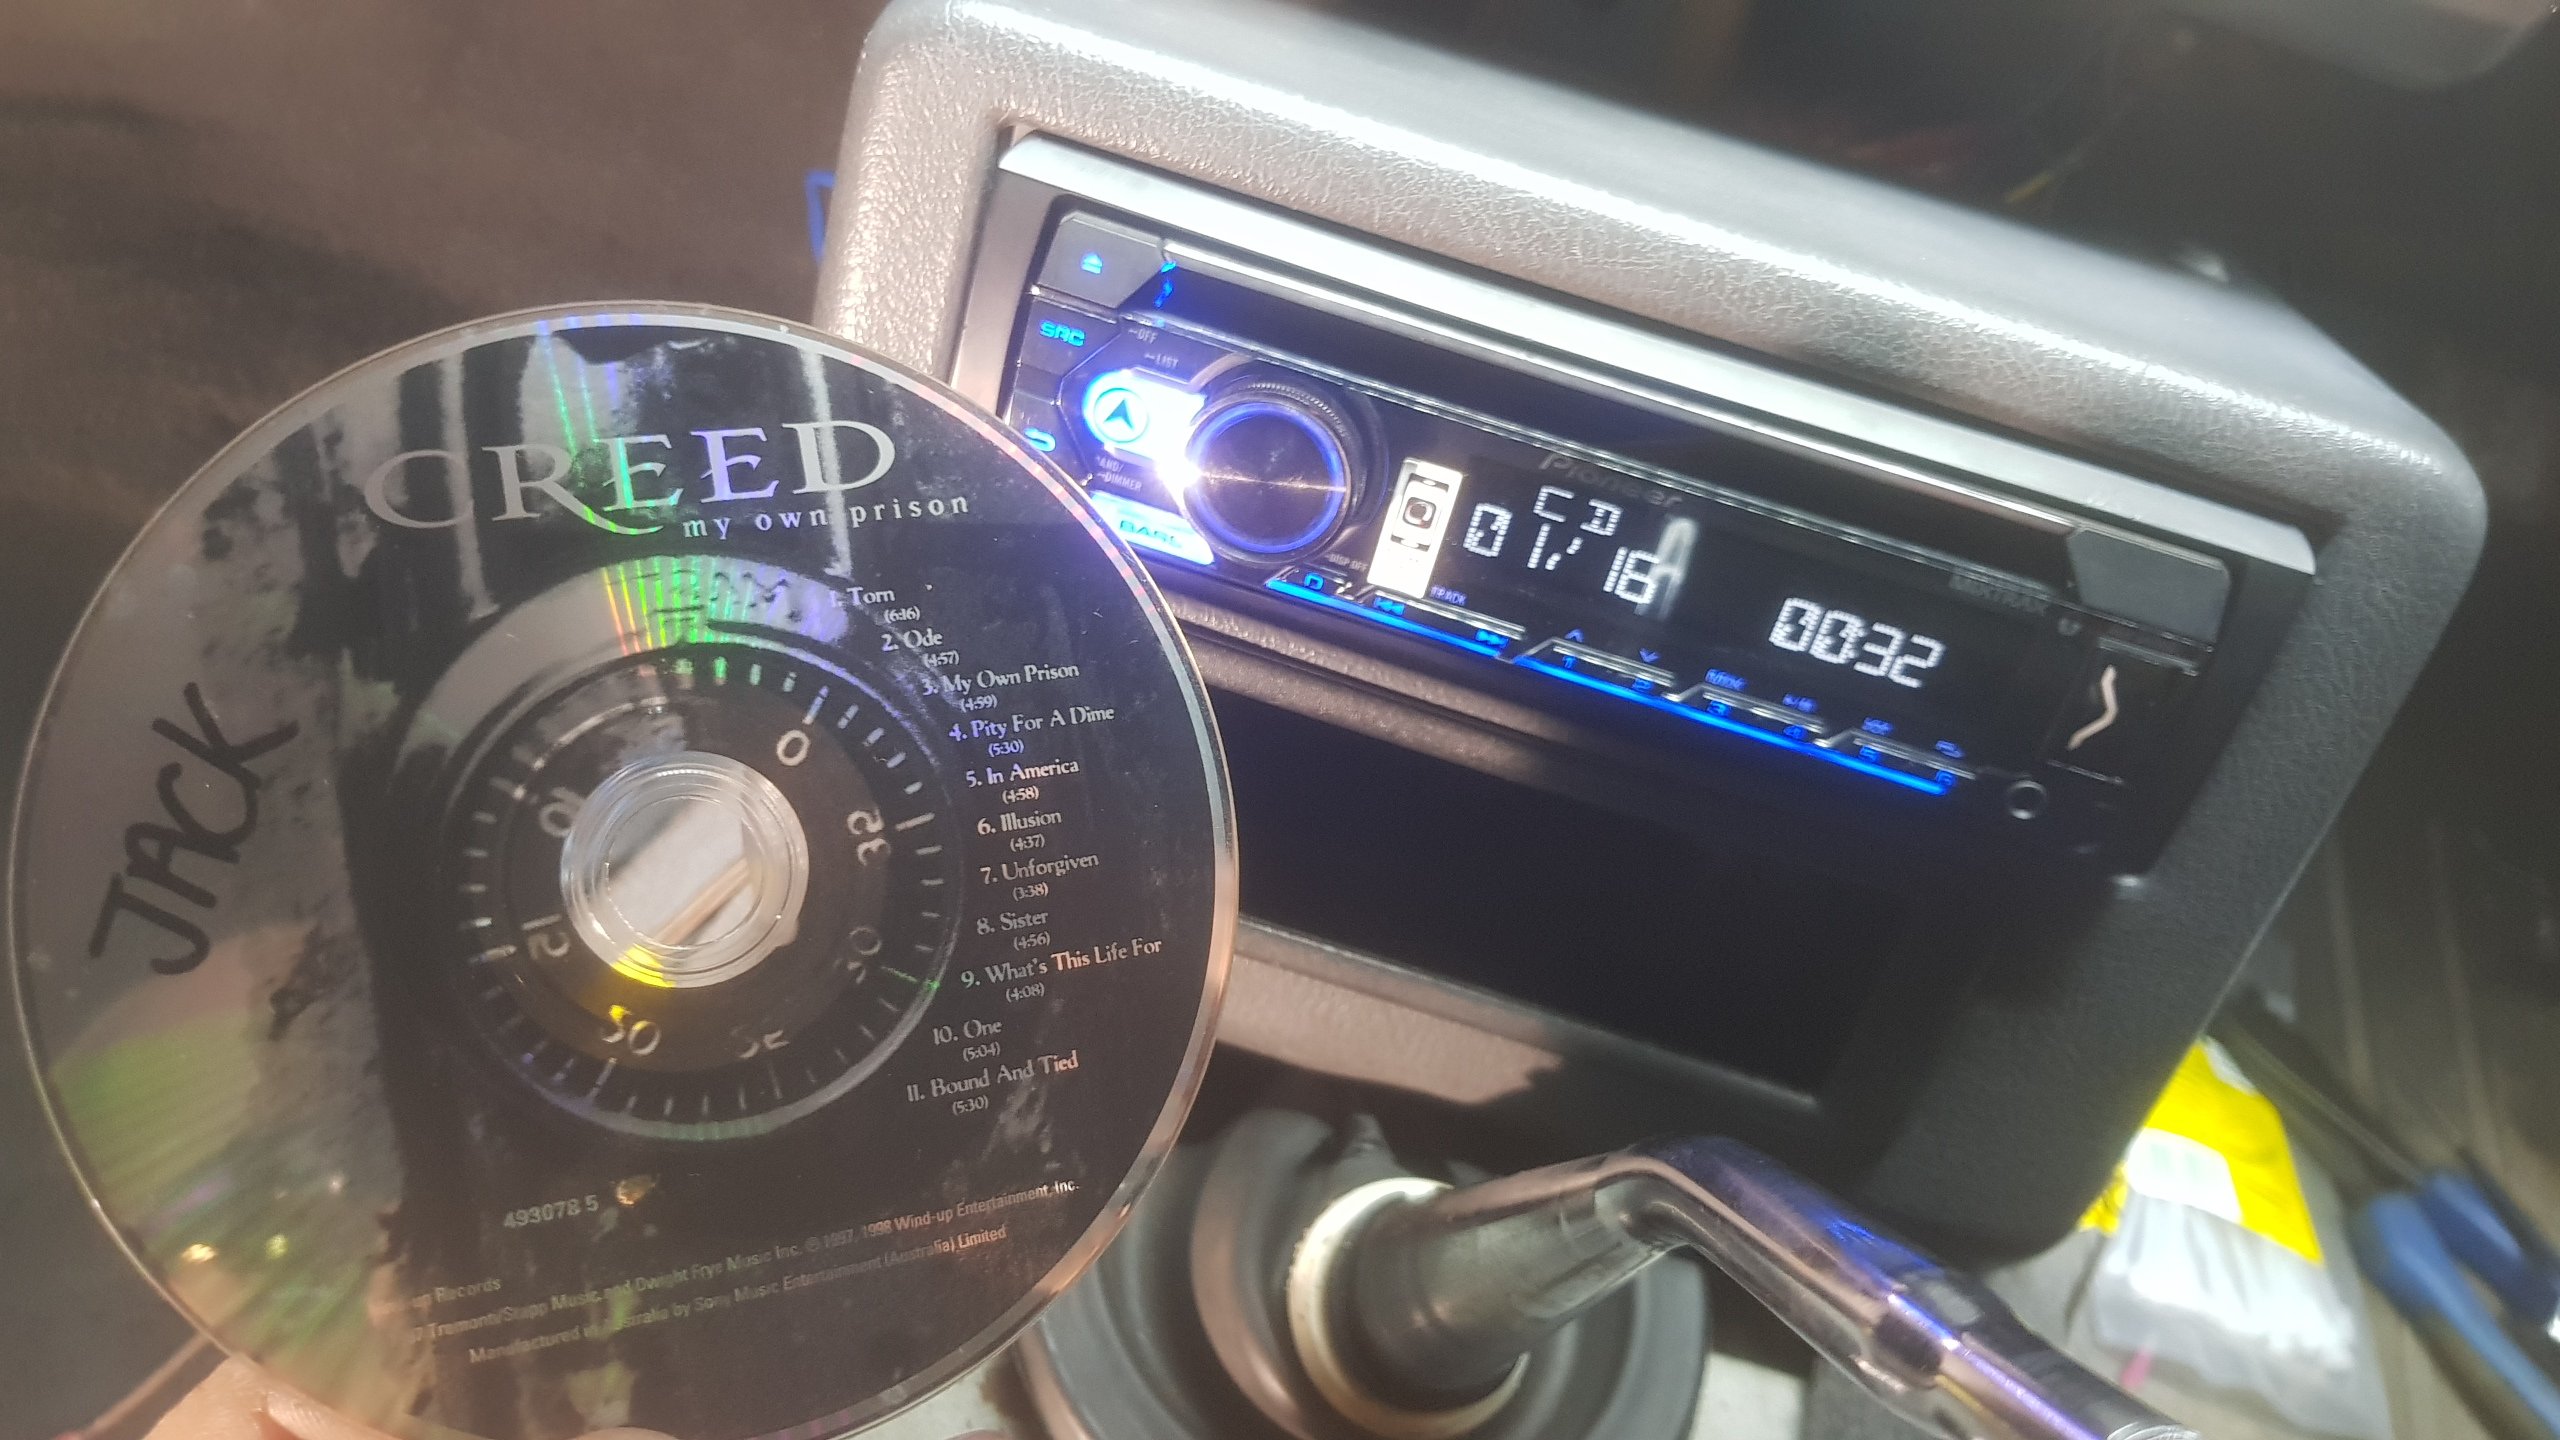
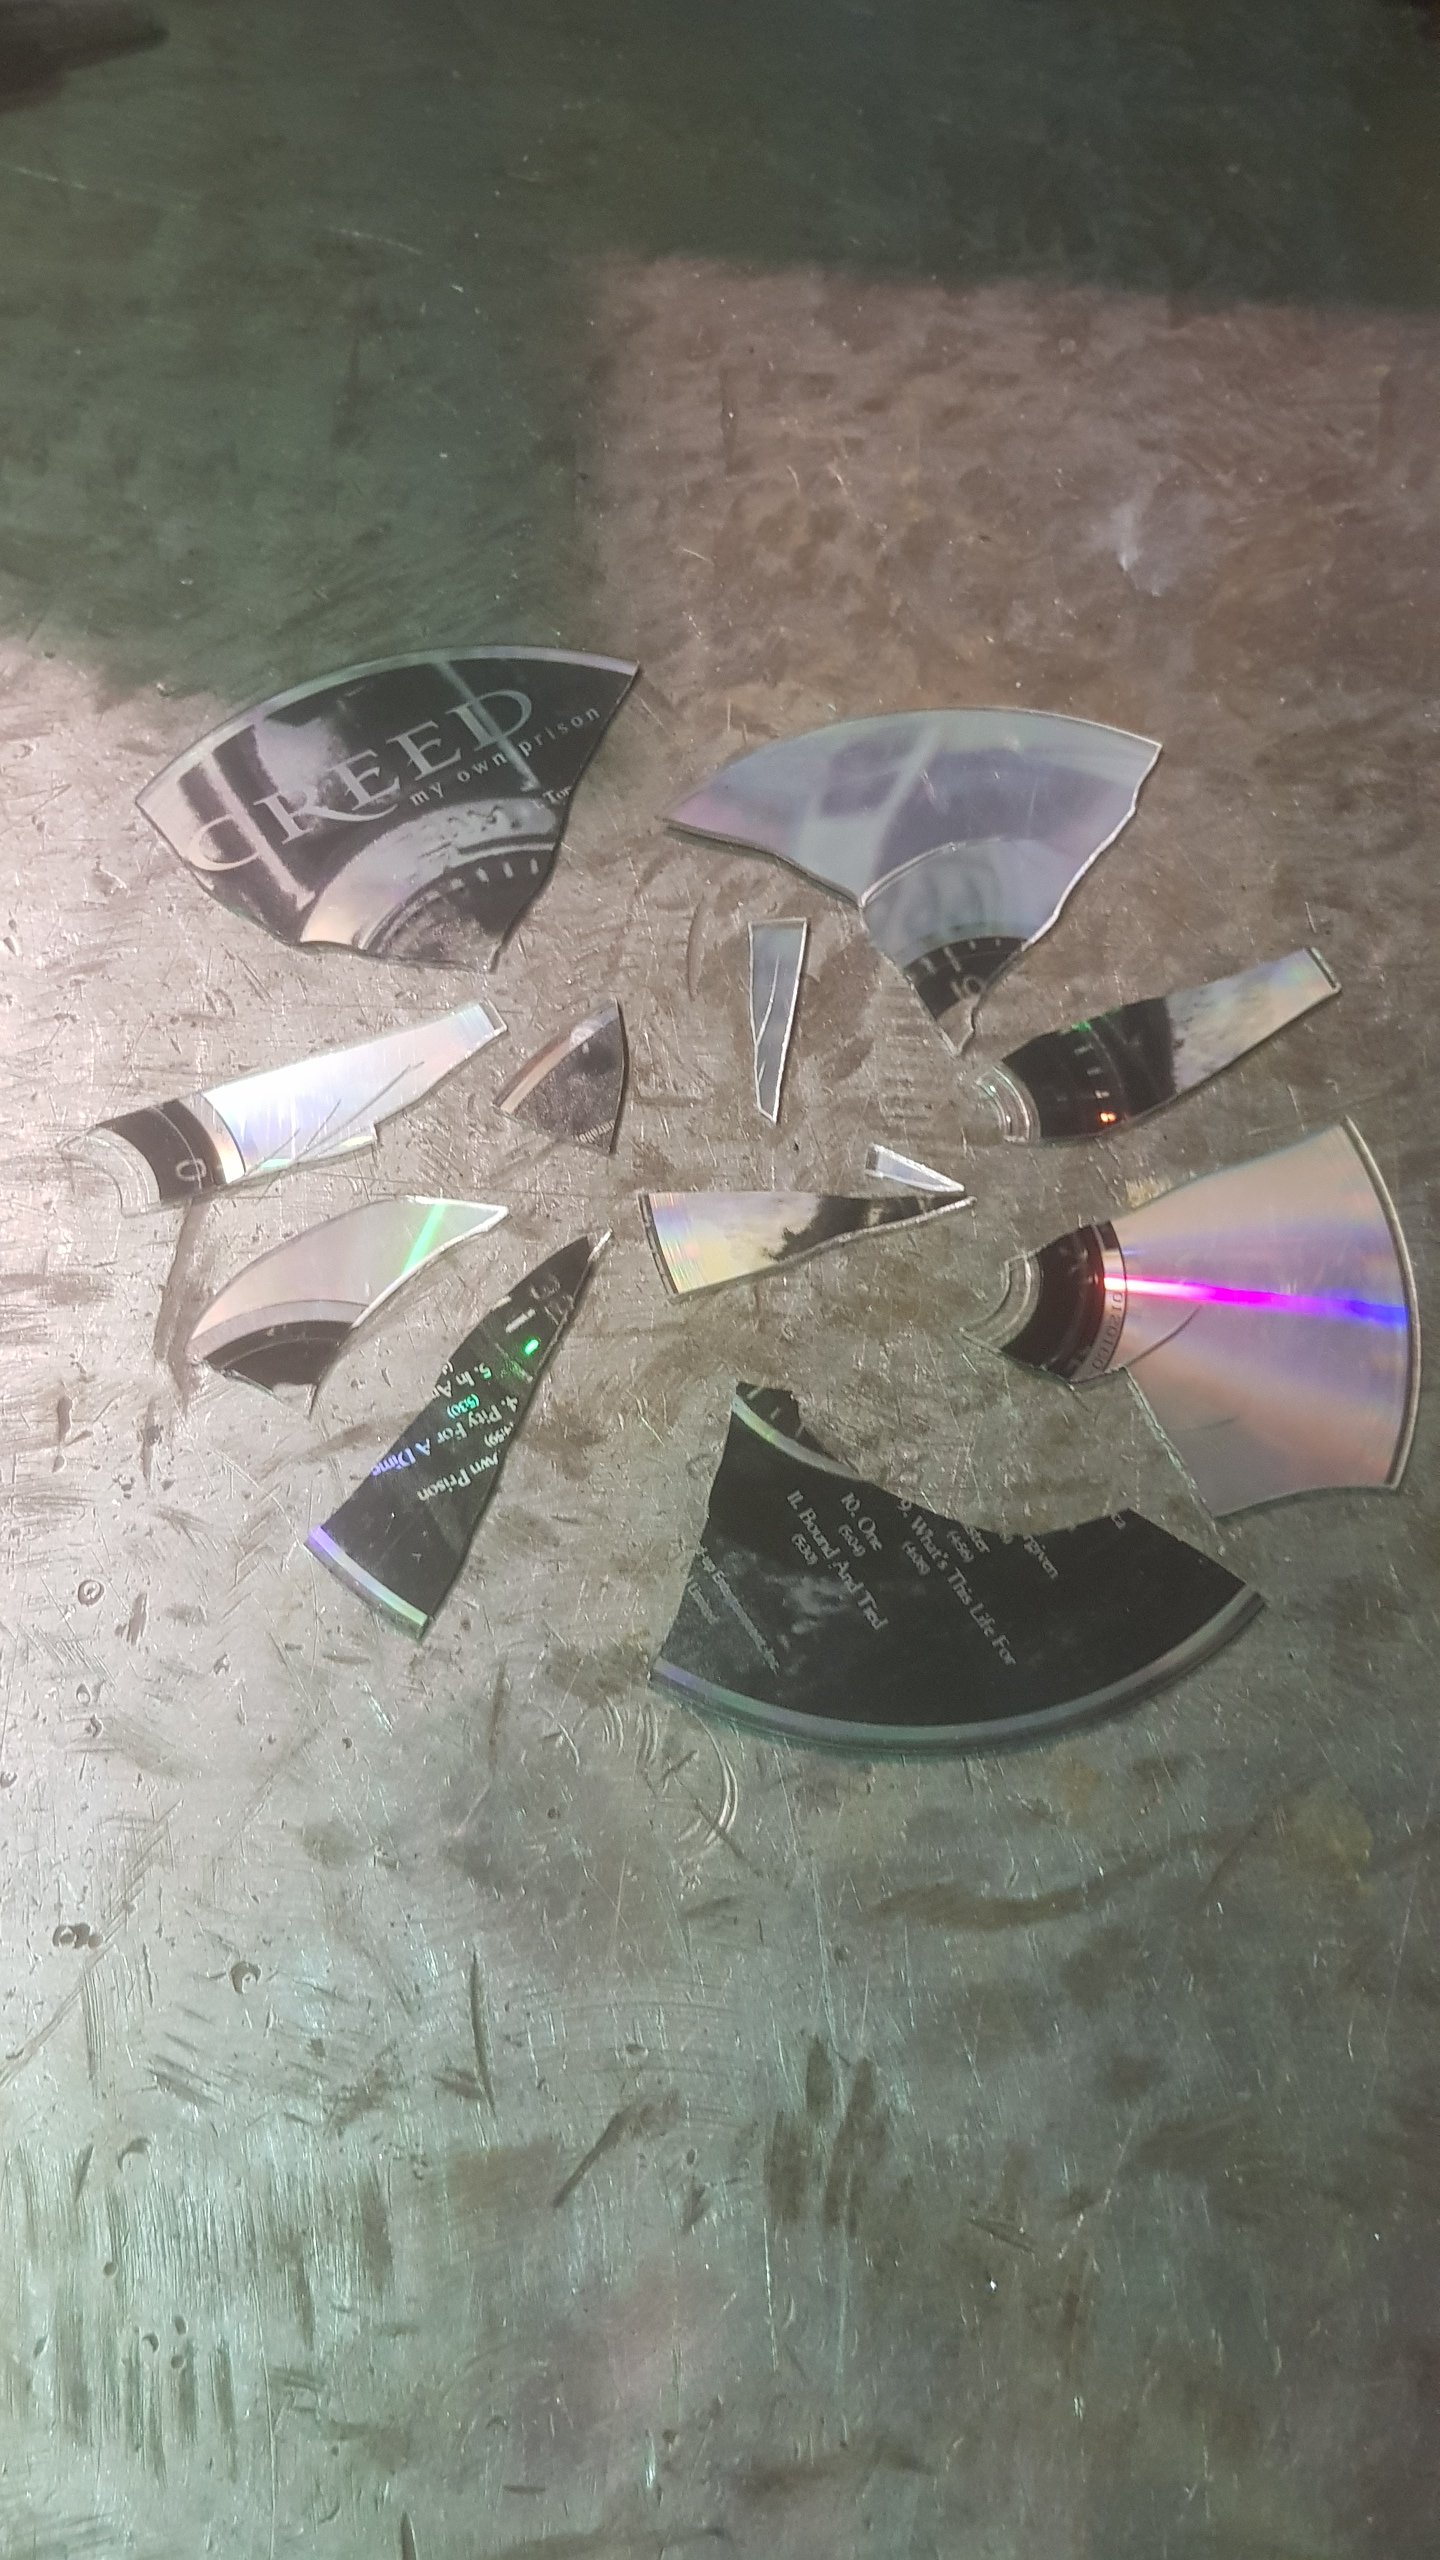
Got the all the wiring run, main fuse to Amp mounted and front speakers mounted. Wired headunit and powered it up. It spits out a Creed CD, so I did the world a favour.
2 points
-
I don't understand, you haven't driven it for months and you are worried about the price of petrol? If you want an economy car buy a Yaris.2 points
-
Got the bottom end assembled, windage tray and oil pickup on. Sump gasket pood onto the sump with black schmoo like factory. Replaced bypass spring and valve as it was cheap enough Had a cunt of a time with the crank seal in the oil pump, after about 10 attempts I got it in properly. Attempted to wrinkle black the rocker cover. Etch primed it in the paint booth and peaked there Sat the head on and test fitted the cheap headers, I'll get away with a 2.5" 90 bend off them and it'll line up nicely with the rest of the exhaust. Hopefully I can move the cat up and fit the reso and flexi in Unsurprisingly the dowel pins that came with aliexpress kit are shit, flop around in the head and don't for the block or the head bolts. Fitted the shifter cables and sat the crv shifter in to see where stuff wants to sit. I'll need to very carefully drill the firewall and miss the heater core and ducting. I can pretend I'm a rally/race driver as the crv shifter is super tall Mounted the oil feed plate to feel better about fighting the rings and crank seal today2 points
-
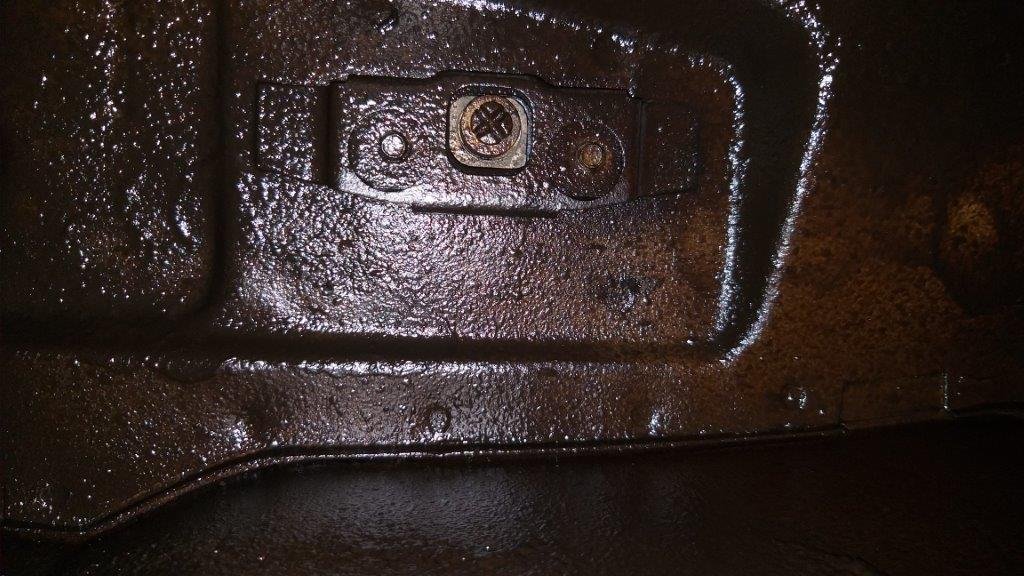
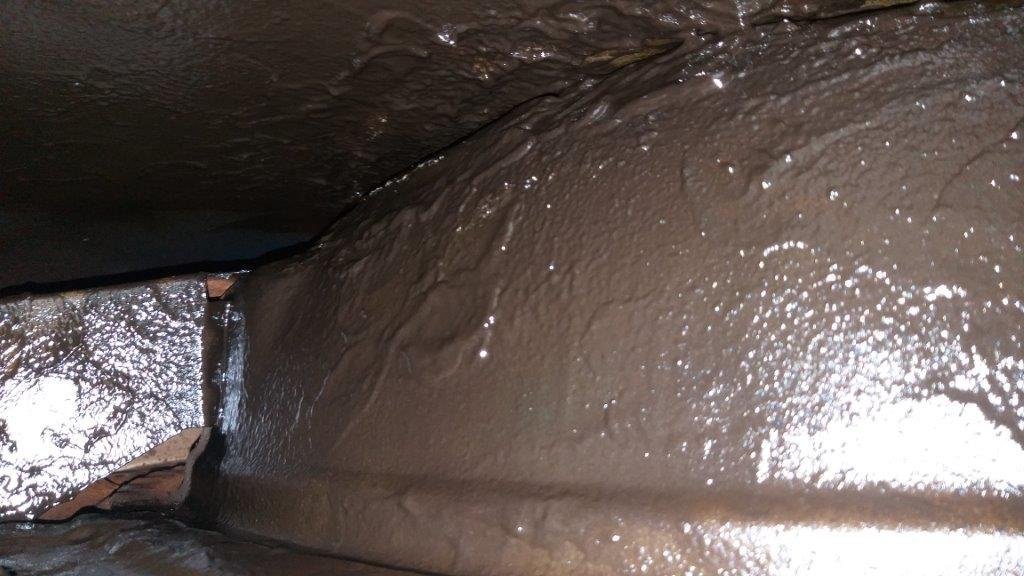
And .... that's the last of the rust proofing done. Pumped two litres of goo into the driver's side rear quarter inner as well as both front chassis braces. Then spent the rest of the morning cleaning up the mess. With that mucky job behind me at least now I can get on to the good stuff, being the reassembly.
2 points
-
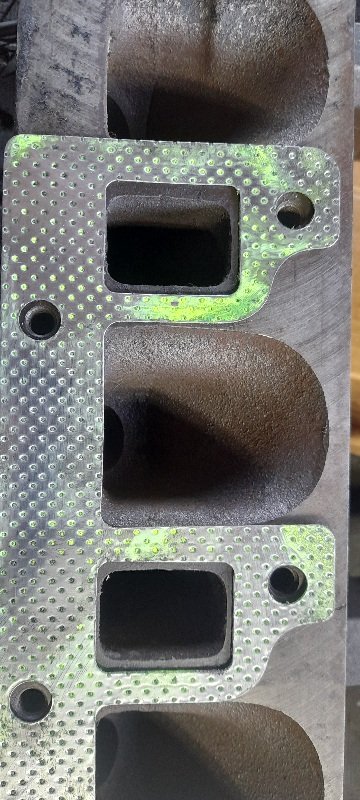
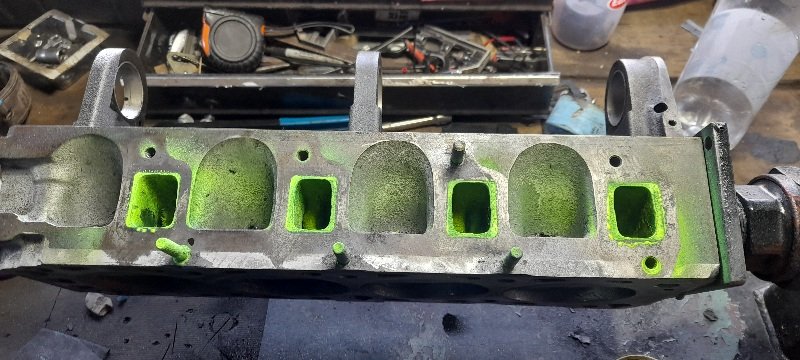
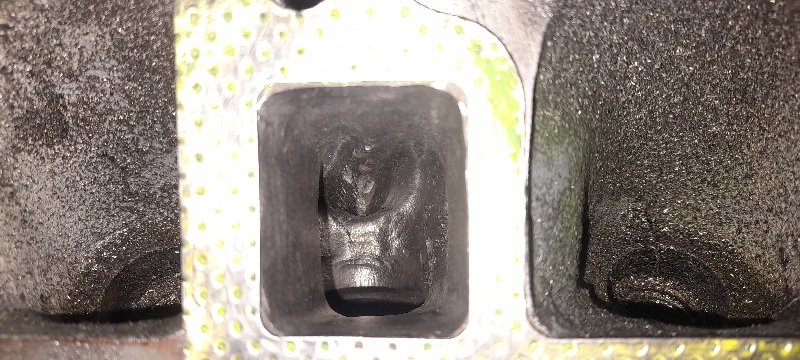
I made a start on the head today ( bit of work ). the exhaust ports are going to be opened up being a turbo so I started with that side .. might just do a bit in the evenings after work.. this is a standard pinto exhaust port. the manifold is allready matched to the gasket so I just put the gasket on the head and painted it to give me some guide lines. and here's what I've done so far ... I'm paranoid about going through in one side where it is thin so I didn't do that much that side ... just opened it all up.. still only roughed at this point.
2 points
-
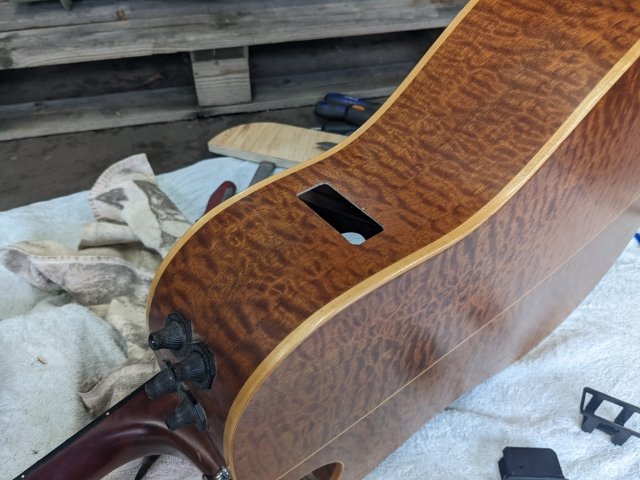
Yea so I have set up a budget recording studio in my shed, it works pretty well. I have been playing with getting a good sound when recording acoustic guitar. My main go to acoustic is a K. Yairi that I bought brand new in 1992. It has amazing looks, sound and playability, but access to the battery for the pickup has always been a drag, you have to loosen off the strings and get a fat hand in through the soundhole. Also if it is left plugged in it will drain the battery. So I ordered a Gotoh panel mount battery box and got to work. This was pretty scary as this guitar is pretty much my most prized possession. All seems good. I added a switch to isolate the battery as well, so if I leave it overnight plugged in and set up it will still work the next day...
2 points
-
Thanks to everyone that has offered. I'm obviously not above accepting charity, as I've been on the receiving end of an incredible amount of it to get this far with things. it's very humbling that anyone would want to help pay for another engine. However I'll be happy to play around with the 1300cc setup for a while. I found all of the 2NZ motor parts needed, I thought I might have thrown some of them out. It looks like all I need is the right length PK belt to suit the addition of the mechanical water pump. Then it'll be good to go once I've swapped the flywheel and clutch over. I havent pulled the old block and the gearbox out yet, but it's not too much work left. The intake manifold has no issues with having the alternator in the high mounted position. The dipstick very nearly fits in the correct spot too. But not quite. I've taken out my VVTI travel stopper, and set the cam to the proper position instead of 1 tooth back. I have confirmed that with the cam in the correct place there are no piston / valve issues. One benefit of the 1300 motor is that there's a little bit more room for the intake, as the block is shorter. So it all sits lower in the engine bay. Looking forward to it!
2 points
-
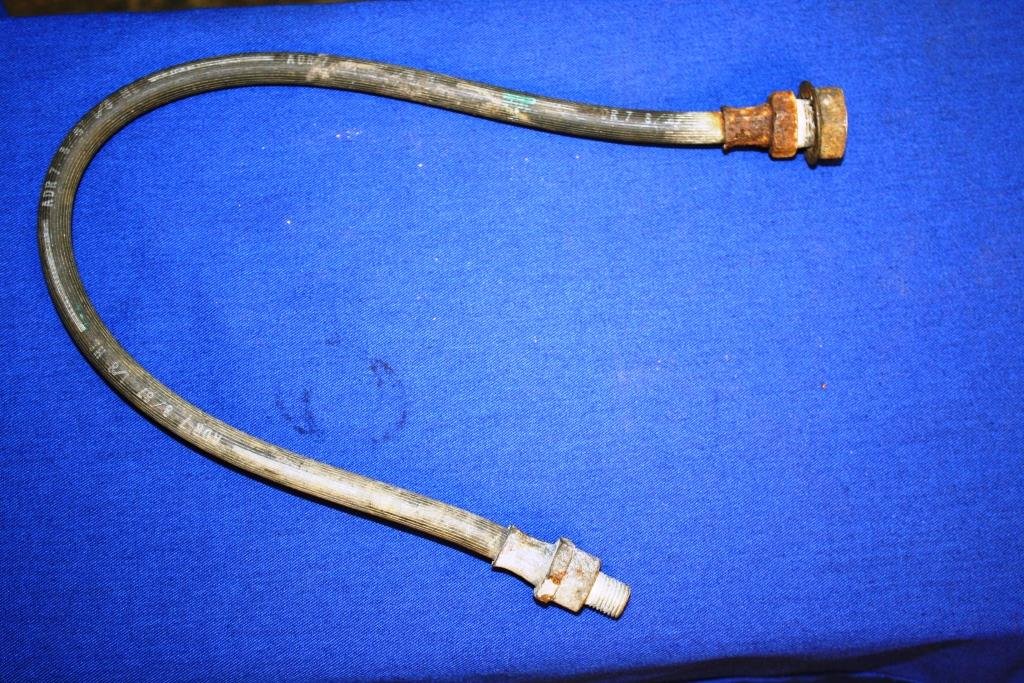
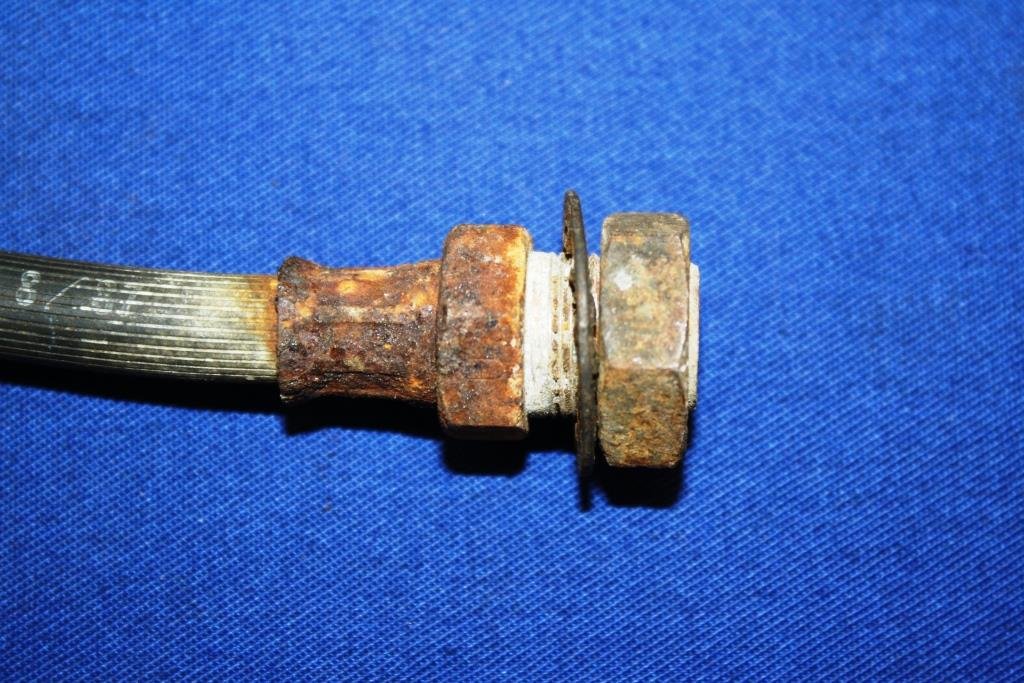
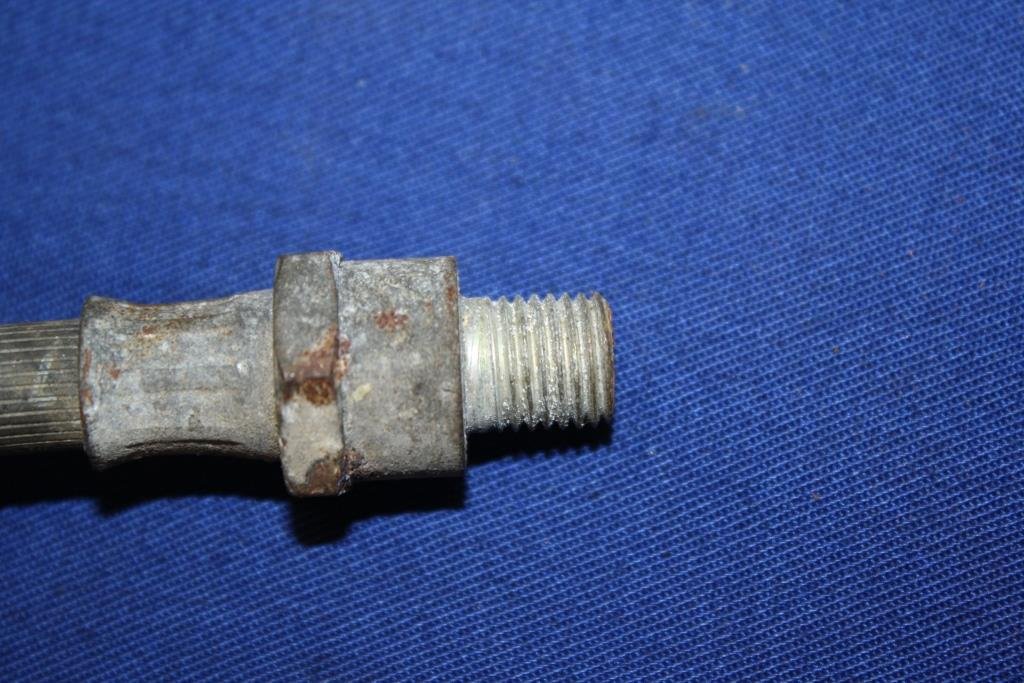
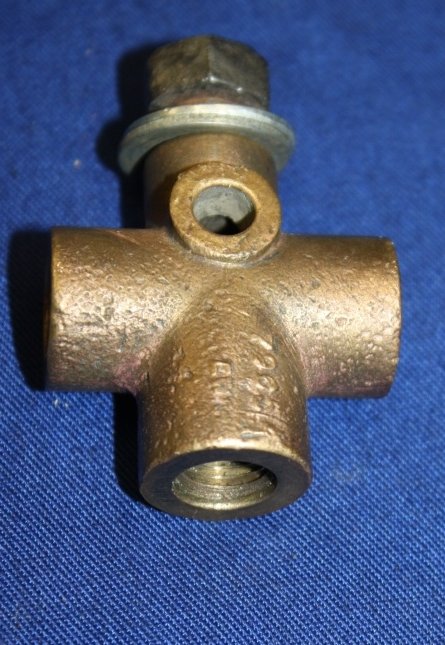
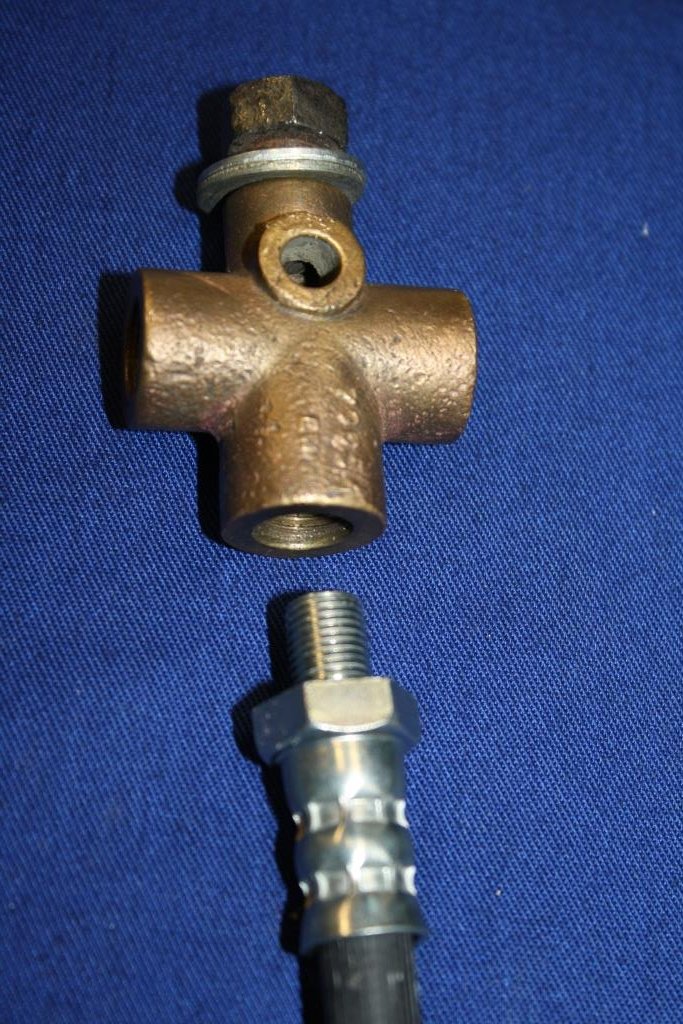
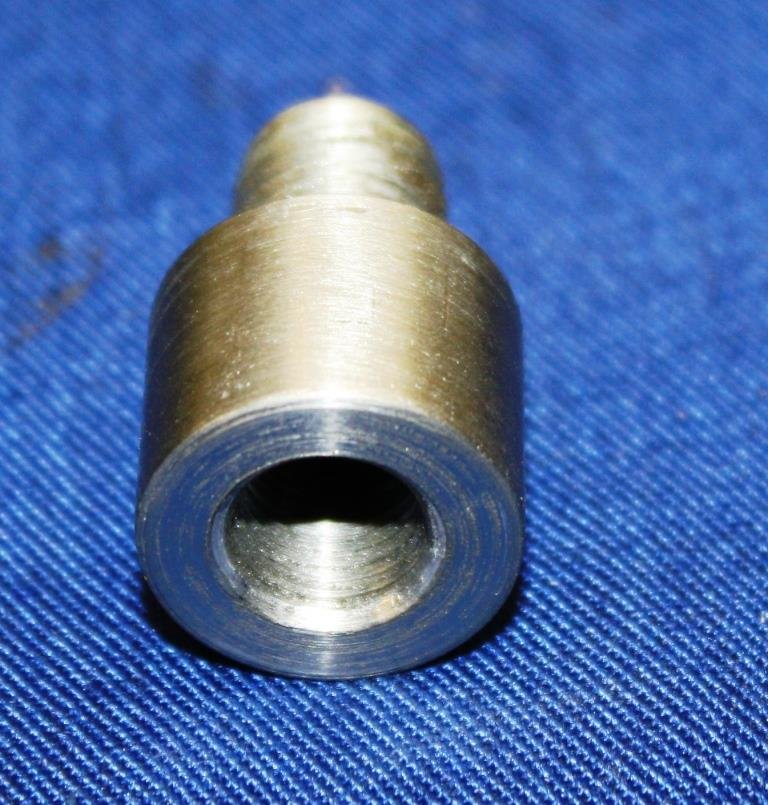
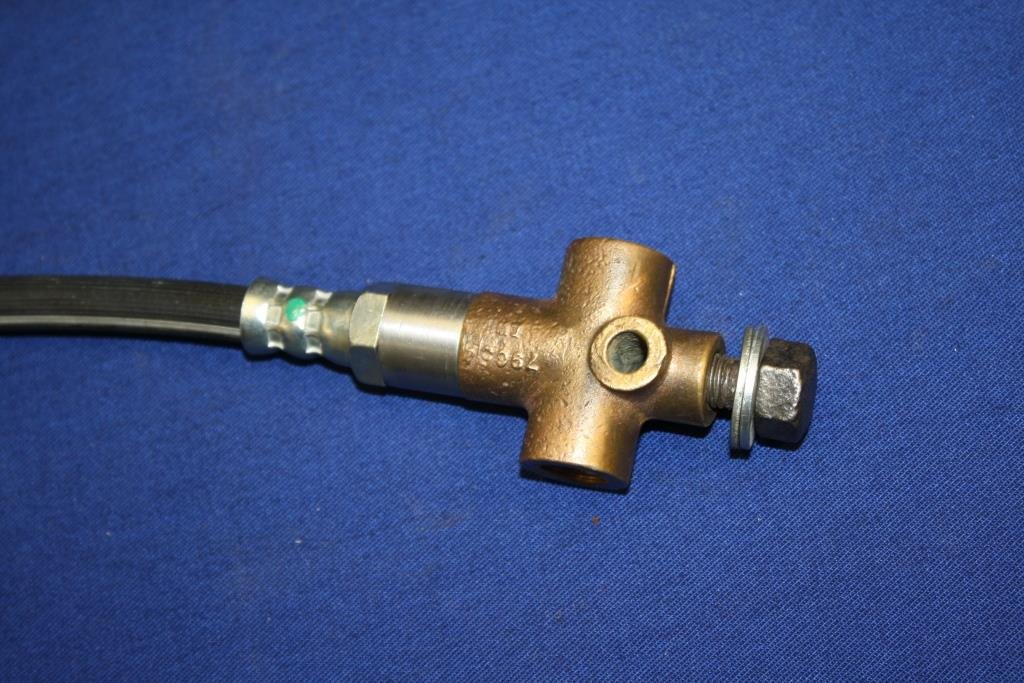
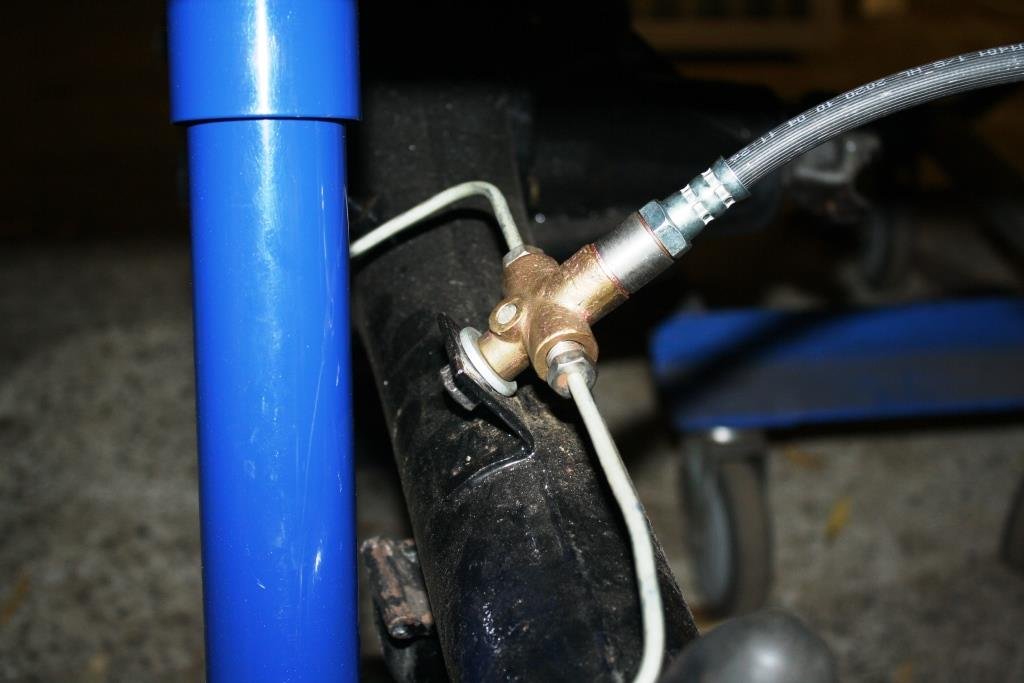
Having difficulty identifying the original rear brake hose. At the risk of sounding like a grumpy old man (yeah I know……), buying spare parts in our modern world can be a bit of a circus. Recent trip to Reppco with afore mentioned hose in hand for example. After failing miserably to identify the hose the “spare parts salesperson” ( I use that phrase with some hesitation) asks for the cars Rego. When informed it’s BP4*** their millennial face glazed over and he/she/they/it/…..etc. starts looking for a safe space to invent even more PC correct gender fluid pronouns! Rant over……… I made the call to use an HQ front hose (same as on the fronts) and hopefully still available in another 50 years time. How could I not reuse the original, glorious 70 plus year old brass 3-way plumbing fitting? Problem was I needed a male 7/16” NF 20 TPI to female 3/8 NF 24 TPI adaptor. (When it comes to brake plumbing gender diversity is a myth!). Found a piece of scrap ¾” round and fired up the faithful old Emco. Yes I know I could have just gone and bought some hardware but Rigamortice and I had a great evening sampling the new brew with Genesis blasting on the Video/Sound system and the neat and tidy result works for me. Sometimes the journey or process is just as important and rewarding as the end product.
2 points
-
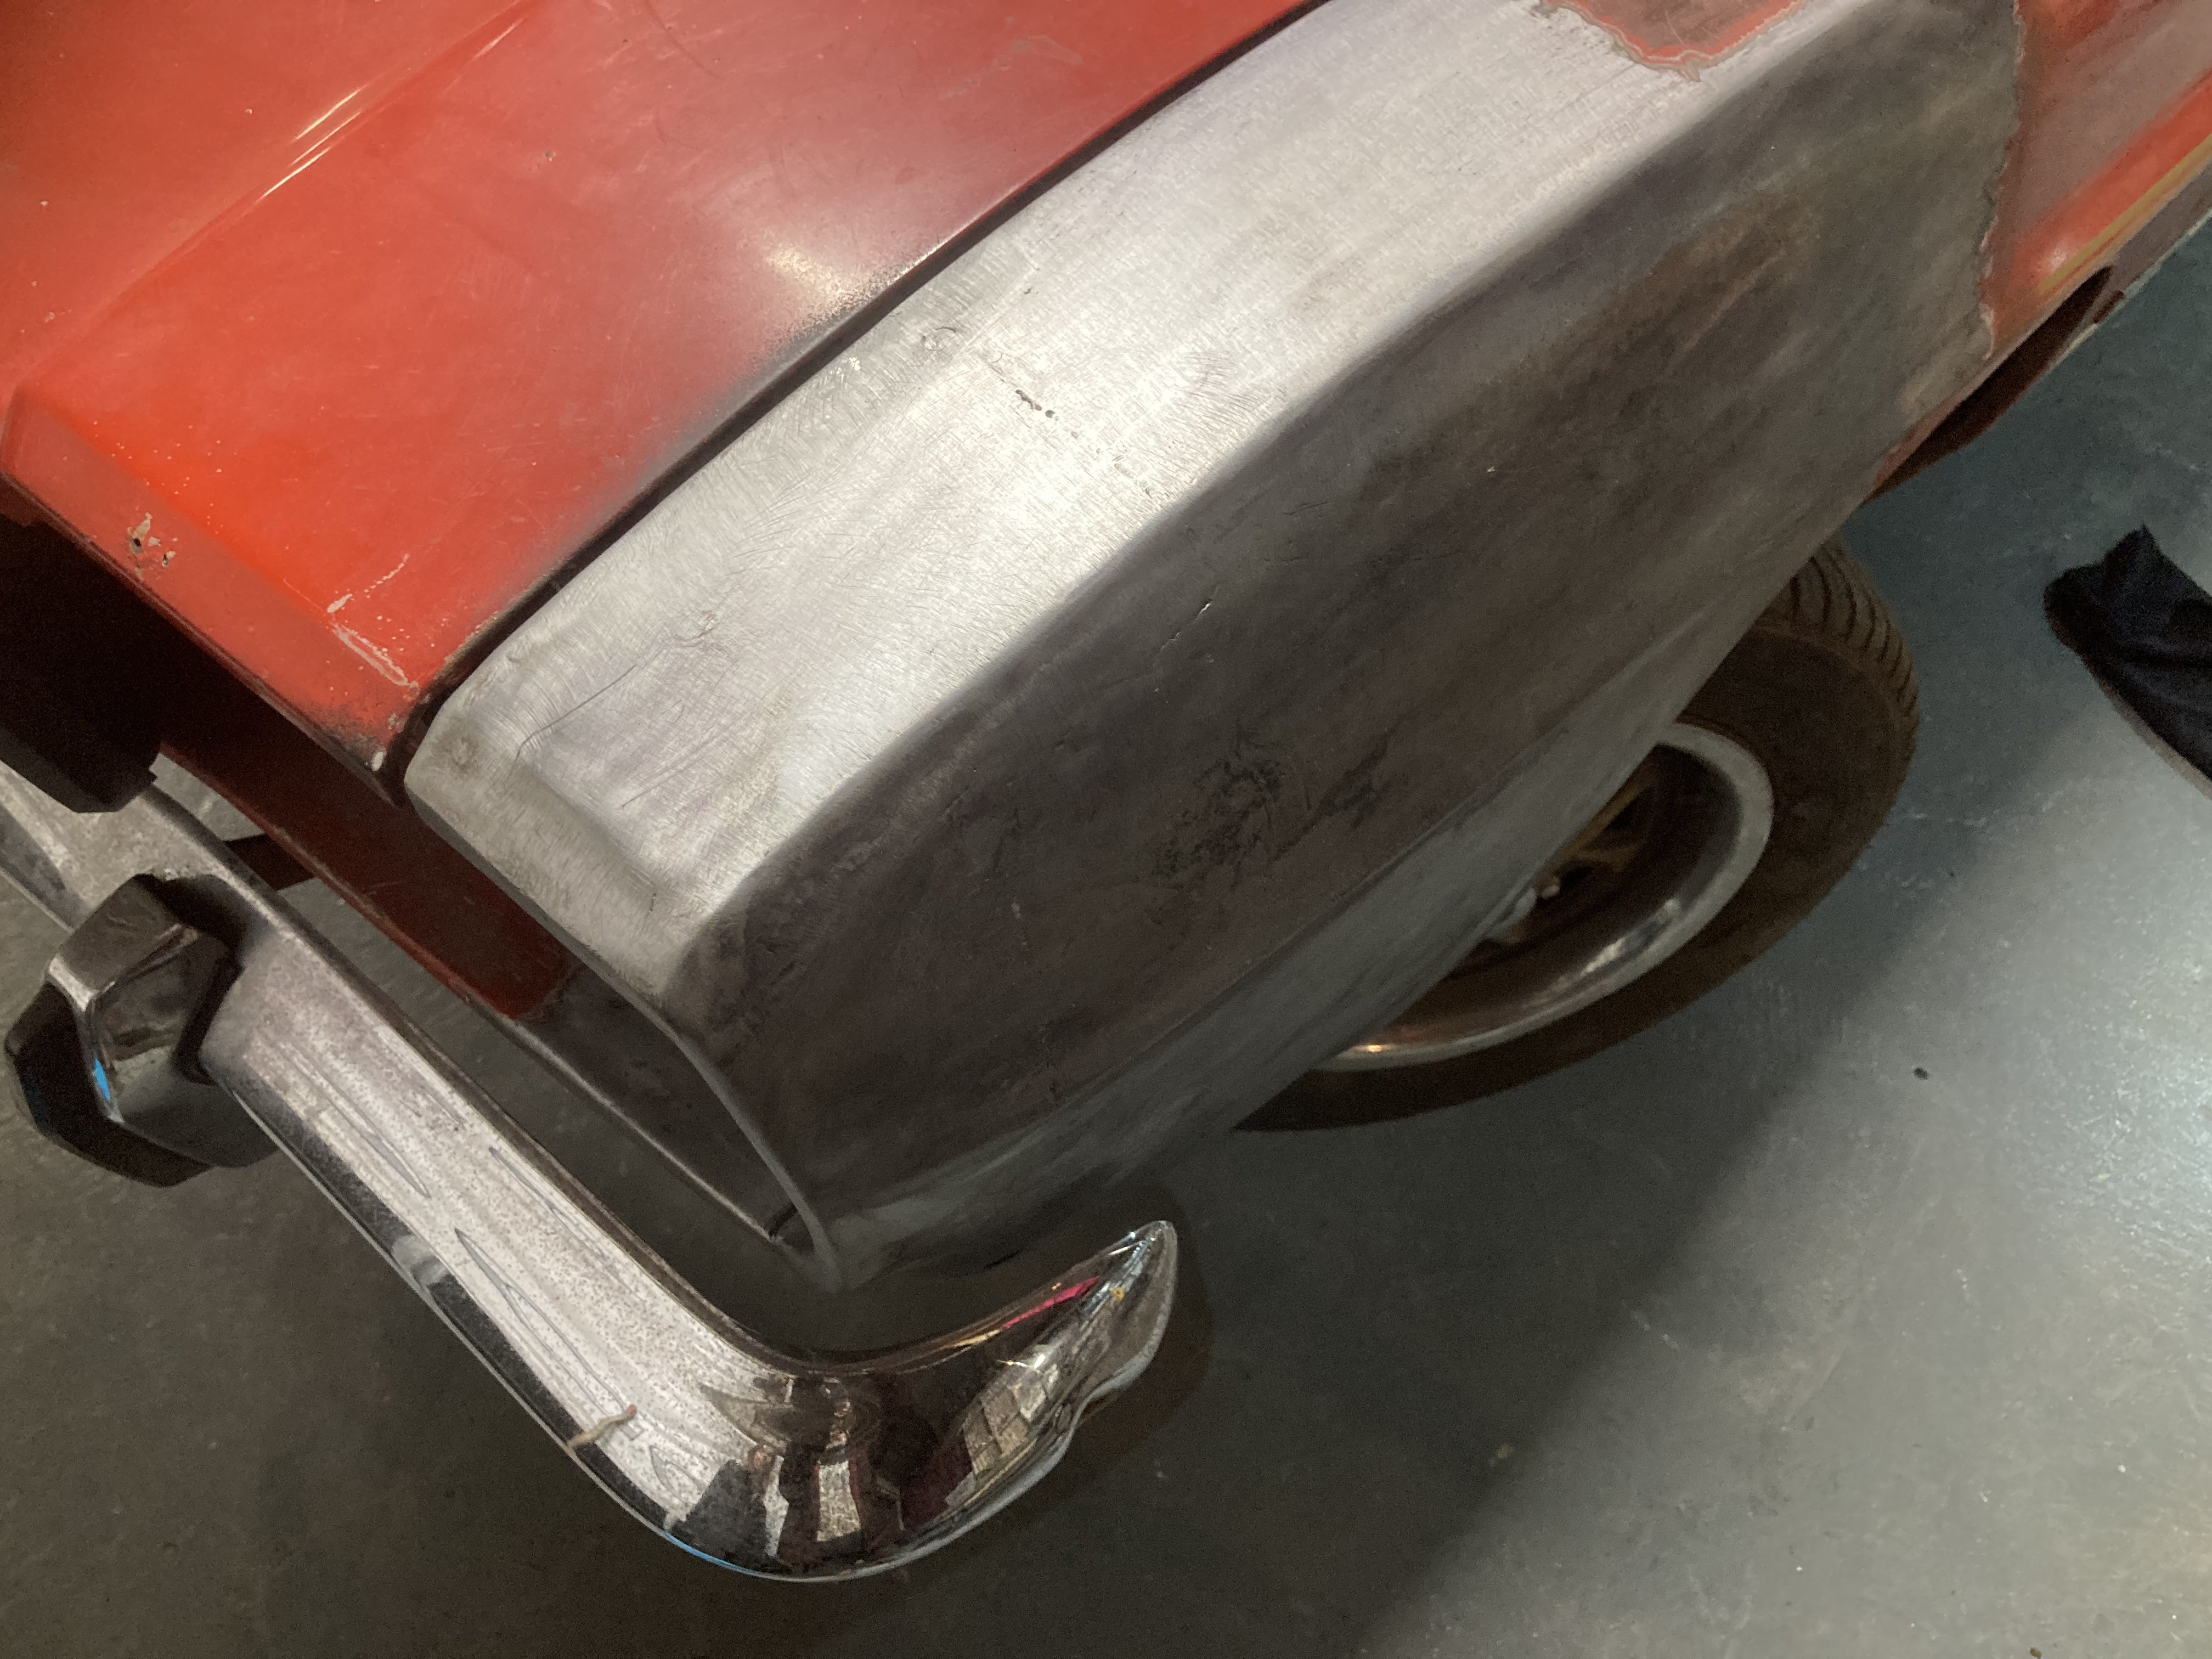
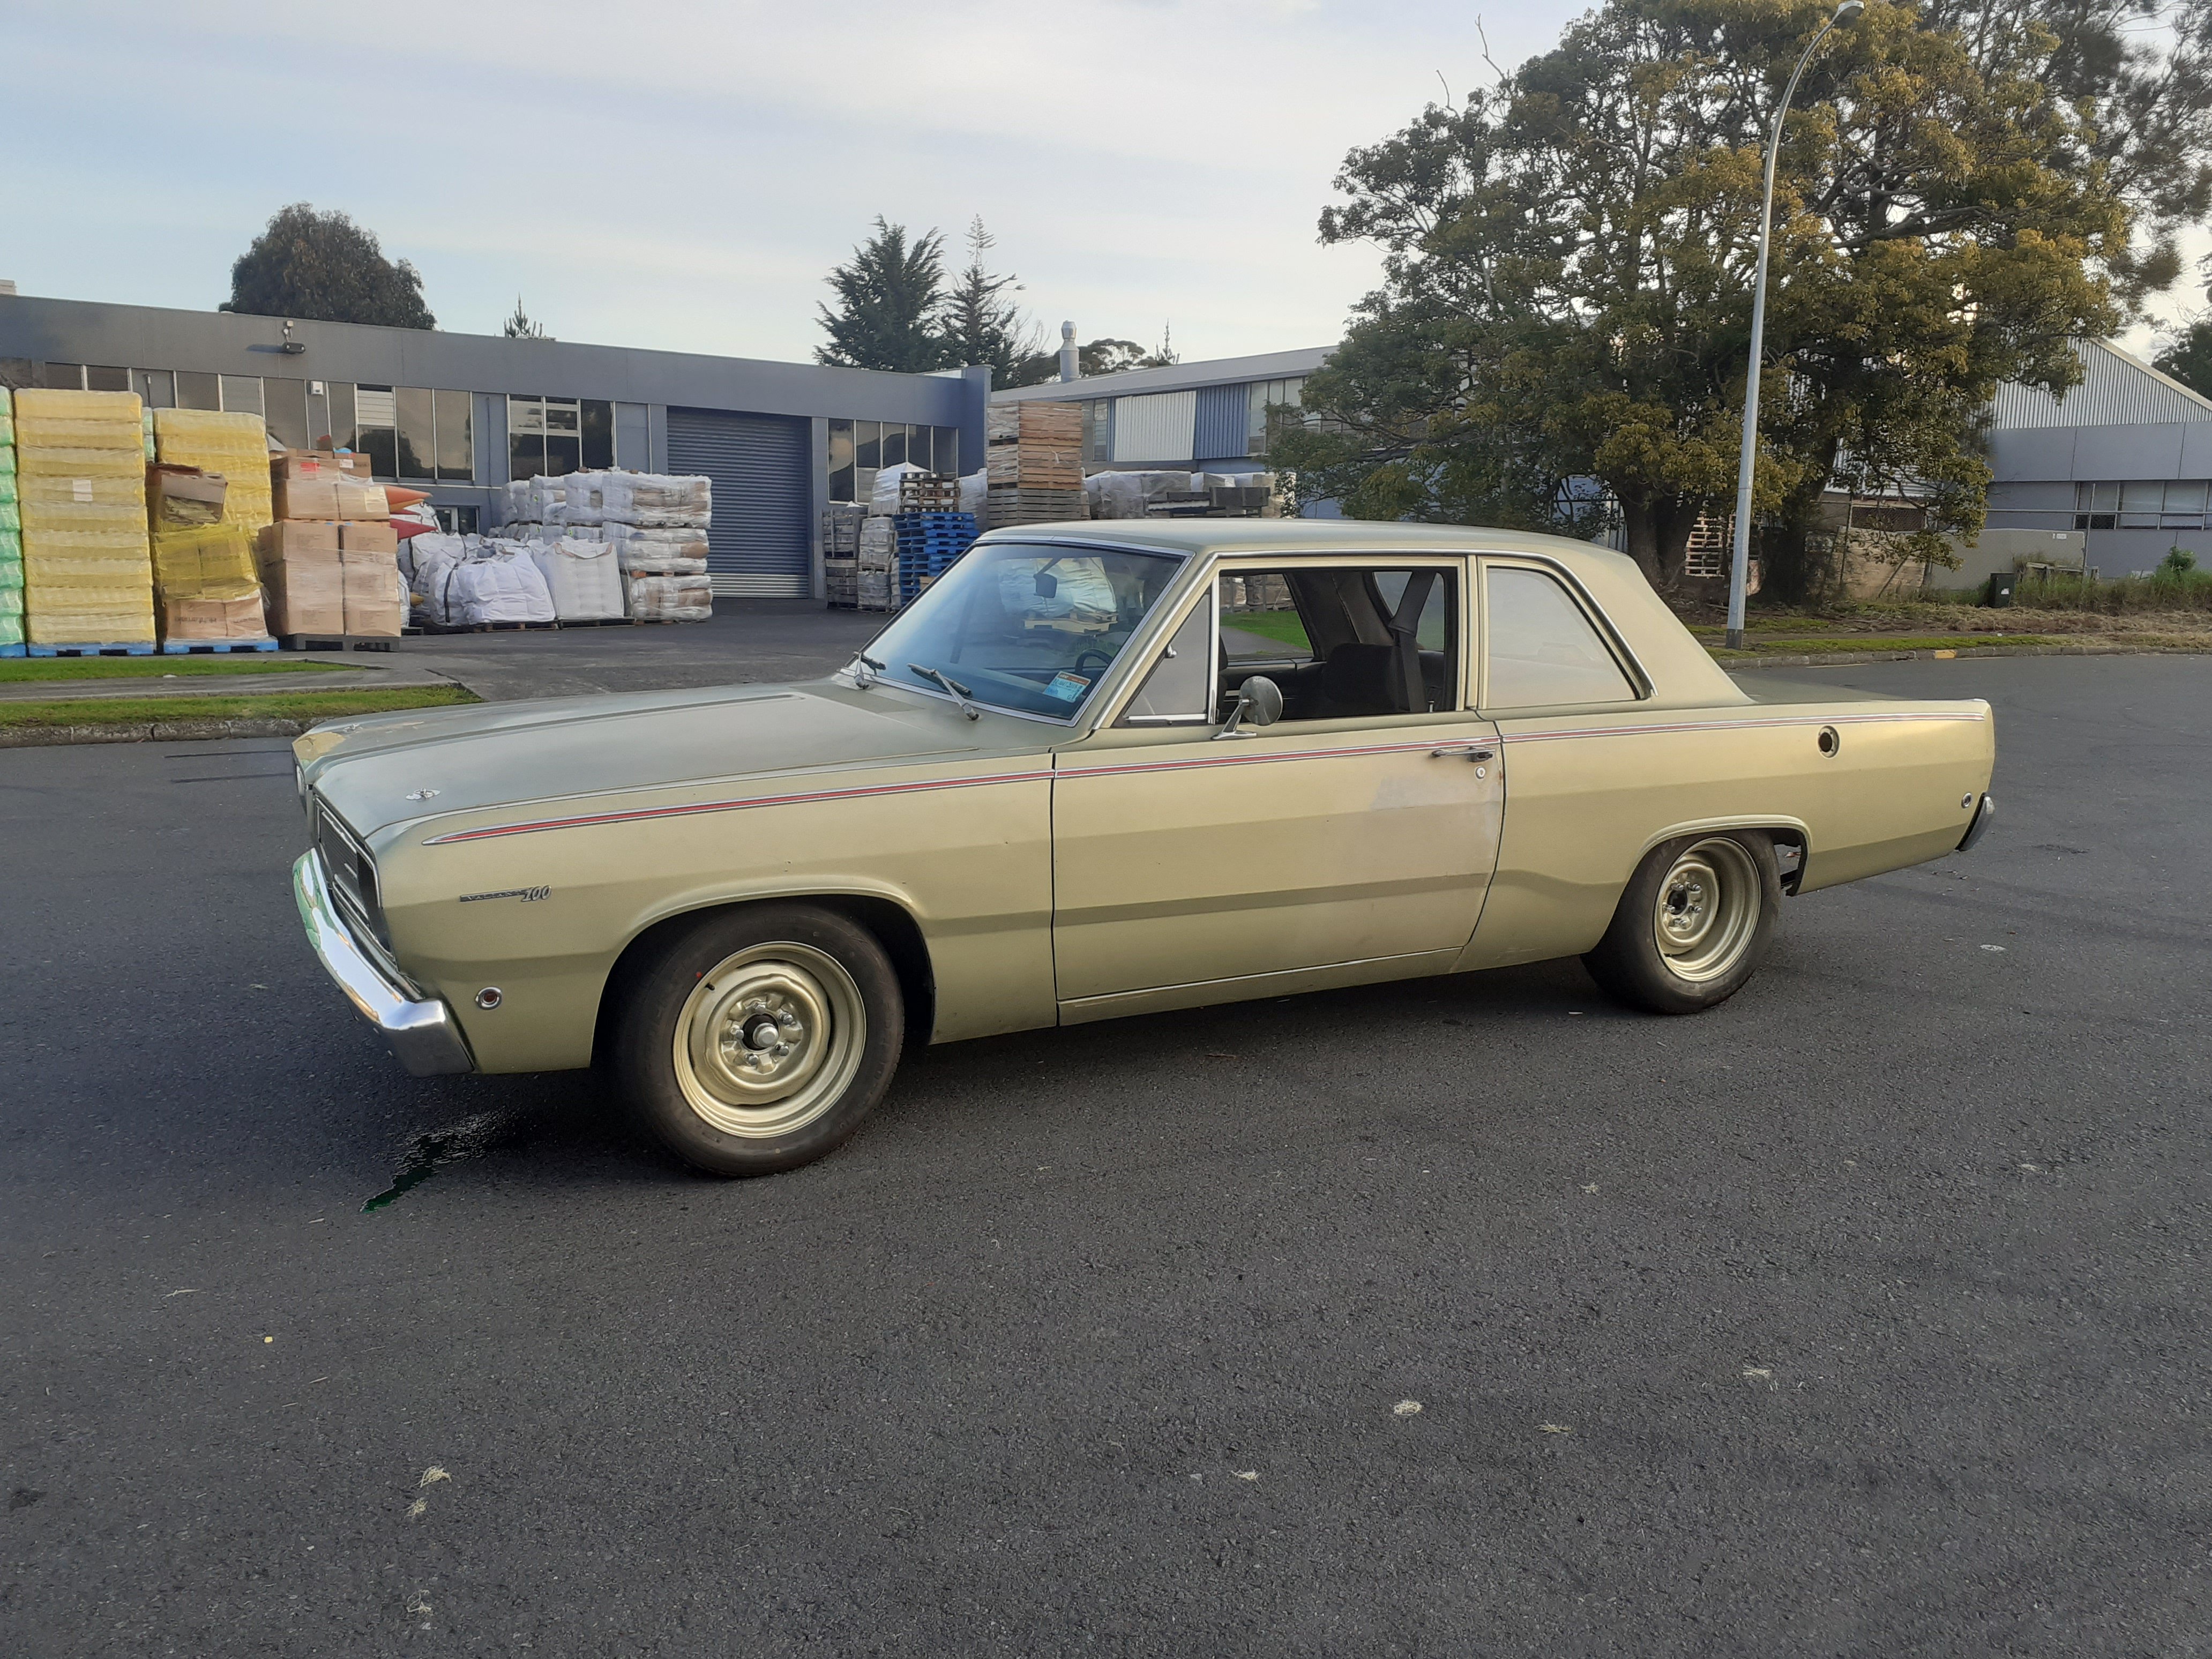
Mama got some new shoes today. Just waiting for the knock off spinners to arrive to complete the look. I've now got heaps of fender gap so I'll be able to dial in a bit of low which will make my heart sing. Before and after shots:
2 points
-
It drives. Got a few bugs to work out though. The main one is it gets hot, and can't cool itself down. This might be a bit of a prick to sort out as there's no room left I think it has more boost than it should do Brakes are a bit spongy, might need next size up master cyl, might improve once they bed in a bit Seats are a bit low Needs something to stop the pinion angle changing under accel, driveshaft just knocked the floor slightly
2 points
-
2 points
-
if it's in a paddock near by, be sure to flatten the grass in a circular fashion while working the metal detector, this will ensure maximum chance of finding the lost bits..1 point
-
For sure its beaten up pretty bad, but is there any sign of fatigue in there evident that a fracture started at the oil holes? Hard to tell from the photos but appears to be a transition in cross section so holes just happen to be in the likely failure region?1 point
-
Just checked all mine, largest is 200W and all 12V. I do have a spare 200W 24V supply if thats any use for testing? Or, buy the 600W Ali express supply, by the time it turns up summer will be here and you can dump it in the pile of unfinished projects.1 point
-
What you need is an ld28 with a 100a alternator on a run stand.1 point
-
Fuckin dick, no wonder it did surprise wheelspins
1 point
-
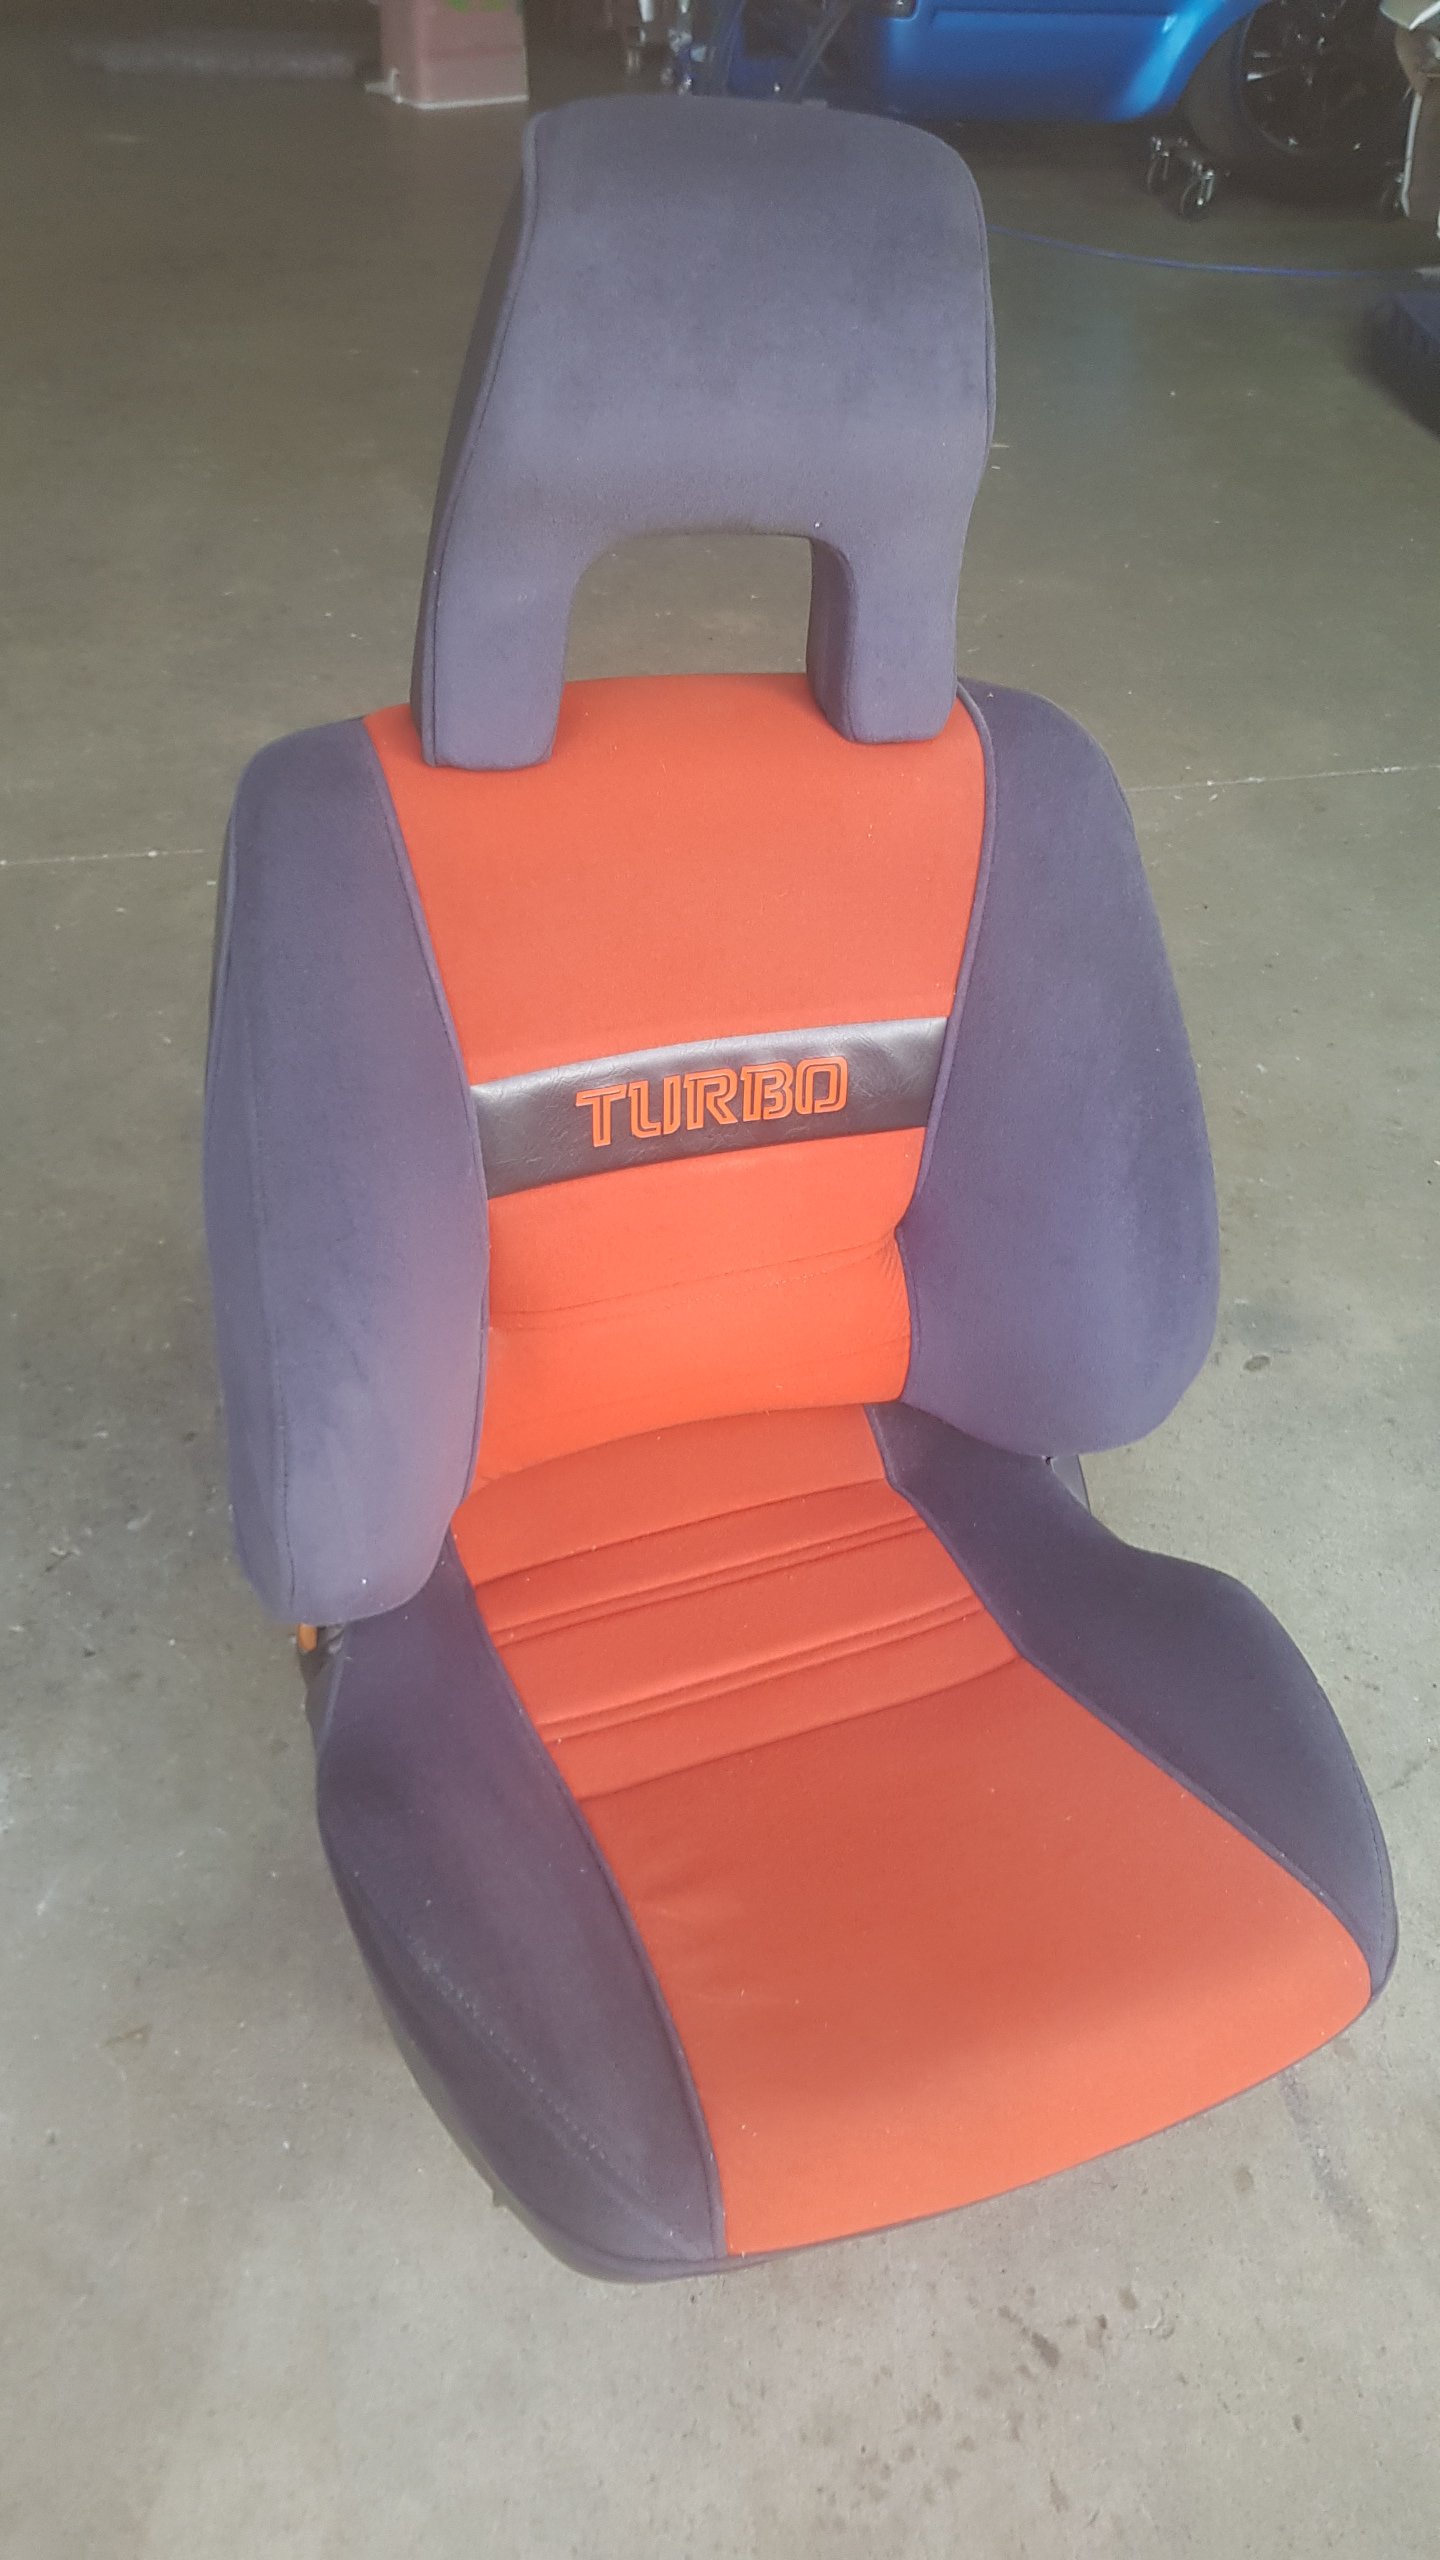
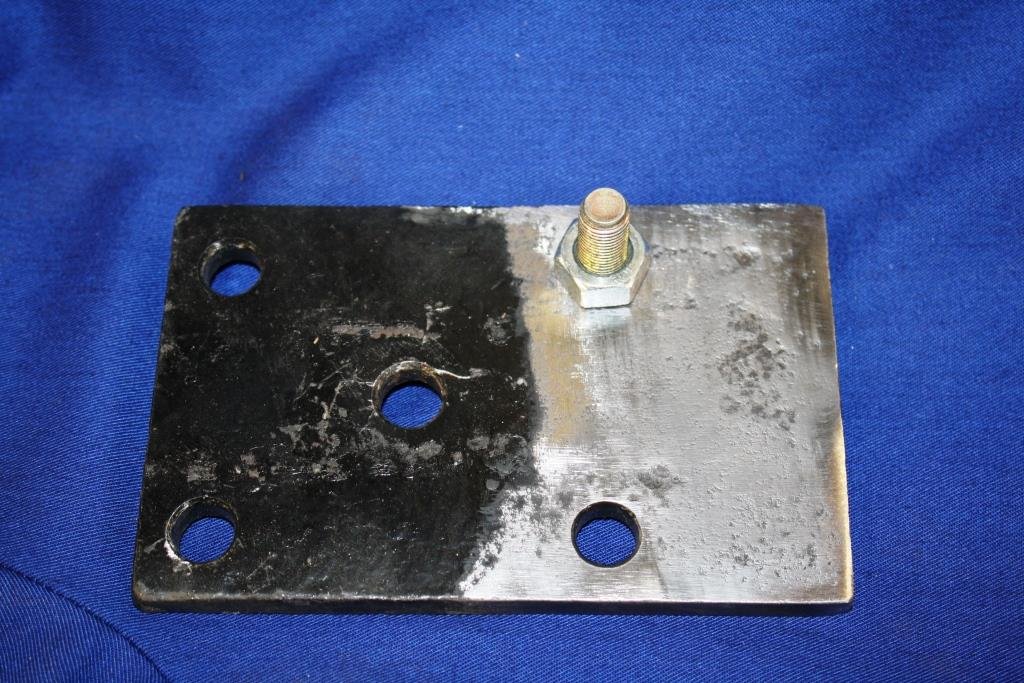
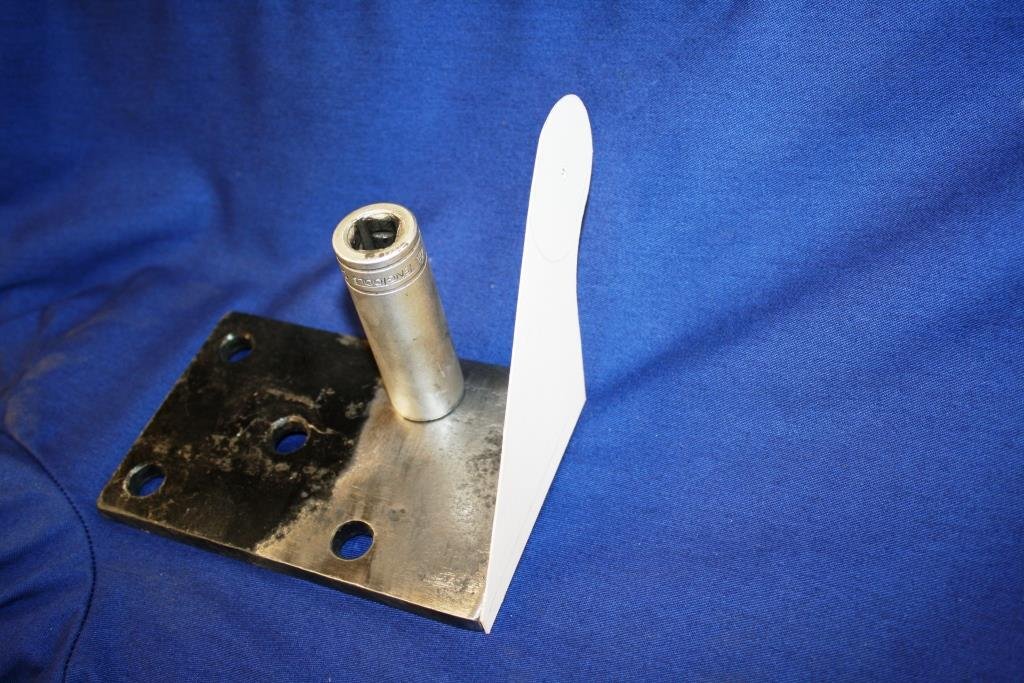
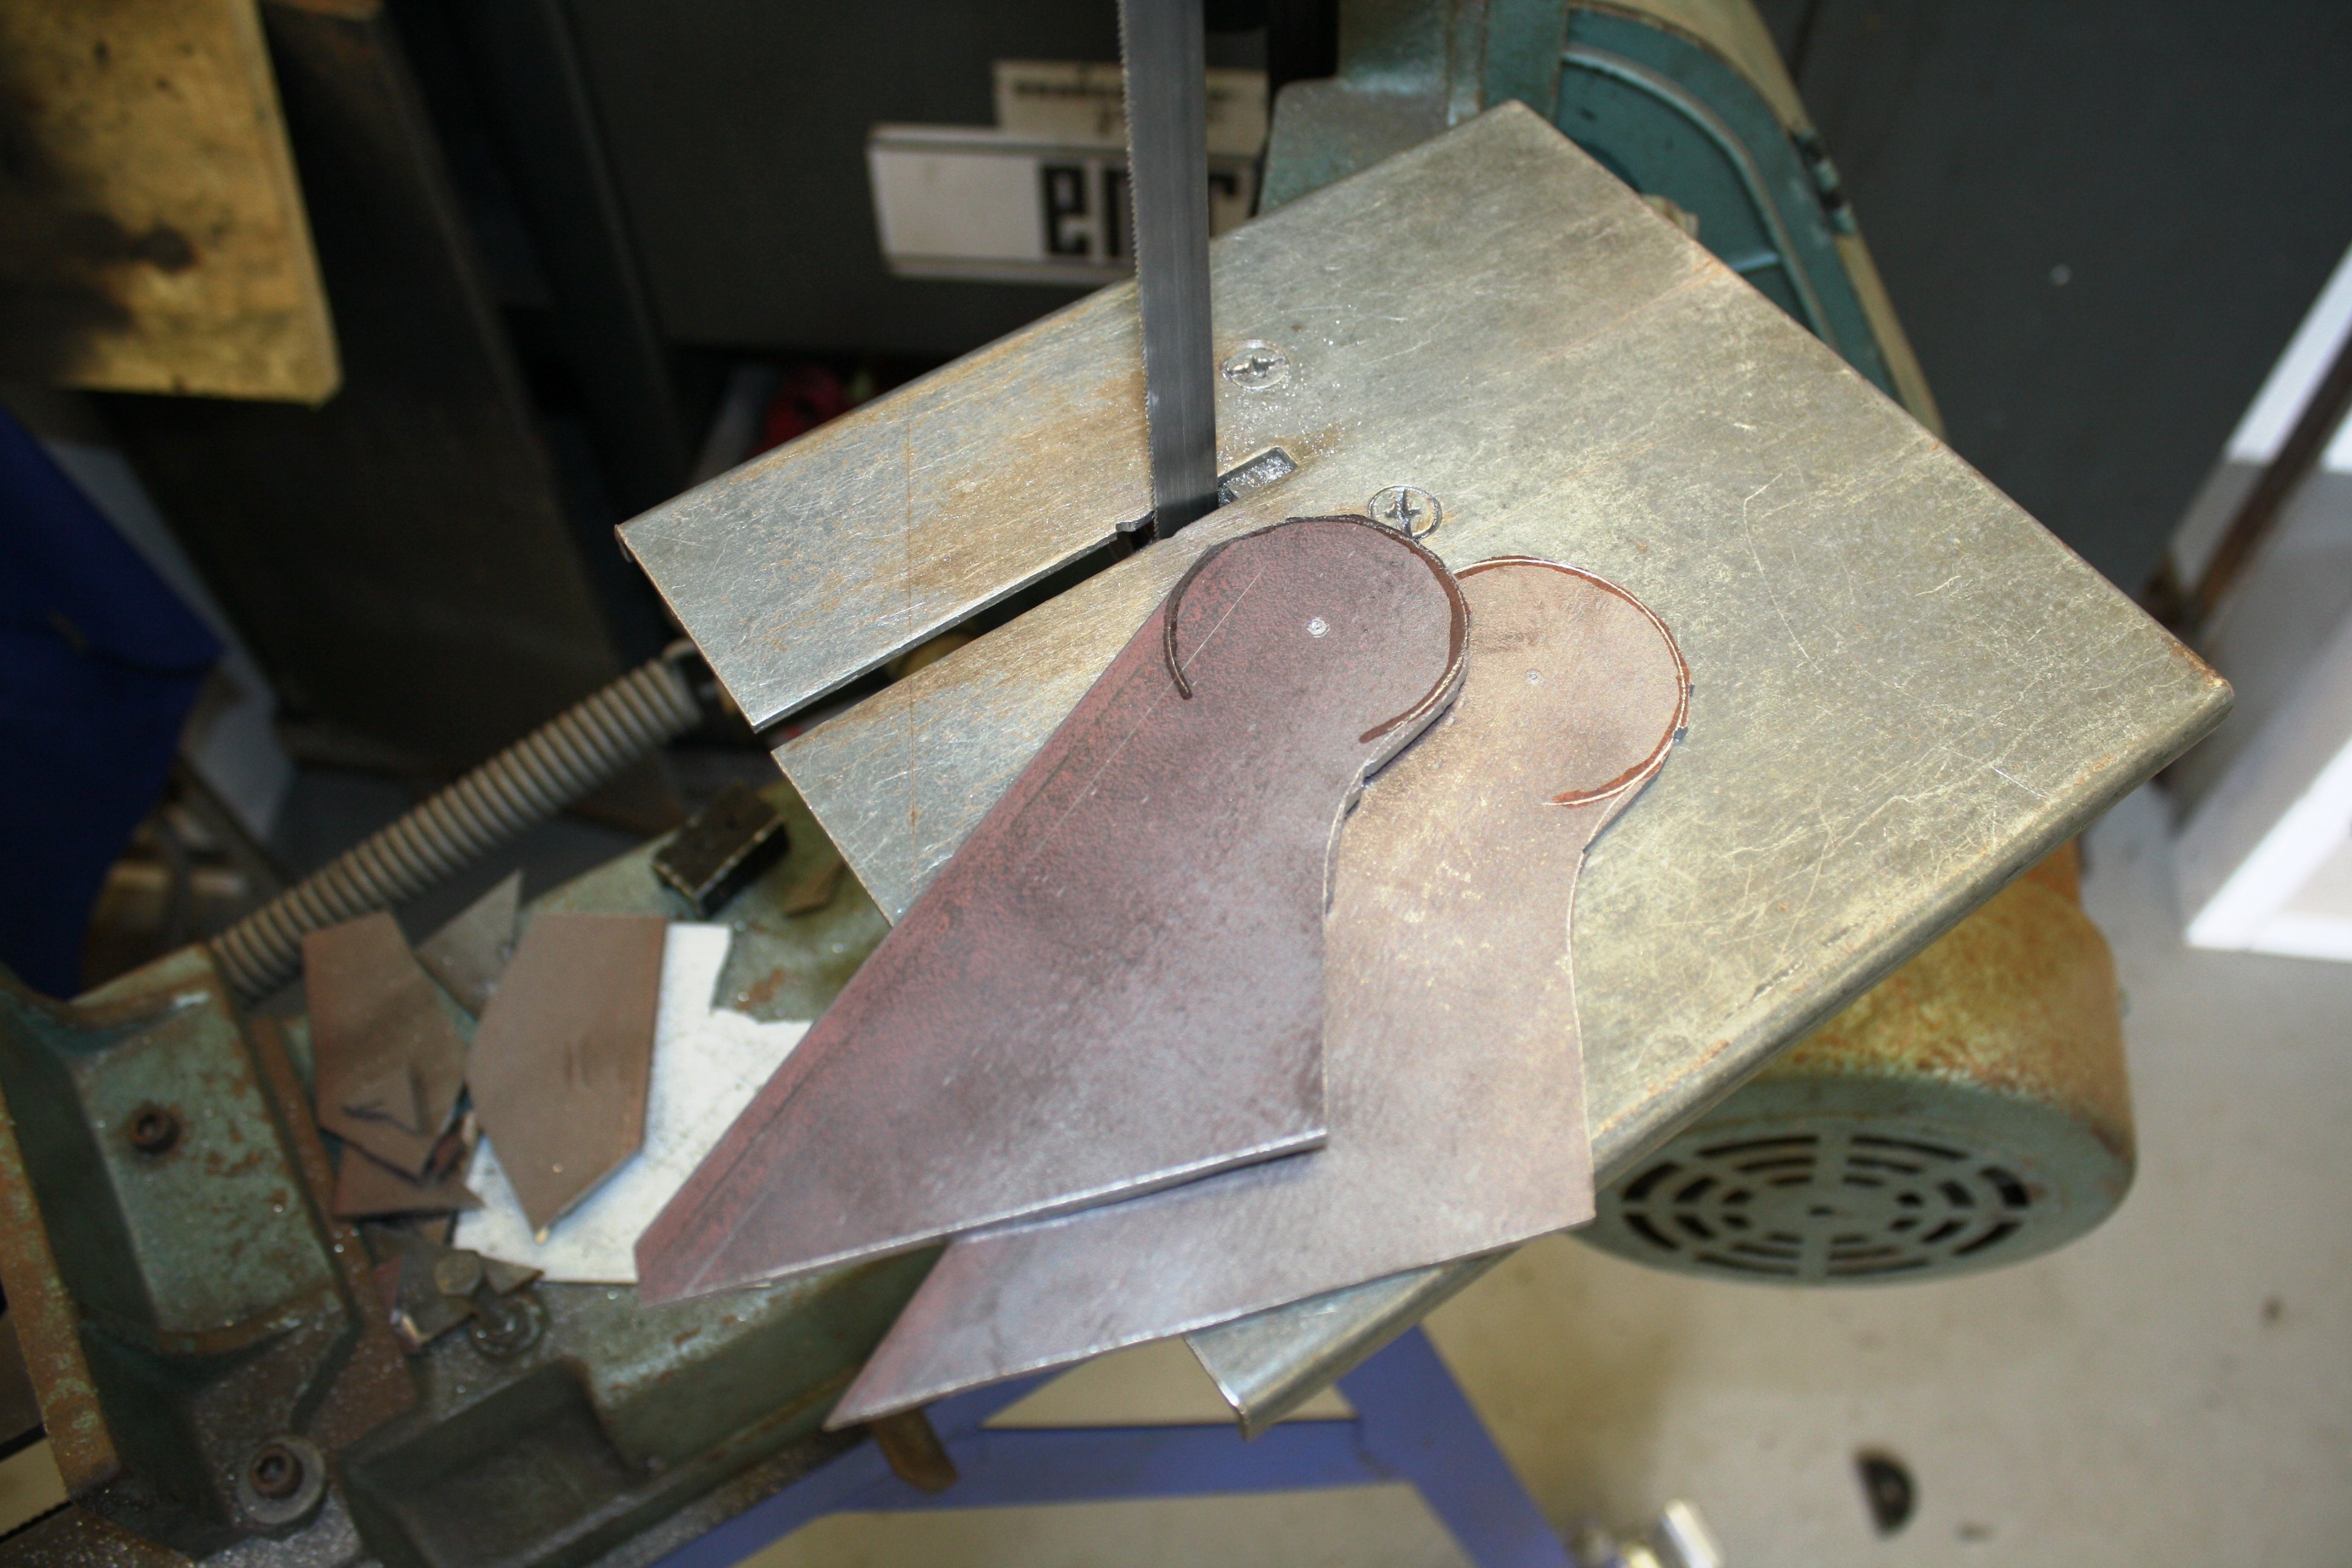
I decided to replace the front seats with something that gives some lateral support. The original bucket seats didn't provide much more than a bench seat and one had been reupholstered in a different green so I thought these would do the job nicely. These seats have detachable head rests. I will need to get the rear seat redone to match and spraying the door cards with black vinyl spray should do as they are in good condition. Just working out how to mount them. The original seats were held in with two bolts at the front and the rear of the seats were on slides. The bits that were bolted to the seats and engaged the slides were only made of plastic.
1 point
-
9 years, 2 weeks and 2 days of ownership now. Just passed my 100,000th km in this thing today. Happened to be on the same piece of road that I test drove it too. Trade in value must have just plummeted to near zero.1 point
-
I think somewhere in the thread there is mention of ebay headers? but needs the exhaust changed to 3" so waiting on that. I would also send some corn for a new block, since this is the best build thread on oldschool etc.1 point
-
Had a date with the hose this arvo. Have the little gem a wash. still has lime/clay/mud residue stuck to it from its last hiding. looking forward to getting this legal . I think I might chuck the 14” rally wheels on it for a looksy
1 point
-
Diving in Balls Deep with a trackday at Eastern creek on the 1st of July - full circuit1 point
-
Nah no 2NZ rods available, and I'm fairly doubtful that all of my current pistons would be usable. Some of the bore is missing down the bottom on cylinder 2, so piston might have copped some damage. As well as the entirety of the oil filter and it's housing is AWOL haha Some good news while I've been stripping the motor down though, I found some of the rattles. The rear engine mount bolt has been vibrating itself loose, and my upper half of the alternator bracket had broken. So I think one or the other of those was making the recent noise, not the clutch or gearbox. So that's good news.
1 point
-
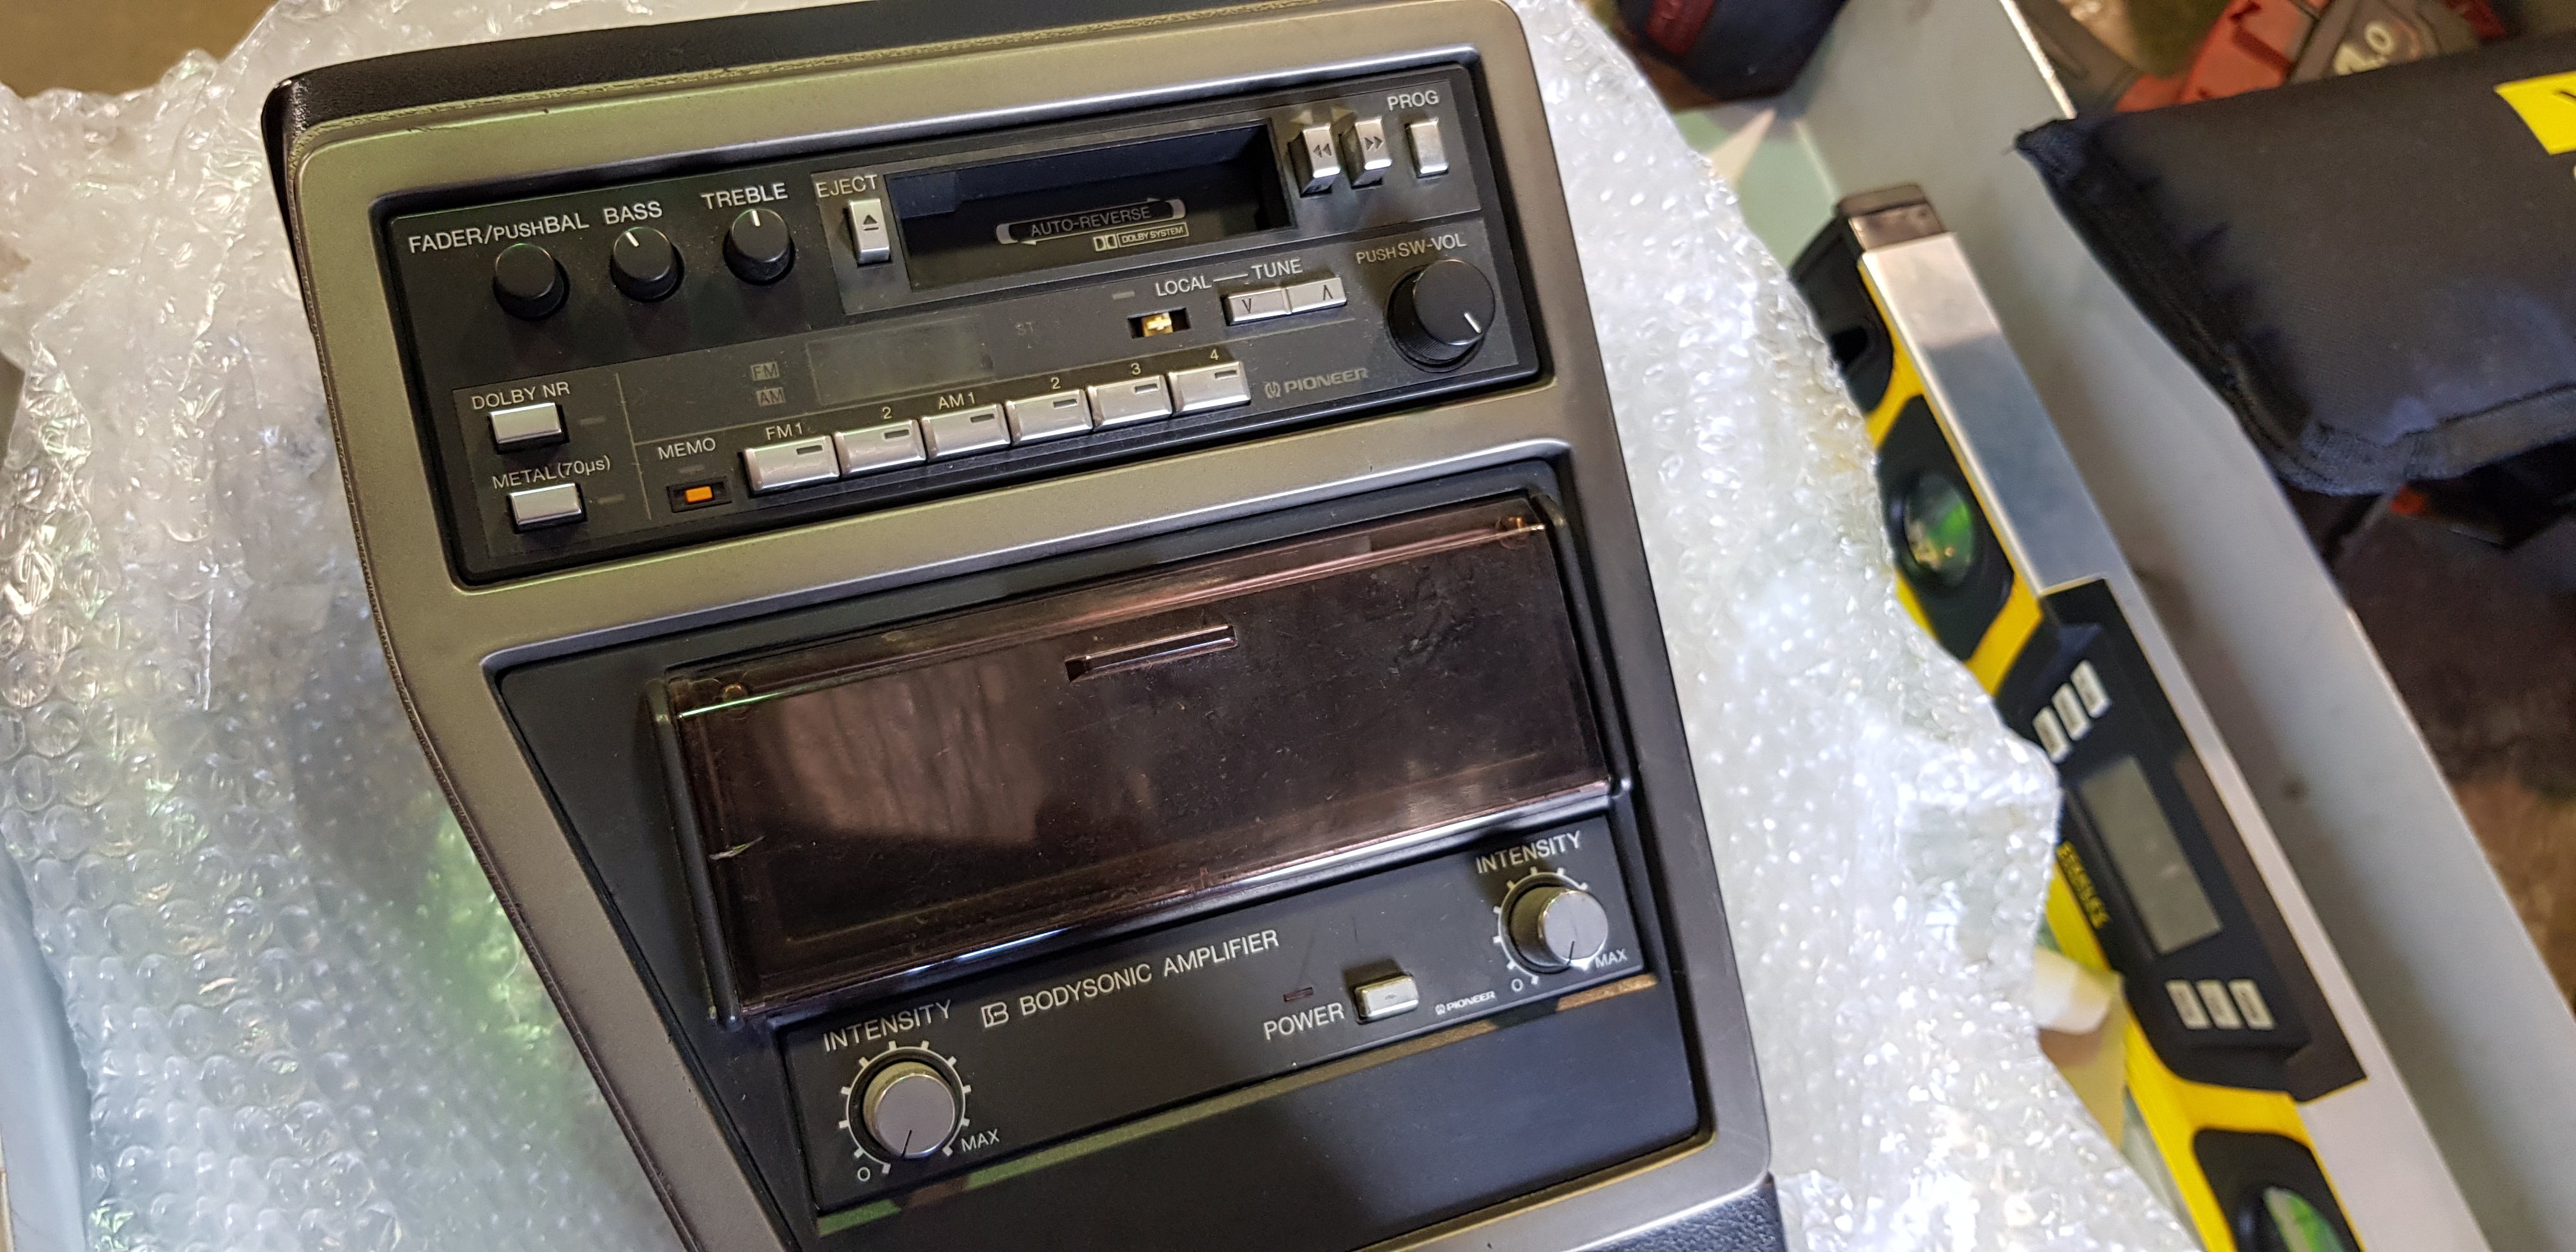
Those are the bits I wanted from it... Rare find. And can see the BodySonic control amp that came with another YAJ score mid last year. Also got the correct optional head-deck made by Pioneer for the Citys with that score.
1 point
-
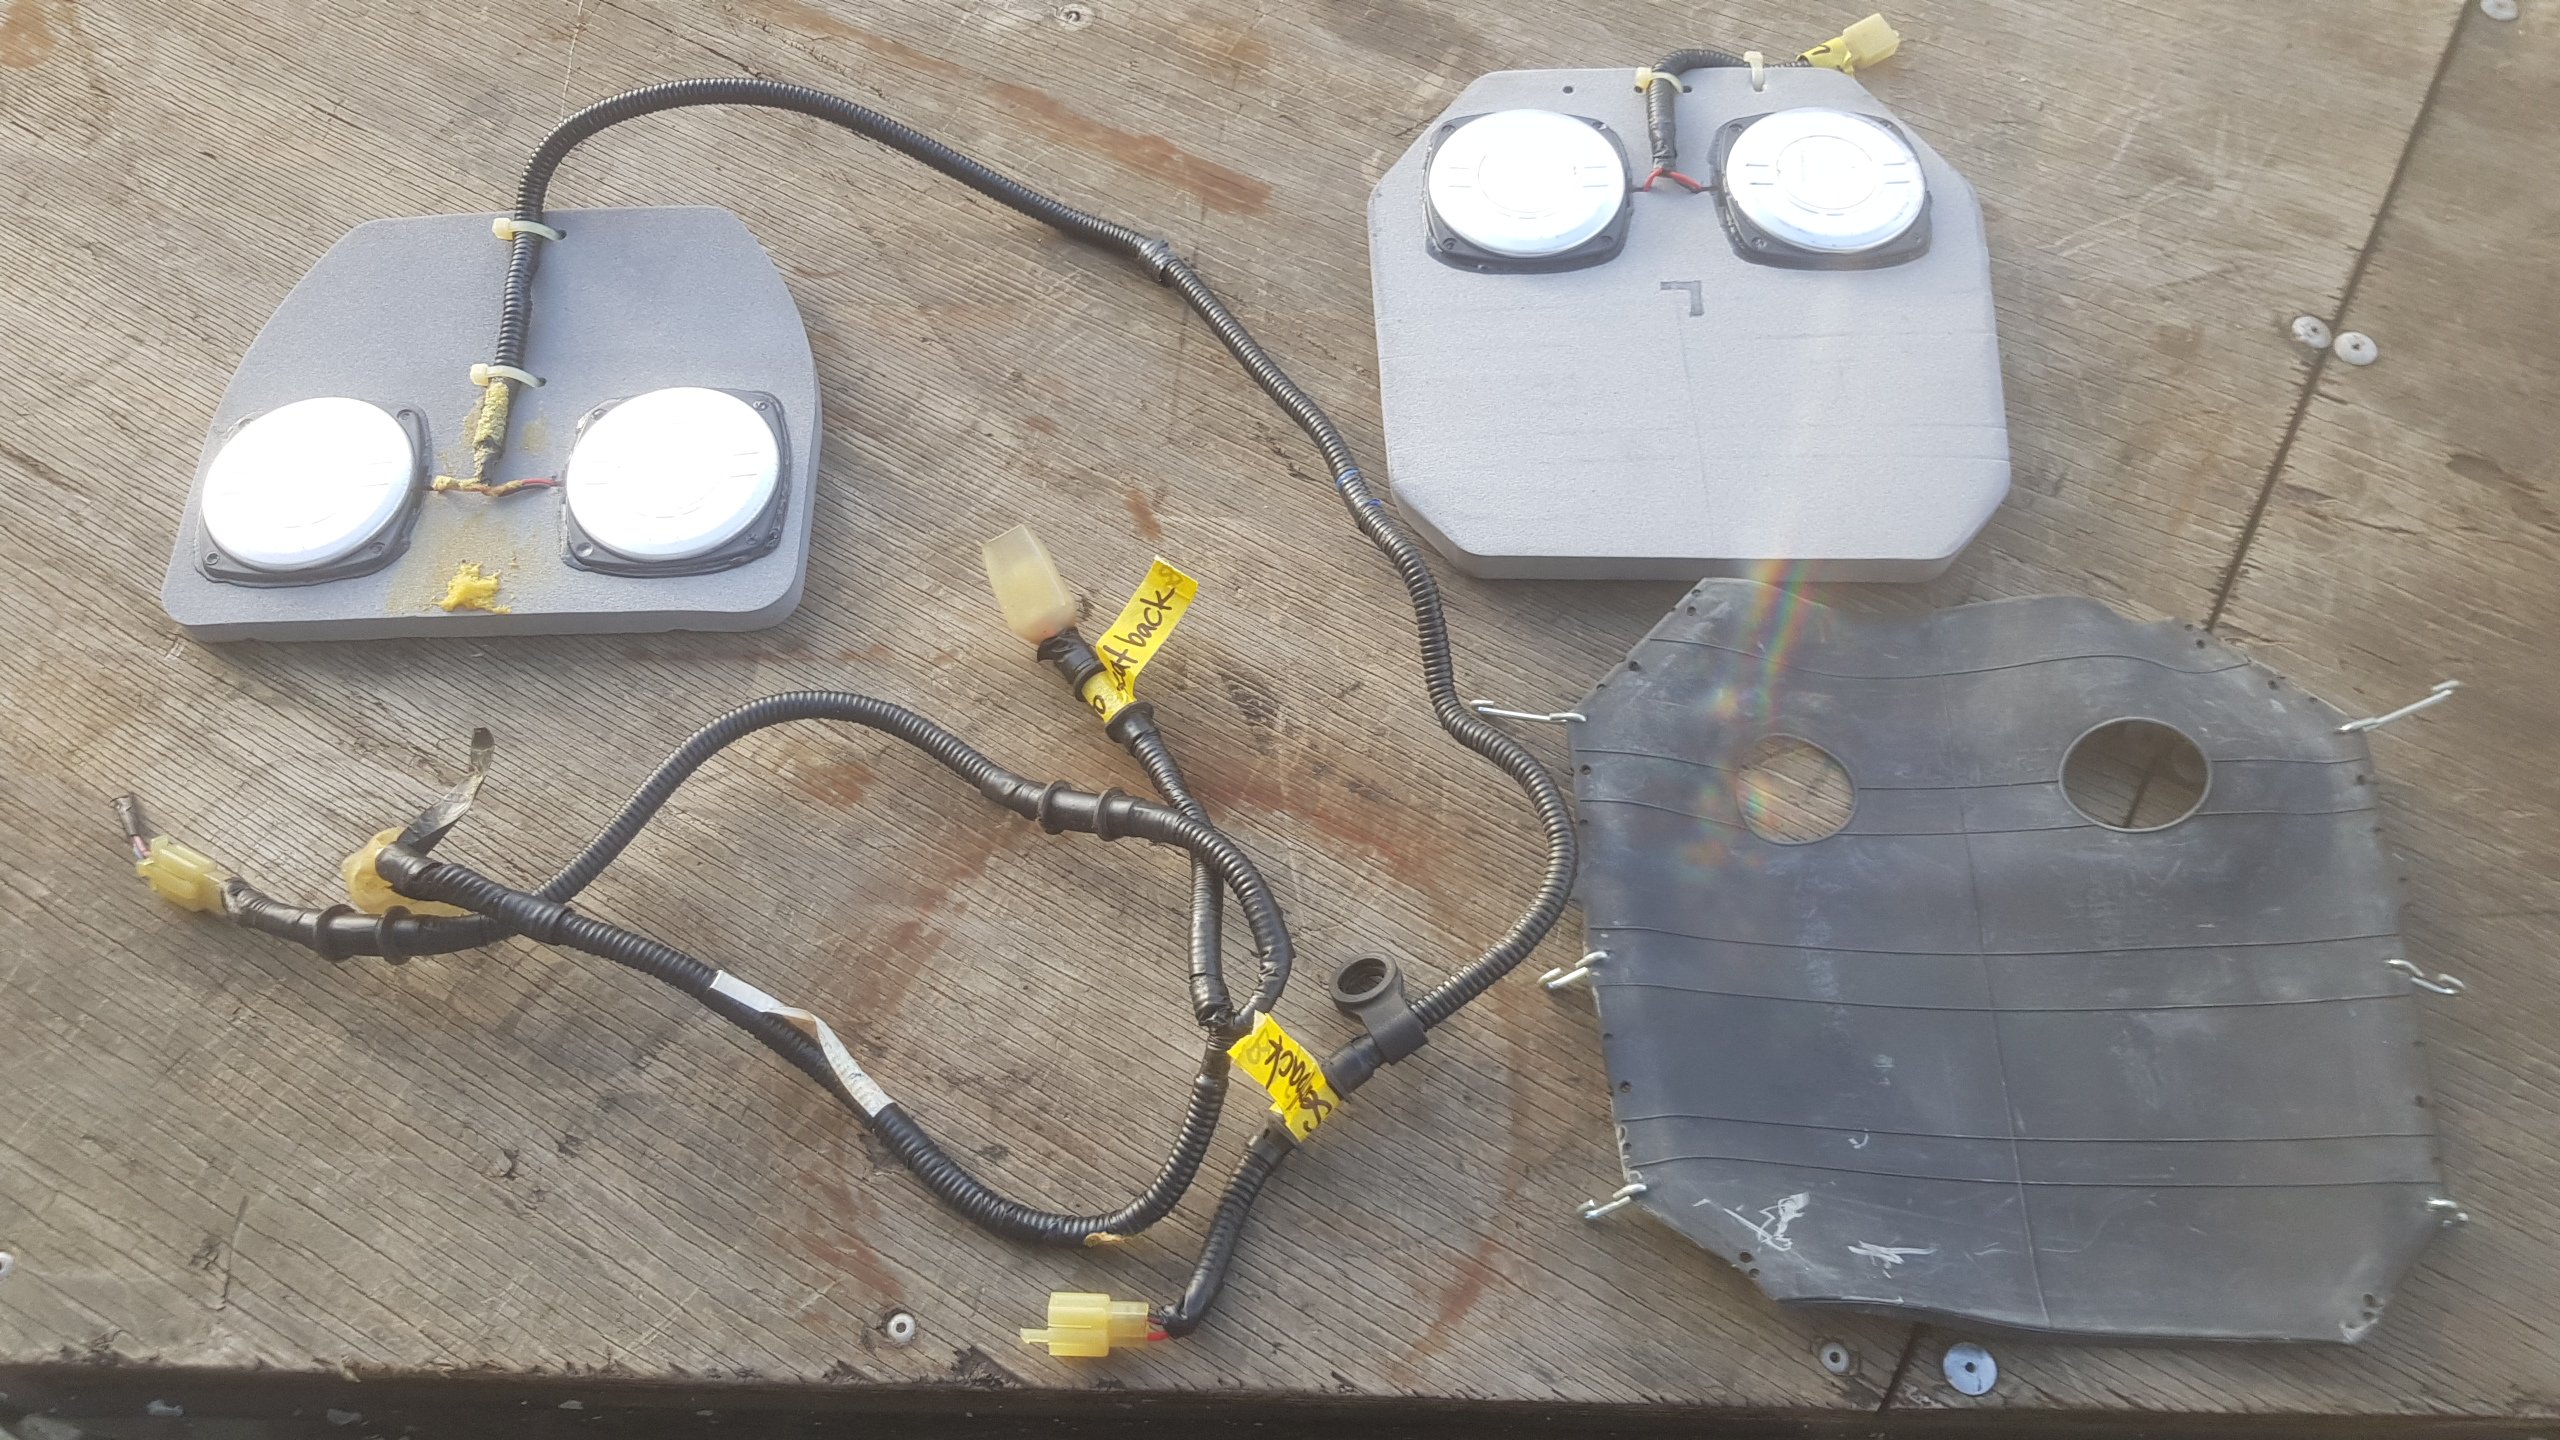
Been a while since an update. Back tracking about 8-9 months ago I brought a City T1 seat from Japan. It was through Moonlight just before he did his last shipment and unfortunatly I just missed that last container. It was no big deal as I wasn't in a rush, so it ended up getting put aside at Stacked waiting for the first shipment from Empire Imports. Fast forward to about a month ago. It finally lands, and is ready for pickup. International shipping is fucked as of late. Anyway, it wasn't the seat I wanted, I actually went halves in all the costs with a guy who wanted it for his T1 resto, but it was the small woofers in the back and base that are pretty hard to find. These came as an optional Pioneer audio 'BodySonic' package. Basically a mono woofer that makes no sound but just gives a vibration with the music. I allready have the BodySonic control unit so now I just have to find another seats worth of woofers to retrofit into my Tallboy City project one day.
1 point
-
An amr500 will bolt right in that spot1 point
-
My dear wife gets bored sometimes and then puts her mind to ways of highlighting my vehicular acquisition habits with a particular sarcastic bent. She has produced this “helpful” flowchart for me.
1 point
-
Slightly out of sequence with my thread guys, just bear with me. After failing miserably to identify the telescopic shocks I’d used to replace the lever action shocks some 40 plus years ago I settled on a pair of aftermarket EA Falcon shocks. To be honest they were cheap new/old stock, (i. e. the EA is not the most popular ‘Coon ever made) and they were blue! Thought I’d use as much as the original bracketry as I could. Cleaned up the old spring pads. Getting tight for room allowing access to the U bolts… Some CAD work… A bit more mocking up…. Had to notch the inside mount to give access to the U bolt nuts . Then started to stitch it all together. In true oldschool fashion I decided I didn’t like the result, spat the dummy, and bought the steel to make larger spring pads. I then cut the mounts off and attached them to the new pads. A quick mock-up and it works for me.
1 point
-
It went to its inspection, haven’t heard back though. My garage situation means I needed to hustle and get this vulnerable metal sealed and protected. Fucking marathon of shitty jobs and many hours spend rolling around under the thing over a week but I’m starting to feel like I’m progressing the way I want to! My eyes still crunch when I blink but it’s worth it? Rear end needs another coat then I can sling it back in. I used a can of cavity wax in all the orifices but I’ll need to grab another tomorrow to finish, then a second coat. Don’t get it in your beard. and one shed down! Contractors have pushed a week so I’m chilling on the green shed demo for a little longer.. I’ve got a crooked spine so I get wrecked after doing physical shit and I’m ok with a wee breather.1 point
-
I need a bigger shed.
1 point
-
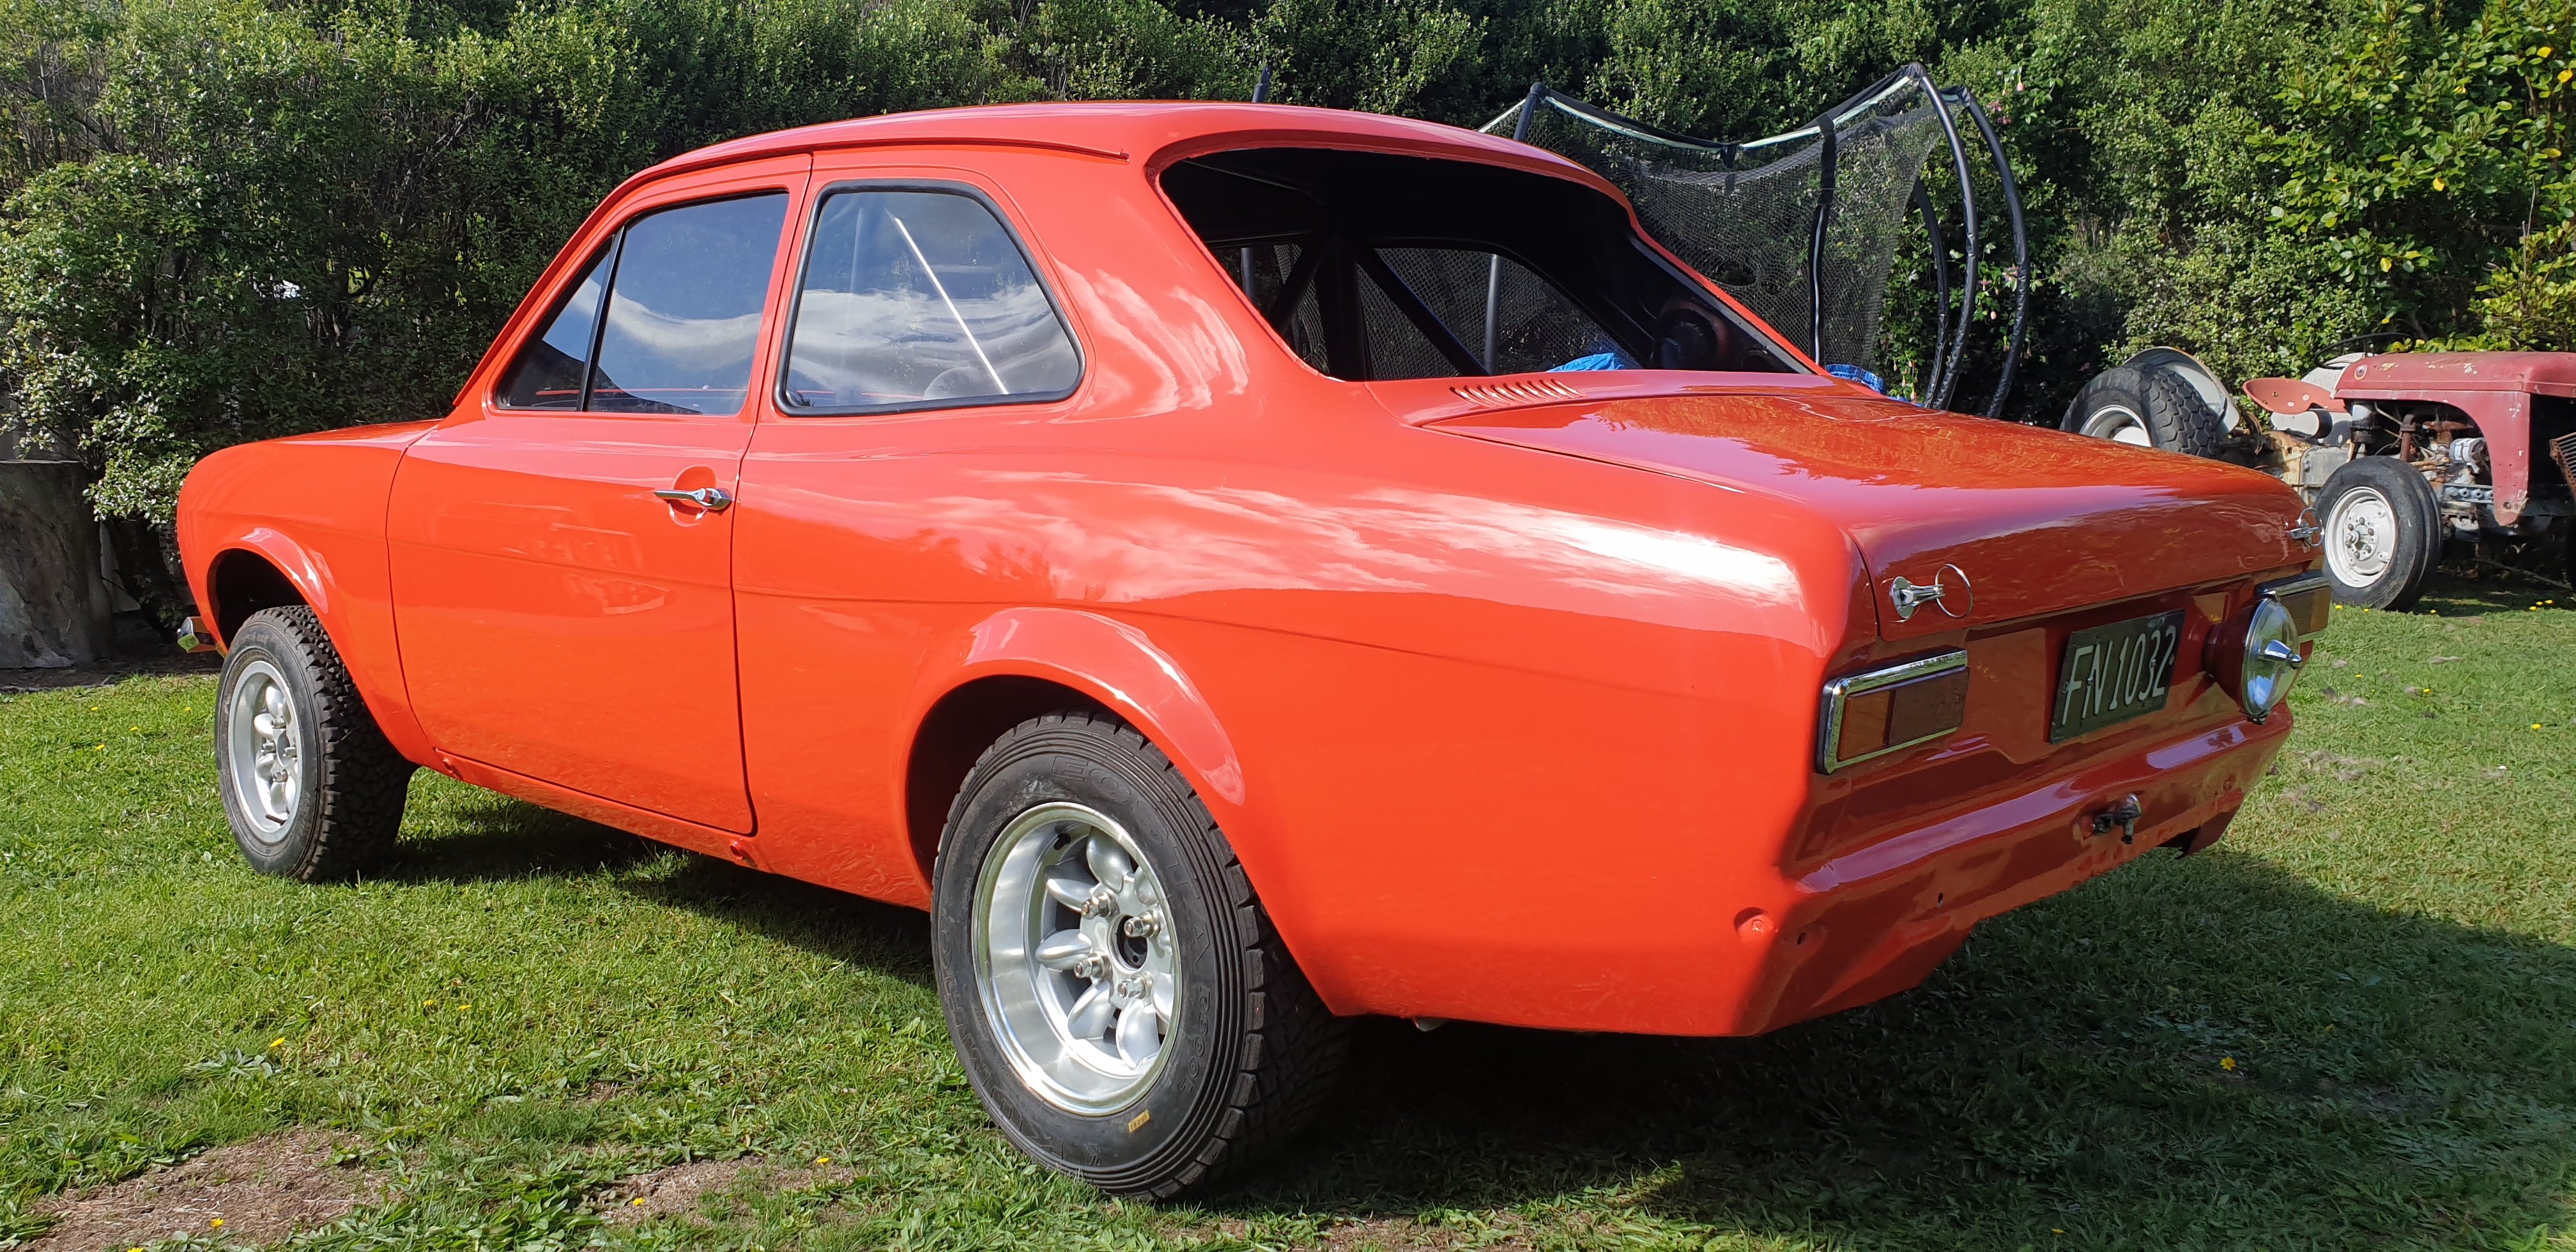
Found the last rego sticker the Escort had and seeing as tho the new screen is now in there was only thing to do.
1 point
-
I'd use paint stripper. The stuff from super cheap that has dichloromethane in the ingredients is safe for aluminium. Stinks terribly, I think it has ammonia in it. Works great for removing carbon from pistons and valves and stuff without scratching too. Don't get it on your skin, even a tiny little bit will start to burn in a few seconds.1 point
-
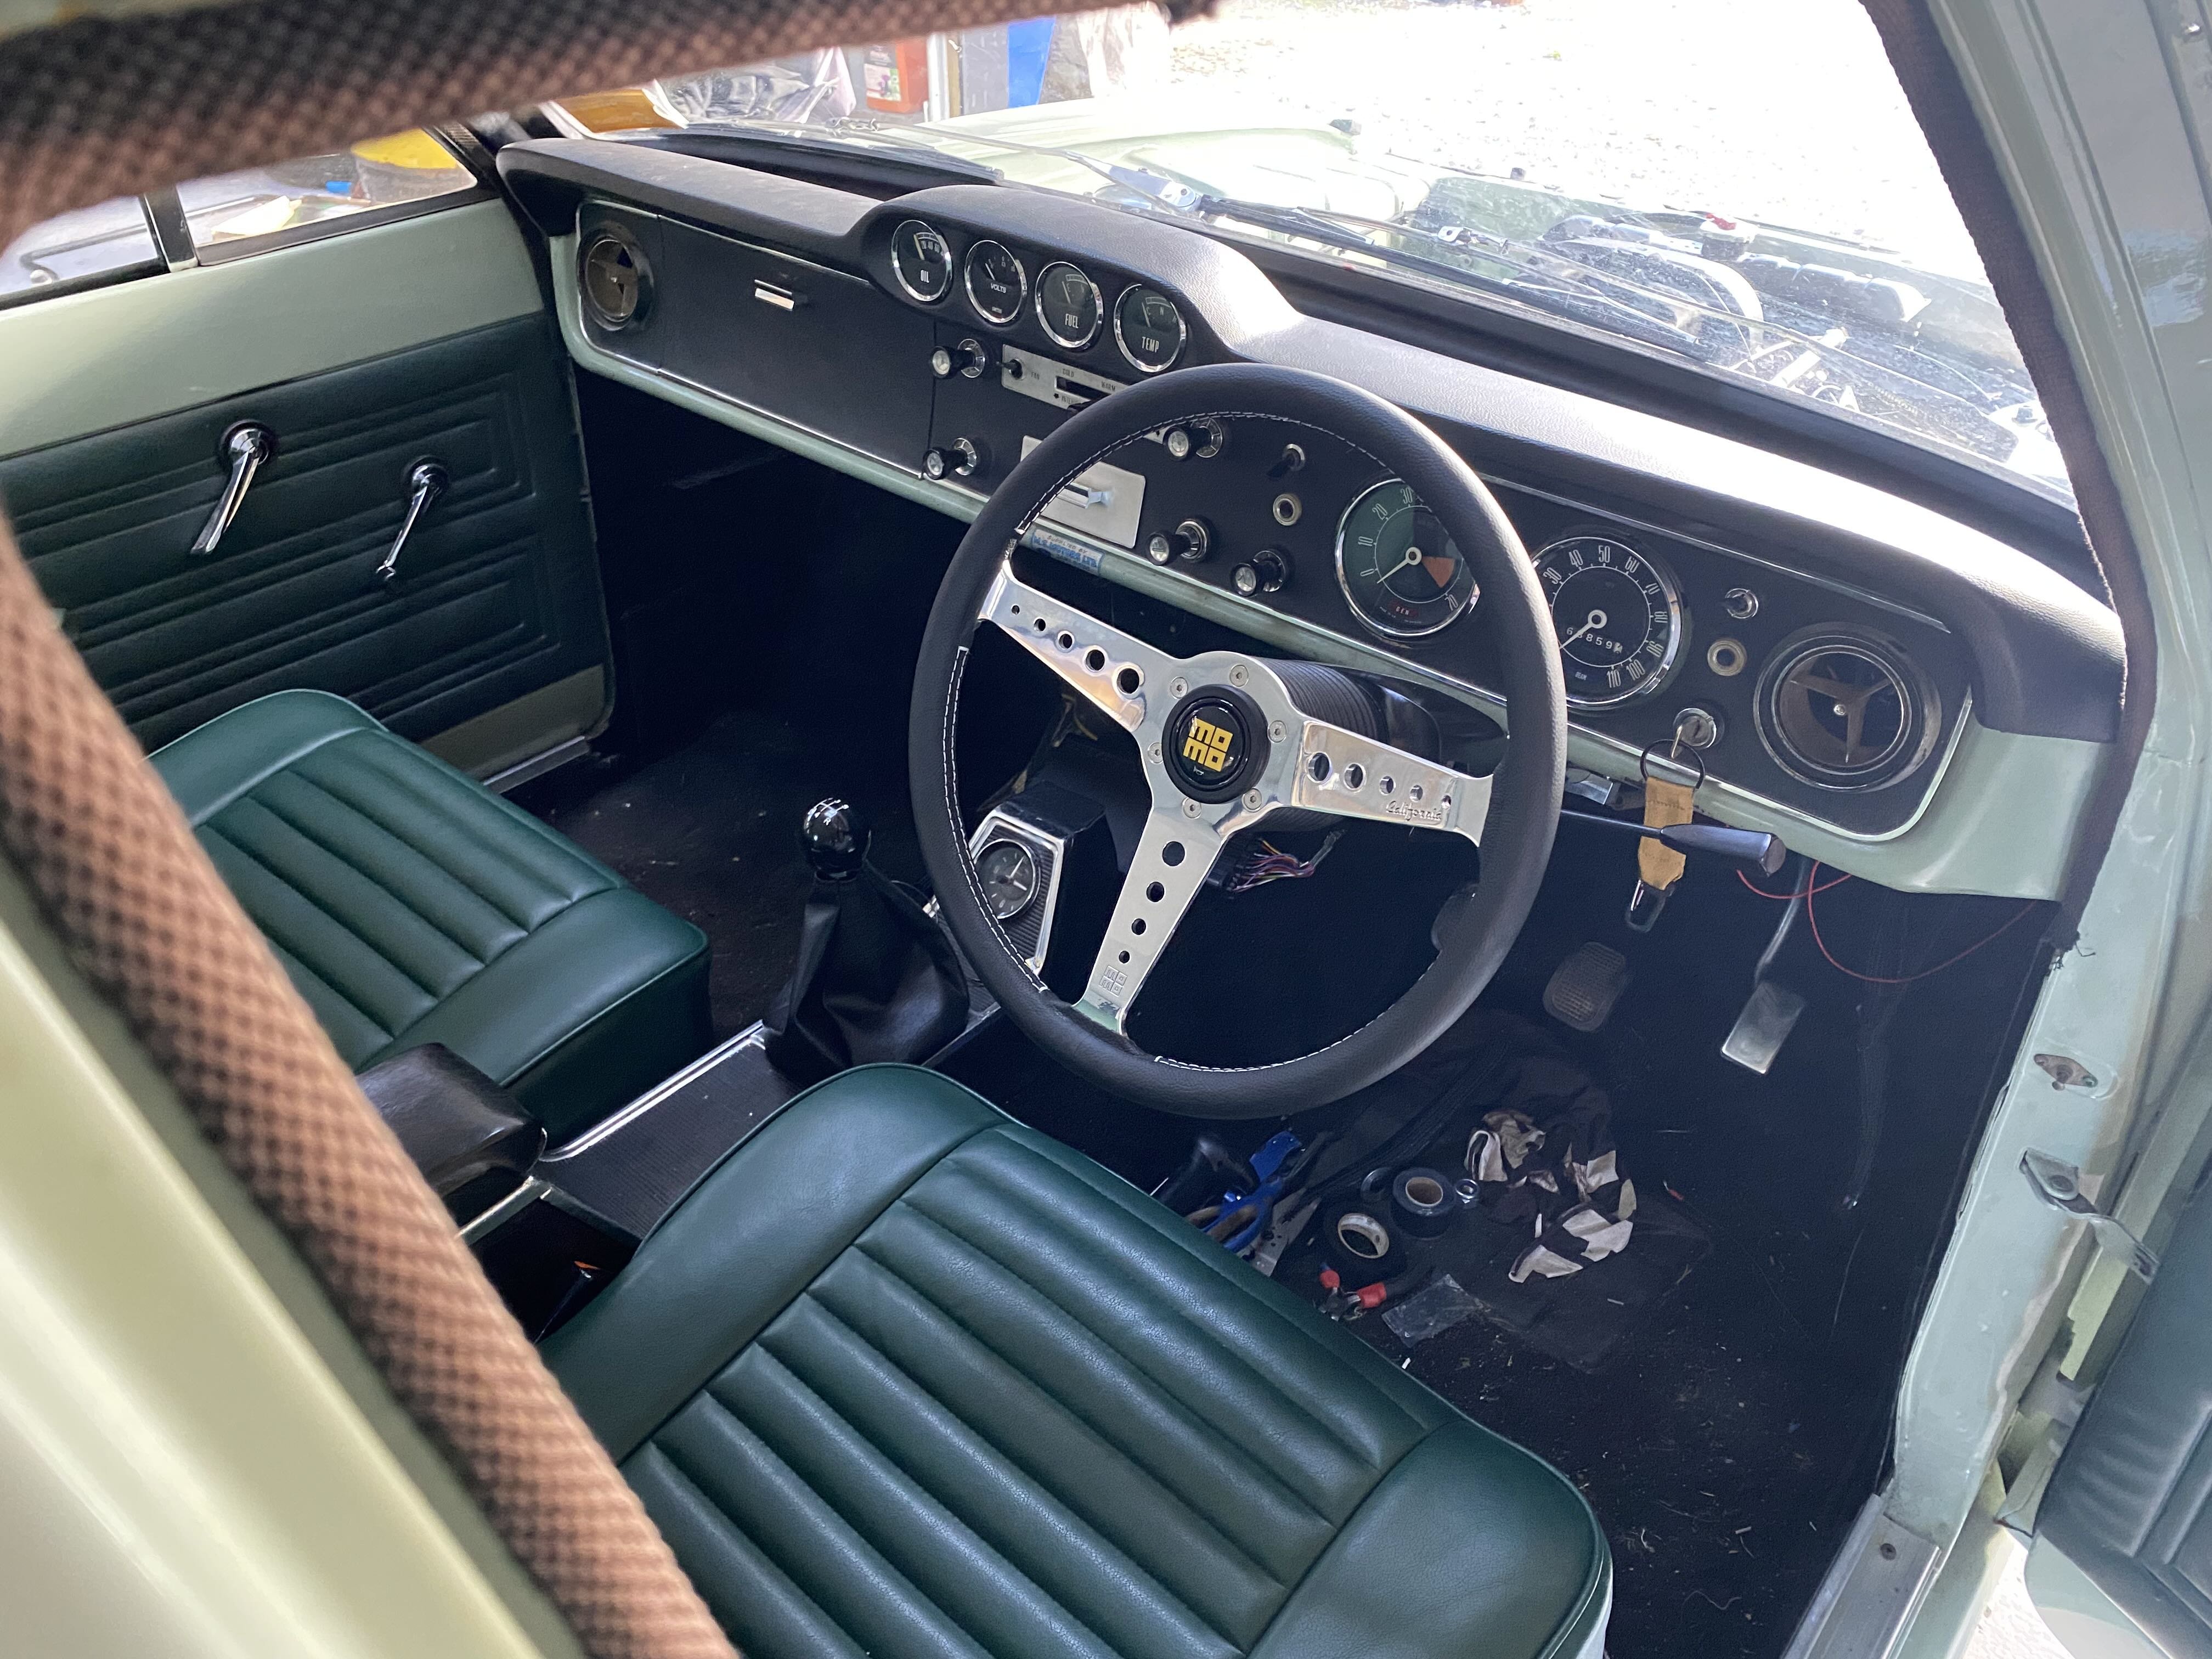
Still wrapping my head round the EFI/ECU life but my layman’s understanding after playing around for a bit is that my ECU isn’t sending ground pulses to injectors 2&3 which seems to be my issue. Injectors 1&4 are on a different pin from the ECU. Hopefully not too much of a drama to sort out. I’ve been plodding along with the interior, have managed to get all the gauges working, including rev counter which is a bonus. Slight issue is that the old 1968 rev counter only goes to 6k rpm’s, where redline in the ST170 is 7200, I’m going to try and rig up the shift light output from the ECU to be where the old generator light was in the rev counter at 6500- really need the engine to be running properly before I can see if that will work. Speedo and rev counter still need to have the outer bezels attached but that will come after final install. Have an underdash parcel tray to go in also but will hold off on that until everything else is finished. Could wait to try out my Xmas present from the better half- a nice Momo California which tops it off I reckon. She also made the shifter boot .
1 point
-
With the last decent weekend for a while I thought I'd push this outside to get some pics and give the shed a good sweep out.. liking the look in the sun..
1 point
-
wow. what a week. 3000kms round trip. averaged 40 mpg. pinto, 5 speed and 3.5 diff. was just off idle most of the time. got this...1 point


.jpg.c5ee675bb29516d5fdf619d5ceeed8be.jpg)
.jpg.a3b9134e316c1905d19660e24f3756d3.jpg)


.thumb.jpg.570970b401ac8d26ce9af7c1bf2bd8cd.jpg)


This leaderboard is set to Auckland/GMT+12:00