
Leaderboard


Popular Content
Showing content with the highest reputation on 06/21/22 in all areas
-
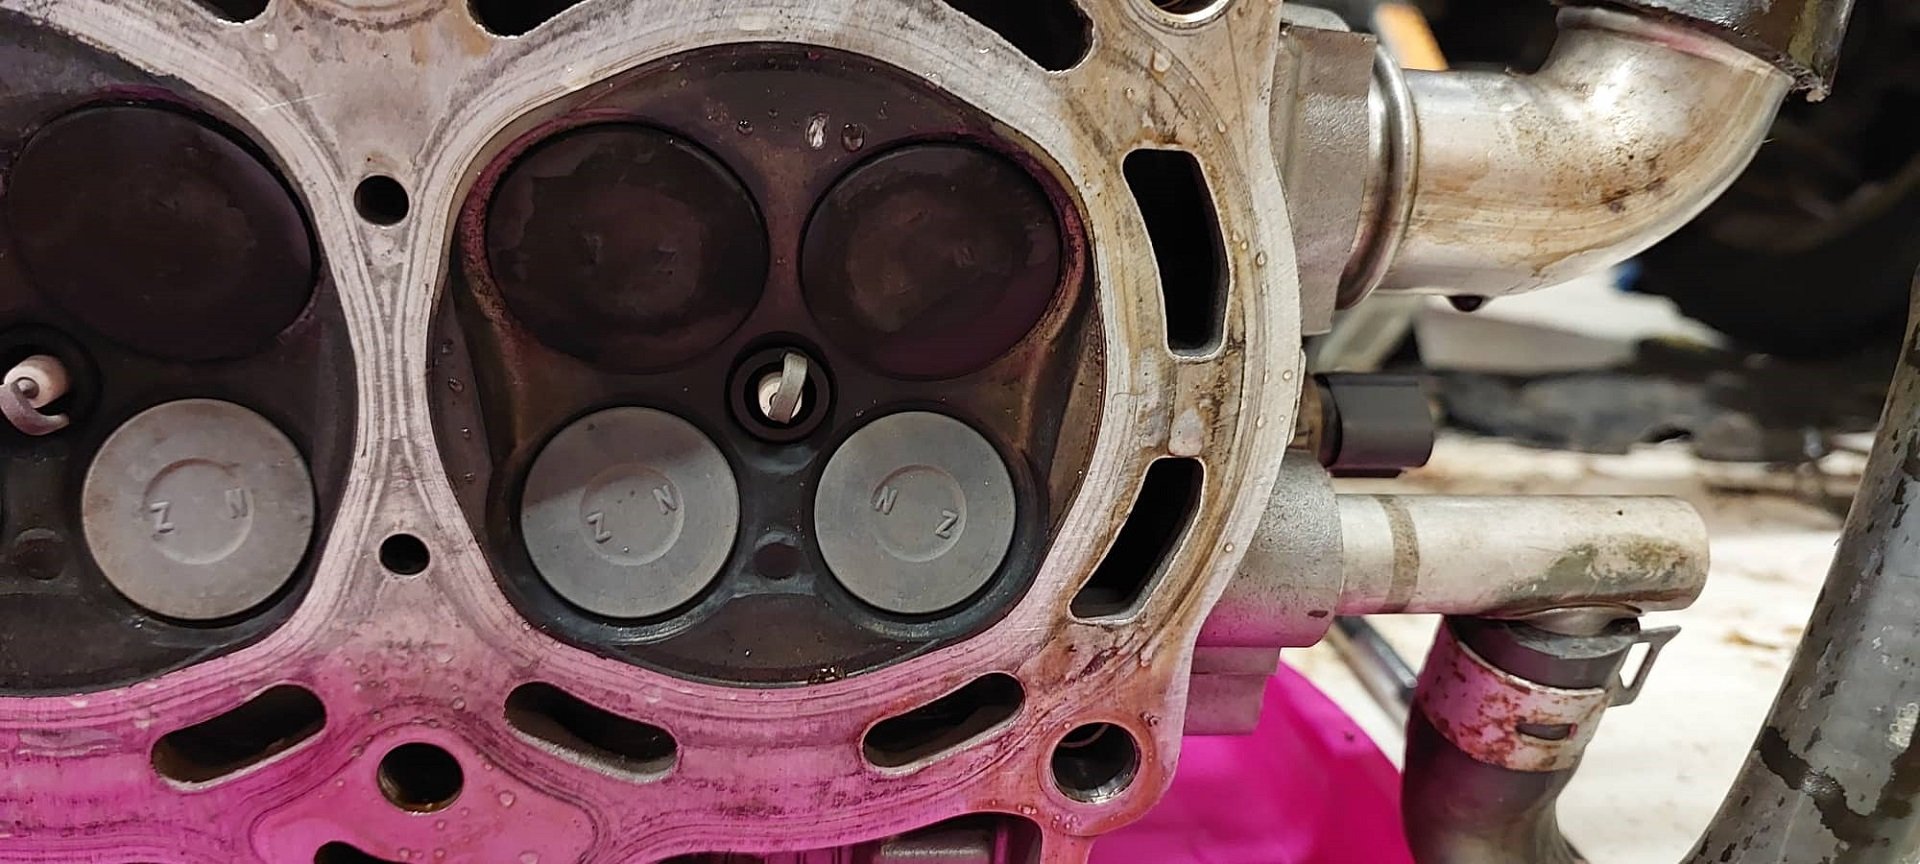
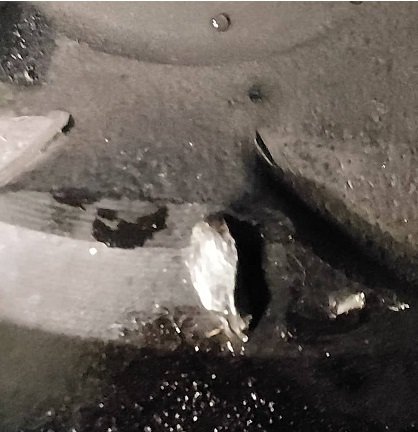
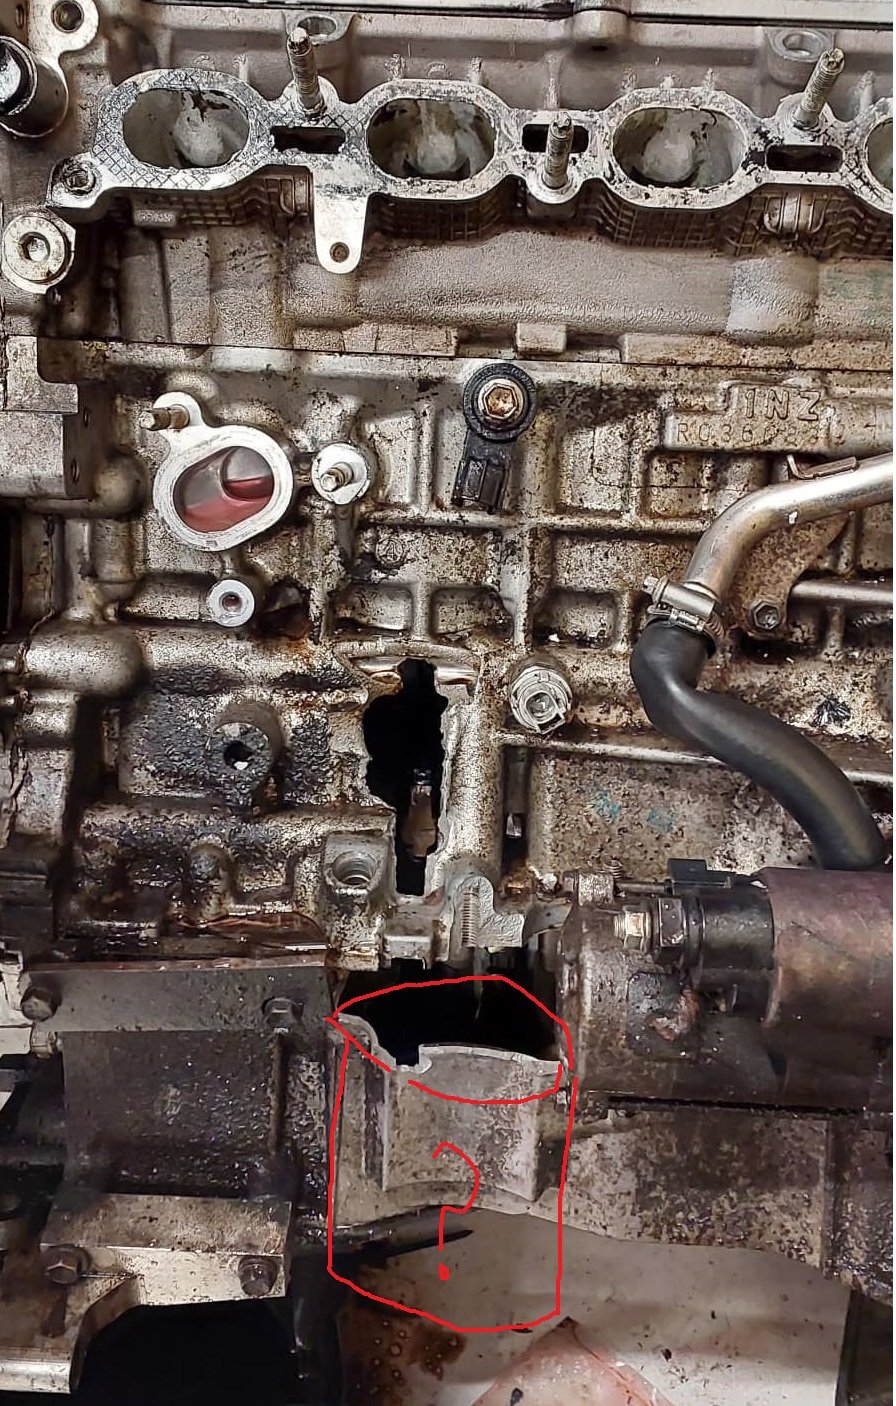
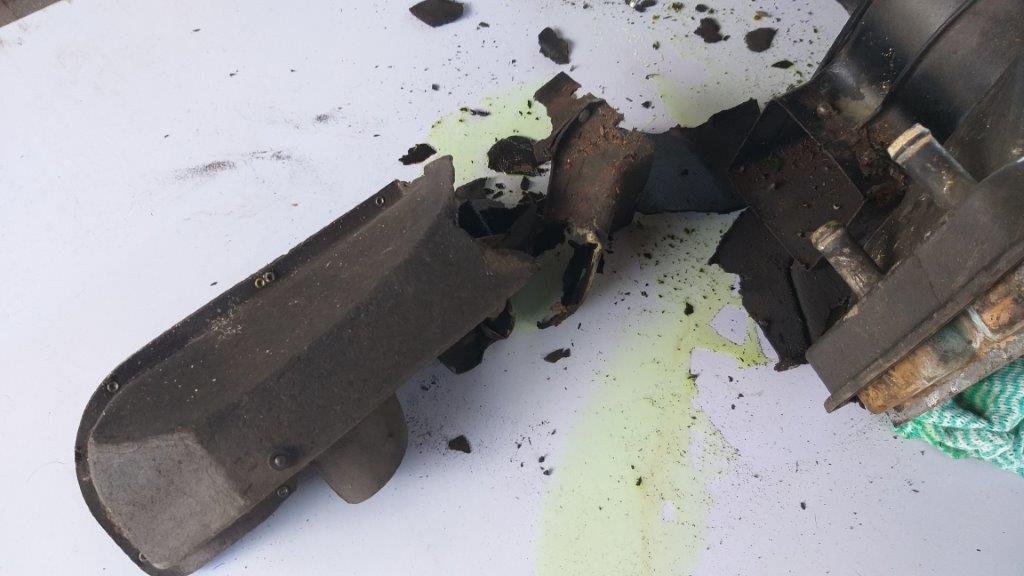
I got the head off today. A rough timeline of events, based on evidence: -Cylinder 2 rod went asplode -Lower part of the broken rod smashed the engine block, front and rear. -The still full throttle engine, probably thanks to my new intake design that has runners pointing to this area (haha damnit) sucked a piece of debris into cylinder 4. -Cylinder 2 piston rotated in the bore slightly while near TDC, and was bonked by one of the intake valves to push it back down a bit. (with very little resistance, as no rod) -No rod left to push it back up, so stayed there and no further damage to #2 valves or head. -The debris that entered cylinder 4 got conked between the piston and the head. Luckily, the piston material took the brunt of it, and it buried mostly into the piston rather than into the head. -Small dent left in the head on cyl 4, straight looking valves everywhere. But will do a leak test on all of them. As possible damage on cyl 2 valves. Project smallblock still looks good to go, so long as I can find all of the 2NZ related bits! The cams are 100% fine, and the head looks 99% fine. I'll give it a good clean out to make sure no debris entered the oil passages. But no evidence of that which I can see. Probably because one of the main oil supply galleries was busted by the conrod, around about the same time as the oil filter said Bon Voyage. Piston #4 close up: Small dent on the head. Will smooth the edges so it wont cause knock. Feeling pretty lucky!
 21 points
 -
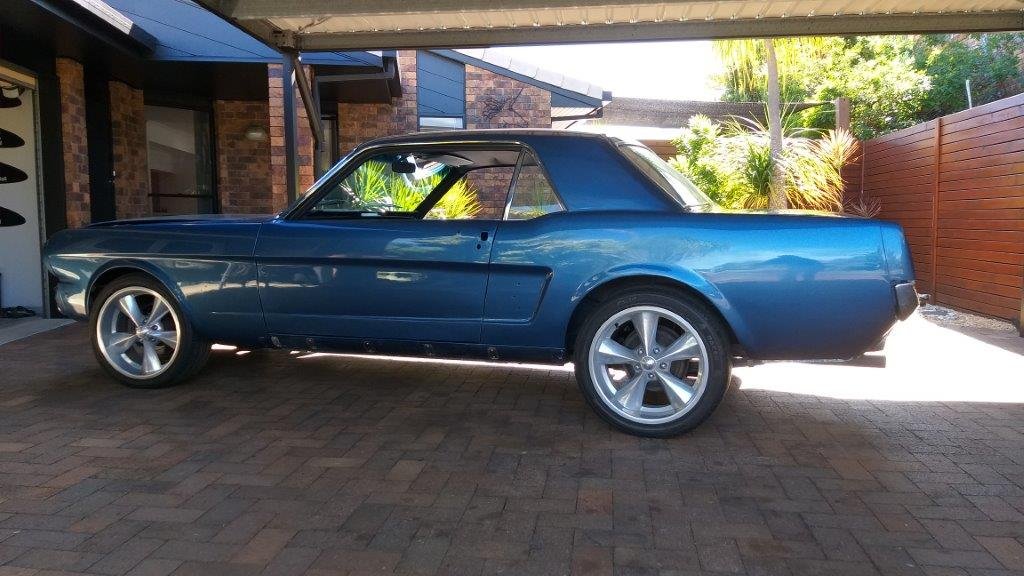
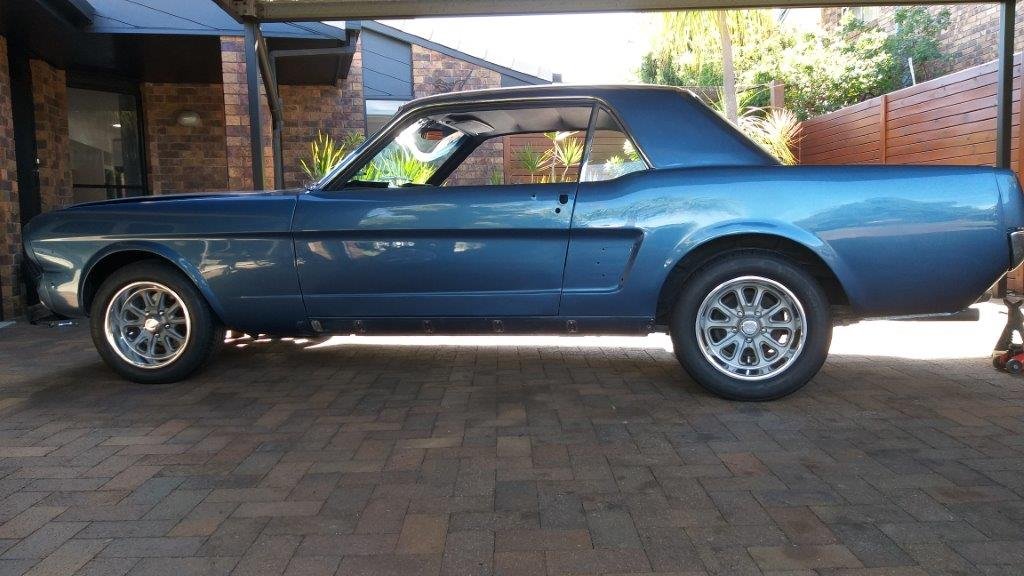
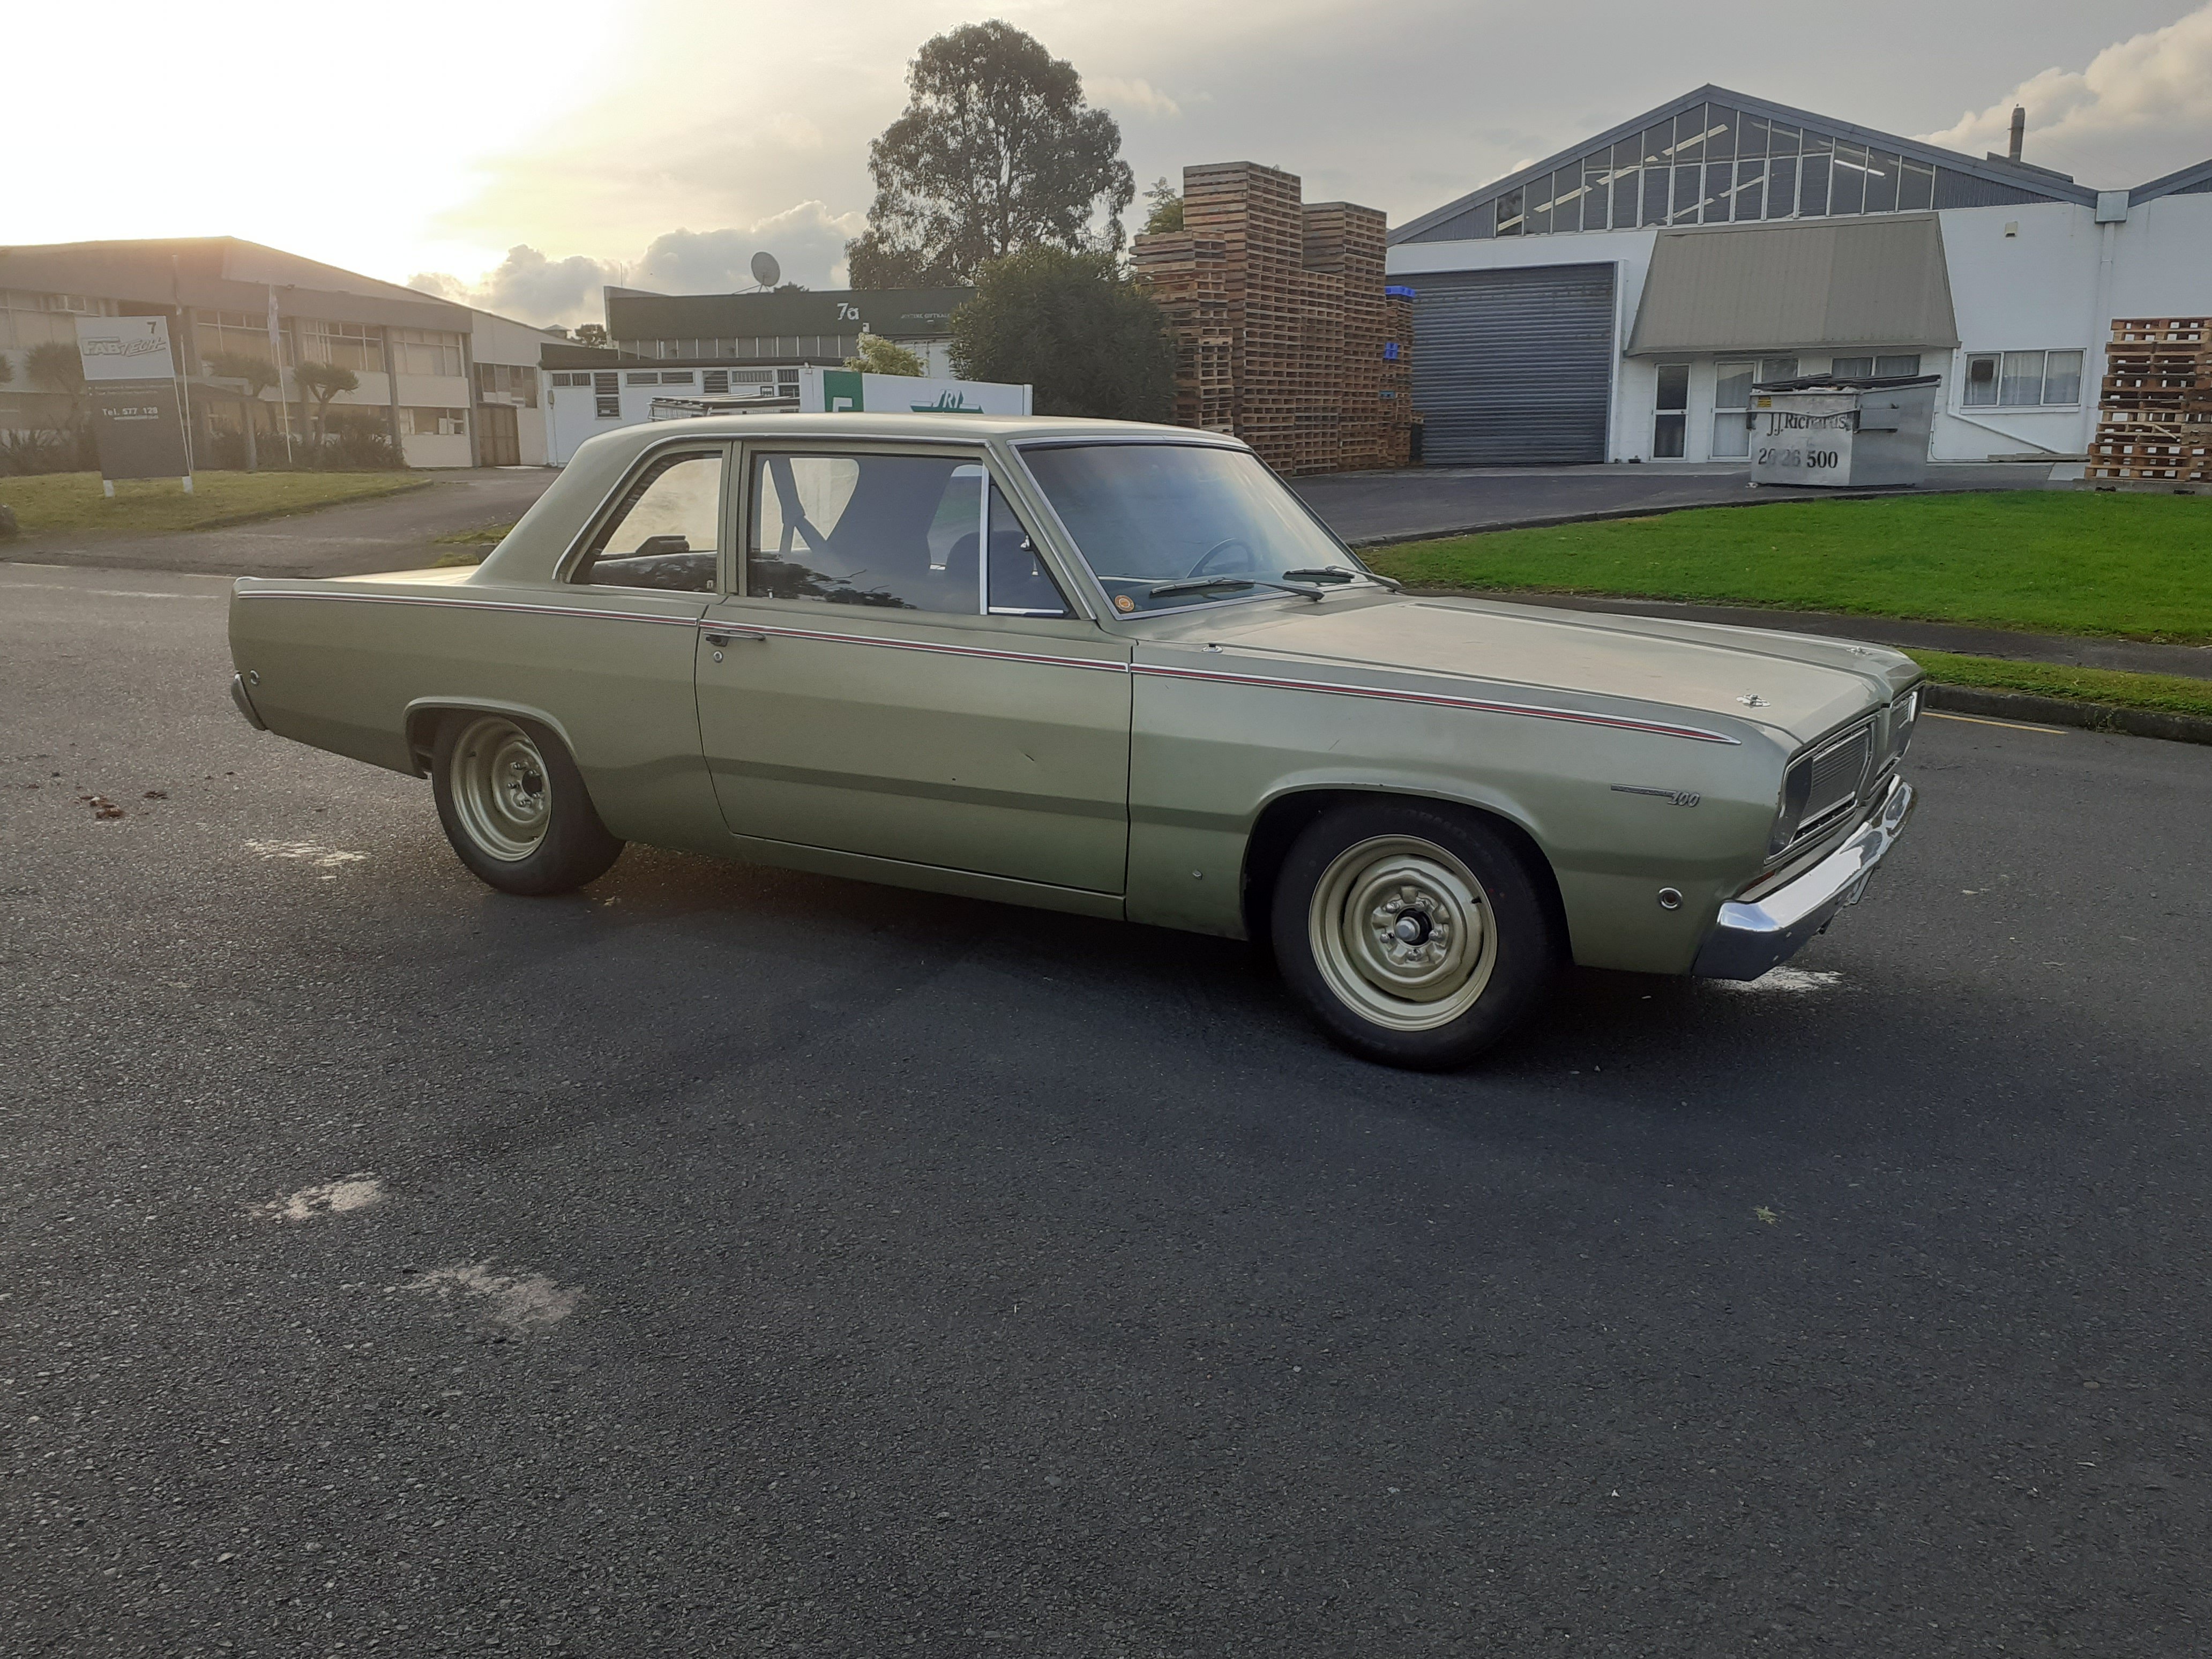
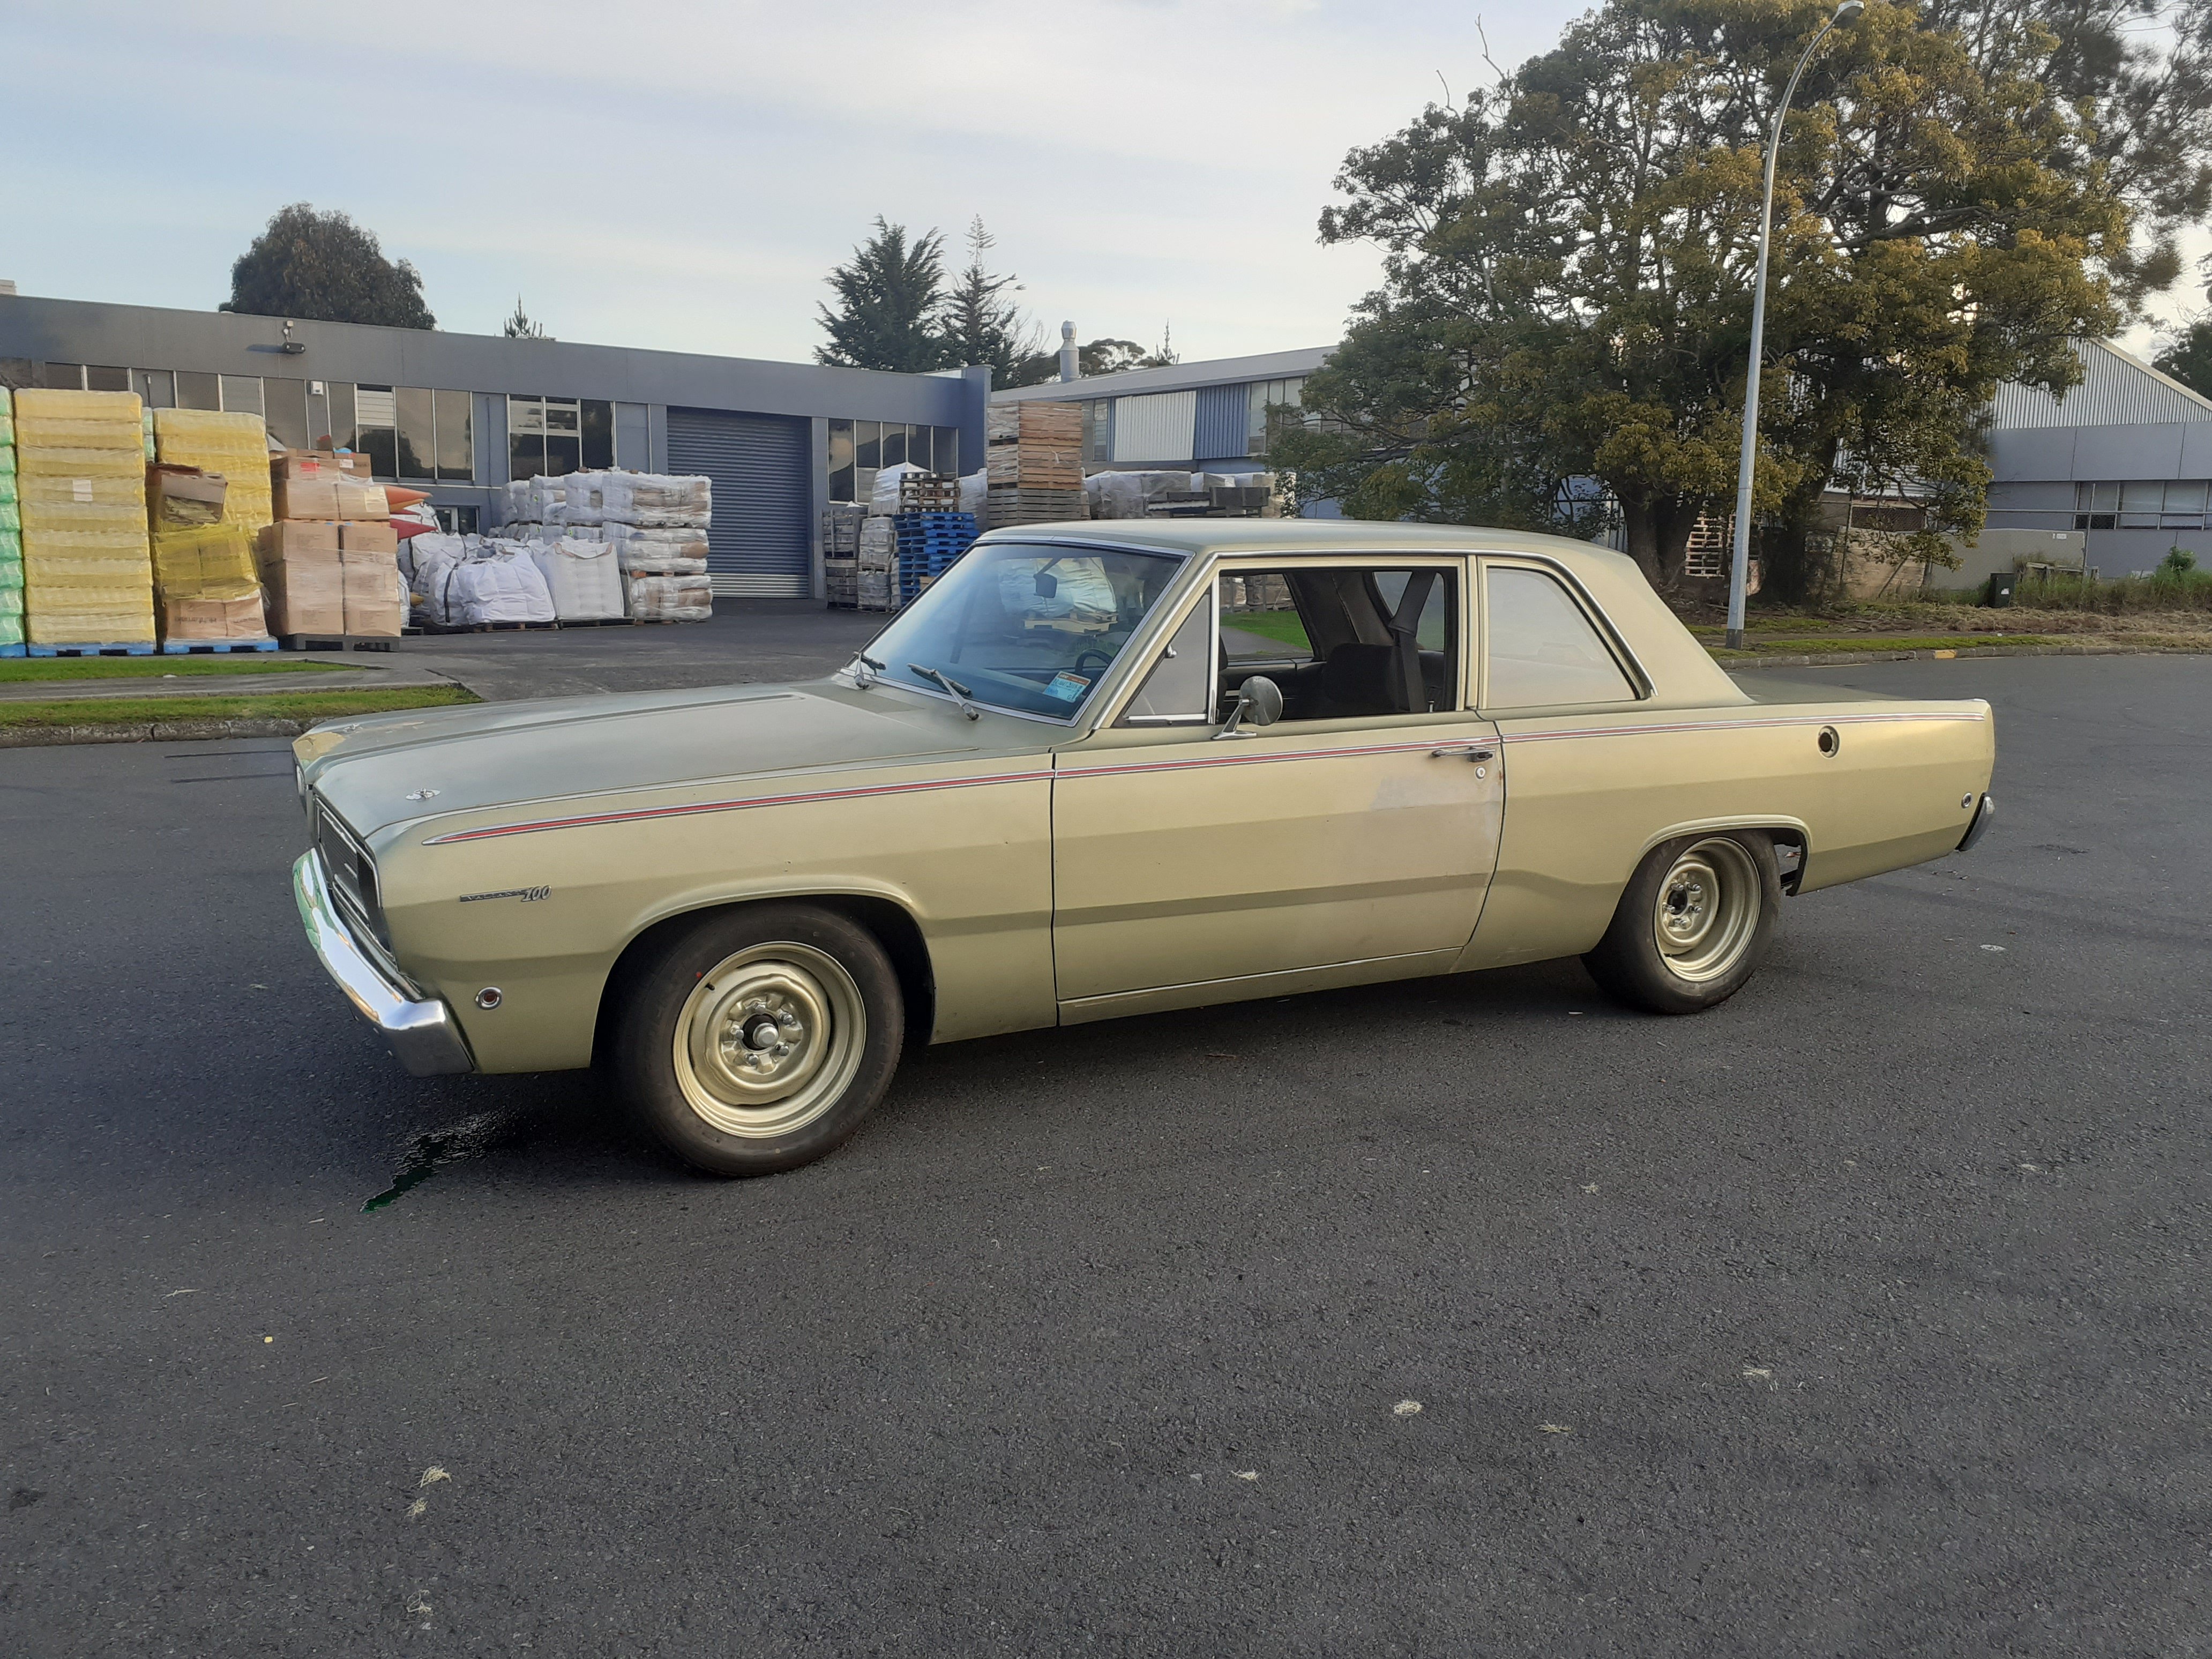
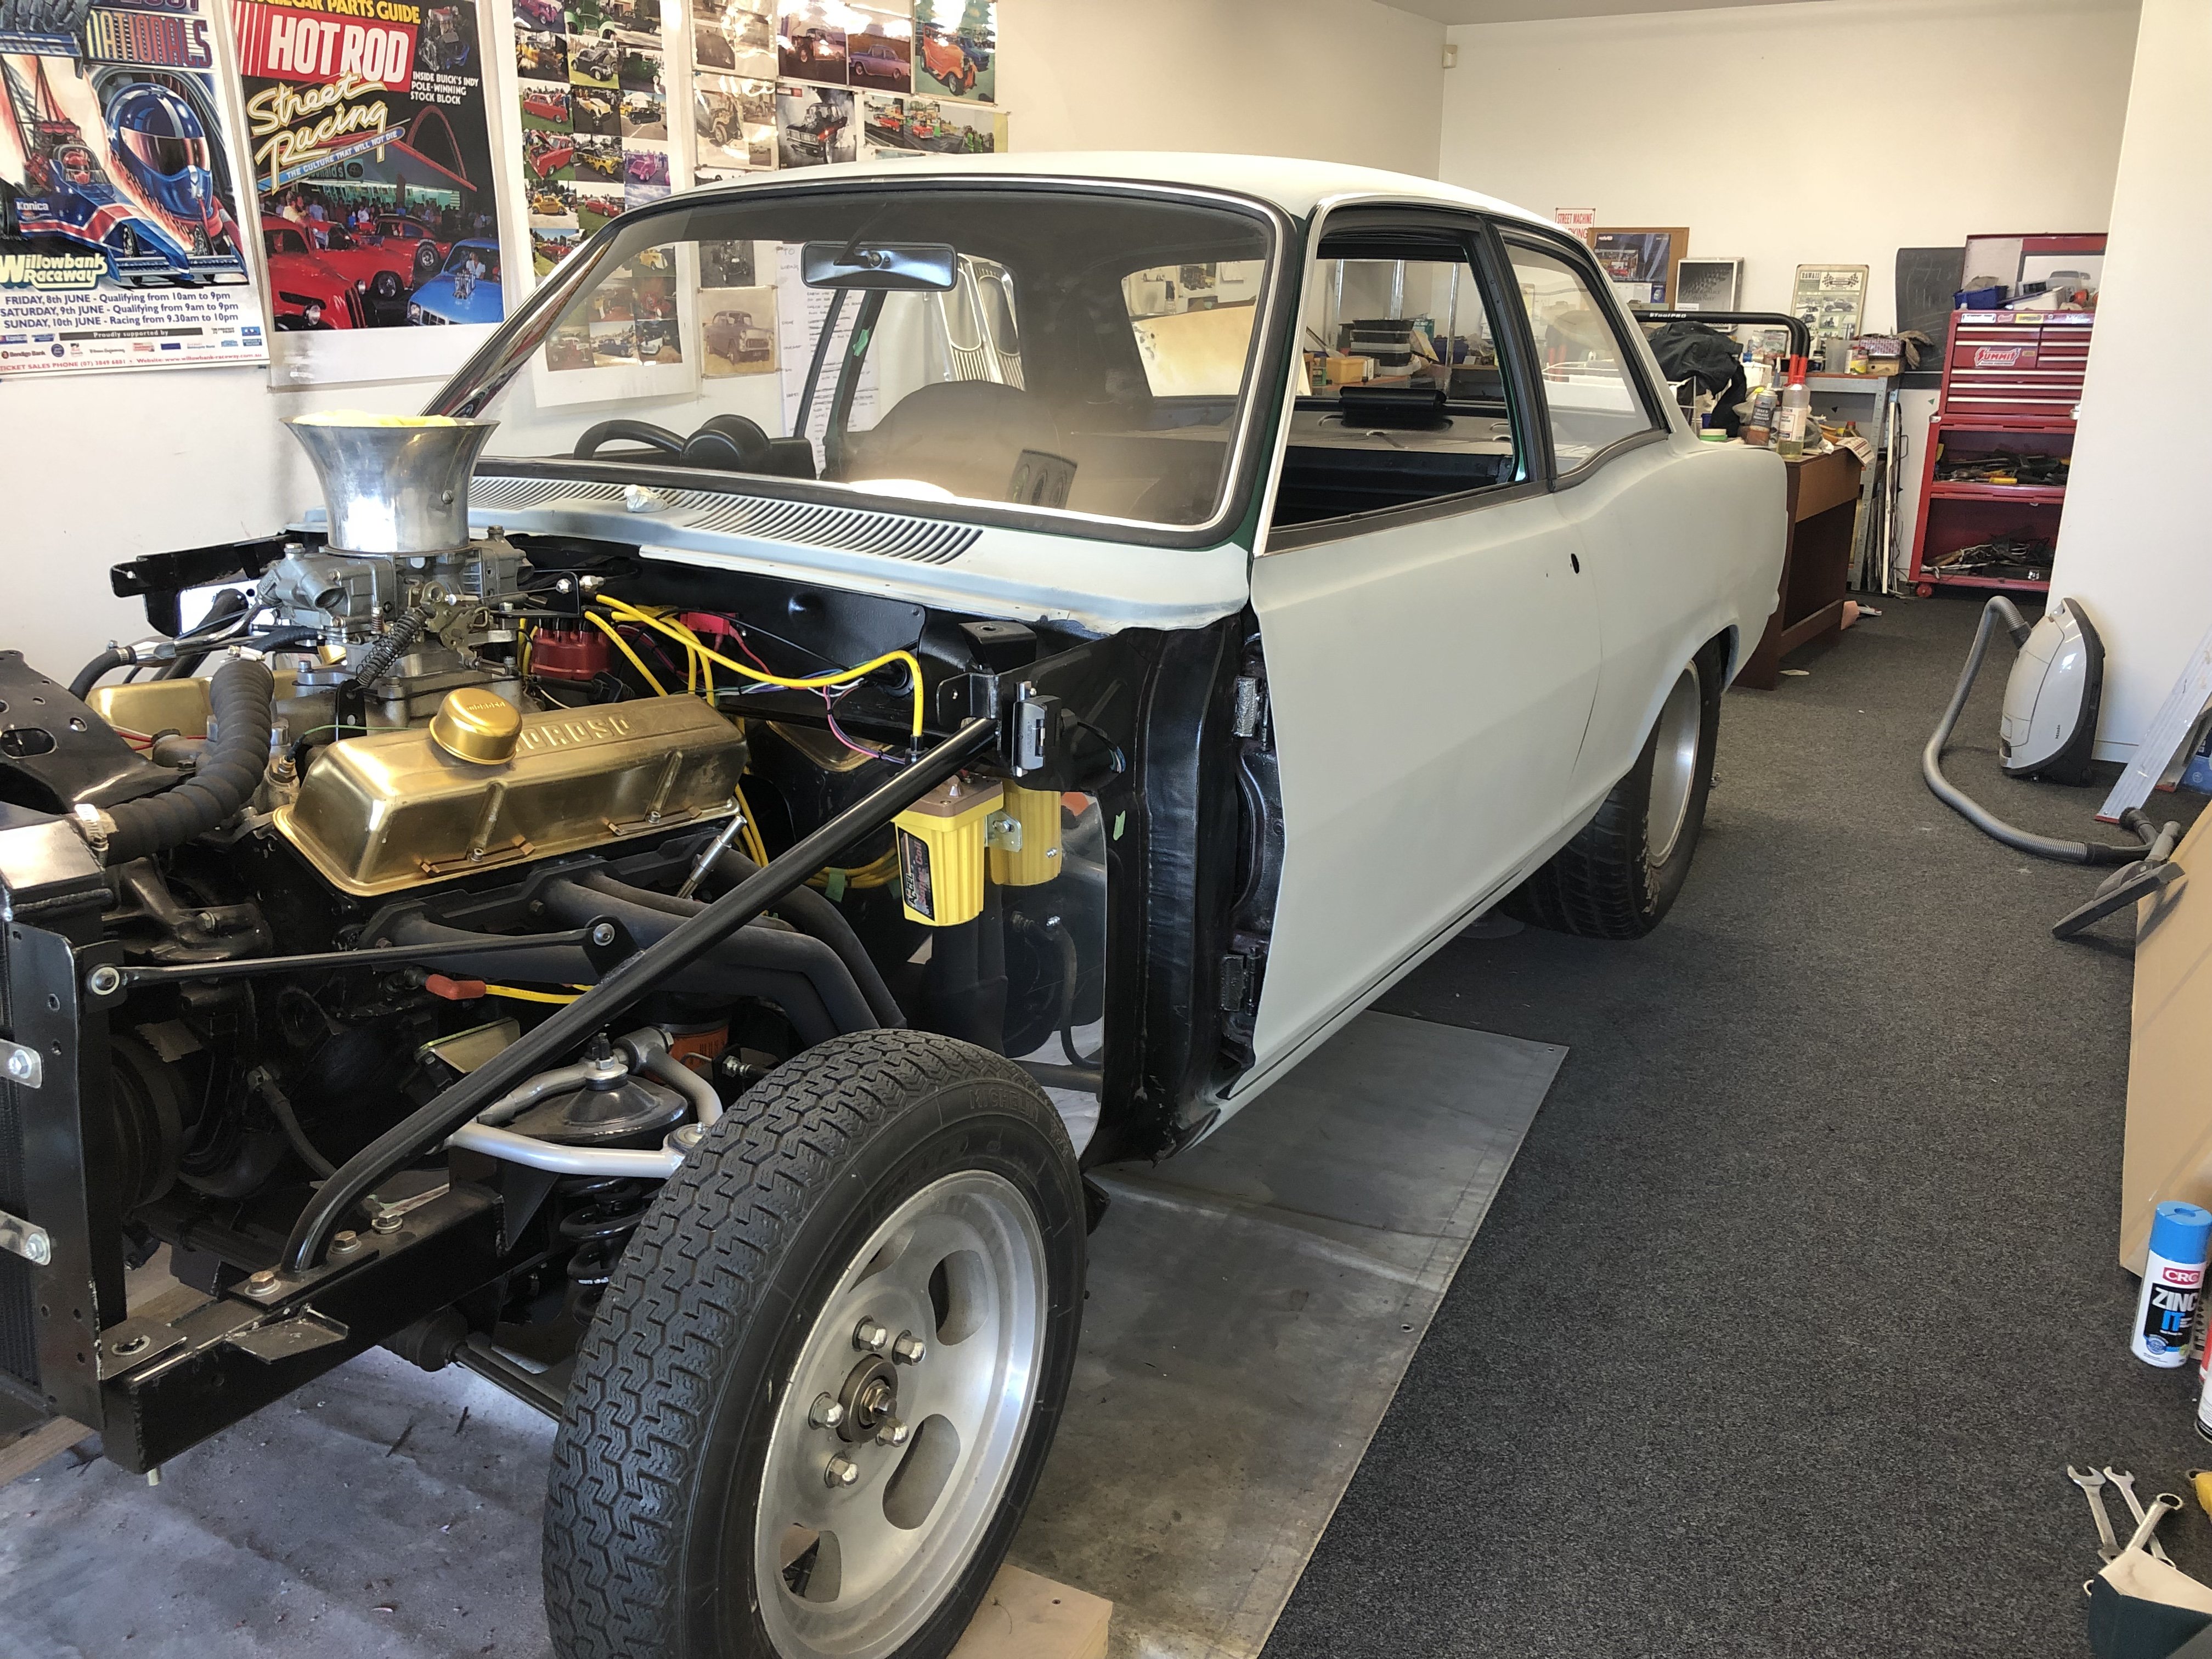
Mama got some new shoes today. Just waiting for the knock off spinners to arrive to complete the look. I've now got heaps of fender gap so I'll be able to dial in a bit of low which will make my heart sing. Before and after shots:
11 points
-
It drives. Got a few bugs to work out though. The main one is it gets hot, and can't cool itself down. This might be a bit of a prick to sort out as there's no room left I think it has more boost than it should do Brakes are a bit spongy, might need next size up master cyl, might improve once they bed in a bit Seats are a bit low Needs something to stop the pinion angle changing under accel, driveshaft just knocked the floor slightly
9 points
-
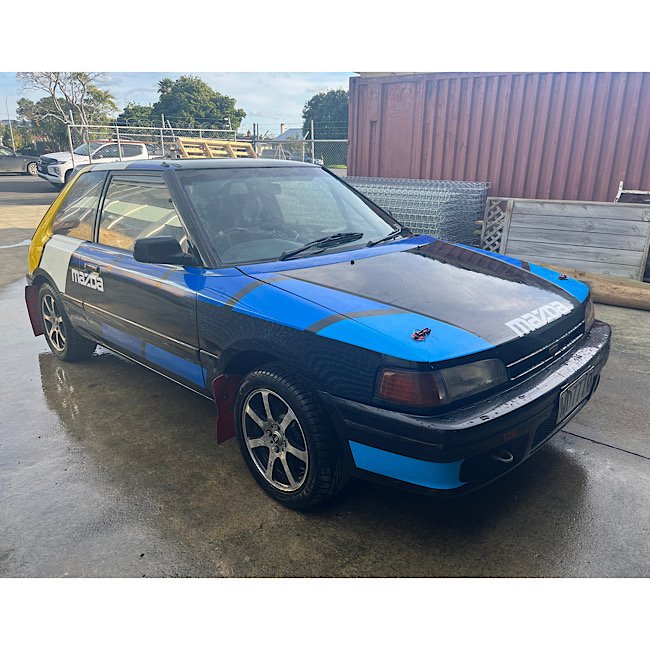
Had a date with the hose this arvo. Have the little gem a wash. still has lime/clay/mud residue stuck to it from its last hiding. looking forward to getting this legal . I think I might chuck the 14” rally wheels on it for a looksy
8 points
-
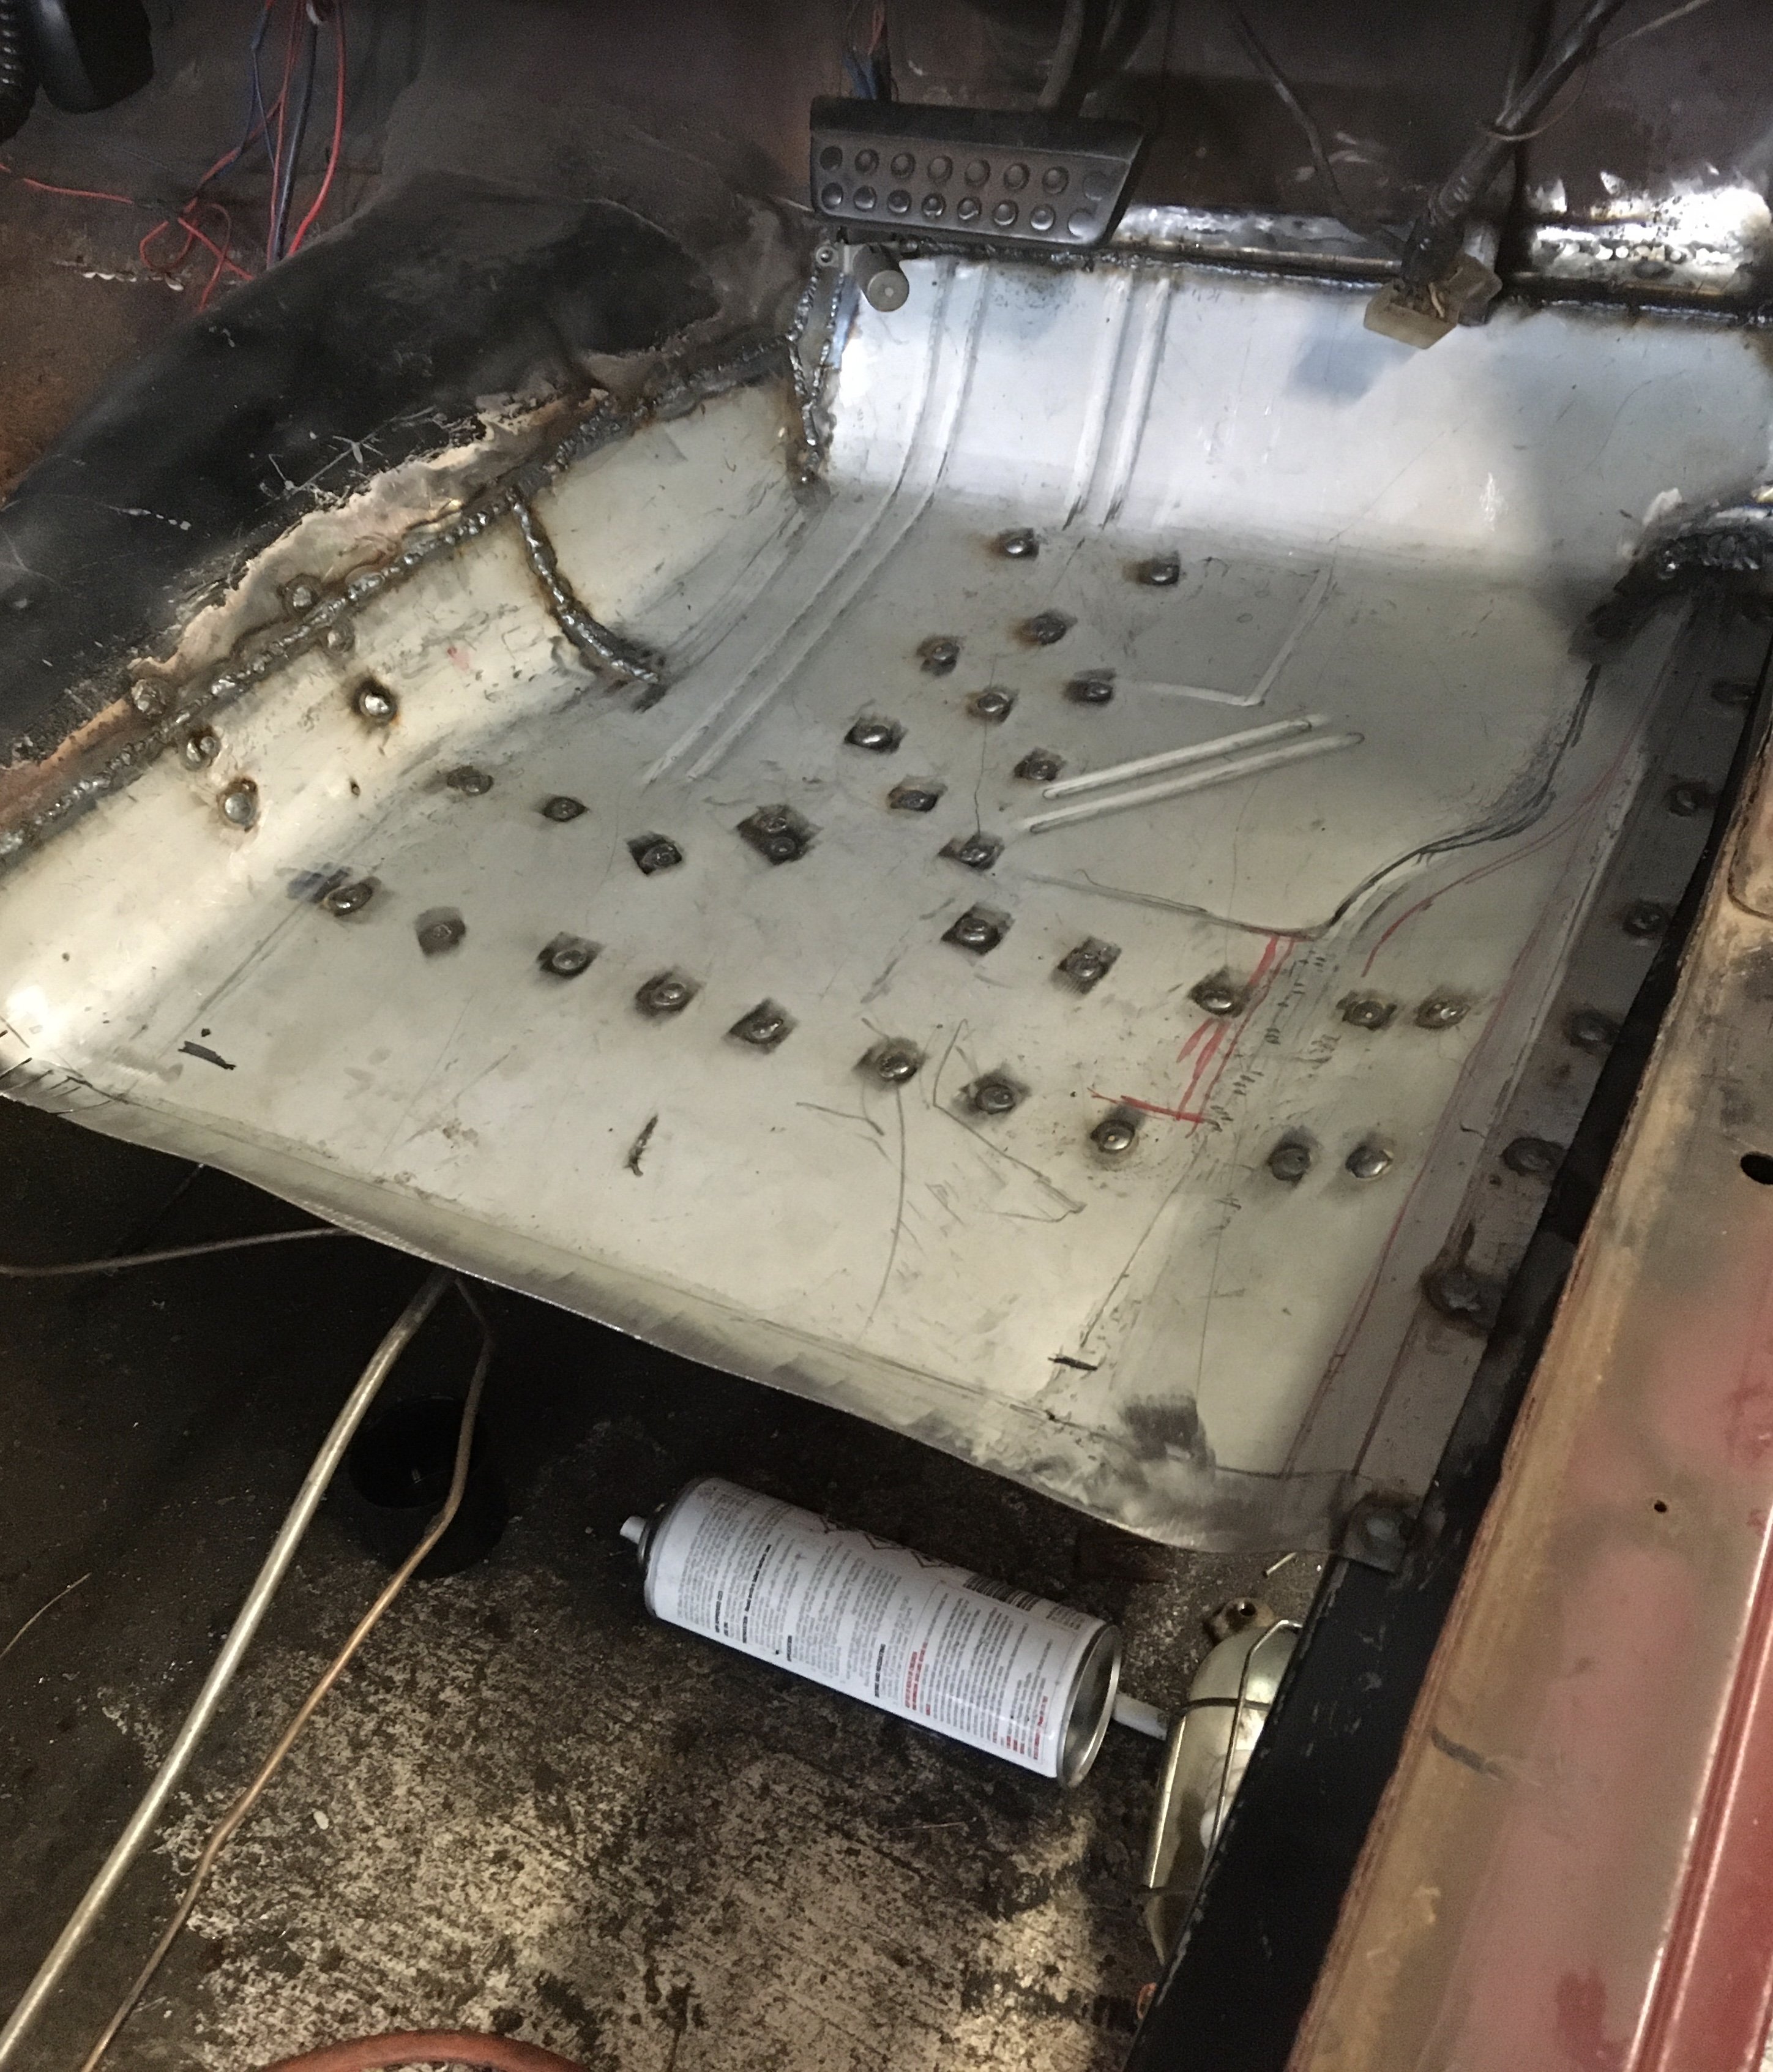
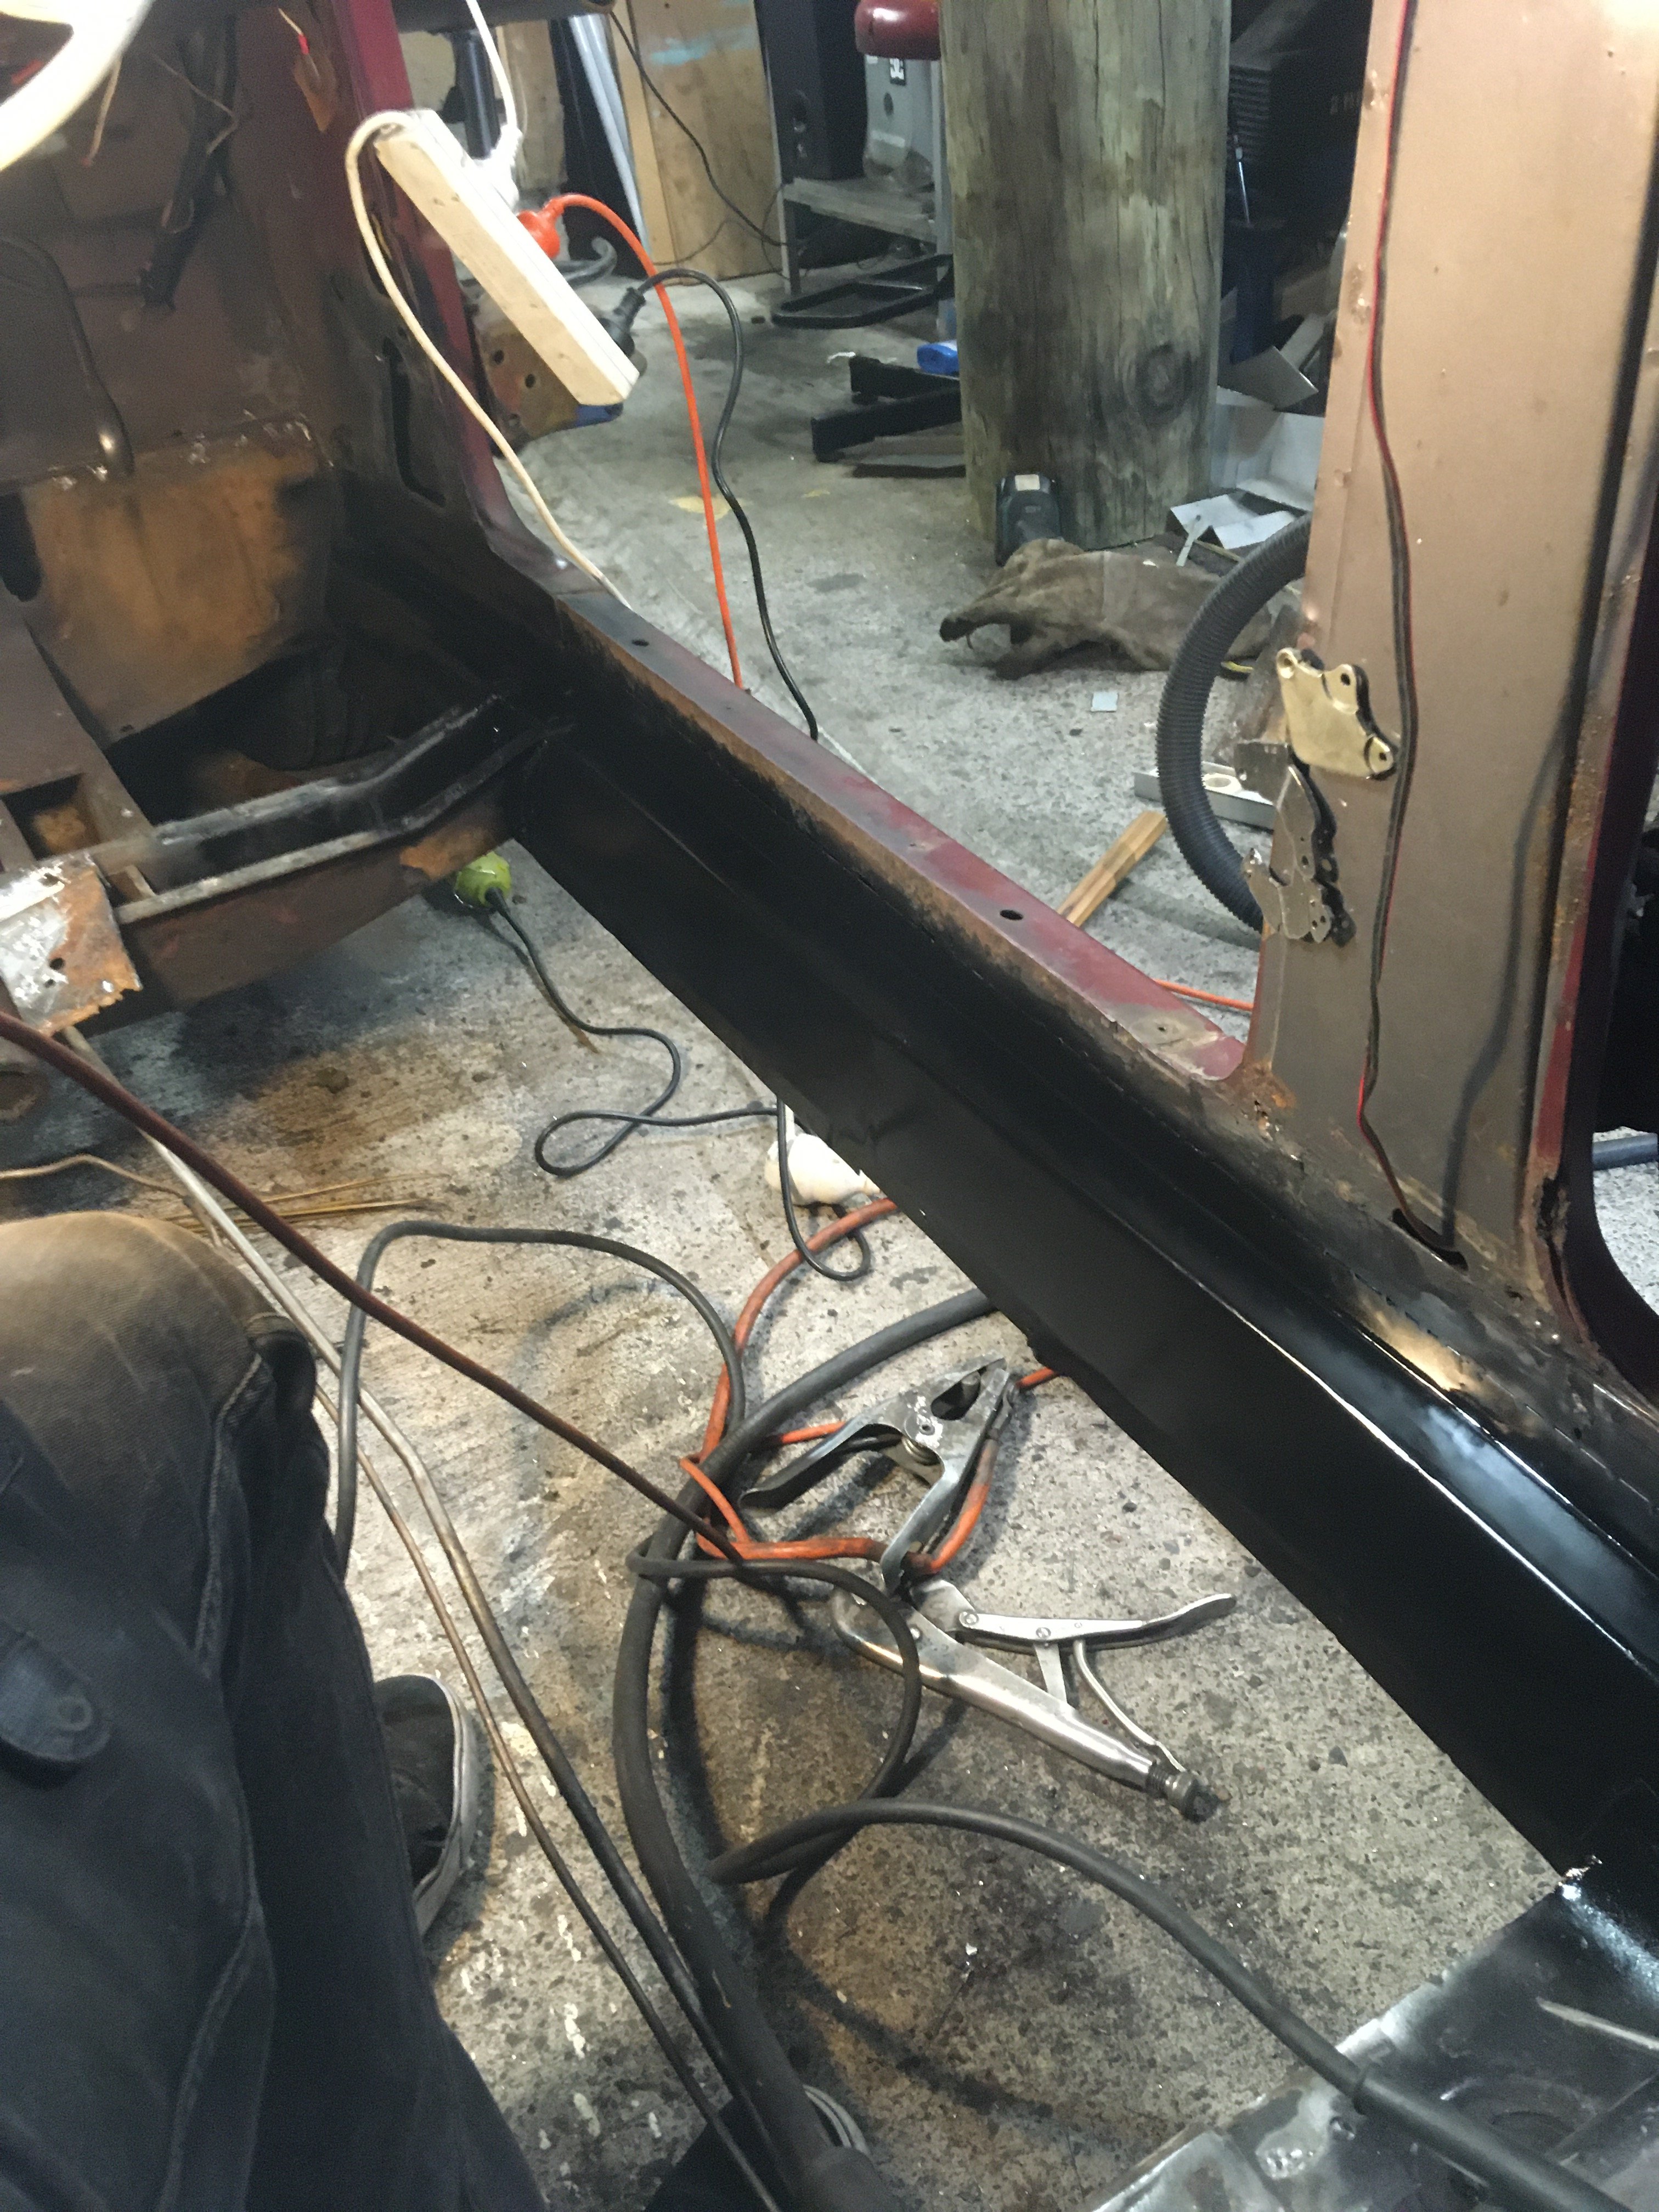
Finally found Time to get another day working on the car , got the rear fitted and tacked in almost half way there
7 points
-
Nah no 2NZ rods available, and I'm fairly doubtful that all of my current pistons would be usable. Some of the bore is missing down the bottom on cylinder 2, so piston might have copped some damage. As well as the entirety of the oil filter and it's housing is AWOL haha Some good news while I've been stripping the motor down though, I found some of the rattles. The rear engine mount bolt has been vibrating itself loose, and my upper half of the alternator bracket had broken. So I think one or the other of those was making the recent noise, not the clutch or gearbox. So that's good news.
5 points
-
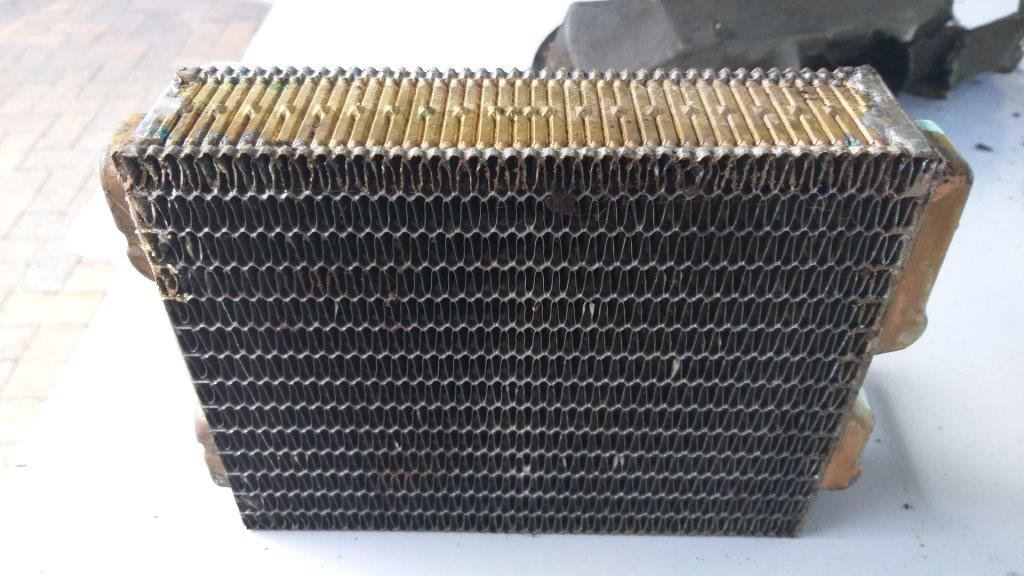
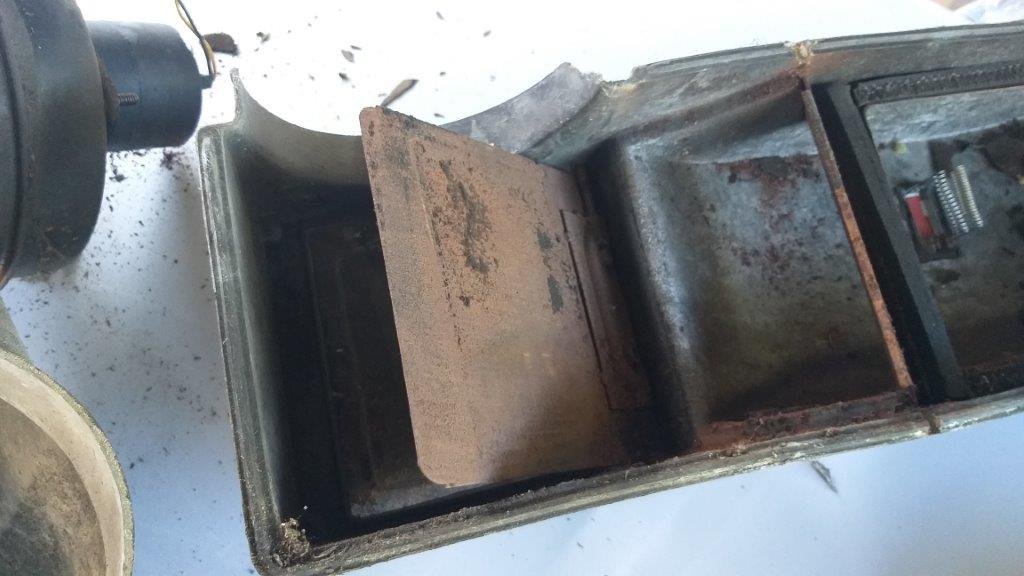
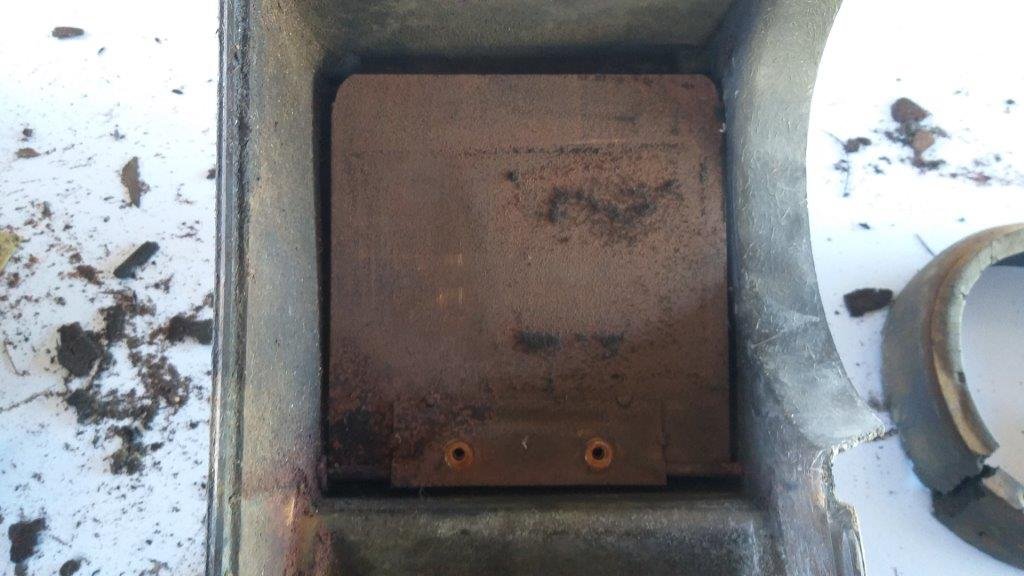
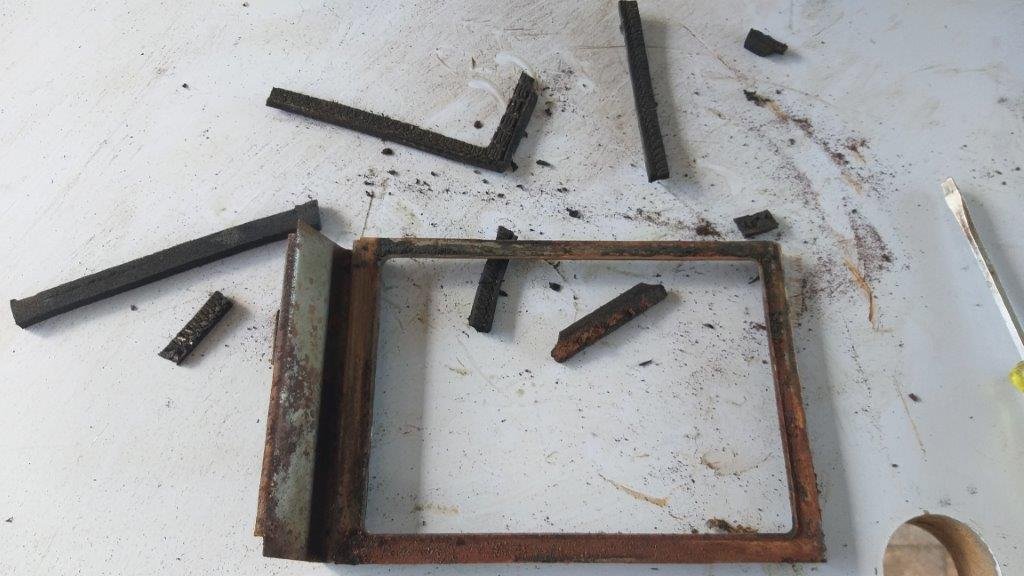
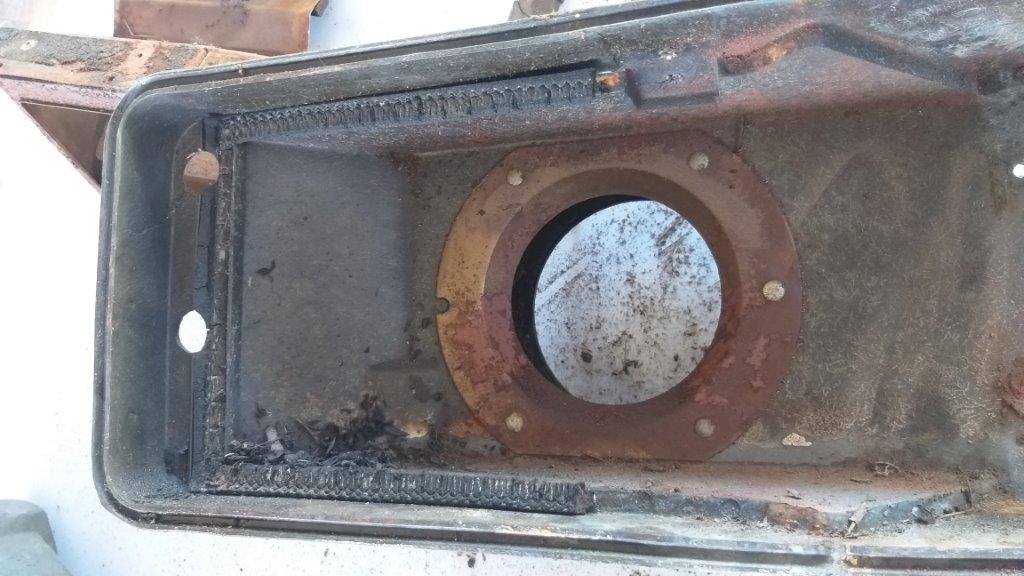
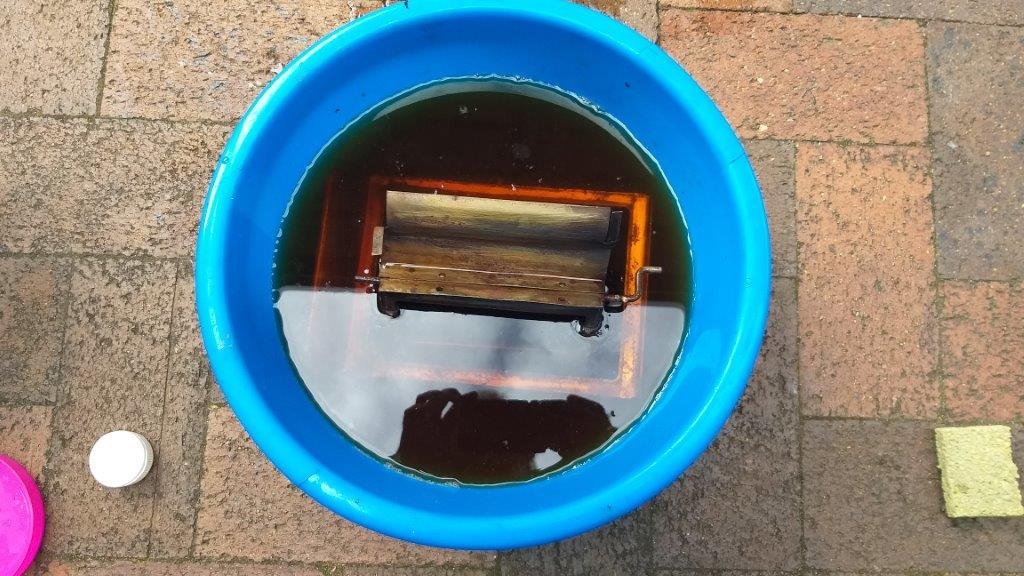
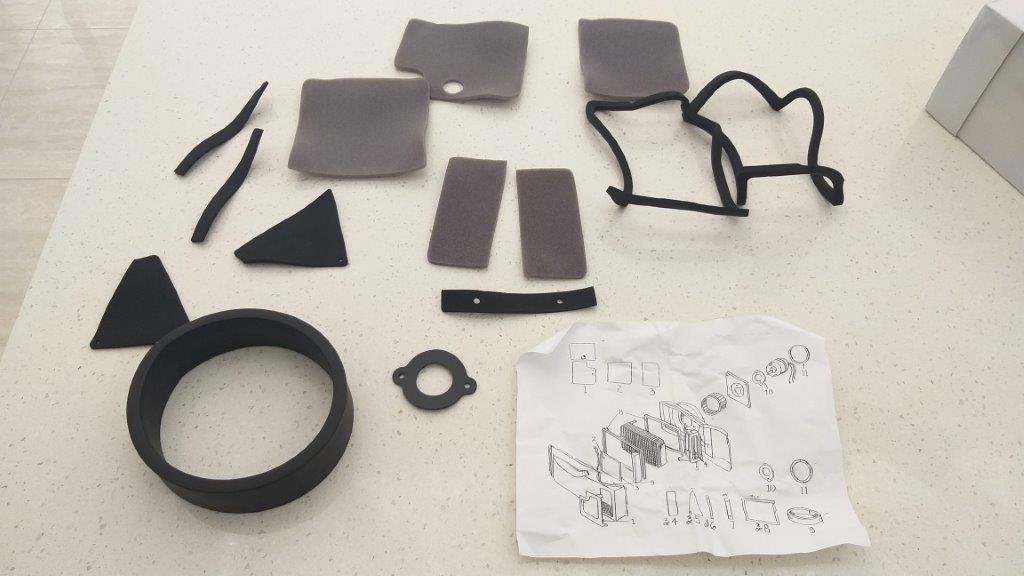
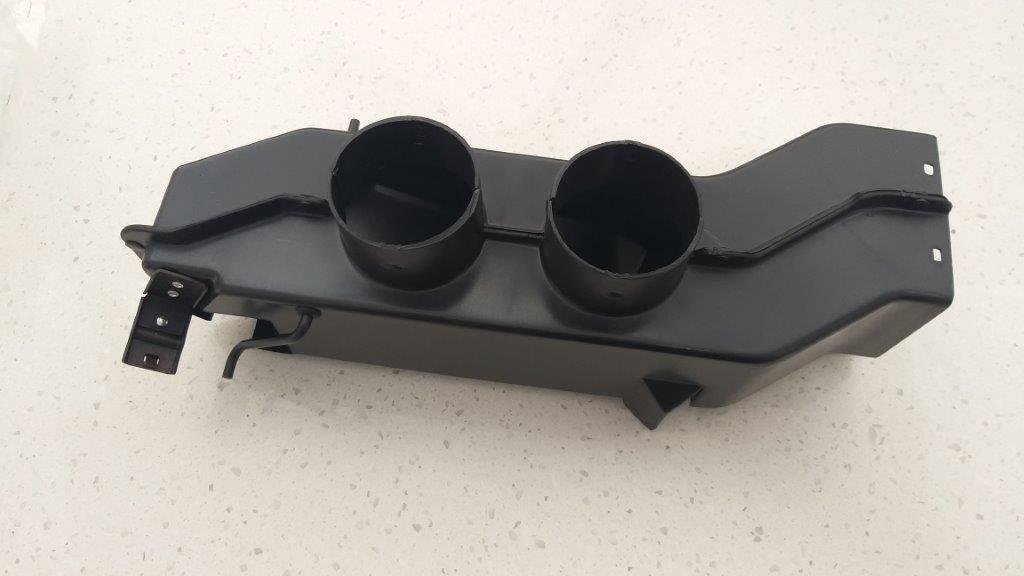
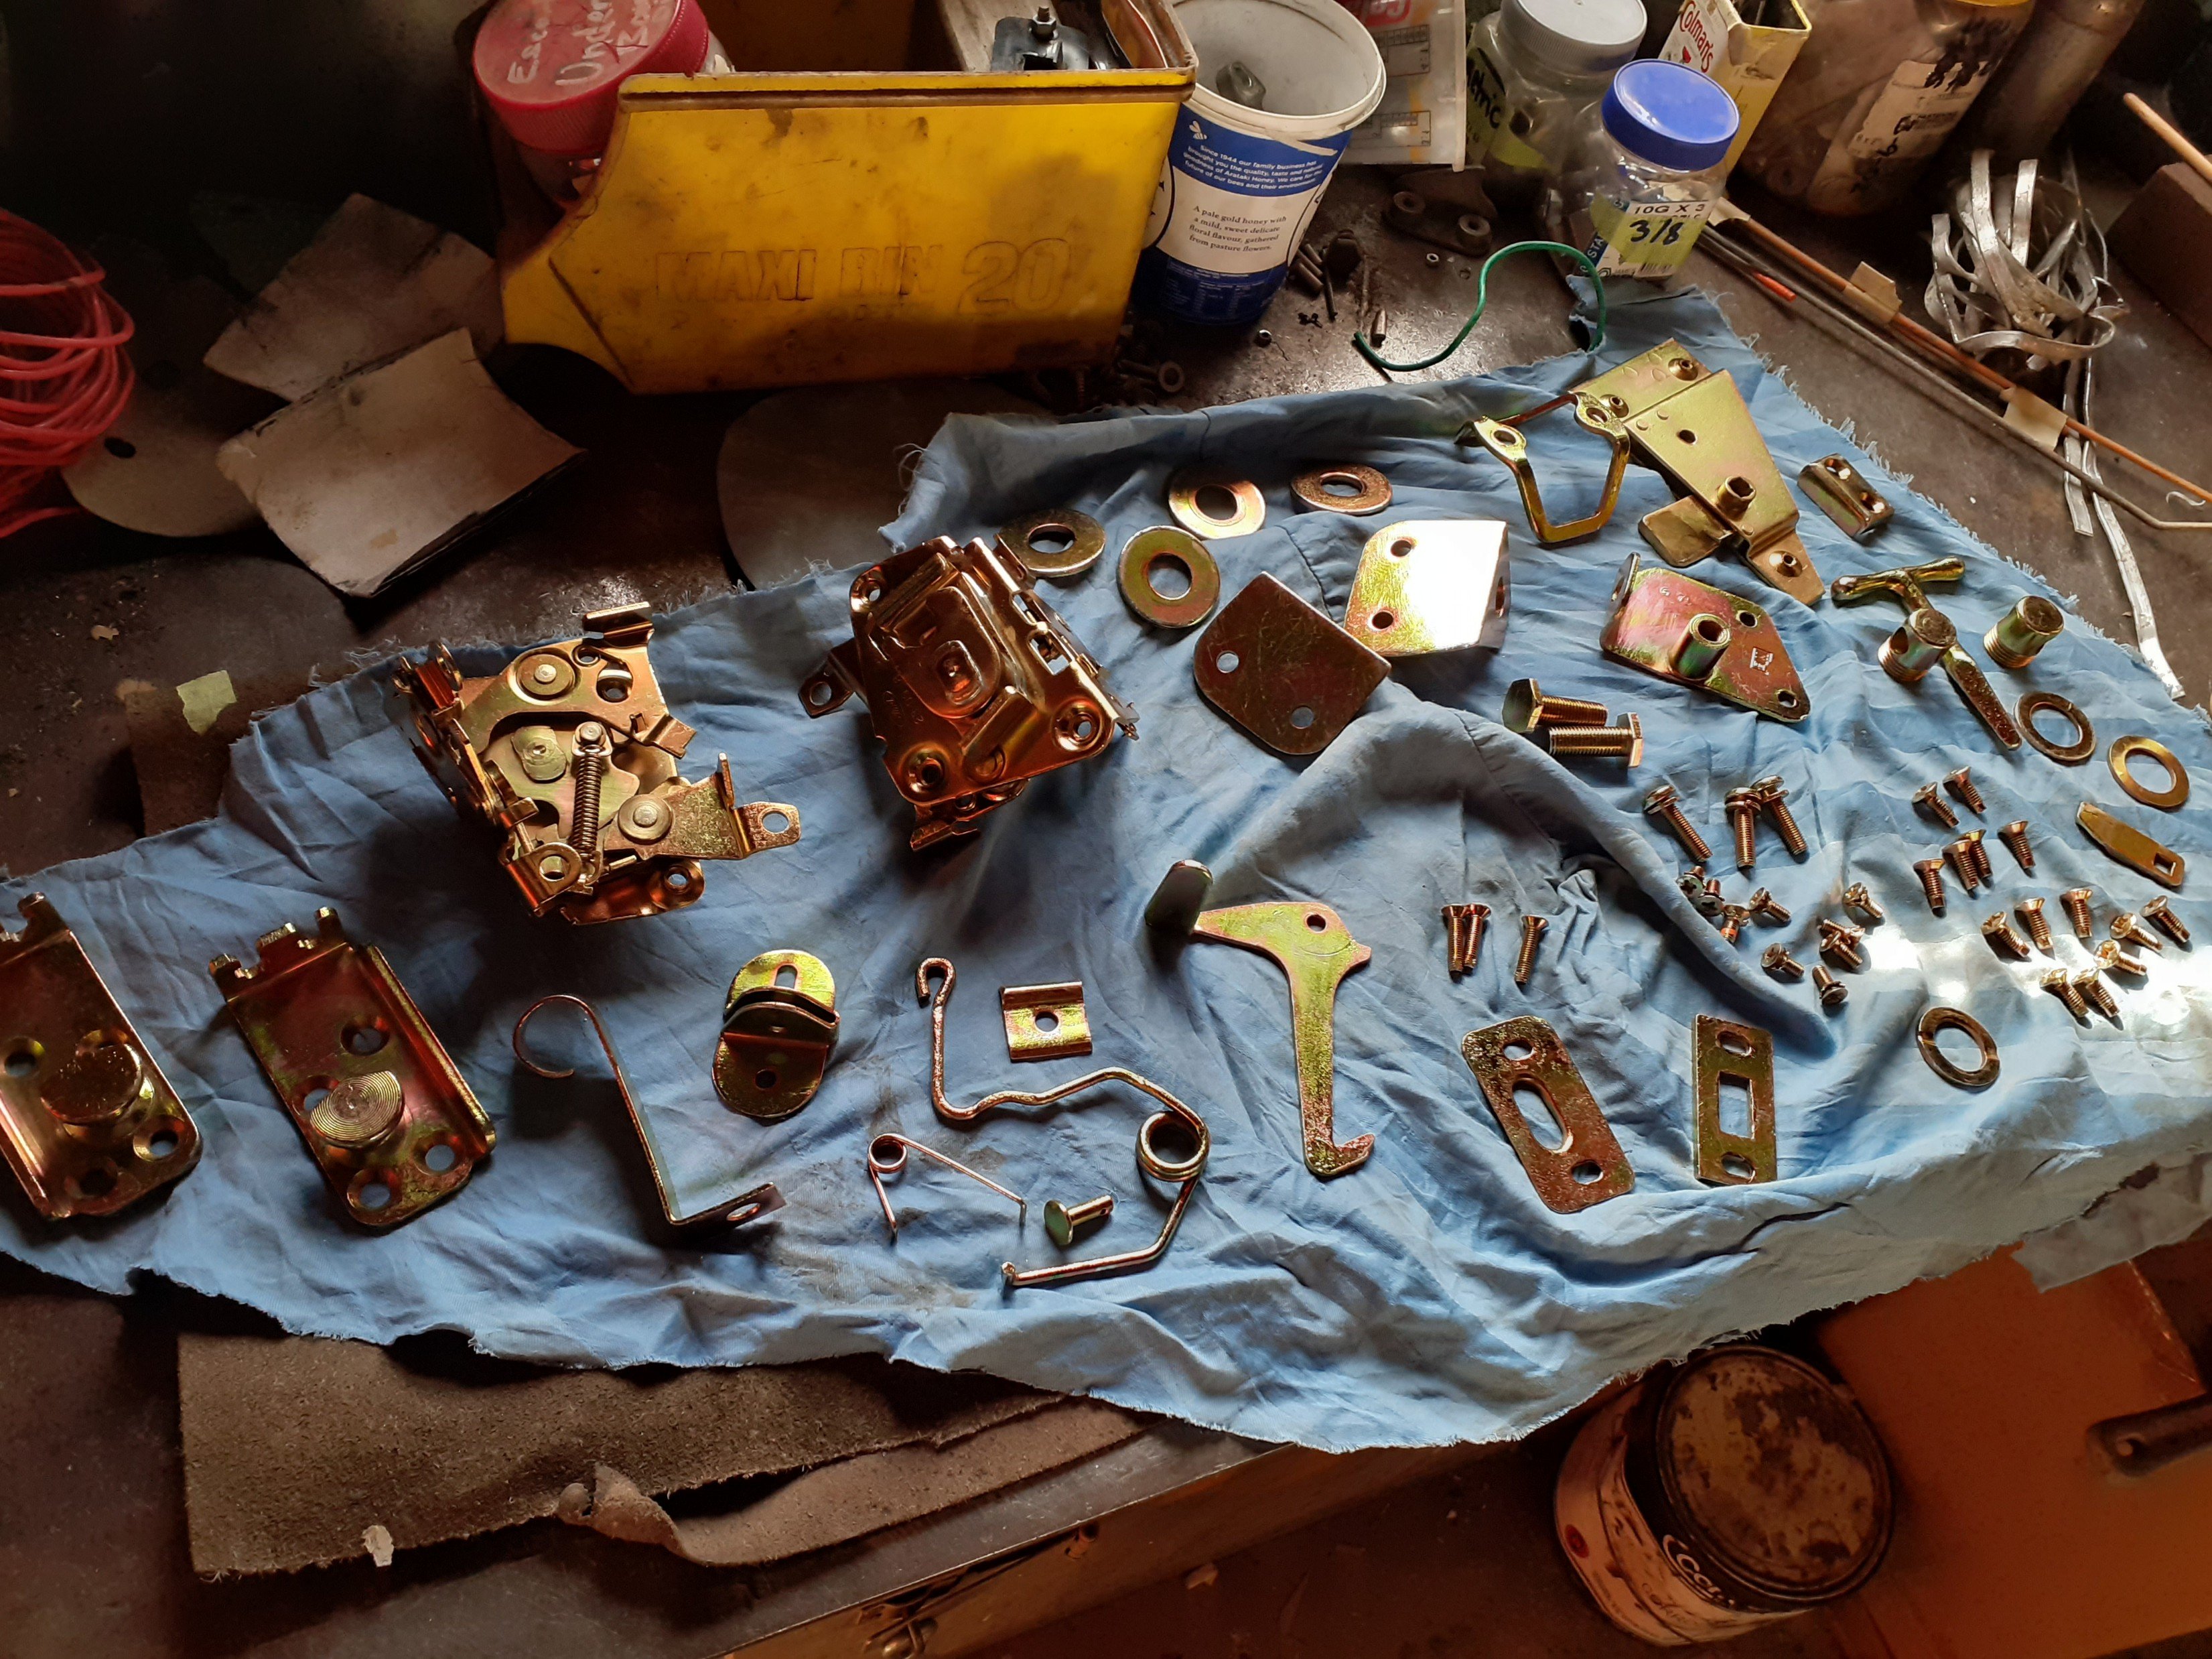
I need to take a run into town to get more of the rust proofing goo to do the other rear quarter and both doors, but I was waiting for some parcels to be delivered this morning, so I decided to crack into the heater box rebuild. Pulled it apart and it was surprisingly clean inside. I've seen Youtube clips of some Mericans pulling rat's nests out of their boxes, so counted myself lucky. As previously mentioned the little plenum extension is well shagged, the internal seals have all but disintegrated and a few of the little trap doors were seized solid. Slapped a bit of WD40 on the hinges and after a teeny bit of gentle persuasion they are now opening and closing smoothly. The main housing appears to be made of some type of fibre based material so I just gave it a quick tickle with the water blaster and left it in the sun to dry. The actual heater core looks mint and there is a little yellow sticker on one of the tanks, so I suspect it is a recent replacement. The main metal trap door and housing is busy languishing in a vinegar bath and I gave the blower motor a quick rattle can reco. I'll chuck some of that rust convertor / primer combo on the metal bits before I glue in the new seals and that should take care of that. Thanks for looking.
4 points
-
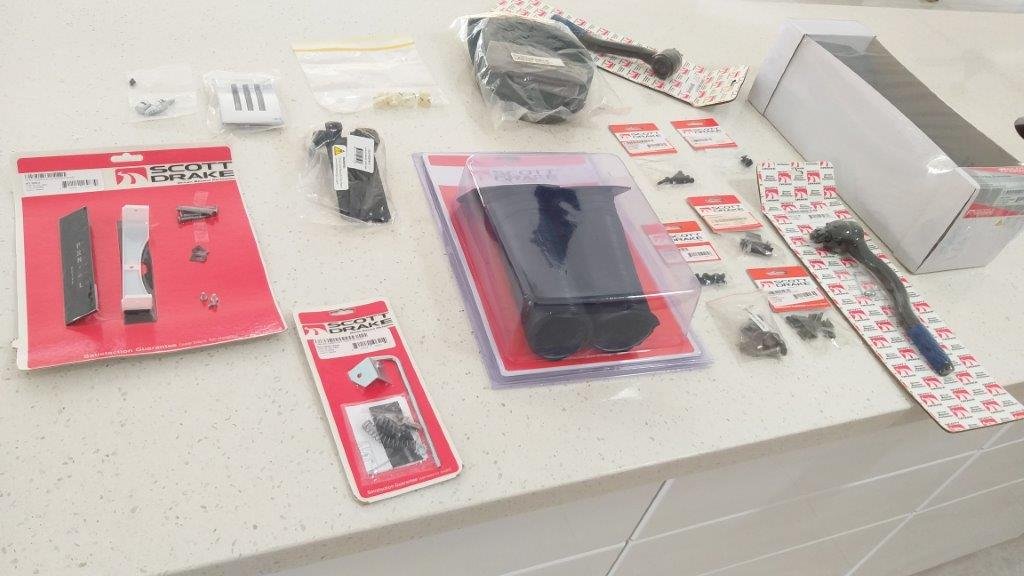
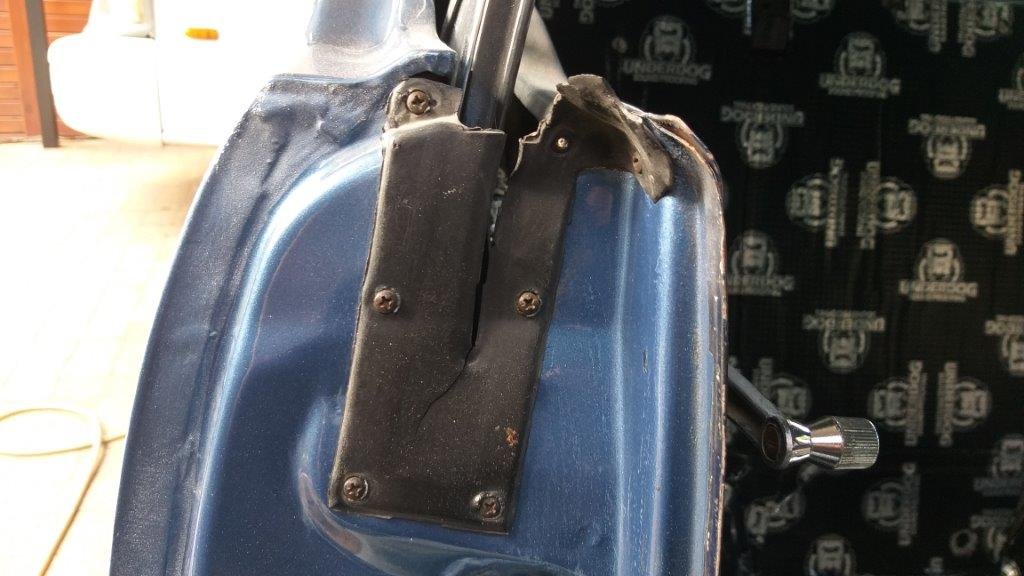
Done a few things the past week. Scored a new mirror glass from a wrecker mate. Old one was broken, but it was good to be able to smash it out to see how it fitted in order to avoid breaking the replacement one. Got the larger 17/16th master cylinder. Bad thing is its only a 2 port for ABS models, where i have the non ABS lines needing a 3 port MC. Is there a drill bit available to drill an extra hole? I think i read somewhere that its just a square hole with a the tapered cone inserted to seat the flare. But i have seen guys who have the bling braided lines just double stack the banjo fittings on the 1 port. Maybe i can get a custom single banjo to double female flare fitting? Also got a set of whiteline swaybars front and rear, with the adjustable links etc A nismo coppermix twin plate clutch. Supposed to be near stock pedal feel with 590kw of holding capacity. Had this for a while, got it for a good price a while back ecu, 84mm throttle, o2 sensor. I even found this gear shifter boot in my stash. Who knows when i bought this, but mine is stuffed so its a win When i got the car going, the clutch pedal was always creaky and looked out of place. I decided that since im getting older and have no back issues i would karma sutra myself under the dash and have a look. I ended up pulling the pedal out and sure enough, its from a R33. lol, now i remember doing that maybe 12+ years ago. I dont remember it fucking my back when i did it way back then, but it did this time..... For some reason i tried to buy a new clutch and brake pedal set with all the mounts etc a while back, but only the clutch pedal bracket is available. It would seem thats its all just a bit different The last photo shows a spacer on the front of the R33 pedal box. After a LOT of googling, i discovered that the bracket lives on the firewall on the R32. Mine is missing. Either the auto models dont have it, or i ripped it off when i put the ill fitting 33 clutch in. Anyway, in a stroke of luck, i tried yahoo japan and found someone selling the full set Jackpot! Was pretty cheap too. Somebody tried to snake me in the dying seconds but gave up before my autobid ran out. Phew Also includes the throttle pedal stop and footrest which im missing. AND the brake pedal. Because i did the old angle grinder conversion from auto to manwell pedal pad, and its a bit terrible...4 points
-
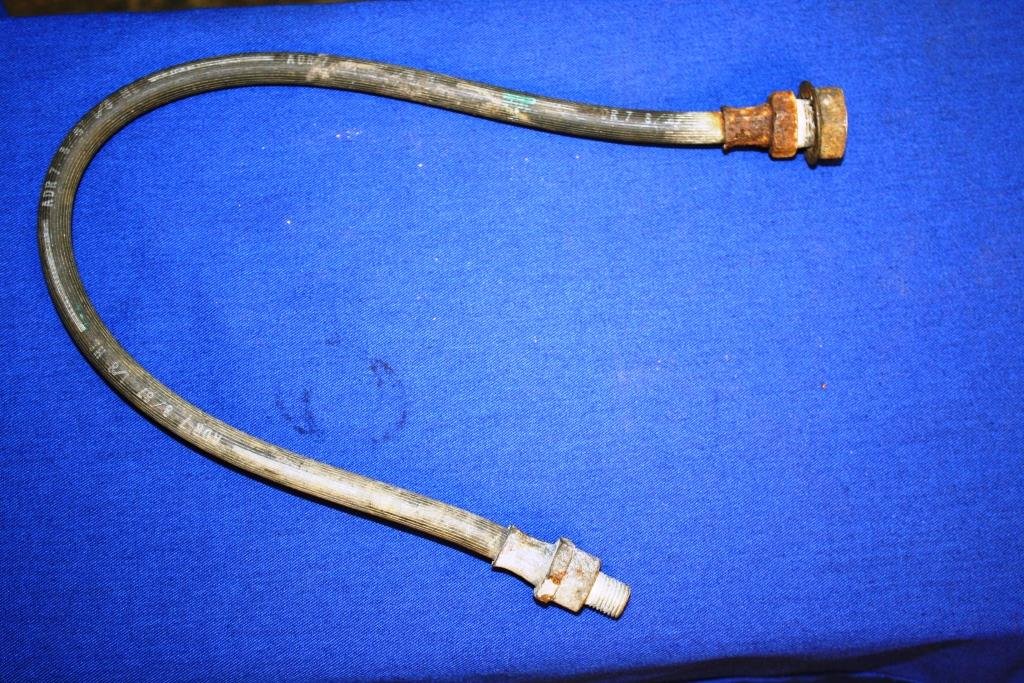
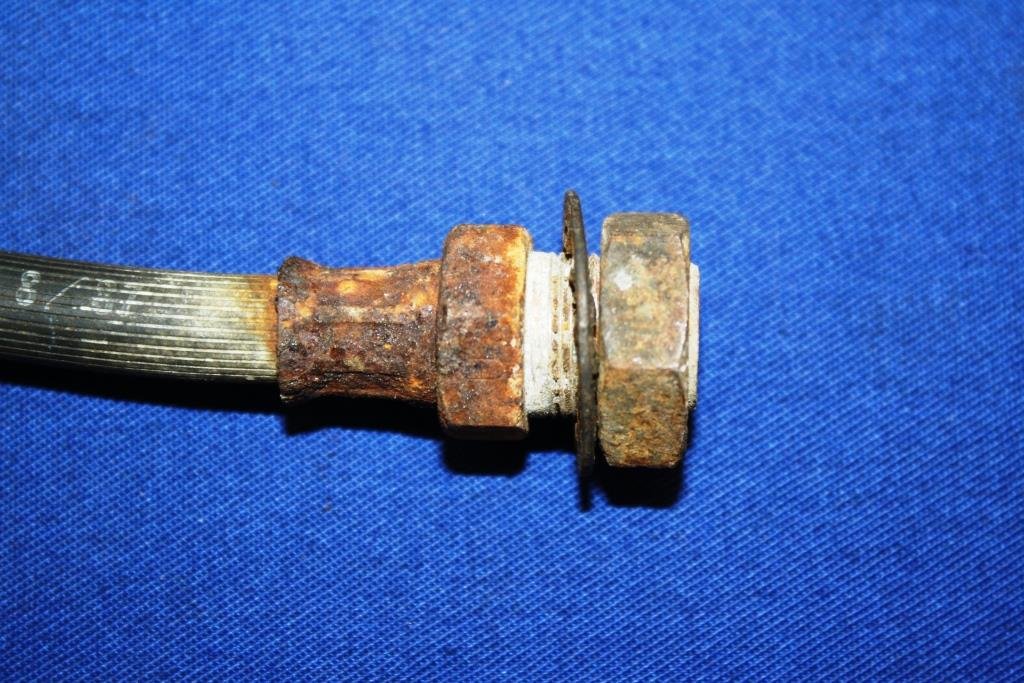
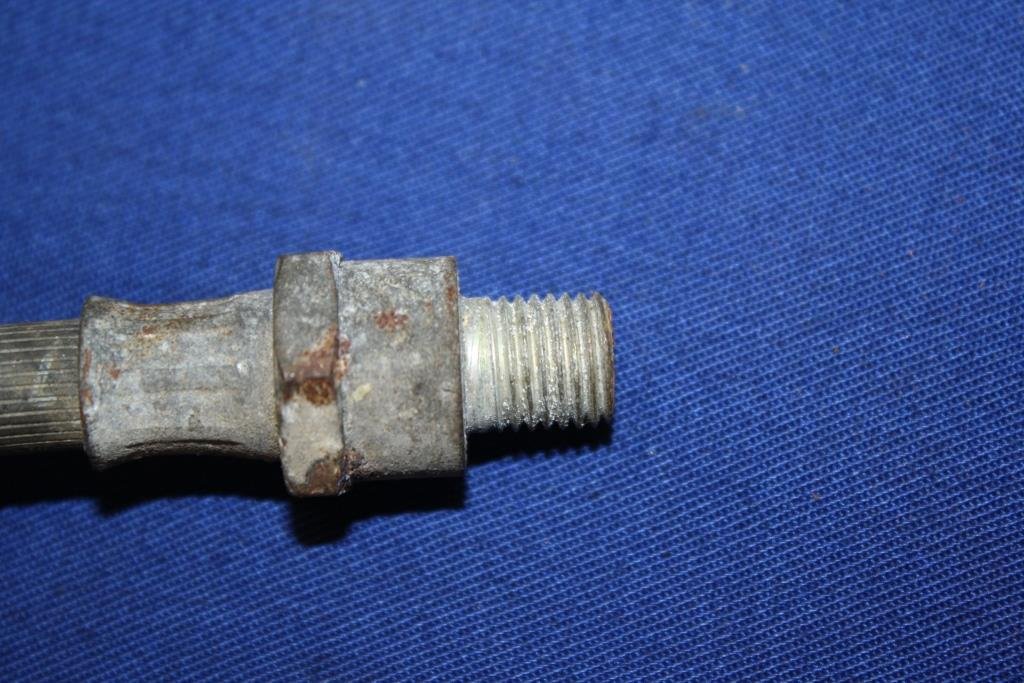
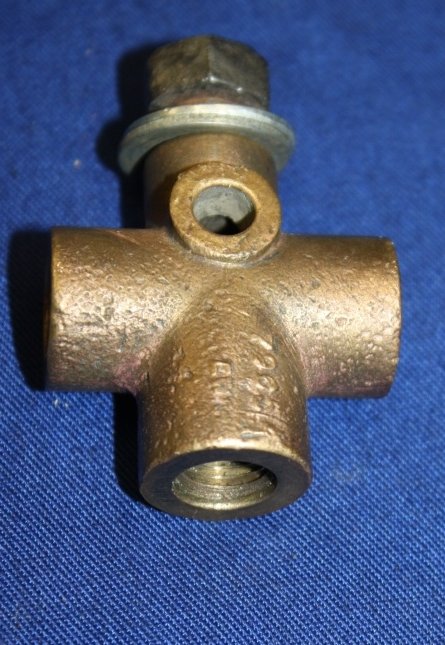
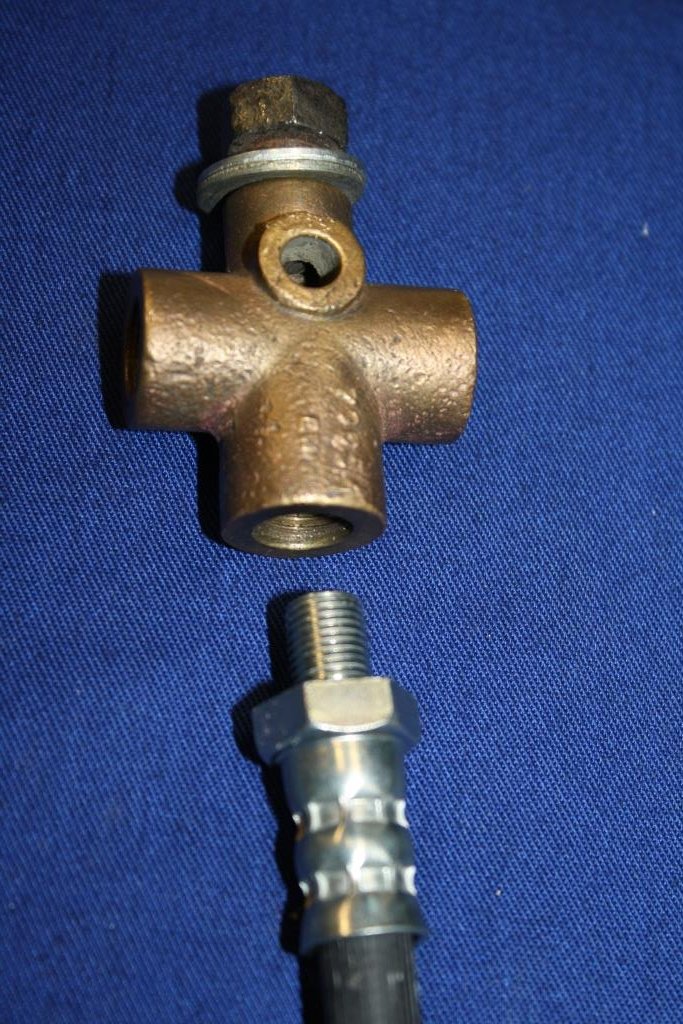
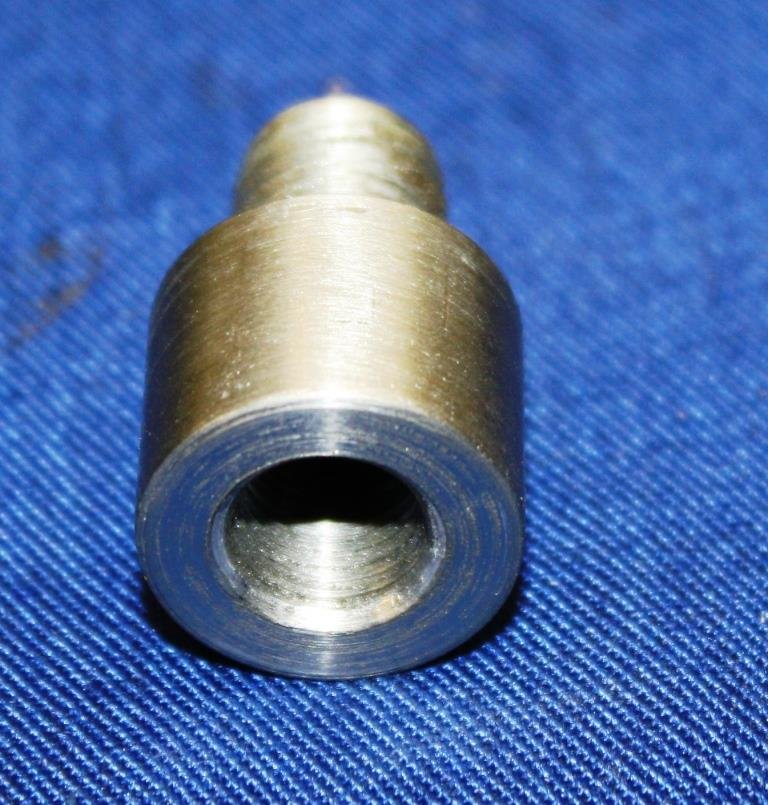
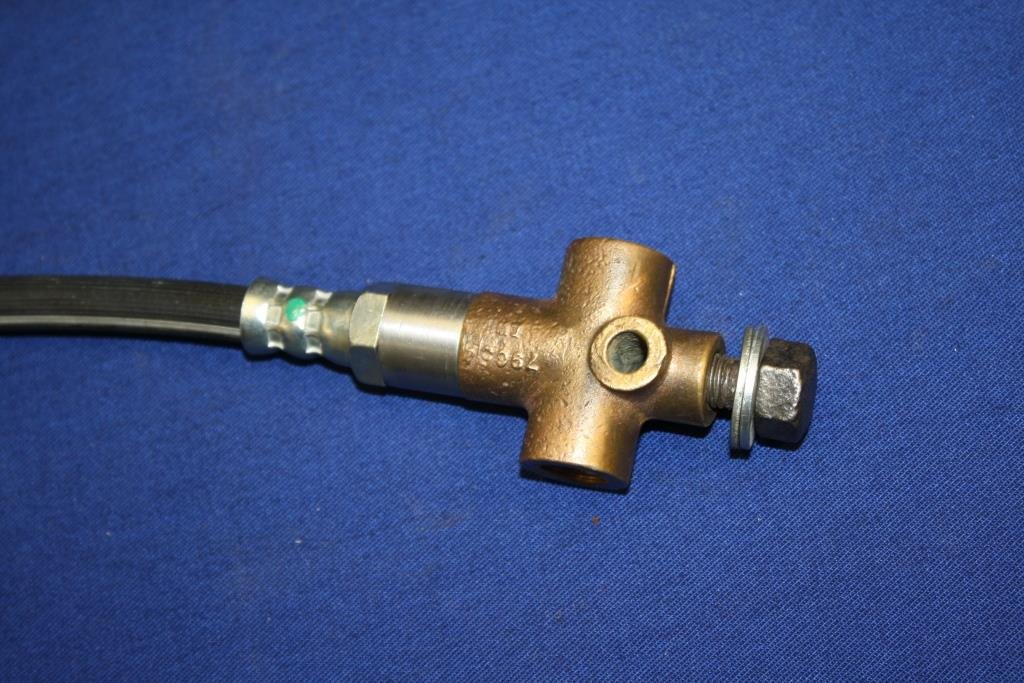
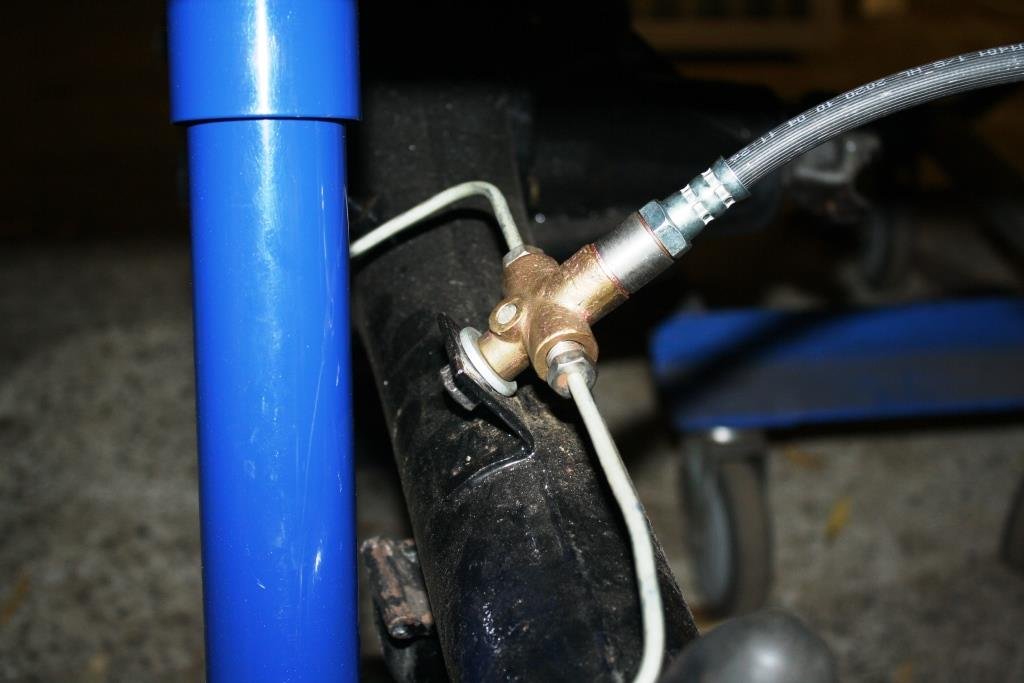
Having difficulty identifying the original rear brake hose. At the risk of sounding like a grumpy old man (yeah I know……), buying spare parts in our modern world can be a bit of a circus. Recent trip to Reppco with afore mentioned hose in hand for example. After failing miserably to identify the hose the “spare parts salesperson” ( I use that phrase with some hesitation) asks for the cars Rego. When informed it’s BP4*** their millennial face glazed over and he/she/they/it/…..etc. starts looking for a safe space to invent even more PC correct gender fluid pronouns! Rant over……… I made the call to use an HQ front hose (same as on the fronts) and hopefully still available in another 50 years time. How could I not reuse the original, glorious 70 plus year old brass 3-way plumbing fitting? Problem was I needed a male 7/16” NF 20 TPI to female 3/8 NF 24 TPI adaptor. (When it comes to brake plumbing gender diversity is a myth!). Found a piece of scrap ¾” round and fired up the faithful old Emco. Yes I know I could have just gone and bought some hardware but Rigamortice and I had a great evening sampling the new brew with Genesis blasting on the Video/Sound system and the neat and tidy result works for me. Sometimes the journey or process is just as important and rewarding as the end product.
3 points
-
2 points
-
Yeah it kinda caught me by surprise. I had my daughter with me and because everything is new, and not tuned properly yet, was taking it easy I got on a straight bit and gave it a stab in 2nd gear at about 40k and it lit up as soon as it hit boost Kid got googly eyes and said "what was that dad?" It makes some good spooly noises when tootling around.2 points
-
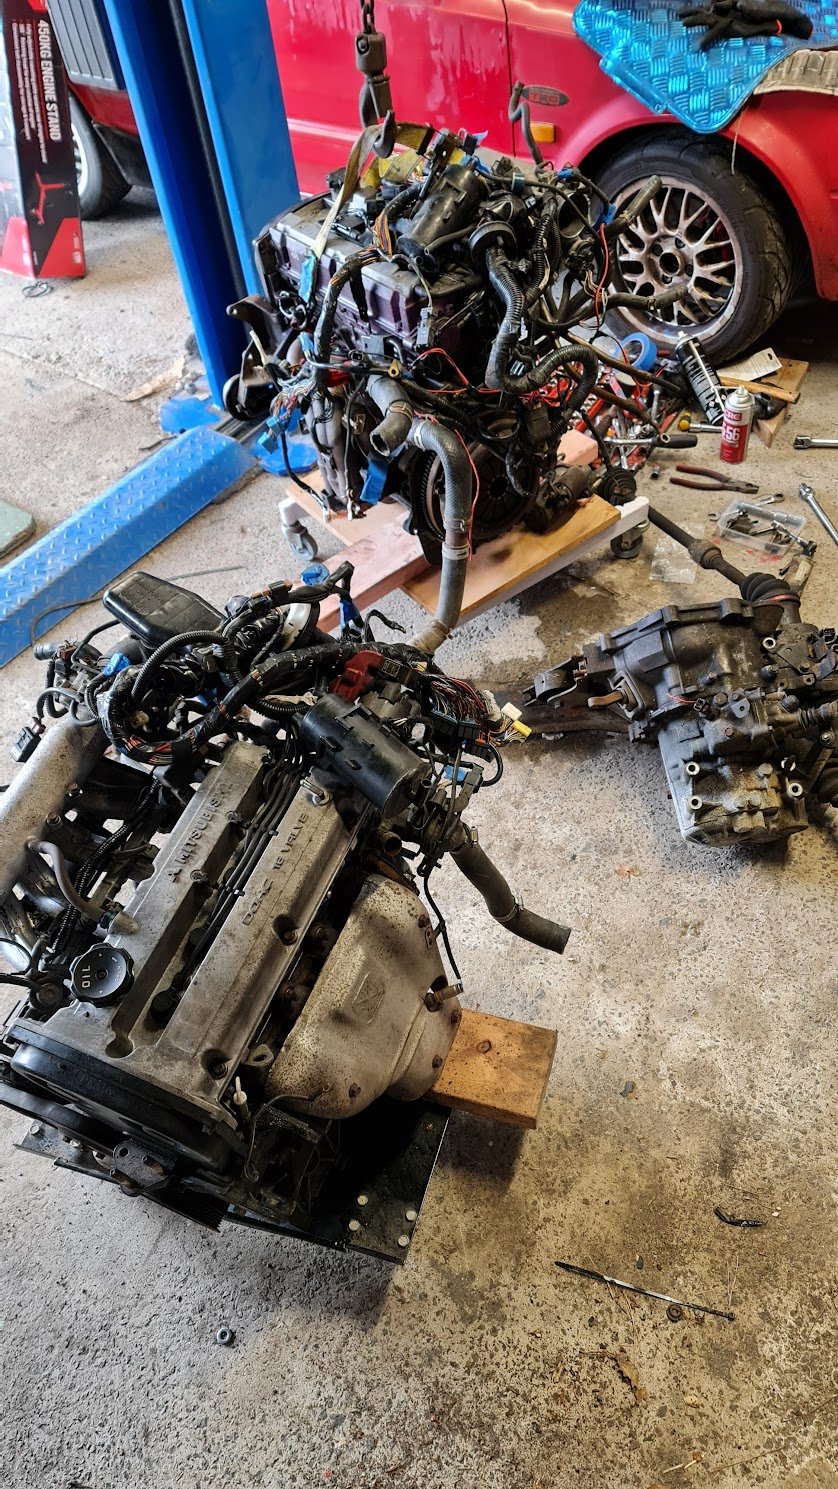
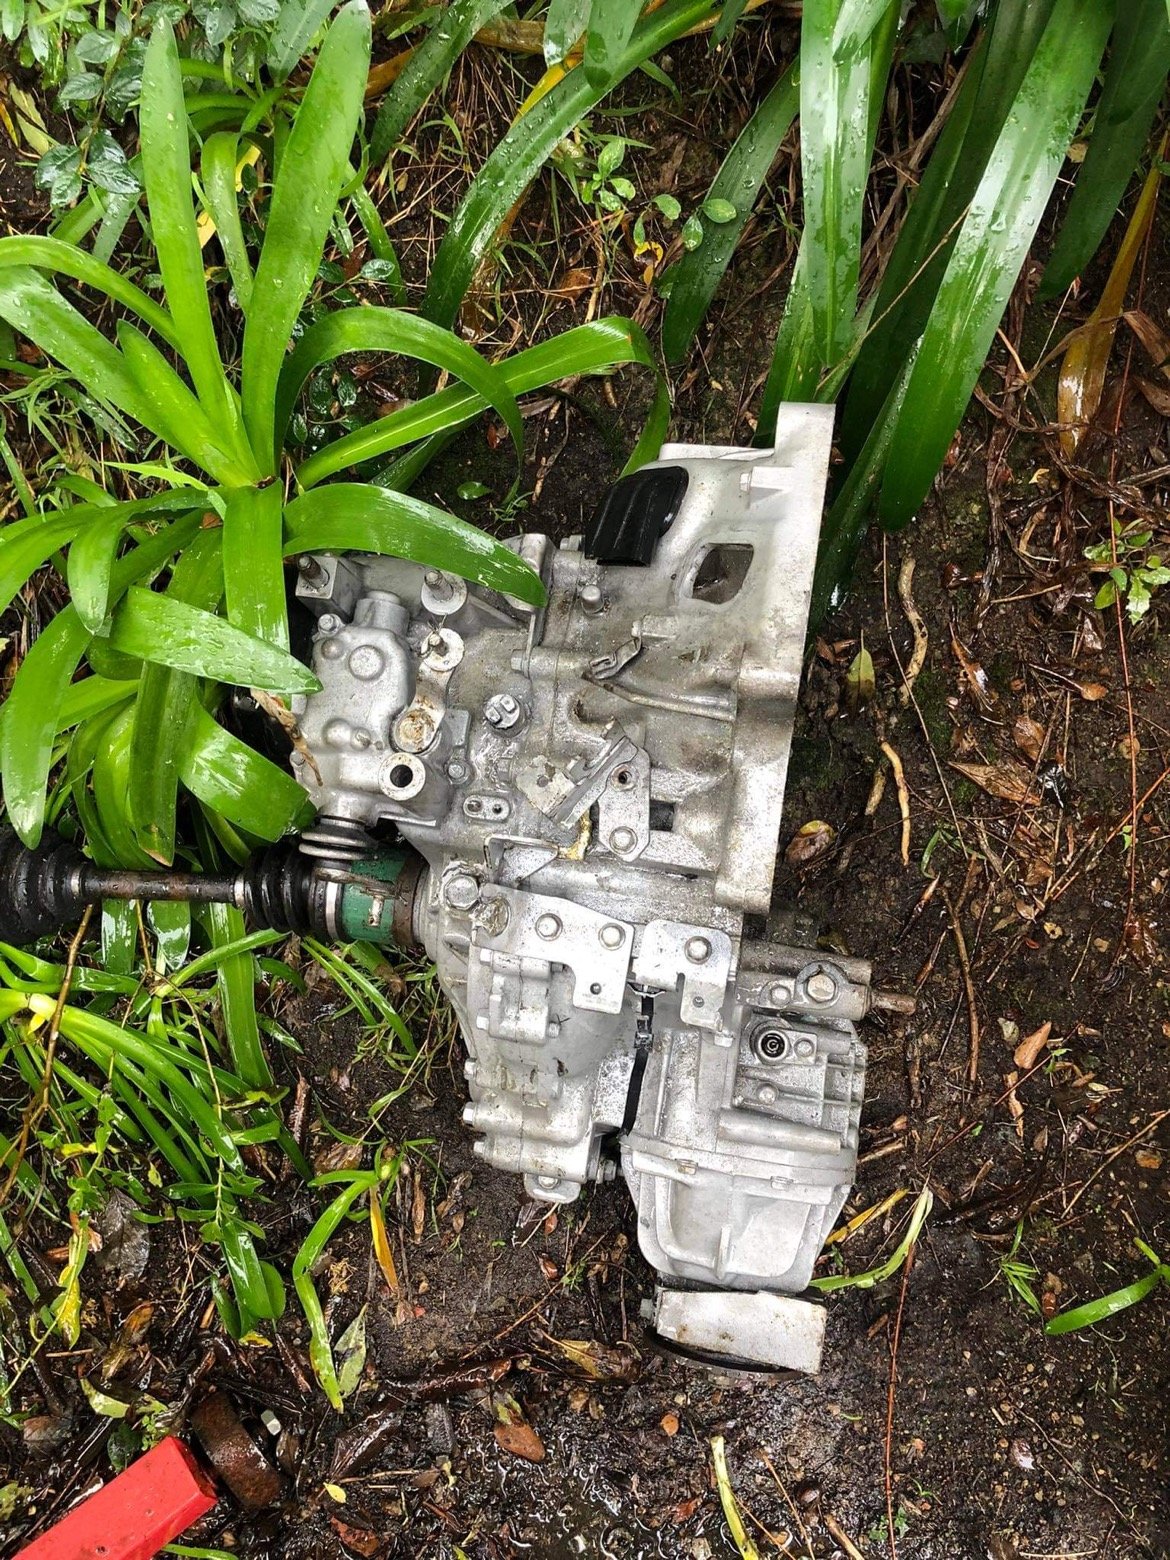
Took the manual fwd gbox off of the mivec engine. Cleaned it up, didn't take a photo so just imagine it has less dirt. Put the gbox onto on the 4g15 and confirmed that the bellhousing bolt pattern is the same which is good. Also welded up a crack in the lower radiator support, just looks like someone positioned a jack in the wrong spot. Fixed now and painted. Think there might be a difference in the power steering pumps because the crank pulleys are different between the engines. Hopefully I can mix and match something to work. Mainly an issue because the mivec engine has a non-A/C type bracket for the P/S pump, which includes a idler pulley to tension the belt where the A/C would be. But the crank pulley on the 4g15 might stick out further. Guess I'll see.
2 points
-
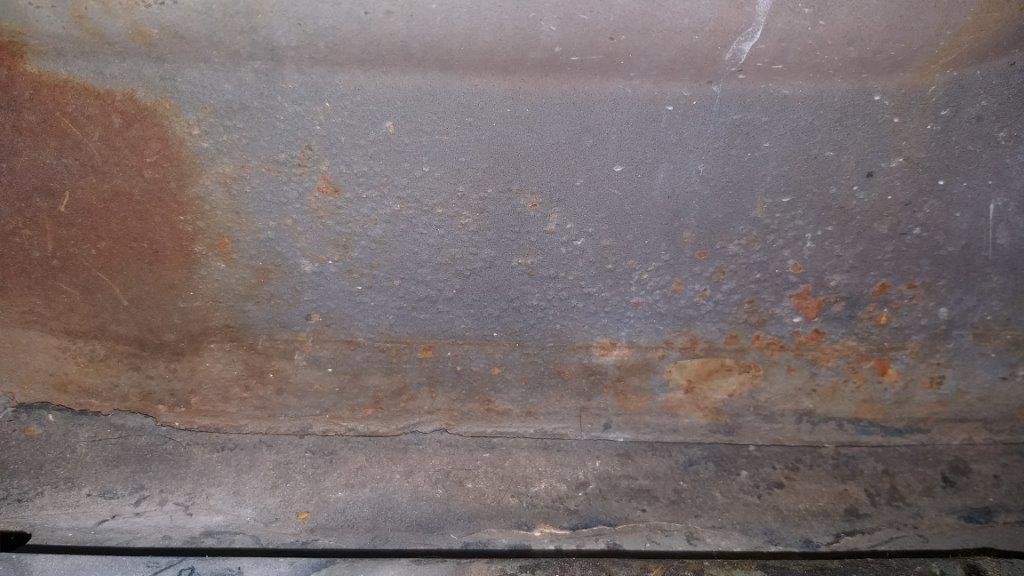
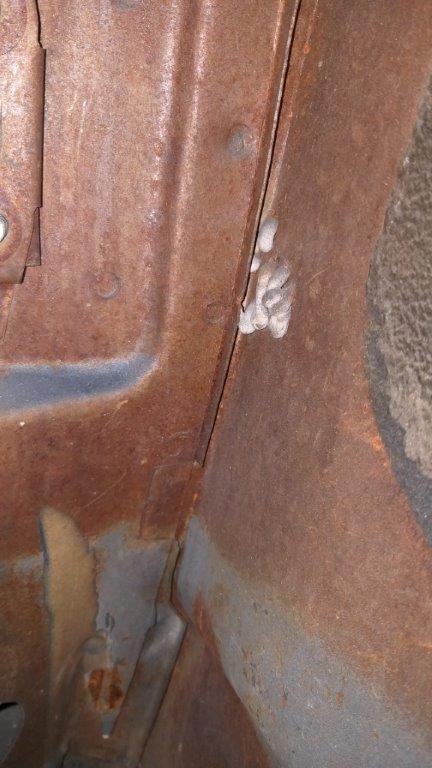
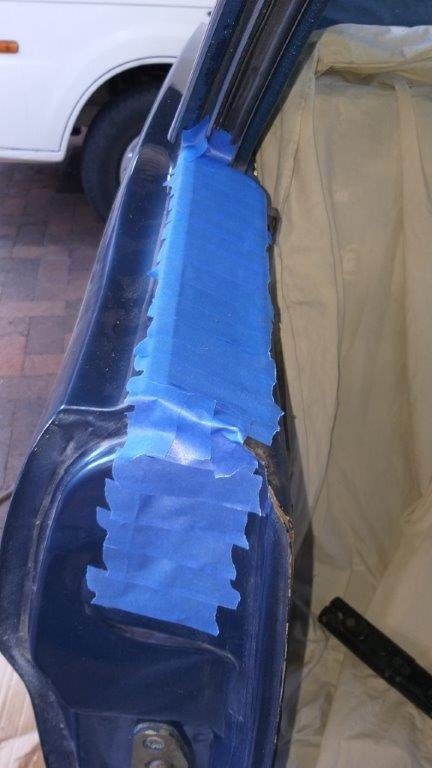
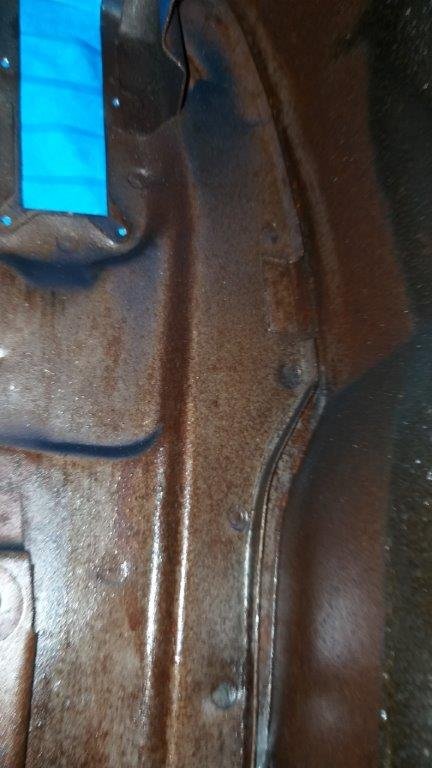
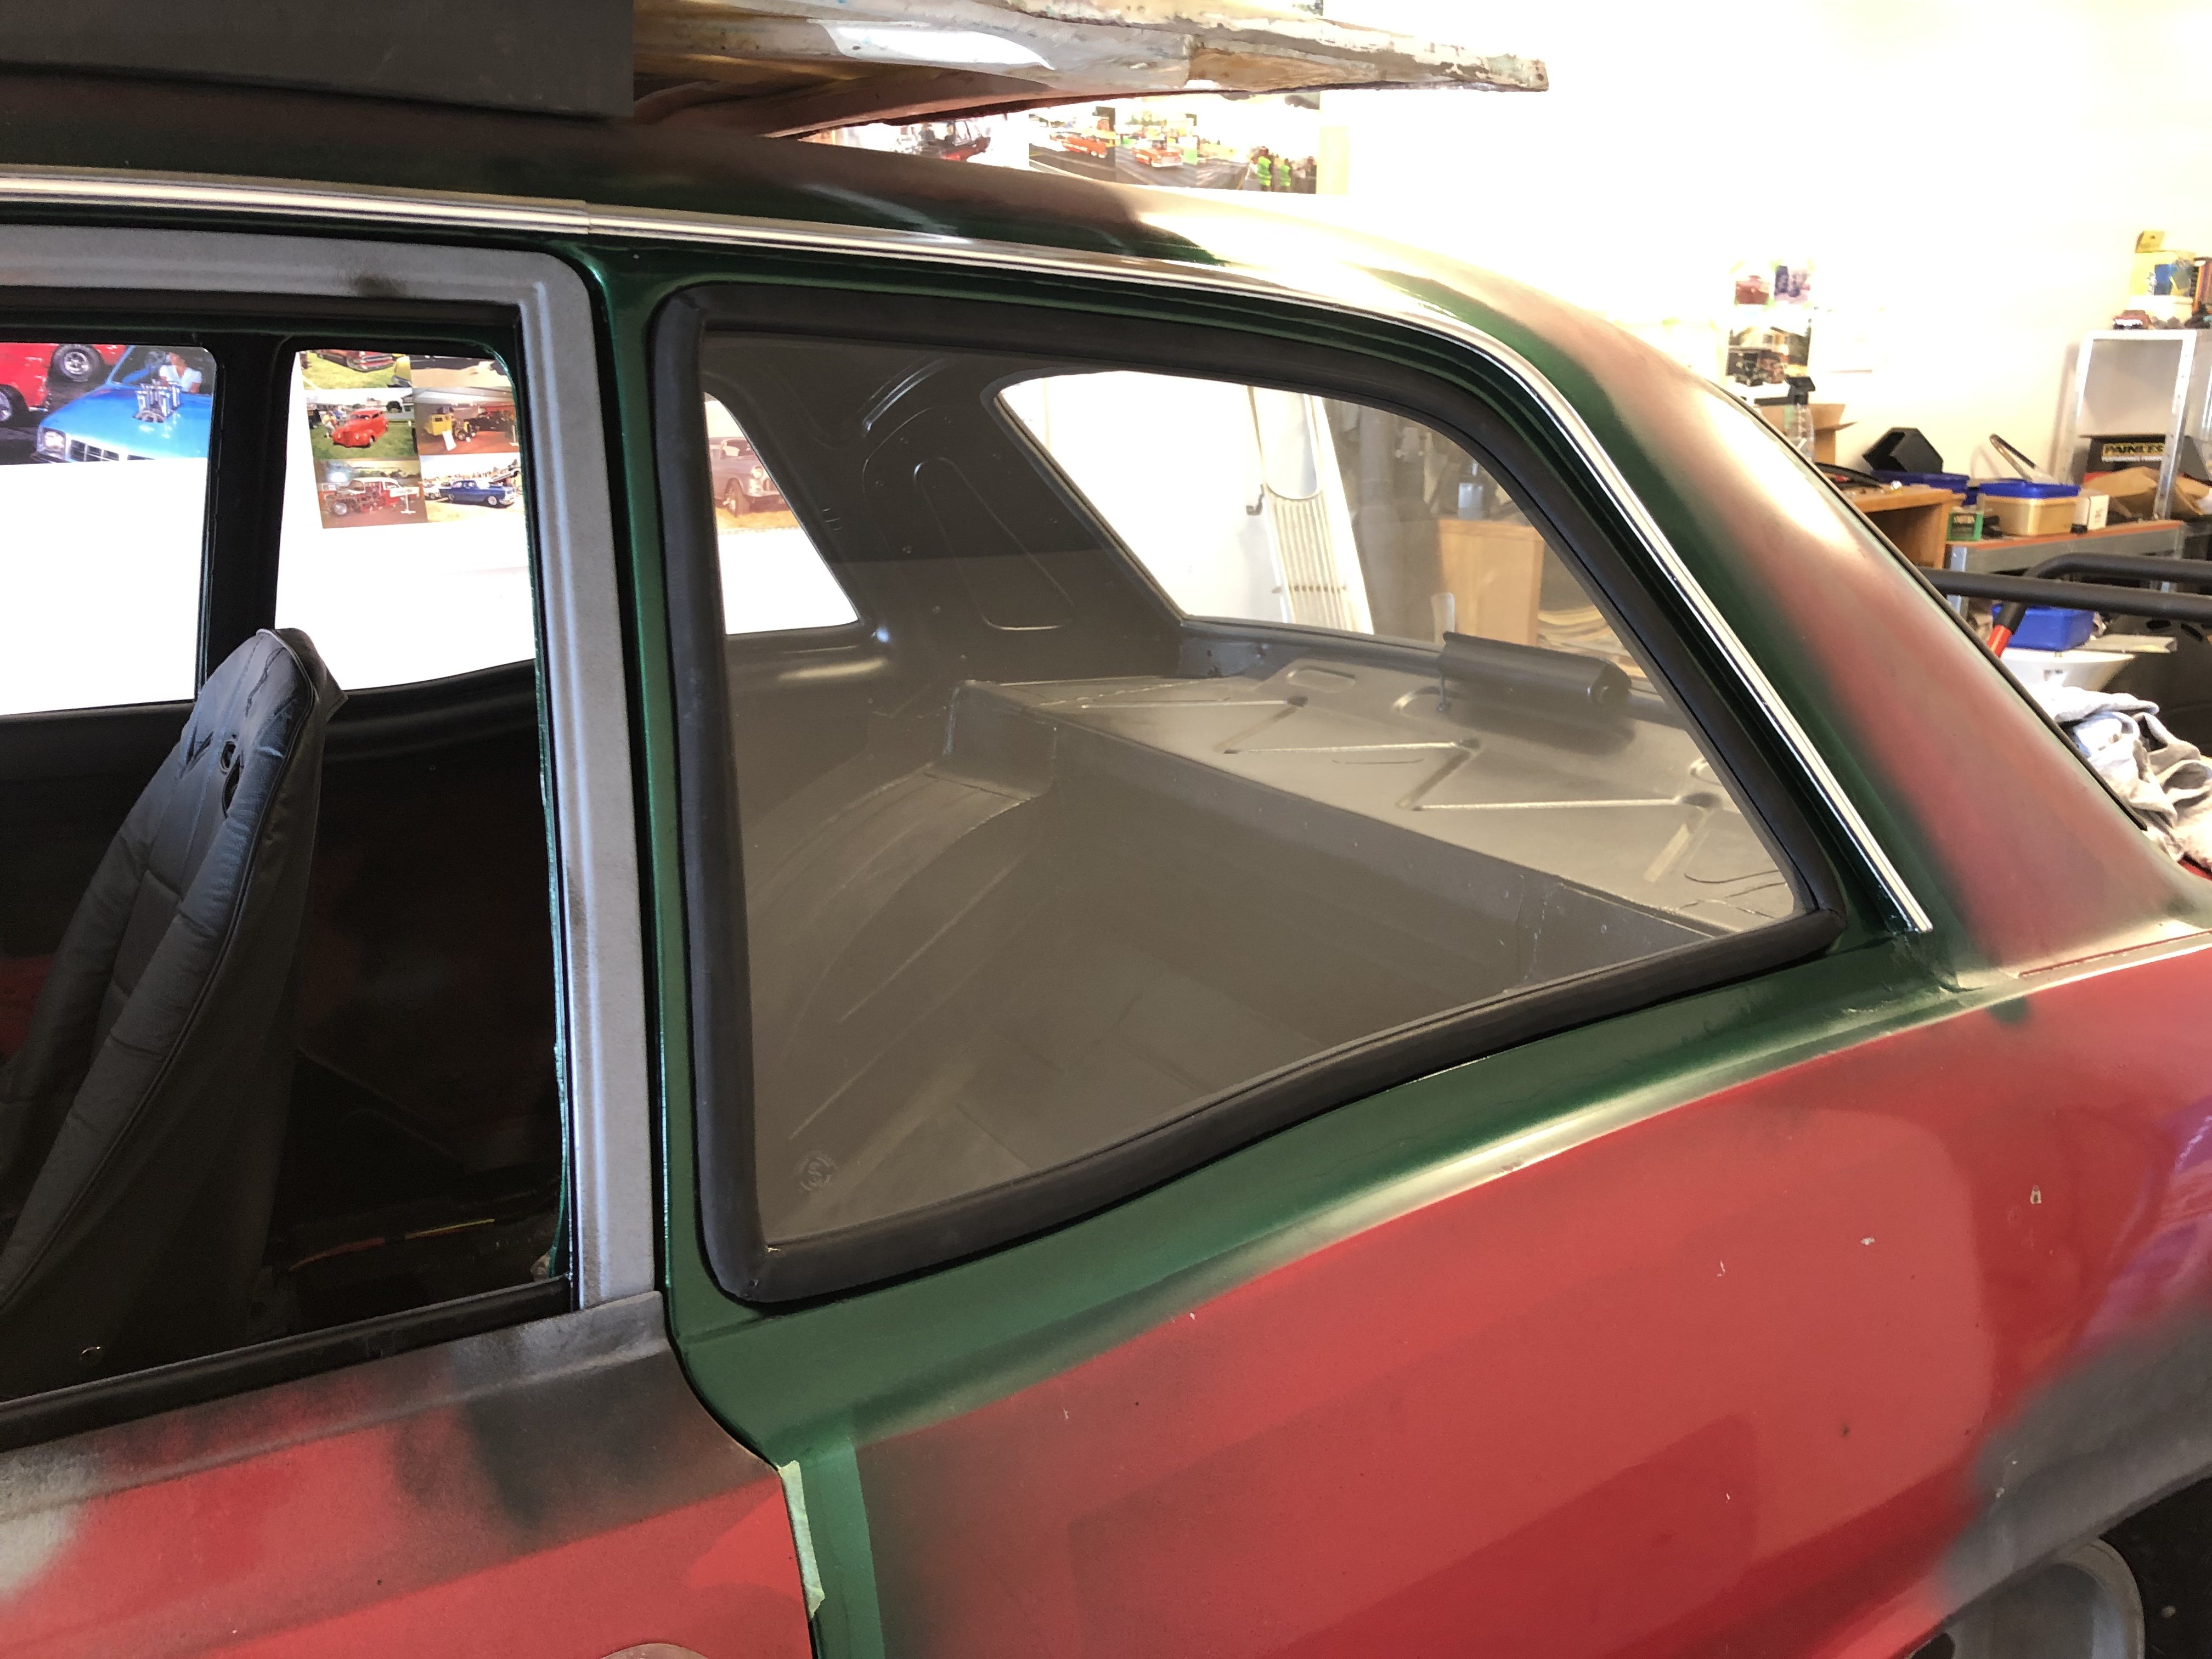
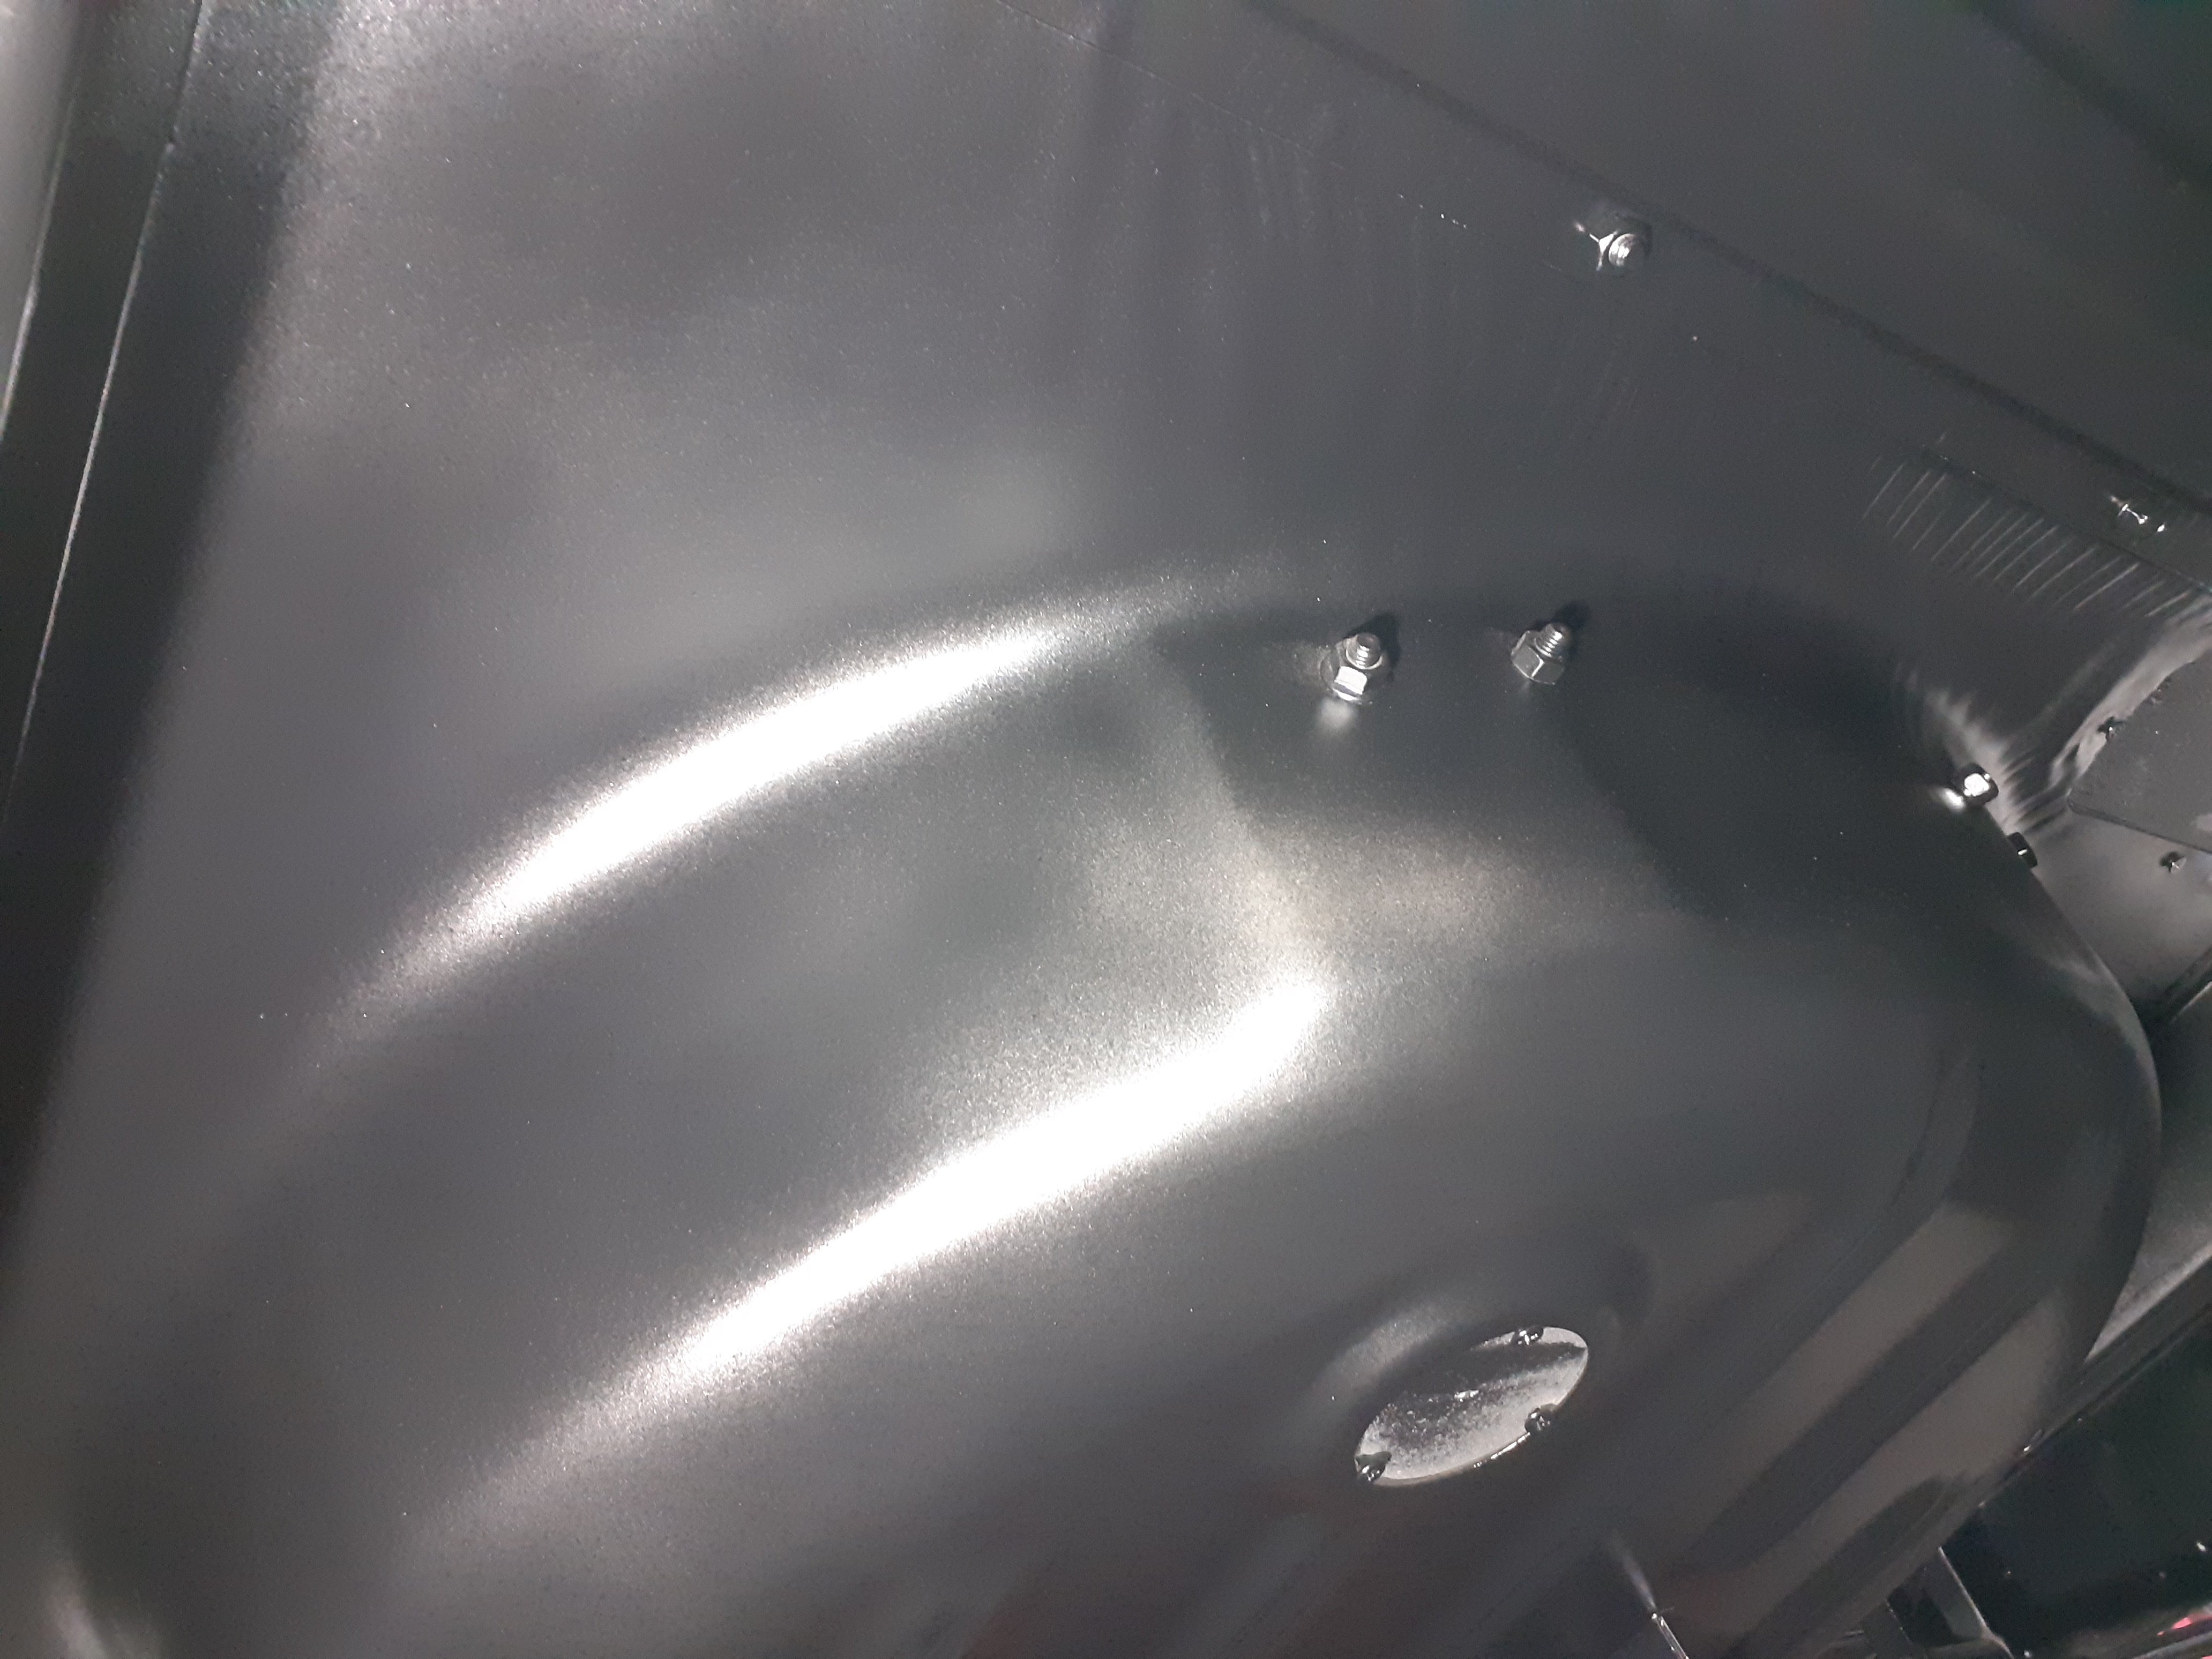
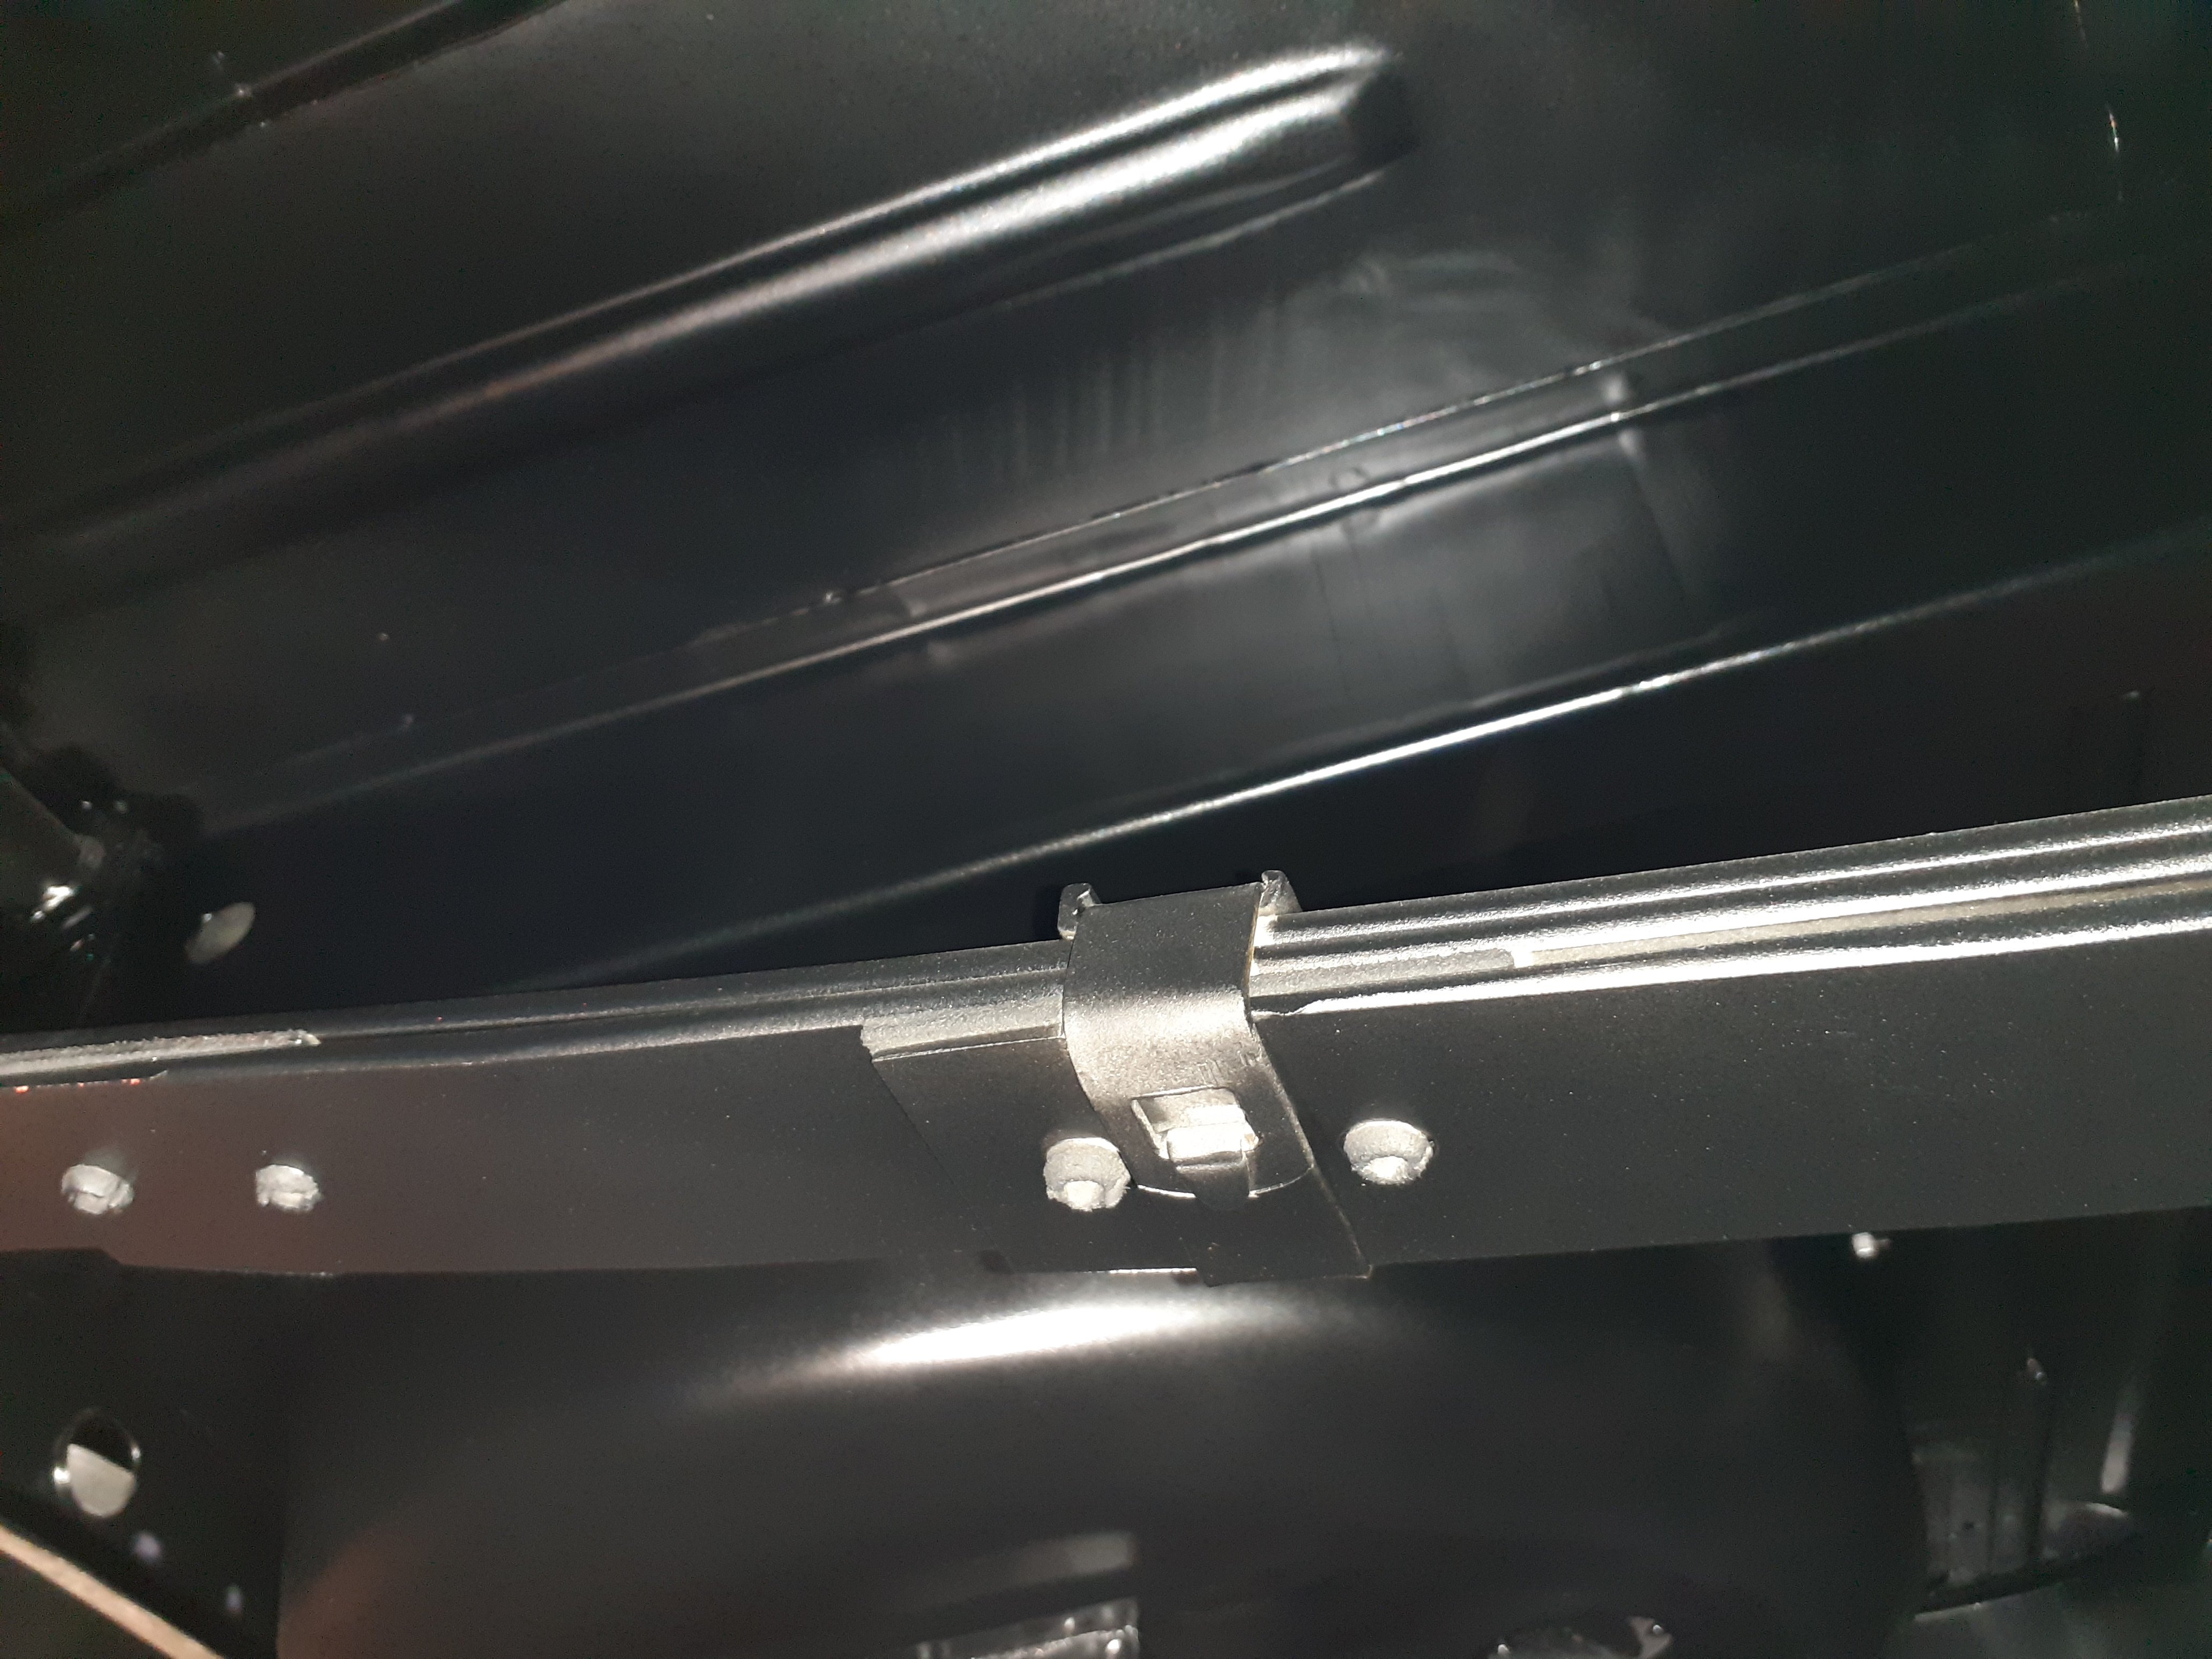
This morning's focus was the rust proofing of the passenger side rear quarter inners. After a good few rounds of compressed air followed by vacuuming I managed to get rid of all of the loose debris. In order to limit any mess on the new paintwork I masked up the window aperture and then used a mini spray gun to slap a bit of rust converter on the bare metal. While I waited for that to go off I cracked into the fun job of cleaning years of dirt and old grease off the window winder mechanism and related window guides. Next up was a liberal coat of rust proofing that I applied using an under seal gun that I sourced earlier in the week. Hopefully that should keep the old tin worm in check for a few more years.
2 points
-
And in other news my favourite courier just pitched up with another batch of parts sourced from Rob at Sydney Mustang Parts. Enough little bits and pieces to largely complete the refurb of the interior as well as the heater box rebuild. Perfect timing.
2 points
-
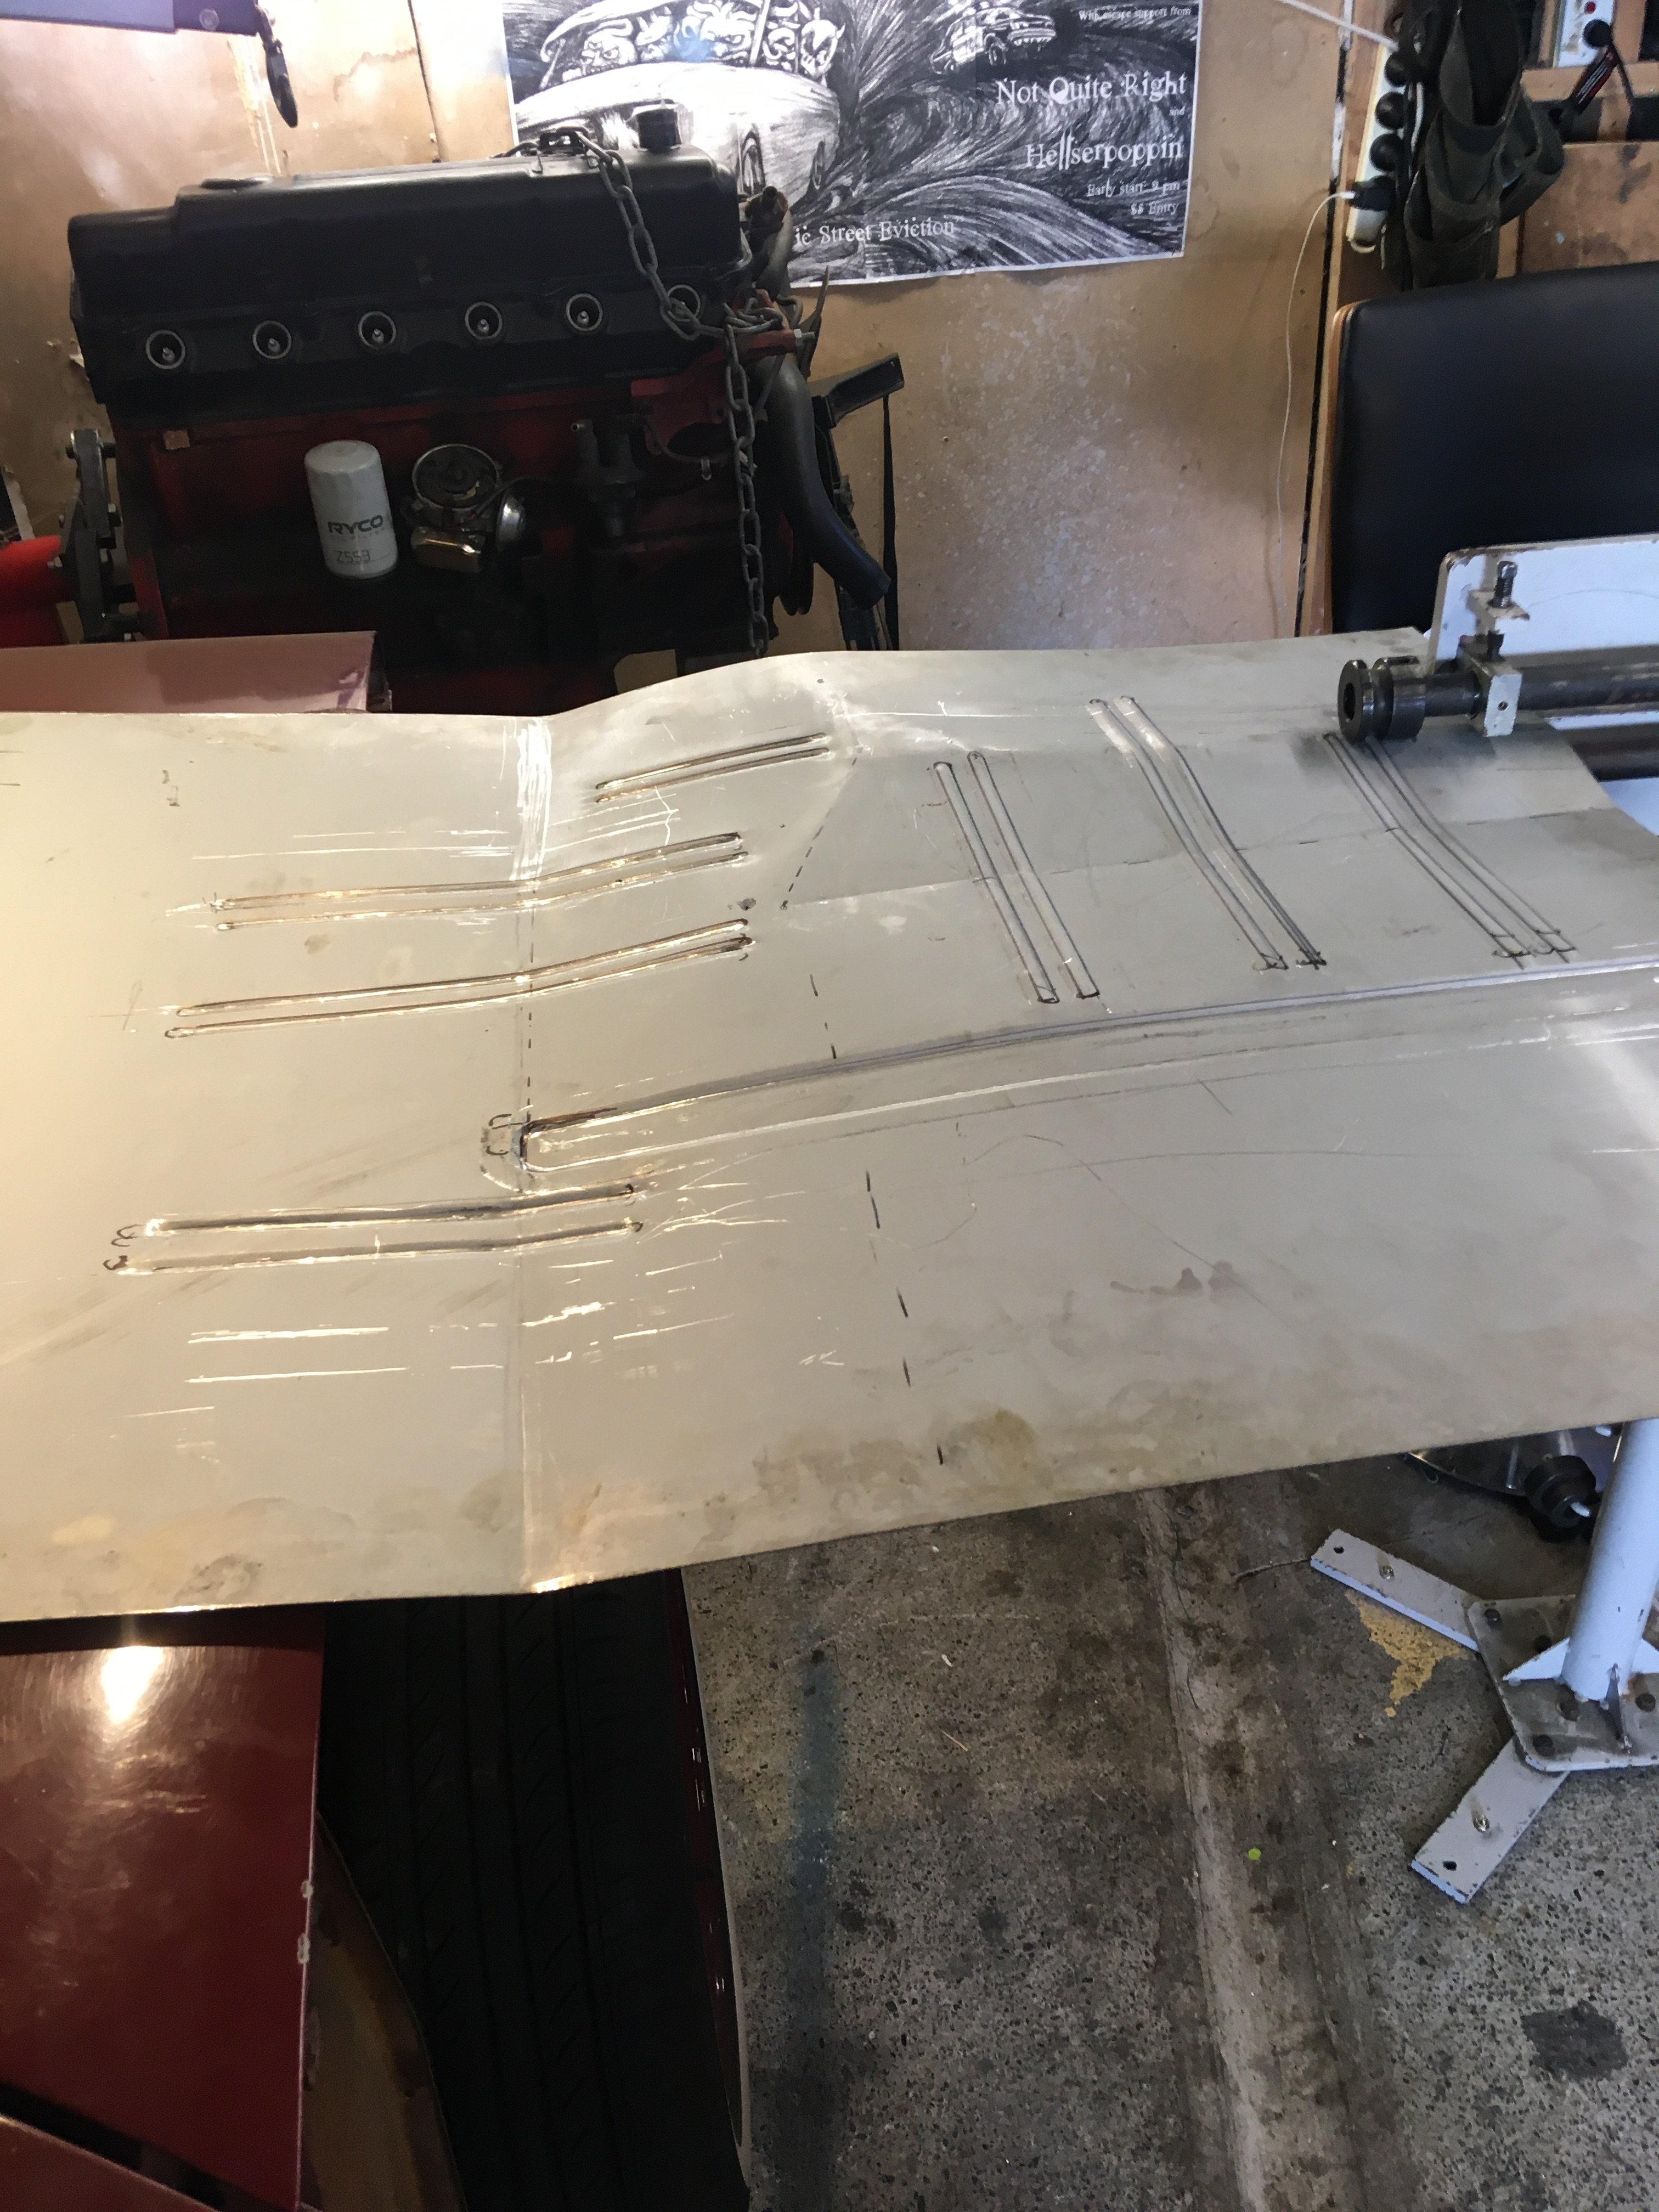
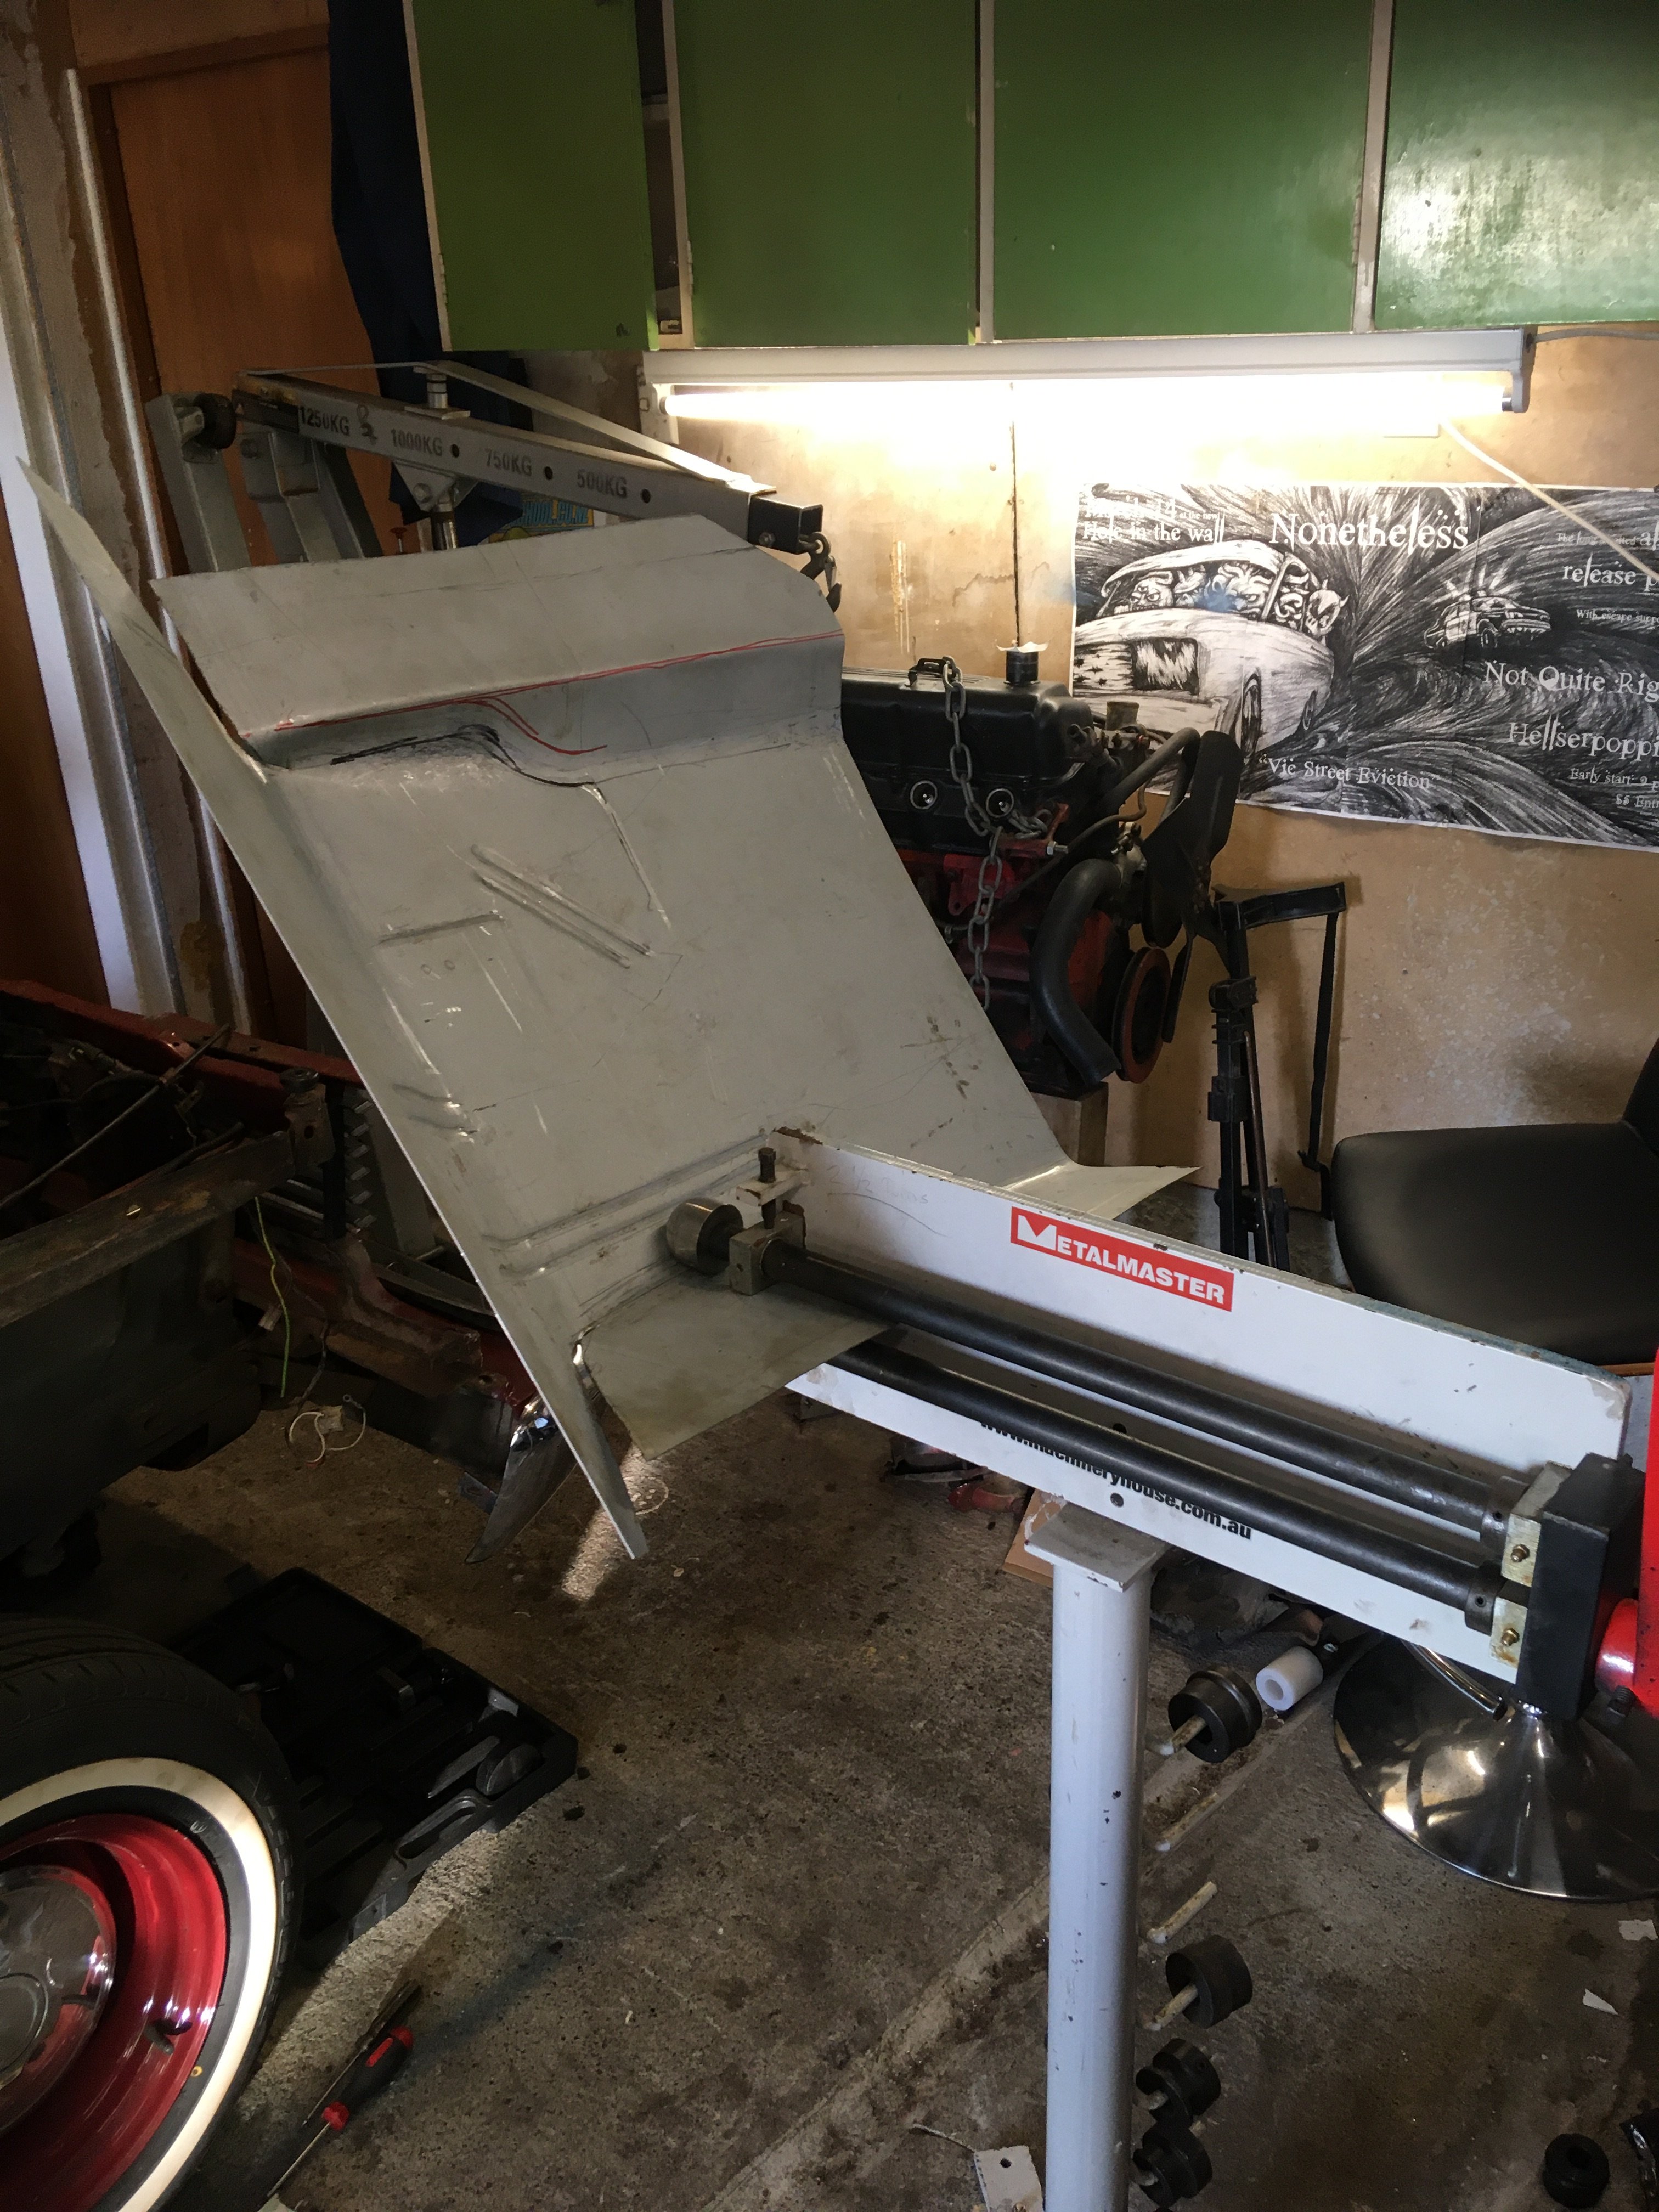
Chassis update: I managed to make it back to NZ for a bit, a couple of months ago, to have a go at this chassis building thing my Dads been raving about! Turns out it is actually hard work! Hes just finished both rails! I just got a bunch of machined parts done. Spring mounts and braces that go between the rails. Just have two sheetmetal braces to figure out then all of it can be bolted/riveted together (with a few more holes and some tweaking I'm sure!)2 points
-
1 corner in 3 to go .. fark, a lot of work
2 points
-
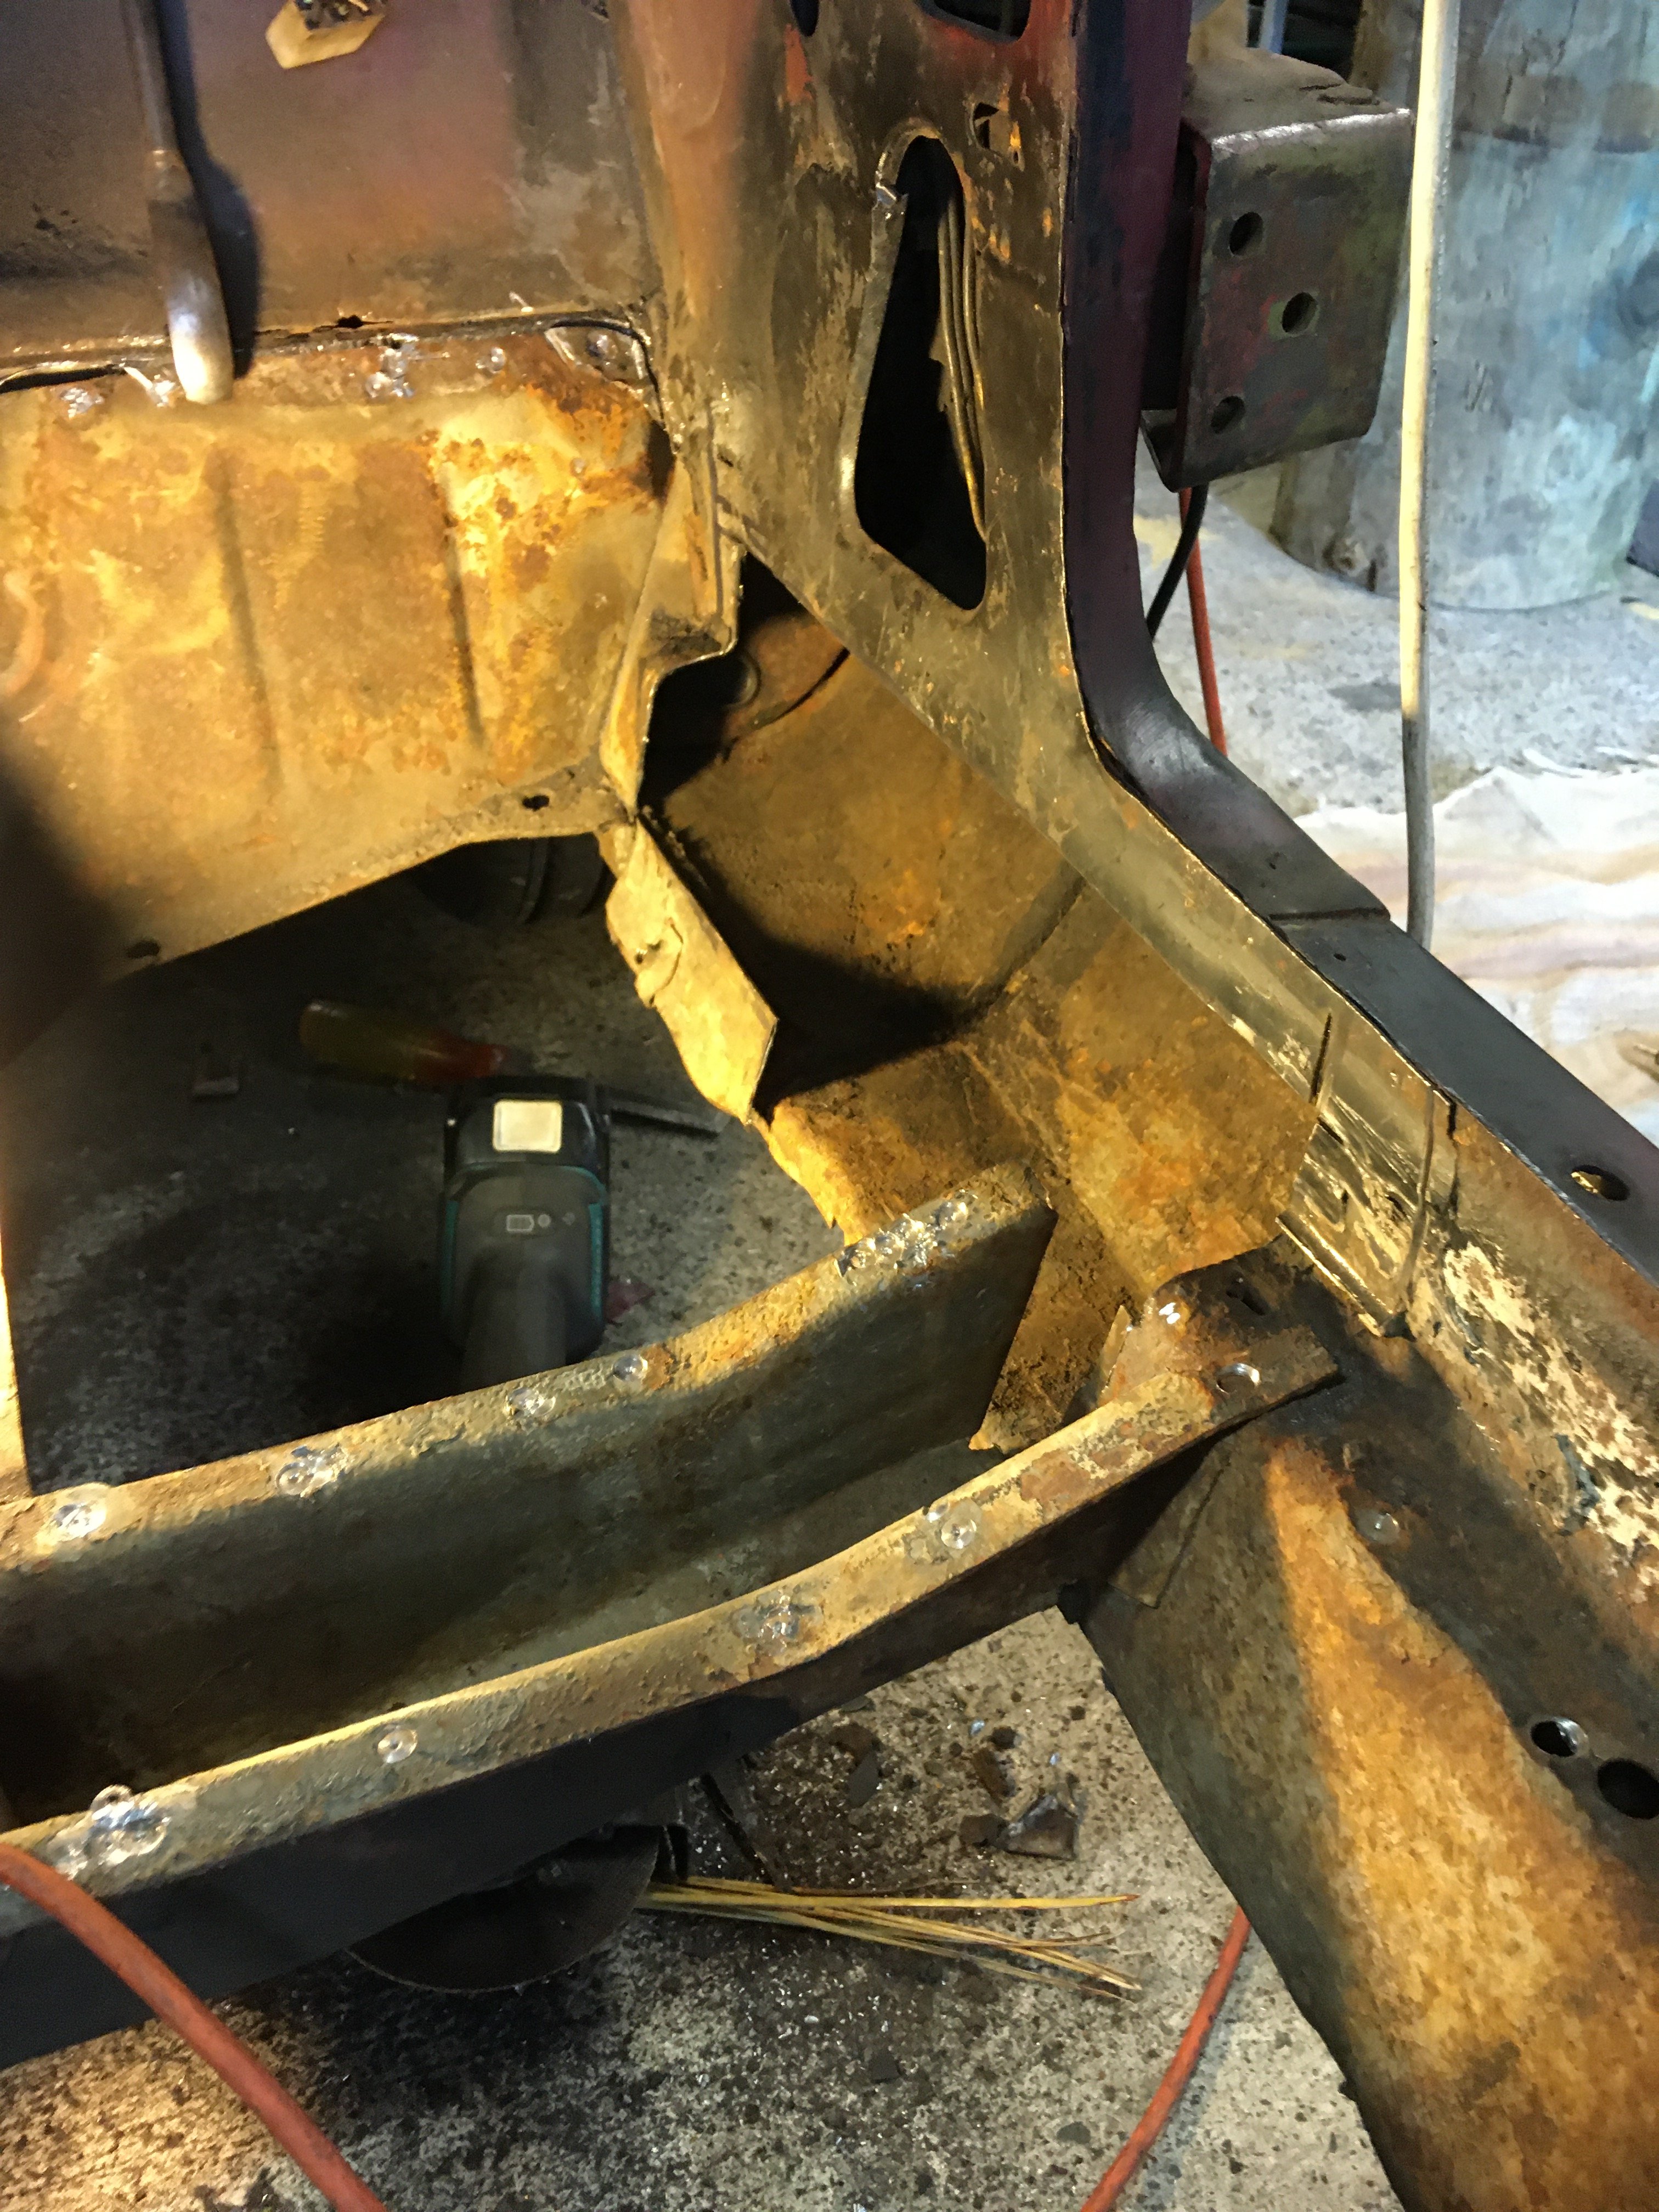
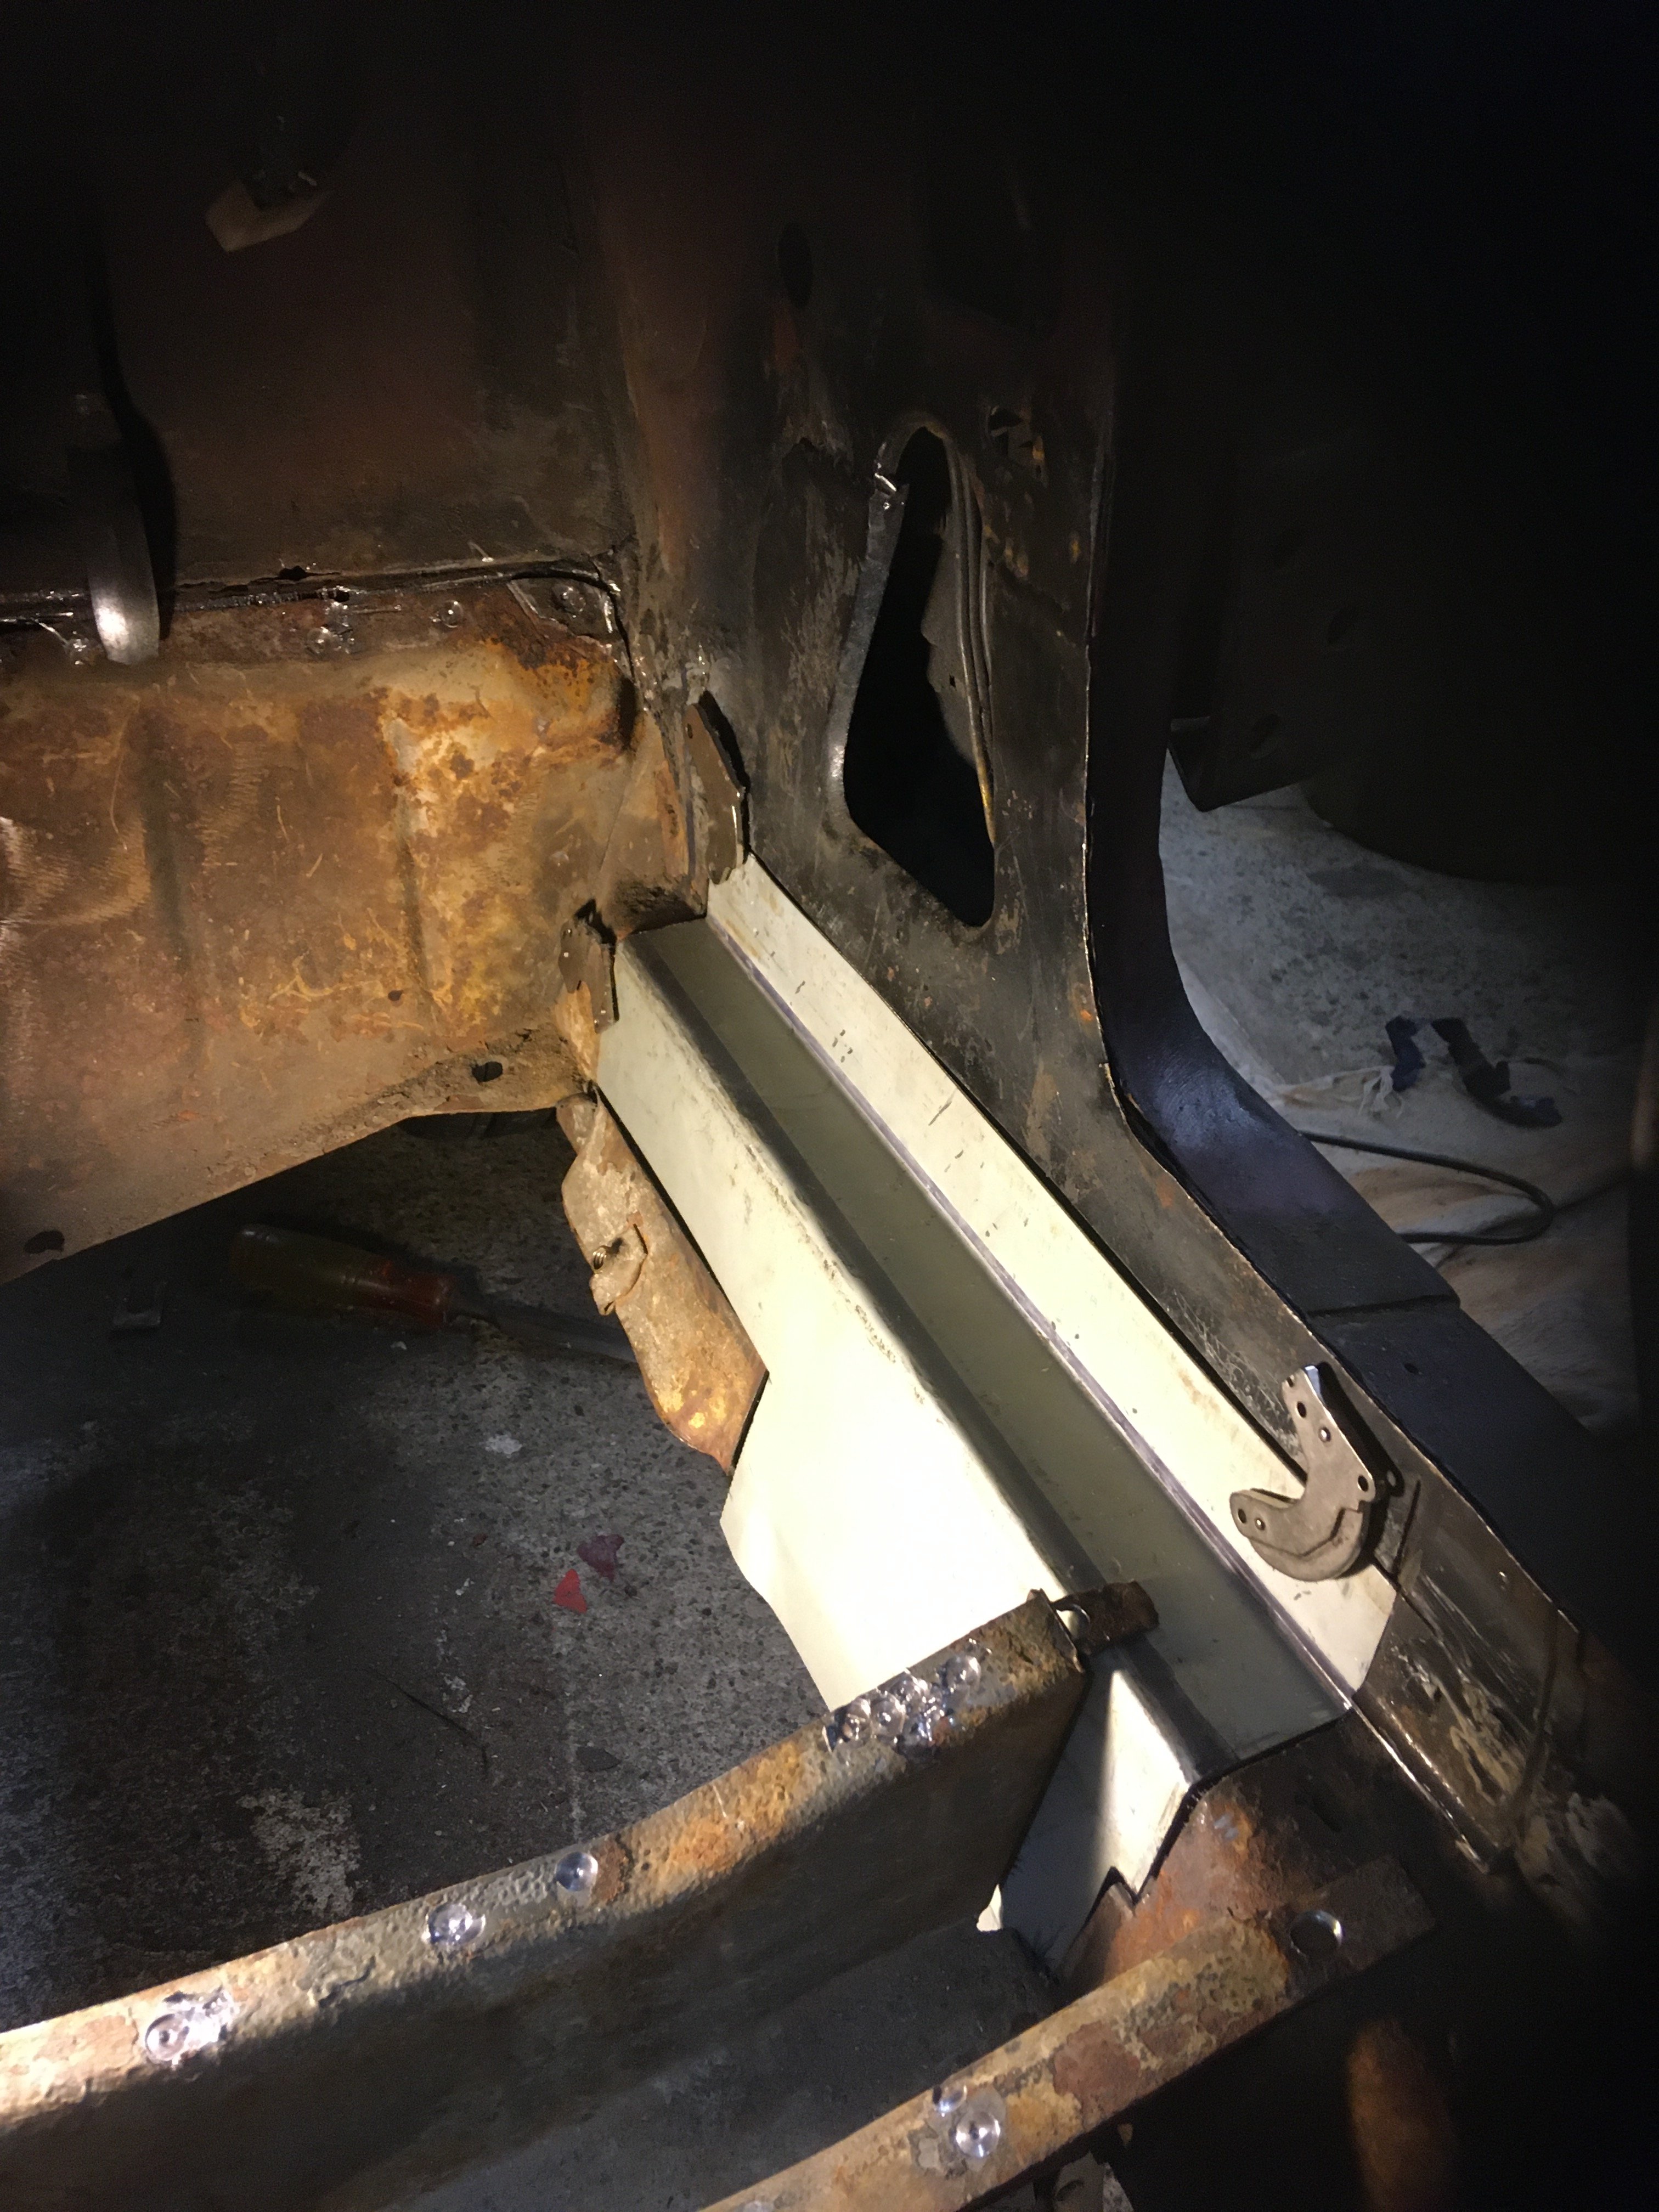
Inner sill almost done will be replacing the top part of the inner door sill amd inner a and b piller after I get the floor in so I can cut out some old repairs .
2 points
-
Yeah that's a common failure mode of 13 second prius engines1 point
-
If it's over 20 years old- no problem Less than 20- has to comply with all emissions standards etc unless you can meet the criteria for a special interest vehicle Will have to pay the clean car fee though, the car has to be 40+ years old to avoid that Rust or damage repair will need repair cert regardless of how old it is I'd avoid anything where they salt the roads, I've got a really nice 64 dodge polara on the hoist at the moment, looks good on the outside but it came from new York, and underneath is pretty fucked1 point
-
Stunning work! Did you consider a gilmer belt / pulley's?1 point
-
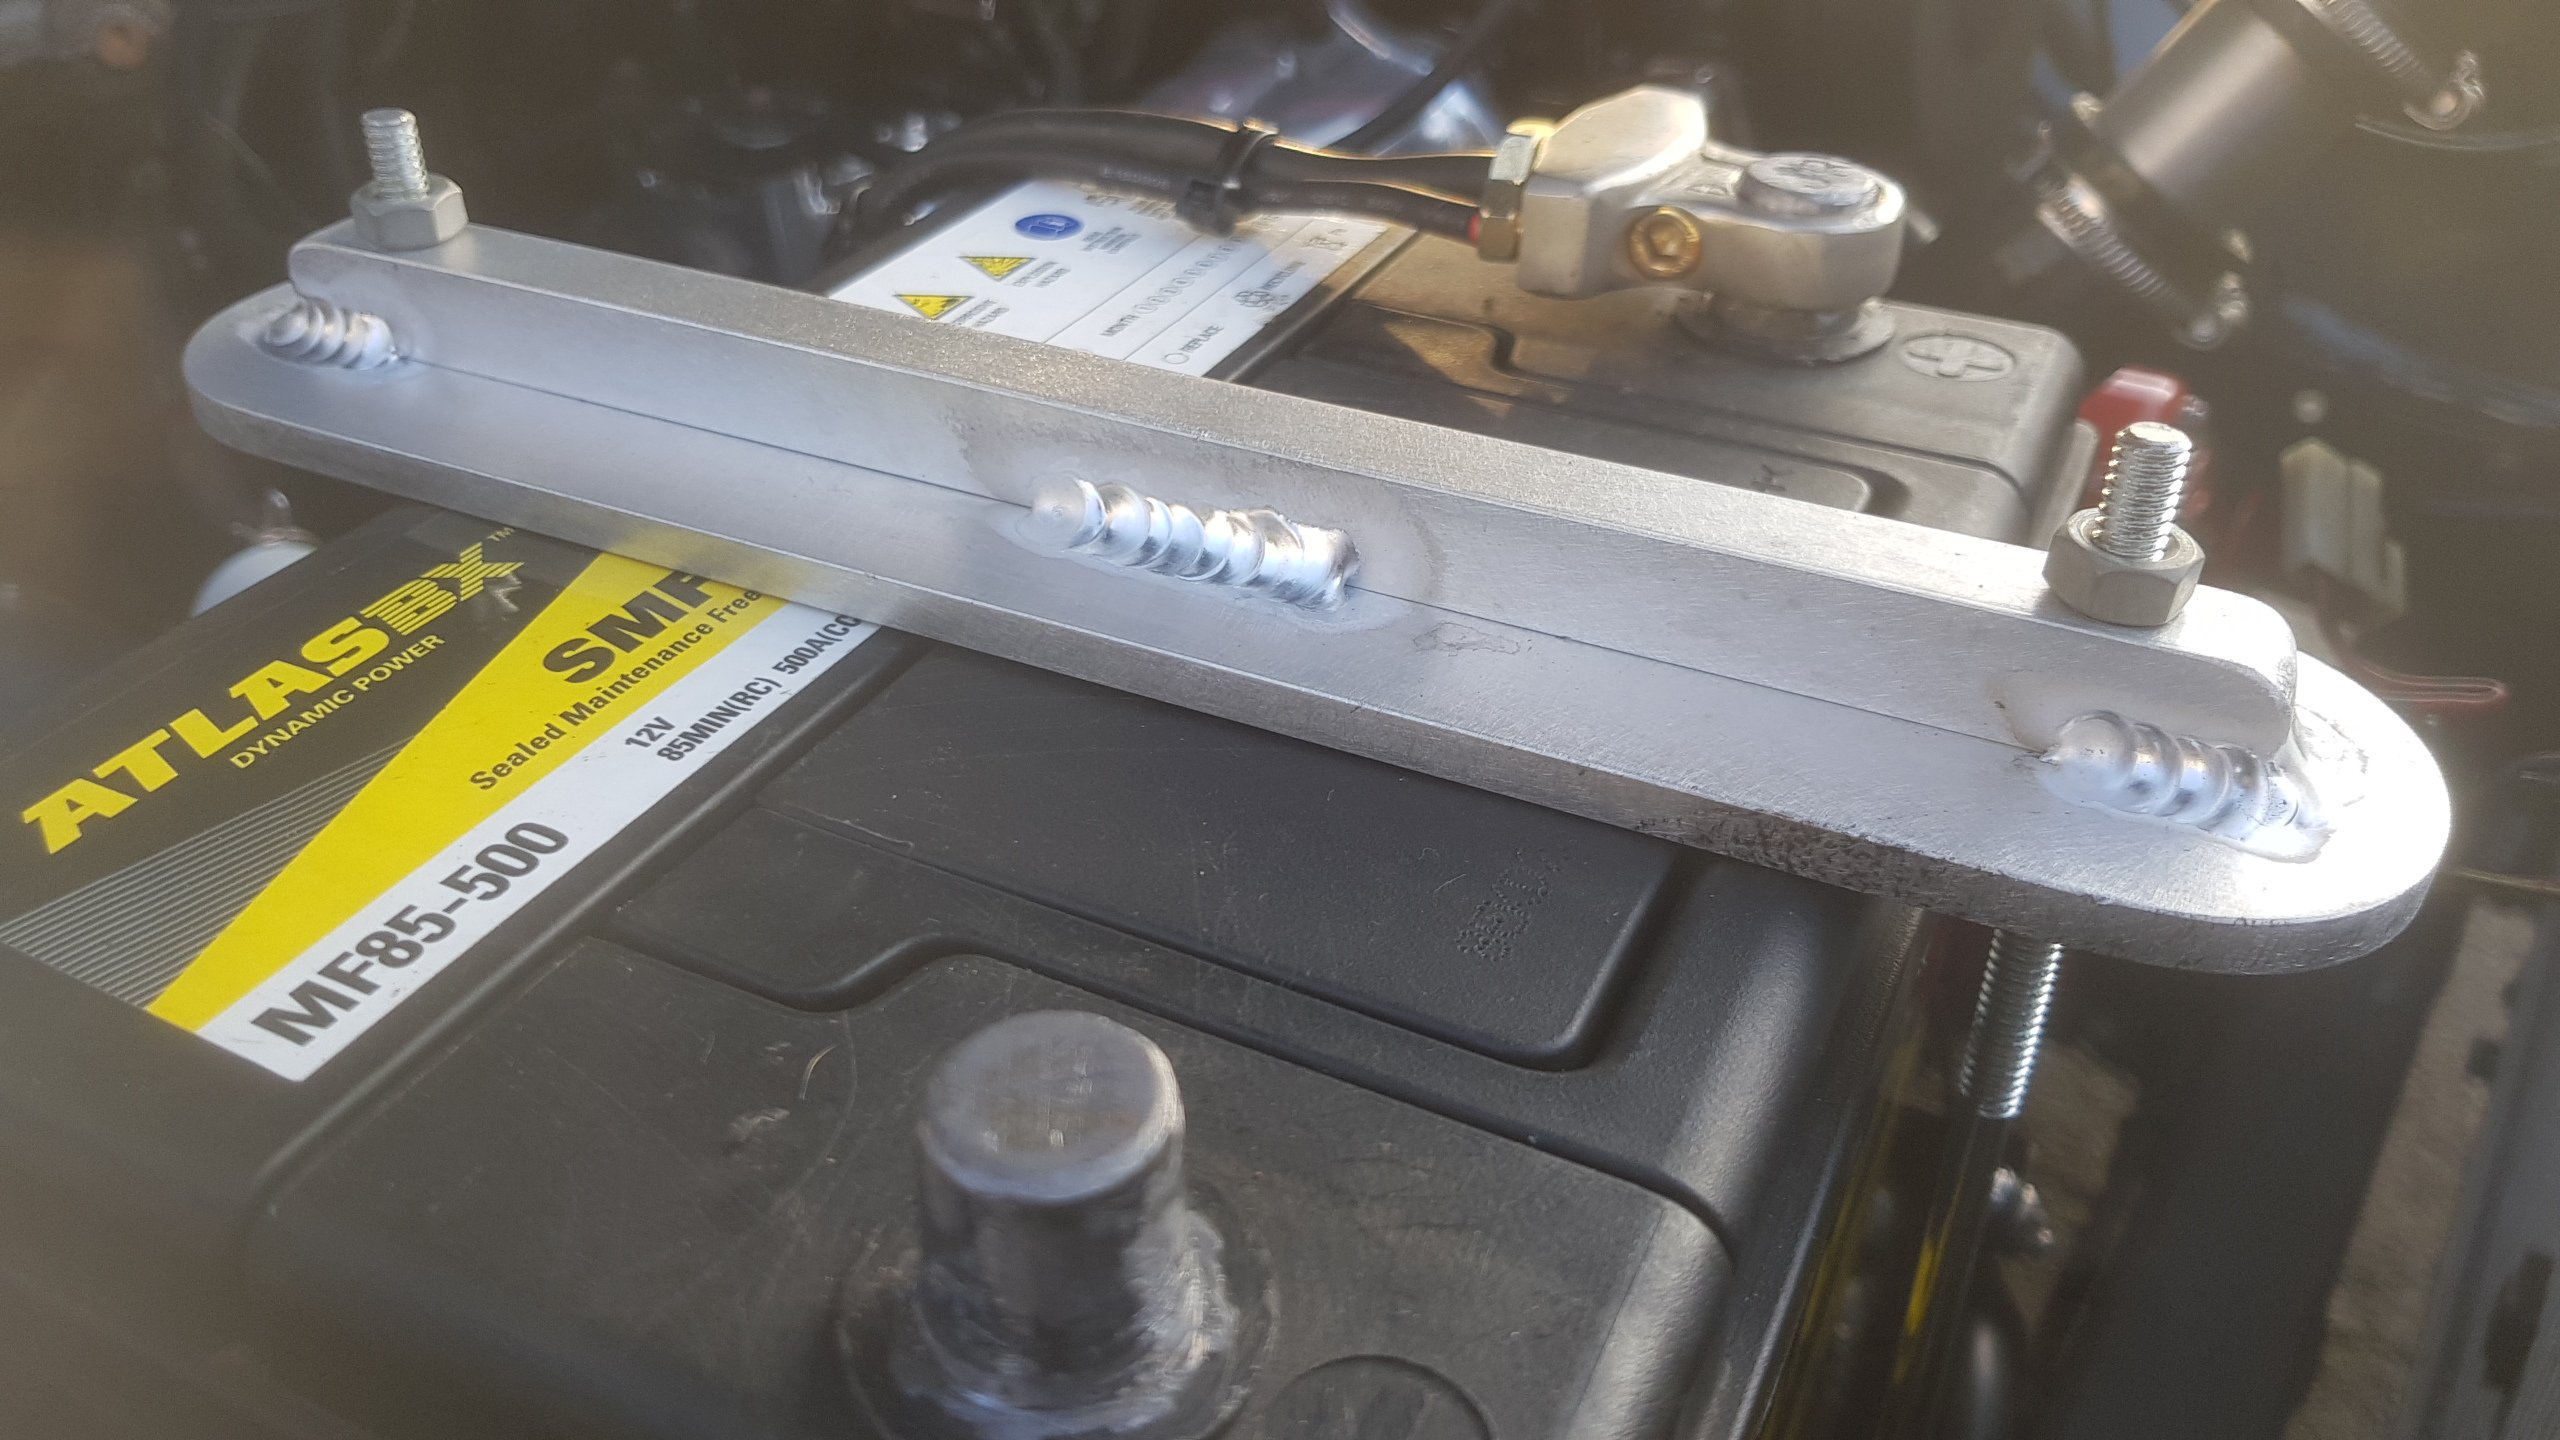
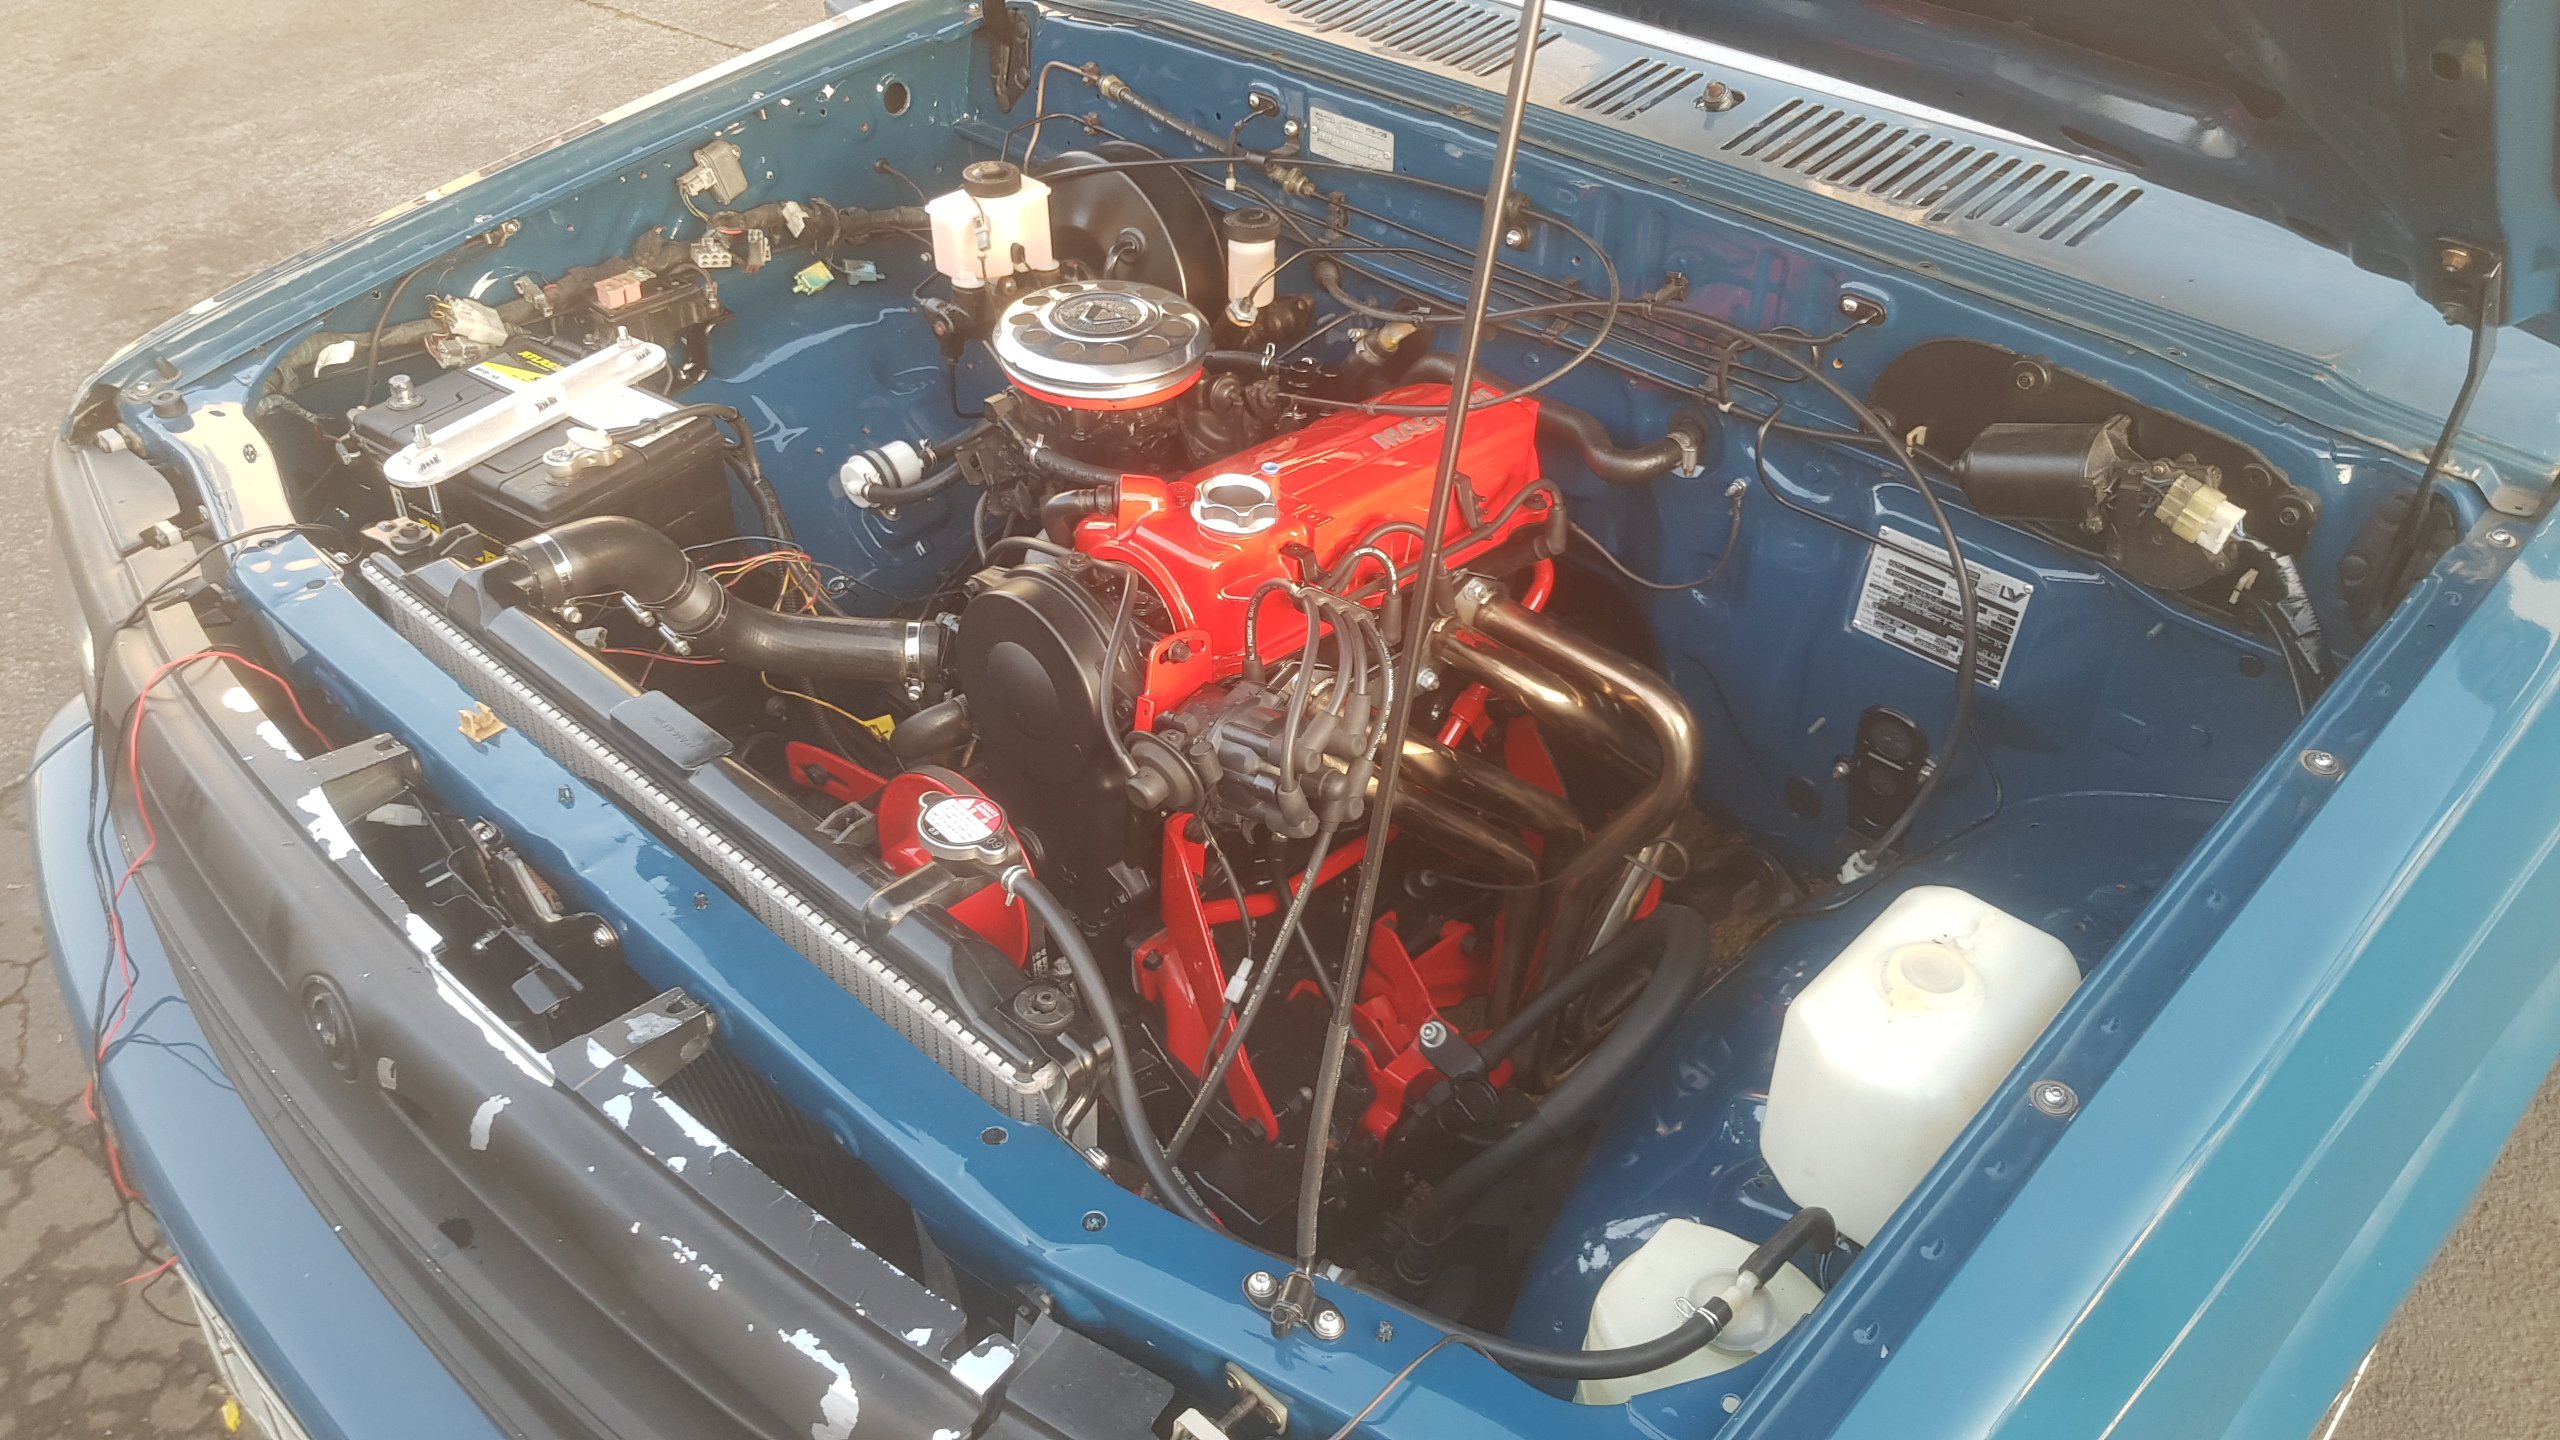
Got the battery tray fitted and had a spare battery tested before I went out a got a new one. Managed to save a bit of money there. Didn't like the plastic battery hold-down so fizzed up something simple but nicer from Ali. Will prob powdercoat black with the next run of stuff I get done. Nuts will get swapped out too. Engine bays looking a bit more complete now. Had been sorting engine loom, but we fired it up and got it up to temp for the first time on Friday night, so now that I know its all good, I can wrap the loom and tick that off the list.
1 point
-
While I was mucking around on fbook this came up and I remember this car really well from the early eighties. Was such an awesome little car and getting fully restored as we speak.
1 point
-
1 point
-
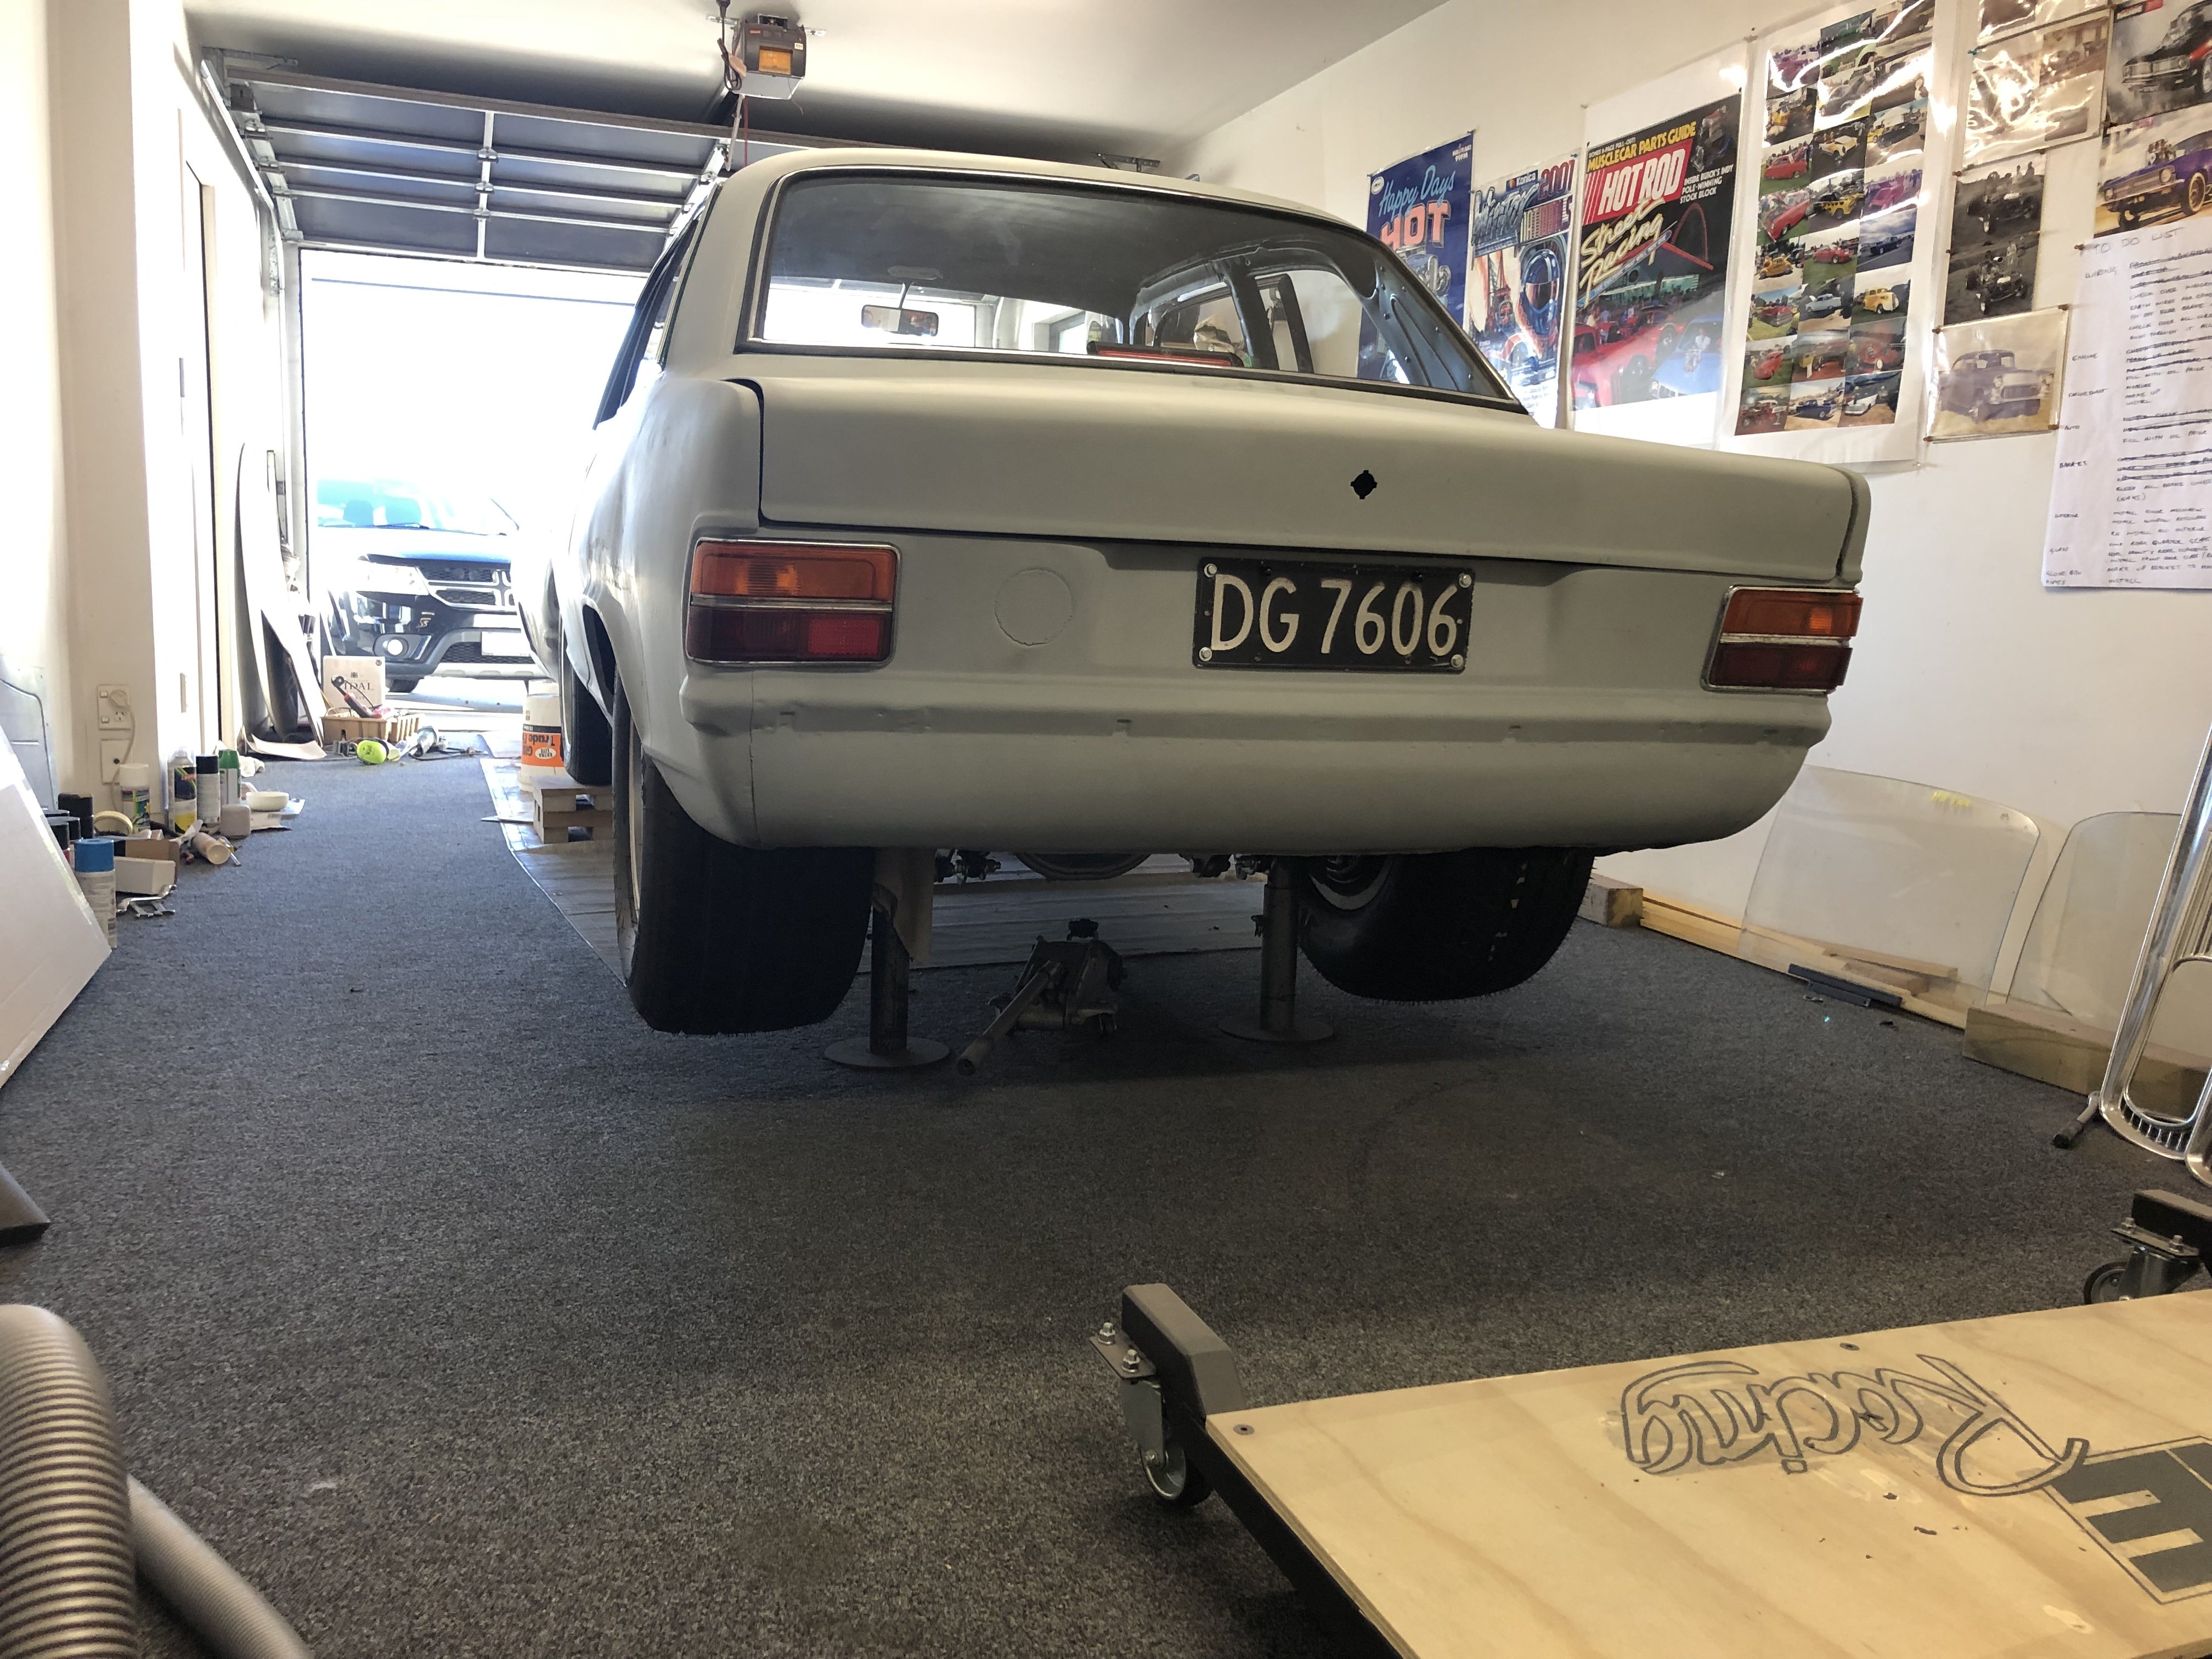
I was getting sick of looking at that ugly red paint so quickly rattle canned it grey. it all has to go back to metal eventually but makes me feel better looking at it.
1 point
-
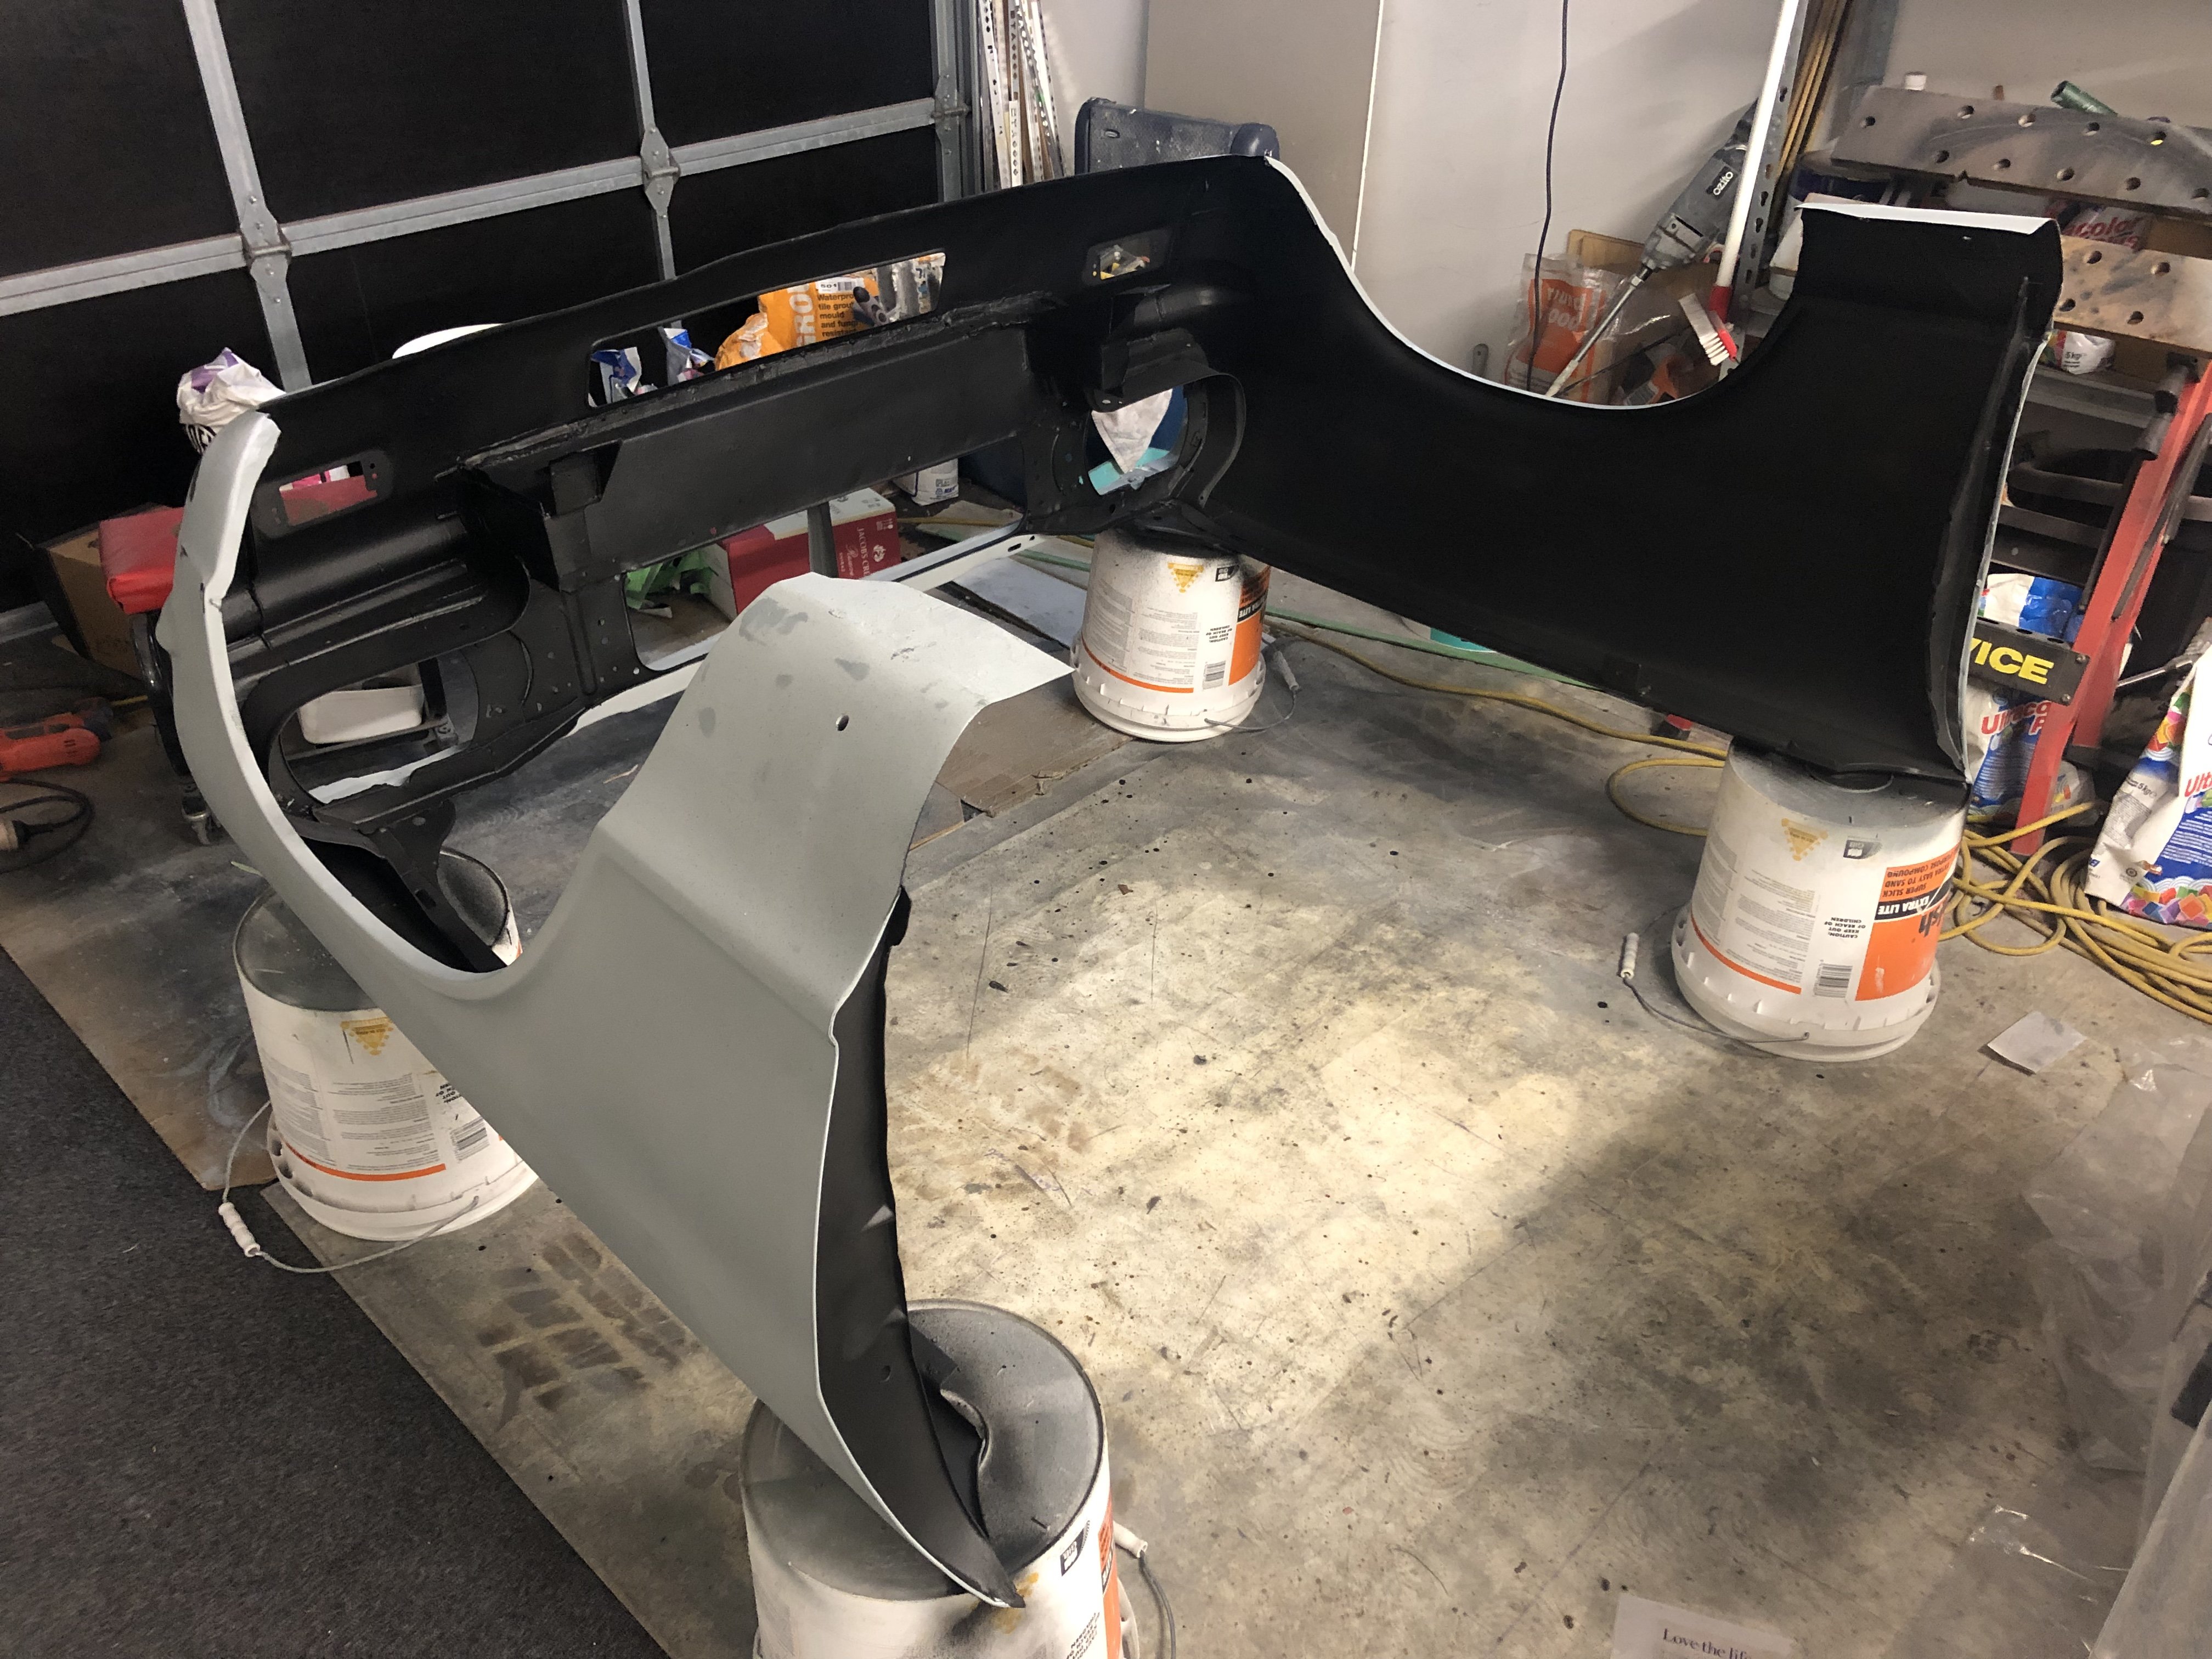
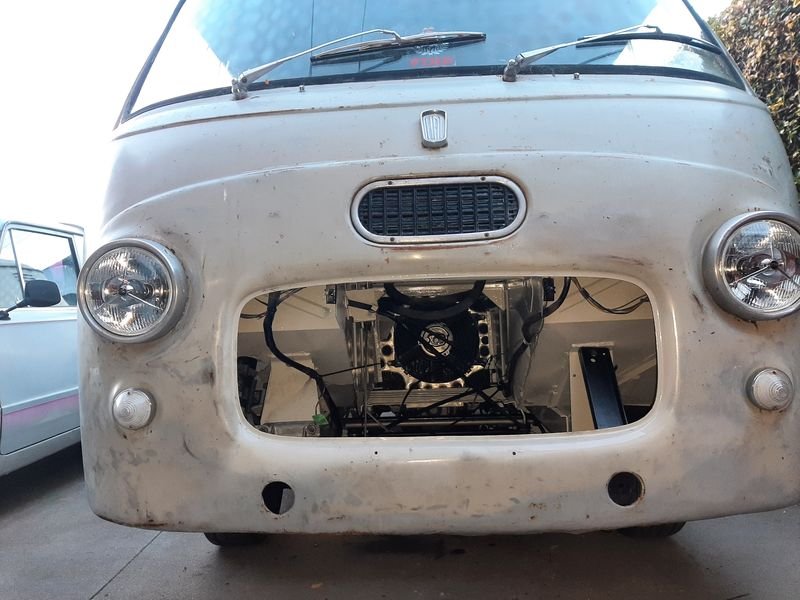
Finally got some primer and underseal on the front clip. just need to spray out the grill area in black gloss and can start putting all the wiring back on.
1 point
-
Cheers! Check it out with the stock Honda intake runners. It looks even more porsche like!...
1 point
-
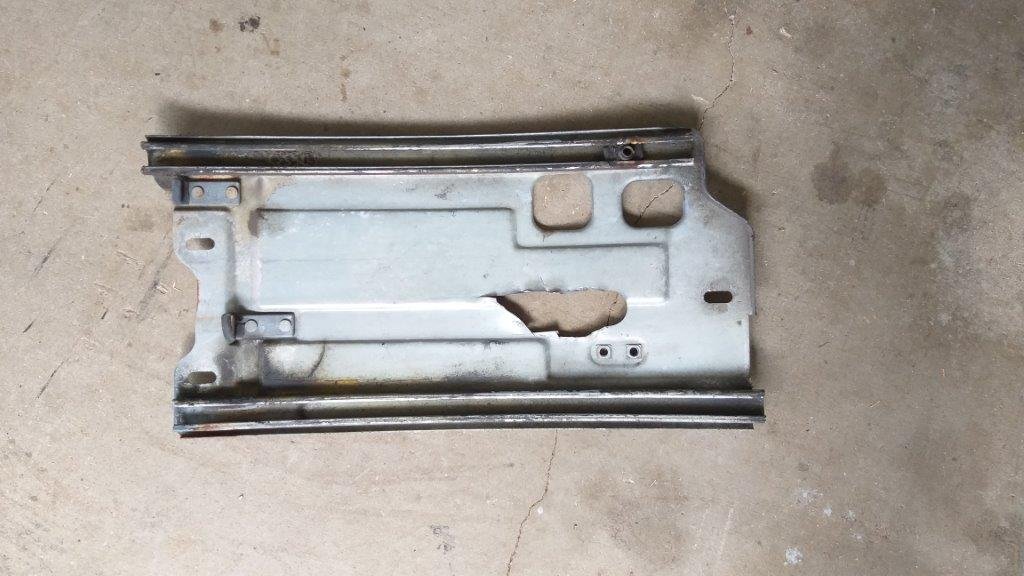
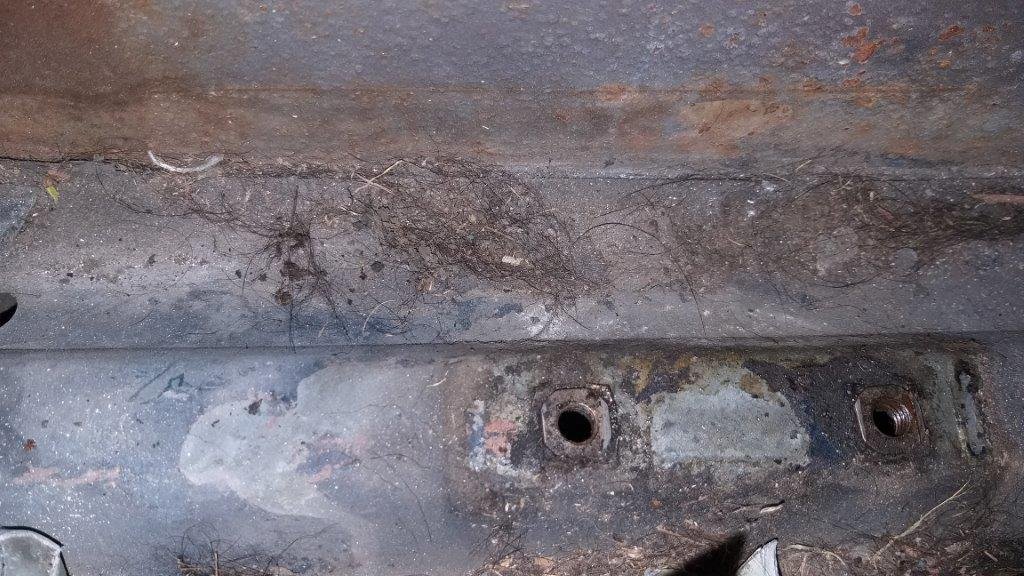
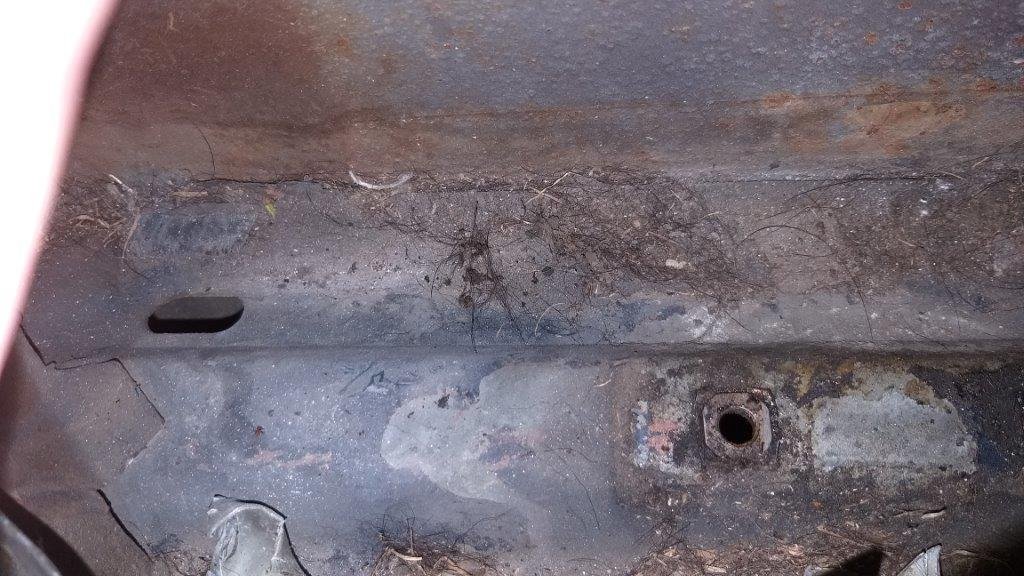
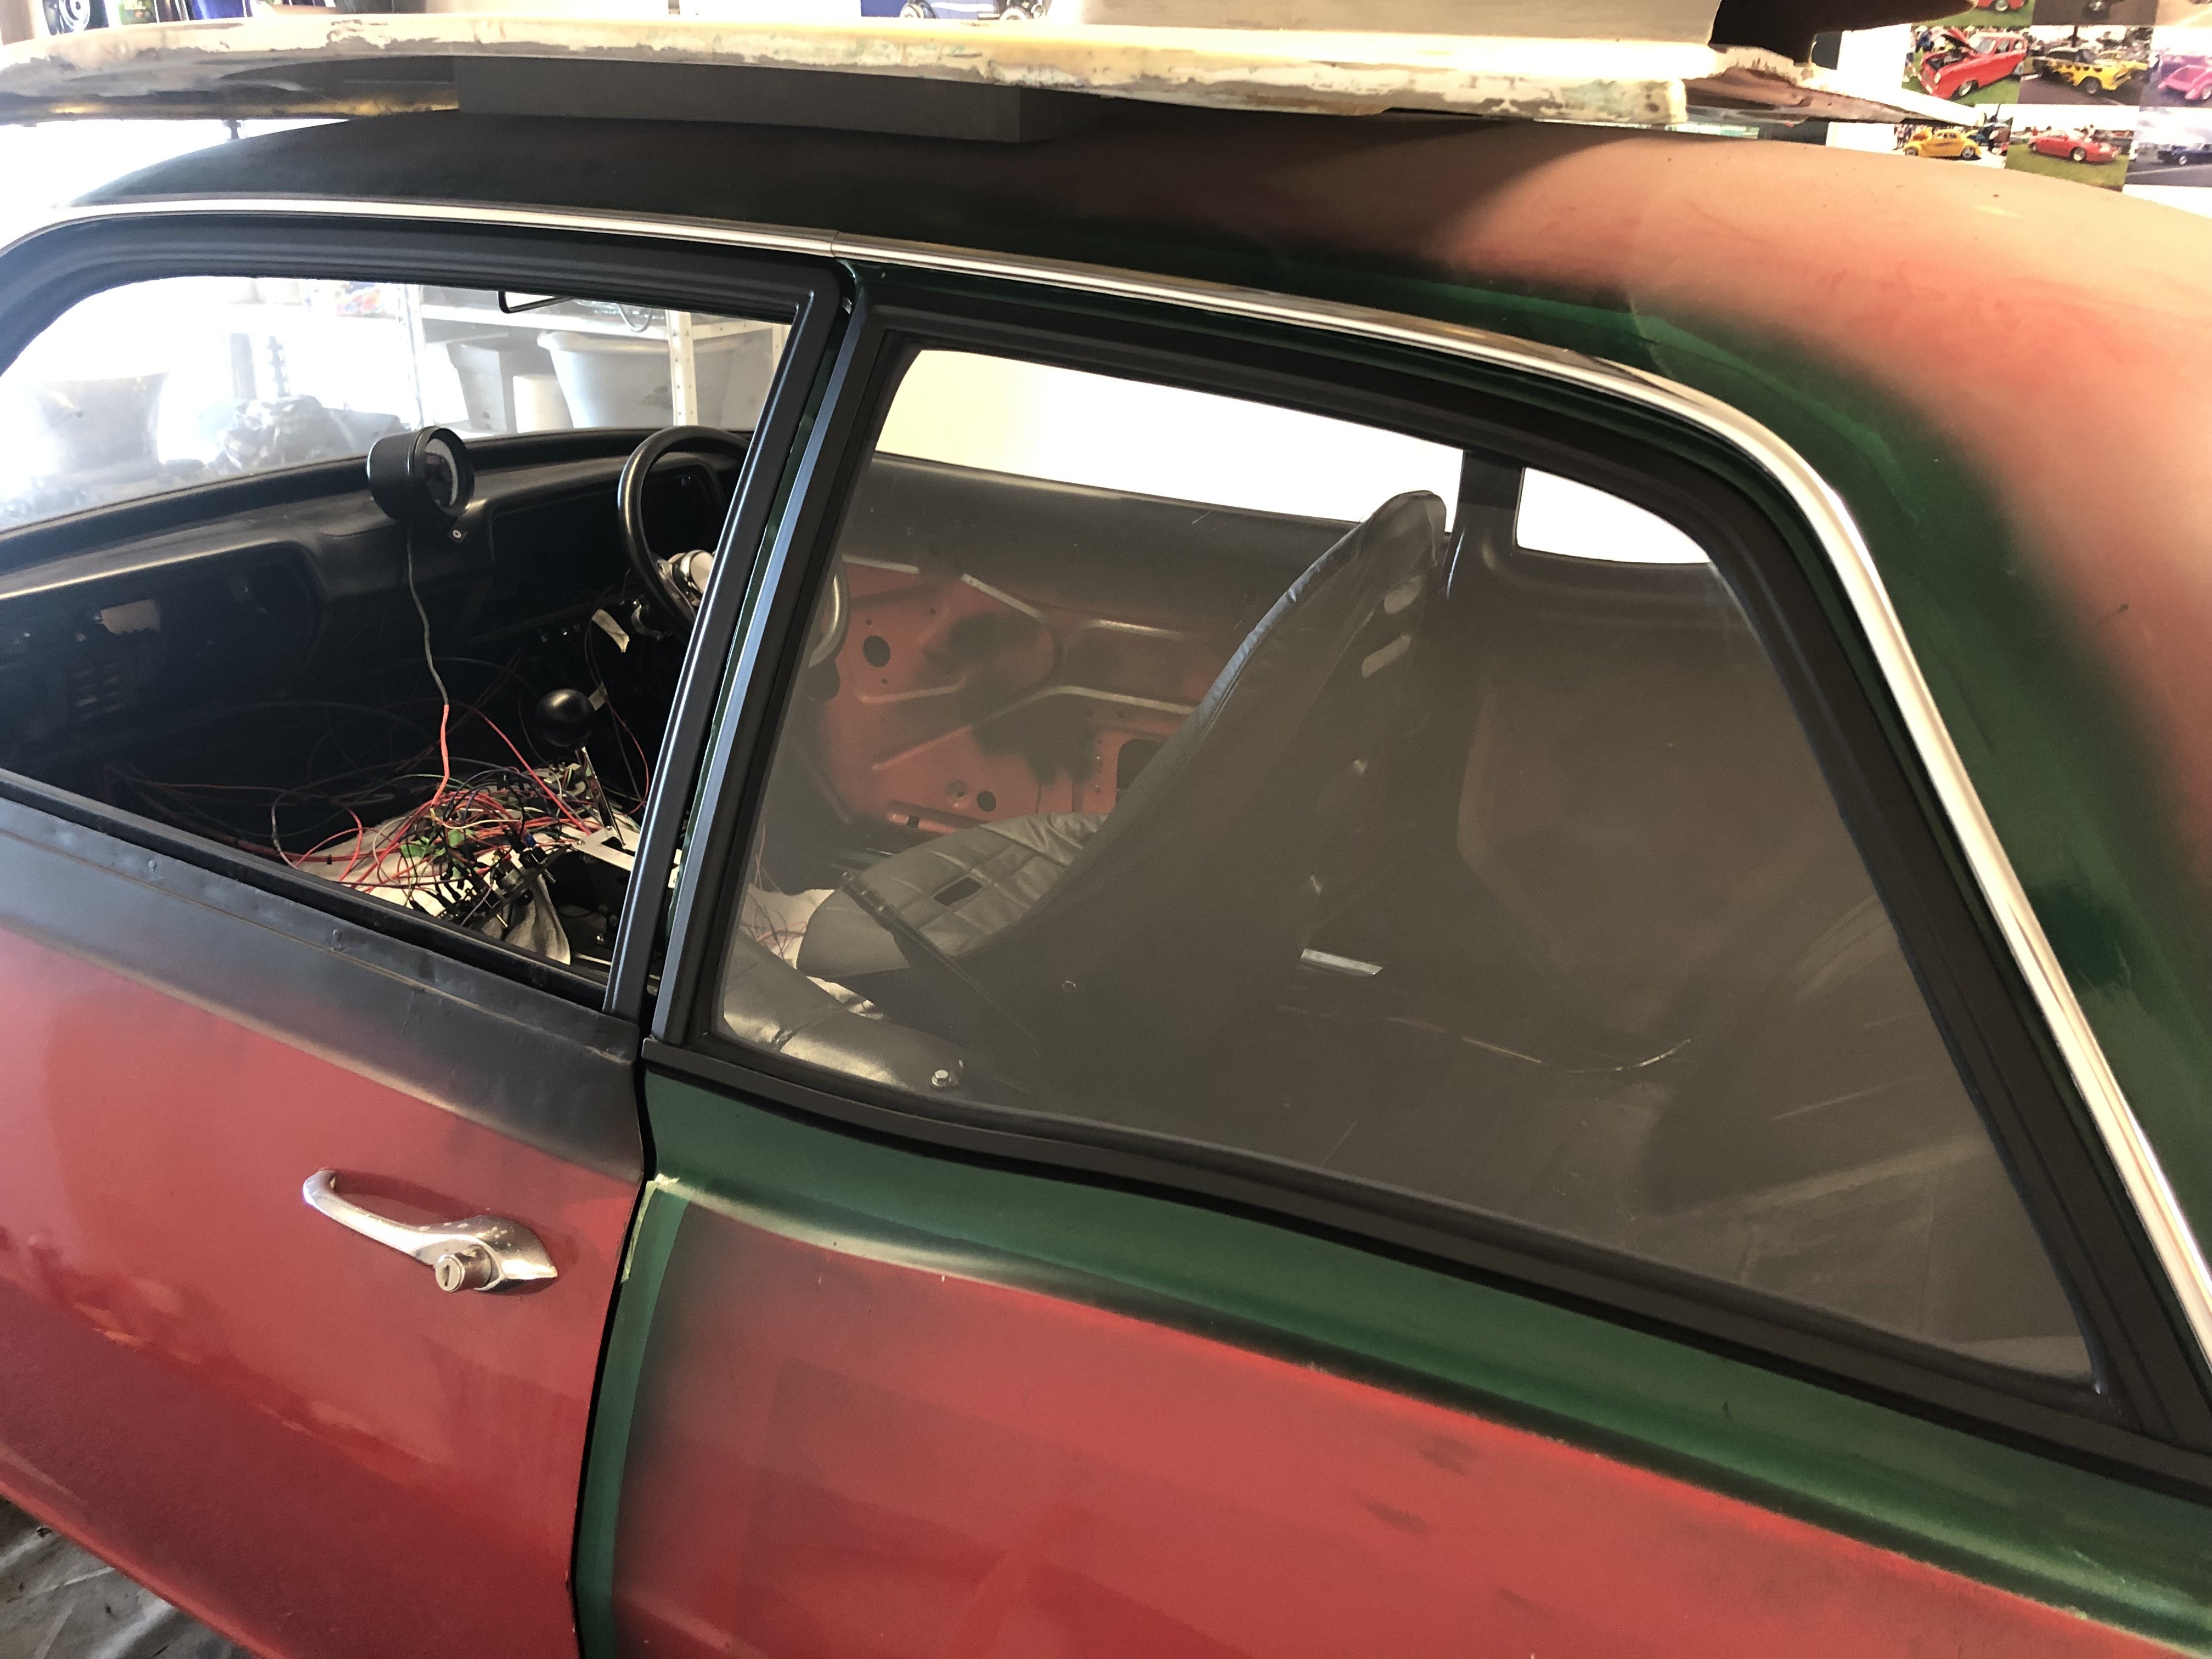
Now that the dash is painted, today marks the start of the interior rebuild. I thought I'd start at the rear of the cabin and work my way forward. So first up is the refurbishment of the rear quarter windows and I picked the passenger side one as the first lady for a shave. The window winds up and down pretty smoothly, but I want to rust proof the internal rear quarter panel anyway, so figured I'd gut the insides as part of the process. The little body seals are well knackered but I've got new ones in my latest batch of parts. Looking at the window regulator and rollers they look fairly decent. The rollers are cheap as chips so I've got a fresh set to install. Apart from that everything just needs a damn good clean and a bit of new grease. Someone has butchered the plate that holds the slides for some reason, but its only a cosmetic butcher. The metal is all jagged, so I'll tidy that up while I've got it out With the panel gutted I was able to inspect the metal. The bottom of the rear quarter looks nice and solid inside. Seems to be heaps of dog hair lying in there (at least I hope its dog hair) .... so I'll get rid of that before I start squirting fish oil about the place. A few "before" photos for your viewing pleasure. Thanks for looking.
1 point
-
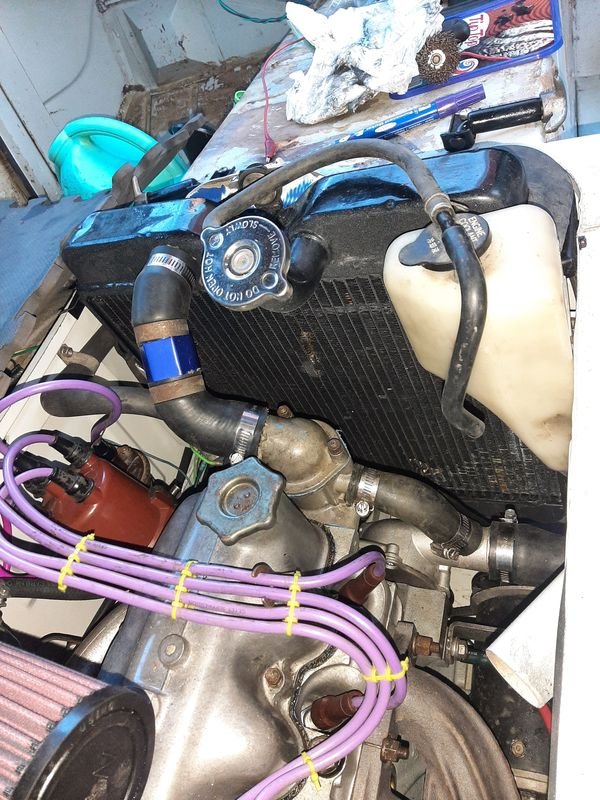
Been 1.5 months life of turbo life Have finally fitted a new radiator overflow Checked the catch can had a small amount of creamy greeny/yellow foam in it so its working Have booked a track day on the 16th of July at a small local track, will ensure the car doesn't fall apart and will then look to go do a couple of hill climbs and a track day at Eastern Creek1 point
-
And that's the dashboard and steering column looking heaps better.
1 point
-
Something something gold. Few dress up pieces.
1 point
-
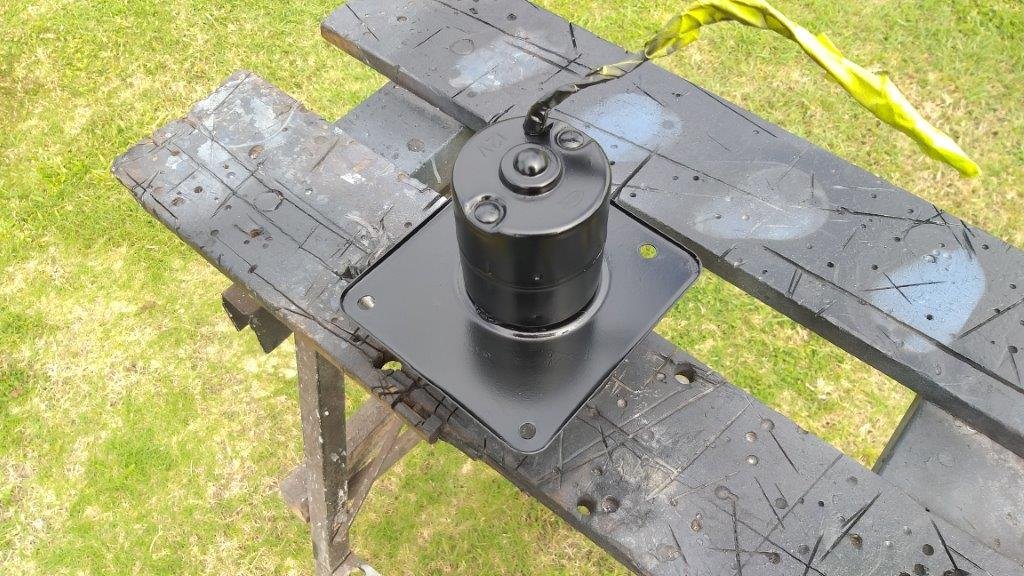
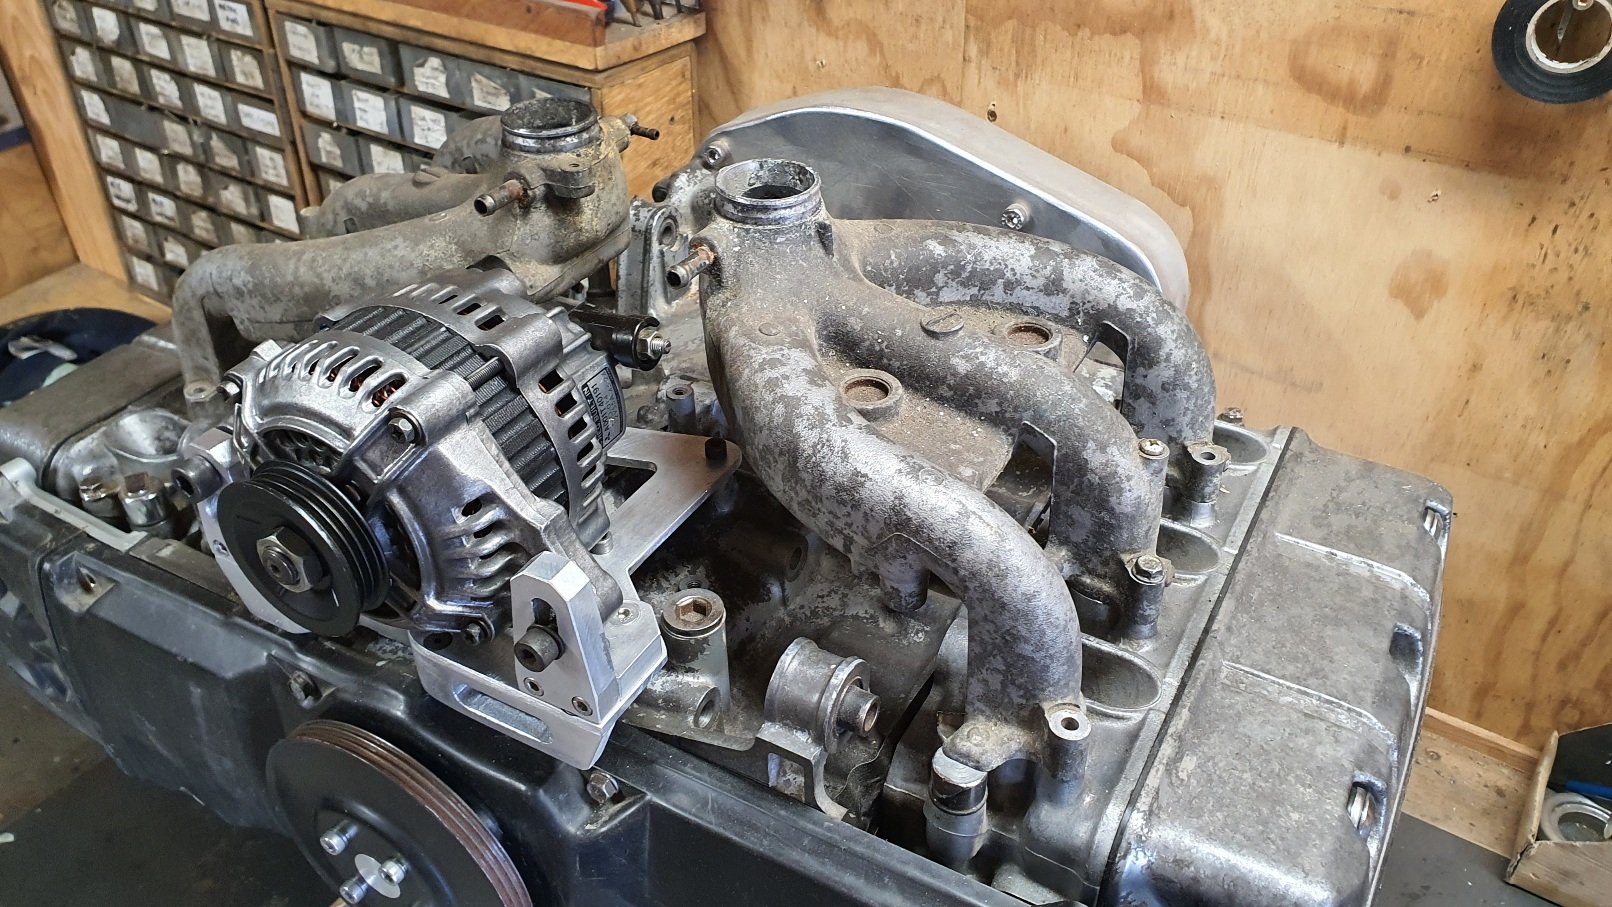
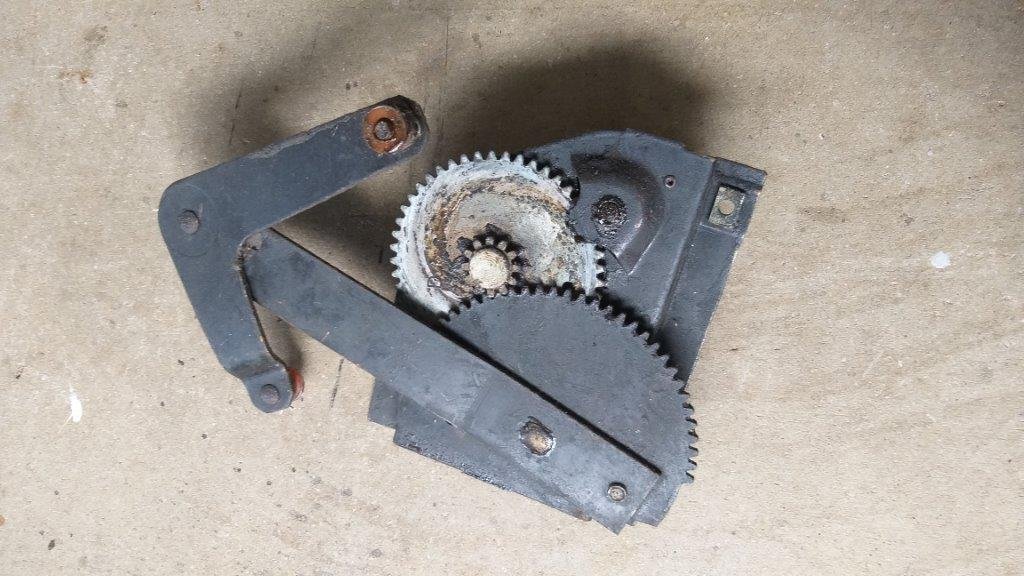
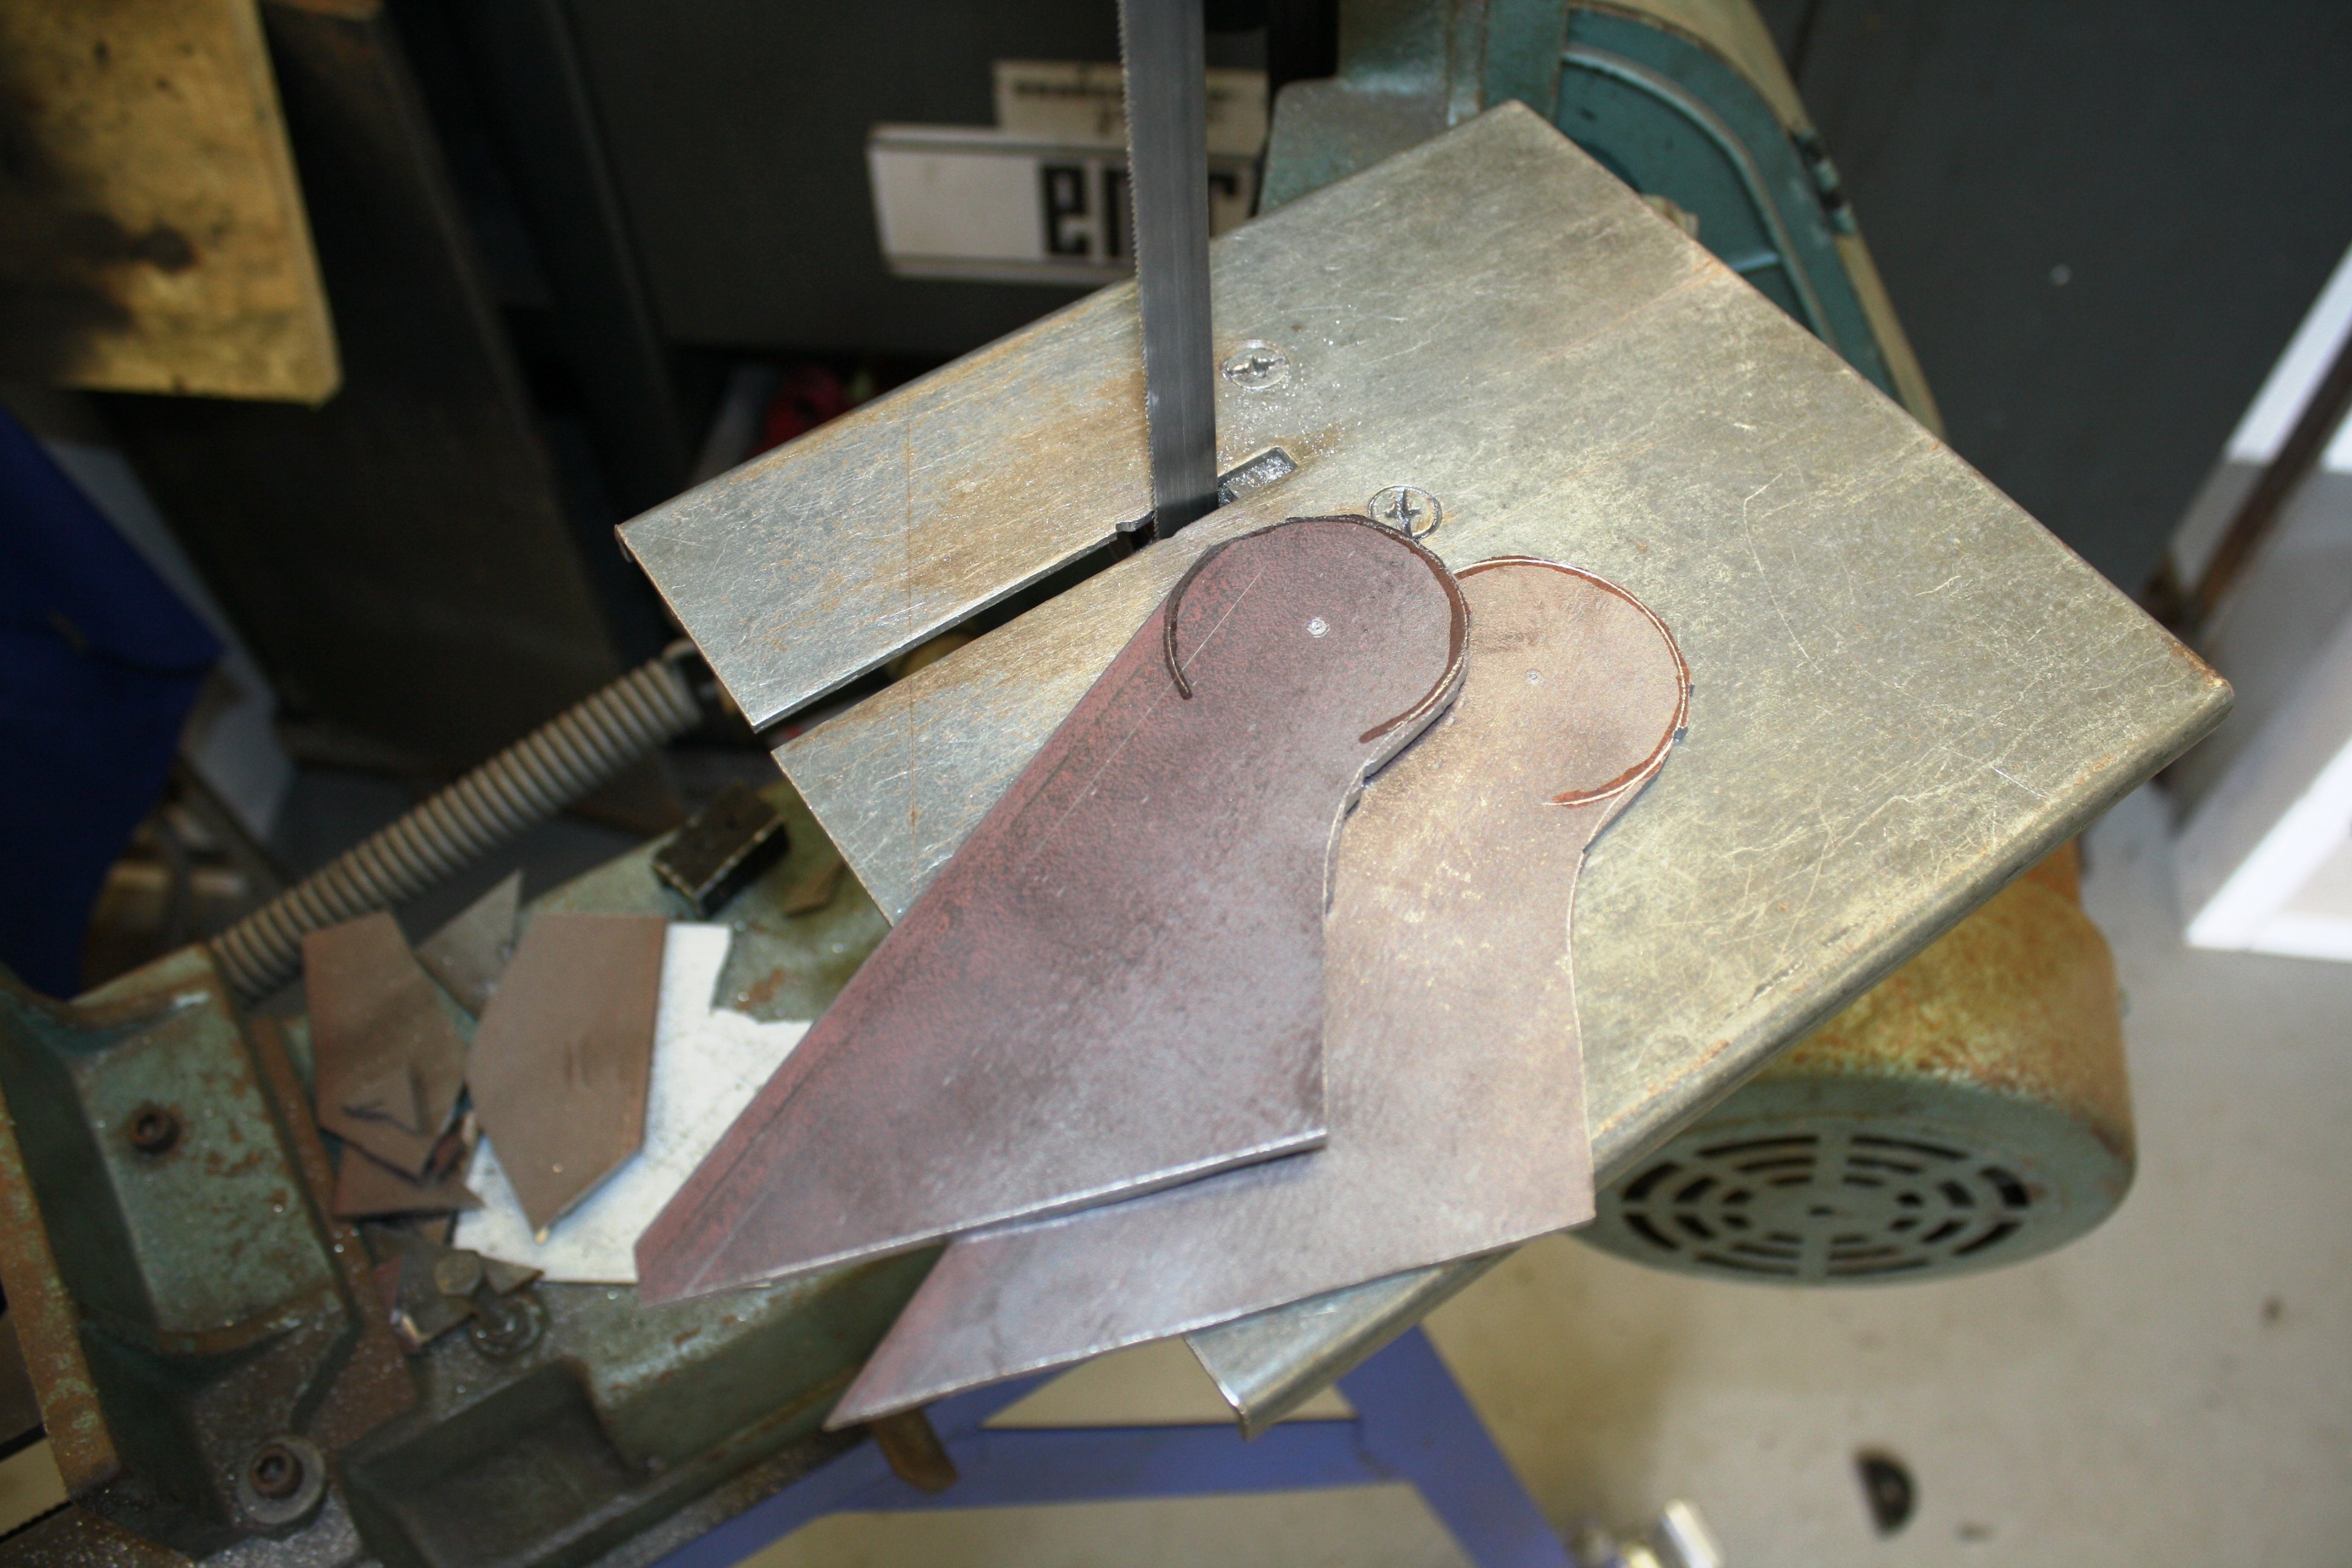
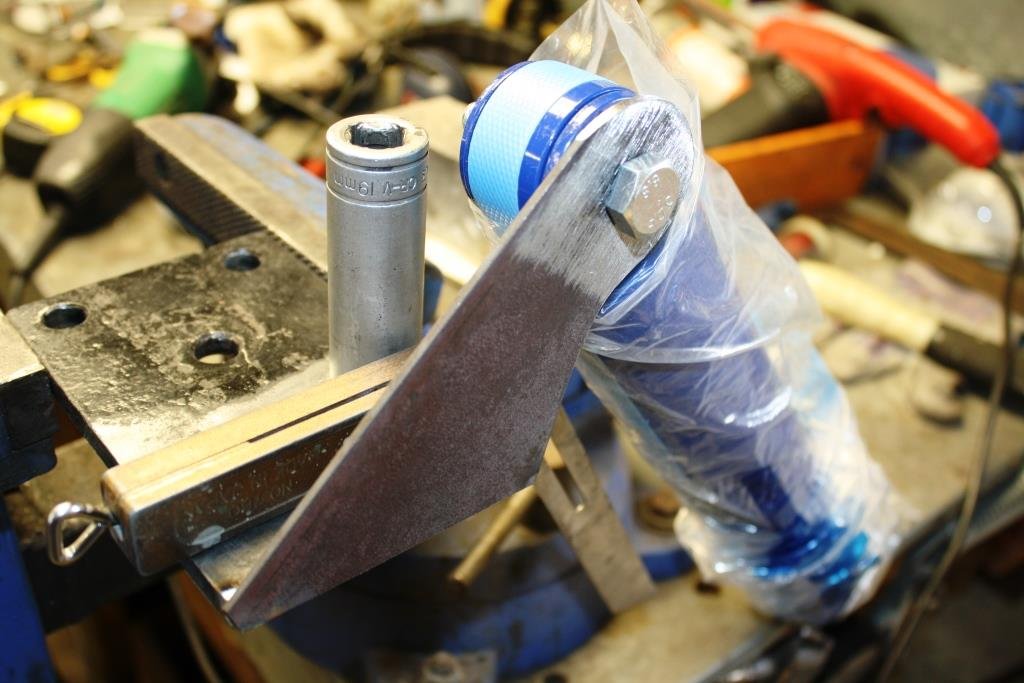
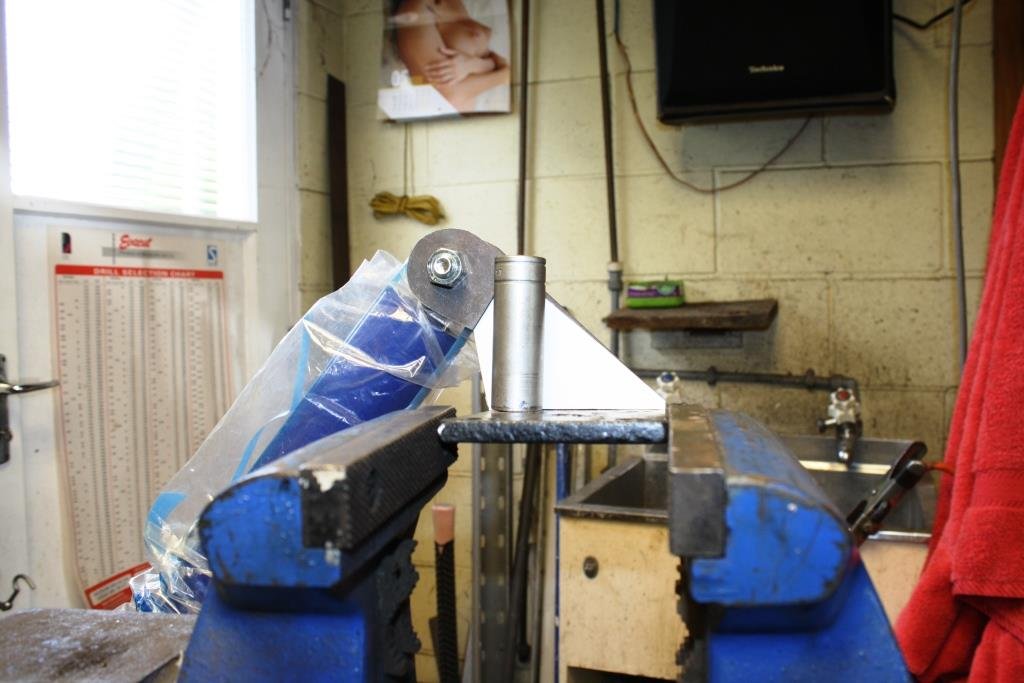
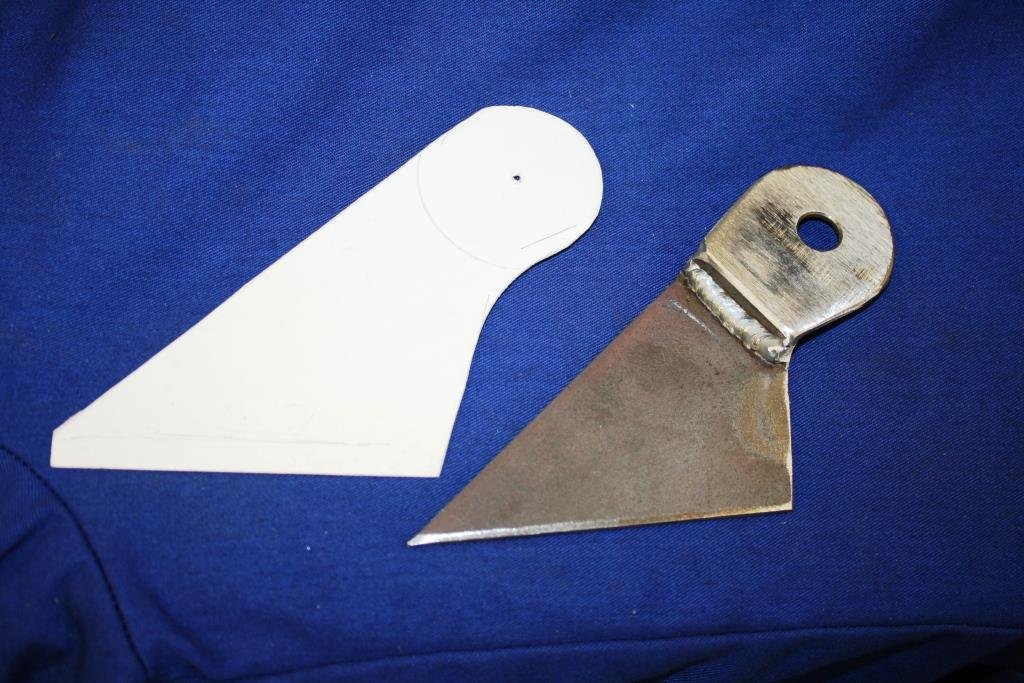
So while I plan out what my induction and exhaust setup with consist of I thought it best to get the alternator sorted. The goldwing engine originally had its alternator mounted off the back of the engine on a seperate casing now removed and driven via one of the many gears that resided within this casing between the engine and the clutch area. That area is now taken up by the bellhousing I have built and the alternator has to go on the front of the engine (which now the back ? of the engine as it sits in the imp..) and be driven off a crankshaft pulley that does not exist. This is what it looks like .. That little round cover hides the main cambelt drive pulleys and has a belt guide plate marked with various timing marks for setting up the ignition.. Under that pressed steel disc resides the first of the pulleys. Sandwiched between the pulleys is a 12 tooth trigger wheel - handy for my planned engine management on a six. I'll replace it with a 36-1 wheel though. So I need to machine up a few bits to allow the crank to run a mini v belt pulley and drive the Honda alternator which I had picked up at the local wreckers will sit about here... At another wreckers I found a pressed steel 5pk pulley from a power steering pump that was about the right diameter, had a flat mounting face and bolted in place with 4 little bolts. Ideal for my plan. I cut it down to suit a 3pk belt.. Then I popped a big lump of steel bar I luckily had left over from some other job into the lathe and machined up a hub with a locating extension on one side to match the inside of the cambelt pulley, of which which extends beyond the crankshaft nose by about 3mm. It drives , via a pin pushed into hub, off the hole in the cambelt pulley, which is there to locate the original timing plate.. The other side of this hub I bored out as far as I could whilst still allowing enough meat to bolt the pulley on. This hub then bolts onto the crankshaft, eccentrically located by the camshaft pulley and held fast by the crankbolt.. Then I machined an alloy 'plug' that fits snug into the bored out hub, machined on the end to centrally locate the steel pulley, rather then rely on the bolts.. And all lined up... So now I have a front drive pulley. Yay. Next up is making some sort of way to mount the alternator securely and not too ugly considering its going to be right there, centrally on view. Starting the mount by making lots of little tiny bits of alloy to tread about the workshop with this tool... I cut some strong alloy plate and mounted it to the top of the engine using several of the conveniently placed cast in mounting points scattered about the place on top of the engine. Thanks Honda I had to add a support on the front, easily bolted to the cambelt housing. Now I had a place that the alternator brackets could be bolted to. I just made it up as I went along and machined bits and pieces until I had what I was looking for. I wanted it to look a mix of between sort of factory and sort of 'race car'. I had lots of fun making more alloy swarf.. Of course I cut my plate too narrow... Eventually I ended up with all these bits to piece together... Together they made this.. But before I plonked the alternator in place I had to clean it. It looked horrid and had obviously resided in a Honda of some ilk with some serious oil leaks. It was also a bit corroded and things didn't want to pull apart too easily. I made a bespoke little bearing puller.. The filthy alloy castings came up nice with a petrol bath.. and even nicer with some wire brushing... While it was apart I cleaned up the slip rings... Painted the centre black. It will possibly be repainted in Imp blue at a later date, as a treat if the engine swap works out ok. Its just a look I quite like - call me 90s boy. Bolted it all back together, complete with a new main bearing that I happened to have in stock (must be one of the most common bearings ever -35/15/10) Then excitedly bolted it in place. My Honda goldwing now has a standard alternator mounted in a pretty normal fashion and it looks nice and neat... With that sorted I can move onto making the cooling pipes and induction setup. I have still not fully made my mind up on what route I'll be taking here but I'll probably to bite the bullet and click buy now on a set of itbs so at least I have something to play with and go from there. I need to find a set of suitable top feed injectors. Something around 200cc at a guess. The standard Honda goldwing 1800 items look like they'd be ok and pretty compact. I'll be making the mounting seats to suit, which I'll then weld in place on the stock intake runners. Fuel rail made to suit.1 point
-
Also got some evo brembo calipers and 320mm ish rotors. There are a few types of adapter brackets so i need to find a decent set that will pass cert, or buy some 350mm evoX rotors and adapters for the front and 350mm 370z rotors for the rear. My overnight parts from the UAE turned up yesterday with the r34 gtr master cylinder to suit the larger calipers. They look like the will have some stopping power. The current brakes used to run out just before i got to the top of mt messenger.1 point
-
long time no hear. Have had the work/life balance tipped way too far to the work side since jan 21 and haven't done much on the car. I did get the engine assembled, and @Bistro gave me a hand to install and test drive/run it in sometime maybe earlier this year. Engine went really well. Knocked a bit with the old gas in the tank, but is going sweet with some fresh stuff. Just running a stock cam and single carb at the moment. I have a cam and a MAXX ecu to run the injected carbs. Need to do the fuel supply inside the carb hats, and order some lash caps to suit the cam. Hopefully ill get onto it later in the year. Image hosting seems to have packed a shit so ill try something else. As it sits, a good storage area for my other projects...1 point
-
I stepped in some rocking horse shit , slipped and landed on a unicorn. yup that’s right, I found a stock GTX gearbox that has been rebuilt. it us now on its way to me along with a left driveshaft and another baby unicorn, a working AFM. price paid, much less than I was expecting to have to pay for one. i technically have the parts to put together a complete car from a rolling body. Don’t dare me please, I can’t deal with that kind of pressure.
1 point
-
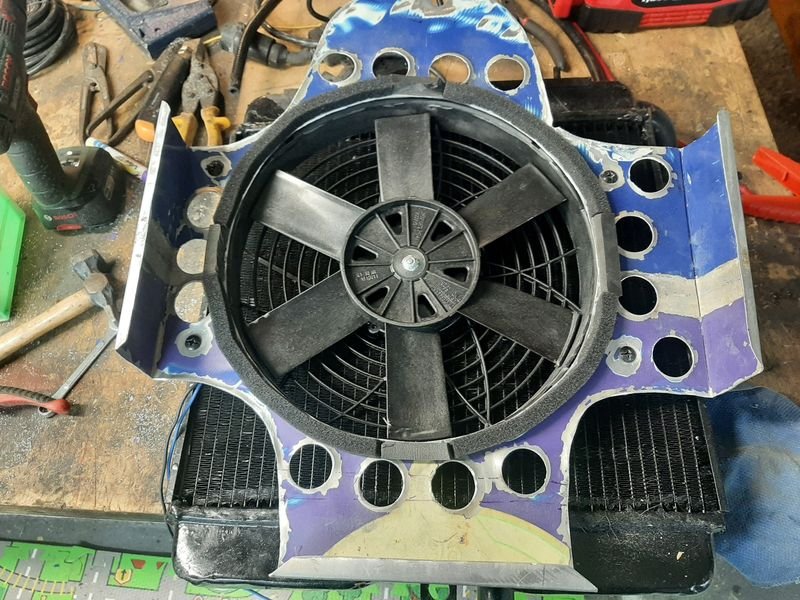
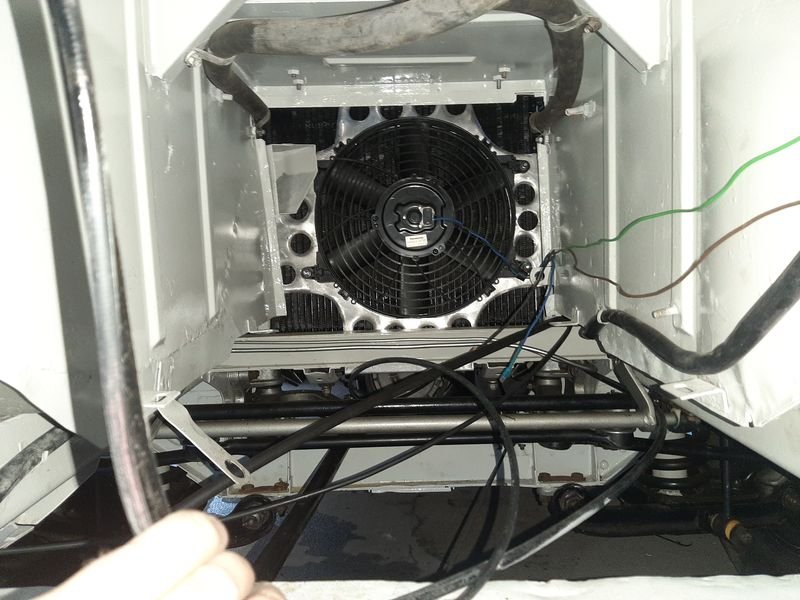
The not-engine bay is looking tidier, found a better hose combo so the cooling system at the front is ready. Hose clamps are longer than I like but what evs. I got the fan mounted and wired in, I won't bother with a shroud just yet though. Next up, more ugly temporary bracketry. It took a bit of fiddling to find a good position for the oil cooler in the vent hole, it had to line up with the body so each of its three mounts are different but it can be removed assembled which is handy.1 point
-
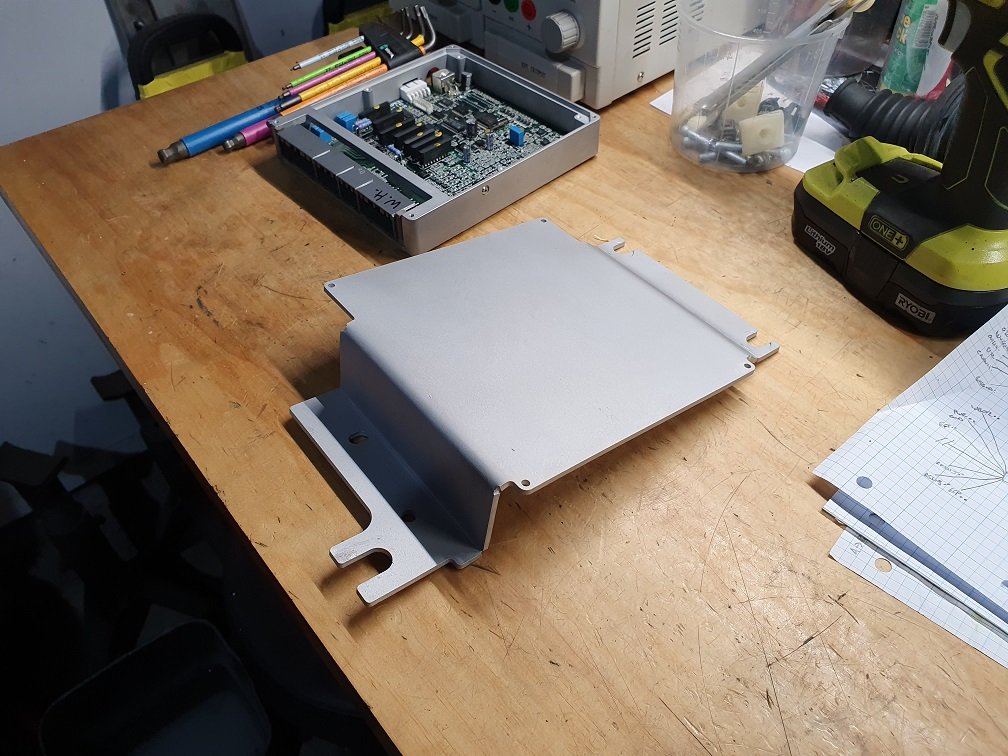
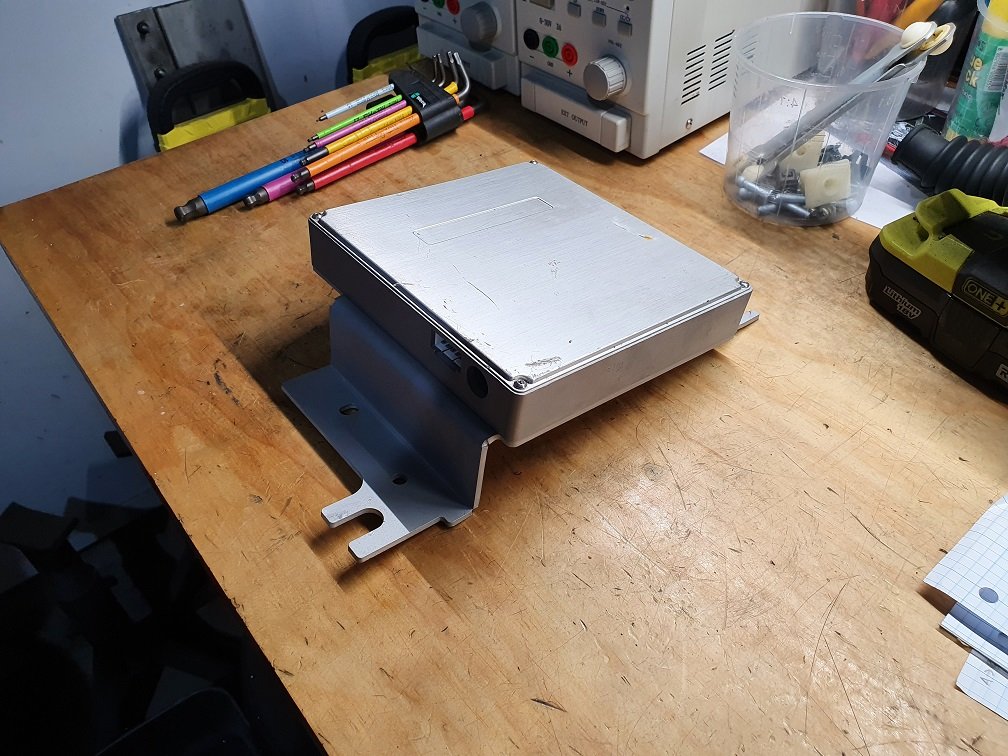
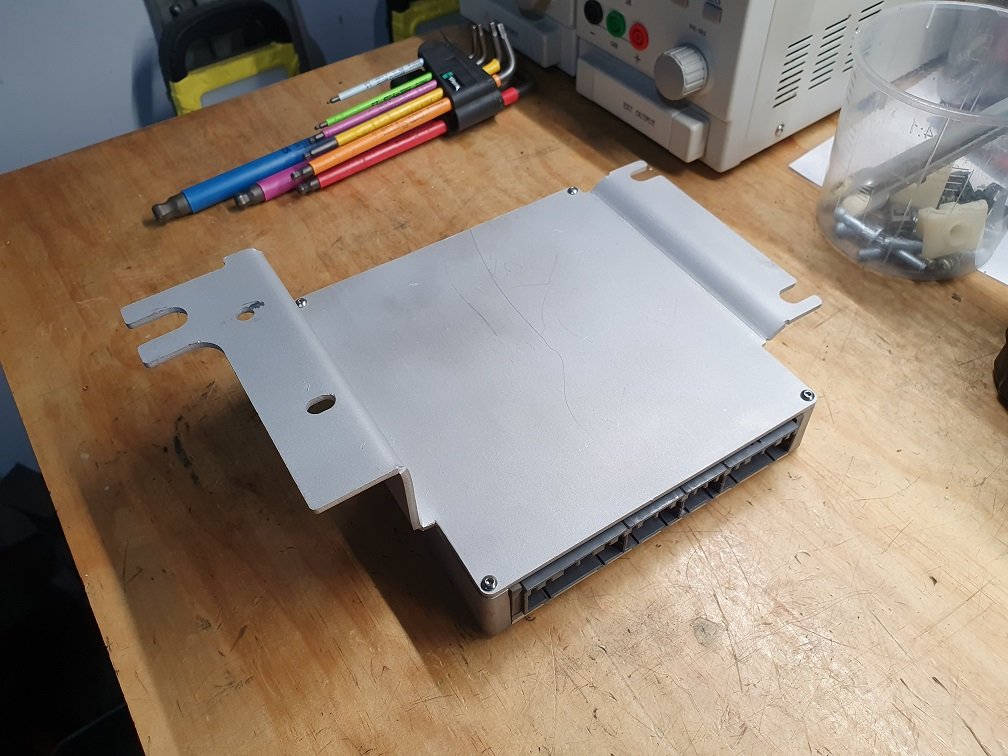
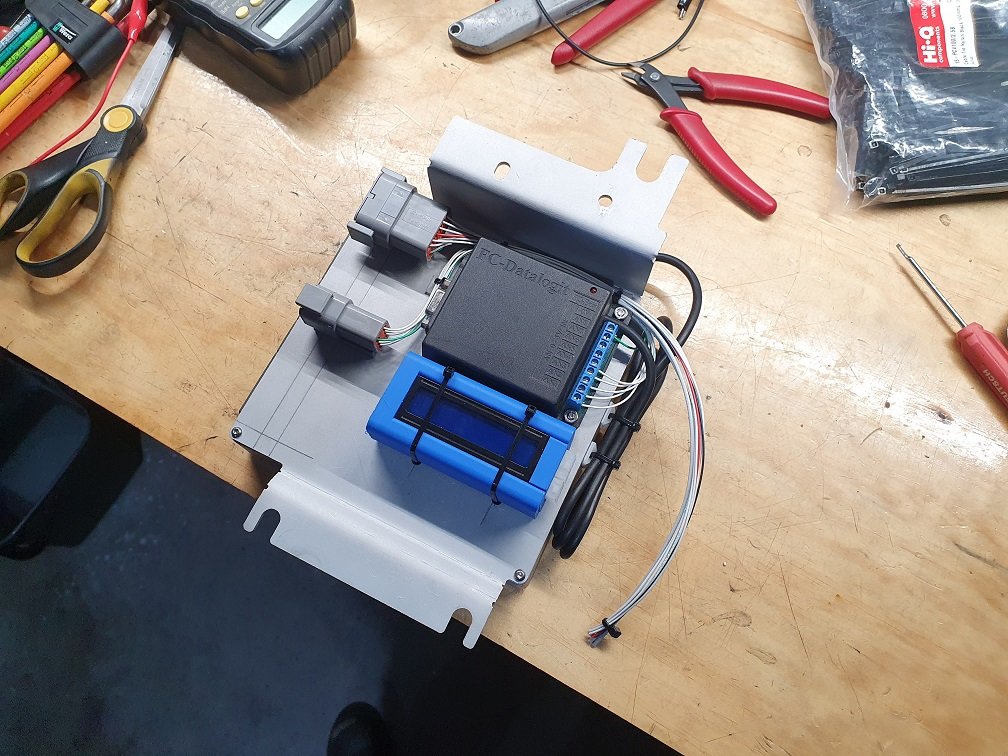
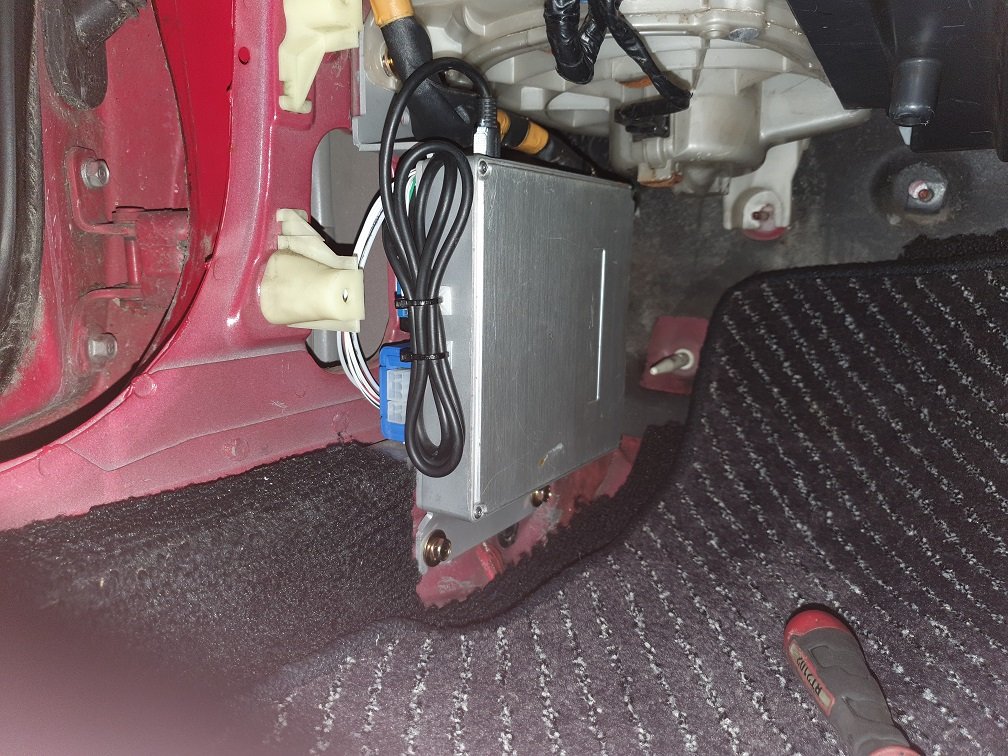
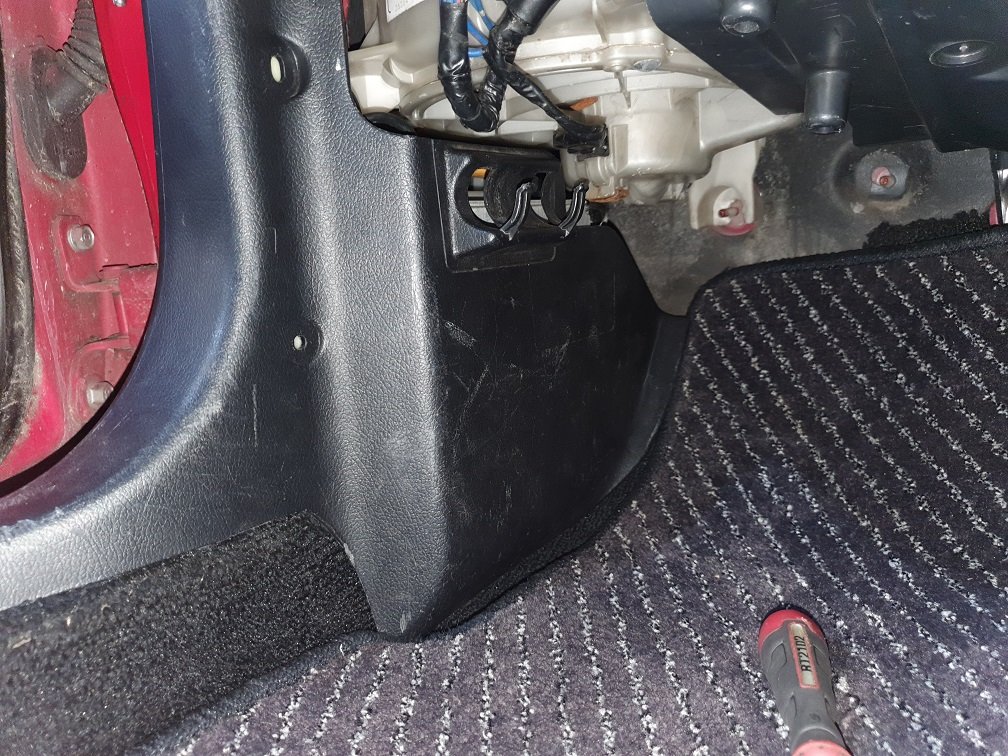
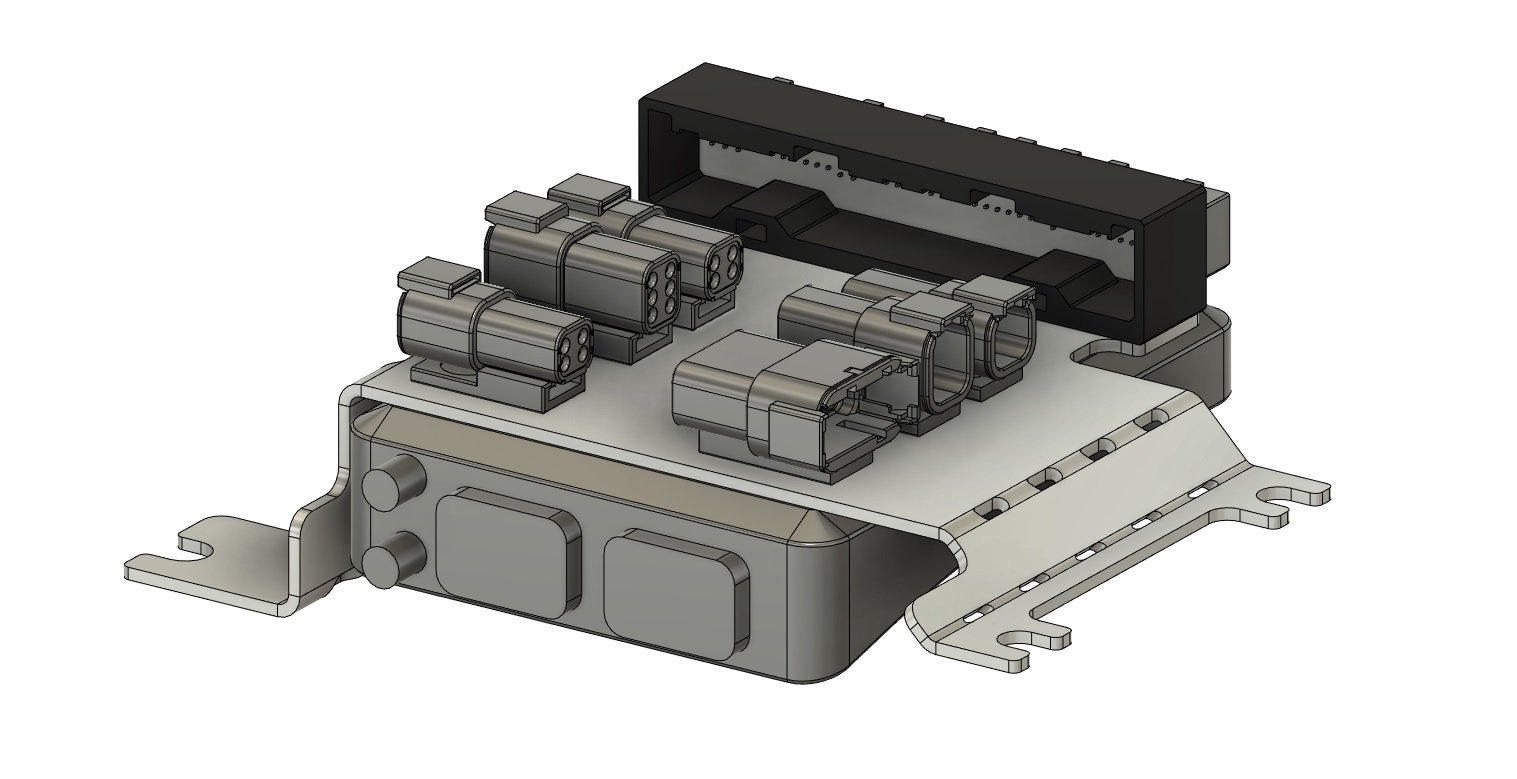
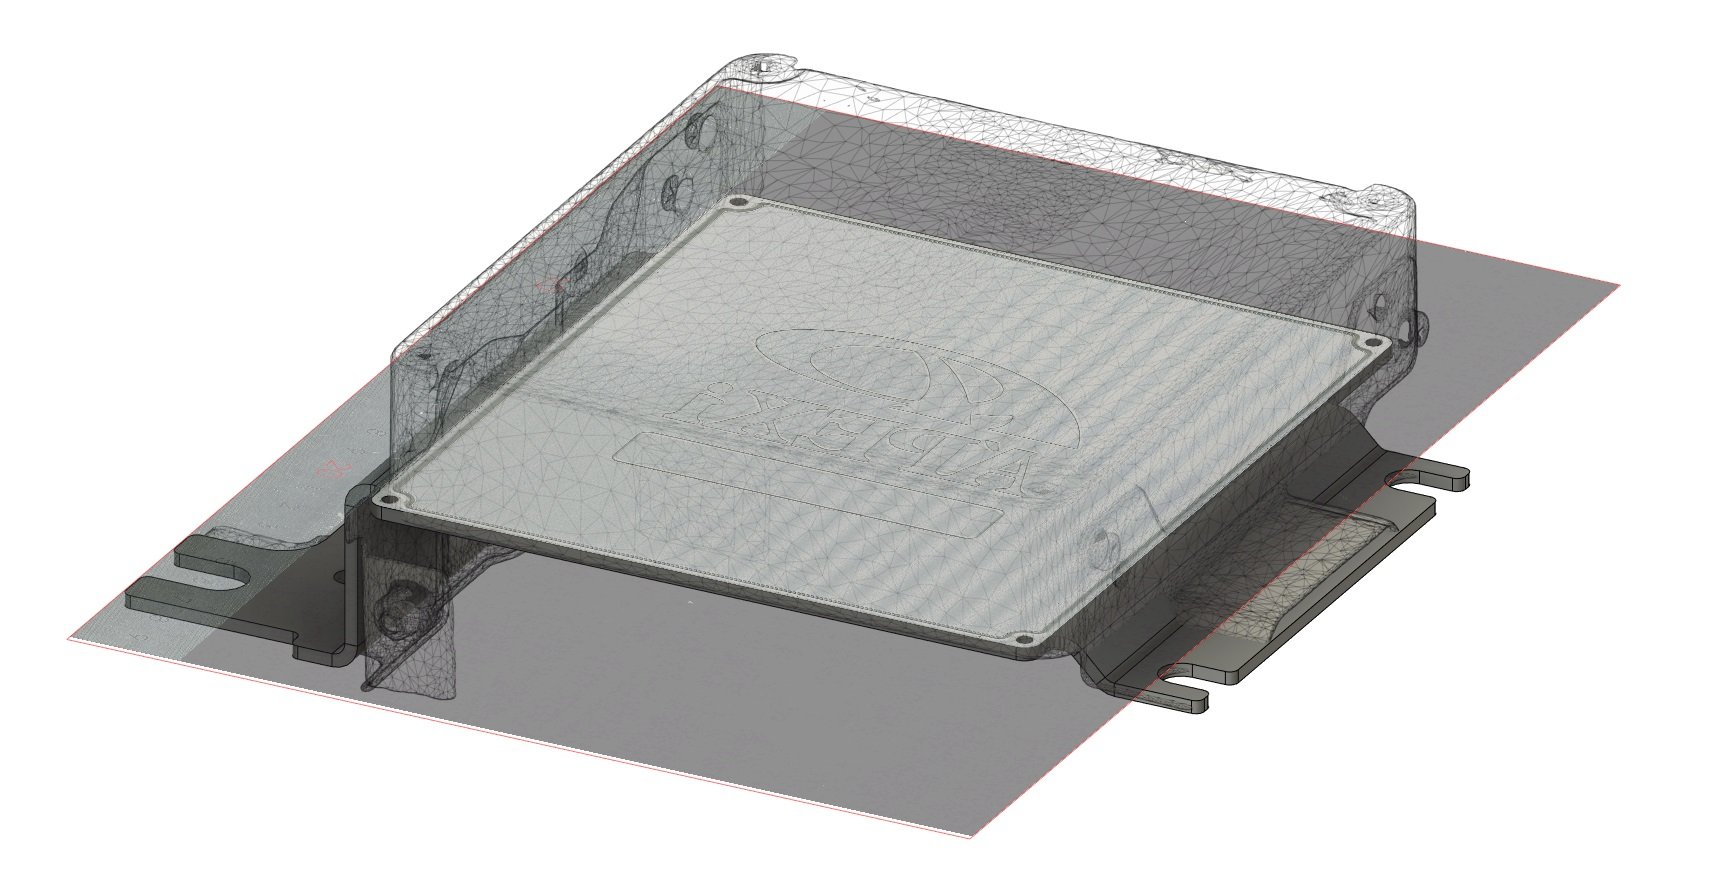
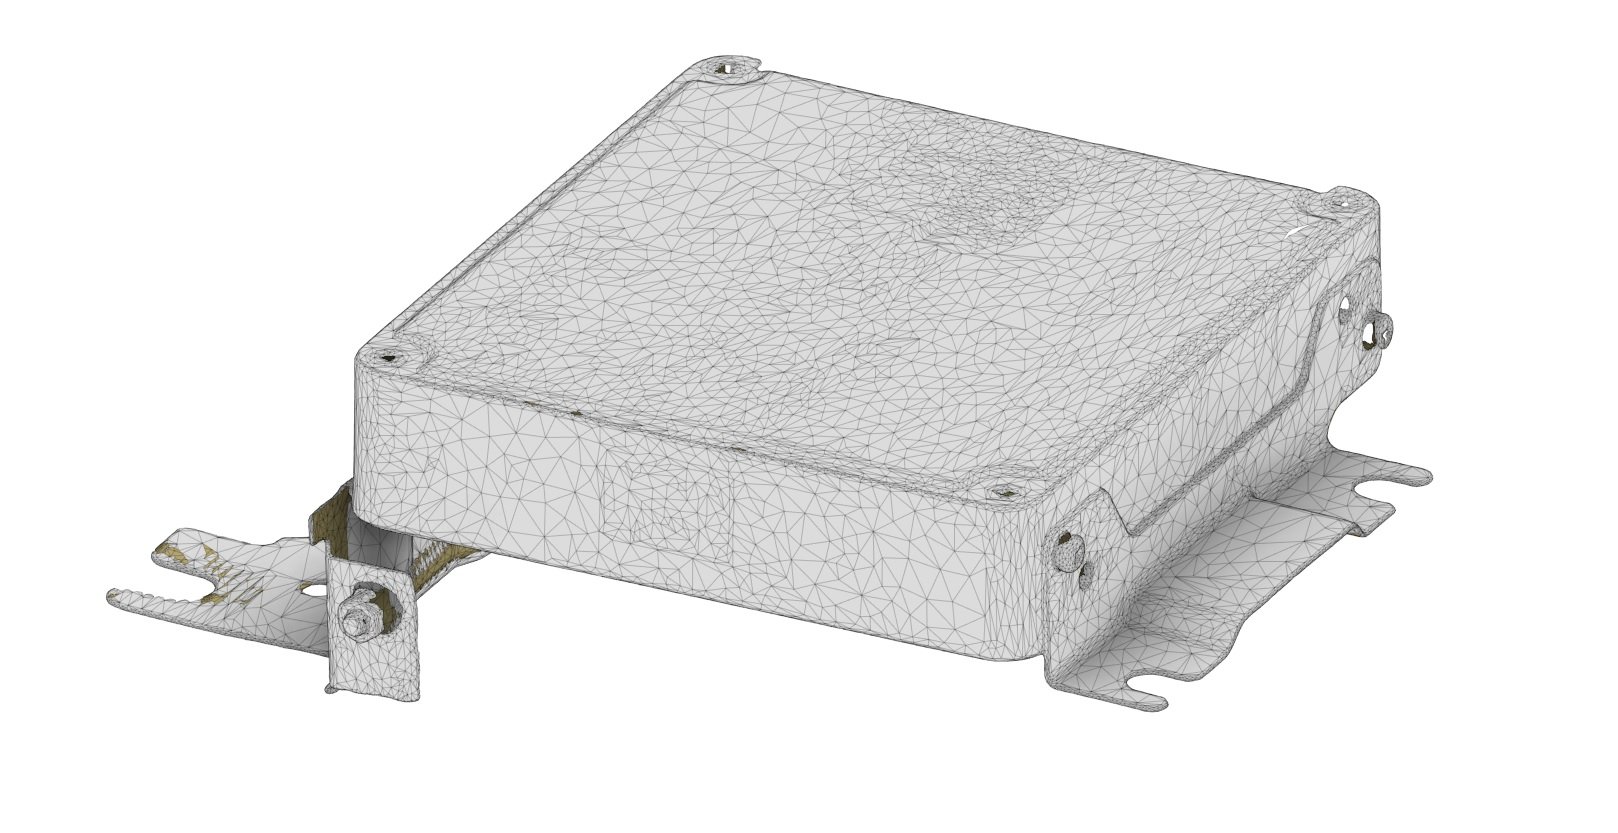
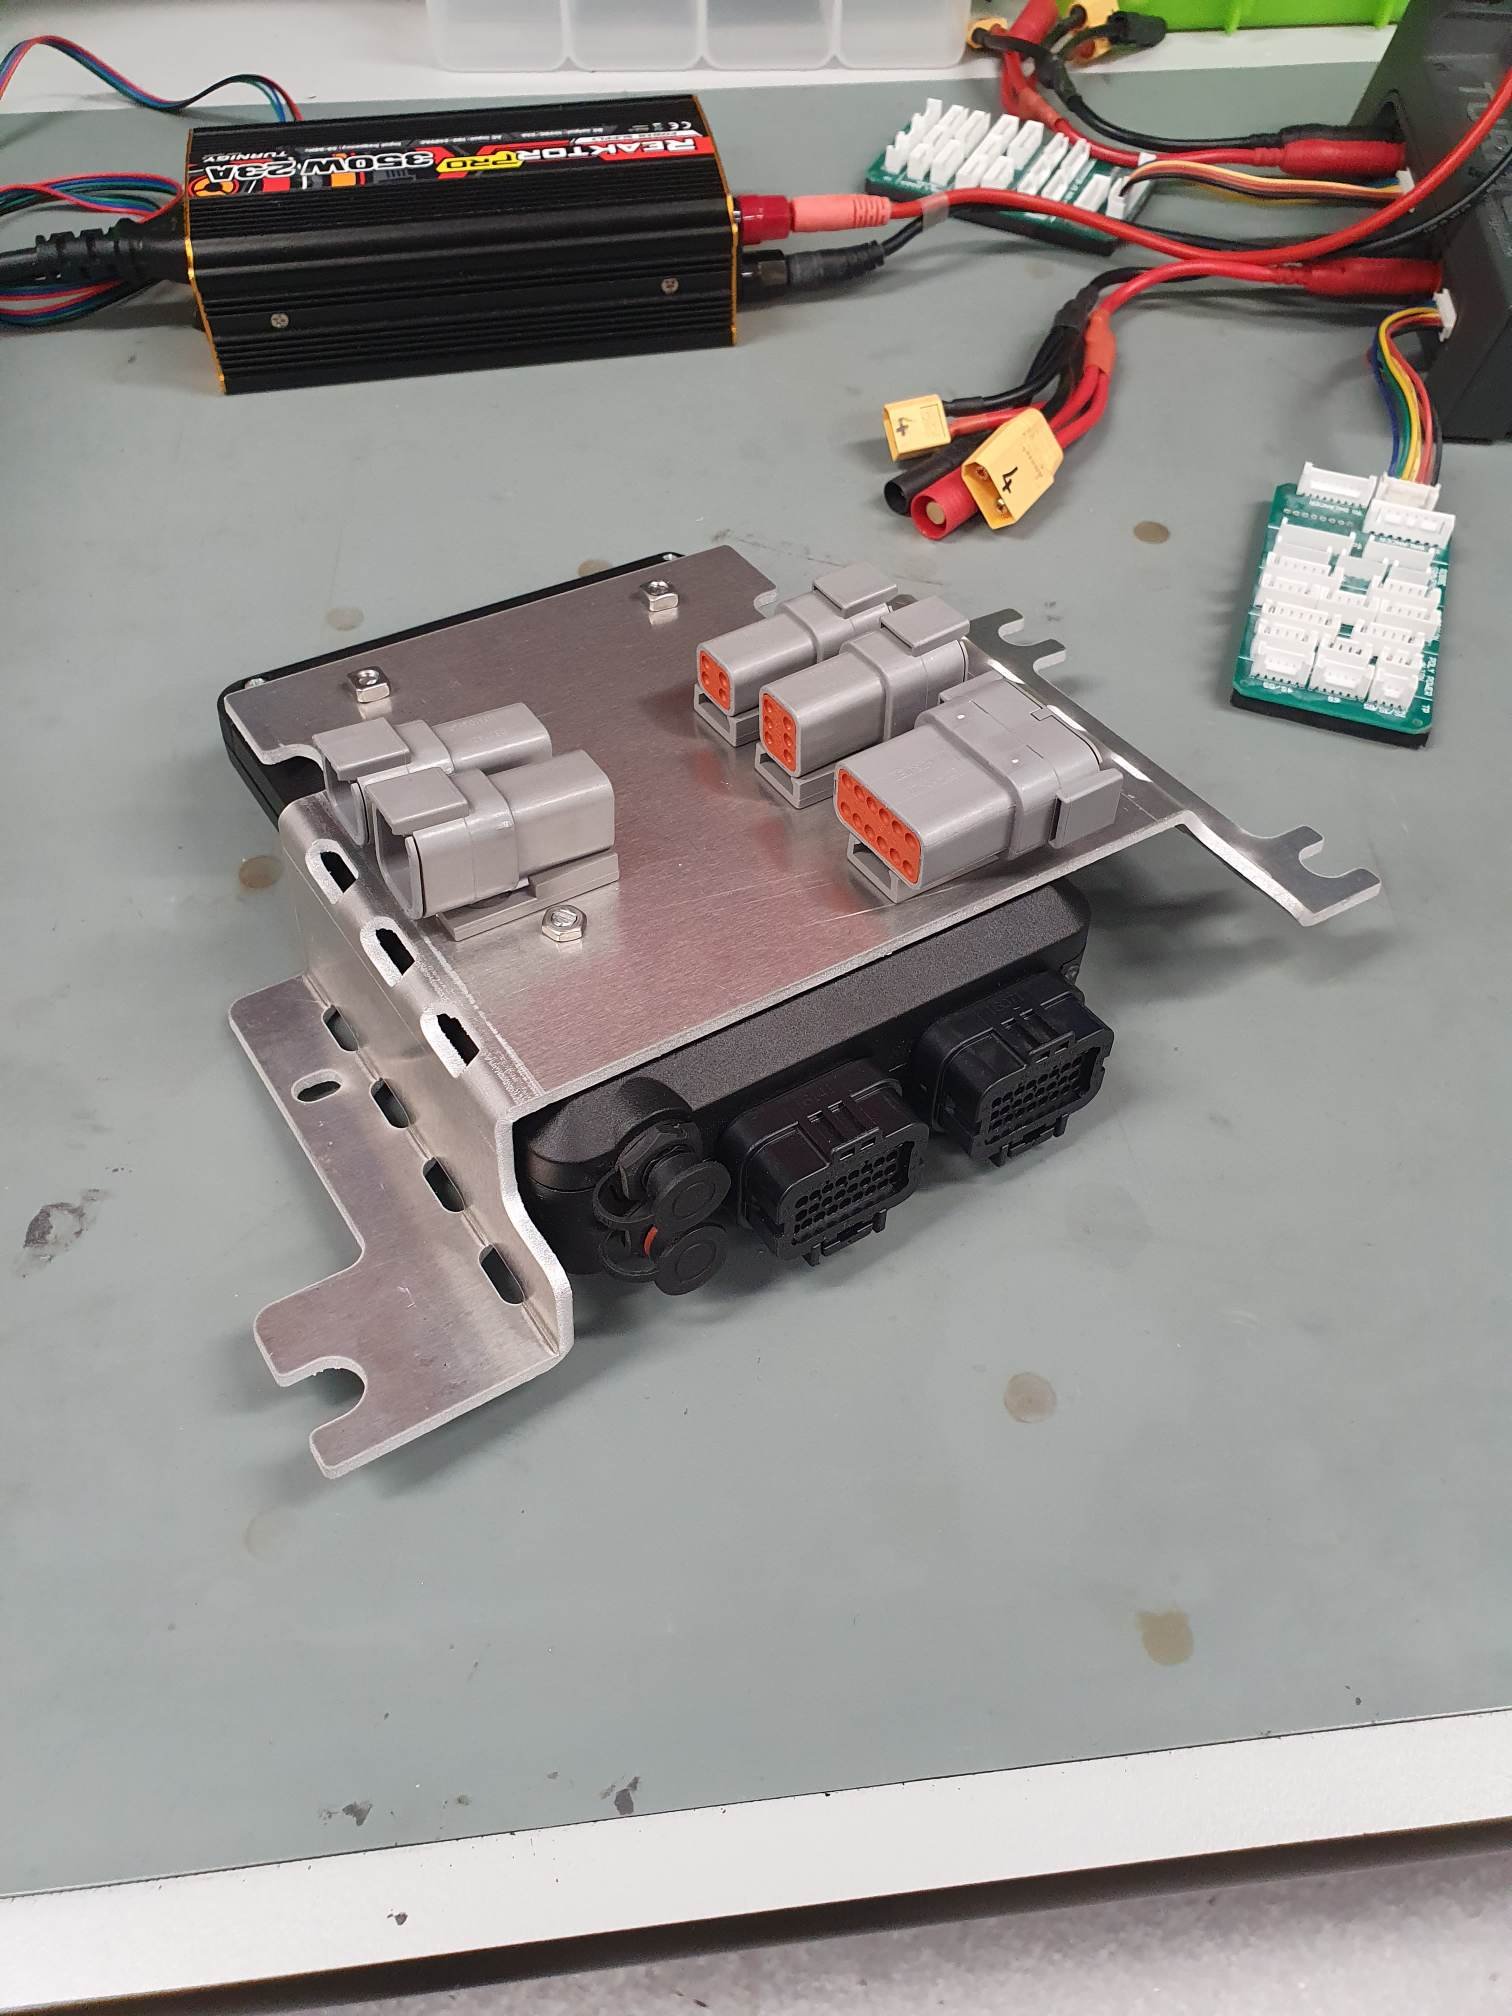
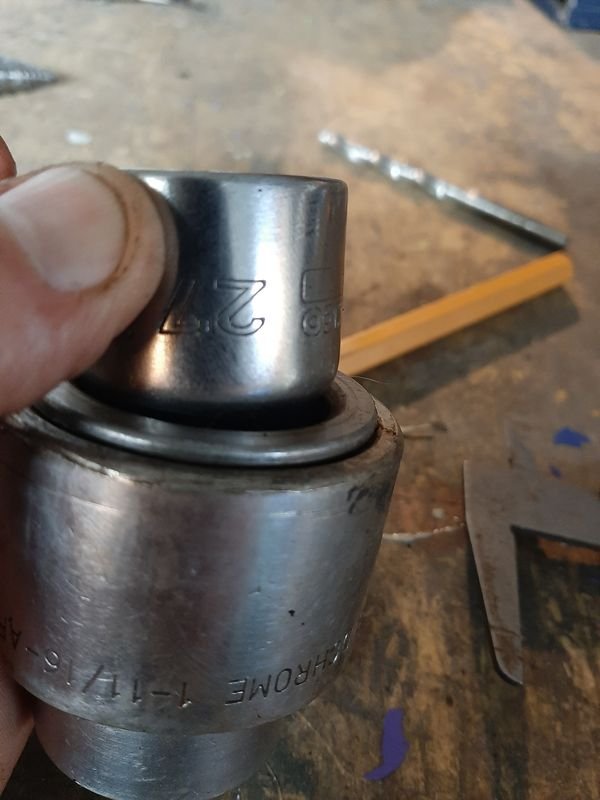
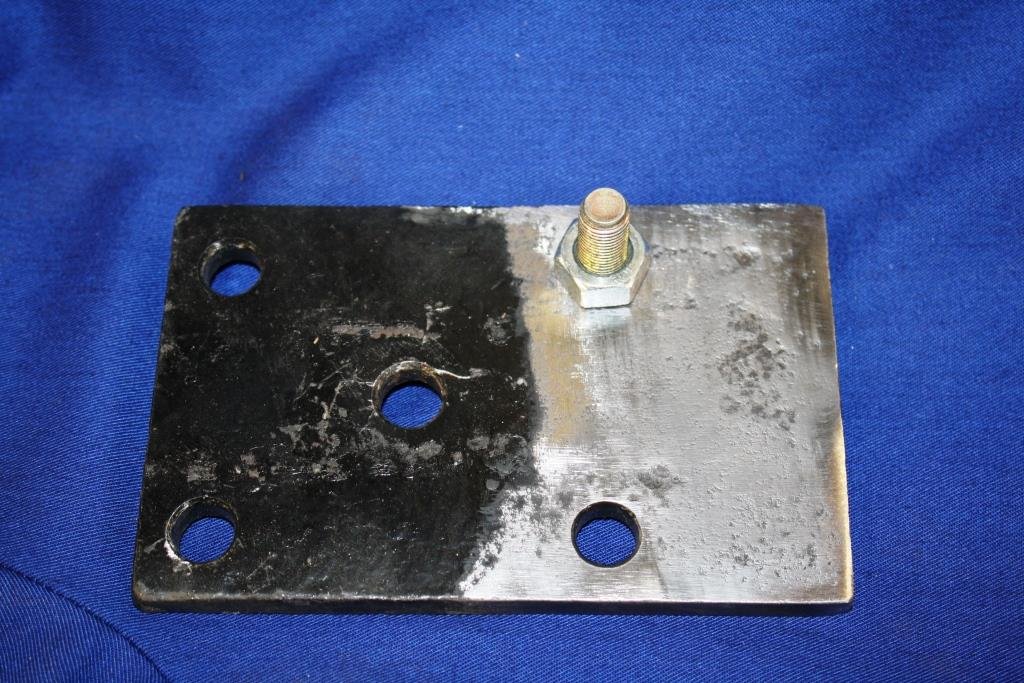
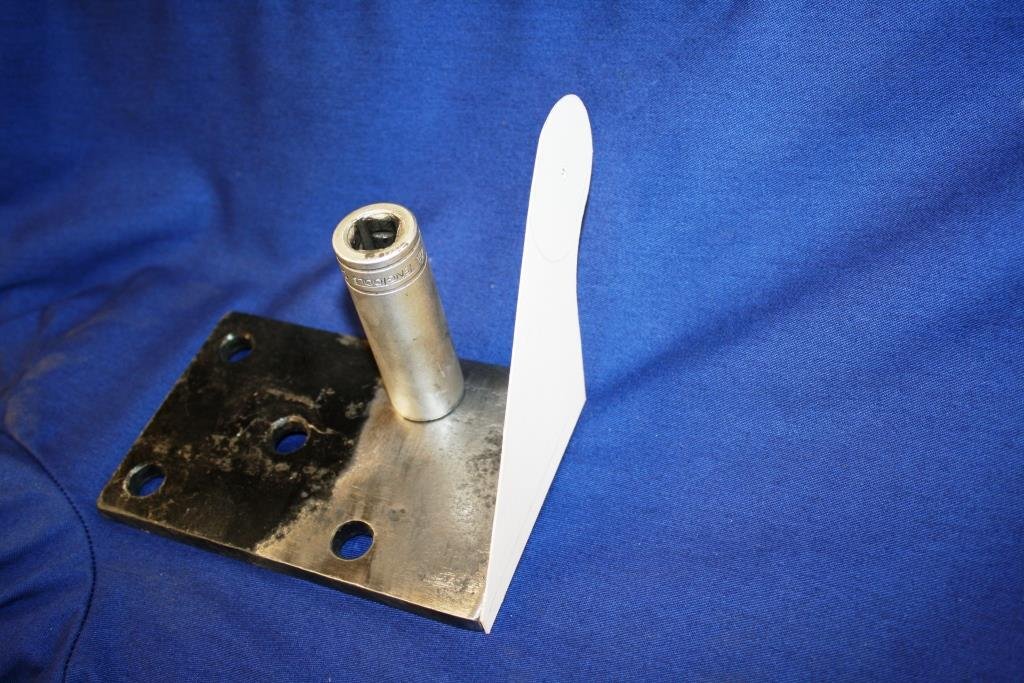
I started building the wiring harness this thing actually needs! Sooooo, let me immediately pivot and tell you a story of ECU's and their mounts. I've got 3 ECU's planned for this thing. To get the thing fired up, leak checked, heat cycled, maybe a couple of drives around I've got a stock super early S6 8bit POS ECU. I've actually got a couple, once with a case and one without. To drive the thing a little longer term, and maybe get a little more jam out of it I've got a Power FC. yes, I can *hear* the eye-rolls, they're antiquated, old, past their used-by, and all that... But, TBH, that still work just fine in a pretty mild setup. Add to this that I've got (borrowed, as they seem to be genuinely hard to buy?) a datalogit to go with it, and there is still pretty active development around tuning these, I should be able to get the thing going pretty well on this :-). In its final form though, I want an e-throttle on it, and I've had a Link Fury kicking around on the shelf for a couple of years, so this will find its way in here. This also has the benefit of a built in wideband controller. I don't really like external wideband controllers that rely on analogue voltages :-/.\ I only want to build one wiring harness for the thing though, so it has to cater for all three conditions. This has driven the design of a harness that uses the original style of connectors at the ECU end, but also quite a few 'auxiliary' connectors in the cabin to cater for mods and the different installations. When I stated building the harness, it was pretty clear that I really, really needed to know where these connectors were going to be mounted. I contemplated just eyeballing it, but know I'd be annoyed later... So, needed to mount all this crap, for all the configurations! Obviously the stock ECU is easy, it just bolts in. Its mounts are actually a little hacked up, but as I'm not going to keep it in there long, eeeeehhhh, its fine. Having this is pretty crucial though, as it let me see how much space is under the passengers kick panel there for mounting all sort of crap. Pleasingly, and quite uncommonly IME, there is actually a heap of space! I scanned the OEM ECU, got a decent mesh out, aligned it in CAD and used it to get the mount point locations. This let me CAD up mounting plates for both the Power FC and the Link Fury. I went a little ham-spec on the Link Fury mount, as its the final one the car will end up with, so should be a nice piece of kit. The Power FC one is a little more 'thrown together', but still tidy enough. Low res version of the scan of the original ECU. Combined with a 2D scan of the power FC backing plate, and a sheet metal replacement modelled up. Quick and dirty. It *just* fit within the work area of the water jet at work (its a baby). Cut it out, folded it up, and screwed it in place of the original ECU cover. After a quick test fit, its a go-er. There is heaps of space on the other side of the new mount for other items too, like the datalogit, and wideband controller. Bit of jiggery-pokery to get everything lined up, drill a few holes... Waiting on the molex connectors for the wideband (14point7 SLC Free 2) to show up so I can finish the wiring. Not worried about the display on it being totally hidden as it'll send its linear output to the datalogit where I can view it on the laptop, and its simulated narrowband output back to the OEM ecu or Power FC via their main connectors. The trim even still fits! Score! ;-). 100% going to have to get/make a torch to go in the holder that looks like an original flare. Right.... One aftermarket ECU down, the other one to go! Little bit more thought involved for this, I wanted to integrate an OEM connector body onto the ECU mount, along with all the auxiliary connections for additional sensors, e throttle, accel pedal, CAN, and the rest. It's kind of a plug-in adaptor and mount all rolled in together. This is what I came up with. I bought an OEM connector housing, and have trimmed the pins (they're only available in a PCB mount version). Have designed and 3d-printed a backshell, and after the wires are soldered to the pins the whole thing will be potted with RT125 or similar. This one actually too two tries, ECU wasn't high enough to clear that plastic wiring channel the first time. Second time was a charm though, and the trim still fits! Have done the wiring design on this... Actually doing the physical wiring on it will be kind of a chore, there is quite a bit too it. Worth it for a nice solid solution though :-). Will start of the wiring of that tomorrow I think, atleast do all the power supply, CAN and any shielded stuff on it what requires annoying splices. Soooooo, I can get to building the actual harness... ummm, soon? Honestly, excited about it :-).
1 point
-
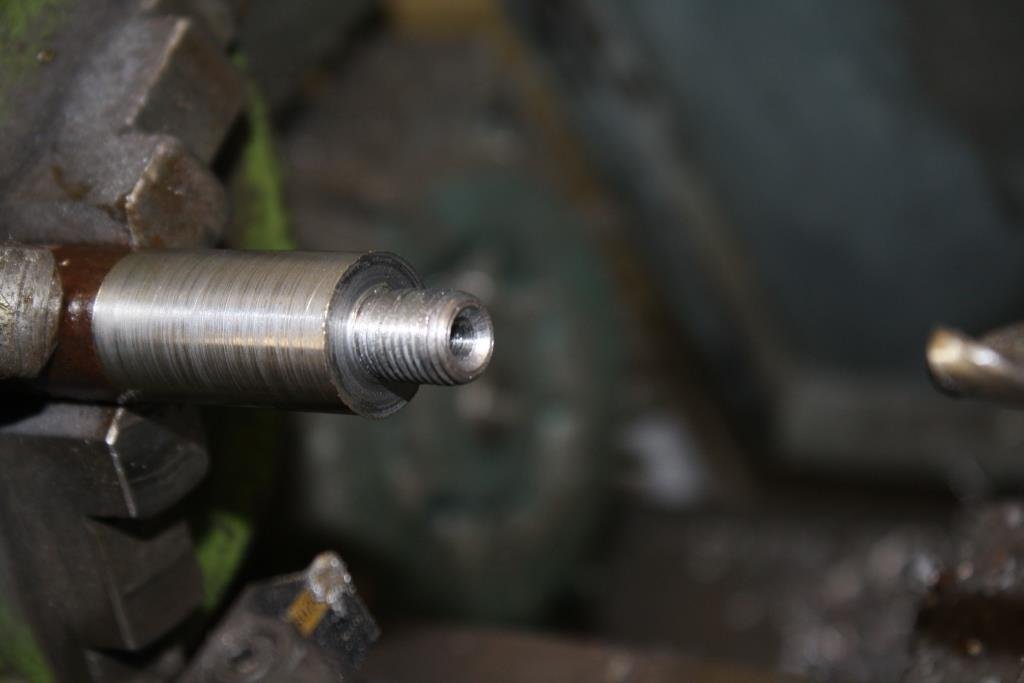
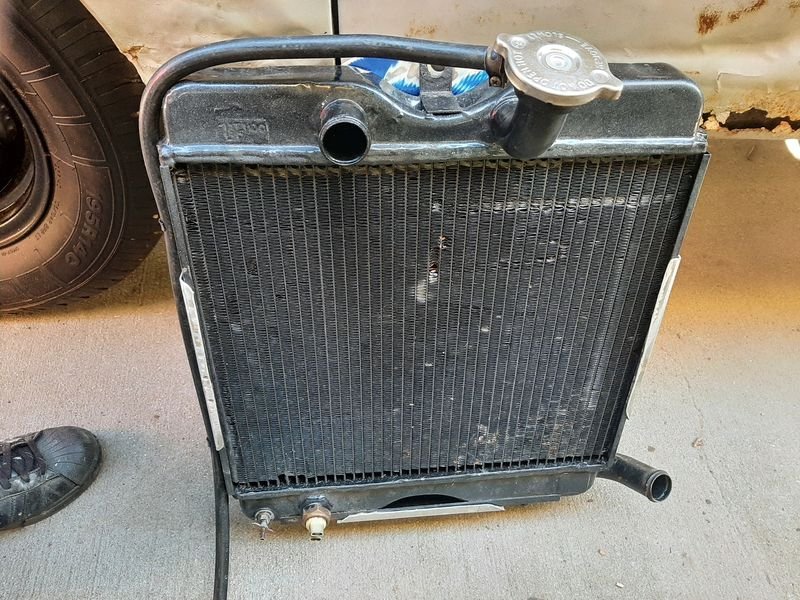
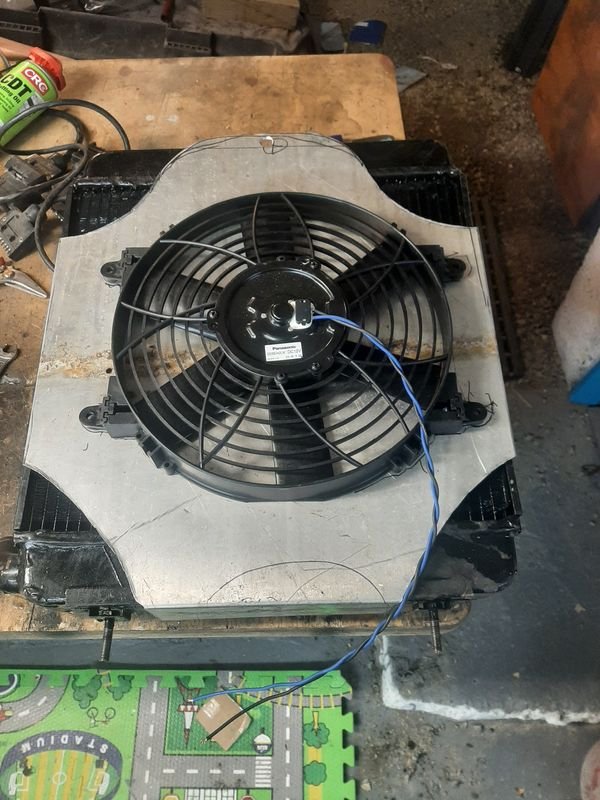
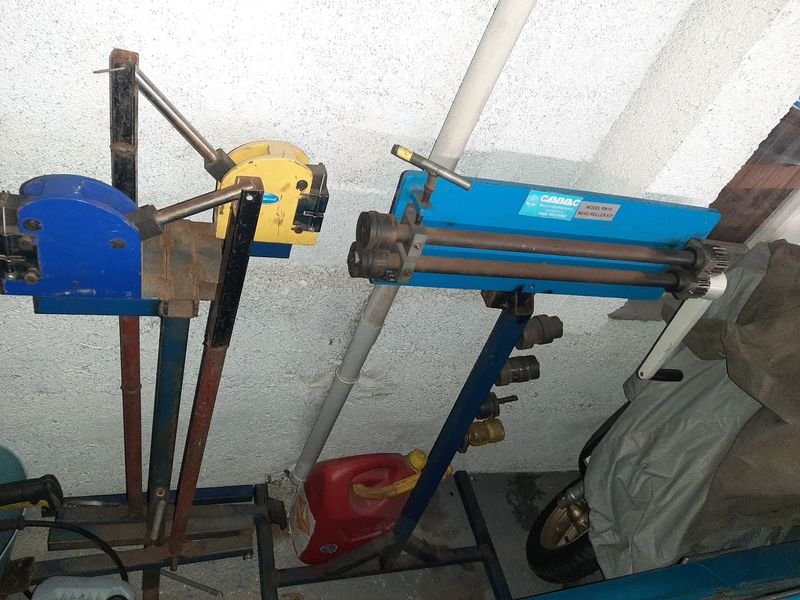
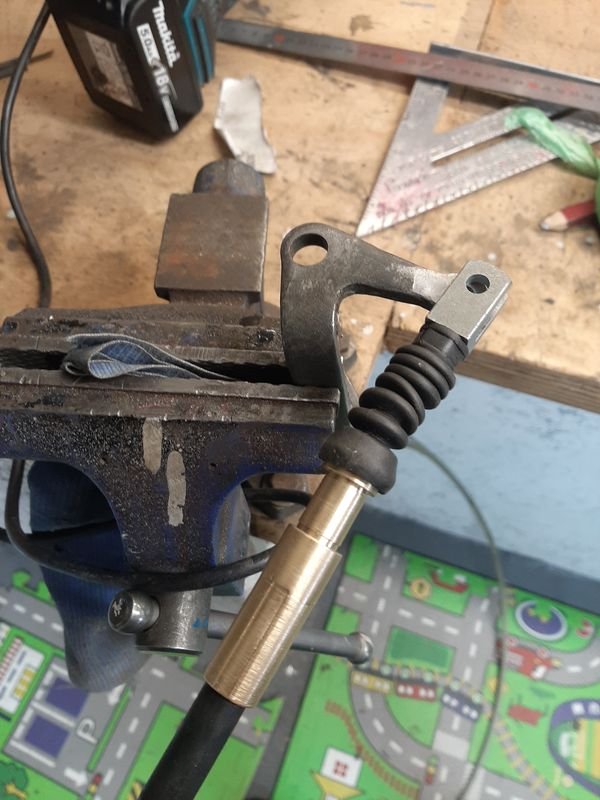
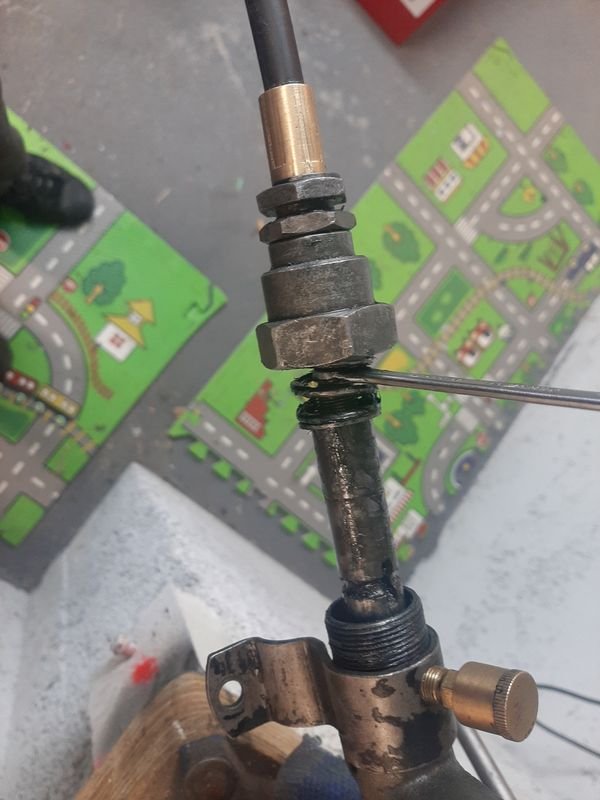
Installing the new gear change cable. In my discussions with Melbar some bits were able to be made to match but some of their standard bits were not exactly the same dimensions as the Fiat original so i asked that they be left oversized and i could smoothing things down as needed, and also accounting for possible wear in the original. This was the tips of both ends Old and bung on the left, new on the right, with the original adjustment nut installed. The tip on this end is the crimp and lives in the hollow end of the gear shift column, i filed that down a wee bit (basically the ridges from crimping) to fit and allow the cable to rotate smoothly with just the right amount of length (rounded the tip a bit more) so that the nut can tighten and the cable can still swivel. That then gets installed in the lock nut and the brass screw and crimp installed in the column change shaft, along with a dampening spring and etc and then that whole lot is attached to the steering column. The Melbar guy said hes never seen such over complicated nonsense. The other (gearbox) end is a bit simpler with a clevis end which they didn't have in a size that suited every dimension required, so went with the one that was right except for didnt fit the 6mm thick stamped pivot arm. I ended up filing the arm down which also lost a fair bit of slop from the slightly rounded top of the arm. I also cut down the boot a bit as it was restricting the throw (as Melbar barry said it would) Thats all back on the van and after a fair bit of adjusting it goes into all the gears again */*/*/*/*/* Next job is to sort out the cooling scenario. Original water pump had fixed fan on its nose, but the Cheap replacement water pump is from a 1500 car that runs an electric fan and a different pulley mounting pattern, so i need to put in an electric fan as well. A 12" pusher is the biggest that i could be sure will fit which isnt that big, but the OEM fan is 10" and doesnt have a shroud so i think it will be OK. Sussing out a layout and attachment Been watching too much Puddin's Fab Shop so had to bust out the 'dimple die' Much better strength and possibly airflow Backside, try to seal off the fan like a reverse shroud so most of teh fans push will go through the rad instead of across it Youmay recognise the alloy sheet from other projects like the sign of the year and the shroud on the 125P ute This is the engine side, with the shroud wrapped around, no screws needed. Had the Radiator shop install a bung for a standard FIAT rad fan temp switch so set up will be the same as the ute (this is the factory set up on it) and as ive retrofitted on the 125 sedan,wagon. Just need to wire it in in yet. Had an overflow knocking around for a while and it will work nicely to replace the factory 'full loss' system (as per pic above) And view from the tunnel - this also has a 'floor' i need to install that basically makes an air ram to the rad and the little carb air box thing as well NOMNOMNOM like a Basking Shark. Will be test driving sooooon and turn it around to make a start on some rust (sliding door to start with) Picked these up from @nzstato (i already have his folder, chur bro!) and ill start making some repair panels like a friken boss while im waiting for paper work etc
1 point
-
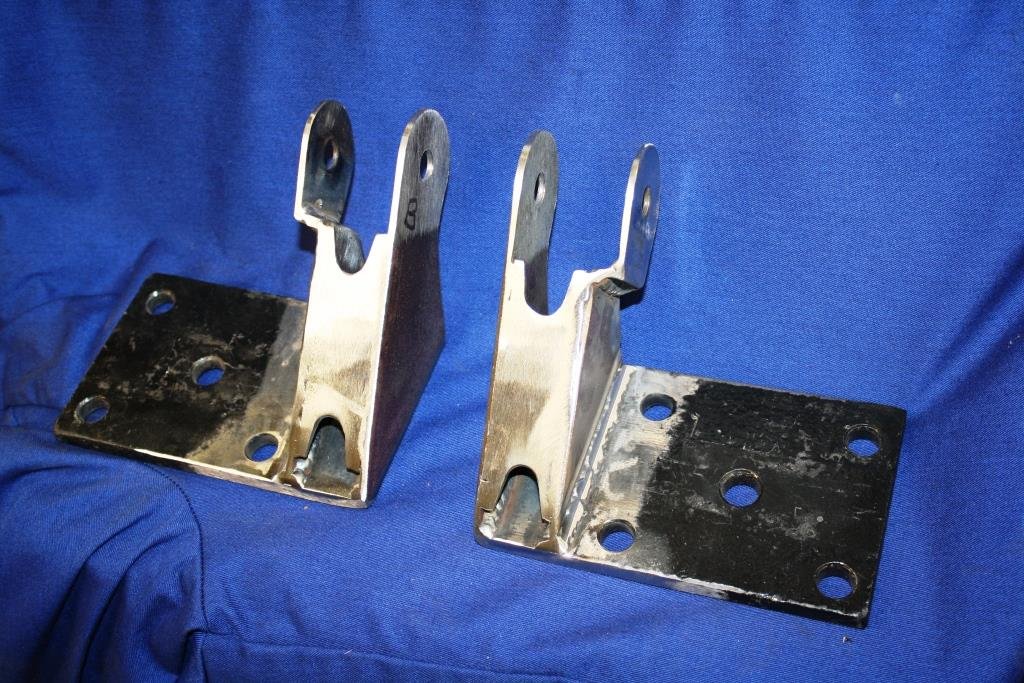
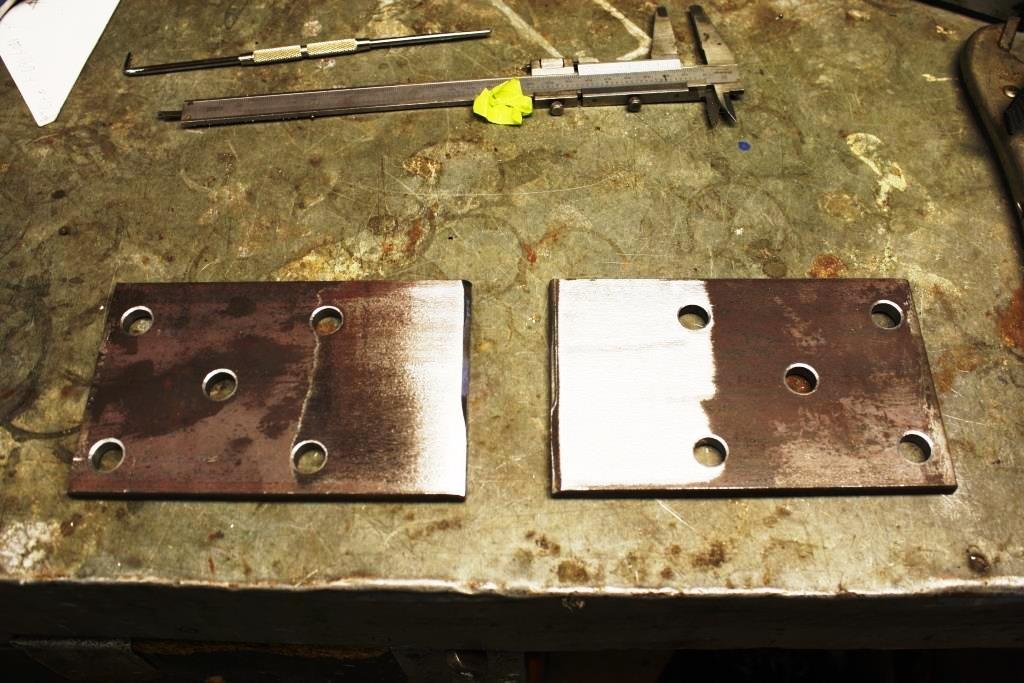
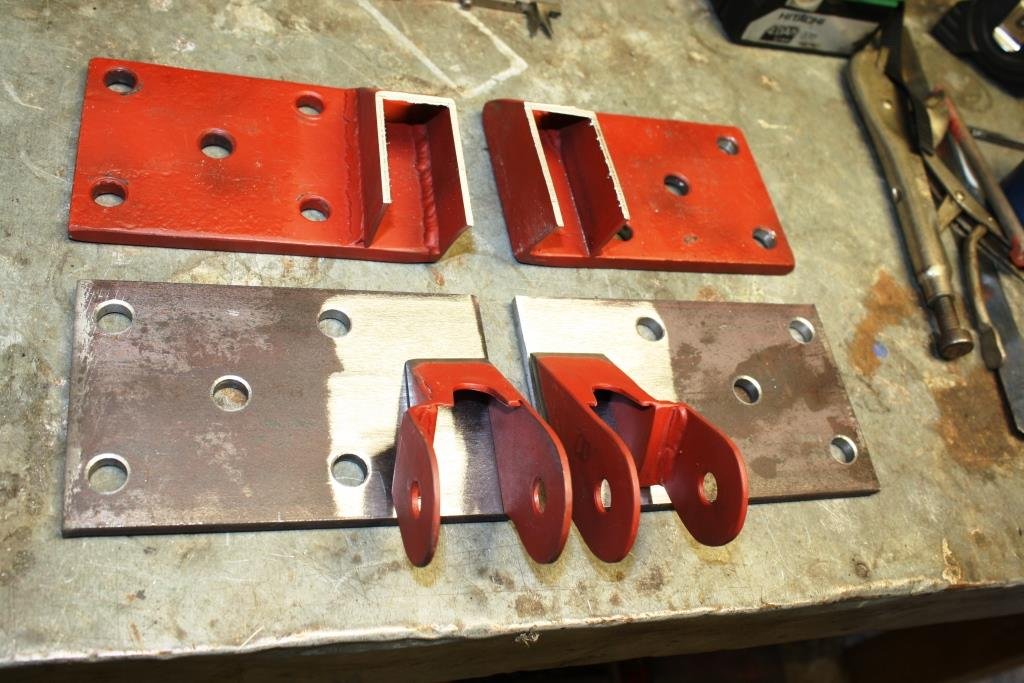
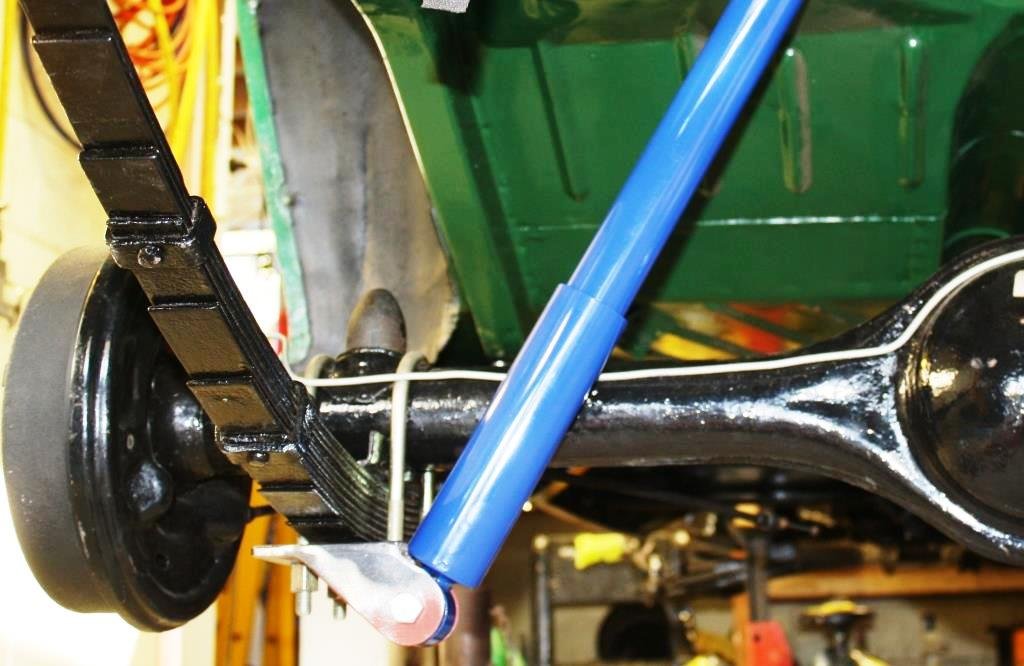
Slightly out of sequence with my thread guys, just bear with me. After failing miserably to identify the telescopic shocks I’d used to replace the lever action shocks some 40 plus years ago I settled on a pair of aftermarket EA Falcon shocks. To be honest they were cheap new/old stock, (i. e. the EA is not the most popular ‘Coon ever made) and they were blue! Thought I’d use as much as the original bracketry as I could. Cleaned up the old spring pads. Getting tight for room allowing access to the U bolts… Some CAD work… A bit more mocking up…. Had to notch the inside mount to give access to the U bolt nuts . Then started to stitch it all together. In true oldschool fashion I decided I didn’t like the result, spat the dummy, and bought the steel to make larger spring pads. I then cut the mounts off and attached them to the new pads. A quick mock-up and it works for me.
1 point
-
1 point
-
Just had the call from Dave to say it was all done, as well as a wombling conversation about what he did, and why, etc and oh, btw, its on the courier and where should he send the invoice? Total invoice incl Courier and GST is a shade under $450, which isn't too bad for a highly specialized, hand made, one off piece to match a worn out greasy sample, imo. I think he spent about 2 days on it on and off and he mentioned the invoice was probably about $50 light. Im not expecting any dramas with getting to it fit or whatever but was to to ring asap if there were any issues and they would try to sort it out. A+ would trade with Melbar again for all my custom cable requirements. I doubt that's competitive with an off the shelf/generic item, but for custom, you gots to pay the costo to be the capo1 point
-
Home made forming die working a treat , could have gone for larger radius but it will work
1 point
-
1 point
-
1 point
-
Trims came out sweet. look heaps better in a matt finish and the whole quarter window almost looks original
1 point
-
Well that was easier said than done. got the trims in place but was a mission. Skirting timber helped keep them in place. will sand them back and repaint as they got scuffed up a bit and I would prefer them with a matt finish. If anyone has a spare set of the door trims I’d be happy to buy them.
1 point
-
Me and my daughter got the windows in without a single swear word from me. next step is to urethane the trims in place.
1 point
-
Got some more gas, and gave it some jandal!1 point
-
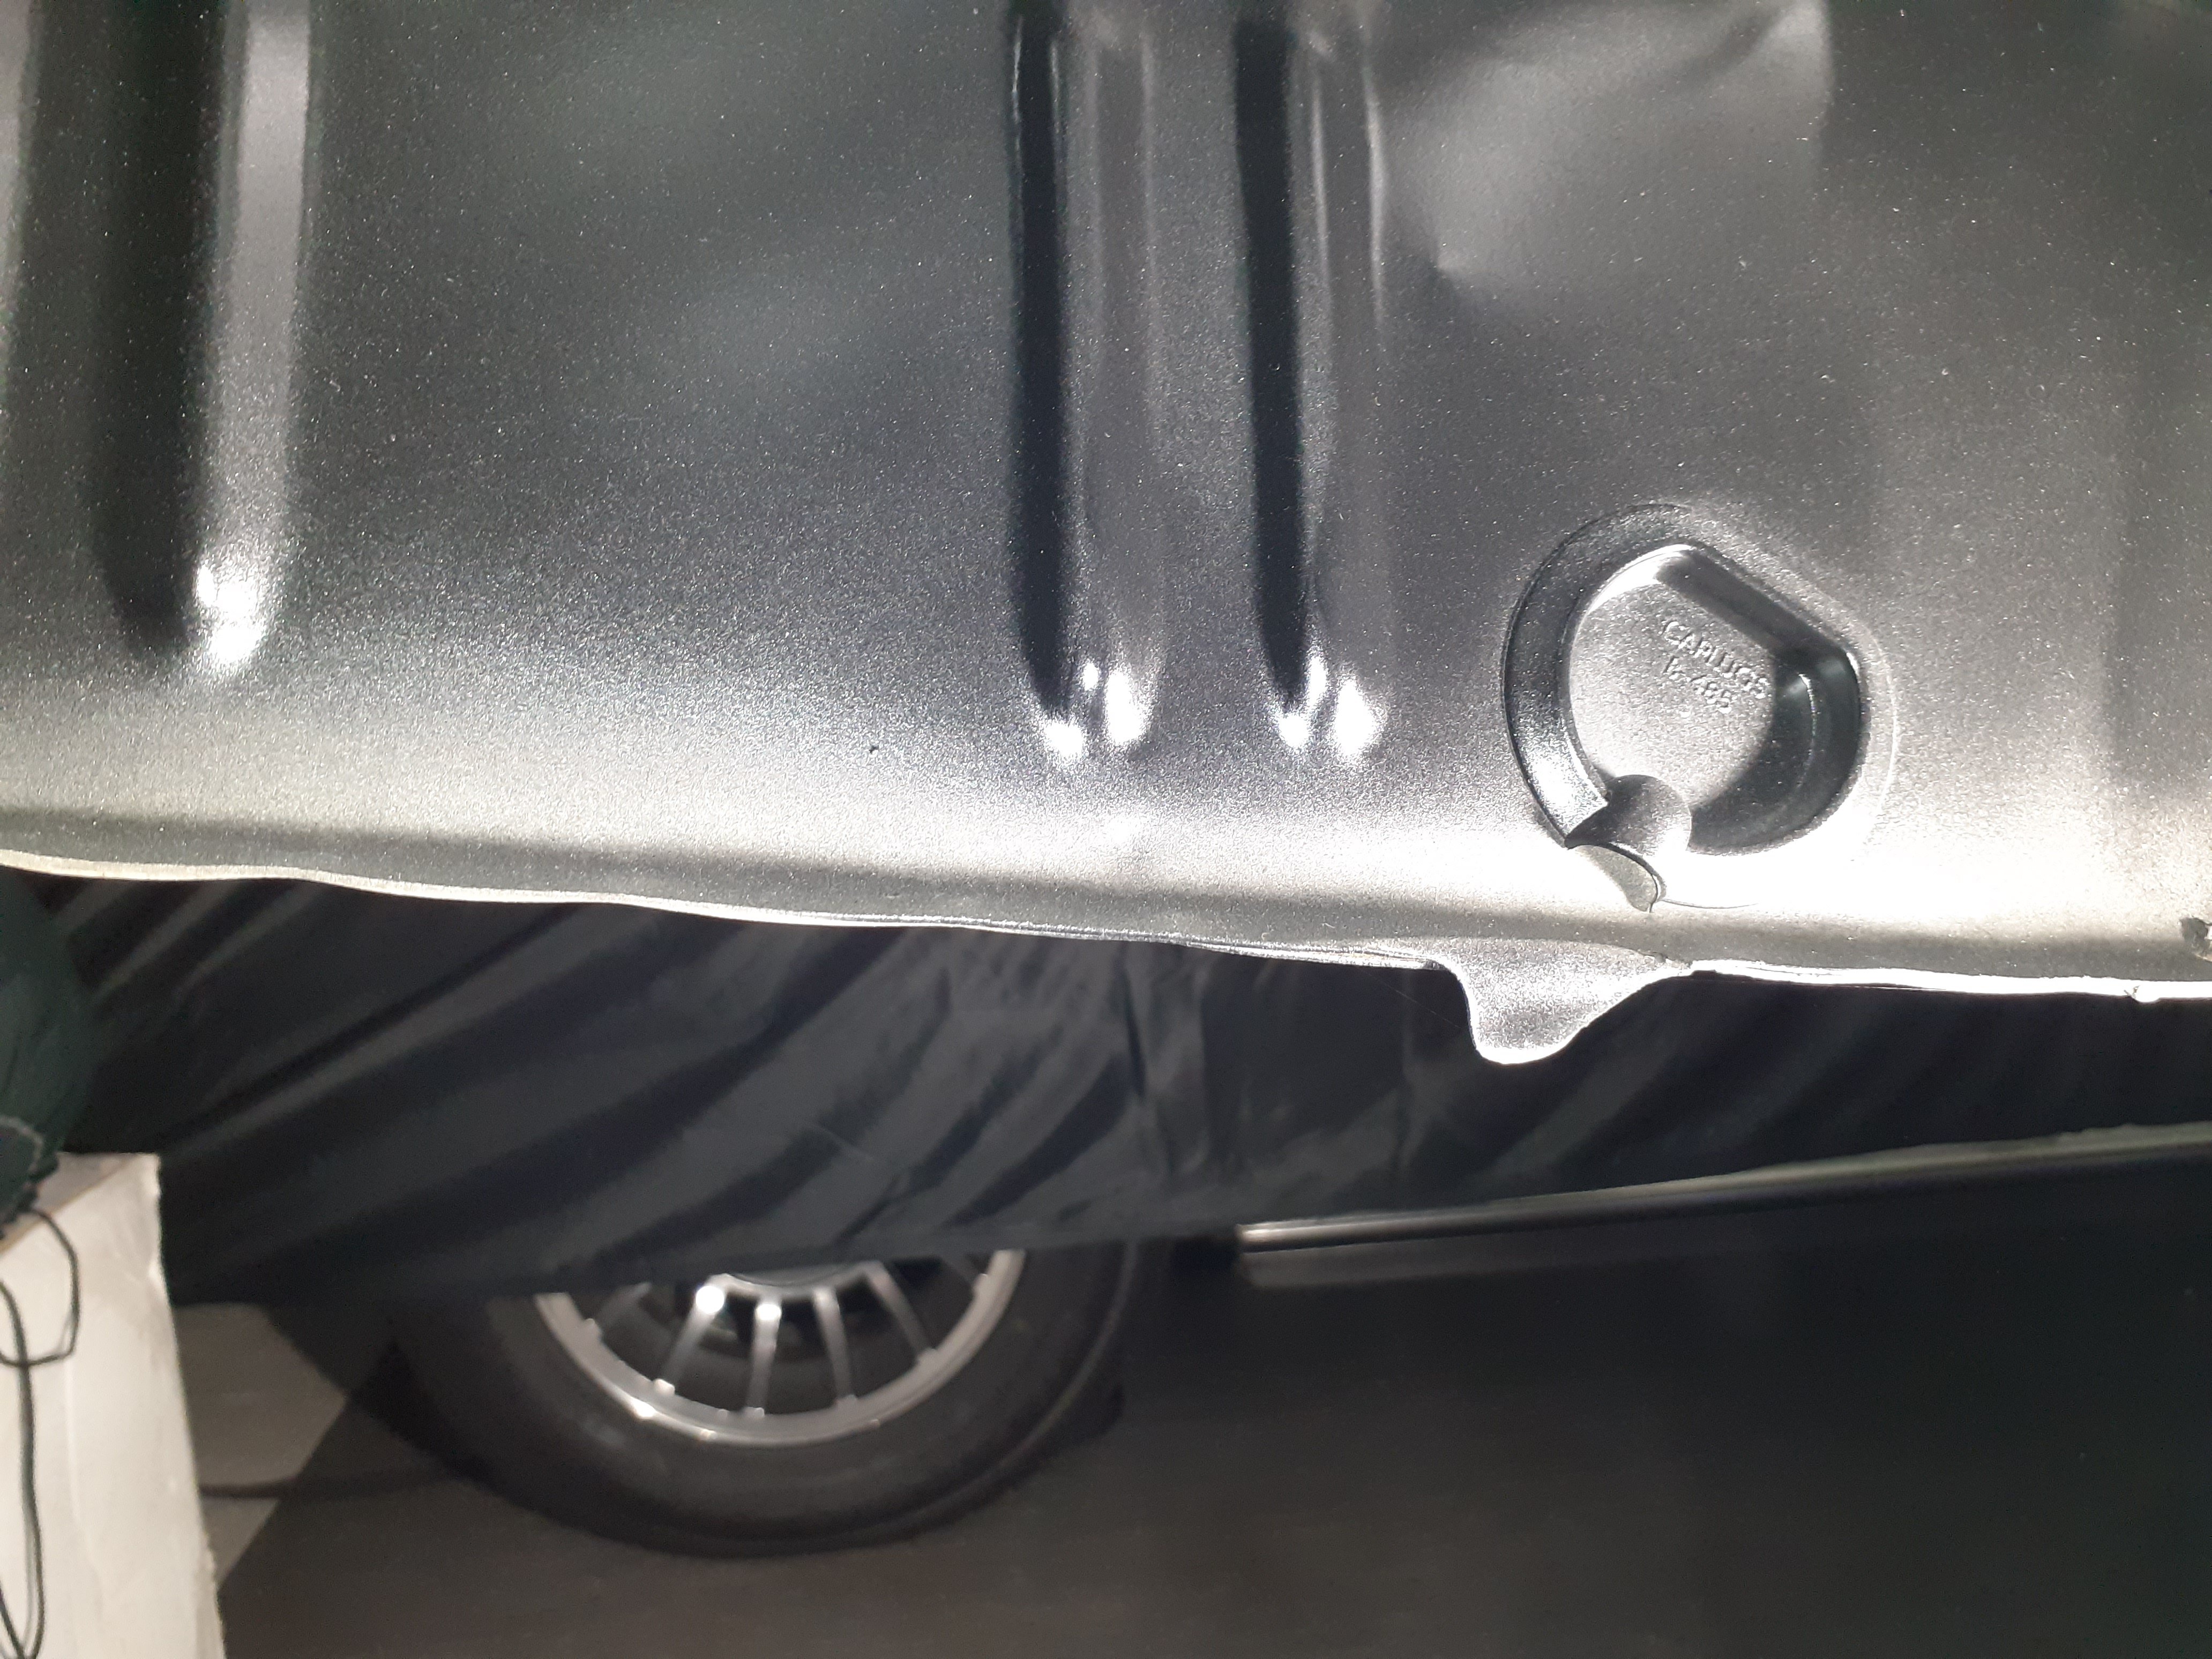
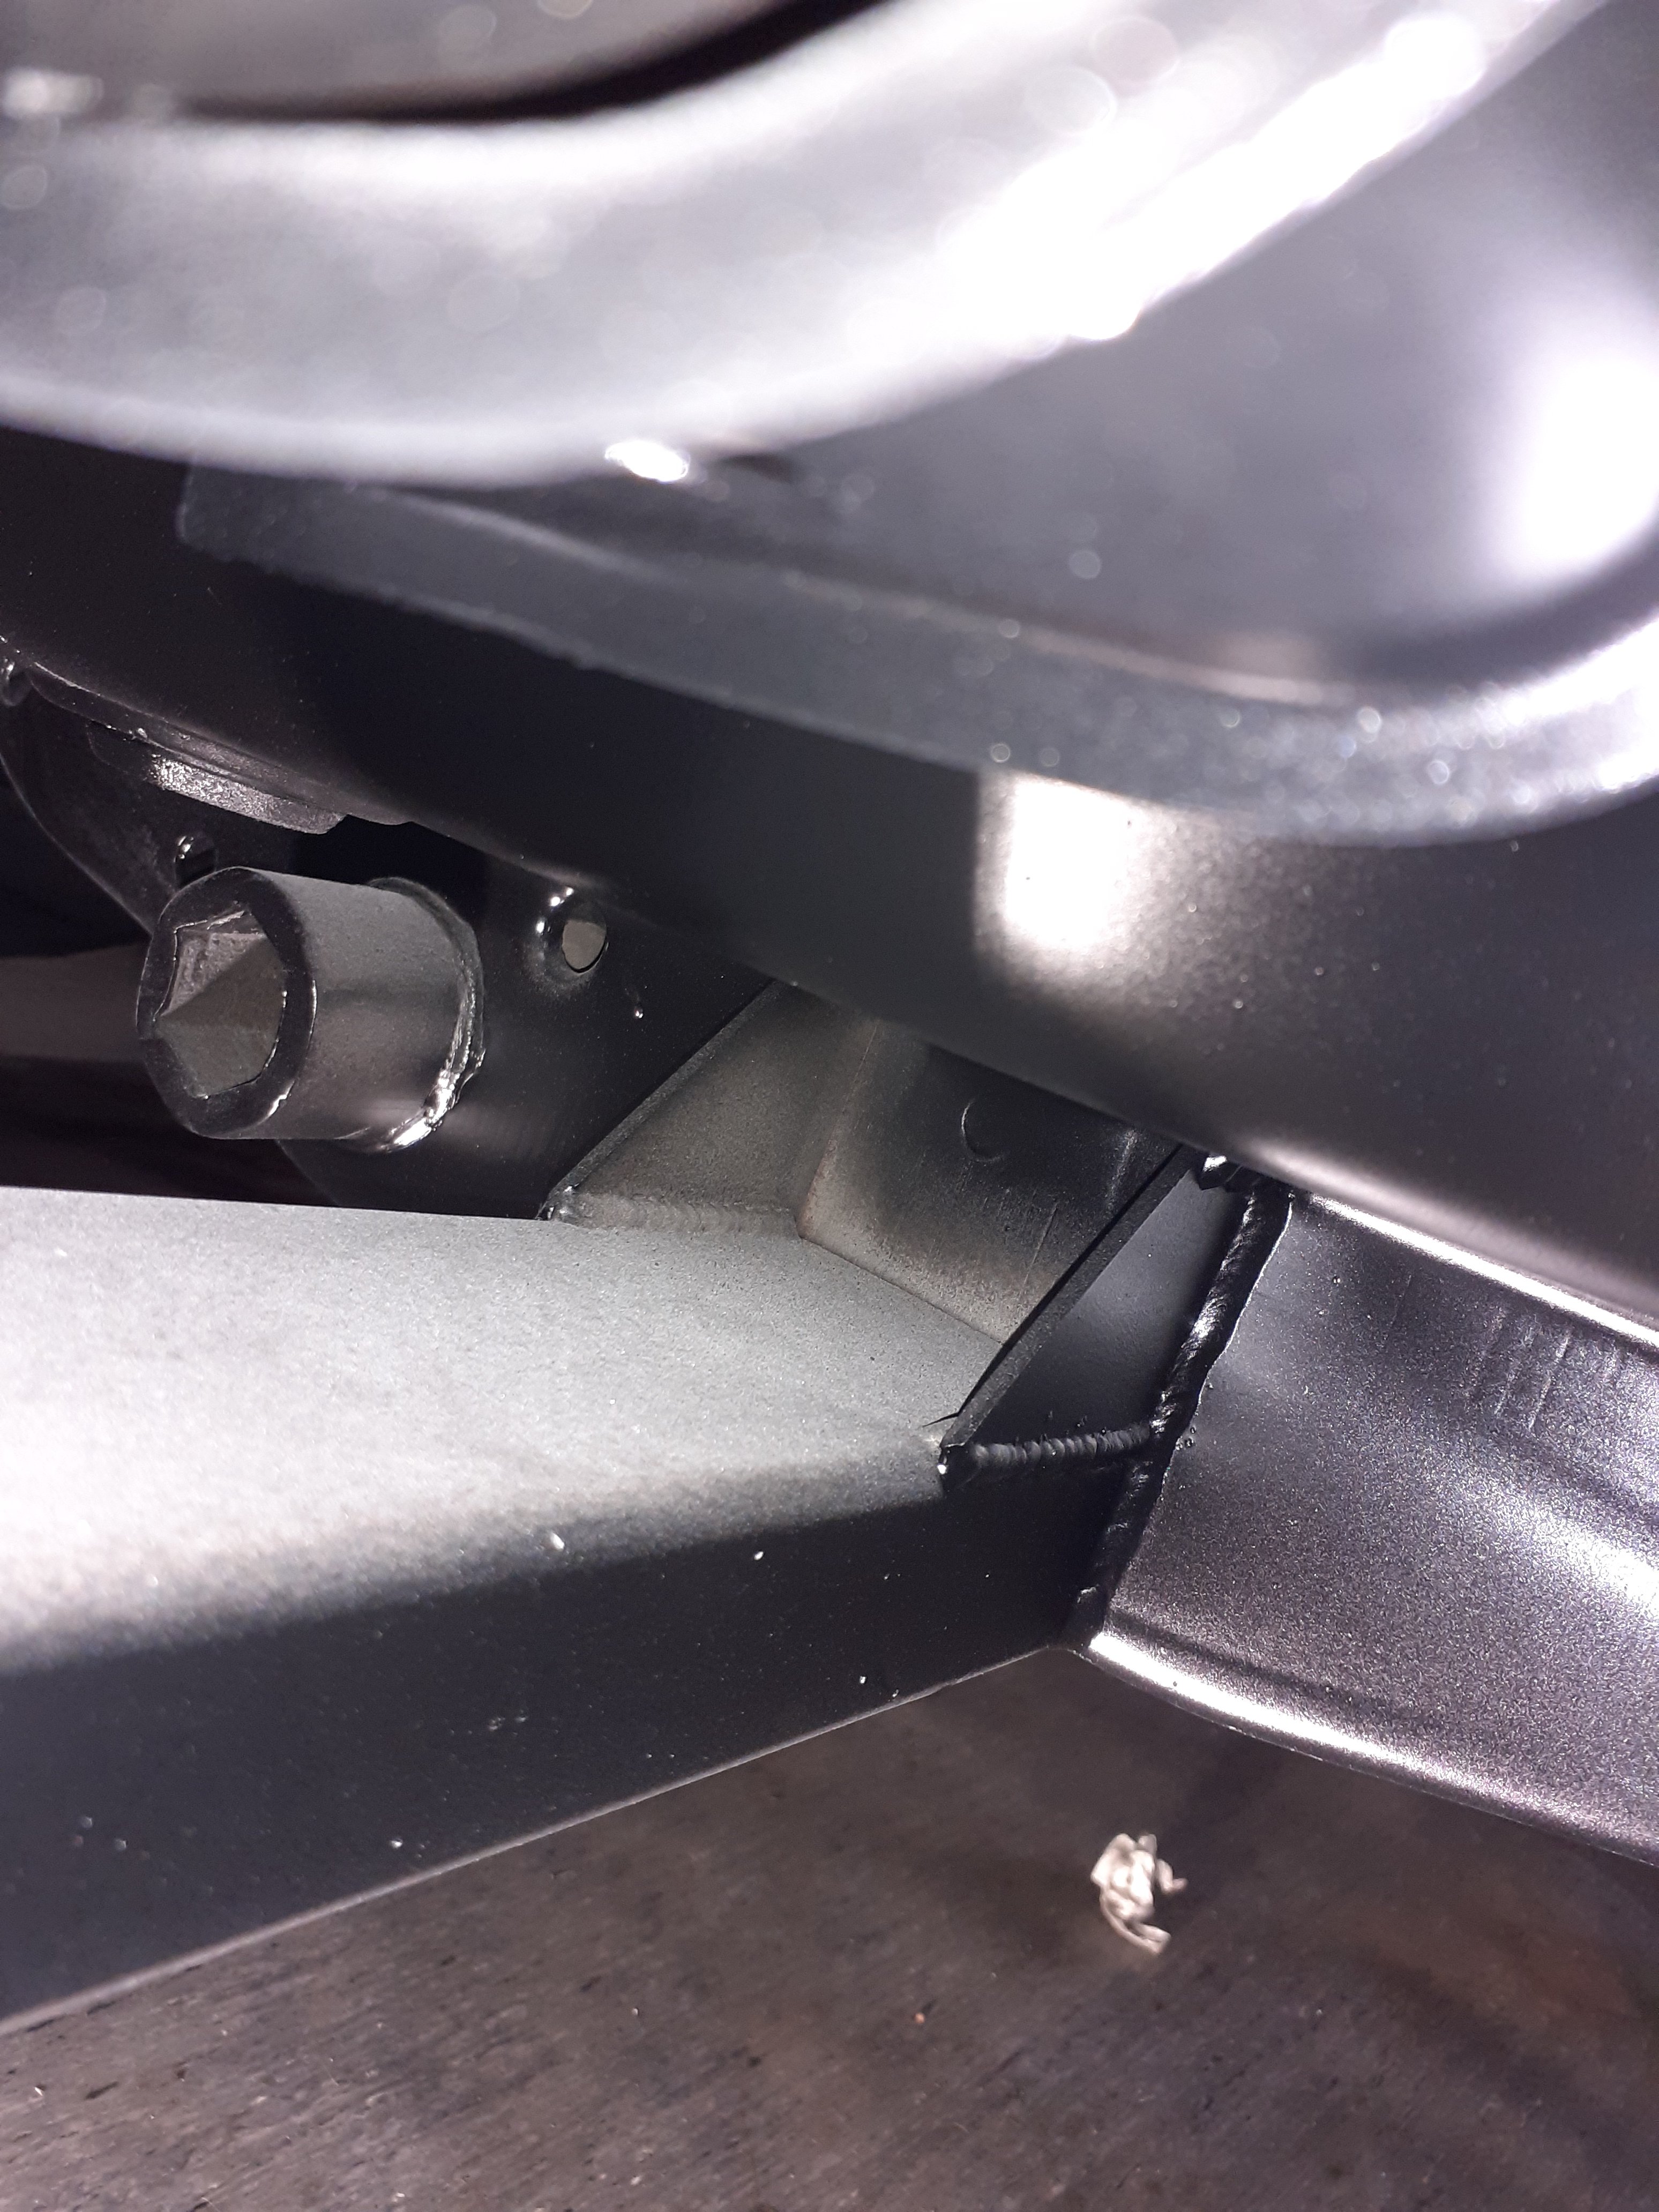
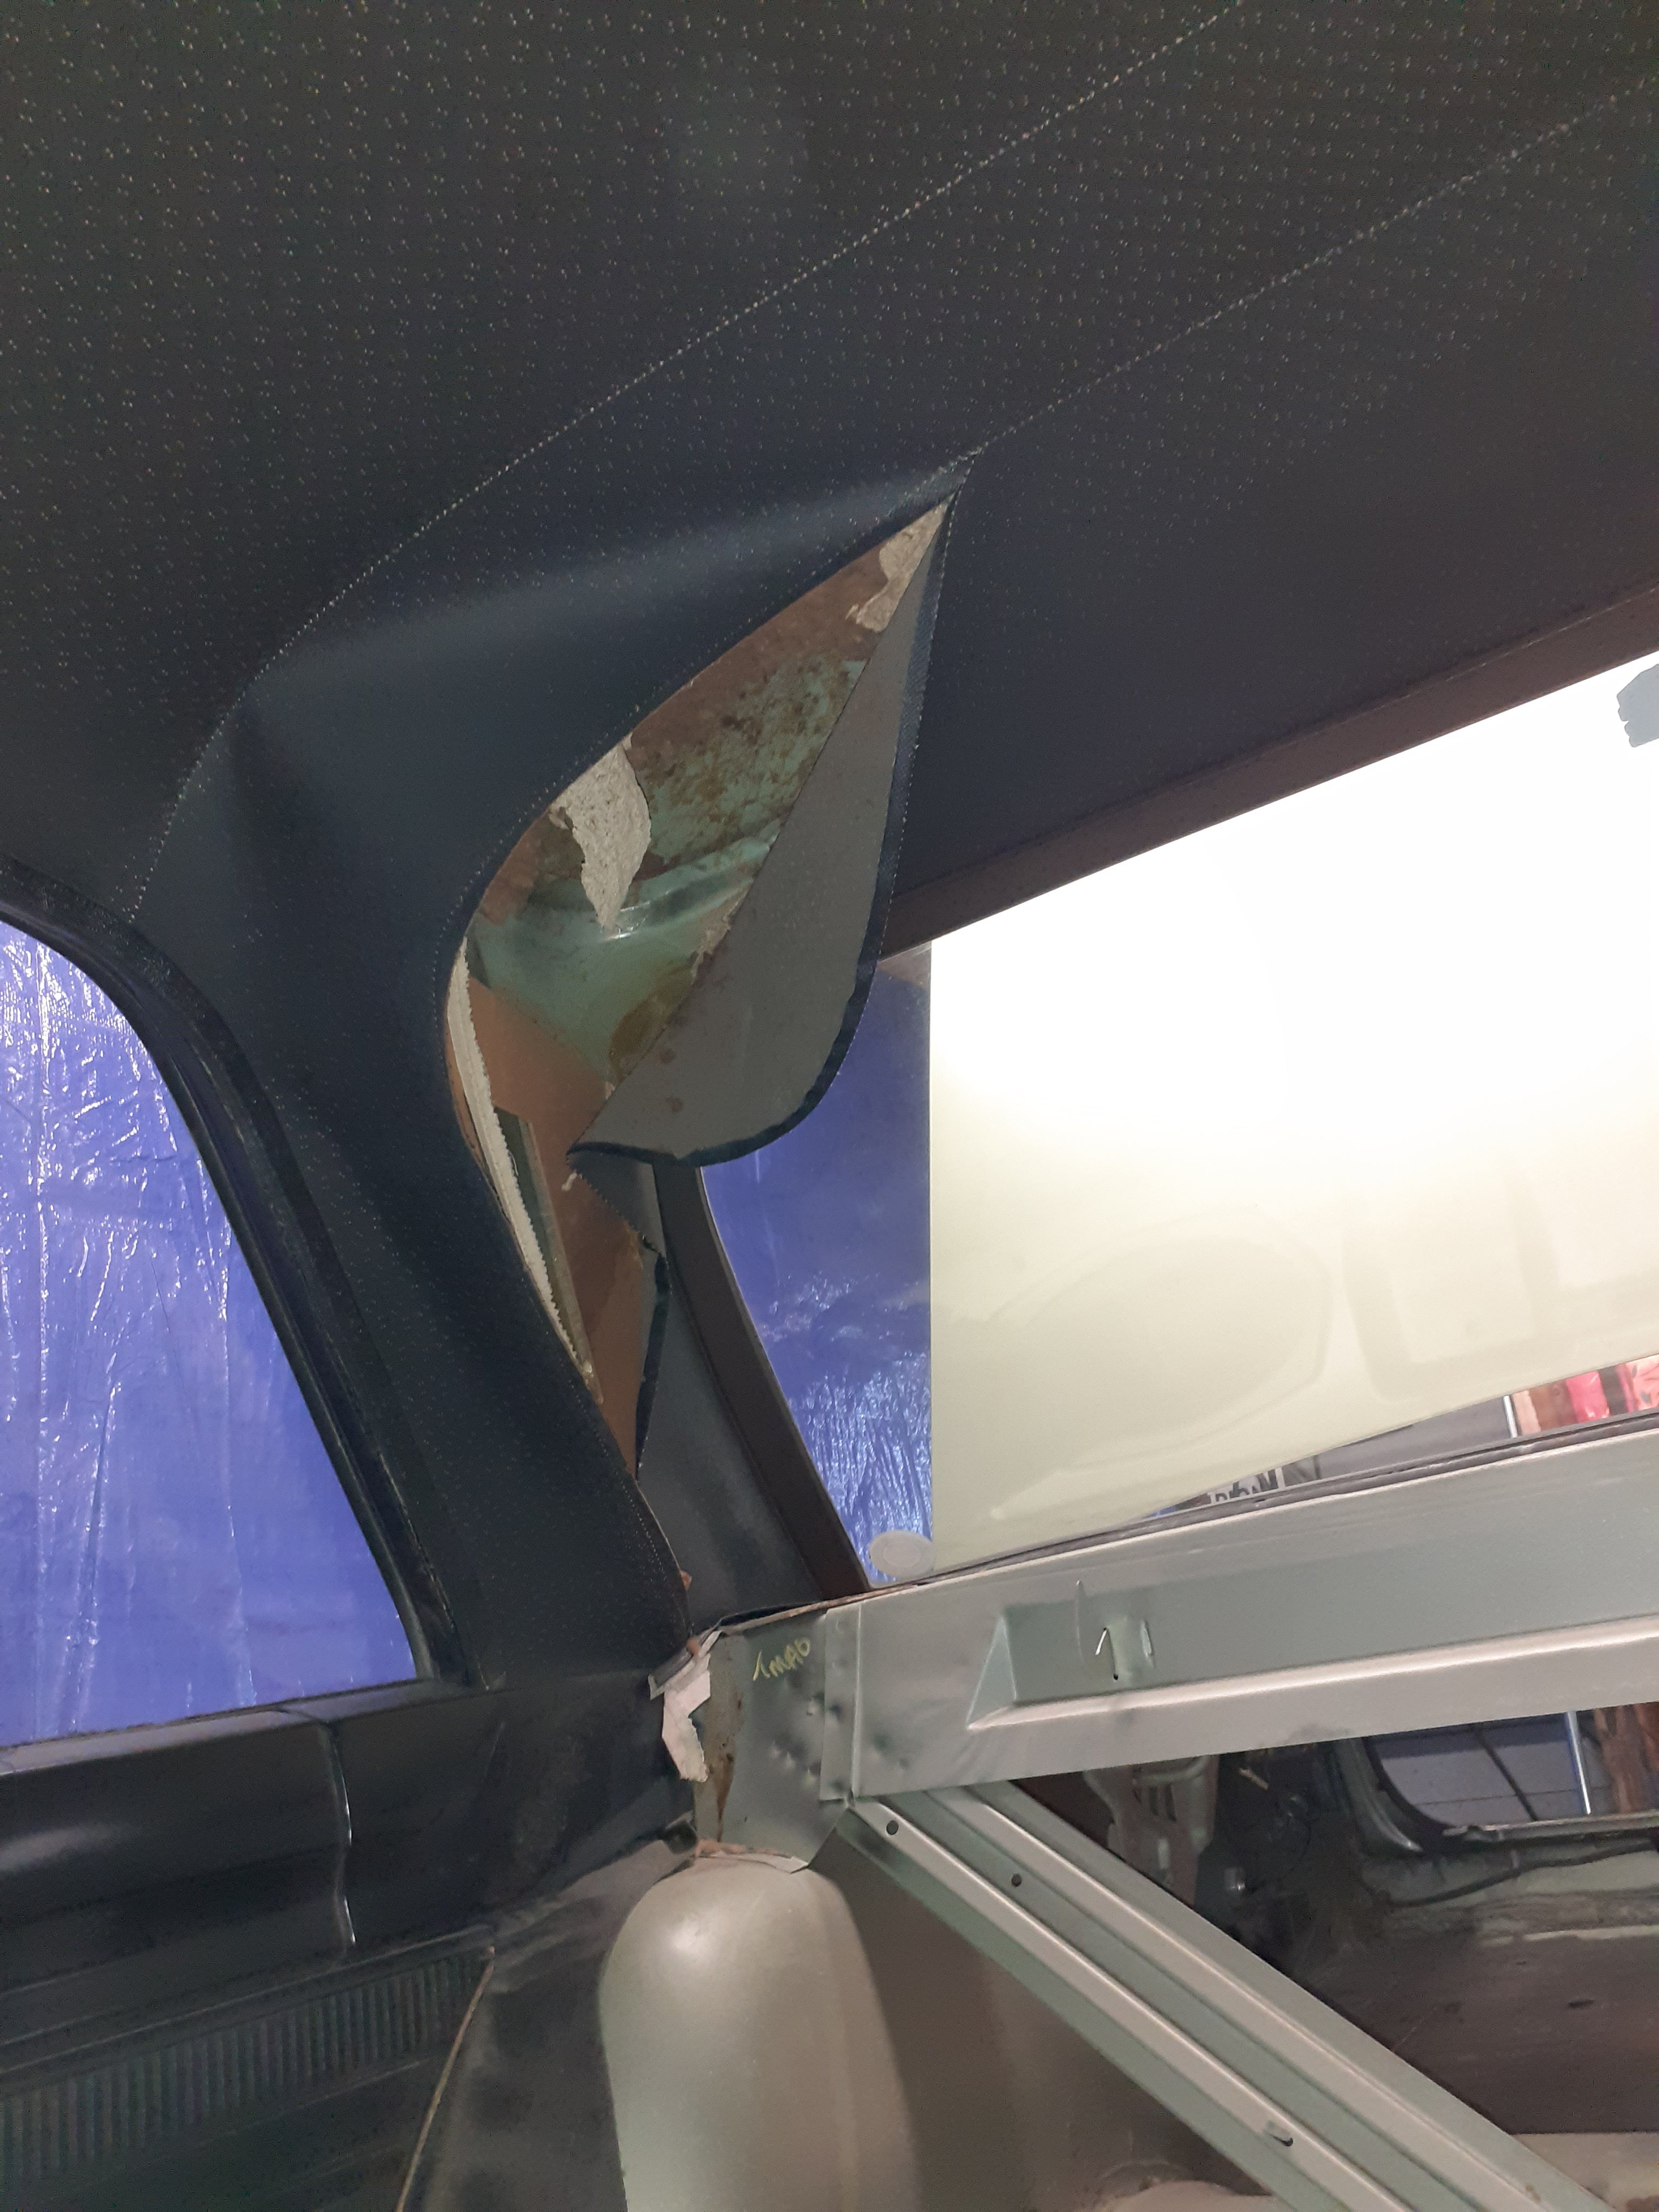
I had a decent look under the car and found a few bits I wasn't happy with, sent autoblast an email about it, no response. So I'll tell everyone to avoid them. Heres why 1. It took a week longer which, to be fair I agreed to and I could have lived with, if it was a good job. I had to chase them, they didnt contact me. This was after giving them at least 6 weeks notice when booking it in 2. The overspray issues, they painted the black parts then primed the engine bay so there was primer misted all over the black especially at the front . This cost $225+gst to repaint at the painters 3. The ripped hoodlining, I dunno how this happened, air got under it? It's an old car and probably got fragile stitching but they must have some issue with their process if parts inside the car get wrecked 4. Thin spots in the paint you can see steel through, parts which are not painted very well or at all, and poor masking. All shows a lack of care or thinking about the job properly So all that cost $2800. I could have got it done for half that at a less reputable place , for the same result, ie me having to finish it better myself
0 points


.jpg.cc53569bcc9f2767aec312ffa3a1b400.jpg)


This leaderboard is set to Auckland/GMT+12:00