
Leaderboard


.thumb.jpeg.384ff72c8d2b0ee0d34a7bdedb55bdcf.jpeg)
Popular Content
Showing content with the highest reputation on 11/30/21 in all areas
-
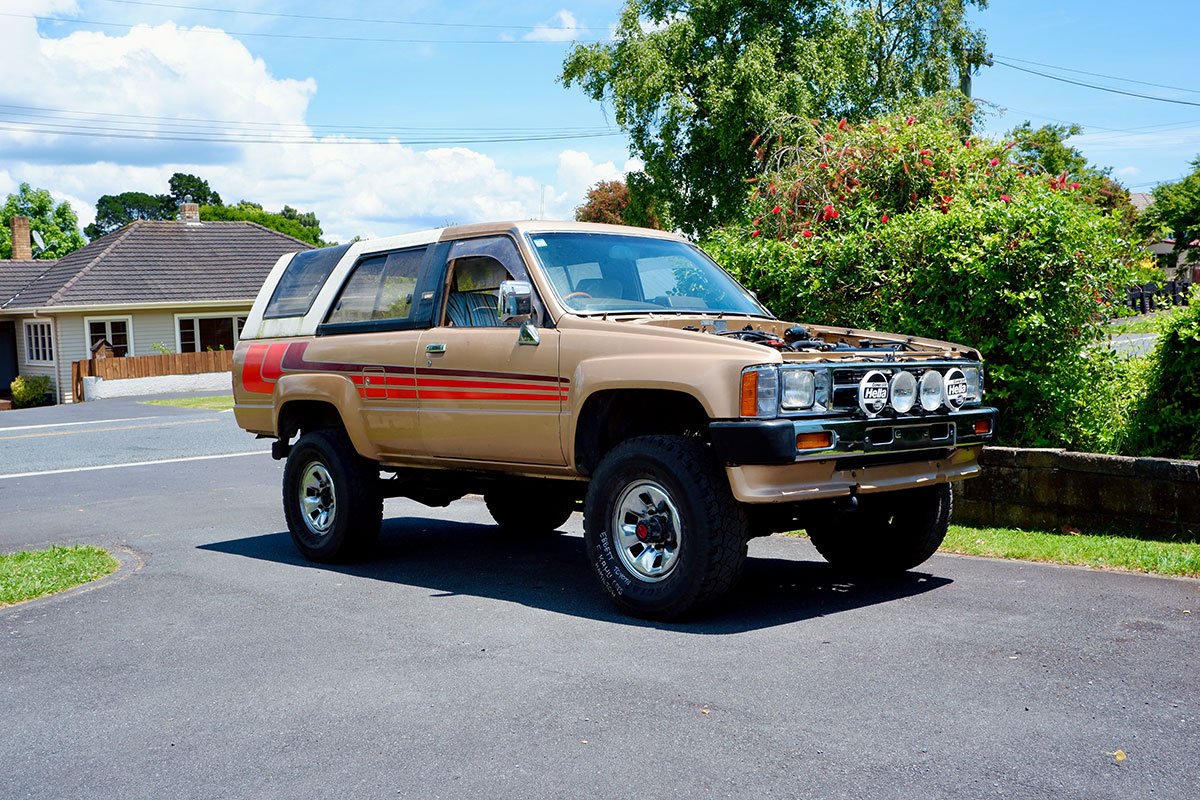
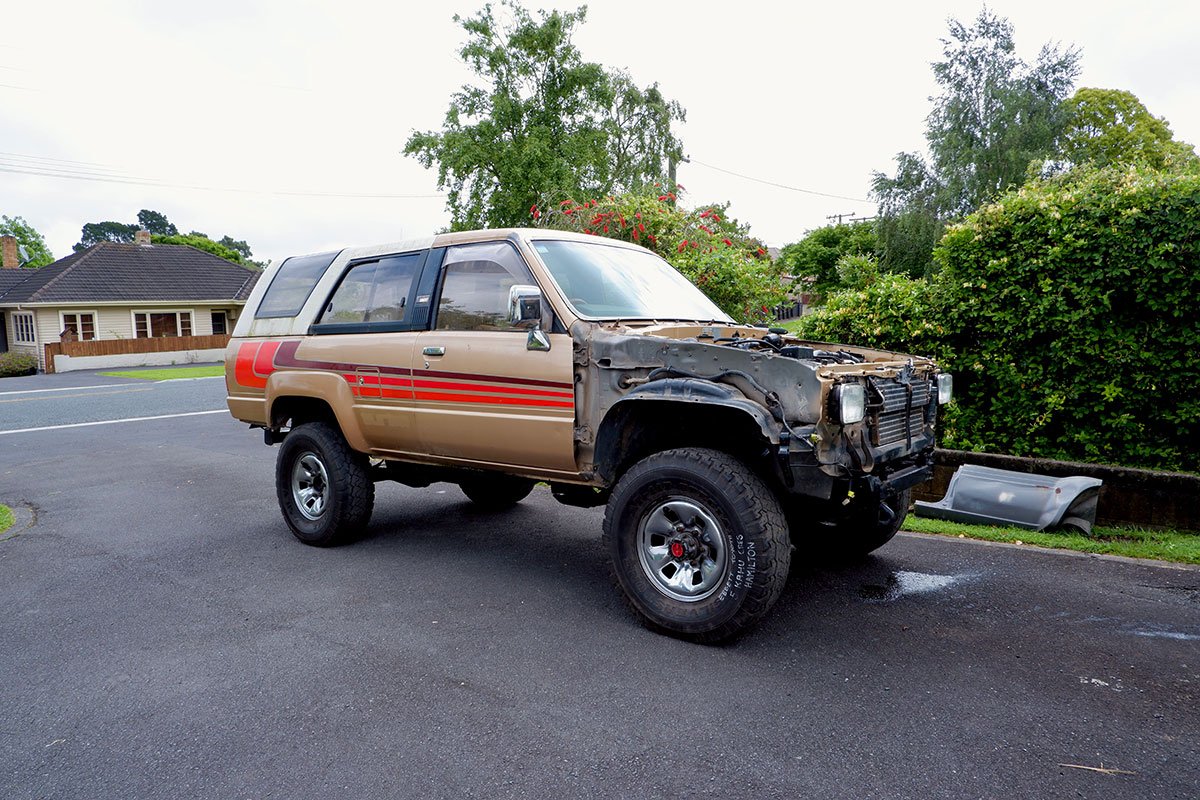
Working away on this, it's now running and driving. New radiator, breaks bled, it's driving just how the white one did before it was stripped down... totally expected. The front is mostly together now. Unsure on the spotlights if I'll keep them on or not, the reason being that they block the grill which I think is one of the coolest parts of the truck. Probably take them off. Still a few small electrical things to sort, bonnet on and it desperately needs a good clean inside and out. Also got new tyres and they look amazing. Next update they will be on!
 18 points
 -
16 points
-
I can't believe how good the condition is under that rough white paint.
15 points
-
Lots of driving, it's sweet as hell. Took it back to the suspension guys to get a check over and tune up. They also brought it down another half inch, which means it is now as low as it can be and still be legal. Pics9 points
-
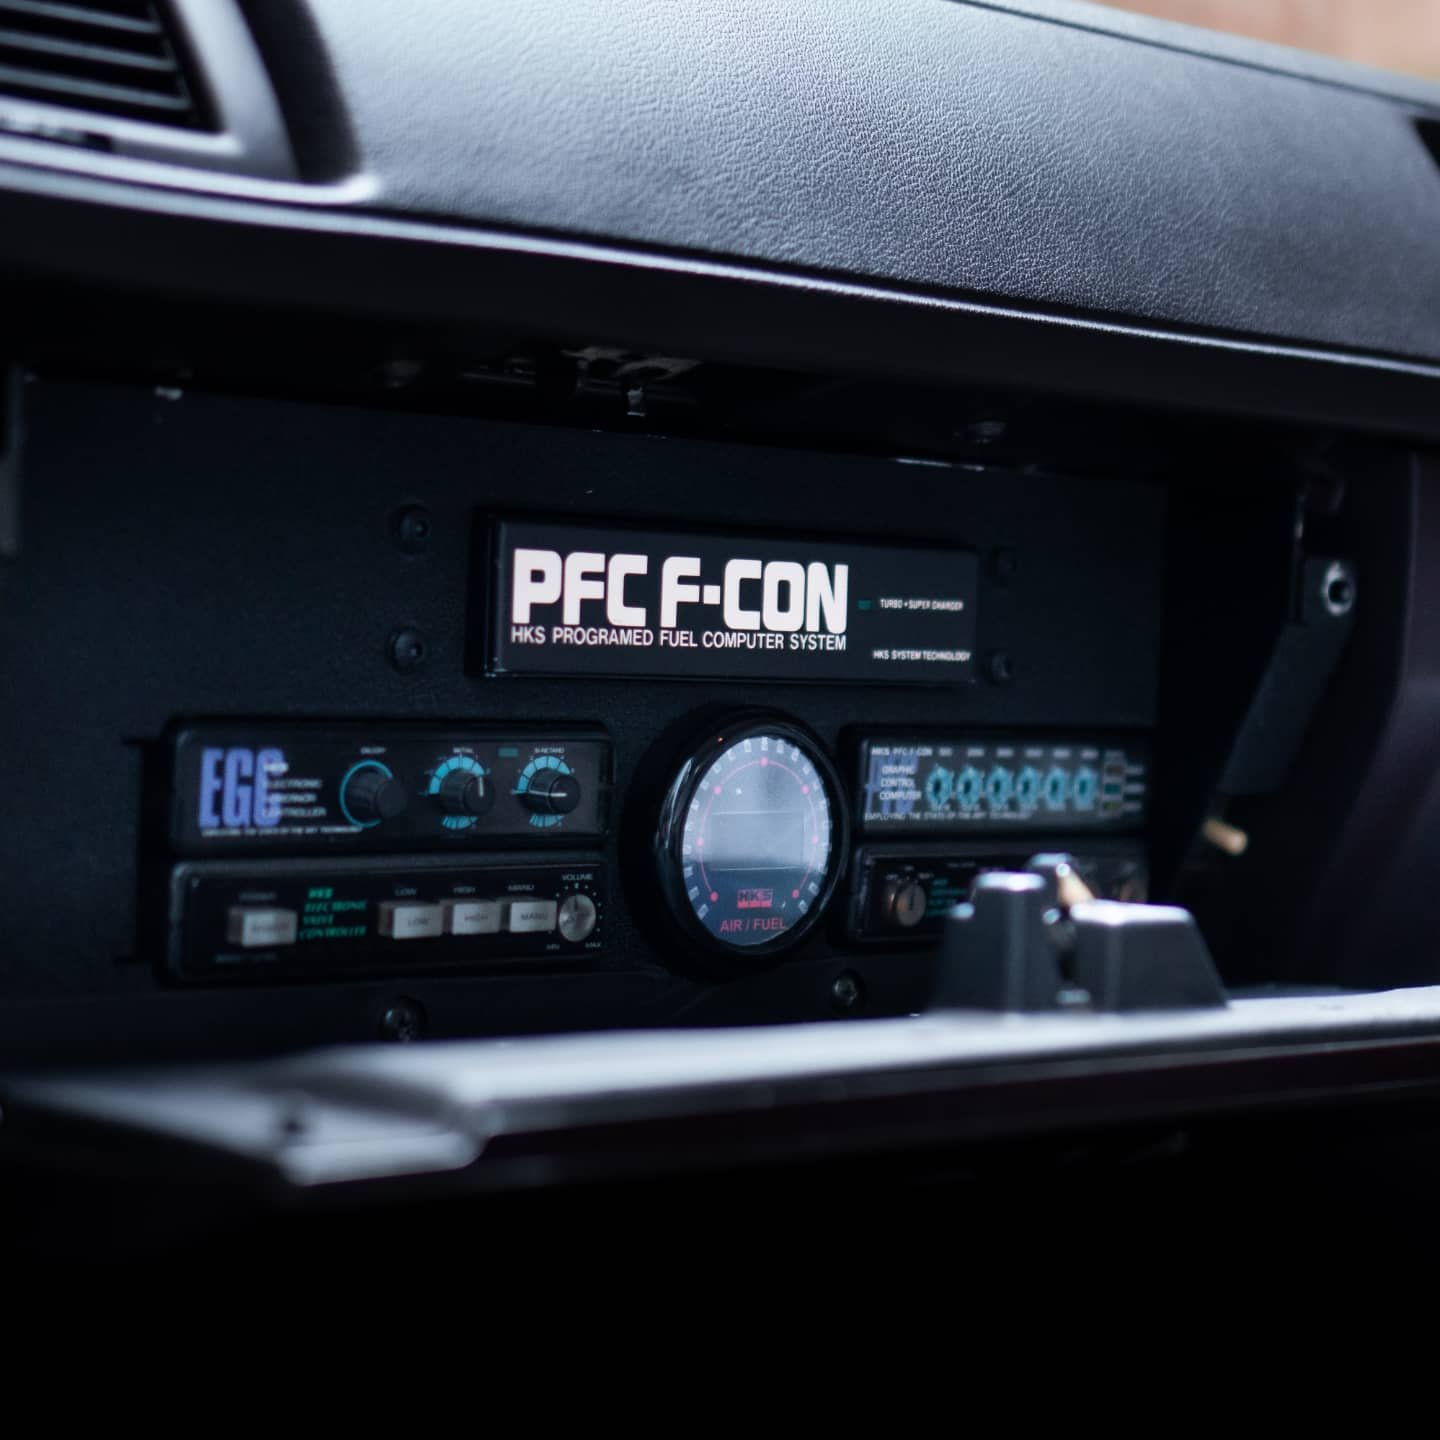
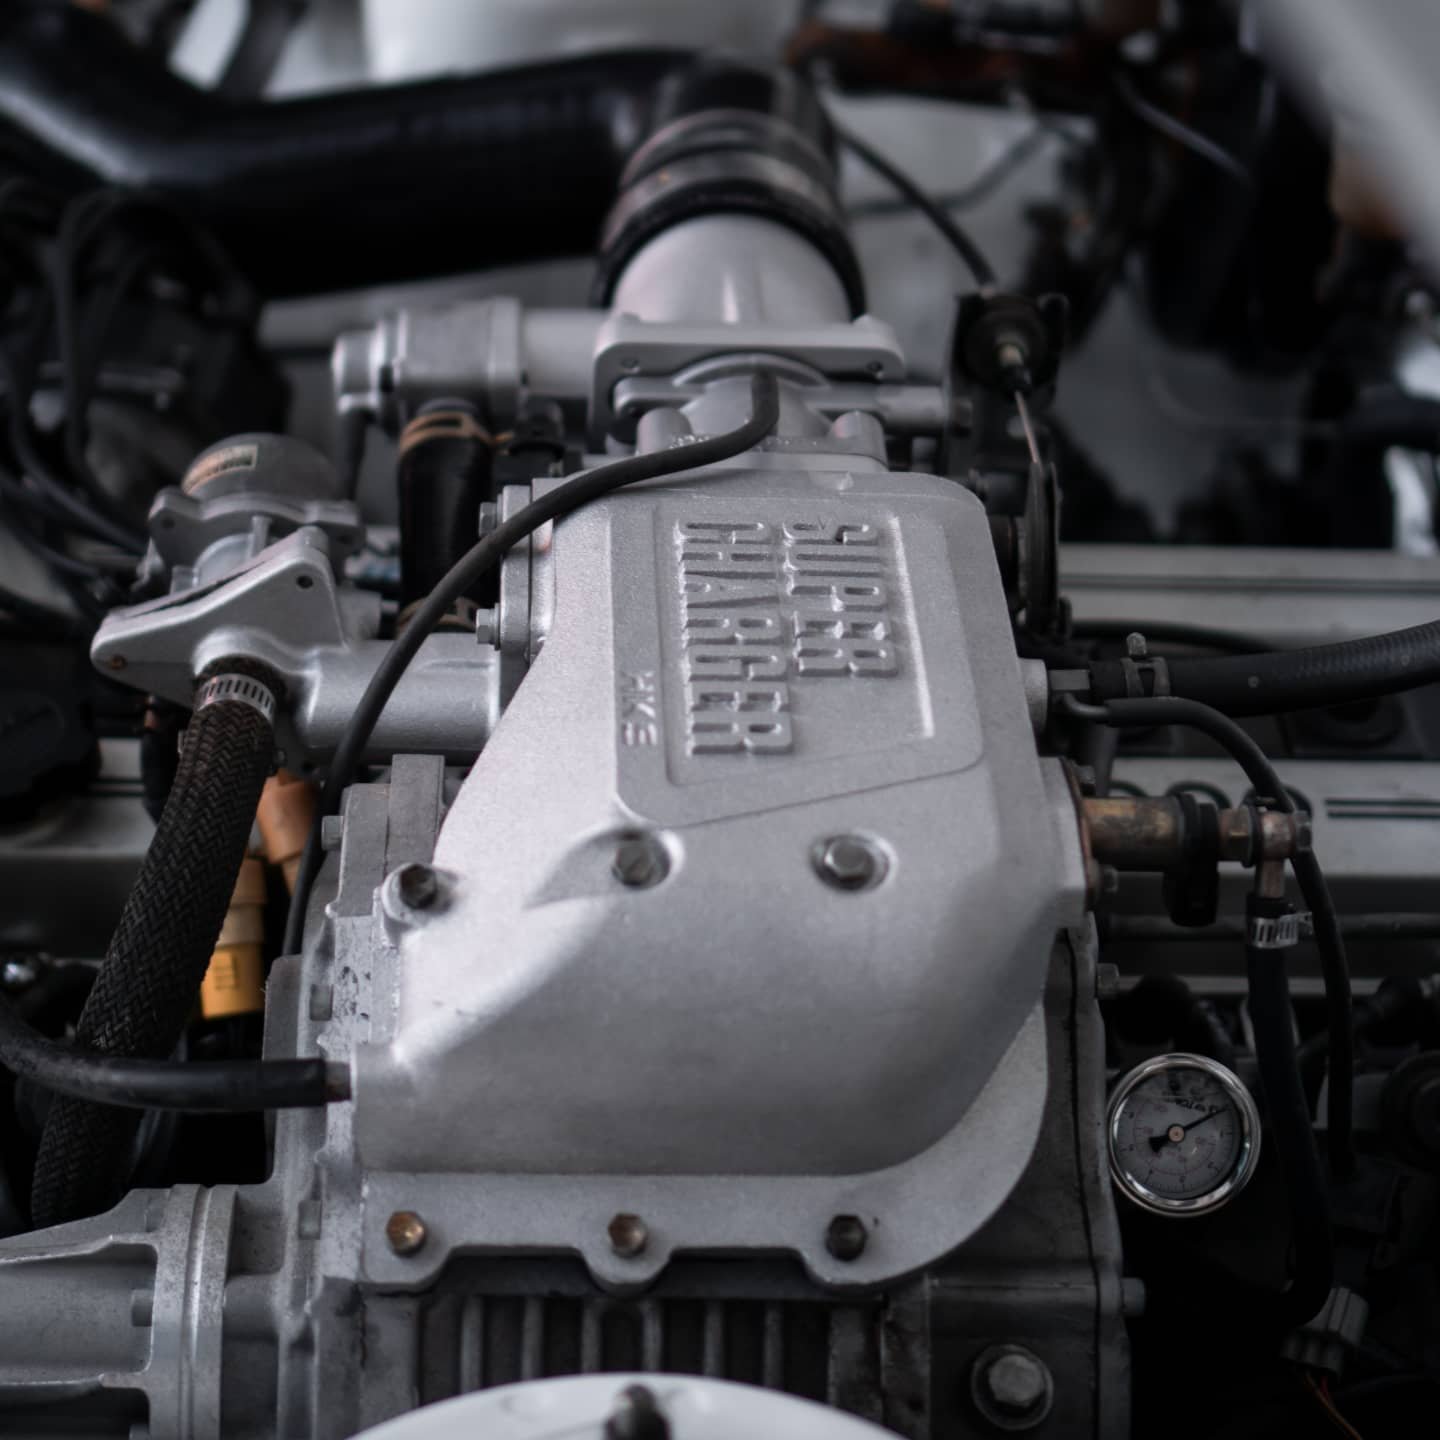
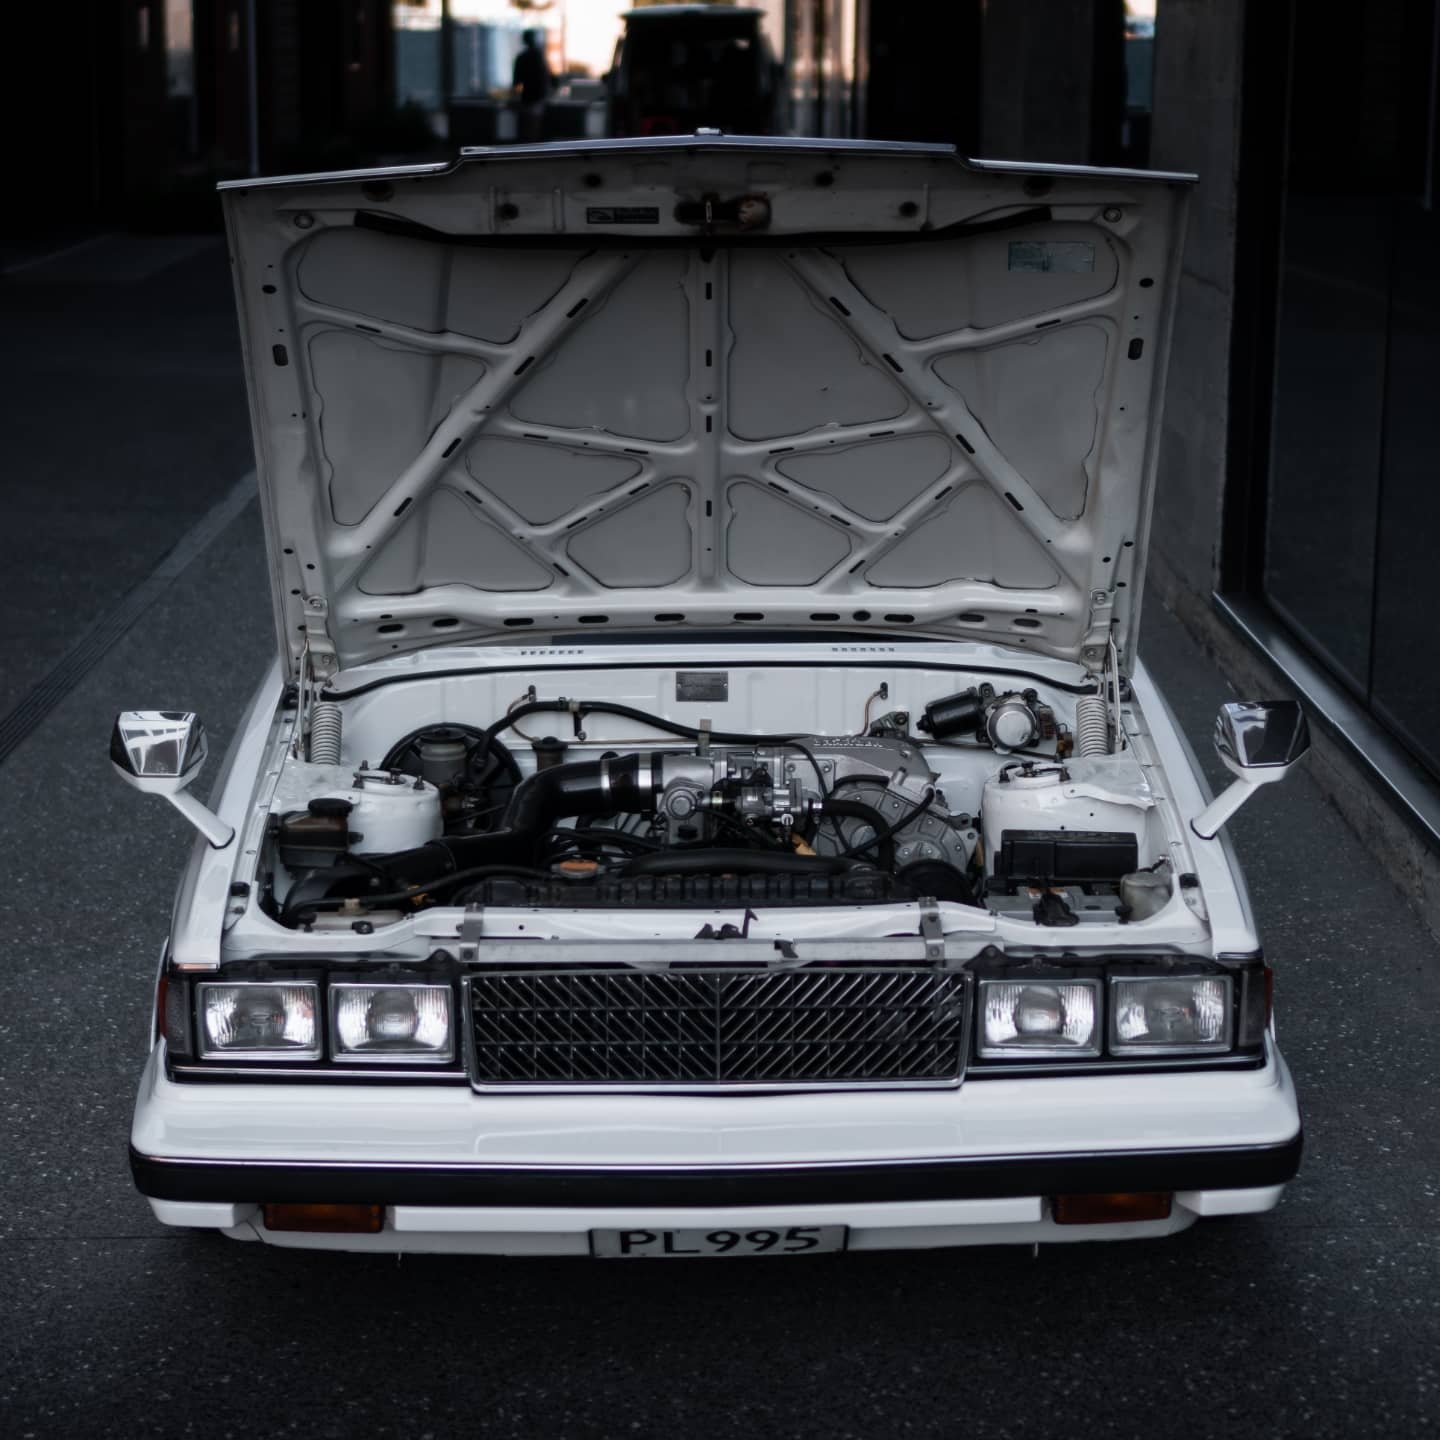
back on the dyno today and all was well. the car took yet another beating and was fine. no fuel issues, no anything issues which was a relief tbh. made 460 KW again on slightly less boost but call it the same. fuck, like it matters at this point, its undrivable at that level anyway so what difference does it make. oil stayed cool and the oil cooler fans seem to work good too which is great. i do need to replace the heat shielding on the exhaust that goes under the floor. that last lot got oil all over it so i removed it and man can you feel the heat coming up through the floor now.... 2021-11-30_10-20-12 by sheepers, on Flickr7 points
-
Mmmmm shiny
7 points
-
Half an hour later ...
7 points
-
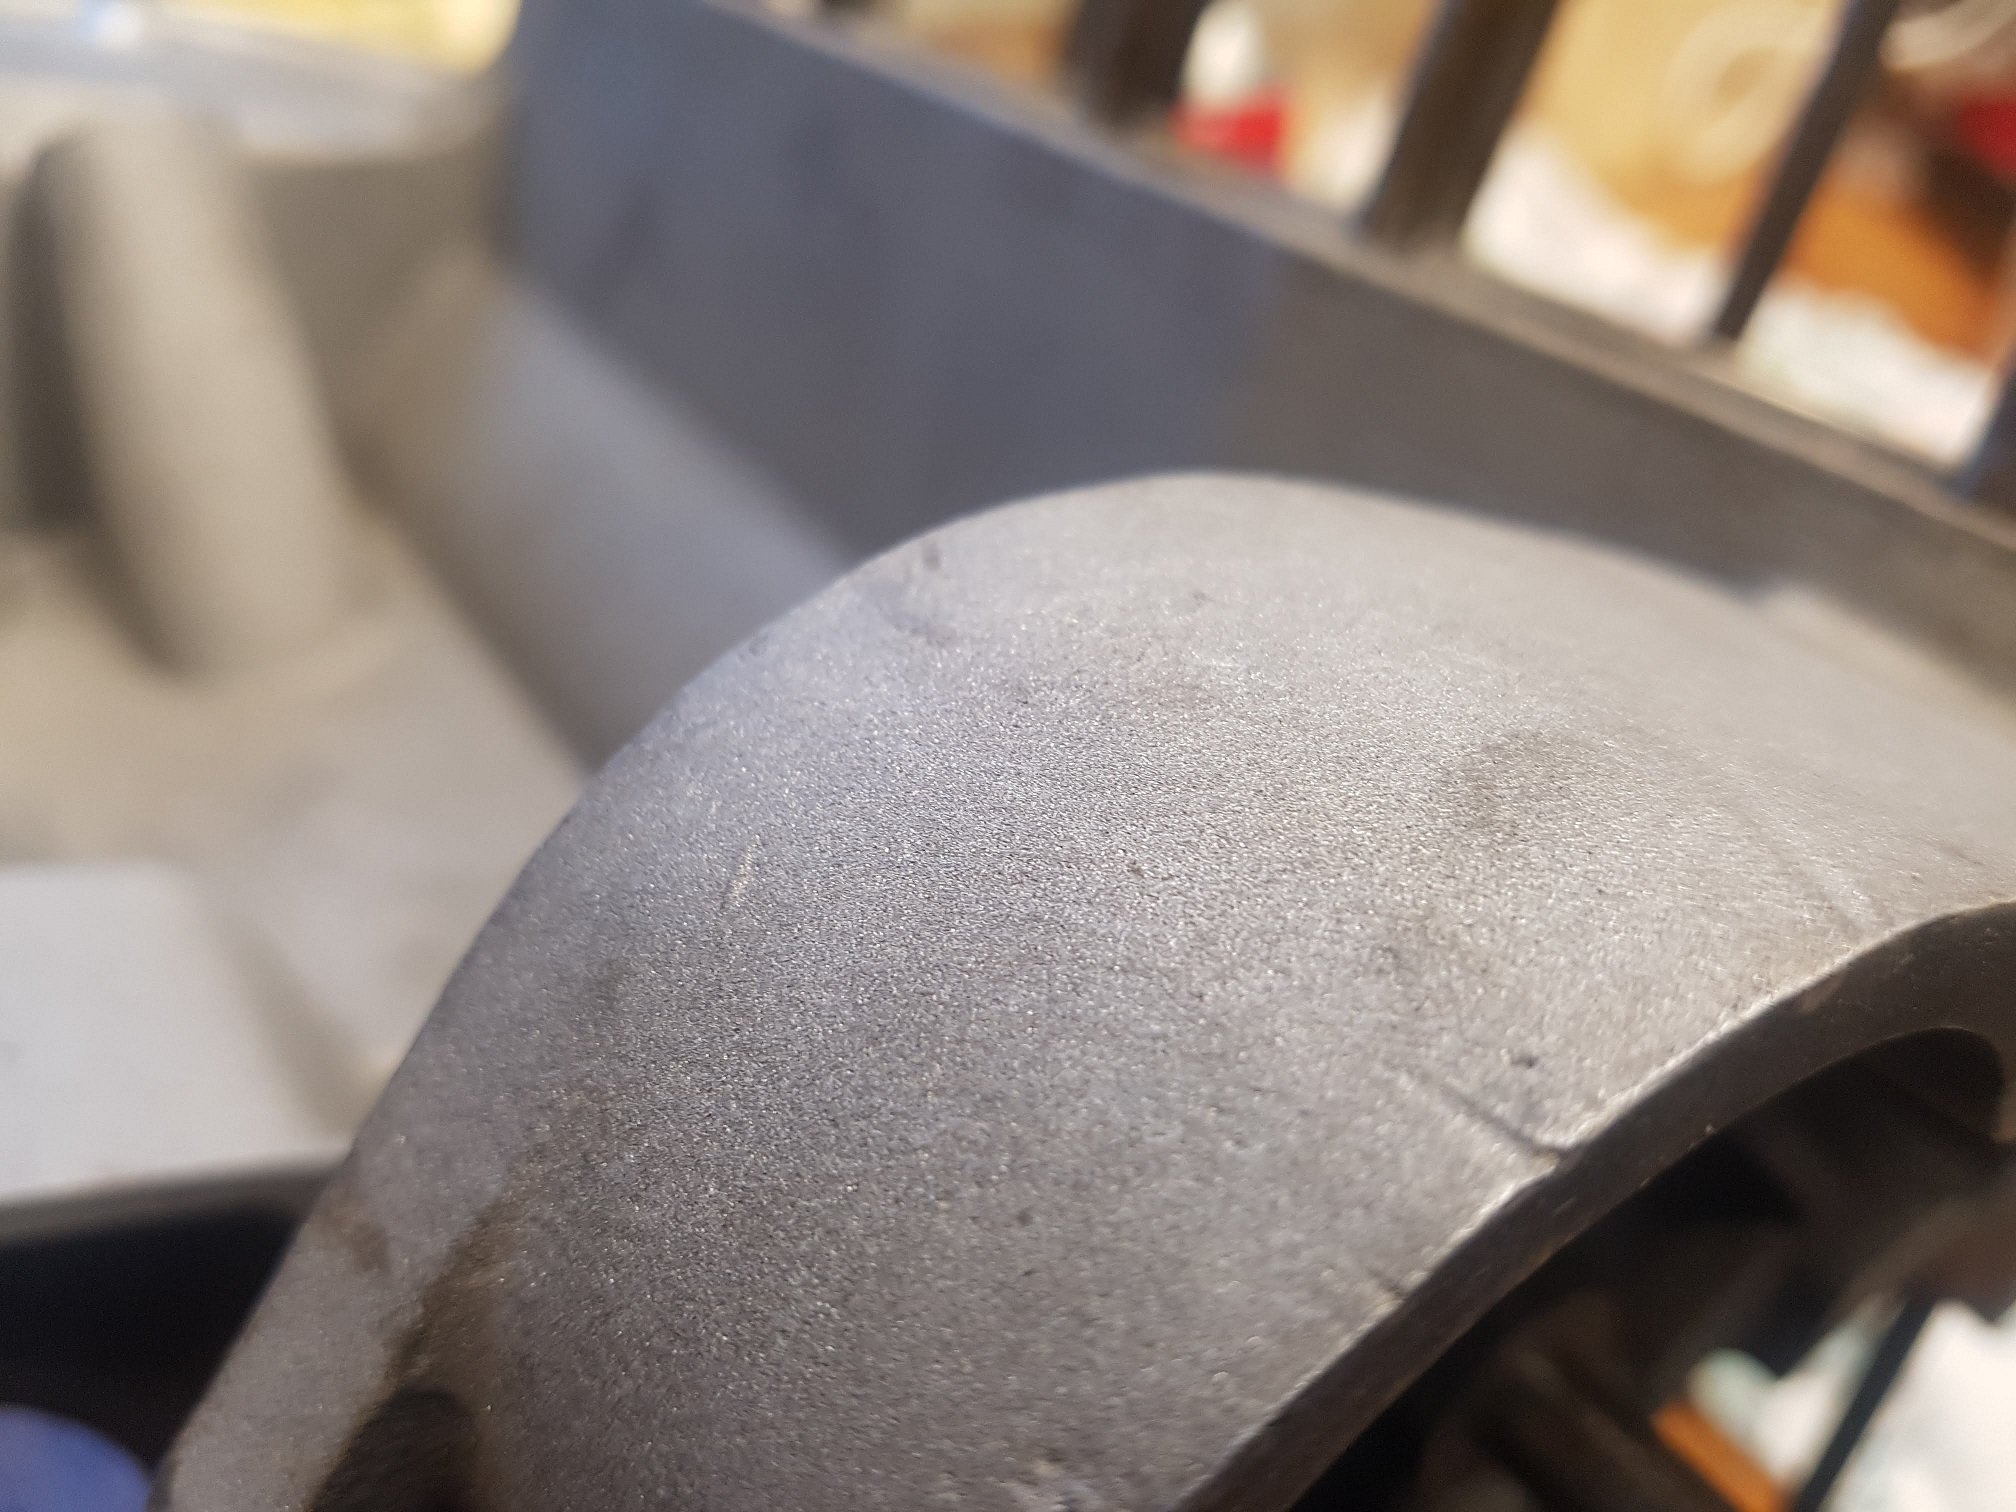
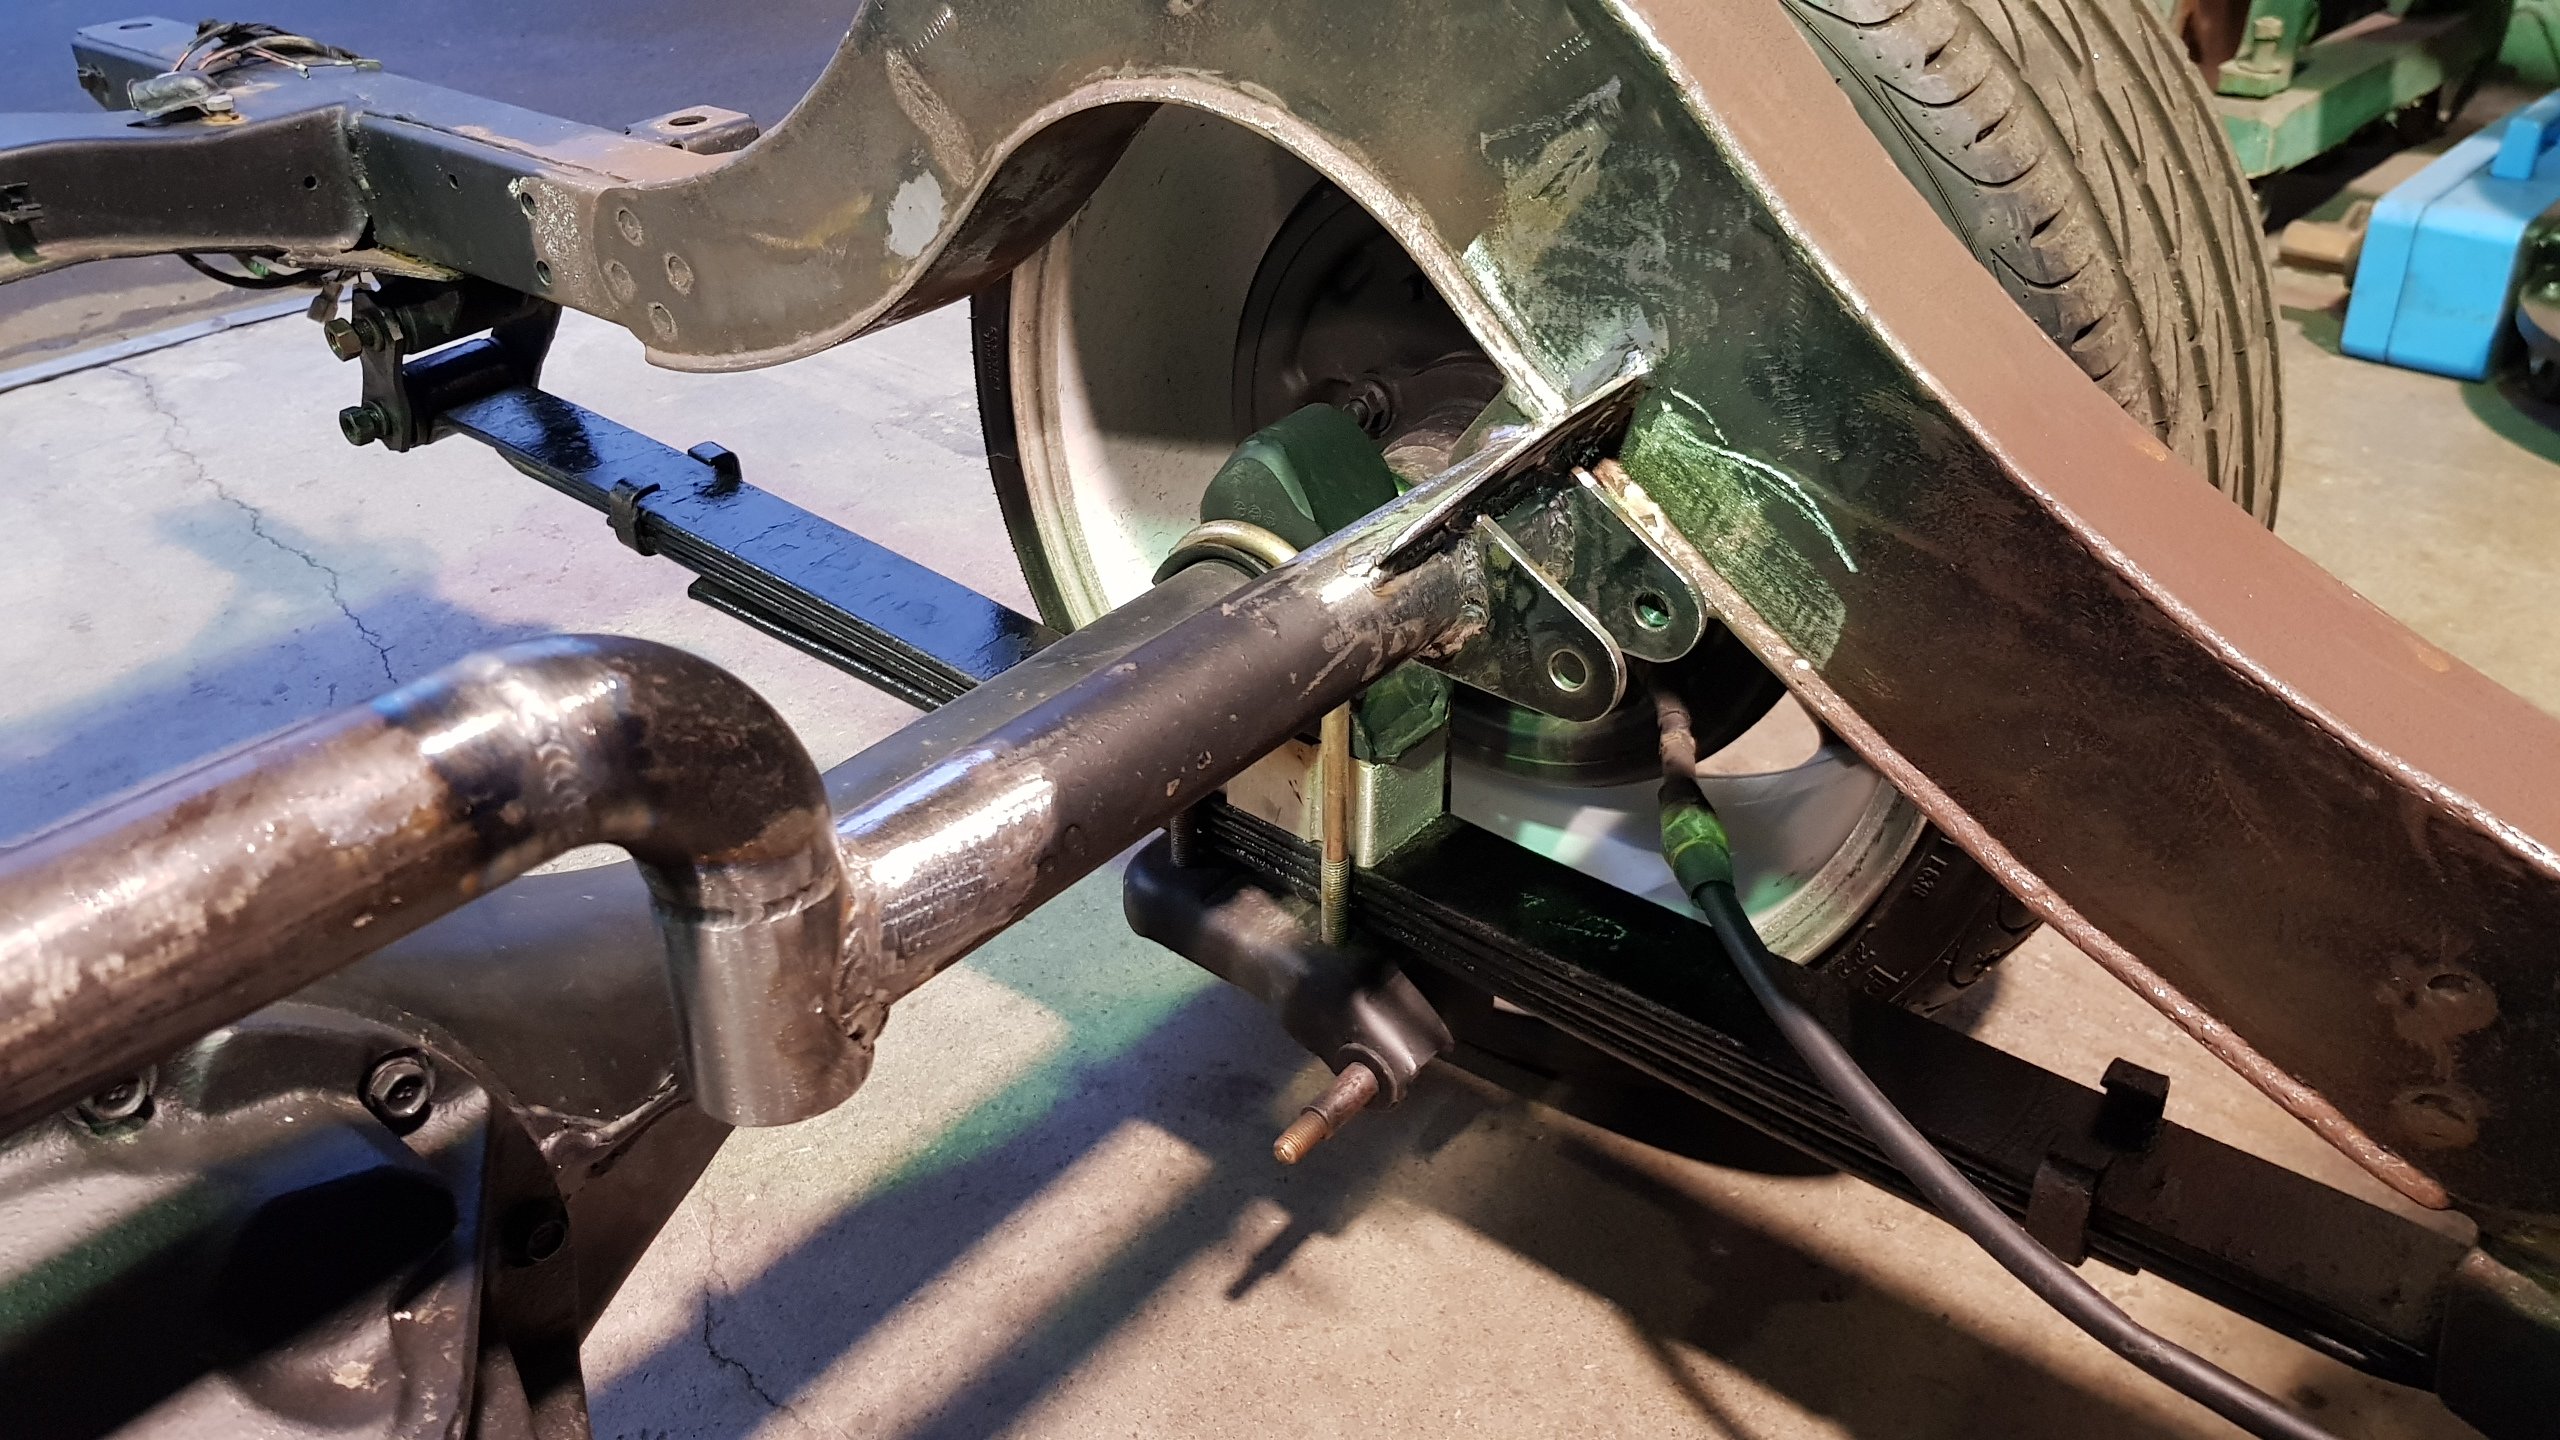
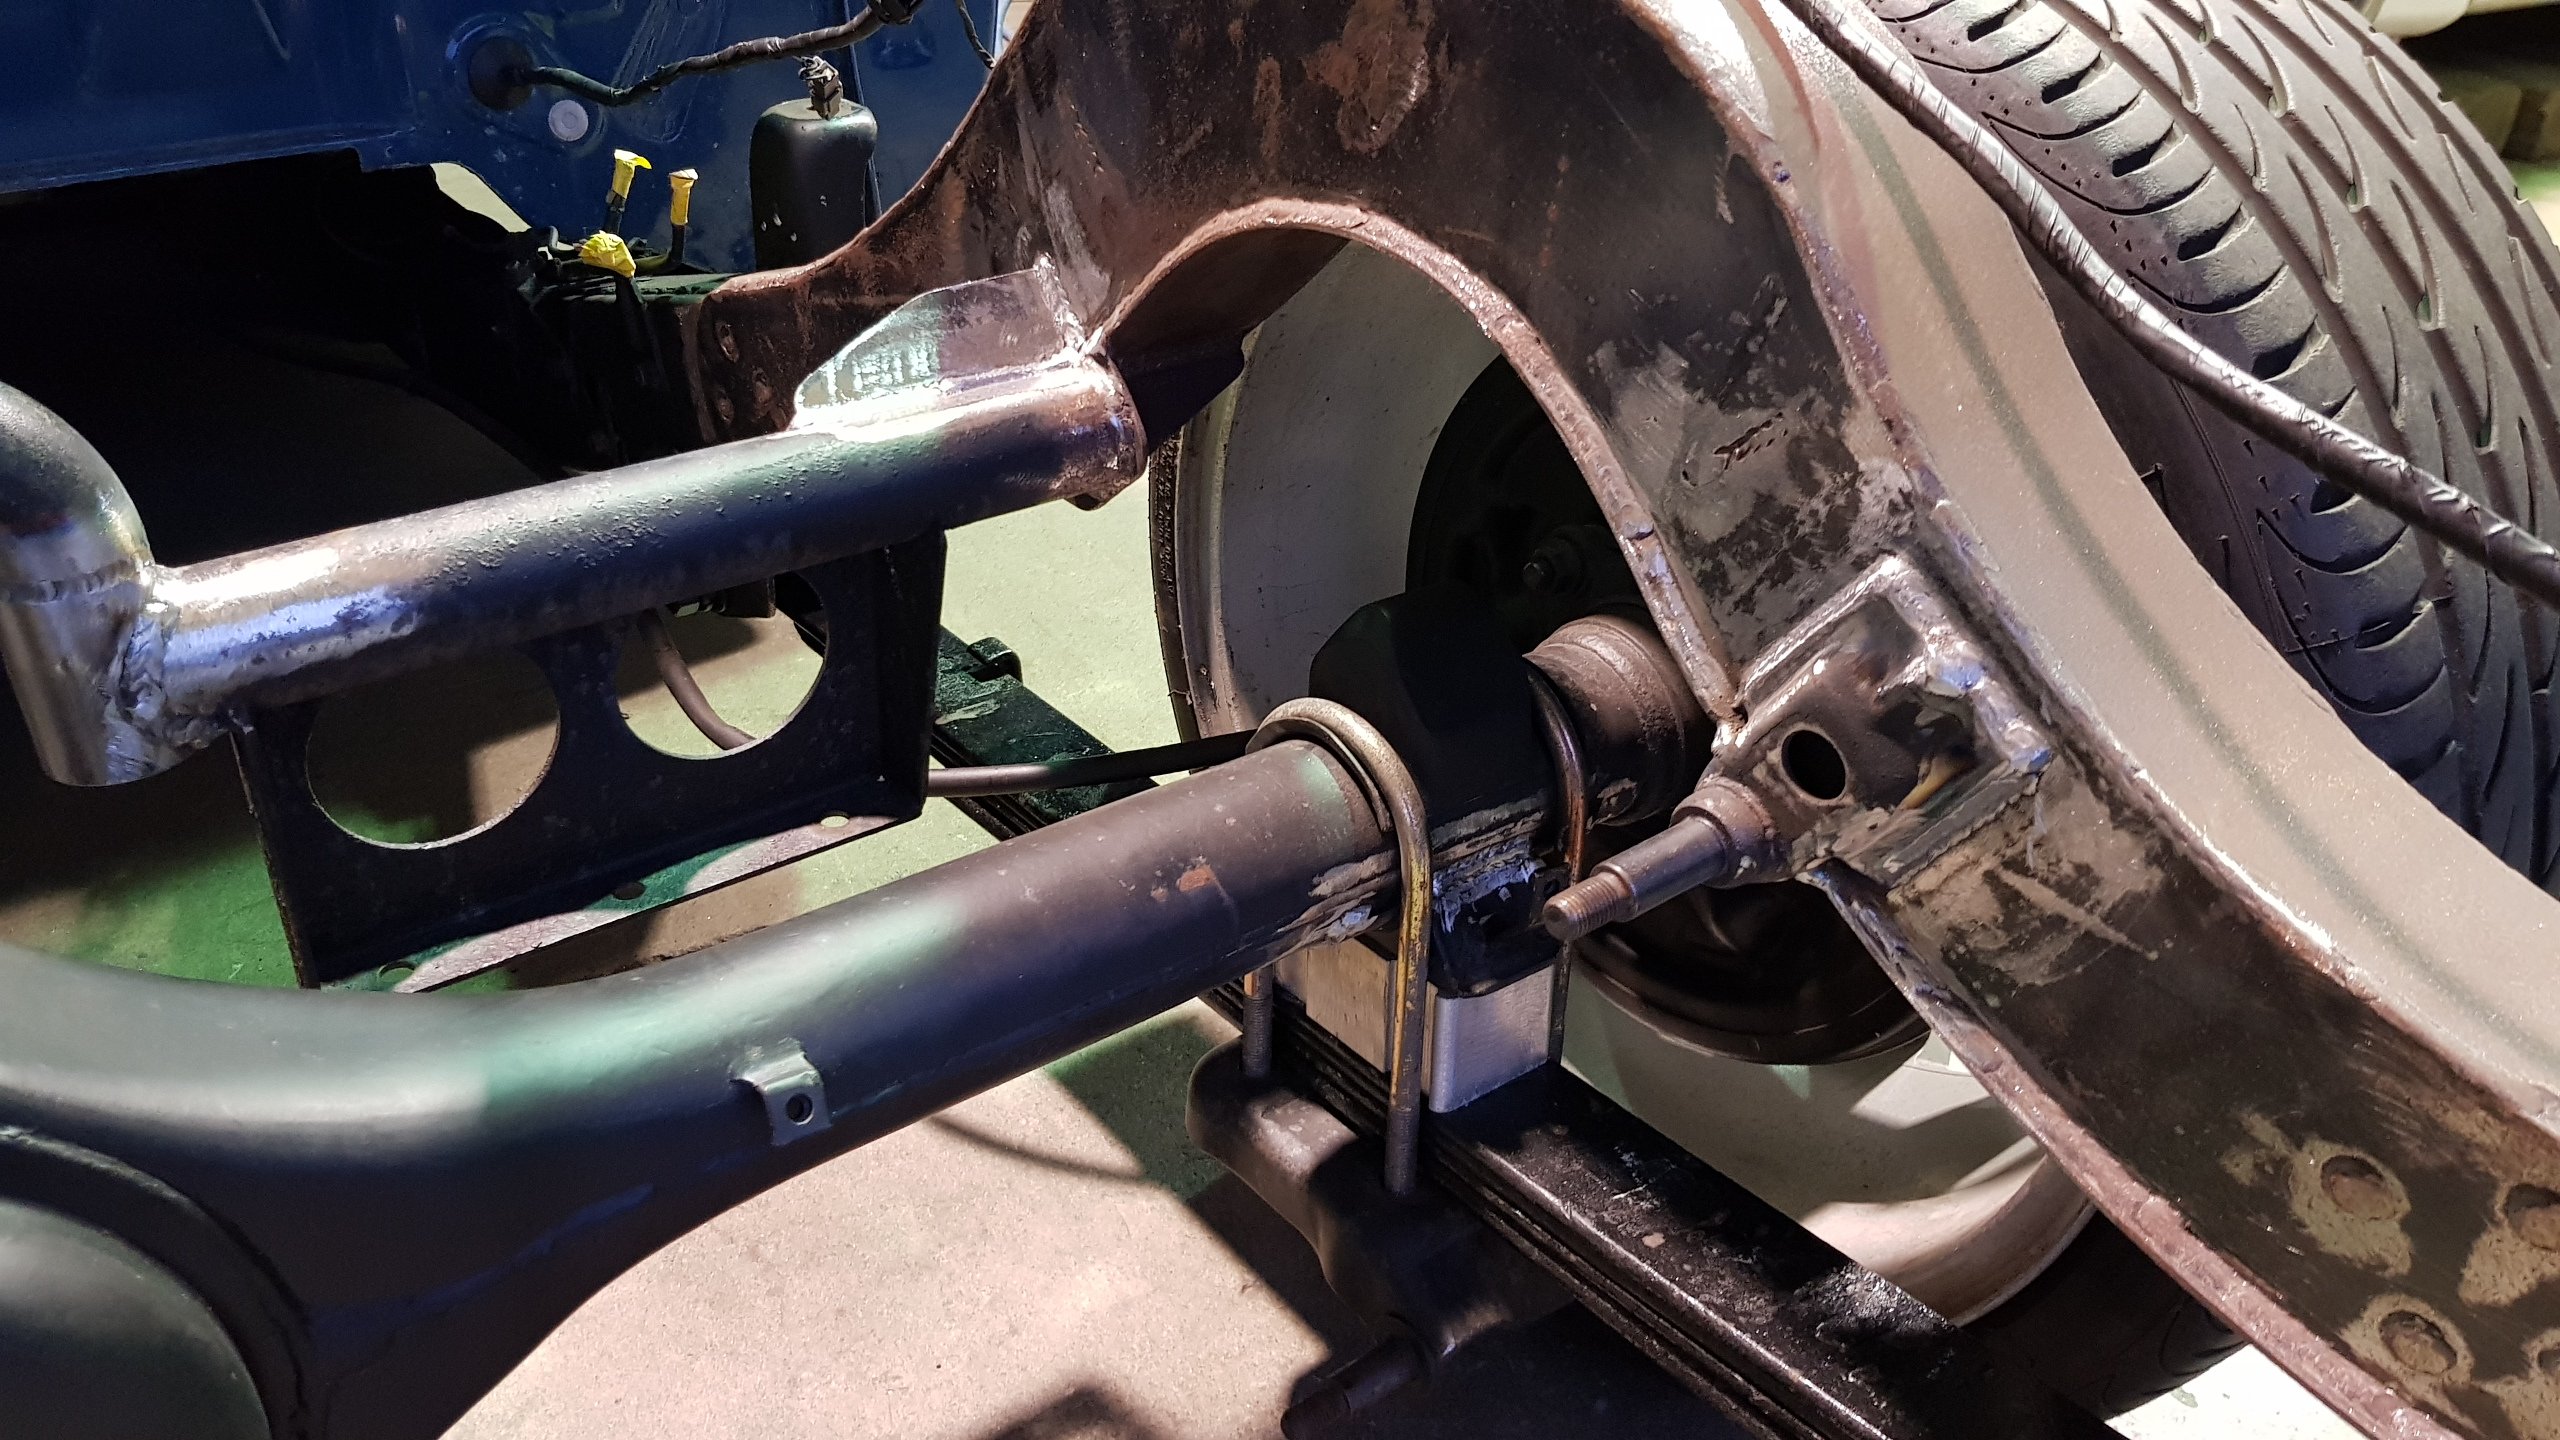
Talofa gents. The longest axles that still make use of the conventional style Hilux wheel bearing holder housing register are the KUN's. You be wanting the early KUN that is sans ABS. 5 stud or 6 name your poison - they are both XL in length compared to the earlier stuff. You'd be doing well to get a 6 stud Hiace axle to work with a Hilux housing - Toyota changed the OD of the wheel bearing. Those 6 stud Hiaces are truly a HD setup and are bigger than a normal Lux.. The reason 5 stud axles are not popular for 4 stud conversions is due to the fact there is no room on the flange face to fit 4 extra holes. You can but it looks dodgy. You can weld but that can be a dodgy proposition too due to this practice being frowned upon by some cert inspectors. So as @cletus pointed out - enter the 6 stud. The vintage and model of vehicle the 6 stud axle originally came from determines what style center it comes with. Look at the dirty great sink hole in the center of the axle on the left hand side compared to the other. All 6 stud axles are shallow in the middle and you need to be leaving as much OEM material in place as possible to give yourself every chance of obtaining a hubcentric fit of the rotor. This feat is made more difficult due to the fact most rotors having a big arsed bevel on the inner face of the hat. You get one shot at it. Fuck it up, the rotor rattles around and the axle is basically scrap. There isn't even enuff meat in the remaining center to tack a ring on with any certainty. You can but well you run the chance of having a shit load of time and effort in a custom width narrowed axle only for it to fail at cert inspection time. You are after this. The other challenge is the forging chamfer/bevel on the back face of the axle. There are basically 2 options to seat the head of a wheel stud being used in a smaller PCD than the OEM Hilux 6 stud PCD - counterbore or lessening the OEM chamfer/bevel dia. Who's got a counterbore setup in their shed on a machine rigid enuff to hold an axle to no/nada/zilch movement. Yeah nah, The diameter is brought down to the OEM 5 stud size leaving a beautifully big and generous chamfer cut. Like this. In everything that you do with axles - you only want to be removing what you have to. Hilux's have generous axle flange thickness. This is one of their strengths. I do my best to play to it. Cheers.
6 points
-
5 points
-
abandoned lockdown project, i think welding was a bit out of grasp for last guy 1972 local built tilting trailer pretty not ideal tilt set up, but its lasted since the 70s springs were toast new deck was also toast because it was rubbish untreated packing ply no more nails together back bit has some rust in it custom camber in the axle, rest of chassis looks good other than the draw bar, but its probably ok hit it a bunch with a crowsfoot and it didnt make any holes needs some wheel nuts that fit Today i removed most of the deck. the front section is ok 18mm ply, threw away the "guards" that were self tapped into the deck, gently pulled on the angle iron trim he had started on and broke all the welds off the surface. cut off the old spring perches, they dont appear to be originals as there is the remains of some old ones still on there. Fitted some 750kg ish springs and new perches, i figure even 3 gn125s is only 330 kg, and i had these springs and some 1200kg ones already, not putting sides on it so wont be carting cubes this also had the added benefit of lowering the deck a couple inches i have chucked on a bit of 4mm alloy treadplate that isnt a good shape/size but will figure something out, will probably go grab another sheet of 18mm ply. needs about 66cm of ramp to give a good run up for bikes, think i will make some up and have them slot in for storage behind the wheels should just about get it good enough with scrap pile bits goal is basic flat trailer that can carry 2 bikes, more tie down points than i would ever need, a box for tie downs. would be nice to be able to store it creatively out of the way, on its side or something3 points
-
In reference to the start of this discussion, which was my car heat soaking (or at least, the IAT sensor heat soaking) at the drags. It's a very simple thing to replicate. Because I can just go for a drive with lots of airflow, do a full throttle run. Then leave the car to sit idling for a significant period until the IAT gets high again (with IAT sensor set to observational only, not changing tune) Then do another full throttle run straight away. Then monitor the percentage of difference in Lambda value of the two runs, and the two idle speed conditions. This will show what the "Real" heat soak value is at each end of the spectrum. Thinking about things a little more though. Since my motor has very high compression, I think it's likely that the heat of compression is probably considerable. So the IAT being 20 or 35 deg probably doesnt make too much difference. From a knock perspective, perhaps IAT isnt that relevant. If that is the case, then it's just adjusting the fuel trim by a % that's needed, based on observational result. Calculations are good for giving a starting point, but observation gives you the sum of all variables, some of which you cant calculate for. From my drag runs, with goal AFR of 12.8:1. In the third gear runs I was just slightly richer of this target. In the first gear runs with heat soaked IAT sensor, I was sitting around 13.2:1 So a definite indicator that the air coming in was cooler than IAT was reporting, so skewing the airmass result. TL;DR: Unplug IAT next time hahaha3 points
-
3 points
-
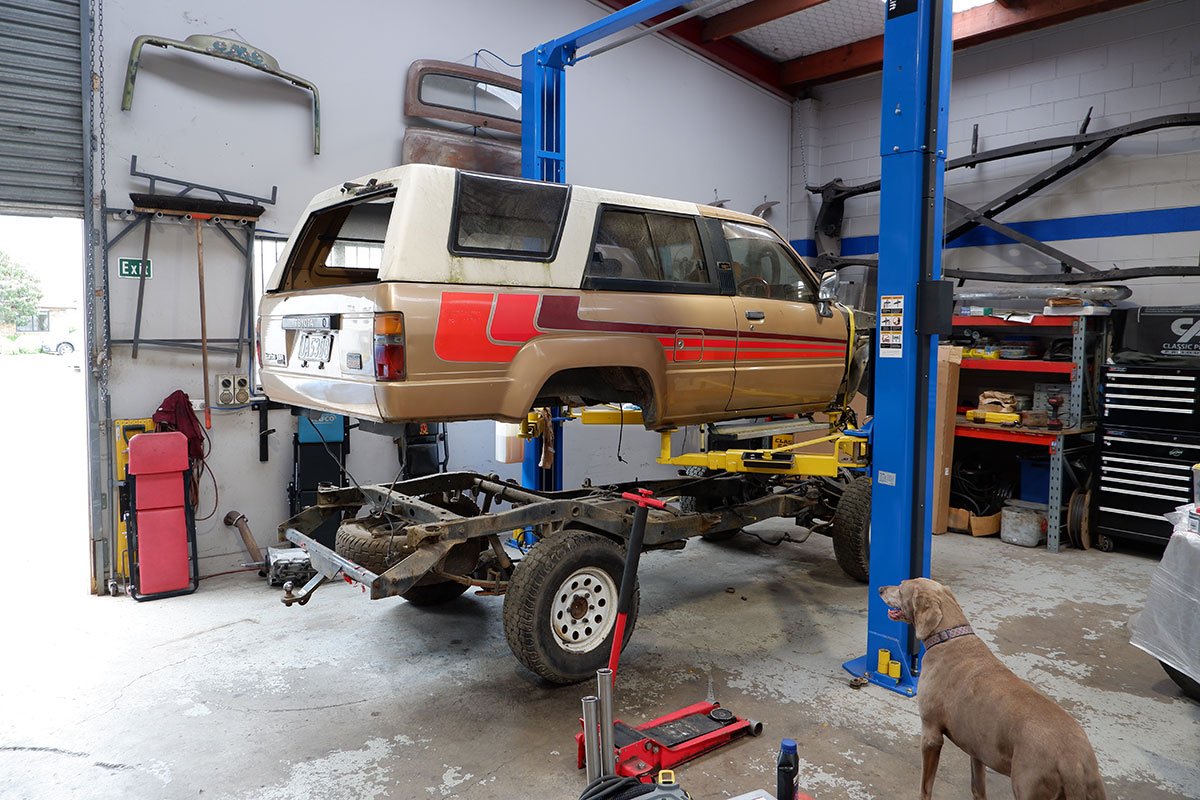
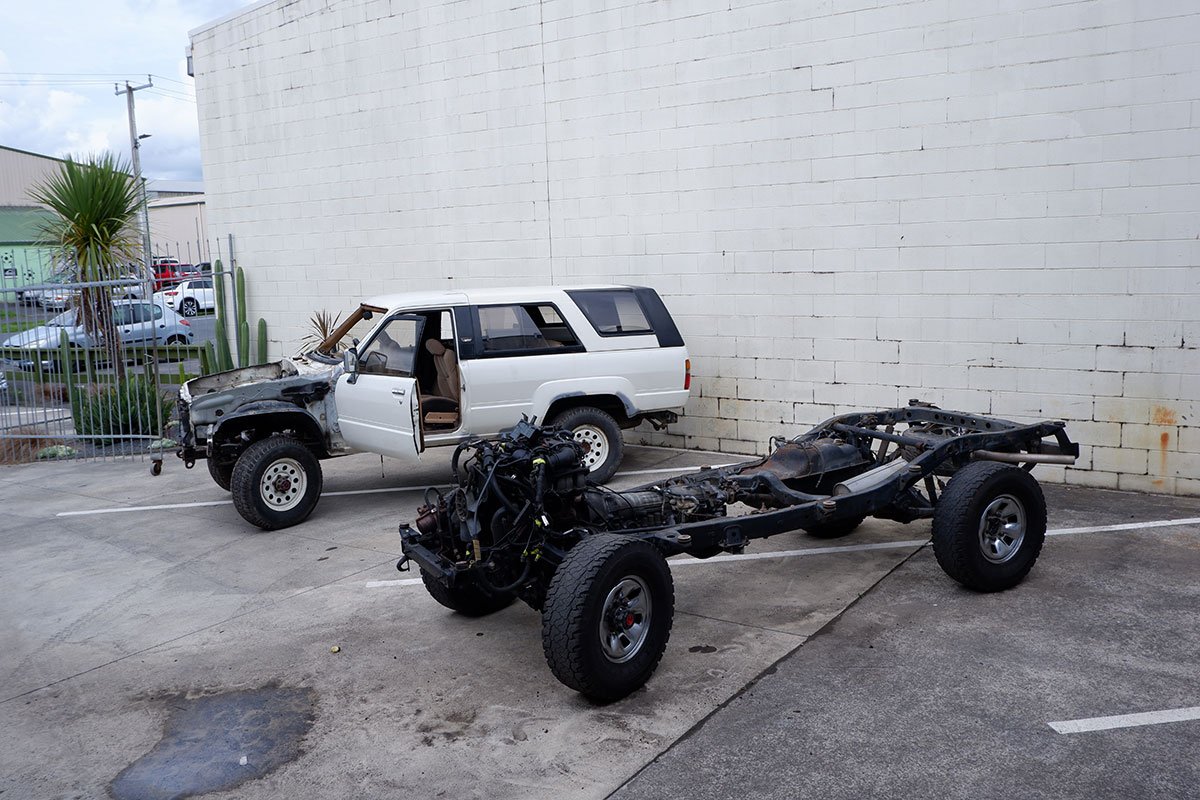
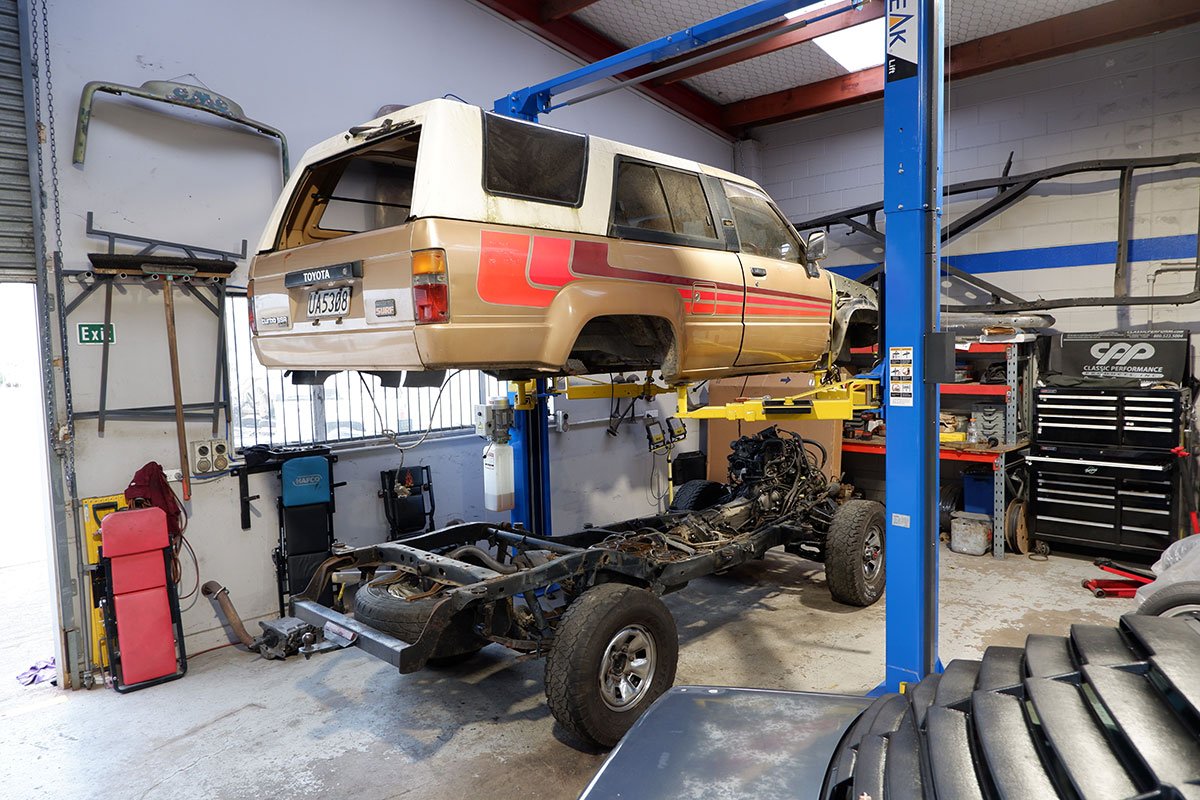
The body swap is done. Reasonably easy with the help of a few GCs. Gave the chassis bit of a clean, probably could have done a better job but hey, better than nothing right!? Plugged everything in with the theory that it would all turn on and start without a problem. It almost did. Just had to fix some dodgee wiring on the engine bay fuse box. That got power to everything, it cranked but wouldn't start. Started thinking the worst but my brother who's an auto sparky found the issue pretty quick, a broken earth to the ECU. Got it started and was stoked. But failed to remember that the radiator wasn't back in and connected and the trans lines pissed trans oil everywhere FFS amateur! Haha ahhh well, needed new fluid anyway.
3 points
-
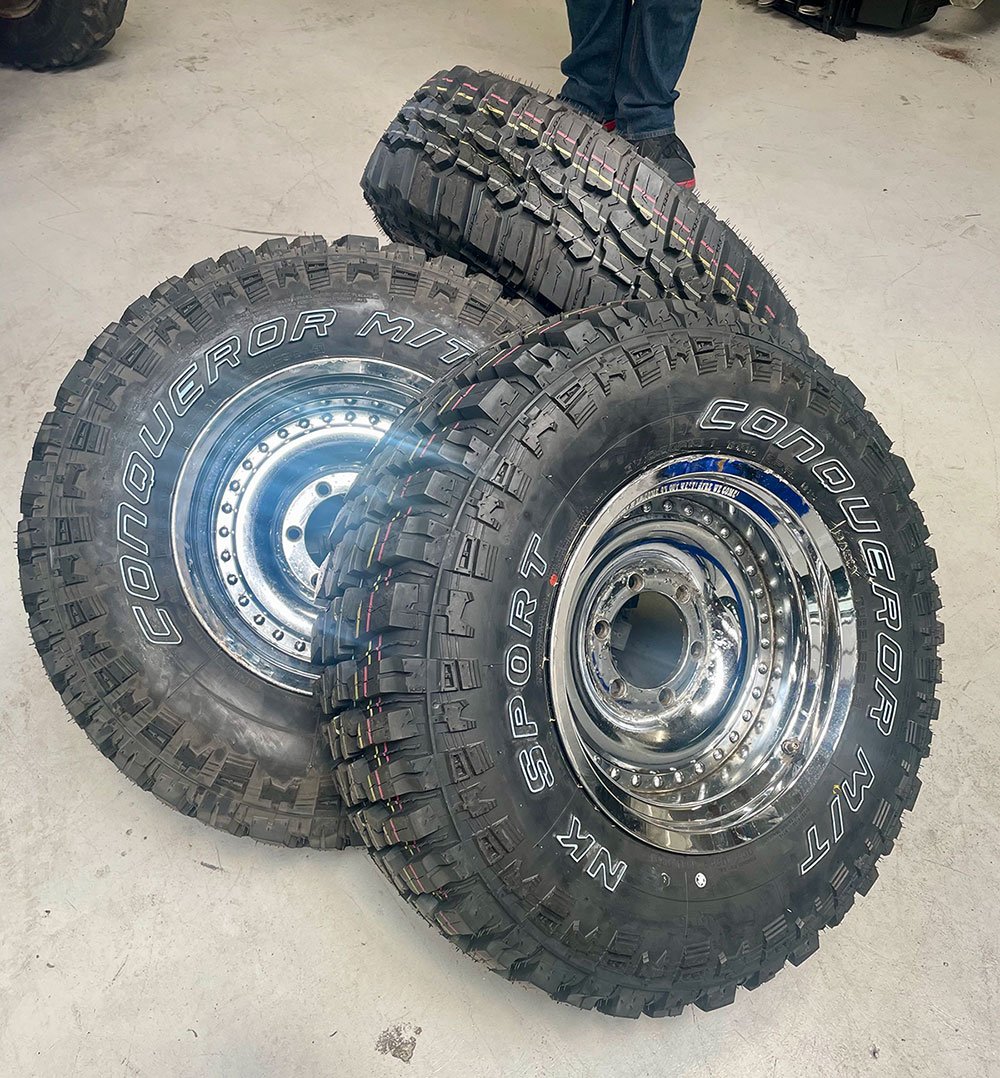
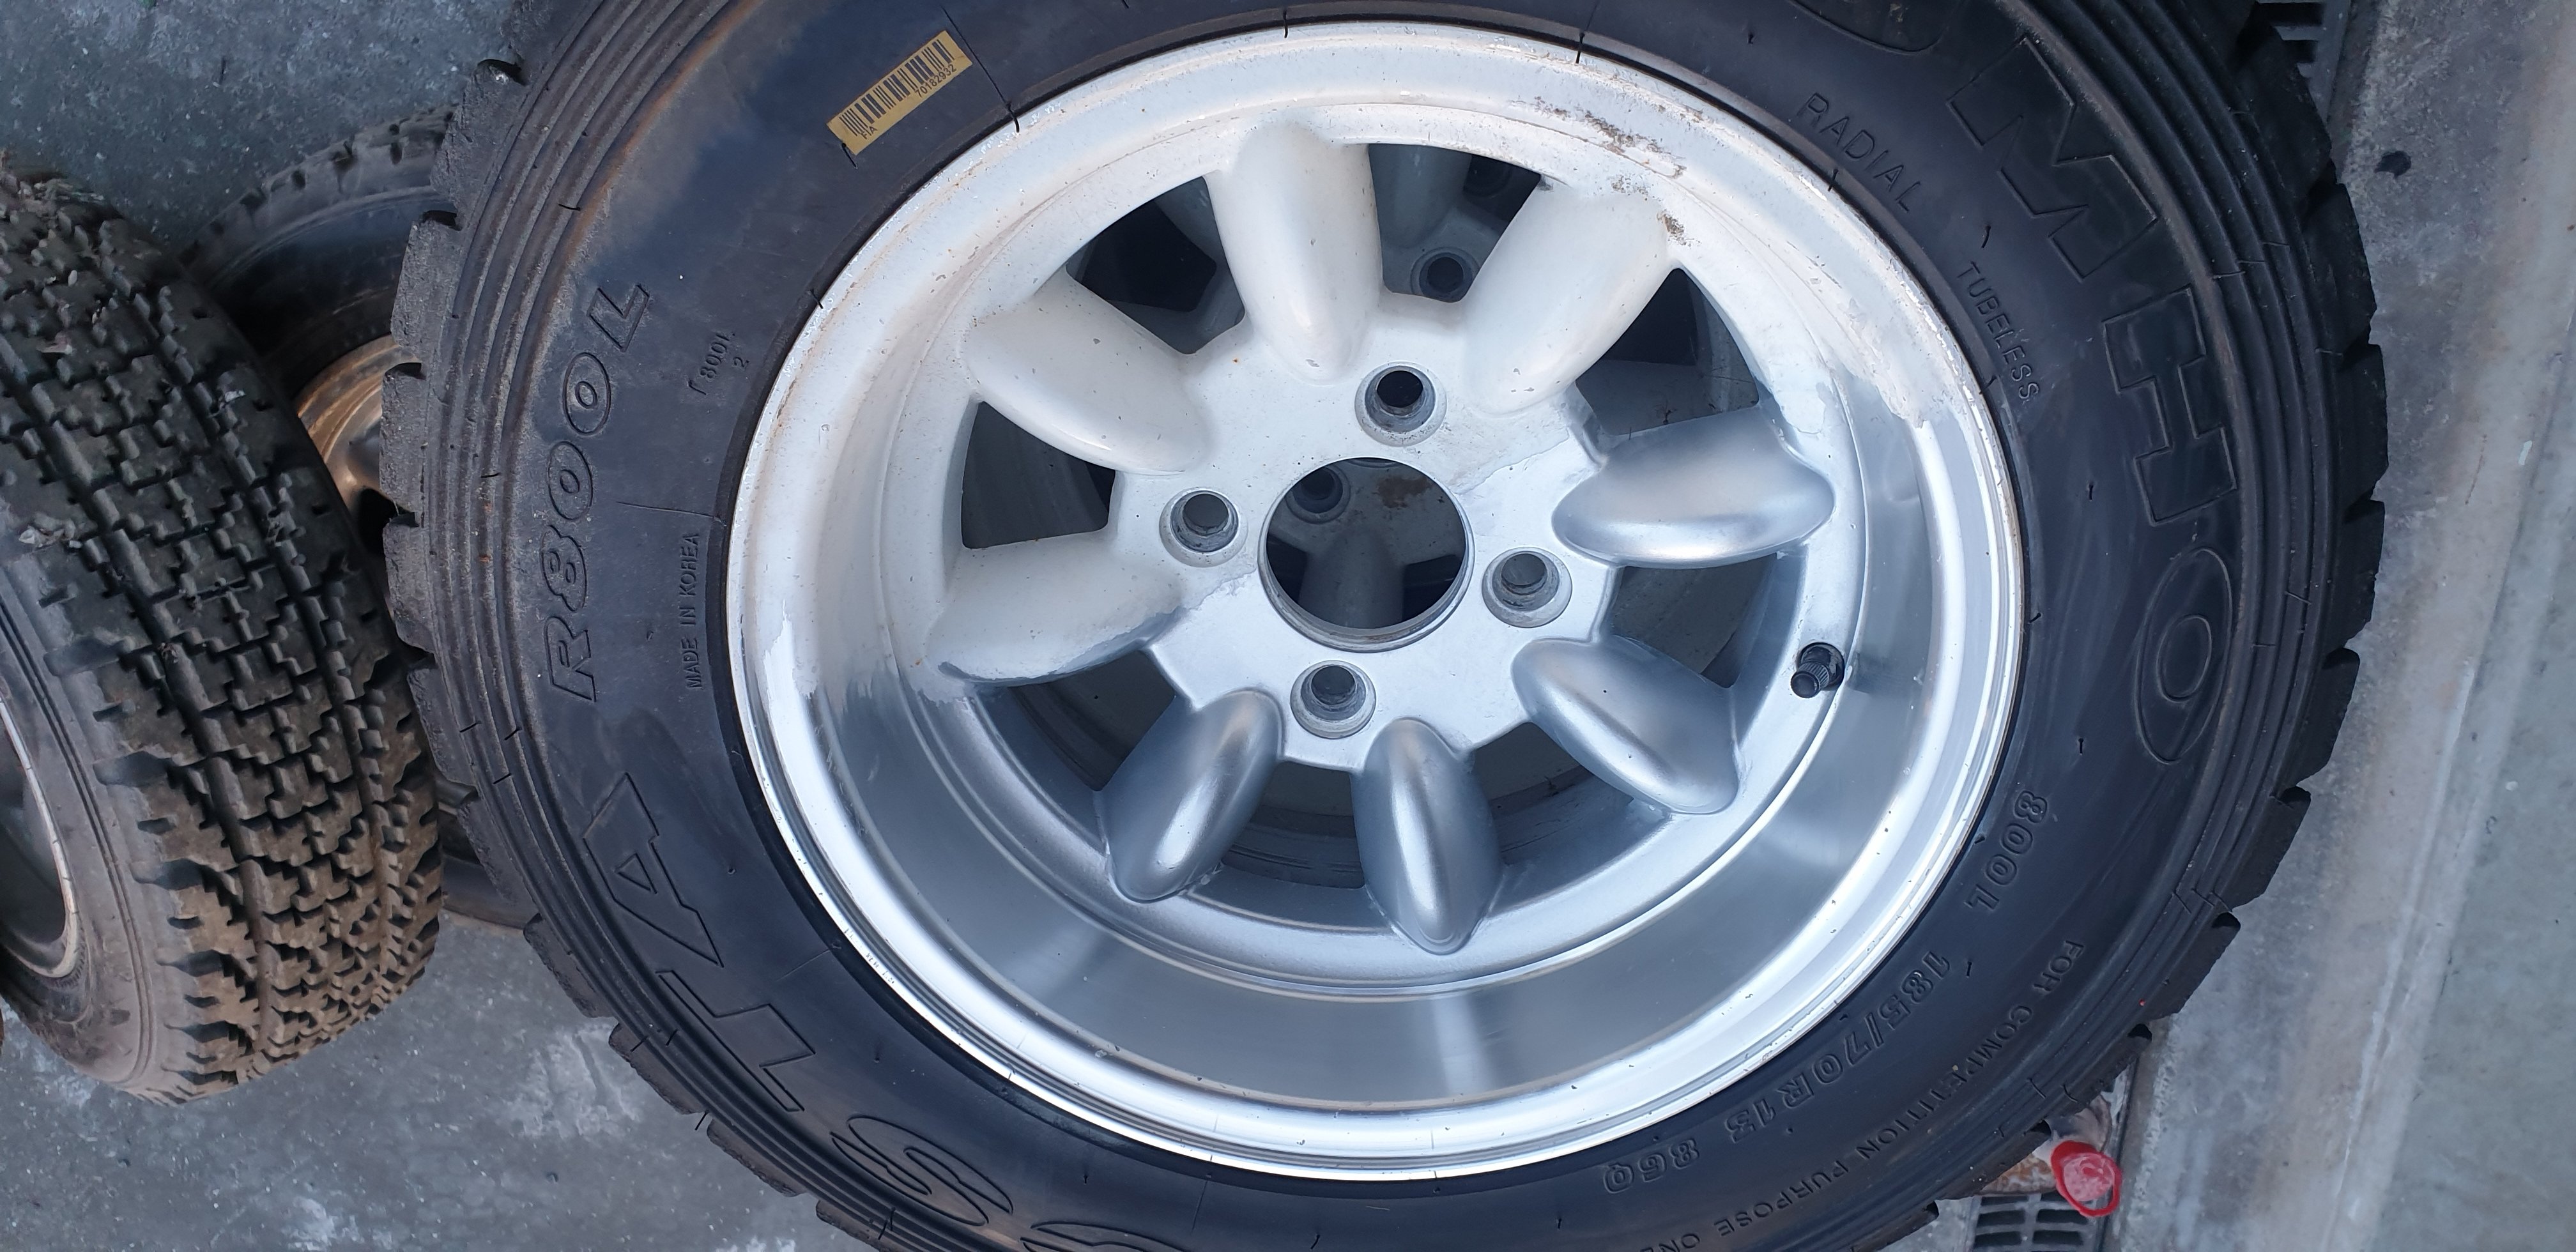
So about 1 year ago I bought a load of wheels and tyres. The tyres are all rally tyres, some second hand and some new. Most of the alloys had been painted with a rattle can white. So last night I thought I'd have a go at cleaning one of them up with some thinners..
2 points
-
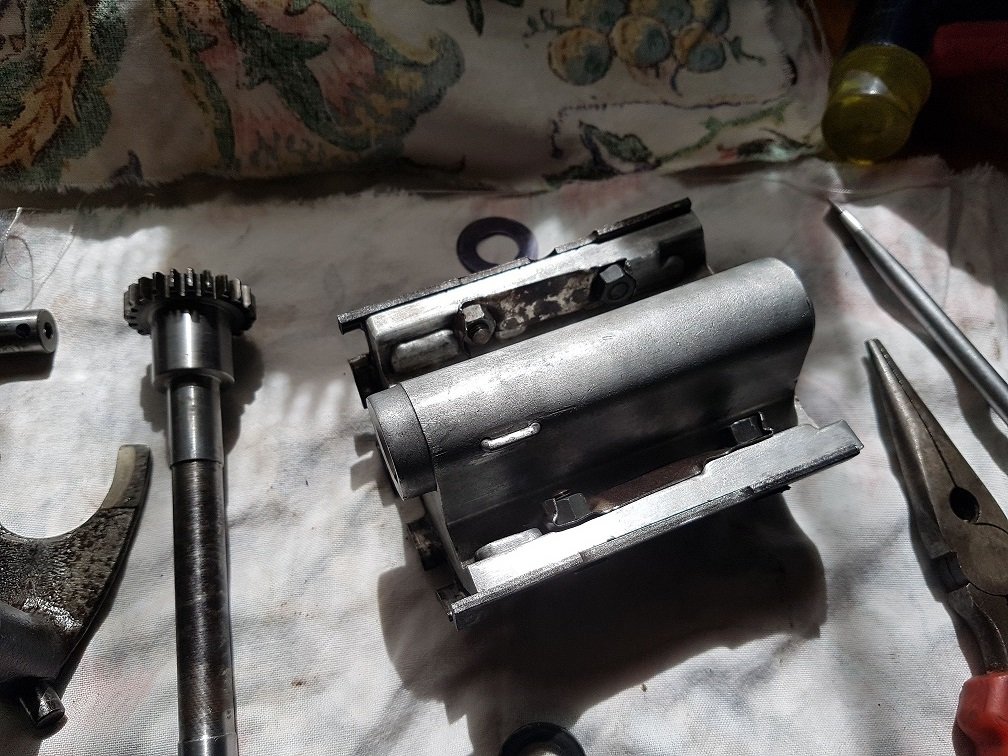
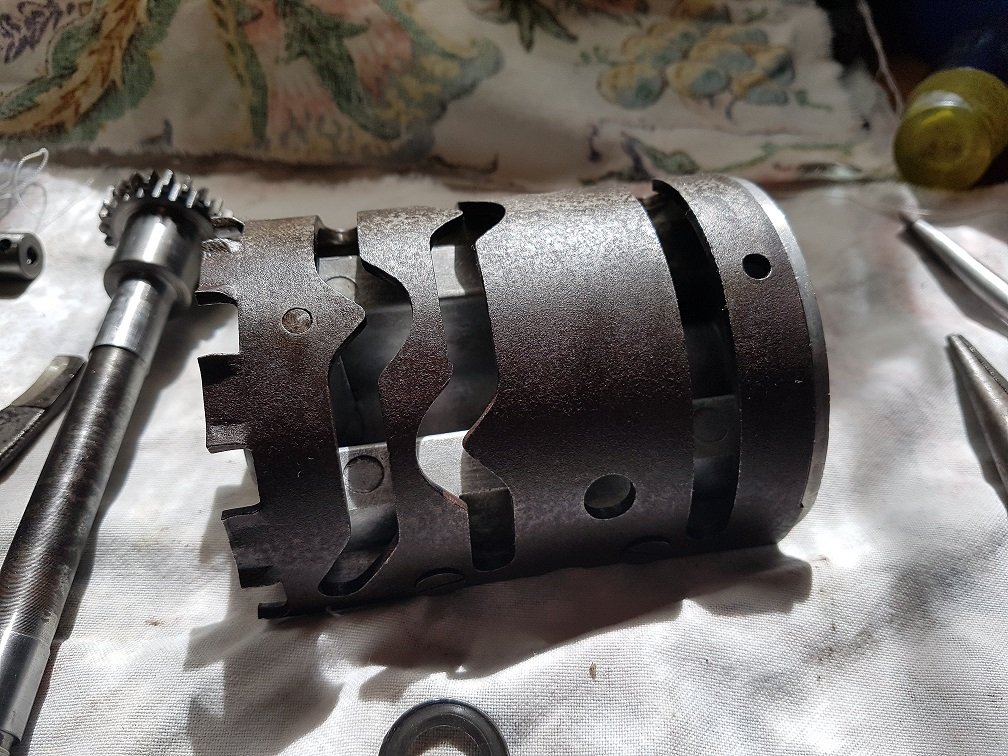
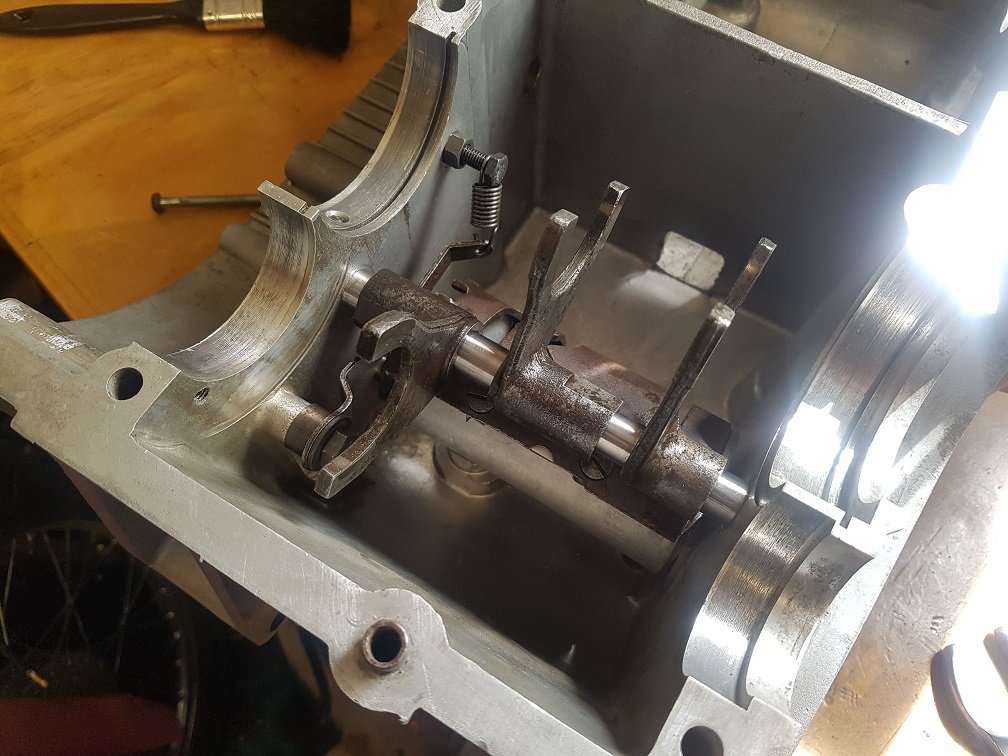
Did some more poking about today. All the gears and all the synchros are (thankfully) in good condition. No chips or missing teeth, so it's only the pinion that has suffered. Sadly I found a second chip on the pinion so thats toast, currently looking for replacements now. The 5th(?) gear was hiding a nasty secret too. The needle bearing had worn into the surface it runs on, so I will need to replace that. It should be smooth like the RH side (it has a needle bearing on either side of the flange in the middle) An almost nekked shaft. Everything needs a damn good clean, there is glitter in everything, and your hands come away black when touching anything. Wallet is open, the next step is going to hurt a lot. Now to wait for parts.2 points
-
^A1 dad there, protecting bubs. Top marks.2 points
-
the injectors i got for it are those ones with a cap on the top and a cap on the bottom to adapt them to different types of fuel rail and different lengths. dont get them. i fought the fucking o rings in the caps leaking for days. if the injector has even a tiny bit of angle to it as you ty and install it they leak. fucking piles of shit. managed to ruin a base seal and i dint have any spares so i had to improvise. i had a larger and thicker ones from a nissan so i set about making them smaller on the od and thinner. 2021-11-21_04-17-12 by sheepers, on Flickr 2021-11-21_04-17-04 by sheepers, on Flickr 2021-11-21_04-16-48 by sheepers, on Flickr 2021-11-21_04-16-33 by sheepers, on Flickr 2021-11-21_04-16-26 by sheepers, on Flickr with that done the only thing left to do was relocate the oil cooler and fit some fans to it. the only fans i could find that were small enough but still waterproof came from the states, they weren't expensive but they took a bit to get here. the oil cooler is now mounted on the side of the chassis rail between the engine and the rail, behind the steering rack. ive been driving it around with a thermocouple in the oil cooler just keeping an eye on the temps. its pretty good and drops fairly quickly as soon as your driving as there's a bit of air flow. so anyway i made a bracket type setup and mounted the fans onto the oil cooler. all i need to do now is wire in the relay and they should work. im back on the dyno on Tuesday so yea, lets see what happens. 2021-11-28_05-10-37 by sheepers, on Flickr 2021-11-28_05-10-31 by sheepers, on Flickr 2021-11-28_05-10-22 by sheepers, on Flickr 2021-11-28_05-10-14 by sheepers, on Flickr2 points
-
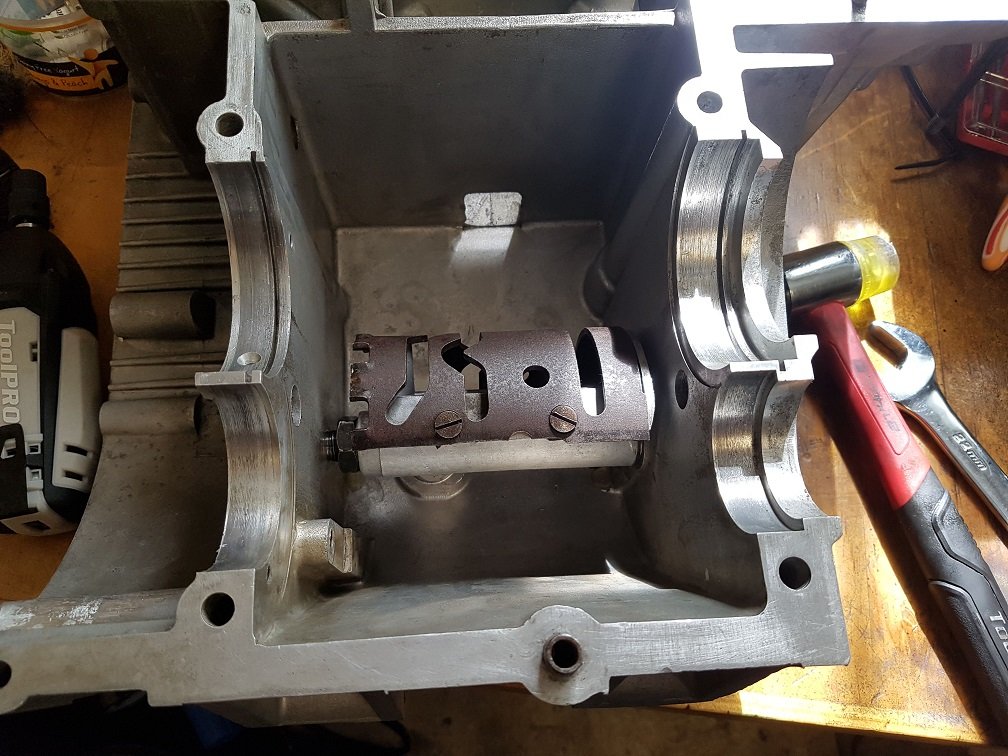
I managed to assemble the gear selector stuff this weekend. And popped in the oil pump. Clicks through all 5 gear positions like a dream. Its all forward from here. Waiting on a tiny needle roller so I can press the bearings on the leyshaft and fit that. And will rebush mainshaft 4th and then the box can go together once and for all!
2 points
-
Hi all . Back in 1992 i built myself a Mk1 Escort rally car, i used this car for a couple of years before barrel rolling it in Woodhill forest at a rallysprint. After sourcing another shell i reshelled the car and did events in it till '99 when i parked it in container while i went on my OE. Fast forward 20 or so years... So after a gentle nudge from my partner that went along the lines of " You should do another rally before you're 50.." So i started to unearth my Escort ( it has been out of the container for about 10 years ). I will try to up load some progress shots as we go. Cheers for following!
1 point
-
I have all three of those. Great combination for fuel economy though. Getting 5.5-6 L/100km around town with current configuration1 point
-
Tin arse1 point
-
Yeah so basically insignificant. I stand by my half track burnout making your car faster statement. After many years of playing with stuff. If you need big compensation your setup sucks mechanically, your car is on fire or you have a efi 4k1 point
-
Not a bad idea. I believe I have a good used replacement sorted along with a replacement main shaft. You can still buy that sleeve new but it's about $90...1 point
-
Oh damn, that would be good But should have enough rubbish here to make one out of1 point
-
Great progress, I don't have much to add but I found installation and removal of the bitch pin (shift linkage roll pin) on my b series honda was easiest with a small g-clamp and a torx bit that would locate down into the pin..I taped a socket to the g clamp foot for the pin to exit in to.. Also don't overtighten the through bolt for the gear lever where it attaches to the shift linkage..1 point
-
I'm enjoying the 3rd party fwd pain, good jerb keep it up1 point
-
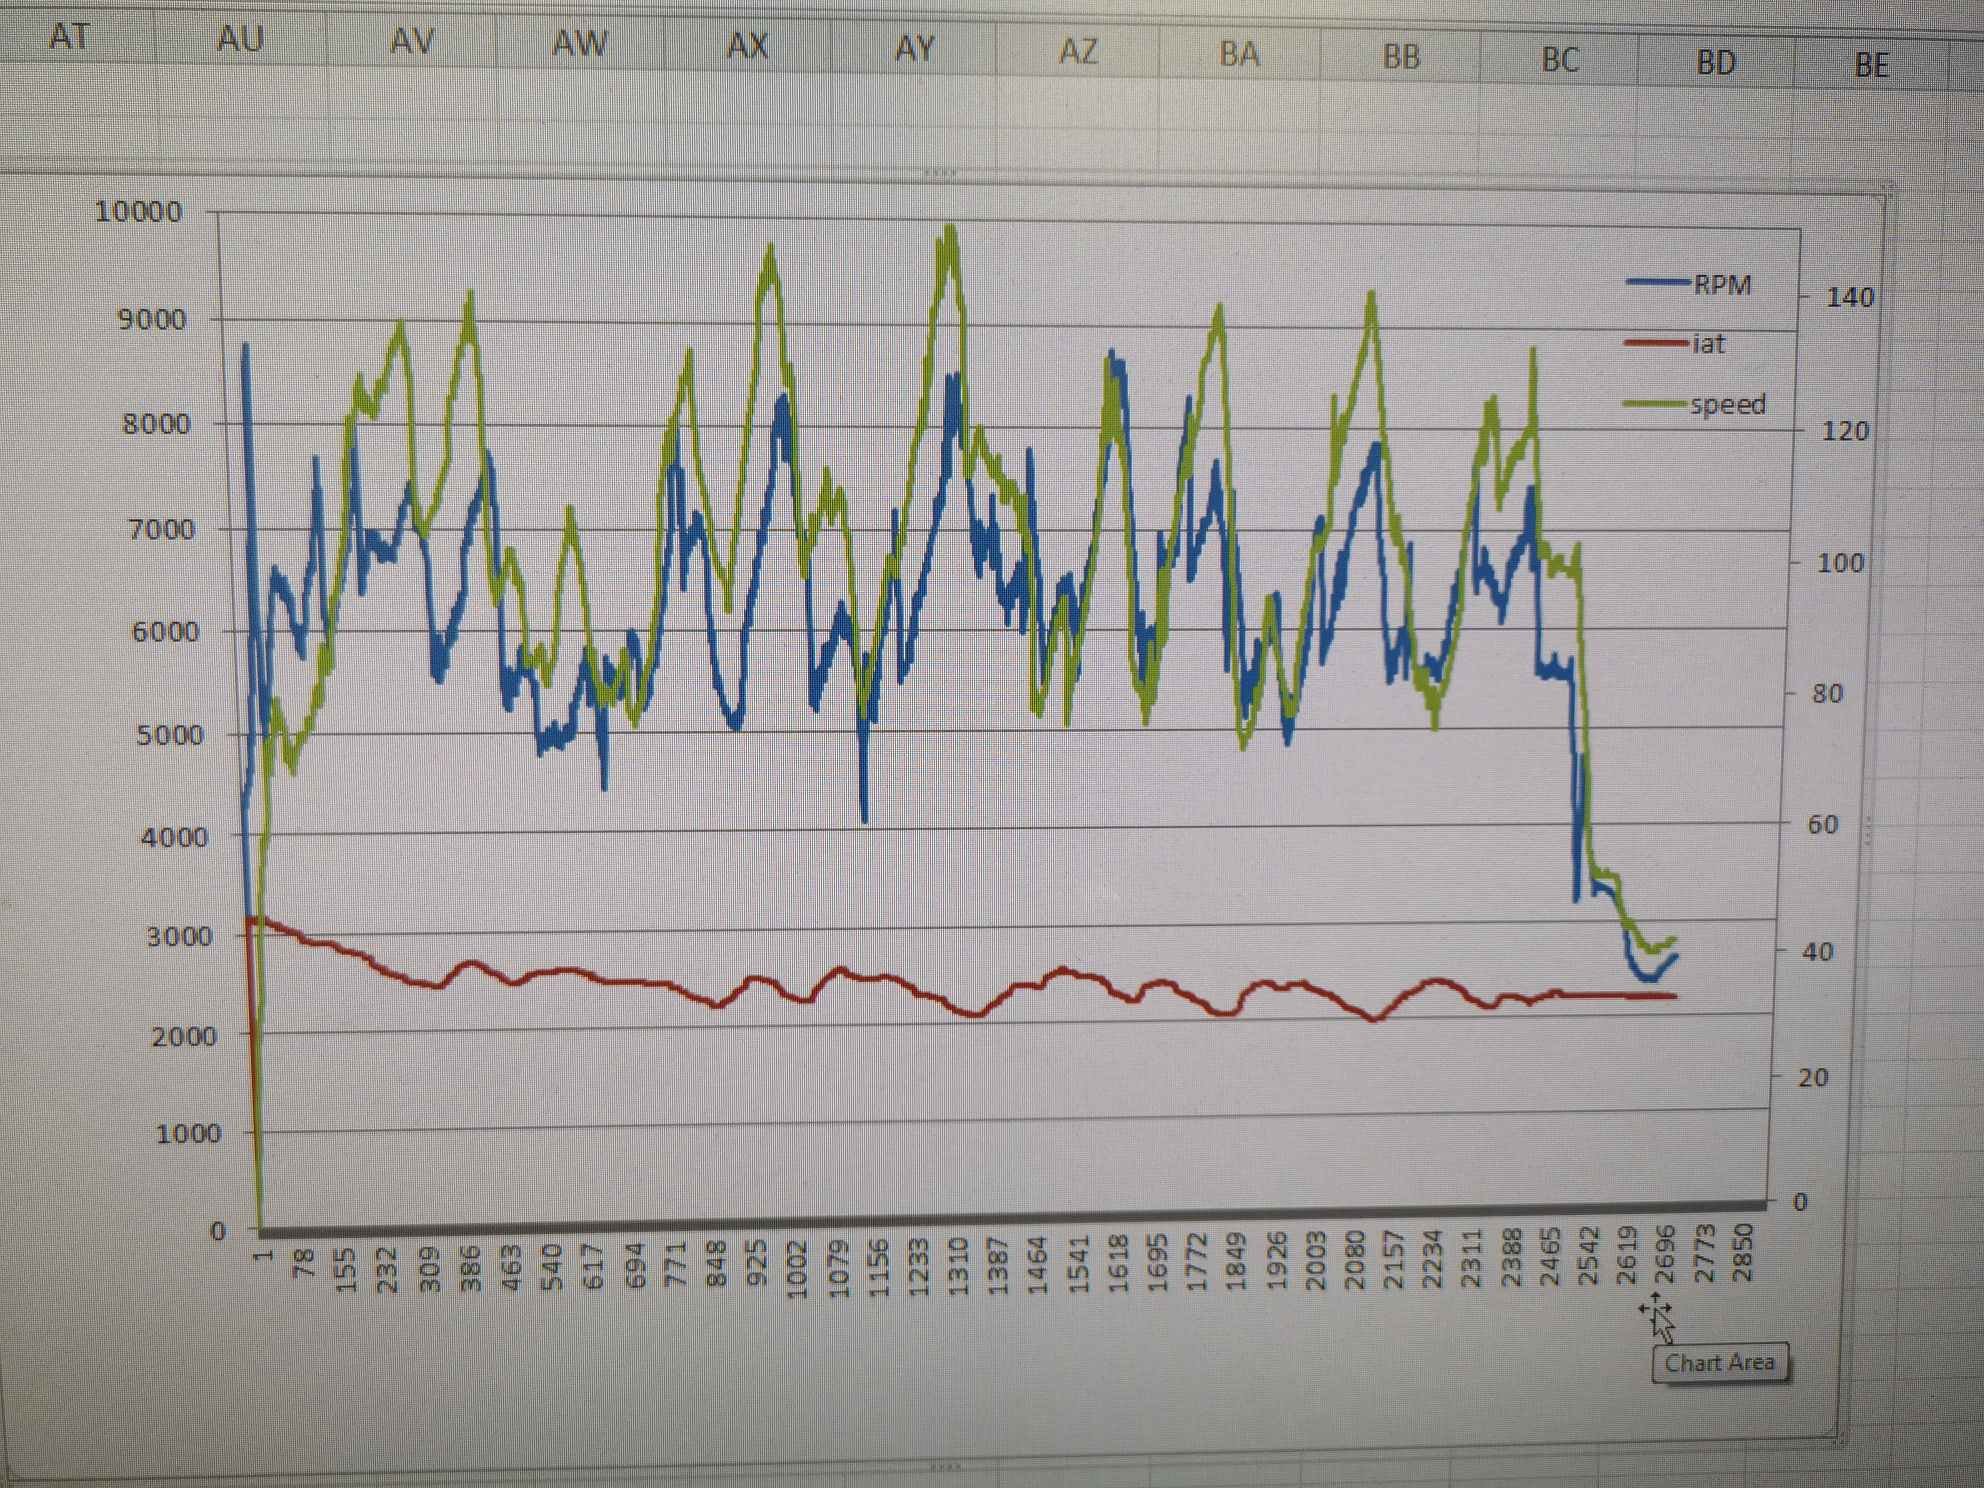
Also Ling, my Honda yesterday over about 2min 45 seconds at Golden cross hillclimb. Rpm plus iat and speed. Also I have a pair of used 225 45 15 nankang ar1 for free if you want them.
1 point
-
This is exactly what happened with my son's car. No documentation at all their end. They just gave us the key. We took the car and did the change on line when we got home.1 point
-
In an effort to fix the reason for its failure to proceed, it was time to drop the gearbox and pull it to bits. I had my suspicions as to why the axle popped out a couple of months back, so opened my wallet and ordered all the seals, bearings and a clutch needed to make the gearbox reliable. The early turbo boxes like mine have an additional Achilles heel, the Type A Torsen differential center. These are known for shearing the flange the bearing is mounted on and ruining the diff. Not knowing if this had happened to mine did play at the back of my mind a lot, but I wouldn't know until the box was out if it was any good or not. The alternative is to find a Type B center from a later turbo car (620ti usually, and almost unobtainium in NZ) or upgrade to a bulletproof Quaife center, at significant cost. I chose to wing it, and not order the diff initially, with the hopes my Type A was still good. I had some reason to hope it was OK, and it wasn't just cost. These cars were well known during their reviews for having really aggressive grip characteristics due to the very agricultural Type A diff center. It was very grabby and pulled hard. A true ditch-finder. I really wanted the car to have this characteristic, as it's part of the charm of the 220 Turbo for me. Other than playing musical cars occasionally, the Tomcat hasn't been driven due to the risk of further damage, and/or becoming stranded again. The other night I swapped the Marina to the other side of the garage and pulled the Tomcat into the garage ready for some surgery. You know this is going to be a serious job when for the first time since I got it, the tool trolley is dusted off and used for tools, not for storing junk. The first job was to remove a bunch of things that would be in the way, such as the battery and its tray, the air filter and pipe, and the cold side boost pipe. Next, the clutch cable gets disconnected. This was a bit of a pain, you need to pull the cable end out/down slightly and slip the wire through the gap in the lever and then the cable pulls free from the bracket. Next was the reverse light wires And then the ground strap needs to be removed, down on the front corner. Around the back, the speedo cable needs to be disconnected. This has a rubber boot covering a spring clip. remove the clip and the cable pulls out of the sender. Unfortunately, my sender is seized in the gearbox and won't pull out, so I'll deal with that later. Whilst there, the starter needs to come out too. There should be a bolt on the top, and a bolt/nut on the bottom. Mine was missing the bottom bolt, clearly, the previous owner thought the top one was good enough. You don't need to remove the wiring, there is enough slack to rest the starter up the front on the battery tray bracket. Next I lifted the car up on Quickjacks and set about draining the oil. A couple of clicks as something metallic hit the bottom of the container made this job very reassuring. Despite doing literally 2-3KM on the oil, it was very dark and had a lot of floating "organic" material (old burnt oil, as I found out later) in it. I drained this through a cloth to see what came out... Well, it wasn't bits of bearing like I expected. Looked much more like bits of teeth.... The shifter assembly was next. This is held in place with a bolt on the front of the steady bar, and a roll pin through the selector UJ. I knocked the roll pin out with a round punch that was slightly smaller than the hole the pin is in To completely remove the assembly (as I am, to also replace the UJ pins and bushes) there are two bolts in the rear mount too. Remember to remove the shift knob first, so the shifter can pull through the rubber boot. The steady bar on the bottom front of the gearbox needs to be removed. There is one bolt through the big bush at the front and then two bolts holding the mount to the gearbox Both axles are next on the list. To remove these I removed the lower arm bolts from the front subframe, disconnected the swaybar from the lower arms and then removed the front tie bars from the lower arms. This allows the lower arm to pivot away on the balljoint and let the hub swing out enough to allow the over CV to be removed from the hub. The Inner CVs popped out from the gearbox with a quick jab of the pry bar. The RH one (the one that popped out previously) was very easy to get out, as if the circlip was not engaged...) Unfortunately with the shaft removed it is clear the end of the splines was damaged when it popped out, as they are worn almost complete smooth. The Circlip is also very worn. In comparison, the LH shaft has very sharp splines. Before going too much further, remember to losen the big plug on the end as it is done up tight AF. I used a large hex socket and the rattle gun, and even then it took a bit to crack free. Do note there will be oil behind this plug and will drain when removed. The rear stabiliser mount needs to be removed next. There is one large bolt through the gearbox side of the mount, and then the bracket has two more bolts to remove. These are easy to access from the front of the car The front mount needs to be unbolted next. Before you can do this you need to support the engine. I used a engine support bar over the top, bolted to a spare hole in the head, but people tend to use a jack with a block of wood under the sump. Now the two bolts through the gearbox can be removed, and the one down through the top of the mount (far left of image). This cover over the mount is a real bastard. I can't see any way to remove it with the coolant pipe and turbo in place. Since I already had the tie bars off, it was only a further 4 bolts and the whole front subframe comes down, front mount and all. It needed a good cleaning anyway. This also makes it a lot easier to remove the gearbox as there is more space. I'd recommend removing it. Before you can remove the final, blue, bolt, there are two more on the back of the gearbox that need to be removed. Be careful, because once they are removed the gearbox will start to move as it's only being held with one bolt at the top. I find it interesting that other than the blue bolt, every other bolt in the bellhousing serves a double function, either holding a bracket for a mount, or the starter. Now, I'm bit of a weirdo so I wouldn't recommend how I got the gearbox out. I'd recommend using a transmission jack and maybe a second person. The gearbox isn't too heavy, but it's weighted really weird (diff is heavy so it tilts backwards). I put the jack under the gearbox, and undid the blue bolt. With one hand I reached through the starter hole and held the top of the bellhousing, and with the other I manipulated the jack. It came free from the engine easily, and then it was a case of lowering the jack and guiding the gearbox down. Once down, I rolled the gearbox onto my creeper so it could be transported to my dedicated gearbox stripping area at the back of the garage (or, a workbench that is strong enough, which I cleared for the occasion). Oh hello clutch. Your days are numbered... A quick lift up onto the bench, and this is what we have. A Rover PG1 gearbox. Quite a small box, considering. The crucial label, showing its a legit 220 Turbo box And the small light as the end of the tunnel, signifying the Type A Torsen center The bellhousing is COVERED in grime. I believe most of this is from oil leaks above the gearbox I also believe this little bastard is the source of the low oil level. One of the lowest points in the box, and covered in oil inside and out. A new selector shaft seal will be fitted (and hopefully a new boot if it arrives in time). Chunks inside the RH side of the diff. I'm not sure if these are from the shredded splines or the diff internals More chunks behind the big plug. Just a sign of things to come First view of the diff bearings. Popped the seal out and had a look. Some more metal chunks behind the seal, but the bearing cage (brown plastic ring) is intact. The other side was more of the same So, no broken bearing cages as I had expected. Now it was time to lift the casing off. Remember to remove the reverse gear idler bolt And then remove the speedo sender (if still fitted) and reverse light switch. After that, gently pry the casing up. It will still be held with the circlip inside the hole the big plug was covering, but we need to put some tension on it. And then using a pair of circlip pliers, spread the circlip apart whilst lifting the case. Some wiggling should have the circlip pop out of the groove and rest on top of the bearing. It'll be obvious when its come free. The case will just lift off now. This was my first glance at the internals of the box. Everything looked more or less as expected, except the magnet... It's been working hard! It's hard to see but the casing is also coated on the inside in brown, burnt, oil residue. This box has been treated badly for a while I stripped the casing by removing the reverse gear assembly, shifter and then finally the main gear clusters. Before I could remove the diff I needed to remove the speedo drive. This is very seized. It took a lot of WD40 and hitting with punches and chisels to first get it to rotate in place and then pry out. I cant seem to completely remove it, but it was enough to clear the diff. With the diff removed, I could confirm both of the bearing flanges were intact. It was promising, but the relief was short lived. Back to that in a moment, first, the bearings. That's some unhealthy bearings! I suspect all of them have suffered both with low lubrication, but also had metal going through them. This is a good thing though, I have replacement bearings on hand. It also confirms the noises I had been hearing, especially in neutral. Now, the bad news... the diff is buggered. Not in the way I had expected, no, that would be too easy. For some reason there has been an internal failure and there is a significant amount of axial play in one half of the diff (the side the axle popped out of, which is no surprise). So sadly that is the end of the Type A Torsen diff. I don't know what has happened, or how it happened (low lubrication is still high on the list) but something is seriously flogged in that center. I haven't quite worked out if all the metal is from the diff or not. I had a good look around and the only other damage I could find was a small chip out of the pinion gear All other gears have all their teeth, the needle bearings spin smoothly, and the synchros arent burred over. As there was no noise when I drove the car, I think I will knock the sharp edges off the chip and continue using it. I can only suspect, that with only 113,000km on the clock, if the oil had been kept topped up, this gearbox would still be fighting fit. But sadly no, it falls on me to open my wallet and get this thing back on the road. It has been suggested instead of throwing money hand over fist at this thing, that I either sell it for parts or scrap it. I can categorically say that no, neither of these things will be happening. This car, although neglected by a couple of previous owners, is a good solid low mileage car. It will always need more and more work to keep it on the road, but you have to expect that with a Tomcat (or 90s Rover), but it would be a travesty to see this thing scrapped and there aren't enough around to pull another one off the road and part it out. So, for now, everything is at a dead halt. I need to order a Quaife diff, and a new RH drive shaft or inner CV. Until they show up, the car is stuck taking up precious garage space and other than cleaning, there is nothing more I can do on this job.1 point
-
Last update for a while probably. I am so chuffed with this car at the moment. I love it. It rides well with the new shockies, runs well and the wideband is sweet for keeping an eye on stuff, its just done a trip to kaikoura and back flawlessly with my mate and his MGB. I'm gonna drag the missus triumph out now and work on that and hopefully just be able to enjoy this as is for the summer.
1 point
-
Had some professional photos taken on Friday as a bit of promo work for @jeffsemporium Really happy with how they've turned out
1 point
-
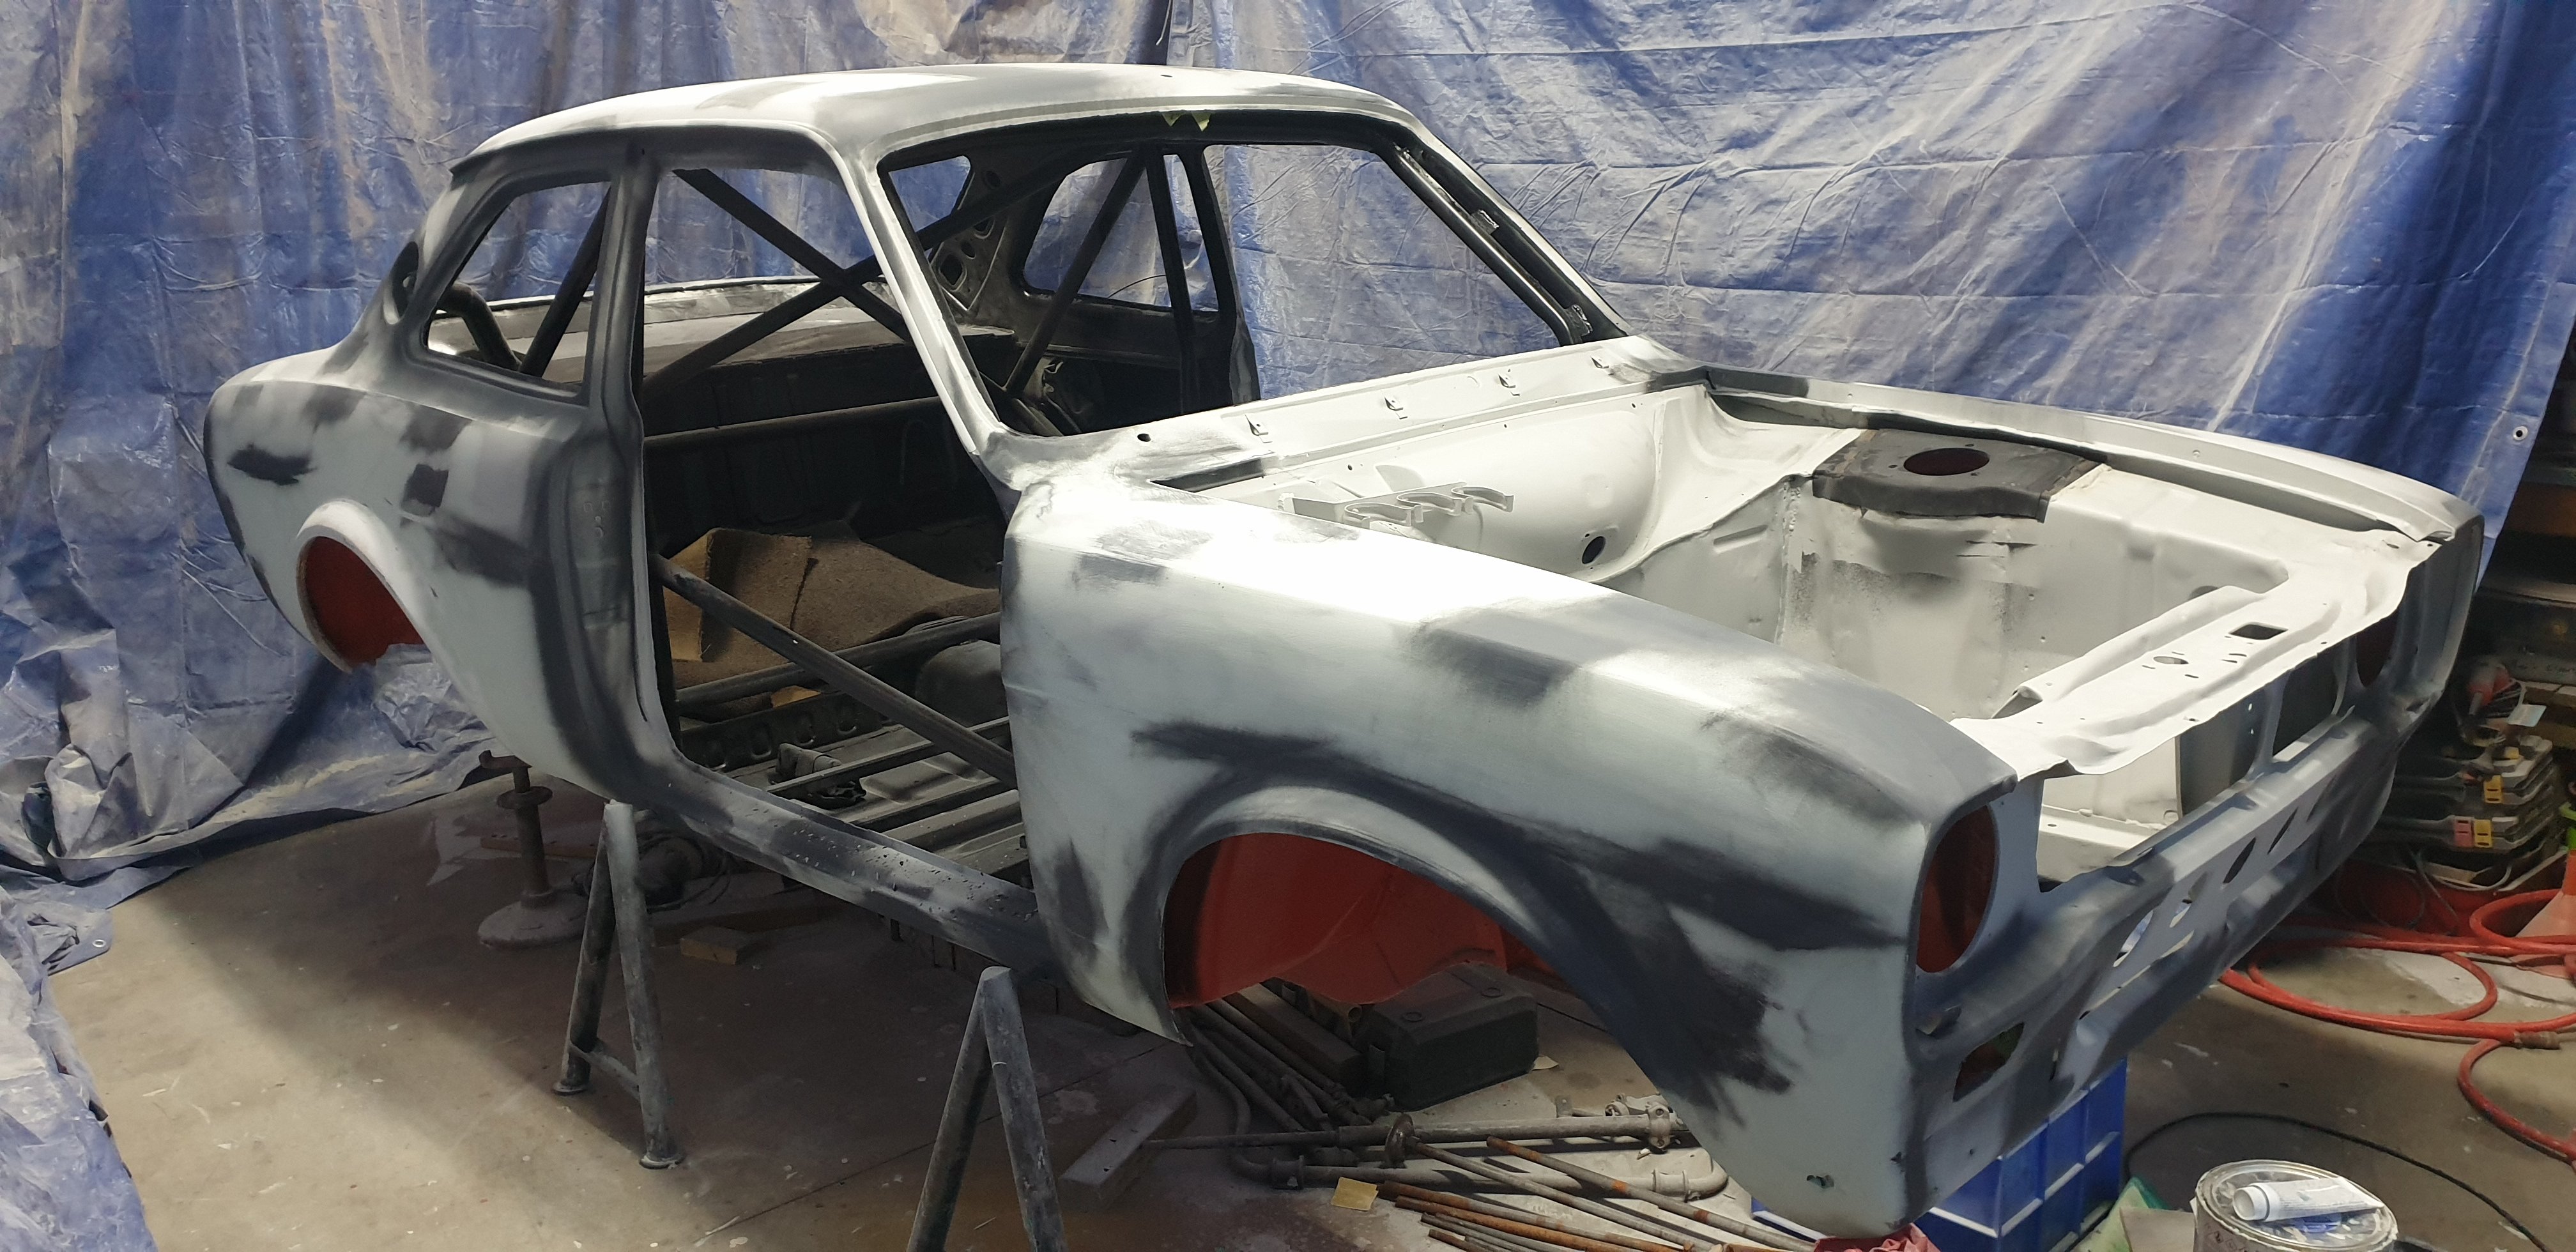
Aaaaaannnnddddddd.... The other thing that happened today was the panelbeater was here for another 8 hours.... The exterior of the shell is now ready for a few coats of high build primer...
1 point
-
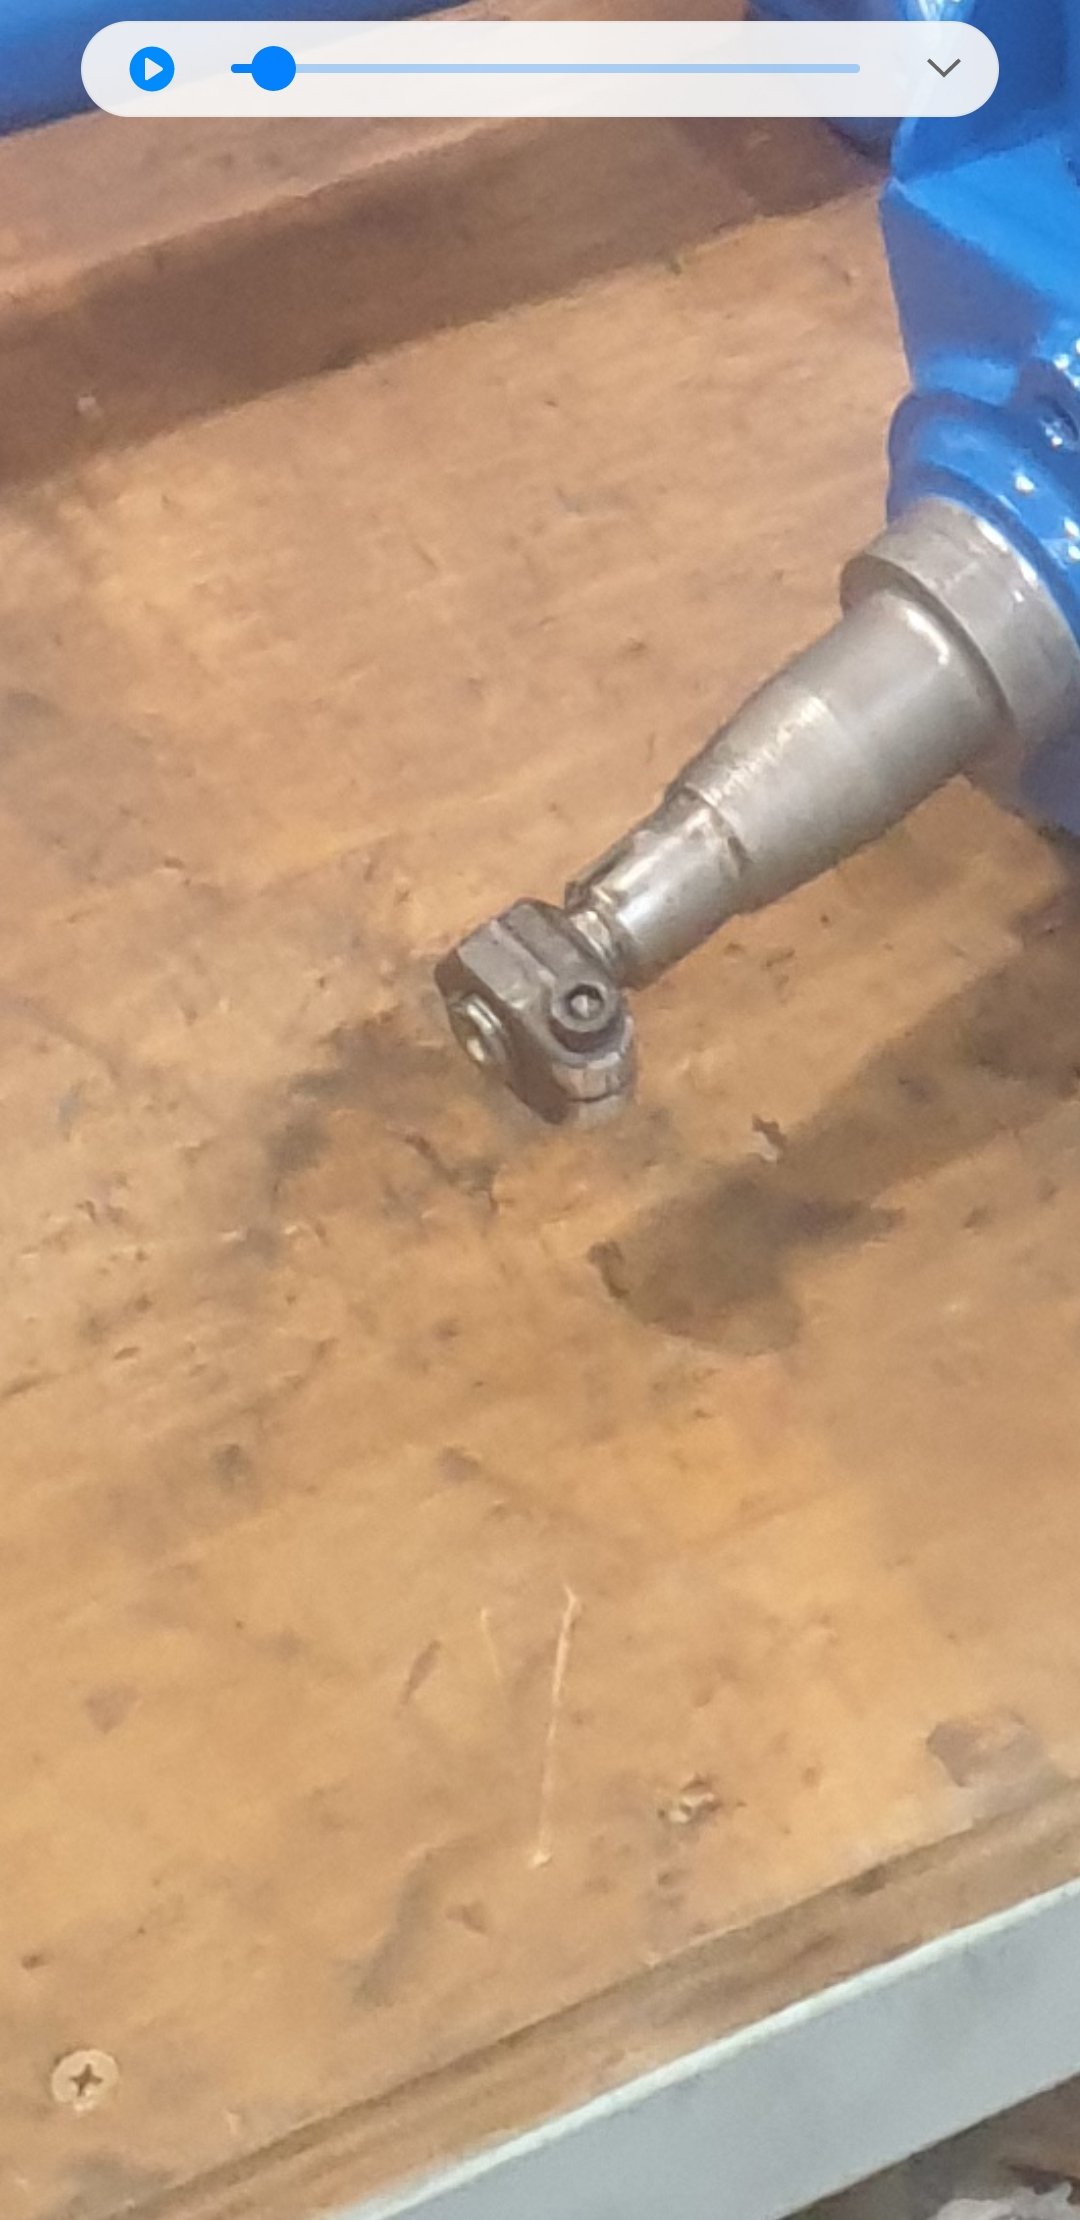
For those of you eagle eyed followers that may have spotted the strange nut on the stub axle.....
1 point
-
Massive thanks to @fletch who came up with the goods. Trip to NP this weekend to pick it up!1 point
-
Workmates doing similar dec/Jan with an xl125. I'll borrow/ buy it off him. Also depends if I am able physically1 point
-
Us fullas (covid permitting) coming from Auckland liked the idea of starting from somewhere we could ride to after flying in. We had a friendly depot in ChCh so we could ship bikes ahead of time. ASSume there will still be vehicles coming from ChCh so we could travel to starting point with them if we can get enough seats that will be ace. Pretty sure it will be @Tumeke @sentra @slacker.cam @peteretep If not all good - we can look into other flights/shipping options if the start point changes to see if that's possible / affordable / not stink providing we get enough notice to book stuff.1 point
-
From what I've heard and read, you can ride from Hanmer to the cobb cottage where we had lunch, but go no further. Roadworks is more at the Blenheim end, with local access only. Could ride to cottage from Hanmer, camp the night there or back to Hanmer. Day 2 Rainbow and then there's plenty of other rides between St Arnaurd and Nelson like Mt Robert, Inwoods Lookout, Porika track, etc Stay night at St Arnaurd and go back through Rainbow. Plenty of options to compensate for no Molesworth. There used to be a pushbike race called the Rainbow Rage, we could steal that name...1 point
-
Shizer it's been a while and cringe at my old posts. Anyways, I chucked a blanket over this and shut the garage while I did other things for a couple of years. Lockdowns meant pulling the blankets off, I got it running on the factory intake so was motivated again. Rear screen rubber in, stainless trims fresh and polished, random clips from russia and its now airbagged using accuair control with airlift struts. It drives well around the hood and I'm slowly getting more confident on going further. I never drove this car so was a big moment. Next on the list is sorting my rear wheels as they are a bit wide for frame laying and then a bespoke itb manifold from Mr Whitley tune. Pic courtesy of Simon when it was picked up a few weeks ago. Il take some when I get the trims back on.
1 point
-
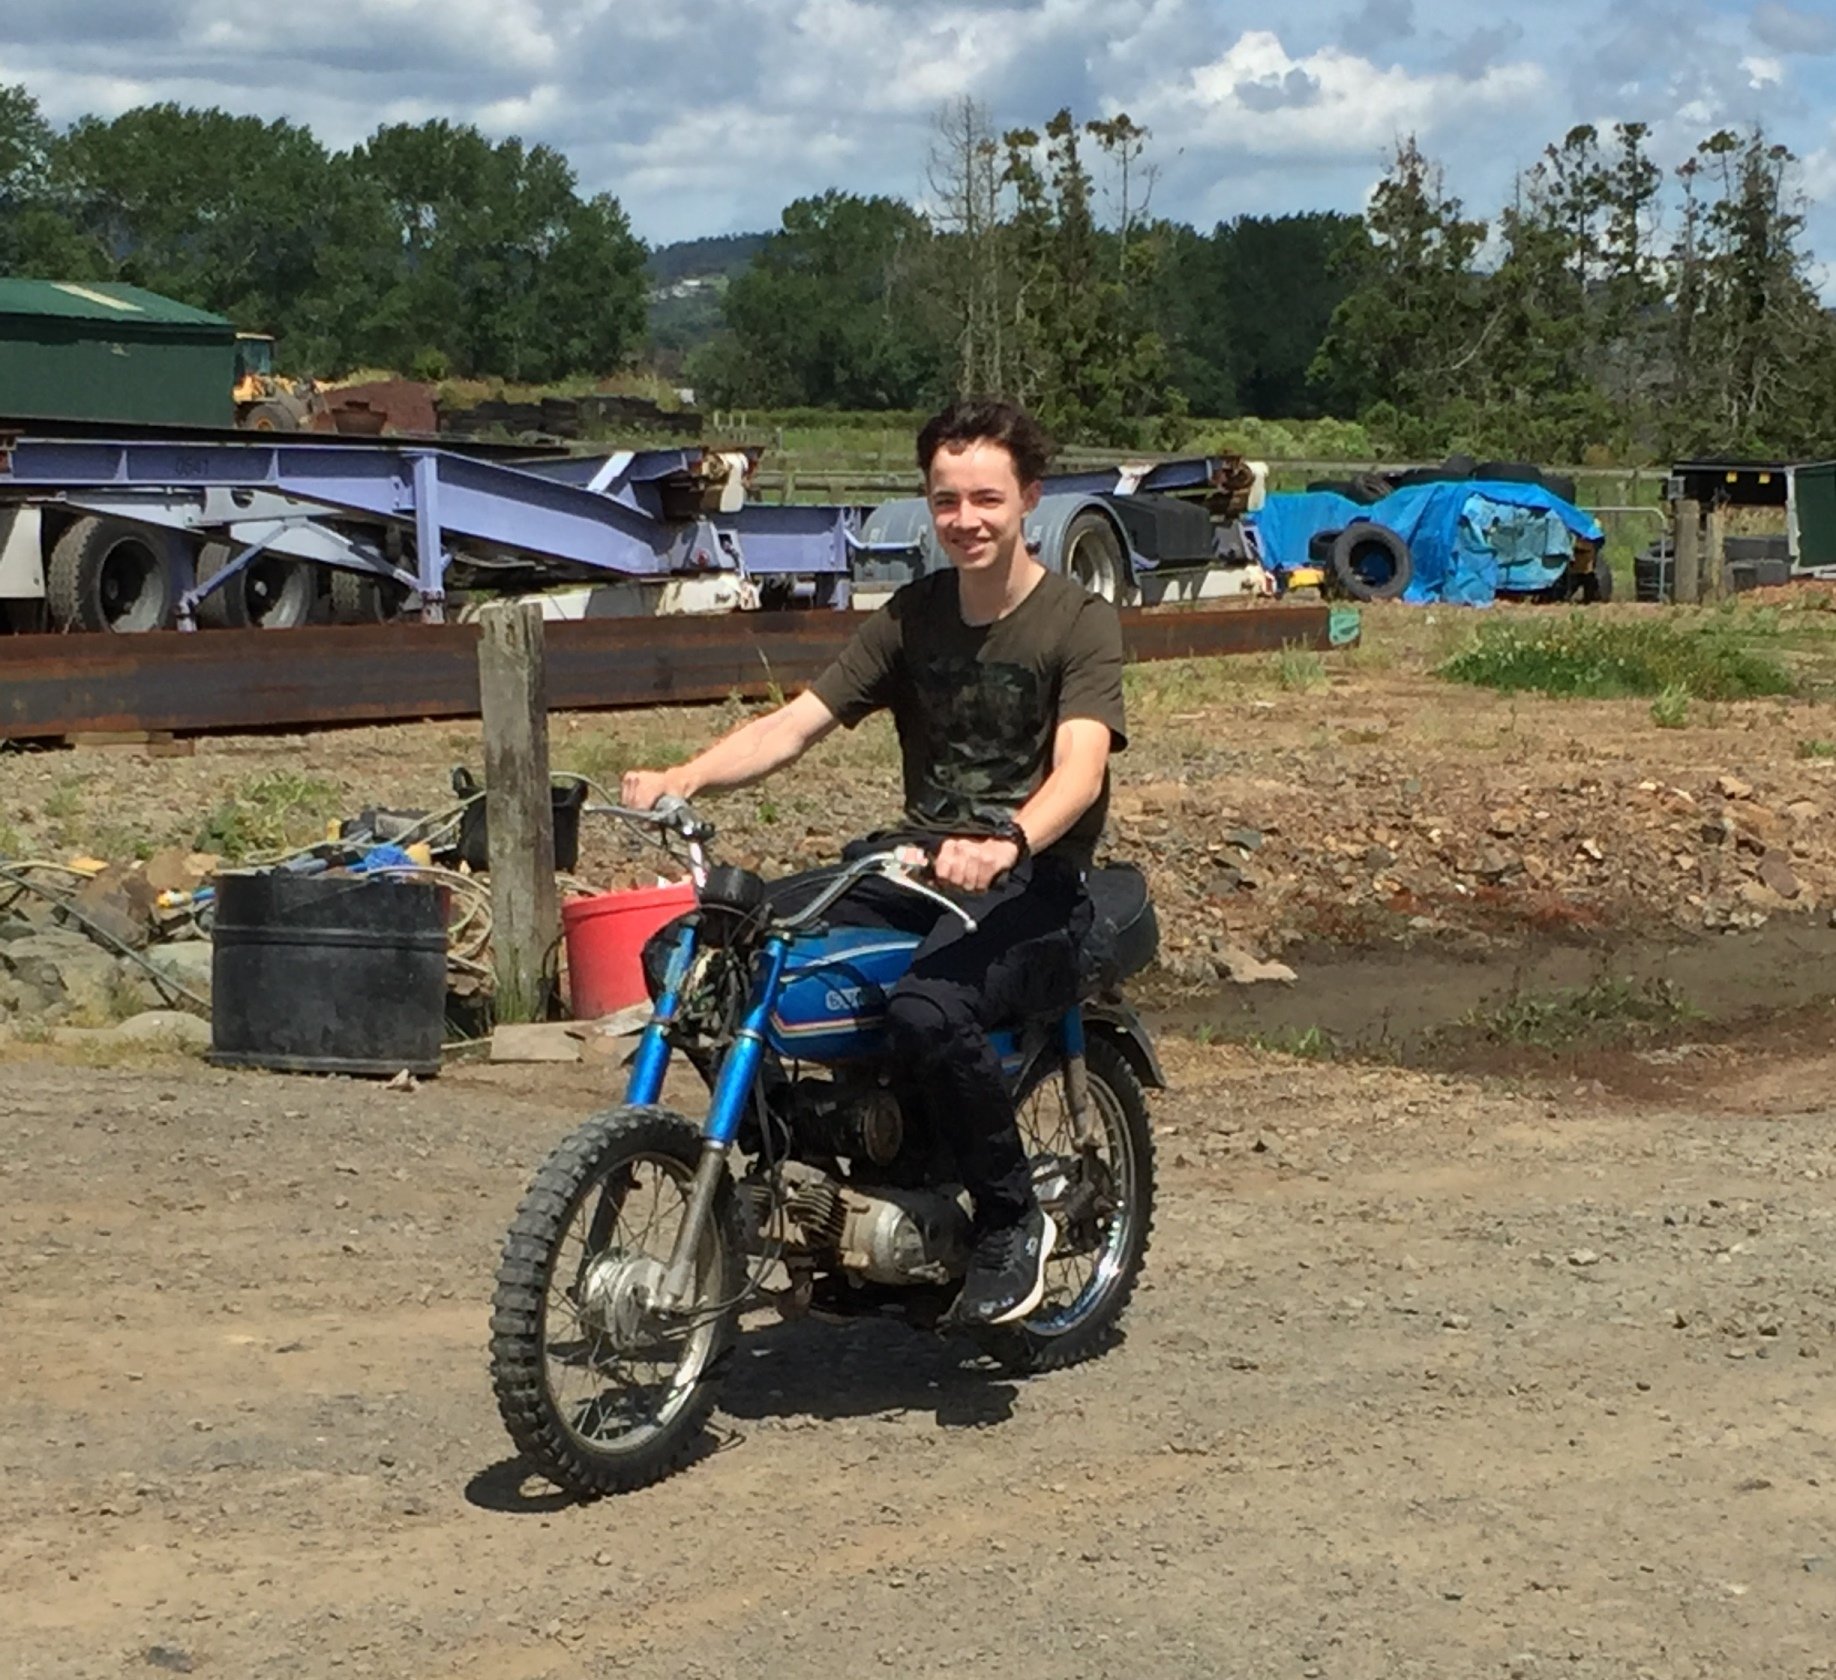
And just to add, Feeling sorry for Red "The concrete mixer", so it'll probably get a rebuild shortly too, then We'll start attacking some some of their looks. Pic of Kempy Jr. enjoying his first ever motorbike ride, you kinda get the feeling he was enjoying it once he mastered the clutch.
1 point
-
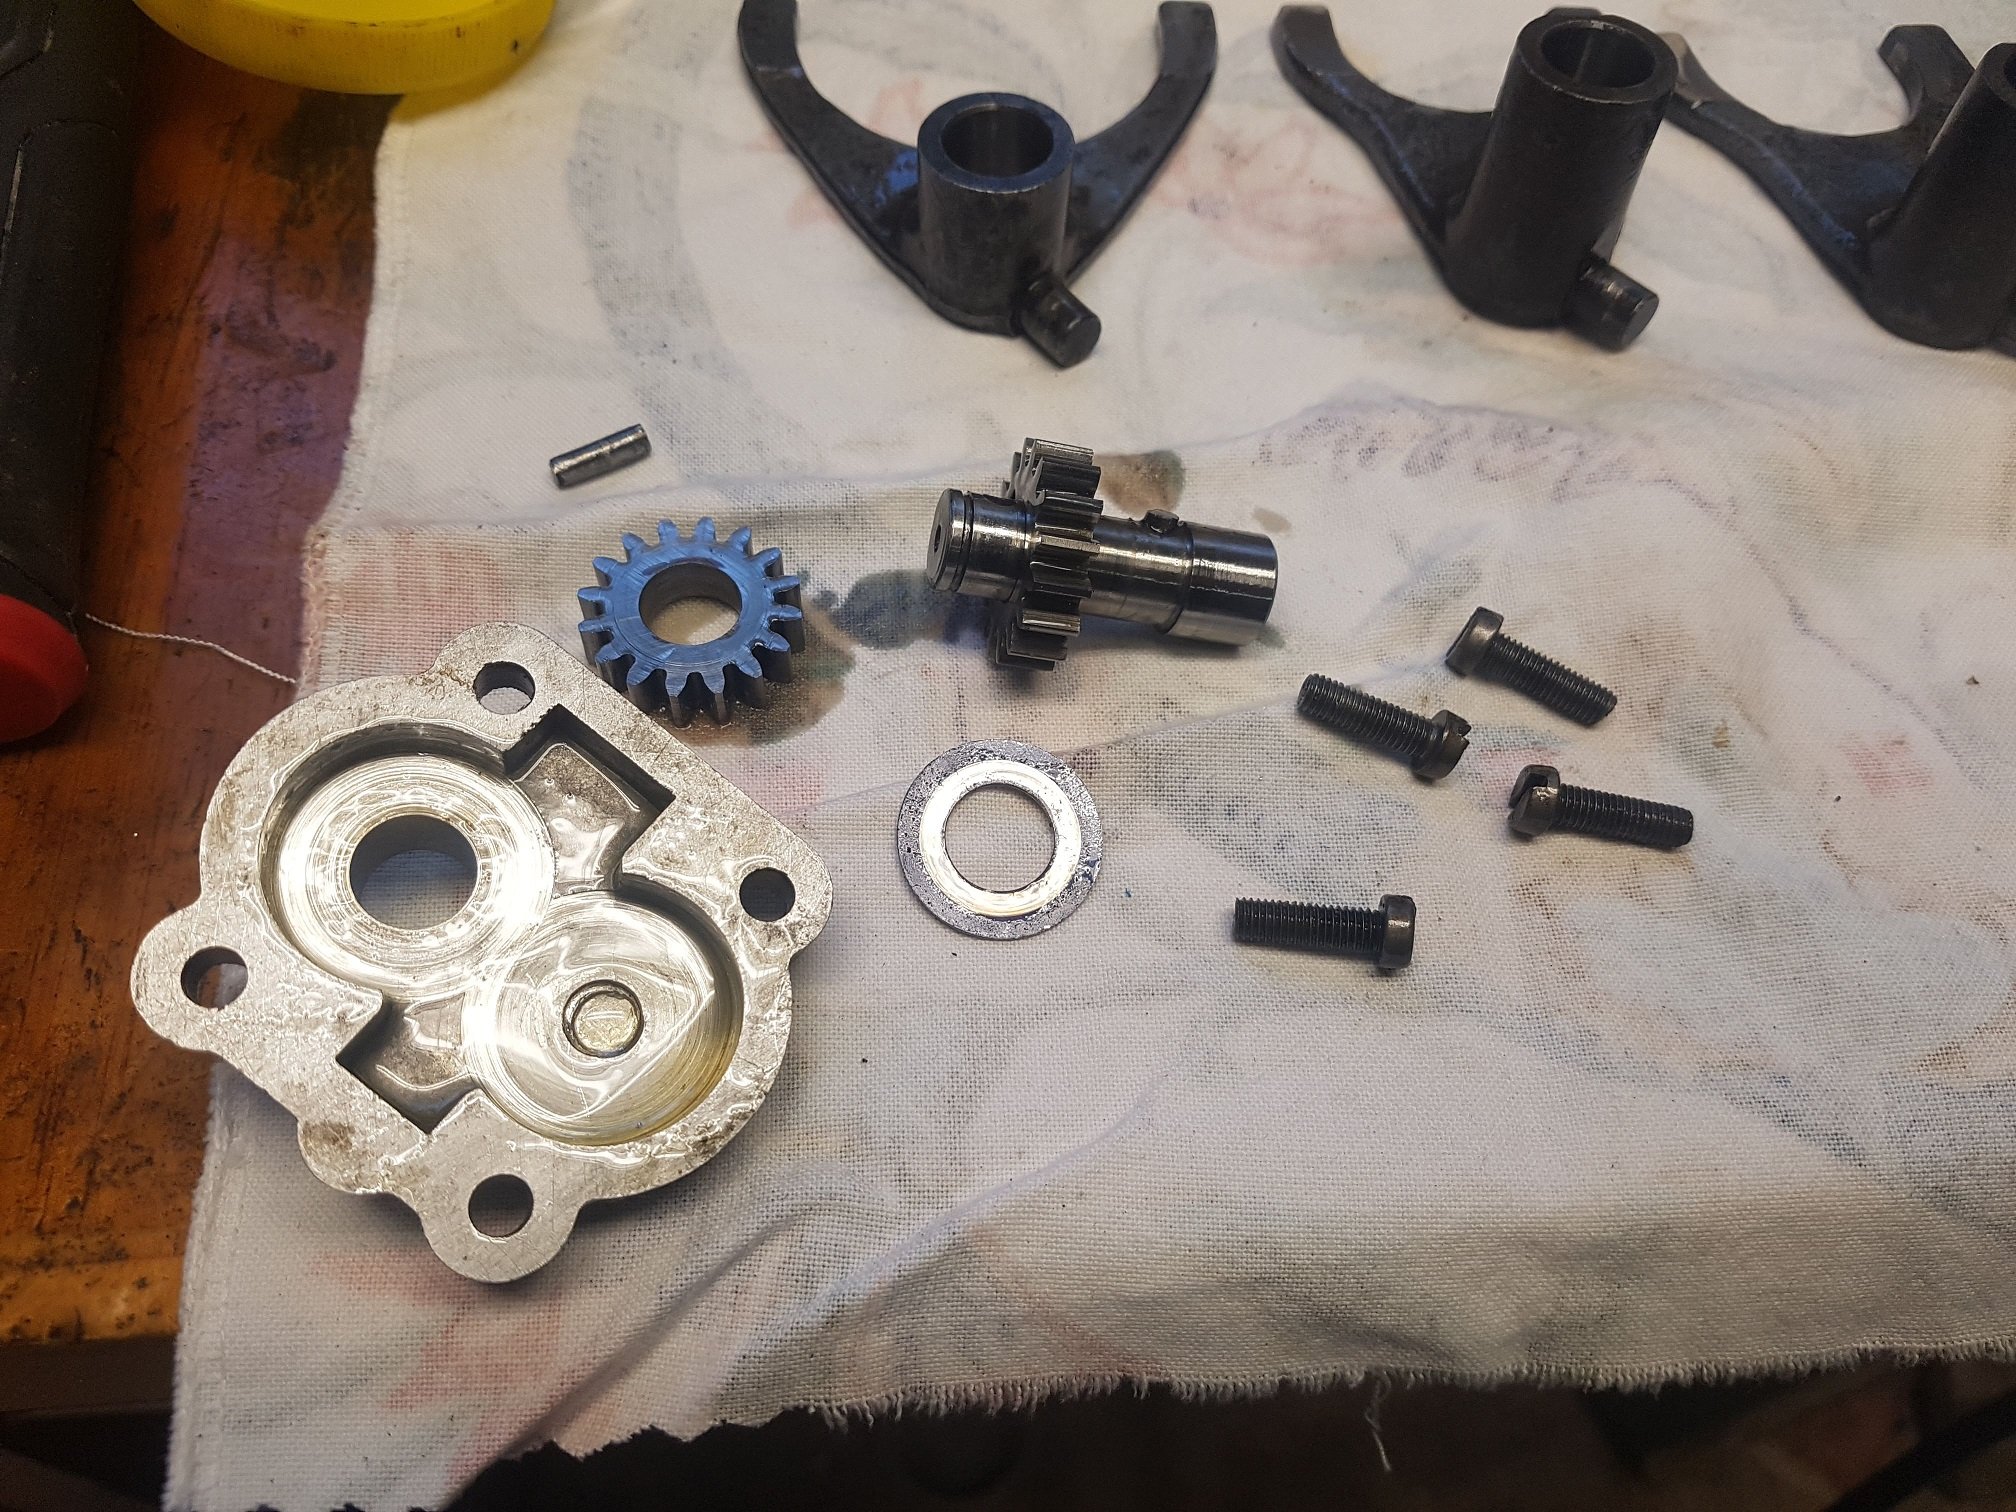
I also managed to get the oil pump apart. It was seized solid. From sitting for the last 26 years no doubt. Free as a daisy now. When I was getting the threads repaired on the cases, I also had the oil pump surface machined, as it had a big scratch in it. All ready to smash back together! What do I do about the 4th gear?
1 point
-
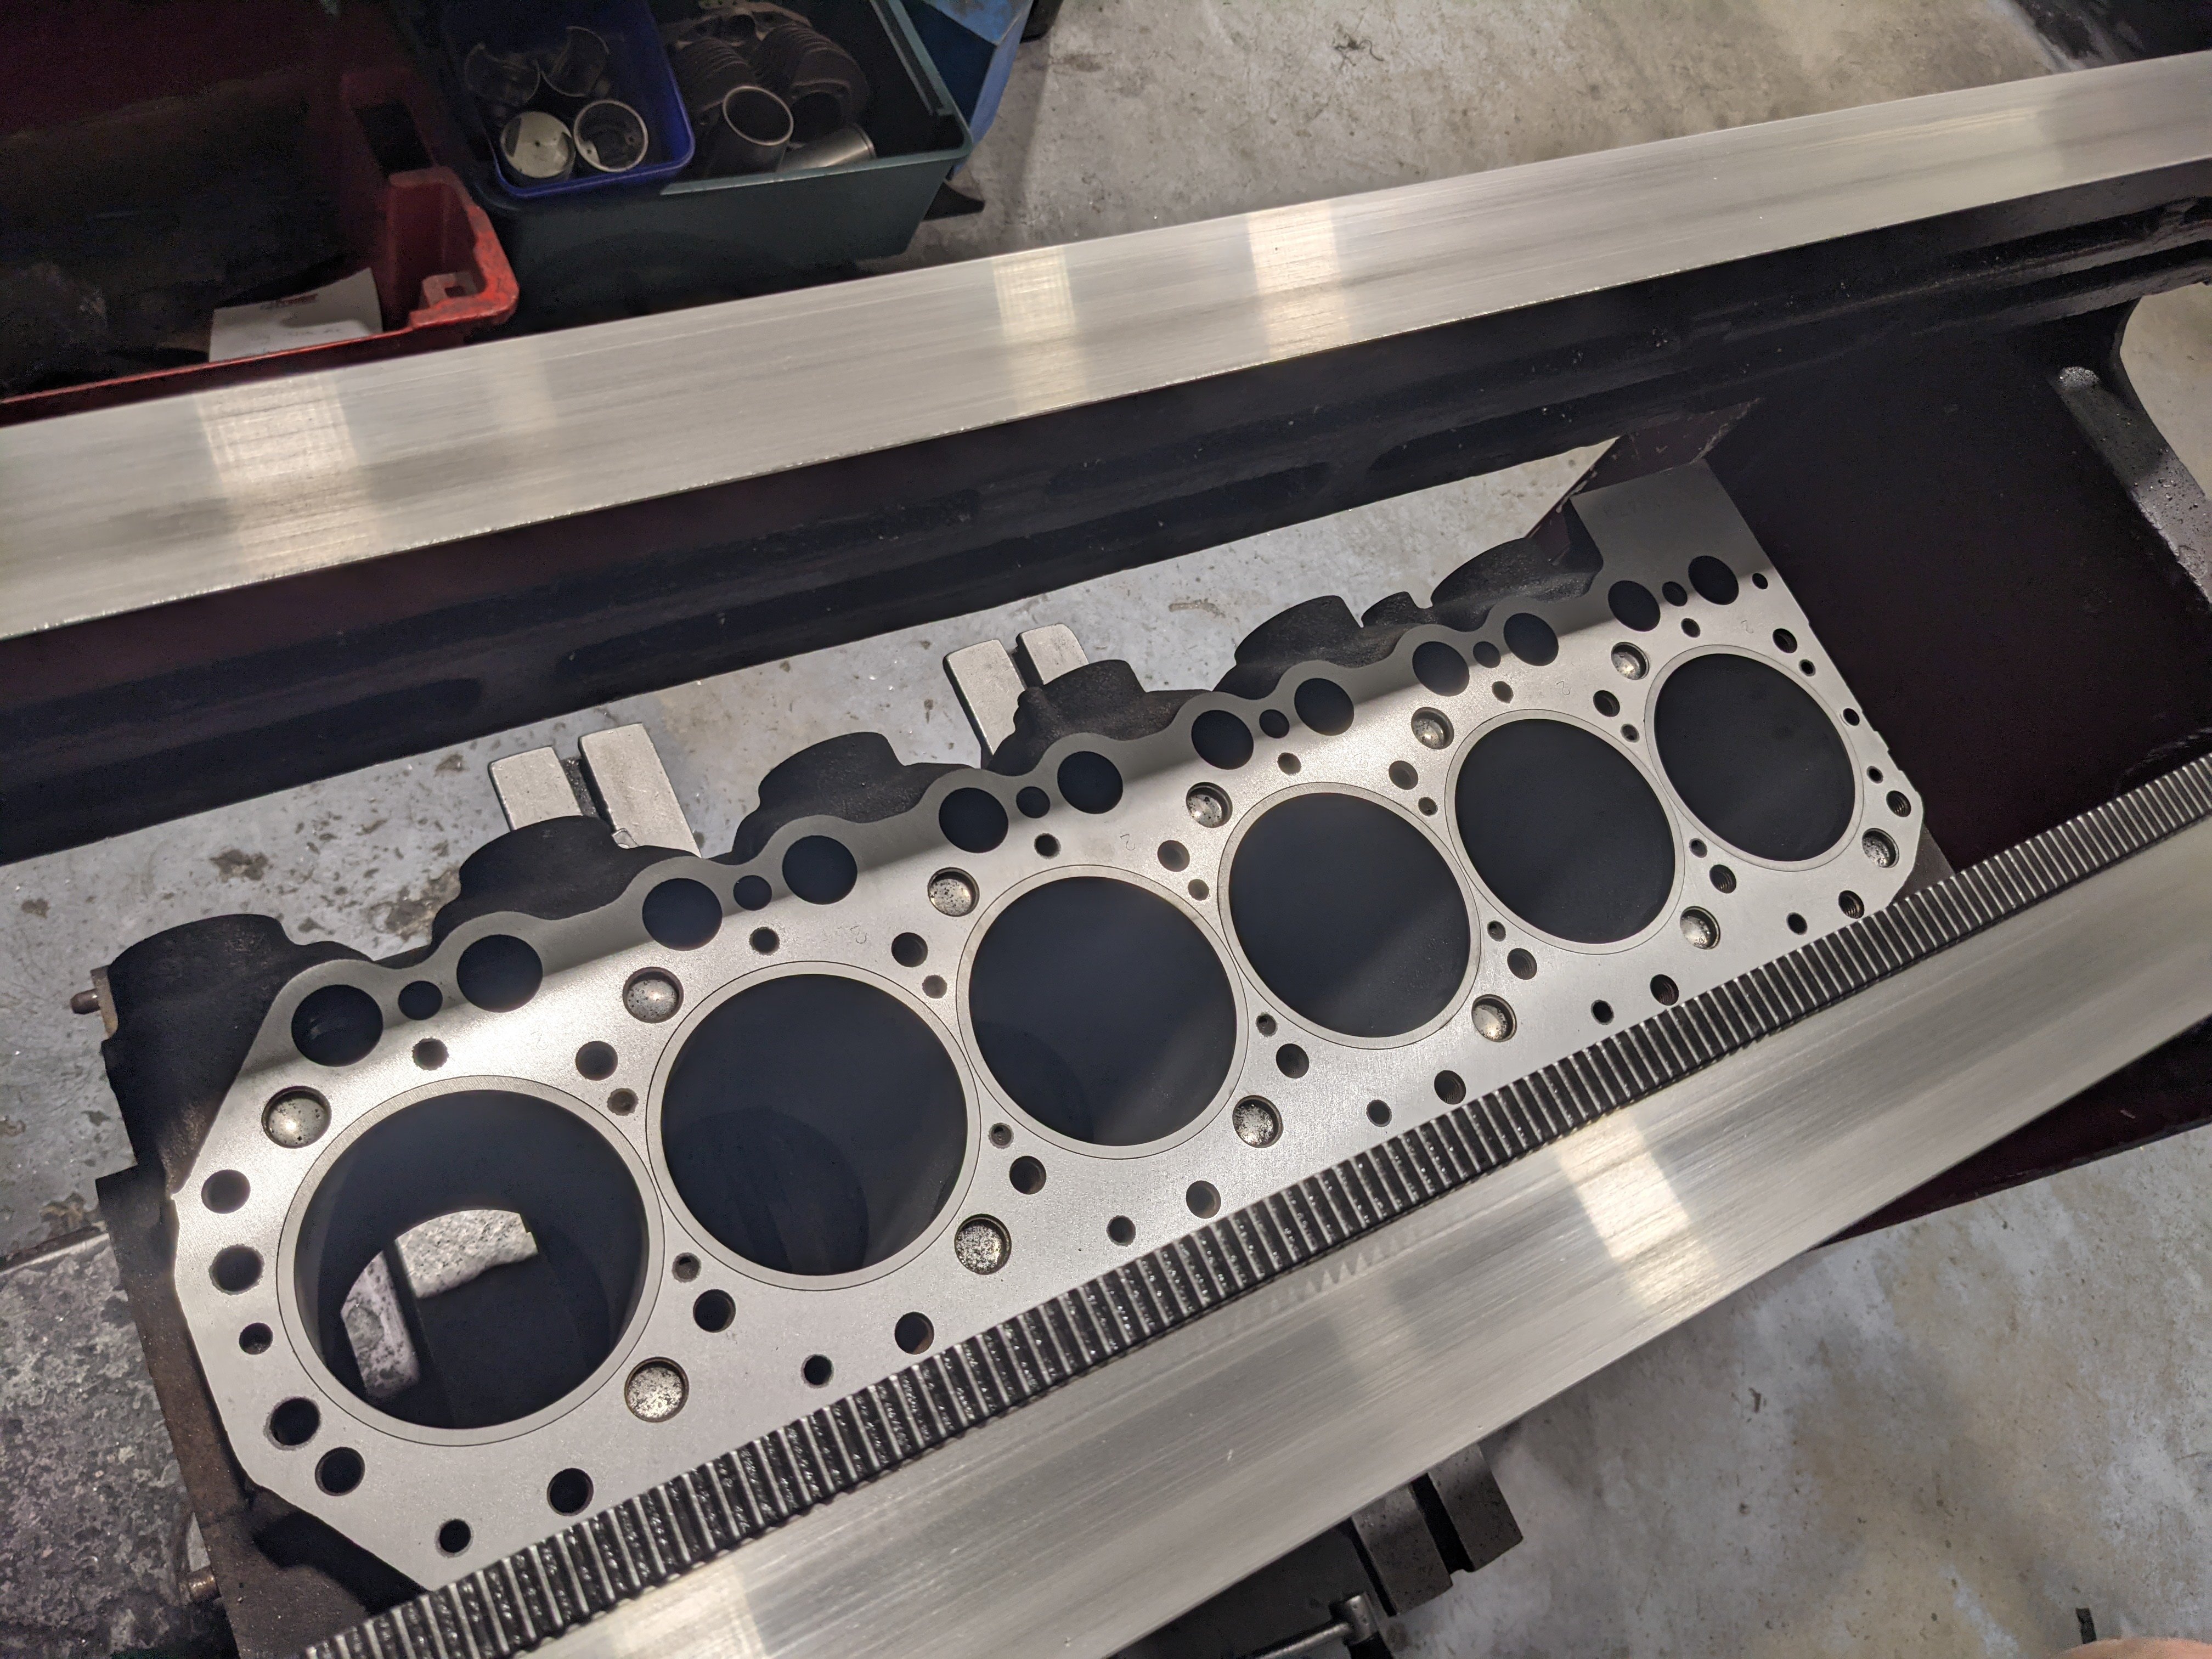
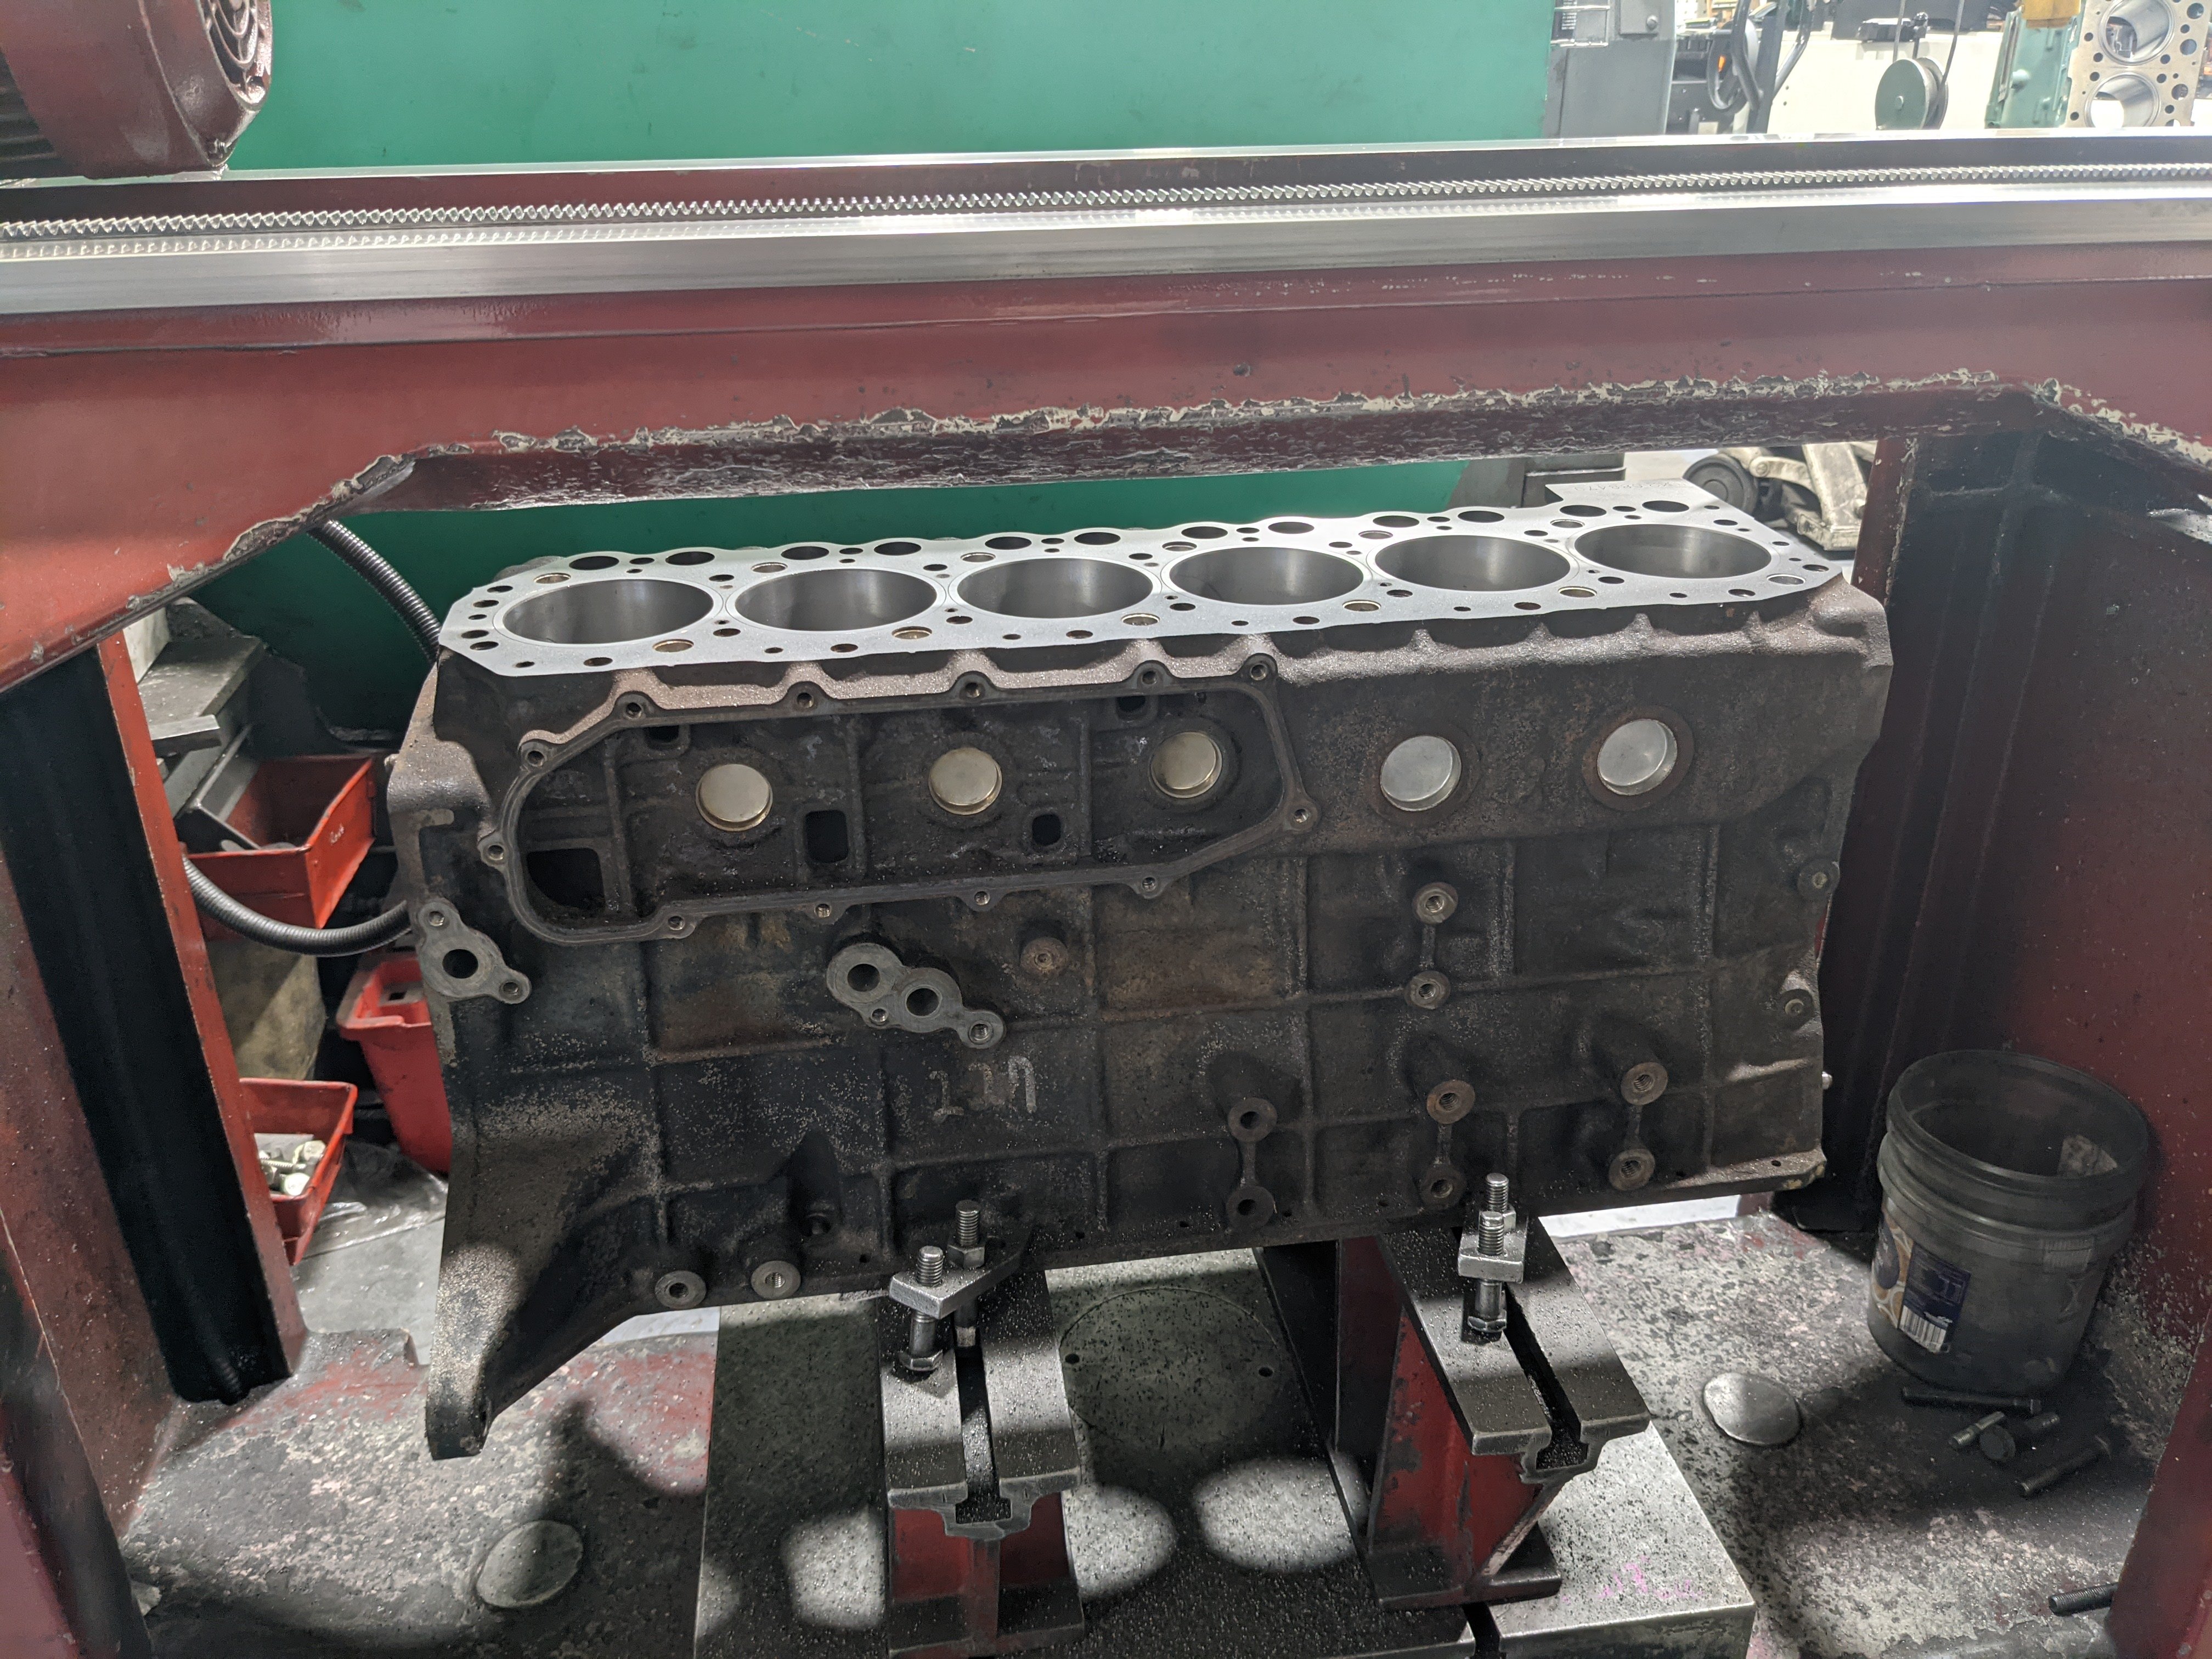
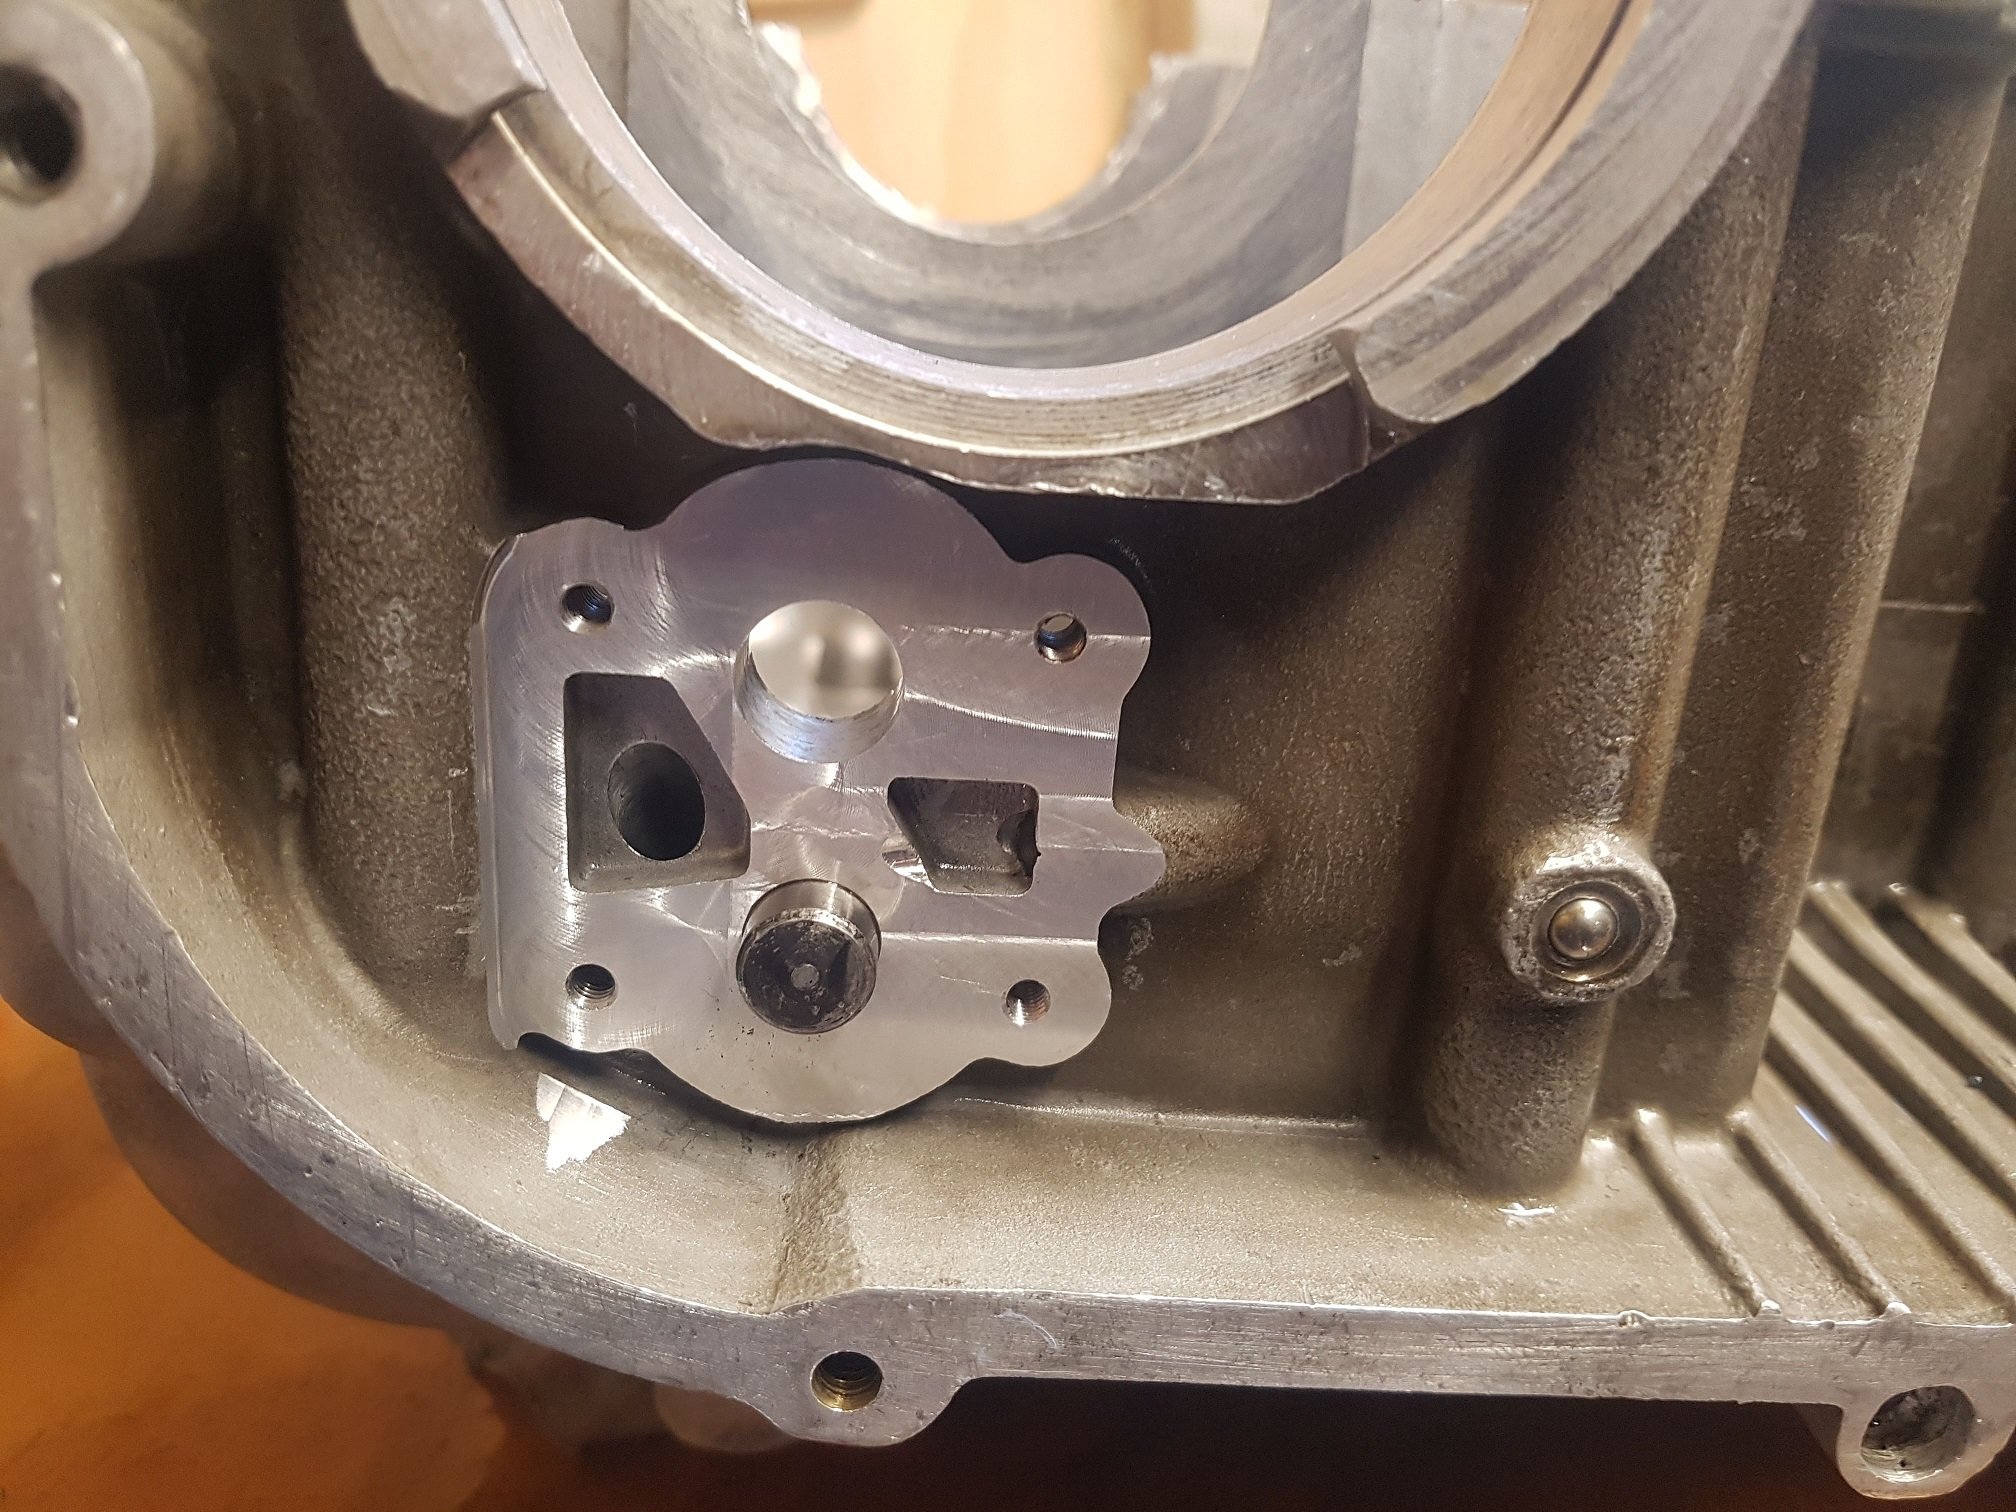
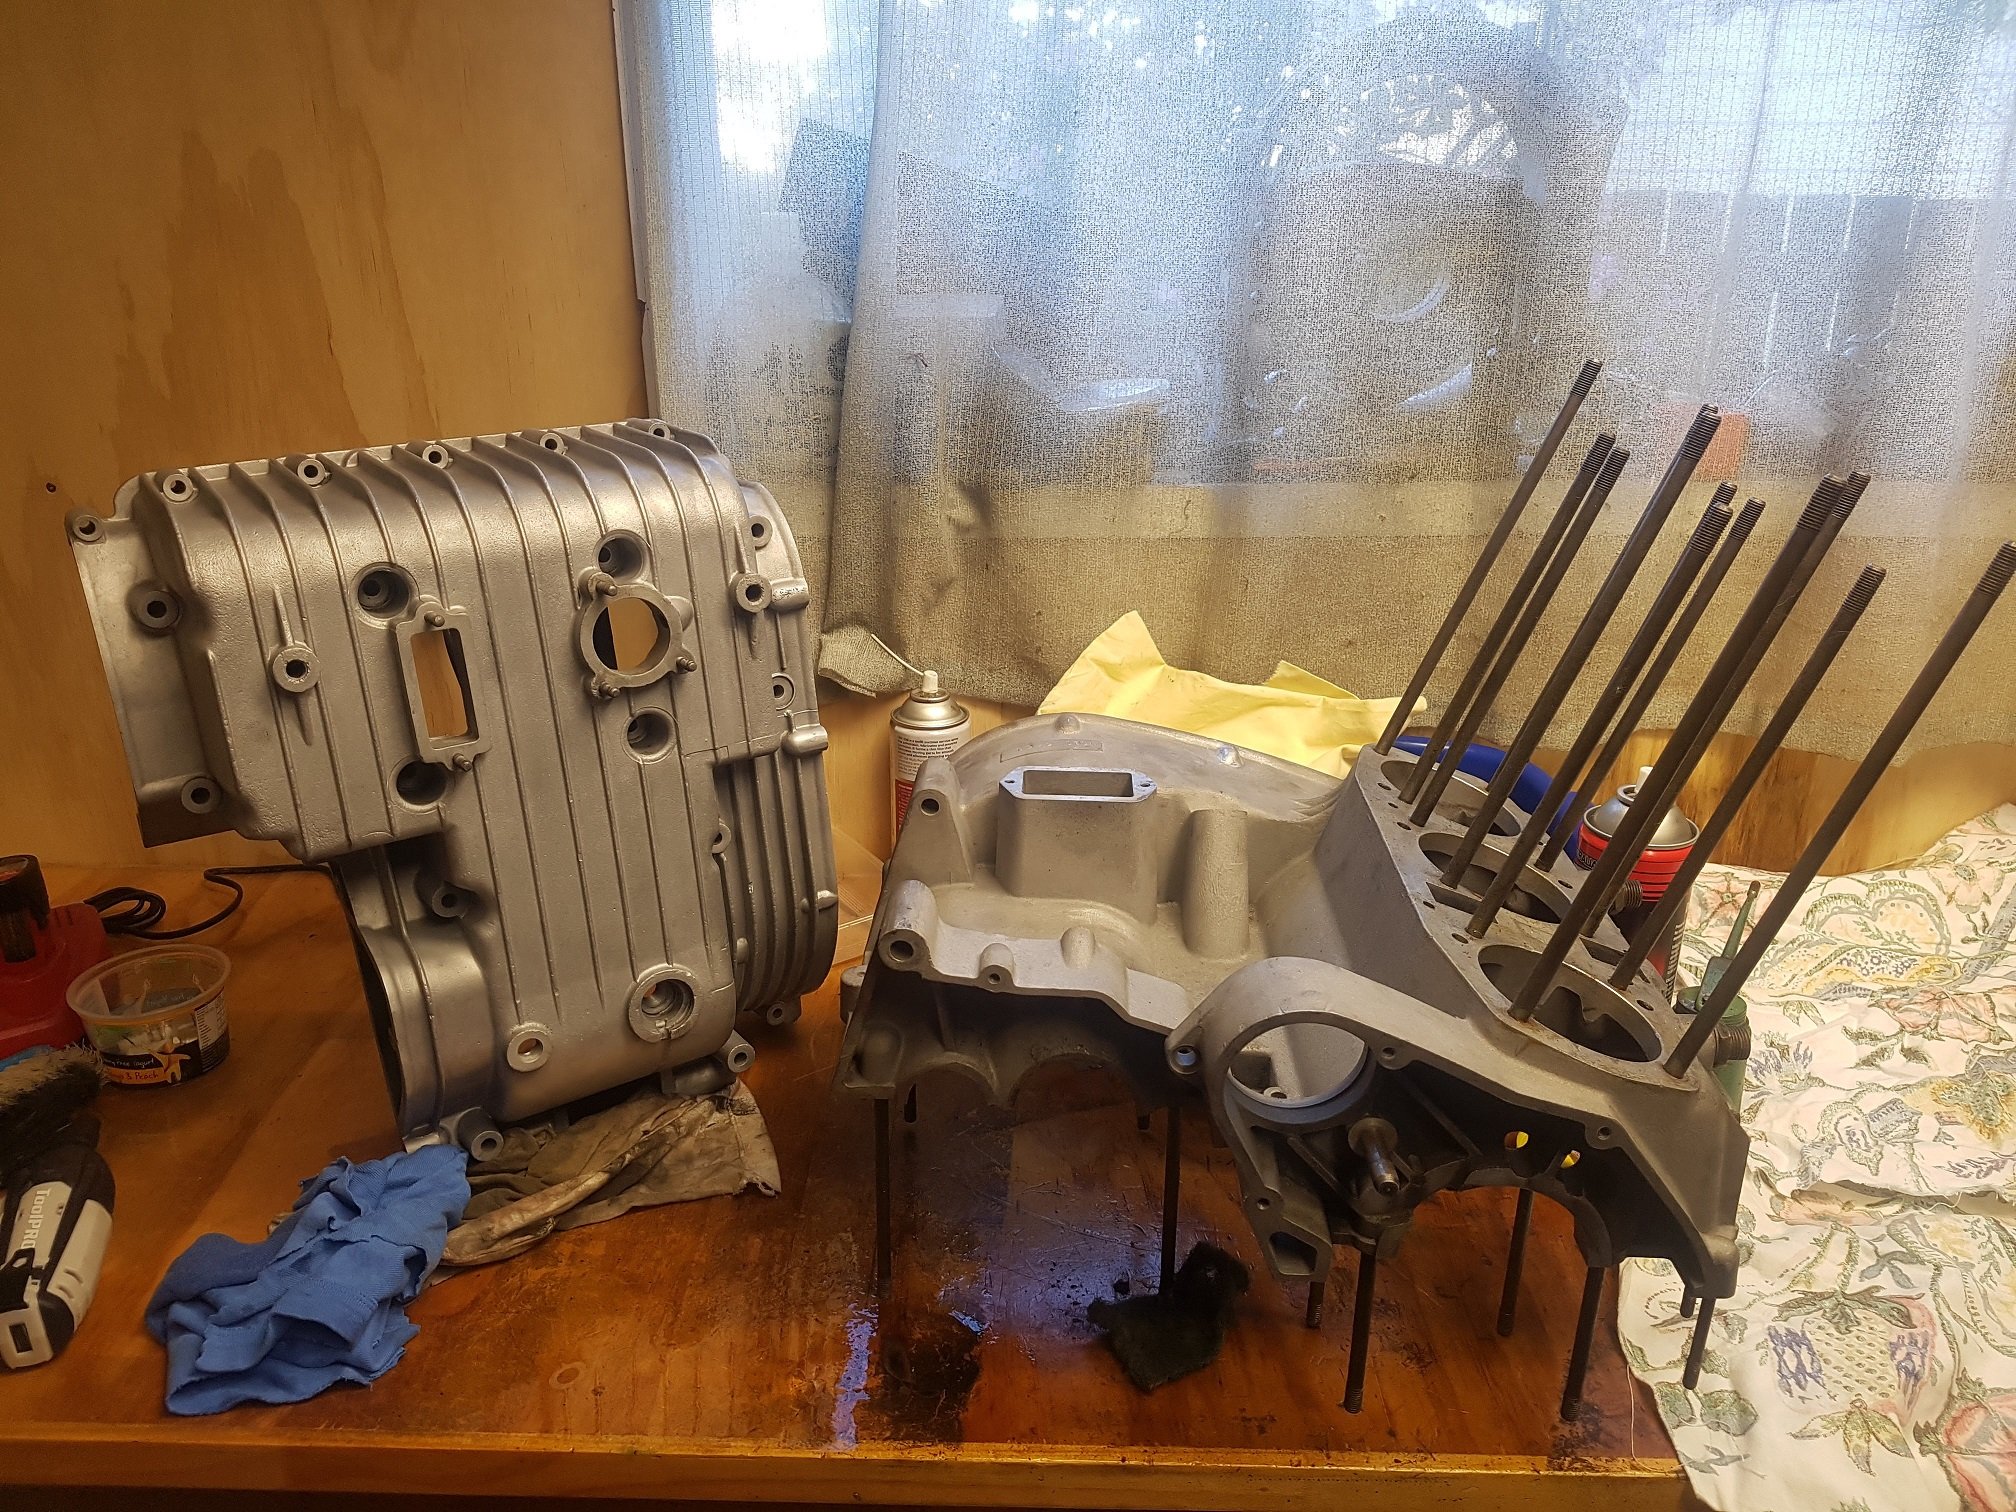
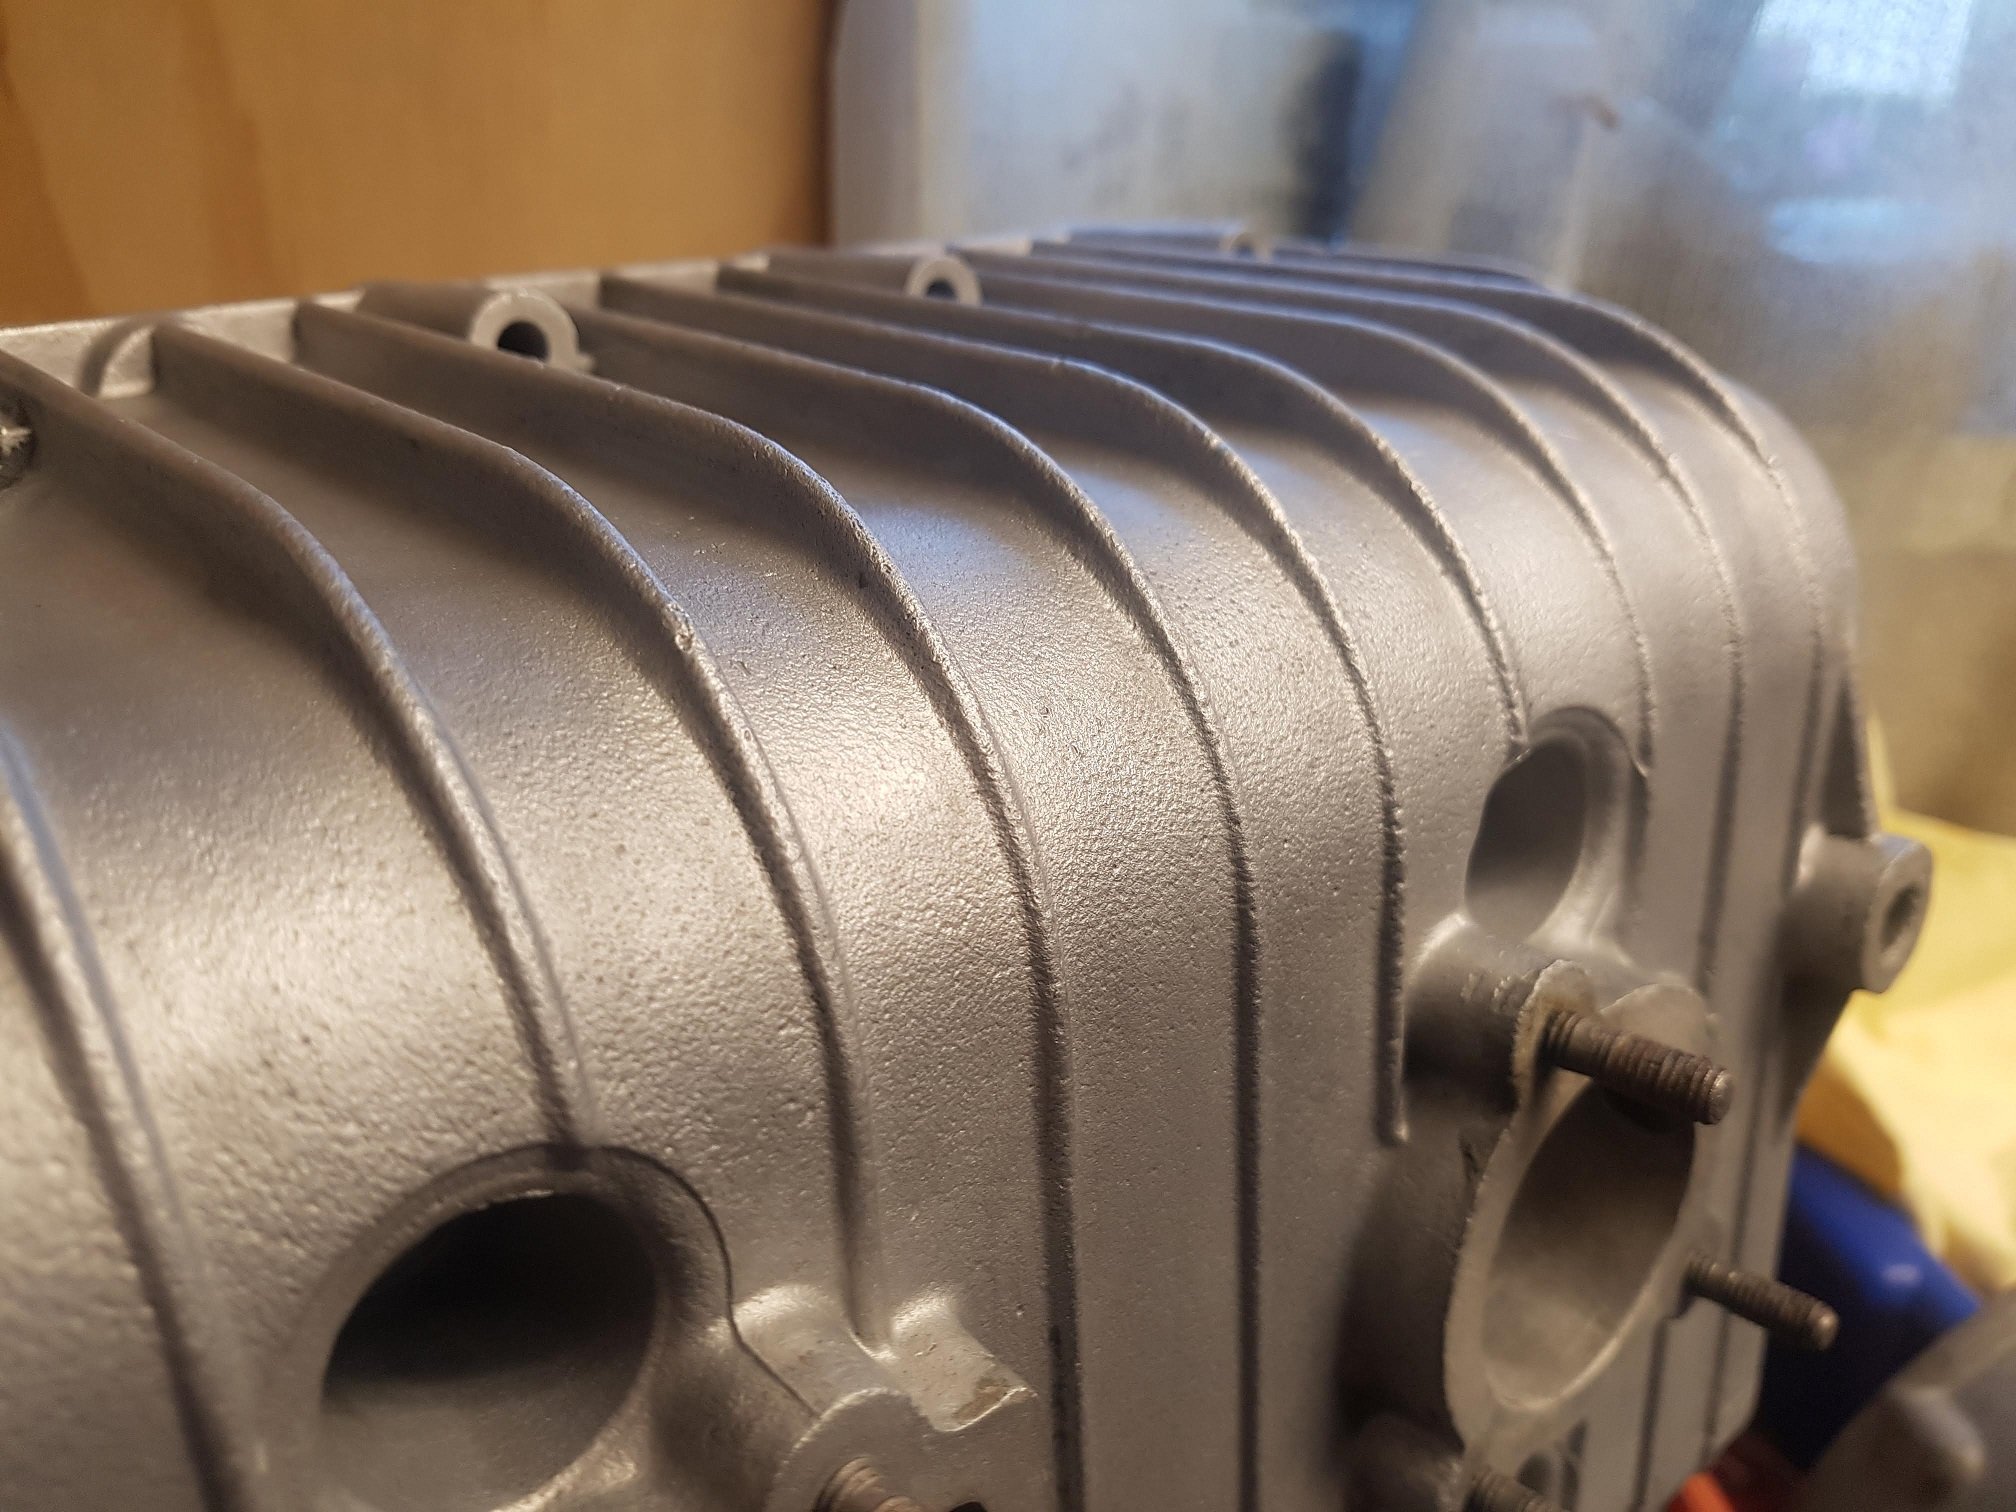
Right, so cylinder head turned up from Australia. Yay. It also came with a few other goodies for the restoration. Still missing heaps of bits, but should have enough to assemble the bottom end! A few weekends ago, I popped round to old mate @kicker and used his sand blaster to tidy up my cases as my sandblaster is at my folks house, and that is an hour and a half away. I could only fit the bottom case in, but it came out just perfect. The finish is ideal, not too bright like vapour blasting, and not too dull like sand blasting. You can see the difference here: You can see the differences between the two finishes below (ignore the low definition sandcasting, yay for italy) Pretty: Not pretty:
1 point
-
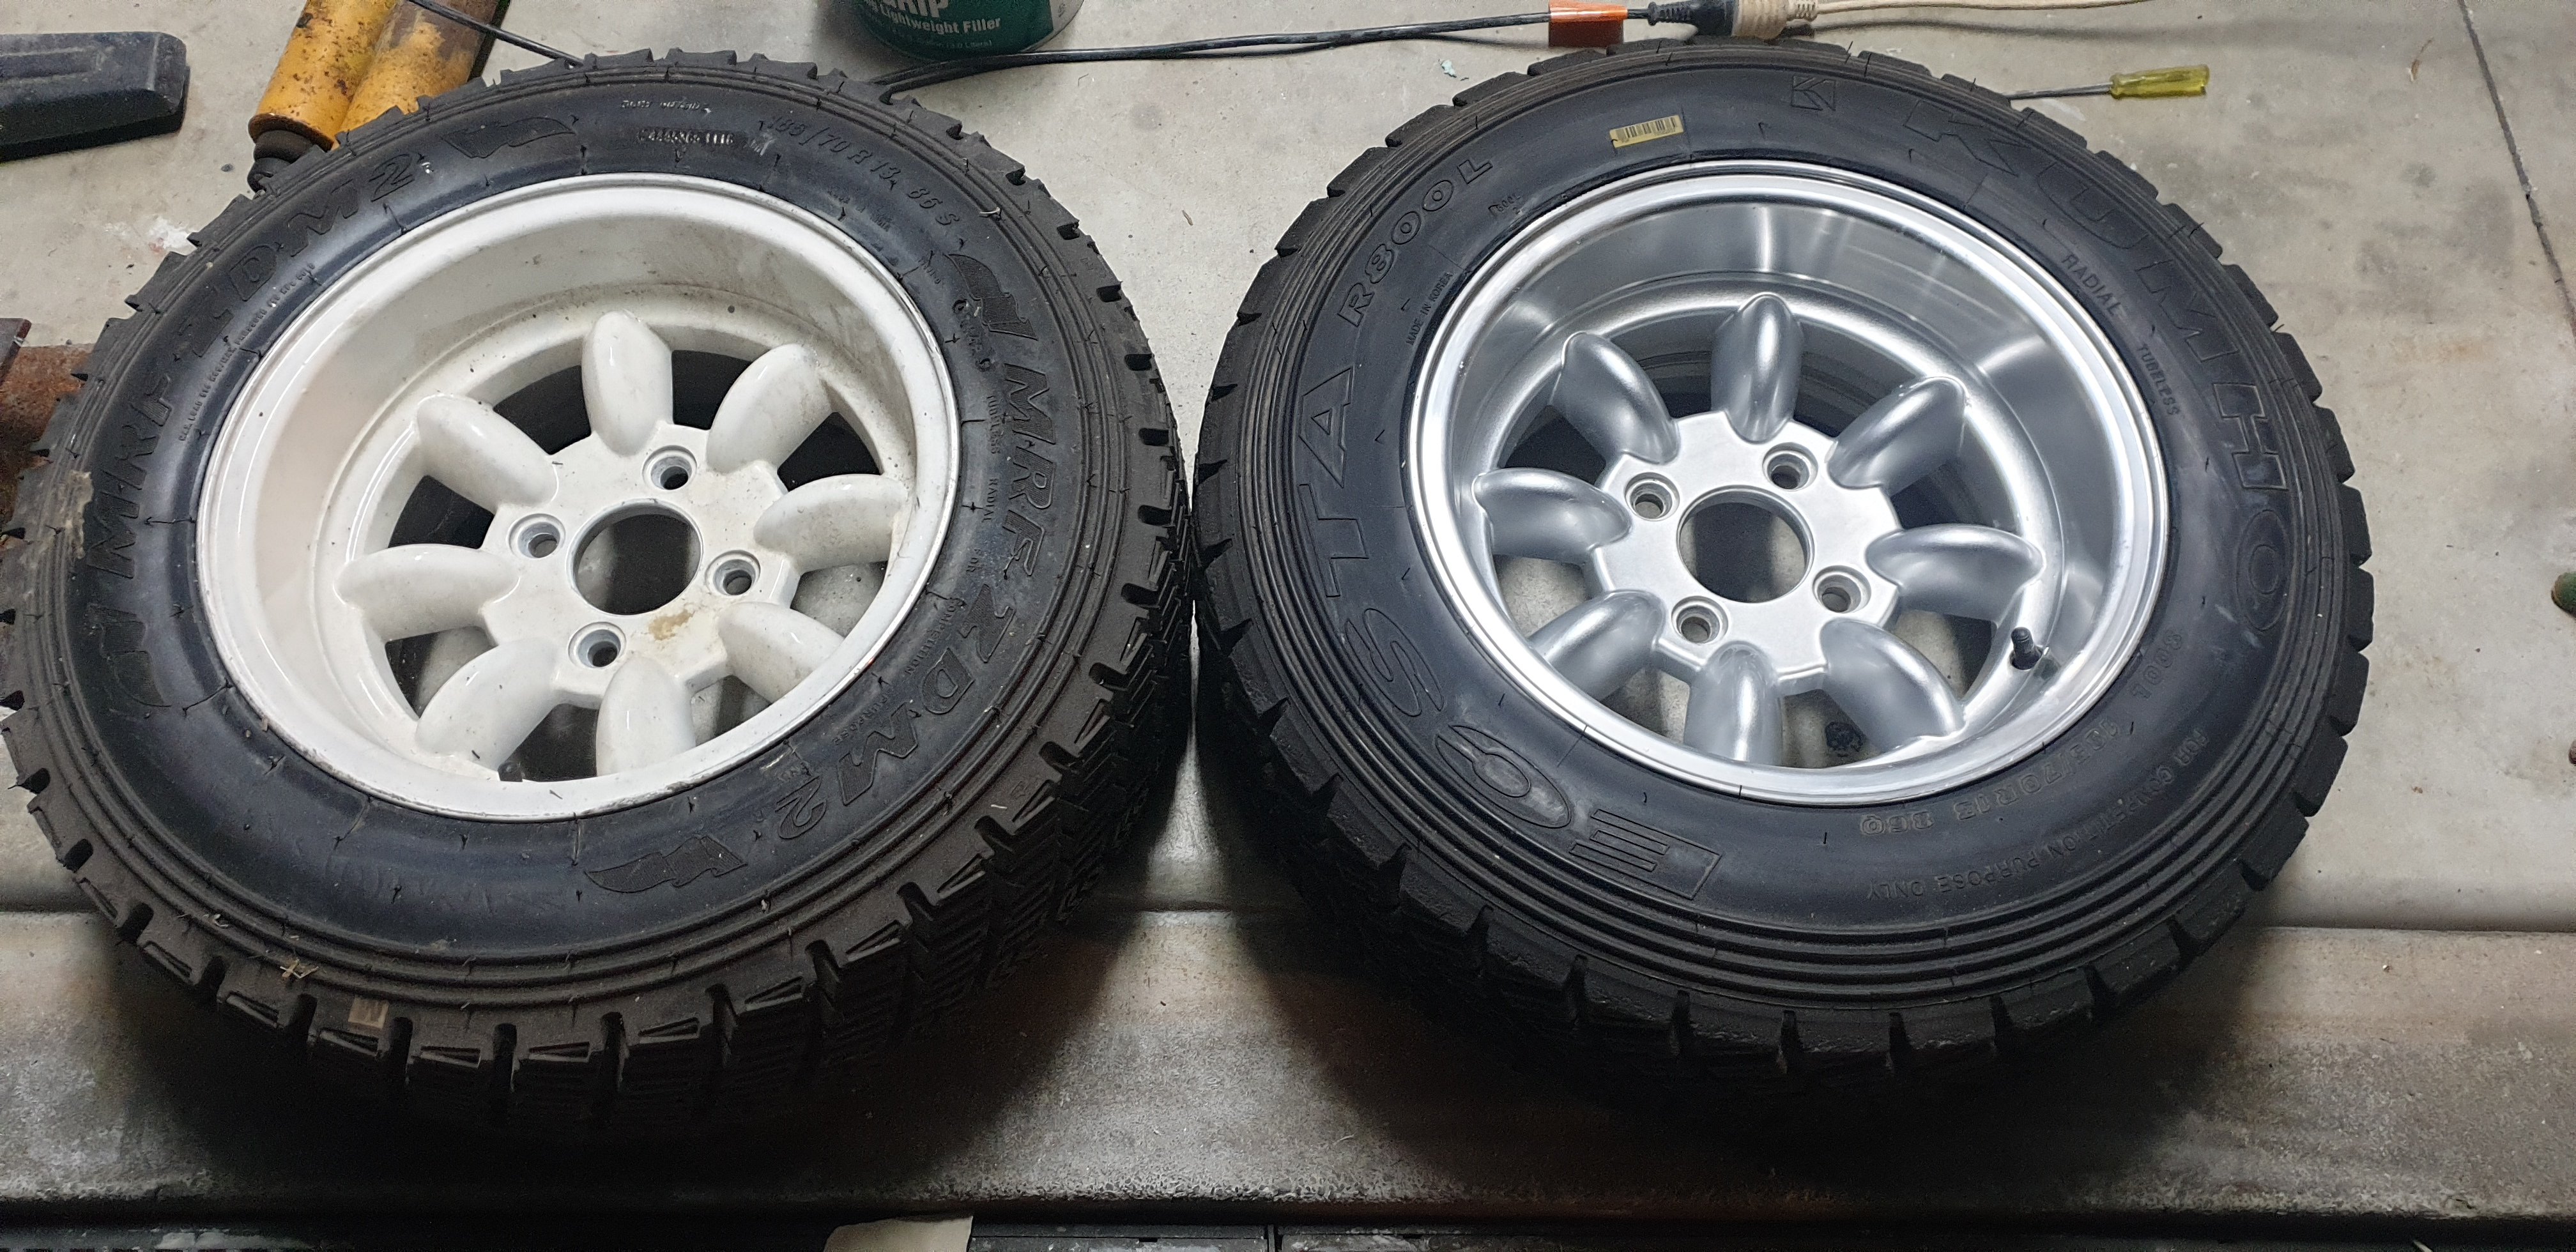
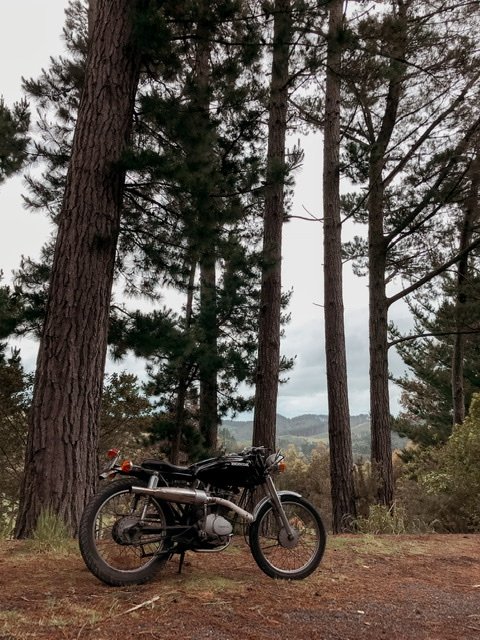
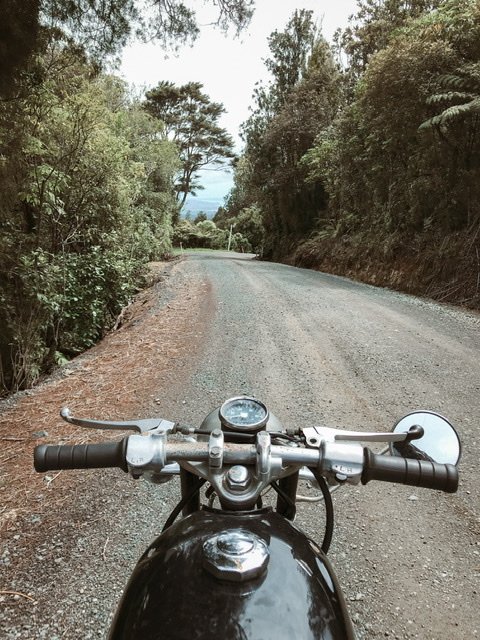
Went for a hoon this morning. Narrow bars, Radially grooved tyres and gravel make for a interesting time.
1 point
-
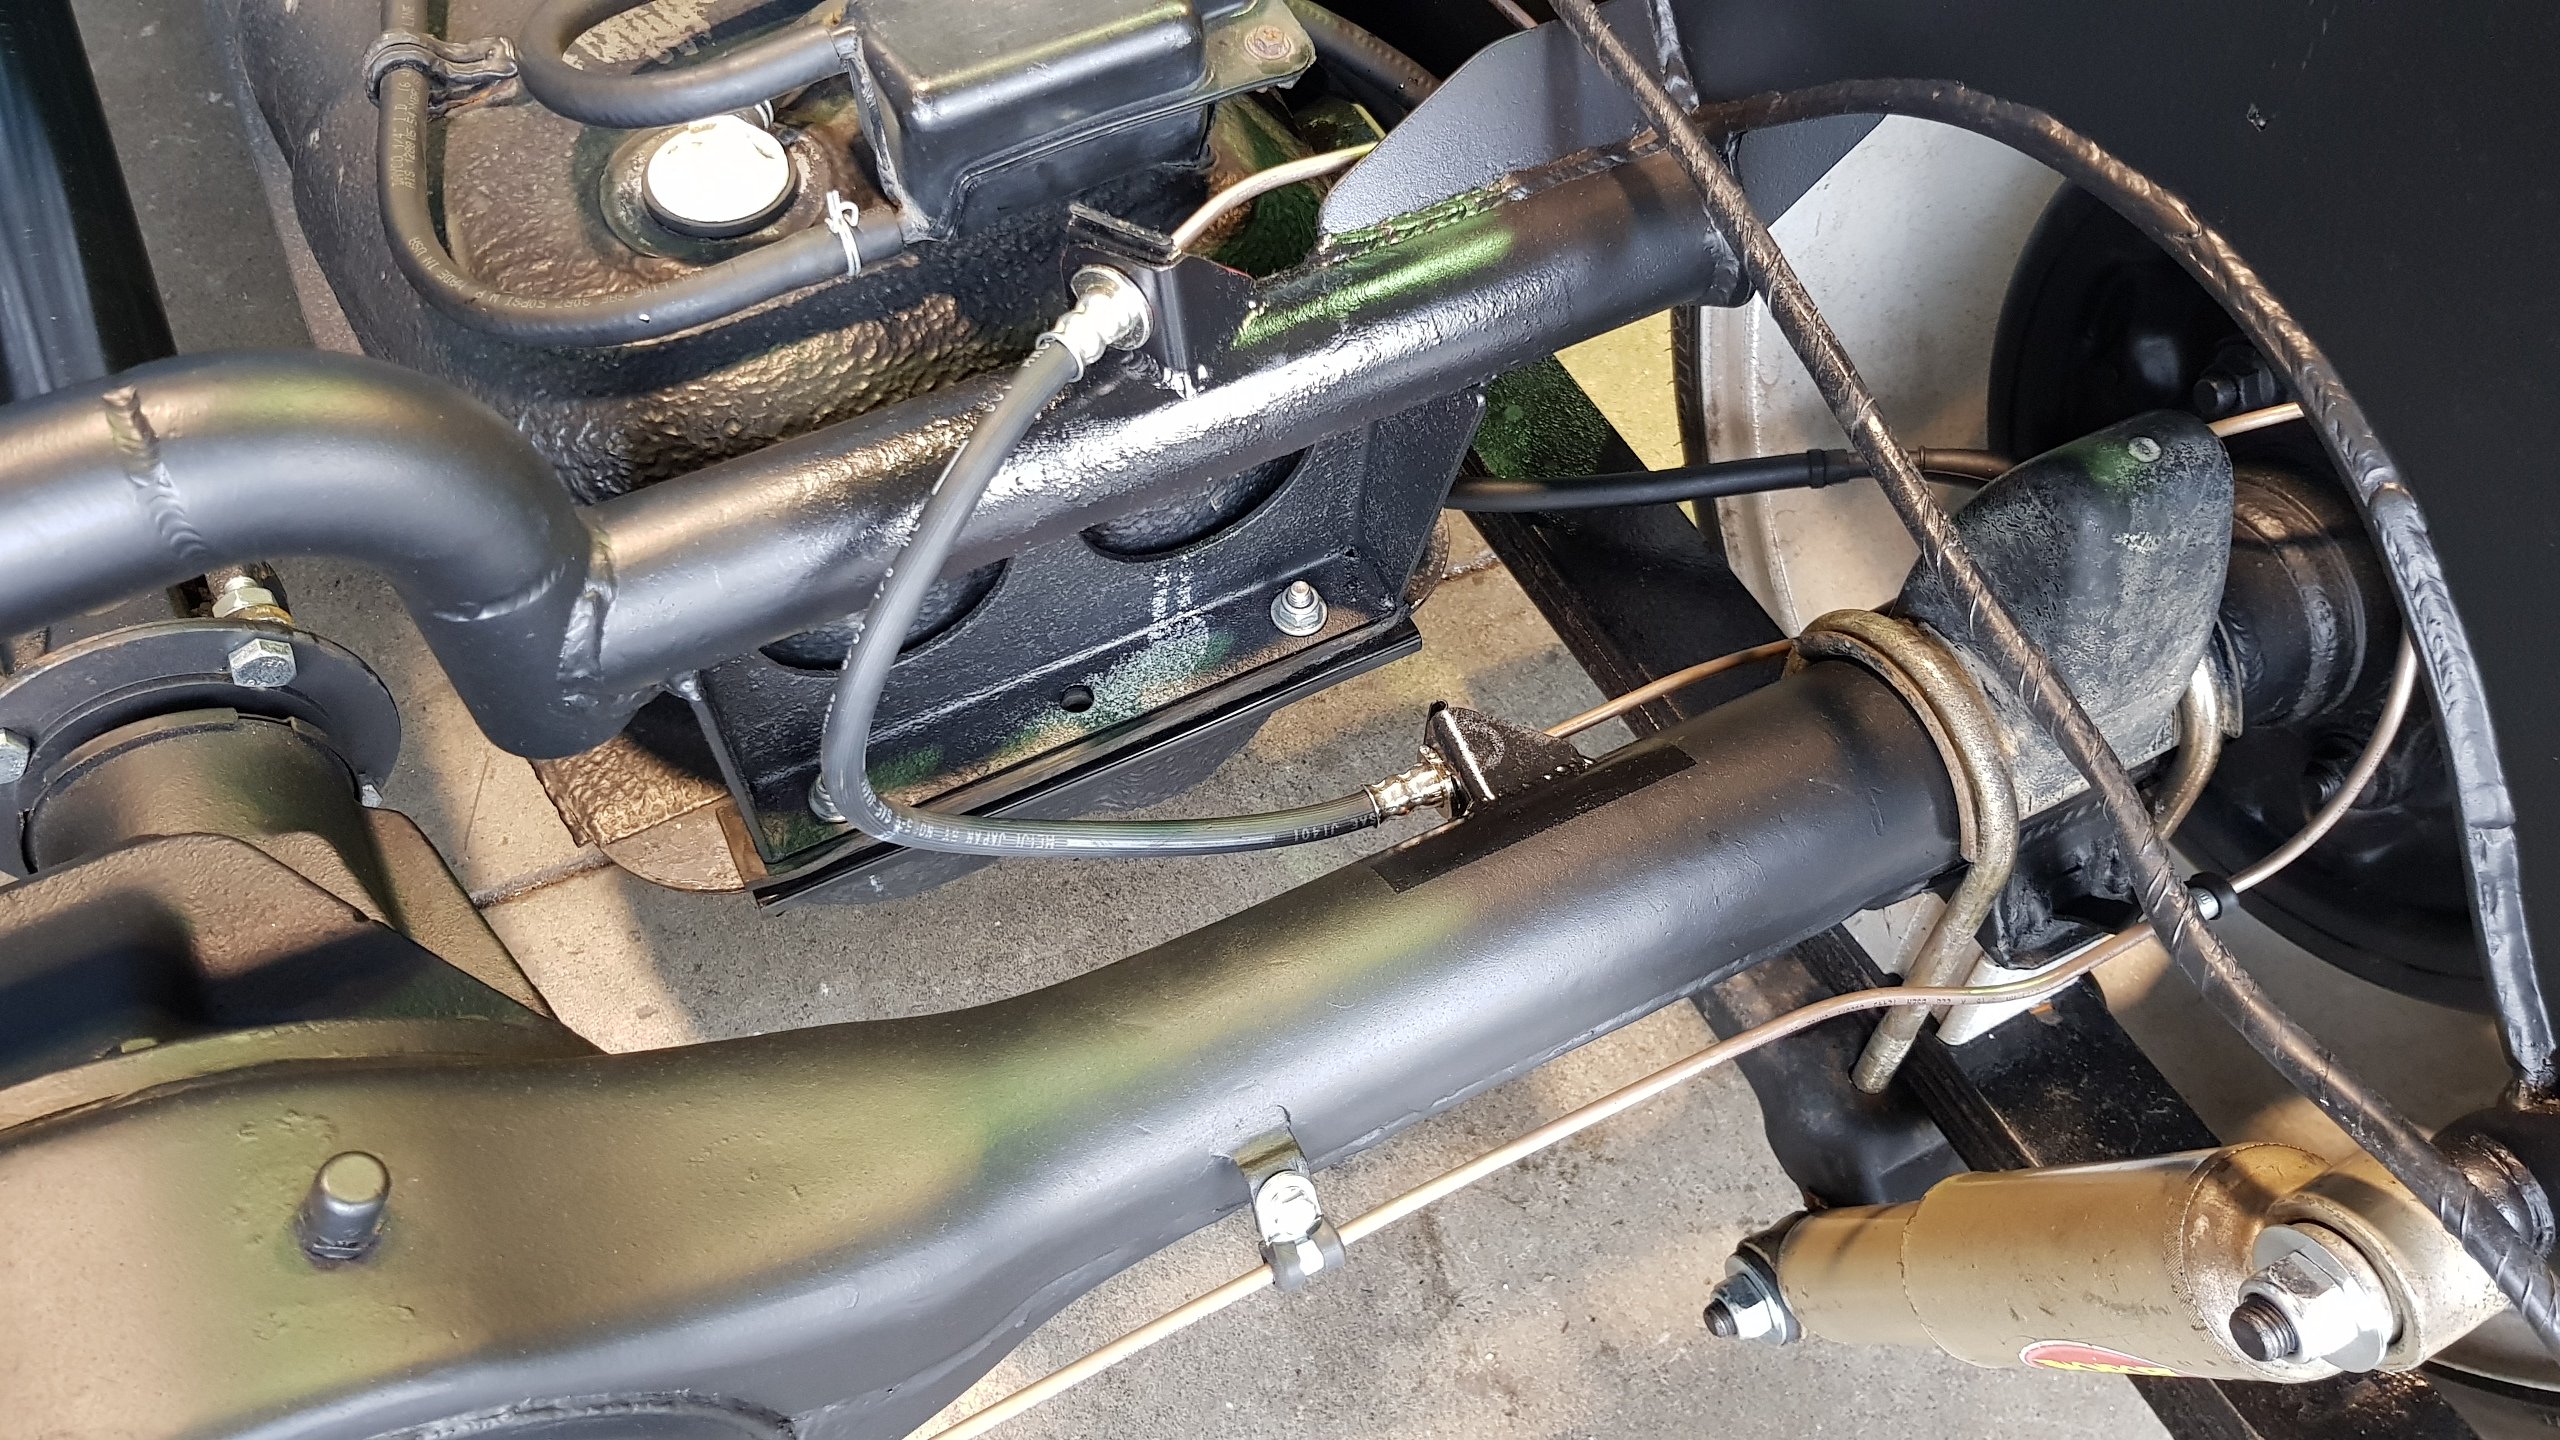
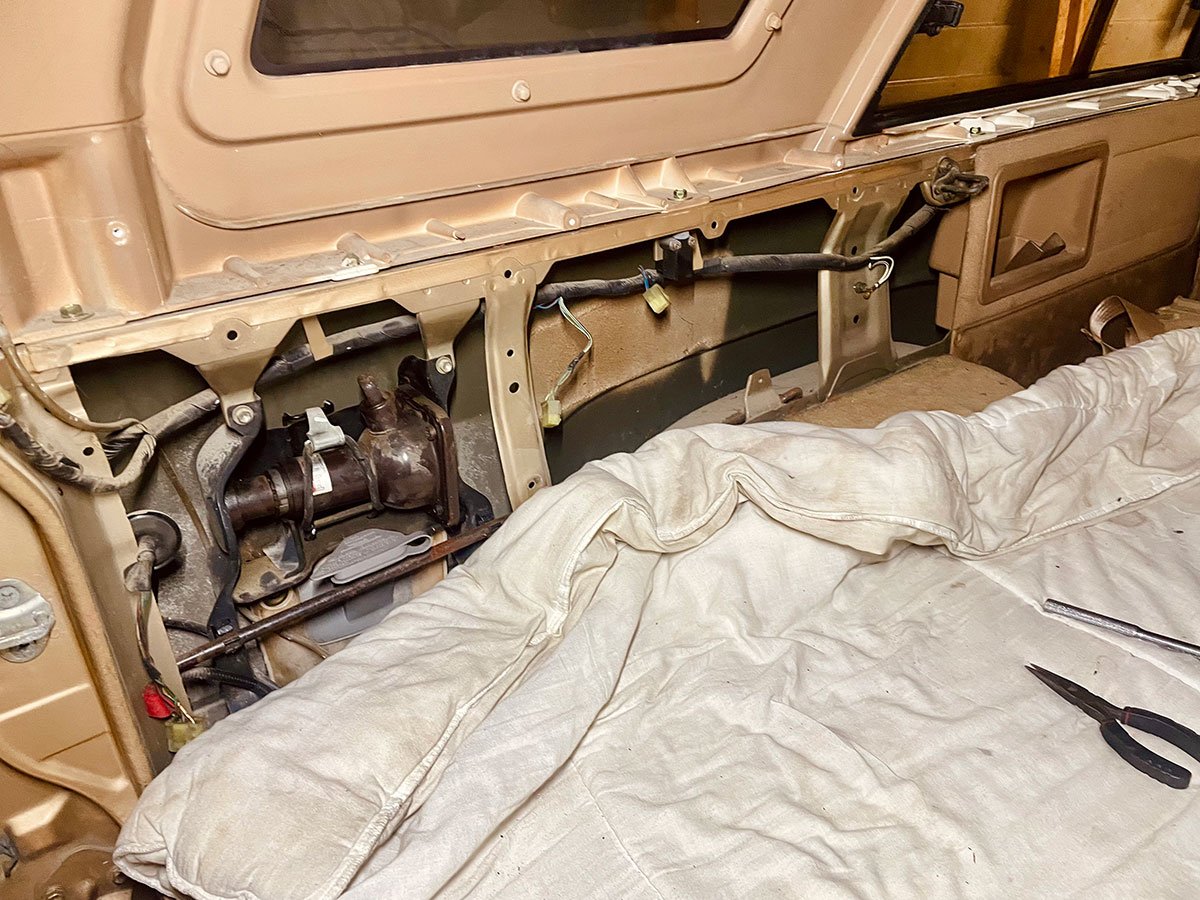
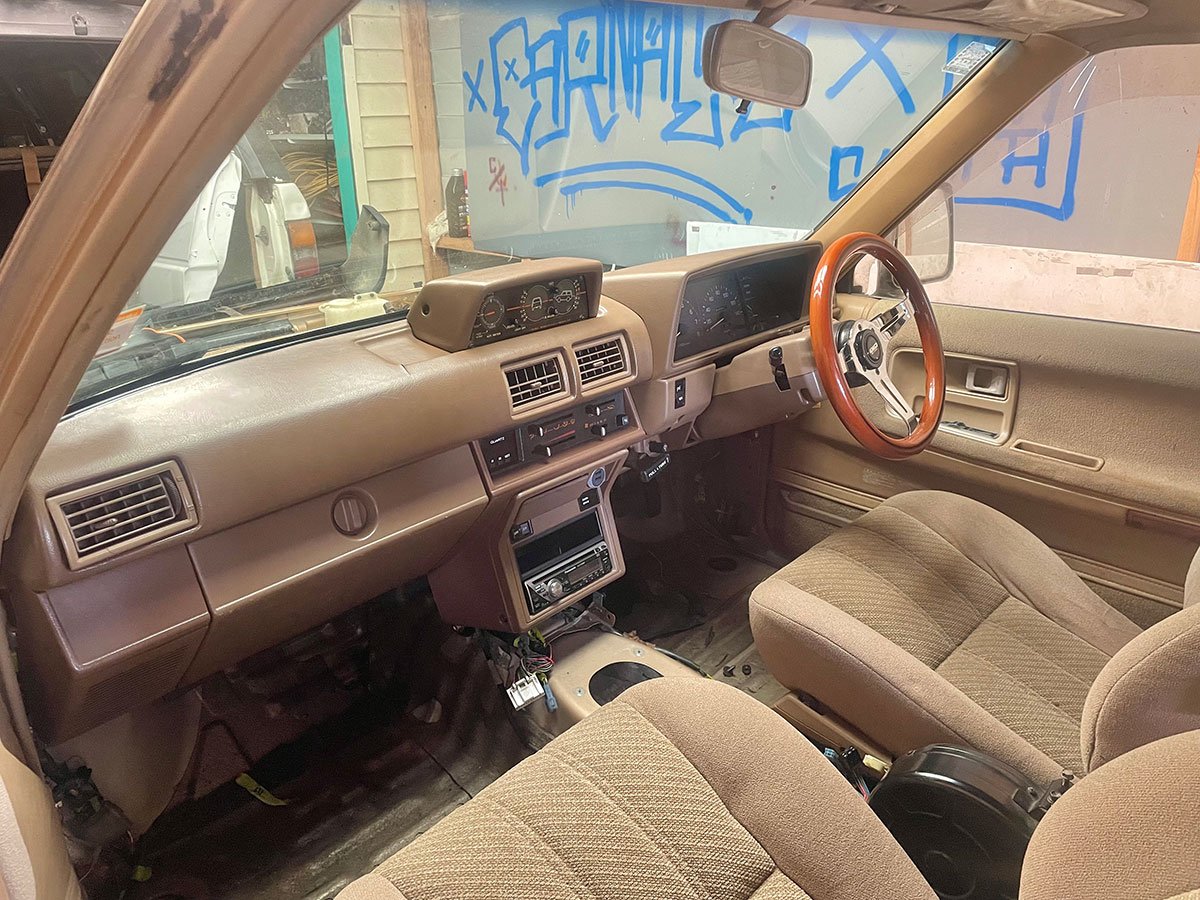
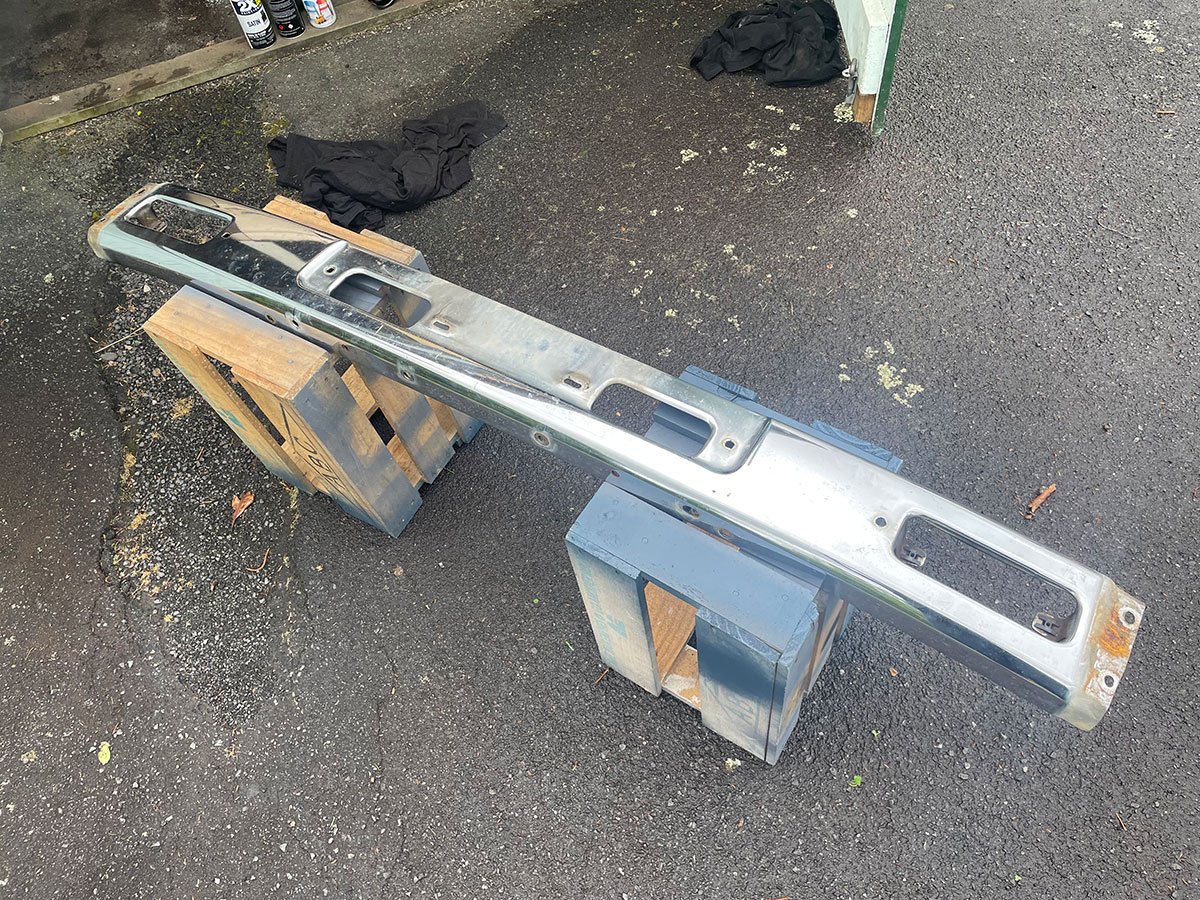
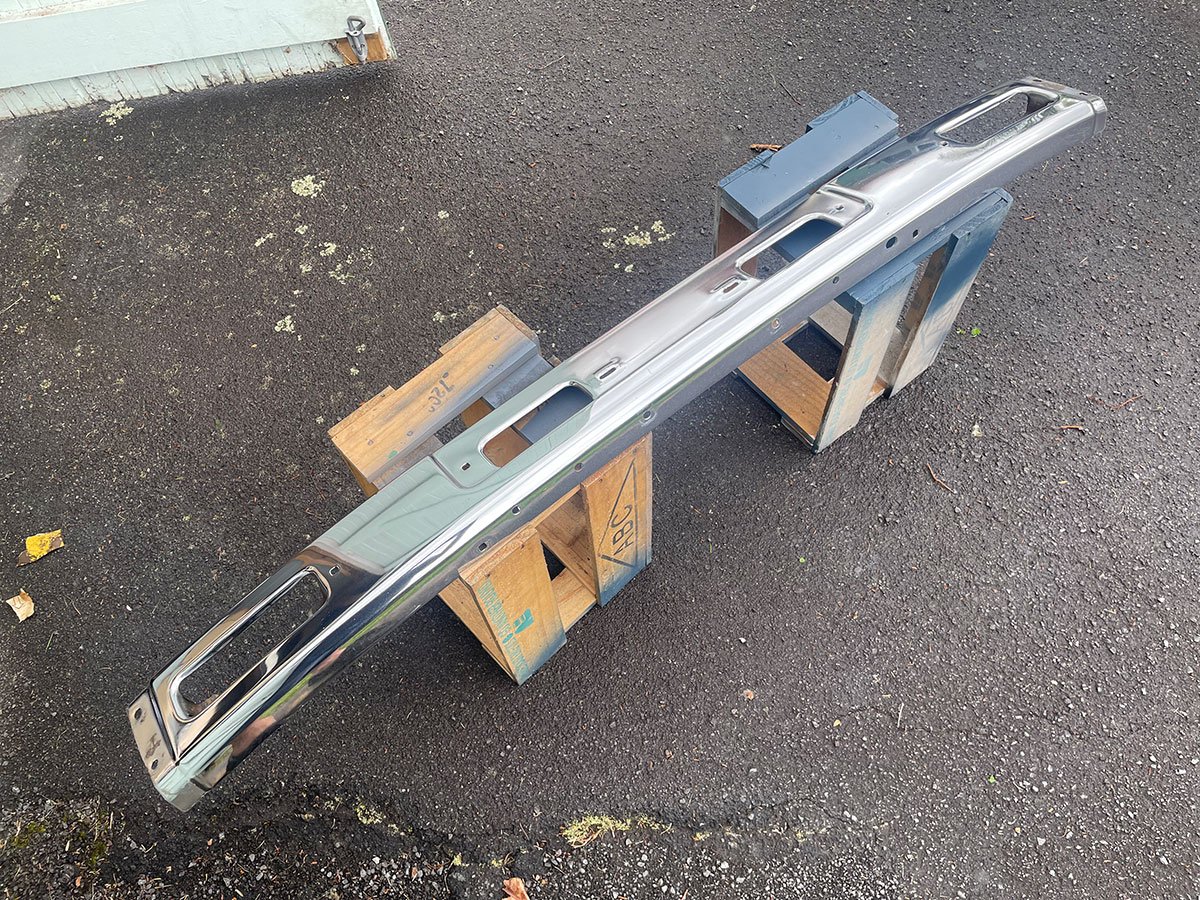
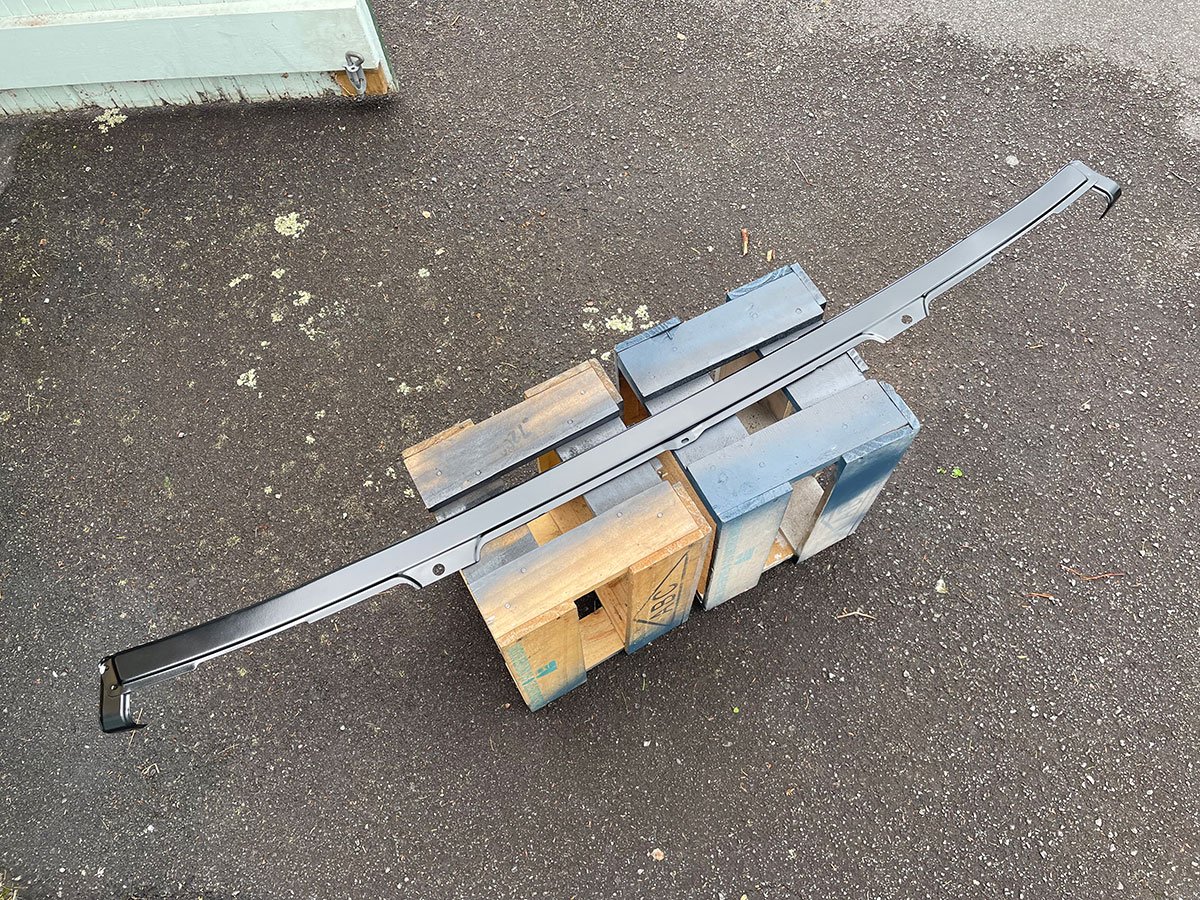
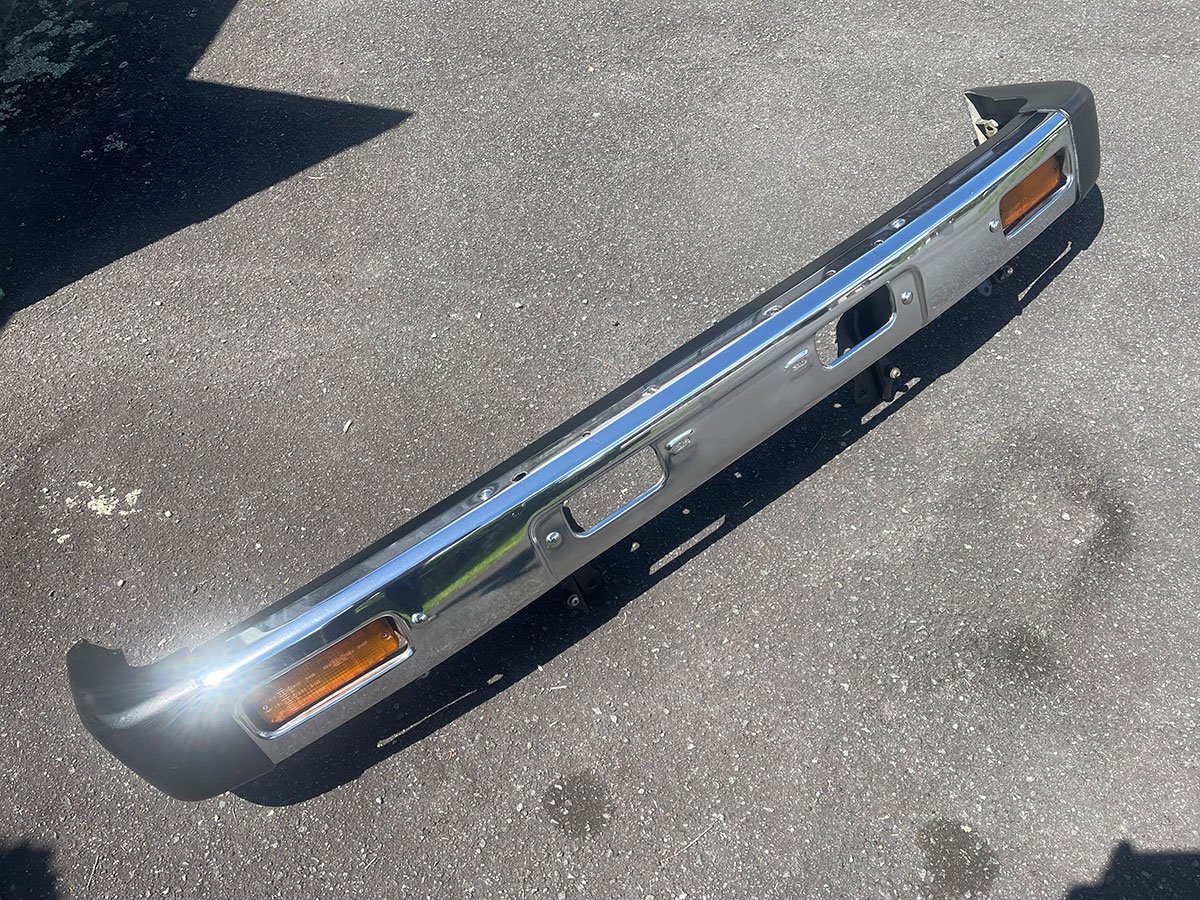
Been ticking a few things off the list. Got the dash all back in with the idea that everything will work sweet (hopefully). Looks good either way. Also, ordered new carpets for the passenger area. Swapped out the loom that goes from the front of the cab to the rear as the plug up front is different. Bitch of a job but done now. Reasonably pointless picture below... Then got onto tidying the front bumper up. After stripping it back the back side is real pitted with a couple very small pin holes. The chrome is actually pretty decent on the front. Collected the good parts from both trucks, rust killed it, polished it up and painted the small valence panel and it looks good enough for me. Might end up buying the chrome part new at some stage. Next update will hopefully be the body swap!
1 point
-
Your arse and beads go together like bread and butter....1 point
-
.....and before you know it you'll be the boss. HORN PLEASE!
1 point
-
Don't stress. You could hide that fuck up with some of these...
1 point
-
Thought I may as well get the shock mounts done before pack up time too. Flipped one of the stock upper shock mounts and used that on drivers side, then used some lasered brackets I had left over from another job on passengers. Shocks sit nice and more upright than stock so should ride a bit better. Can almost see the light at the end of the tunnel now.
1 point
-
Needs quite a bit of love... so it'll be strip, sandblast , setup, etch prime.... etc
1 point
-
.and then I found this when I got home from work.
1 point
-
Your other half is a cat? Who's the person holding her?1 point


.jpg.e6a4e65c1baa717483d55e4d75fde754.jpg)
.jpg.32e2b21c54f0e7ea9532cc4989ac2f16.jpg)
.jpg.663d3d6c55dd68d0b79b45871e10637a.jpg)
.jpg.aaf9dfe1dae41da239fcc2b55ee74d58.jpg)
.jpg.5d3bc365a961398df41737512b0356ec.jpg)


This leaderboard is set to Auckland/GMT+12:00