
Leaderboard


Popular Content
Showing content with the highest reputation on 11/24/21 in all areas
-
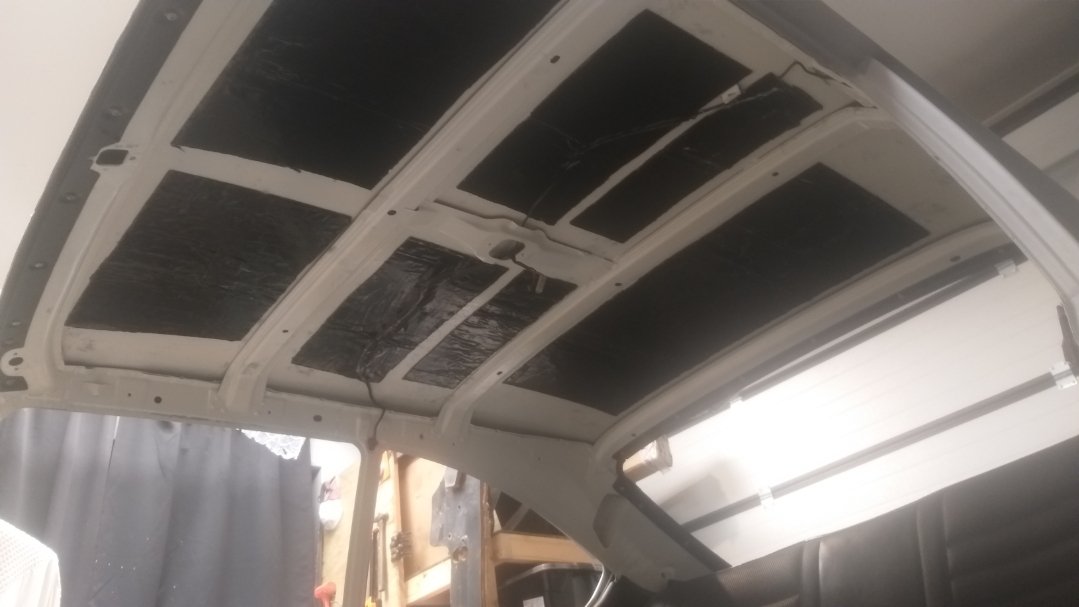
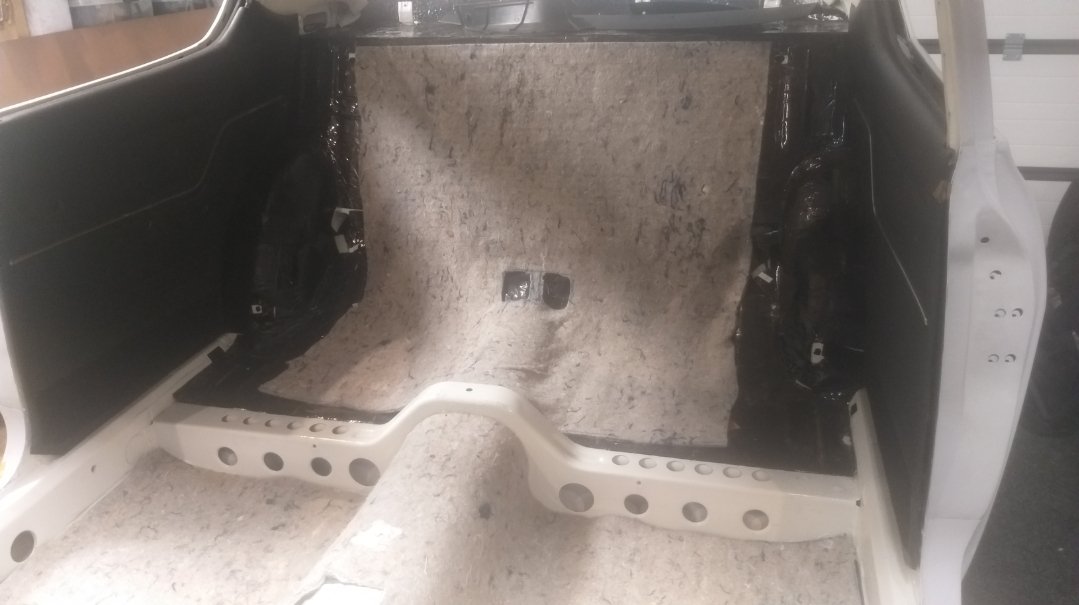
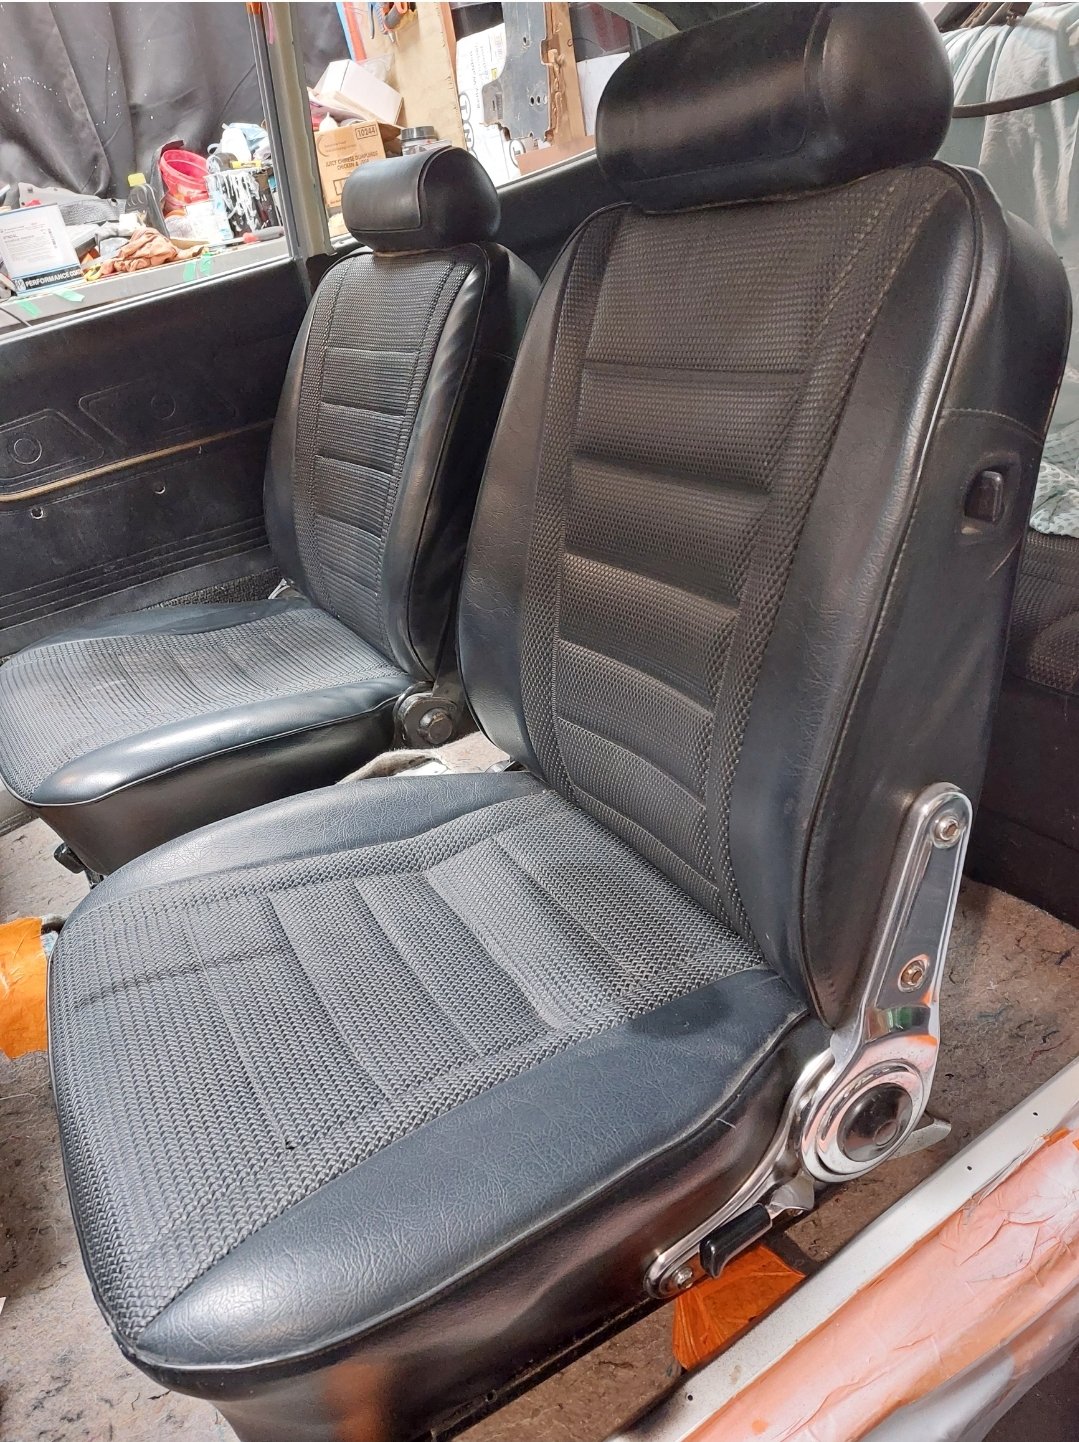
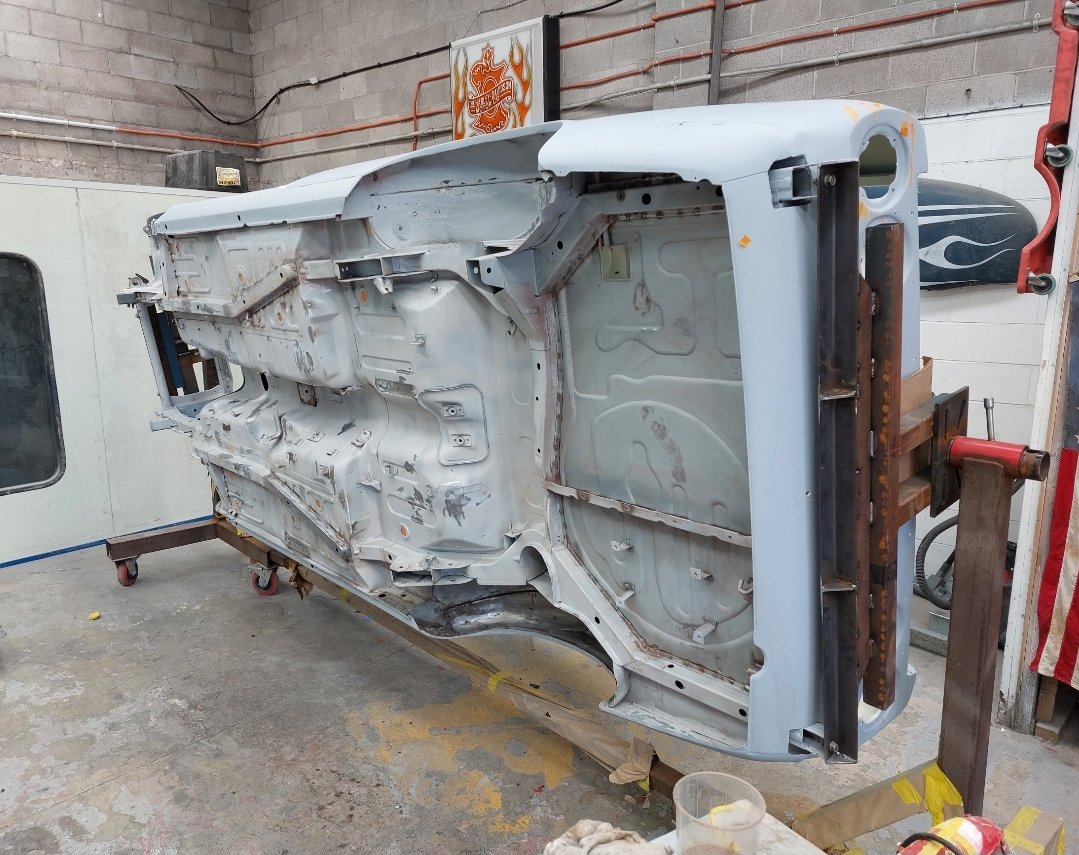
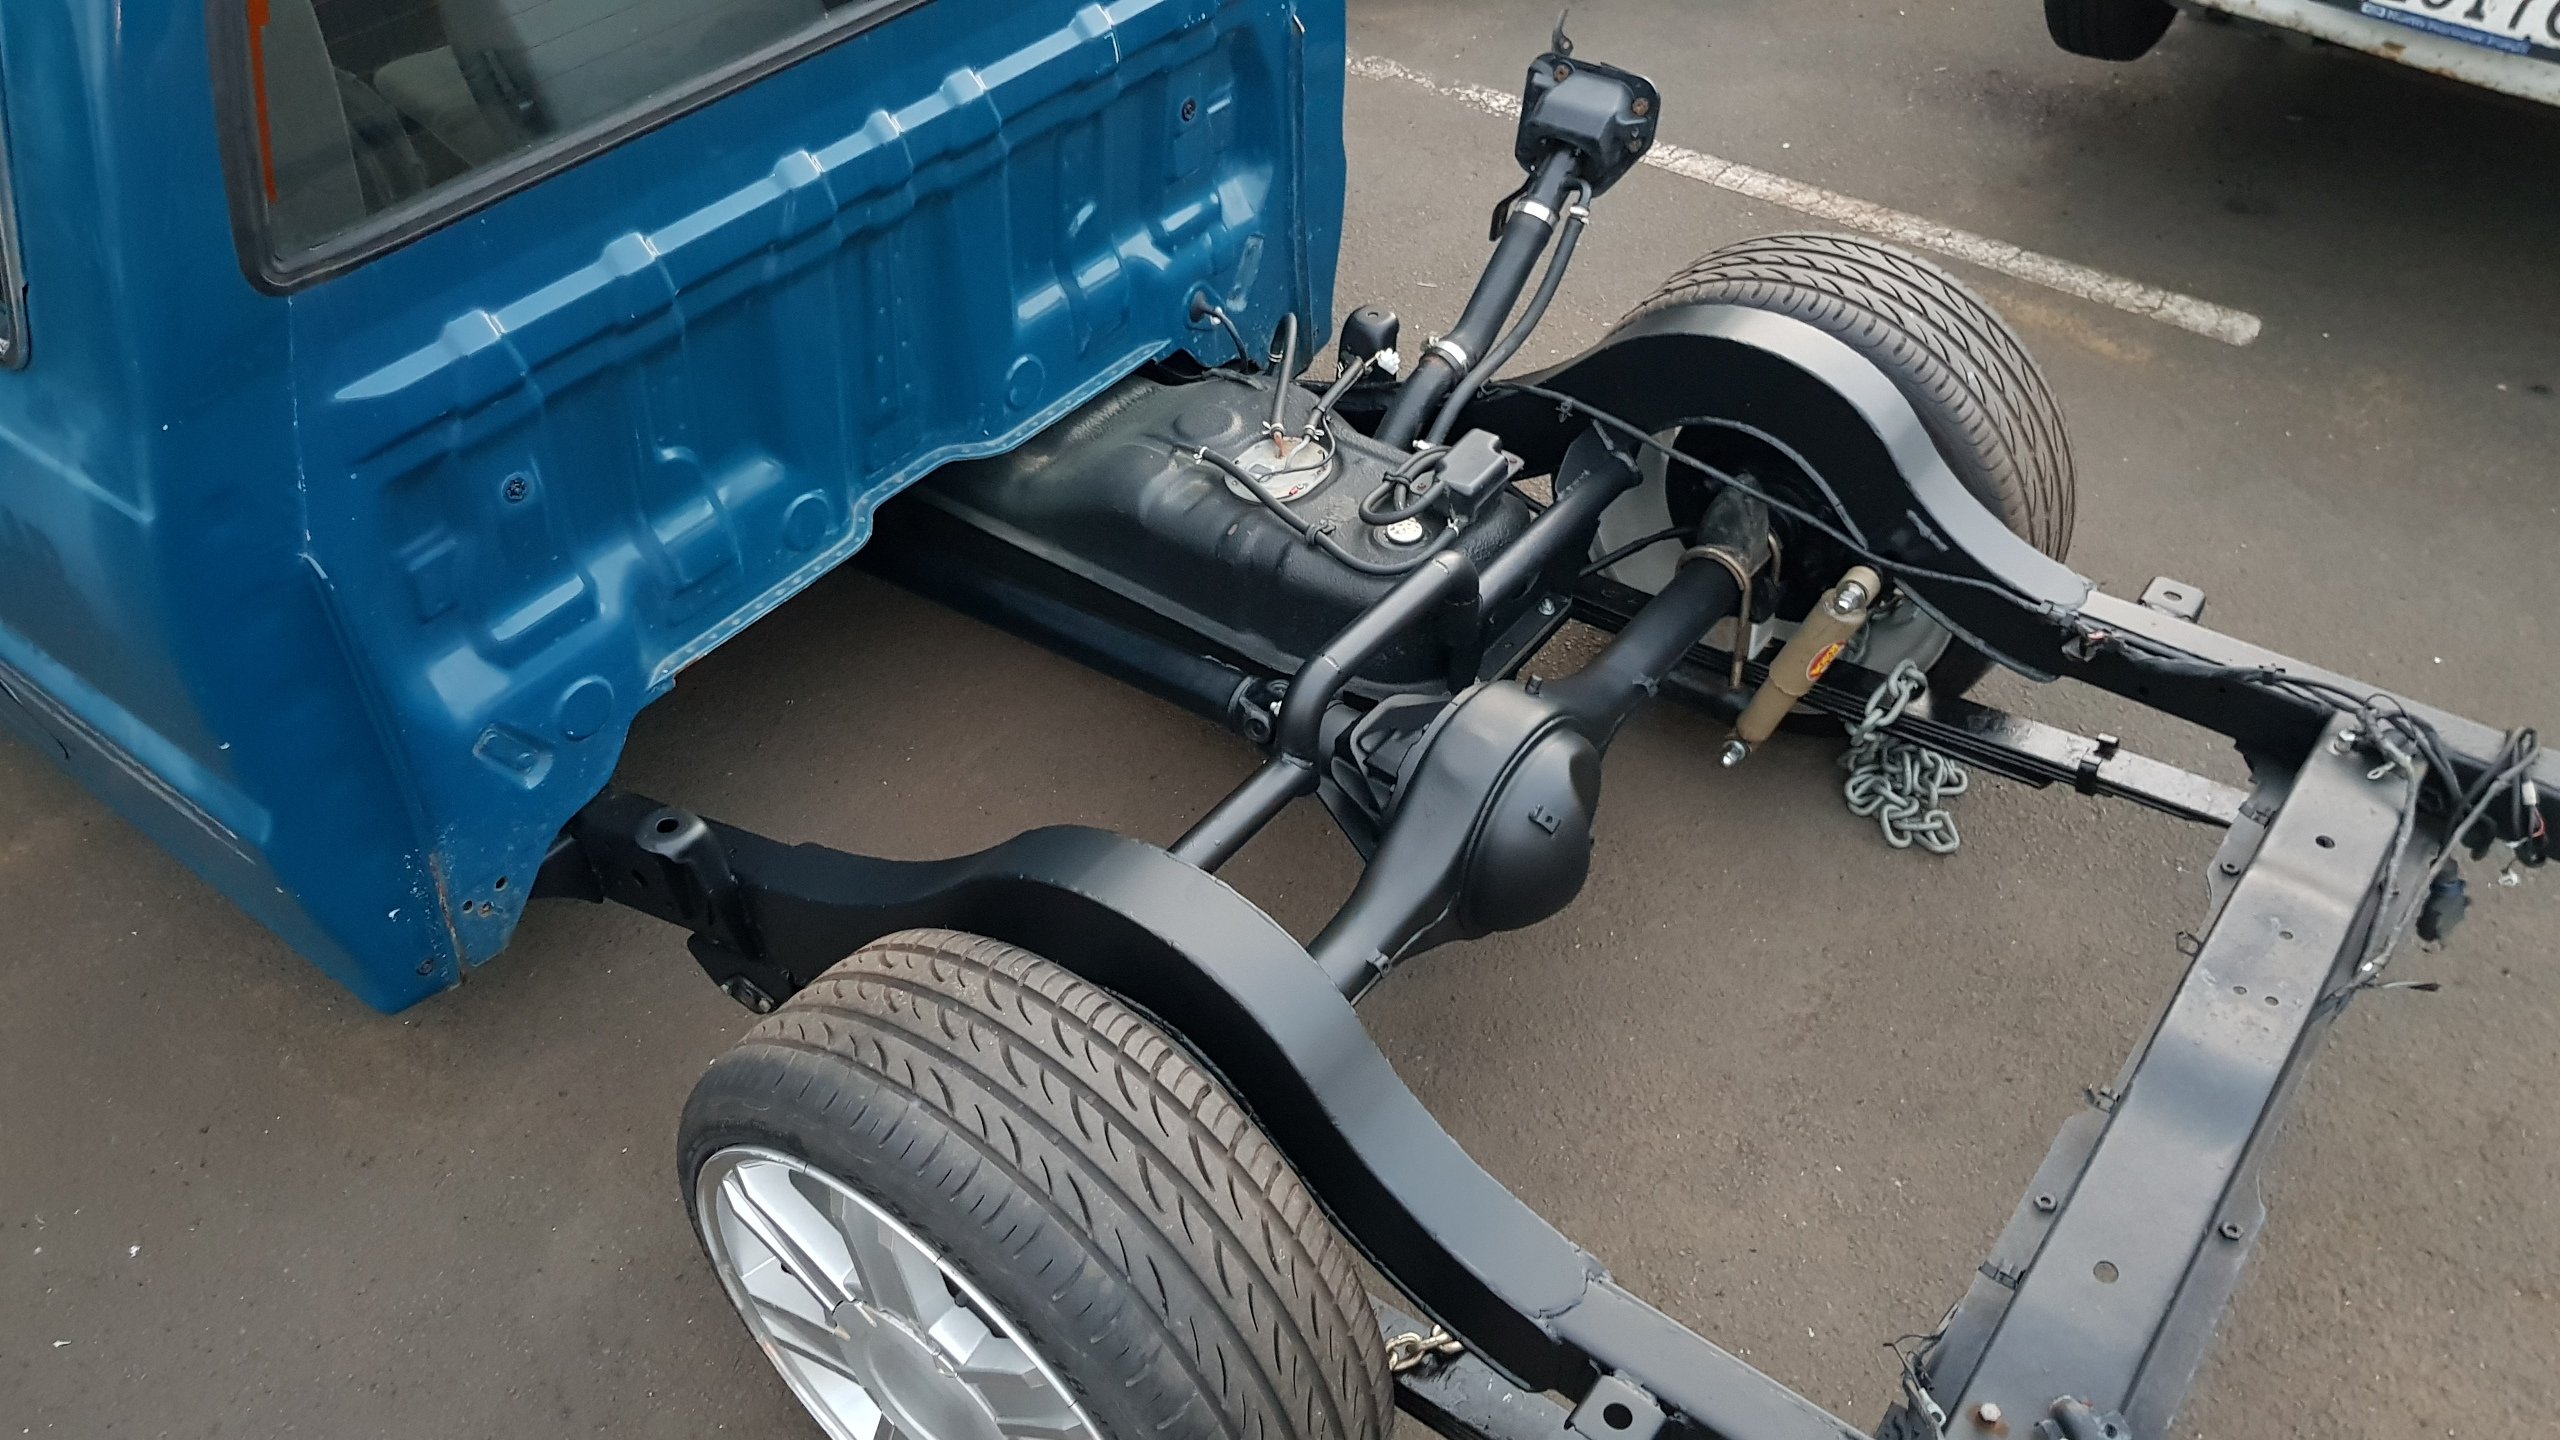
Have been prepping smaller jobs inside underfelt cut for floor and hoodlining, plus foams, spent ridiculous amount of time trying to get seat mechs to work correctly(still not 100%). Major part is its now finally at the painters, spent a day yesterday helping prep underside, good things to come
 17 points
 -
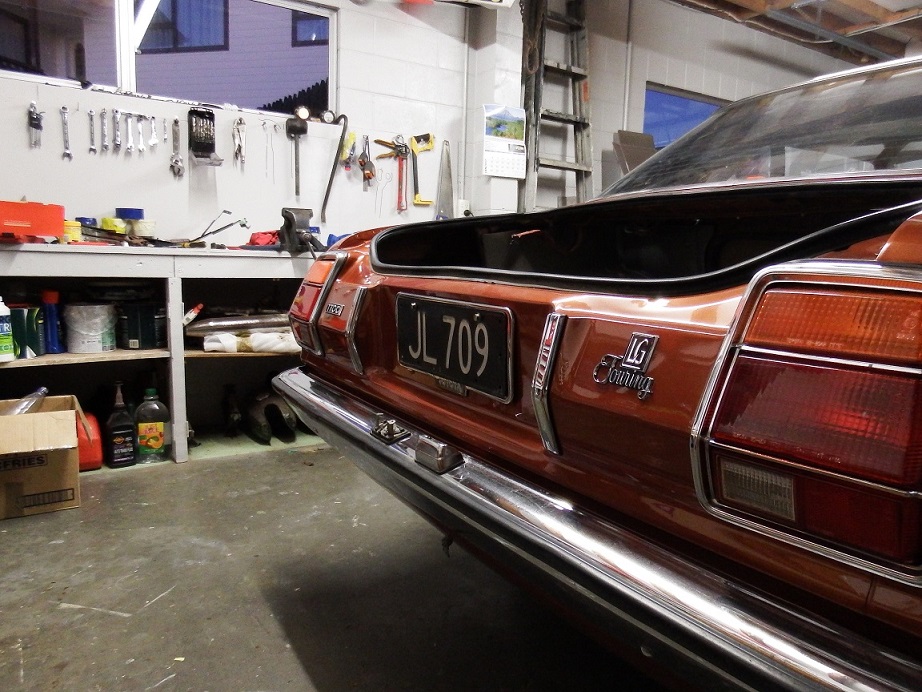
I'm a big fan of the fawn and green interior
16 points
-
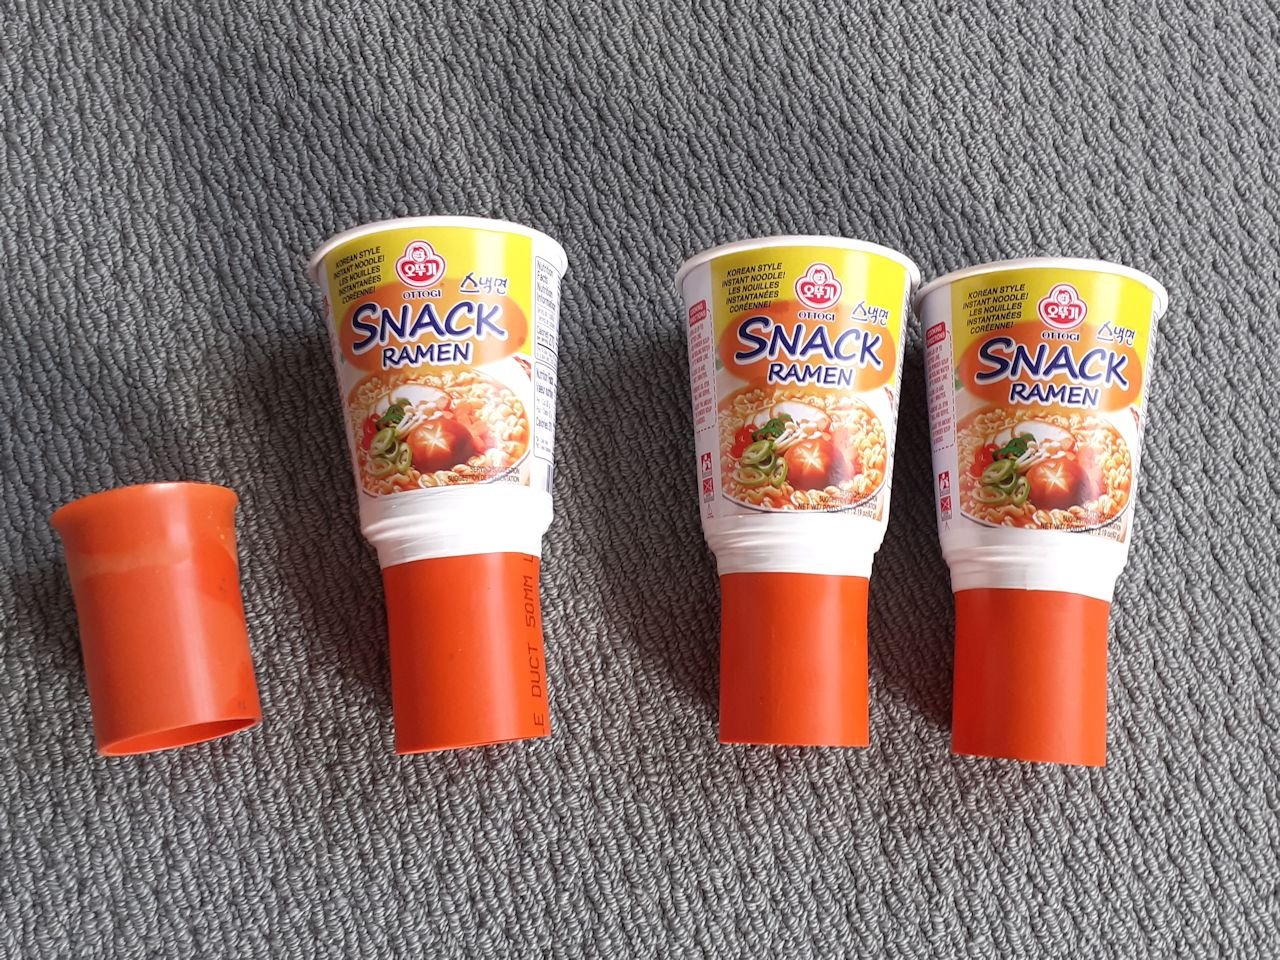
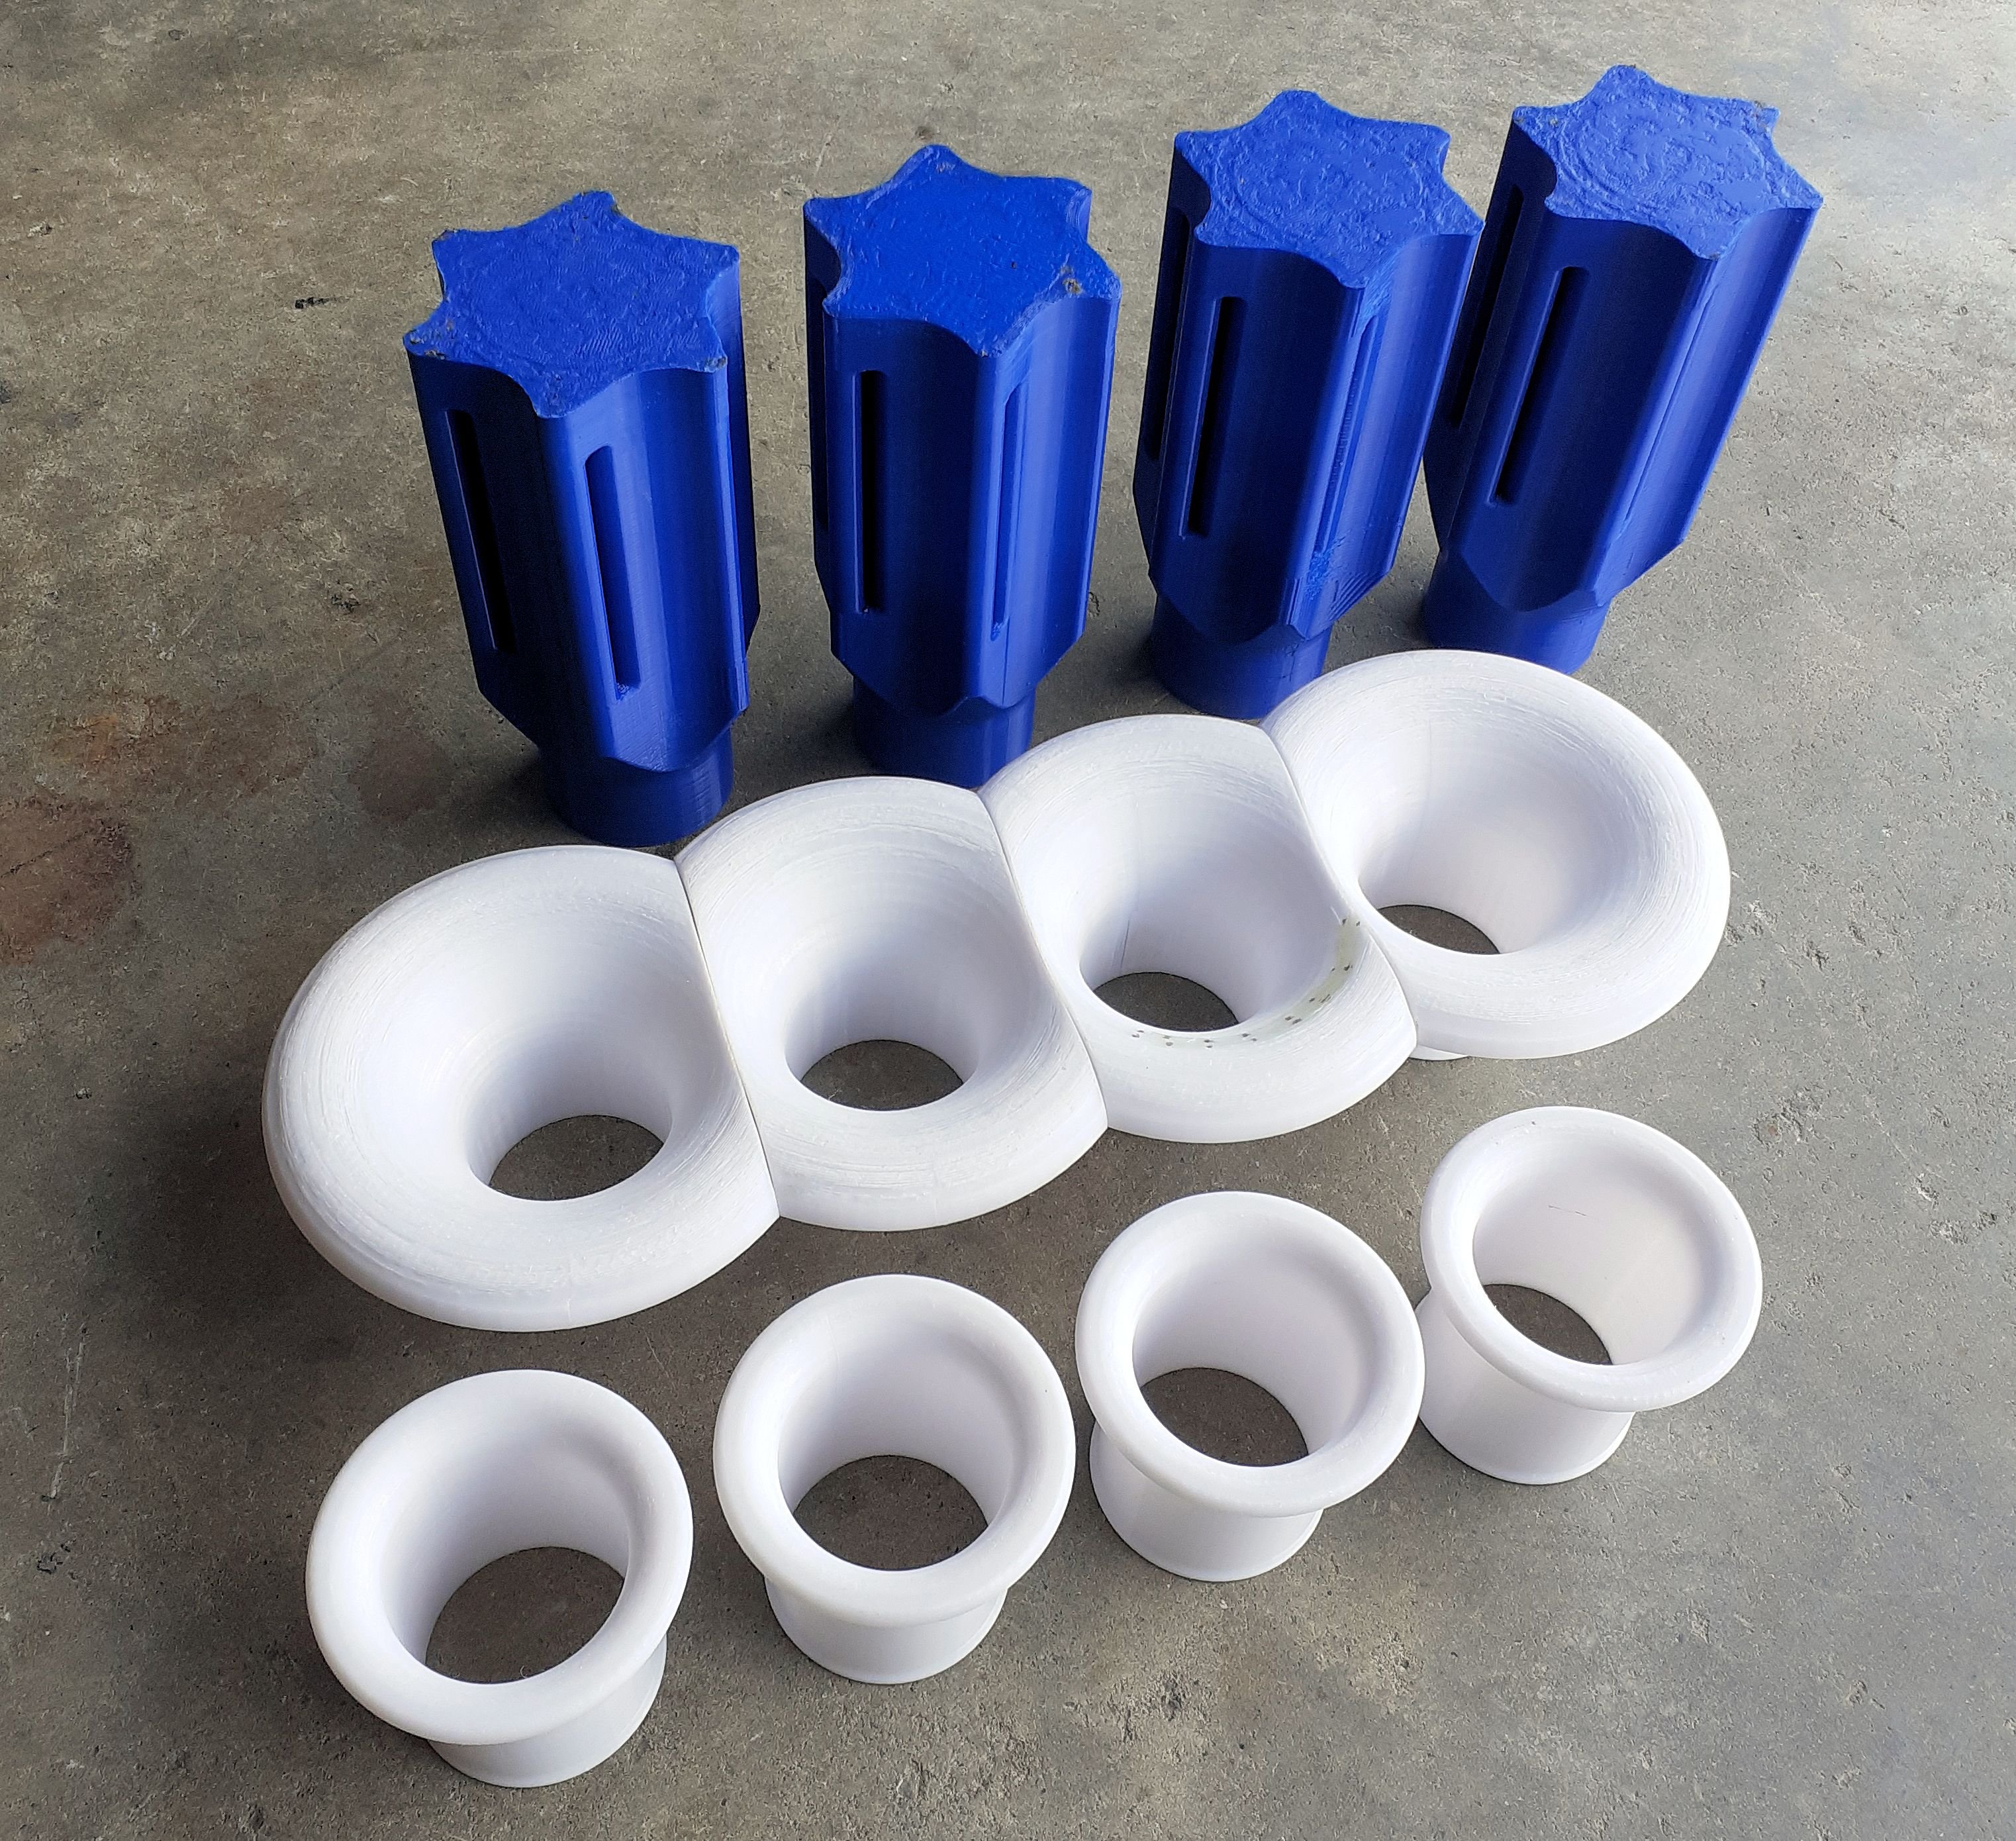
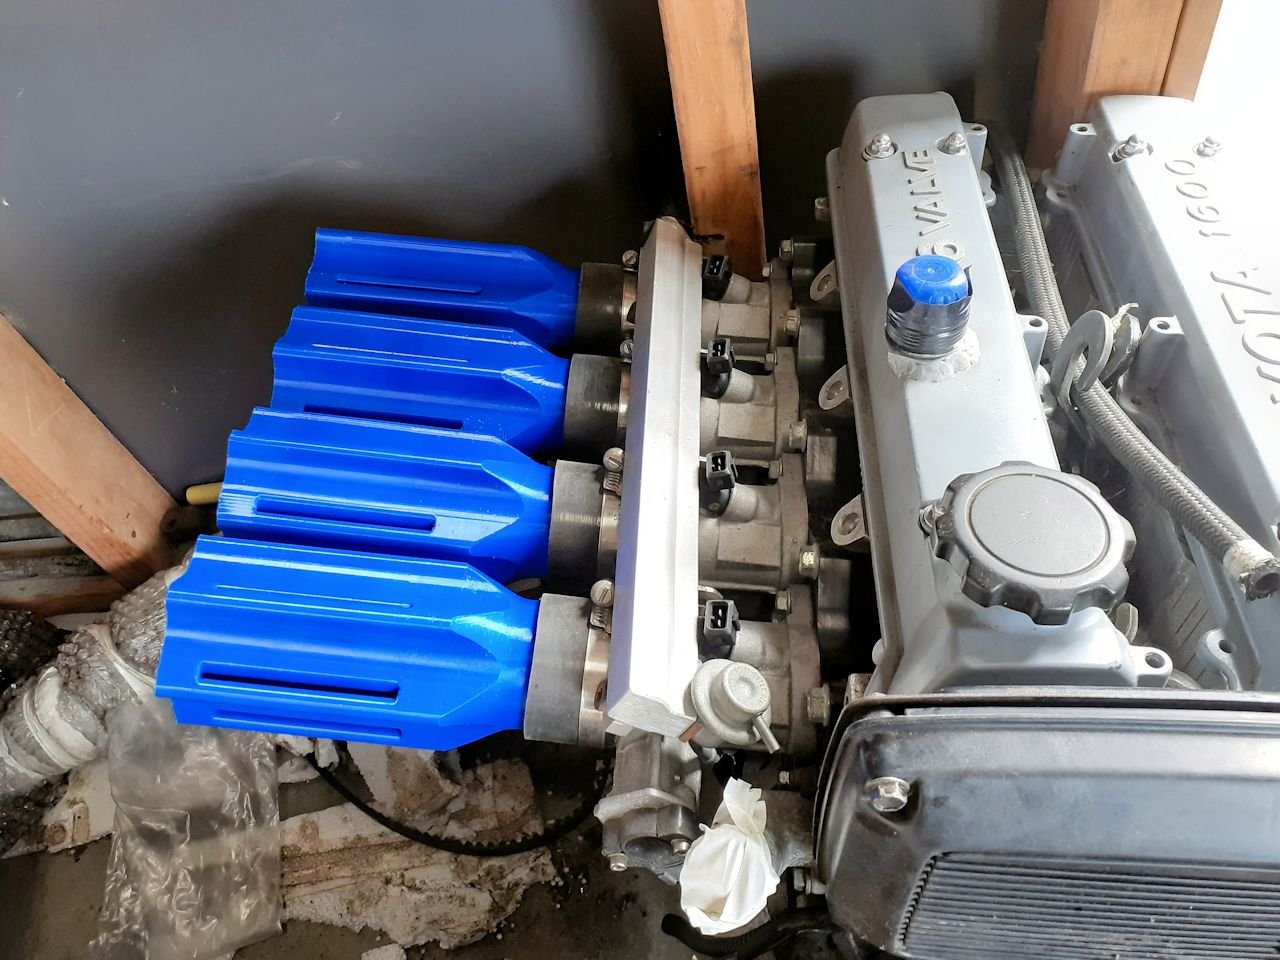
was going for the ramen / pad thai combo. but old mate pad thai made his cup the wrong size. so looks like its ramen noodles for lunch, to get that 4th cup They even have the full rolled bellmouth everyone likes
15 points
-
Well I got back into this and finally finished building the box and have now filled it with tools. Very happy with the finished product. Continuing on from my first post I added a few more bits. First off was a lid that covered the stainless tray. This was 18mm plywood left over from the shed build. I hinged it off from one side and made a swing out support to hold it up when its opened. Then I build a lift up section along the back to hang spanners and screwdrivers off. I added a lid to this bit. I ripped down some bits of eucalypt timber left over from the coffee cart we recently built for a customer ( that's another thing I must put some pics up of because it was a cool project!) These bits of timber were then profiled into corner cappings. With them attached Hannah then oiled it all and varnished the flip back lid. I made some handles. One main one for shifting it about the workshop and then a swing up one with more leverage that is for moving it offroad. I found a little handle we have had for yonks. Ideal for the lift up section... Finally a little box on the side for a few often used cans- wd40, spraygrease, zinc it black etc. I took no photos of all this because I was just absorbed with the build. Now complete I filled it with all the tools I use on car jobs etc. This was super fun because it meant I could shuffle loads of stuff about and off the walls. I could also move my old toolbox that took plenty of useful 'Flat six' sized space and put it under the bench. The bench area became a bomb site with stuff all over the place as I did a workshop bench spring clean. Got rid of lots of crap and re-organised a load of stuff into new trays I'd bought from Bunnings. This satisfies me no end. Anyway- back to the toolbox. Which now has a very catchy name. The 'Wheelybox 2000' pics. Closed up and ready to move... and opened up (a pic sort of like a toolbox equivalent of 80's Lambo poster with all the doors/boot/engine covers open).. In action... on the move.. detail shots... ( should have done a narrow depth of field shot of the cans through an open window...) the tray.. and for your amusement - this is what happens when I do a spring clean... So happy with it. It going to be a bloody useful asset to the business and save a lot of walking back and forth to the bench, especially when doing jobs on cars, trucks and tractors etc outside. Should have done it ages ago! My next plans for the bench area are to paint the plywood walls a bright colour and probably add a window over the bench - especially as we have chopped down loads of trees and we would now be able to watch the sunset through it as I tinker with Goldwing engines. I'll update the bushblock thread with that sort of workshop tinkering though. Better get back onto the Micras and the Imp 911 first eh....14 points
-
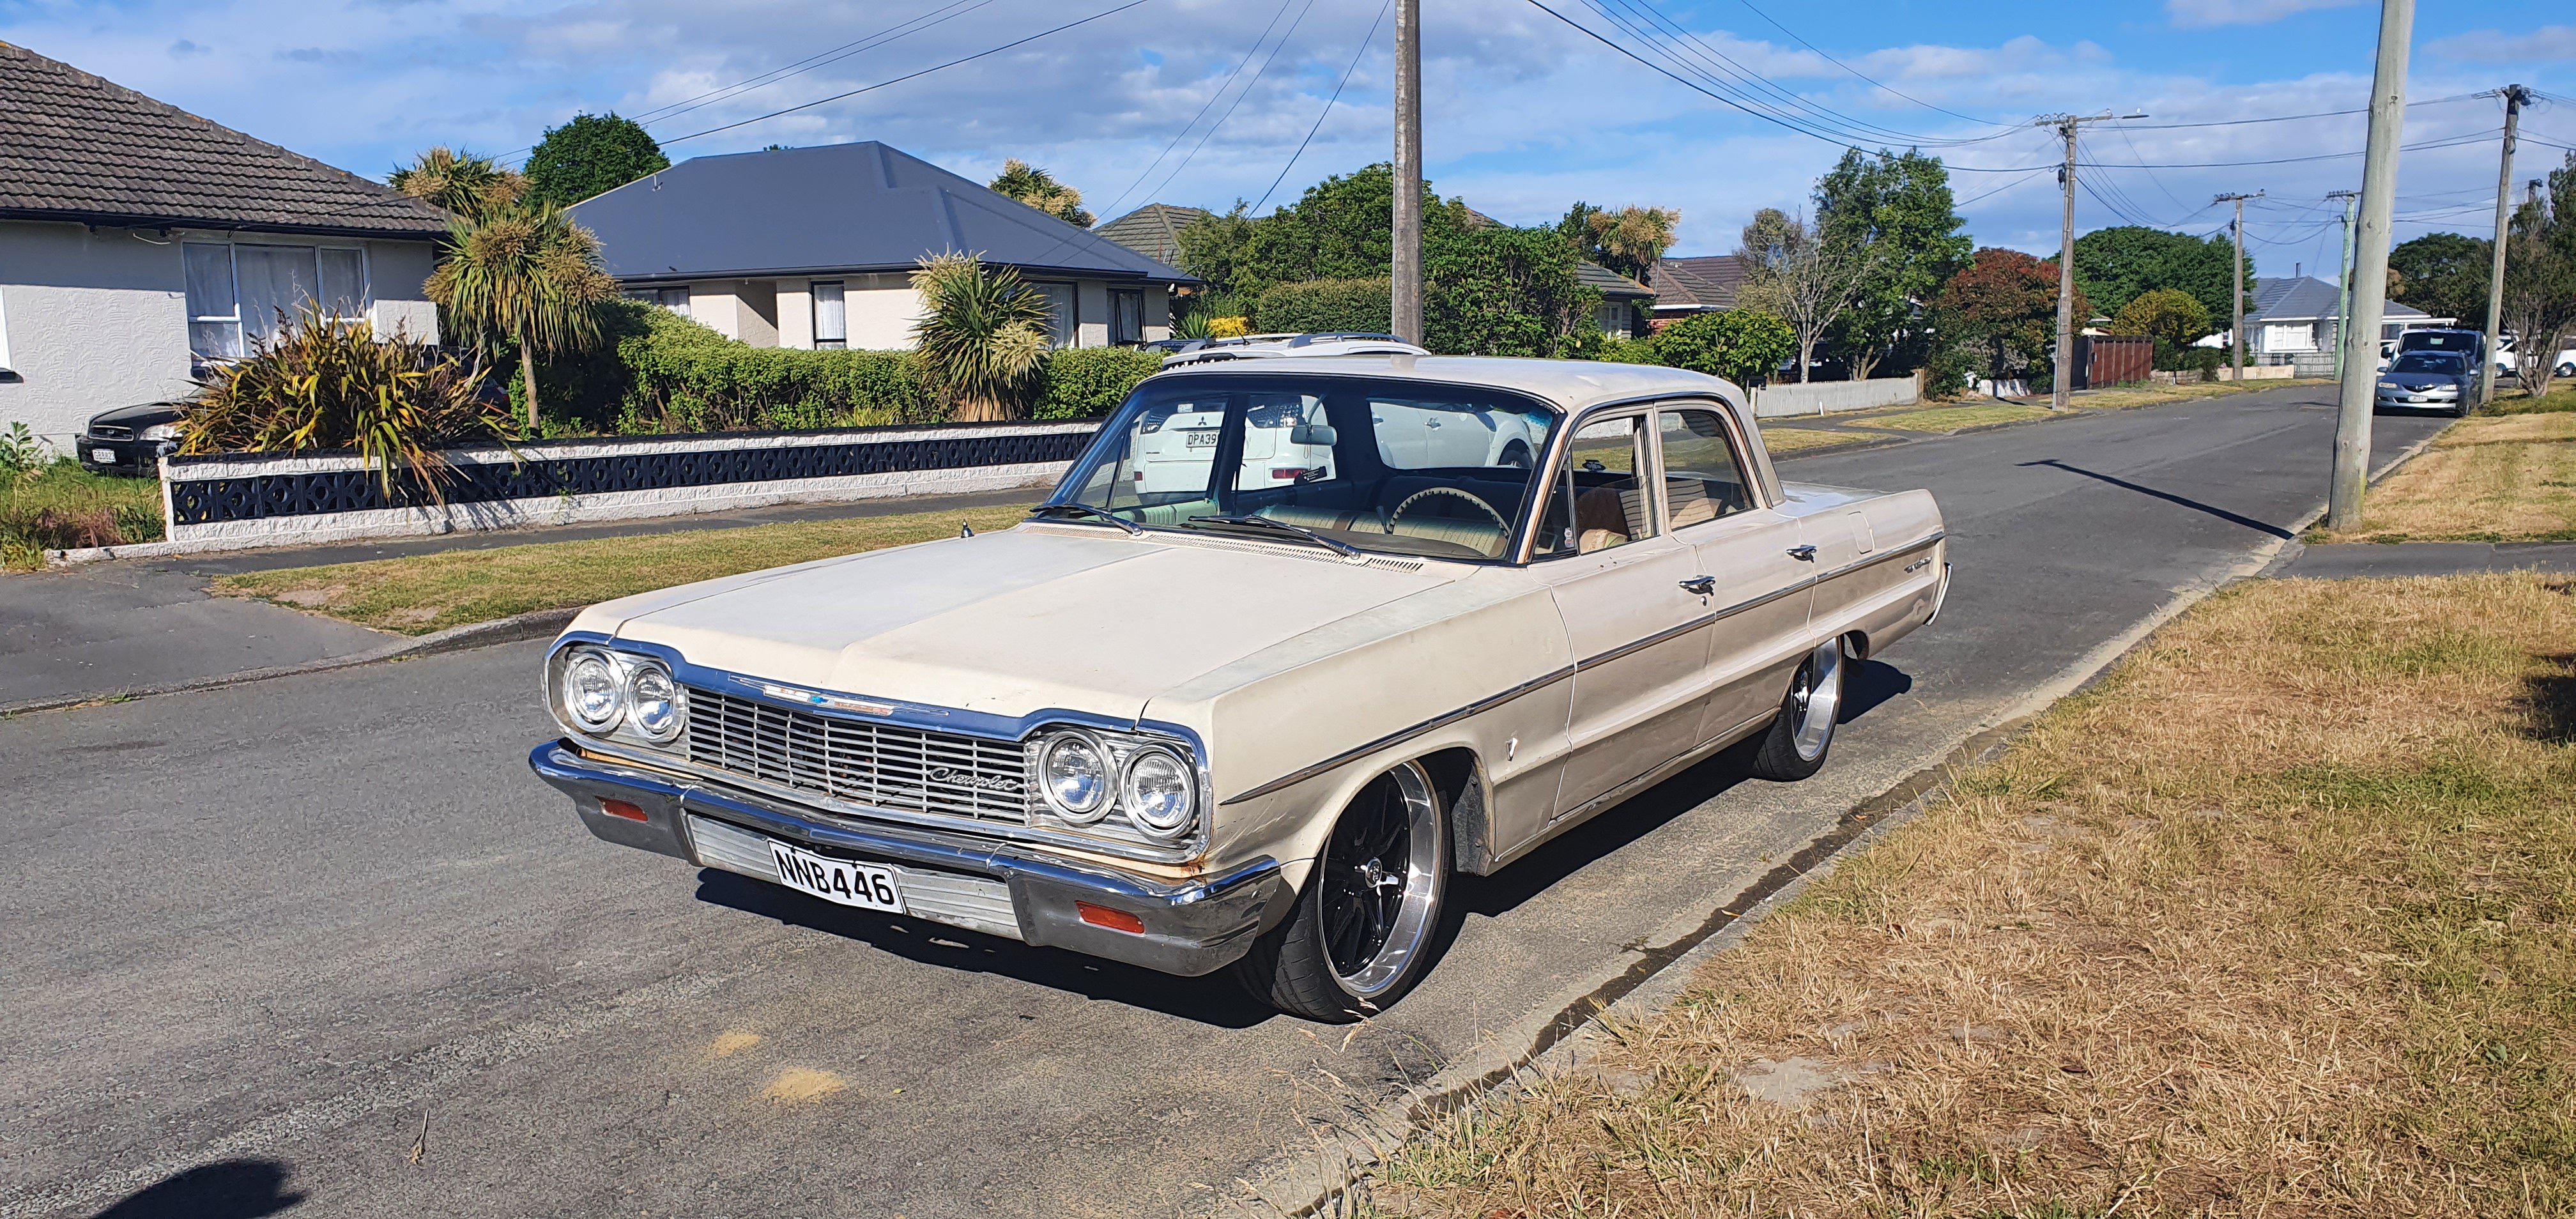
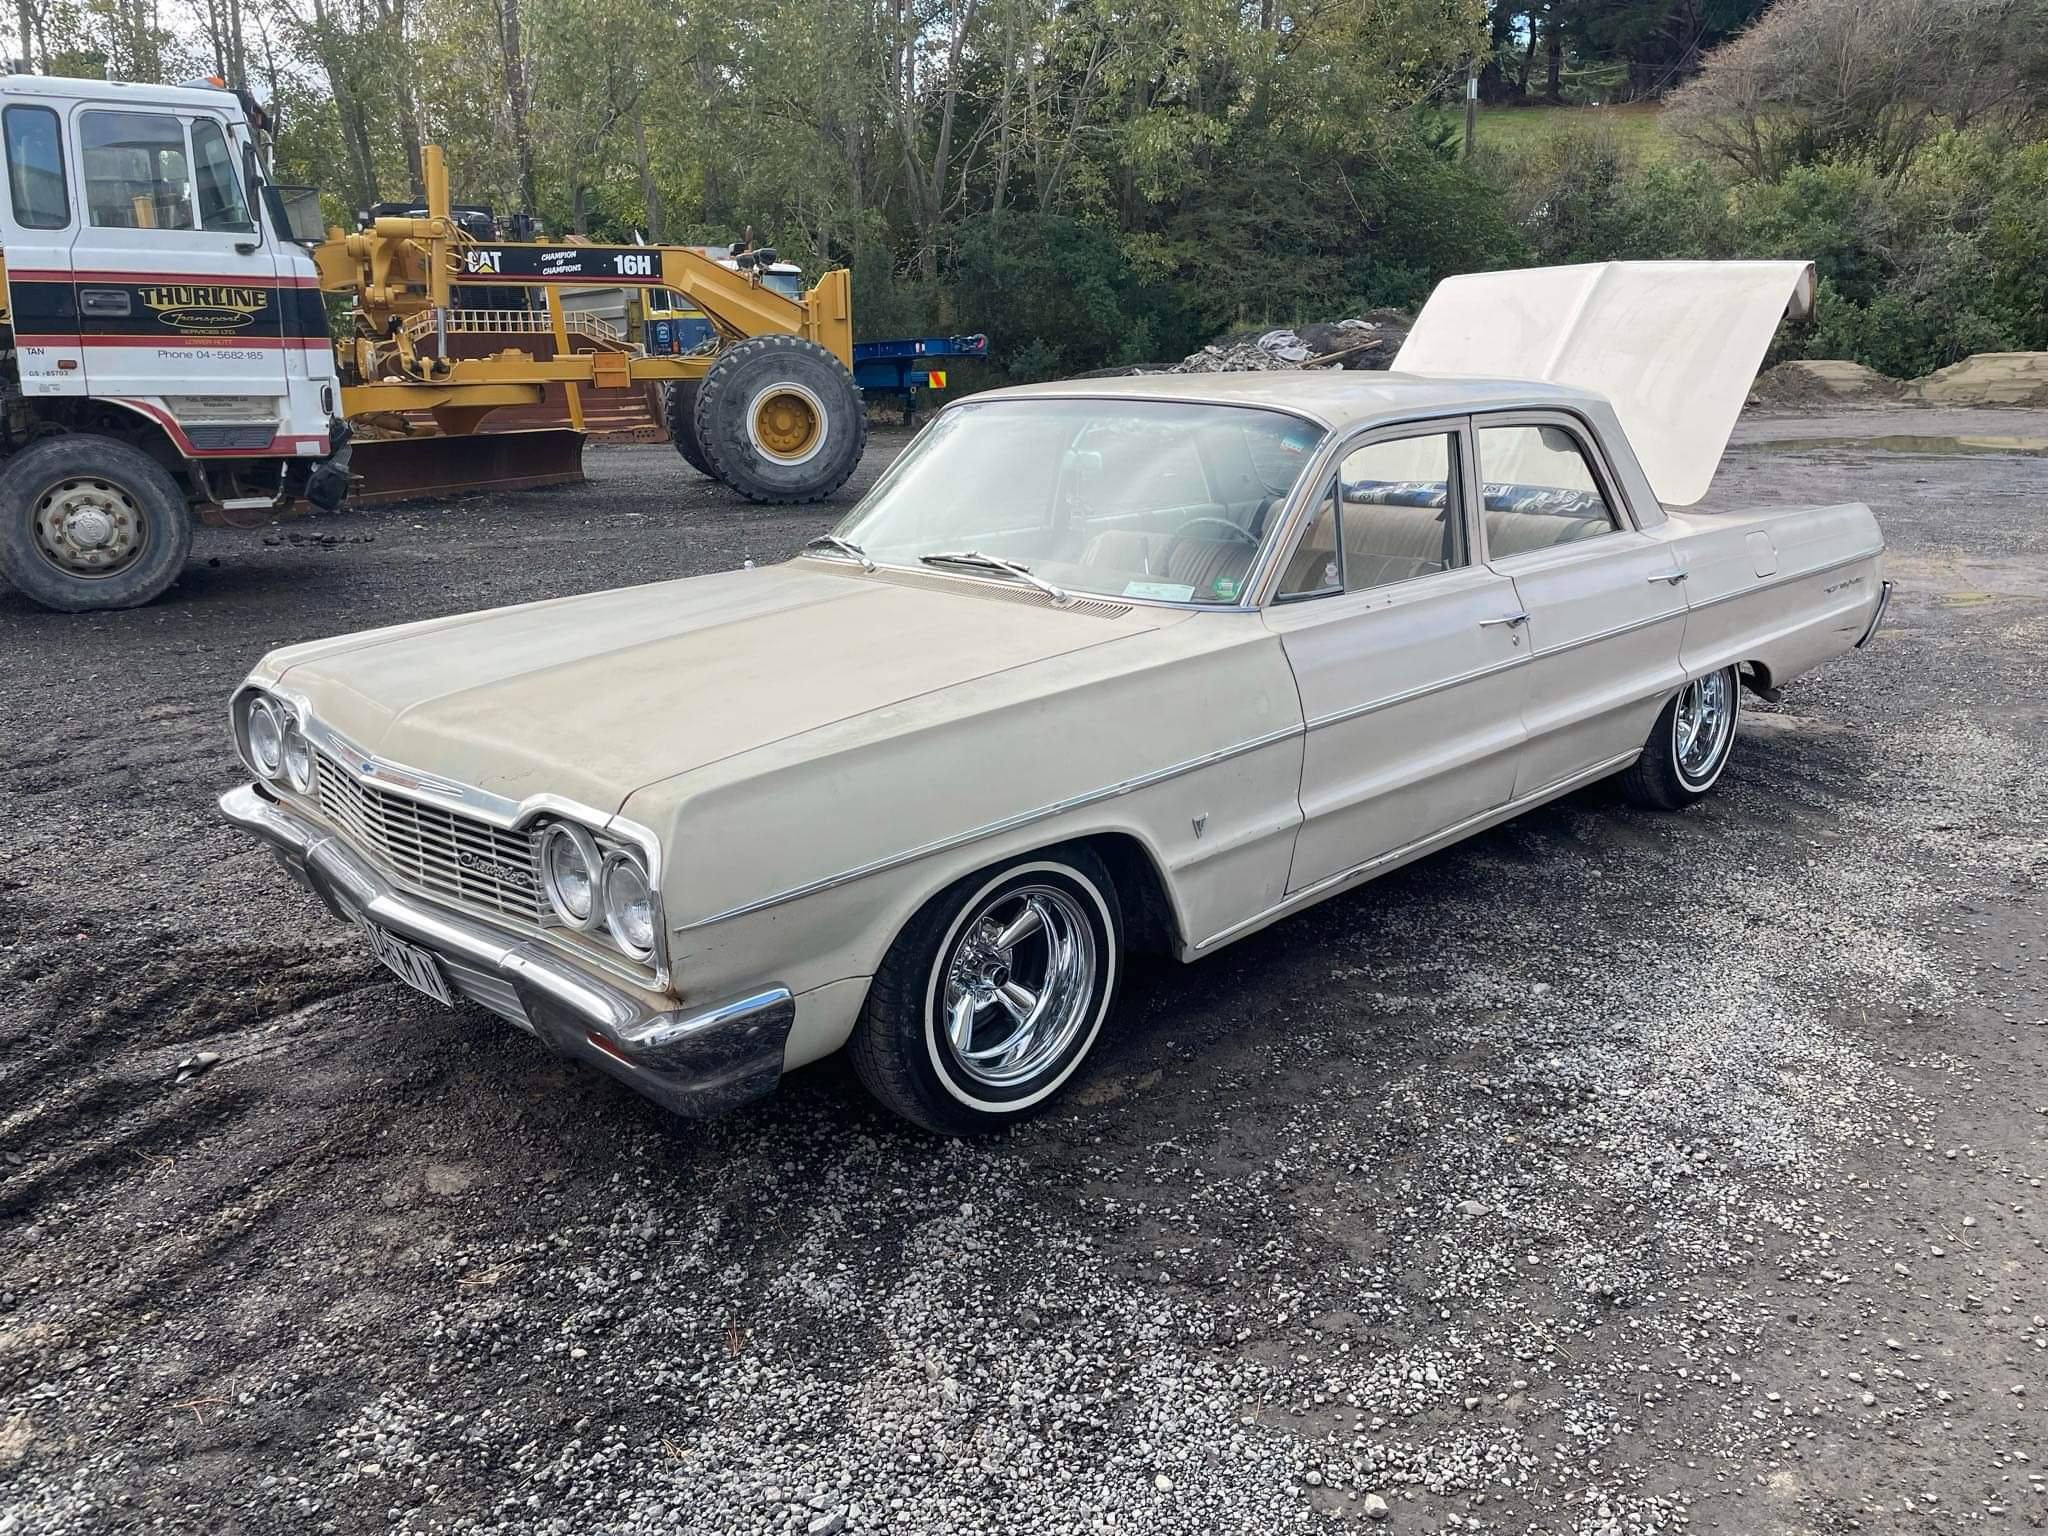
Discuss here Sharn incoming. Lots of words not many photos (yet). So, I'd been wanting to buy an Impala for a while and when the datsun popped up I thought it could be a good opportunity to make some money to put towards owning one. Unfortunately prices went crazy this year so it still seemed out of reach. As soon as it sold I put an ad up on one of the Facebook pages and I think I only got two responses. One was for a car way out of my budget and the other was a Bel Air in Wellington that looked rough. Anyway as time went on the Bel Air started to look like it could be worth looking at. I messaged @crustywhip and he was in the UK. Oh. No worries, if the guy still has it when Kane gets home we'll go from there. Thankfully the car wasn't actually advertised for sale so when it came time to revisit the idea it was still available. Kane had a look for me last week and determined that yes the body and interior is beat up but it is original and mechanicals are good. That was enough for me. Flight booked. "Hey m8. Have a 64 Belair if u interested? Have just put brand new mags on it also. Has NO RUST and has been through compliance etc when my m8 I brought it off had it. New body mounts and vtnz checked and wof also. Awesome tidy car and drives mint as! All original paint, carpets , seats etc etc so been untouched part from the wheels haha. It’s got a good 307 in it at the moment. My m8 had the bottom end checked by his mechanic and all tidy as. Only looking at selling to by a new vehicle for my new business otherwise I’d keep it 100% send u some pics" So anyway. Picked it up on Saturday and drove it home yesterday. It was tidier than I thought it would be and it drove well so I'm pretty stoked. I'll add some photos when I next drive it. Plans are to get rid of the 20"s asap and go to 14"s. Get some of the body tidied up (There's a gark down the right side and some dents in the roof I wouldn't mind disappearing). A new hoodlining, probably a stereo, and all going well hydros.
8 points
-
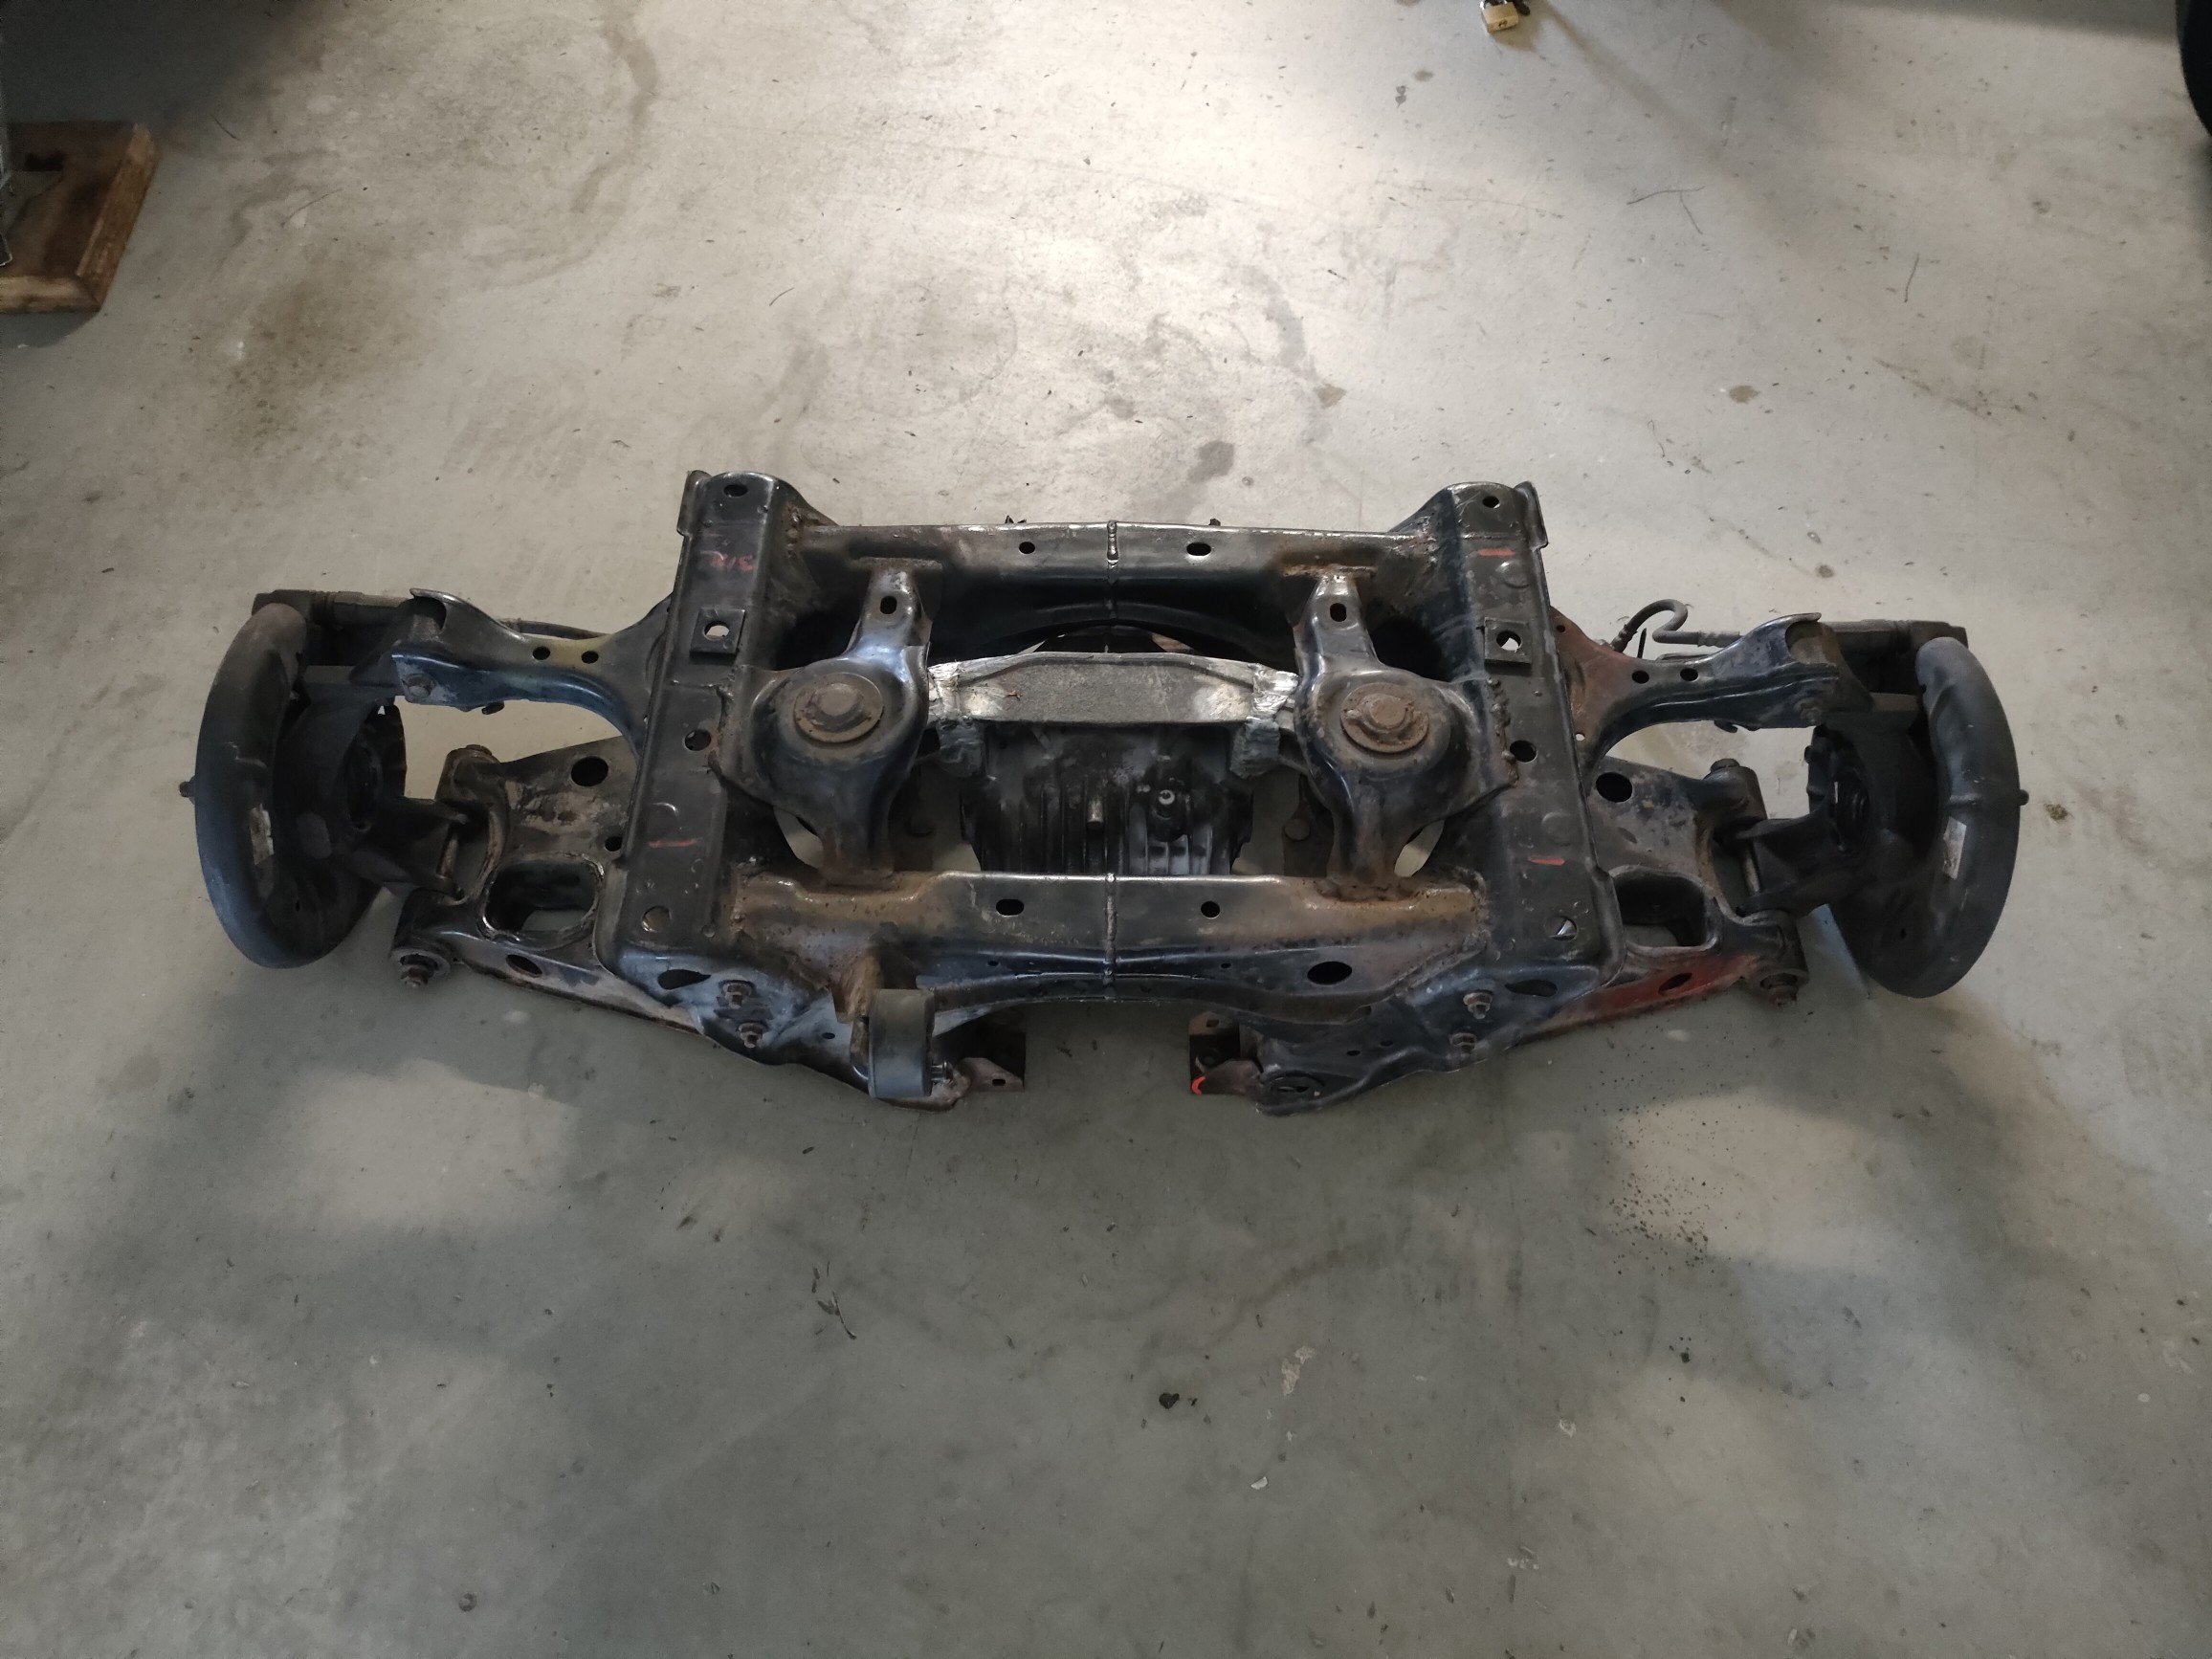
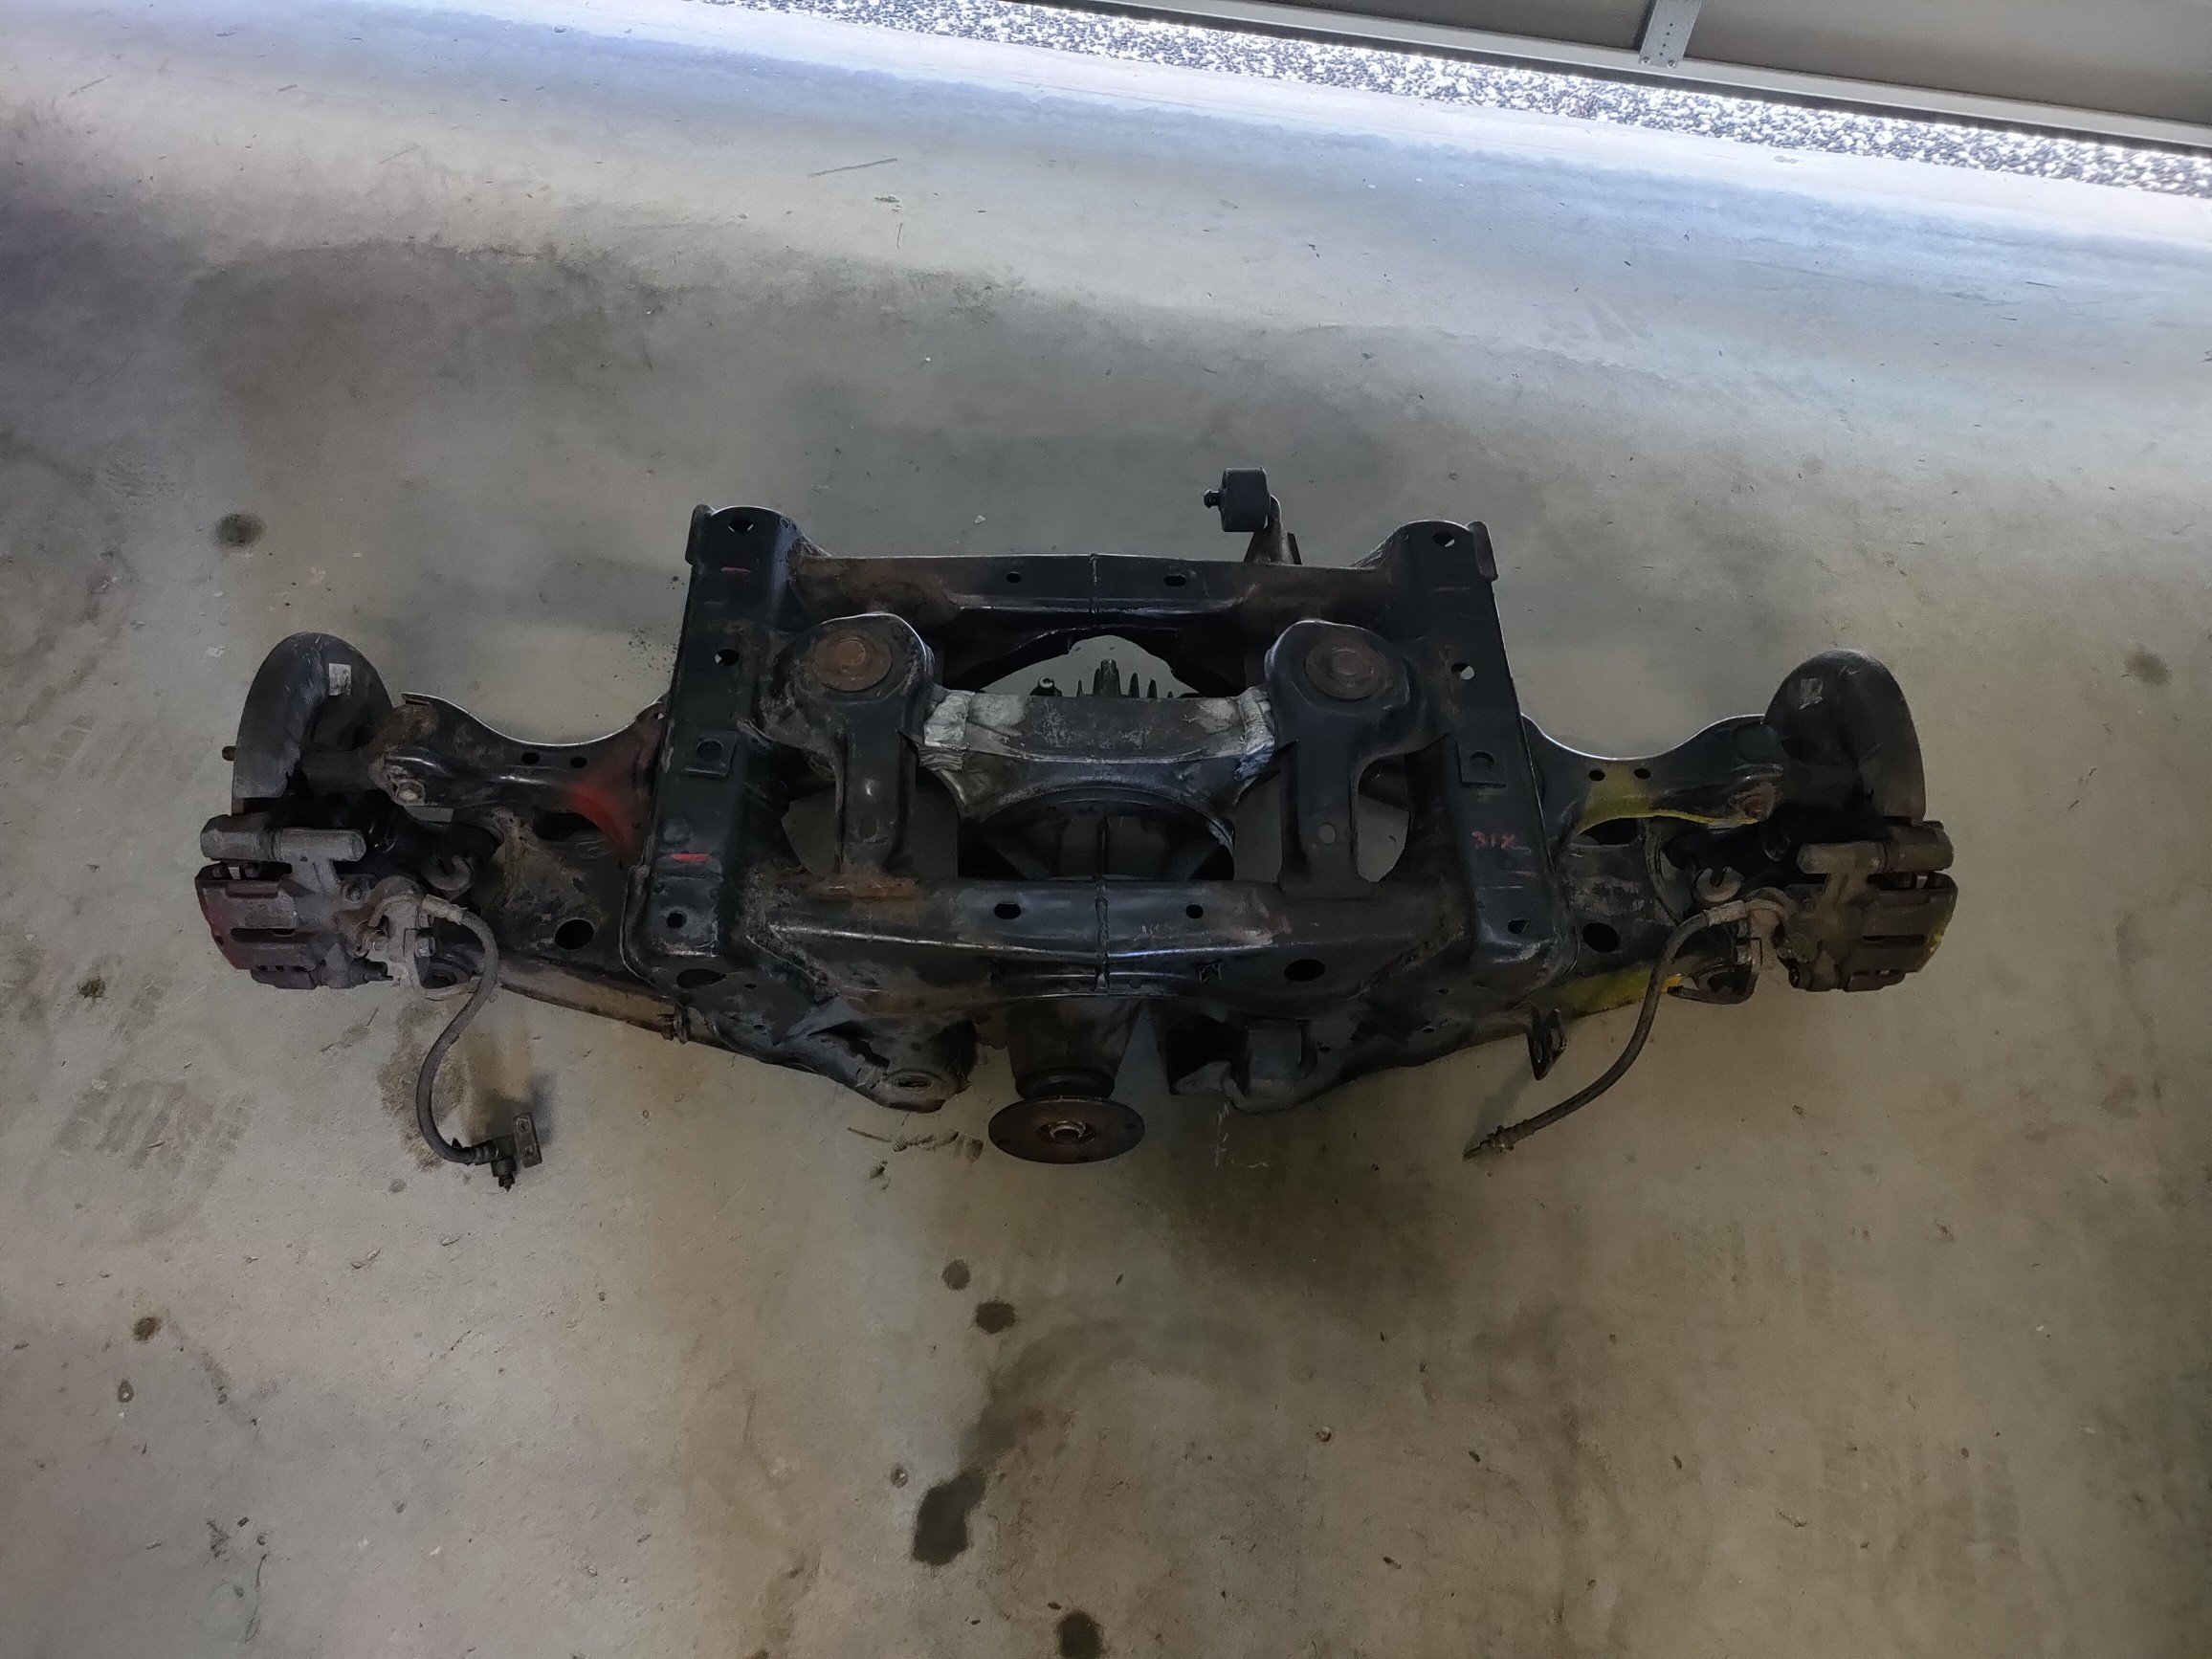
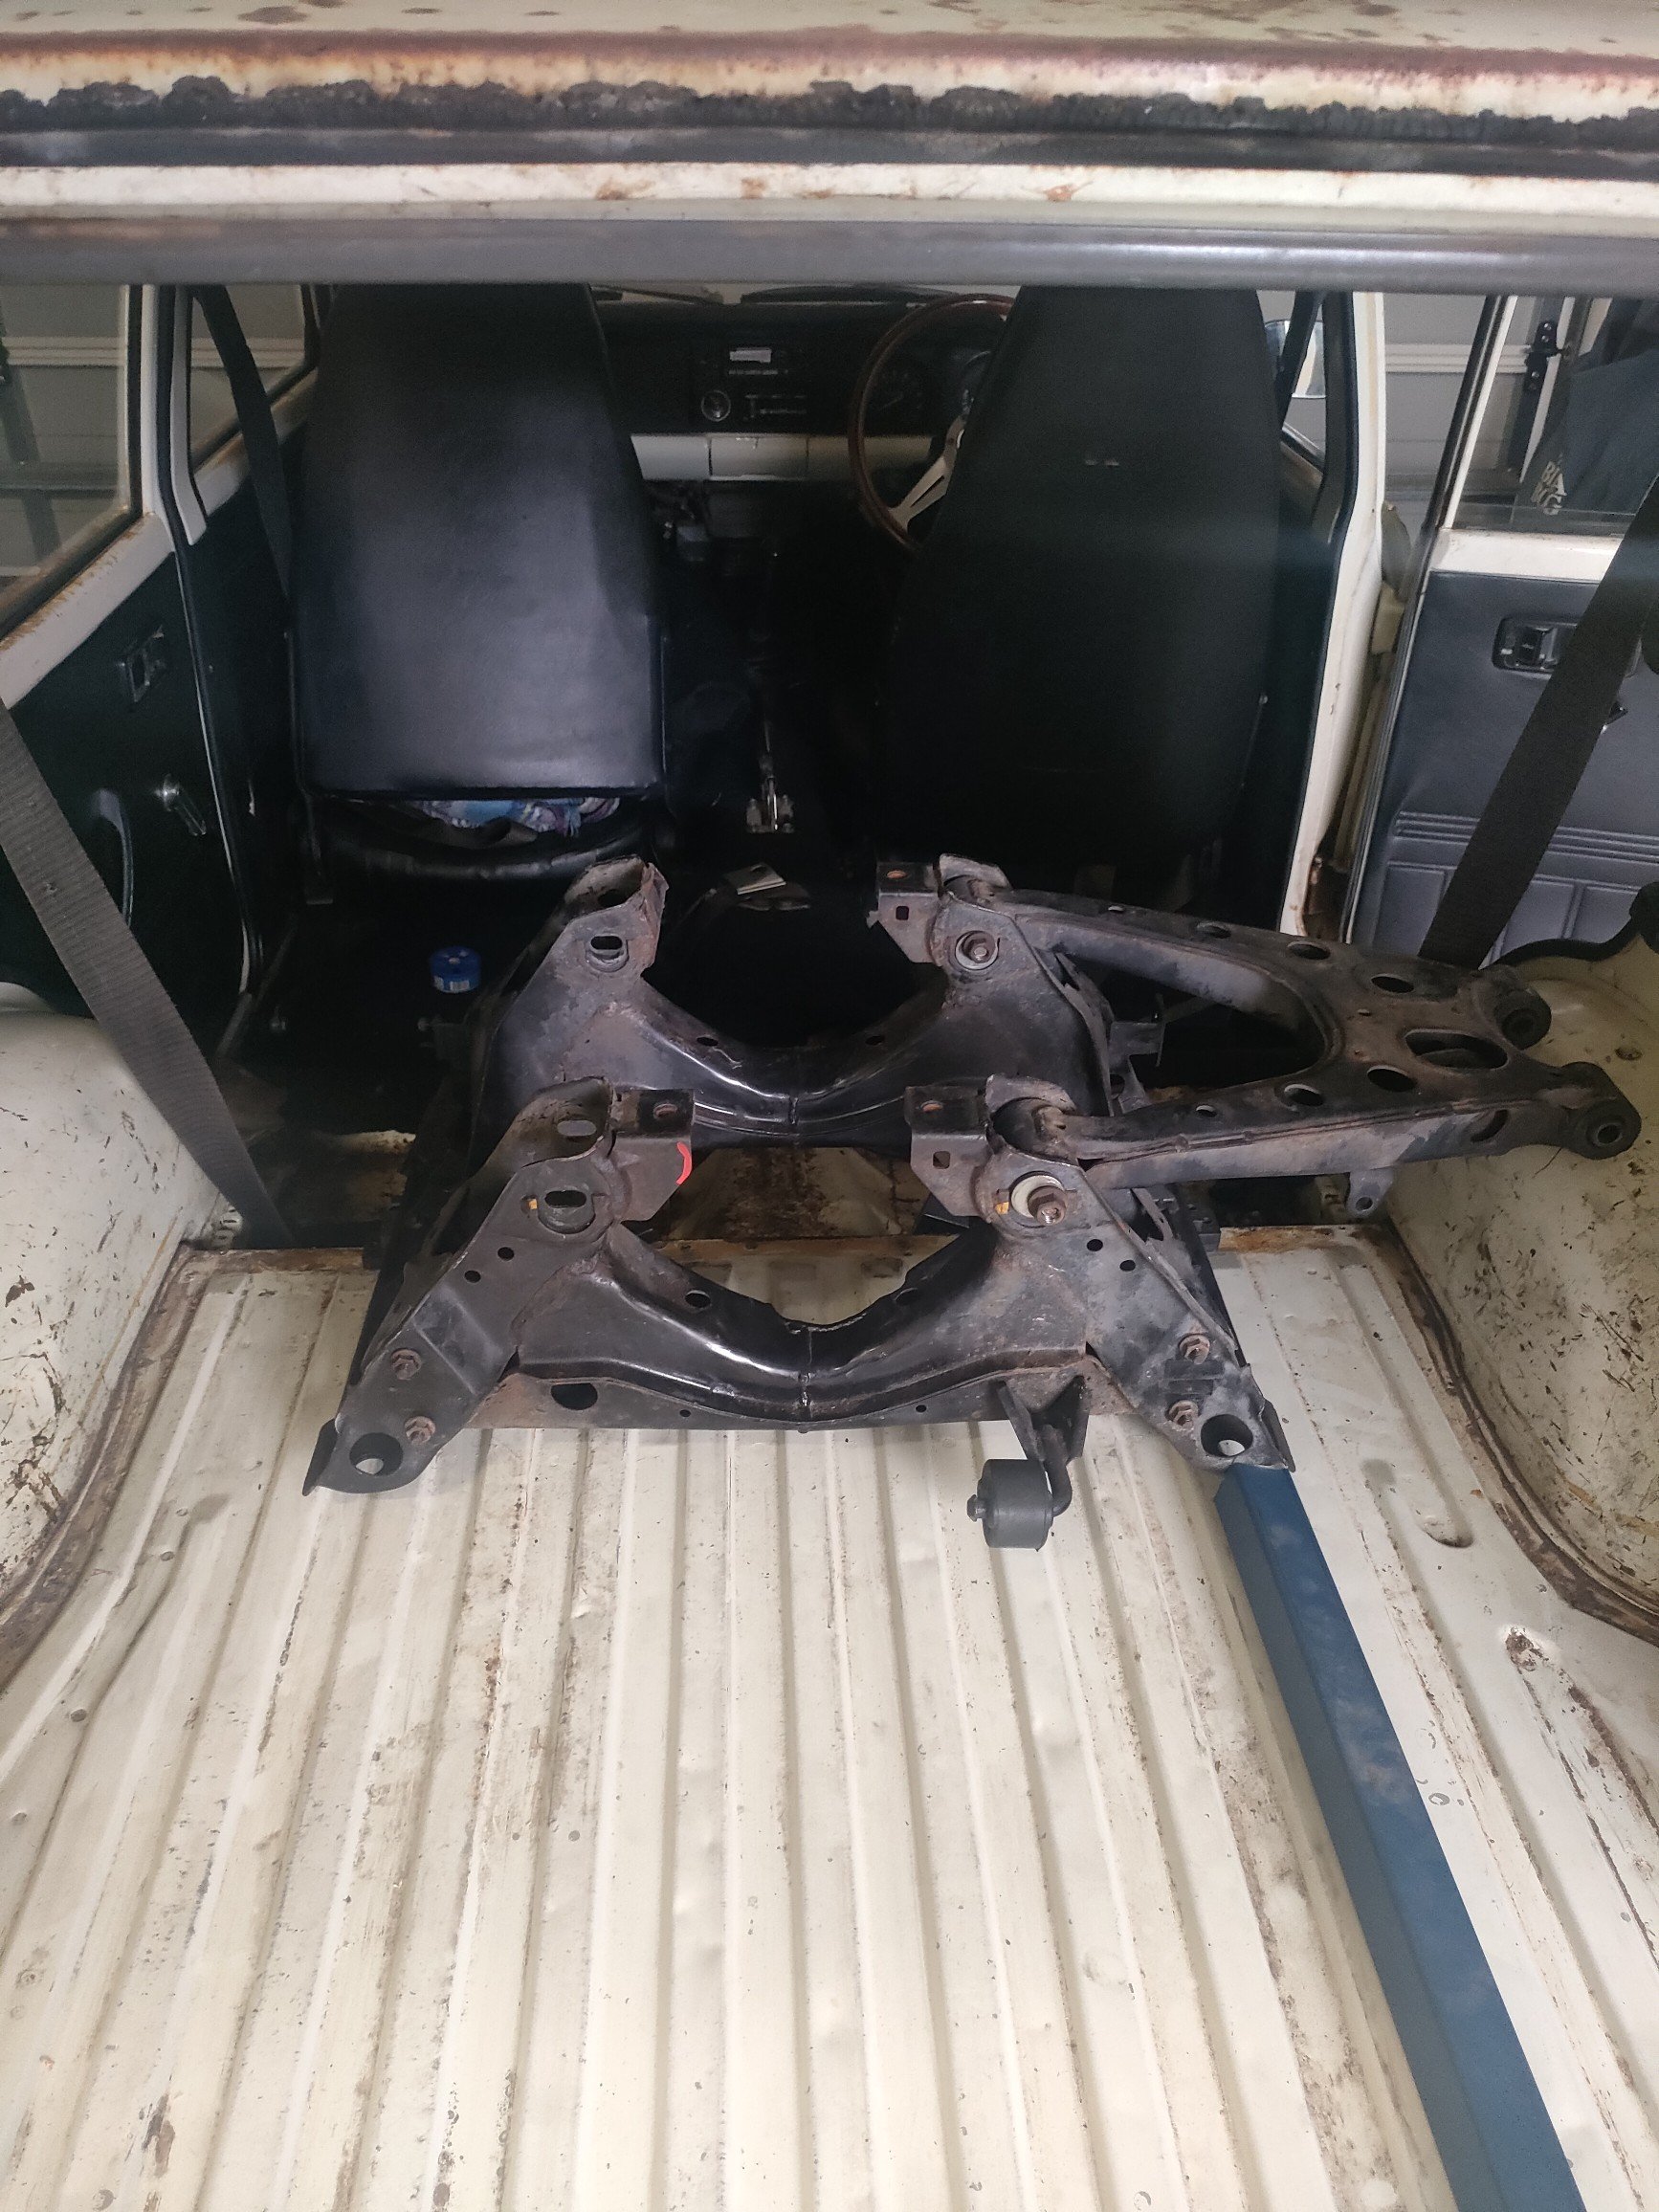
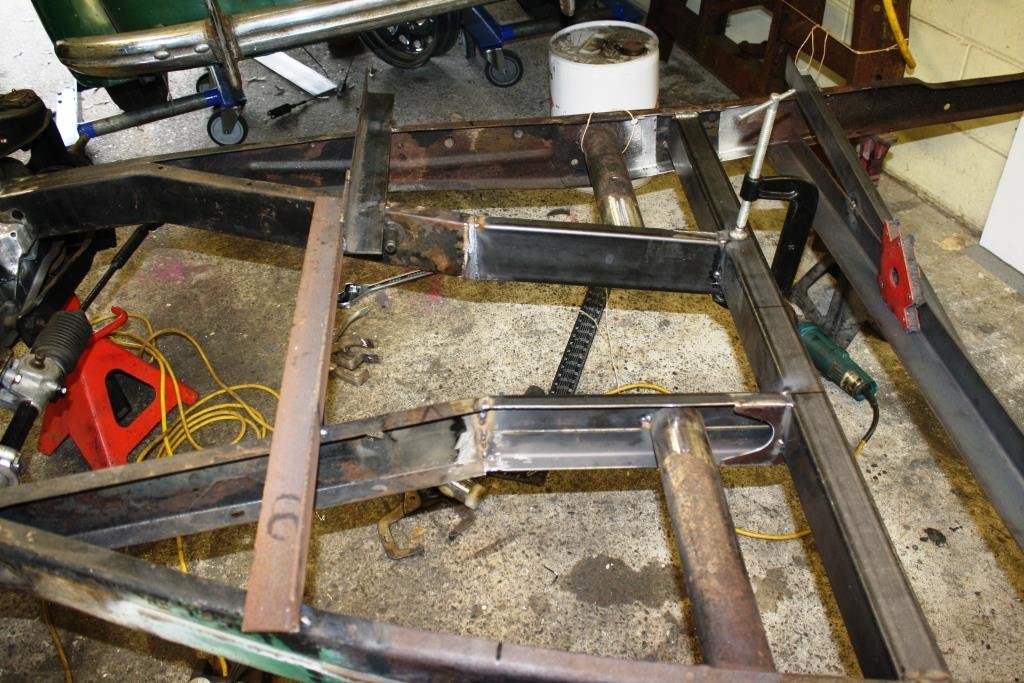
So after driving this for a bit, I really found it way too rough. Maybe I'm getting old. Diff hitting floor etc. Was going to cut out where it's hitting and modify it etc, but want new wheels as well. If I'm doing that all that, I might as well 4 link it, and if I'm doing that, I might as well change to 4x114, and if I'm doing that I'll have to stuff around and shorten the diff to fit the wheels I want. Long story short, shit snowballed and now I'm the owner of a shortened MX5 rear end. (And still have to change to 4x114) Will build some new rails for the frame to sit under, and run them from the back to the rear seat area, and try tie them in with the original rails. Really wanting to use 40x40x3 SHS, to keep the subframe as high as possible under the boot floor, but everyone seems to use 50x50 for this sort of thing. If anyone has experience in this, will 40x40 be enough? The original rear "rails" are only monocoque, so surely 40x40x3 will be more than enough for a subframe to sit under. I won't be cutting much out of the originals.
5 points
-
If we put beacons on top of the support vehicles and all were hi viz the road works wouldn't be an issue.4 points
-
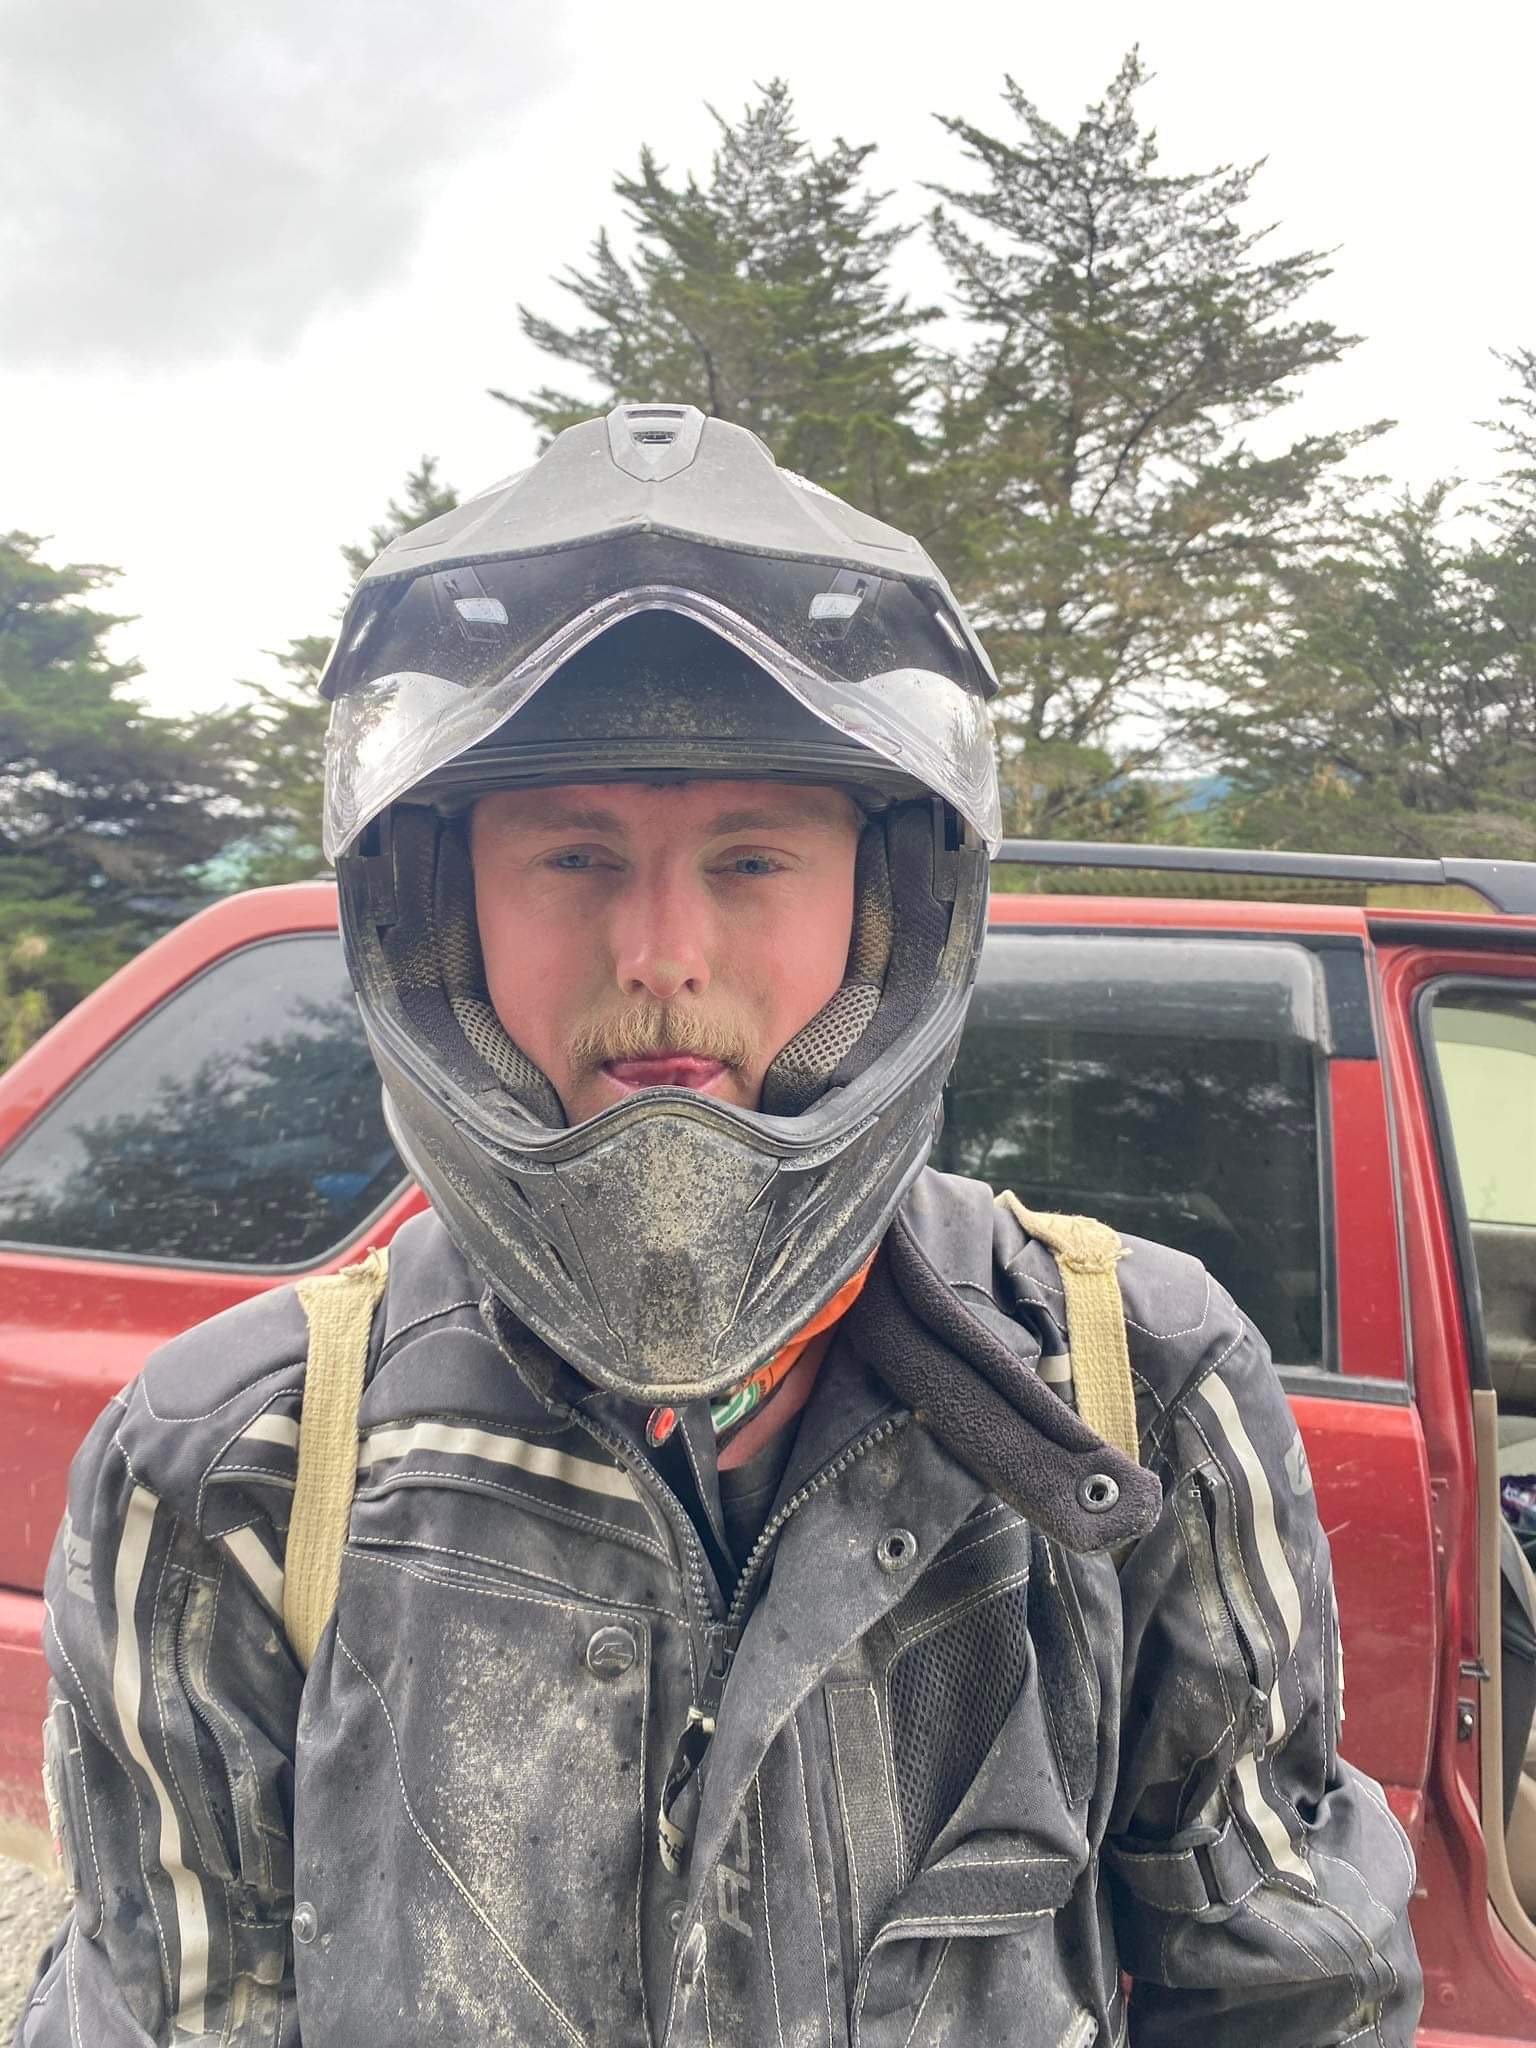
Shizer it's been a while and cringe at my old posts. Anyways, I chucked a blanket over this and shut the garage while I did other things for a couple of years. Lockdowns meant pulling the blankets off, I got it running on the factory intake so was motivated again. Rear screen rubber in, stainless trims fresh and polished, random clips from russia and its now airbagged using accuair control with airlift struts. It drives well around the hood and I'm slowly getting more confident on going further. I never drove this car so was a big moment. Next on the list is sorting my rear wheels as they are a bit wide for frame laying and then a bespoke itb manifold from Mr Whitley tune. Pic courtesy of Simon when it was picked up a few weeks ago. Il take some when I get the trims back on.
4 points
-
And laid down some black. Gave all the bushes, which I replaced earlier in the year, a clean and fitted with fresh grease. Also spent some time cleaning up the threads on the shackles and lower shock mounts plus the fasteners to suit. Some of them were pretty manky. Got it all back togethor and threw the has tank back in too. Good way to finish up a nice evening. Excuse the wheel nuts on the shock mounts, I had no m12x1.5 nylocs at the time.
3 points
-
Priced up supremes today. It came into the country on some but they were long gone.
3 points
-
3 points
-
More pics
3 points
-
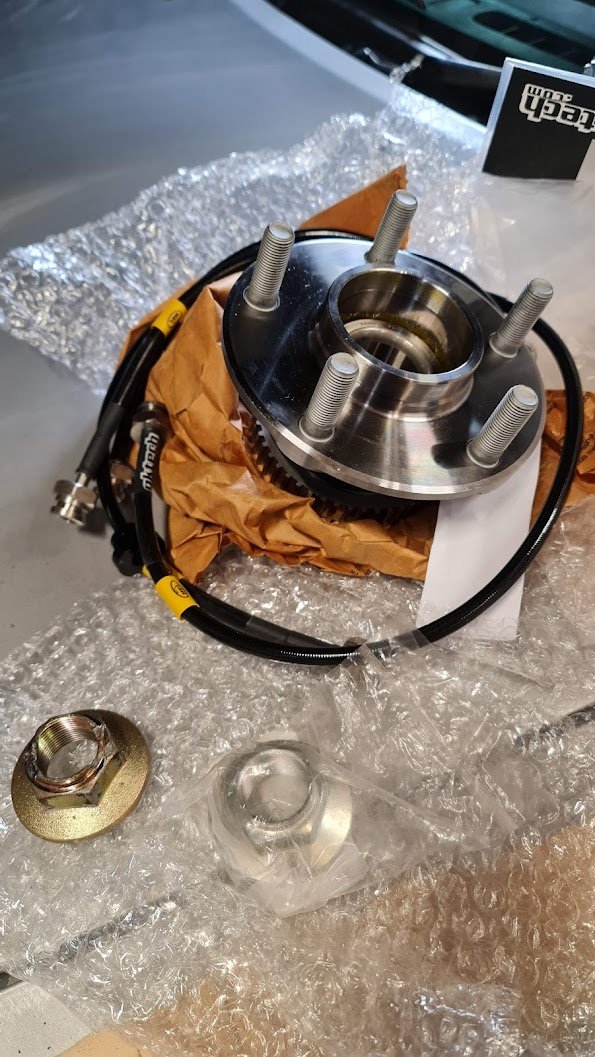
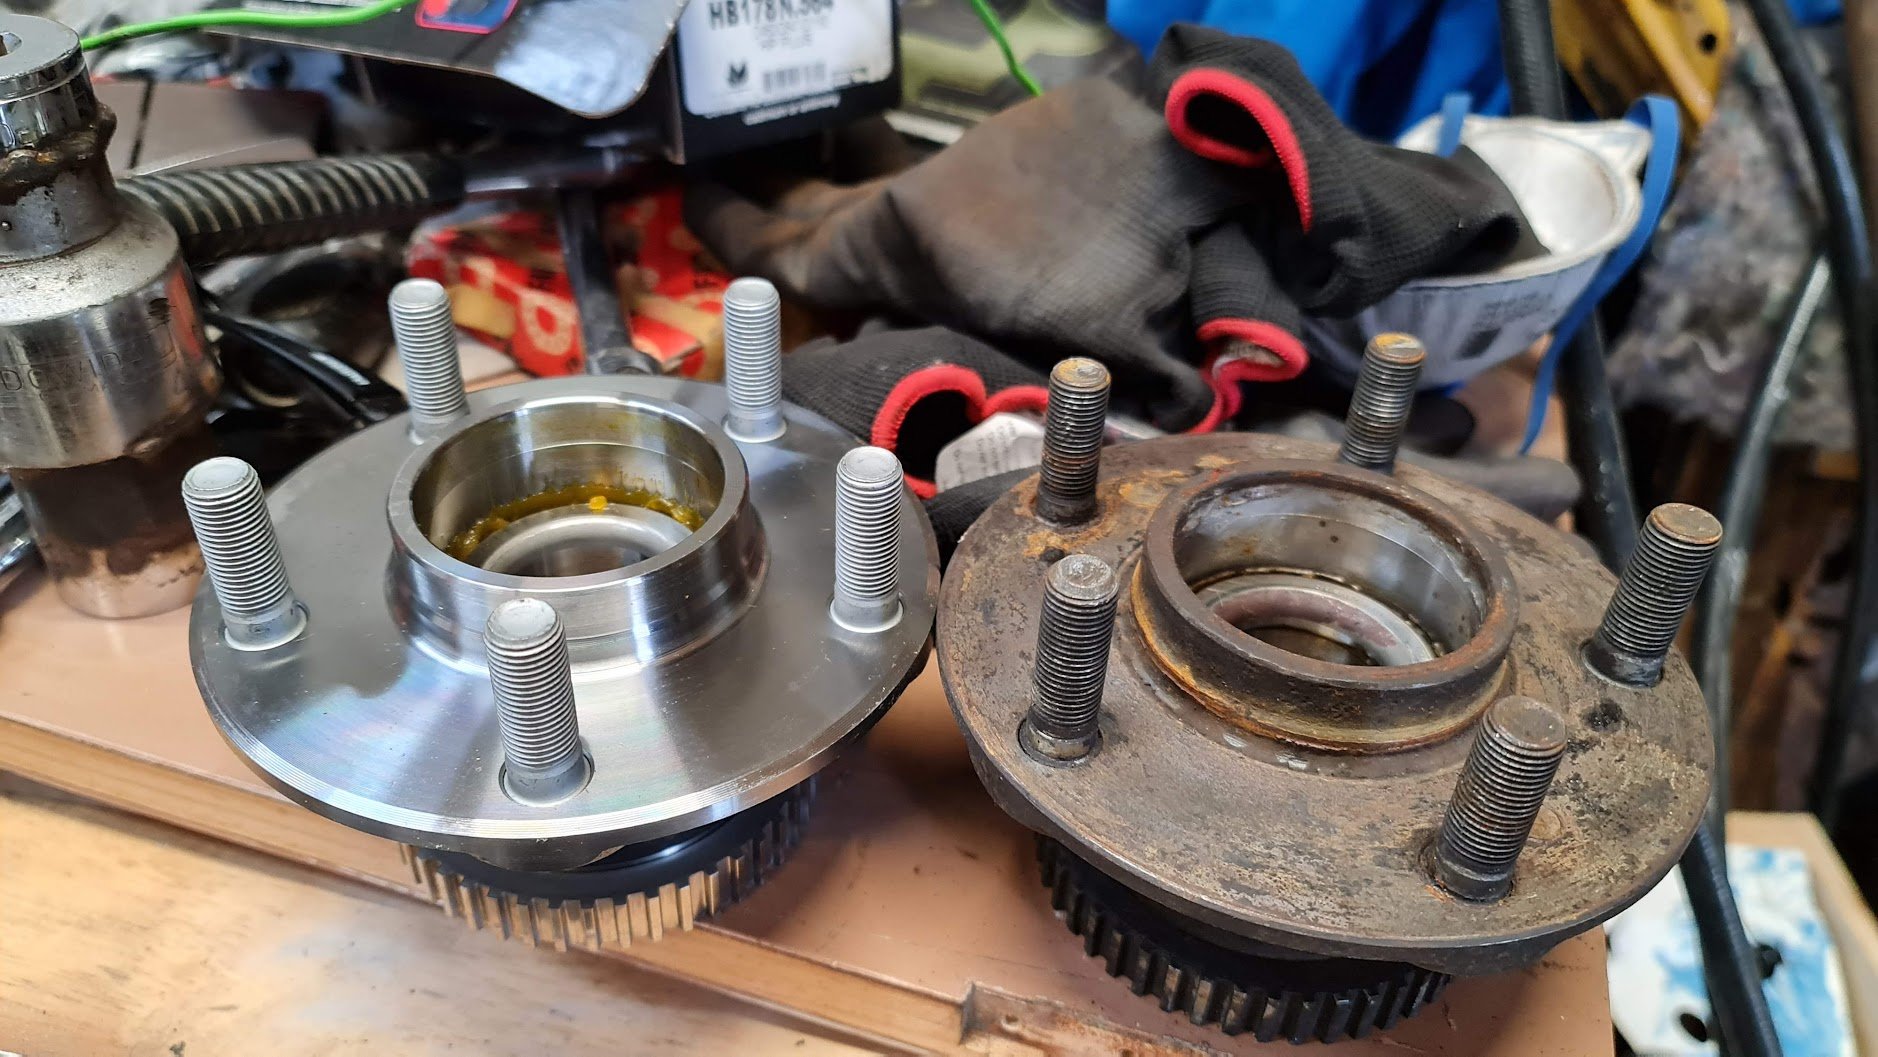
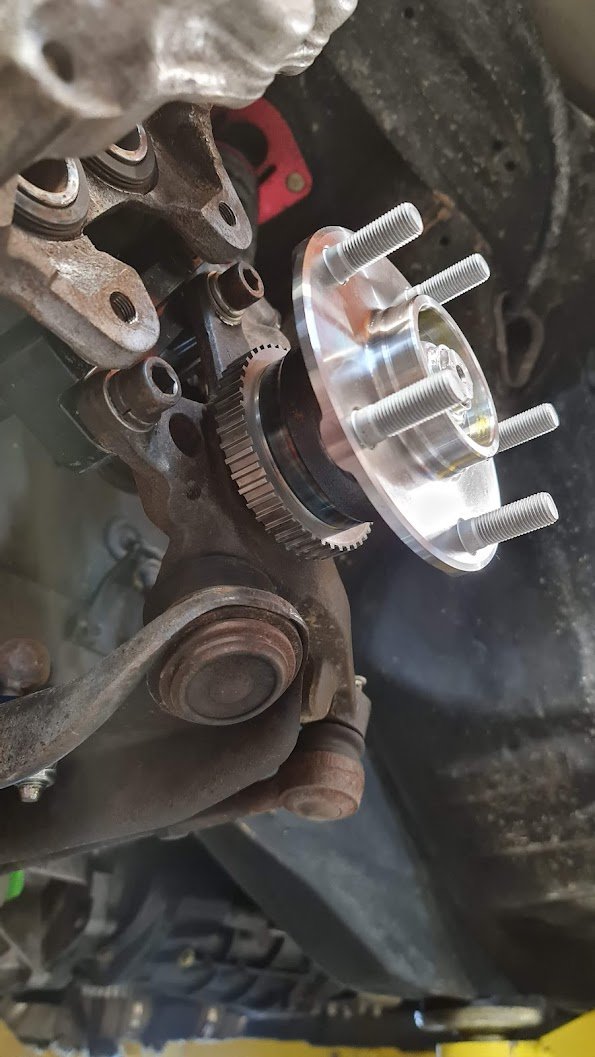
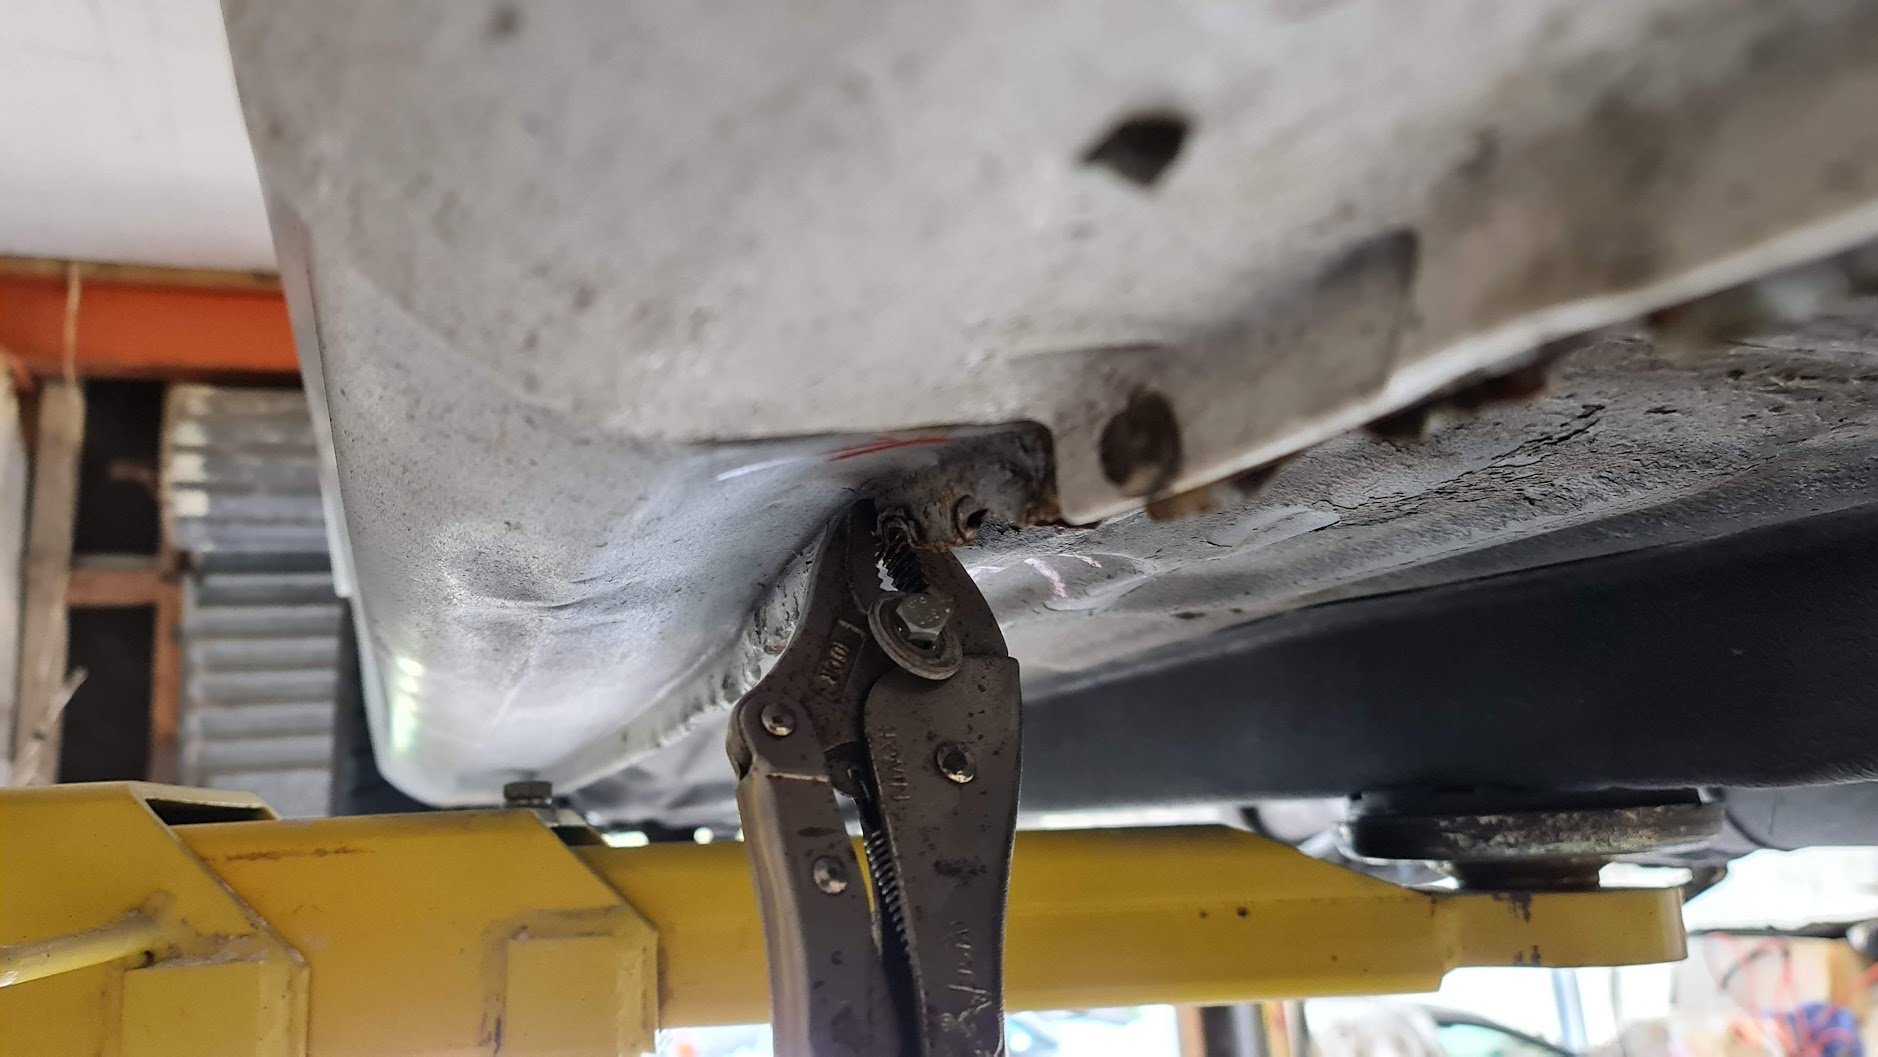
Man, so busy... wish I had more time to work on my cars. Anyway, recently failed wof on bad FL wheel bearing, rub mark on FR brake hose and the sill is push up on the jacking point. Weirdly I cannot see how the hose could have rubbed at all, I get the feeling it's been like that the whole time. It's on the inside/chassis side, even pushing it by hand I can't get it to touch...weird. Here's a blurry photo, the red part there. And the wheel bearing was definitely stuffed, I had noticed a noise recently when turning right so that explains it. They are S14 hubs with the bigger spindle, which also means the bearings are not replaceable like S13 ones. You probably could figure something out but I just bought a genuine Nissan hub. Mmmmm genuine shiny oily paper wrapped hub.... Also got some GKtech braided brake lines, have installed the fronts. Yet to bleed as its up on the hoist while I work on pulling the sill back again. Will be interesting to see if I can feel any pedal difference going from normal soft lines. Ugly sill, to be honest I am pretty certain it has been like this for a long time: I have got it back to really good condition again, haven't got any photo's. I need to primer and paint it too.
3 points
-
We knew that this was a deregistered car from the start and got into it anyway. Just part of being a noob I guess, but I always figured we'd be able to sort it out down the line.. maybe it'll be a bit expensive but should still hopefully be reasonable in regards to the value of a fully restored Starion. Right...? I called a few panel beaty places and instead of straightening the car out, they straightened me out. It's not fun hearing "oh yeah you can expect about $30k for an average panel and paint job on a car this old". Especially when that's followed up with "deregistered? Okay yeah we can do it but it'll have to be be the Rolls Royce of repair jobs". But one of the nicer folks I called offered to come around and check it out soonish. So I had no idea whether we still even had a project. Anxiety effing sucks. Thinks like sunk cost fallacy was at the forefront of my mind. Was this a lost cause? How much will this repair cost - is it going to be better to just getting a beaten up reg-on-hold Starion and starting fresh with that? How many years would it take for that opportunity to make itself available again? I didn't want to put another second into the car. All motivation just gone. Also the frustration of the legalities of this. I could roll the dice and hope the re-registration people just feel like stamping paper that day, and don't whip out the endoscope or mandate stripping everything back to metal. Yet if whoever had it registered last had just paid the $peanuts every year to put the registration on hold the above repair would be perfectly legal. ARRRRRGH. ---- Guyman McPanelbeaty finally is able to come around. He's a numbers guy so he brings a hammerbeast. I bitch to them about my registration frustrations. Hammerbeast replies instantly with "yeah", throws his hands up, "yeah!" He goes on his own rant. This was a perfectly legit (if ugly) repair back in those days, the style of the time, onion on his belt. Kindred souls. They like the car. It's in pretty good shape rust-wise, they hand-wave the other repairs. They warn me of the dangers to my wallet if I end up going with a darker colour (or god forbid black). What colour should I go with? Not important right now, but this question will be asked a little more frantically later on down the line. But onto the work. I ask them to ballpark the repairs that need real certifying, the bare minimum to just get it back on the road. They guesstimate the work and throw some numbers out. The numbers are acceptable. My shoulders relax. I shake their hands and literally bounce back inside. We have a project! ---- Of course, they're super busy so it won't happen until next year, but I have homework in the meantime: I have to find new front rails and a new radiator mount. There's a wreck in Palmerston North so I started there. "Yeah mate let me check. You need both rails?" "Yes please." "... ah sorry mate, someone's already taken the front cut" Amayama's manager is permanently offline. The image above is from their site. Easily over 50% of the parts I order there end up being out of production, and for whatever reason they don't have the rails themselves listed separately, so I wanna talk to a person. The rails + wheel housing + other thingy are over NZ$1k each to import. if they exist. Bah. NZ's Starion facebook group is small but often useful. Not this time though - I got a name dropped to me but he was out of stock. The Austarion facebook group is much more lively but same deal there. @ProZac's Starion Sell-Up has long exited FOMO territory and is well established in MO territory. I have some more options before I'm ultra desperate (USA + expensive shipping, more mitsi parts websites, from-scratch fabrication) but things aren't tracking great lol. Does anyone know of anyone with a Starion parts car who might be willing to part with their front rails? Motivation's back tho.3 points
-
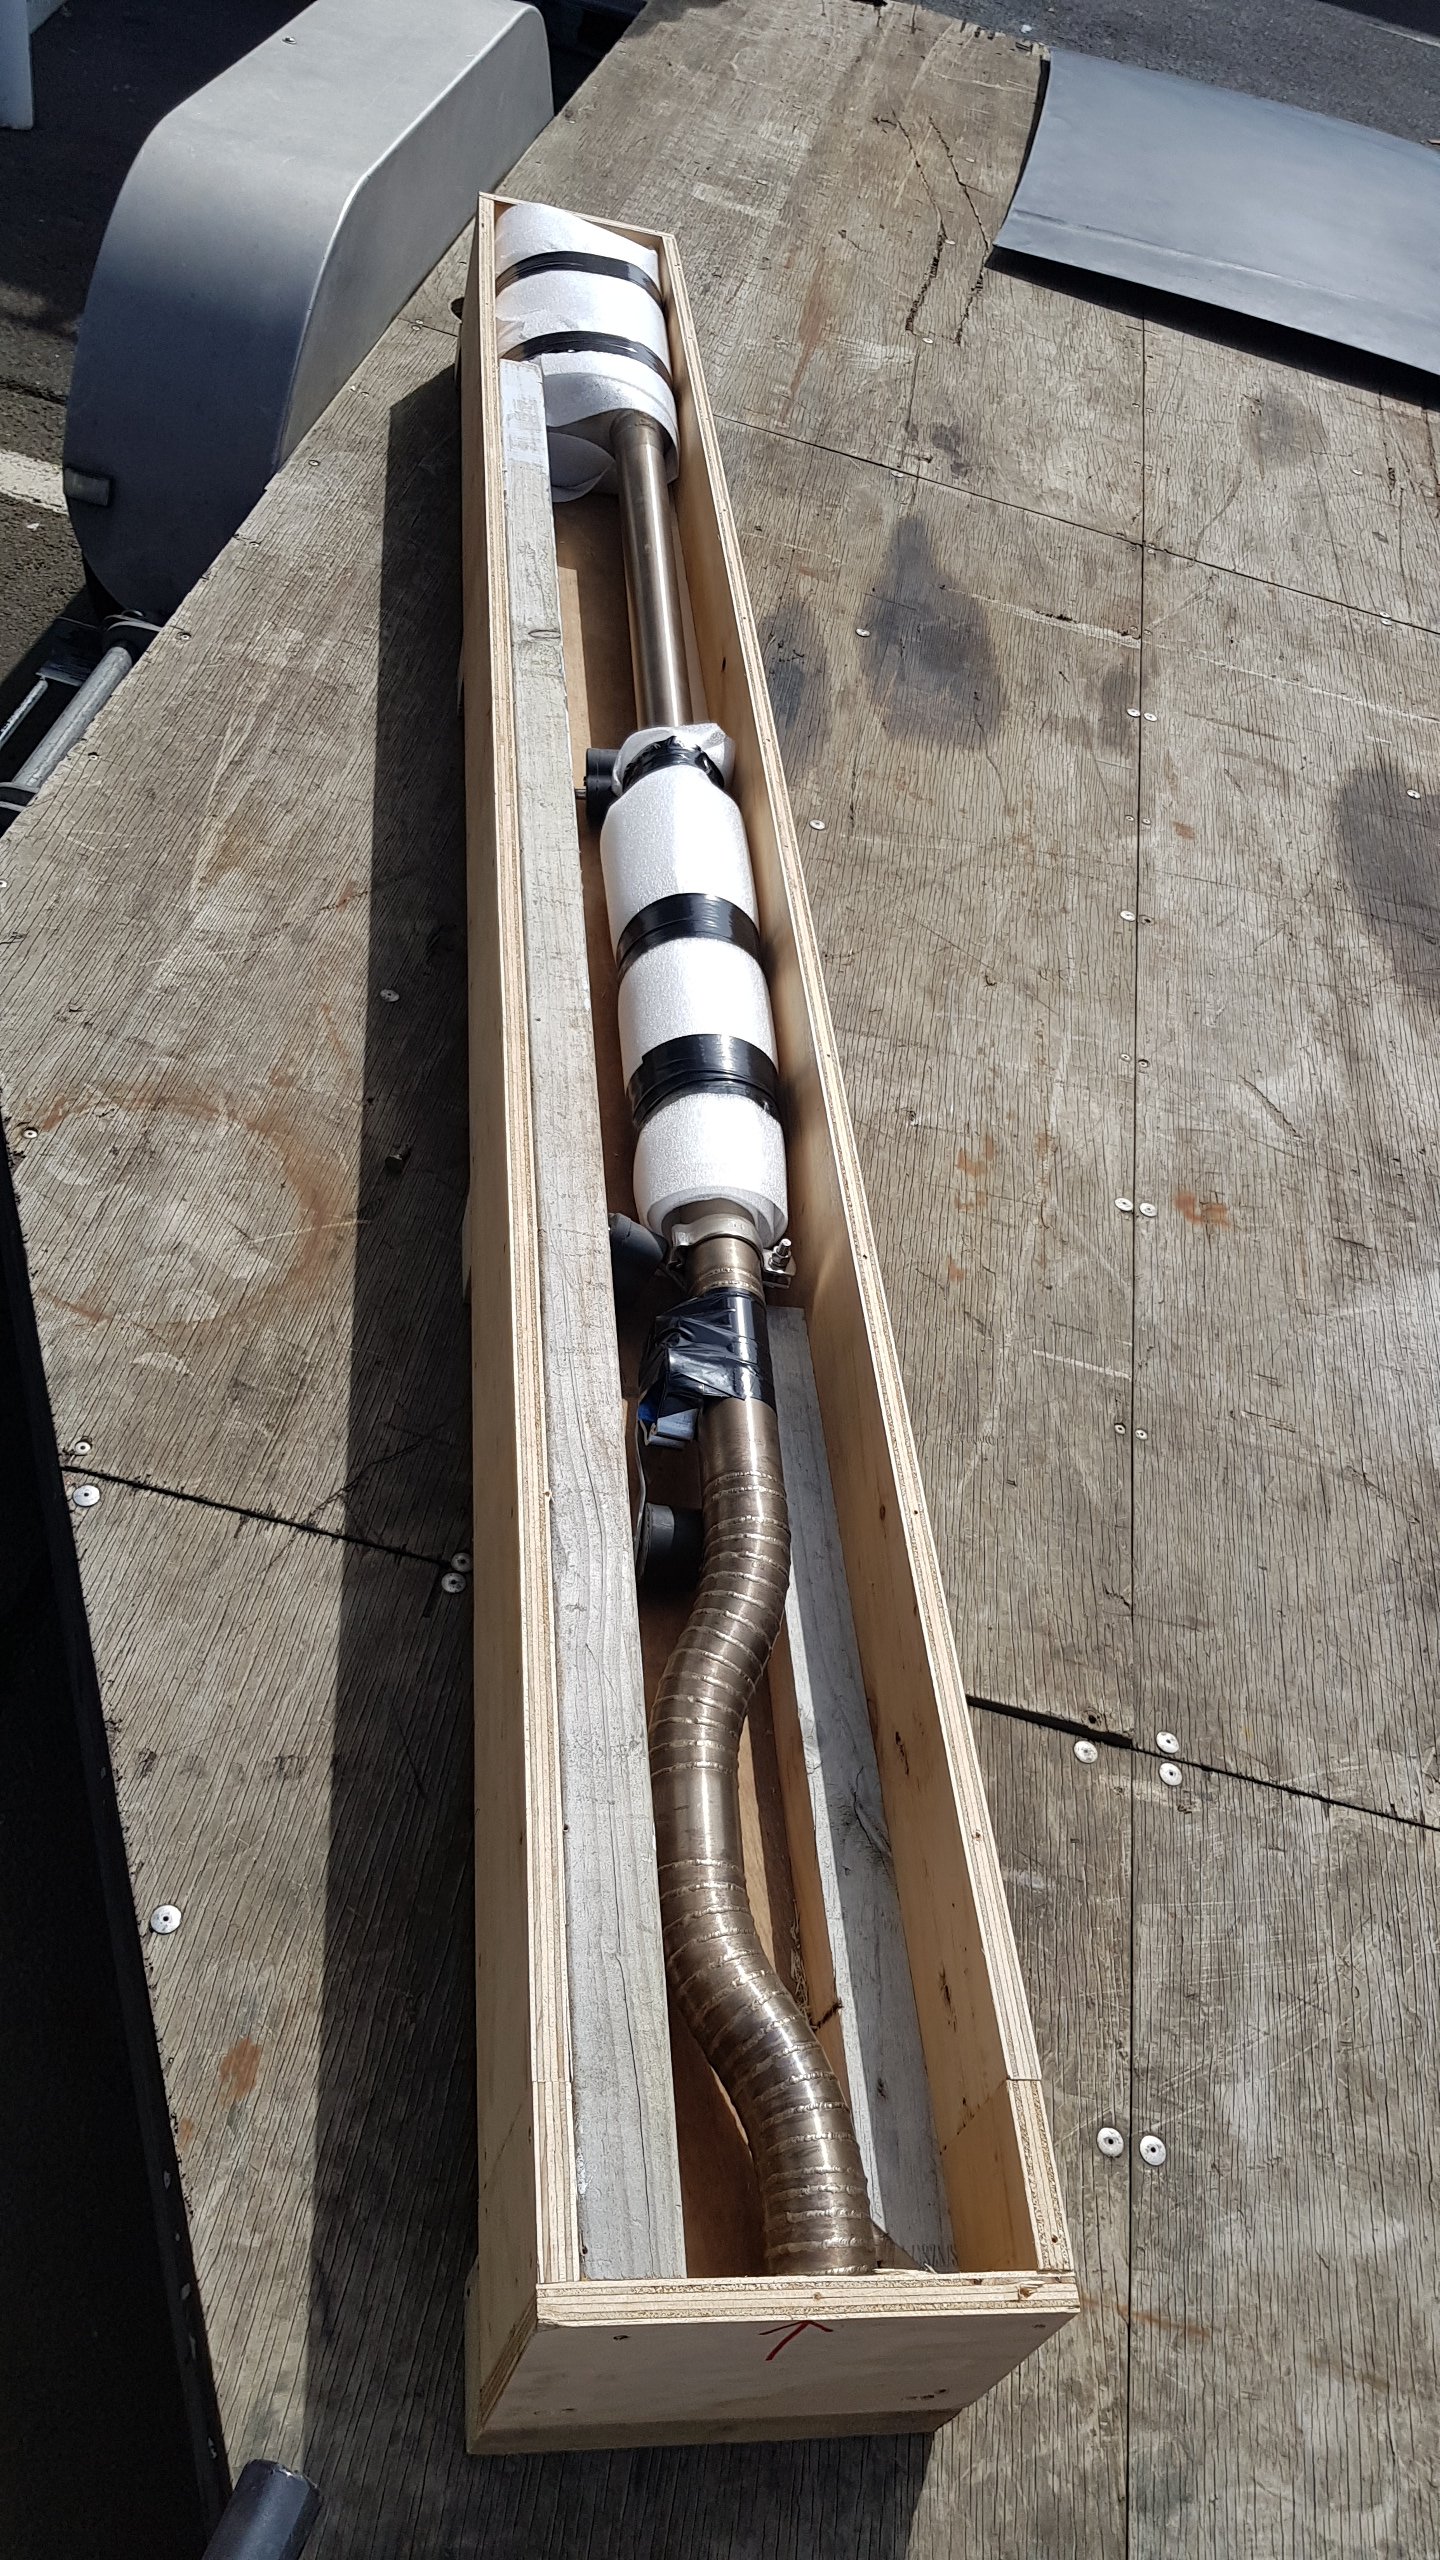
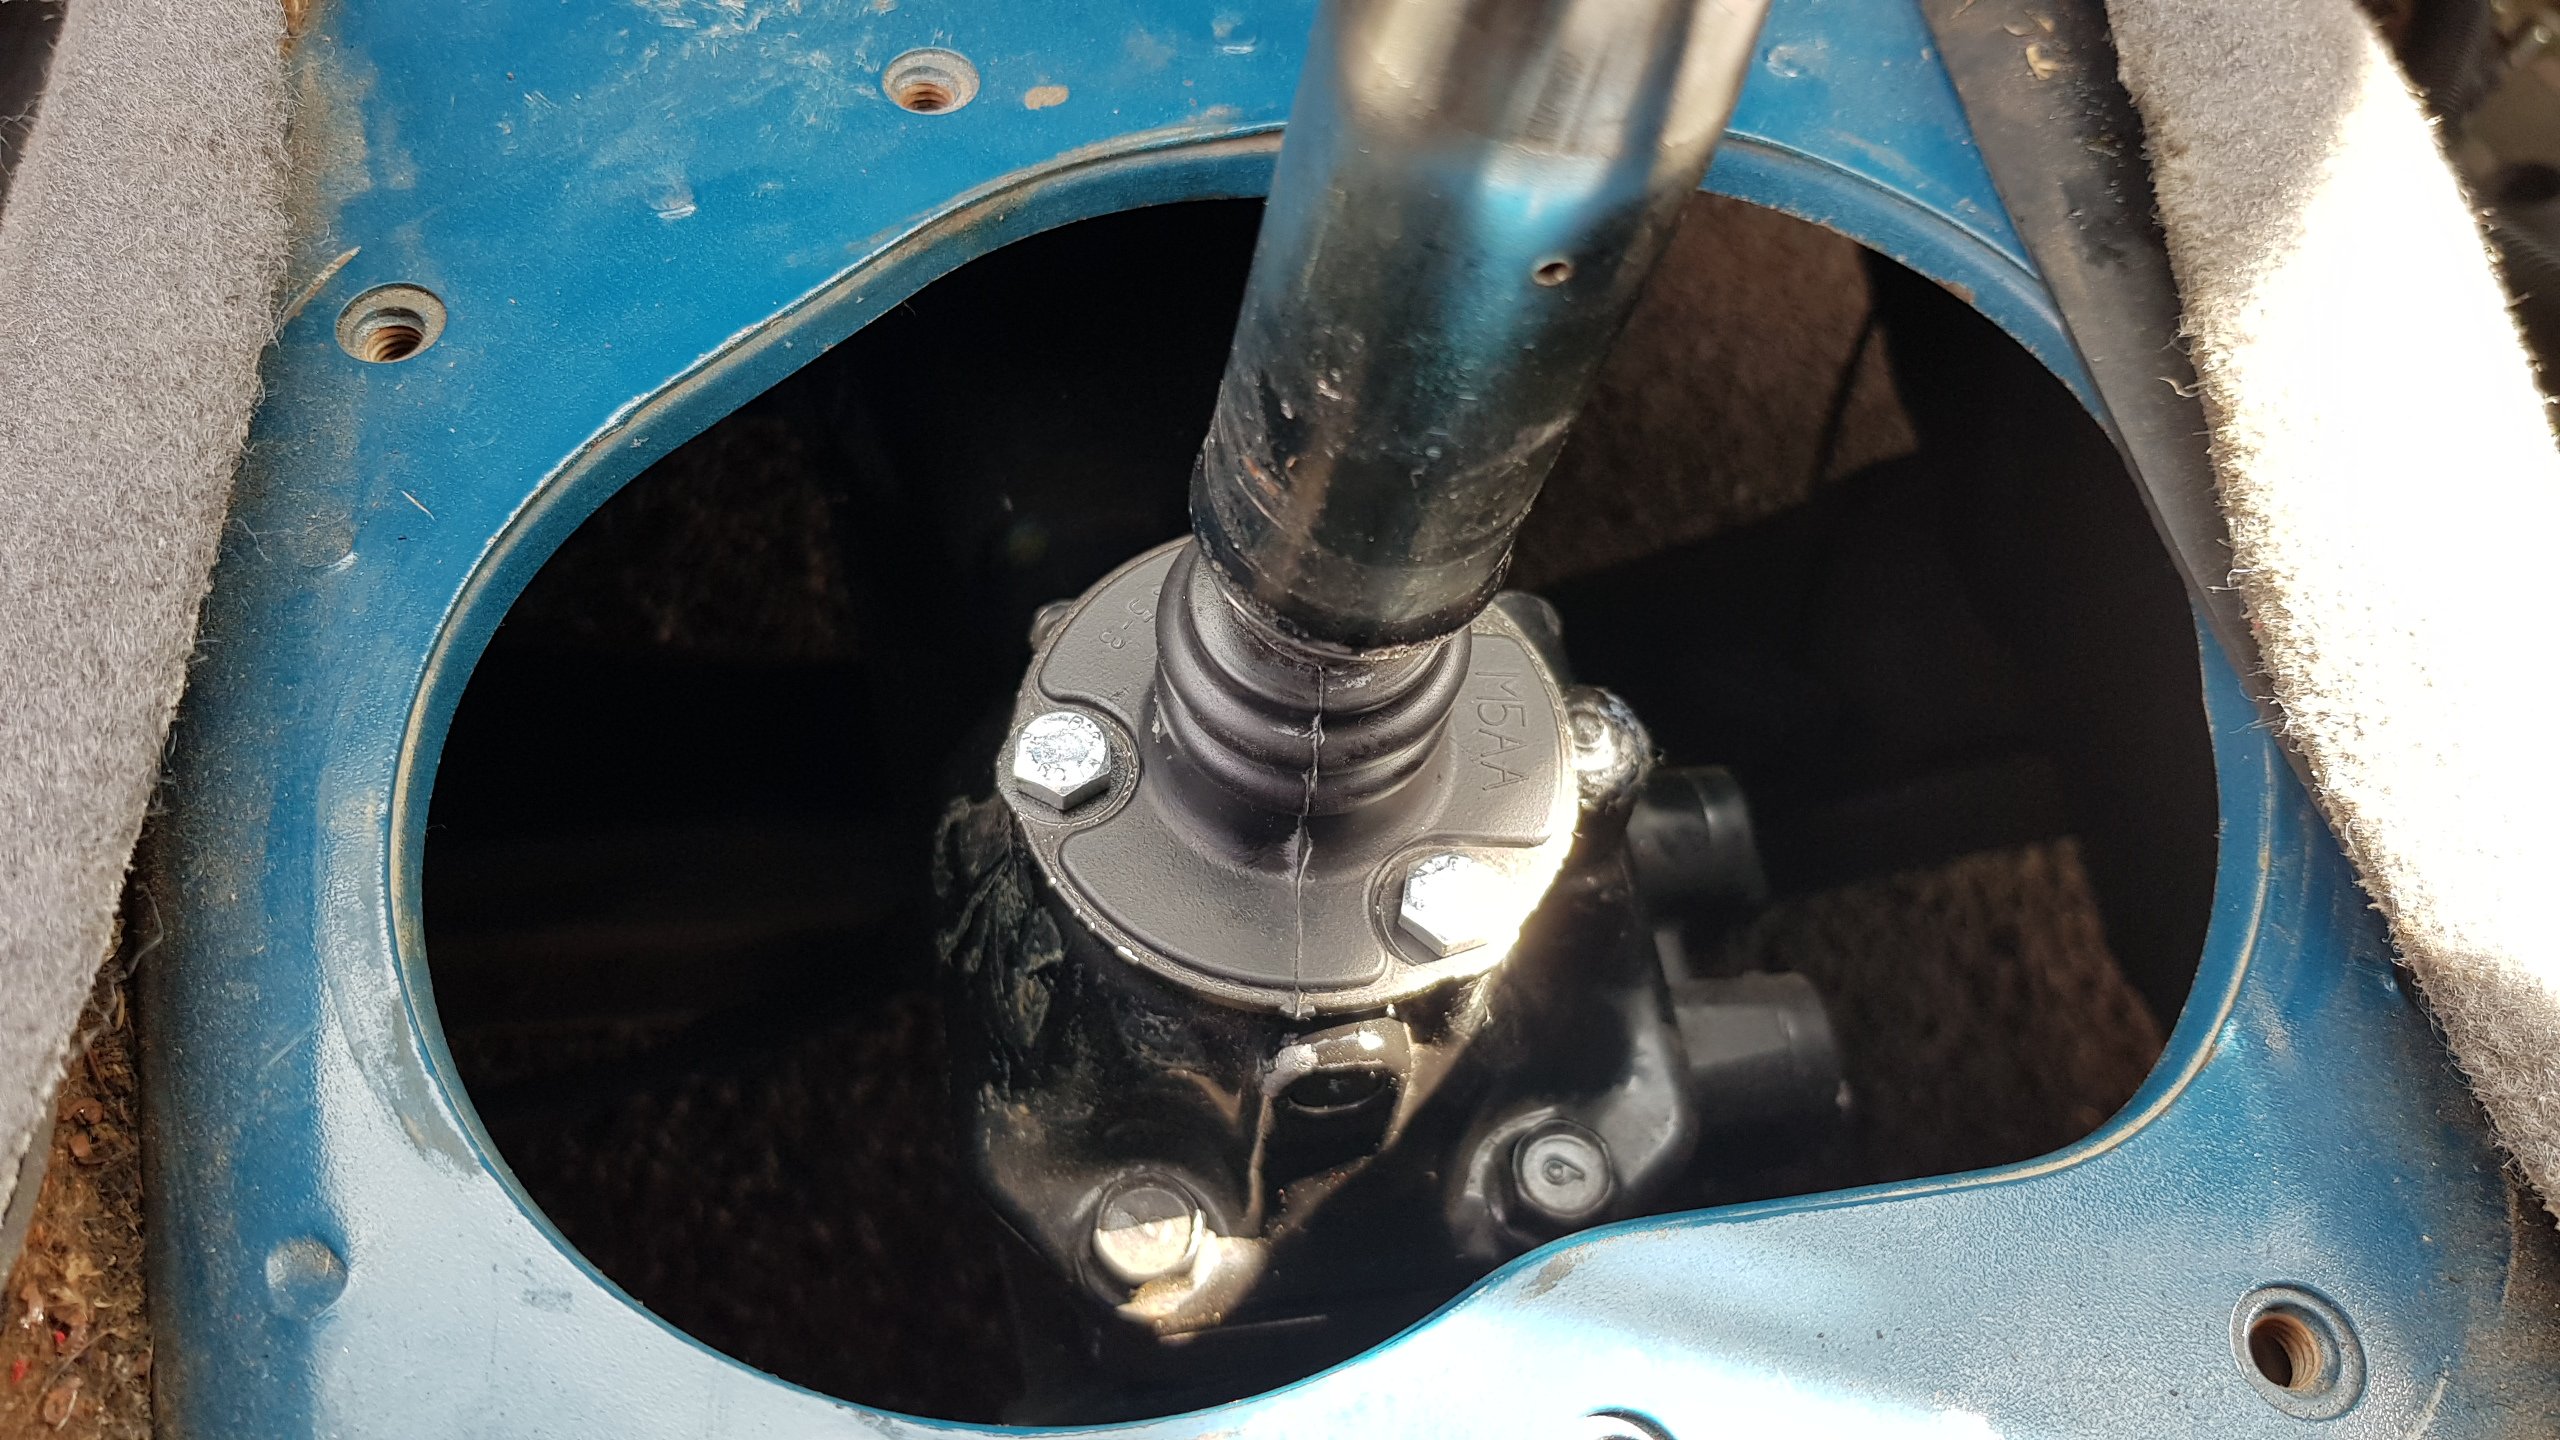
Bit more progress on the B2000 over the past few weeks. I had a bunch of stainless tube and bends lying around, but havn't had the hoist free or the time to make a system, so when I spotted this setup that a guy was selling I thought I'd better jump on it. He was parting out his bagged truck for some reason which never actually made in on the road. He had the system made to tuck up above the chassis rails but still fit the stock chassis mounting points. Has an AdrenelinR muffler and reasonator fitted so wouldn't have been a cheap setup to get made. Can't complain for $425 shipped from Timaru to Akl... He even made this sweet crate to send it up in. My shifter bush kit finally showed up from Aussie, so I swapped out all the worn shit and fitted a new non-split boot then got it installed. Tight boxes are gooooood.
2 points
-
I forgot to readdress this. I did speak to the individual last week, and from what he'd explained, was that he was residing outside of the Waikato boundary, but had travelled to his personal property inside the Waikato boundary to tend to it, adhering to whatever rules or permits applied at that time (I don't know). Probably redundant now regardless, as I understand there is no Waikato boundary any longer? I'm unsure if anyone was particularly concerned by this whole thing or not, but there it is, as I know it anyway.2 points
-
Workmates doing similar dec/Jan with an xl125. I'll borrow/ buy it off him. Also depends if I am able physically2 points
-
Indeed2 points
-
Surprisingly wasn't too much difference between Datsun sale price and Chev purchase price thankfully so the mazda is safe.2 points
-
I'm up for whatever tbh. Start in Blenheim, ride to st Arnaud, do the rainbow to hanmer, camp there the night. Do the rainbow in reverse back to Nelson. (Reverse of day three last year) Then the maungatapu to peloris, up the wairau/mt patriarch and back to Blenheim?2 points
-
Us fullas (covid permitting) coming from Auckland liked the idea of starting from somewhere we could ride to after flying in. We had a friendly depot in ChCh so we could ship bikes ahead of time. ASSume there will still be vehicles coming from ChCh so we could travel to starting point with them if we can get enough seats that will be ace. Pretty sure it will be @Tumeke @sentra @slacker.cam @peteretep If not all good - we can look into other flights/shipping options if the start point changes to see if that's possible / affordable / not stink providing we get enough notice to book stuff.2 points
-
From what I've heard and read, you can ride from Hanmer to the cobb cottage where we had lunch, but go no further. Roadworks is more at the Blenheim end, with local access only. Could ride to cottage from Hanmer, camp the night there or back to Hanmer. Day 2 Rainbow and then there's plenty of other rides between St Arnaurd and Nelson like Mt Robert, Inwoods Lookout, Porika track, etc Stay night at St Arnaurd and go back through Rainbow. Plenty of options to compensate for no Molesworth. There used to be a pushbike race called the Rainbow Rage, we could steal that name...2 points
-
So what we did last year, except up the Rainbow from Hanmer rather than up the Molesworth (up being North, not up the river valley!). This would probably be the easy option, but nothing new / that interesting. Inland Kaikoura route still has a very large proportion of kms on SH1, and overall wouldn't be that interesting on small bikes imo. There's no other back roads route that I know of. Most of the Nelson Lakes National Park is walking tracks only. Motorcycles and vehicles are specifically banned. So the question is, are we tied to starting in Hanmer? Noting Rainbow is then our only option.2 points
-
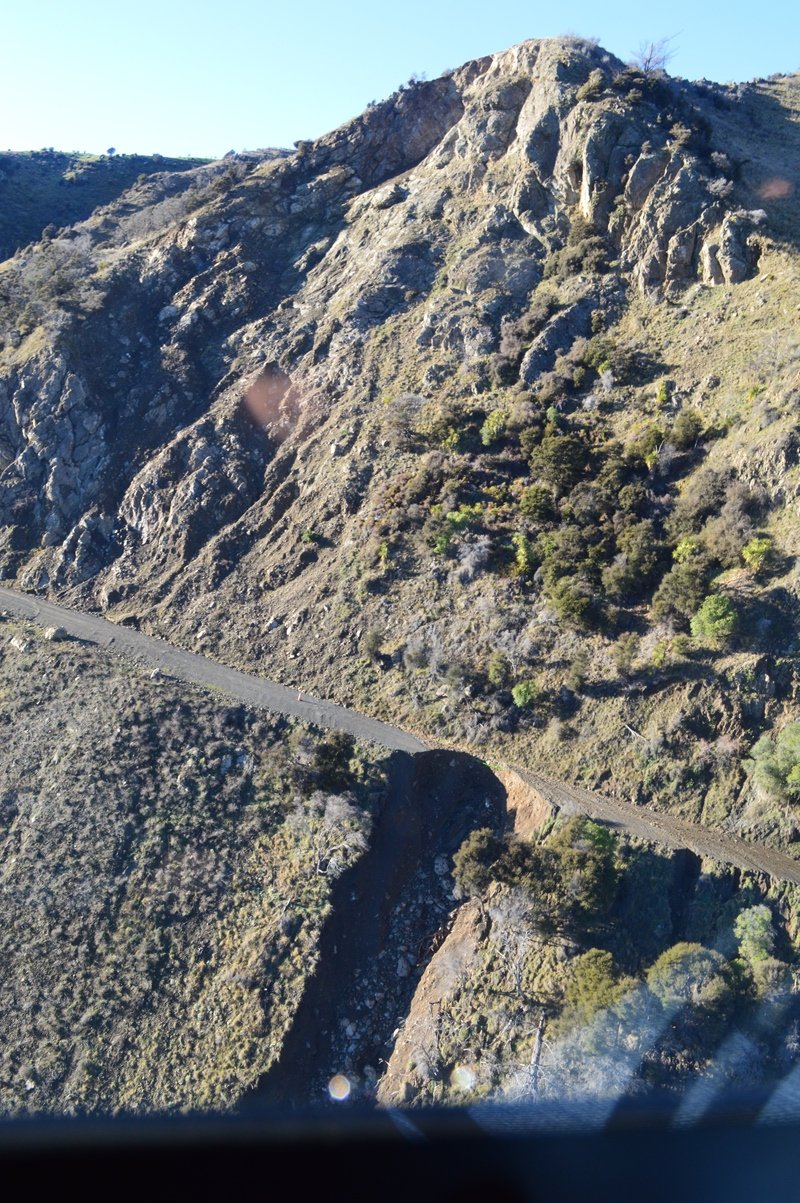
They said upper part of the road, but yeah weren't very specific beyond that. There does seem to be a whole lot of repairs spread out, there's multiple pictures of slips and washouts.
2 points
-
Yup. my money is on the small white ones working better than the big ones. well the big ones will just act like a shorter runner. Will see what i can do to resurrect the peach cans. although there seems to be more noodle cups scattered across my kitchen bench than peach cans at the moment..2 points
-
few more come in!
2 points
-
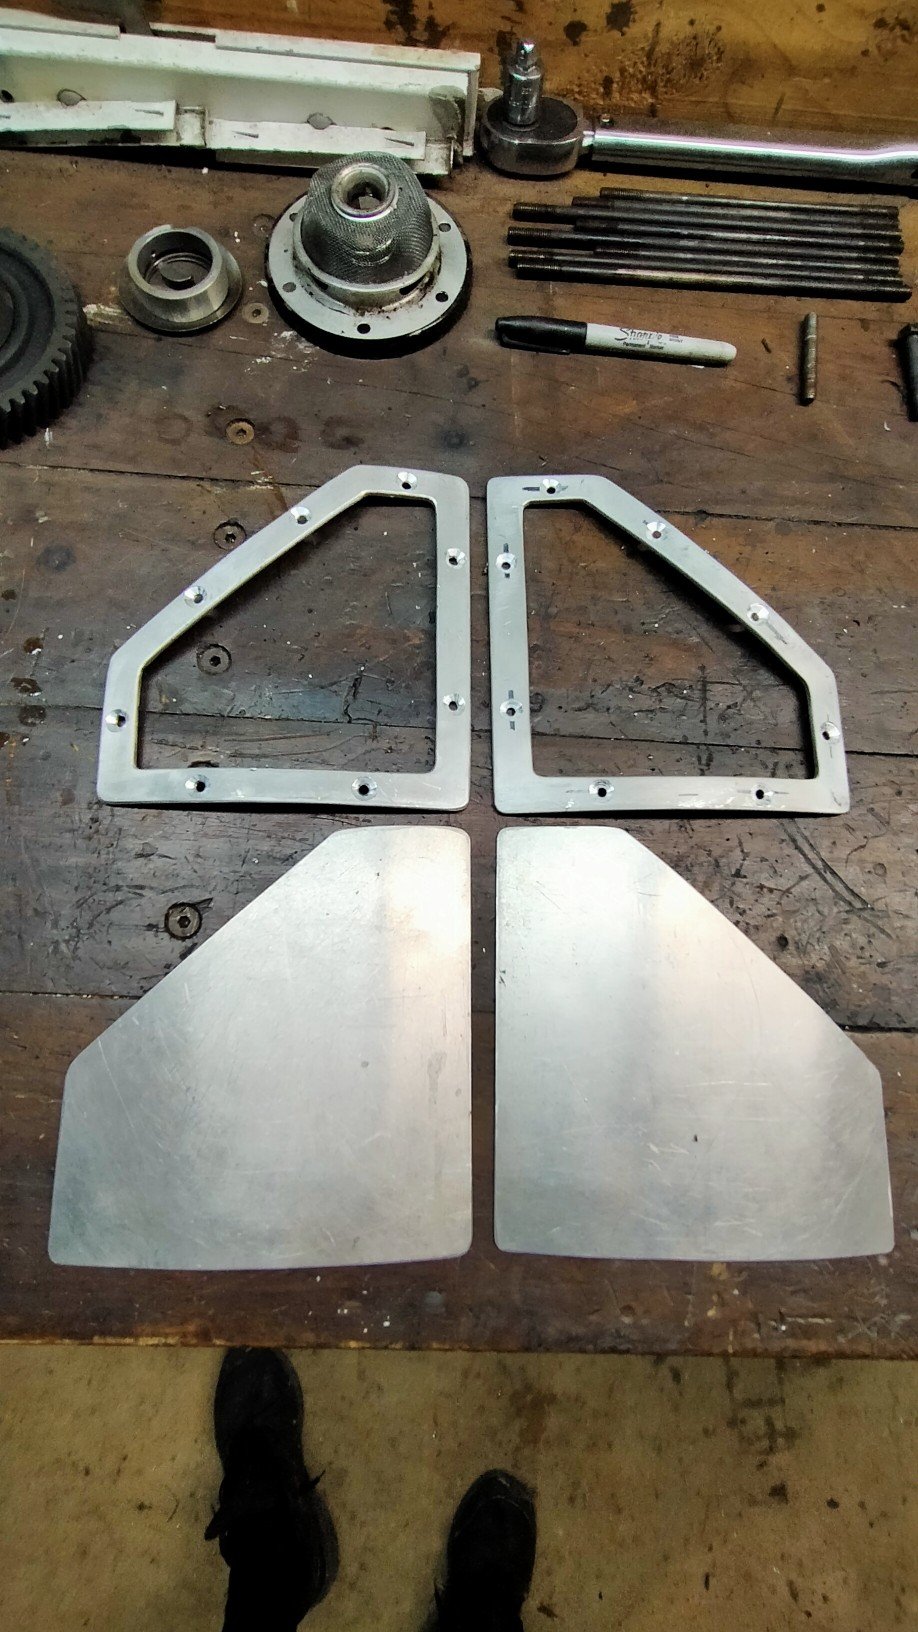
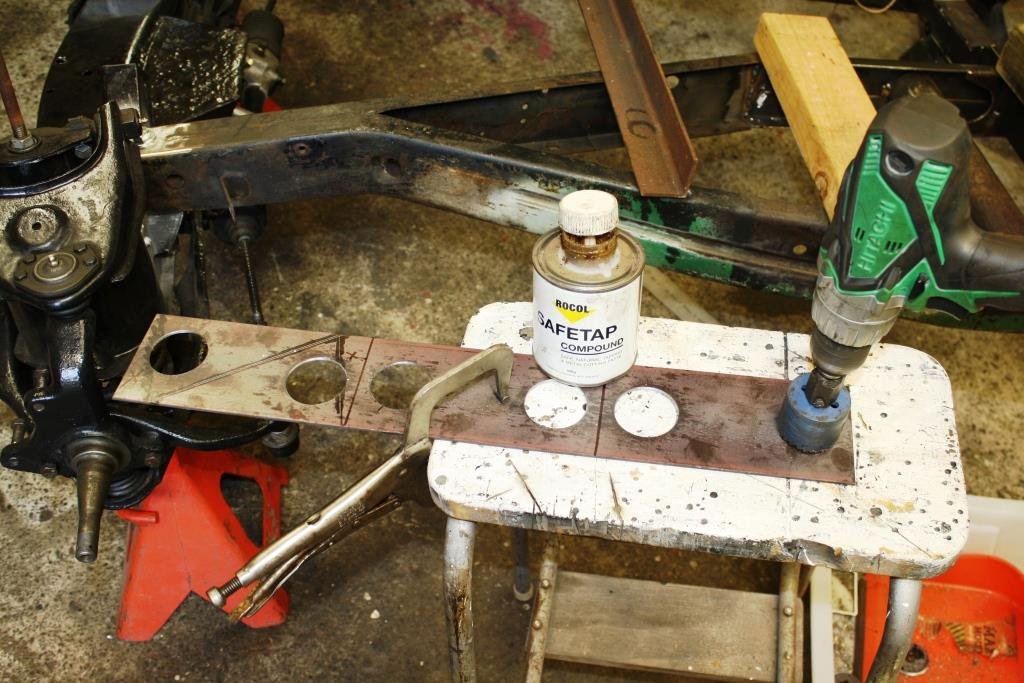
So I took the case and crank over to Qualitat for their air-cooled guy to check if the it was viable to rebuild. Wasn't holding out much hope as this is 40-50 year old chunk of alloy that I abused on a daily basis. Took the opportunity to clean up the rear wheel well. Made these from some scrap alloy I had. Marked up a that's about right spot. And cut some massive triangles out of my nicely painted engine bay. Drilled hole and popped rivnuts in. Left the edge rough to hammer over the frame to strengthen the panel up. Both bent to shape and countersunk for mounting, the plan was to drill and tap the frame for the covers to attach with but was thinking about using VHB tape. All this work is to make installing the carbs and manifolds easier, it to about 10 minutes to put the engine in last time, and two hours to tighten the four nuts that hold the manifolds on.
2 points
-
So, I sold this thing last month. Mostly trouble free motoring. It now resides near Dunedin. New owner bought it unseen and flew up same night and drove it home.
2 points
-
2 points
-
I hope those are the ones with the LVVT warning issued about them?1 point
-
How many bikes does your trailer carry? Two or three? I'd have space for one extra bike on my trailer, (maybe two at a pinch?) and Harry could fit one extra bike on with the bbq.1 point
-
Great ideas here, here is a ride I did about 12 years ago, it's ~500km total so probably not bad over 3 days, but I'd tweak it with @Pee Dubs sounds ideas. https://www.wikiloc.com/trail-bike-trails/20091114-seven-summits-ride-895251141 point
-
Could you buy and store your own box trailer? Just a wild idea.1 point
-
Ha, I pulled the head and there was a fuckton of dirty cokey stuff that had fallen to one side and compacted. This was stopping all the cylinders from reaching tdc. I thought it was weird that at least two cylinders were not moving all the way. Cleaned it all out and it looks pretty good, I suspect the engine has had a rebuild cos there is almost no ring lip and you can see hone marks on the bore. The head looks ok but is dirty as fuck. I'll see what the head on the toast engine looks like cos at least I know it was a good runner. I pulled a bearing cap and that looked good too, maybe I'll see what a set of bearings will cost now it's this far apart.1 point
-
yes please.. you've had that a while now.. I admire long term car ownership, something I aspire to & regret the older I get1 point
-
Tar/underseal we just use a heat gun and a scraper to remove at work. It's a shit job no matter what. But that's the cleanest way to remove. Wire wheels usually just heat it and make a gooey mess same with sandblasting or sanding Then solvents usually paint thinners to get the last sratchings off.1 point
-
I've been trying with LN2 on some nasty aftermarket tar-like goop on the Datsun underbody, no real result ended up resorting to a knot brush & grinder and various scrapers, heatgun and finally acetone. D-, will not do again.1 point
-
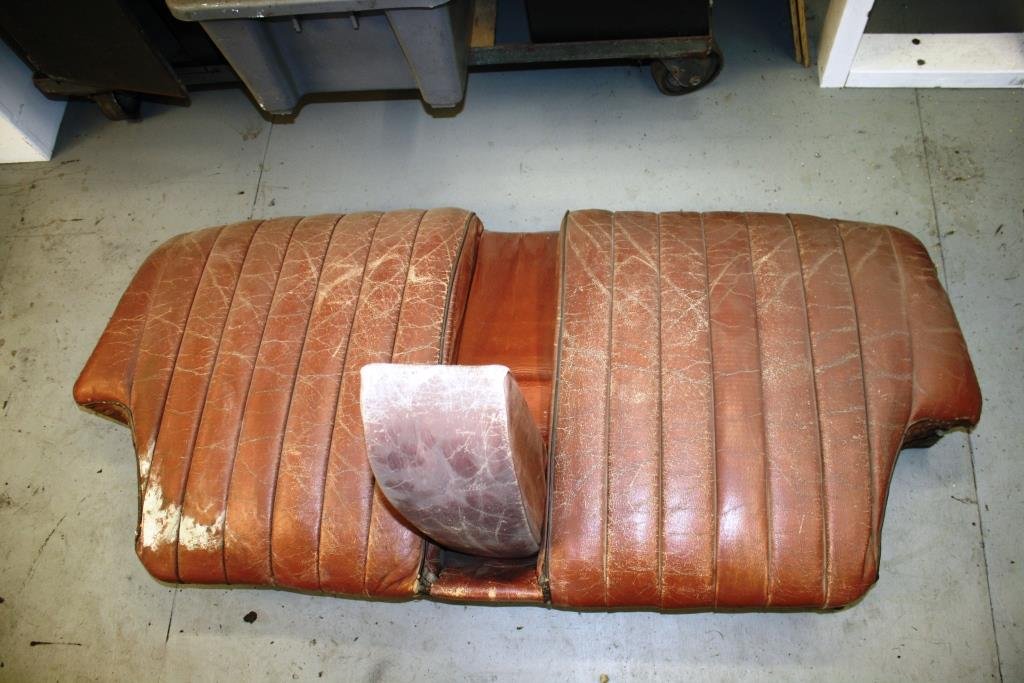
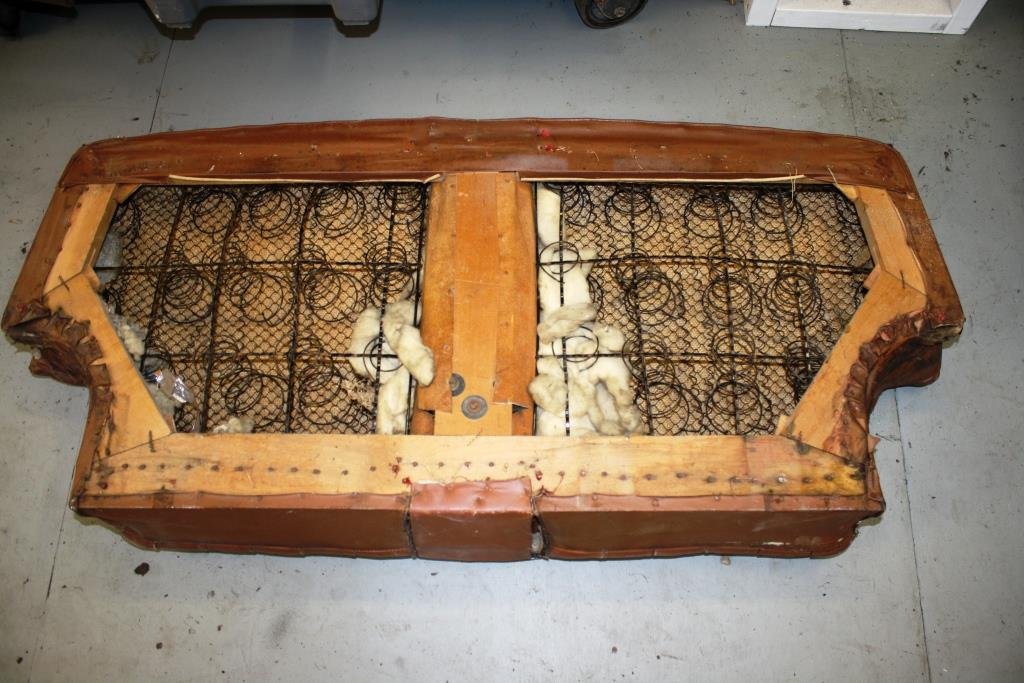
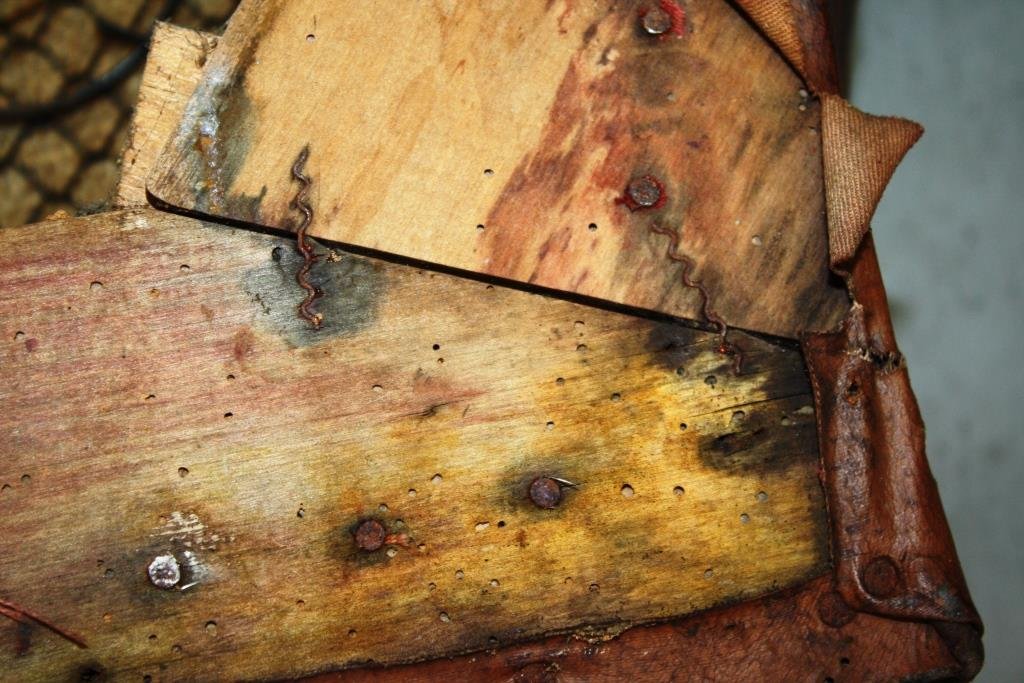
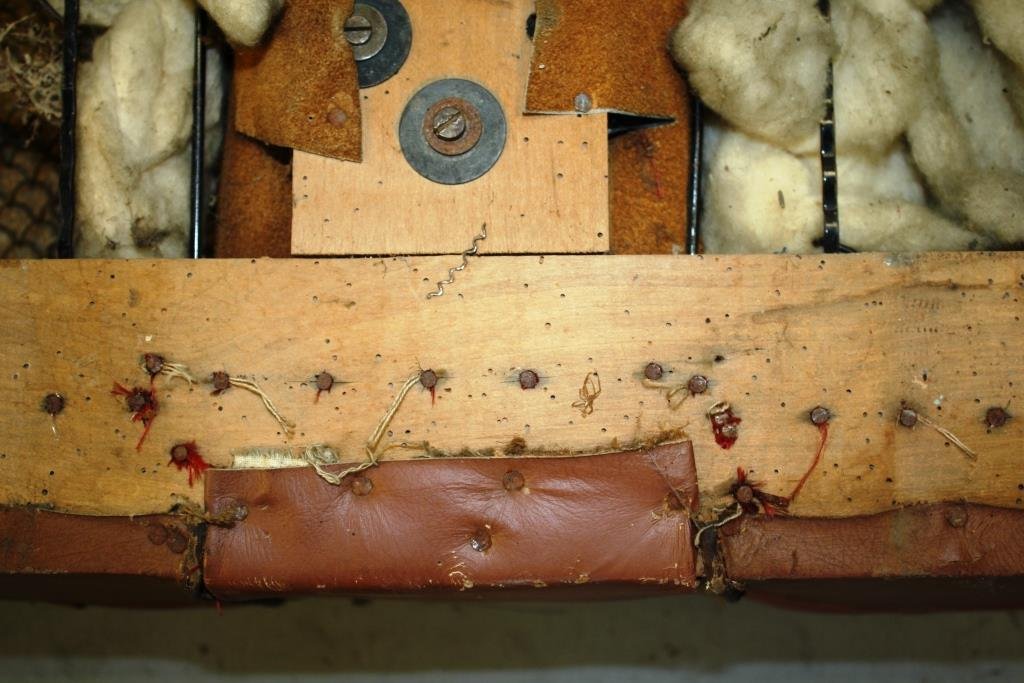
The seats came our easily, plan is to keep them looking scruffy and original. The leather is cracked and dry - any suggestions on how we should be treat it will be much appreciated by both Rigamortice and yours truly. Love the old leather, the kapok stuffing, the springs and the wooden frame – not a modern staple in sight.
1 point
-
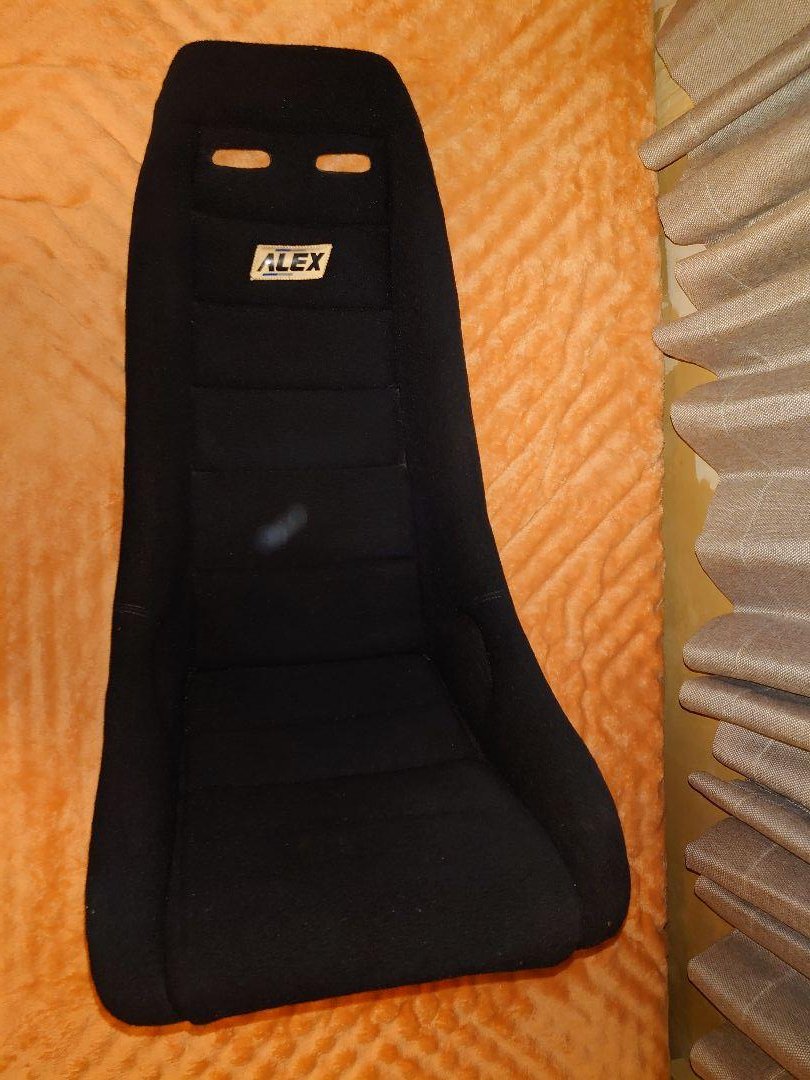
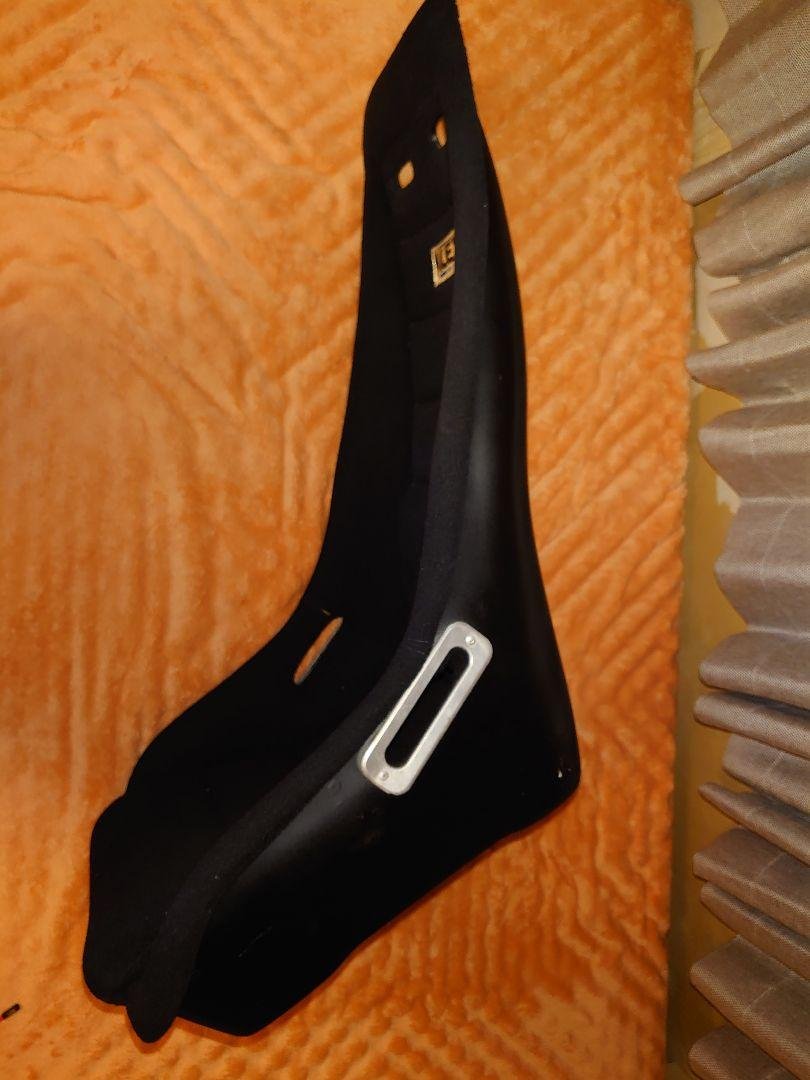
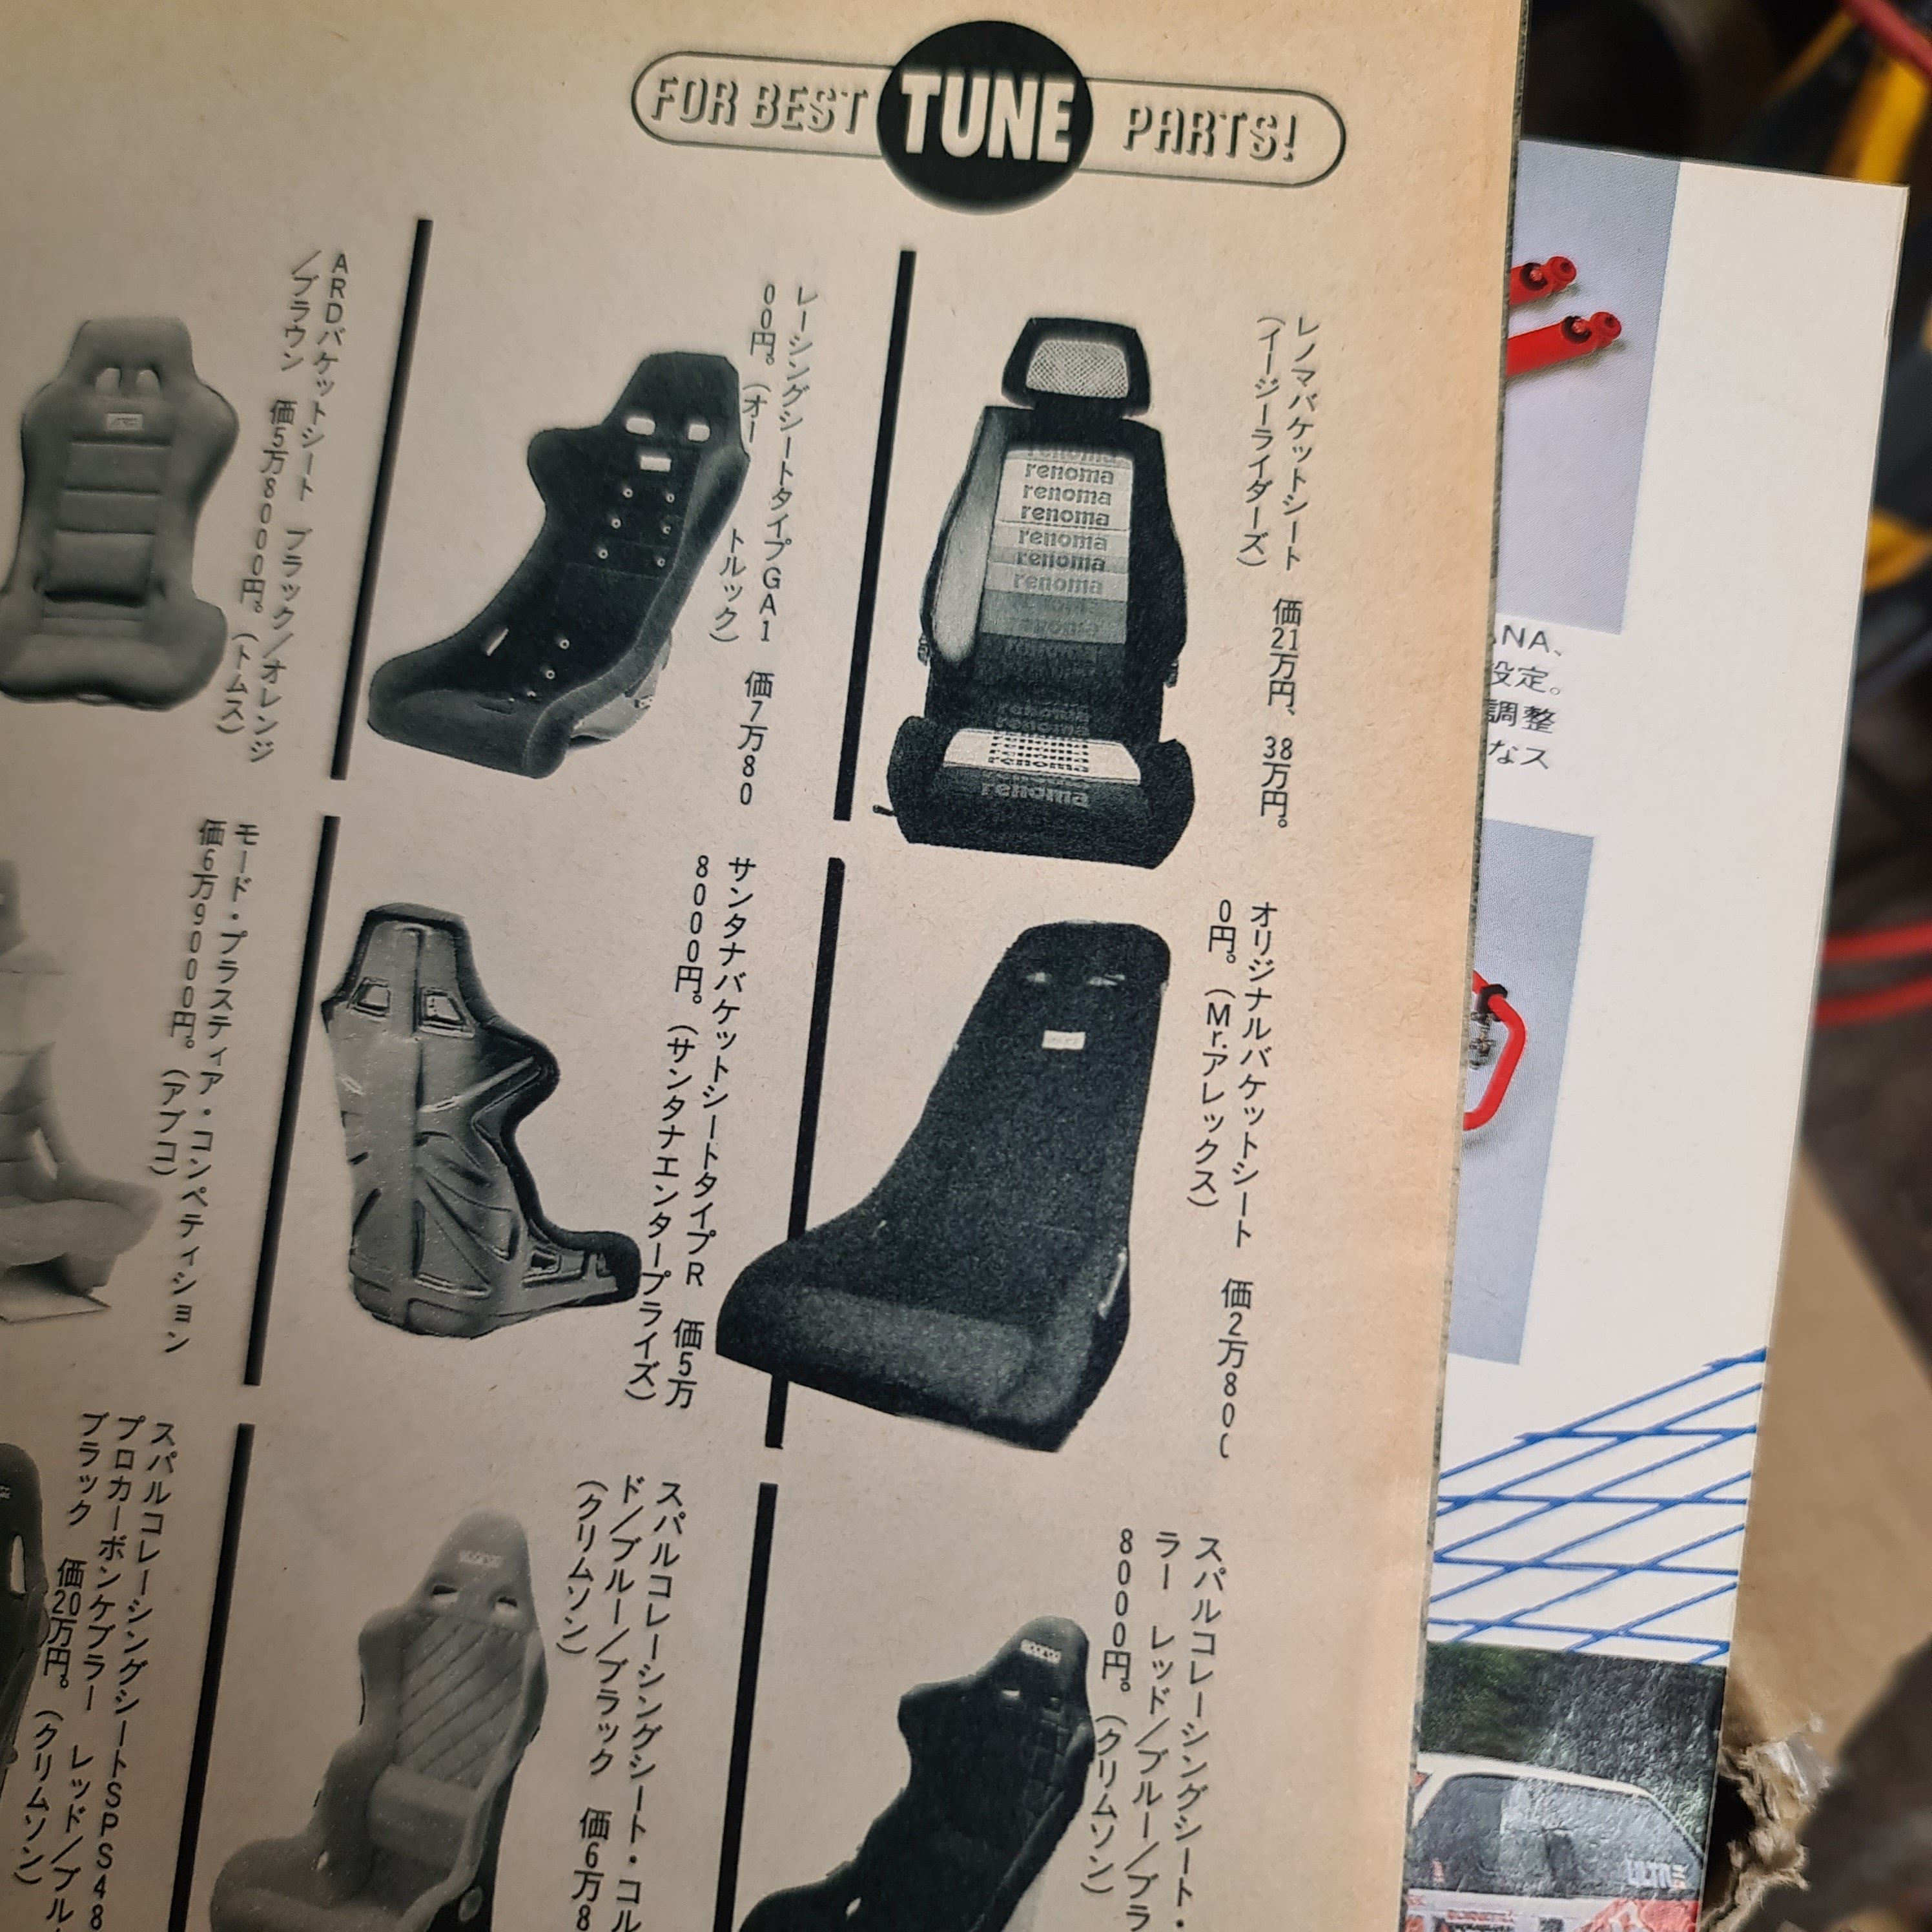
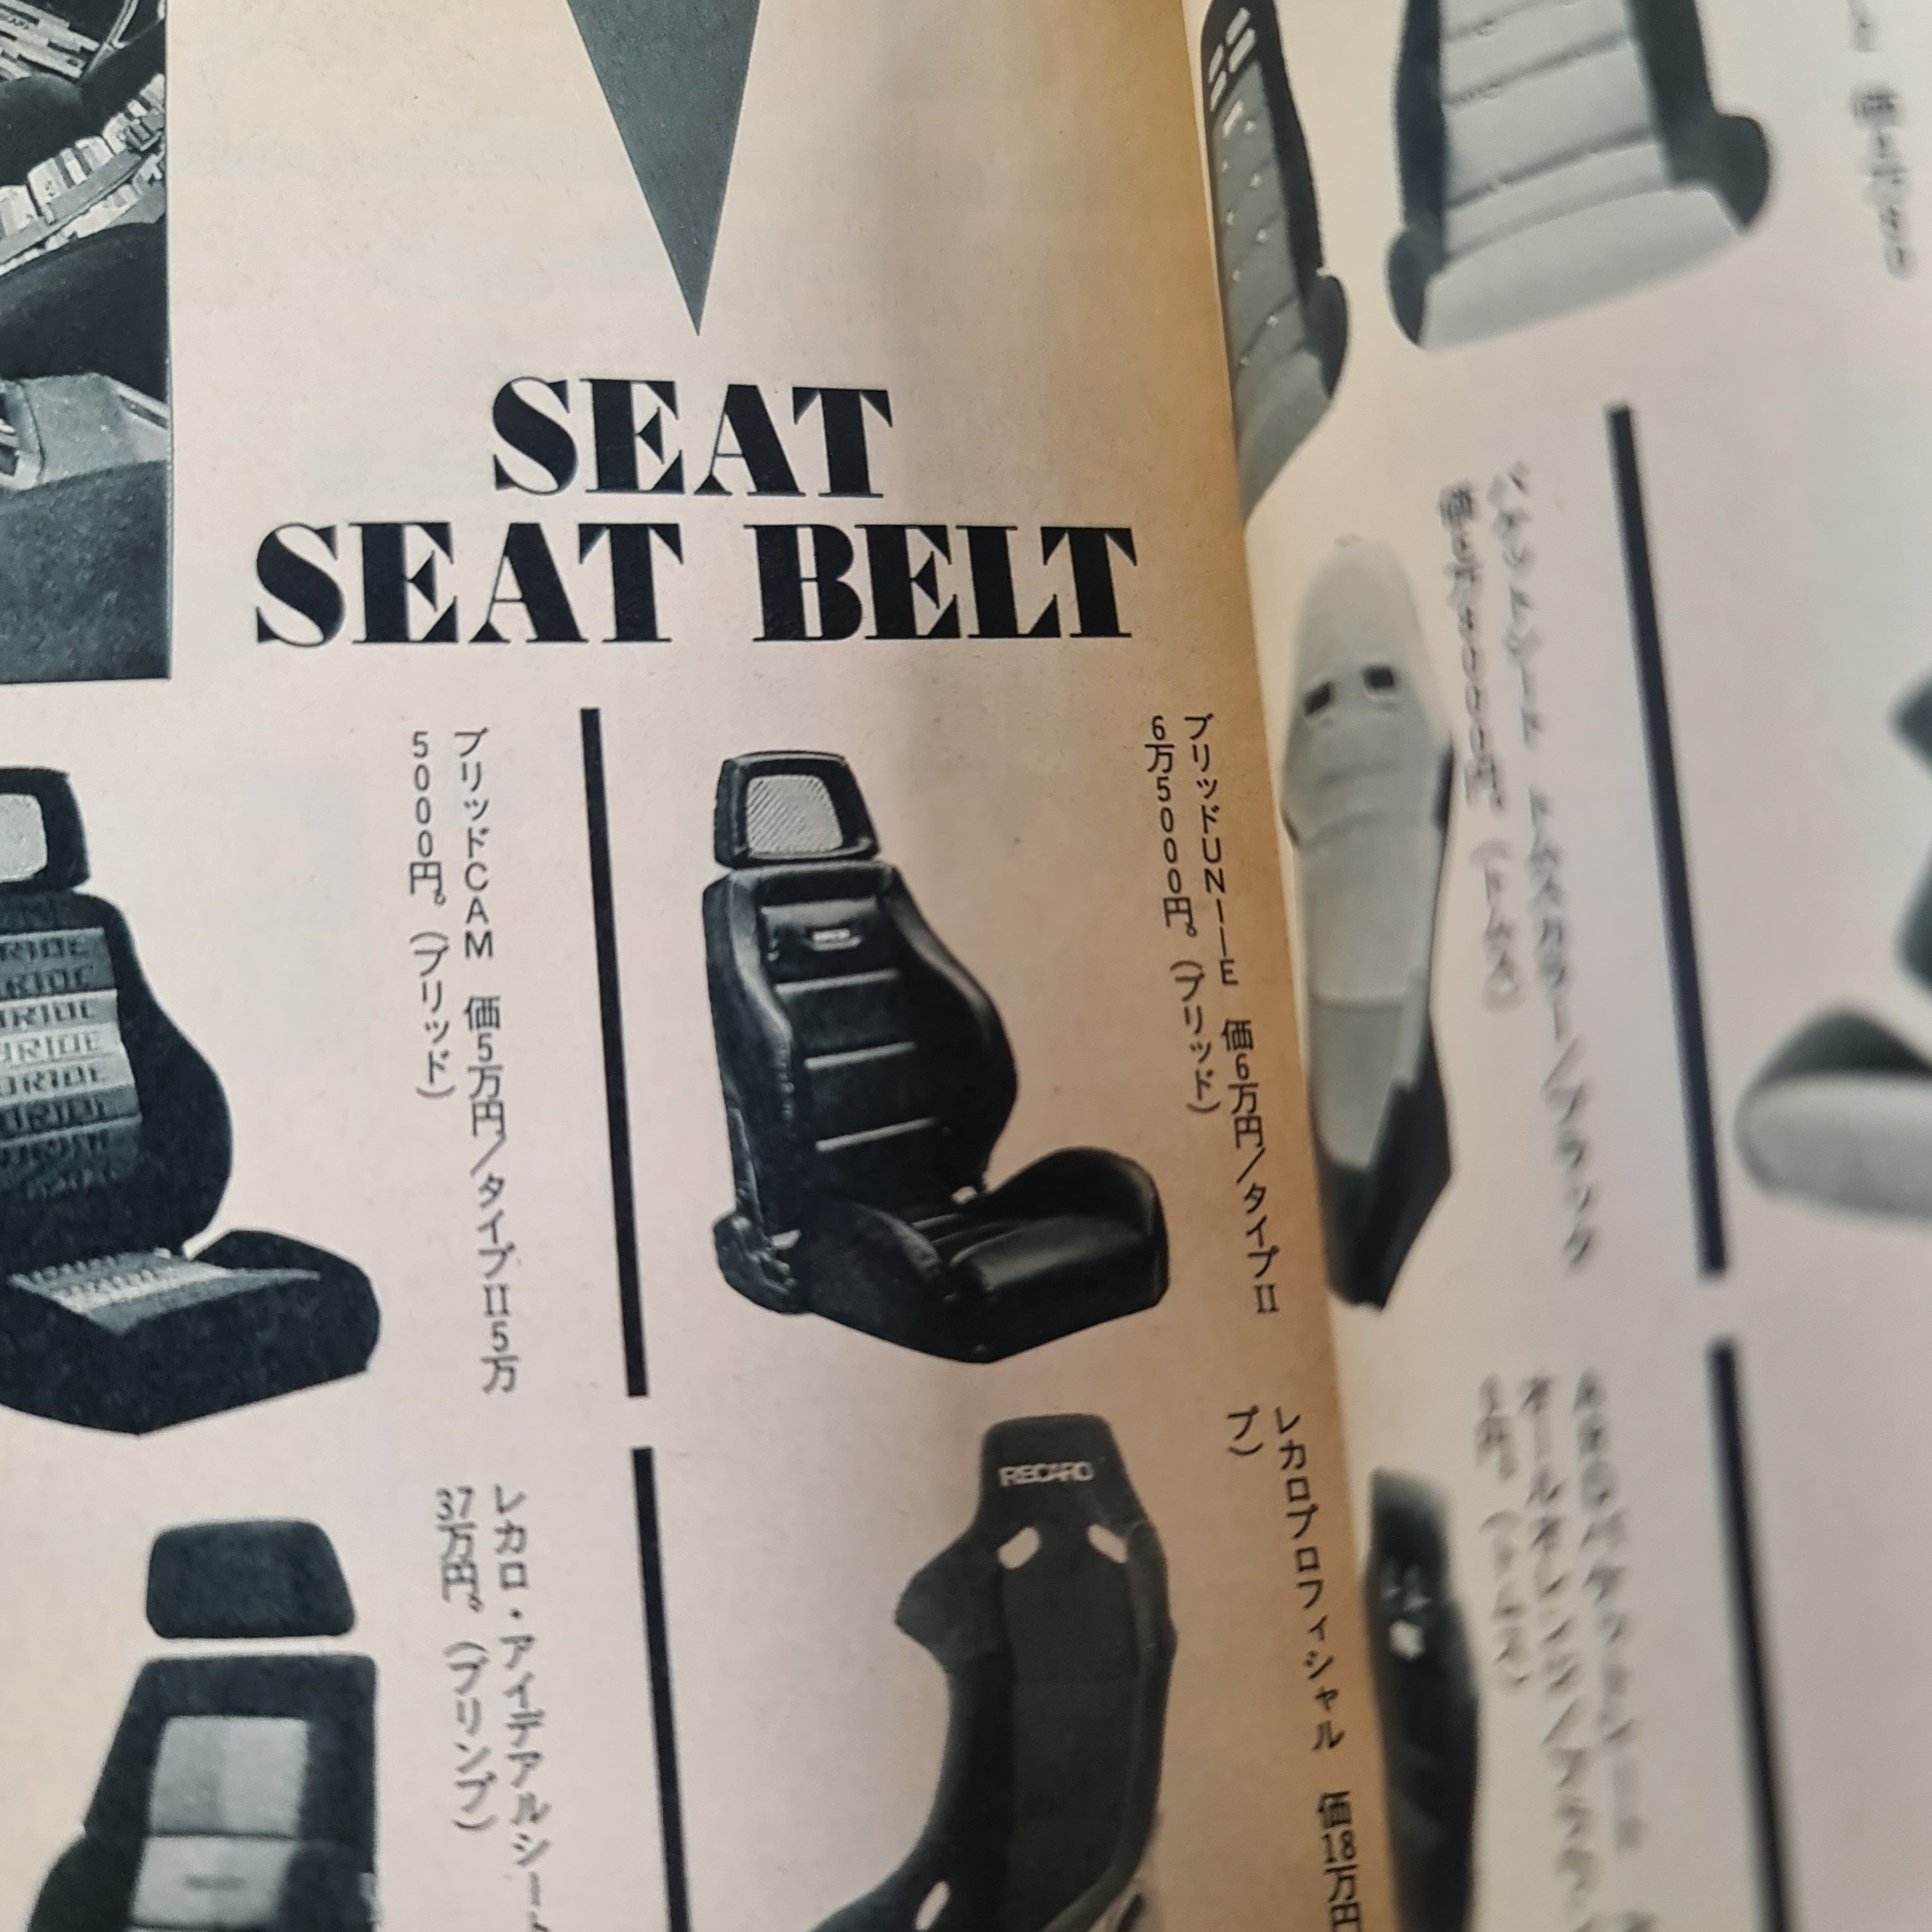
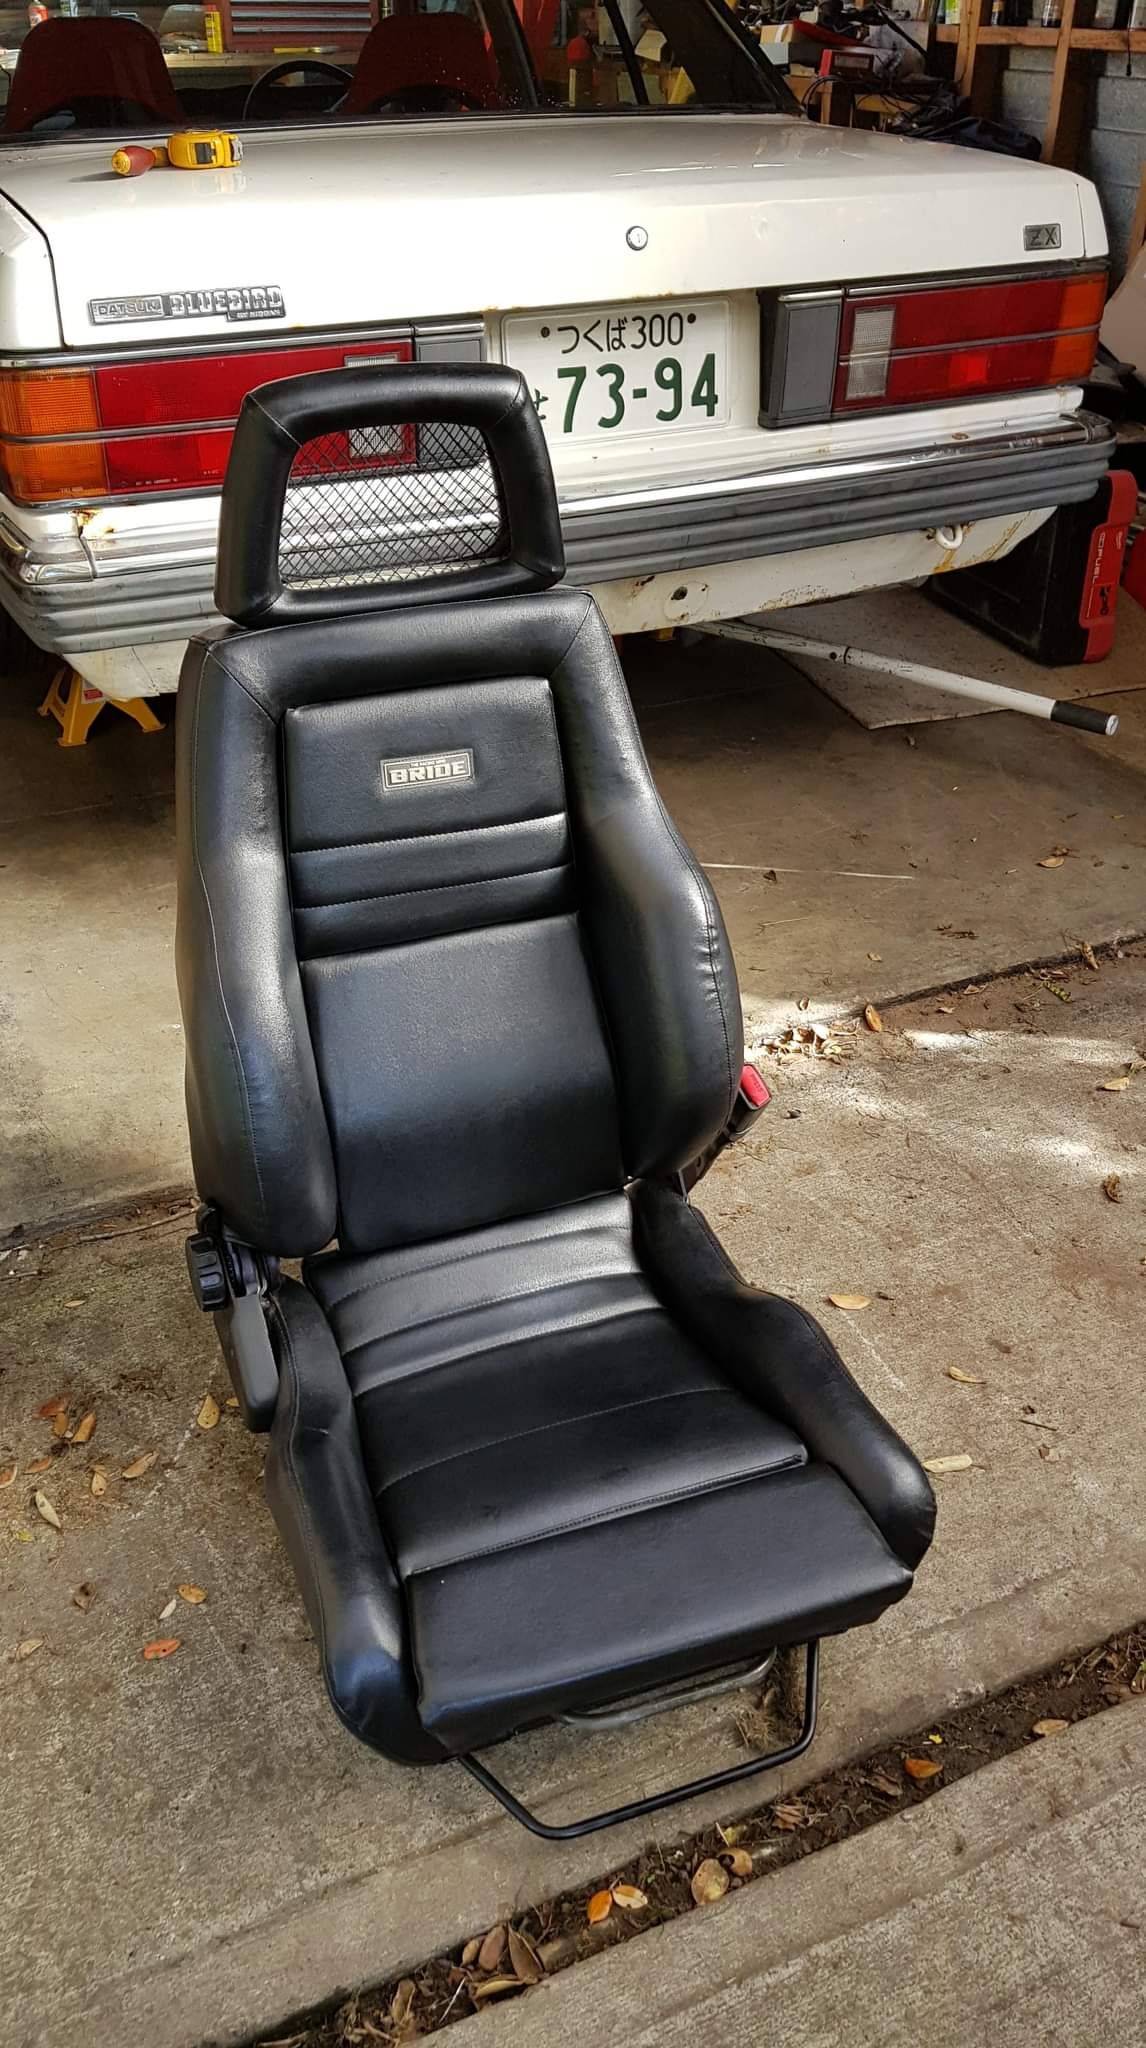
Have been a bit slack on working on this but have word the tailgate is almost done. As much of the bottom straightened as possible and then some filler to sort the rest. Purchased an old fiberglass fixed back to run in this as a bit of a tester to see how bad the shipping prices from Japan are for them. Who is Alex? I'm not sure but I have a vague memory of flicking through catalogue pages and seeing the name so went for a sift this afternoon. Listed in 1989 CARBOY sports tuning guide from Japan is the 'Mr Alex' fixed seat for ¥28000 Also found my old Bride reclineable which I didn't think was an original upholstery at the time
1 point
-
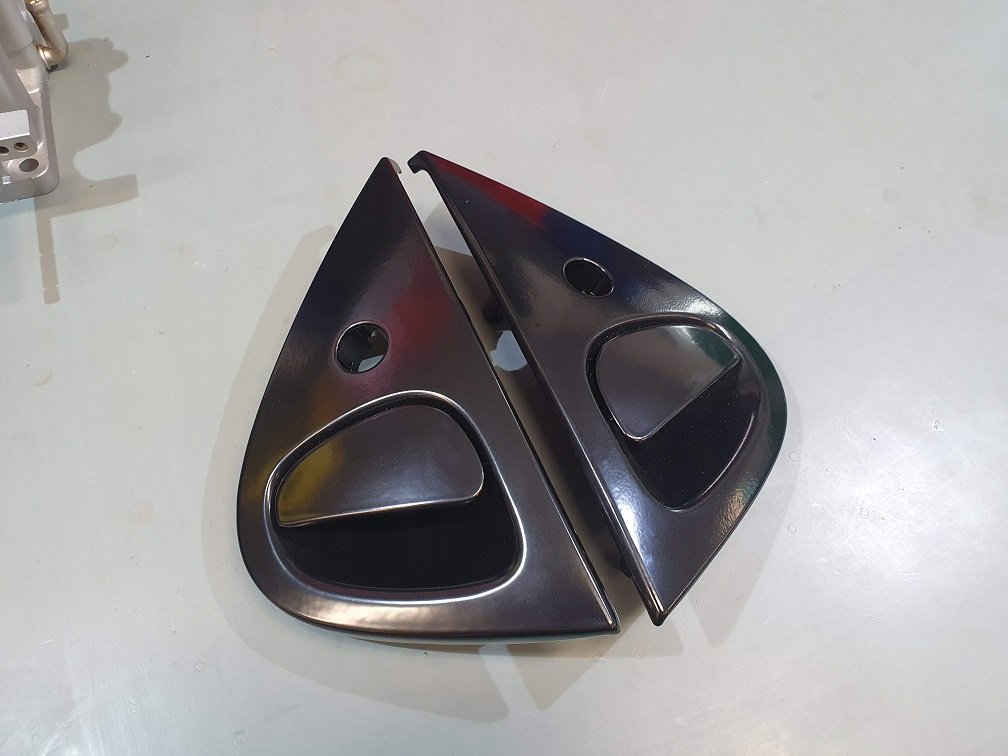
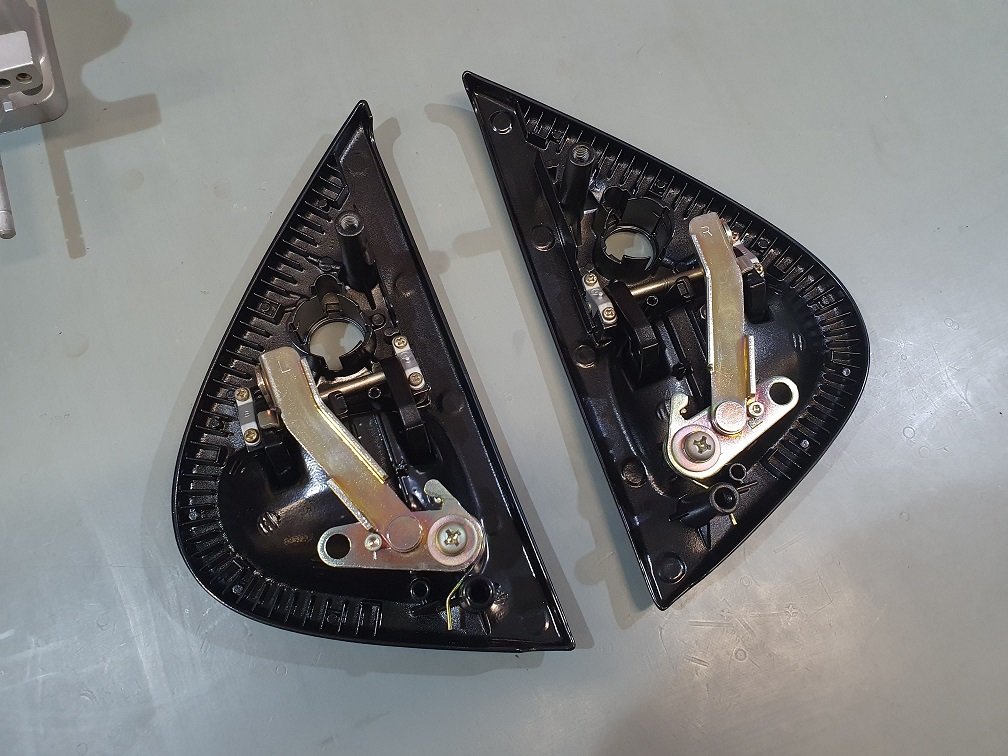
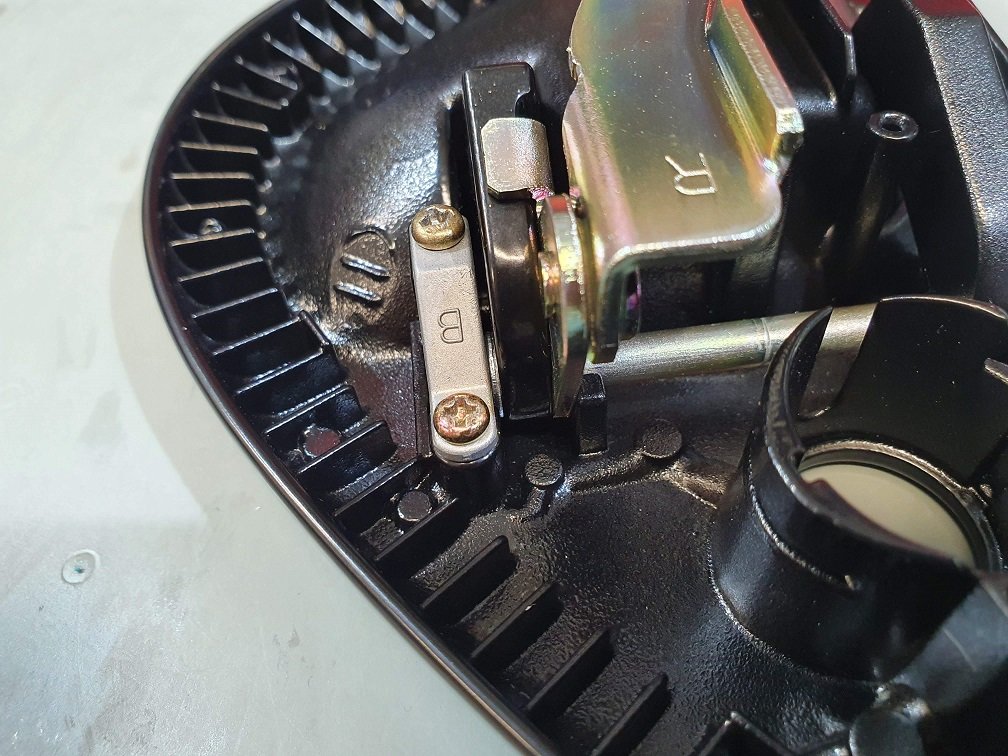
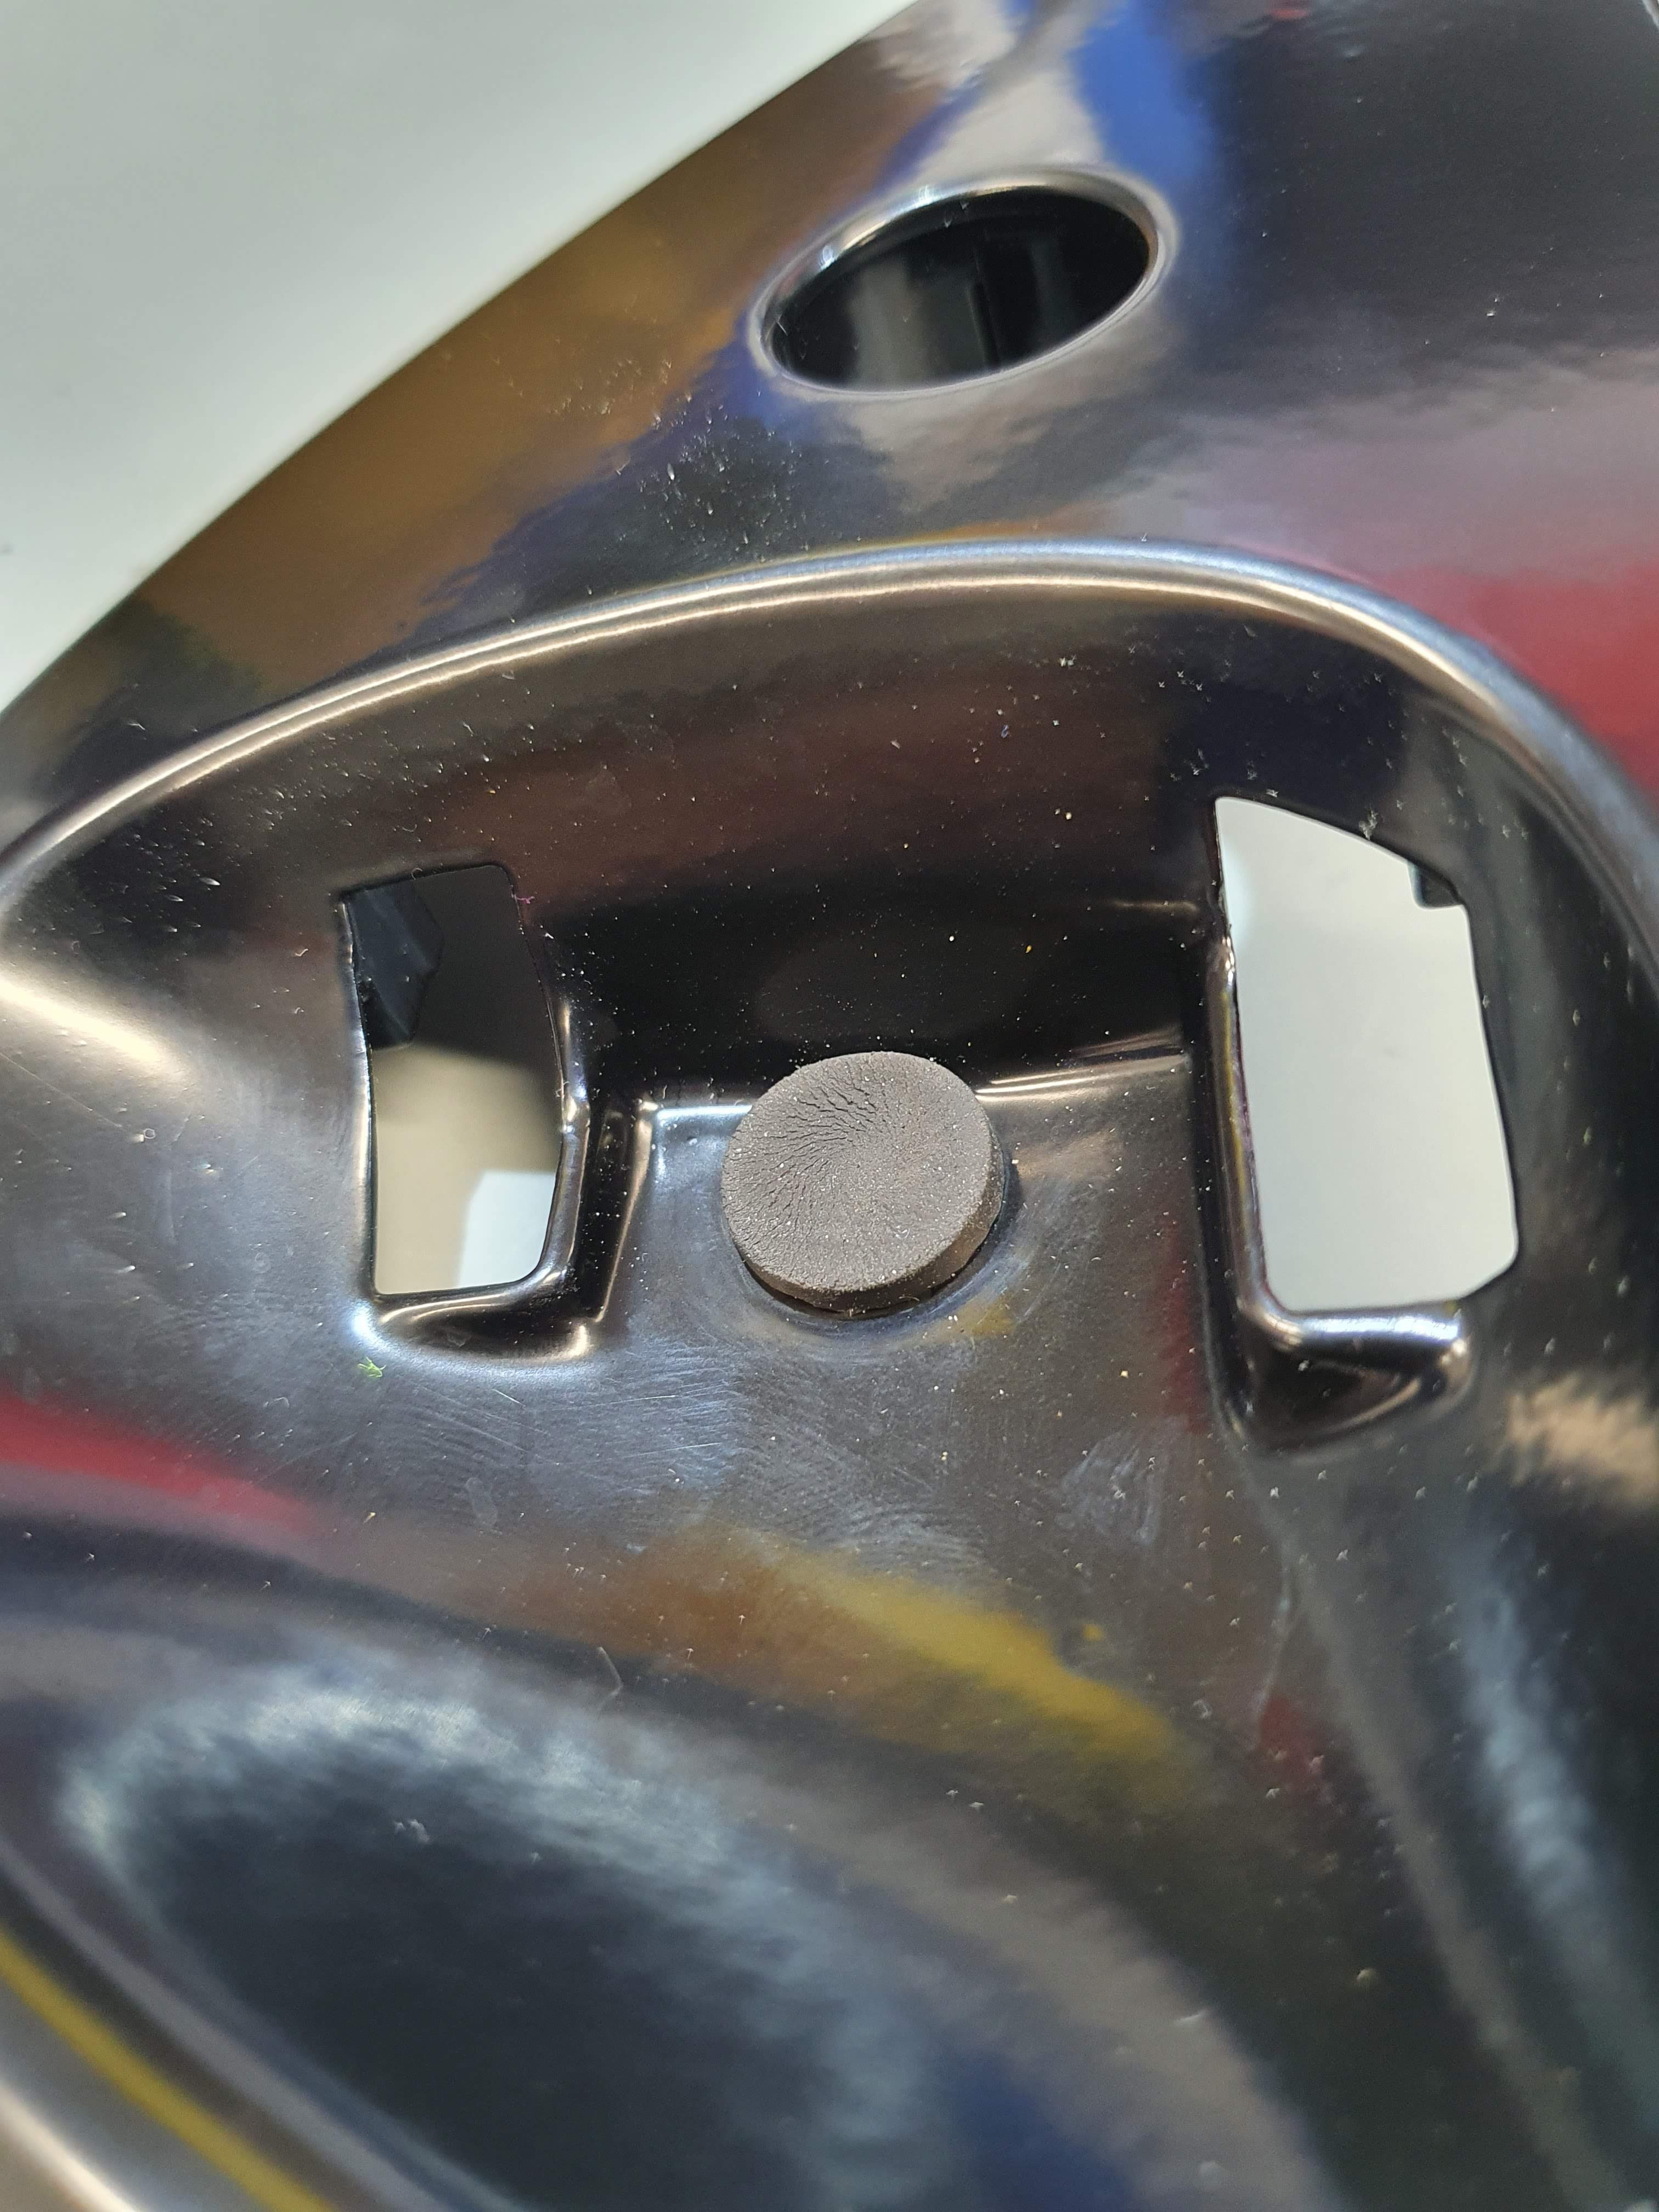
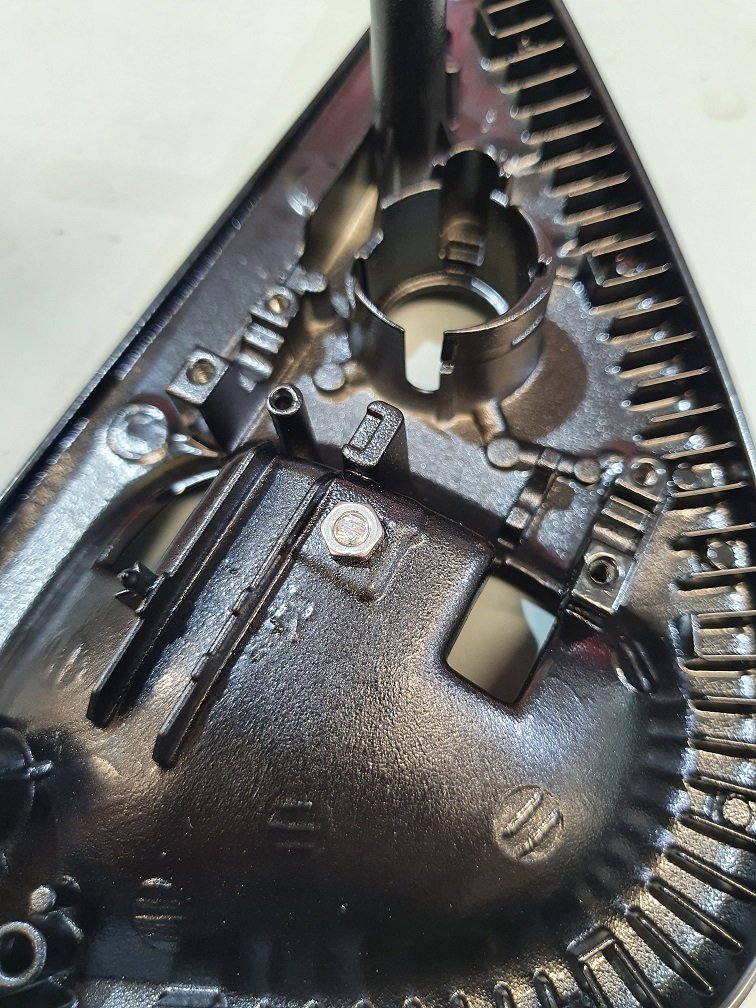
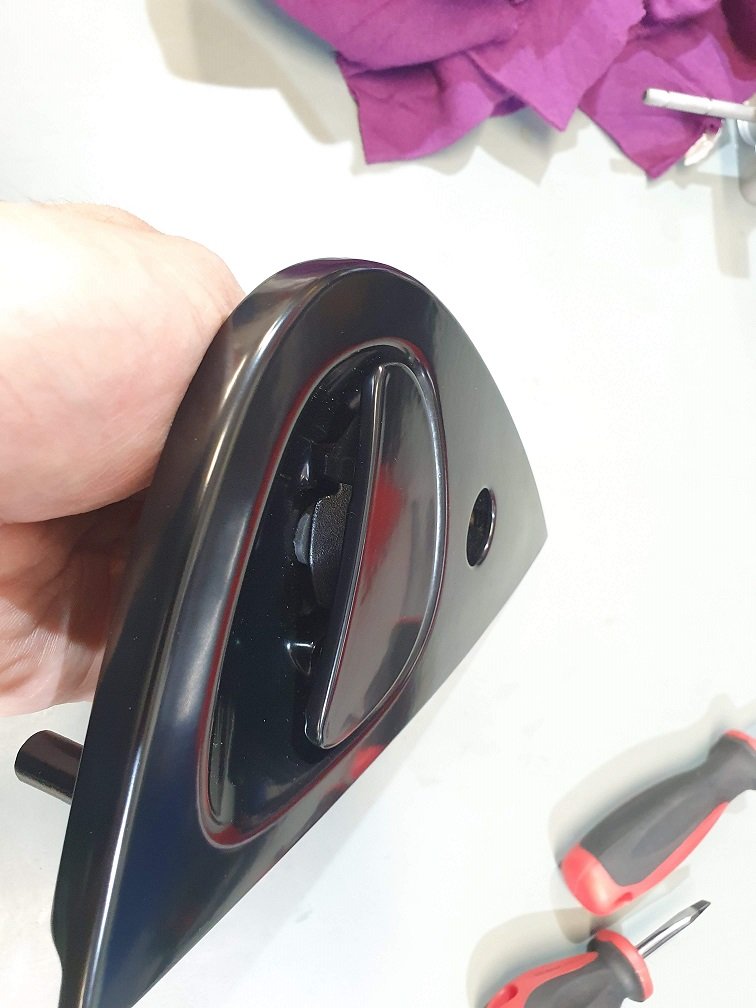
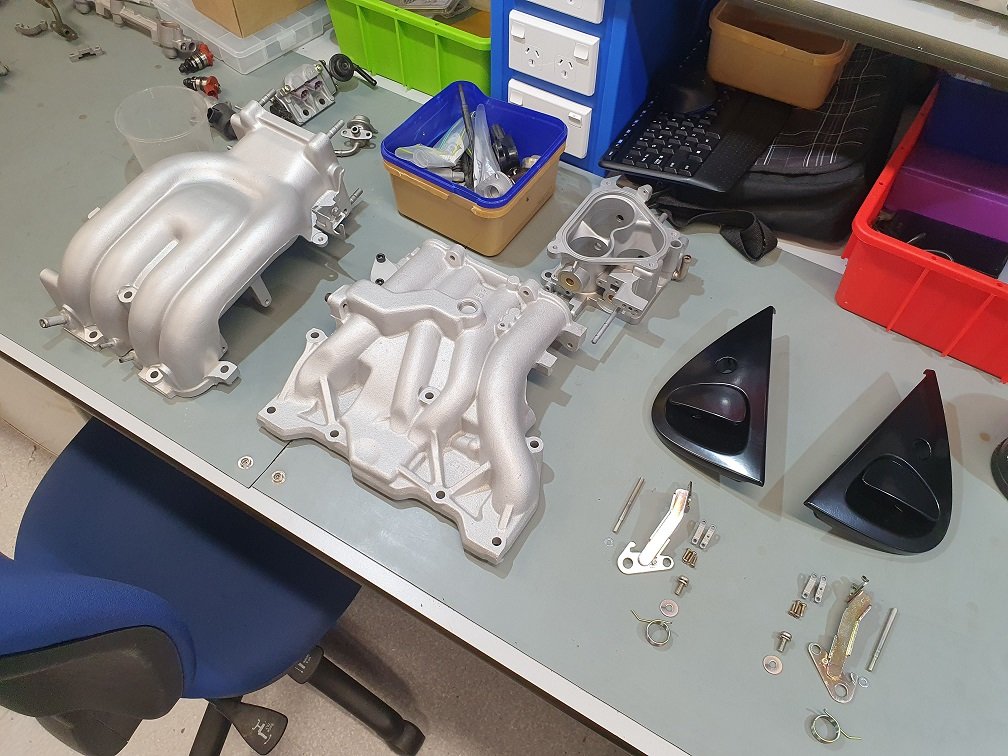
Bloody hell, the saga of these door handles! Definitely could have just bought a new set... I've saved a bit of money this way, but invested a heap of time in its place... Still, every part has a story, its something you touch every time you use the car, and this set is even better than a new set now with the aluminium cast handles instead of the factory plastic pieces. I got a local company to powdercoat the handles, and they did a pretty average job TBH. They said they'd re-coat them, but after waiting a month without that happening, I gave up and just collected them. The coat was so thick in places I couldn't assemble them without cutting bits of it away, and the finish was pretty rubbish... I re-blasted them to get it all off and was back to where I started. After watching a couple of youtube videos (to become an expert in the subject, as we all know that's what youtube is for...) I purchased Eastwoods DIY powercoating setup and some semi-gloss black powder. Wow, this is one of those rare occasions where the reality was actually as easy as it looked on youtube, and the outcome surpassed what I was expecting. Easy process, nice and clean, and super durable finish in exactly the right colour / gloss level to match the factory parts. Handles there ready for final assembly, with some other bits I've got on the boil. I made some better rubber stoppers to set the handle height correctly when the doors are closed. These are 16mm diameter m4 threaded rubber equipment feet that I trimmed down, chucked up in a drill and linished to about 2mm thick, while spinning them in the drill to keep things even. Time will tell if they're up to the task, but this thing will never be a daily again, so I think they'll be okay. Then assembly is simply the reverse of disassembly, with the addition of an m4 flat washer as a shim. Just to the right of the 'B' clamp there. Kind of a pain to get into place, but it removes all the play in the system. All the moving parts got a smear of grease so keep things smooth. You can see the stopper bolts there, but they're not engaged when the handles are fully closed, so are doing nothing whatsoever. With the larger diameter stoppers, the handles close down onto them properly. The original ones seem to small to really do much. One of them was missing on this handle set, and the other was pretty thin. Voila! What a faff for a set of door handles.... But dayum, they do look fine :-). I've blasted all the lock housings, but I need to take the tumblers from the original set so the car is keyed the same all around. Future job, these can get wrapped up and put away in the wardrobe for now. Back onto things the car actually need to run... maybe... I'll probably get distracted by something shiny ;-).
1 point
-
and almost a year later of NOTHING happening 17 June 2021 started the wagon up yesterday, took ages to get the fuel up to it for some reason.. did another cold start today fired up instantly as expected.1 point
-
1 September 2019 DONE! front stainless steel just had to dig out the plastic clips for the self tappers to screw into(like XD/XE/XF dash screw things)not even polished1 point
-
Just got sent this. Sums up the ride perfectly.
1 point
-
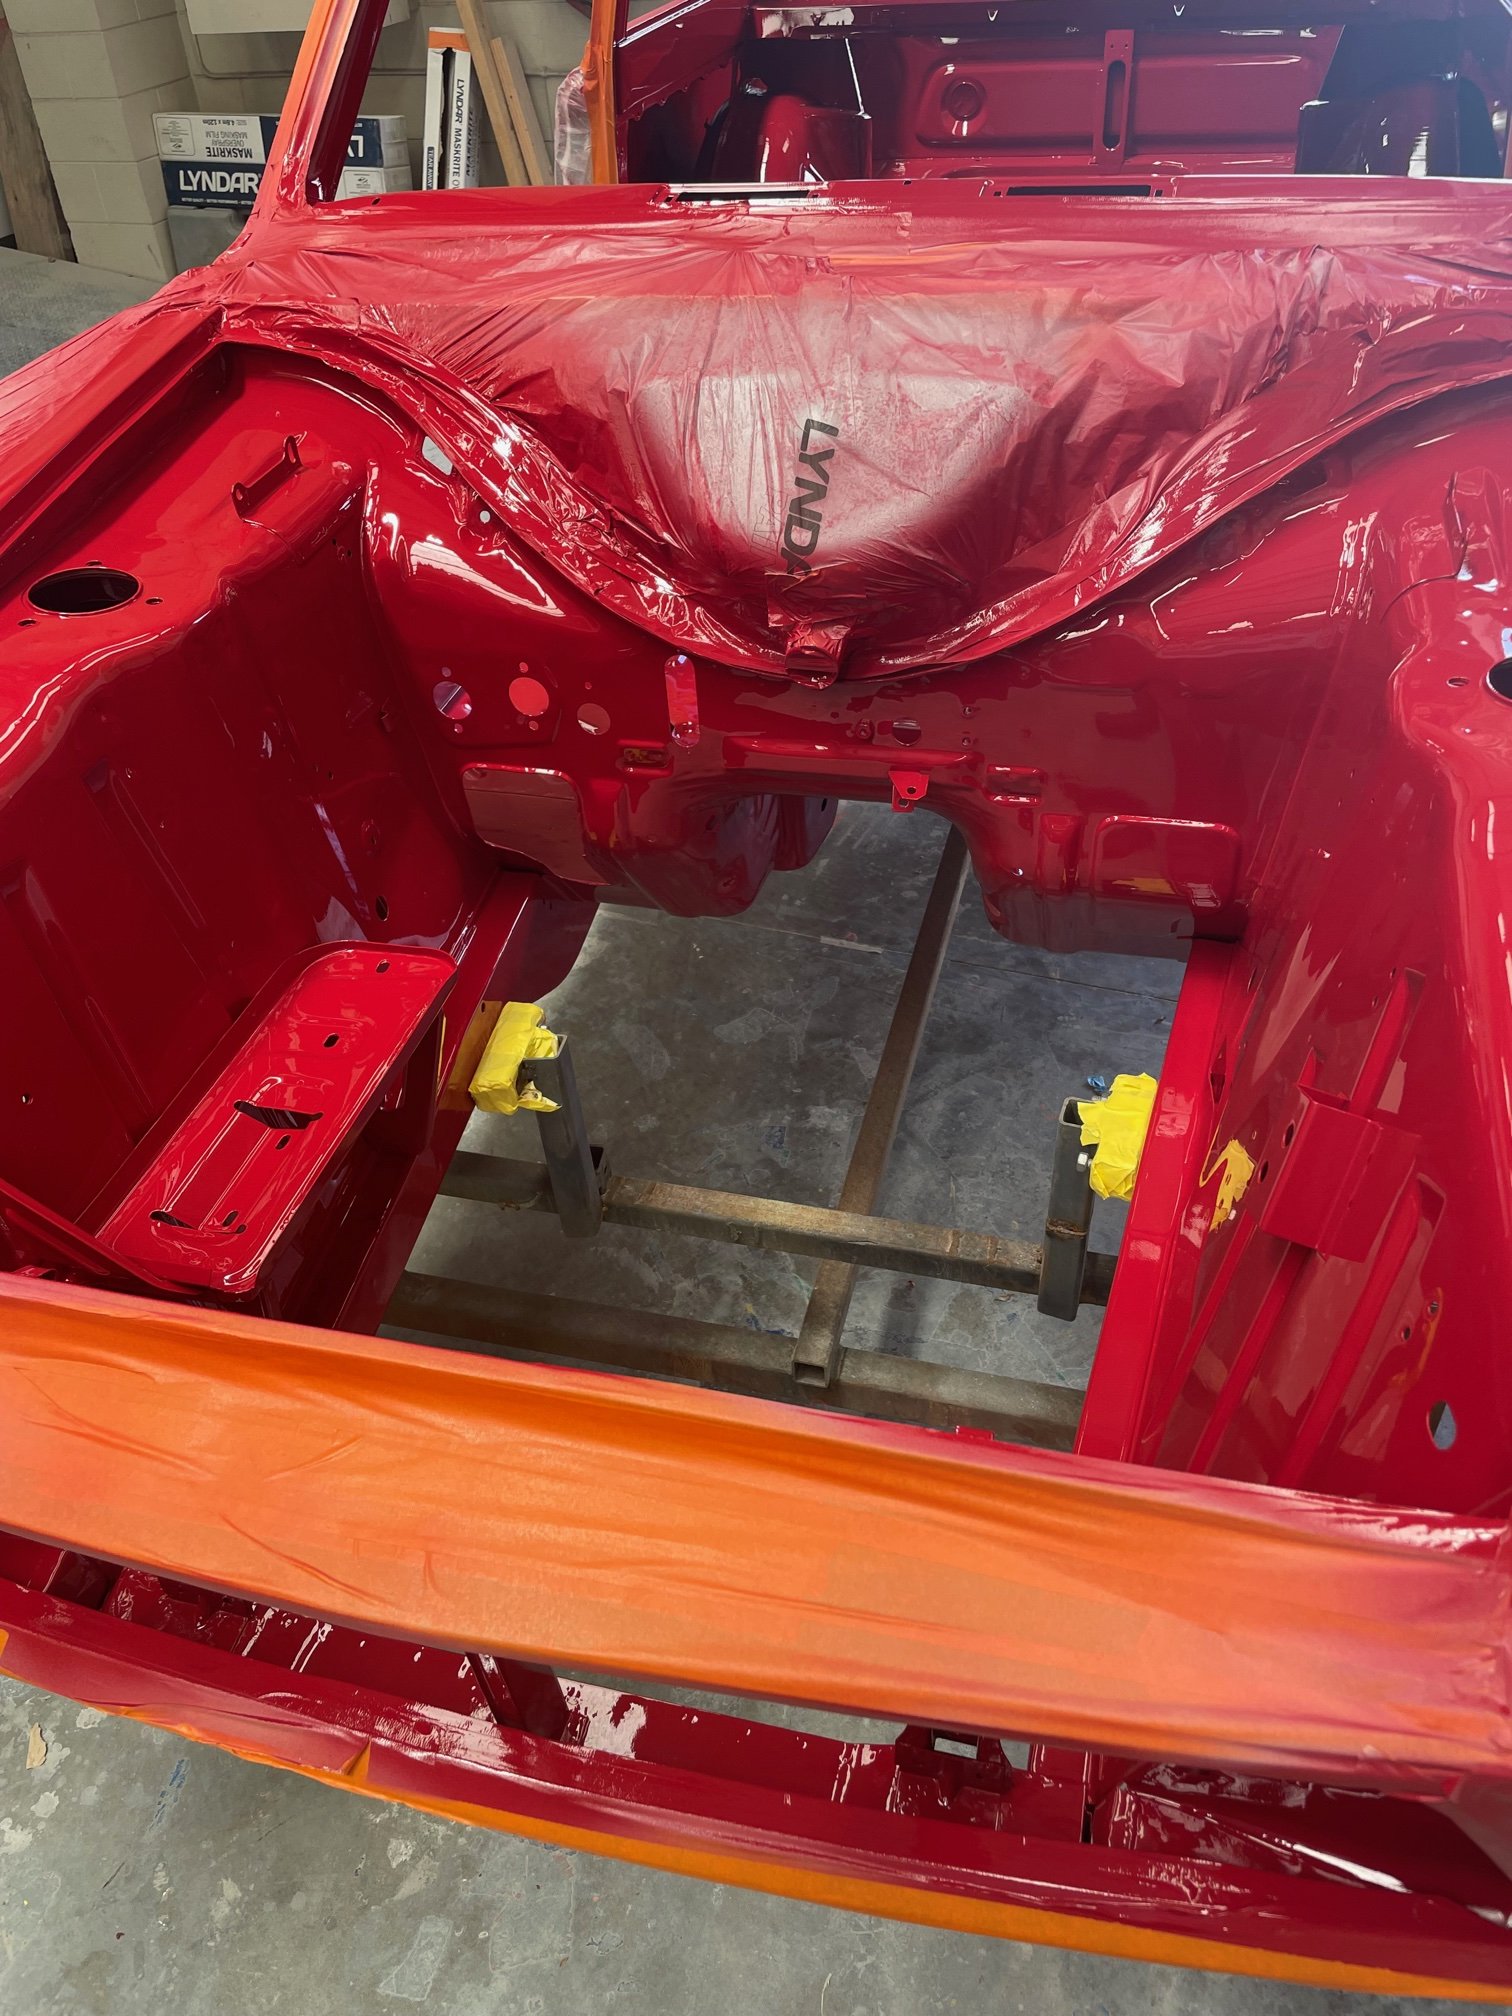
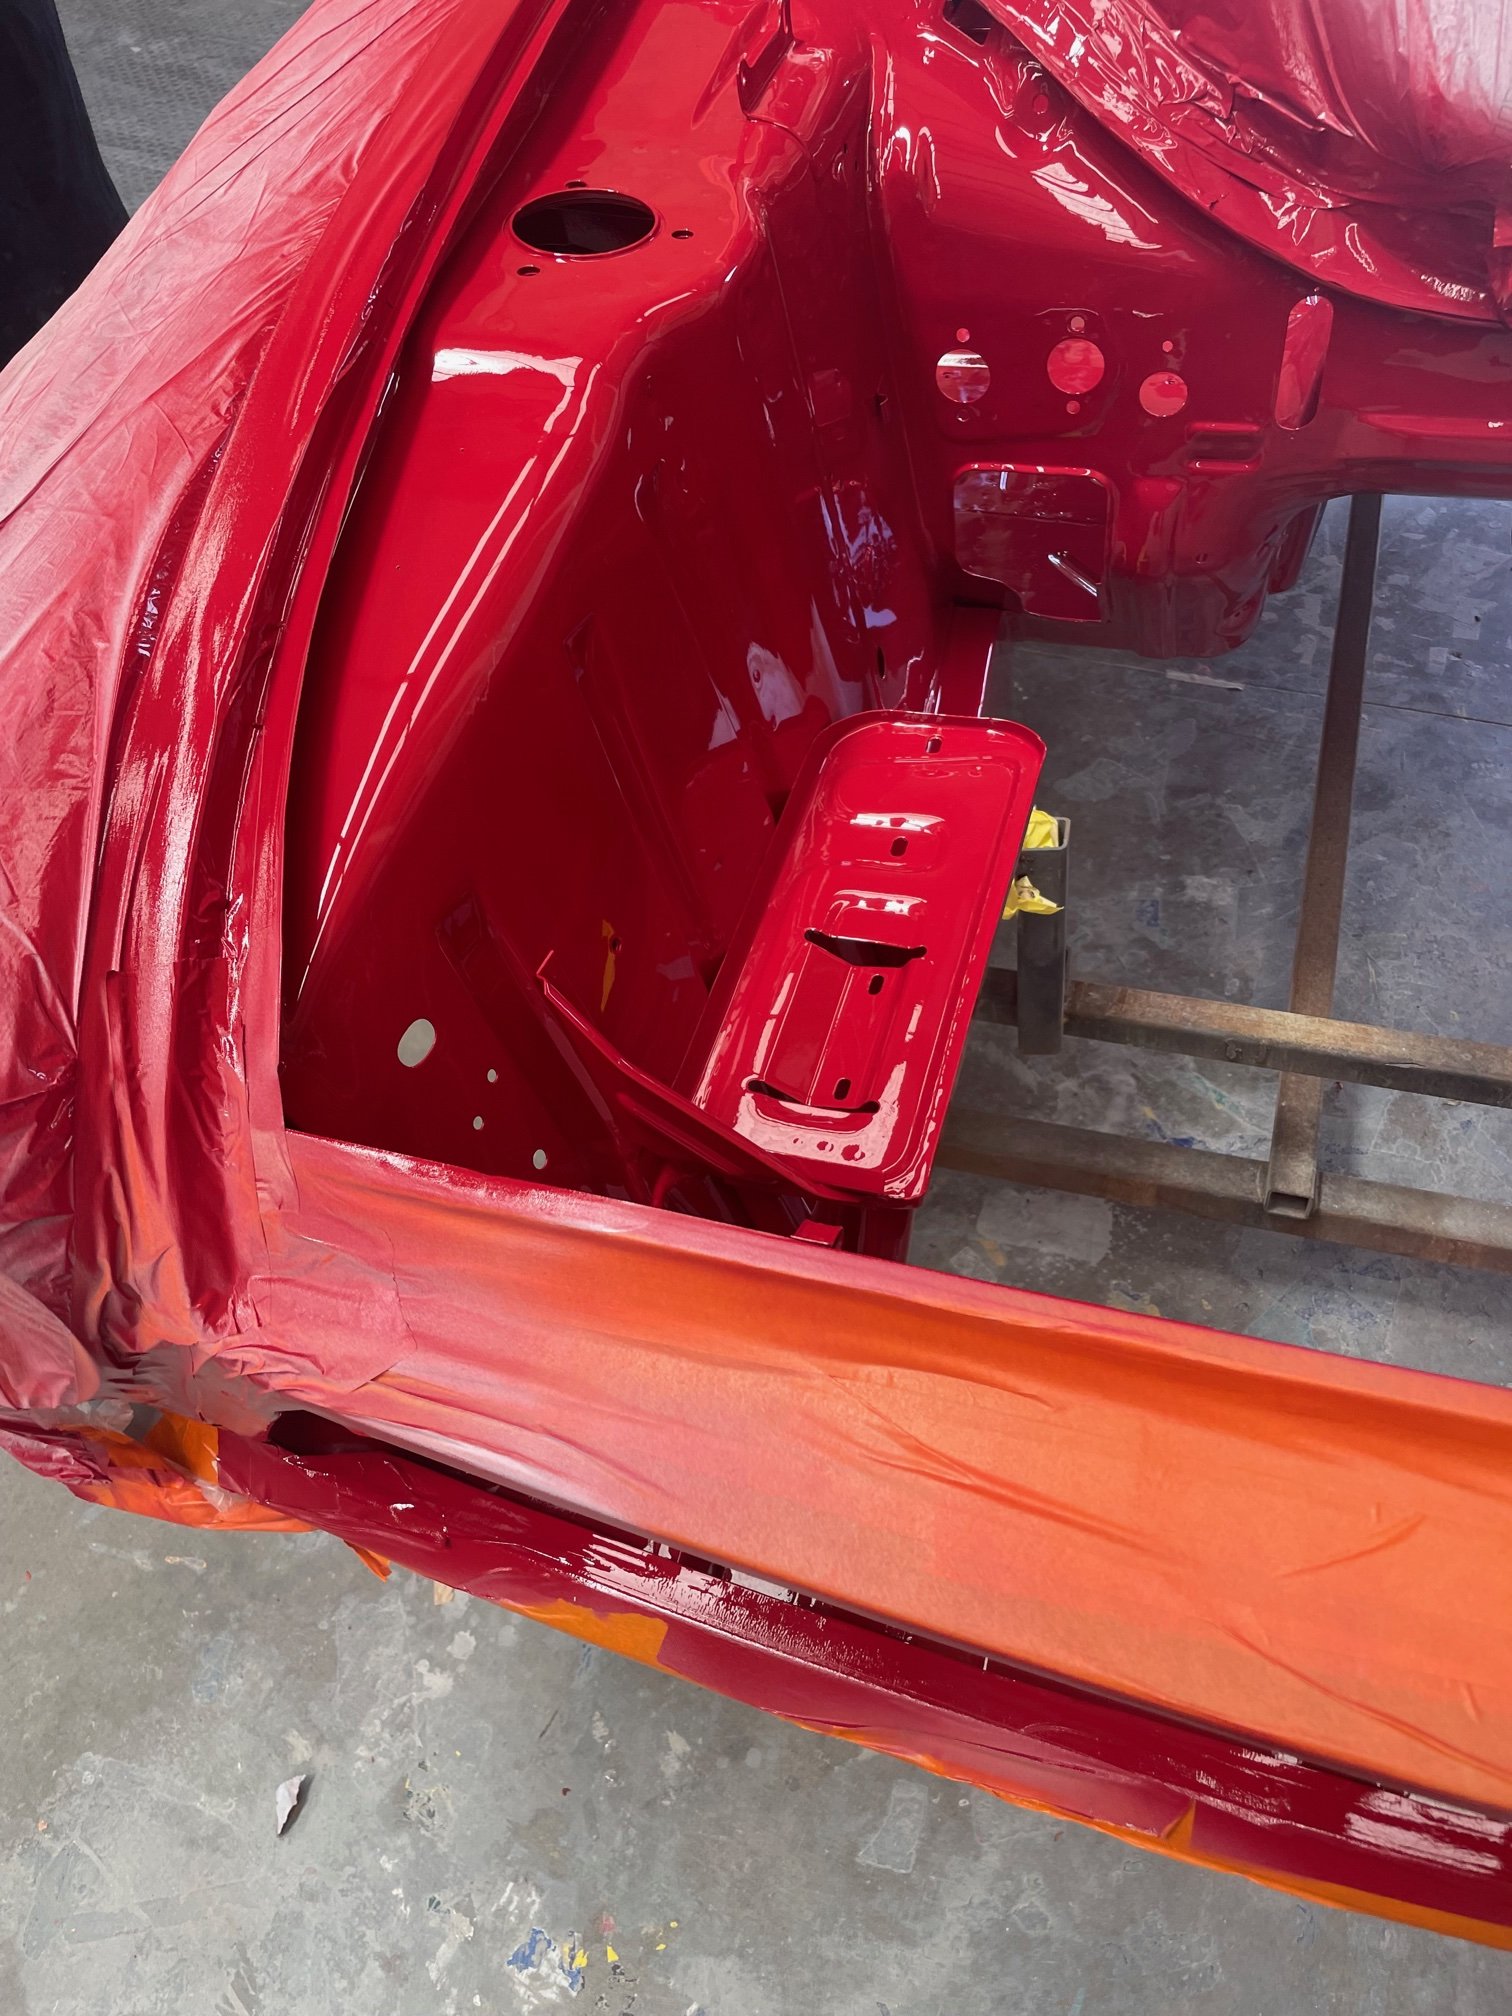
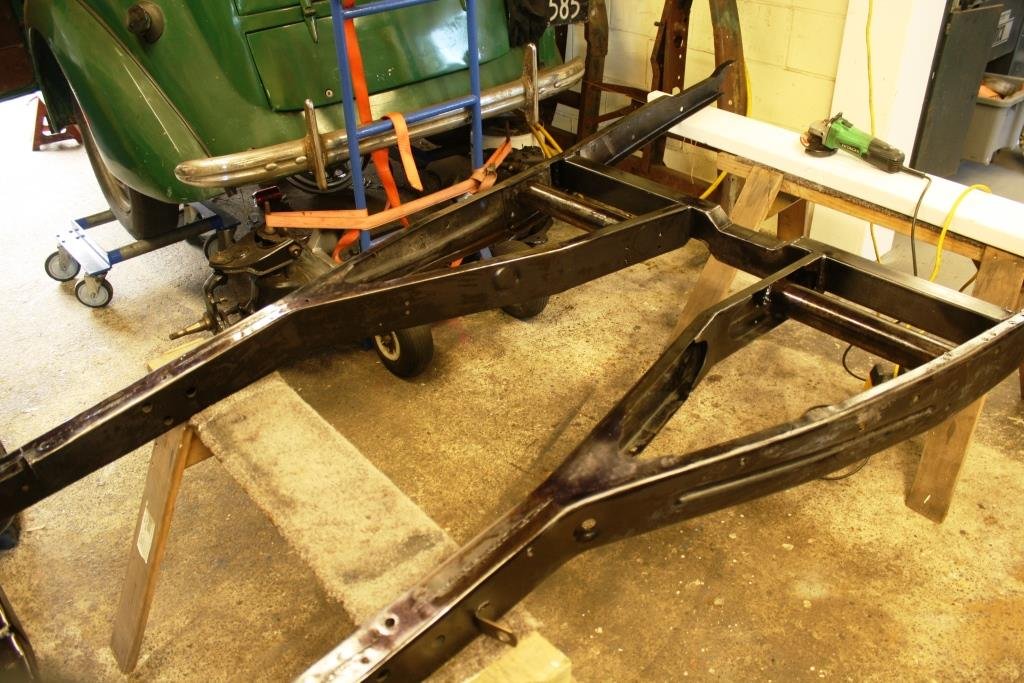
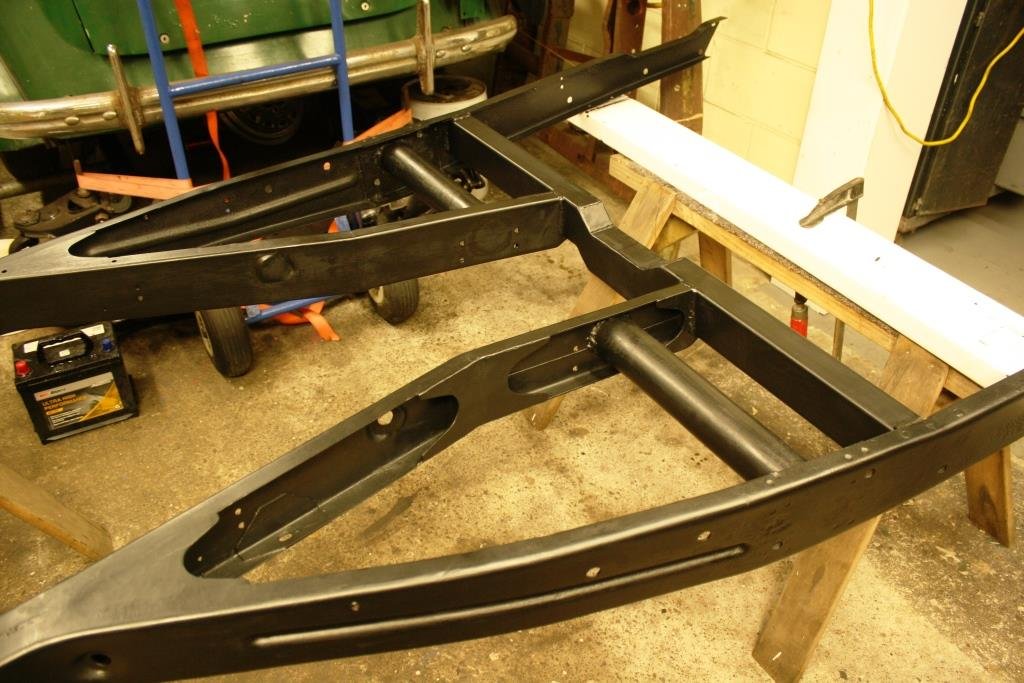
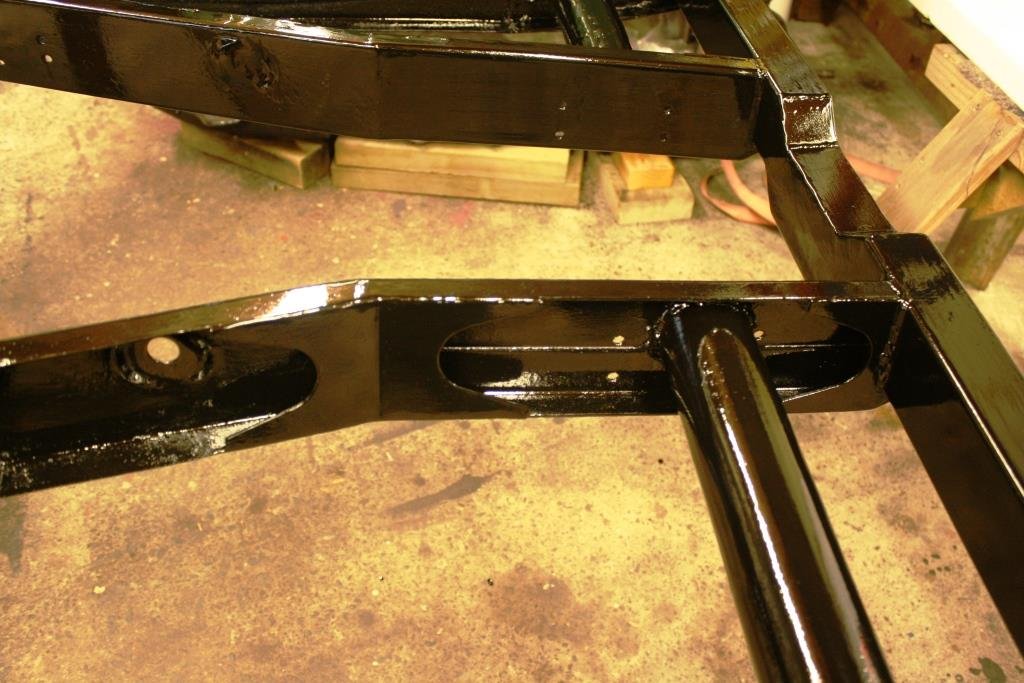
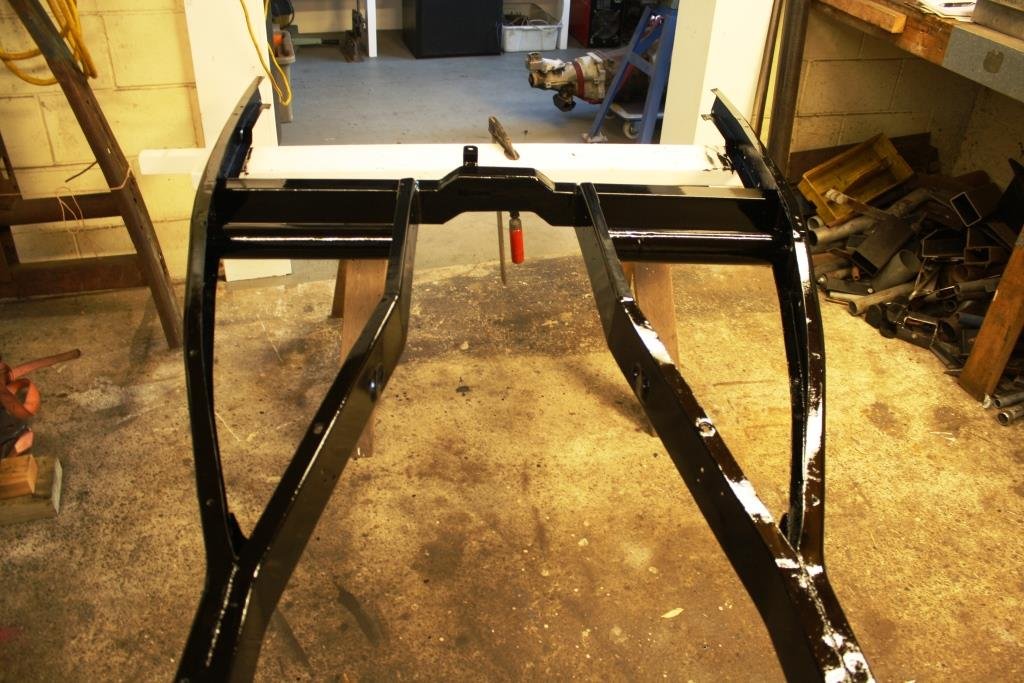
After a noisy afternoon with a wire a wire buff and a flappy wheel Rigamortice’s chassis got a couple of coats of CRC rust converter. Followed by a coat of Wattyl etch primer; jeeze the fumes knock you over… And two coats of Wattyl Killrust epoxy enamel.
1 point
-
It's in worse condition now, shitloads of rocks everywhere on the pelorus side. Think of all the loose shit at the top of mt patriarch, a hint worse then pair that with what the trail was like last year. Nelson side is pretty grouse though, had lots of fun on that on the drz. helps when your front wheel isn't about to fall off and you have brakes that work hah1 point
-
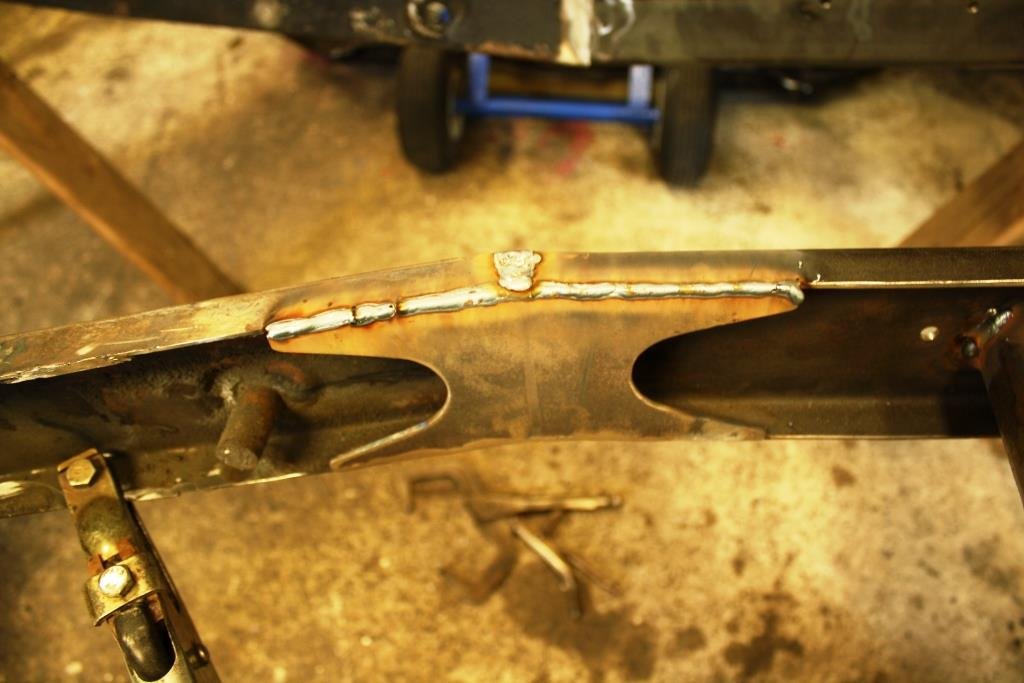
Discovered 100 x 30 cold rolled channel was unobtainable in level 3 lockdown so had to improvise with the grinder. Time for some measuring.. And some CAD, (cardboard aided design). Cut out some gusset plates, the reason for the curves is to reinforce & brace without creating stress points when the chassis flexes.
1 point
-
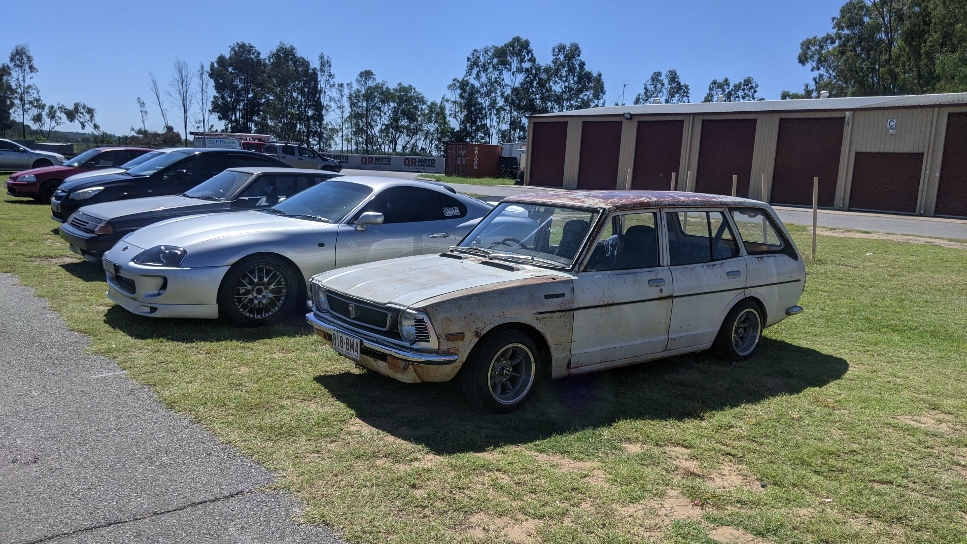
Finally got thing on the road and took it on its maiden voyage to a japday at Queensland raceway. Ran flawlessly and rides surprisingly ok with 3 people in it. Need to get my hands on a k50 5 speed now though. Was probably doing 4k rpm and 80kph.
1 point
-
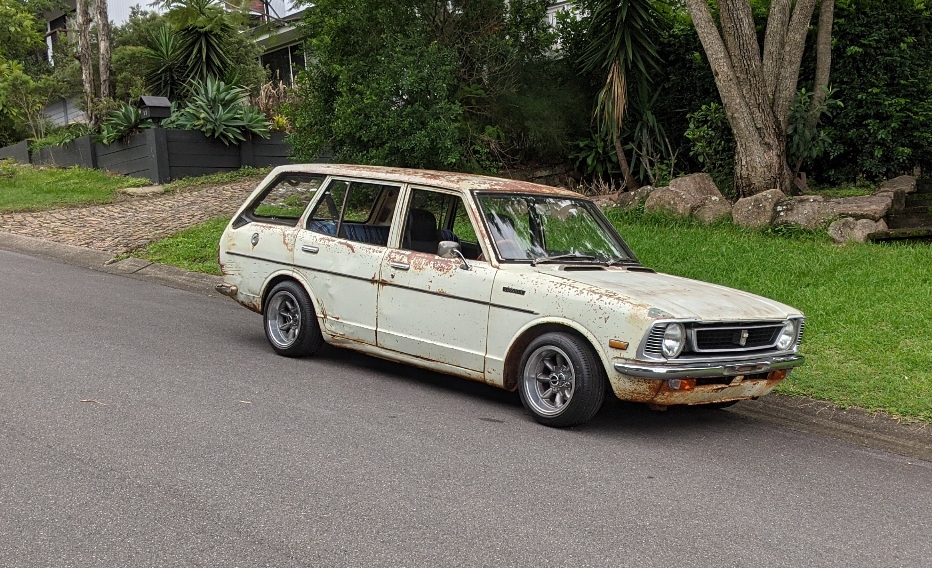
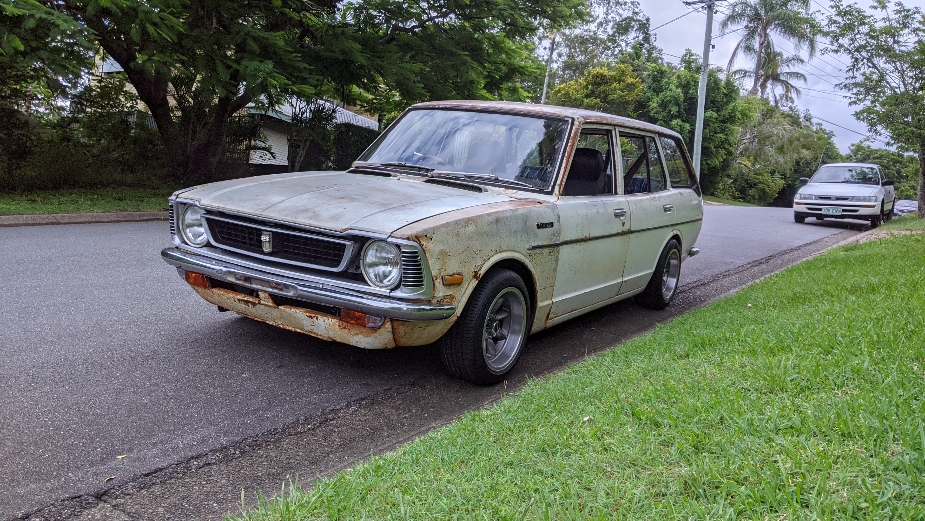
Tidied up the front end over the weekend. Painted up the corner bezels with new insert bits. Still on the hunt for a coupe or later ke20 lower grill trim piece though. Trying to get it on the road for a Jap day in April, here in brisbane. Also have a front lip on the way.
1 point
-
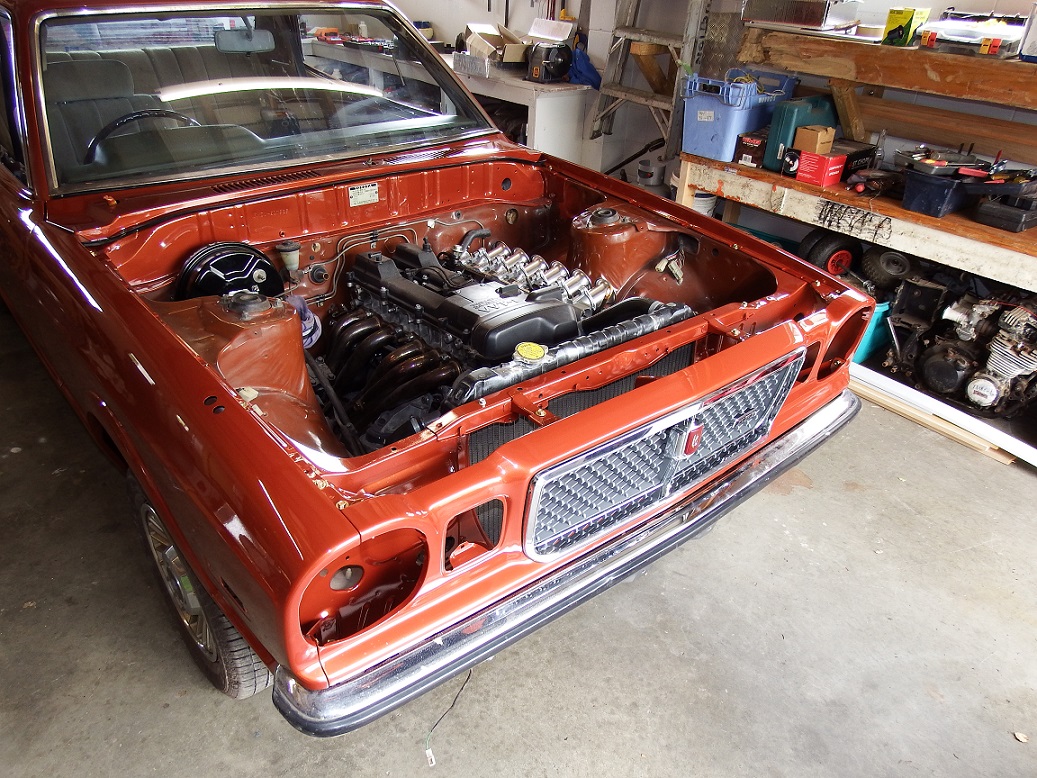
Spent some time on this over the weekend between jobs. Kayne came over on friday to fit panels and will align when the bonnet goes on next week. All the lights are now fitted and now working on the inside which is almost done. My dads been pining pretty hard and has detailed the badges which is pretty sweet. I will get pics of the exhaust while im fitting the gas tank as thats next.
1 point
-
Got my home boi home and onto putting it back together. Kayne has done an awesome job, so many details have been put into the car its becoming a pleasure to put back together. My personal favorite is the color between dash pad and windscreen being a paint match to what was factory tan instead of the colour of the car.
1 point


.thumb.jpeg.e0a4bff61111e0c8c7396950fcc94da1.jpeg)


This leaderboard is set to Auckland/GMT+12:00