
Leaderboard


Popular Content
Showing content with the highest reputation on 11/22/21 in all areas
-
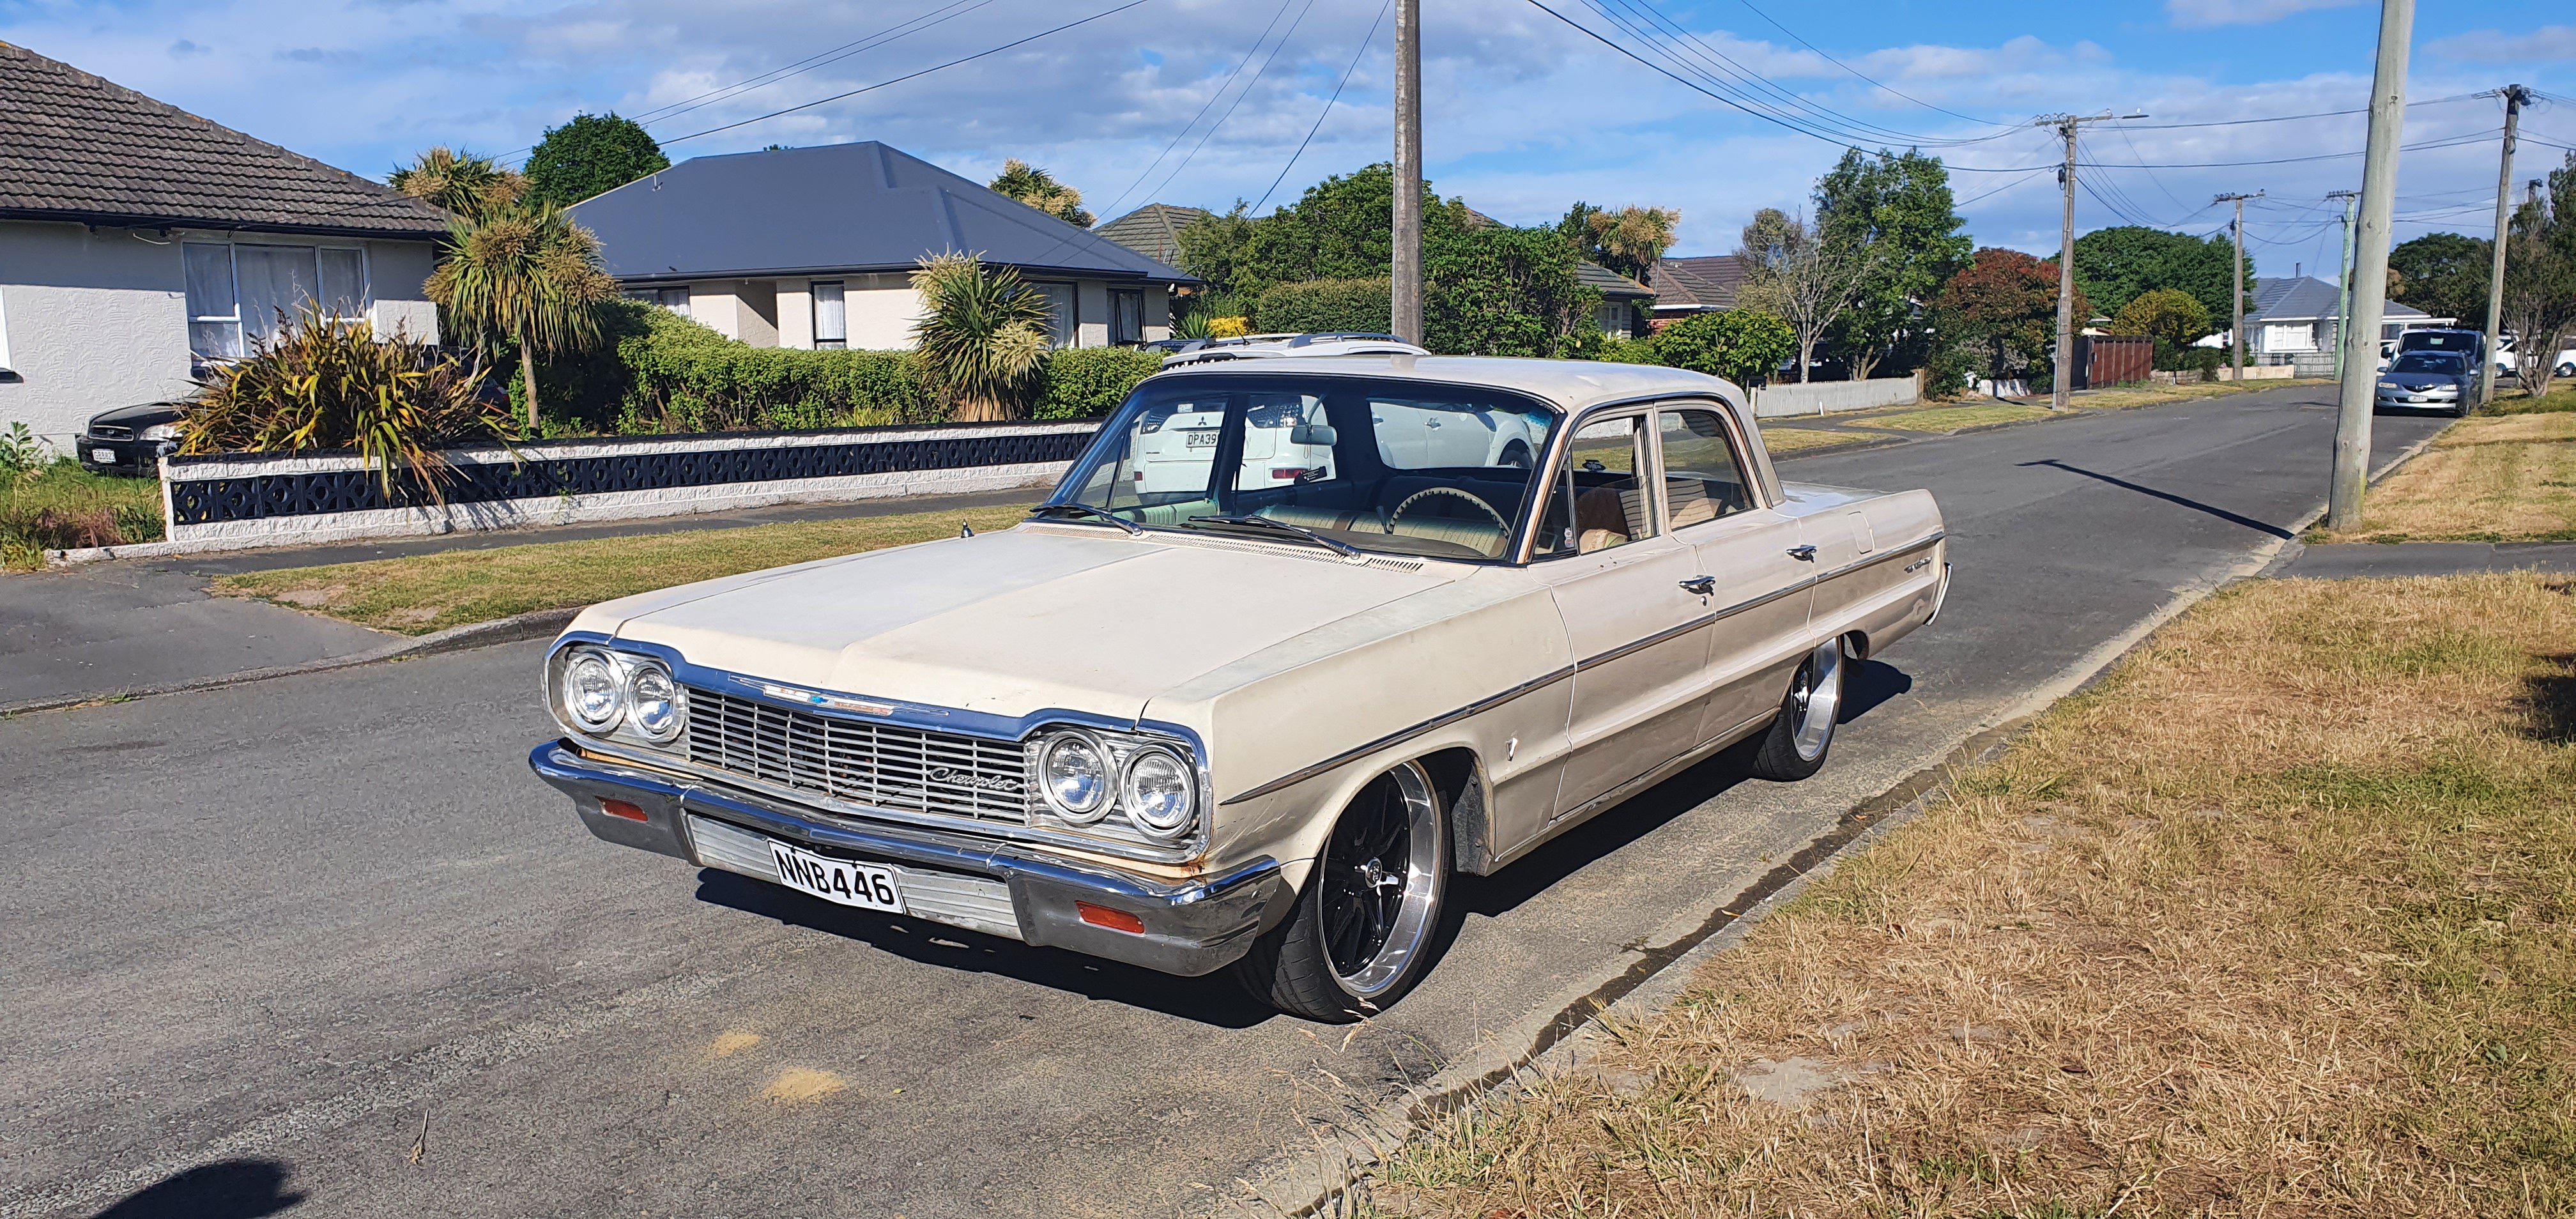
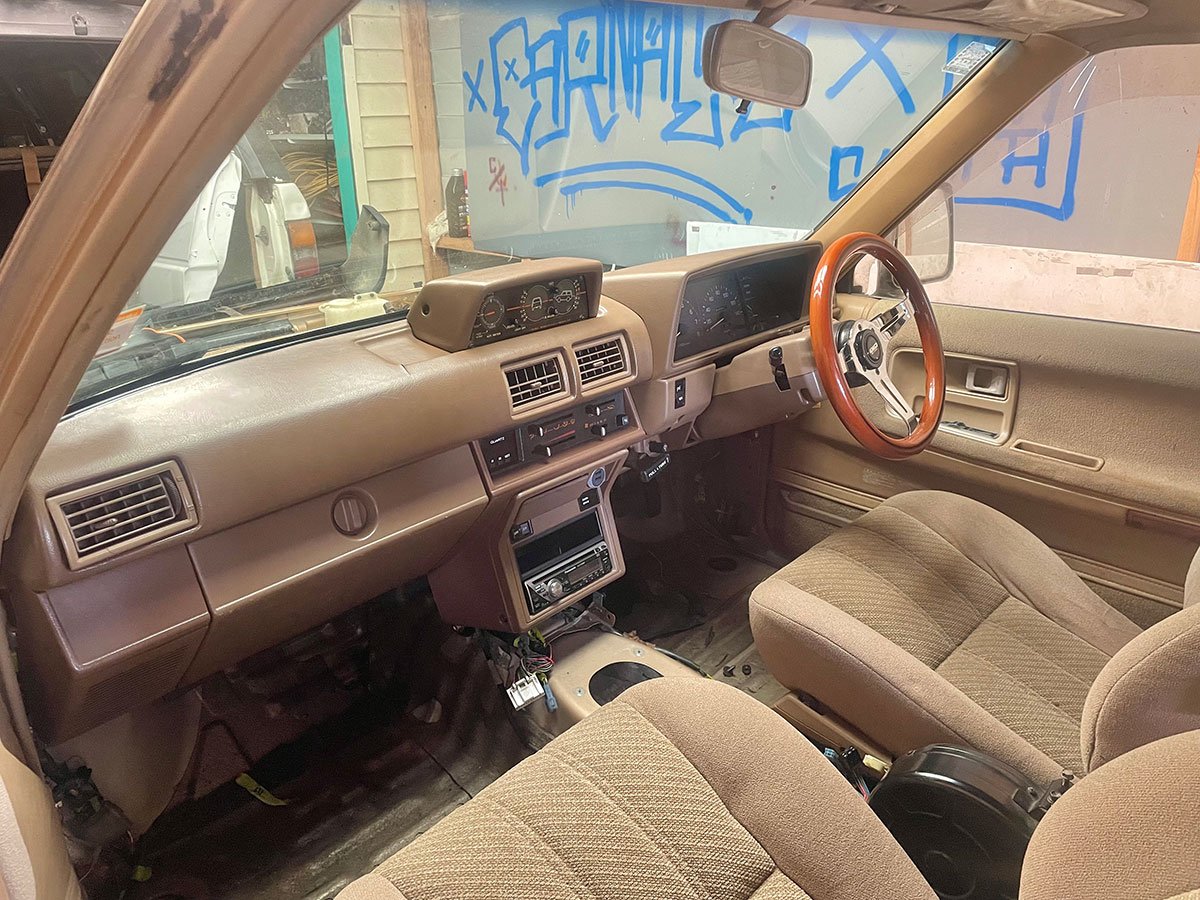
Discuss here Sharn incoming. Lots of words not many photos (yet). So, I'd been wanting to buy an Impala for a while and when the datsun popped up I thought it could be a good opportunity to make some money to put towards owning one. Unfortunately prices went crazy this year so it still seemed out of reach. As soon as it sold I put an ad up on one of the Facebook pages and I think I only got two responses. One was for a car way out of my budget and the other was a Bel Air in Wellington that looked rough. Anyway as time went on the Bel Air started to look like it could be worth looking at. I messaged @crustywhip and he was in the UK. Oh. No worries, if the guy still has it when Kane gets home we'll go from there. Thankfully the car wasn't actually advertised for sale so when it came time to revisit the idea it was still available. Kane had a look for me last week and determined that yes the body and interior is beat up but it is original and mechanicals are good. That was enough for me. Flight booked. "Hey m8. Have a 64 Belair if u interested? Have just put brand new mags on it also. Has NO RUST and has been through compliance etc when my m8 I brought it off had it. New body mounts and vtnz checked and wof also. Awesome tidy car and drives mint as! All original paint, carpets , seats etc etc so been untouched part from the wheels haha. It’s got a good 307 in it at the moment. My m8 had the bottom end checked by his mechanic and all tidy as. Only looking at selling to by a new vehicle for my new business otherwise I’d keep it 100% send u some pics" So anyway. Picked it up on Saturday and drove it home yesterday. It was tidier than I thought it would be and it drove well so I'm pretty stoked. I'll add some photos when I next drive it. Plans are to get rid of the 20"s asap and go to 14"s. Get some of the body tidied up (There's a gark down the right side and some dents in the roof I wouldn't mind disappearing). A new hoodlining, probably a stereo, and all going well hydros.
 28 points
 -
Shizer it's been a while and cringe at my old posts. Anyways, I chucked a blanket over this and shut the garage while I did other things for a couple of years. Lockdowns meant pulling the blankets off, I got it running on the factory intake so was motivated again. Rear screen rubber in, stainless trims fresh and polished, random clips from russia and its now airbagged using accuair control with airlift struts. It drives well around the hood and I'm slowly getting more confident on going further. I never drove this car so was a big moment. Next on the list is sorting my rear wheels as they are a bit wide for frame laying and then a bespoke itb manifold from Mr Whitley tune. Pic courtesy of Simon when it was picked up a few weeks ago. Il take some when I get the trims back on.
17 points
-
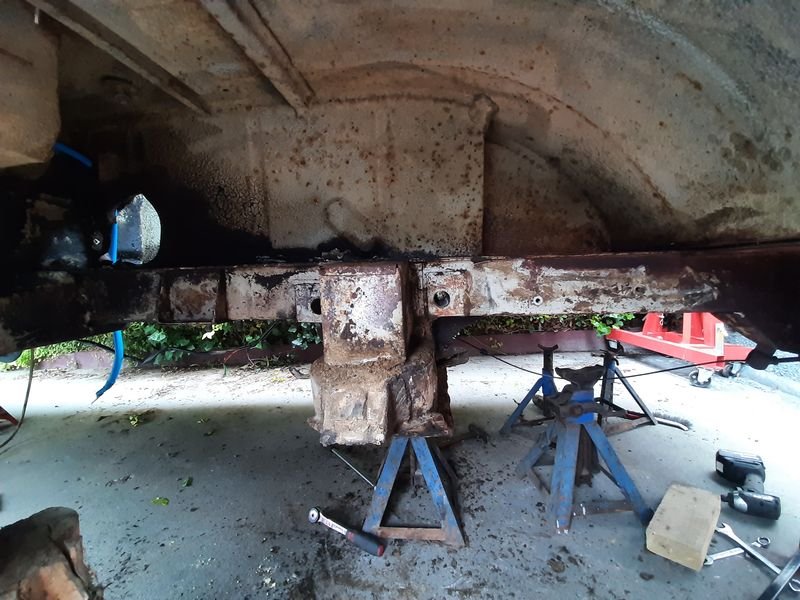
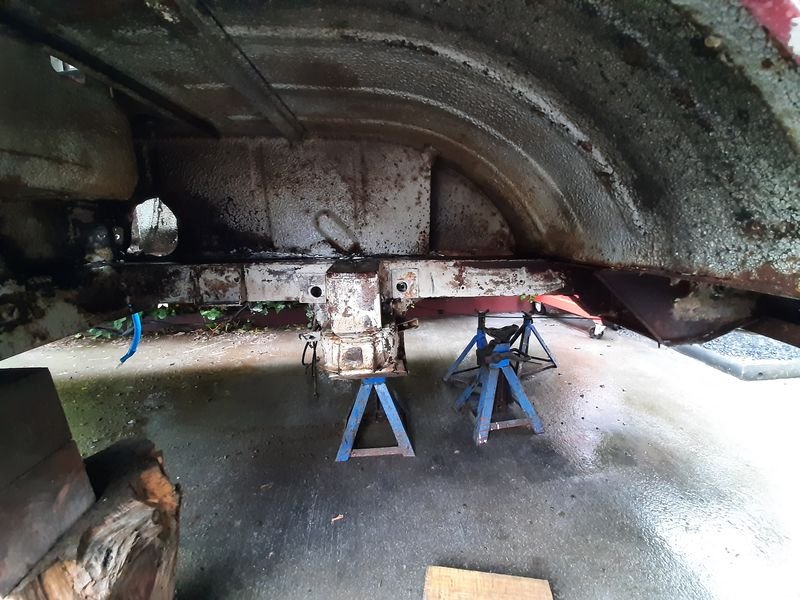
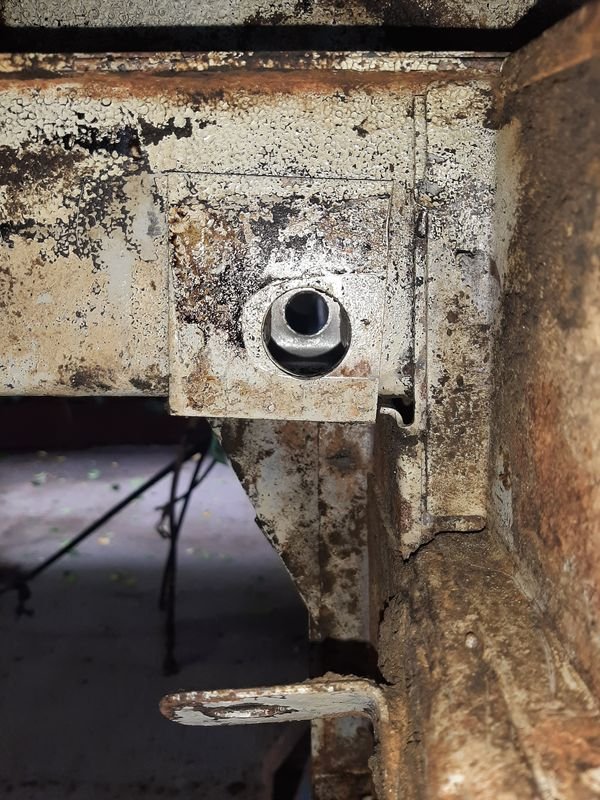
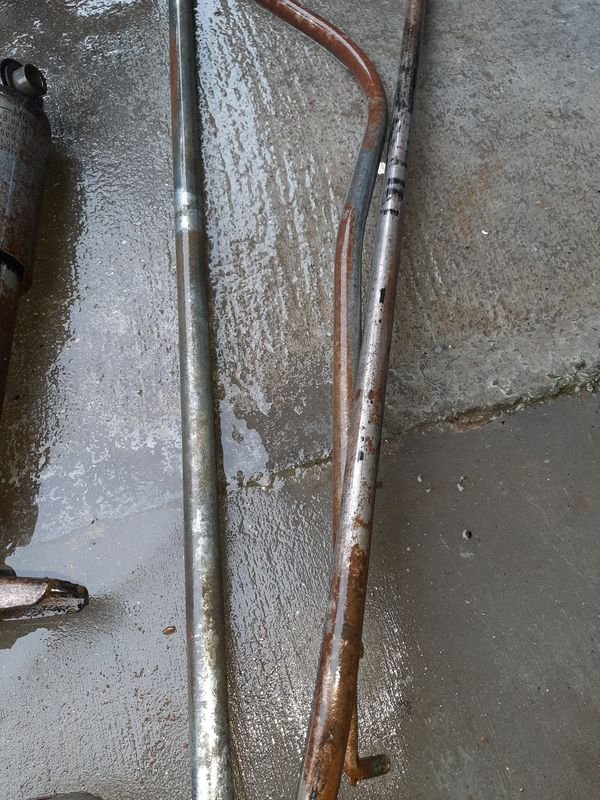
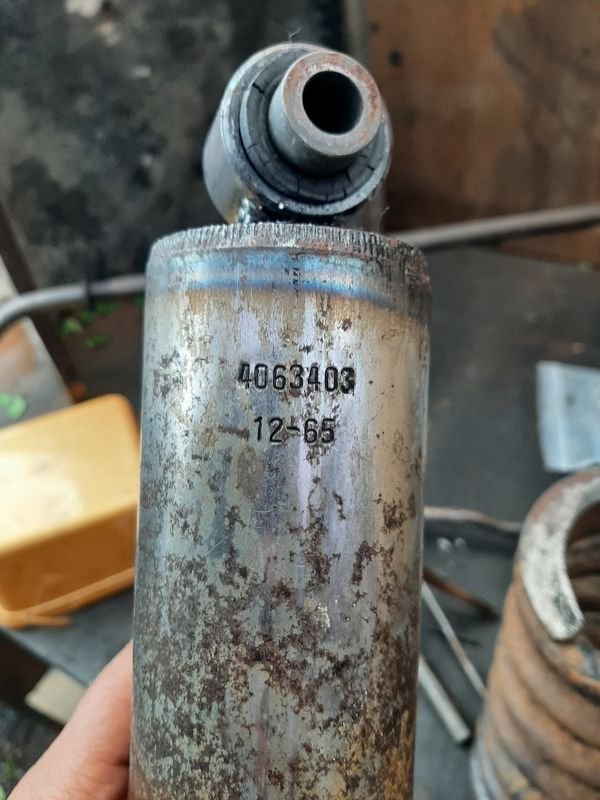
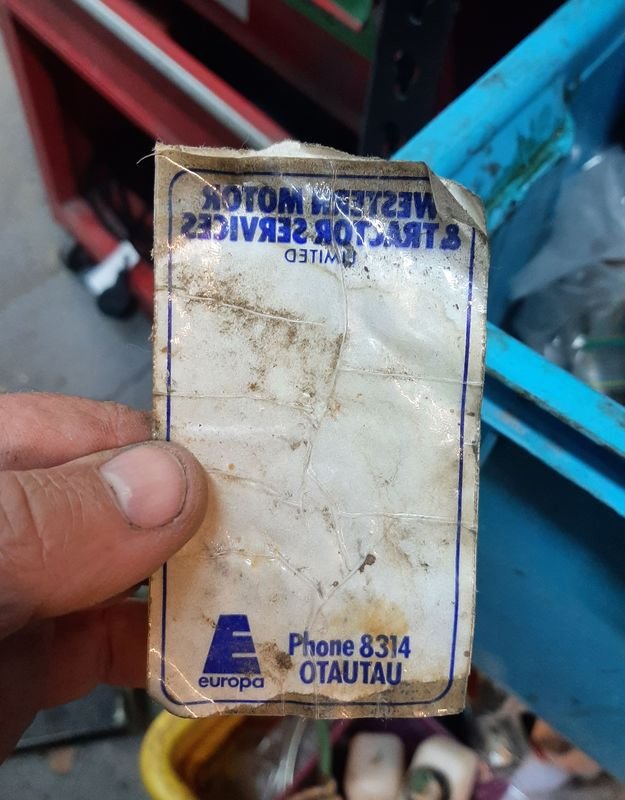
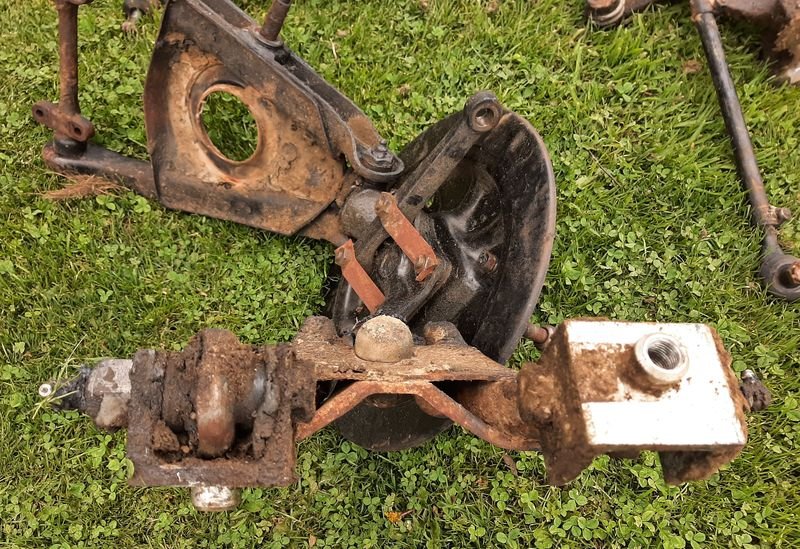
With the rear suspension done, and reinstalled the handbrake cable, i started to unpick the front end. I want to clean all the greasy dirt that is still caked on everything (and has actually done pretty well at preserving stuff) and then i can clean, paint, regrease and reassemble. Im very pleased to say, the rust is all on the 'outside' of the van in the panels, and not the chassis structure. Took all the brakelines off first, including the lines from the reservoirs (they are up behind the drivers seat) to make later, they all unscrewed easy. I didnt have the right spring compressor so just used the jack under the lower control arm but i think ill need one for putting it back together! Some before and afters Drivers side after dropping the wishbones out, and then after a scrape and waterblast Same area immediately after dropping the suspension and after a scrape and a waterblast. The light brown is a mix of oil, grease and road dust that is anything from 1mm to 20mm thick. Usually clean paint or metal under it, so could be worse! Only surface rust really is where the greasy smeg wasnt - a lot of cleany shiny metal where the paint came off with the waterblaster. This pic show where one of the main bolts comes thought, the inside of the rail is minty mint mint The two wishbone assemblies and the steering rack. ALL of the tie rod ends! One of the suspension assemblies, give a good idea of the crust on everything. Ive water blasted under the van about 10 times. After a clean, still has factory (?) shim count stamps . I got some new CRC degreaser for the parts washer, stuff is magic, seems to have a slight derusting action too. The gear change linkages came lovely, and have no discernable wear which is another sign of low milage Pretty sure these would have been factory fitted (CKD built by Torino Motors in Otahuhu), but cant believe how clean they came up! Pretty sure thats a manufacturing date stamp, which also makes me think this van is also a later (66 on) one. I re-found this service sticker that was in the cubby in the van that i thought id lost put somewhere for safekeeping . Along with the Kelso address painted on the Hubcaps, I reckon she is a Southland Van Place is still going Im going to get some paint made up soon (i have lost my paint swatch) so i can make a start respraying the shock mounts and engine bay etc before bolting everything back in. Still a lot of cleaning and stuff to do first. Head is off at the machine shop getting looked at, and i have the rims in the back of the daily to get the tyres stripped and then off to the sandblaster, so progress is continuing.
17 points
-
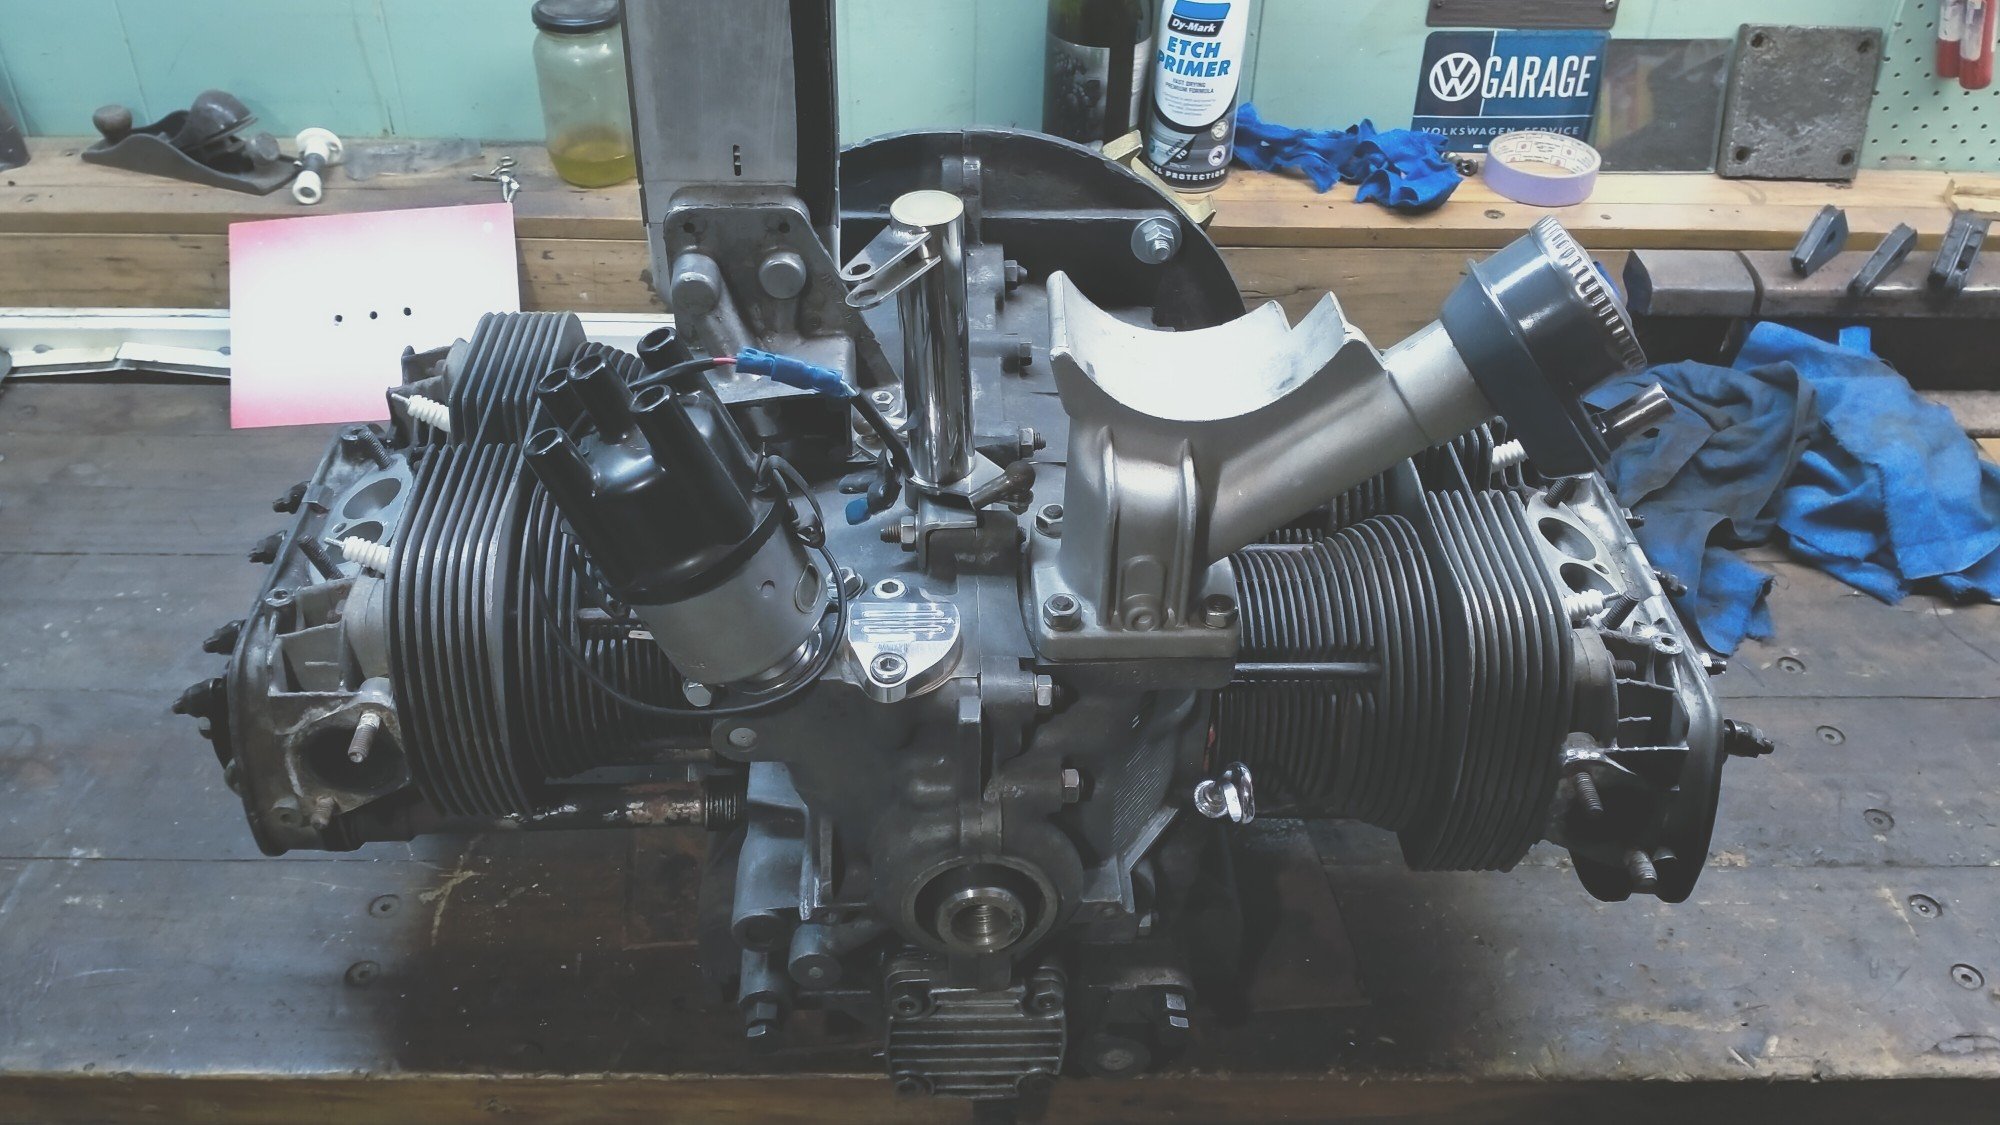
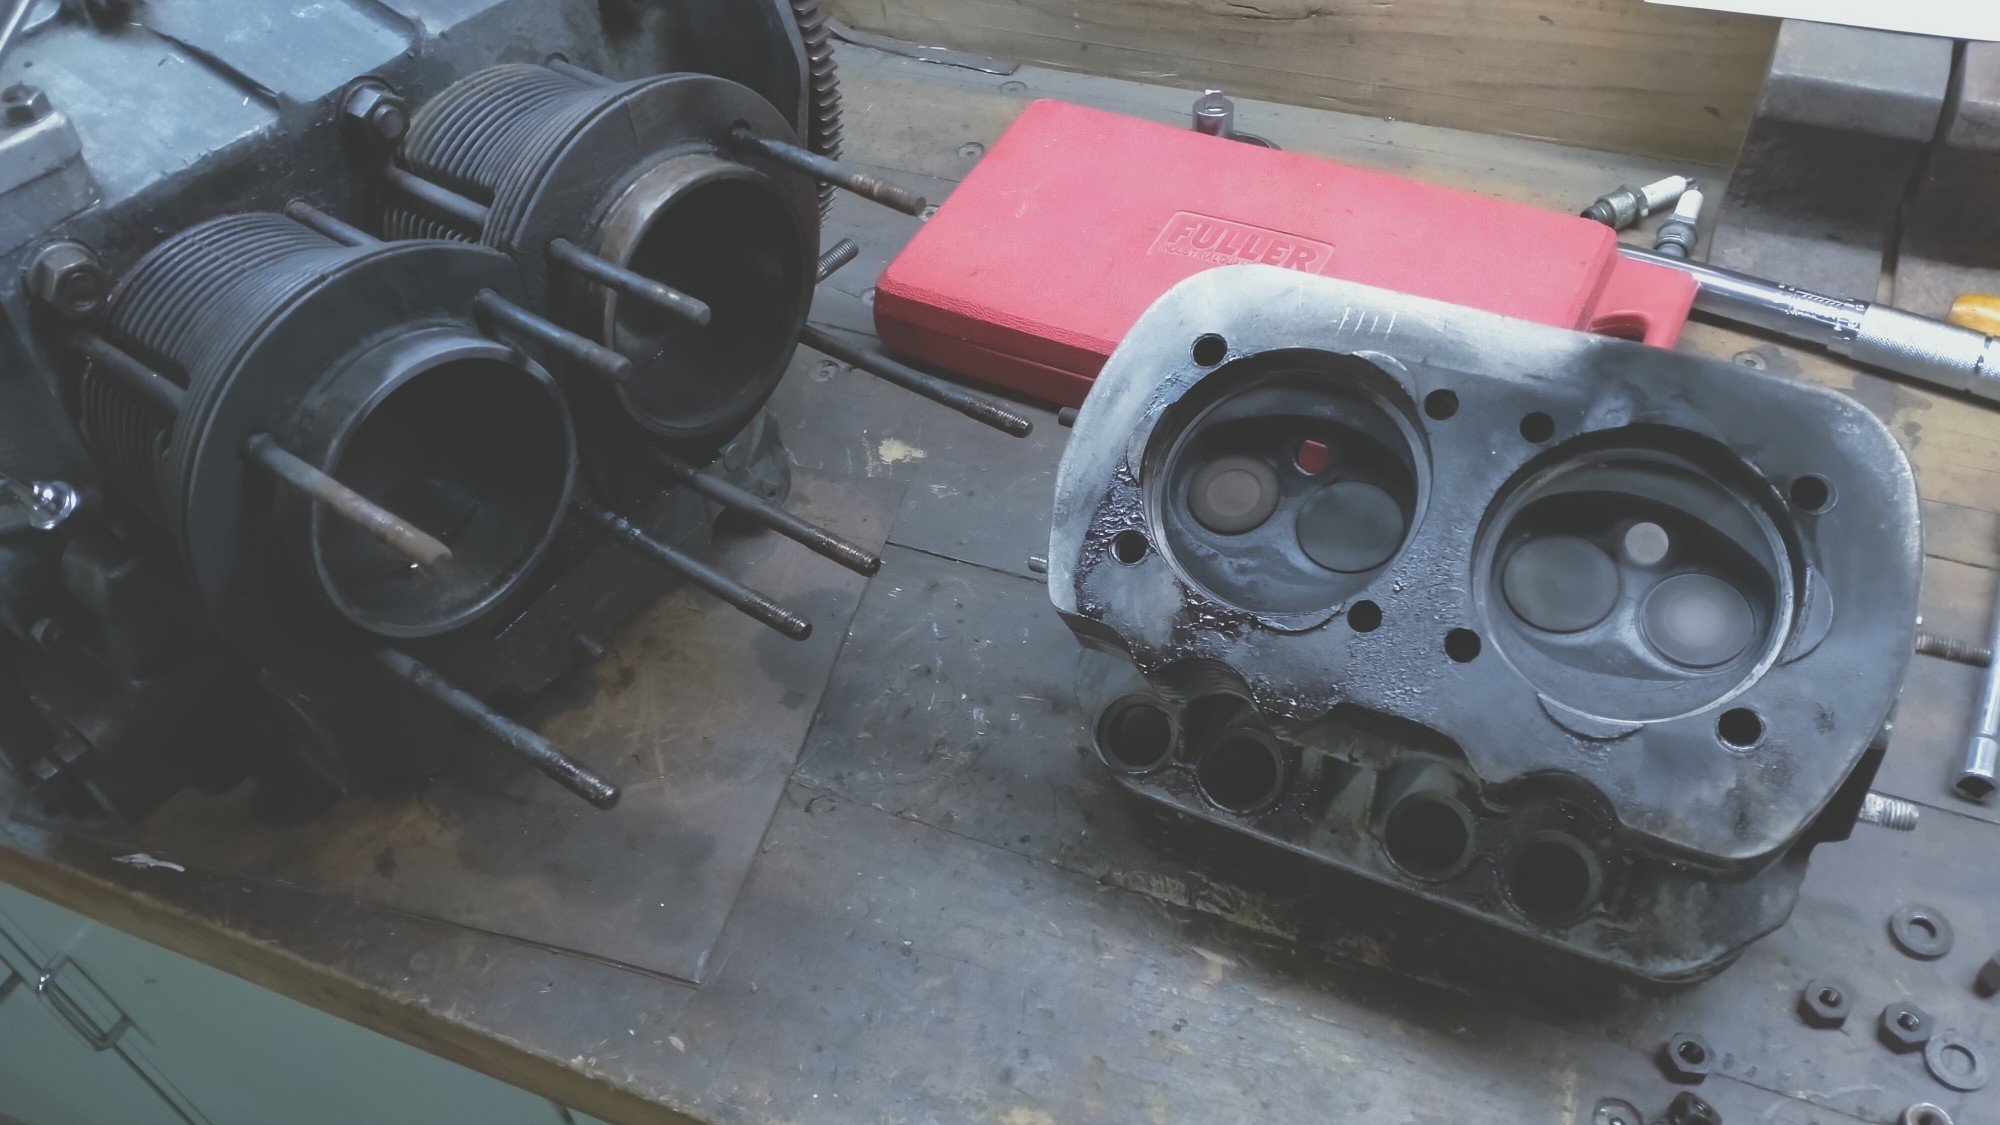
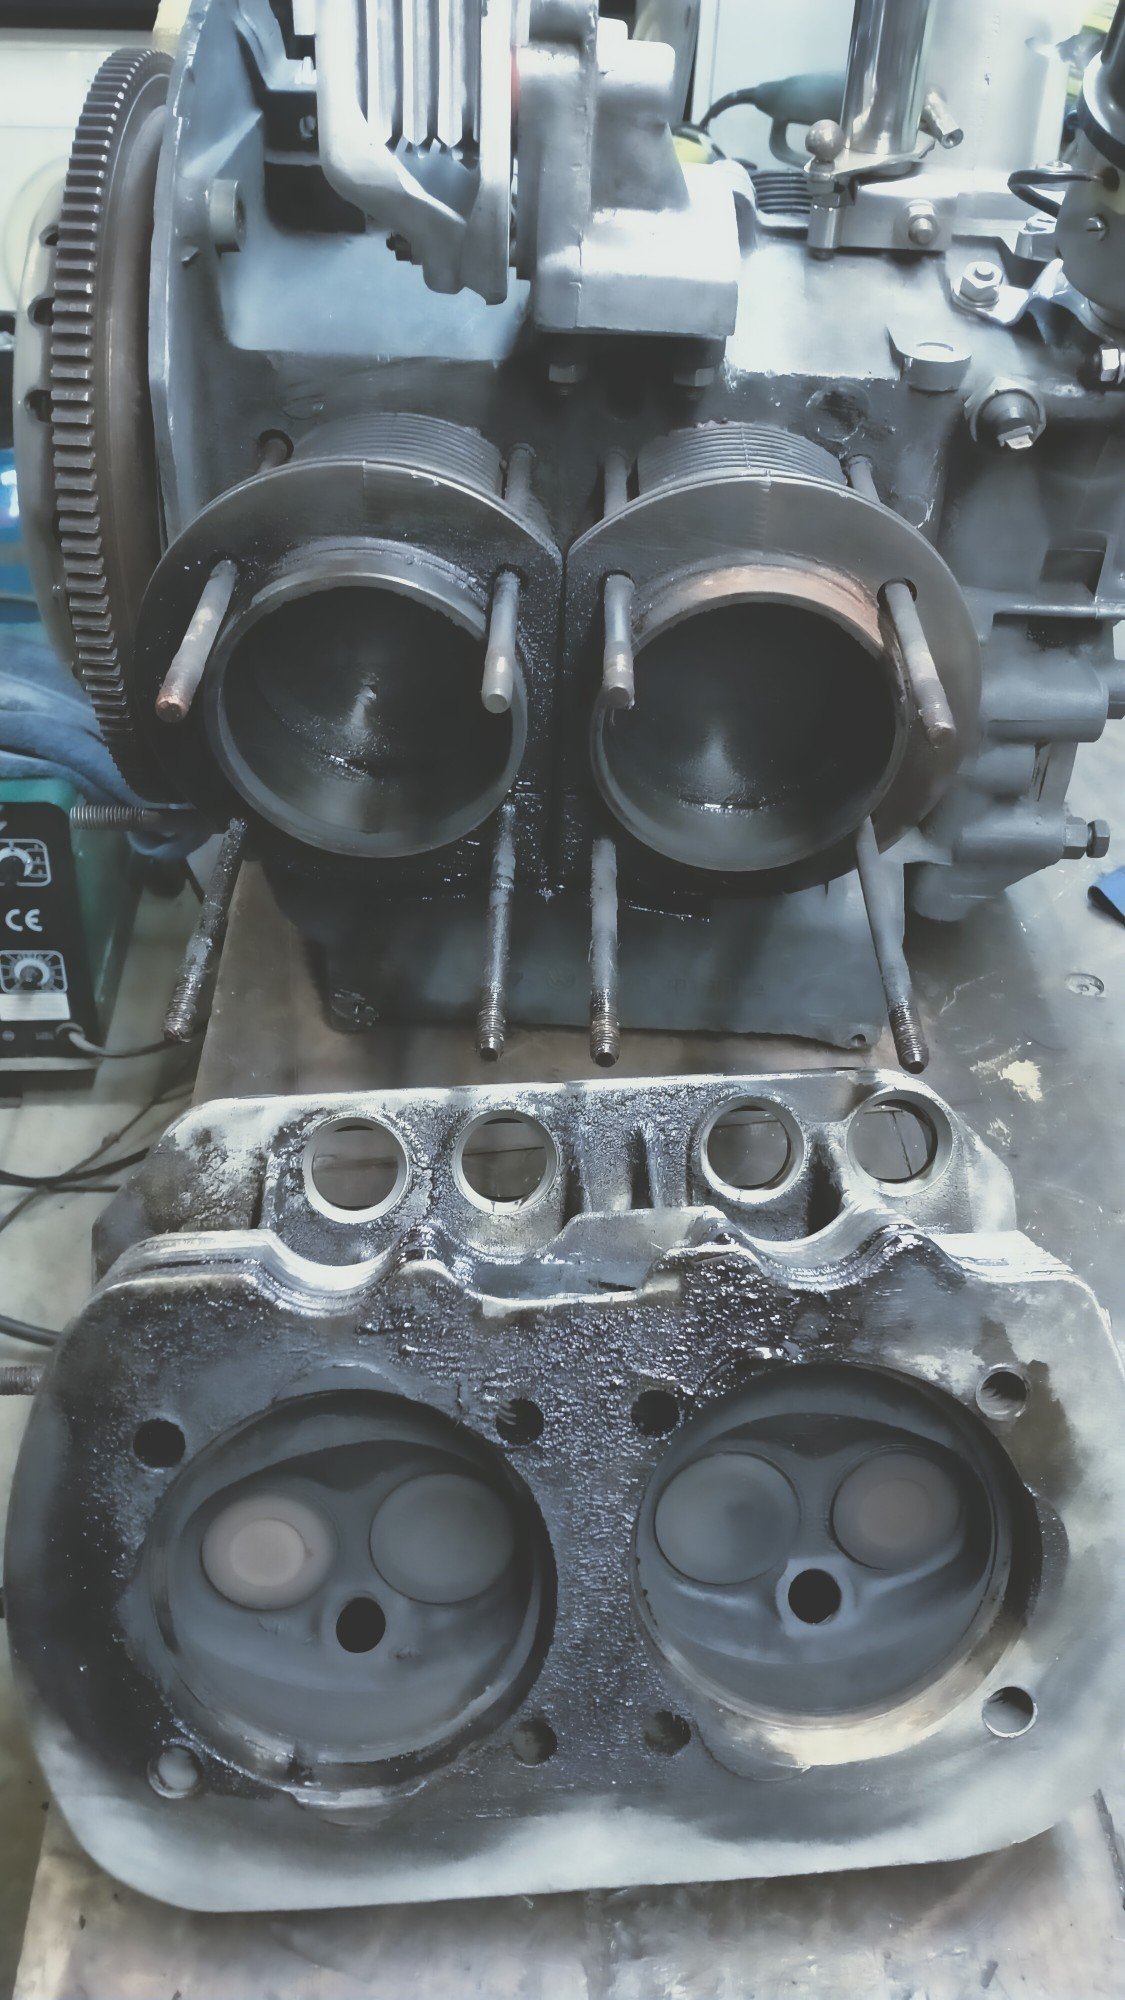
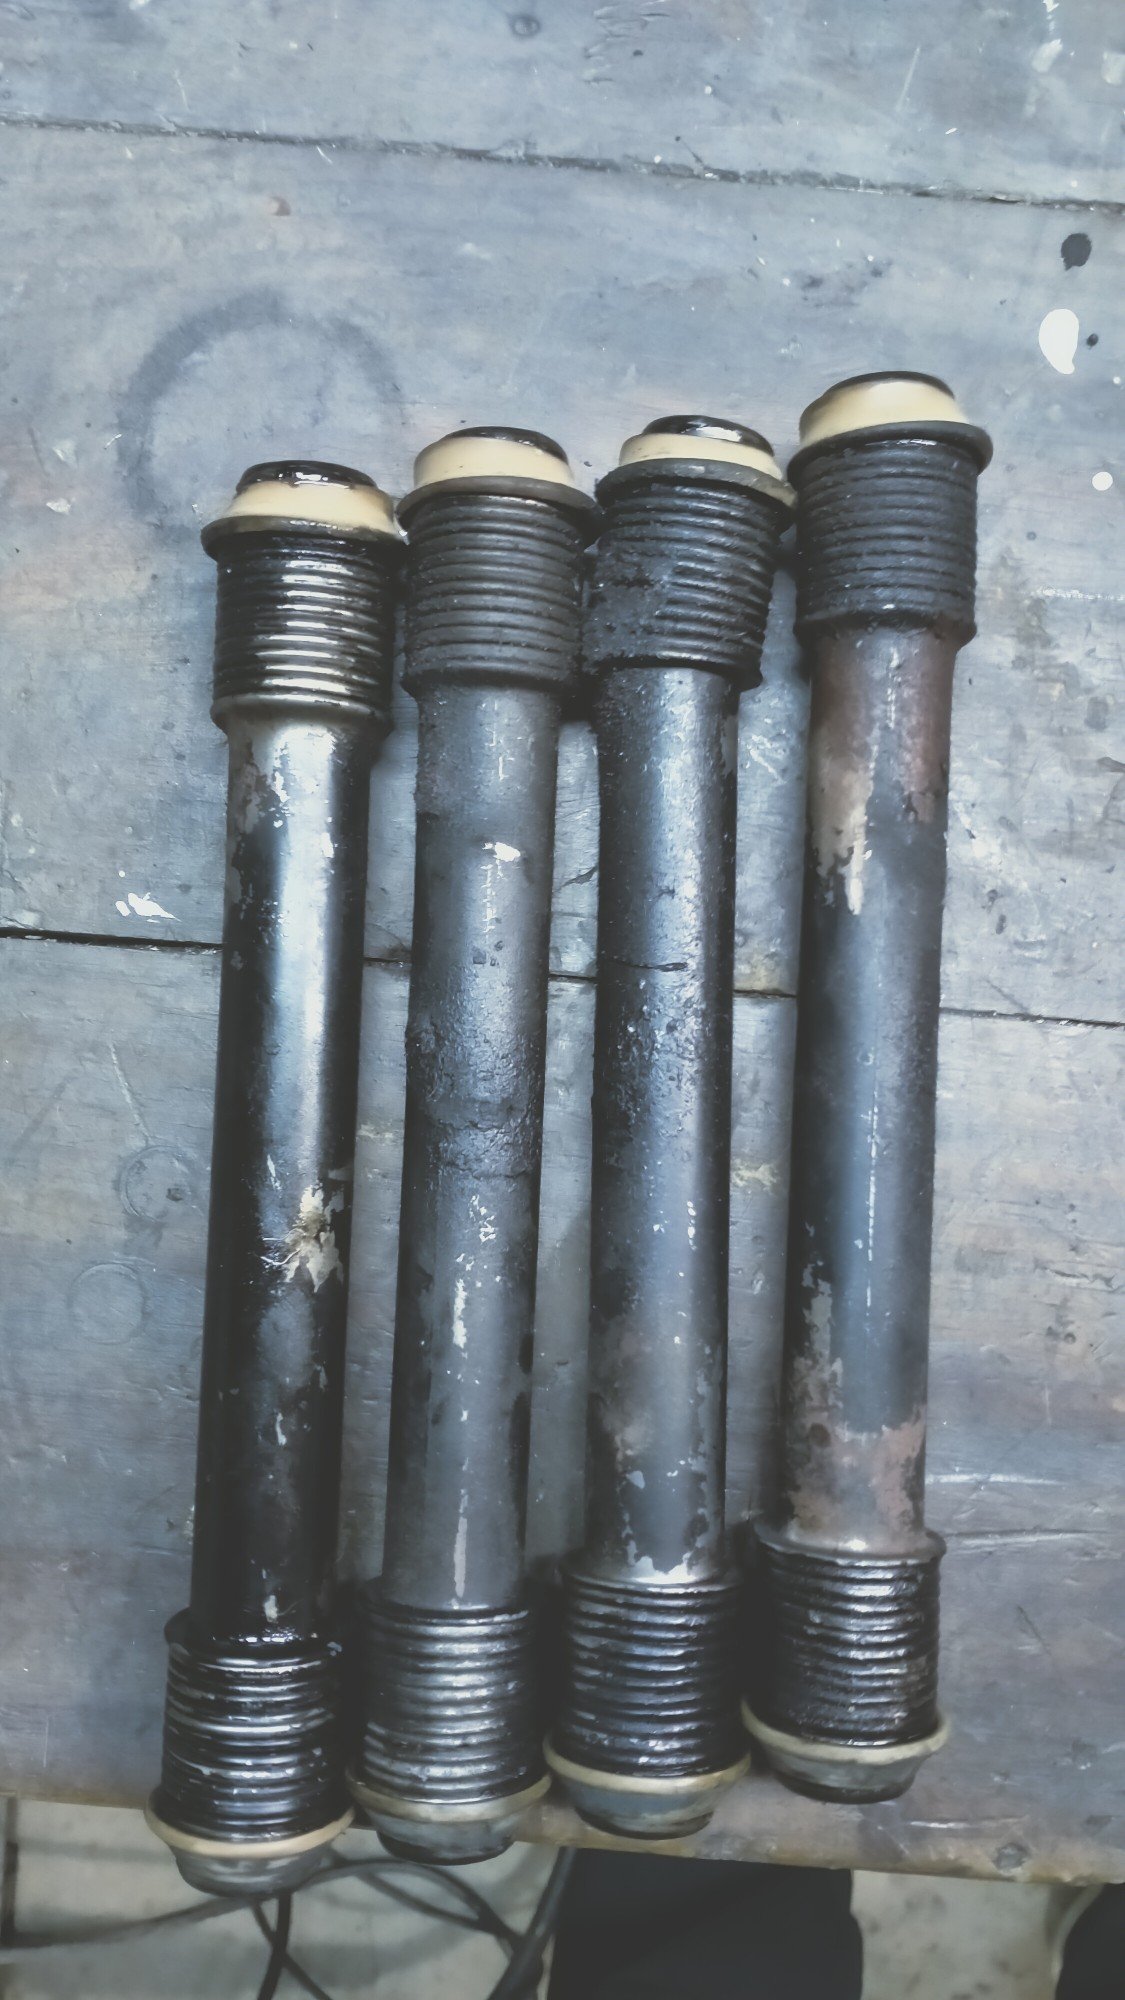
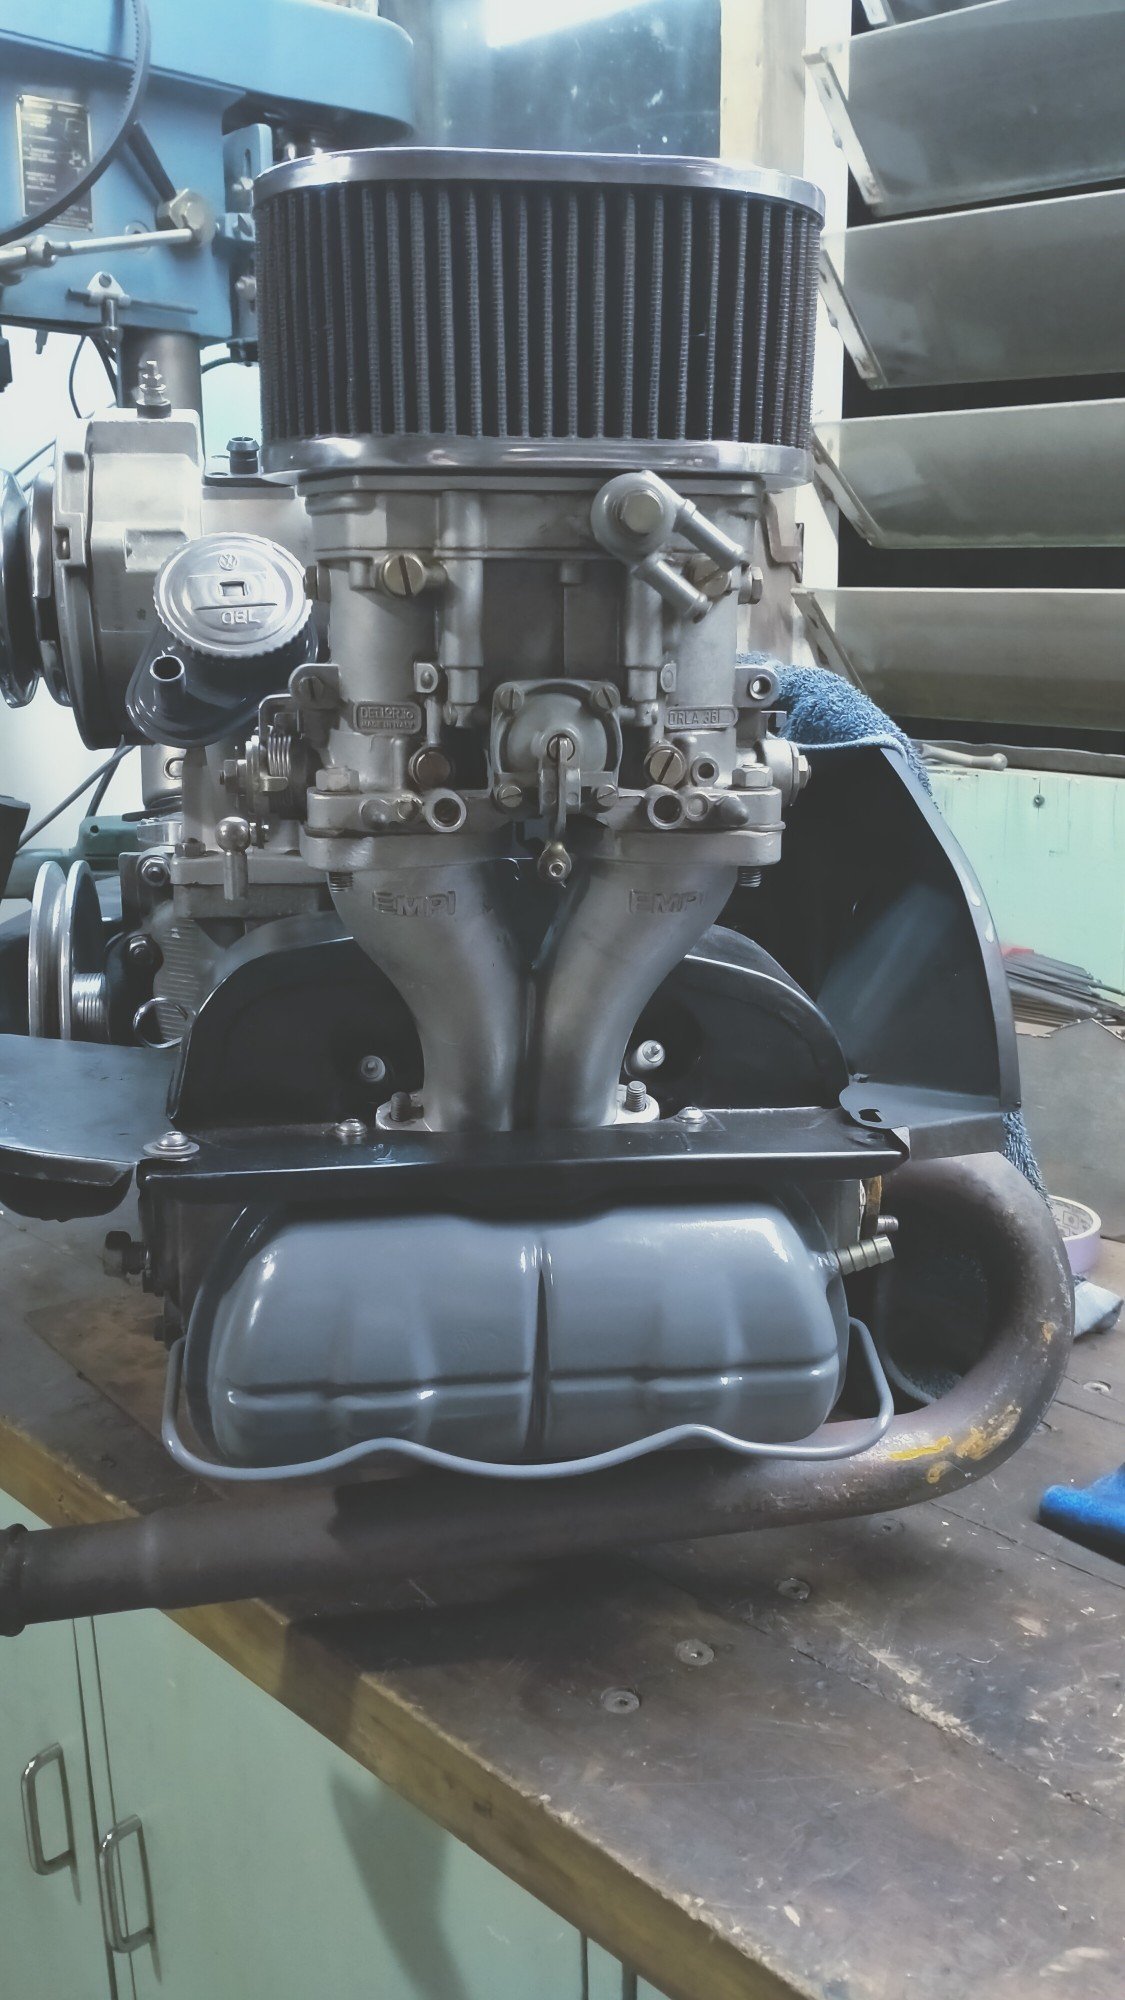
Decided I should allow some time to have fun with the car before considering Webers. So I got a new Holley Double Pumper. Looks the business. Went with an old 50s Cadillac air cleaner. Not a fan of the normal round ones. Its quite dangerous having Summit Racing, Original Parts Group, Classic Industries etc on your door step! Next day delivery on anything!16 points
-
We knew that this was a deregistered car from the start and got into it anyway. Just part of being a noob I guess, but I always figured we'd be able to sort it out down the line.. maybe it'll be a bit expensive but should still hopefully be reasonable in regards to the value of a fully restored Starion. Right...? I called a few panel beaty places and instead of straightening the car out, they straightened me out. It's not fun hearing "oh yeah you can expect about $30k for an average panel and paint job on a car this old". Especially when that's followed up with "deregistered? Okay yeah we can do it but it'll have to be be the Rolls Royce of repair jobs". But one of the nicer folks I called offered to come around and check it out soonish. So I had no idea whether we still even had a project. Anxiety effing sucks. Thinks like sunk cost fallacy was at the forefront of my mind. Was this a lost cause? How much will this repair cost - is it going to be better to just getting a beaten up reg-on-hold Starion and starting fresh with that? How many years would it take for that opportunity to make itself available again? I didn't want to put another second into the car. All motivation just gone. Also the frustration of the legalities of this. I could roll the dice and hope the re-registration people just feel like stamping paper that day, and don't whip out the endoscope or mandate stripping everything back to metal. Yet if whoever had it registered last had just paid the $peanuts every year to put the registration on hold the above repair would be perfectly legal. ARRRRRGH. ---- Guyman McPanelbeaty finally is able to come around. He's a numbers guy so he brings a hammerbeast. I bitch to them about my registration frustrations. Hammerbeast replies instantly with "yeah", throws his hands up, "yeah!" He goes on his own rant. This was a perfectly legit (if ugly) repair back in those days, the style of the time, onion on his belt. Kindred souls. They like the car. It's in pretty good shape rust-wise, they hand-wave the other repairs. They warn me of the dangers to my wallet if I end up going with a darker colour (or god forbid black). What colour should I go with? Not important right now, but this question will be asked a little more frantically later on down the line. But onto the work. I ask them to ballpark the repairs that need real certifying, the bare minimum to just get it back on the road. They guesstimate the work and throw some numbers out. The numbers are acceptable. My shoulders relax. I shake their hands and literally bounce back inside. We have a project! ---- Of course, they're super busy so it won't happen until next year, but I have homework in the meantime: I have to find new front rails and a new radiator mount. There's a wreck in Palmerston North so I started there. "Yeah mate let me check. You need both rails?" "Yes please." "... ah sorry mate, someone's already taken the front cut" Amayama's manager is permanently offline. The image above is from their site. Easily over 50% of the parts I order there end up being out of production, and for whatever reason they don't have the rails themselves listed separately, so I wanna talk to a person. The rails + wheel housing + other thingy are over NZ$1k each to import. if they exist. Bah. NZ's Starion facebook group is small but often useful. Not this time though - I got a name dropped to me but he was out of stock. The Austarion facebook group is much more lively but same deal there. @ProZac's Starion Sell-Up has long exited FOMO territory and is well established in MO territory. I have some more options before I'm ultra desperate (USA + expensive shipping, more mitsi parts websites, from-scratch fabrication) but things aren't tracking great lol. Does anyone know of anyone with a Starion parts car who might be willing to part with their front rails? Motivation's back tho.11 points
-
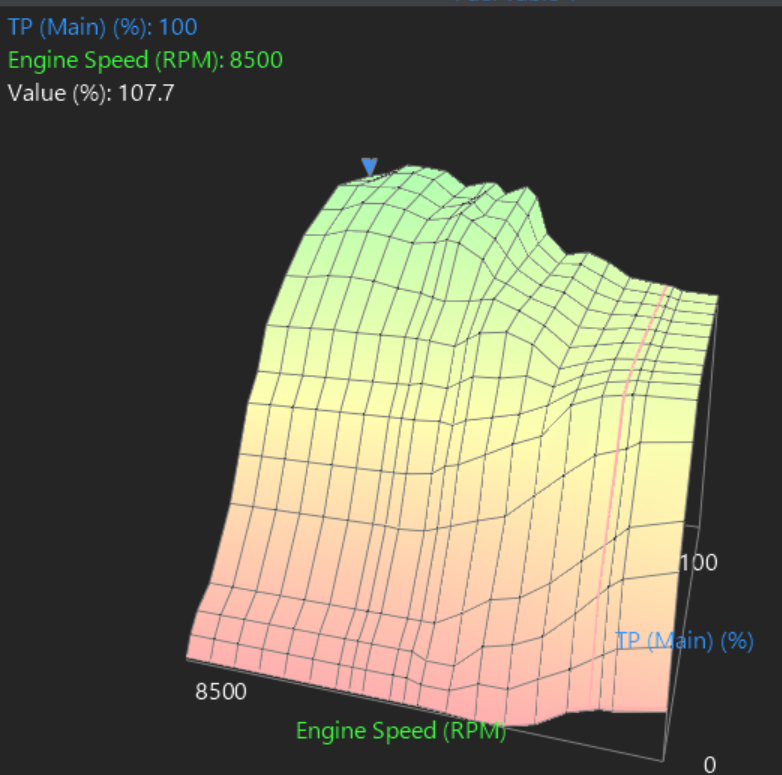
Going through results from this, gains super arent huge, but it's something. However I'm now happy that the VVTI situation is as good as resolved, as I've got a good working range while still keeping the full high comp. Now I will be able to see full benefits from a good exhaust. So that's next on the list. Coilovers and some slam would be cool, but out of budget for the next long while. EDIT: I refined the tune a bit, and yeah its picked up some midrange, can pretty easily see the difference compared to last! Feels great, I'm happy with it. Glad to have this bit ticked off the list. Based on some of the stuff that KPR has done, it would be interesting to see if that big steep increase at 4k rpm improves with a better exhaust. There's drags on at Meremere this sunday, if the stars align I might get there.
11 points
-
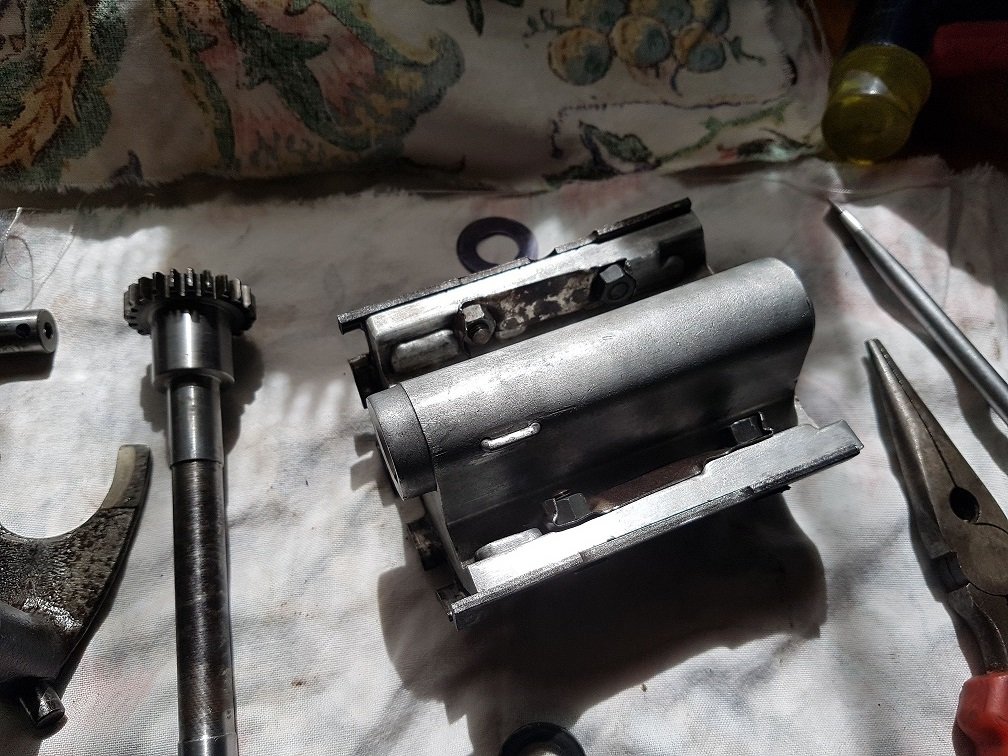
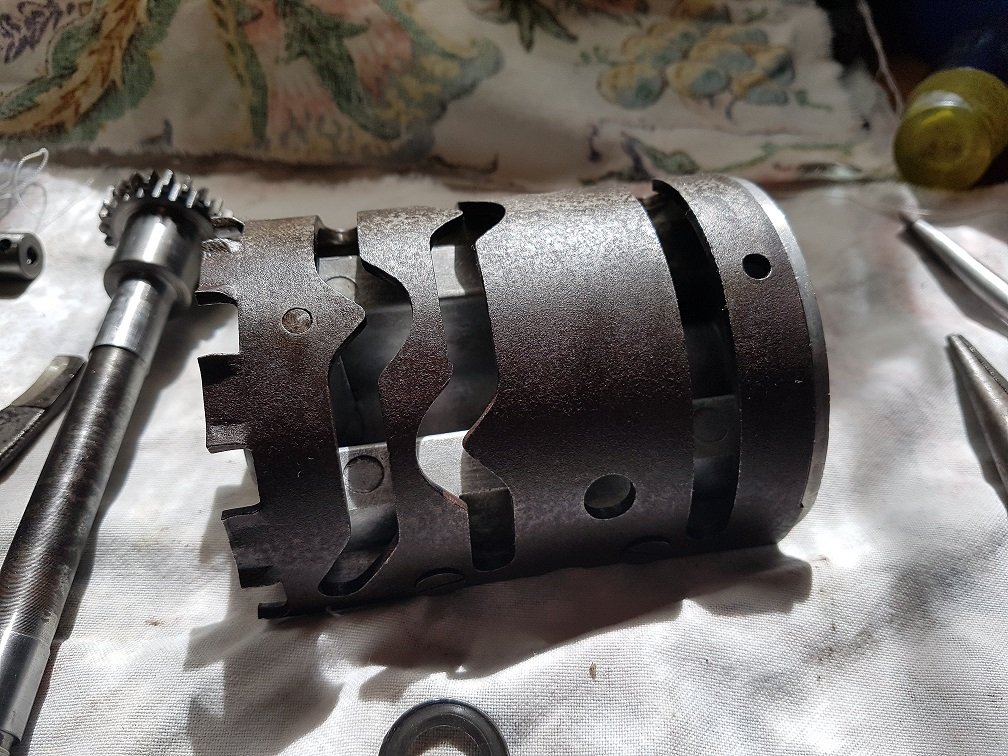
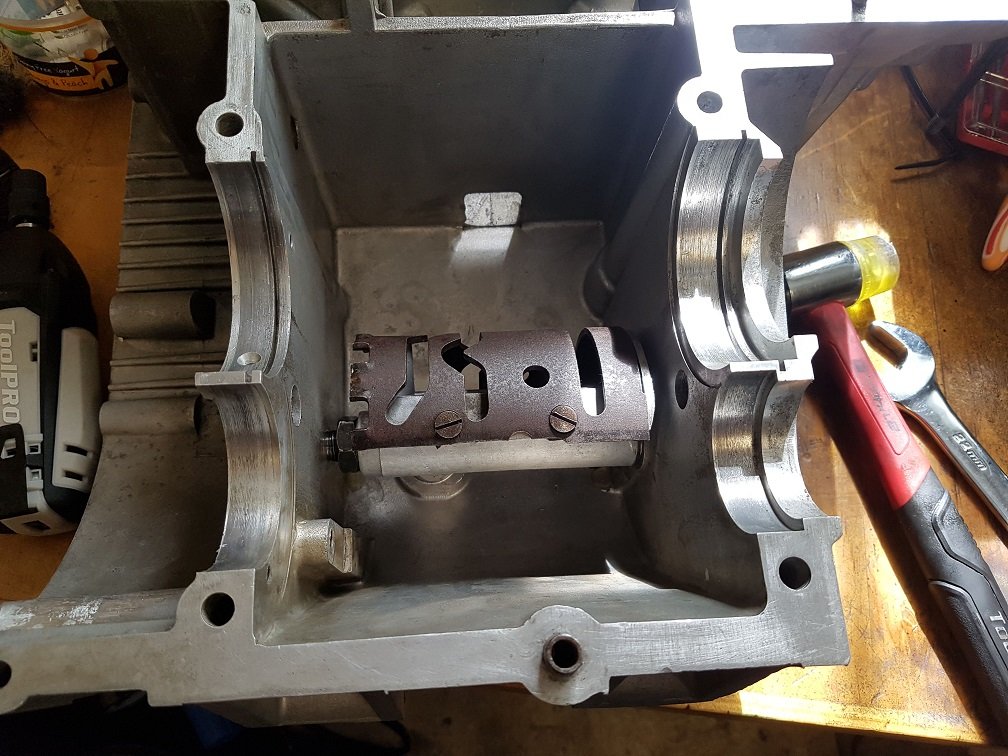
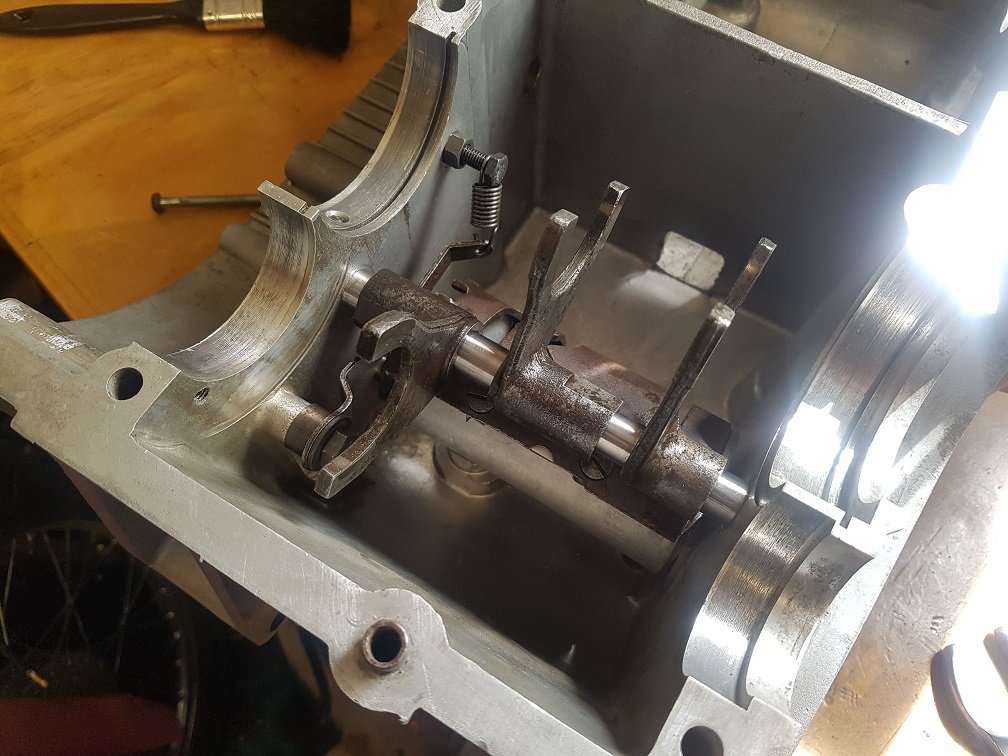
I managed to assemble the gear selector stuff this weekend. And popped in the oil pump. Clicks through all 5 gear positions like a dream. Its all forward from here. Waiting on a tiny needle roller so I can press the bearings on the leyshaft and fit that. And will rebush mainshaft 4th and then the box can go together once and for all!
10 points
-
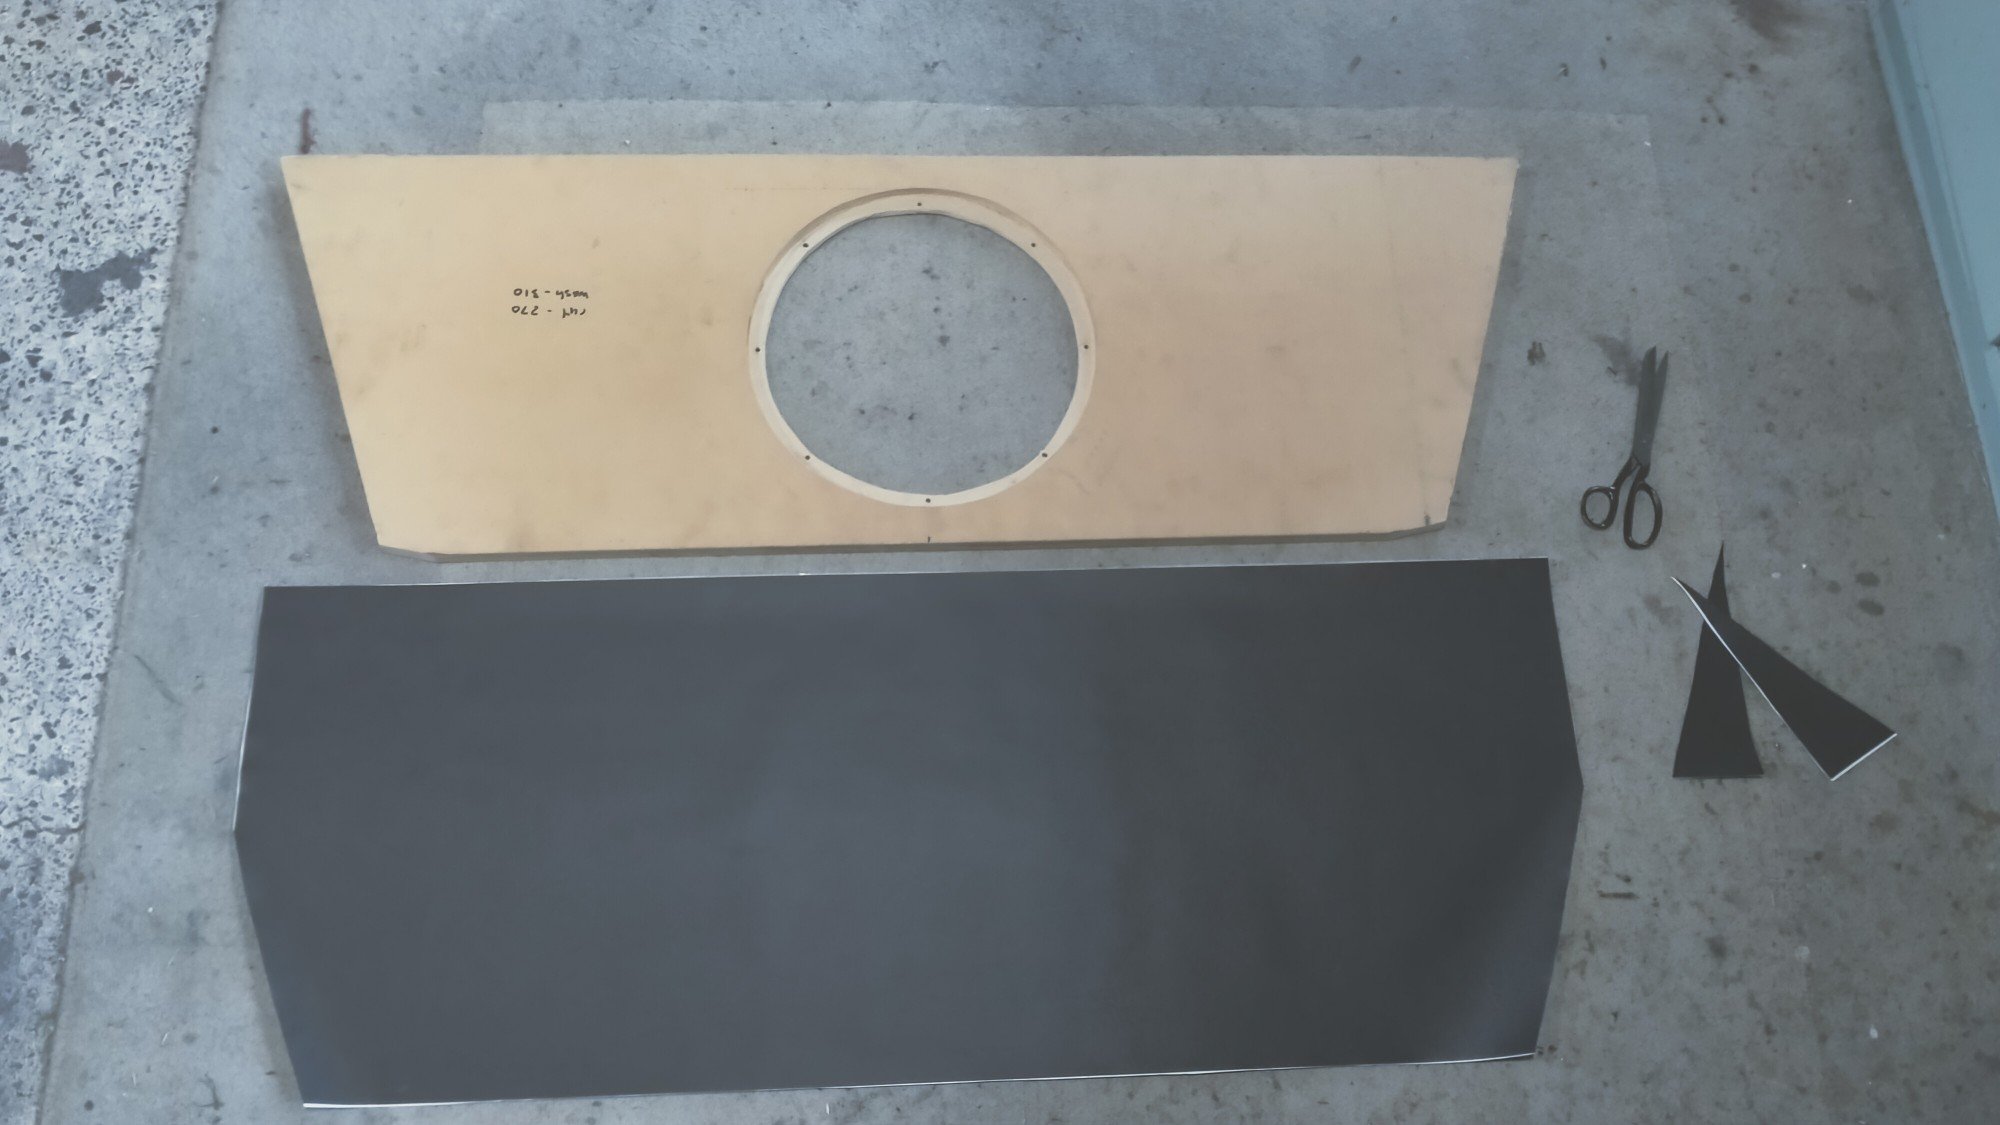
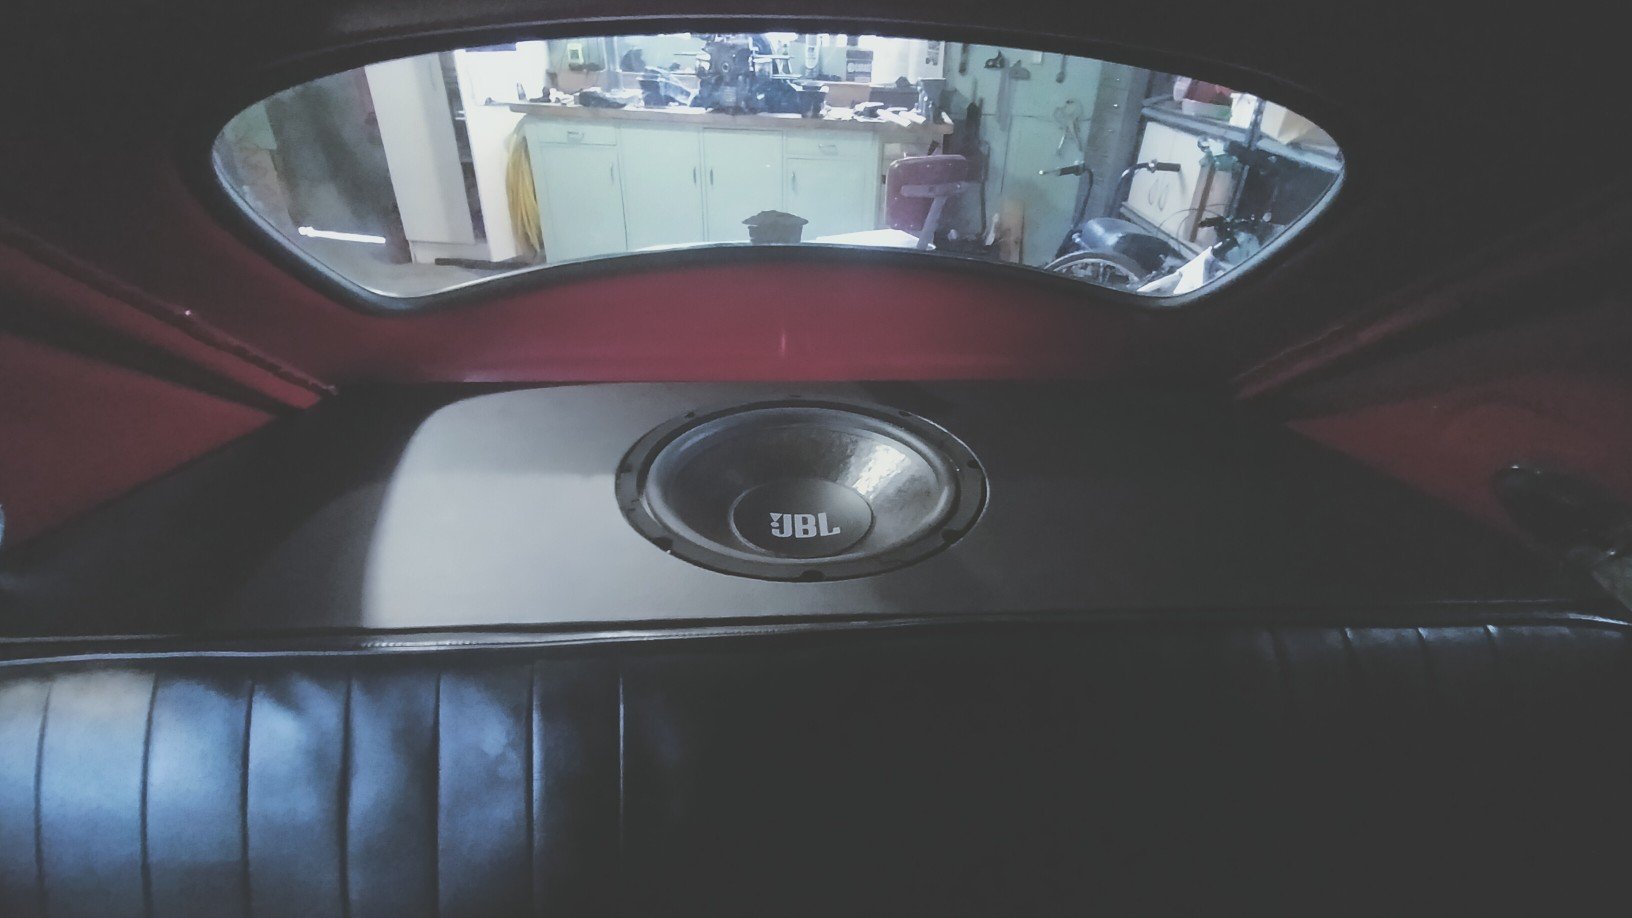
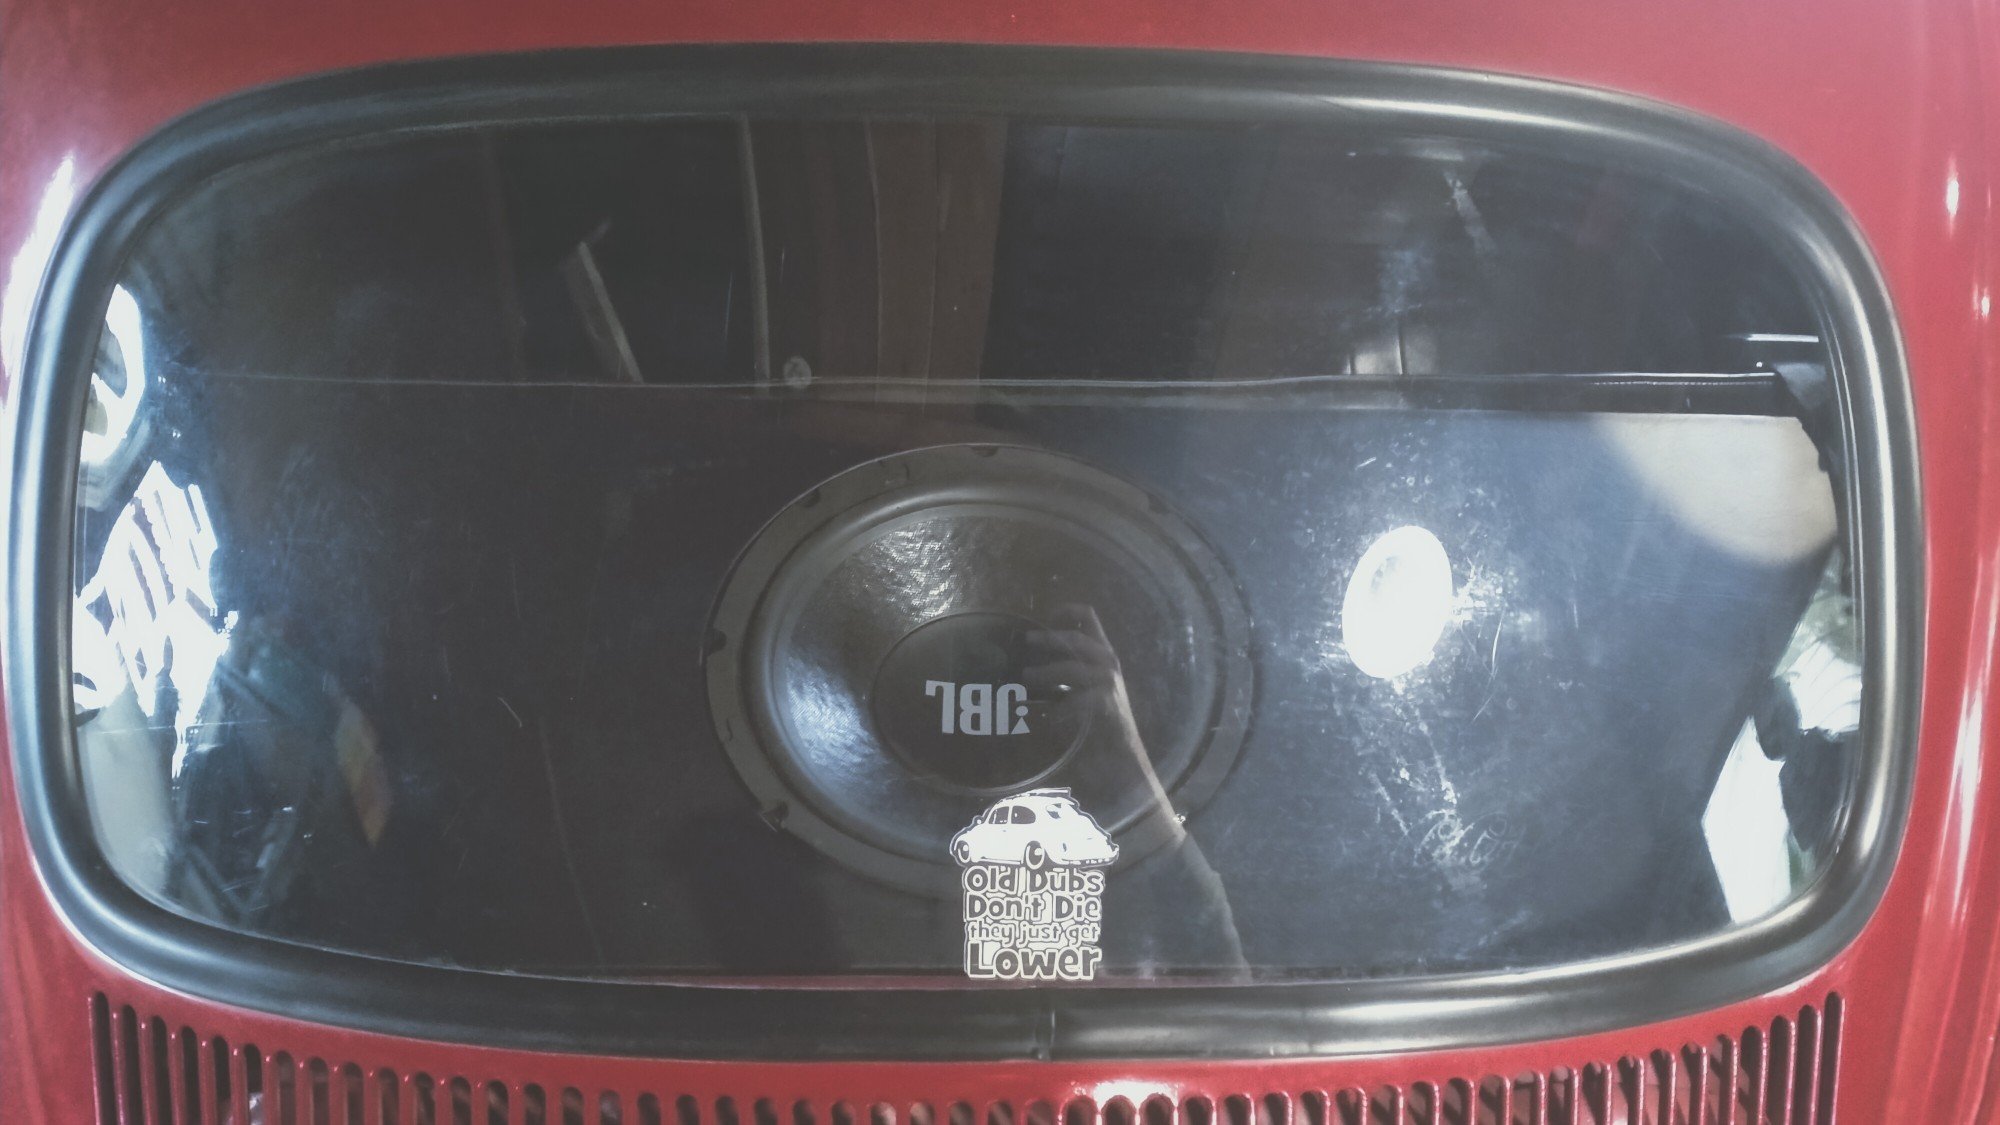
Turns out I've been driving around for over a year(when it runs) with a ugly mdf parcel shelf. Fixed that a couple weeks back. This was a second from work, it's just black vinyl from para rubber. Very happy as now the whole interior is black. Maybe one day it will get a headliner.
10 points
-
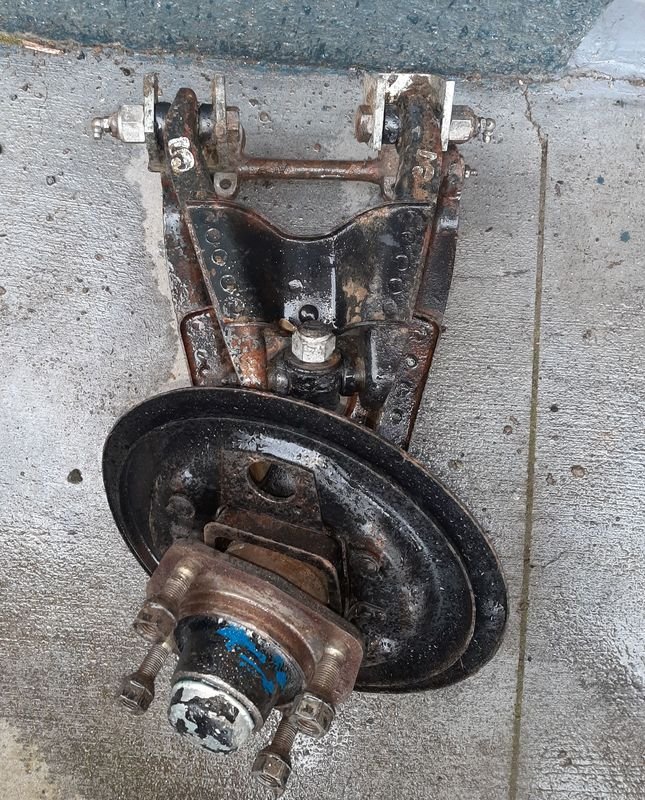
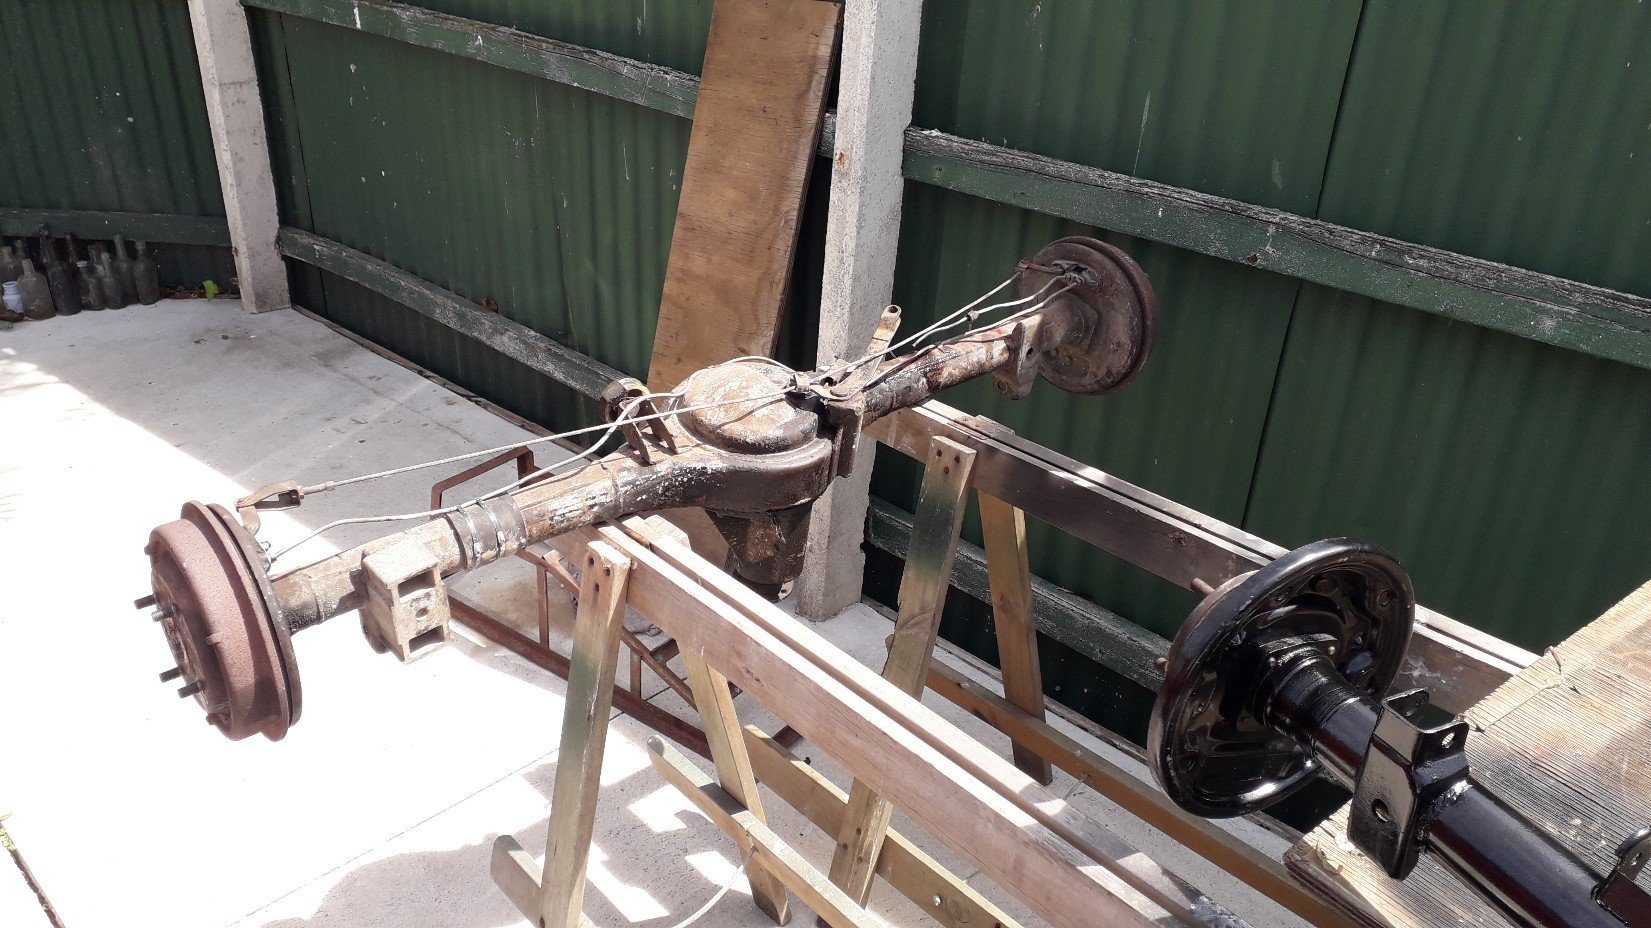
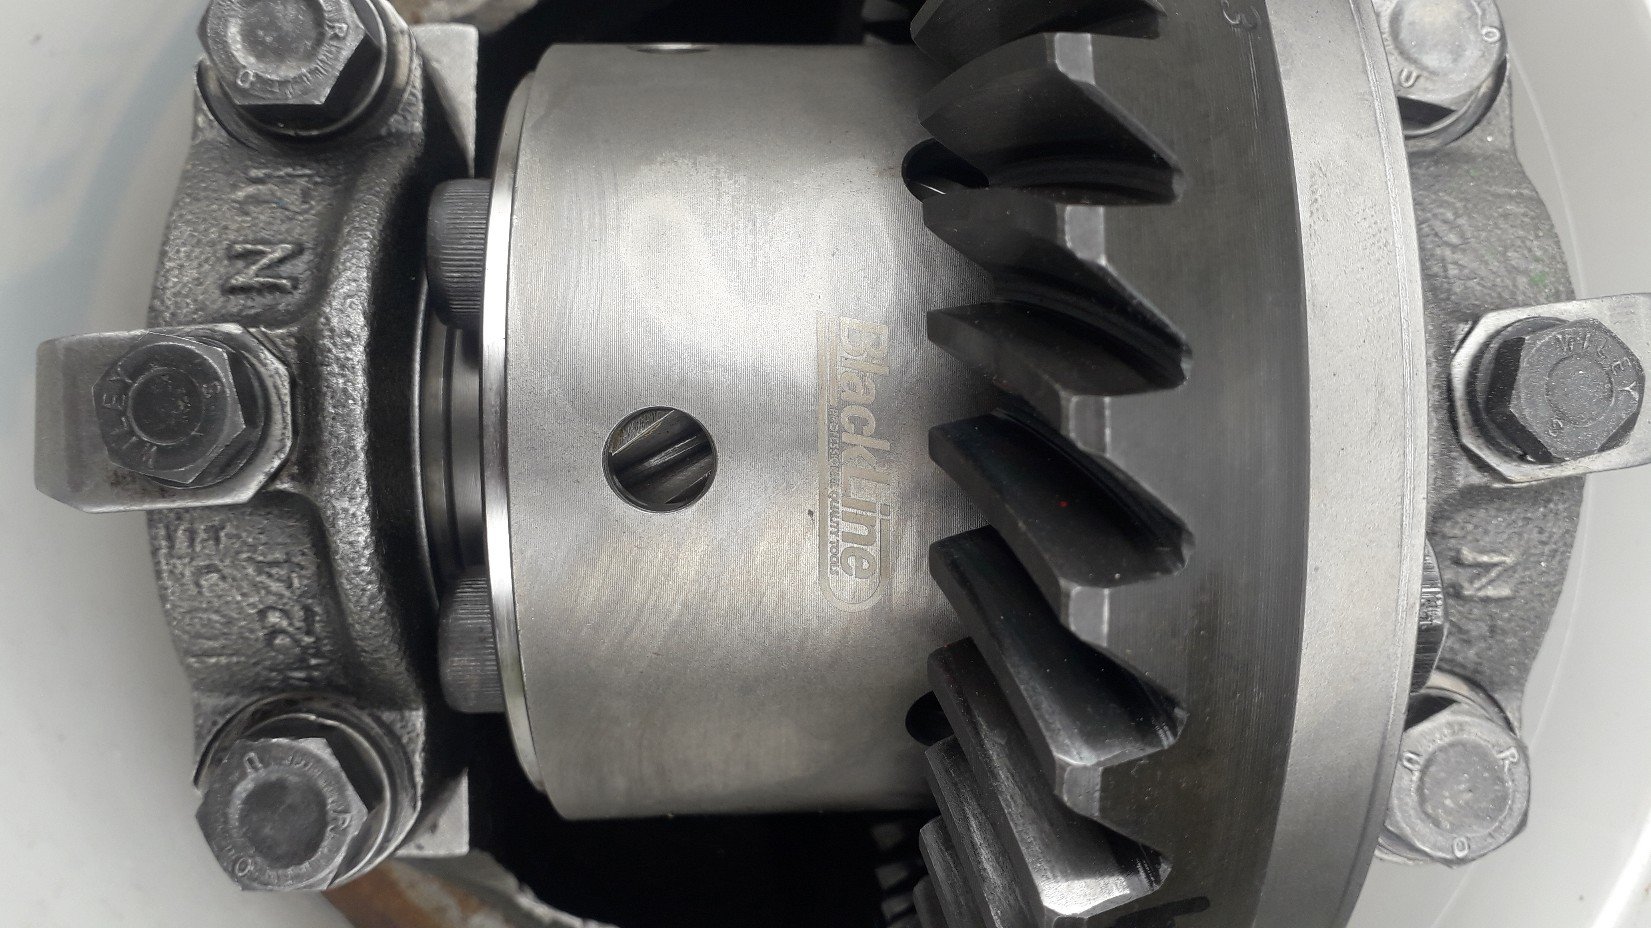
A huge update for the car, but a shitty update when I try and write about it. theres only so many pictures you can take of an axle. I had the 3.54 gears and blackline Lsd sitting in the house since august. the supply chain is wrecked as we all know. so I had brake shoes, springs and wheel cylinders brand new ordered but they never arrived. got all the way to Auckland, sat there for 3 weeks then got sent back to the uk. go figure. so I fitted the old shoes, used a mixture of the best springs and clips I could make of the 2 sets and bought wheel cylinders again. I pressed new bearings onto the axles and bolted it all together. I just needed to get it done the old diff was knackered. I took the car out today to a motorkhana with a mate with the MG club today. had great fun and it was also a great test of the car, suspension and diff etc and I got a few hrs cruising to tweak the carbs and keep an eye on the wideband. I need to do more research. when the car runs best it reads about 12.8 cruising and 12.2 on full throttle. from what I've read so far that's too lean but I need way more reading up on it. anyway.. few pics. old new.
10 points
-
Yeah all of the prius electric stuff happens in the gearbox, and apparently they are heavy as hell. So the 5 speed earns its keep for fun factor and keeping the weight down. Sooo because I was annoyed that it still looked like it wanted more advance. The rolling pin idea that @Spencer posted was great, and I probably should have done this. But I retimed the chain so it was only 1 tooth back, and yep in this position valves hit pistons. So I made a fairly ghetto stopper that jams between the housing and the existing stopper pin. It looks like it could fall out but it cant (famous last words...) I had a few issues getting vvti working again at first, I found that my stopper was *slightly* slightly slightly too long compared to the depth of housing. So it was creating a tiny gap to the lid so the oil could pour out with less resistance - so not enough to move the cam or disengage the pin. Fixed that, and have just been for a hoon to see how new angles look. Results are awesome, there's now a distinct cross over where various angles are better than the other. So a max of 37.3 deg with the stopper in place. Awesome! So that's 17.3 deg advance over normal cam timing's home position. So I could still potentially have another 20+ deg over that, with piston cutouts - but it doenst look like it's going to be necessary. As I've got a cross over point from max advance at around 5500rpm. Still going through the results to make a new VVTI map, but its looking promising.
9 points
-
I really should do something about getting the Manhattan up here. Mates been pretty good storing it for this past year for me and letting me get other purchases dropped off at his place. At least my Recaro Lx collection is multiplying whilst its down there.
7 points
-
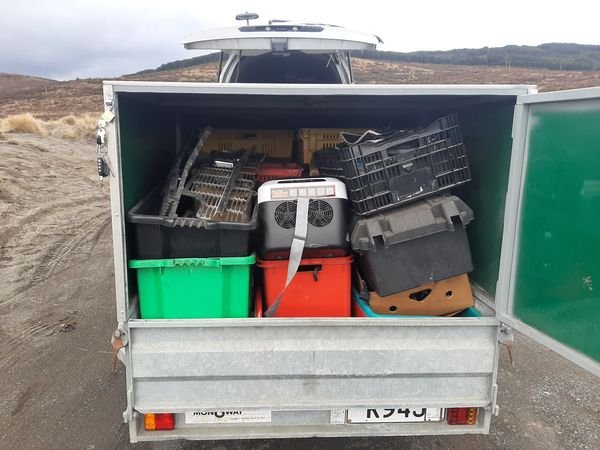
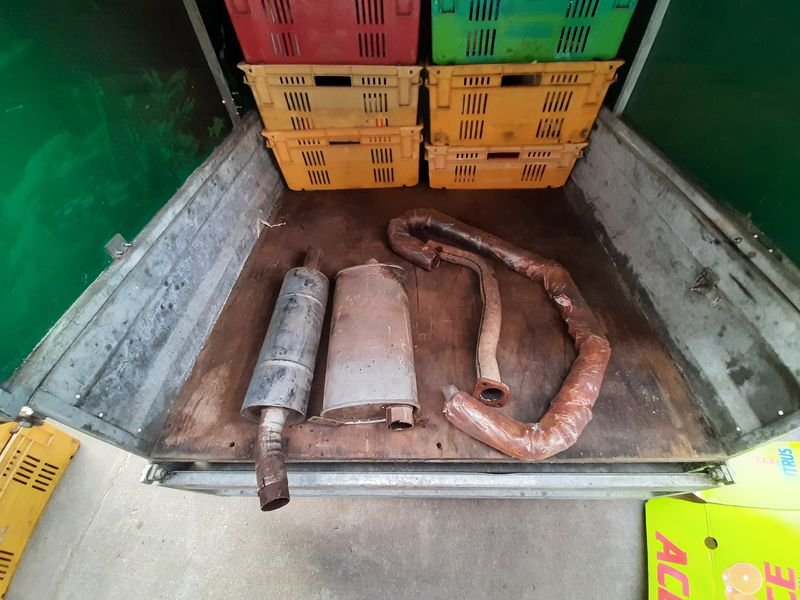
Rubbish update: I plucked the exhaust out of the garden and gave it a quick flick of paint. The can was naffed so i pierced it and brushed it on.. It’s purely to keep them uniform. I’d love to do headers one day so wasn’t mad keen to detail these manifolds. The pipe work is practically new, like I’d be surprised if it had 100km. Can read the part numbers stamped into it. Mufflers I think are on their second life but I have some spares.7 points
-
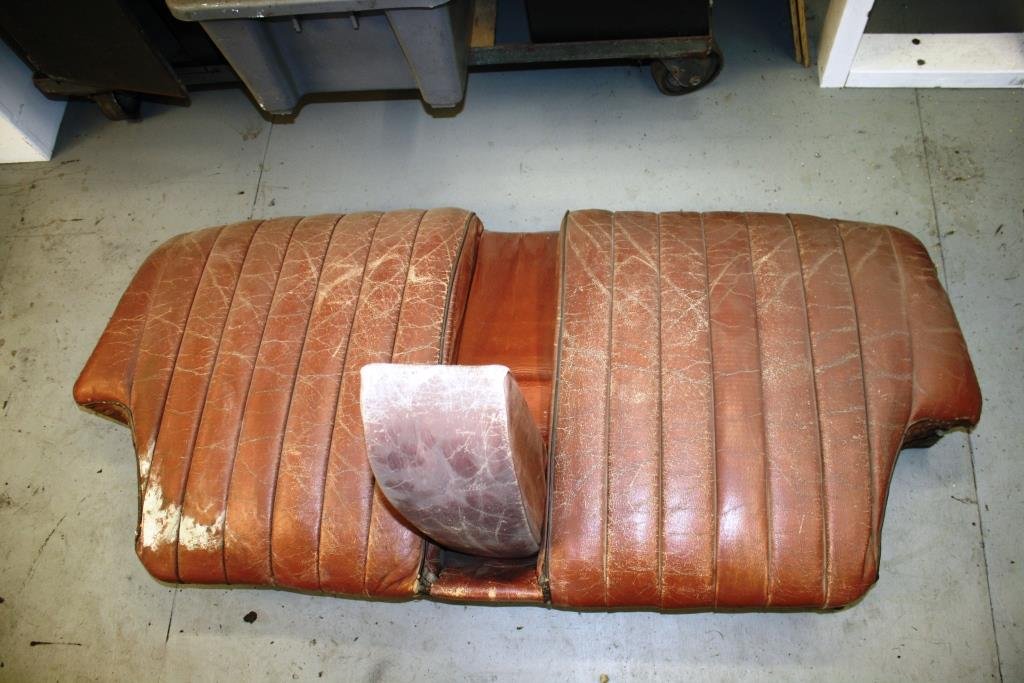
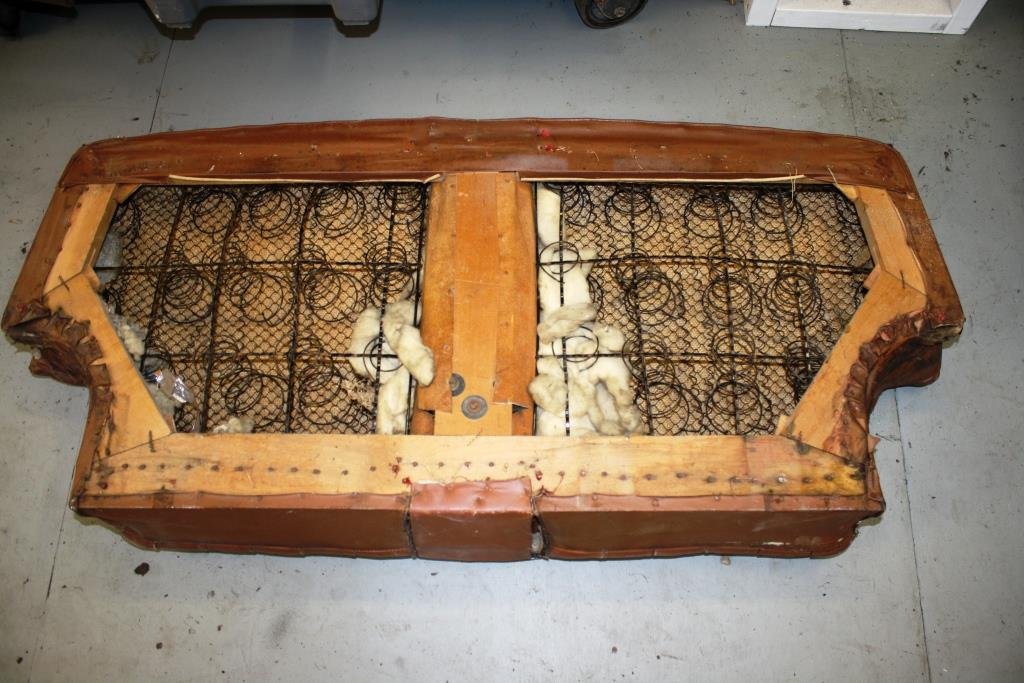
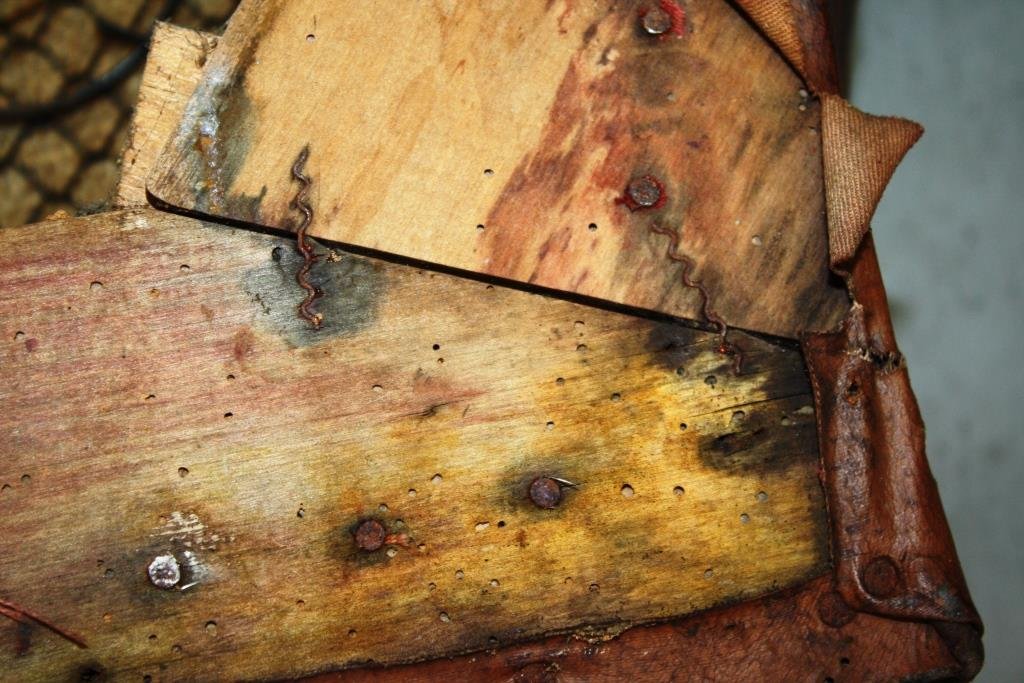
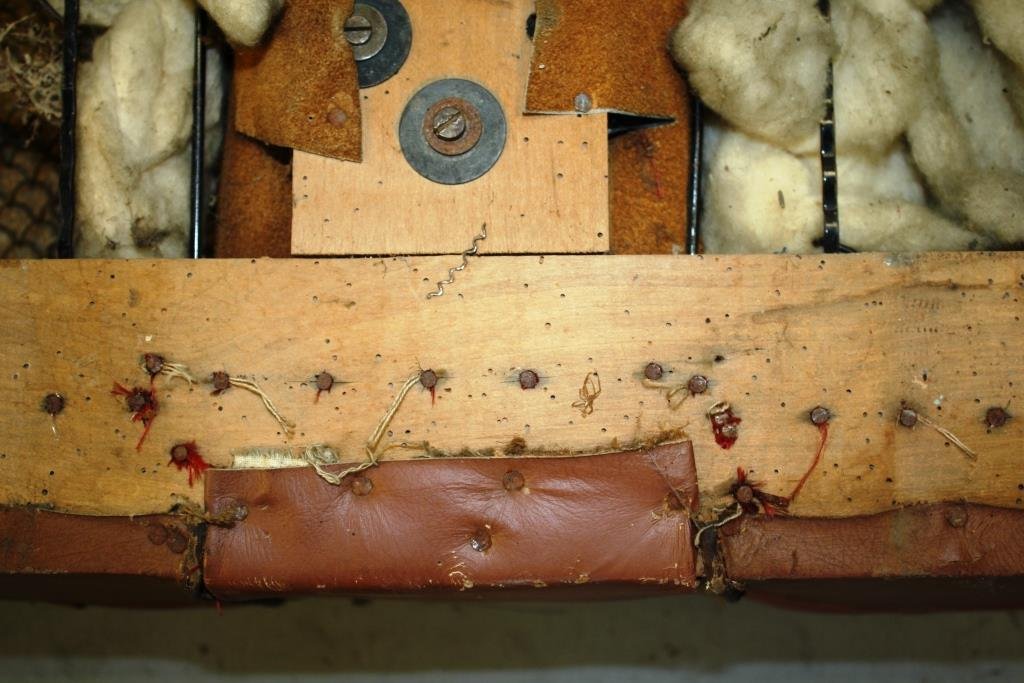
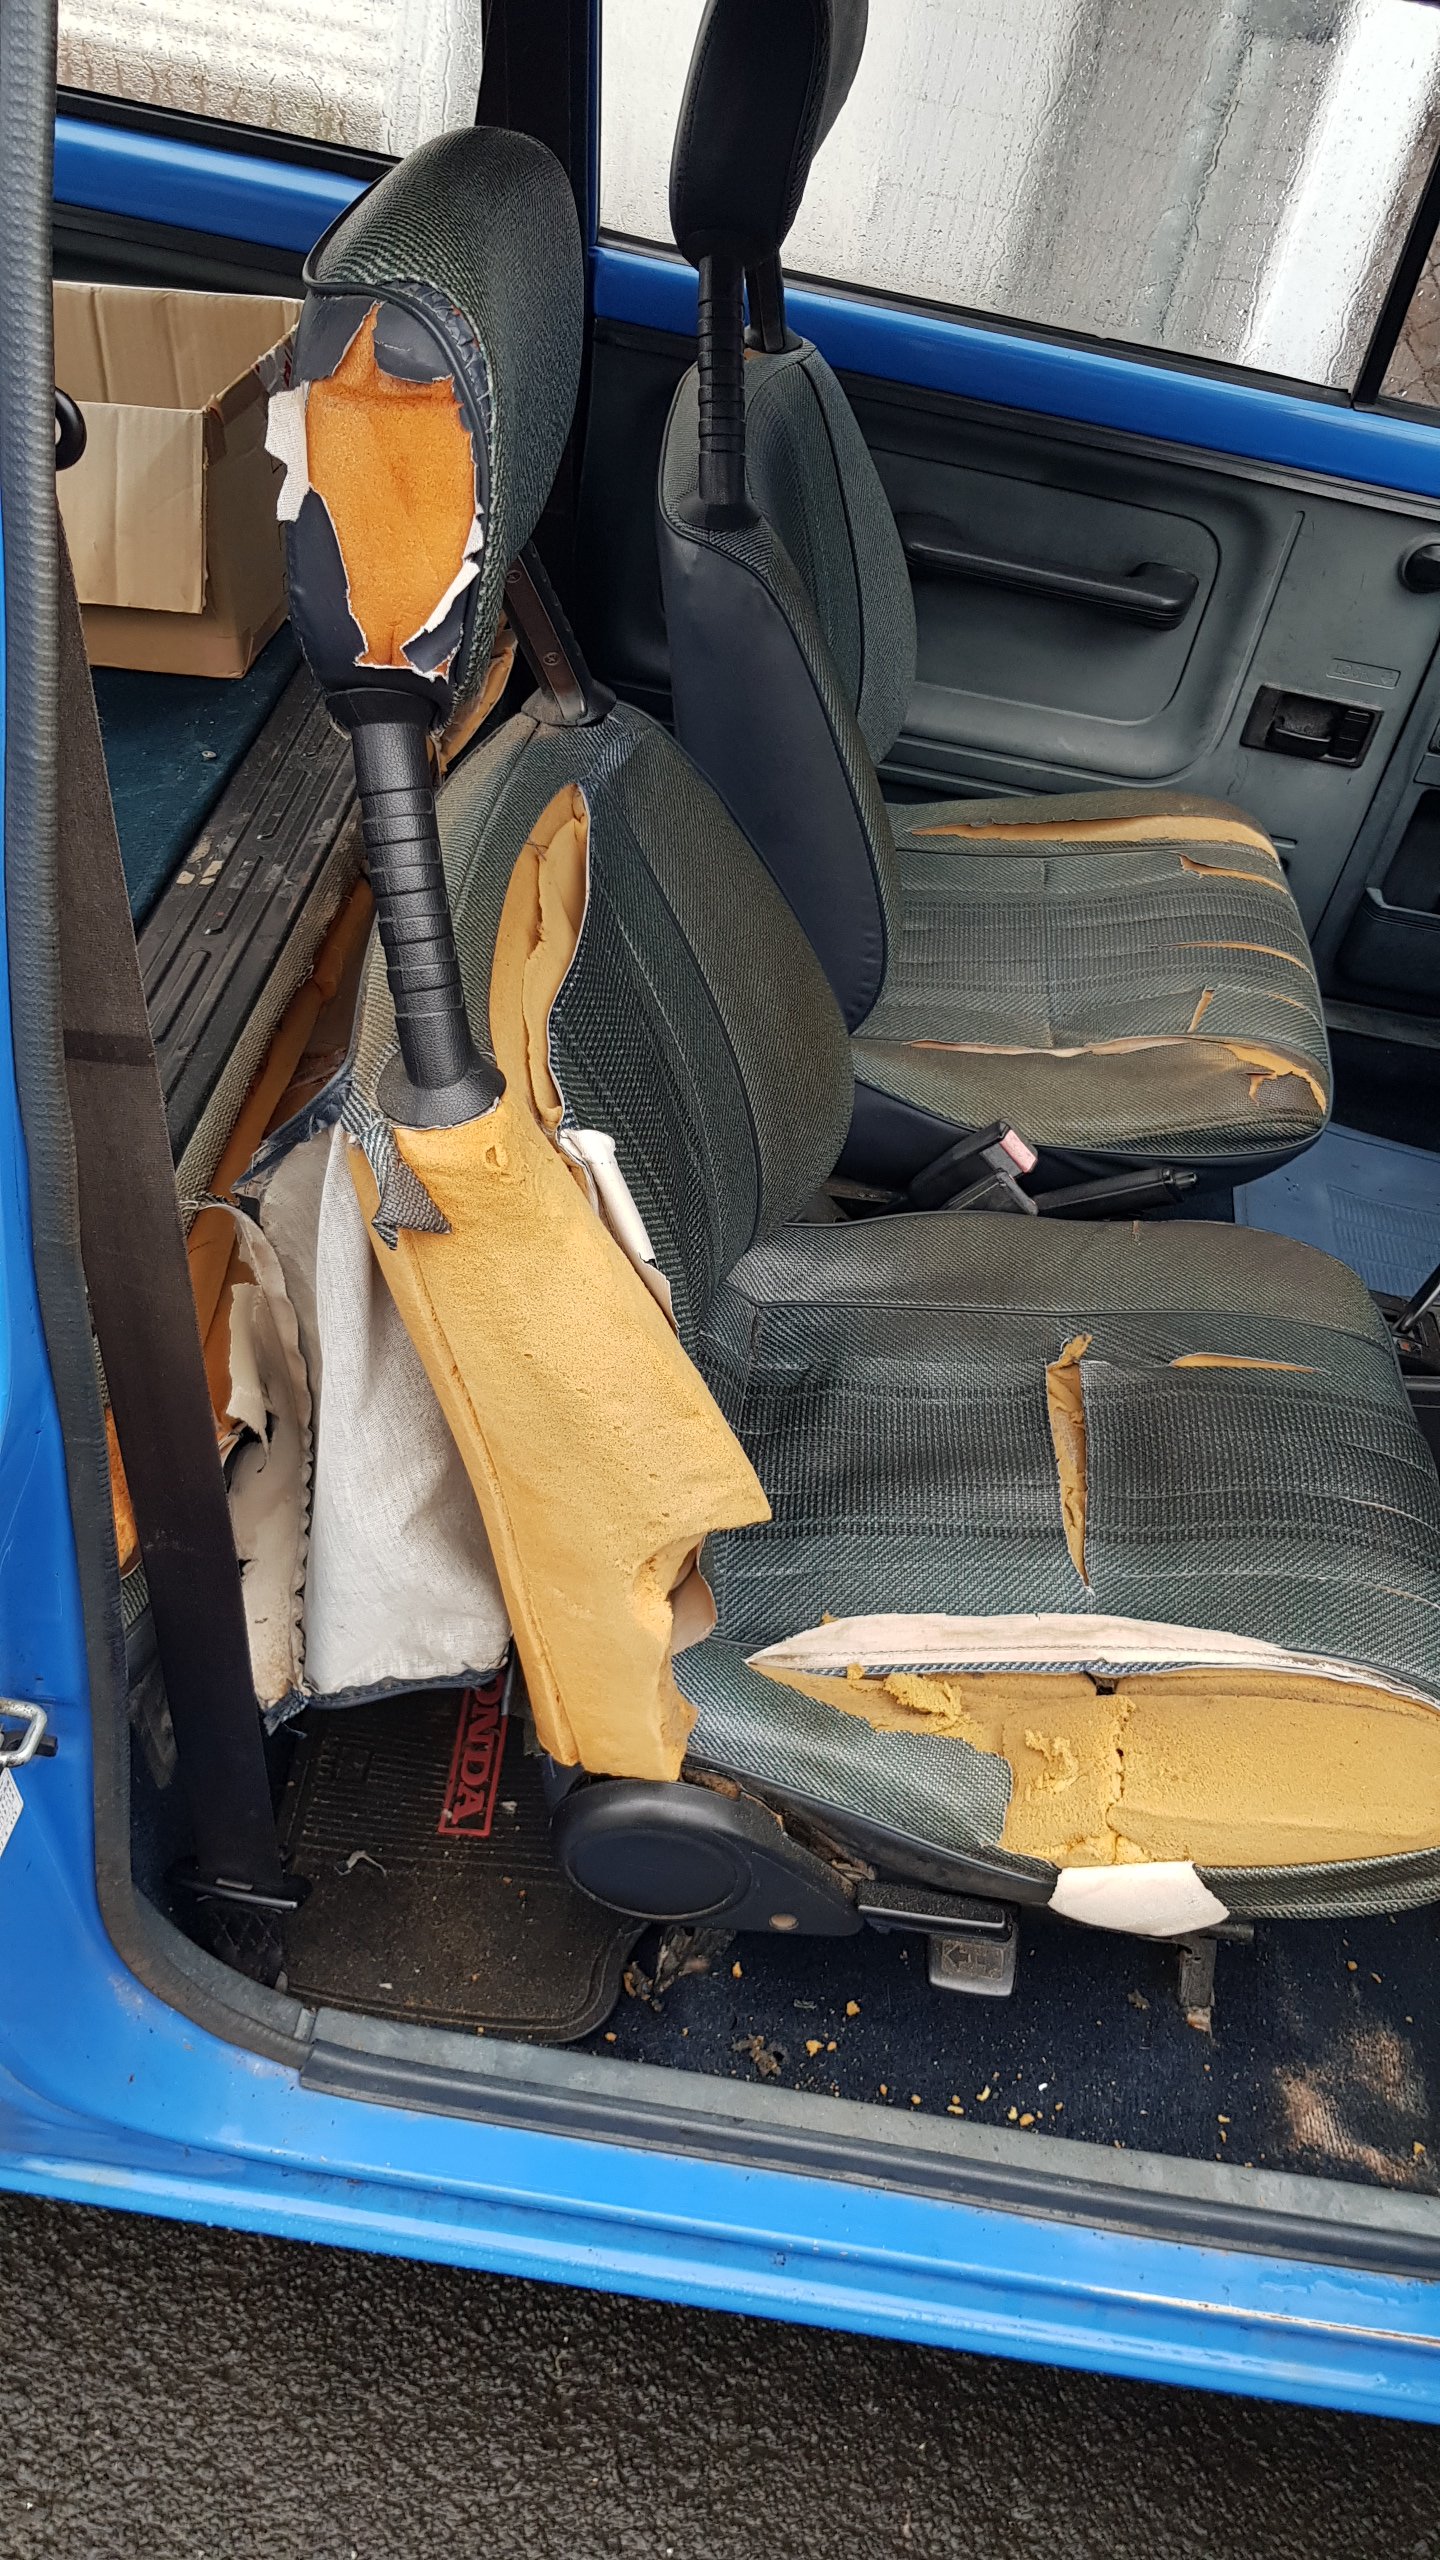
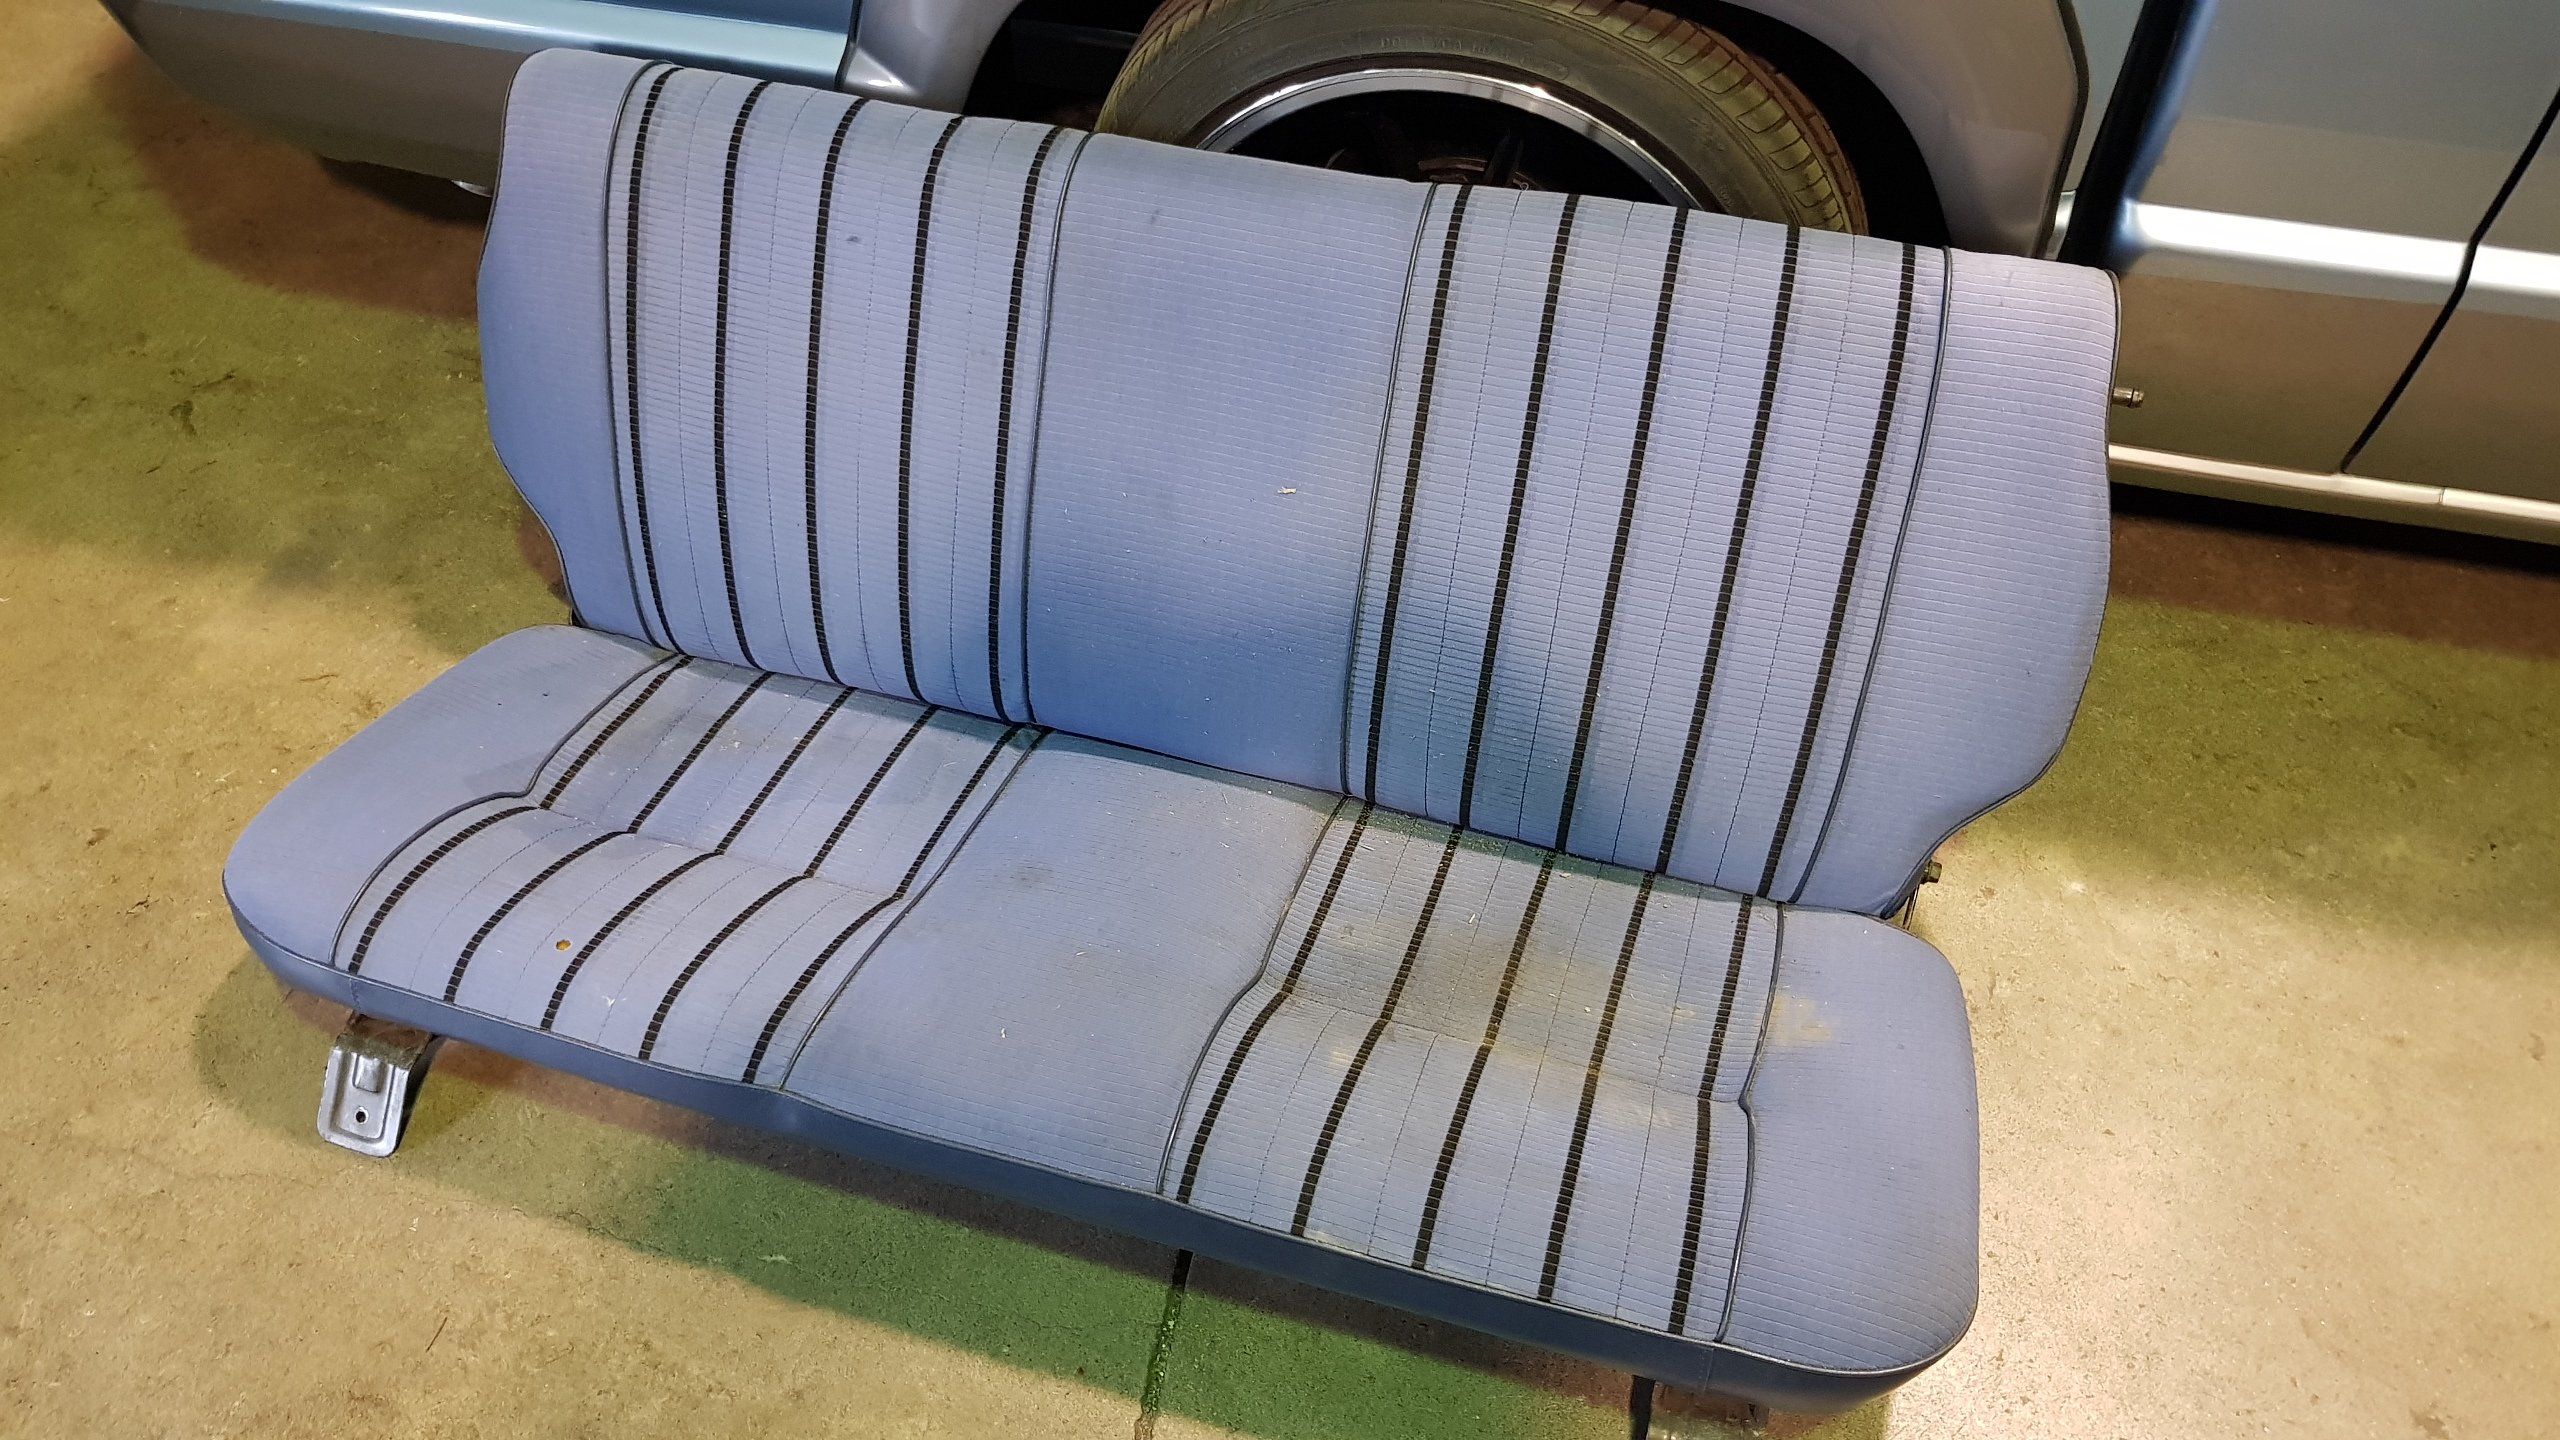
The seats came our easily, plan is to keep them looking scruffy and original. The leather is cracked and dry - any suggestions on how we should be treat it will be much appreciated by both Rigamortice and yours truly. Love the old leather, the kapok stuffing, the springs and the wooden frame – not a modern staple in sight.
6 points
-
So, I sold this thing last month. Mostly trouble free motoring. It now resides near Dunedin. New owner bought it unseen and flew up same night and drove it home.
5 points
-
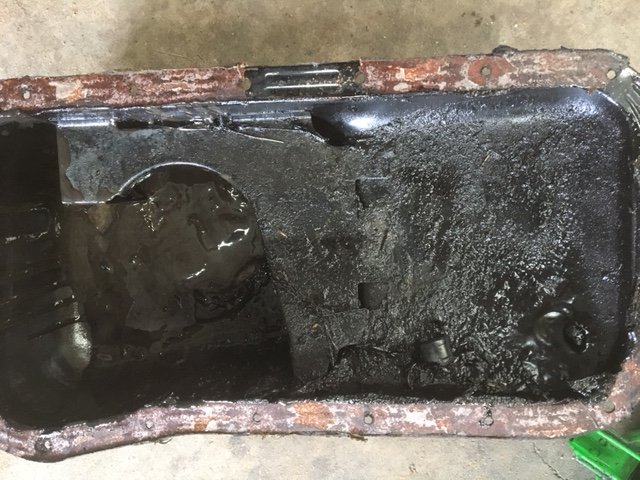
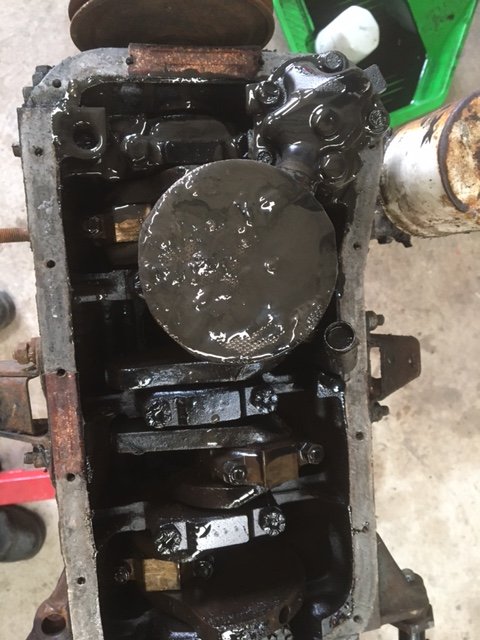
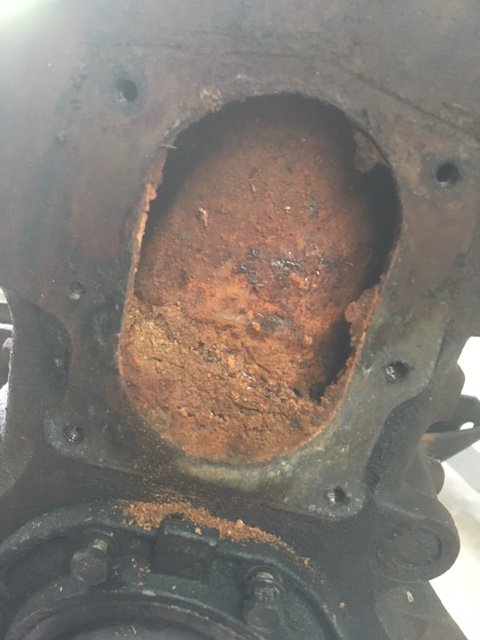
So I didn't really said why I've pulled the motor again, but as I'm sure you've assumed from the tow truck photo, it wasn't good. When I last had it out to replace the clutch and oil cooler, I noticed that no1 spark plug was lose, it tightened back up fine so thought nothing of it. Then down the bottom of town, after we got off the motorway, bang! Bang bang bang like the whole exhaust system had fallen off. But it was just old number 1 spark plug going number 2s. So one of two things happened. Either thread stripped out of the head or the head is cracked between the valves and the plug hole.
5 points
-
replace the gear Joe, $200 isnt worth the time having to crack the cases again.5 points
-
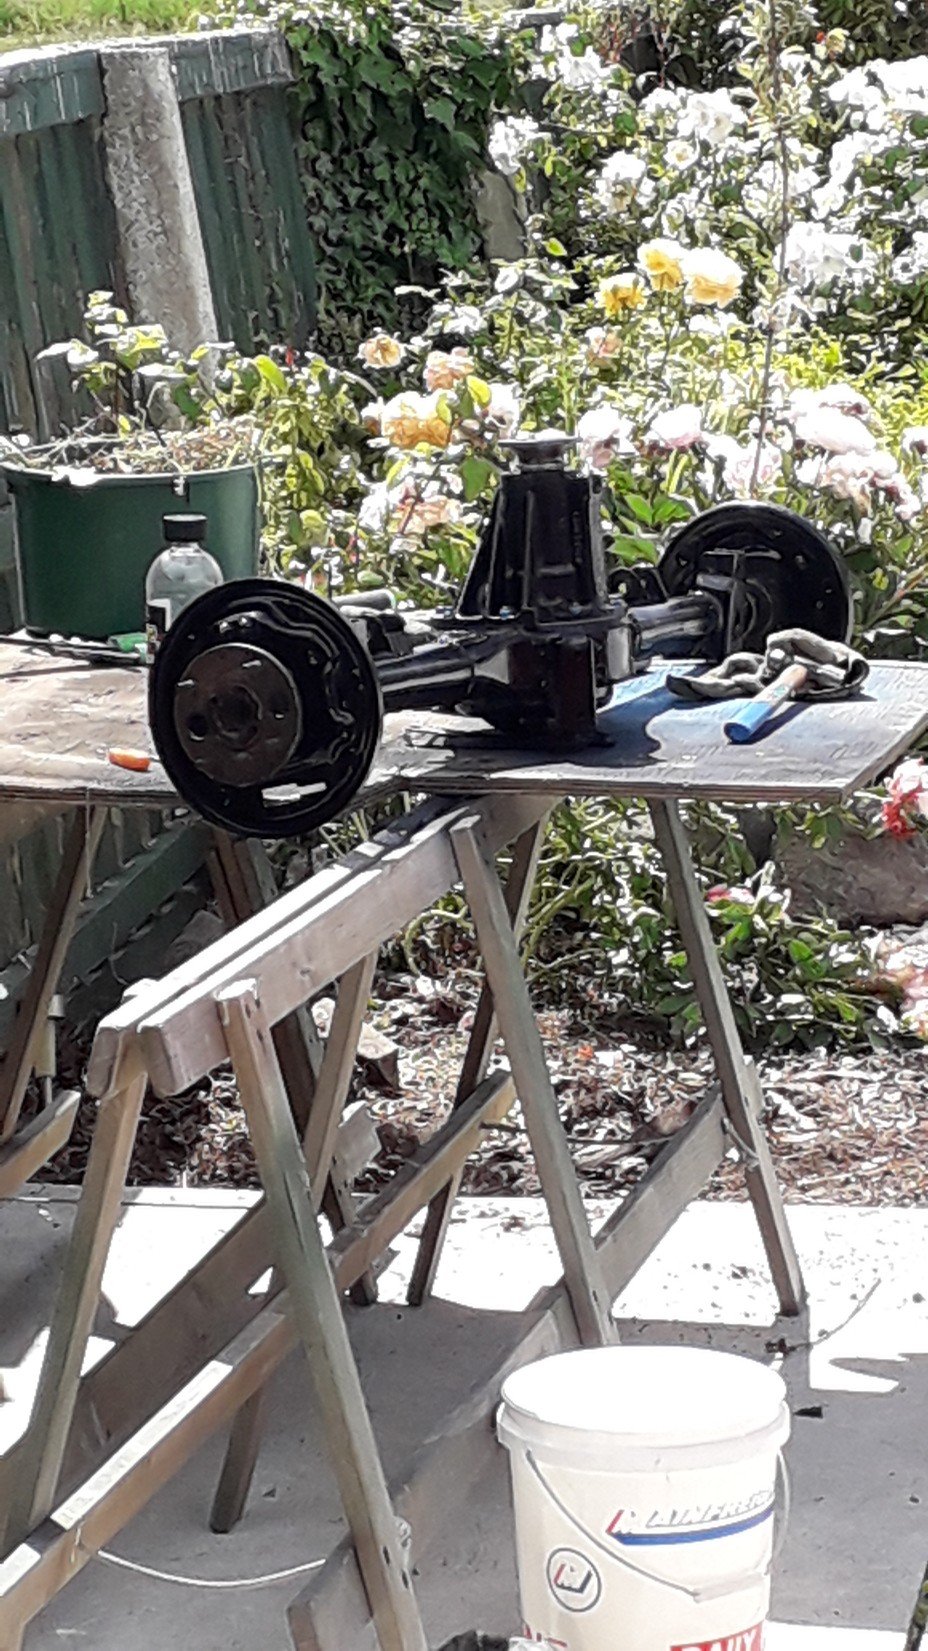
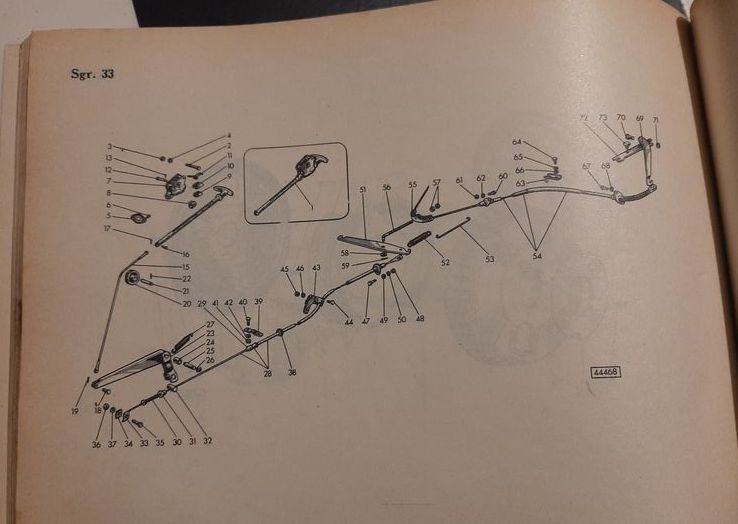
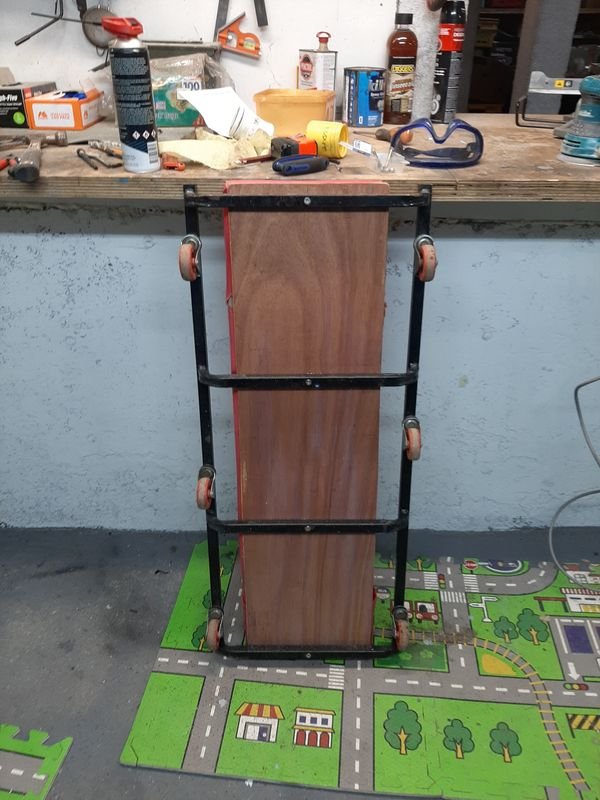
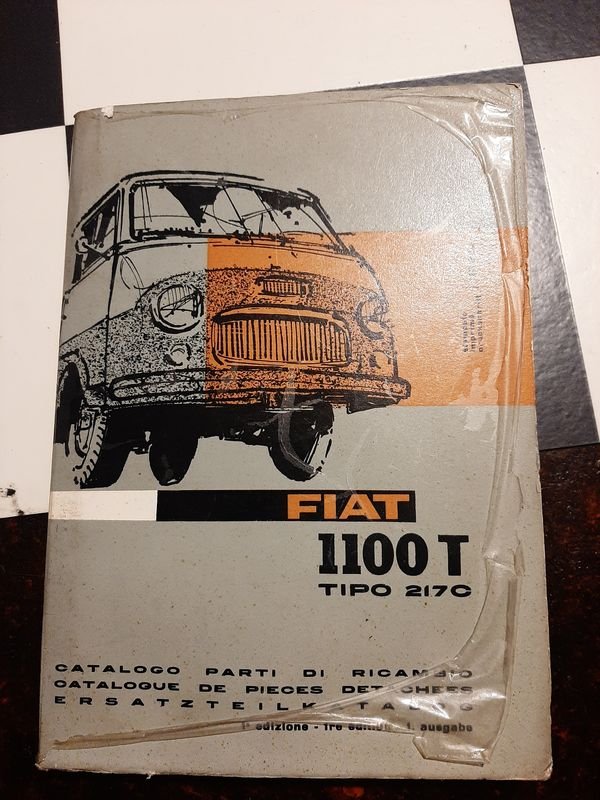
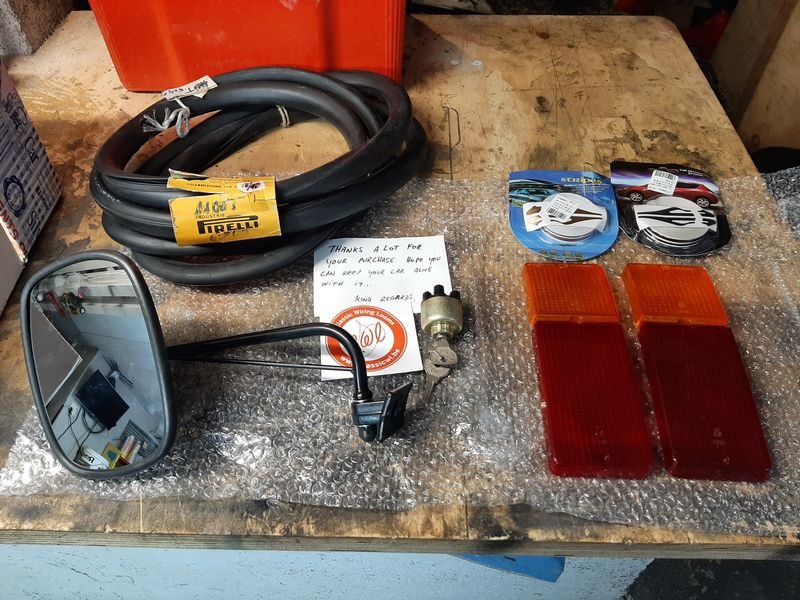
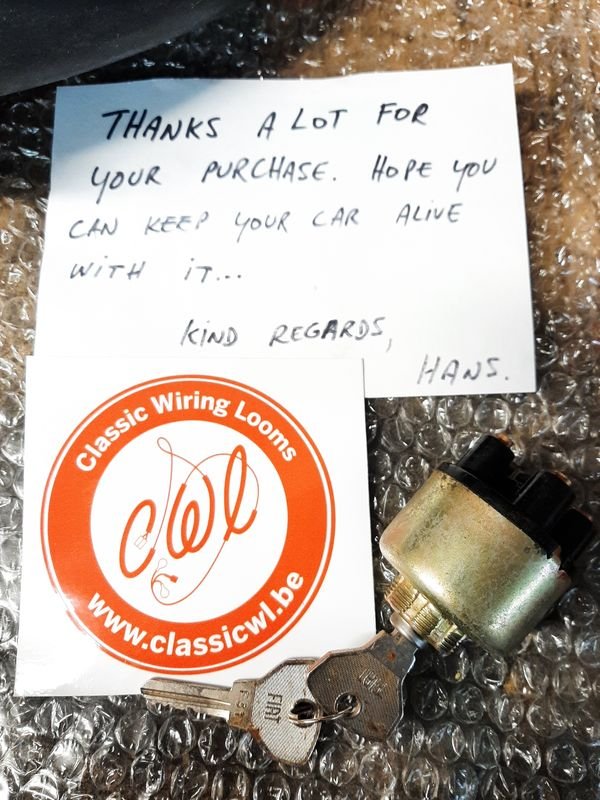
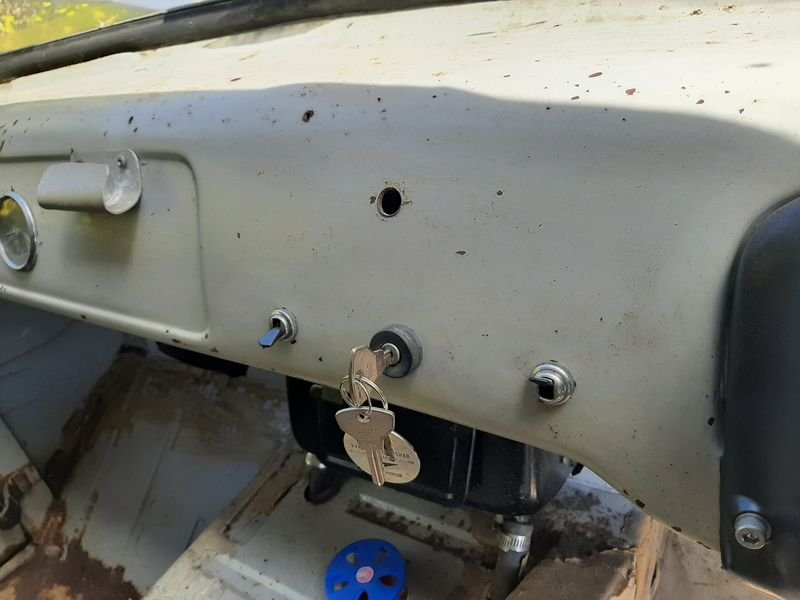
Chucked the diff back in a while back, fresh black makes everything else look worse. Had a bit of a splurge on ebay, got a NOS Pirelli windscreen rubber, which means i can cut the old one off eventually a NOS Sipea ignition switch a replacement (not NOS but made in Italy) passenger side mirror some NOS tail lights lenses for the 125p ute Ignition switch came with a nice note Thanks Hans, Installed, so van finally has some keys Also got this parts catalogue, good for practicing the italian, french and german But full of great diagrams like this, which has already proved invaluable taking a few things apart, and putting them back together. Also broke my crawler with the diff so that got new base wood - used some random ply that would result in the least waste - tuned out fancy!
5 points
-
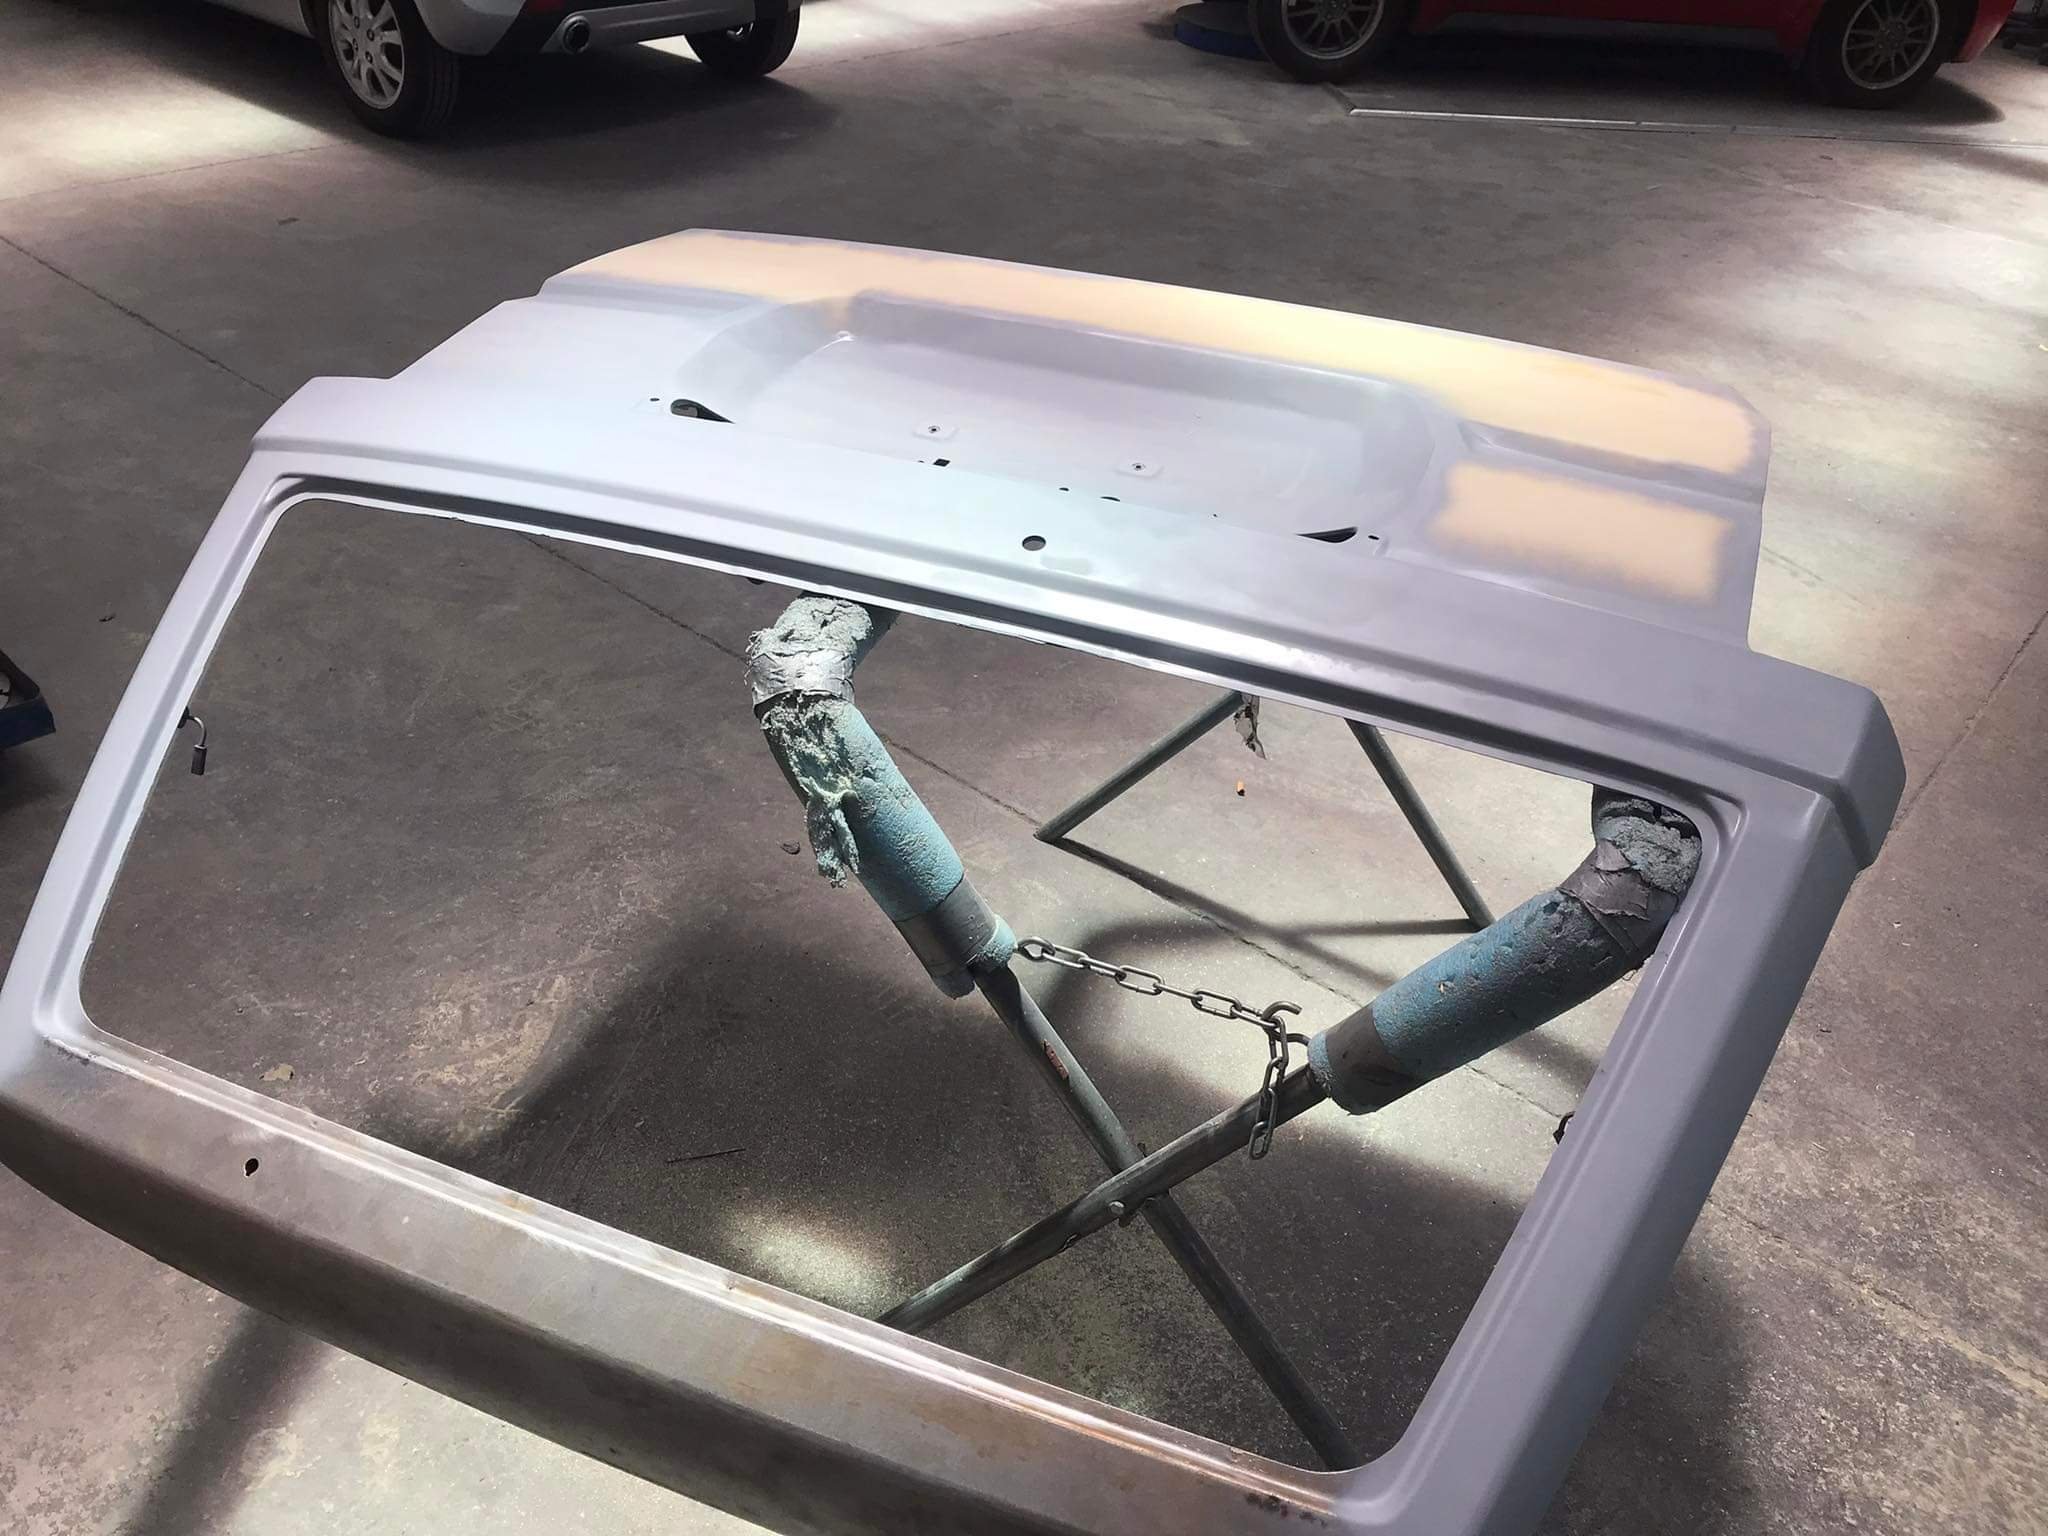
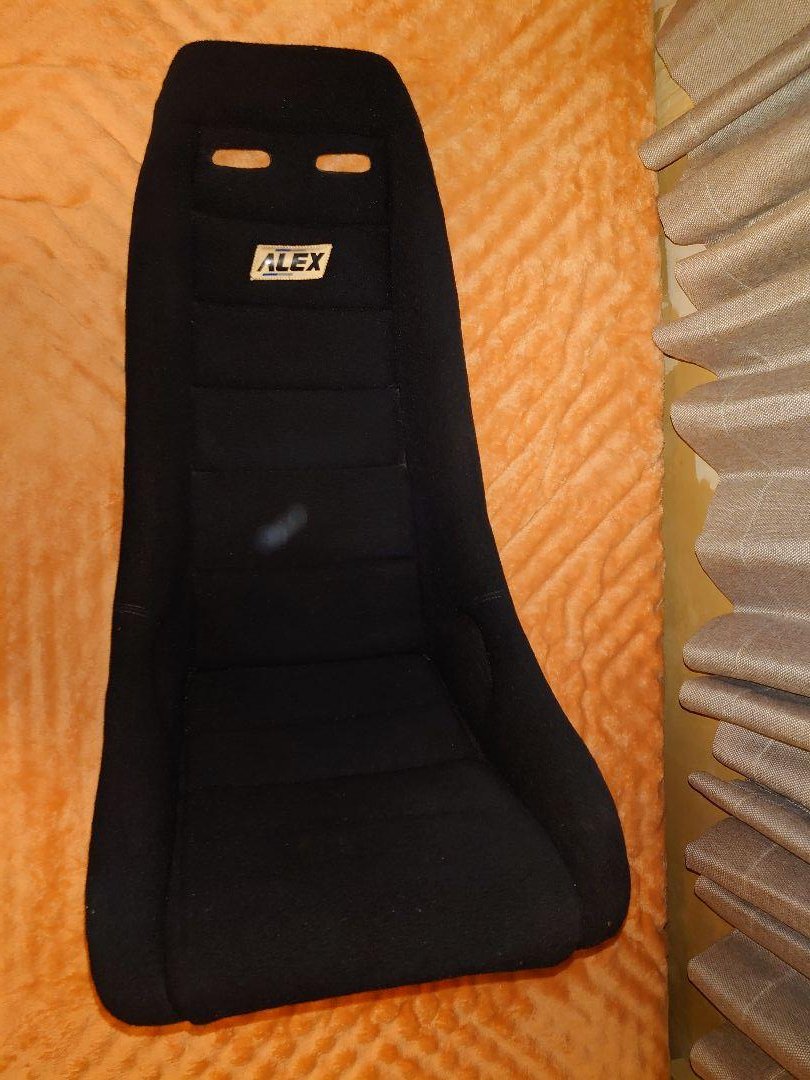
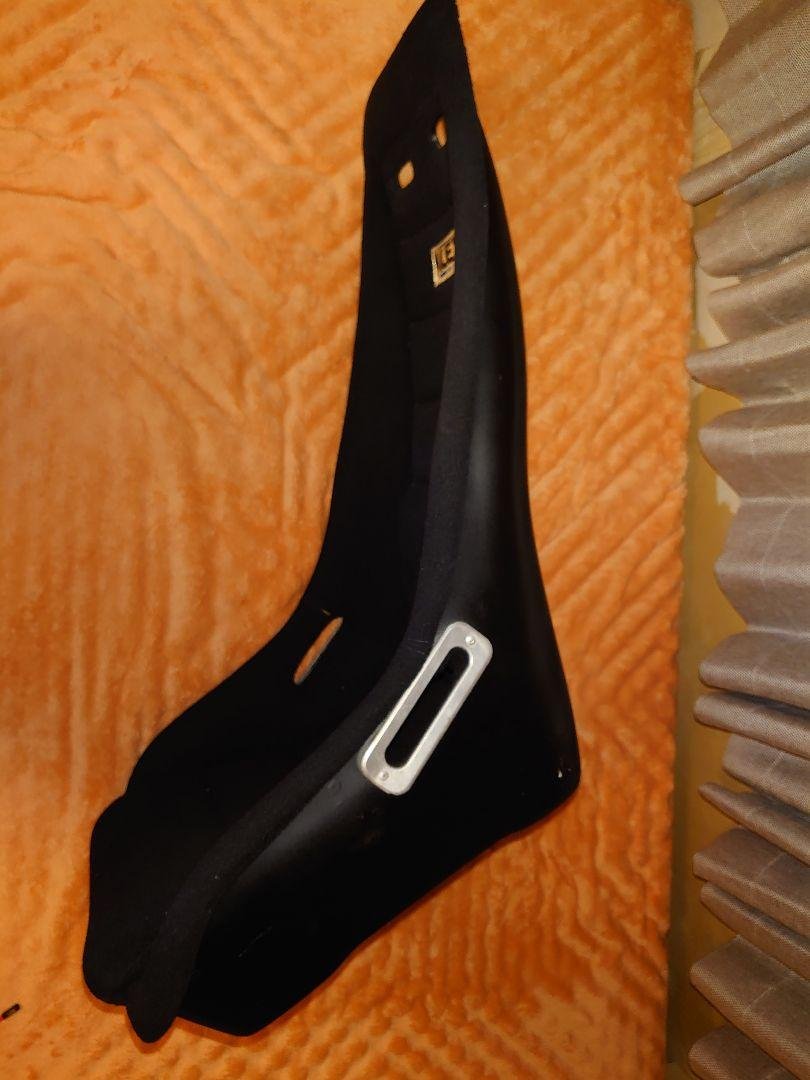
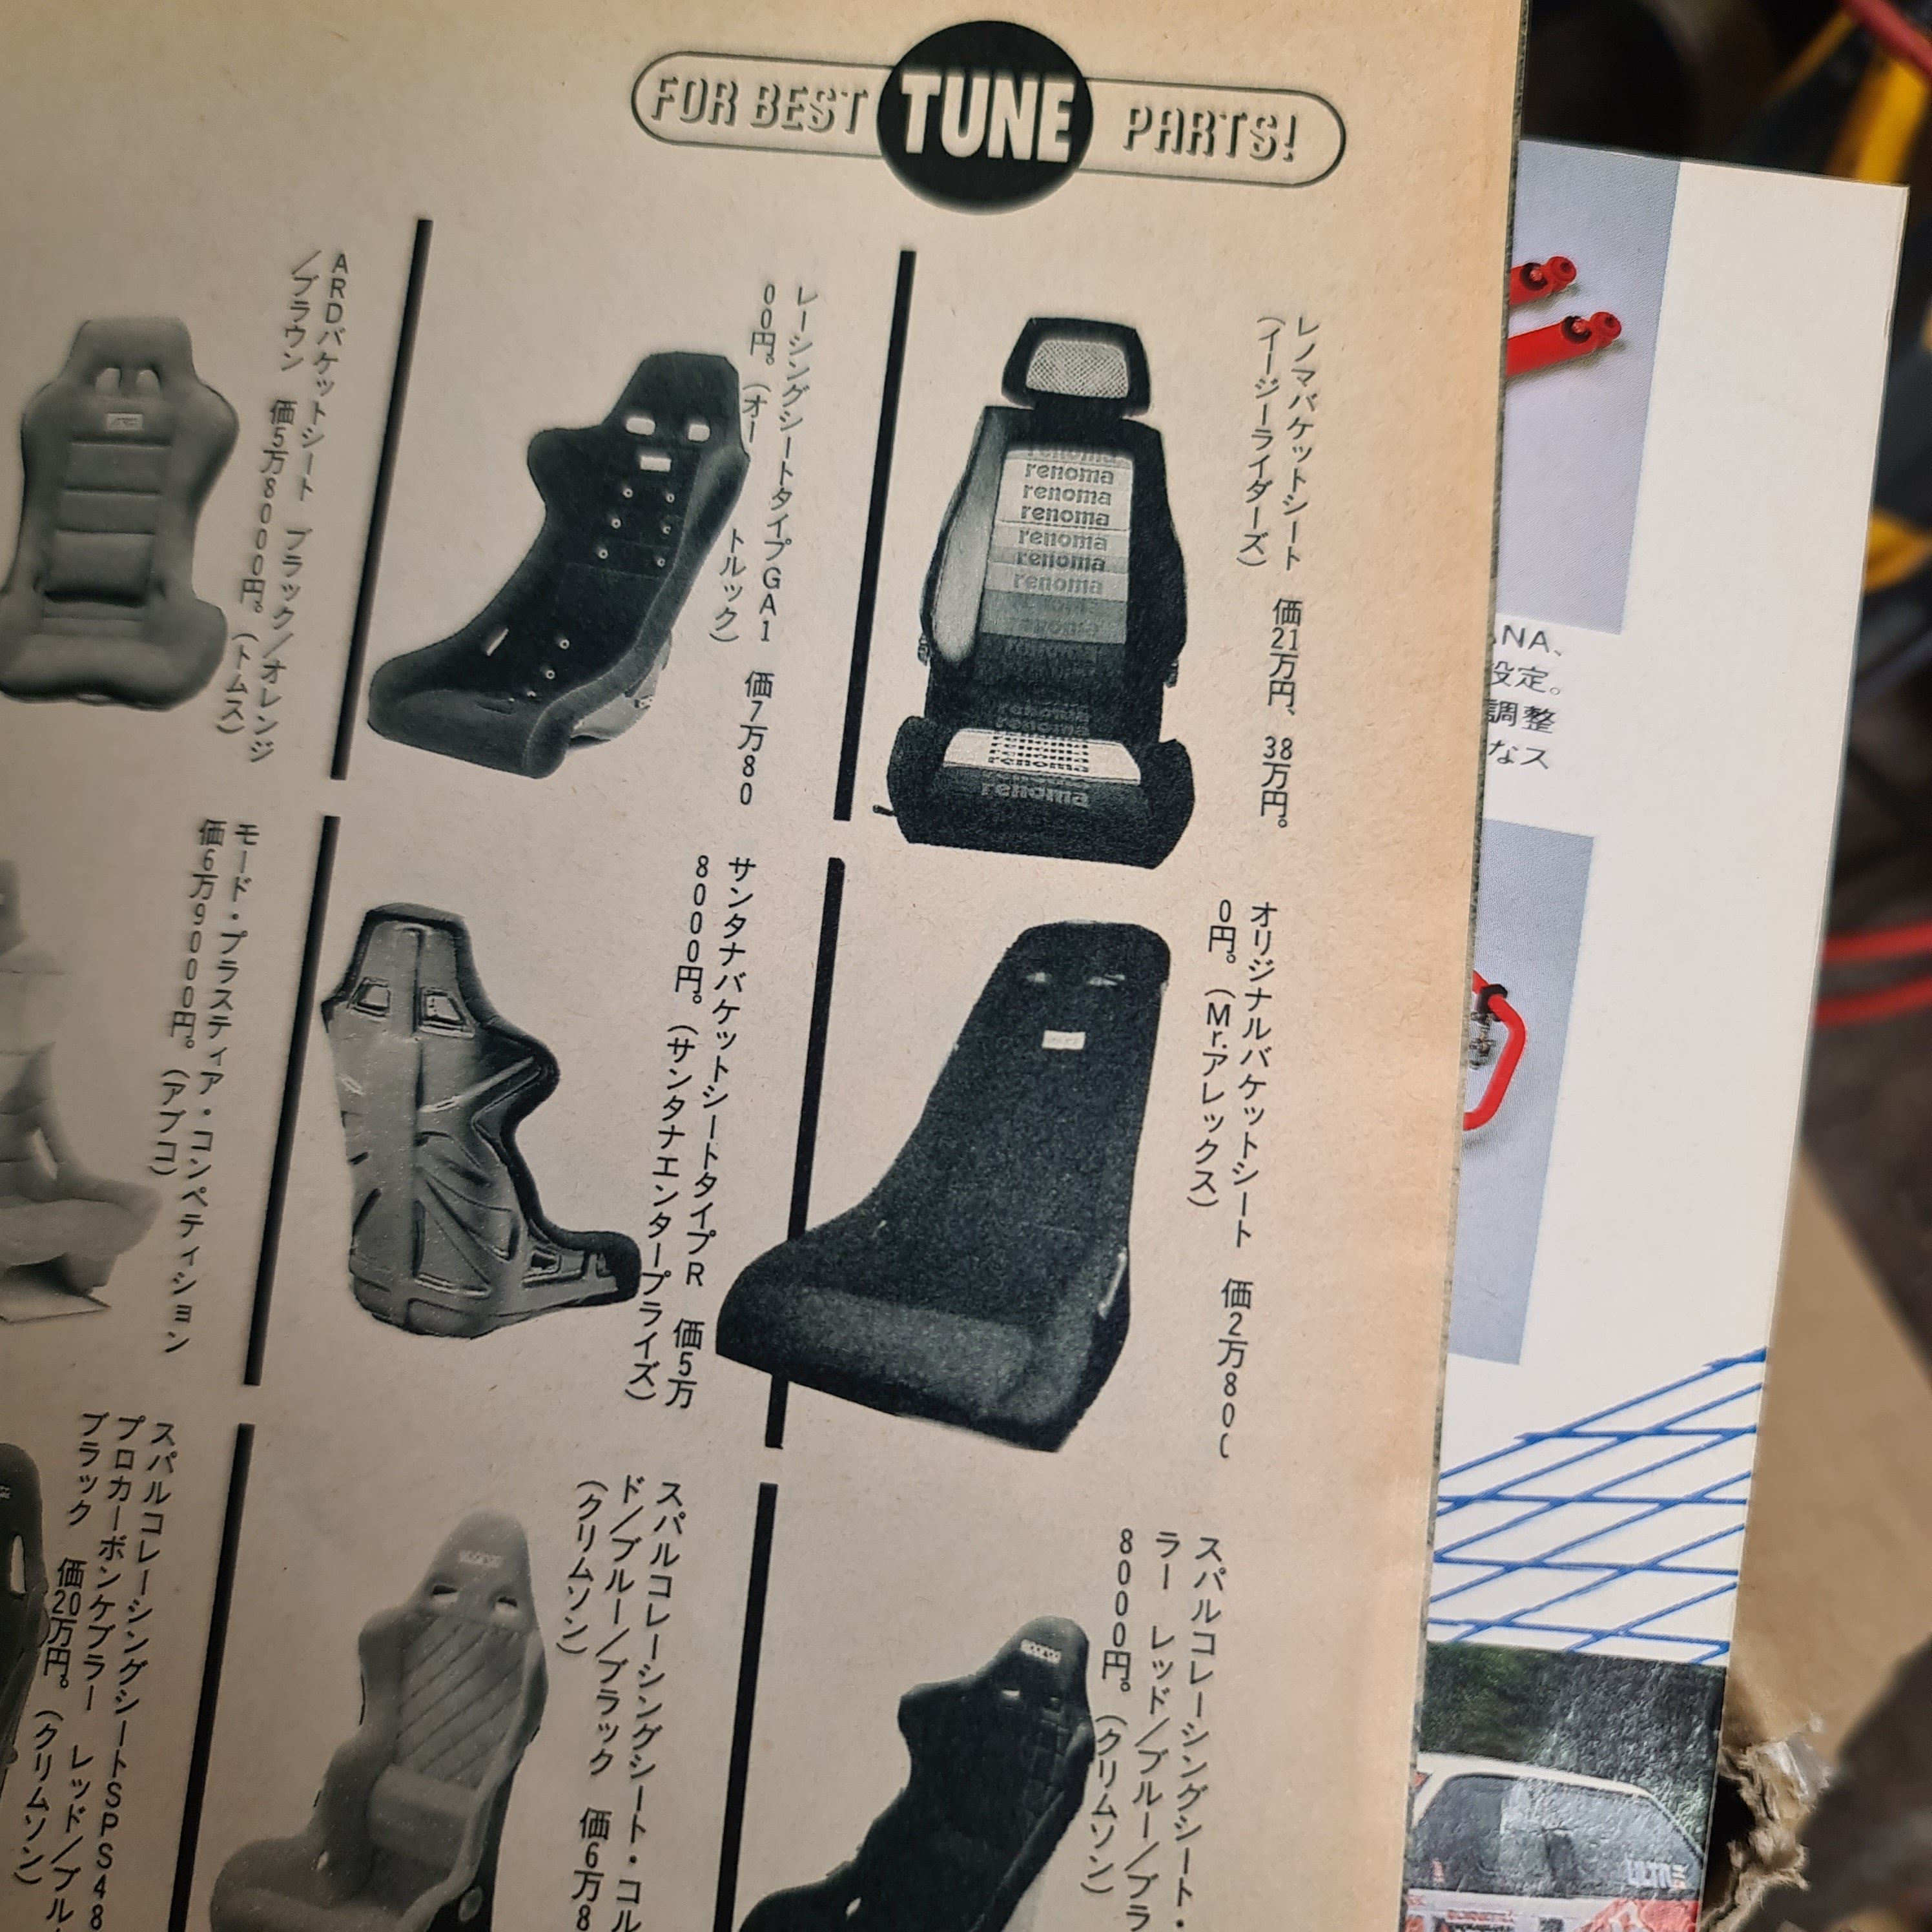
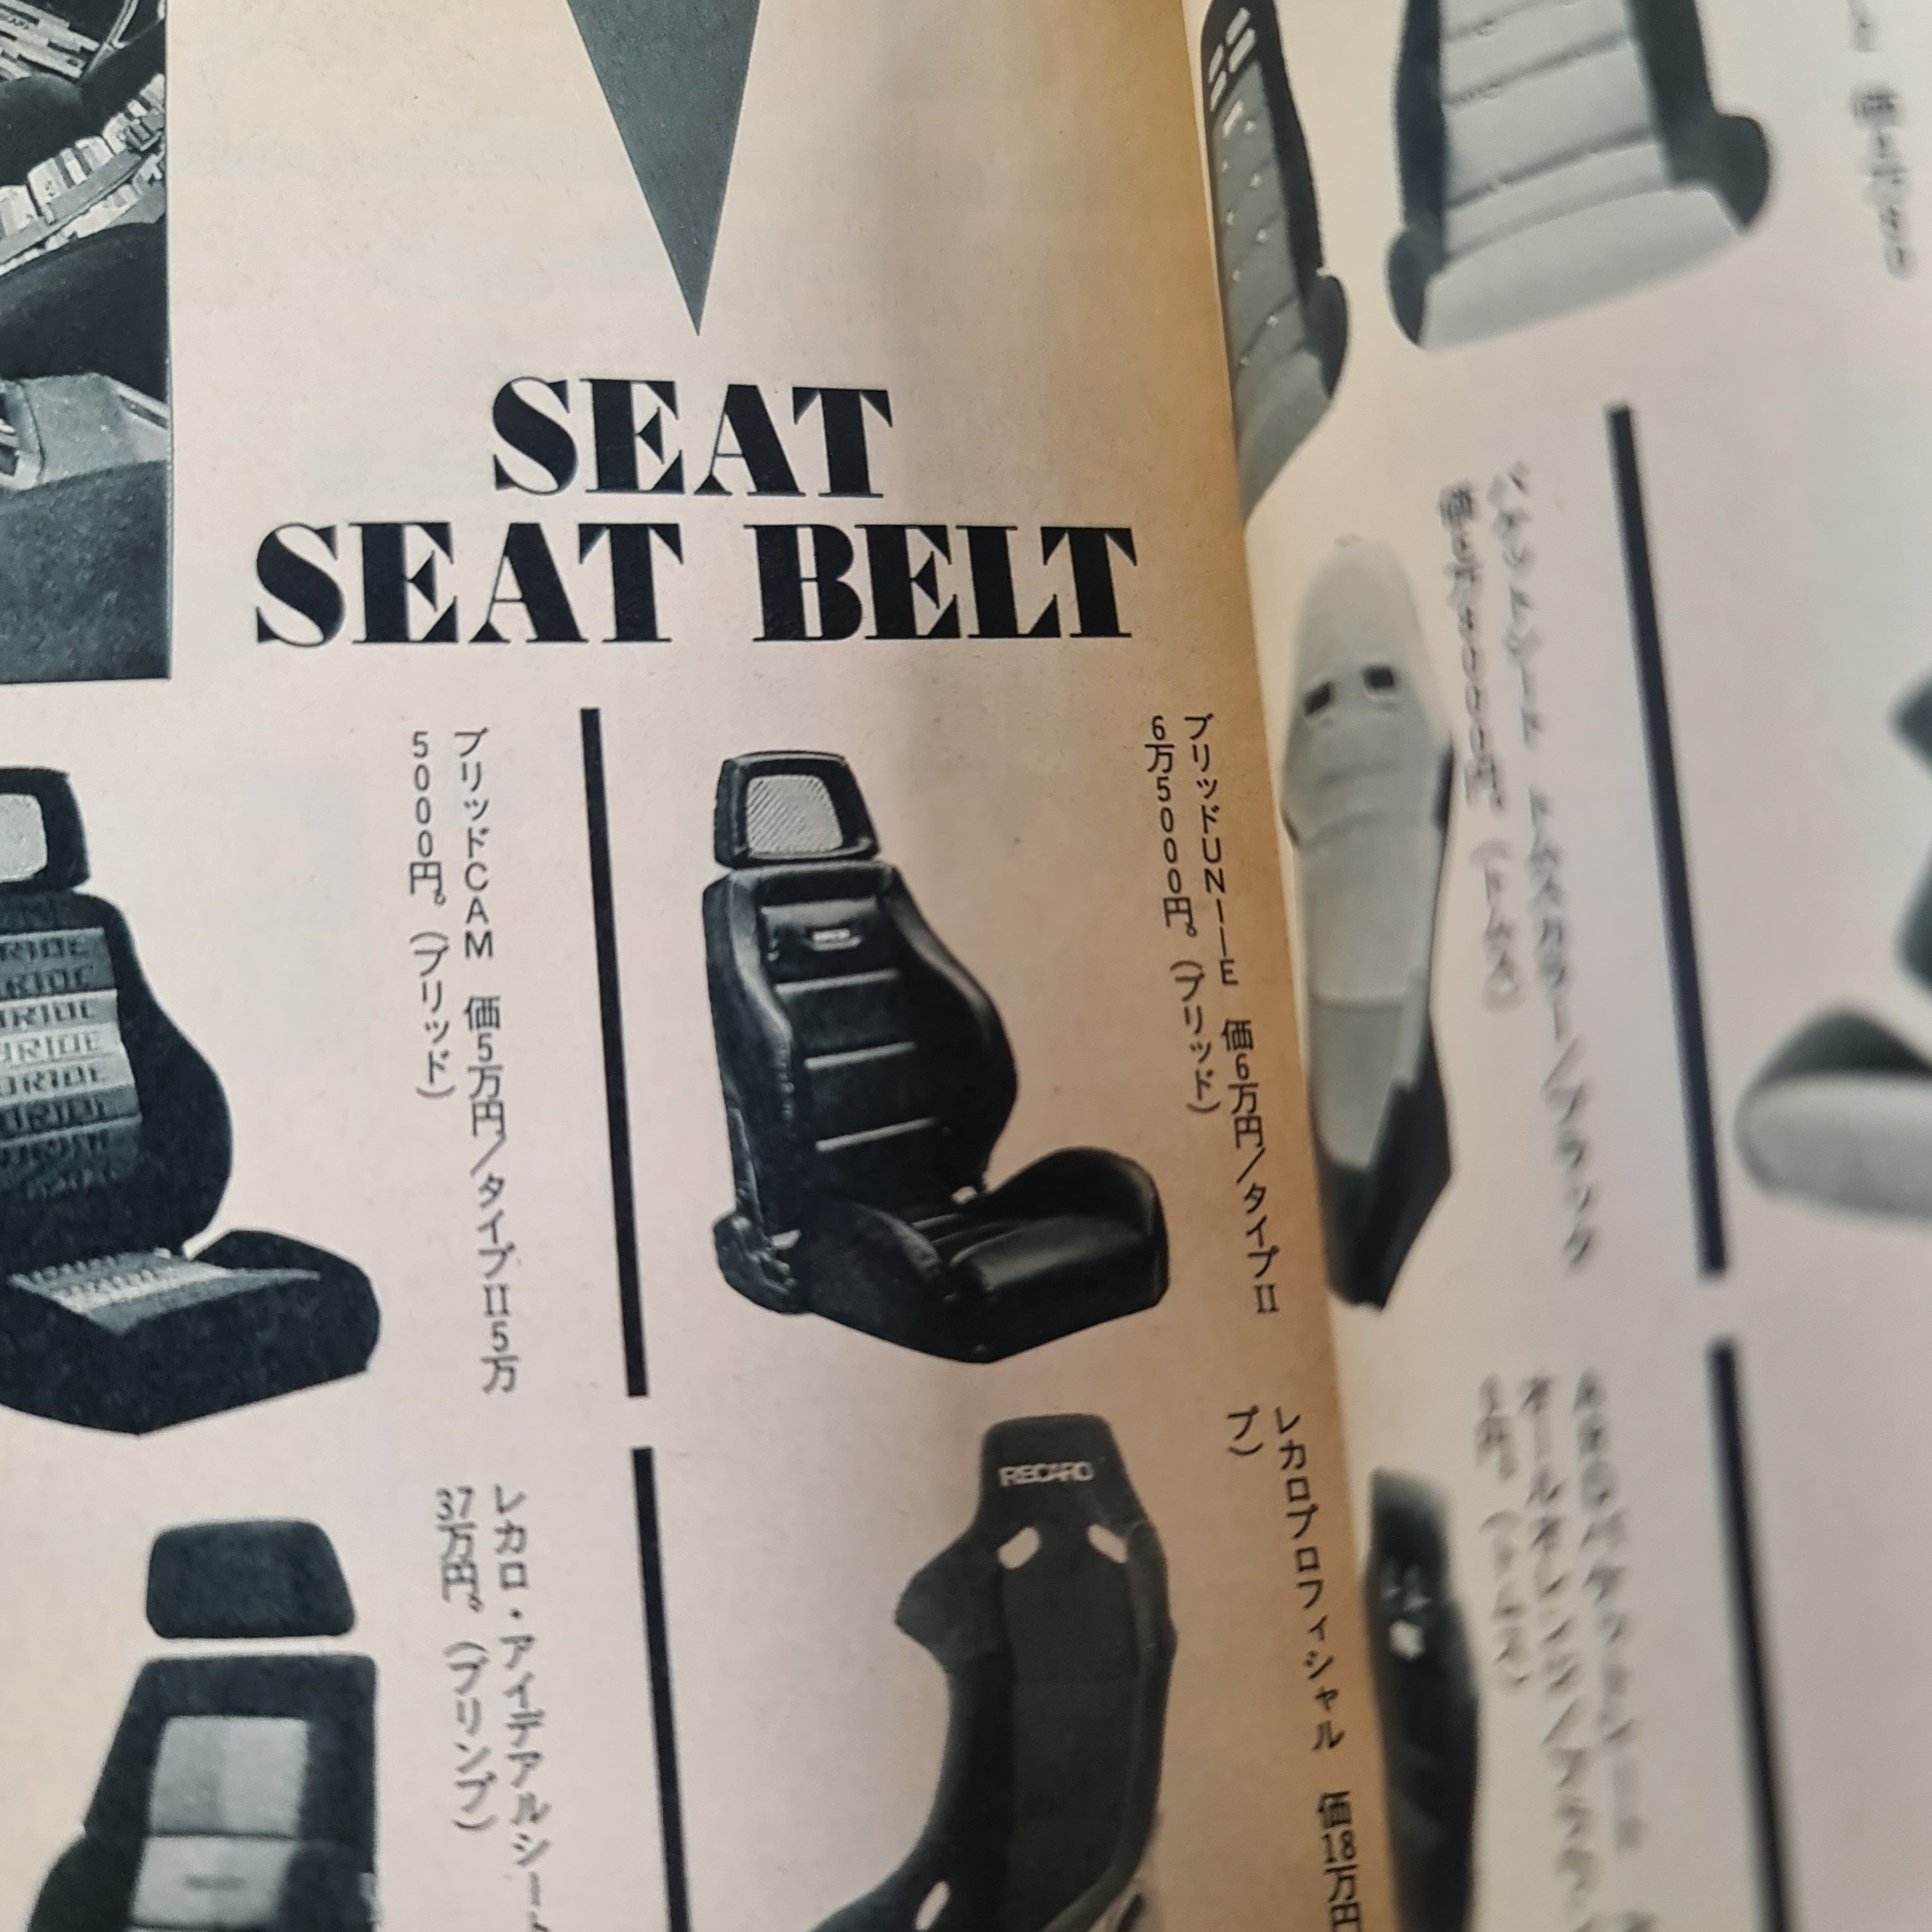
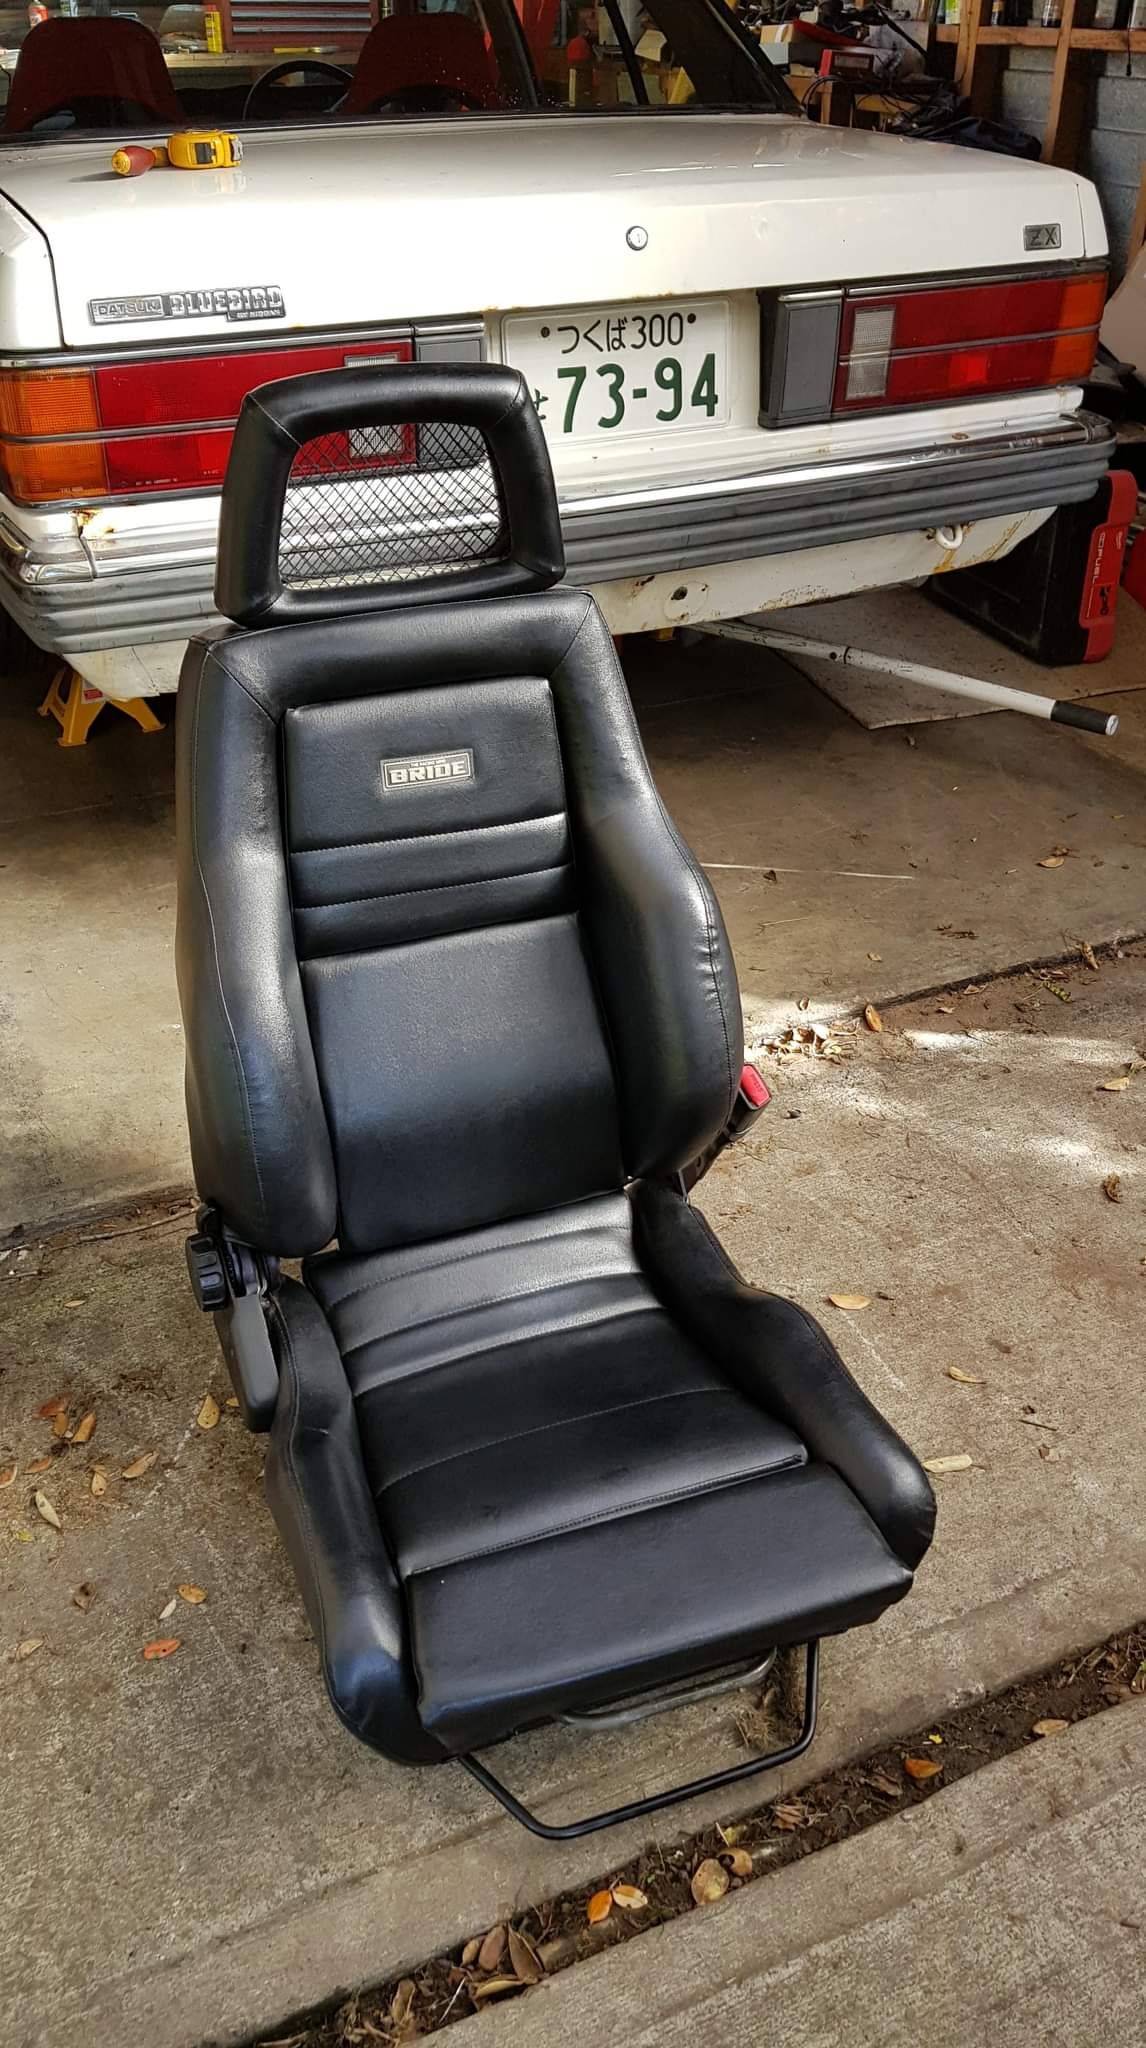
Have been a bit slack on working on this but have word the tailgate is almost done. As much of the bottom straightened as possible and then some filler to sort the rest. Purchased an old fiberglass fixed back to run in this as a bit of a tester to see how bad the shipping prices from Japan are for them. Who is Alex? I'm not sure but I have a vague memory of flicking through catalogue pages and seeing the name so went for a sift this afternoon. Listed in 1989 CARBOY sports tuning guide from Japan is the 'Mr Alex' fixed seat for ¥28000 Also found my old Bride reclineable which I didn't think was an original upholstery at the time
5 points
-
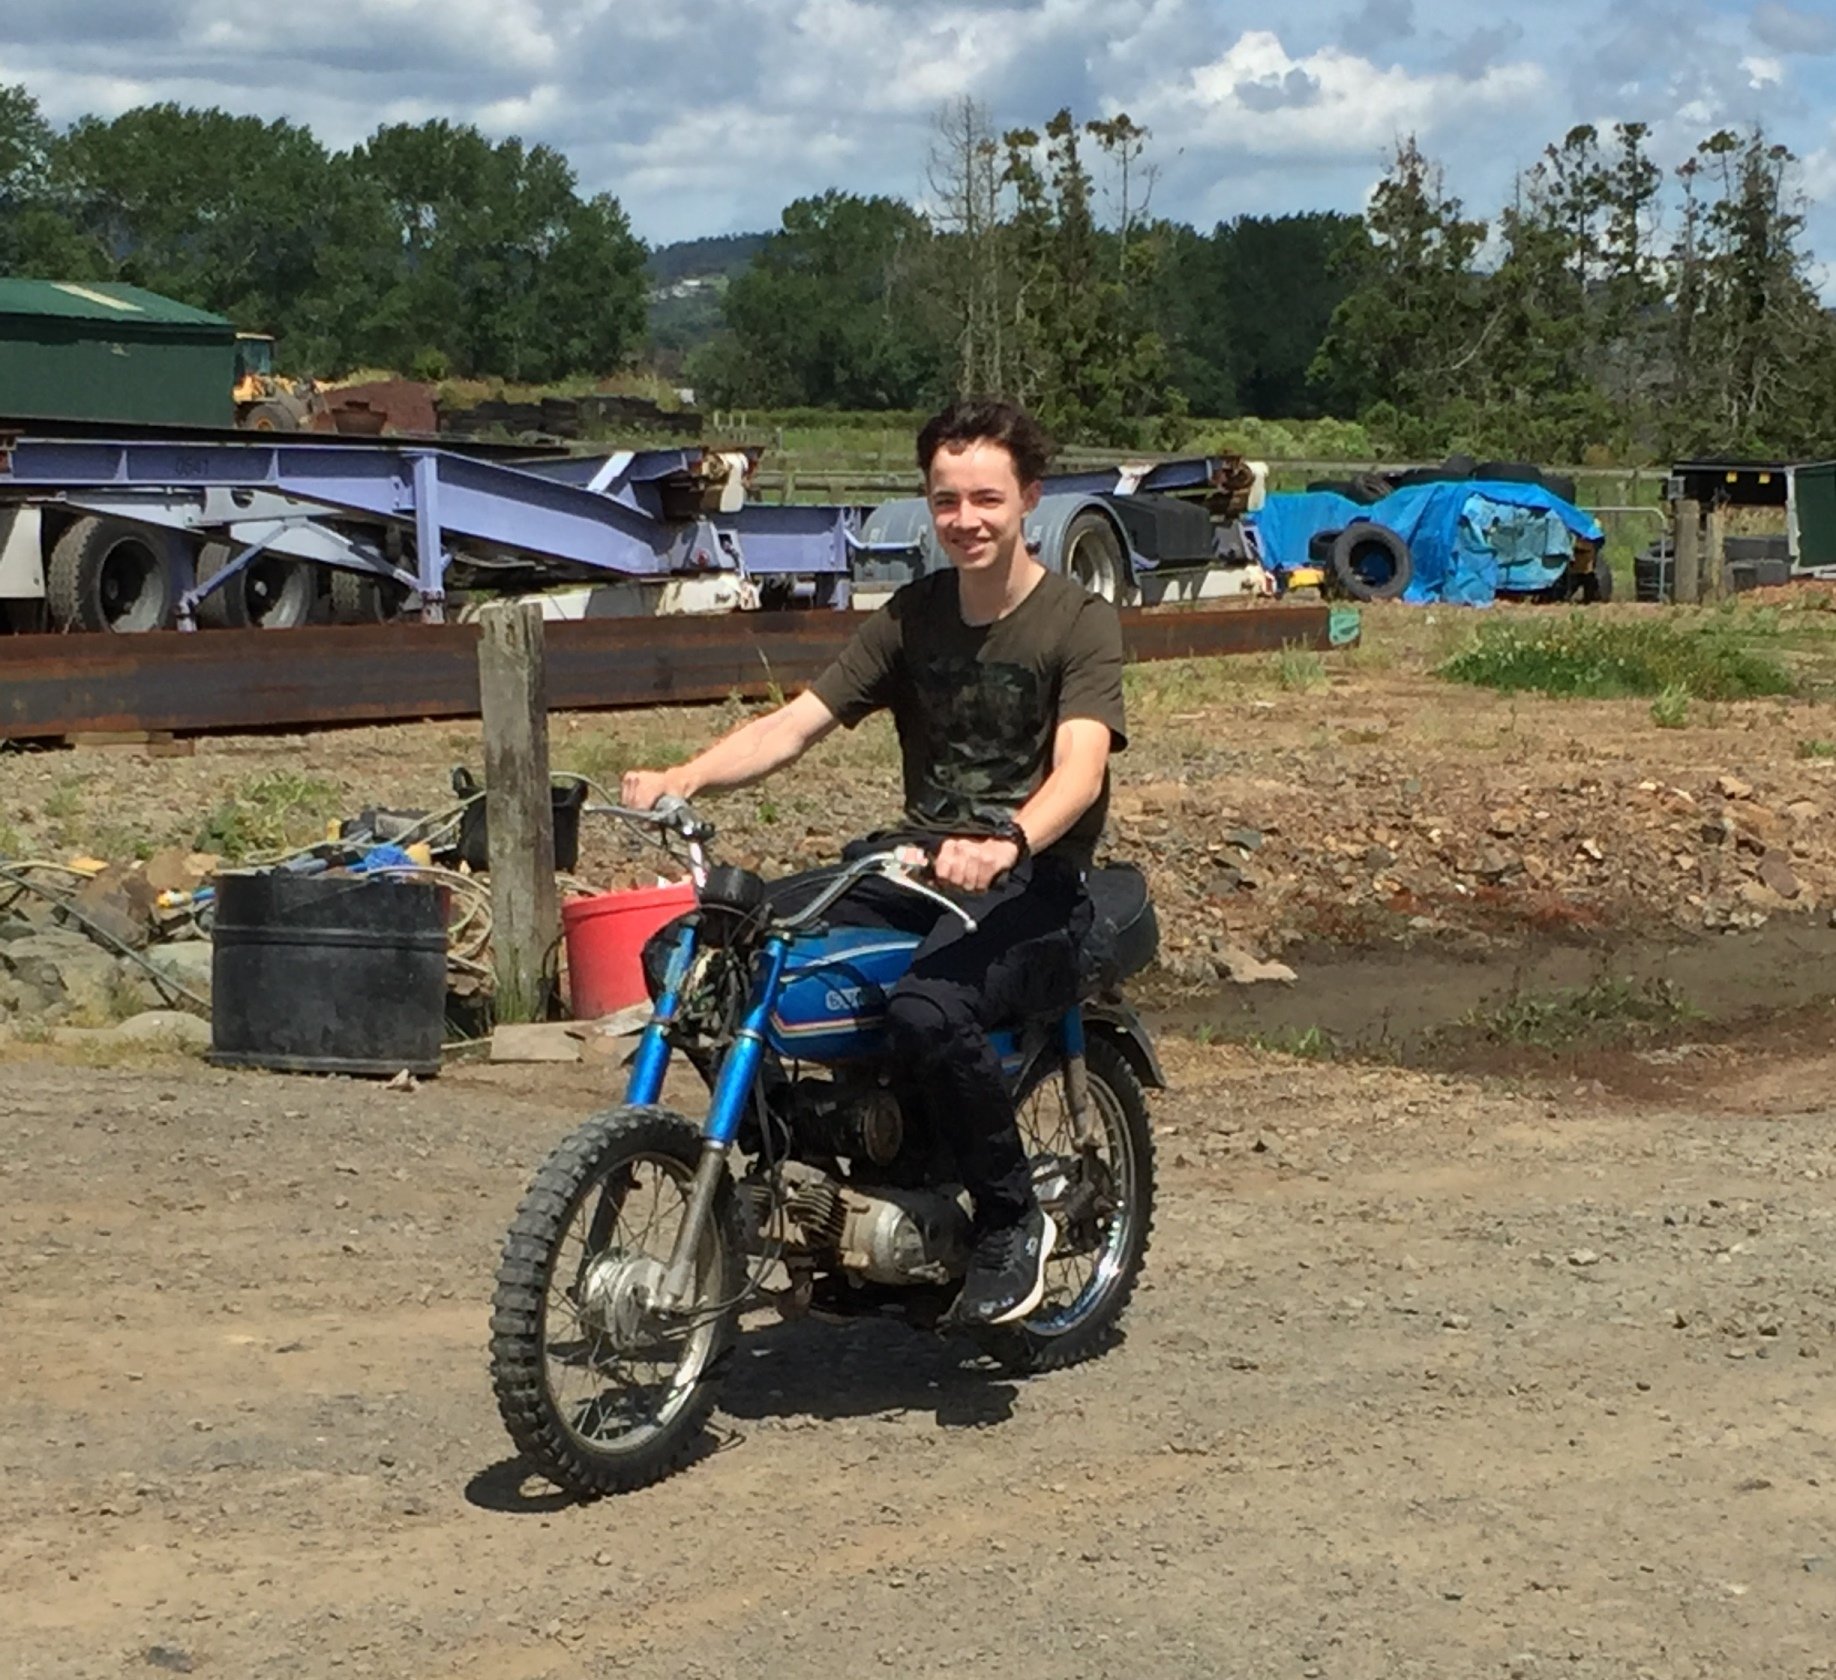
And just to add, Feeling sorry for Red "The concrete mixer", so it'll probably get a rebuild shortly too, then We'll start attacking some some of their looks. Pic of Kempy Jr. enjoying his first ever motorbike ride, you kinda get the feeling he was enjoying it once he mastered the clutch.
4 points
-
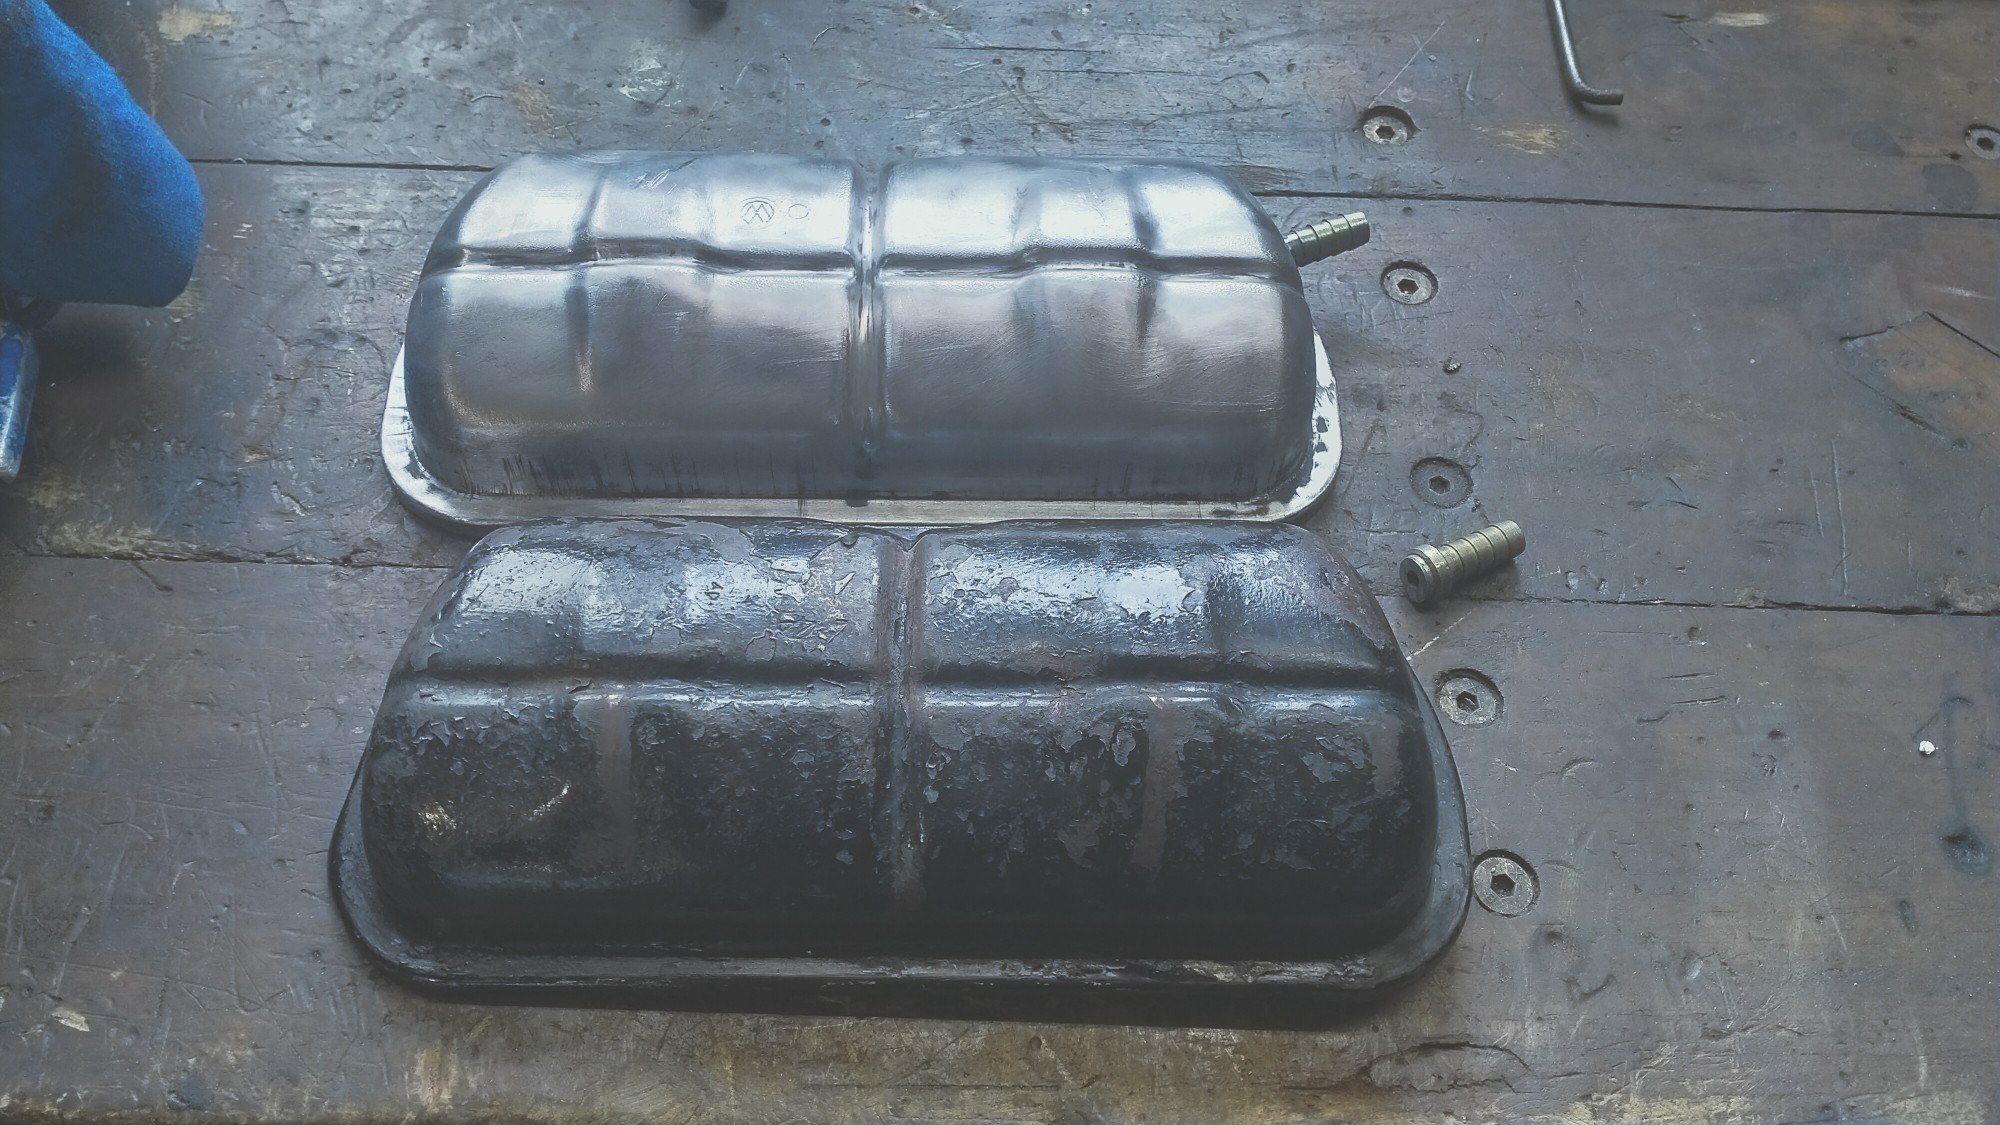
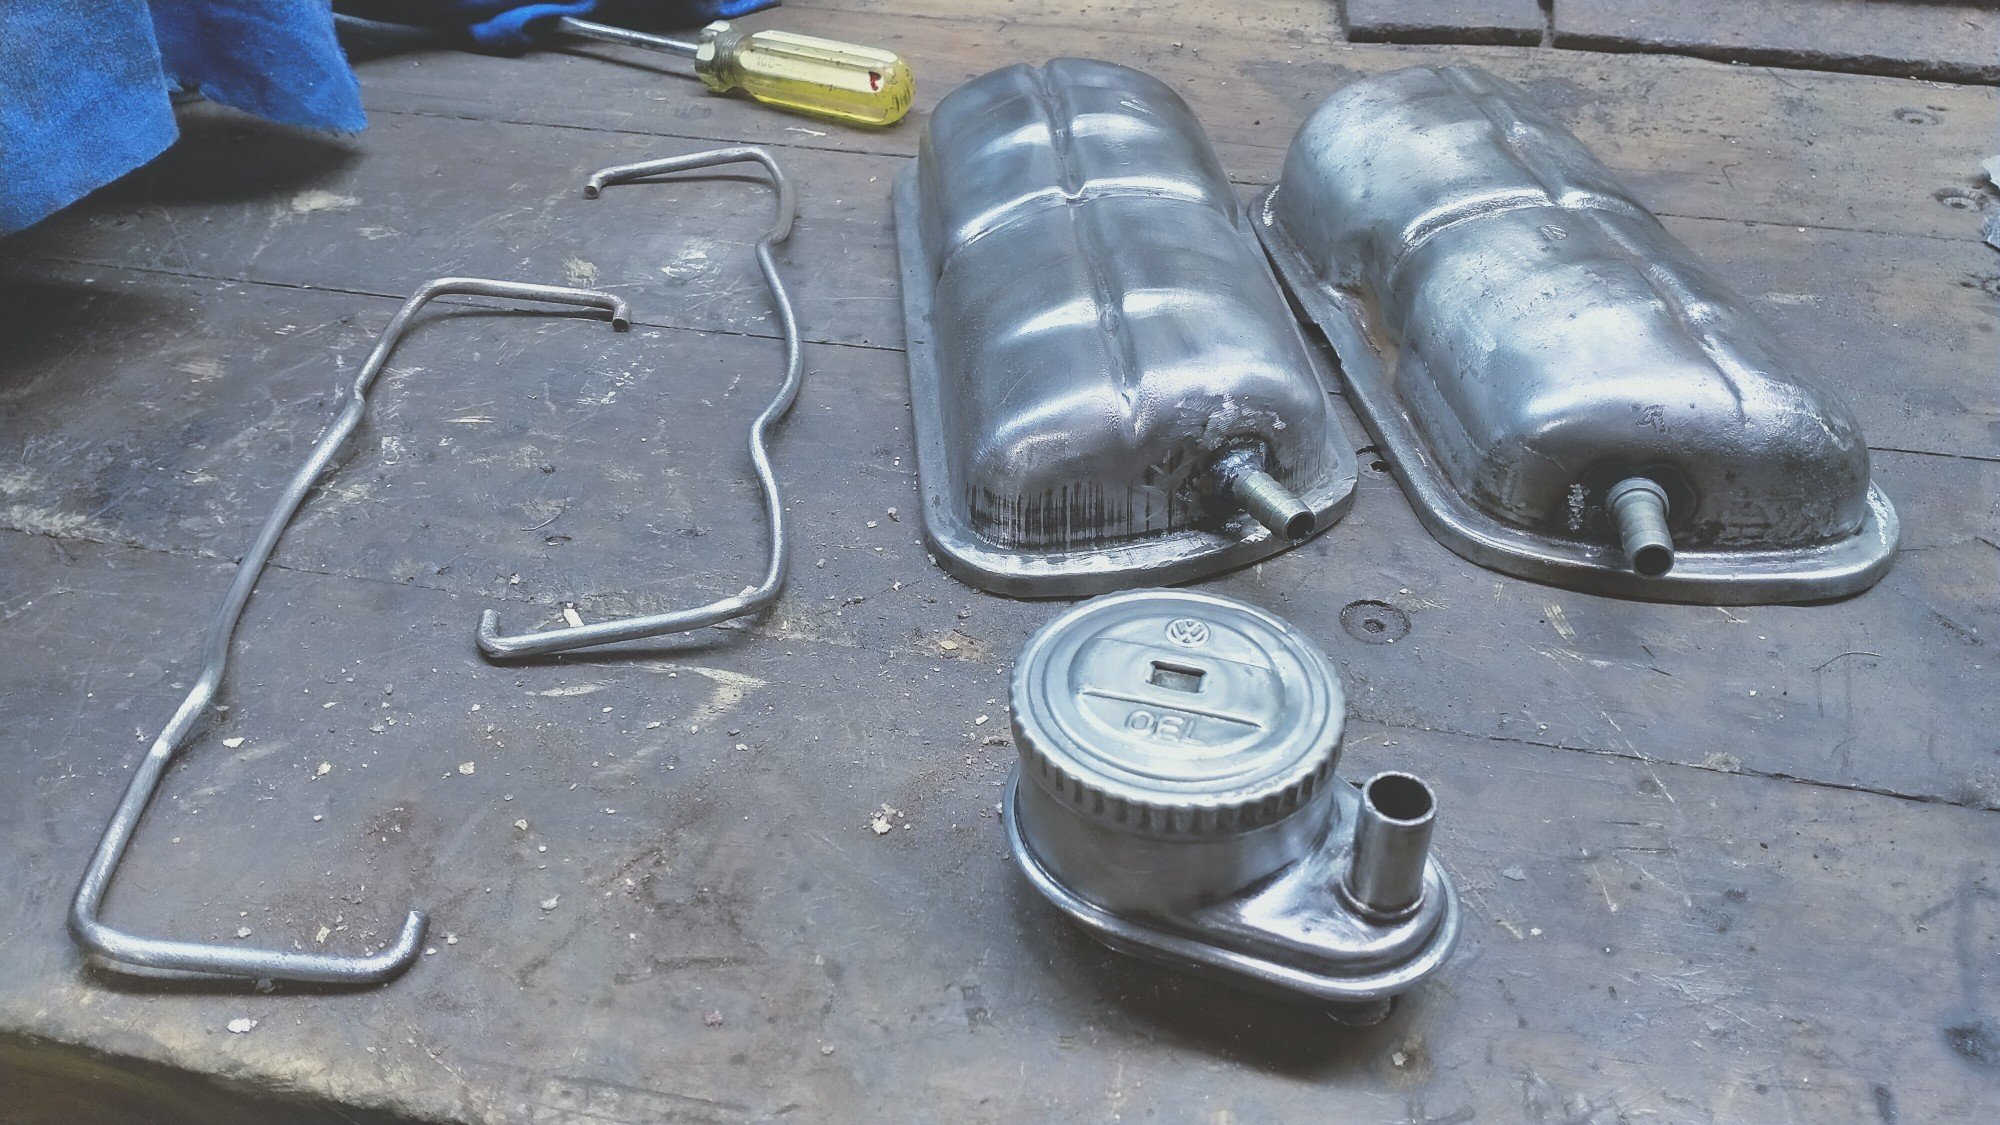
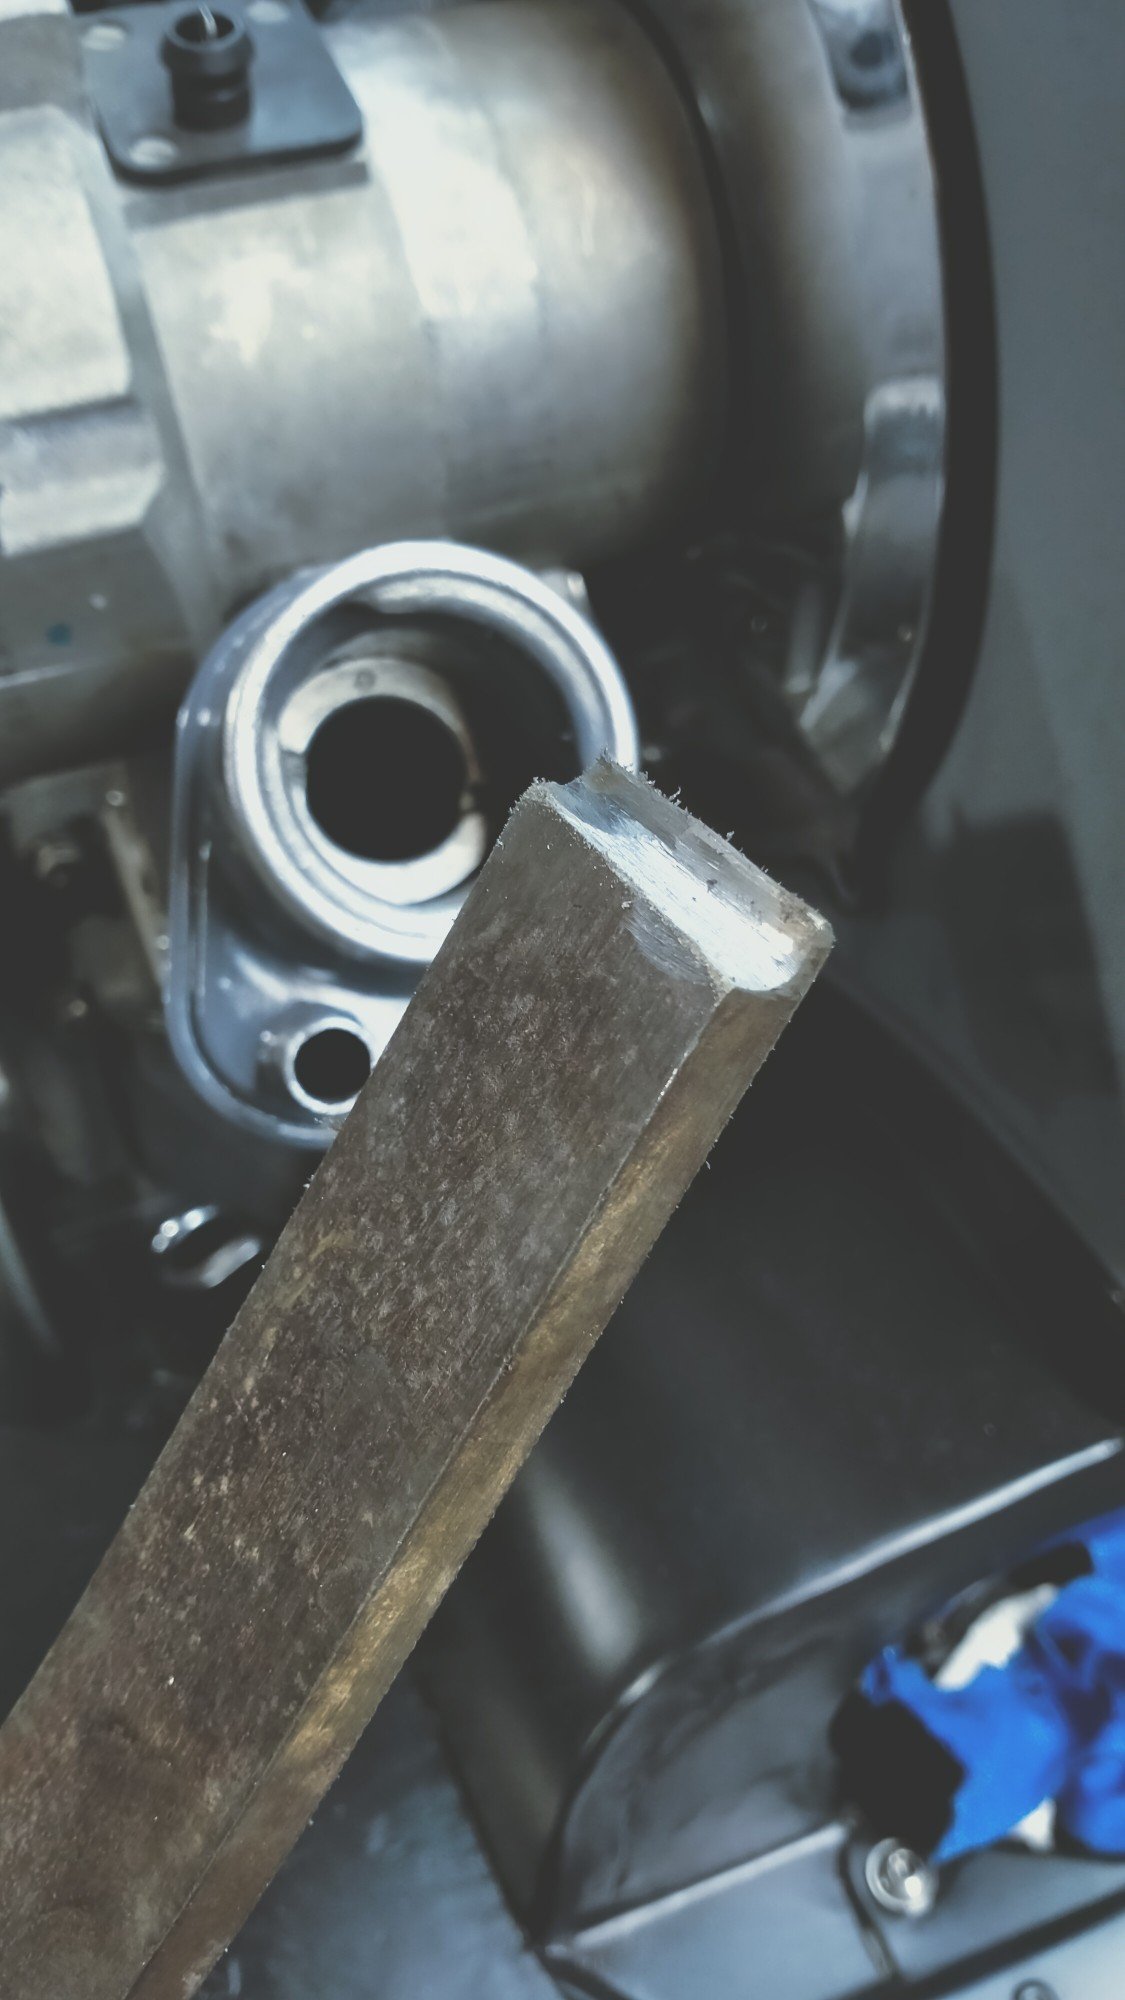
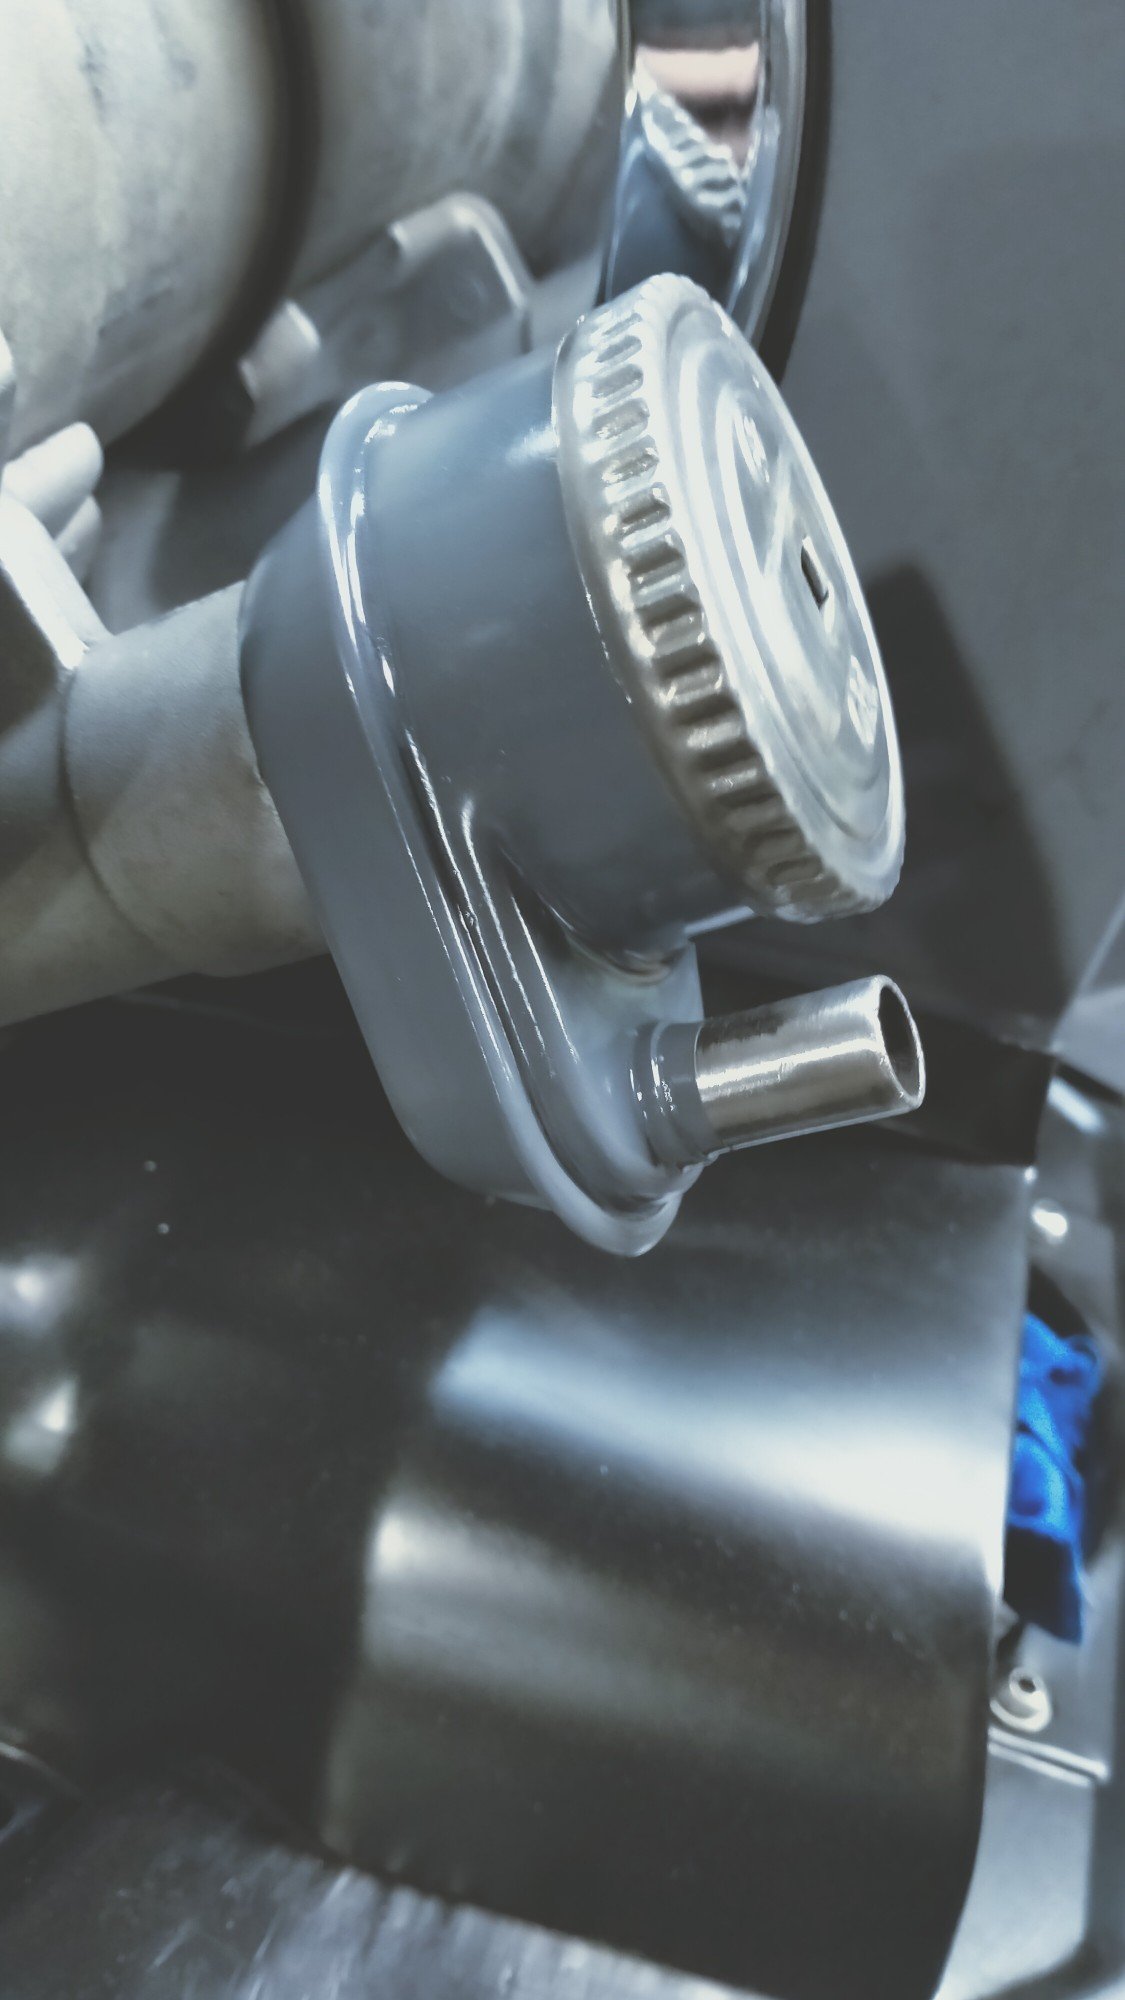
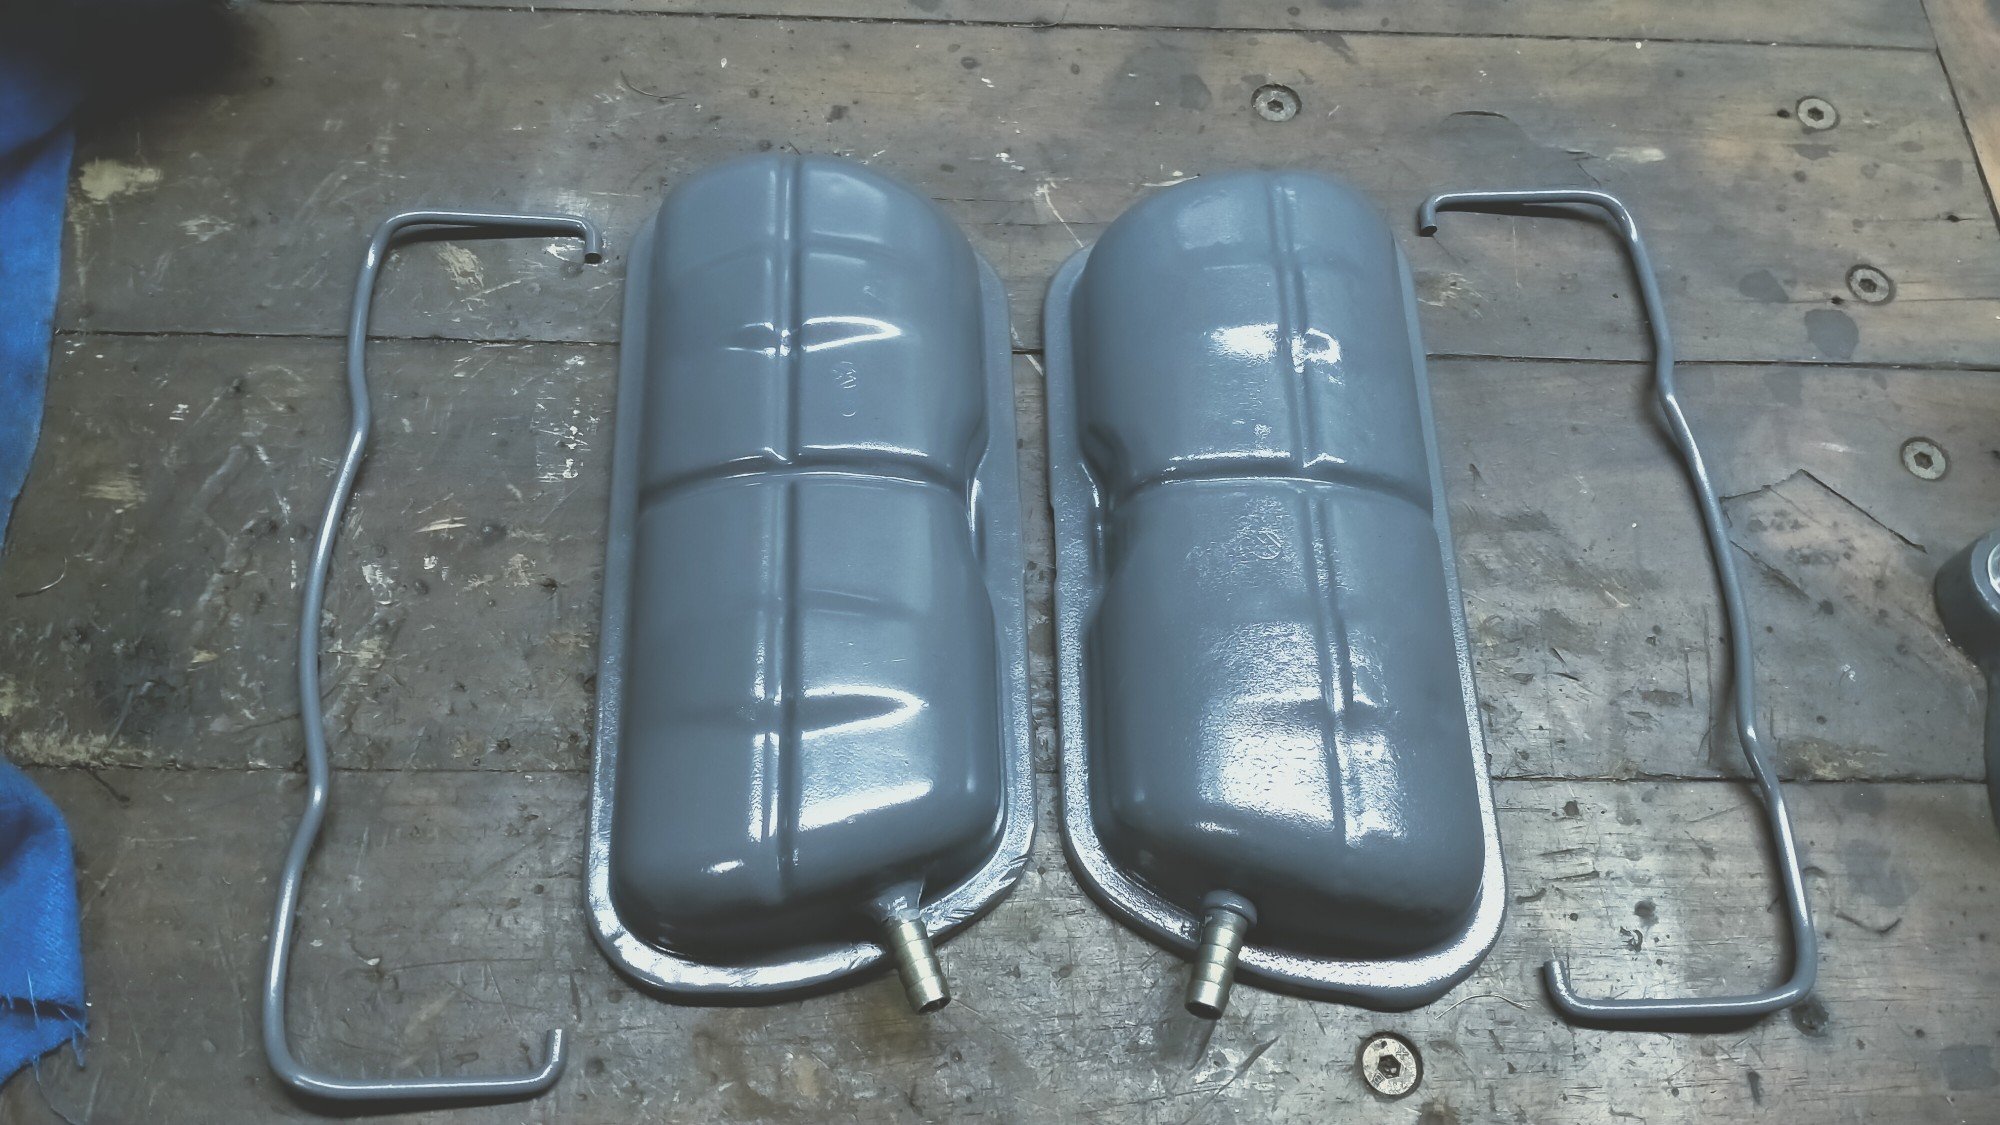
In a effort to reduce future oil leaks, I wanted to improve the crankcase ventilation. There are a million opinions on this, so I've pretty much gone with the old school factory baffled oil filler and vented valve covers, which will be plumbed up to a catch can. Found some old air connecters, cut them up and welded them in. Had been wanting to do this forever. Unsure of the grey. Had to make this to screw in the big interior nut that holds the filler on. gunna kill me the first time I slide the bale's up and scratch that paint!
4 points
-
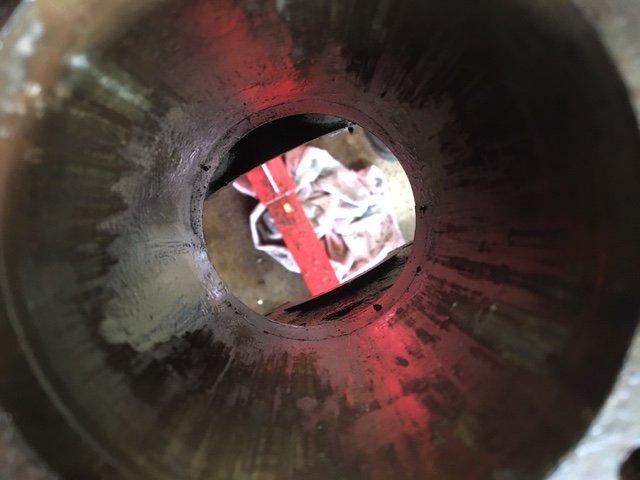
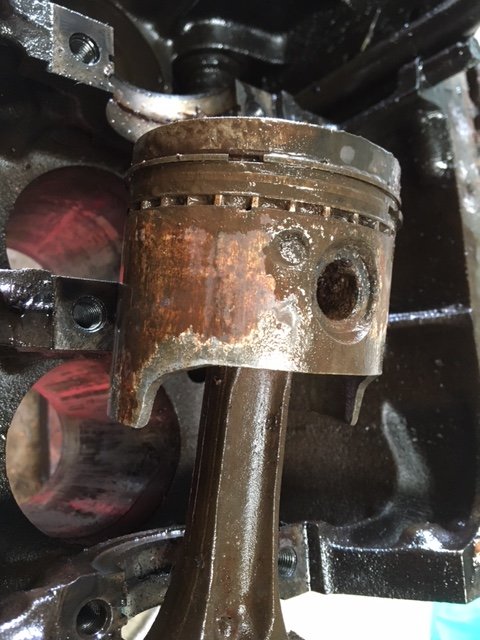
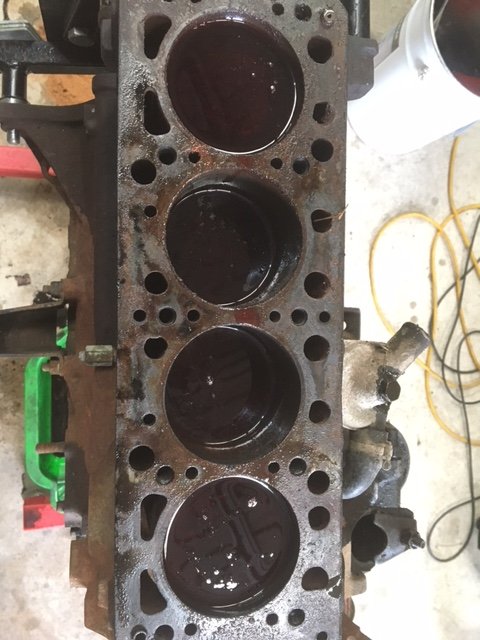
Rewinding a little, I stripped the spare engine. Remember how I had written earlier that the vendor had stated it had “good bores”? It seems my scepticism was well founded! mhmm.. Ooh, nice. Clearly well maintained. Won’t turn, so soak them pistons Three days later, 3 pistons out, one still firmly in. I tried all sorts of brews, heat etc. Hammering with a wooden drift did not work at all, the drift was absorbing too much force. In the end I smashed it out with a steel drift. During this pounding, the head flew off my big ball pein hammer and of course it landed on the CAR!! Bounced twice, and luckily missed the boy, Anyway, check out the mint bore And piston I will scrap this piston due to the loads I imposed on it during extraction. So I have a usable crank, head and some pistons and rods and of course the block could be used if bored out, but since pistons are unobtainium that’s academic. The cam lobes are rusted to buggery and the intake cam is rusted into the cam box and I’ve been unable to extract it.
4 points
-
It's because you aren't putting the nitrogen through your waterblaster, that'll make it chooch properly.3 points
-
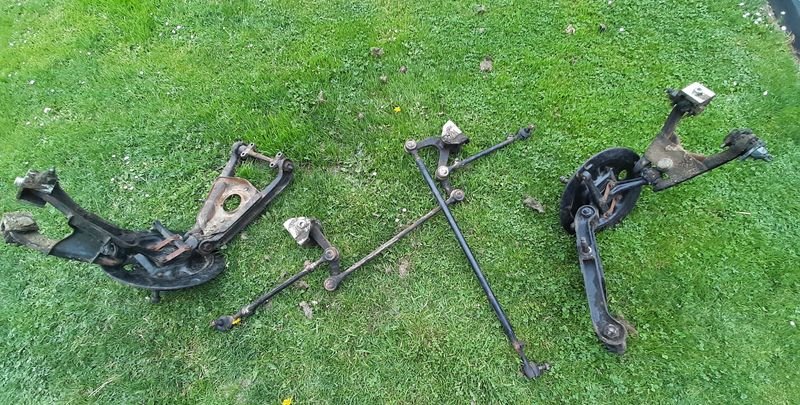
Scored a few bits for the BlueWaffle last weekend. A mate sent me some pics of a City at Manukau U-pick, so myself and @piazzanoob went for a gander. My seats are pretty wasted, so the plan was to use the Manhattan City seats in the blue car, but thats still down south so I pulled a good rear seat from it which will clean up sweet, and there was a ba5 Prelude there too, so I robbed the front seats from that. Also got a drivers lower arm which has a better balljoint than mine and some other random bits that were missing.
3 points
-
I second this movement, neatsfoot oil is excellent. Also, when we ordered it last we got it under @hampie's name and they kept sending saddlery warehouse advertising stuff to her. Got to tease her about being a horse lady whenever it turned up til we moved house.3 points
-
So what everyone has actually being waiting for, the final comparison between Toyota Altezza RS200 3SGE BEAMS and a Honda Accord Euro R K20a engine in the same chassis Still trying to get my hands on a single dyno sheet with the 2 different engines on it. So this will have to do. Modifications/Setup Toyota Altezza RS200 3SGE: 120,000 k's SQ Engineering Quad Throttle adapter plate 4AGE Blacktop throttles 70mm trumpets Combined Piper Cross Filter Stock Injectors SQ Engineering Slim line alternator (smaller Echo alternator) No Power Steering pump or AC Custom header (TRD Copy) to side exit exhaust 2.5" Adrenaline R muffler Link G4+ Storm (Blue) Engine internally stock Lightened flywheel HD Exedy Clutch J160 Gearbox 3" Driveshaft with sliding yoke into gearbox Oil: Castrol 5w40 Rev Limit: 8000rpm Dynoed in 5th gear 1:1. Honda Accord Euro R K20a: 108,000 k's Skunk 2 Ultra Street Intake Manifold 770cc FIC injectors Skunk 2 74mm Throttle Body. 3" intake pipe from pod filter. Custom header to side exit exhaust 2.5" Adrenaline R muffler Stock water pump replaced with EWP Alternator replaced with smaller Honda D15 one. No Power Steering pump or AC Stock Oil Pump and Balance Shafts replaced with ported Type S oil pump. New Timing chain Lightened flywheel HD Exedy Clutch Link G4X XtremeX Honda S2000 AP1 Gearbox 3" Driveshaft with sliding yoke built into shaft as gearbox has flange VTEC 4500rpm Oil: Castrol 5w40 Rev Limit: 9000rpm Dynoed in 5th Gear 1: 0.94076 Same: Tires 54cm Michelin Slicks at 21 PSI, on same Rims Same AE86 Diff (Brakes were changed from stock to AP with knock back) 4.5555 Crown wheel and Pinion. Same Dyno Different: Dyno retarders have changed from 110v to 220v. Results 3SGE : 201hp @7250rpm 173.6 lbft @5150rpm K20a: 206HP @8250rpm 167.9lbft @5300rpm Thoughts I'm a little bit disappointed in final figure, but I think my expectations were to high. You have to take all the HP figures that everyone posts with a grain of salt. Especially anything from the UK who like to give made up flywheel figures when they dyno there cars on a rolling road... Changing from a front wheel drive to rear wheel drive setup definitely has more drivetrain loss, from what I've read a factory stock S2000 AP1 with 240/250hp at the flywheel dynos 200hp at the wheels. Also a lot of people show "stock internals" figures which include changing cams etc. So the power figure is in the right ballpark really for the modifications (stock K20a has 220ps at flywheel) as rear wheel drive. Looking at some of the NZ figures I have seen, the engine would probably get quite a gain (20 to 30hp) from a set of drop in cams (no other valve train changes) But if you ignore the single figure and look at the dyno sheet it pretty much makes 200hp from 6700 rpm all the way to 8700 rpm which is a very significant power band. So overall, it's a good improvement. Shakedown So I then got it out to the track and managed 4 laps before the gearbox lost most of it's oil when a bolt came loose. Luckily I was going fairly slowly so no internal damage done hopefully. However a bigger issue is a massive driveline vibration. Plan A: Driveshaft is getting balanced at 5000 rpm (it does 9500 rpm in 6th) Plan B: CV Front joint on the same shaft, or a replacement driveshaft. Driveshaft is to short to go 2 piece and we think the angle of the engine and gearbox is impacting the universal joints. However aftermarket CV joints for these are supposedly not very good. So currently looking at options. Car definitely felt like it was pulling really hard, but with so few laps, and me just making sure everything was working, not a good indication of final result. Videos: First 2 Laps: Second 2 Laps (where it dropped the oil): Flyby (Potato Cam):3 points
-
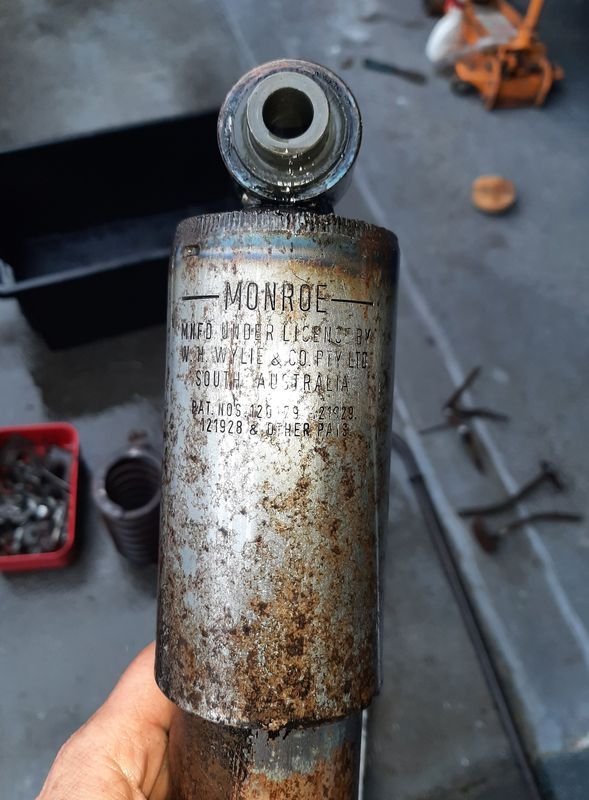
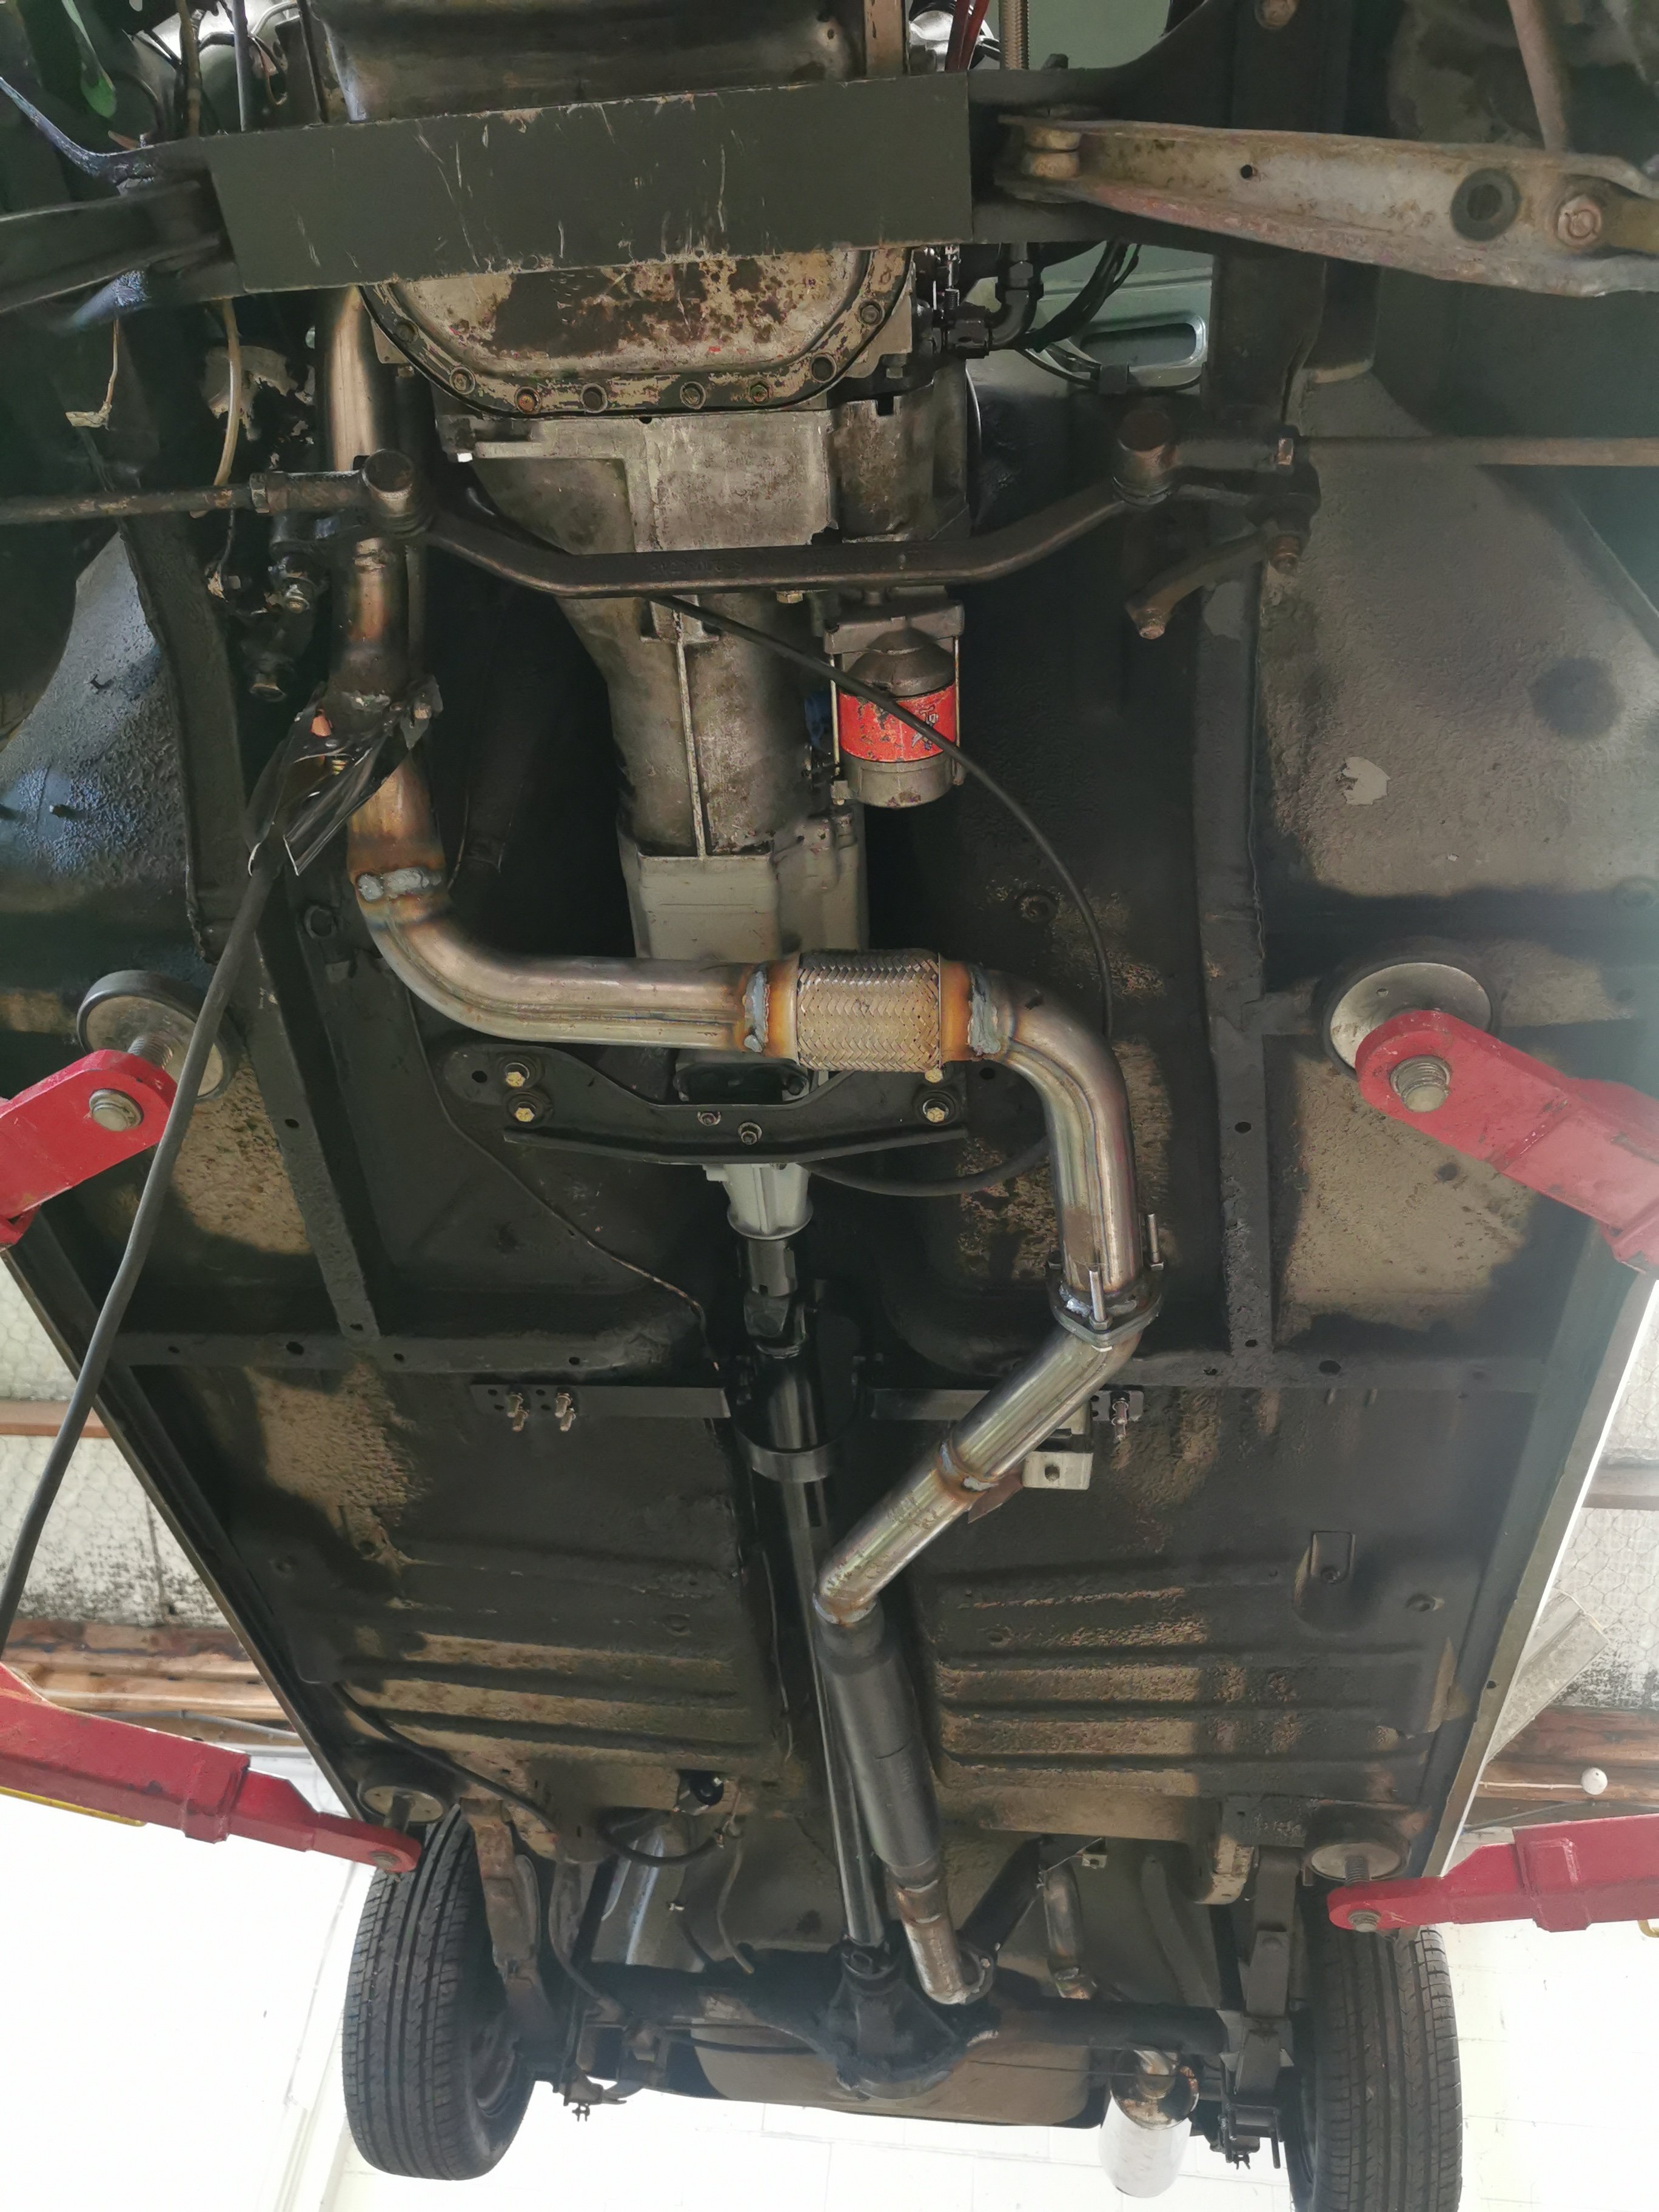
Working on Sundays. It's exhausting work. So I decided to pull the headers and make them tuck in a bit more. This has given the steering arm an extra 15mm clearance. I wasn't happy with 10mm clearance. Then set about making the rest, to include a flexi and 2 three bolt flanges. I have 2 cotton reel mounts in there at the moment and a hanger on the dumpy. About to make a 3rd cotton reel mount for just behind the resonator/flange to carry that load. Then I'll drop it all, finish the top welds and then spray it in high temp paint. I'm pretty chuffed with it so far, will also check for knocking and clearence issues, but so far it all looks good.
3 points
-
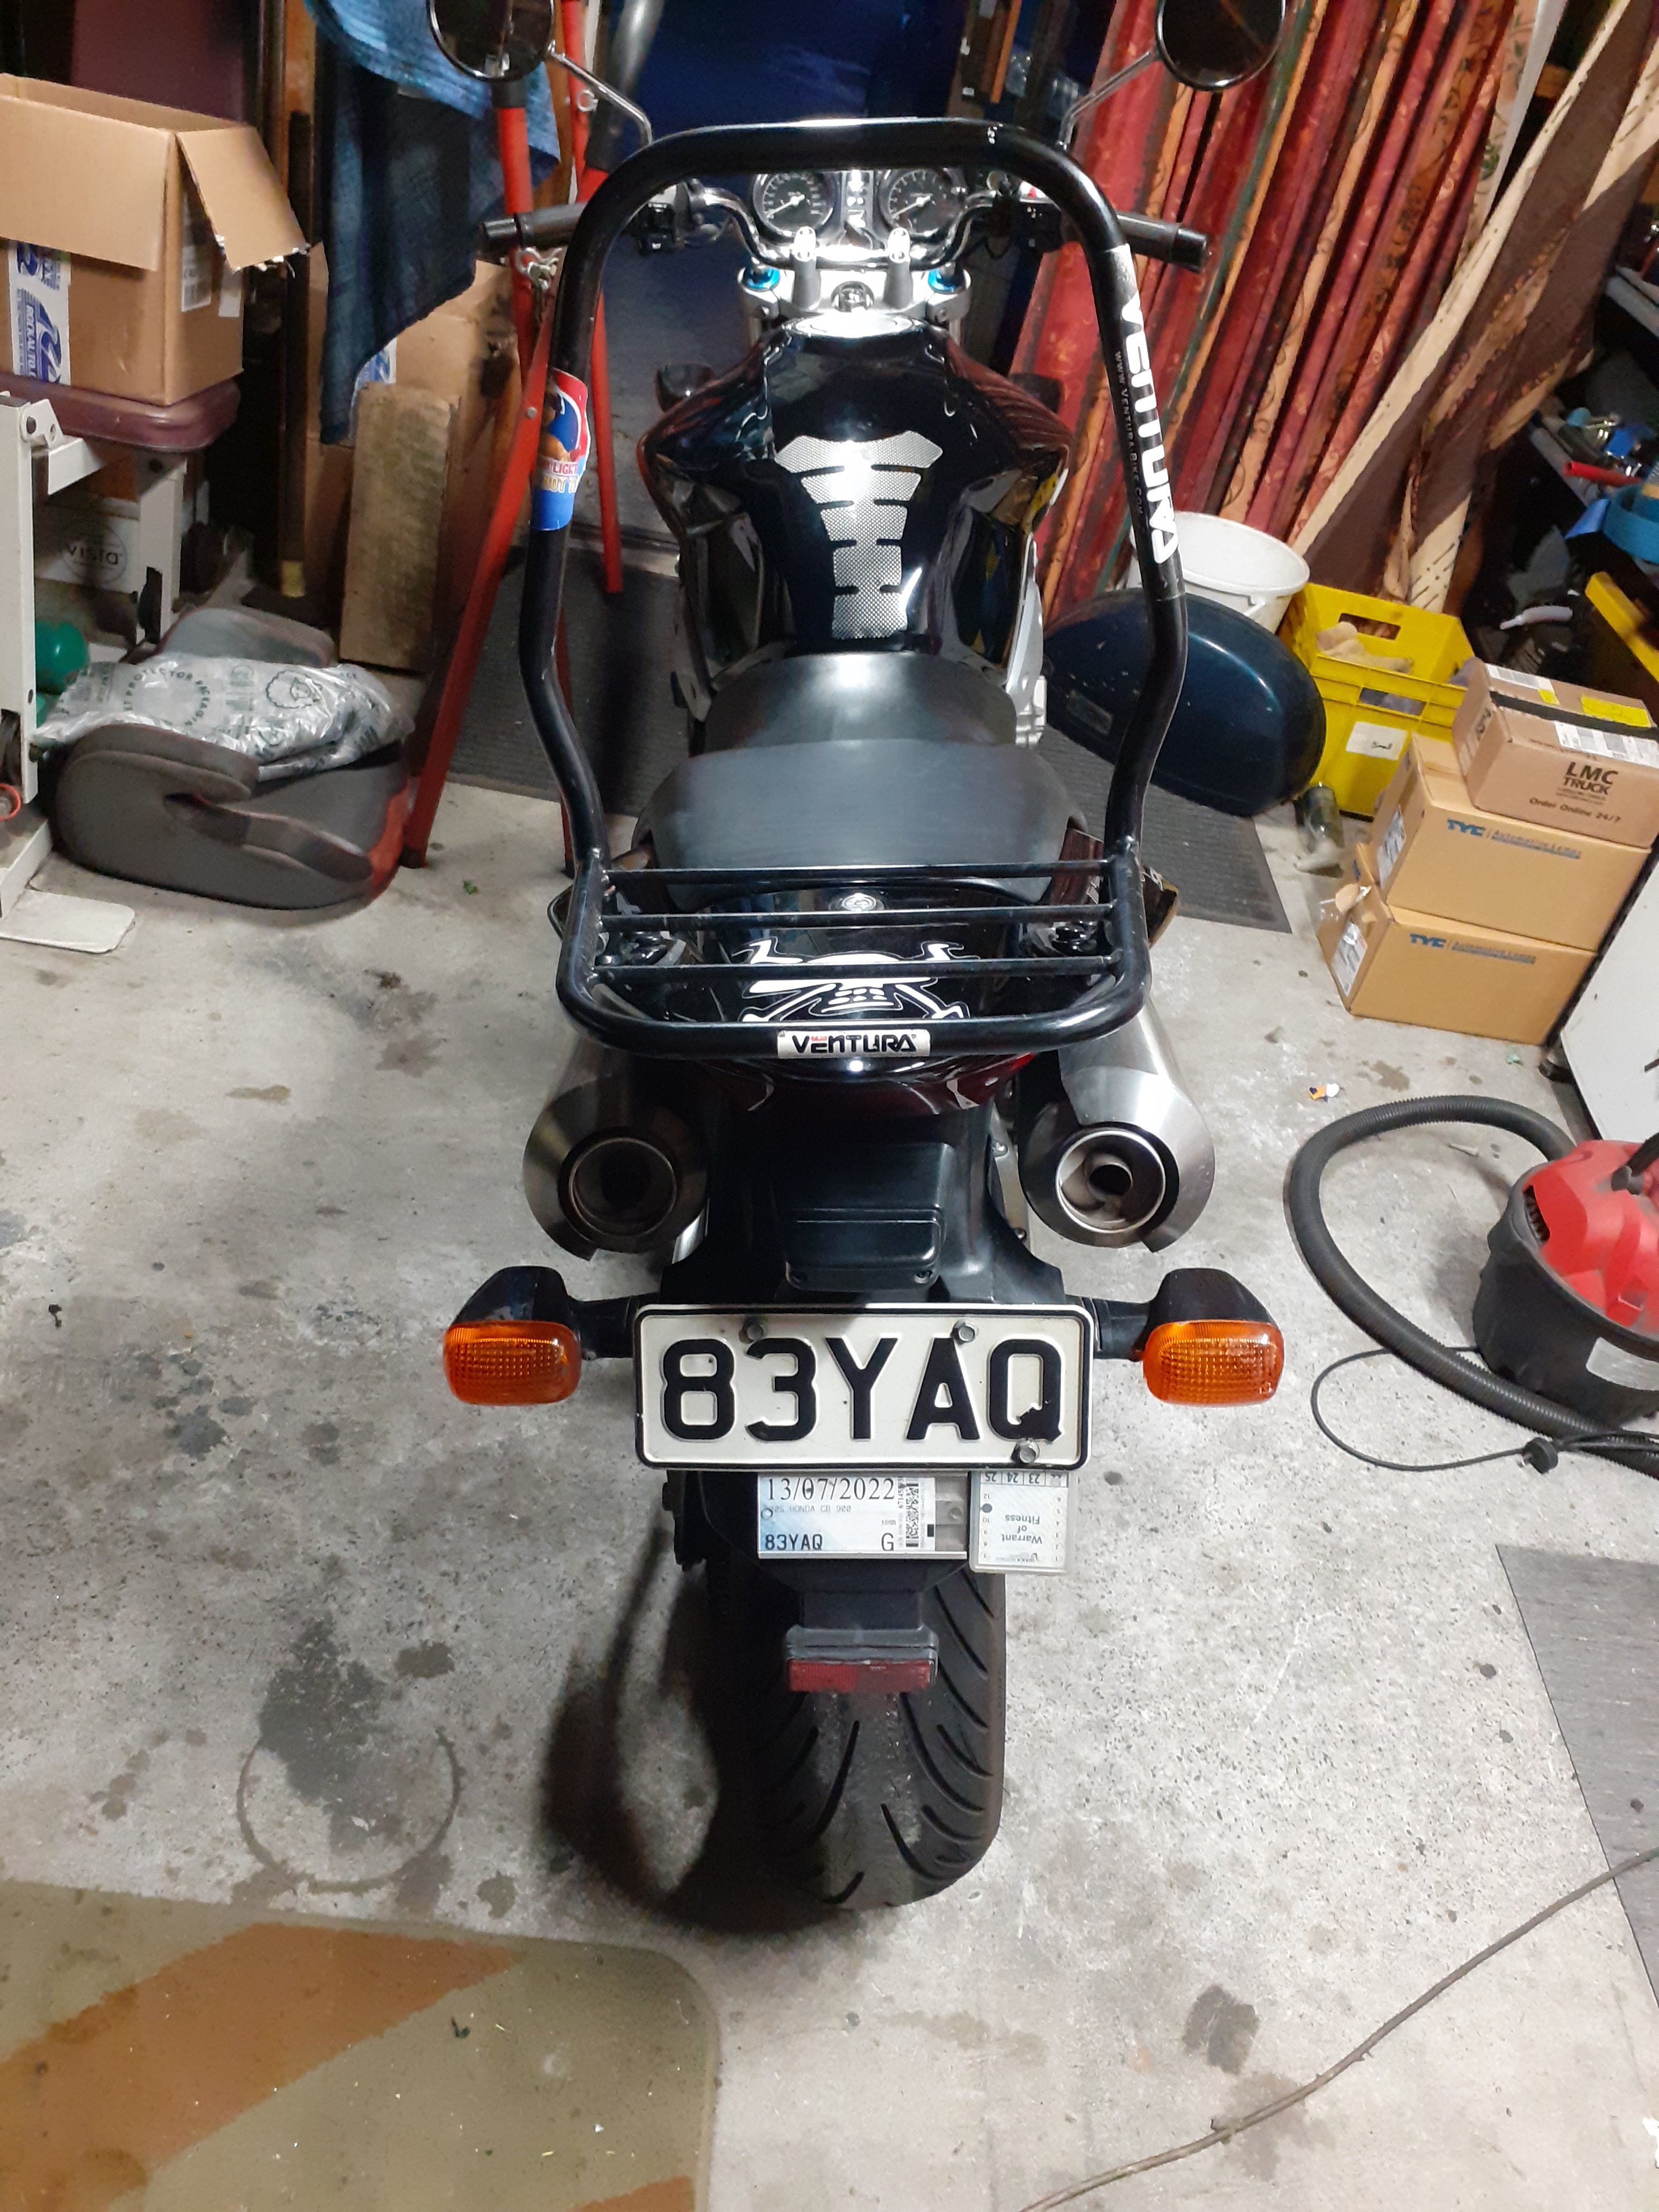
Bum tidied up a bit Rack off, stickers off, rego and wof moved out of the environment, guard chopped off a bit shorter, plate moved up. This will do for now Once I move the exhaust I'll do some small indicators and reg plate lamp and get rid of the guard completely
3 points
-
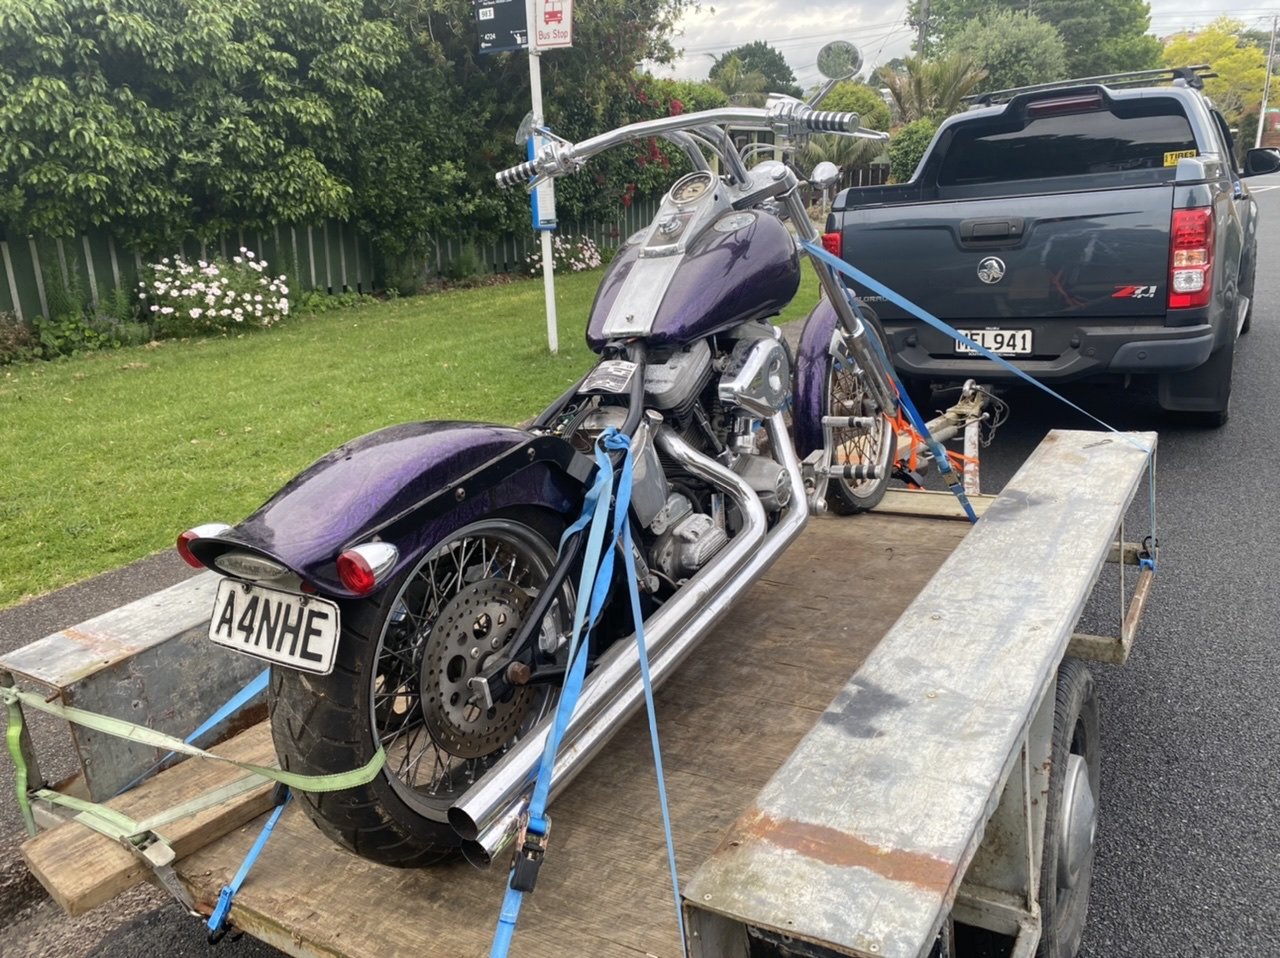
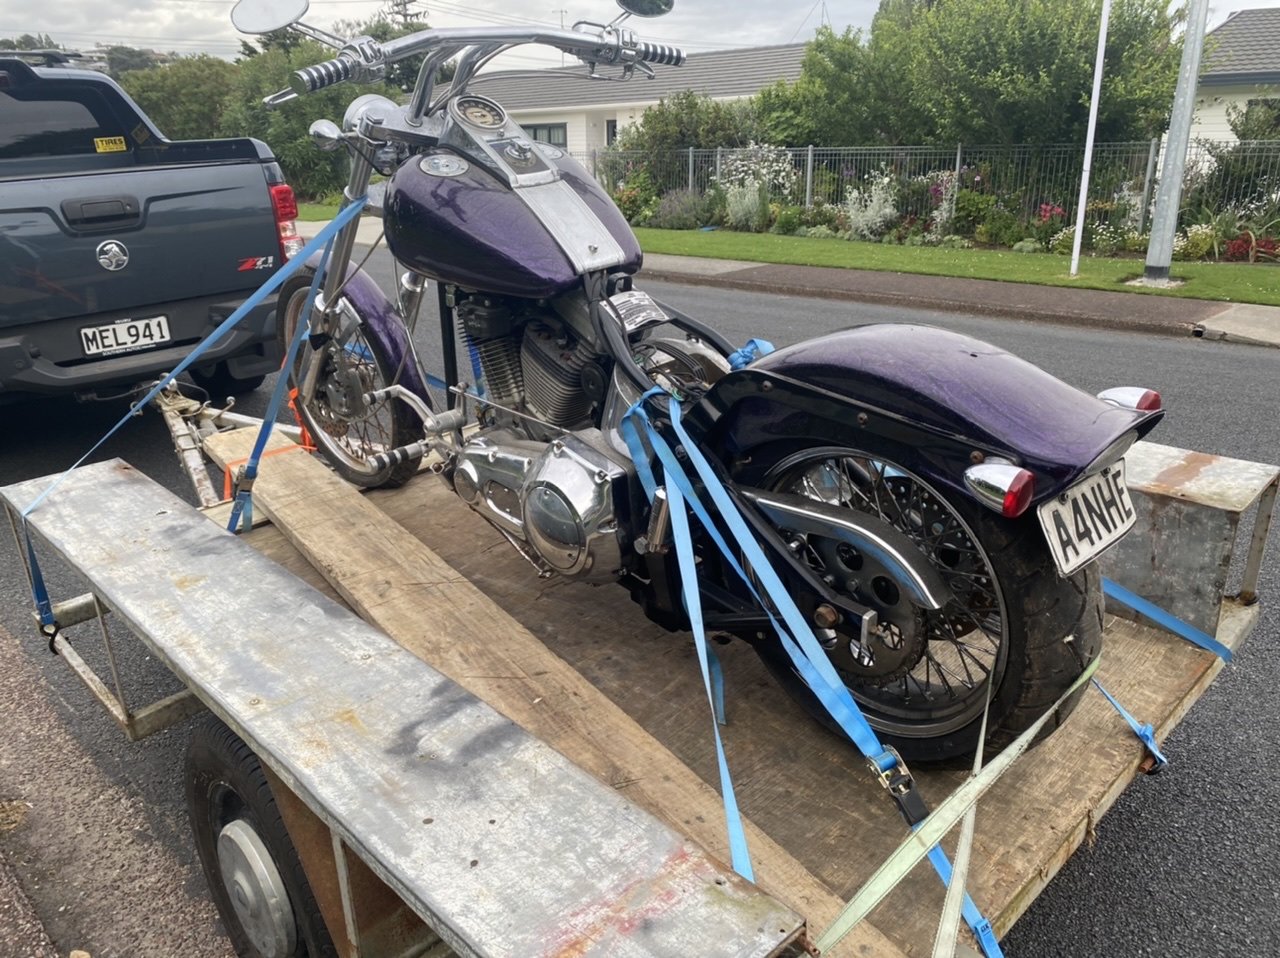
Like getting a tattoo and at the time saying “never again”, then a few years later you start forgetting that pain and wanting to go through it again, I decided I wanted to buy back my old bike. Bought the Don Morrison frame back in 2004, took 8 years and a shit ton of money to finally get it certified and on the road, then sold it 3 years later in January of 2015 for fuck all and having only done about 1200 miles as the oil pump decided to shit itself and I got pissy with it. Fast forward to November 2017 and the guy I bought it off asked if I wanted to buy it back as his Mrs was having a kid and Harley life wasn’t on the cards for the foreseeable future so he was gonna sell it.. he’d spent a bit getting the oil pump rebuilt and oil tank cleaned and sealed (shit in the tank got into the pump).. I nearly bought it but pulled out due to finances and memories still fresh. Fast forward another 2 years to November 2019.. carbon copy conversation of 2017, he still hadn’t gotten round to selling and gave me first option to buy before he tries to sell.. I chickened out again, deciding the money was better spent on a trip to the States with the family instead.. Fast forward 2 more years again, November 2021.. (there’s a theme here and I don’t know why).. my circumstances have changed, I’m single, I have money, and I’m up for making stupid rash purchases, so I rang the guy up and sure enough, he still had it and he wanted less than last time so I bit the bullet and picked it up the next day before changing my mind. Mix of emotions when saw the bike.. happy to get her back but sad to see the state she was in.. only 1640 miles on the clock assuming it’s still working, but she looks like shit. Kinda like a “Barn find” but maybe not the good kind, A lot of the chromed alloy finishes have deteriorated, and a fair bit of rust pitting to nuts and bolts here and there. Gonna probably change the look of the bike out of necessity to my minimal budget, and look at blacking it out.. stay tuned if you like, it’ll probably take as long as anything I do on the Galaxie tbh
2 points
-
Shit, I was the first oldschool member to own this. Got it from The Loot for $200. Then sold it to @Spencer . Then I think went to @pies then @Seedy Al?2 points
-
Ordered a pair of new tie-rod ends and have tracked down an A/C pump too so just finalising the deal on that. Need to make some time for it in the next month now.
2 points
-
smash a 4-age in there, even better a 4-agze The guy I sold my Trueno to dumped it at a wreckers up there somewhere coz it needed new wheel bearings (he a mechanic btw). So there's a good 4-age there2 points
-
That's the OIA thing I used. And I got the reply that they "don't give out that information, and to try carjam". Tori's link might be enough. Will see. Want to wait till I get Harley stuff back before submitting another. Wouldn't want to overload them eh. Harley stuff couldn't be more straightforward, so I don't know why its taking so long. I literally have all the documentation. Its just missing one name on the previous owners signed bill of sale (which I should have just written on it), as the VTNZ inspector wasn't happy that it was a "complete" ownership trail. Just cos of that one missing bit. Ah well. Luckily I don't mind paying heaps for poor service. Its almost been 2 months now. Not a word of the status, despite chasing. Always the same "being reviewed" status. yay, transparency.2 points
-
It has always used a little bit of oil, I suspect she let it get too low. I did warn her... She was on her way to their fav isolated hangout spot, so maybe previous 8k nangs out there have contributed.2 points
-
I've found from experience that 8Krpm paddock nangs with low oil level will do it2 points
-
Alright done. End of thread spam. Part two will be next weeks release and part three will be the week after. Can view with the link anytime before then.2 points
-
Yeh Ill be heading along on my Yamaha F5
2 points
-
Cert achieved! Next step is to make the exhaust a little quieter and then get a wof
2 points
-
I decided I wanted a bigger bike, I'd been going over all sorts of different options for ages but ended up leaning towards something japanese and reliable I went into a harley dealer once but felt weird, like when your aunty sees you walk out of an adult video store Thanks to @MACKAZ for having a look at it for me , it was in whangarei so I got biketranz to deliver it Pretty happy with it, I always find it interesting to see how the type of vehicle it is, influences how you ride/drive it. I thought a big bike may encourage riding like a diddle and going 1 million kph everywhere but this is the opposite, because it's so smooth and torquey it's quite happy bumbling around at the speed limit, whereas DRZ kind of ends up brappp everywhere because it's not very smooth at lower rpm It's about as exciting to look at as a mid 00s camry though so I'll do some cosmetic stuff so it doesn't look like I'm on my way to a Ulysses club run
2 points
-
A few years ago I got sick of wearing glasses and got laser surgery. My eyes suck so they couldn't just do the in-and-out, drive-yourself-back-to-work one. They laid me under the laser, put alcohol into my eye, scraped to the lens with a tiny spatula, lasered the lens into behaving (after warning me that the smell would be the air ionising not me burning) then tweezered a bandage contact into place. I was told I'd have to basically stick to a dark room at home for at least a week. I'd been told what the process was. I was okay I guess, I wanted it and was steeled for it. Then the doc said "cool that's one eye done, onto the other one" and it suddenly hit real. There's no backing out now. I've got one eye done, I can't exactly nope out at that point. While the mystery of the first eye was easy to experience as it came, I knew exactly what was coming now. I suddenly felt very anxious. I'm feeling a lot like that again. One eye done. There's no backing out now.2 points
-
I know, stupid ecu's. I told her if this was a Triumph Herald it still wouldn't be going - but at least I would know why.2 points
-
Congrats on first shake down! One thing to consider is that even if power were the same, your power to weight ratio has improved on account of the weight loss. And less weight in the heftiest part of the car, so there are handling gains too. Also the peripheral benefits you mentioned at the start, like excellent aftermarket support means there's heaps of scope for development. I'm stoked to see it running, look forward to seeing further developments! I reckon you can easily wring a bit more out of the motor with some tweaks. The best part and most fun part is definitely yet to come. Thanks for your efforts to document the actual changes etc, I think this is legitimately the first time I've seen an attempt at a fair comparison.1 point
-
I'll ask a fellow car-guy who lives in that neighborhood if he could oblige.1 point
-
Super stoked to get givn this and a awsome poster today from a total gc will hang in sheds wall for sure
1 point
-
I've already got a copy of that "we don't do that" email as part of my doc collection. Aswell as screen grabs from that site you linked showing that the plate, frame and engine numbers all return "Not Stolen" Hopefully that's enough on that front. I got an official response from Kawasaki NZ saying they had records that it was imported and sold in Auckland by Kawasaki NZ in 1971. So hopefully that's a golden ticket? maybe? If only there was a clear, consistent list of what is required for the applications. But that would be too much to ask for wouldn't it.... So hopefully a stat dec saying how a bought it, and a signed identifier sighting from VTNZ, and that should be enough of a case to submit for the alt docs form approval. Will post my outcomes in here.1 point
-
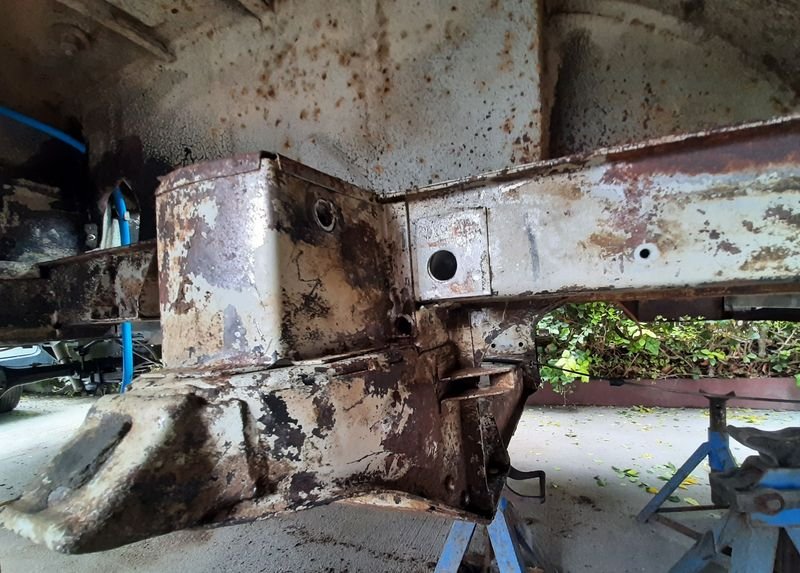
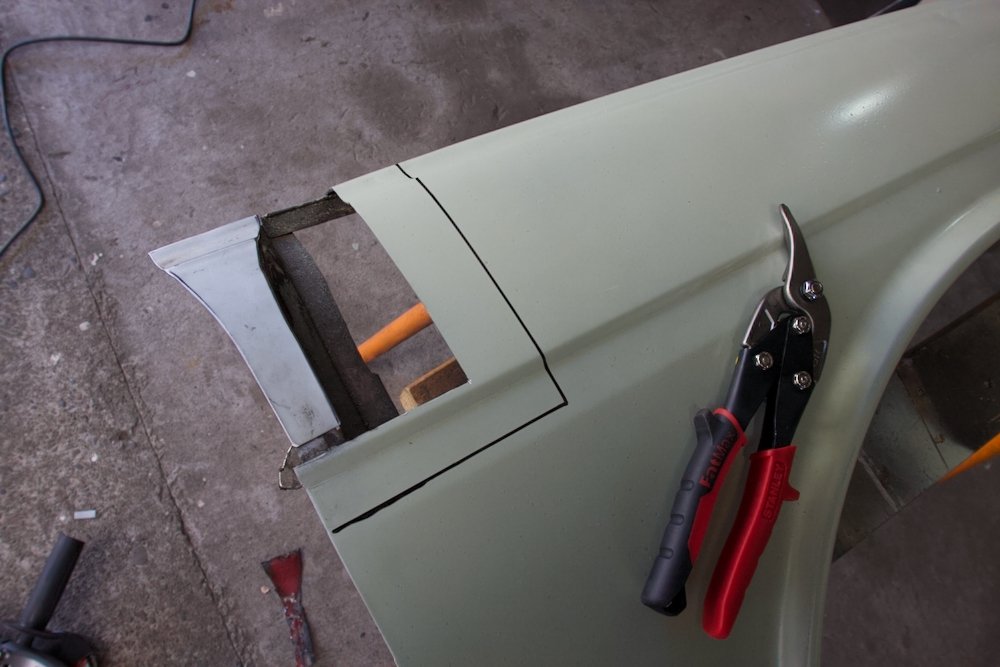
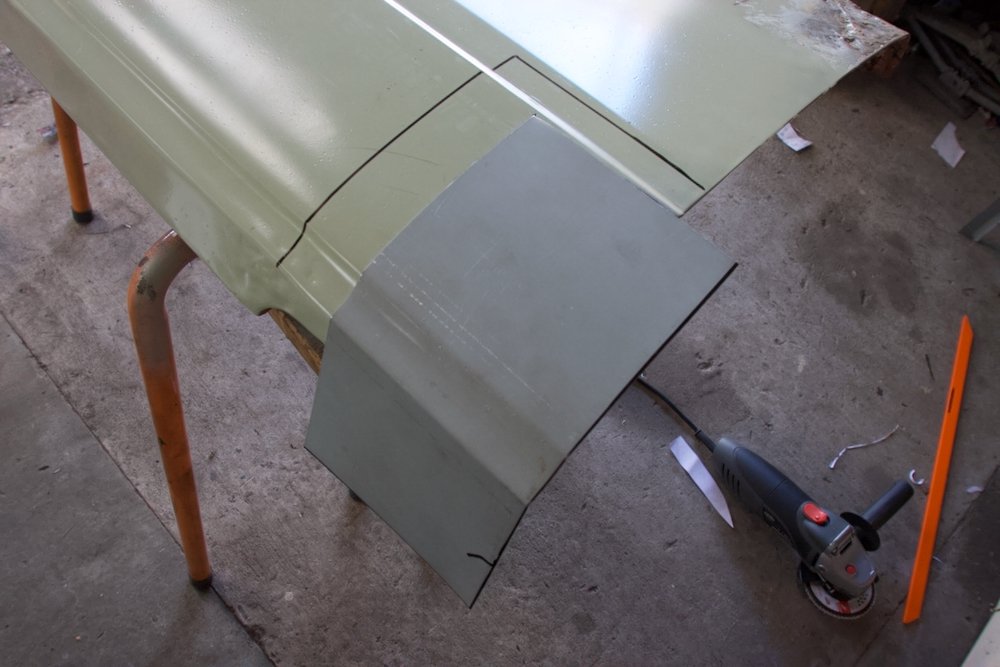
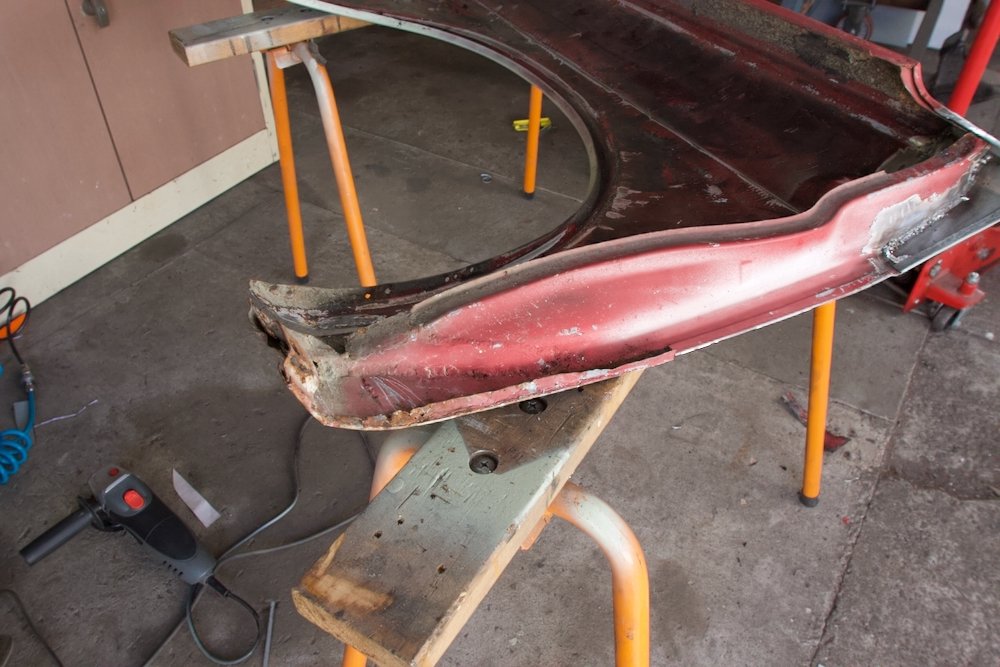
Find rust, cut, make patch, check fit, trim, check, trim, check, trim, check, weld Thats pretty much how the last few sessions have gone, props to @mof for hooking me up with some argon, that got the boot floor into place legend! Gave up searching for 0.8mm offcuts and just went a brought a sheet, that allowed for visible panel repairs to kick off, starting with the drivers front guard The trailing edge had significant rust repairs, what appears to have been the strategy was cut out the rot and where the frame/stiffener is, just weld direct to that and fill with bog. Of course this made my job fun, I had to give up on like for like replacement going with judgement and dry fitting to the car. First of all replaced the rotted section of frame: Then shape the contour into a fresh piece Never got a weld pic, but its now securely attached. Then work on the lower, this got nasty, can just make out the multiple weld lines from donor patches and is pretty rusty/bent to work out where it should be. Reproduced the lower frame and glued that in after many dry fits to the car Also see the back edge of the upper patch fixed in place, managed to replicate the folded edge too, very chuffed. A quick inspection of the passenger guard showed it to be in much better health until I started digging... While it is relatively rust free, it had the best part of 5mm bog over the whole thing, its been very bent at some stage, beaten about right then filled (with much enthusiasm!) Full clean up showed quite a mission ahead Using the better guard as a guide, I sat down with the hammers and various dollys I've got much better shape now with the larger dents out, but will give it more time, it will need bog but hoping I can learn a few tricks to minimise the amount. New repro guards are near $500 give or take with freight extra so i'll be avoiding that bill as much as possible! Thats the notable work to date, many more smaller patches here and there in the sills and boot and two more large areas to tackle, most challenging is the rear guard lip, thinking a shrinker/stretcher combo would be helpful here, anyone have experience with them and able to offer advice? The vice mounted Machinery house ones look pretty good value, any reason to double down and go to larger stand mounted ones?
1 point
-
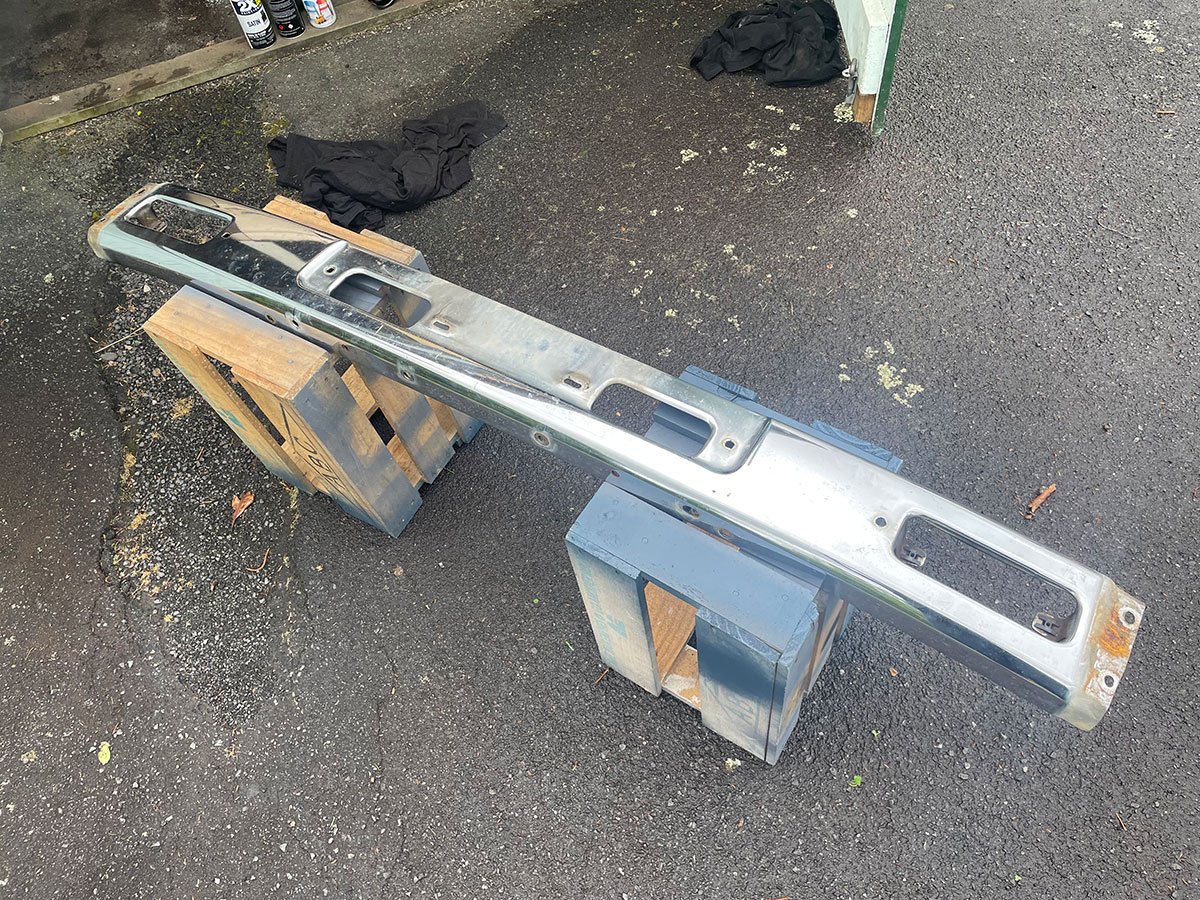
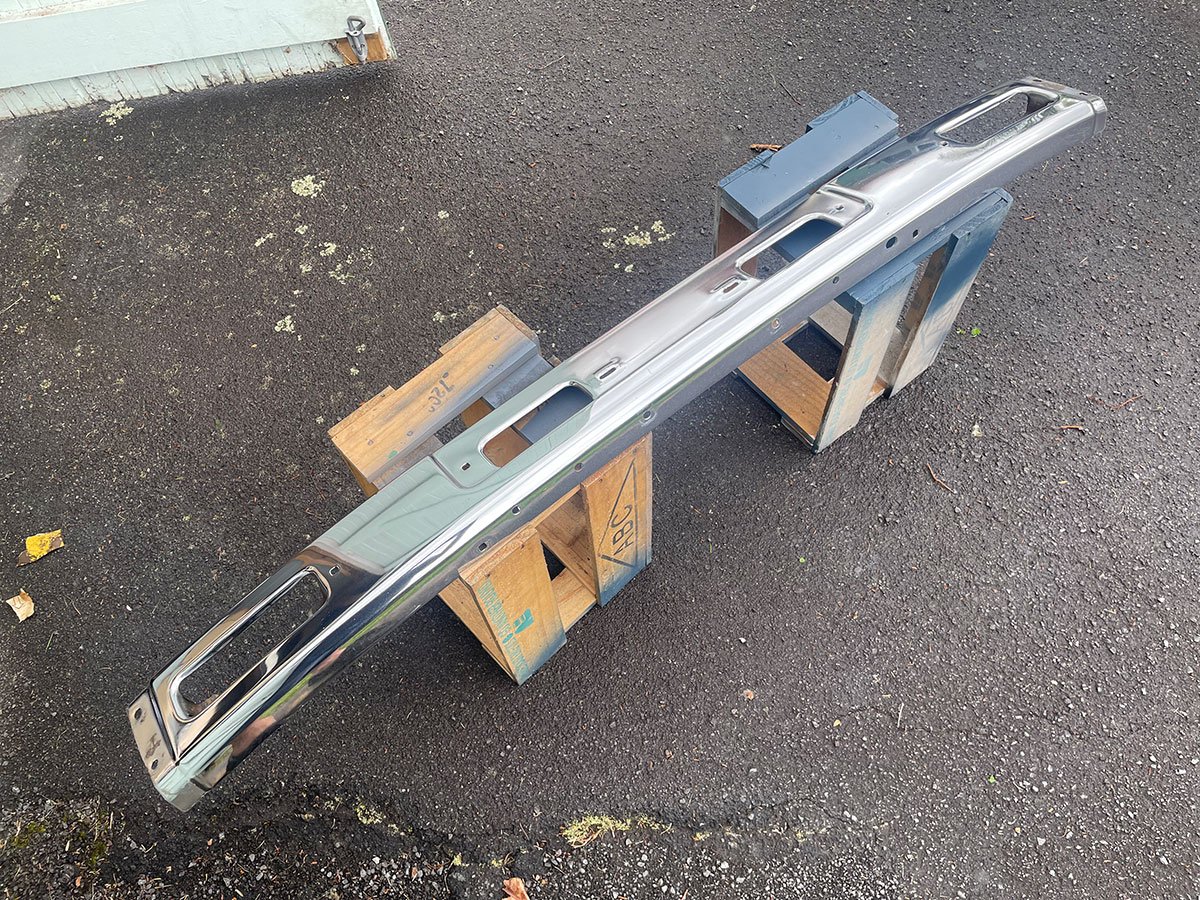
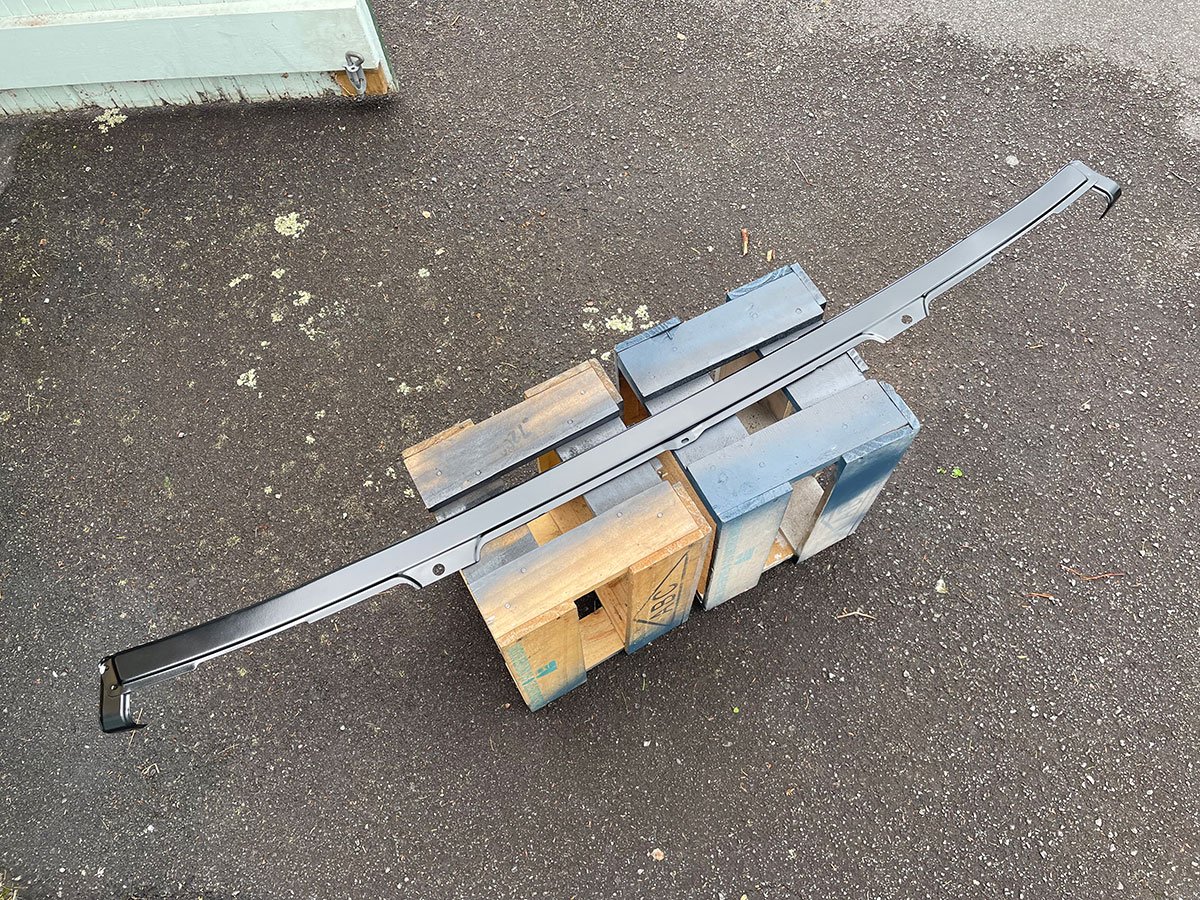
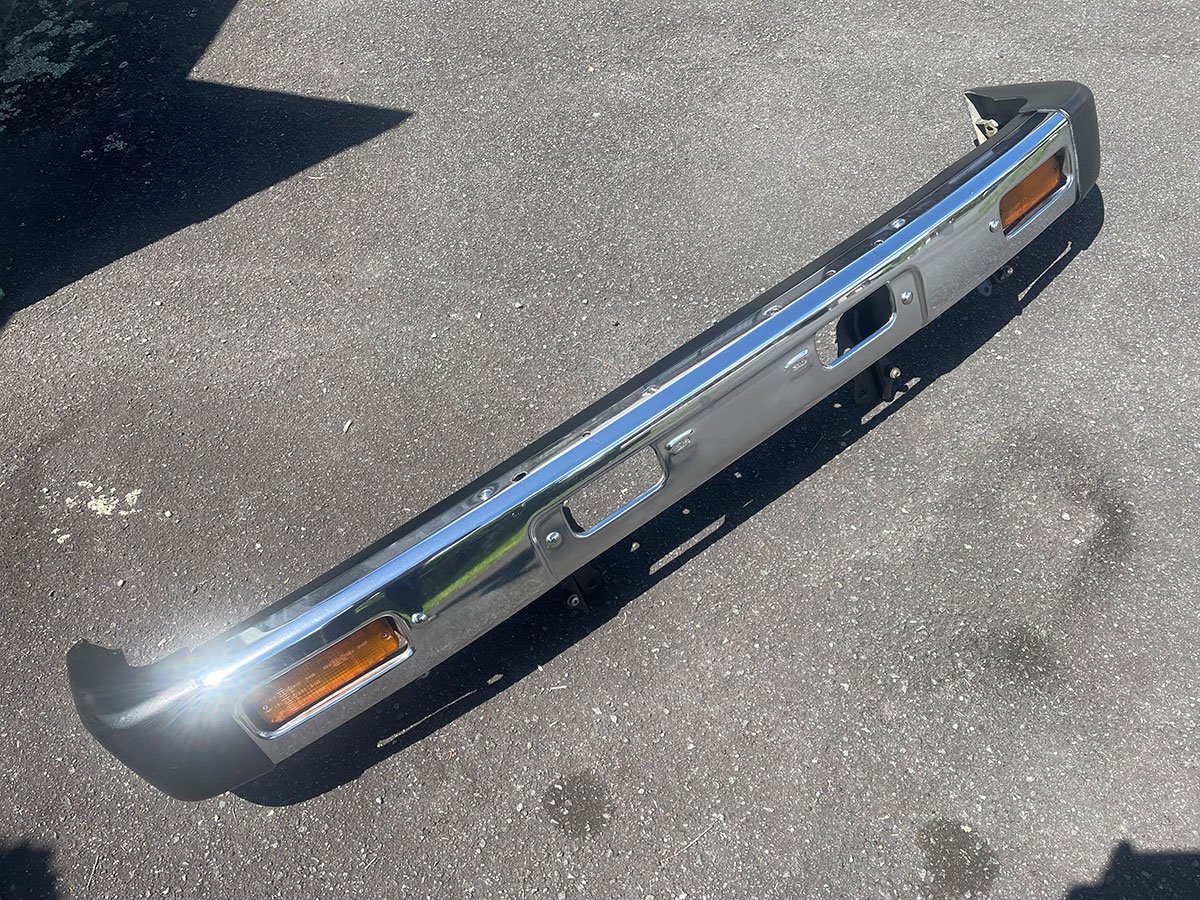
Been ticking a few things off the list. Got the dash all back in with the idea that everything will work sweet (hopefully). Looks good either way. Also, ordered new carpets for the passenger area. Swapped out the loom that goes from the front of the cab to the rear as the plug up front is different. Bitch of a job but done now. Reasonably pointless picture below... Then got onto tidying the front bumper up. After stripping it back the back side is real pitted with a couple very small pin holes. The chrome is actually pretty decent on the front. Collected the good parts from both trucks, rust killed it, polished it up and painted the small valence panel and it looks good enough for me. Might end up buying the chrome part new at some stage. Next update will hopefully be the body swap!
1 point
-
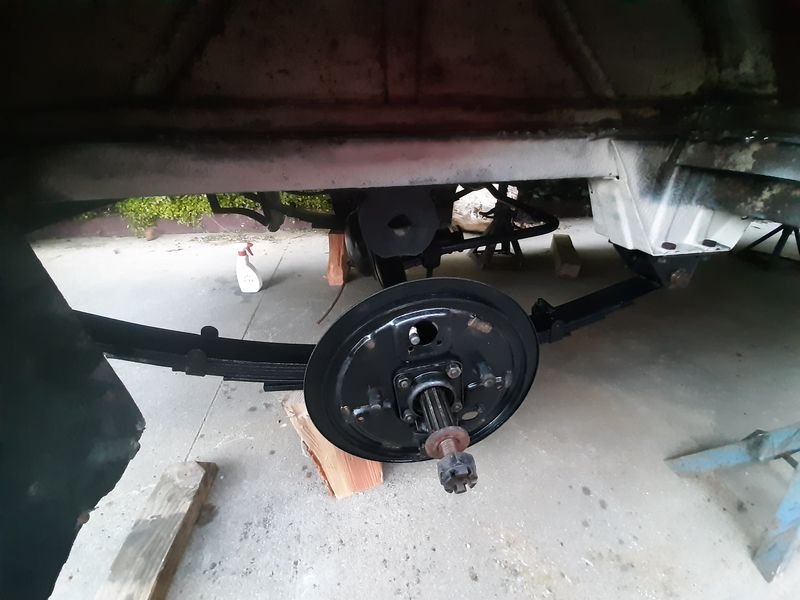
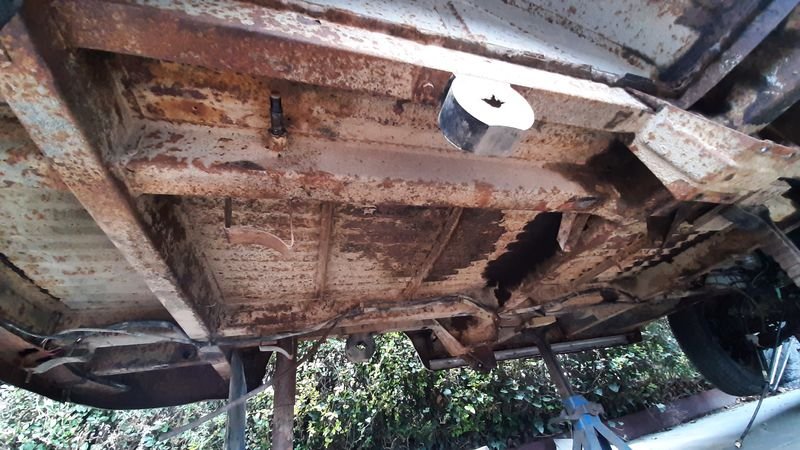
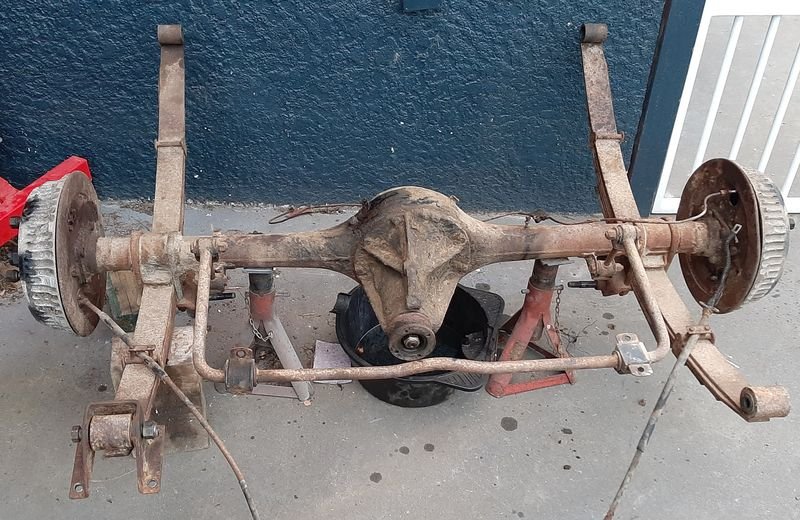
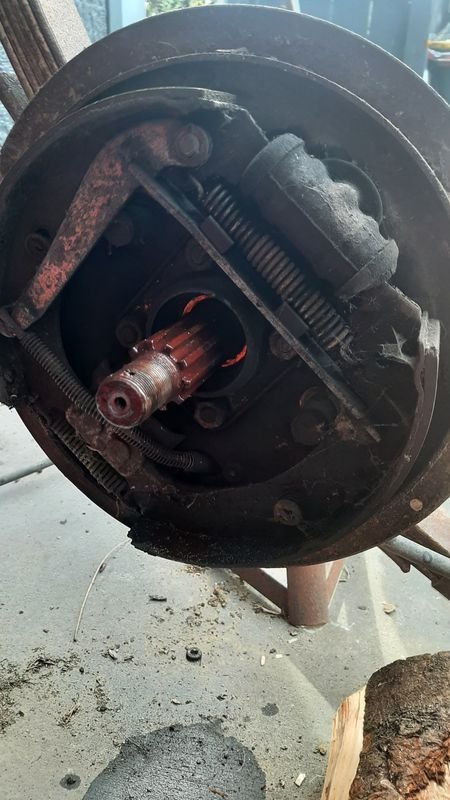
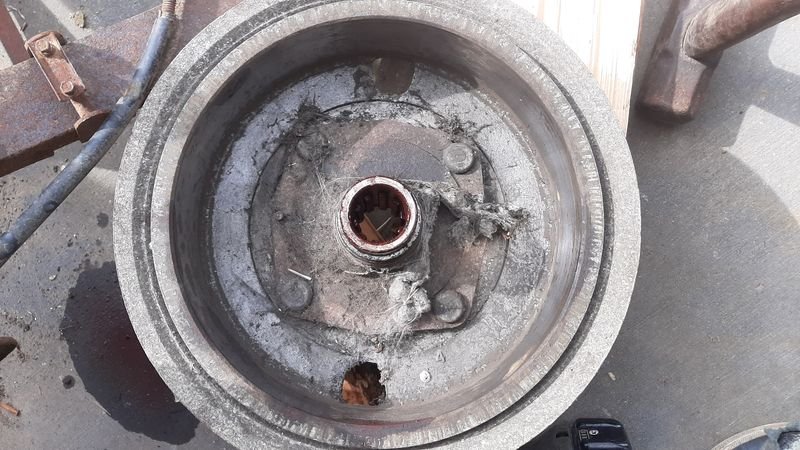
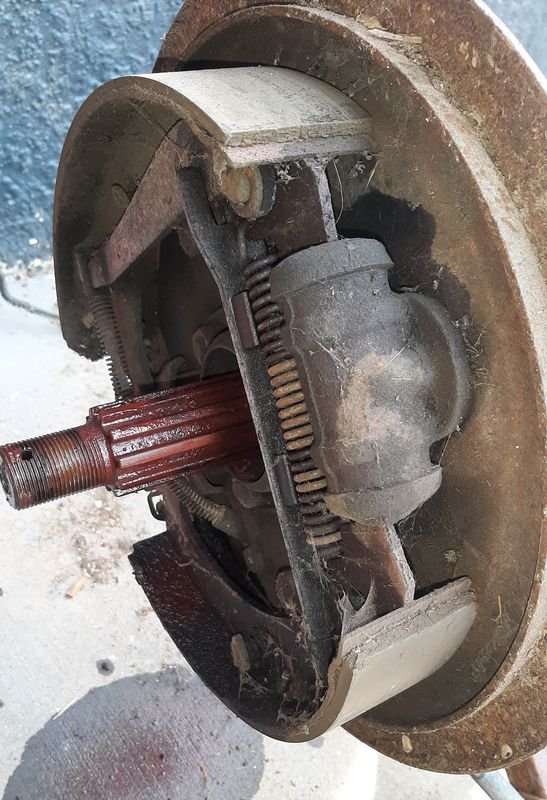
With the Ute sorted, its back outside and the cars are shuffled back inside. Back to the Van. Dropped the rear axle for a cleaning up before refurbishing the brakes/new lines etc. This is the underside of the van - i know it looks like shit, but it's mostly flaky underseal/paint, dirt, 50 yo dry grease and surface rust. All the rails are solid and unbent, the floor is a bit saggy but thats from being loaded, not rust. Ill try popping that up a bit with a bit of wood on the jack under the thin cross members. I think ill clean up and brush repaint in the factory grey mainly around all the mounting points and areas that will be hard to access with the diff back in the way so it doesn't look too restored/fixed before i sort out a repair cert, and the rest ill give a tickle with the wire bush while the diff out and just brunox or something to hold it steady. Diff oil was actually not too bad, and given the amount of oil on the outside, there was a surprising amount still on the inside. Ill replace the diff pinion and outer axle oil seals too once i get them off and note the specs to order them from the bearing place. Only one broken fastener, which was one of the captive nuts for the sway bar mount so ill need to cut the floor to weld that back in. Always very impressed with the quality of Fiats fasteners, they very are rarely the issue irrespective of the state of the crap they hold together. These have an axle/hub setup like a beetle or kombi with the drum and hub as one unit, held onto the splined axle shaft with a big fuggentight castellated nut. Pass side rear brakes where already disassembled when i got the van, which requires removal of the hub and drum, and that hub slid off nicely. I suspect a leaky axle seal was probably the cause of the original brake issue but as a bonus it kept the spines well lubed on that side! The driver side on the other hand was pretty dang tight. The spline and hub rusted together. The man in the book has a special tool but i dont, so cobbled this up. It was stuck on pretty good! But eventually it popped off. Reference photos for drum reassembly below also show everything inside the drum is present and correct, which is as expected as the handbrake worked pretty good before, interestingly also has fairly low wear. Crusty spline will need some cleanup but a blast with brake cleaner already made a big difference. Ill probably replace the wheel bearing on this side while im in there 4x150 steel hub with integrated bearing, aluminium with steel lined drum. Brake surfaces are like new, no appreciable wear or scoring, the pass side is slightly worse, but still very good.
1 point
-
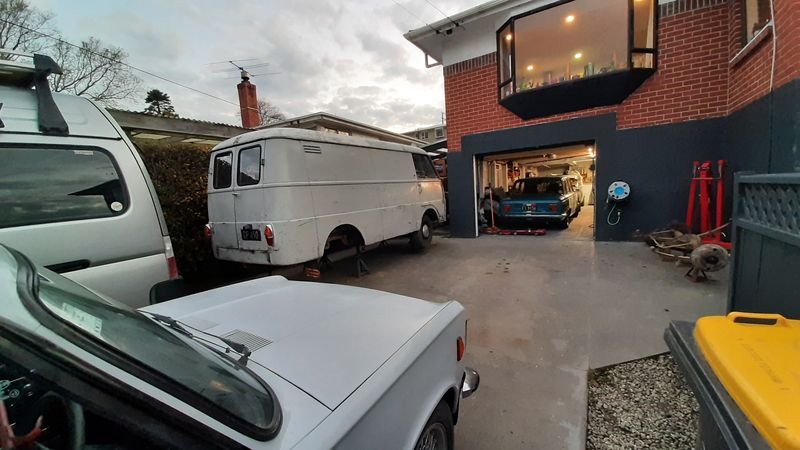
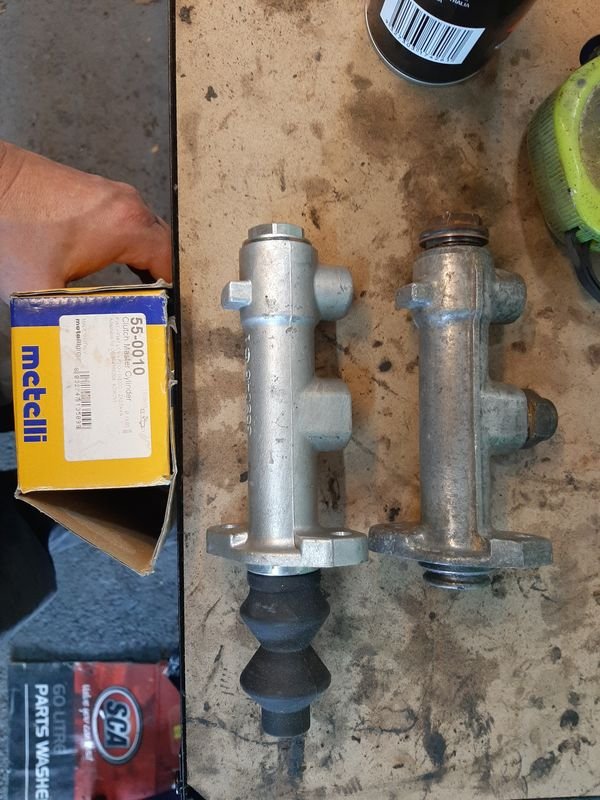
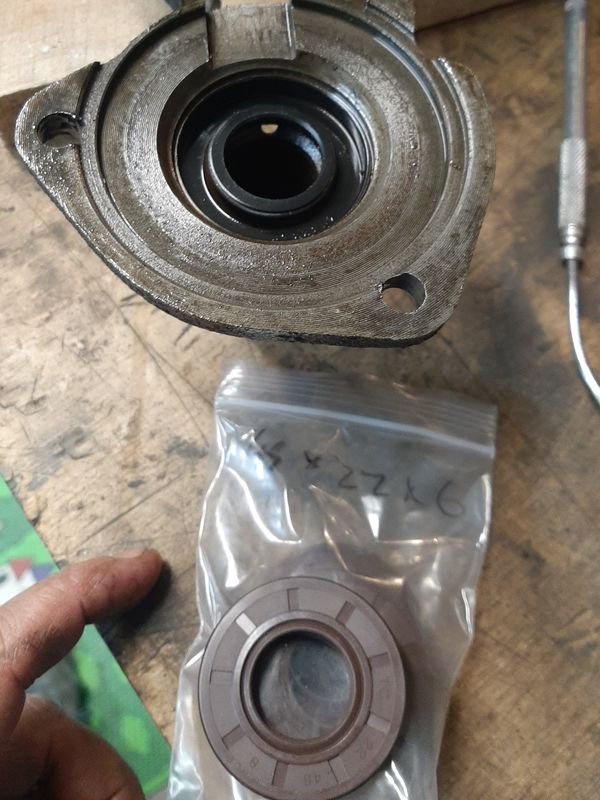
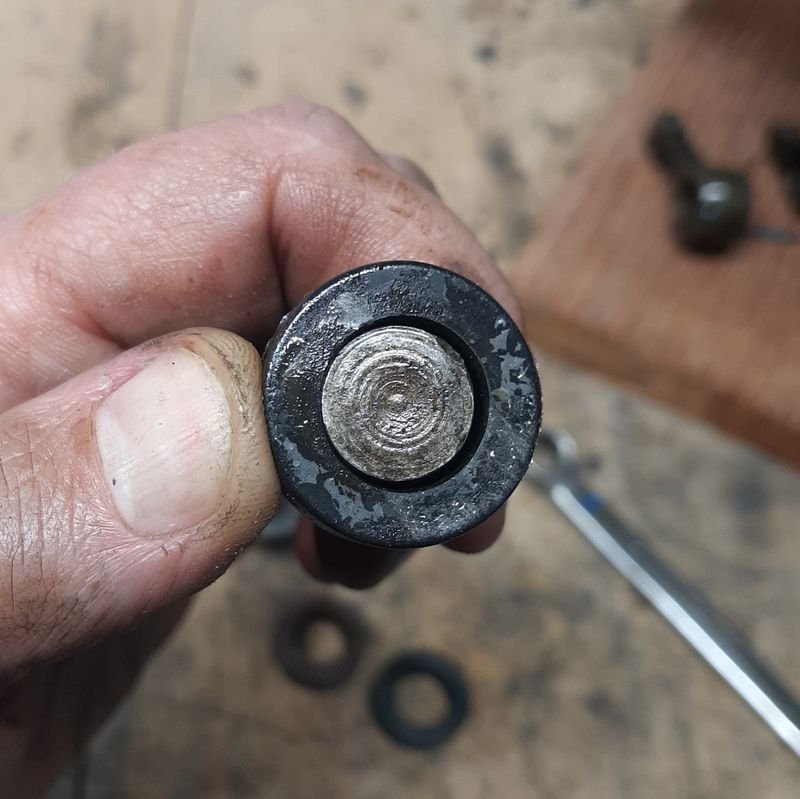
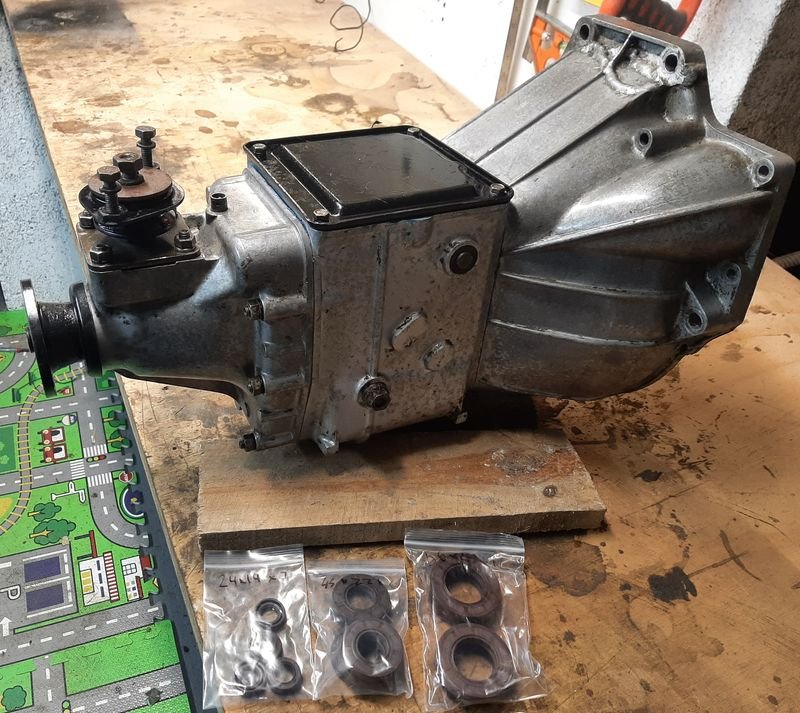
based off the sizes on the old ones, I ordered two full sets of gearbox oil seals including shipping from Ali Express for less than the Buy it now price of a single NOS seal via Ebay. Definitely due for some! This one is the rear seal and a real shit to get the old one out as its face is flush with the inside of the recess. Gearbox is now as ready as it ever will be. Been pretty busy with work and a couple of weeks in Auckland visiting family and dragging back a solid van load (+ trailer) of shite from my storage unit - still another load to go. Anyway, some of the retrieved treasure includes a Fiat 1500 clutch master i got ages ago to try on the 2300 wagon, that didn't fit. Perfect match for the Van Various bits for a new exhaust And all sorts of other rusty shite treasure that will maybe come in handy one day for the Van and maybe the rest of the fleet.
1 point
-
Still doesnt go but have another sweet grill and did some suspension joints and bushes. Coil overs are out as low cars are cool but a right bitch to work on when they dont run. New rear screen rubber is on its way from japan and I got a couple sedan ones if any one is keen. Also getting some mirror bases made to allow for curvature of the guard. This will eliminate the mirror droop often seen with these.
1 point


.jpeg.af1e6e0d05eaf3b92c89f594f37a027c.jpeg)
.jpeg.9bbfc2e64566dda9b080611b006d5947.jpeg)
.jpeg.cd63114ccc911a77ddc4d0057135cc19.jpeg)
.jpeg.77d0f7ff858570342d4f8a42ac96b177.jpeg)

_1.jpg.a5478ceee28d931b7027ddef34a2f117.jpg)


This leaderboard is set to Auckland/GMT+12:00